HOLIDAY DONATION DRIVE - SUPPORT MSW - DO YOUR PART TO KEEP THIS GREAT FORUM GOING! (Only 20 donations so far - C'mon guys!)
×


6ohiocav
-
Posts
543 -
Joined
-
Last visited
Content Type
Profiles
Forums
Gallery
Events
Everything posted by 6ohiocav
-
 Mike, Looks great. Thanks for the tutorial. Once again, your trials are my tribulations. In answer to your last question, I believe the plans call for an extra short plank that is attached to the outside hull for the hawse hole. I am not at the workshop, or I would shoot you an image. What size rope are you using for the cable?
- 843 replies
-
- 3
-

-
- niagara
- model shipways
- (and 2 more)
-
Joel, Since I have the same question, can I get a clarification. You indicated that "The end is belayed to the foot of the foremast so it doesn't run out". Is that Above the deck, or below? If it is ABOVE, do we run the cable into the hatch, and then back out to belay to the mast? That then begs the question of how we should belay it (what type of knot). Obviously, if it is below, then we simply dump the cable into the hatch. Also, on the historic ship, wouldn't the cable be attached to its own bit below deck, and wouldn't there be a capstan or other device in the bow below deck (or above) to haul it? Mike, What size rope are you using for the cable? Is it a kit supplied product. I don't believe I have a thick enough black rope from the kit to accomplish this.
- 843 replies
-
- 2
-
-
- niagara
- model shipways
- (and 2 more)
-
Mike, Sorry for the delay in responding. Perhaps you have already attempted to drill the holes, but this is clearly a job for a pin vice drill. I would not touch this thing with anything that is powered. I love Joel's idea of guide holes. Easy to repair if they show up in the wrong spot. Fortunately, this is a place where the soft basswood is a good thing. Looking forward to the pictures. I am once again sailing in your wake, and may turn to this project while I wait for additional stores from the quartermaster on my ship. By the way, my kit does not have anything at all that looks like a hawse pipe.
- 843 replies
-
- 2
-
-
- niagara
- model shipways
- (and 2 more)
-
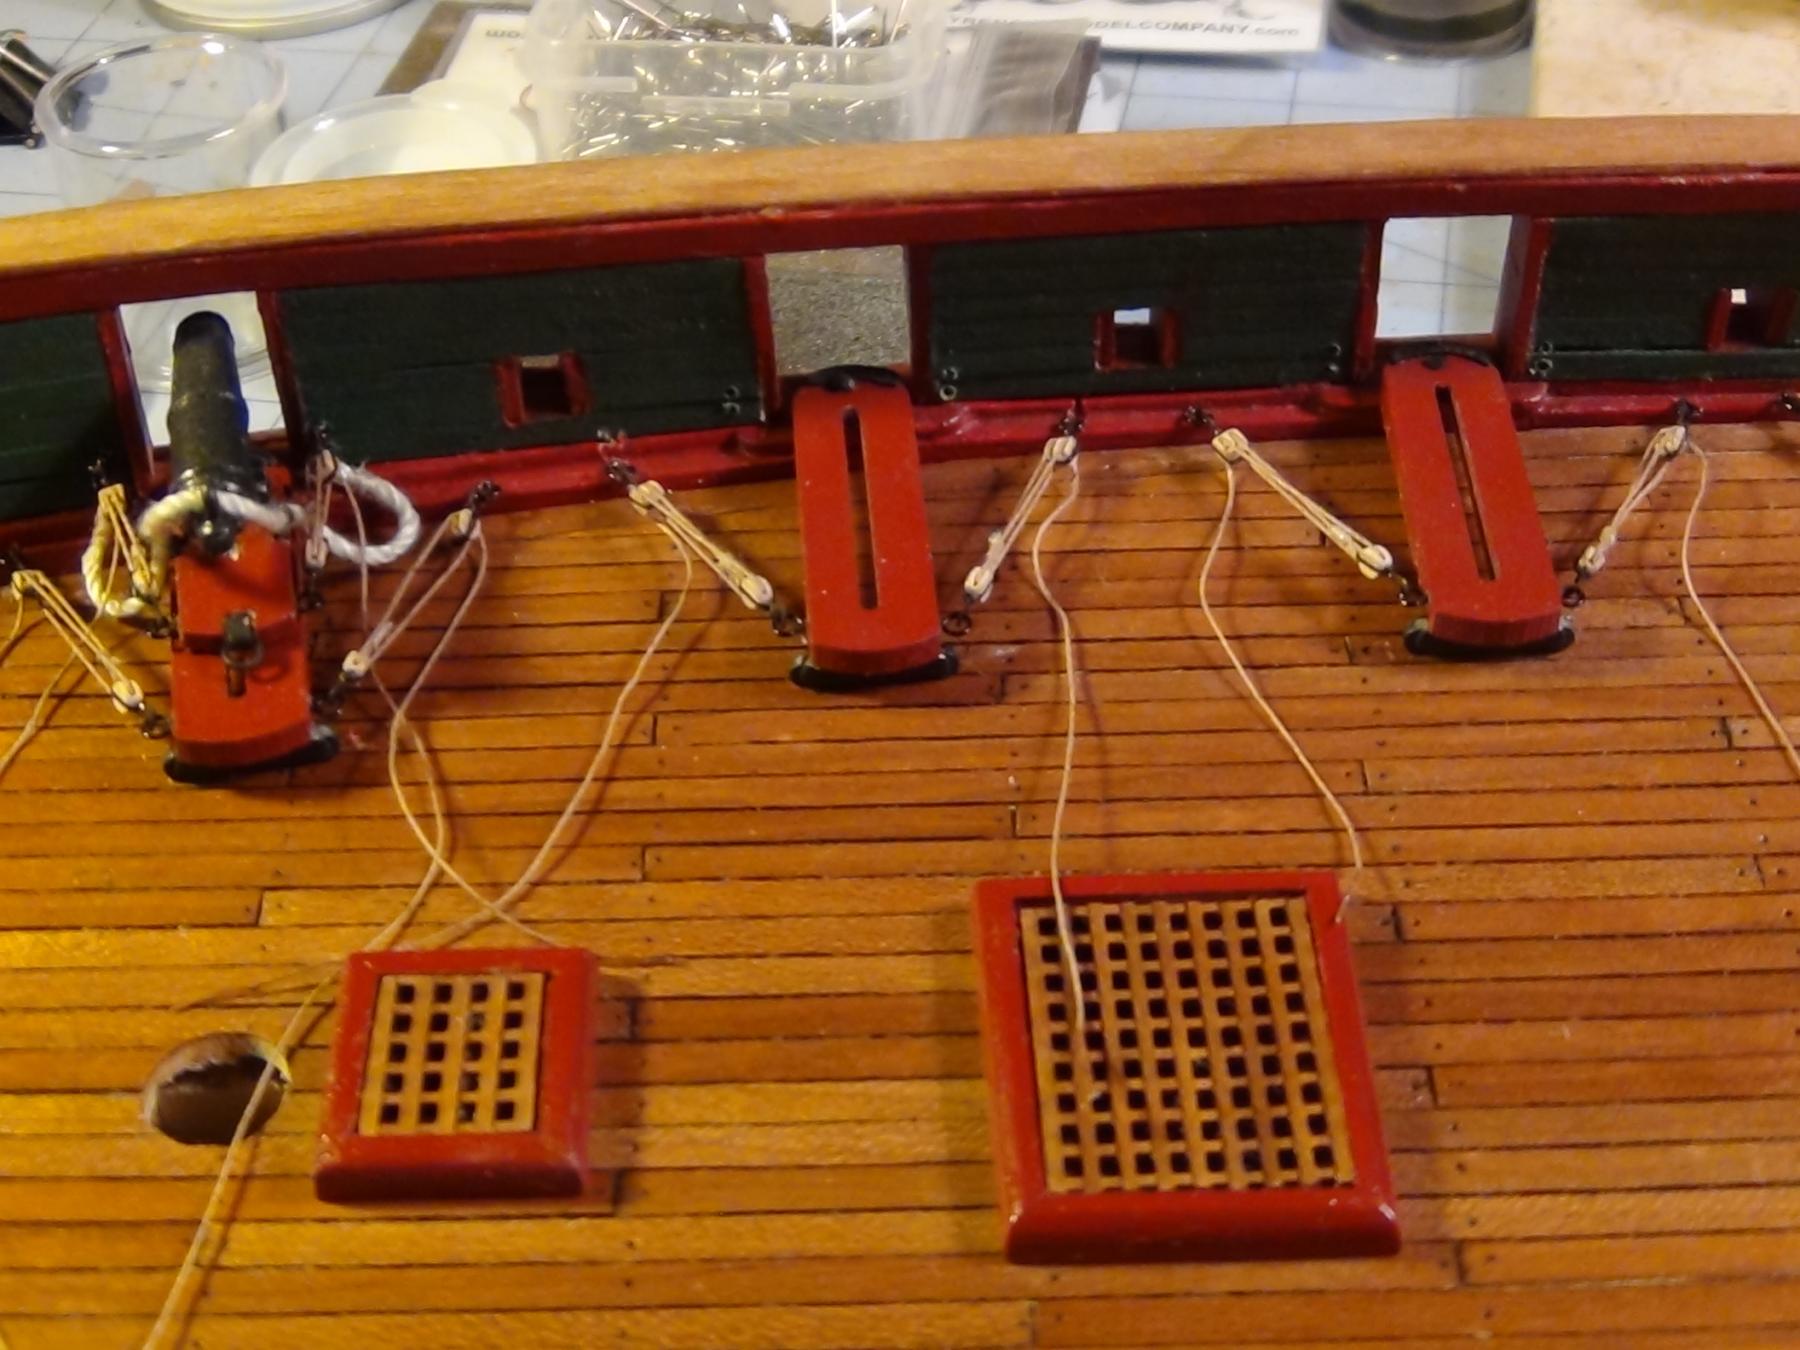
Mike, I agree that doing the platforms first ended up being a good idea. Since I did not have the right breeching rope, it came about out of necessity as opposed to a defined plan. Building from the ground up however is always a good idea. I just would have never thought of it in the case. The breeching lines are all loose, and holding nicely. It is rather quite amazing that the tackles really work as they should, albeit in micro. A real tribute to the quality of the Syren blocks. I am totally sold. As soon as I decide what to do about the tails (coils or faux coils), and as soon as all of the guns are mounted, I will freeze the lines and the hooks. At least that is the plan. Funny you should ask about the pins. I ended up using simple straight pins that I blackened. At first, I decided to cut them in half, and actually use them to secure the carriages, To do that, I had to drill the holes deeper in the planksheer. Since the cap rail interfered, they were at a slight angle. I scratched away the paint from the bottom of the gun port, placed a dab of medium CA on the bare wood and a bit of glue on the tip of the pin and a wee bit on the bottom of both wheels on the back of the carriage, and put it in place. Getting the pin to seat however was difficult, and I did not have a lot of time. In the end, I had to push the pin with the back of a metal punch, using way too much pressure than I was comfortable with. I then decided to cut the pins shorter, and even after that, to cut them to about 1mm below the carriage, so it simply sat in the pre-drilled hole in the planksheer. The CA was enough to secure the carriages, making the pins more decorative than functional. Even though my deck is finished in poly, the CA on the wheels has secured them sufficiently to the deck, and there is no trace of any glue. Unless my ship takes a broadside, I feel confident that the carriages will remain secure. In the end, moving way down the scale to 3mm blocks and .008 tackle rope and securing the quality parts from Syren was the right choice. Following your suggestion, along with Brian's and others to downsize on the blocks and rope for the guns was a good one. They look very authentic, to scale, and there is plenty of room between the blocks. The kit supplied blocks are way too large, and completely out of scale. Of course that comes at a cost. My eyes have been strained to the limit spending hours working with these incredibly small blocks. Stropping them and threading rope through the even smaller holes is a real chore. And I still have about 50 more to do. In the end, I am very happy with the look. So, worth the effort. Thanks for all of the good advice. I am just waiting for the breeching line to complete this task.
- 648 replies
-
- 5
-
-
- niagara
- model shipways
- (and 1 more)
-
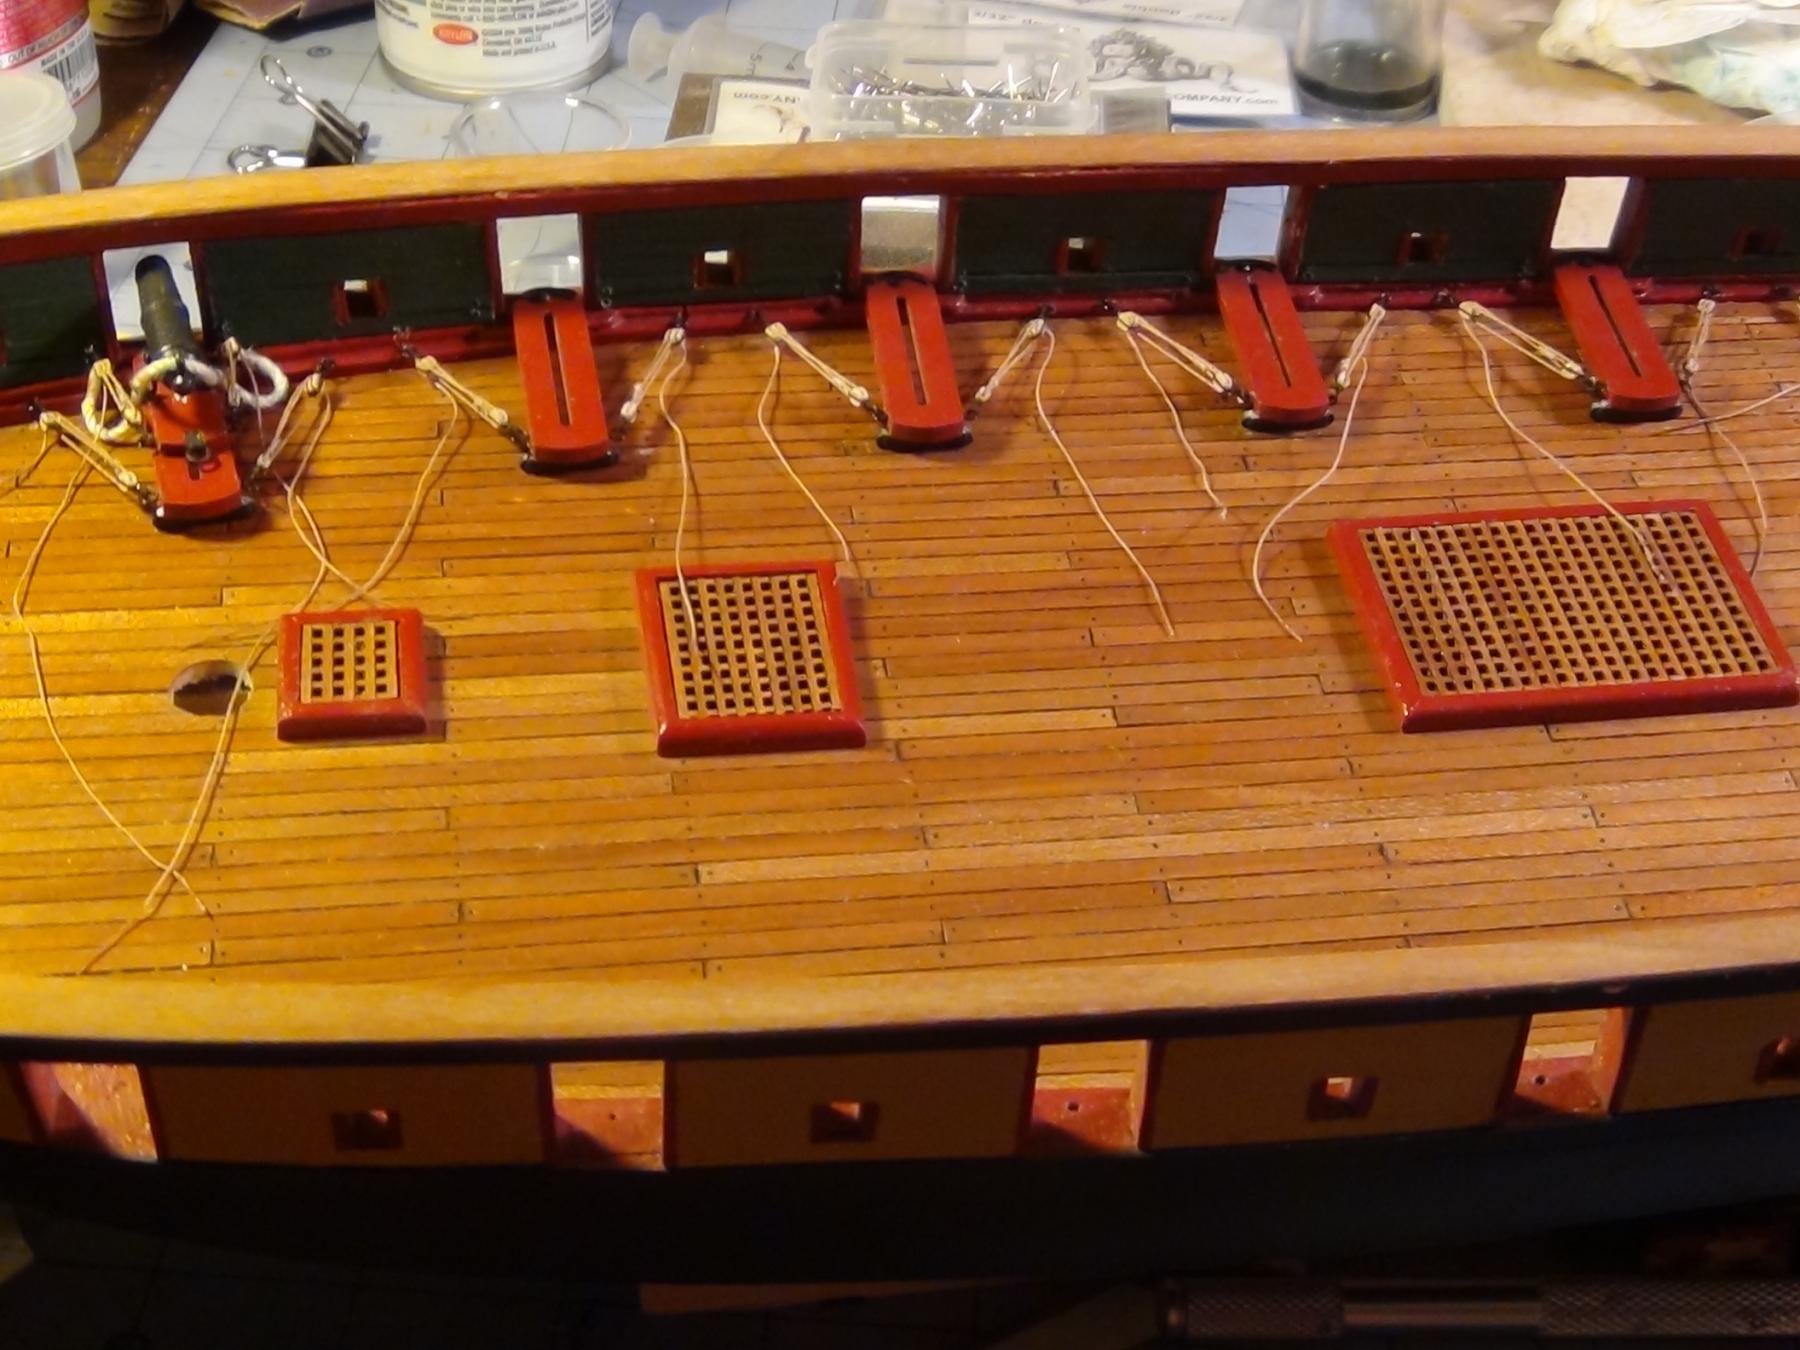
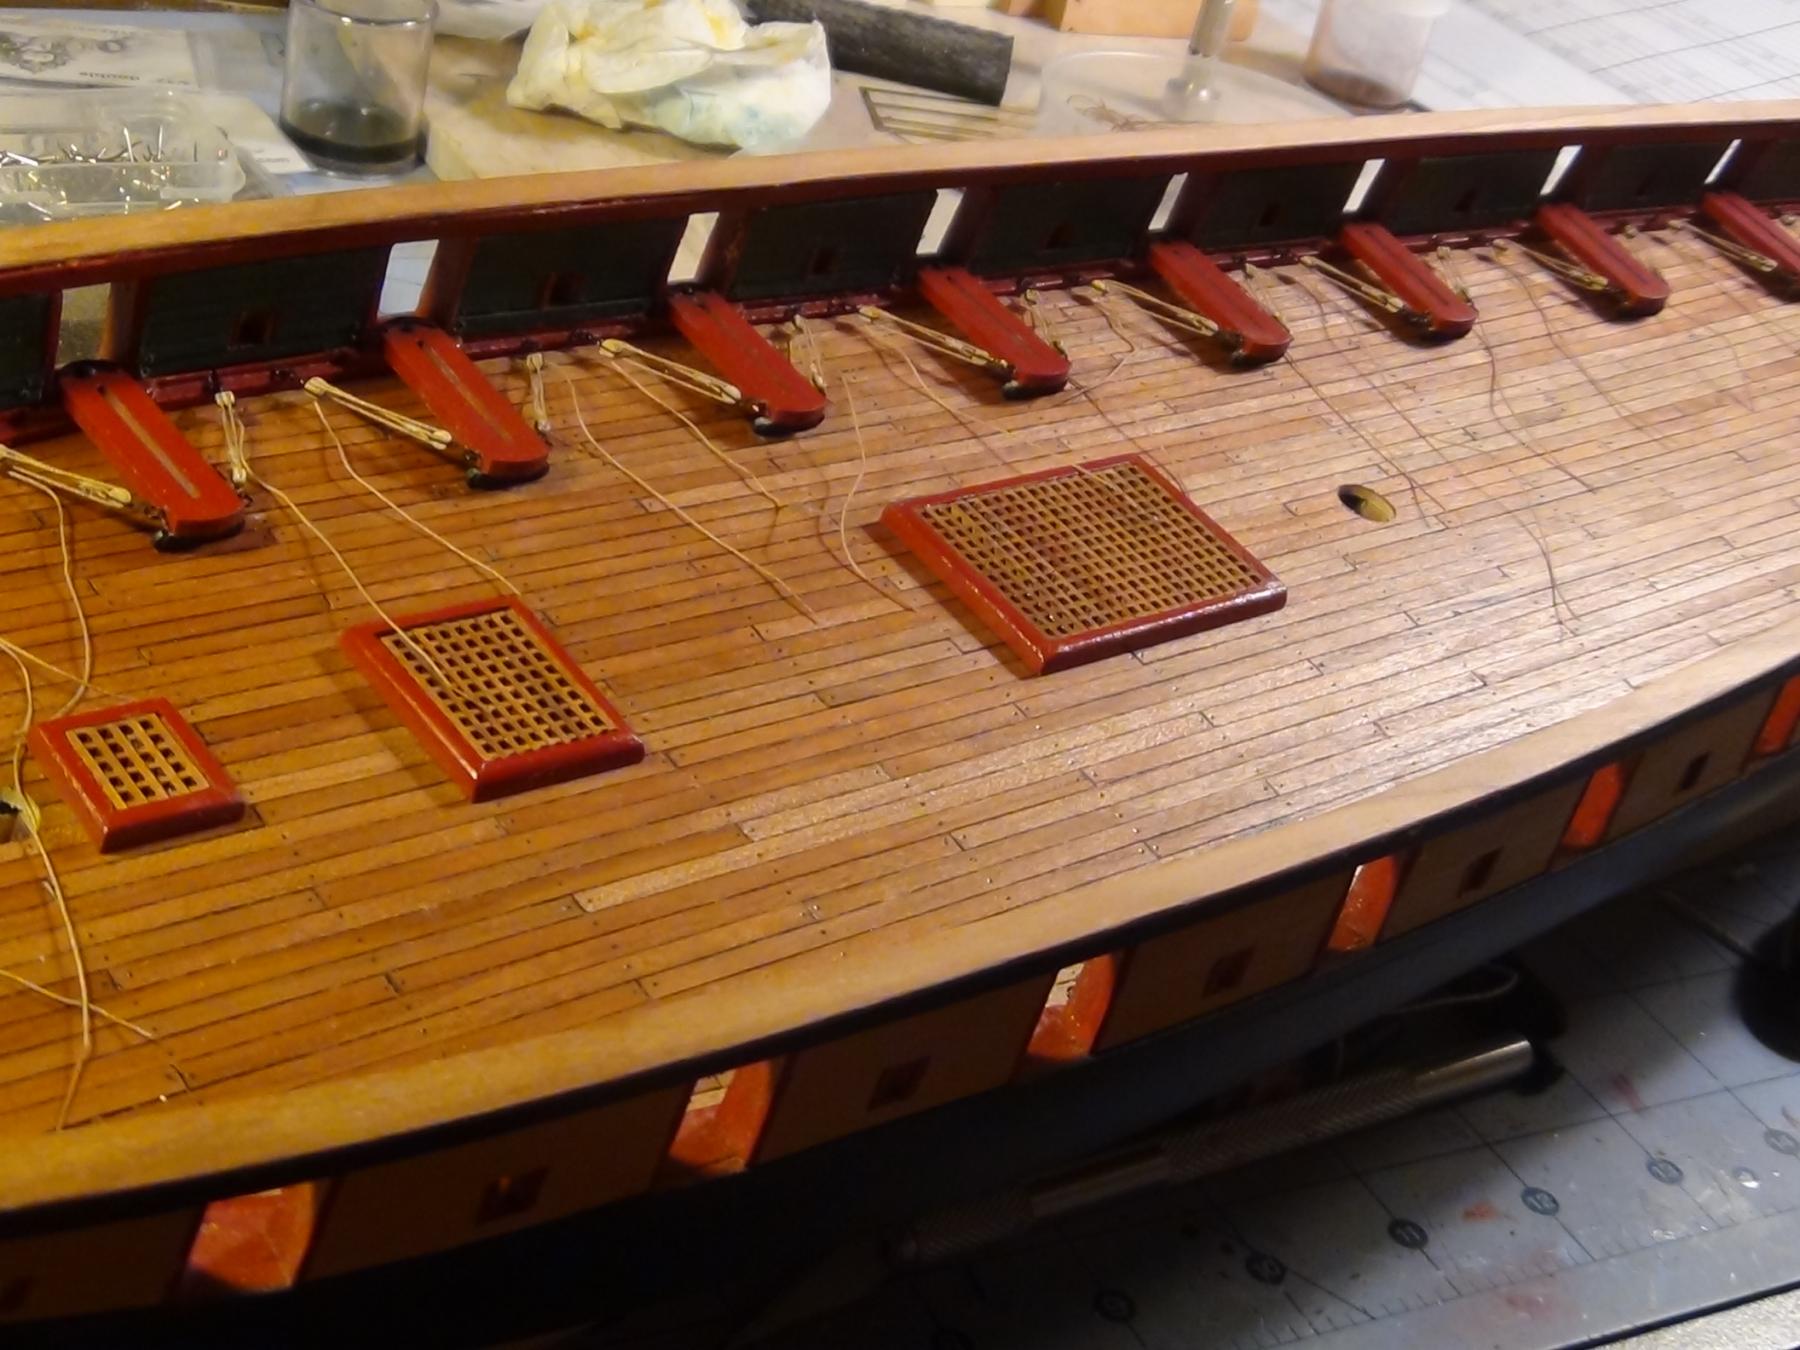
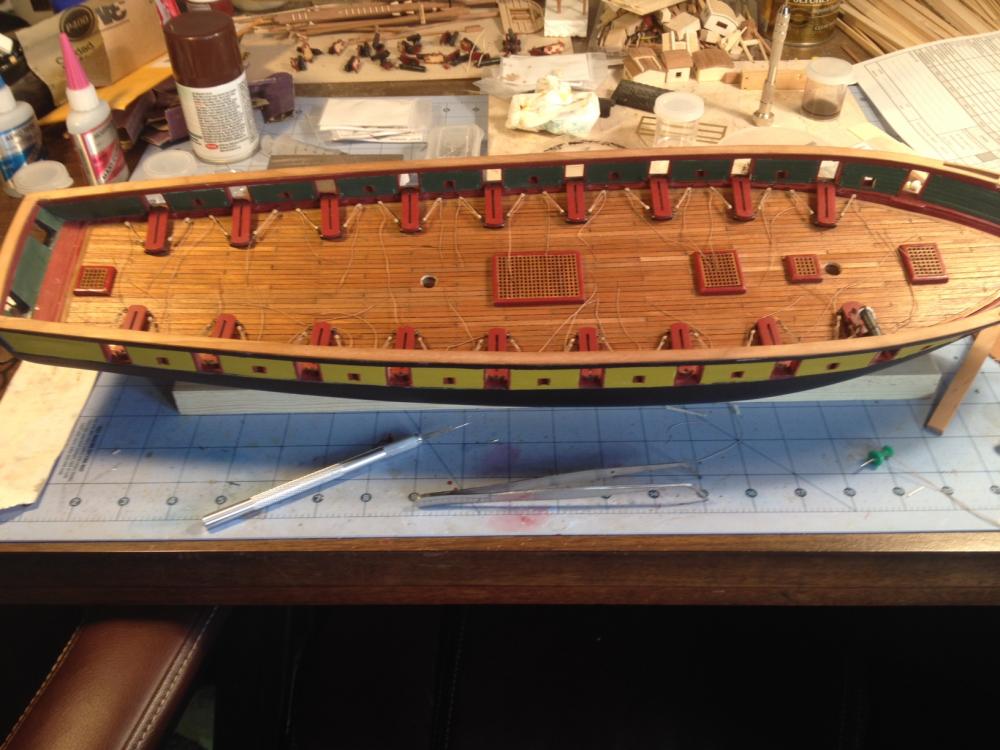
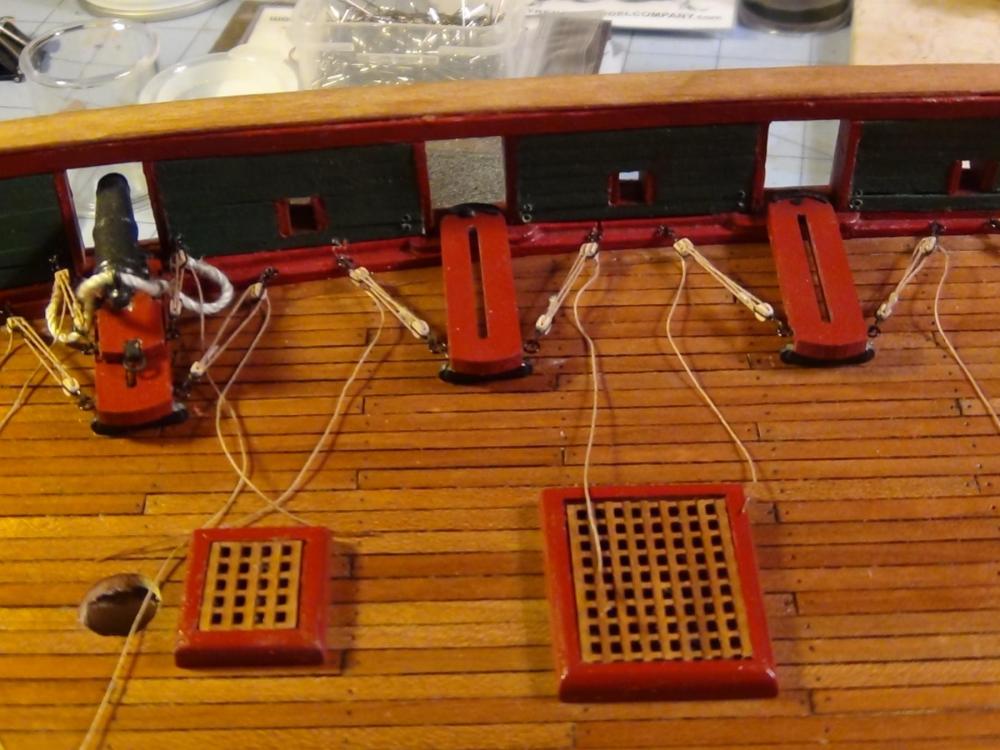
Finished gluing down and rigging the port site carronade carriages.
- 648 replies
-
- 6
-
-
- niagara
- model shipways
- (and 1 more)
-
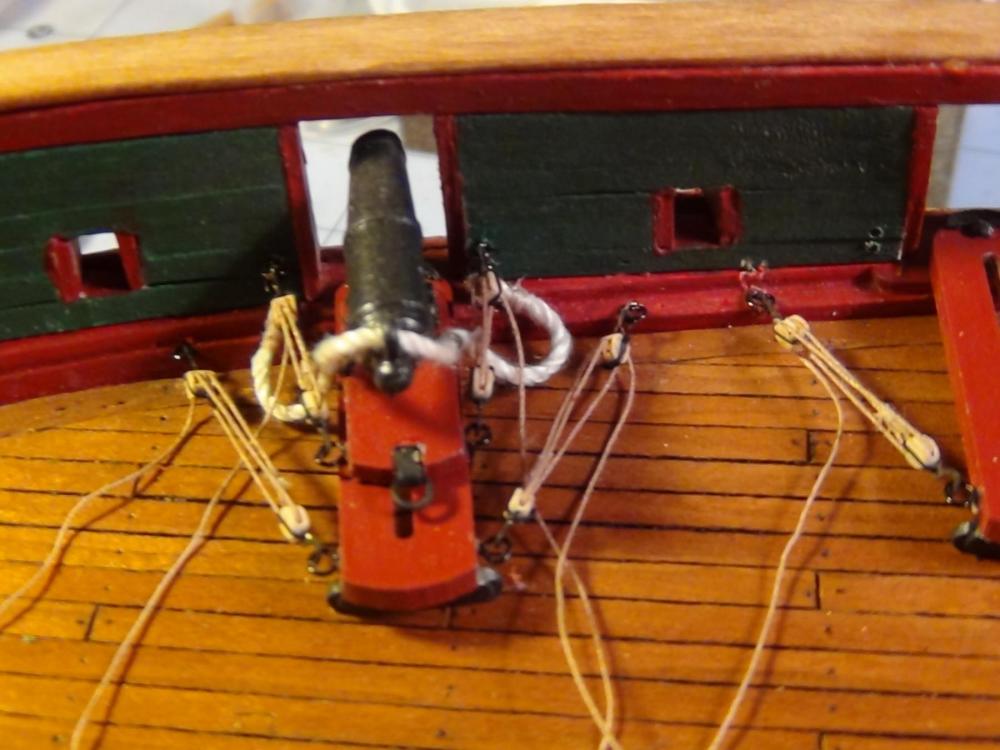
Your right Mike. The picture is a little fuzzy, but the rope is as well. It is a cotton blend. Just not adequate. Replacing that one will be somewhat of a challenge, since the eyebolts are glued in. I will figure that one out when I get some new rope.
- 648 replies
-
- 2
-
-
- niagara
- model shipways
- (and 1 more)
-
Carronade Rigging I finally started rigging the guns. And as soon as I started, I ran into a problem. The kit calls for a .31 breech line, but does not supply it. The closest is a .28 black and a .28 buff, at least according to the parts list. When I looked at the rope provided, I can't really tell what is what. In any case, the largest buff rope looks too small to me. So, I took a trip to the craft store and picked up a role of what I thought was a buff colored rope that appeared to be the proper diameter. When I got it home, I tried it out. I siezed a ring on one end, fished the other end through the rings and the back of the barrel, and siezed the other ring. With rings tied on "off the ship", I twisted some .28 gage black wire around each ring and glued it into the previously drilled holes in the bulwarks. I decided to have the barrels brought out "some." I then rigged the blocks. As I look at the first gun, I am not sure I like the breech line. It looks to "white." So, I decided to stop and it would appear that I will be ordering some more rope. I decide to glue down the carriages on the starboard side and rigged the blocks on those. I very much like the Syren 3mm blocks. They look very authentic. What a difference from the square shaped ones in the kit. Here are some photos. Opinions are welcome.


- 648 replies
-
- 6
-
-
- niagara
- model shipways
- (and 1 more)
-
Love the anchors and the rigging. I AM also waiting to hear how the hell to drill the hole for the anchor cable. THAT JUST PLAIN SCARES ME.
- 843 replies
-
- 3
-
-
- niagara
- model shipways
- (and 2 more)
-
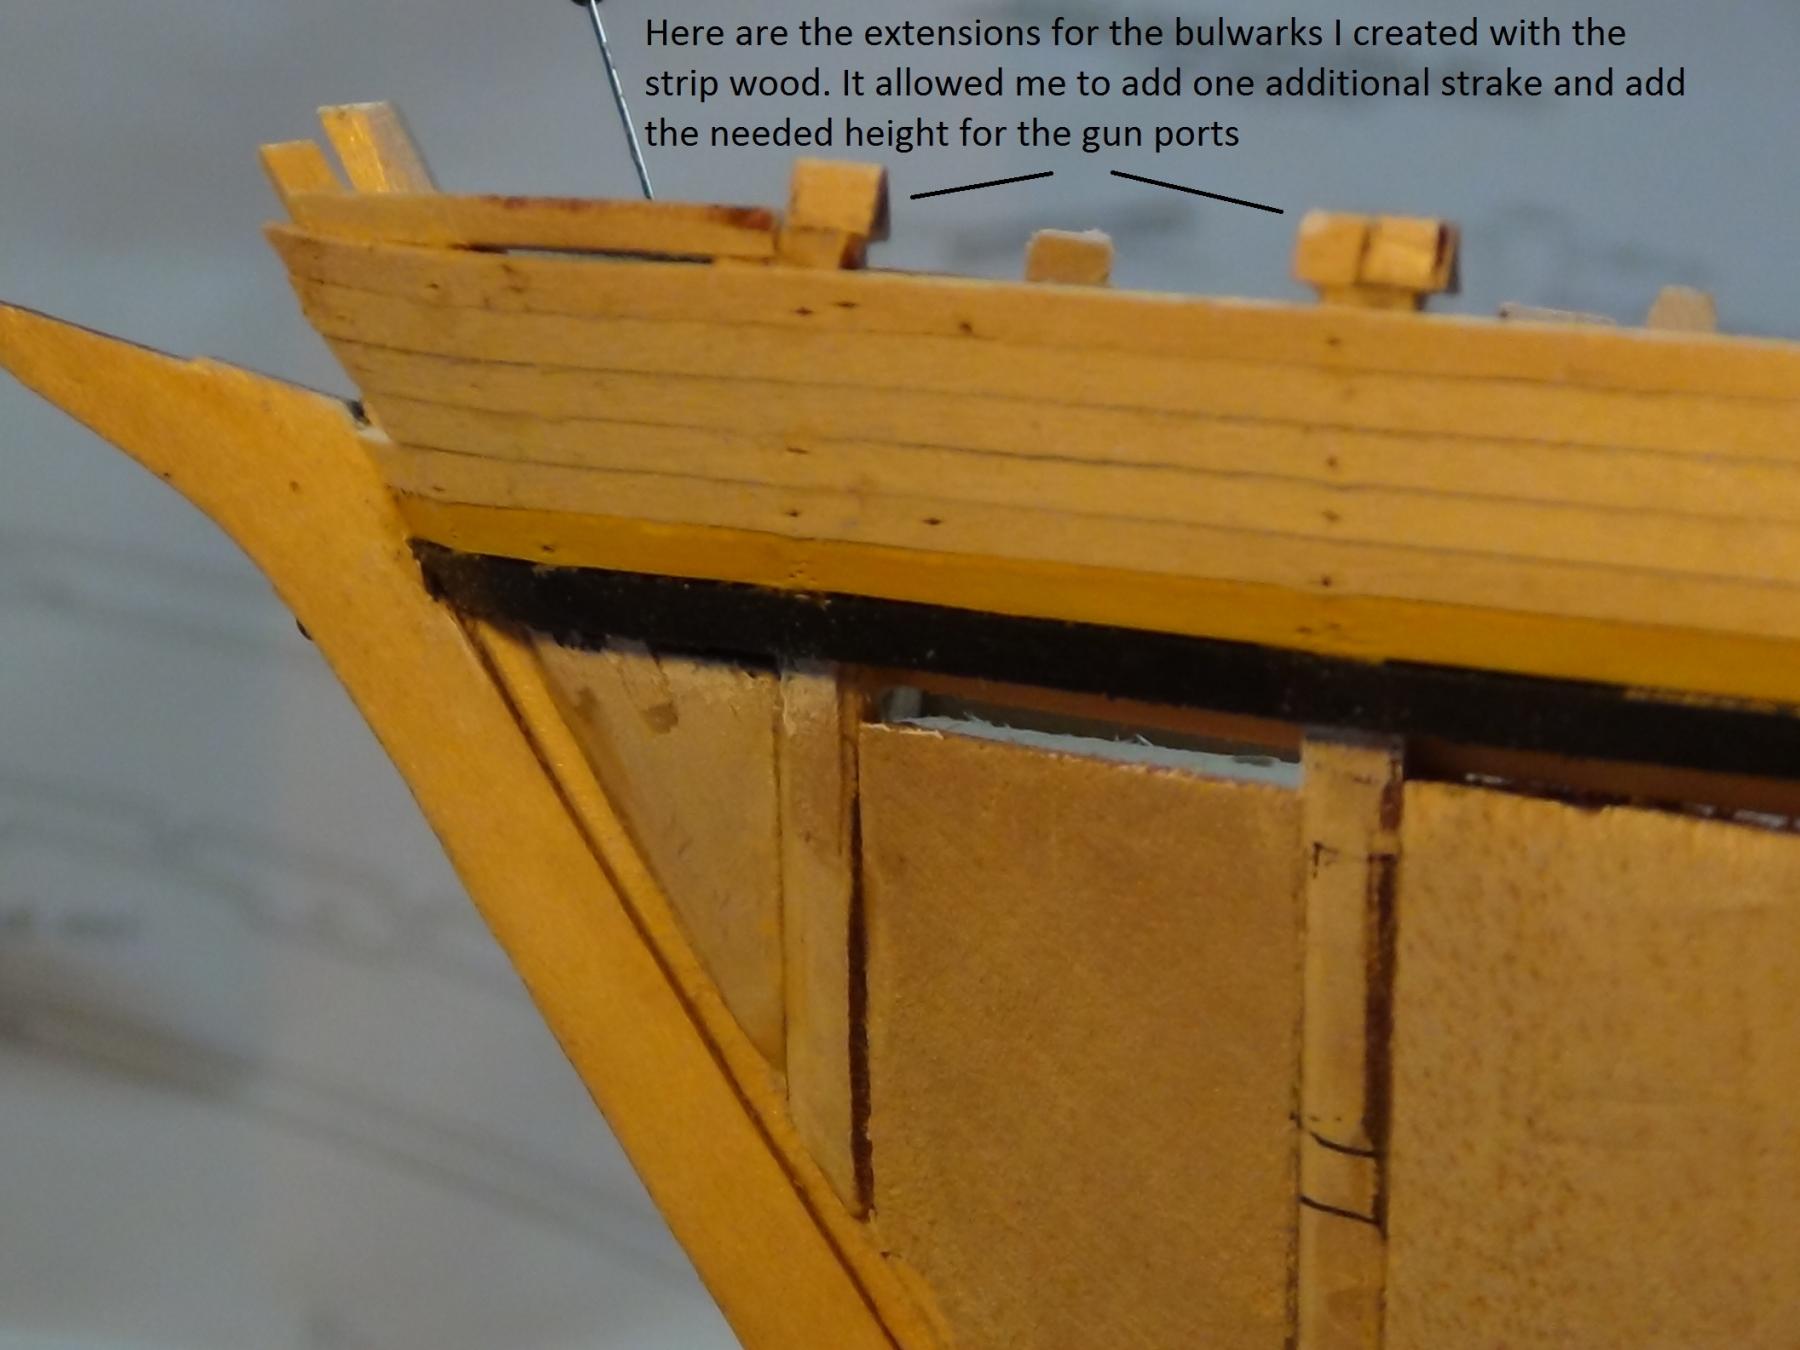
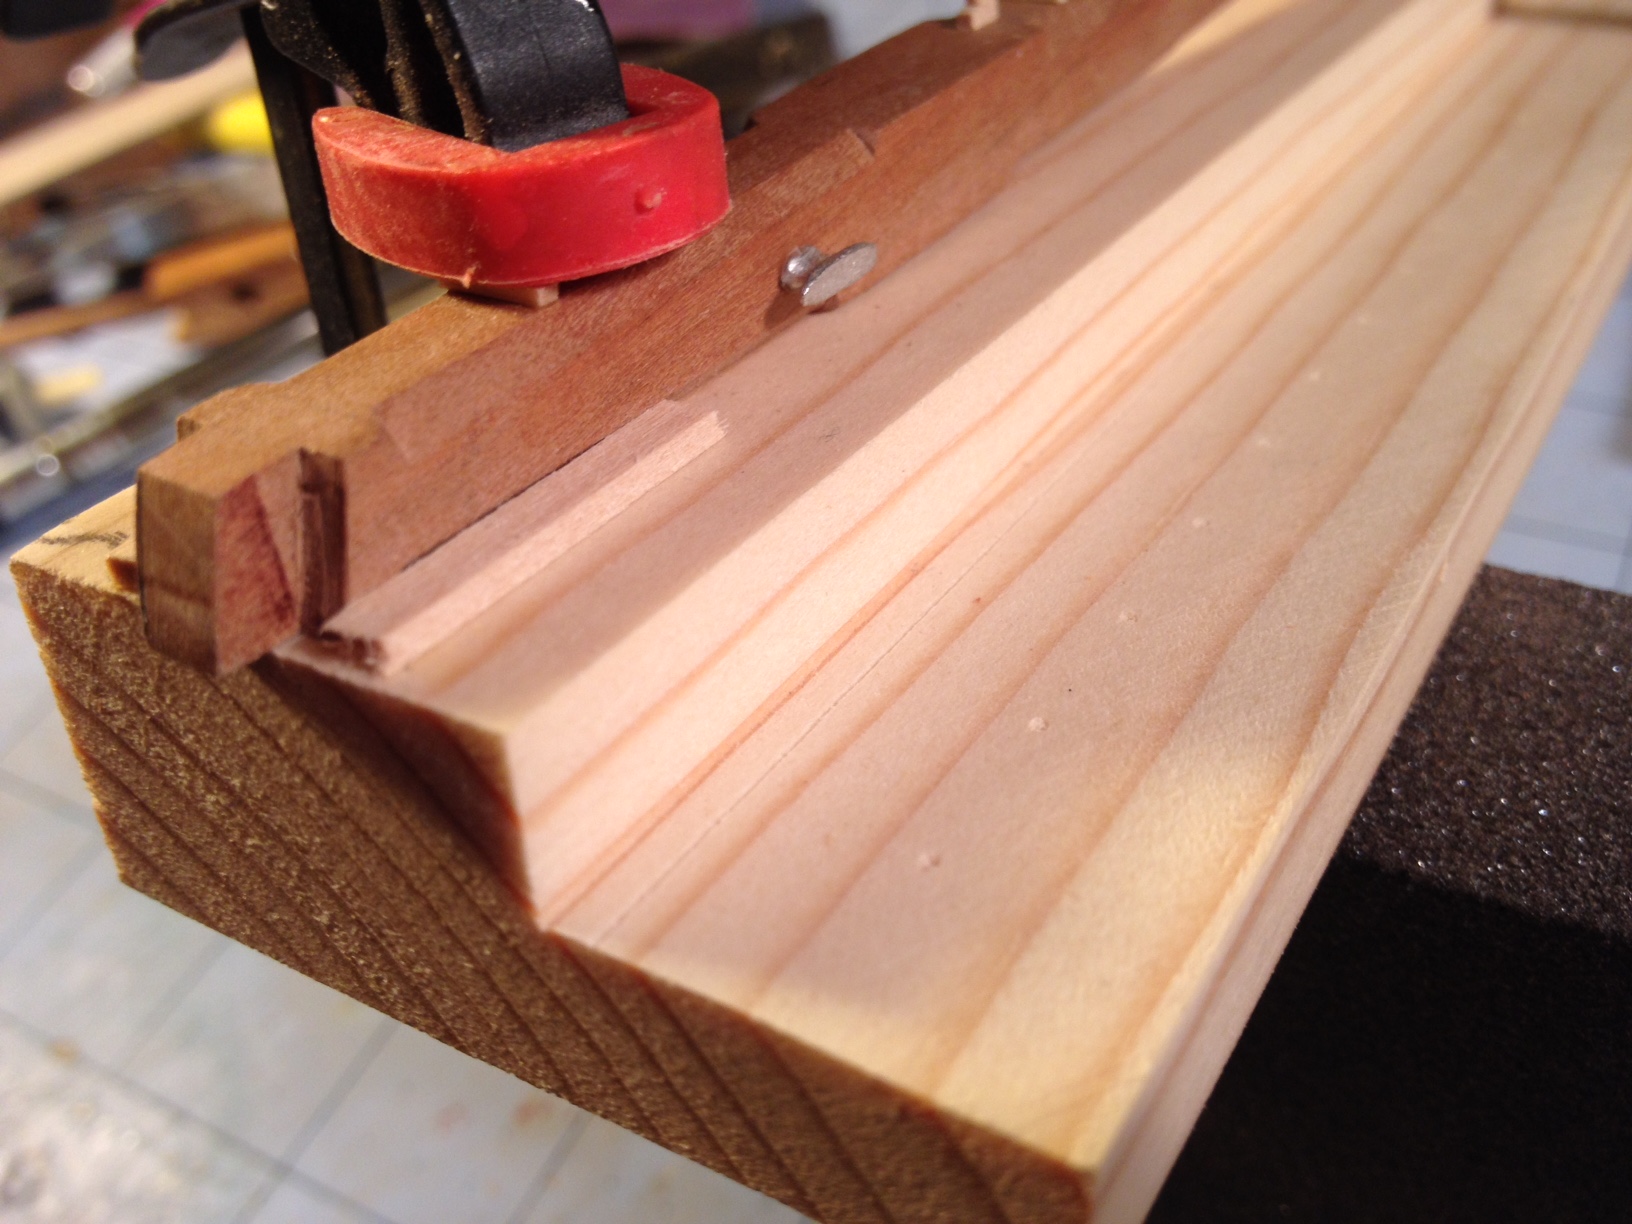
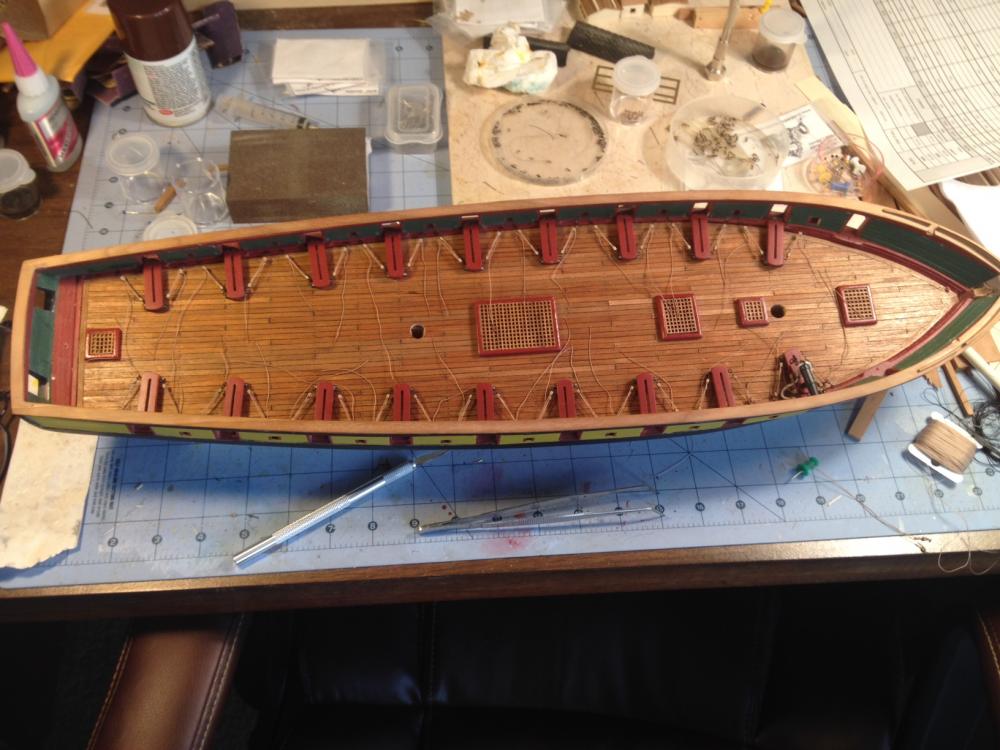
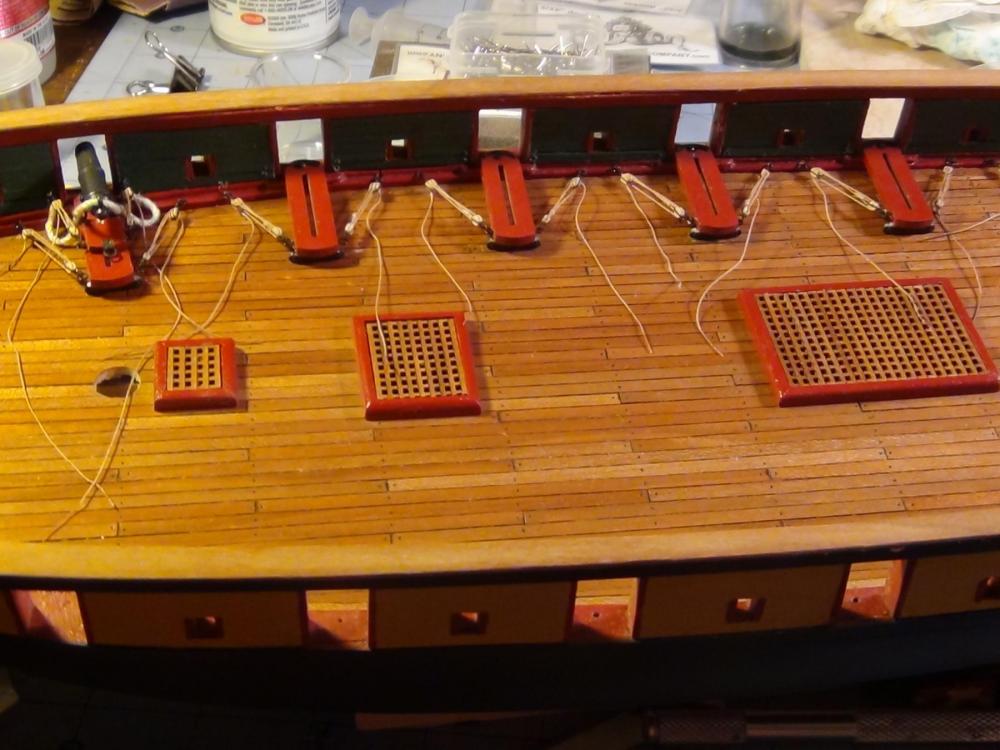
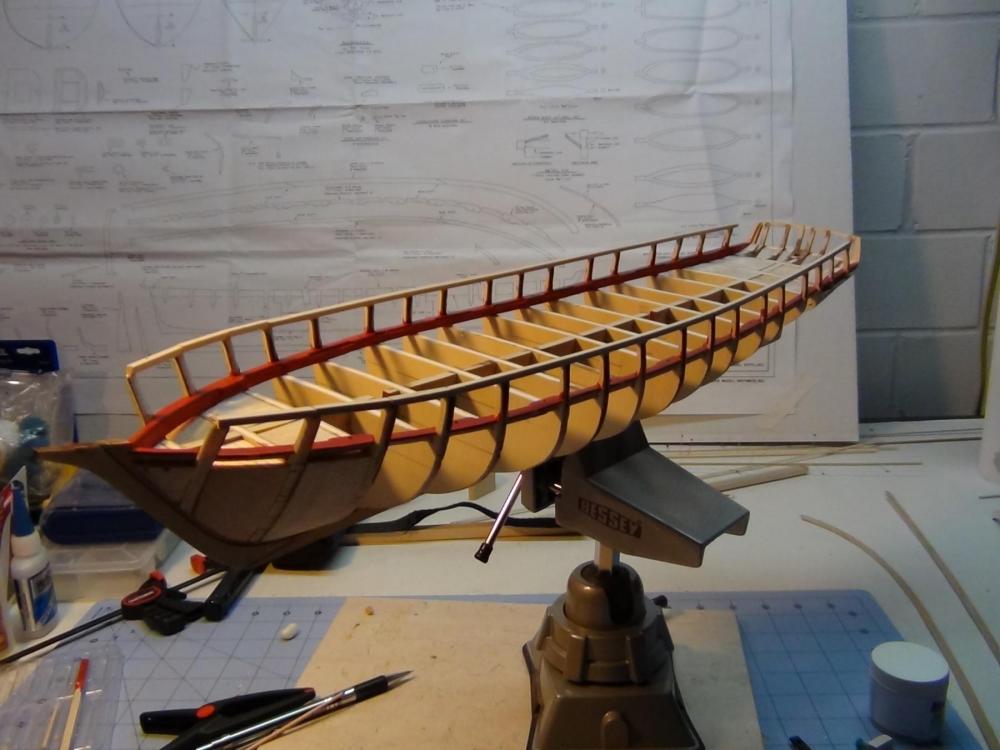
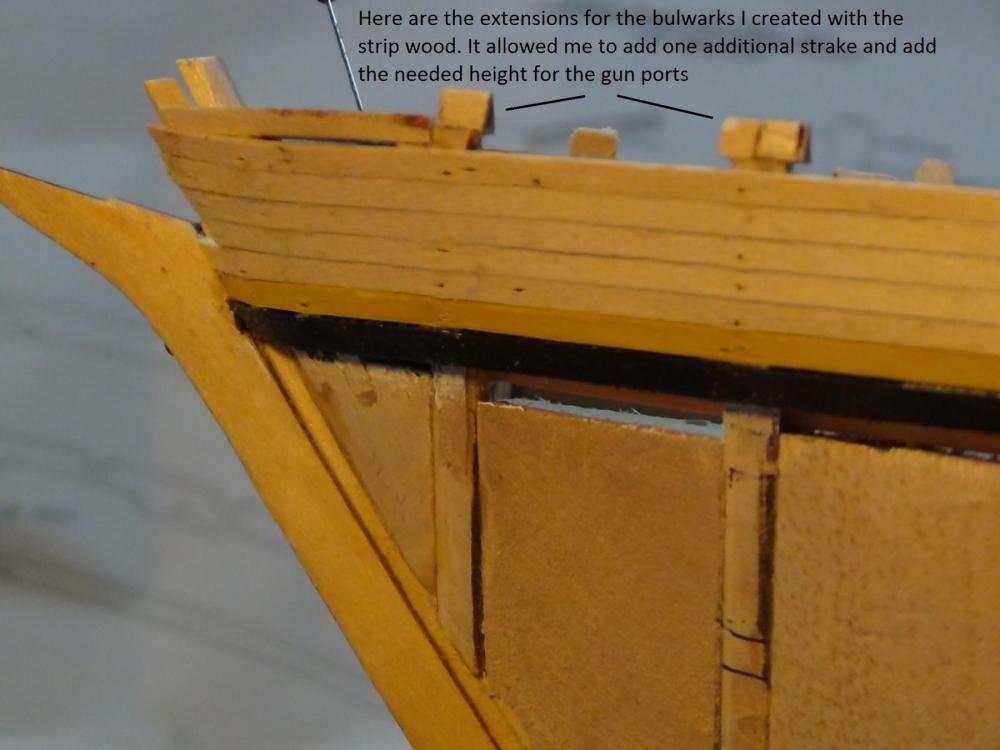
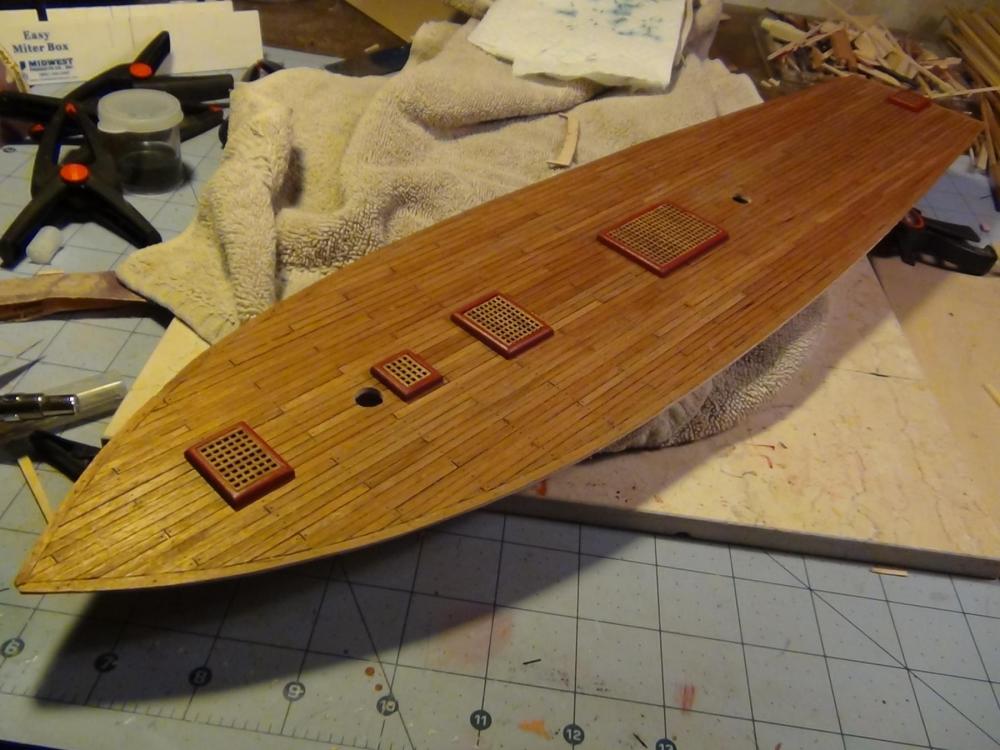
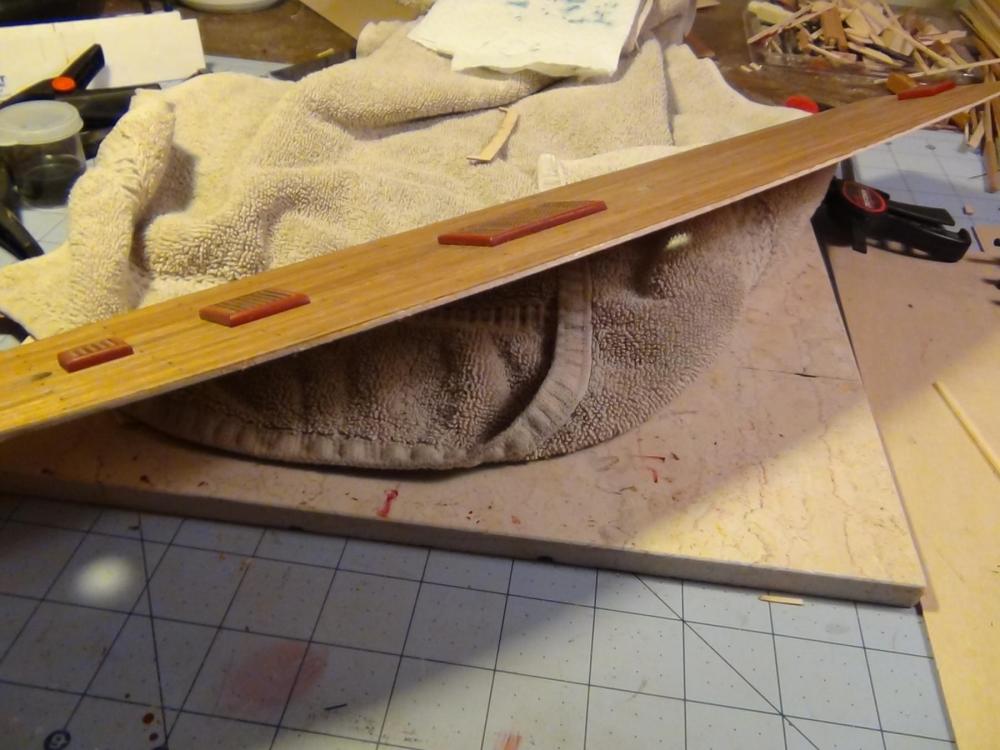
It is tough to see from the picture, but the plywood base is the same thickness as what the plans call for the deck planking. I have only raised my deck by the thickness of the veneer. The cherry strips are about the width of a piece of construction paper. Joel's point though is a very good one. When I started this build in 2012, there was a flurry of posts from Niagara builders warning all of us about the height of the gun ports, and that was for those building the deck pursuant to the plans. We were all advised to think about adding some length to the bulwarks and construct one of the carronades early on and make sure that they fit. I urge all Niagara builders to follow Joel's suggestion and check this measurement regardless of how you make your deck. Early on, I decided to glue a 1/8th piece of stripwood to the top of my bulwarks and then cut away the scrap in between, thus extending the bulwarks by 1/8". I found one of my old pictures that shows that. With that additional height, my raised deck will allow enough clearance for the guns. I always worried that raising the bulwarks would screw something else up, but fortunately that has not happened .... YET Another saving tip from this incredible forum. I would have never in a million years come up with that one. I could not do this project without all of you. Of course the proof will be in the pudding when I start mounting the guns tomorrow.
- 648 replies
-
- 5
-
-
- niagara
- model shipways
- (and 1 more)
-
I knocked out another 75 blocks. I ran out of my gun rigging rope (20 yards gone), and have ordered some more. I have enough material at this time to rig 15 carronades. Before I turned in last night, I decided to finally glue the deck down and will start applying eye bolts, cleats and such, and once done, start installing the guns. It has been over a month since I have actually done anything with the hull. I have a huge inventory of parts, deck furniture, masts, yards, and such just waiting to be installed. Things should start picking up from here.
- 648 replies
-
- 4
-
-
- niagara
- model shipways
- (and 1 more)
-
This looks great. It reminds me that I still have to make the knee and fit that in somehow. I will be definitely following your lead on the rigging.
- 843 replies
-
- 1
-
-
- niagara
- model shipways
- (and 2 more)
-
Eric, Here is a link to a Naval Ship modeling museum here in Canton Ohio. Larry Pulka is the ship builder and curator. He builds scratch model masterpieces in bone. He secures his material from local butcher shops. I am sure if you contacted him, he may be of some help to you. By the way, if anyone is in the area, this is worth the trip. His work is spectacular. http://www.modelshipsbylarrypulka.com/index.html
-
Don, Agree with all of the members. If you were to paint anything, I might consider painting the under surface a darker color over the white. It may mask some of the gaps. Just a thought.
- 653 replies
-
- 4
-
-
- trabakul
- marisstella
- (and 1 more)
-
Spent 4 hours on the build and only stropped 35 more blocks. Not yet half way, and no end in sight. I can't even imagine what it would take to rig the guns for a ship of the line, proving the exigency of dummy guns below deck. If and when I ever finish this daunting task, I will have to finally get around to gluing my deck to the hull. I have been avoiding that for no reason other than fear that I have somehow missed something. Then it will be time to mount the carronades and start rigging. Question for the Forum What is the best way to secure the carronades (and my 2 - 12 pound long guns) to the deck? The front of the sleds have a pin that bolts to the deck inside the gun port and I was planning on gluing them there. When I figure out how far the guns will be deployed, I was planning on gluing the slides to the sled. Does that sound reasonable. Should I also glue the back wheels down? How about the long guns? Just glue the wheels down? Thanks all.
- 648 replies
-
- 3
-
-
- niagara
- model shipways
- (and 1 more)
-
Ditto Jon's post. Hail to the Master! I have not seen that many photos, but I just marvel at your brass work. This skylight railing is beyond amazing. I absolutely envy what you turn out on your mini engine lathe. You are an inspiration to us journeymen builders.
-
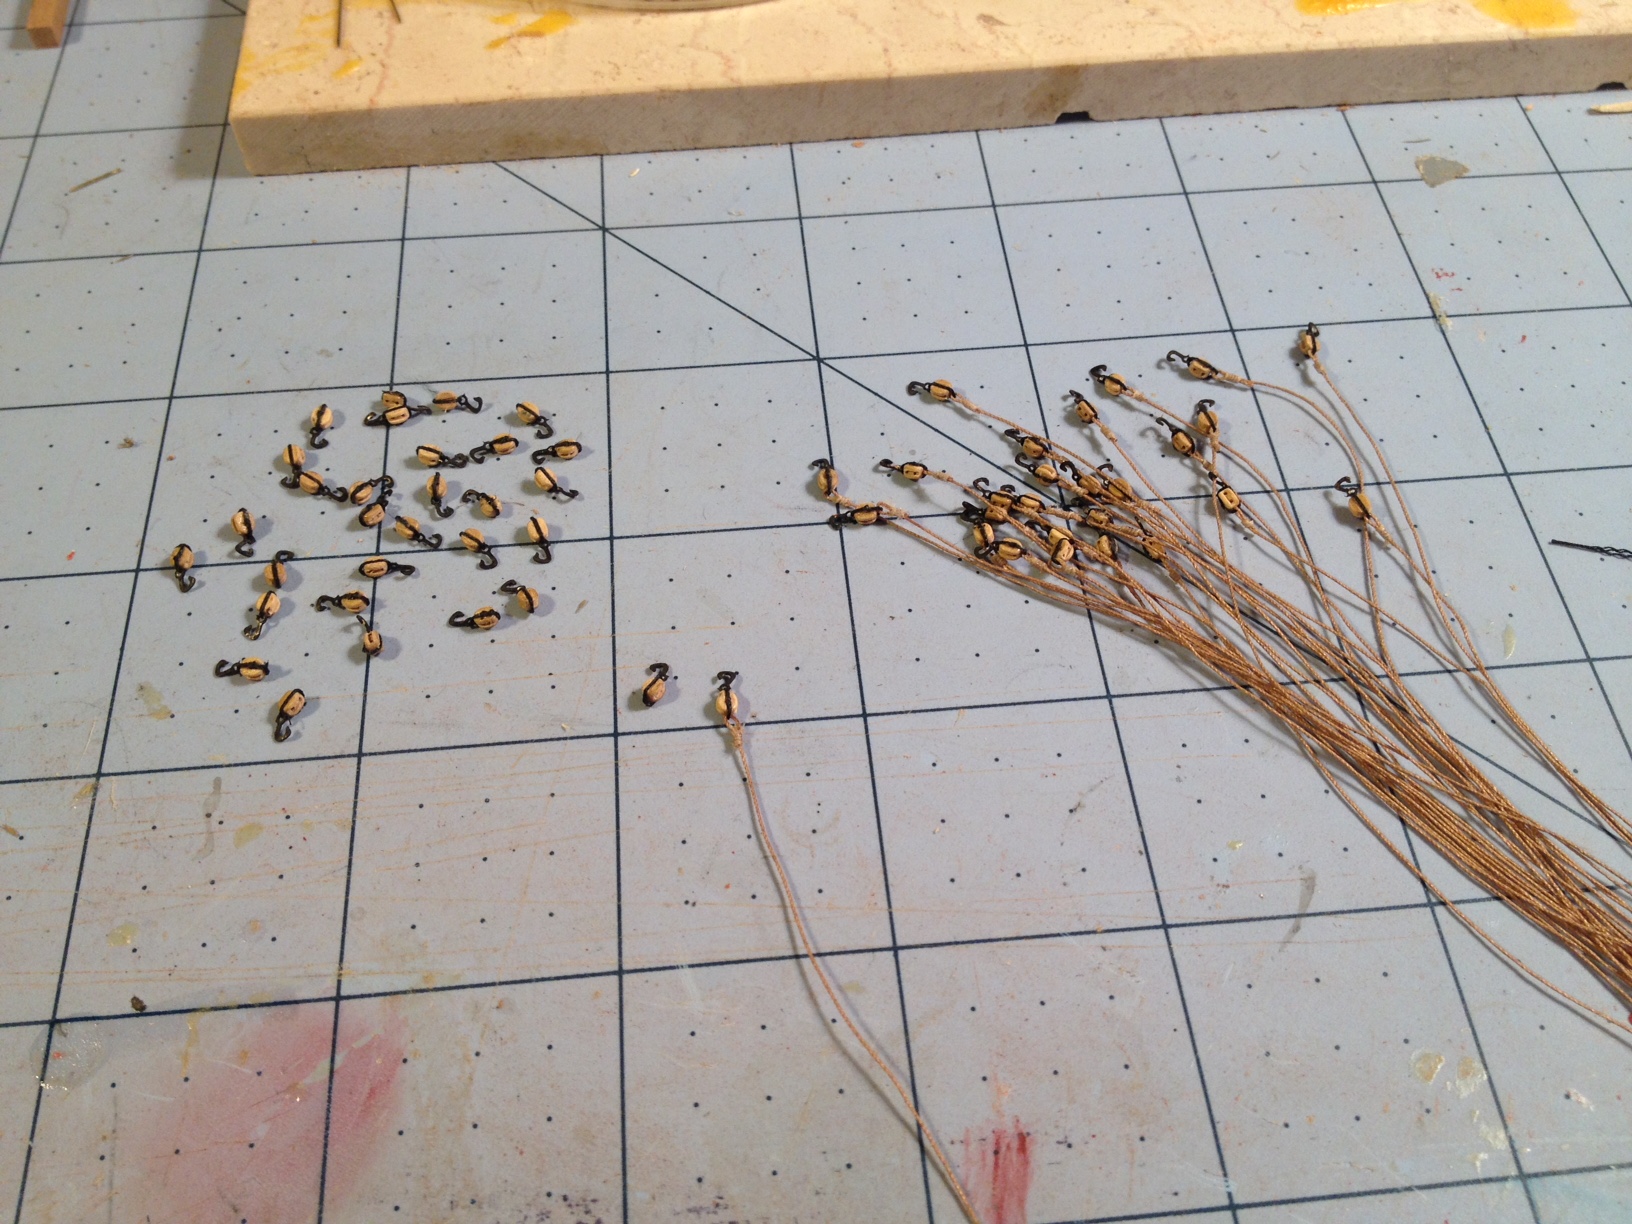
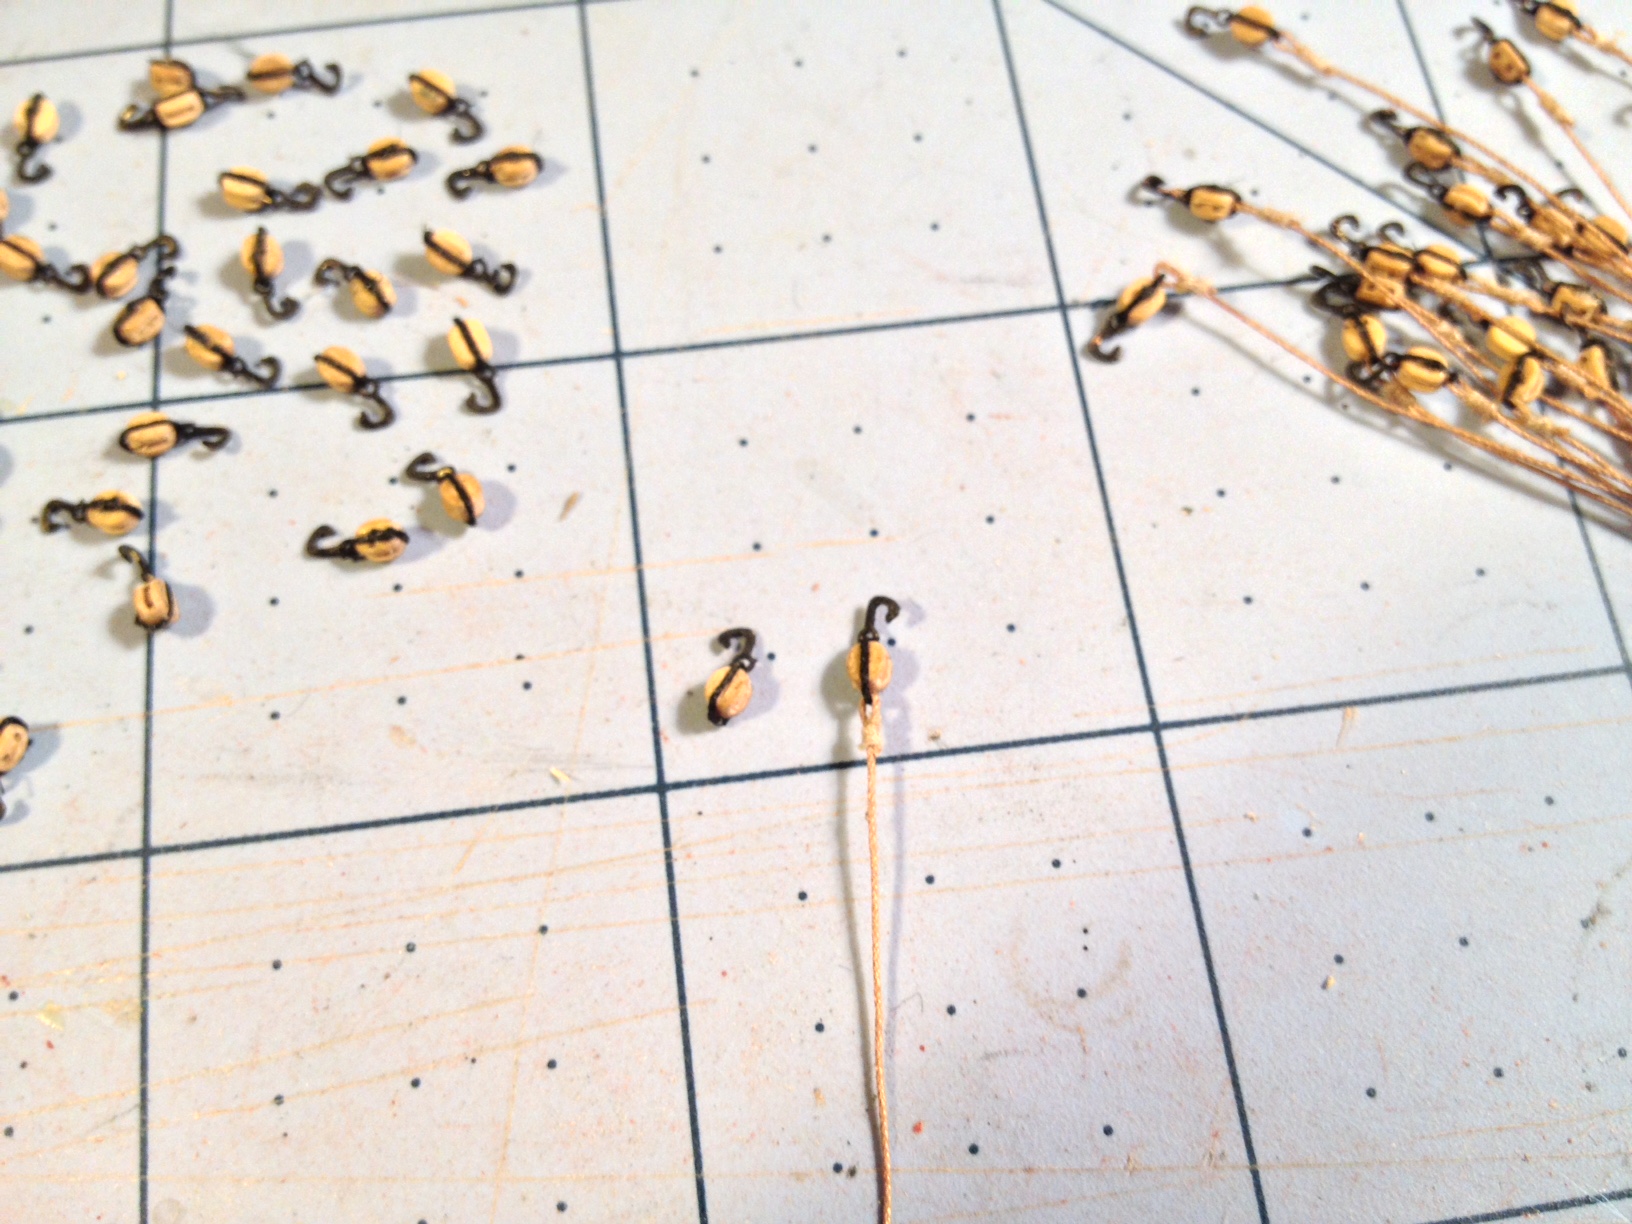
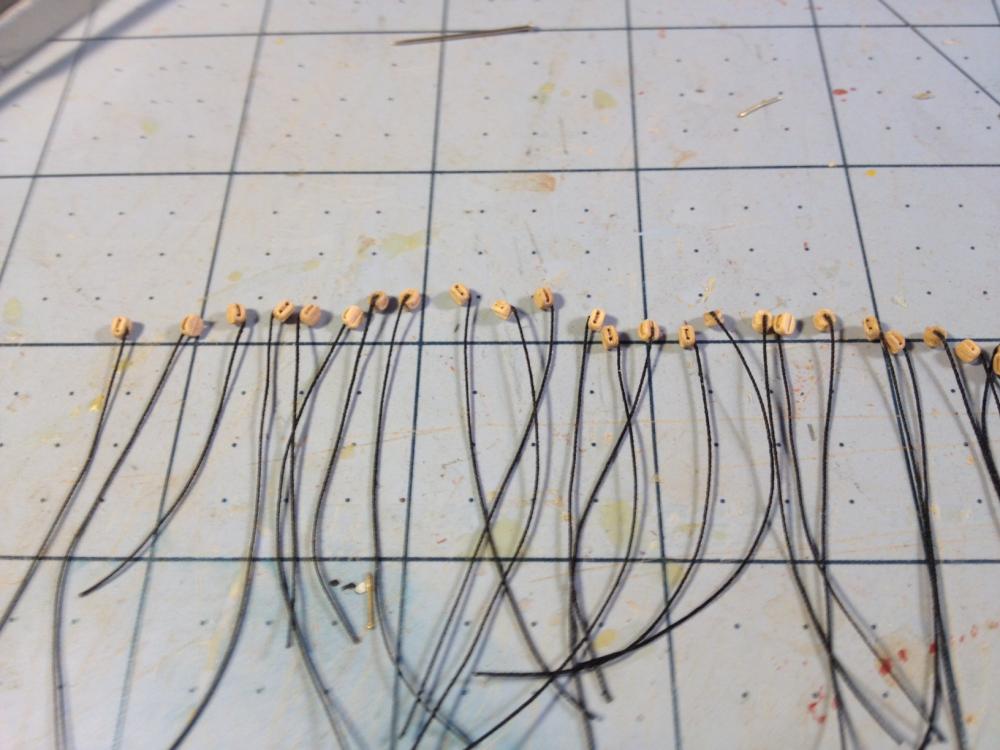
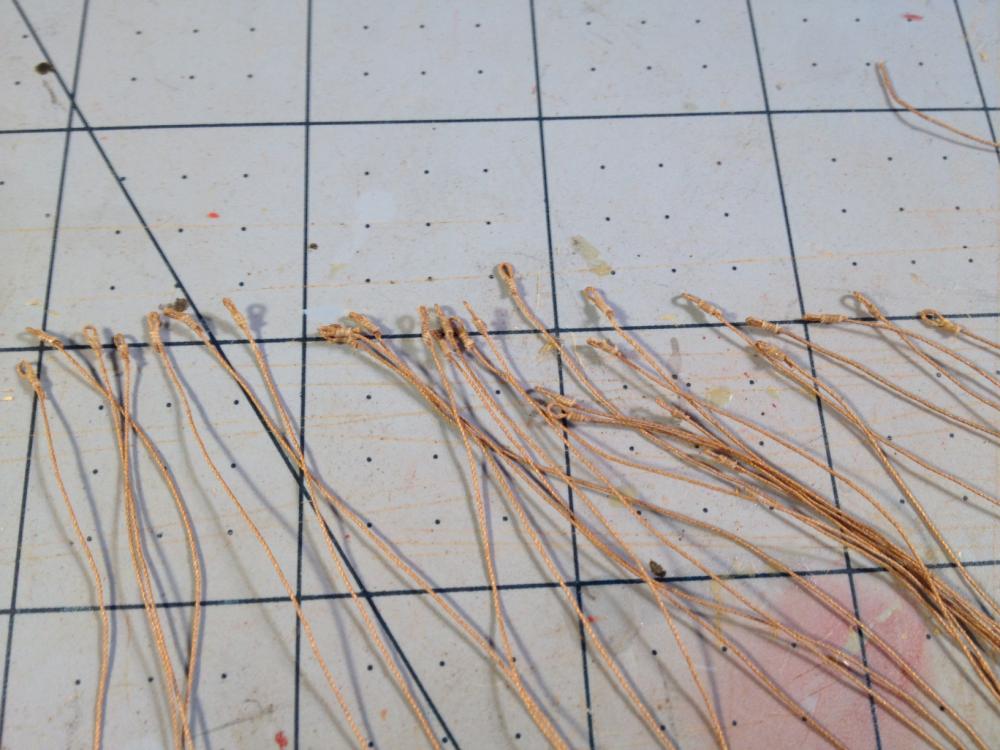
Mike. I tried all kinds of methods to do this. I first tried to tie them myself. It was difficult. Actually, Brian's method was better than anything I tried. In the end, I went back to the pre-made seizings. I make them by wrapping thread around a small straight pin and soaking with super thin CA. I then cut the tube into small sections, around 1 mm. I am using .008 Syren brown rope for my gun tackles. I freeze the end with CA and cut the end at a 45 degree angle. Threading through the seizing is a challenge. Holding the tube with the tweezers, I first thread one end. The end is like a tooth pick because of the CA. It goes in easily. Getting it back through is the hard part. I now switch hands and take the seizing in my fingers and use the tweezers to grip the end of the rope. The key is to insert the CA end into the tube enough to get it started. Sometimes, you can simply thread it right through. Most of the time, however, I found that by holding the seizing with a pinch of my thumb and forefinger, I can gently pull the long end of rope with my middle and forth fingers and at the same time, push the CA end with the tweezers. With both movements, it actually works. I then add a drop of yellow glue to the end as I pull the rope through to make a small loop. All of the blocks in the picture were done this way. This is tedious, but it is clearly easier than wrapping each seizing individually - at least for me. Also, using the straight pin makes the seizings small enough to make the finished product look good. They look better that the tied seizings I did. It also takes at least half the time.
- 648 replies
-
- 4
-
-
- niagara
- model shipways
- (and 1 more)
-
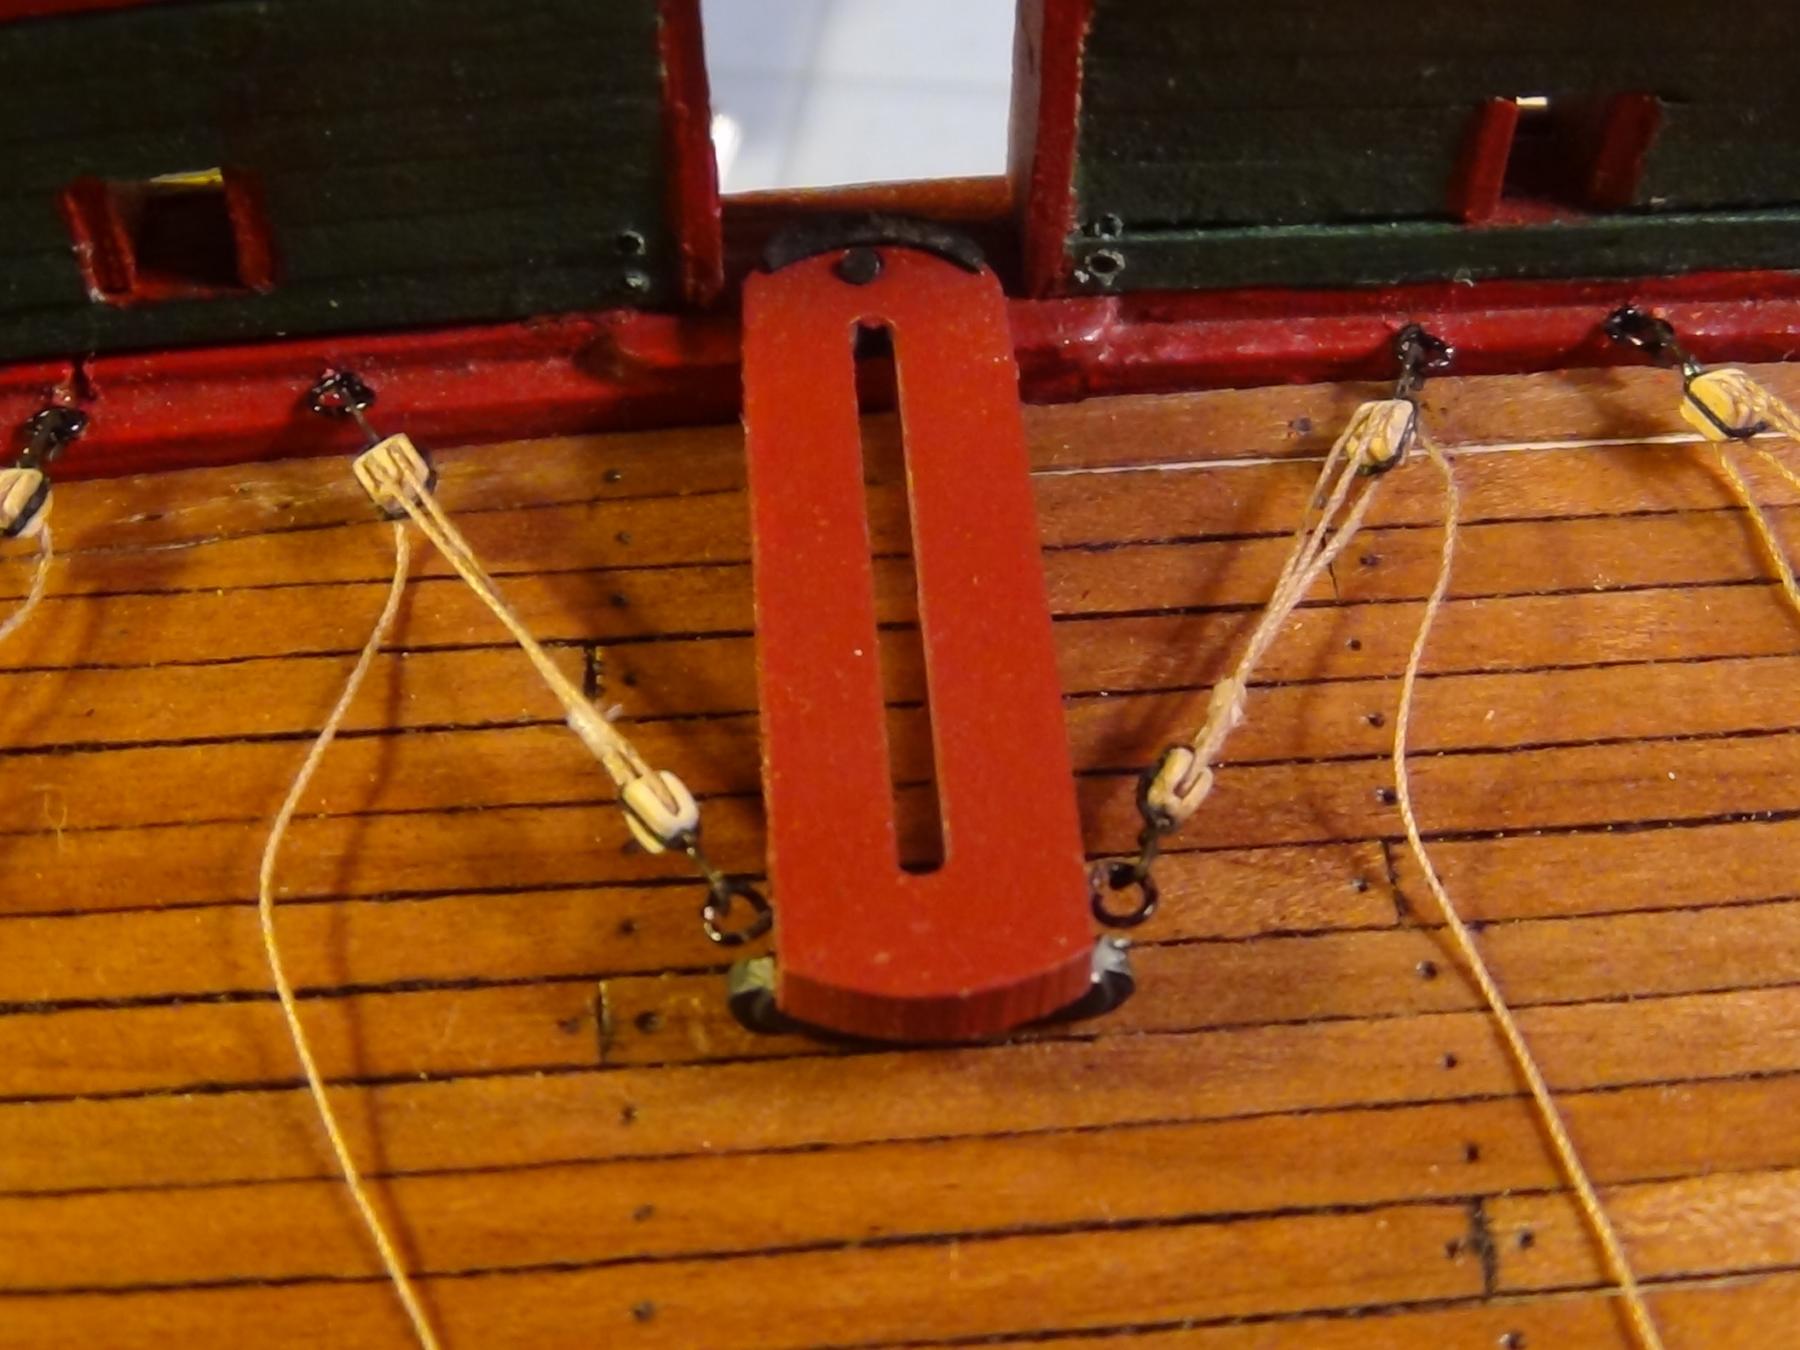
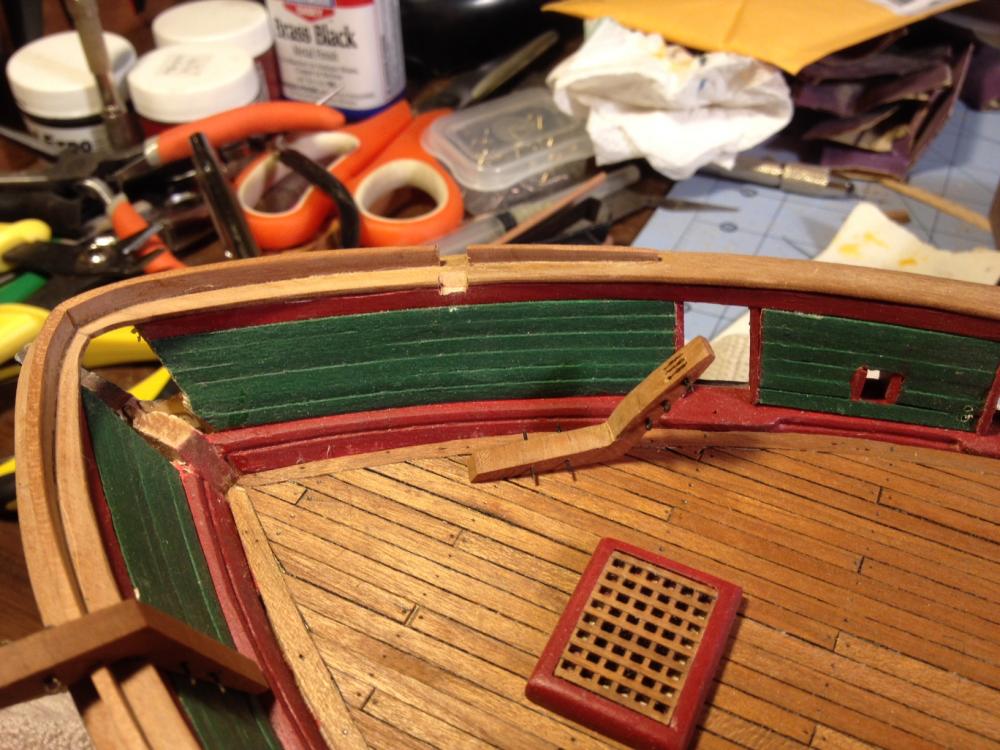
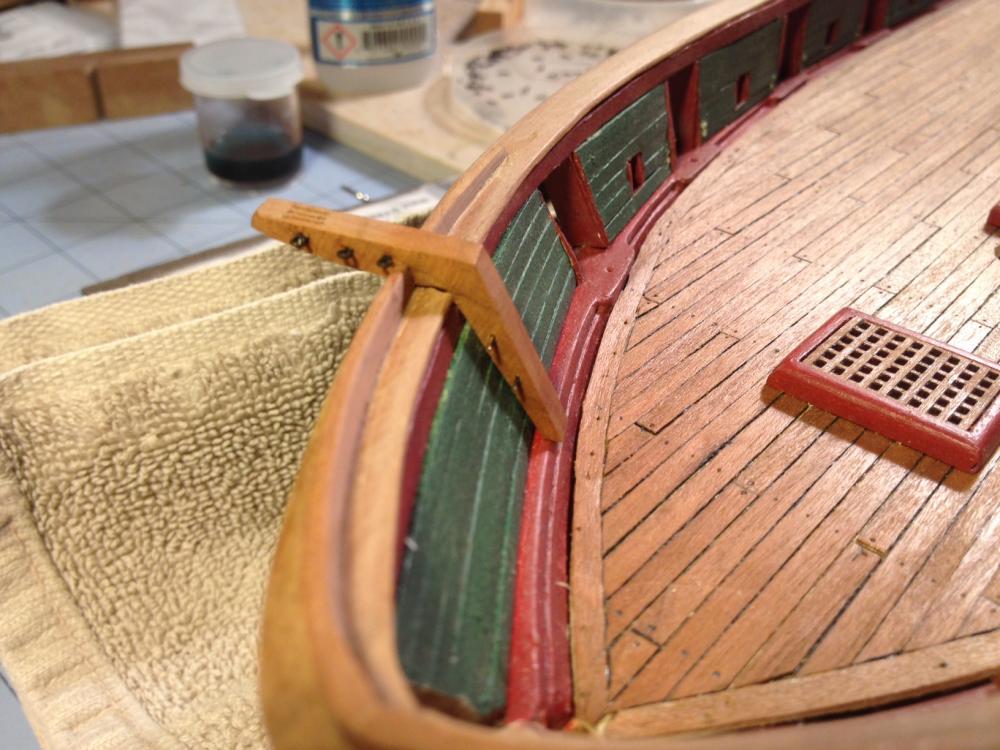
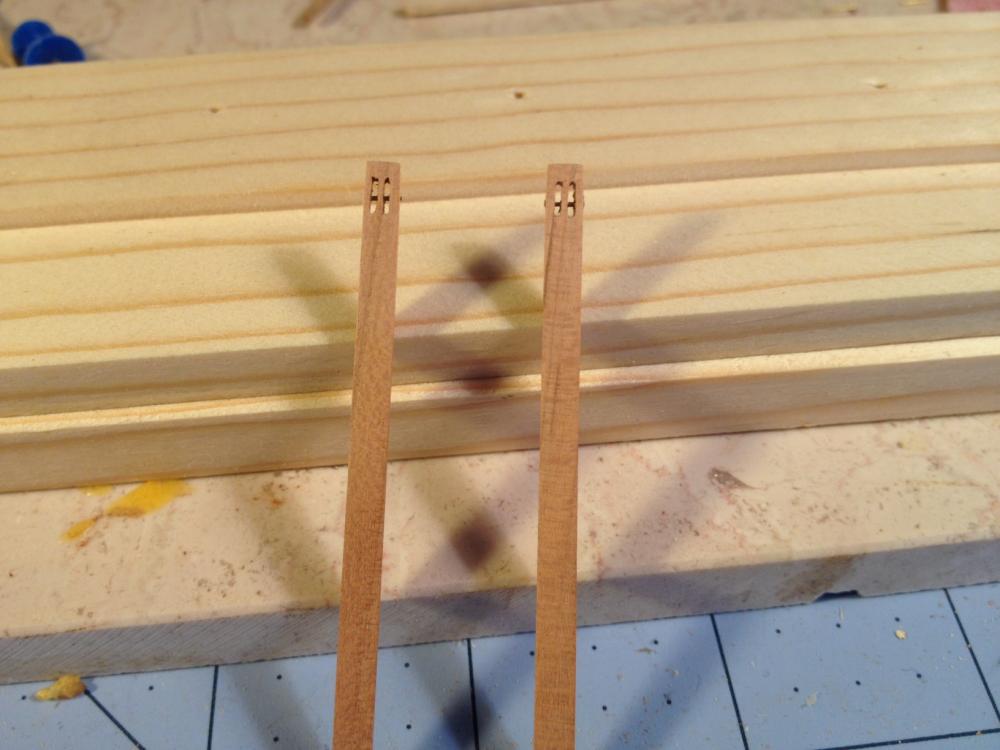
Mike, Perhaps you have already overcome this hurdle, but here are the photos of my hull and catheads. It looks as if you had to make the same modifications to the hull rails that I did to make them sit right. I cut my three slot sheaves all the way through and just placed a pin through the middle. I will not be adding any wheels. I made them out of cherry using the laser cut pattern.

- 843 replies
-
- 1
-
-
- niagara
- model shipways
- (and 2 more)
-
More Gun Tackles I cranked out 50 stropped blocks. Had a lot of rain today so I could get after this new challenge. About 1/4 done.

- 648 replies
-
- 4
-
-
- niagara
- model shipways
- (and 1 more)
-
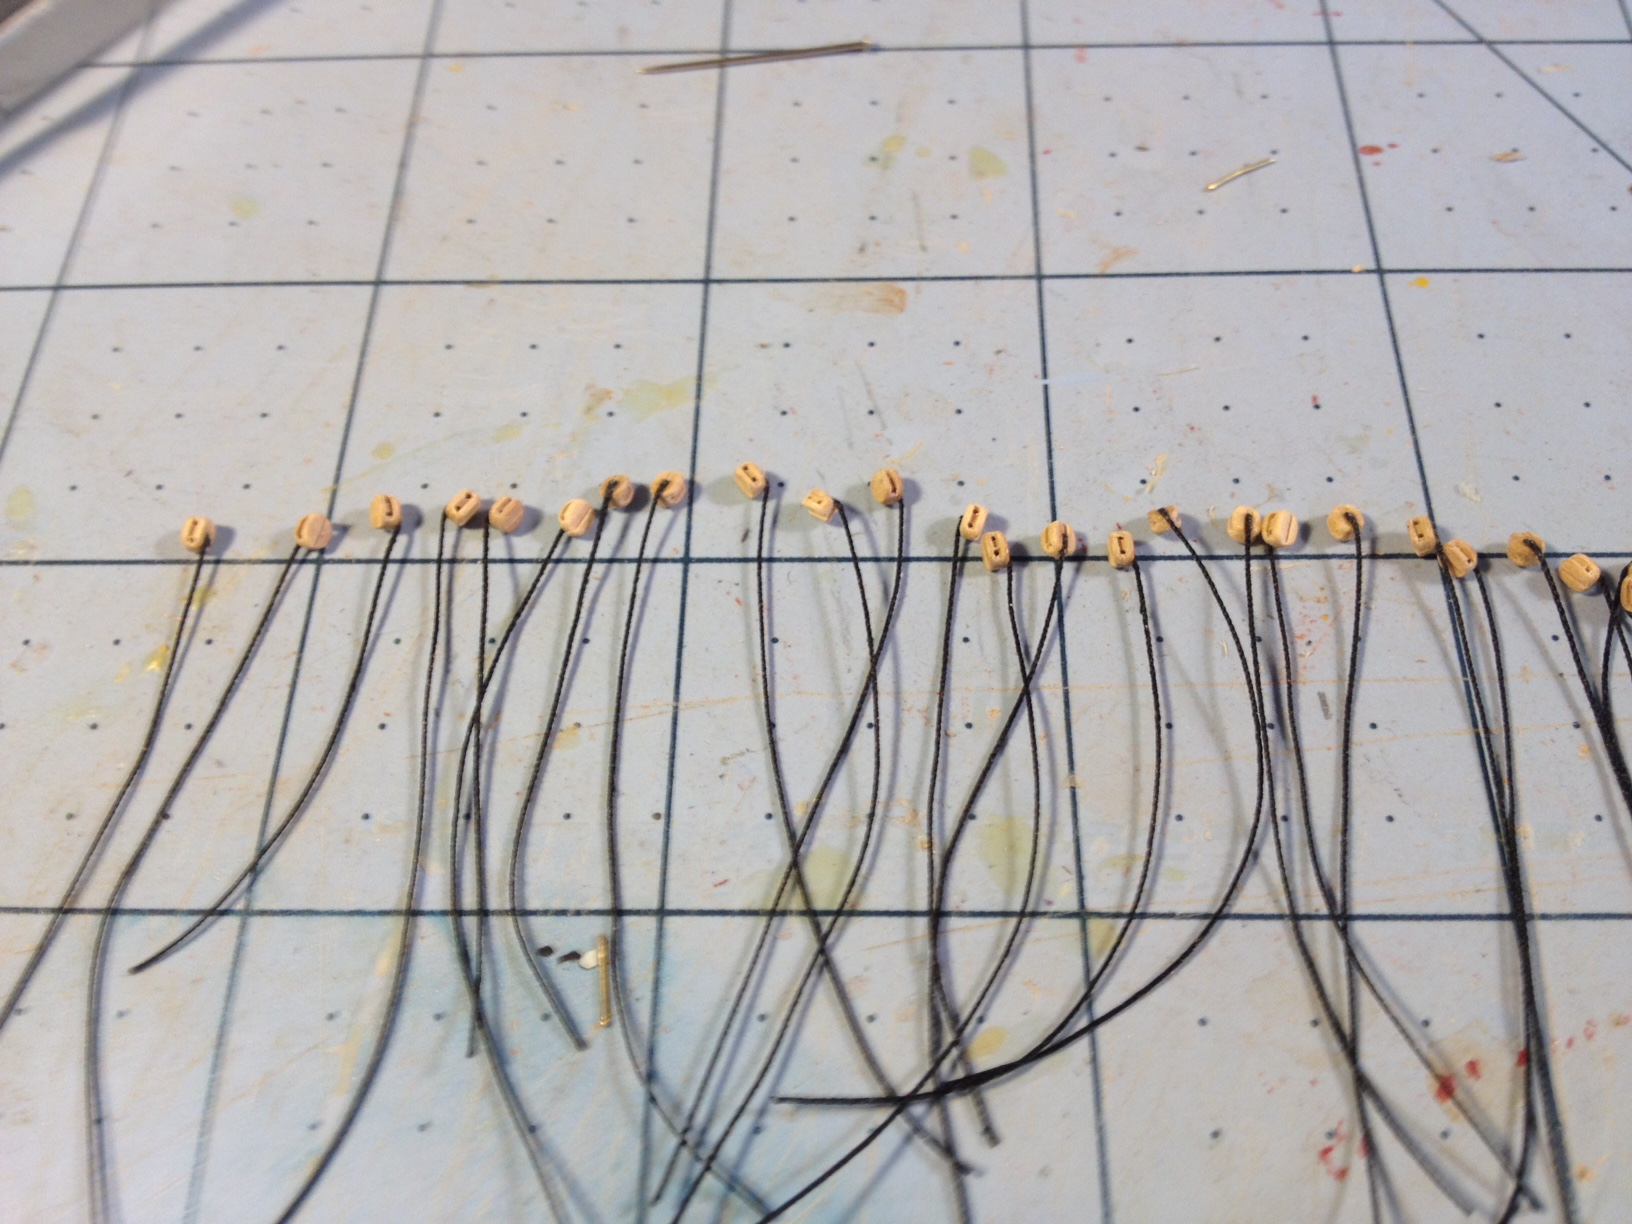
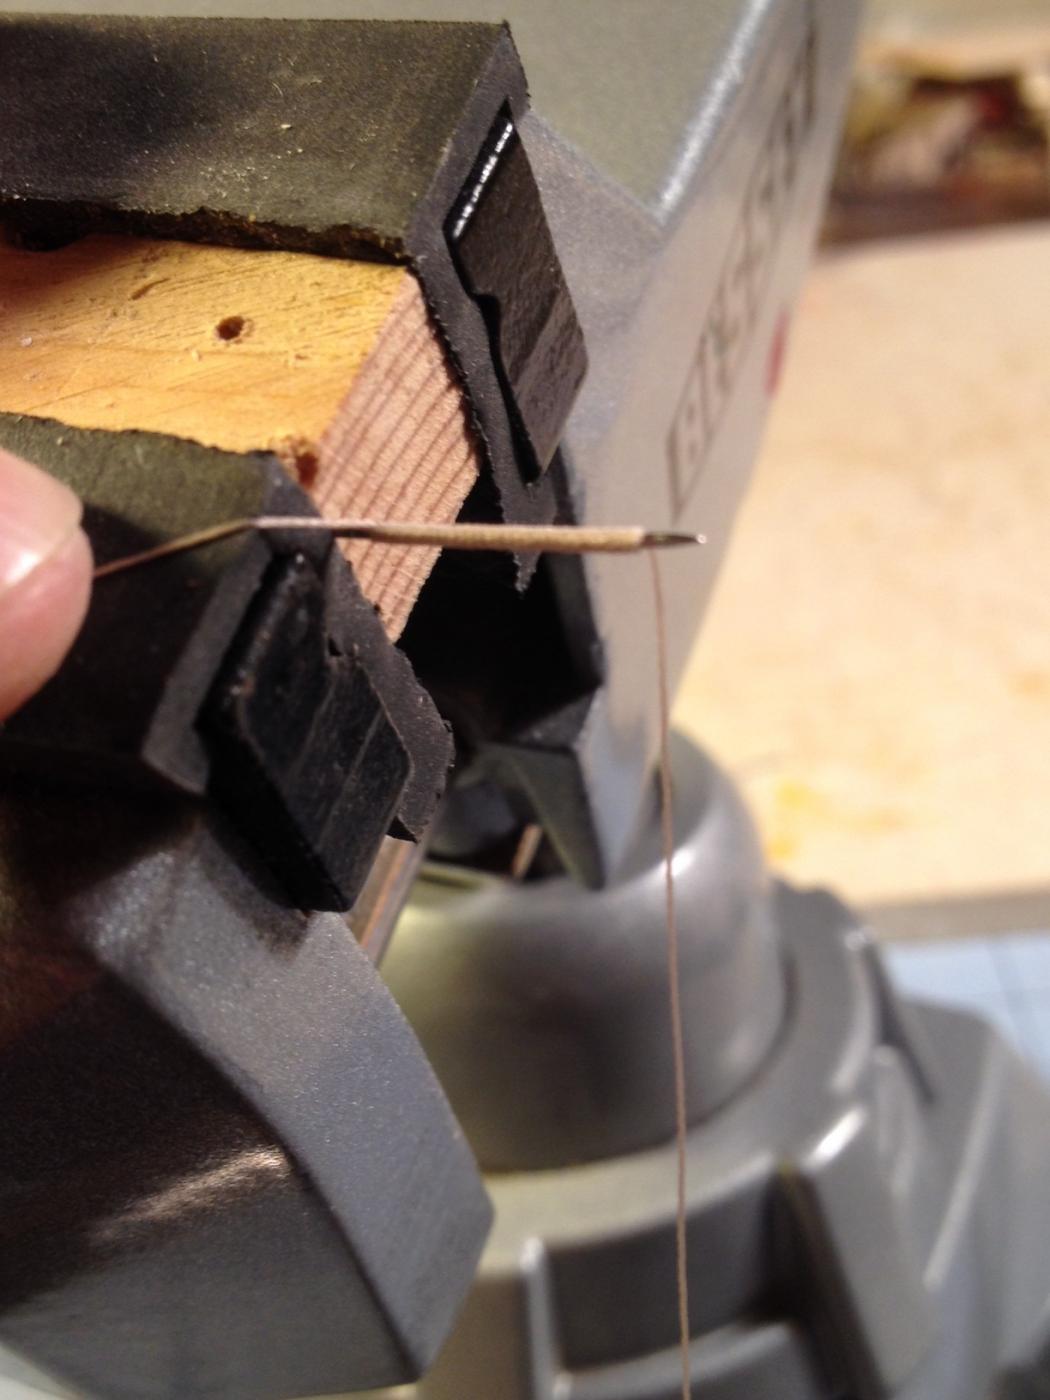
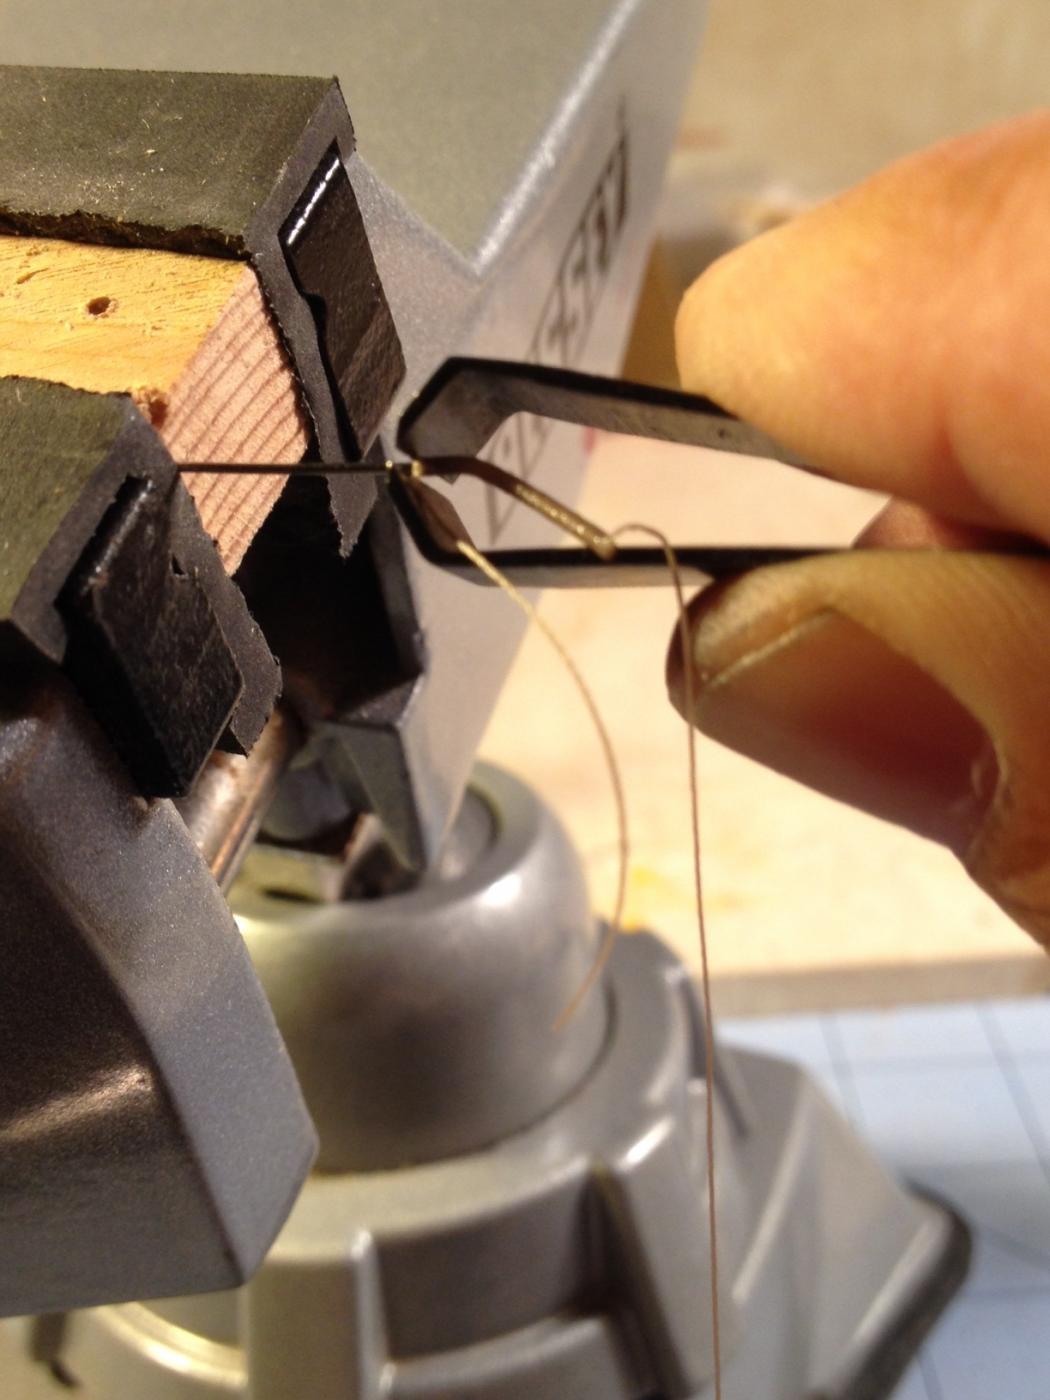
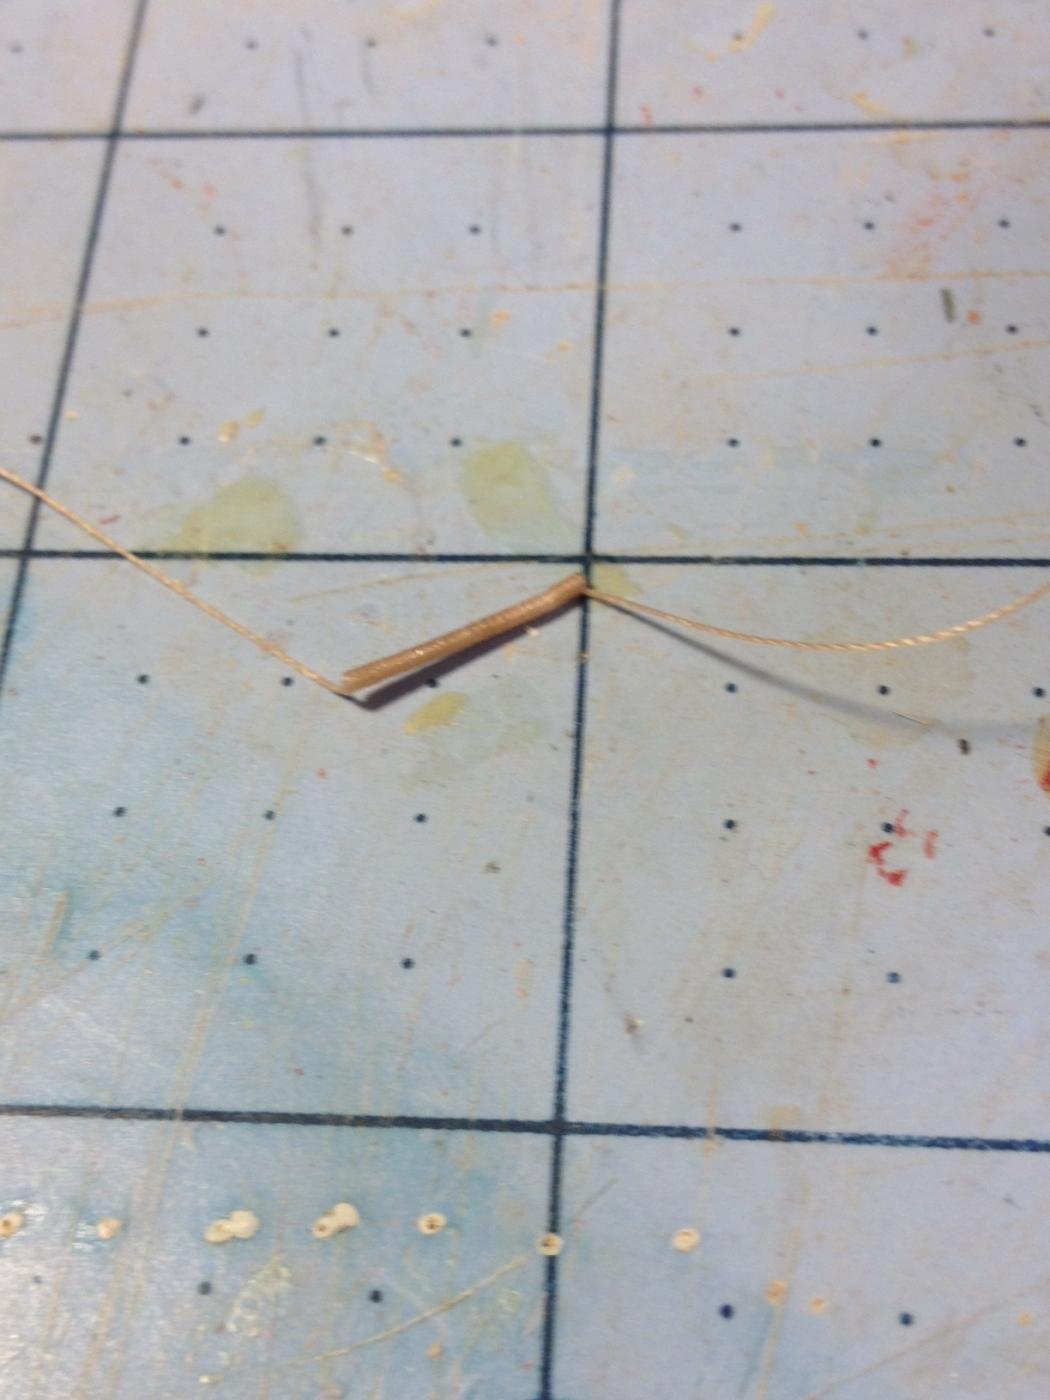
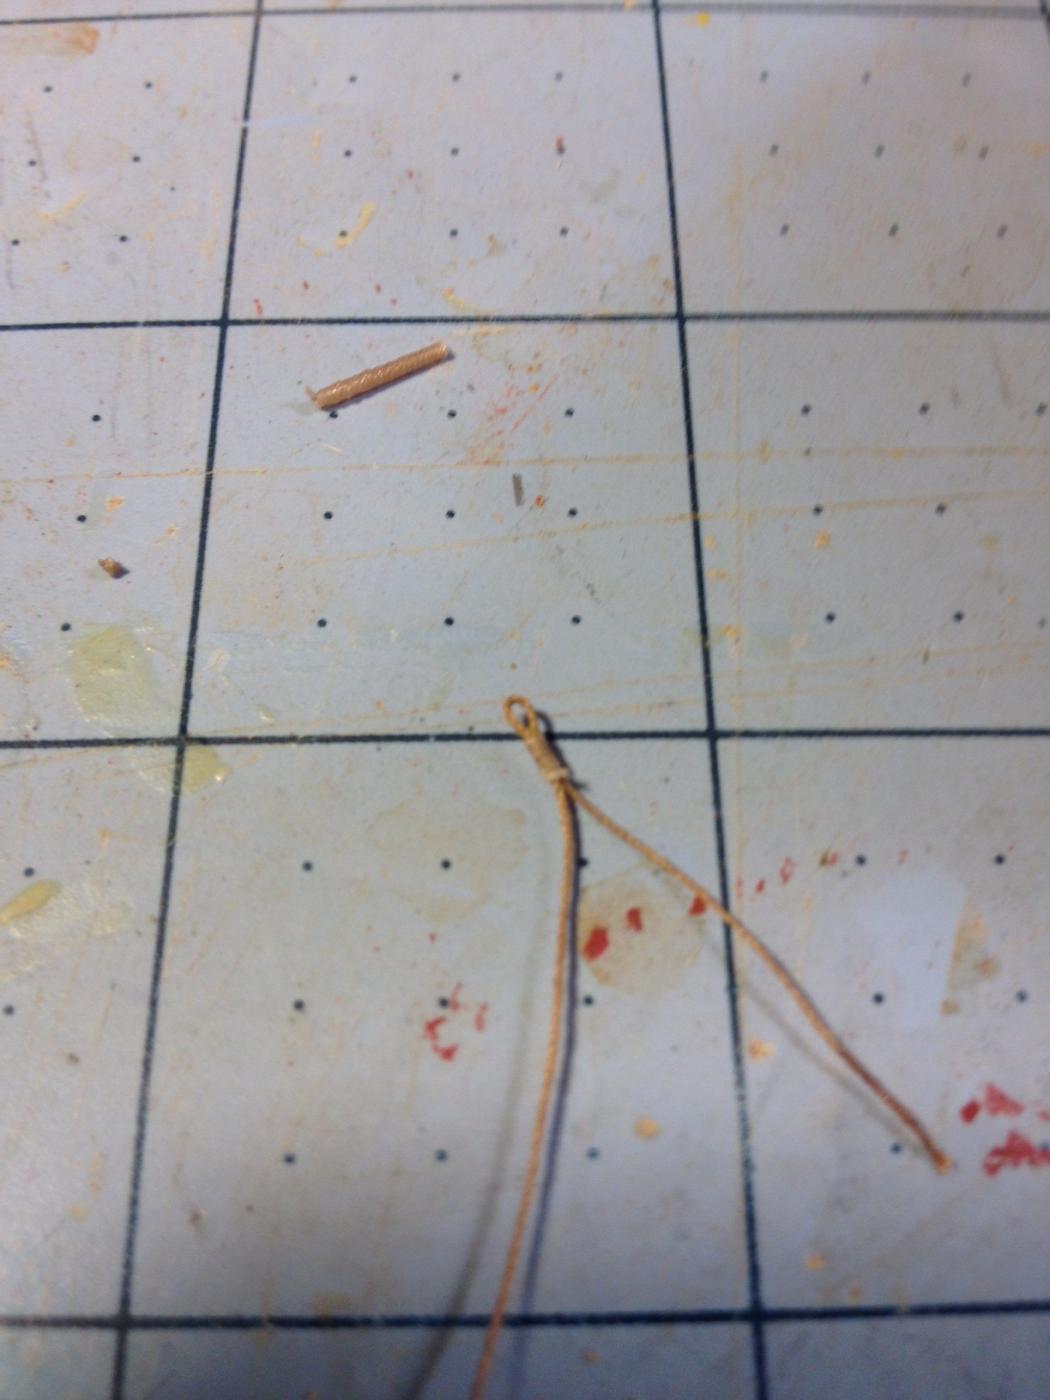
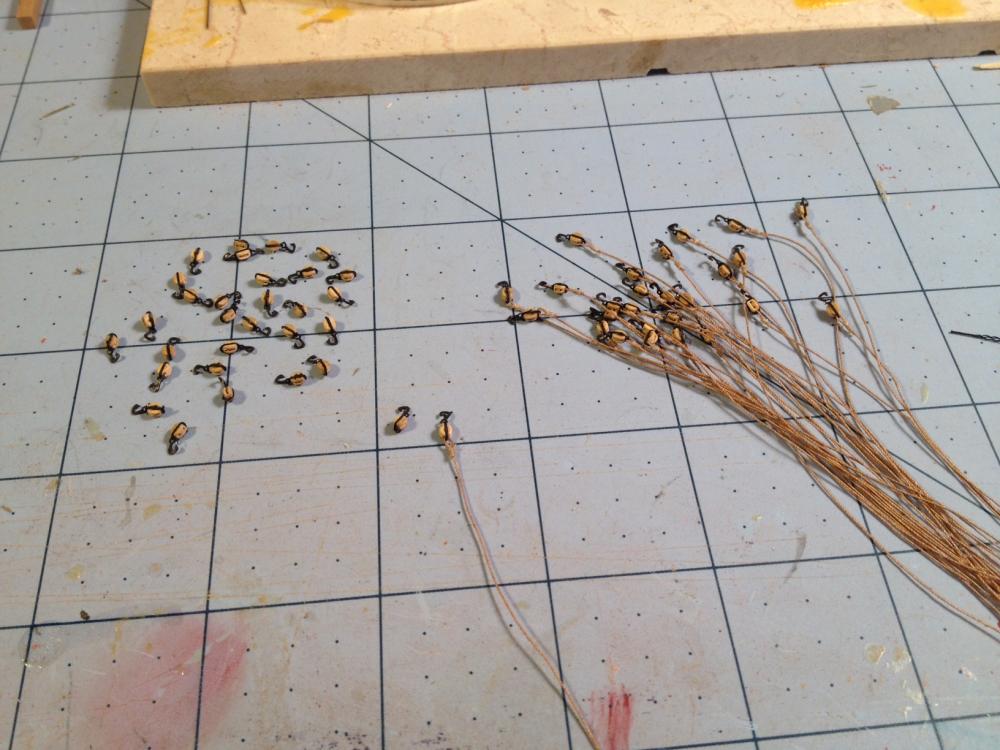
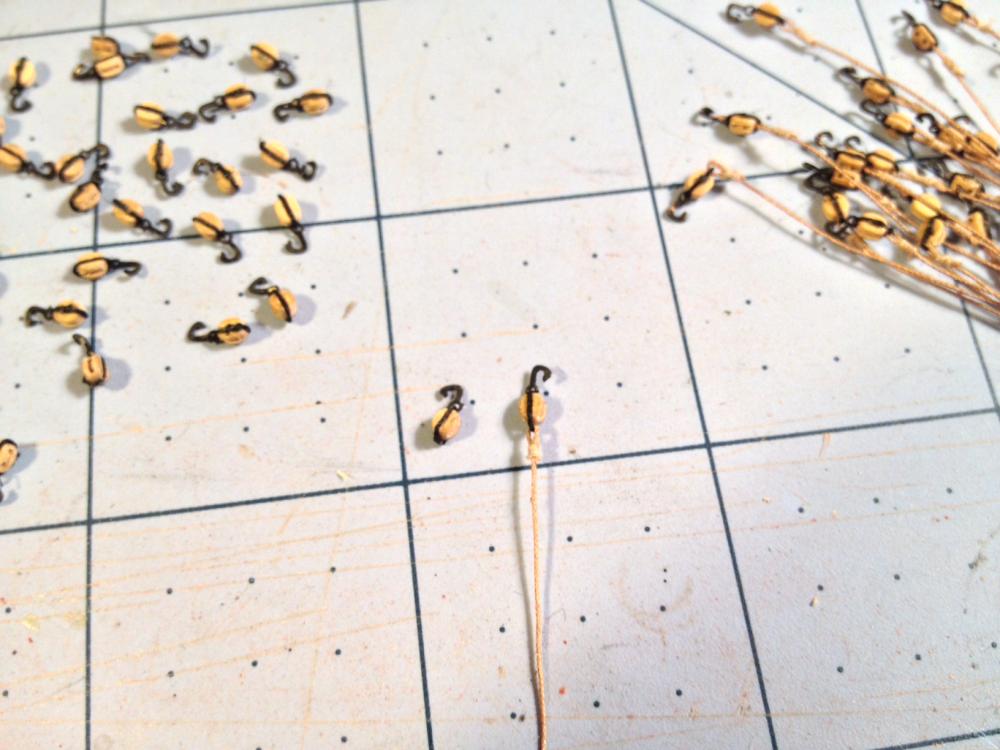
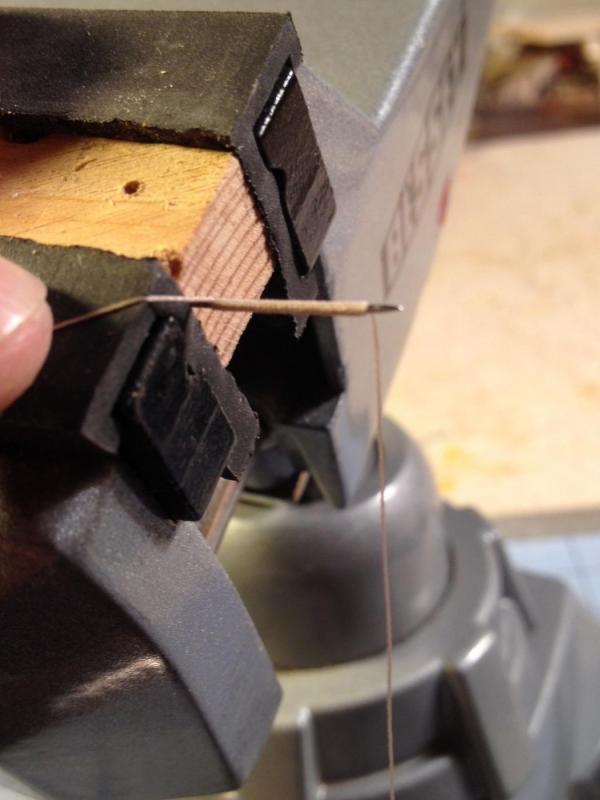
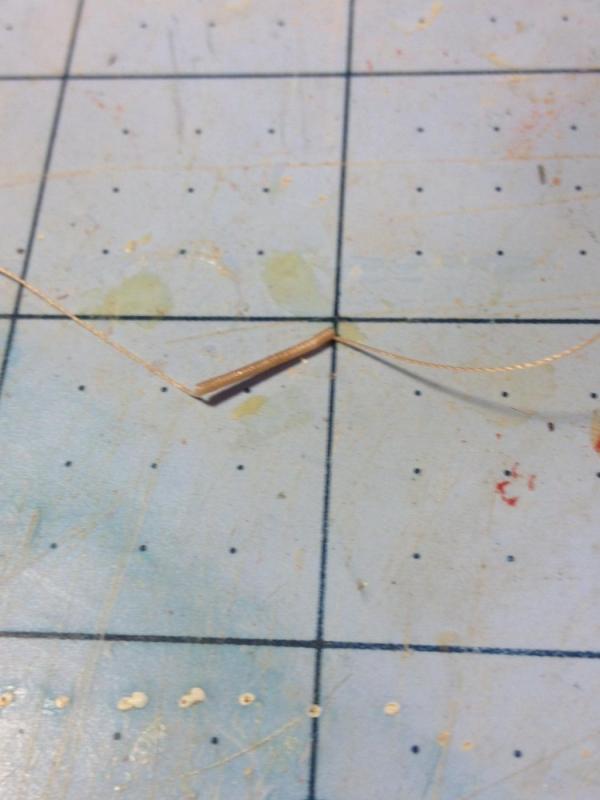
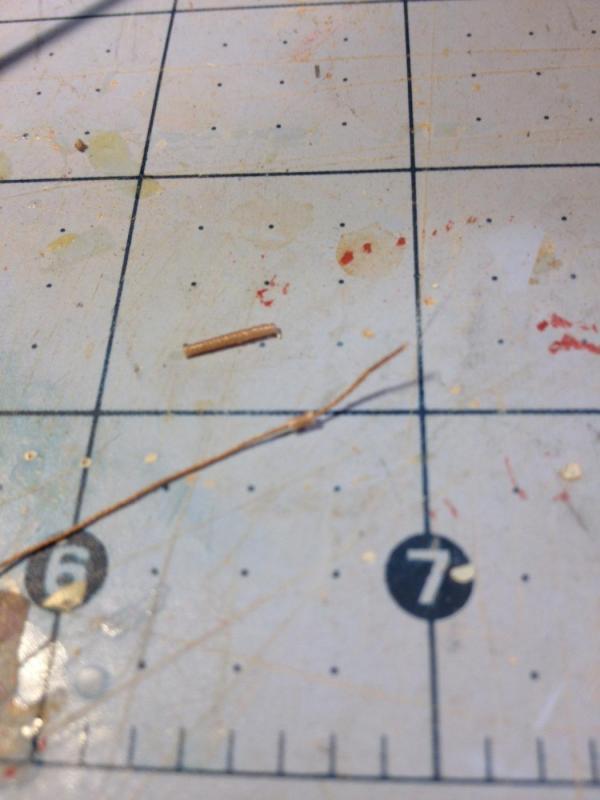
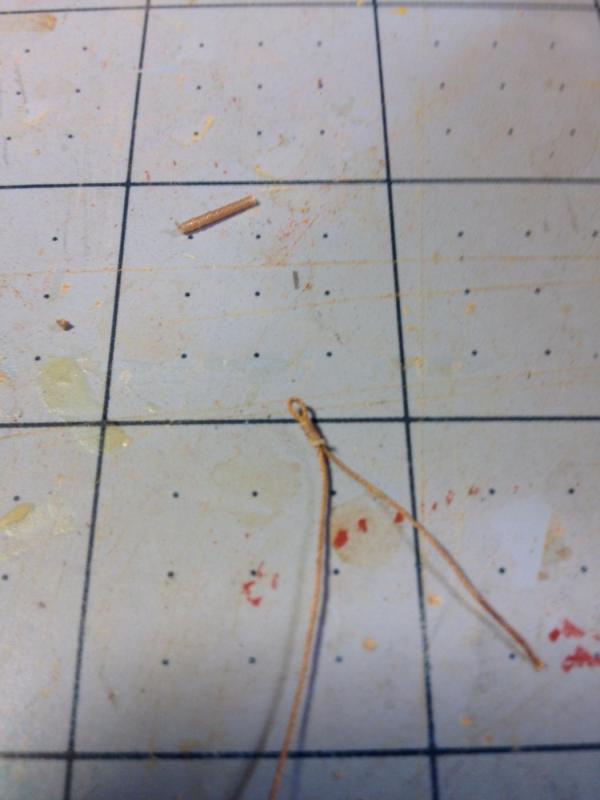
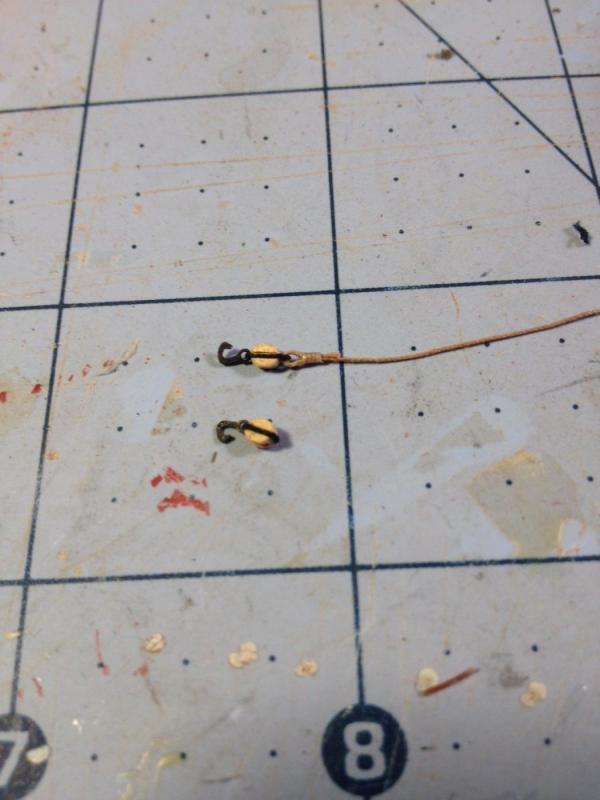
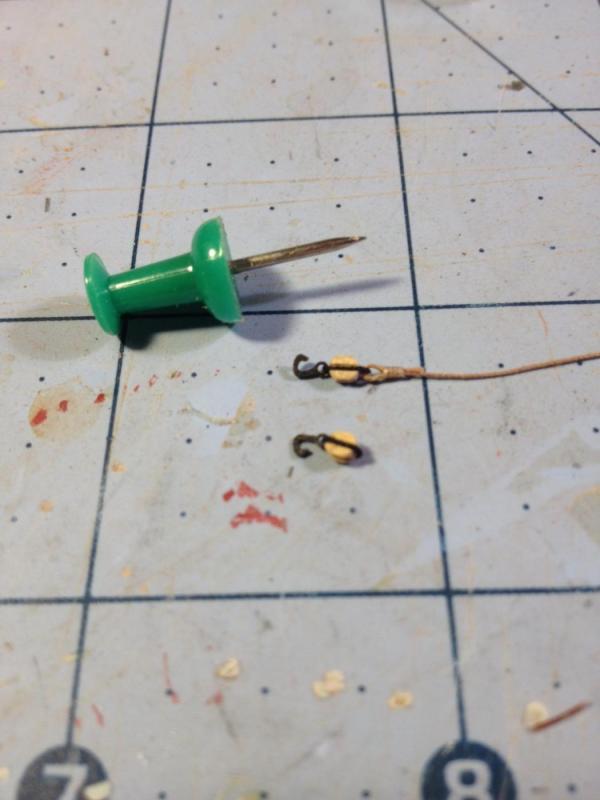
Gun Tackle I received my order of 3mm single and double blocks, 3mm hooks, and some .008 rope from Syren. I placed the order on Monday and got the shipment by Friday. Great service. My first reaction was shock at how incredibly small the blocks were. They are exactly 3mm. Looking at a ruler and trying to imagine what 3mm looks like is one thing, but handling something that small is quite another. I am very happy with the scale of the blocks when compared to the guns. What a challenge this is going to be. I only have to strop about 170 of these buggers. So I started experimenting. I have my own block and tackle that we use to tighten the picket lines for our horses, and I wanted to replcate my set. I wanted to attach the tackle rope by seizing a loop and stropping it to the block. I made a small jig much like what i have seen on this site with the ends of two straight pins to hang the block on while working on it. I started with the small loop on the tackle rope. I clamped the end of the rope in my small vice and tried to rap some of the small brown thread provided in the kit. No matter how careful I was, I could not get the right size on the loop. Mostly two large. And this was incredibly taxing. I feel like I have moved from the miniture to the sublime. It took me over an hour to make a single acceptable loop using this method. So I tried something else I had seen on this site. I decided to make some pre-made sieze collars. I clamped a small staight pin with a flat top in the vice against a piece of scrap wood that allowed the pin head to dig in for a good grip. I then wrapped about a half inch of siezing rope tightly onto the pin. While holding it tight, I coated the rope with super thin CA. Once dried, I pulled the tube off of the pin with a pair of nippers. I then cut a very small piece of the tube to make a collar. I then slipped my tackle rope through the collar and then backed the rope back through the collar to make a loop. I had to dab the end with some CA and cut it at a 45 degree angle to get it into the small hole. But it worked. Once I created the loop, i applied a drop of yellow glue to keep the collar and loop secure.(CA discolored the rope too much). With the loop and my blackened brass hooks, i inserted the teenie block into the jig and stropped it with some black rope. I used medium CA to attach one end of the rope to the side of the block. I threaded the loop and the hook, and then attached the end of the black rope to the block with more CA. I let dry and carefully cut off the remainder. I spent 4 hours on this exercise and I only got three blocks done. Only 167 left to do. Here are some photos.

- 648 replies
-
- 4
-
-
- niagara
- model shipways
- (and 1 more)
-
Mike, Just had a look at your inquiry. Been waiting for my blocks and ropes from Syren and working on my son's graduation party so I have been away for a while. I made exact copies of the laser cut catheads, using the cut outs to trace a pattern on some cherry and cut them on the bandsaw. I understand your frustration on the fit. I had to make some adjustments as well, but perhaps not as much as you have described. I cut the notch on the chock rail, and had to file some material away from the inside vertical stem of the cathead so that if fit snuggly against the bulwark. I also had to do some surgery on the inside of the cap rail. I have not glued the catheads to the hull. I will take some photos tomorrow of what I filed away to get mine to fit. I just spent 4 hours stropping a whopping 3 blocks.
- 648 replies
-
- 1
-
-
- niagara
- model shipways
- (and 1 more)
-
Mike, Just put in my order from Syren for blocks and rope following the results of your exhaustive research. Thanks for all of the trial and tribulation. I hope to return the favor somehow. I will be constantly looking over your shoulder and following right behind you taking advantage of all your experiences. Happy rigging.
- 843 replies
-
- 2
-
-
- niagara
- model shipways
- (and 2 more)
-
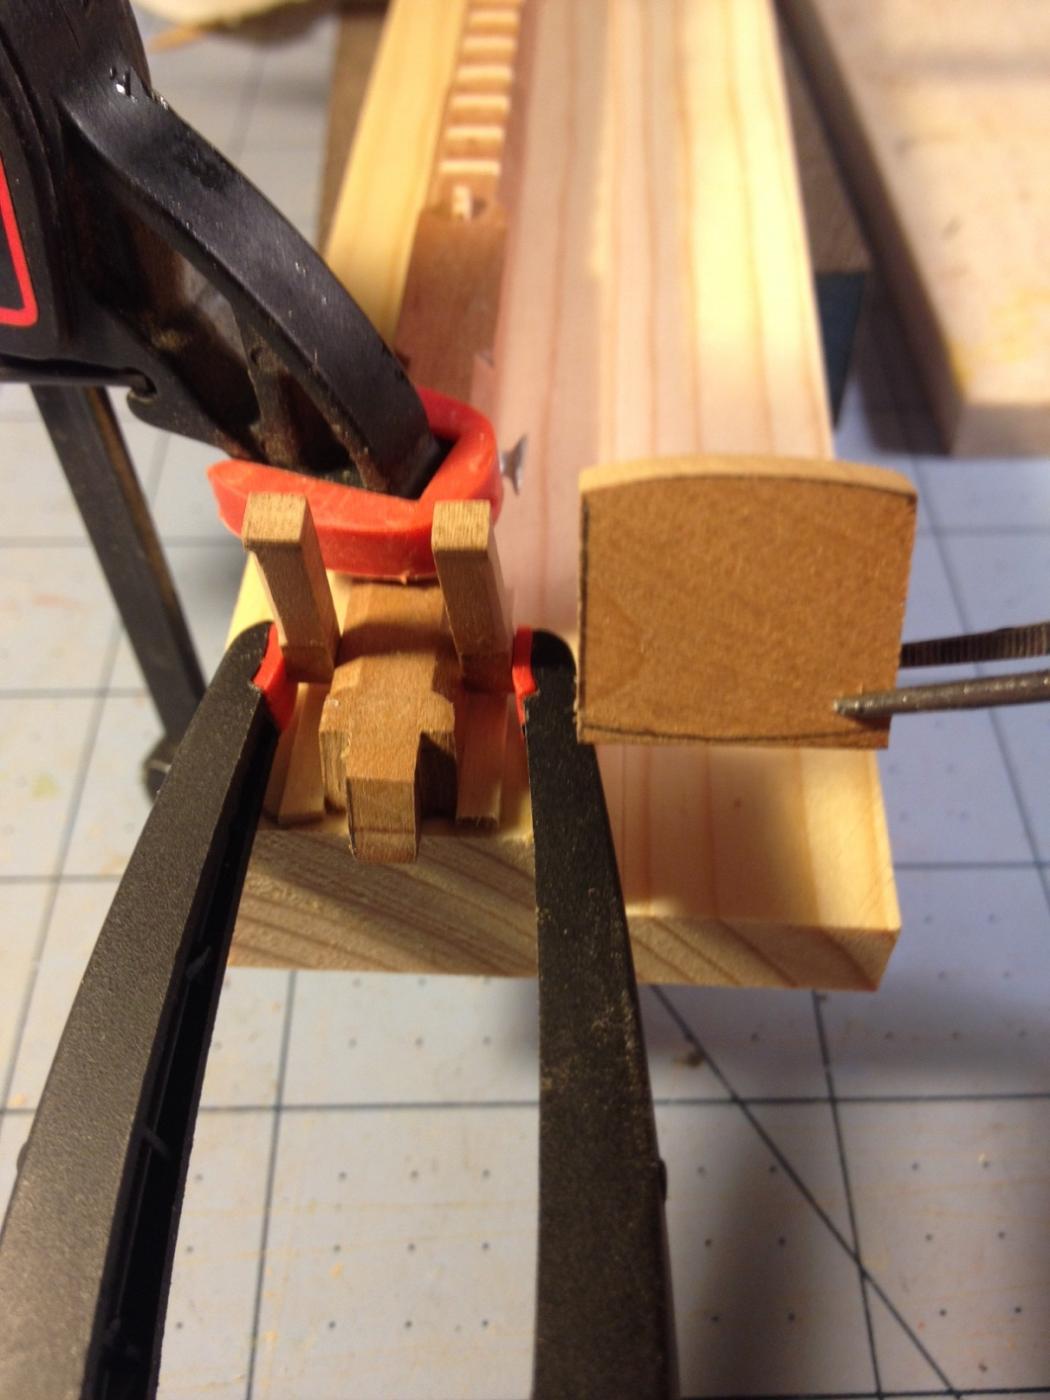
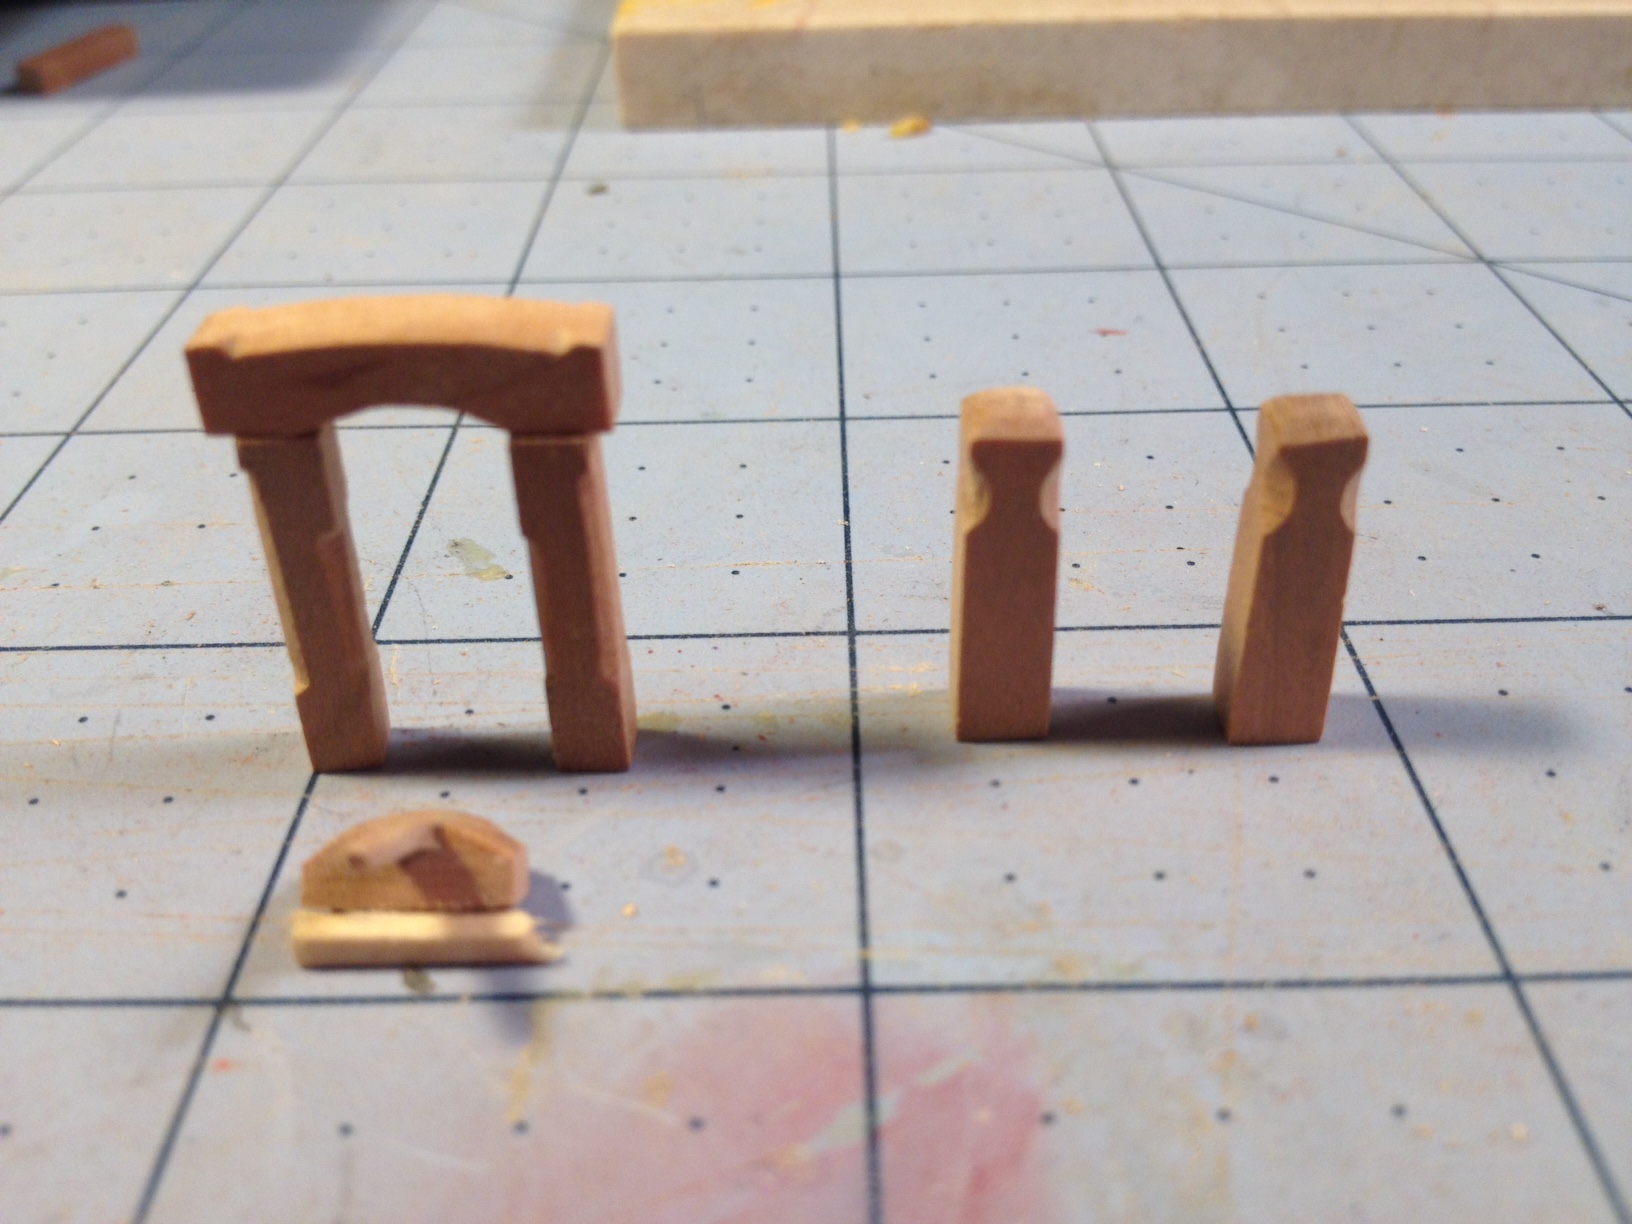
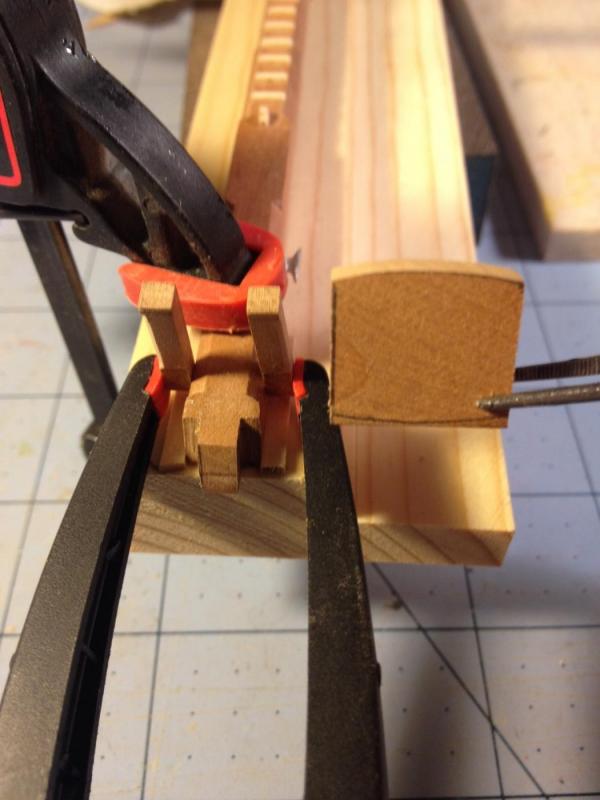
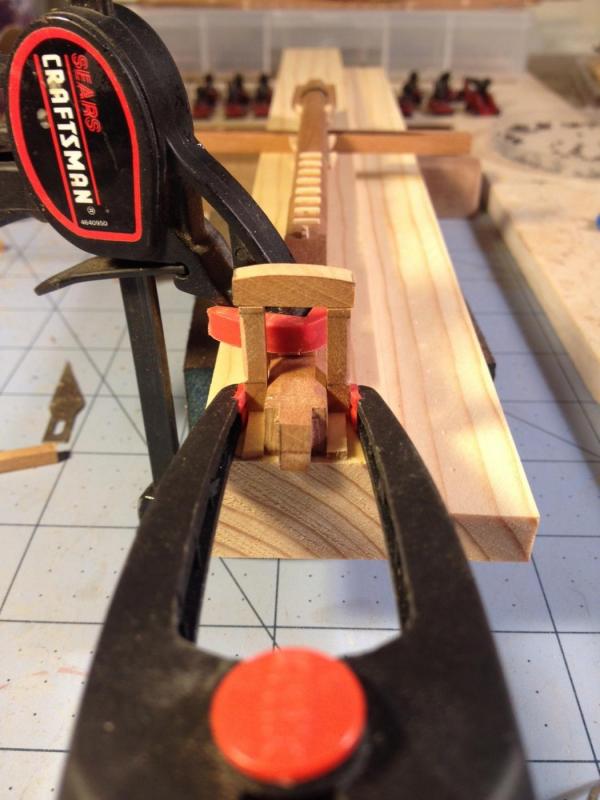
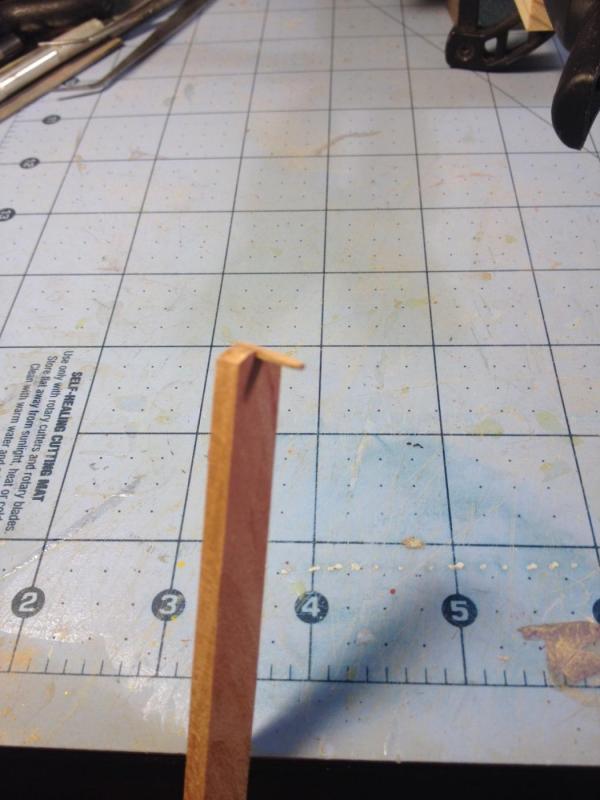
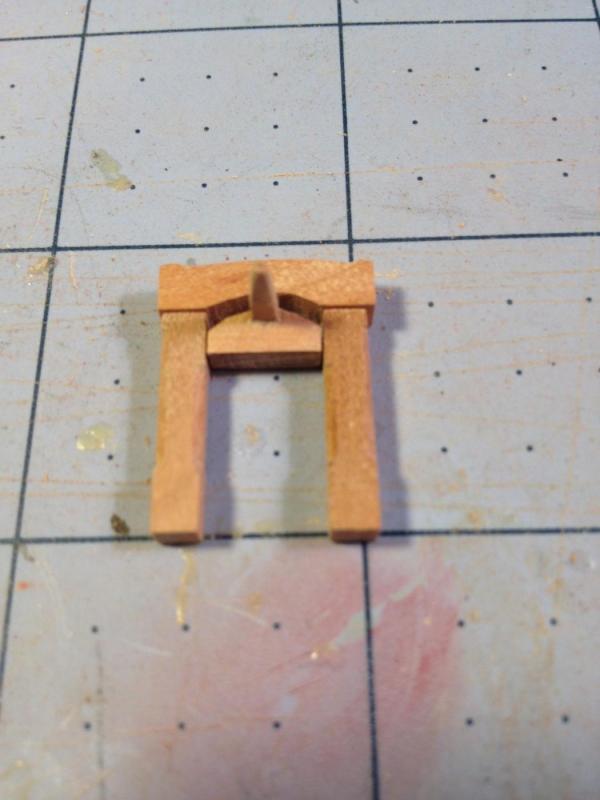
Ships Bell and Bowsprit Bitts I worked on the frame for the ships bell. It attaches to the octagon sides of the bowsprit. It is actually suspended above the deck. It has a crown and block that the bell attaches to. The block has a mortised handle used to ring the bell. Both the crown and block have curved tops and bottoms. all of the parts are chamfered, and the entire structure is smaller than a dime. Getting the proper length for the crown and block is critical. In order to get that measurement, and make the entire structure square, I decided to make a simple jig to mount the actual bowsprit in. Since the frame sits above the bottom of the bowsprit, I measured some strip wood and glued it down for the frame pieces to rest on. Once the frames were clamped in place, I was able to measure the distance between the two and cut out the crown and block. The curves were cut by hand with a half round file (inside diameter) and my bench sander (outside). I cut a very small mortise for the wee little handle and glued it in place. I also made the bowsprit bitts. All of the pieces were made out of cherry. Here are some photos of the process and final results.


- 648 replies
-
- 4
-
-
- niagara
- model shipways
- (and 1 more)
-
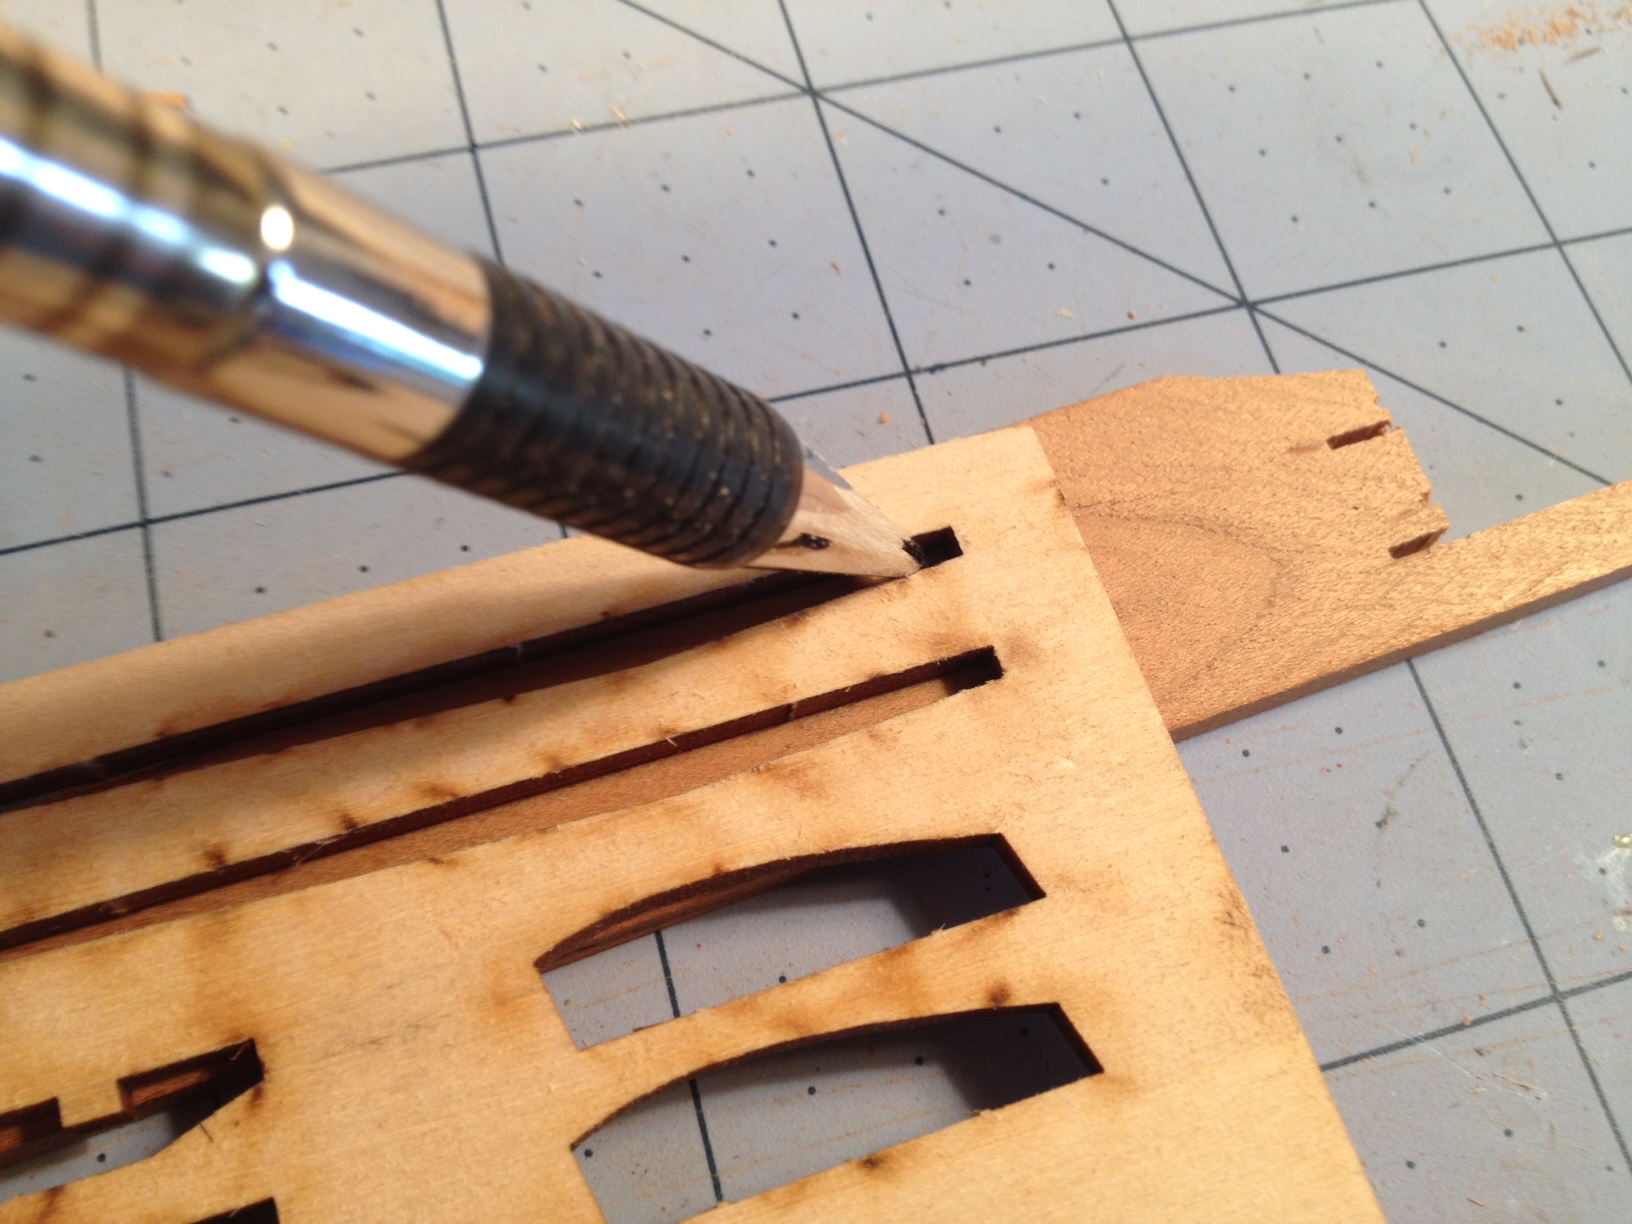
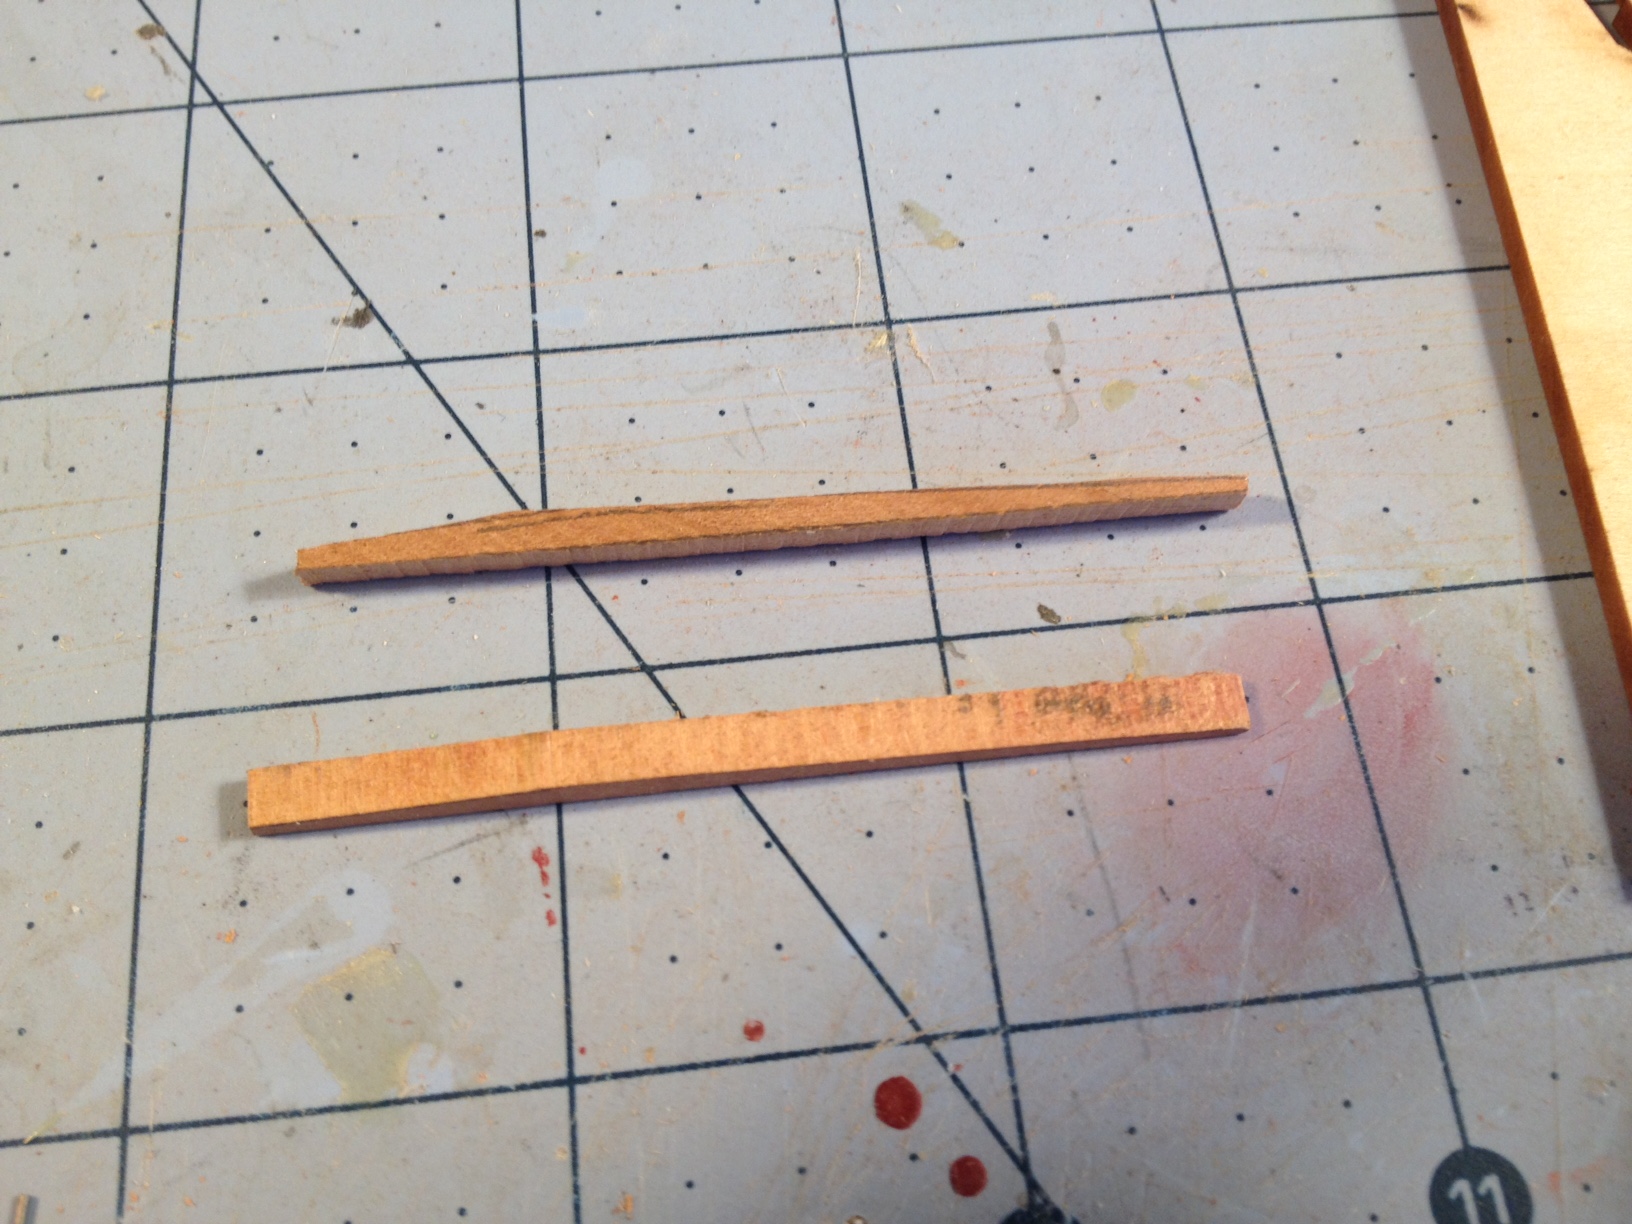
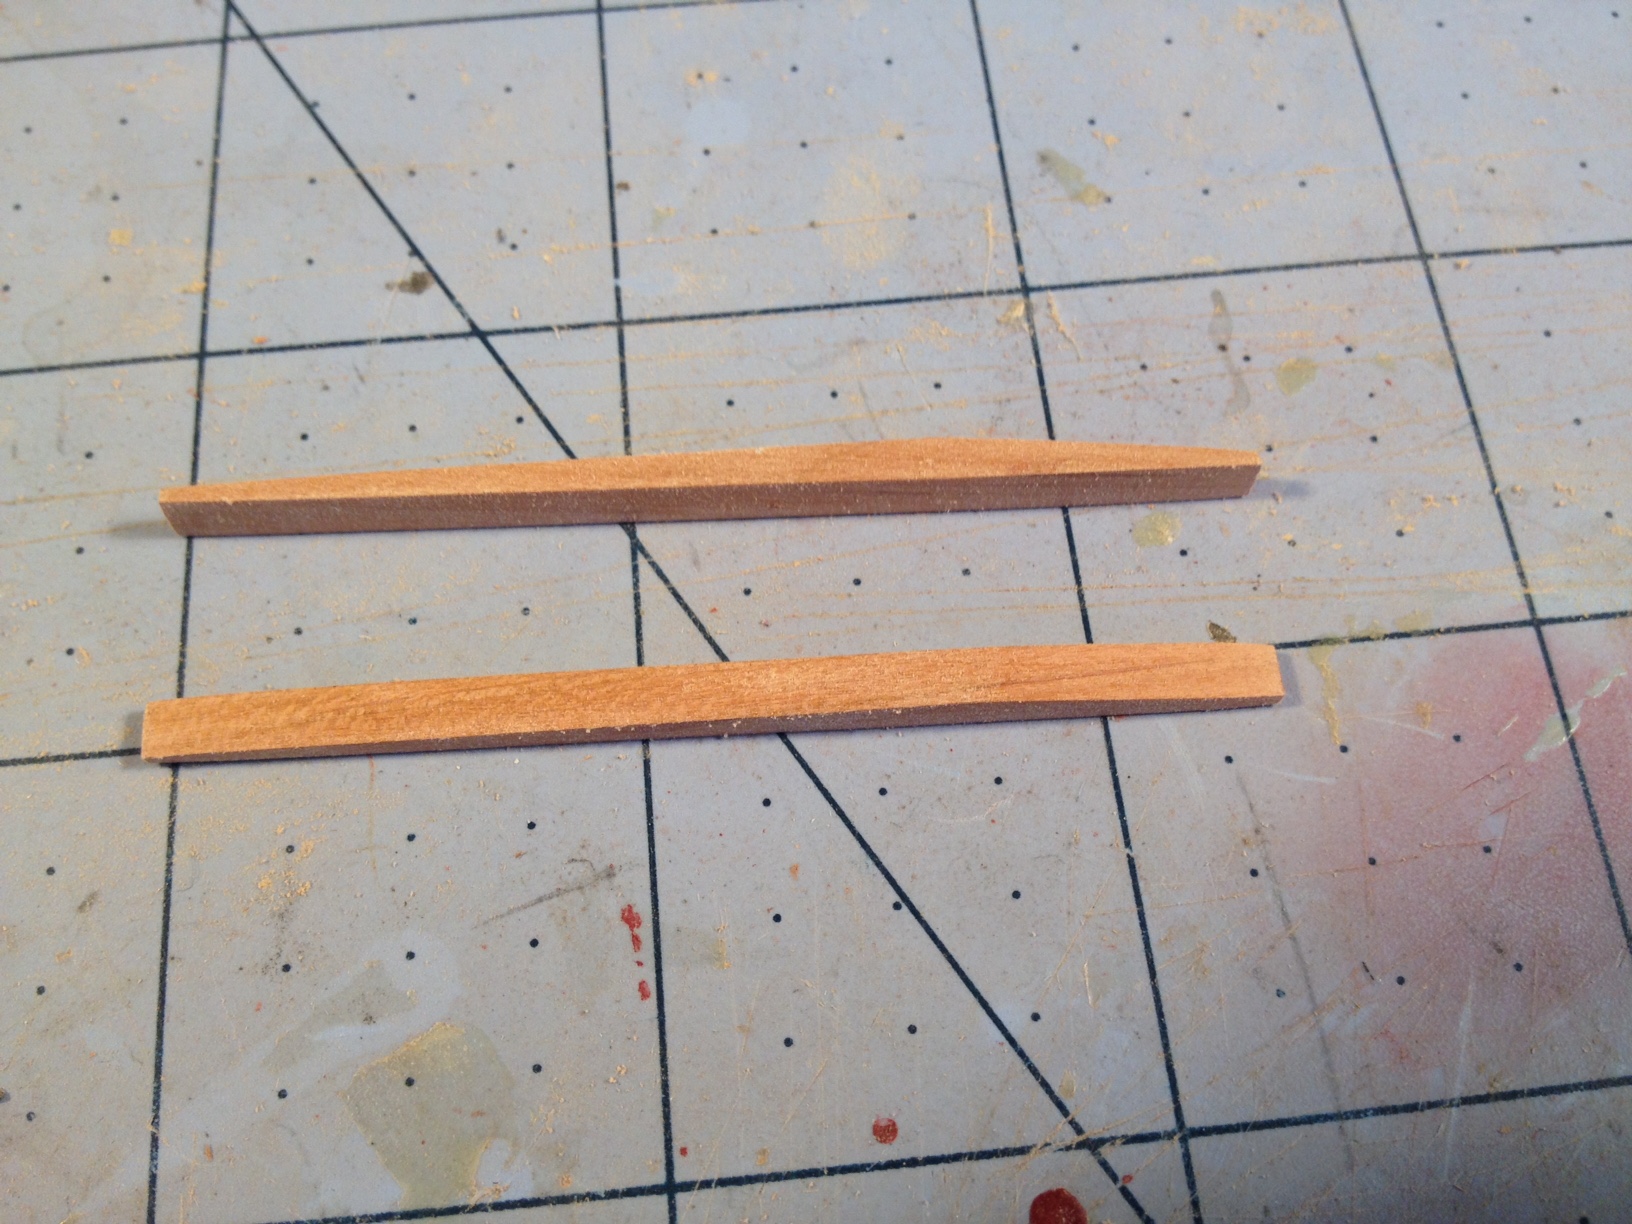
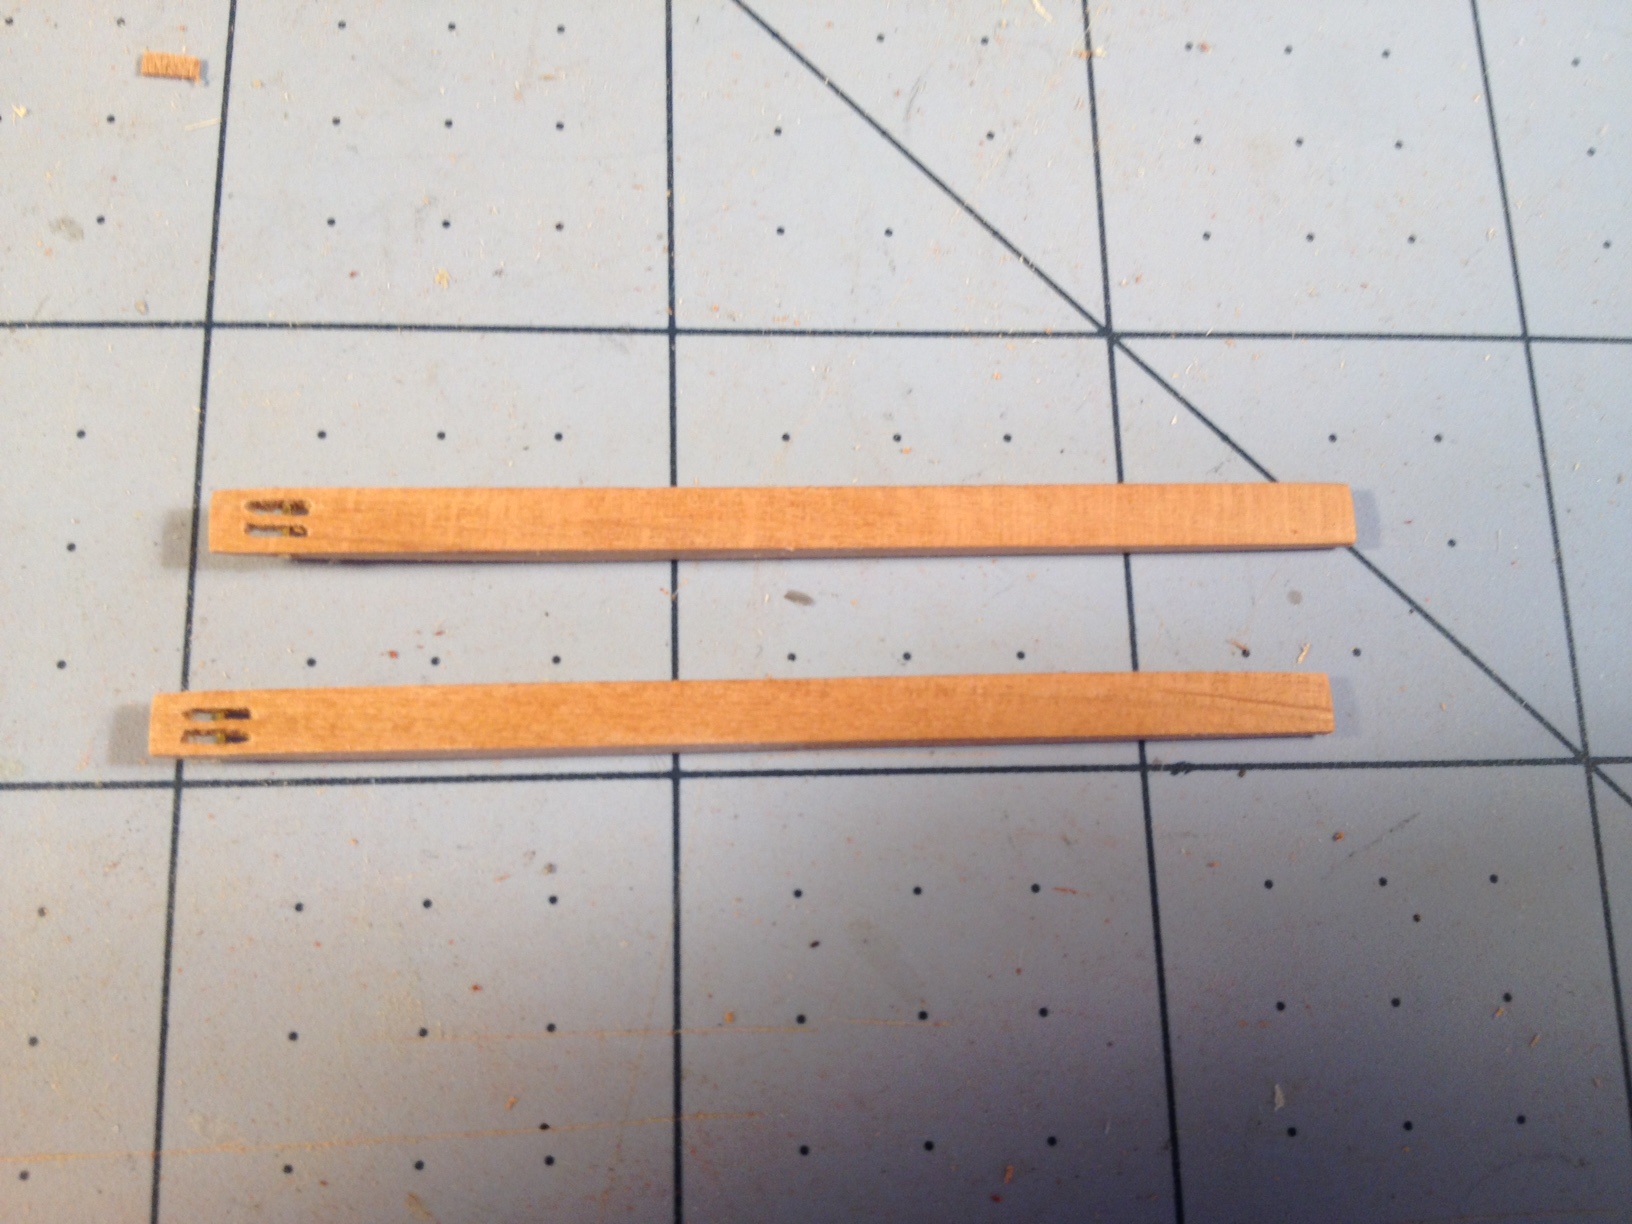
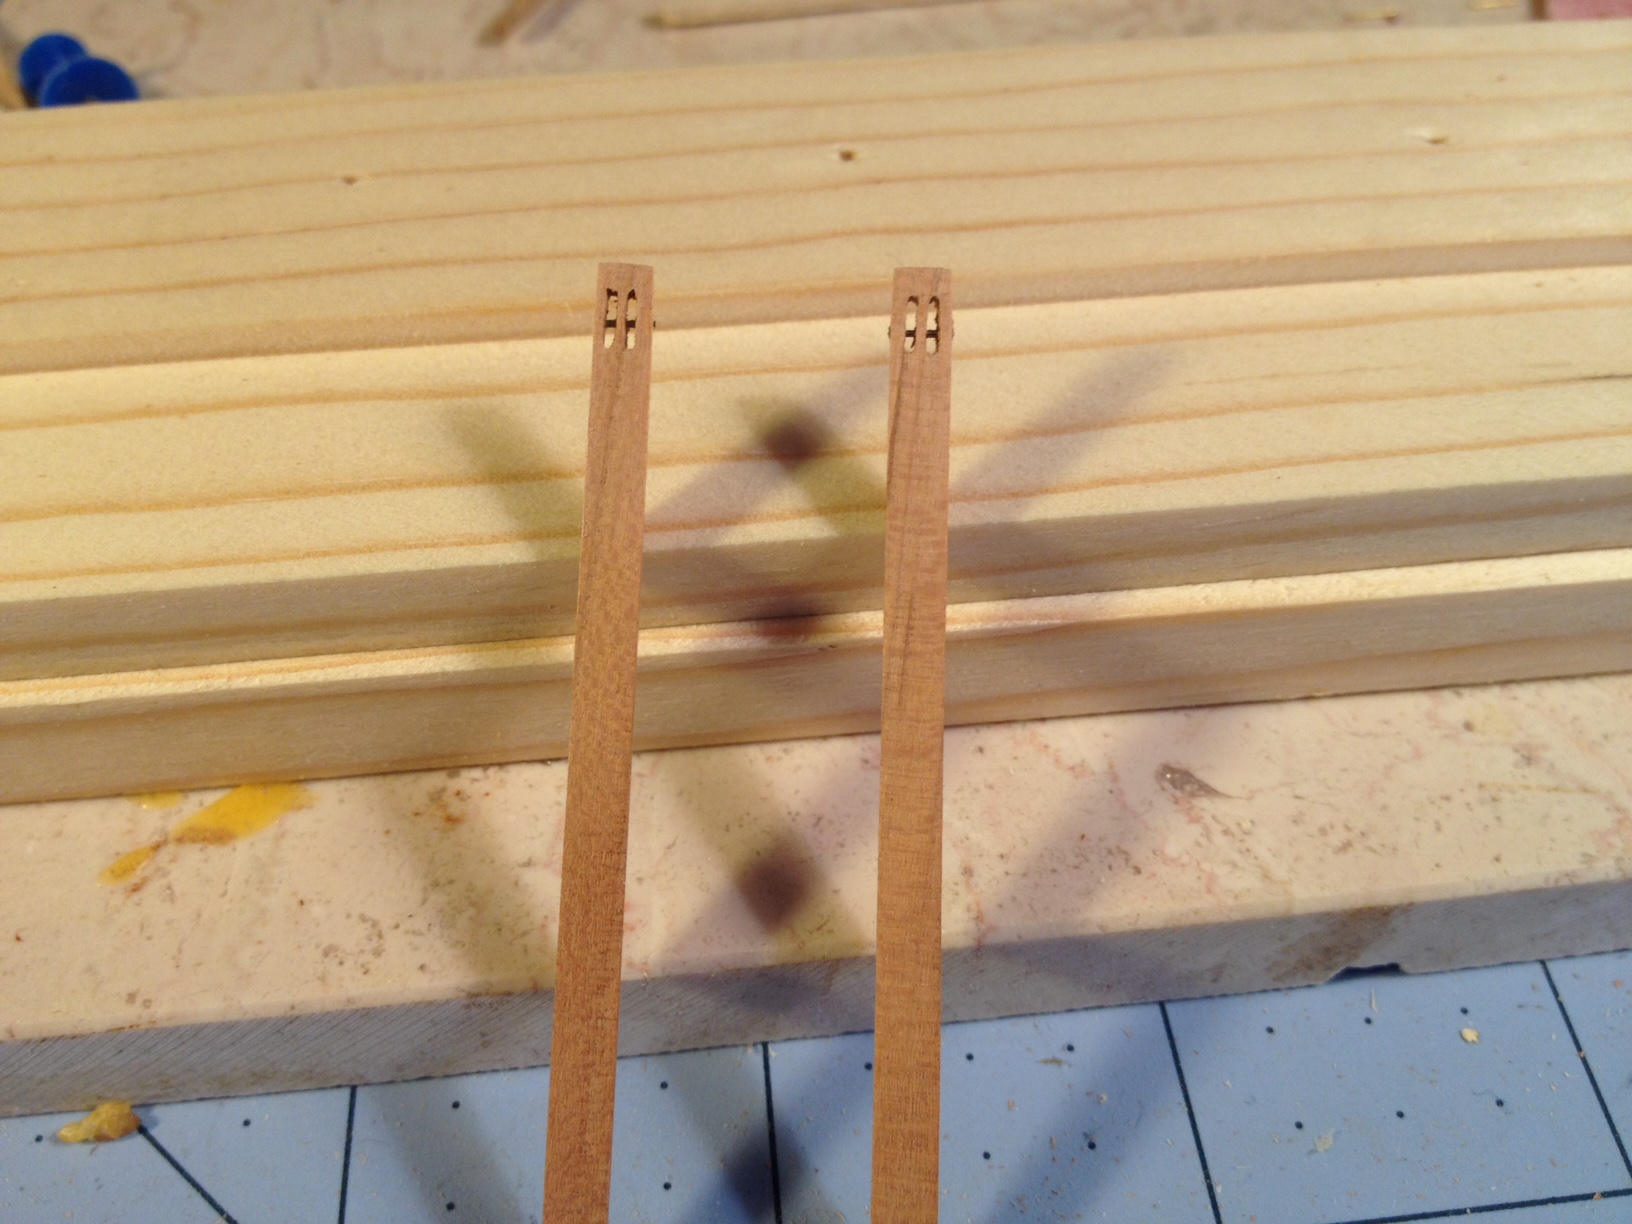
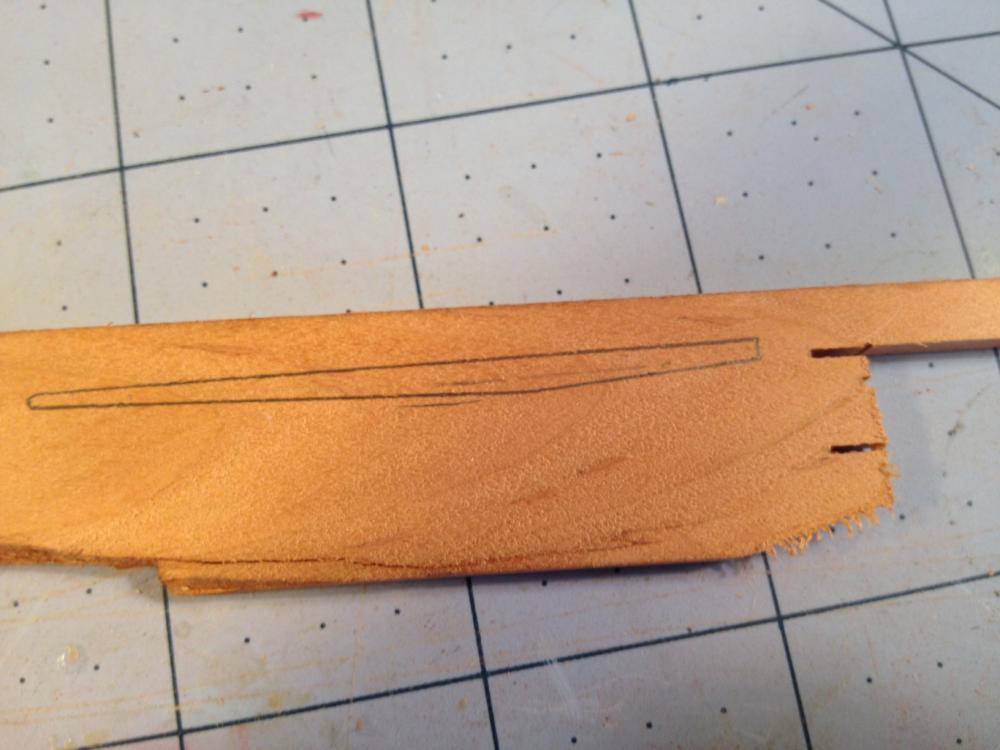
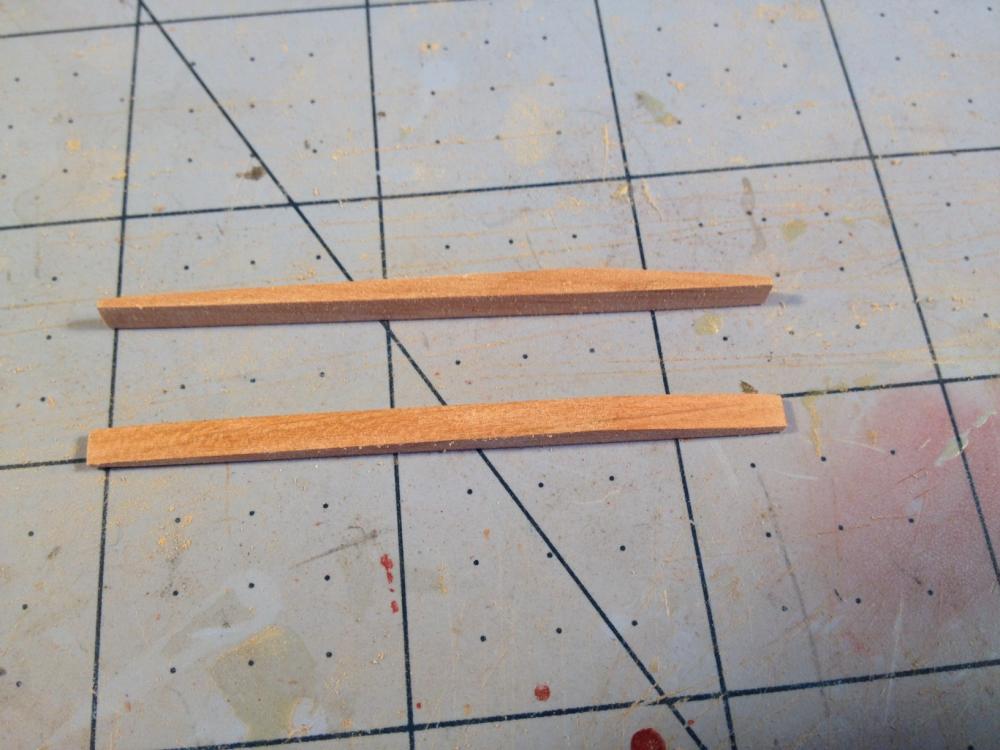
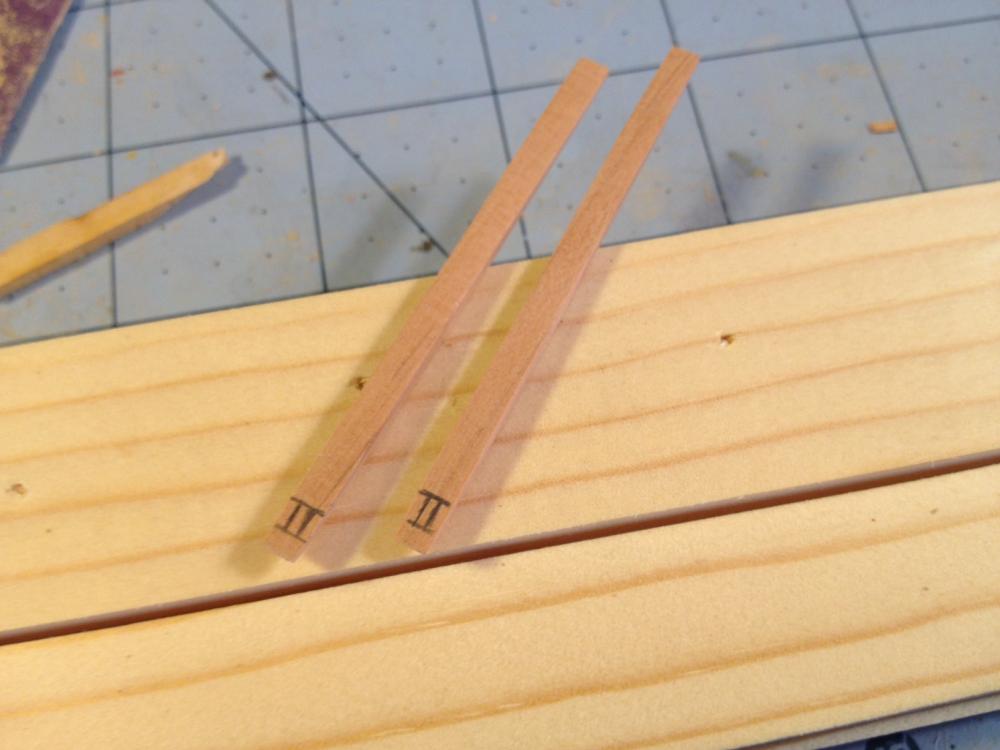
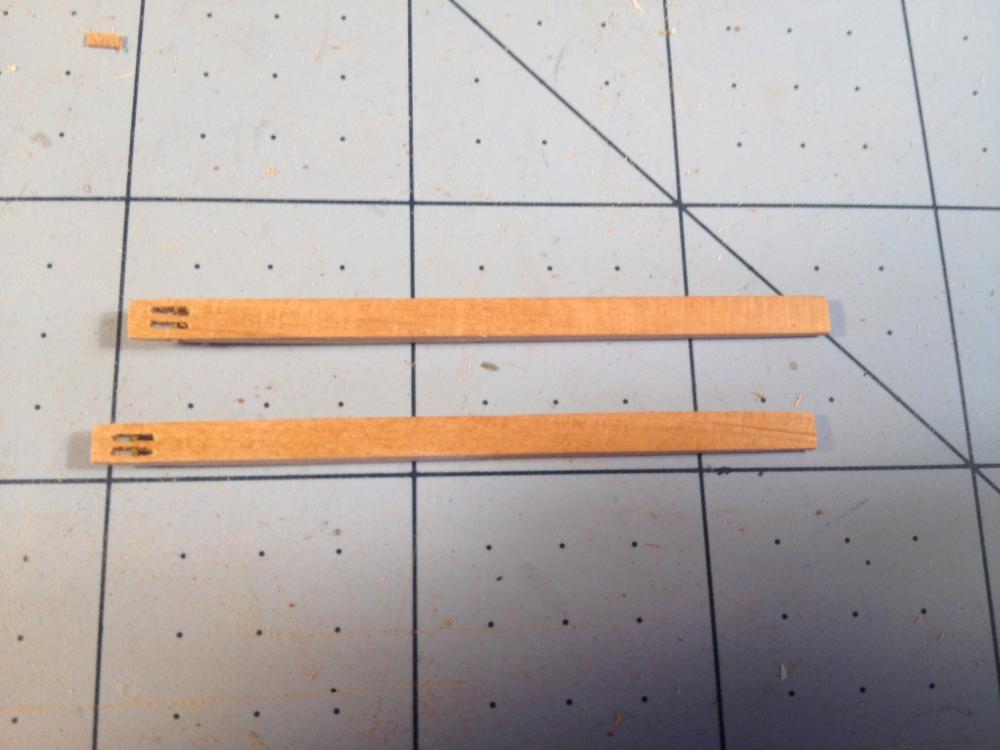
Boat Davit Worked on the boat davits. Traced the laser cut template onto some cherry and cut them out with the band saw. I Carefully sanded them into shape and then marked the sheaves. I drilled then carved out the slots with the x-acto knife. Then drilled a small hole through the side and inserted a pin with some medium CA. I did all of that - took most of the evening - and then realized I put the sheaves on the wrong end.... Soooo, I did it all over again. Very soon, I will have all of the deck component parts done. I already finished the masts, yards, bowspirits and spankers. The guns are all done. Therefore, it may be time to glue down the deck and begin the process of attaching all of these parts to the ship. A daunting task.


- 648 replies
-
- 4
-
-
- niagara
- model shipways
- (and 1 more)
-
Ken, I came across your log and must say your post regarding the sljo's in your life hit home today. Today is my anniversary, and I am going all in to earn some important build time. Great work on your longboat. I will be visiting often.
-
Brian, I have been copying portions of my plans and cutting out templates to use to make parts to replace the kit supplied plywood for my Niagara, and NEVER thought of checking to make sure that the scale was altered. Thanks for the heads up. I have also cut out sections of the actual plans and have found that I have to make sure that the images are in true 1/64 scale, as some are NOT. Superb work on the cockpit deck!