


Overworked724
-
Posts
1,263 -
Joined
-
Last visited
5 Followers


About Overworked724

- Birthday 08/22/1966
Recent Profile Visitors
4,266 profile views

.thumb.jpg.62d1d69fed1f32364417cb1f9cdeb009.jpg)


-
 Argaen Lok reacted to a post in a topic:
US Brig Syren by Argaen Lok (aka Scott Larkins) - Model Shipways - Scale 1:64
Argaen Lok reacted to a post in a topic:
US Brig Syren by Argaen Lok (aka Scott Larkins) - Model Shipways - Scale 1:64
-
PaddyO reacted to a post in a topic:
US Brig Syren by Argaen Lok (aka Scott Larkins) - Model Shipways - Scale 1:64
-
 Yeah. The tape is thin and does occasionally kink. Not much you can do about that, other then work around the kinks when you are cutting out your plates. But your jig seems to be doing a decent job of giving reproducible plates but I can't see too much detail. One thing to consider that I found out early on...if you use a wood base for when you are 'whacking' out your panels, you may find the wood will bruise and you'll start seeing your plate stamp a bit deeper, potentially tearing the copper foil. I found that using a cutting mat as a base was resilient enough to keep it's shape and keep the stamp pattern consistent. Great job so far! (Putting on the plates was monotonous, but really satisfying once you get the technique and a good rythm! Don NOT touch any of the plates with your fingers or you will get finger print patterns later on as the copper oxidizes)
 -
PaddyO reacted to a post in a topic:
US Brig Syren by Argaen Lok (aka Scott Larkins) - Model Shipways - Scale 1:64
-
Looks great! I like the paint job on the stern piece decoration. Nice job!
-
Overworked724 reacted to a post in a topic:
US Brig Syren by Argaen Lok (aka Scott Larkins) - Model Shipways - Scale 1:64
-
Overworked724 reacted to a post in a topic:
US Brig Syren by Argaen Lok (aka Scott Larkins) - Model Shipways - Scale 1:64
-
Overworked724 reacted to a post in a topic:
US Brig Syren by Argaen Lok (aka Scott Larkins) - Model Shipways - Scale 1:64
-
Overworked724 reacted to a post in a topic:
US Brig Syren by Argaen Lok (aka Scott Larkins) - Model Shipways - Scale 1:64
-
Overworked724 reacted to a post in a topic:
US Brig Syren by Argaen Lok (aka Scott Larkins) - Model Shipways - Scale 1:64
-
Yep. I had to redo mine for this same reason. Those metal chunks were way to large. Chuck's practicum was bang-on correct on this part. I ended up tearing them down and reshaping the hinges using a Dremel equipped with a rotary sander to shave down the edged until they fit and looked ok. To be honest, half the fun is kit-bashing until you are satisfied with your model. You are doing great. The sign of a good modeler is that you aren't satisfied with anyone else's work! So you have to do it yourself! LOL Keep on...we are all watching. And I am back to the bench because of your efforts. 😃
-
Overworked724 reacted to a post in a topic:
US Brig Syren by Argaen Lok (aka Scott Larkins) - Model Shipways - Scale 1:64
-
Unrated reacted to a post in a topic:
US Brig Syren 1803 by Overworked724 – Model Shipways – Scale 1:64
-
Ok. Just to recalibrate your thinking but...you are inspiring me with your build. My Syren has been lying 'fallow' for many different life-related reasons. But honestly, I could have been working 15-20 minutes a day on her to keep momentum. But that's the challenge. Momentum. Life DOES get in the way. And watching some other modeler progress in the build you yourself are also working on while you have to take a break for life reasons makes you crazy! It's MOTIVATING! So, thanks for the wind in my sails...this is helping me get back to the bench. Still watching...don't give up!
-
PaddyO reacted to a post in a topic:
US Brig Syren 1803 by Overworked724 – Model Shipways – Scale 1:64
-
PaddyO reacted to a post in a topic:
US Brig Syren 1803 by Overworked724 – Model Shipways – Scale 1:64
-
Overworked724 reacted to a post in a topic:
US Brig Syren by Argaen Lok (aka Scott Larkins) - Model Shipways - Scale 1:64
-
alde reacted to a post in a topic:
US Brig Syren by Argaen Lok (aka Scott Larkins) - Model Shipways - Scale 1:64
-
PaddyO reacted to a post in a topic:
US Brig Syren by Argaen Lok (aka Scott Larkins) - Model Shipways - Scale 1:64
-
vvvjames reacted to a post in a topic:
US Brig Syren by Argaen Lok (aka Scott Larkins) - Model Shipways - Scale 1:64
-
OK. Just chiming in here since I know how frustration feels when you think you've messed up. First, your build is looking outstanding. This part was one area I spent a lot of time fretting over since I had put in a faux deck to give my flooring a bit more stability, since I was terrified of the nibbing. One obvious thing you could consider is to completely omit the waterways. I did exactly that on my Sultana, and the result was still a very proud model. The waterways have holes drilled into them, but your model could simply do without if you are fretting about the fit of the waterways piece below the swivel brackets. You might wish to simple install the swivel brackets and then 'fit' individual waterways pieces between each one - since the brackets hide the waterways piece anyway. Either way - it's your build and I think you are doing a marvelous job!
-
Oh, I doubt that! I'm watching your progress and I think we are pretty close to the same level. Great work so far!
-
PaddyO reacted to a post in a topic:
US Brig Syren by Argaen Lok (aka Scott Larkins) - Model Shipways - Scale 1:64
-
Not your build or planking. I think the laser cut margin planks for the bow section weren’t very well made. I overthought this bit too. In the end I made new margin planks for the bow and it was worth it. Removed a lot of frustration and reduced the gaps between hull and margin. Easily covered by waterways triangular piece. See my build, entry # 410. Cheers!
-
Very tight work! 👍🏽
-
Overworked724 reacted to a post in a topic:
US Brig Syren by Argaen Lok (aka Scott Larkins) - Model Shipways - Scale 1:64
-
Overworked724 reacted to a post in a topic:
US Brig Syren by Argaen Lok (aka Scott Larkins) - Model Shipways - Scale 1:64
-
 Overworked724 reacted to a post in a topic:
US Brig Syren 1803 by Overworked724 – Model Shipways – Scale 1:64
Overworked724 reacted to a post in a topic:
US Brig Syren 1803 by Overworked724 – Model Shipways – Scale 1:64
-
Yeah. You did it. You actually rejuvenated my interest in my build! It’s always more fun when you have someone building the same model as you facing the same challenges. So…you are coming up on coppering. I need to get my sh*t together and get some progress going on my build or you’ll pass me!!!! Bloody nice job on your planking!!! A bit of advice: Wood filler and sealant or a lacquer can even out your surface imperfections and give your copper plates clean purchase. None of my plates have peeled and that’s after a few years now. Watching your build more closely now!! Cheers!
-
Not dead!!! This build is still alive. Just real life stuff getting in the way.
-
Yep. Had same problem. Those laser cut caps for the ship’s boat were both a bit narrow and too short. Maybe if I’d sanded a bit more they could have fit a bit better, but I prefer to make my own as well. Nice work!
-
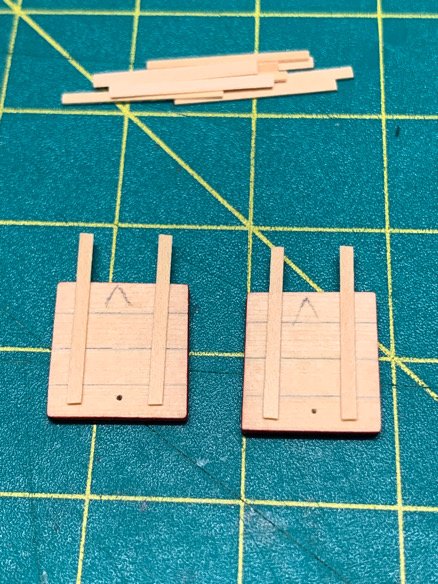
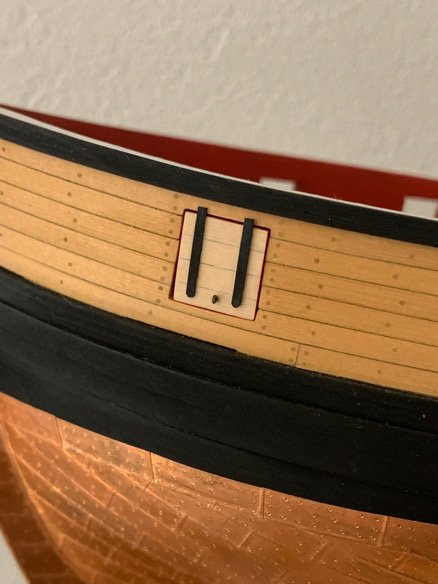
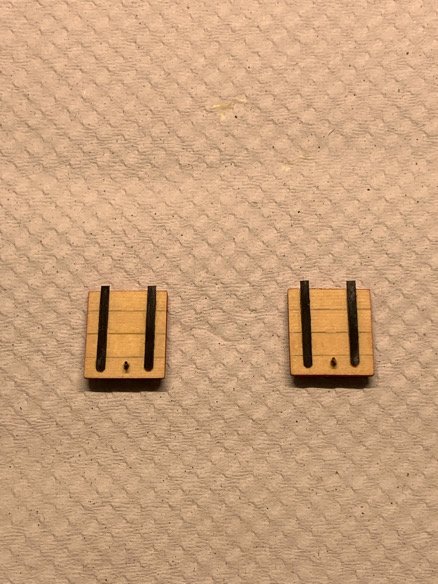
Ran into a snag. The bridle port doors nearest the bow are single piece doors that SHOULD have a longer hinge strap (photo etched). But, my kit either didn’t come with them or I lost them. It would not look right with the smaller hinge straps…and I did check but it seems off. I was going to try to create some out of brass when I thought I could use thin boxwood strips I made to create the shingles for the gallery roofs I made earlier. (Doesn’t hurt to not throw away anything sometimes!) A quick coat of paint and Waa-La! Easy bypass and they look pretty good. I can trim the strap lengths easily and add on the hinges after I’ve glued them on the ship. Moving on!!!
-
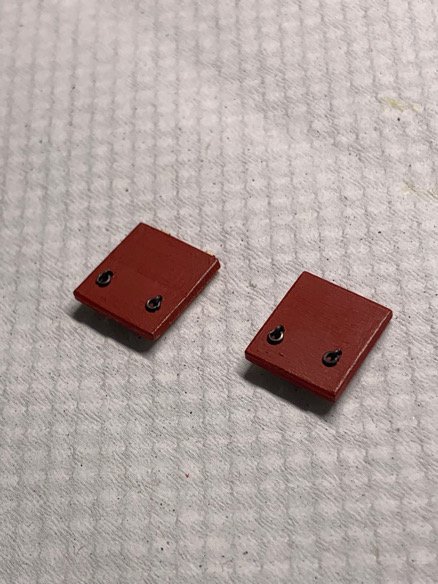
Before I start trying to drill holes for the gun port doors, I realized I needed to remake the doors nearest the bow and stern, as well as the transom doors. What sucks is they still don’t fit perfectly, but I’m tired of messing with the doors and they’re close enough. So, I’m going with them. The paint isn’t a perfect match either…but what the hell.
-
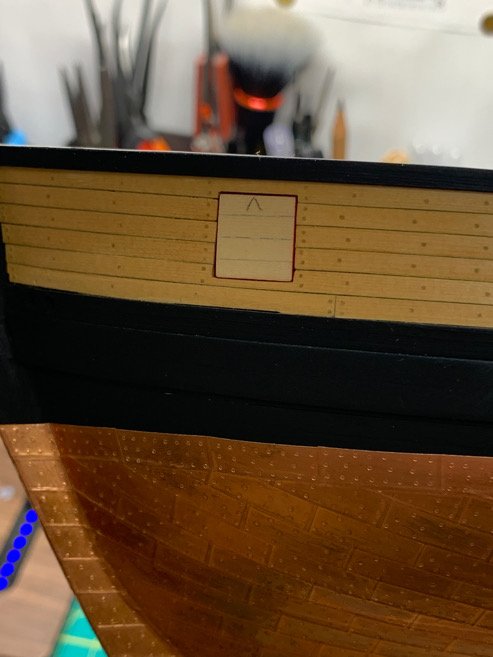
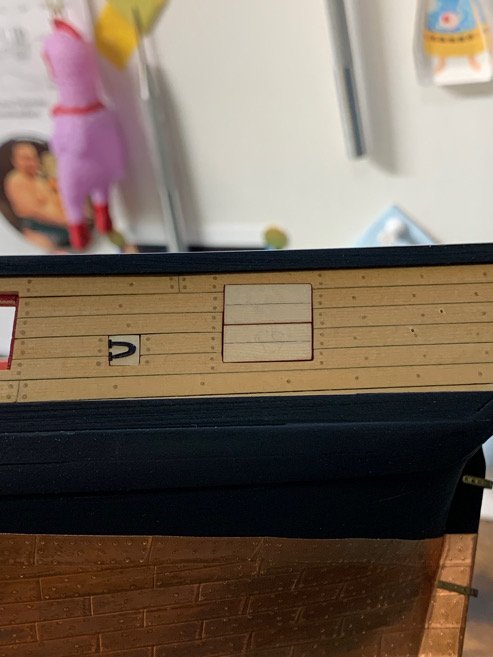
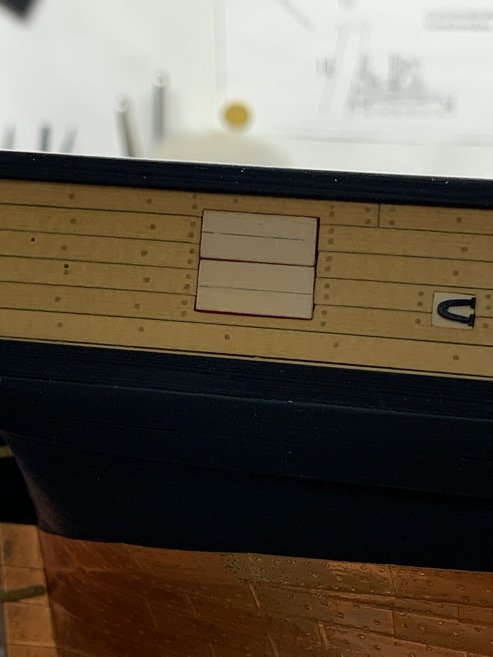
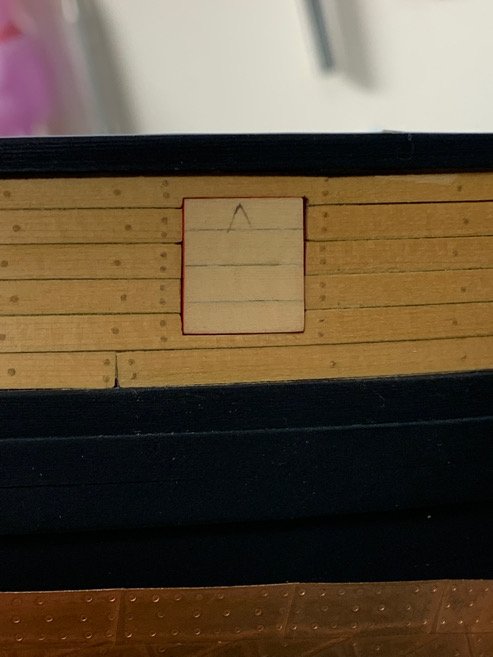
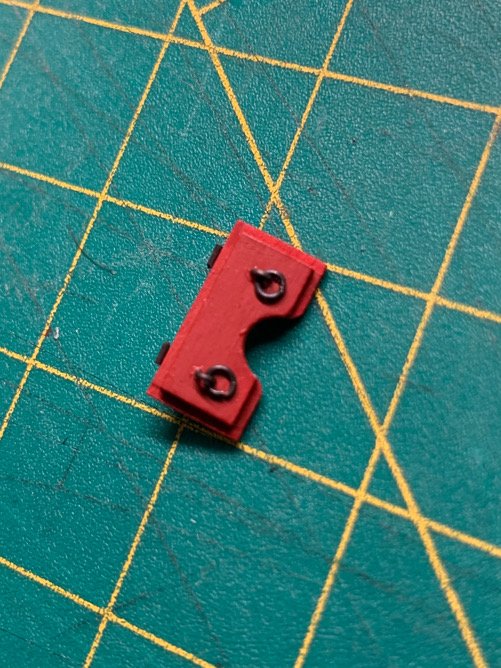
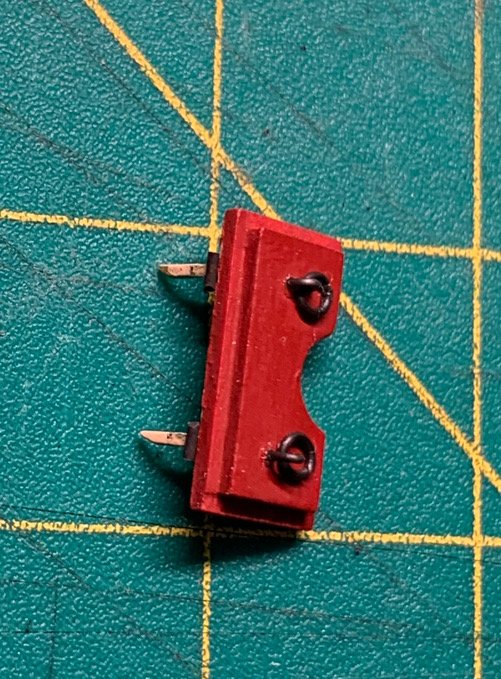
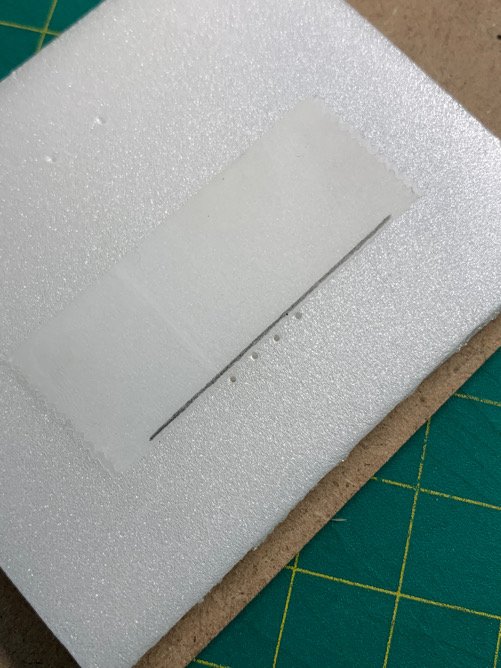
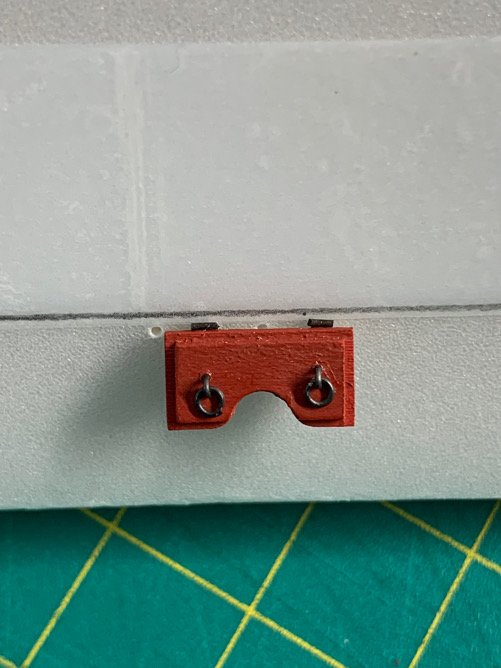
Sooooo…gun port doors. Chuck’s practicum has about 2 sentences on mounting these suckers. In short, I’ve been struggling on how to Mount them so they don’t look askew or show the hole you need to drill into the side of the ship to mount them. Also, the idea of trying to put those tiny 1.4mm hinges on AFTER I’ve mounted them terrifies me. I opted for putting on the tiny hinges first. Then made a faux window sill with a foam board to see where best to drill the holes and ensure they look clean. Theoretically, this means once I’ve got them drilled and prefit, I can store them until I need to mount them. I see myself ripping these off by accident multiple times in the future. Hey…in theory this should work. Looks ok with the practice piece. 🙏🏼 Gratuitous pics below.
-
Also…found some unique clamps at the local hardware store in Kirishima that will work great for 2nd hands as well as modified arms for my serving machine! Pics to follow. 😋