Overworked724
-
Posts
1,263 -
Joined
-
Last visited
Content Type
Profiles
Forums
Gallery
Events
Everything posted by Overworked724
-
 Yeah. The tape is thin and does occasionally kink. Not much you can do about that, other then work around the kinks when you are cutting out your plates. But your jig seems to be doing a decent job of giving reproducible plates but I can't see too much detail. One thing to consider that I found out early on...if you use a wood base for when you are 'whacking' out your panels, you may find the wood will bruise and you'll start seeing your plate stamp a bit deeper, potentially tearing the copper foil. I found that using a cutting mat as a base was resilient enough to keep it's shape and keep the stamp pattern consistent. Great job so far! (Putting on the plates was monotonous, but really satisfying once you get the technique and a good rythm! Don NOT touch any of the plates with your fingers or you will get finger print patterns later on as the copper oxidizes)
 -
Looks great! I like the paint job on the stern piece decoration. Nice job!
-
Yep. I had to redo mine for this same reason. Those metal chunks were way to large. Chuck's practicum was bang-on correct on this part. I ended up tearing them down and reshaping the hinges using a Dremel equipped with a rotary sander to shave down the edged until they fit and looked ok. To be honest, half the fun is kit-bashing until you are satisfied with your model. You are doing great. The sign of a good modeler is that you aren't satisfied with anyone else's work! So you have to do it yourself! LOL Keep on...we are all watching. And I am back to the bench because of your efforts. 😃
-
Ok. Just to recalibrate your thinking but...you are inspiring me with your build. My Syren has been lying 'fallow' for many different life-related reasons. But honestly, I could have been working 15-20 minutes a day on her to keep momentum. But that's the challenge. Momentum. Life DOES get in the way. And watching some other modeler progress in the build you yourself are also working on while you have to take a break for life reasons makes you crazy! It's MOTIVATING! So, thanks for the wind in my sails...this is helping me get back to the bench. Still watching...don't give up!
-
OK. Just chiming in here since I know how frustration feels when you think you've messed up. First, your build is looking outstanding. This part was one area I spent a lot of time fretting over since I had put in a faux deck to give my flooring a bit more stability, since I was terrified of the nibbing. One obvious thing you could consider is to completely omit the waterways. I did exactly that on my Sultana, and the result was still a very proud model. The waterways have holes drilled into them, but your model could simply do without if you are fretting about the fit of the waterways piece below the swivel brackets. You might wish to simple install the swivel brackets and then 'fit' individual waterways pieces between each one - since the brackets hide the waterways piece anyway. Either way - it's your build and I think you are doing a marvelous job!
-
Oh, I doubt that! I'm watching your progress and I think we are pretty close to the same level. Great work so far!
-
Not your build or planking. I think the laser cut margin planks for the bow section weren’t very well made. I overthought this bit too. In the end I made new margin planks for the bow and it was worth it. Removed a lot of frustration and reduced the gaps between hull and margin. Easily covered by waterways triangular piece. See my build, entry # 410. Cheers!
-
Very tight work! 👍🏽
-
Yeah. You did it. You actually rejuvenated my interest in my build! It’s always more fun when you have someone building the same model as you facing the same challenges. So…you are coming up on coppering. I need to get my sh*t together and get some progress going on my build or you’ll pass me!!!! Bloody nice job on your planking!!! A bit of advice: Wood filler and sealant or a lacquer can even out your surface imperfections and give your copper plates clean purchase. None of my plates have peeled and that’s after a few years now. Watching your build more closely now!! Cheers!
-
Not dead!!! This build is still alive. Just real life stuff getting in the way.
-
Yep. Had same problem. Those laser cut caps for the ship’s boat were both a bit narrow and too short. Maybe if I’d sanded a bit more they could have fit a bit better, but I prefer to make my own as well. Nice work!
-
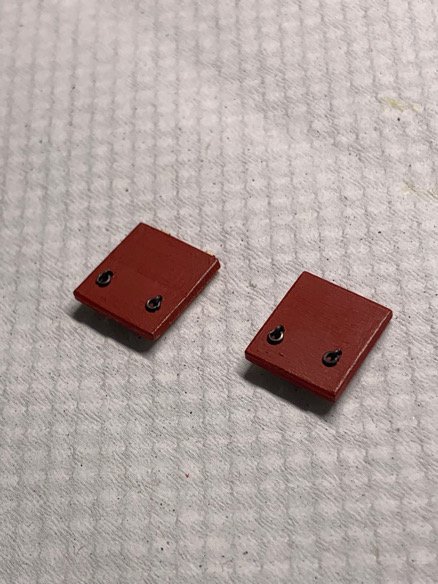
Ran into a snag. The bridle port doors nearest the bow are single piece doors that SHOULD have a longer hinge strap (photo etched). But, my kit either didn’t come with them or I lost them. It would not look right with the smaller hinge straps…and I did check but it seems off. I was going to try to create some out of brass when I thought I could use thin boxwood strips I made to create the shingles for the gallery roofs I made earlier. (Doesn’t hurt to not throw away anything sometimes!) A quick coat of paint and Waa-La! Easy bypass and they look pretty good. I can trim the strap lengths easily and add on the hinges after I’ve glued them on the ship. Moving on!!!
-
Before I start trying to drill holes for the gun port doors, I realized I needed to remake the doors nearest the bow and stern, as well as the transom doors. What sucks is they still don’t fit perfectly, but I’m tired of messing with the doors and they’re close enough. So, I’m going with them. The paint isn’t a perfect match either…but what the hell.
-
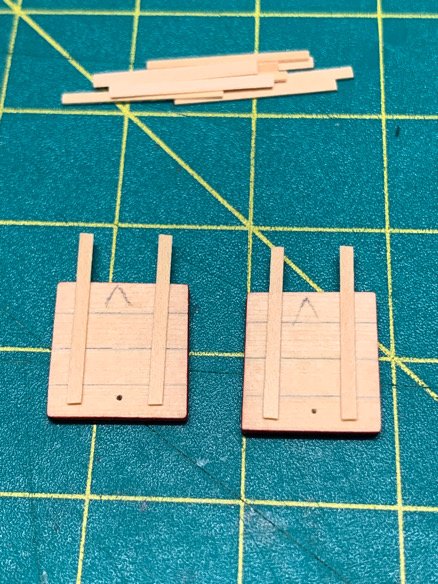
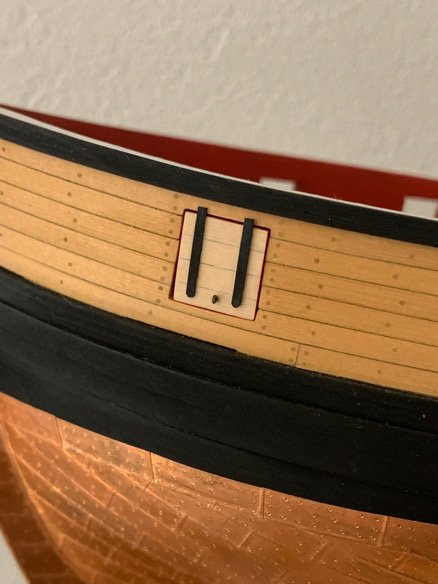
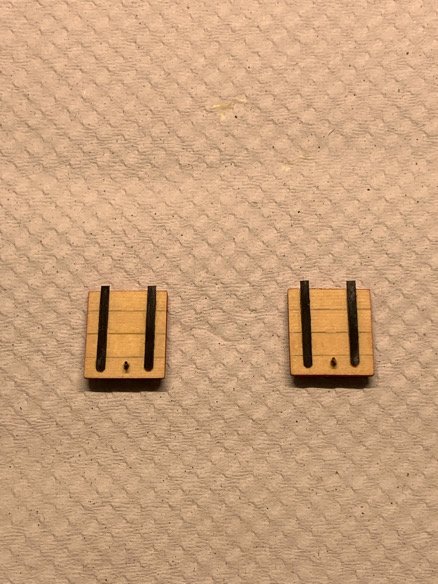
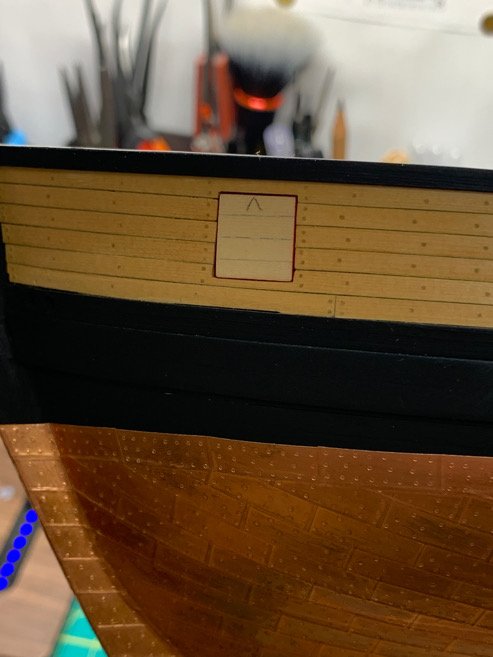
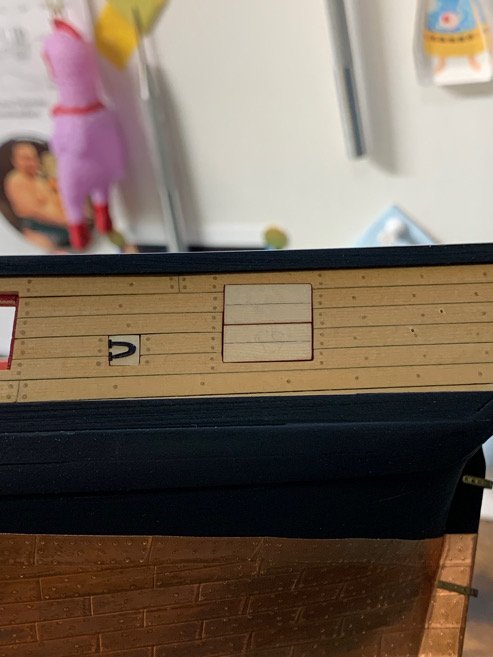
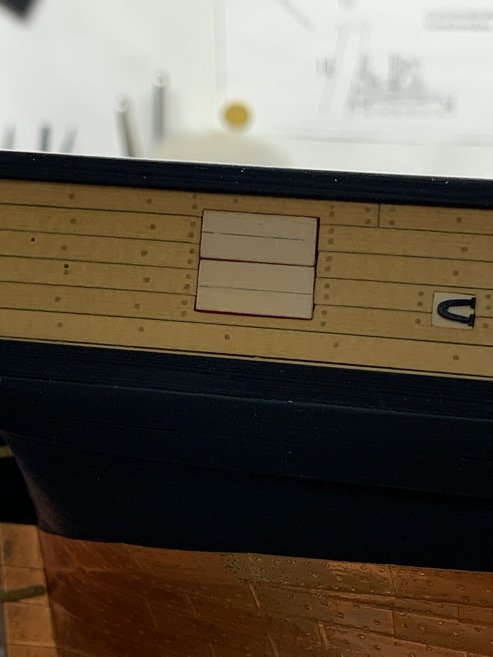
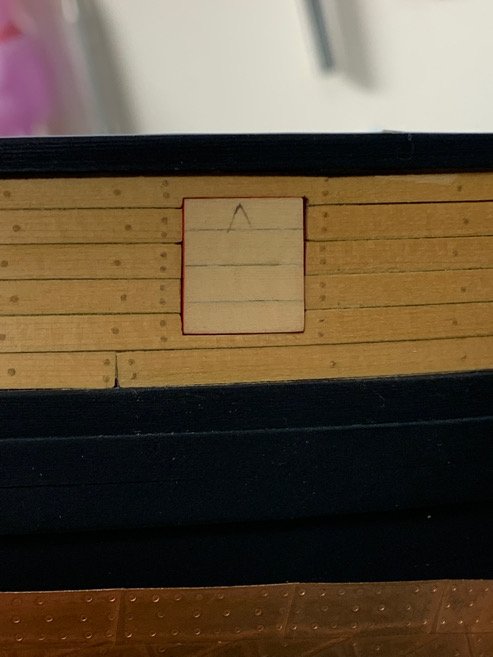
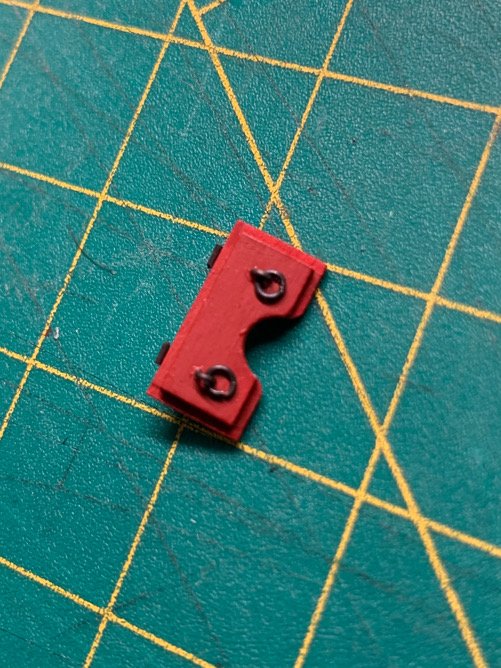
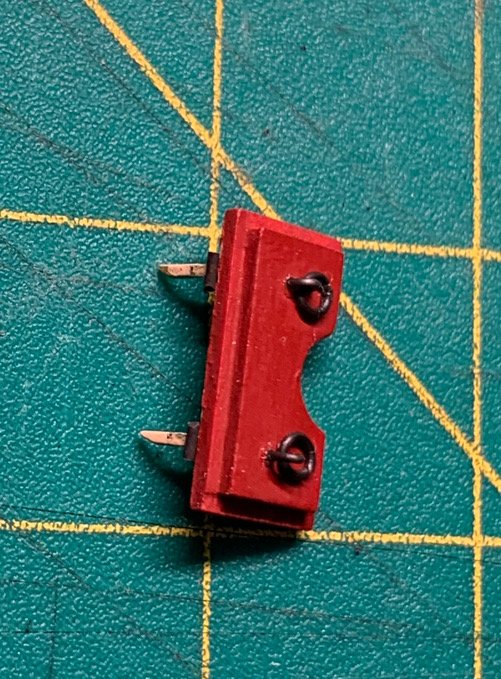
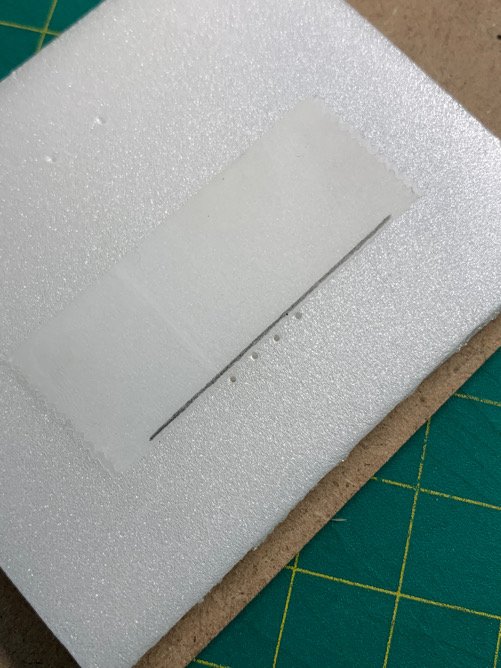
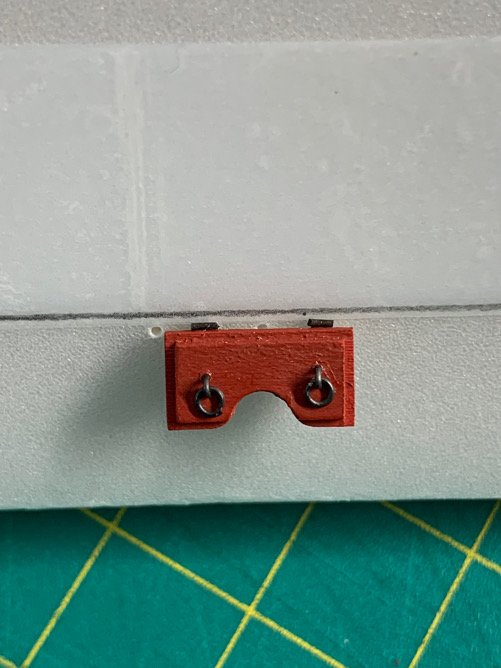
Sooooo…gun port doors. Chuck’s practicum has about 2 sentences on mounting these suckers. In short, I’ve been struggling on how to Mount them so they don’t look askew or show the hole you need to drill into the side of the ship to mount them. Also, the idea of trying to put those tiny 1.4mm hinges on AFTER I’ve mounted them terrifies me. I opted for putting on the tiny hinges first. Then made a faux window sill with a foam board to see where best to drill the holes and ensure they look clean. Theoretically, this means once I’ve got them drilled and prefit, I can store them until I need to mount them. I see myself ripping these off by accident multiple times in the future. Hey…in theory this should work. Looks ok with the practice piece. 🙏🏼 Gratuitous pics below.
-
Also…found some unique clamps at the local hardware store in Kirishima that will work great for 2nd hands as well as modified arms for my serving machine! Pics to follow. 😋
-
Sigh. Gotta say…those gun port doors have been ‘Writer’s Block’ for me. Just like the Pintles and gudgeons…been trying to figure out how to Mount them cleanly. In the meantime…I made the doors for the stern gun port doors. Pics to come soon…but I think I finally pushed through the barrier.
-
I will use thin washi (Japanese) paper. I’ll tape it to standard stock paper and run it through an inkjet printer. Then I’ll reverse the washi paper and tape to a cutting pad … easy to see the graphics. I use a glue stick to lightly and evenly cover the back of the flags…use a razor blade to cut out the shape, lay rope across the middle and fold it to complete the flag. Scissors to trim and clean up the shape. With washi paper, you can lightly wet it to creat realistic folds…as it dries, it maintains its shape. It’s also extremely thin, so doesn’t seem out of scale. Folks do their flags in a variety of ways. I prefer this way as it’s simple and I don’t trust myself to paint my own to my satisfaction.
-
Redo looks great! Looks like it was definitely worth the time invested. 👍🏽
-
Very nice! I'm waiting for you to catch up to me before I start my carronades! 😃
-
I'm sure it looks fine to the naked eye. Zooming in is the bane of every modeler because we are all perfectionists! Zoom in close enough and you'll find imperfections in everything. I think it looks great! Those are some small pieces!
- 436 replies
-
- 1
-

-
- Syren
- Model Shipways
- (and 1 more)
-
They can also make you feel like a complete imbecile. 😝
-
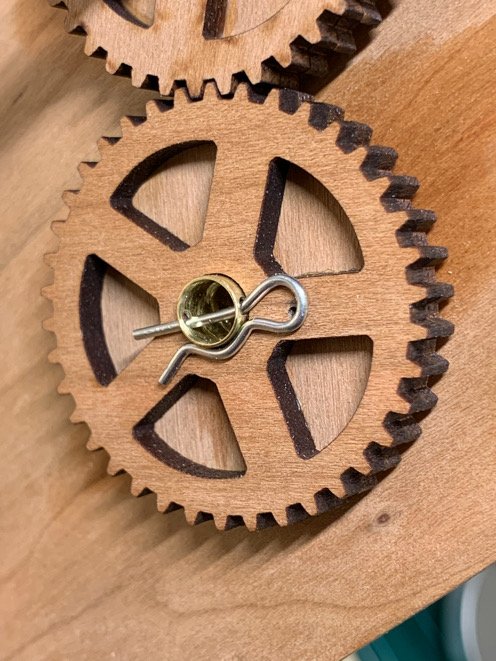
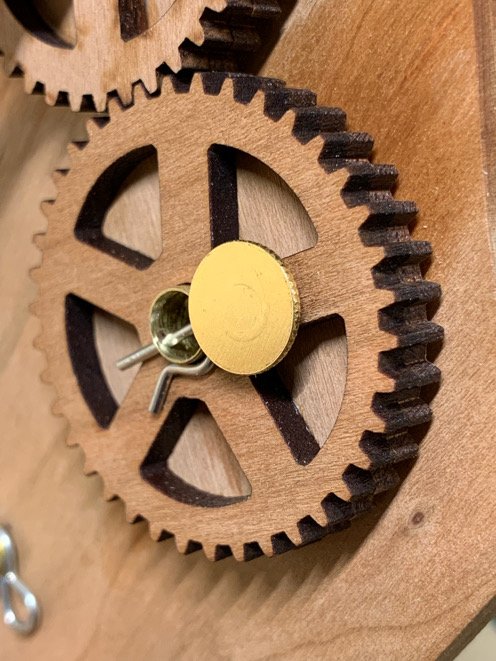
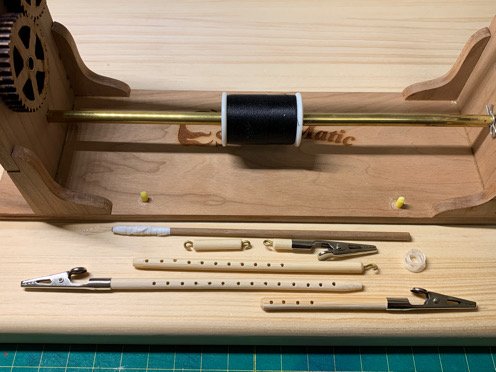
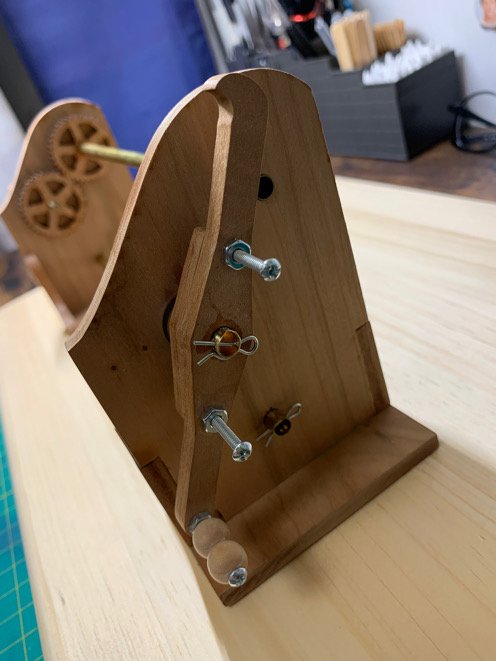
Took a diversion for a couple days. I've had Chuck's Syren Servo-Matic in storage for over 2 years gathering dust. Since it's a skill I've not developed and one I will need for the rigging, I decided to sniff test my device and see if it was working, and whether I was up to actually being capable of serving my rope...something I did not do on the Sultana. So...long story short...it worked and I was able to serve a 20" section of 0.035" tan rope I had laying around with some black cotton thread. The problem I had was then thing was so squeaky my teeth were itching. This is where I did something REALLY DUMB! The squeaking was driving me insane and it was late...so my sleep addled brain said, "Hey...squeaky stuff needs WD-40!" So without thinking (at all), I took a few drops of WD-40 and dropped them into the joints. Boom...squeaking disappeared. You can see the WD-40 streaked wood below. Suddenly, the cog connected to the rotating lever started to slip and it fell completely off. I had to look it up, but yeah...WD-40 dissolves CA glue. Who knew? Besides the fact you shouldn't use it on wood in the first place...I'm an idiot. Instead if trying to glue it on again, I decided to get some new washers and some 'R' pins. Drilled some holes into the brass tubing sections where I needed them, and used a simple tack to lock in the cog with the R pin...waalaaaa. I also put in holes for R pins on both outward facing brass sections so I could use them to lock in various attachments I made for finicky bits I will need to serve later on. Final fiddly bits with my newly repaired and fully QUIET and functioning Servo-Matic in the last pic. I served up a 24" section of the same 0.035" tan rope with black silk thread and the result was astounding as well as fairly quick. I came away with newfound confidence that serving rope is not the bugbear I thought it was...so it gave me a little confidence boost. Moving on....


-
Got an answer to my question above from a shipmate who also researched into it. My flags are correct. I think some other modelers who built this kit noted the discrepancy when they made their own flags but didn’t mention it! 😎 I guess that makes me a squeaky wheel. Moving on…
-
I think she turned out just beautiful! What a fantastic achievement!
-
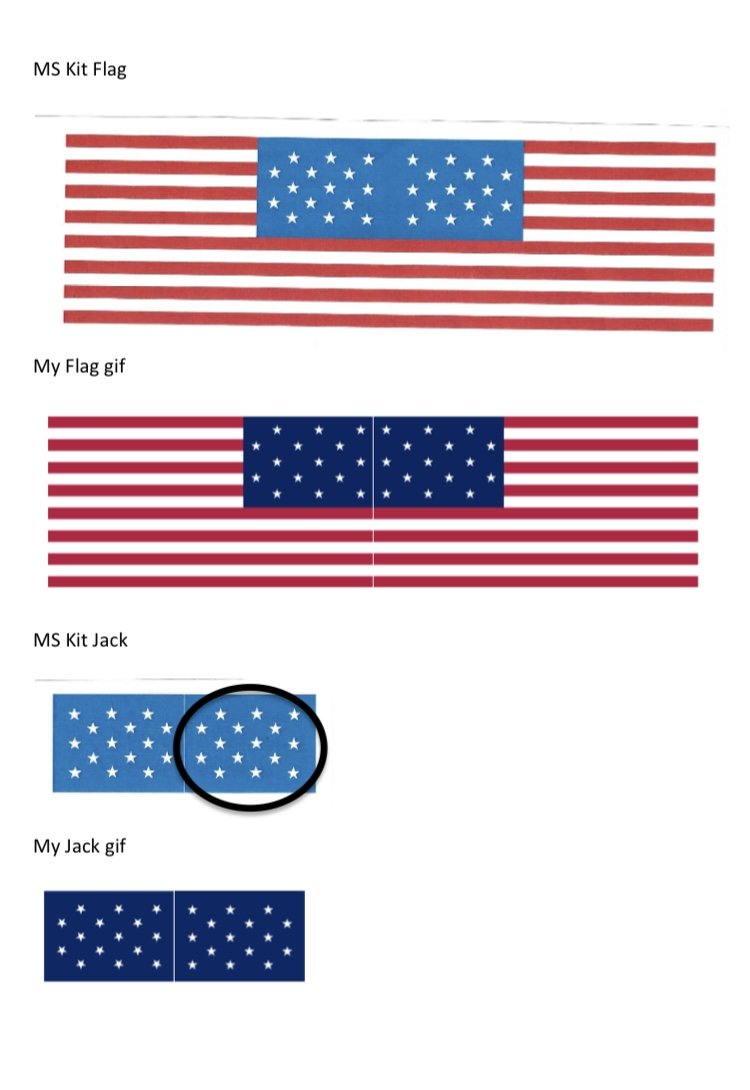
Was spending time organizing and doing odd little chores on my USS Syren parts and decided to make the graphics to prepare the flags when I get to that point. My intention is to prepare them using washi paper as I did on my last build. So, I looked up the flags online and prepared the flag and jackstaff graphics. I thought the graphics and sizes were pretty close to those in the kit, and was happy to move on and consider this little chore complete. But I noticed a major difference between my naval jack and the Shipways kit supplied naval jack. See the graphic below. The main country flag and reverse images are an exact match. Slight color differences but nothing else. The naval jack provided in the MS Kit is completely reversed from the gif I prepared. Considering that I got the graphic for both the country flag and naval jack from Wiki, I'm wondering which is correct. I could you some help here...is the MS kit provided naval jack incorrect or is there some mistake I am making?