


Overworked724
-
Posts
1,263 -
Joined
-
Last visited
Content Type
Profiles
Forums
Gallery
Events
Everything posted by Overworked724
-
 Following along! If you look at my build I think my baton wasn't lining up on those score marks either. Looking good!!!!
 -
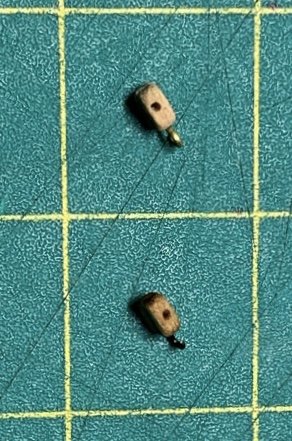
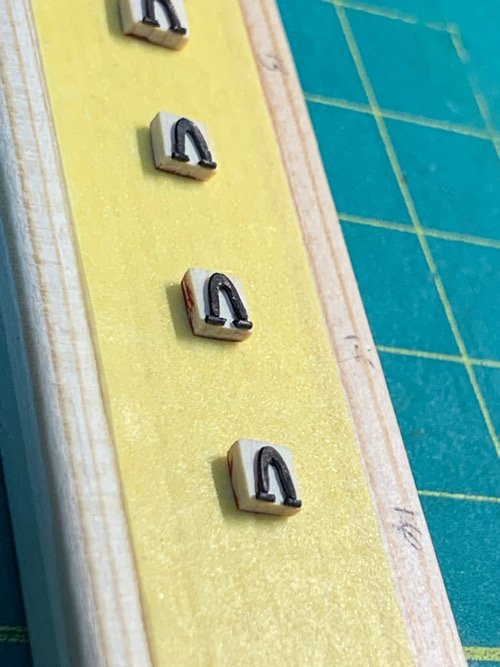
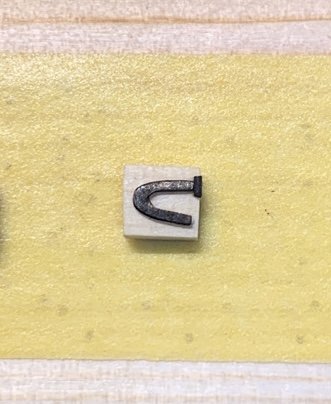
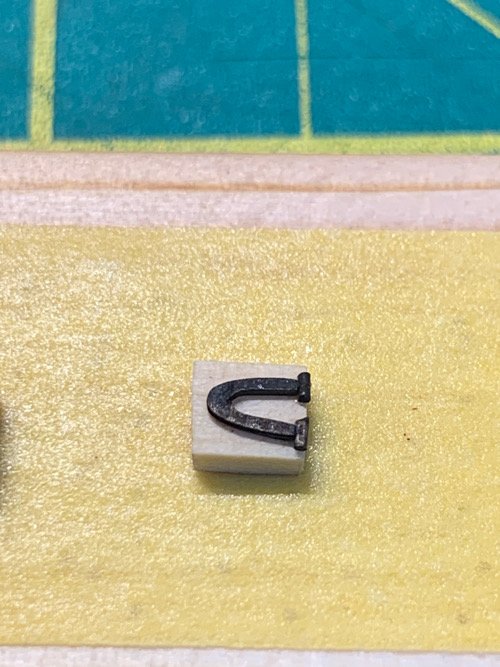
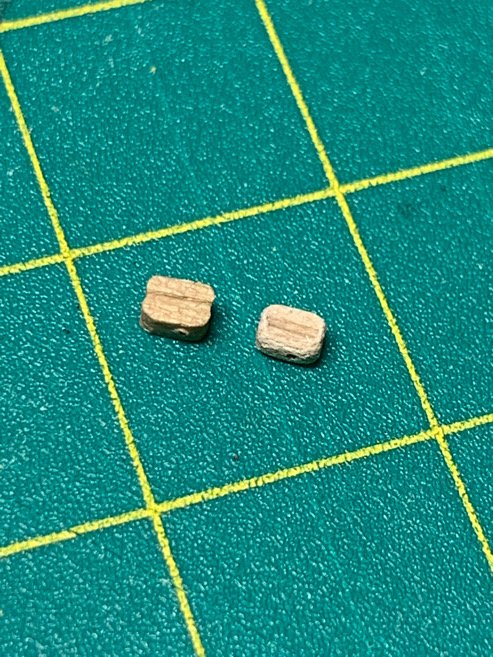
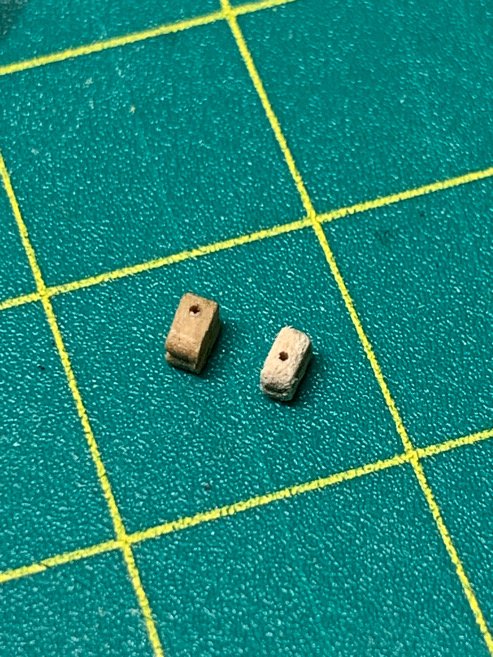
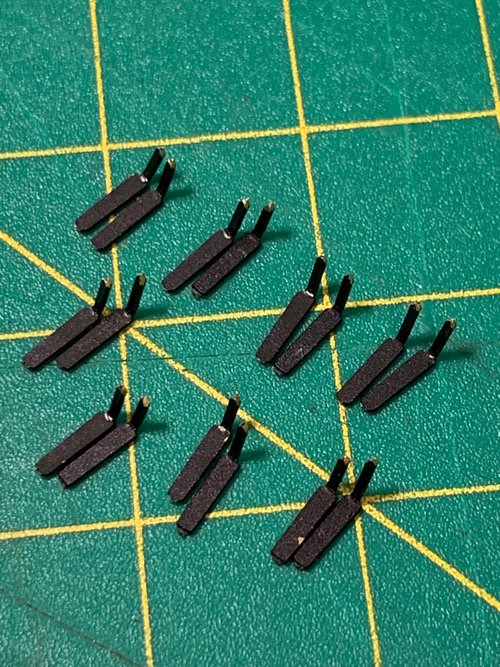
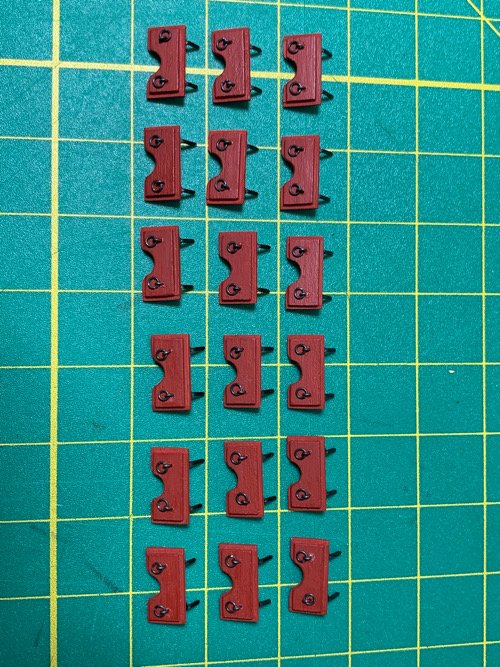
And stained/blackened. The top one is just for comparison. I blackened the hooks before adding to stained block. Looks passable. 👍🏽
-
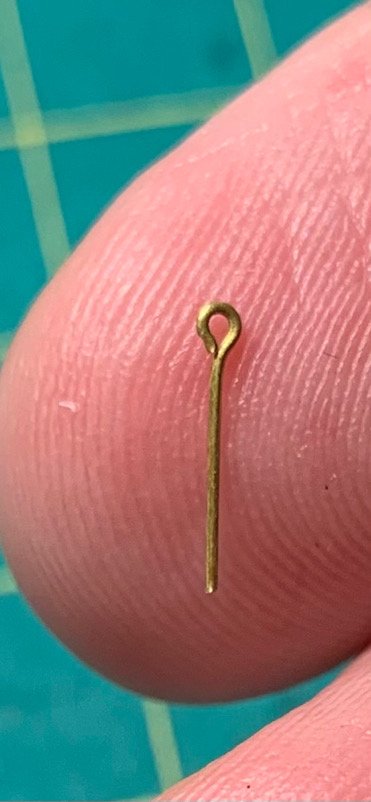
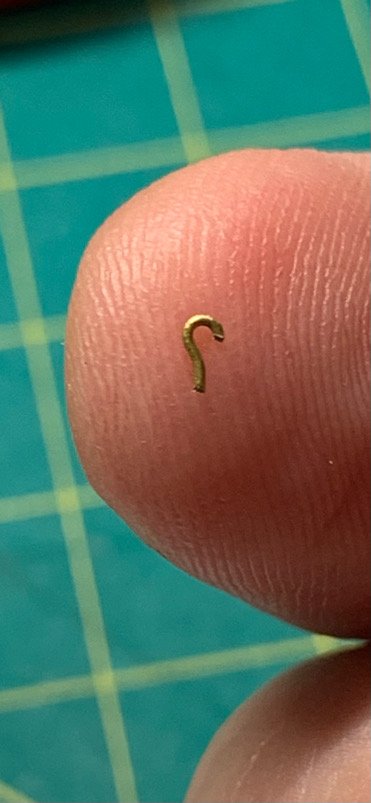
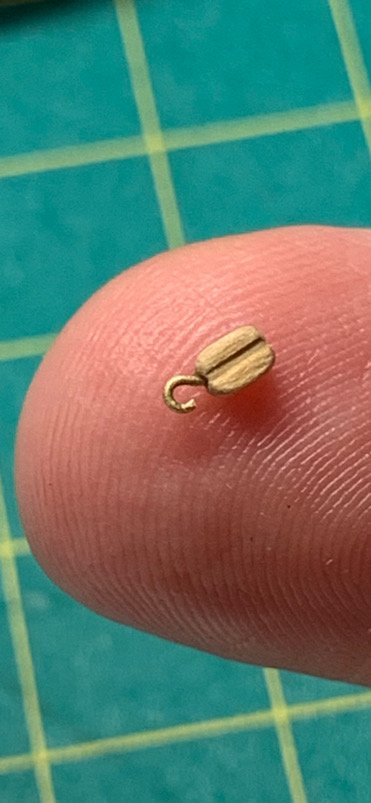
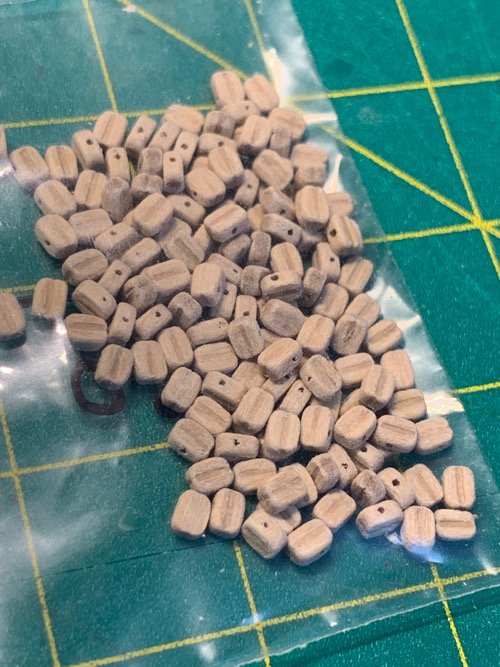
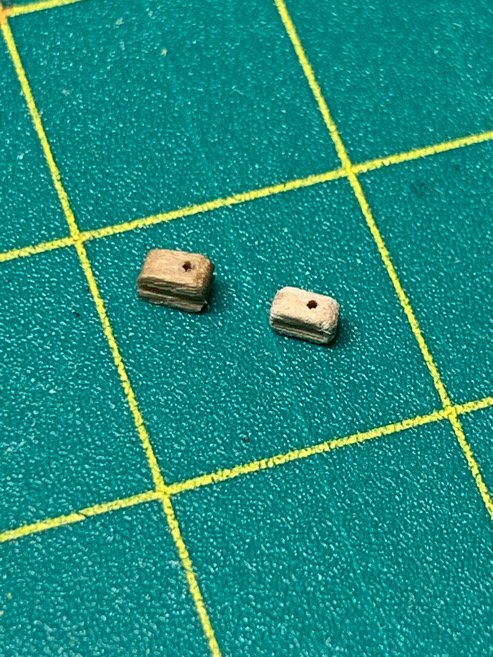
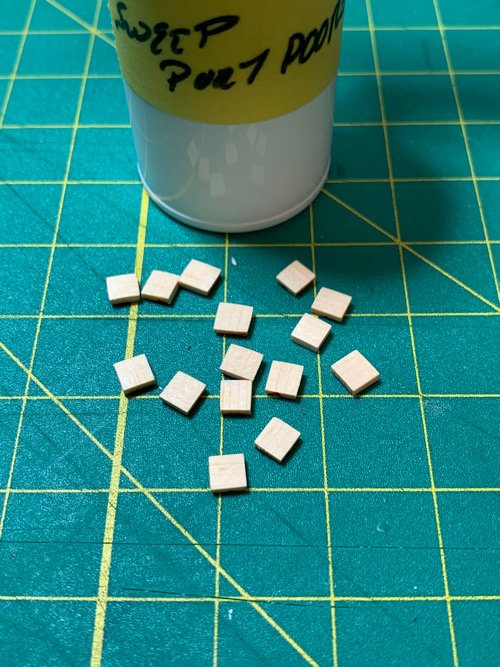
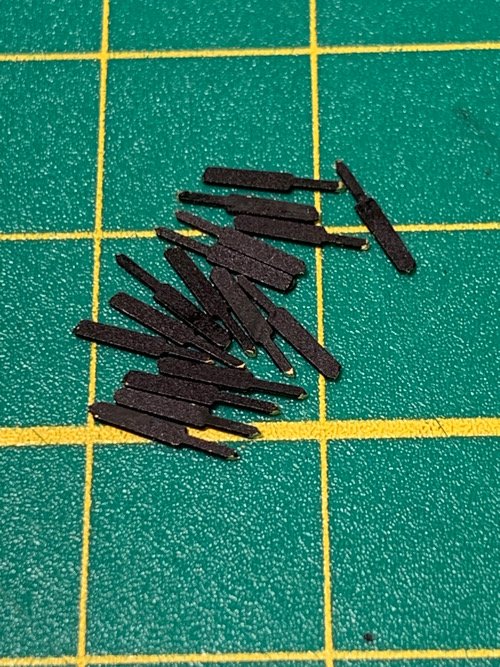
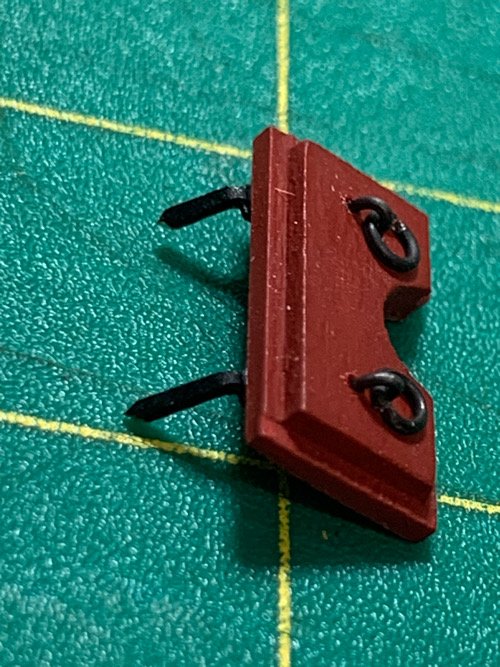
Getting slowly back into it…decided to attack a necessary chore to support the carronades. The tiny tiny blocks needed for the tackle are ridiculously small. 2mm single blocks need to be fit with hooks. Chuck’s practicum shows them shaped and rounded. After attempting and failing multiple times, I decided manual dexterity to create those perfected rounded little guys was simply beyond my ability. So…I just prepped the little blocks after sanding them a bit in the block sander. I made about 150 of these little suckers which should be enough. I had the mats to make about 20 more if I drop/crush/break any of them. The little hooks I prepared using the smallest brass rings I could find…forgot the part number but pic below. Much easier trimming these brass rings than trying to make them from scratch. Drilled the tiny holes on the blocks (easier than I thought)…and WaaaLaaaa! I’ll post a pick of the blocks after blackening and staining a bit later. Her are a few gratuitous pics. Do these little blocks make my fingers look fat? (He asked self consciously..🤣) Moving on…
-
Did 2025 really just hit me...wow. This link is still live. No pic to post, but progress is being made. Stay tuned.
-
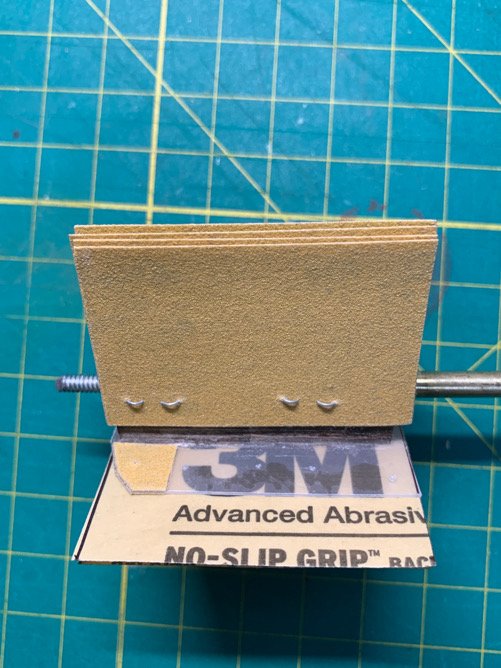
Got the sweep port doors done. Much happier with the redo. The hinges don’t stand proud of the brackets on the doors. I put the metal brackets on with a little bit of room to fit in the hinges. It’s a cheat, but it saves me from having to glue them on after I mount the doors on the ship. I test fitted them and all is good. The only problem is the wood is so much brighter than the wood on the ship. That’s the result of waiting so long to restart my modeling journey. I’m hoping time and some tung oil coats will age the sweep/gun port doors until they are a closer match. Here are a few photos. Sweep port doors ready to mount. I’ll probably get to them this weekend. The block sander works great. Here’s a pic of my 2mm blocks after running them in the sander 5 min. I still have some gun port doors to prep/paint…the journey continues.
-
Those tiny hinges are a pain in the butt….he vented to no one in particular. 🤬
-
If they do, I can’t afford them!!! 🤣
-
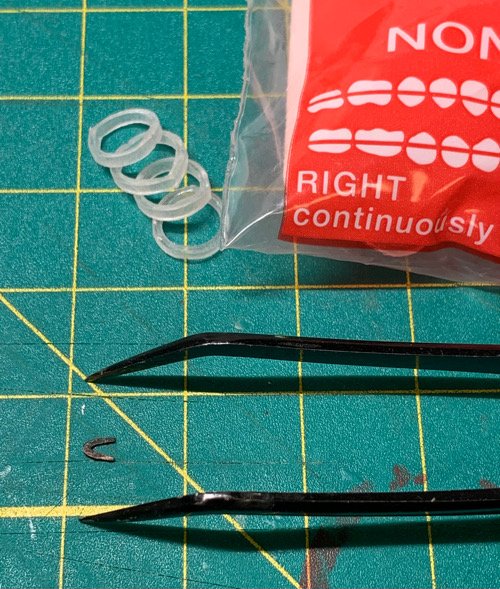
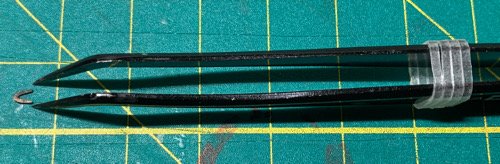
Stupid tool hack. Not sure if I’m only just figuring this out and everyone else has their hack…but I’ve always struggled with my tweezers always being a bit too wide for tiny bits. It means you need to exert that tiny bit more pressure to make and maintain control of a delicate piece…which means, more often than not, that by being too gentle I reduce the needed pressure to hold onto the damned thing…and it falls out of my tweezer grip. So my hack is…dental rubber bands. I wrap a few around my tweezers to close up the jaw width and reduce the necessary pressure I need to exert on the tweezer sides to maintain a solid hold. Great hack…more control with less exertion and instability. Apologies if this was captured somewhere else in some other blog…but I felt like a genius when I figured it out. Gratuitous pics… Moving on…

-
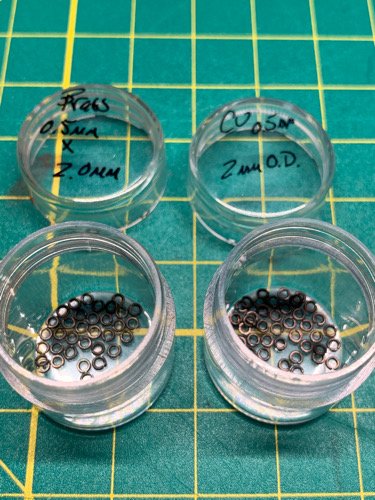
Since I have tons of rings and rigging upcoming, decided to do a personal preference experiment with regards to brass versus copper wire. Using the Jax blackener diluted 1:3 with water. I ran a set of copper and brass rings of same dimensions through the mix. In truth…hard to say which I prefer. No chunky black oxidation fragments came off either batch. Drying, cleanliness and evenness of the blackening was consistent across both metals. I did ensure I pre-sanded the metal before shaping and dipping the rings. All in all…no winner here. I think the take away is that cutting the blackening agent and removing any preoxidized layer before blacking gives a consistent patina on either metal. Not going for black here…but a metallic sheen like gun metal. Some pics. Off to do the doors tomorrow. 🫡 Moving on…to dinner. 🥘
-
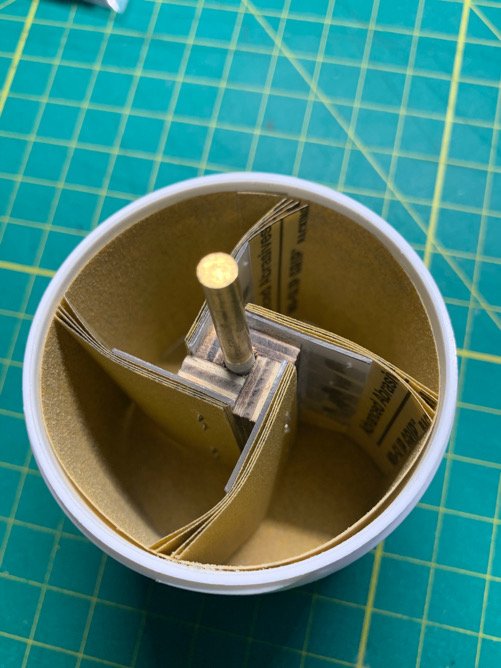
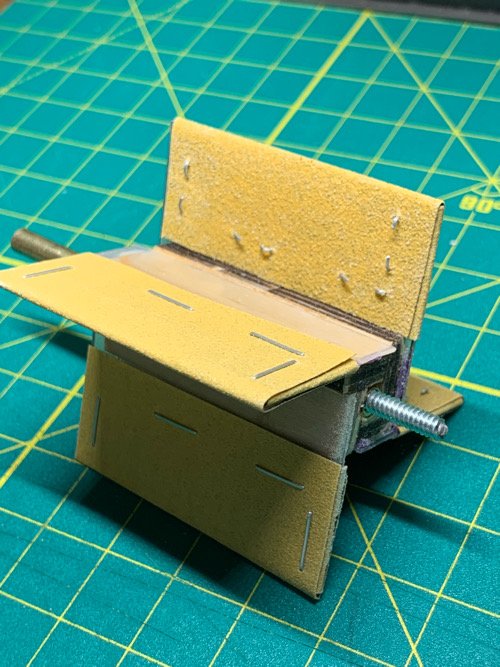
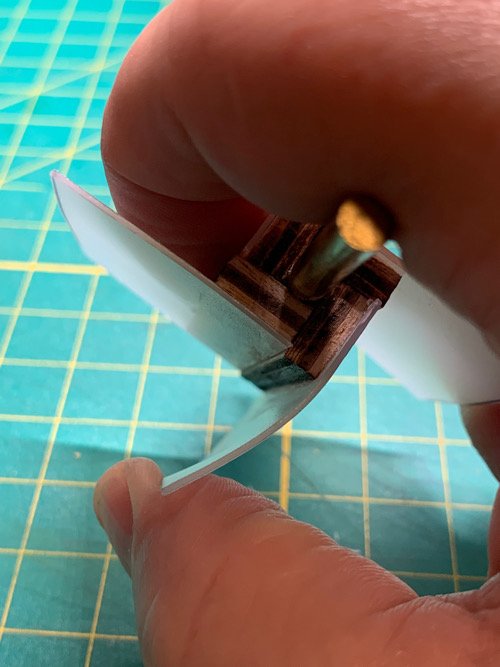
Thanks for the feedback, Dave. I modified the fins so they don’t rub the wall of the canister. Bundled 4 layers of sandpaper to extend out from the fins for a snug fit against the sides. Works MUCH better! No grinding sound and the sanding process is much gentler. Glad I can use this thing now. 😎👍🏽 Final pics on this side journey. Moving on…
-
Just a pic of the results. I’ll modify my block sander a bit more as I stated above, but the results are much better. Moving on….
-
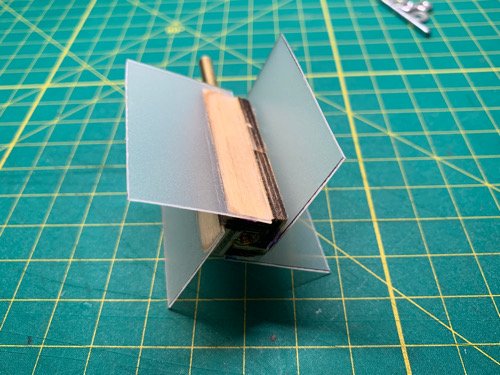
I like this version. I think the flaps on mine are still a bit too long and stiff giving rise to occasional crunching of the blocks. I’m going to shorten them and extend the sandpaper wings like this pic above. Thanks, Dave.
-
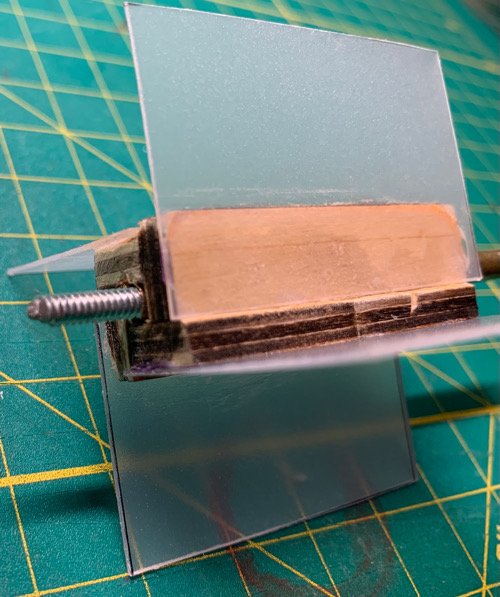
Awesome post, Dave. So, in essence, I’m not the only one seeing the ridiculous design of this wood block ‘shredder’. After mucking around with my Model Expo cheapie block tumbler…I think I could probably make my own which would work 100x better. But for now, just trying to get that thing to work at all. So here is what I came up with using 180 grit paper. Works…it’s stable…no stress. The plastic wings flex nicely so you don’t end up crunching the blocks to smithereens. Moving on…. Simple and easy to use.

-
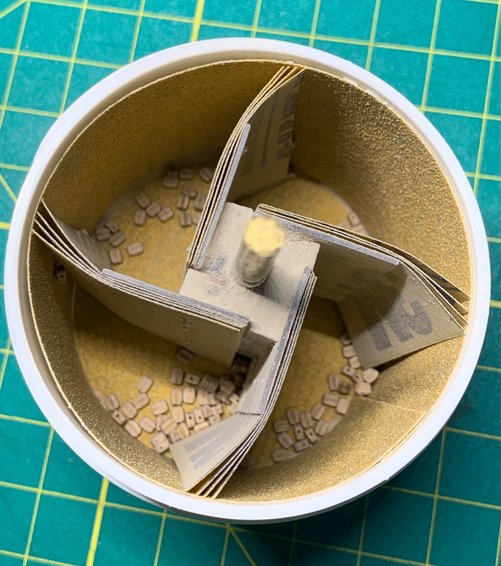
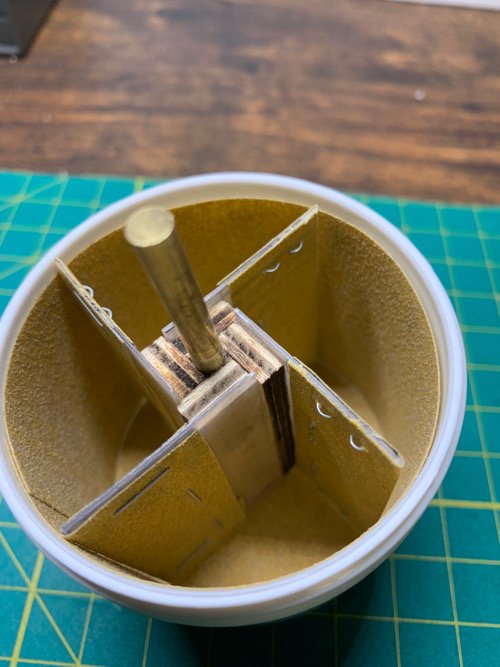
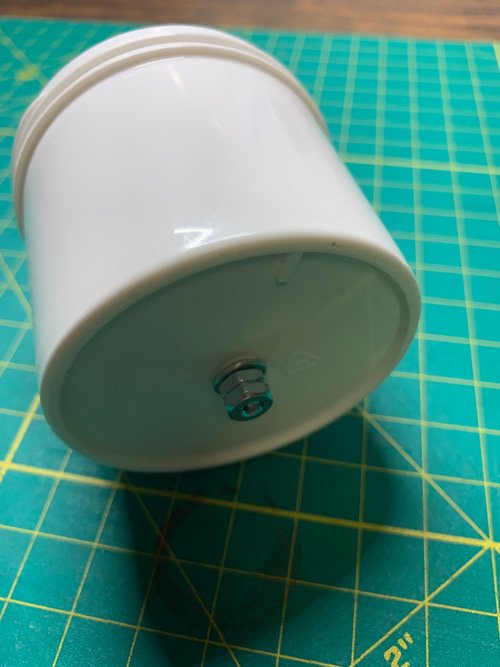
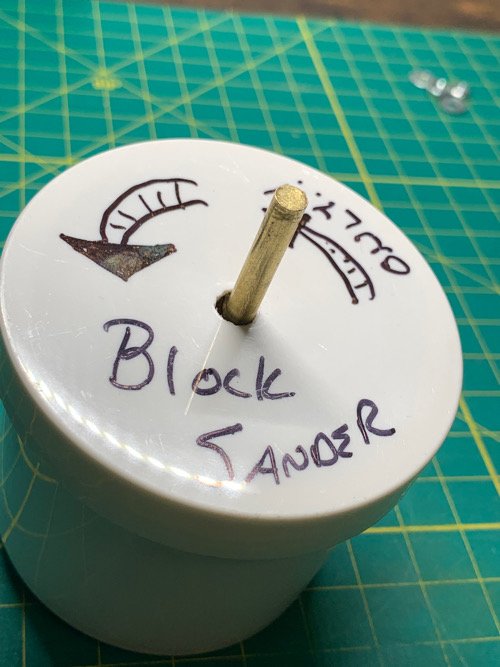
Got sidetracked by my handy dandy cheapie block tumbler. I think everyone has one. It’s a plastic bottle with sandpaper inside…a metal spindle with wooden flaps (covered in sandpaper) goes inside with the blocks…attach spindle to drill…press ‘go’ on the drill and magically, about 5 min later, you have more eye pleasing and realistically weathered and rounded blocks. Only problem is the damn thing-jig-doodad never worked. I tried it on the 2mm blocks I plan to use on the carronades and the wooden flaps exploded. So…since my little shop is limited in space and tools…and I need it…I decided to modify it a bit to see if I can make it a bit more user friendly. More later…my hope is I can get this tool working a bit more efficiently without worry of wooden parts cracking off…I mean, come on! What a crap design.
-
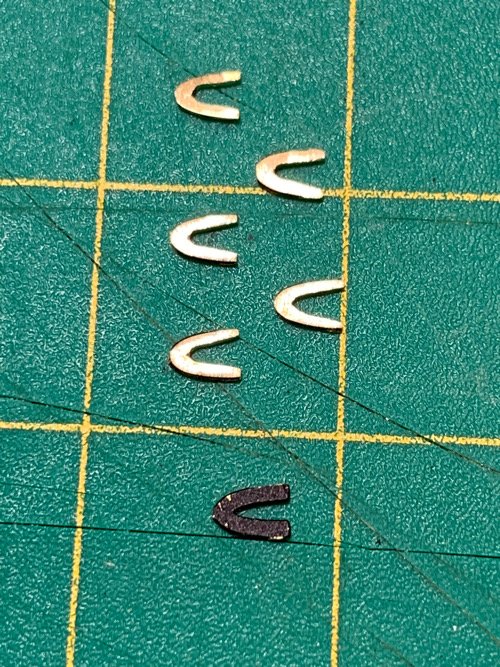
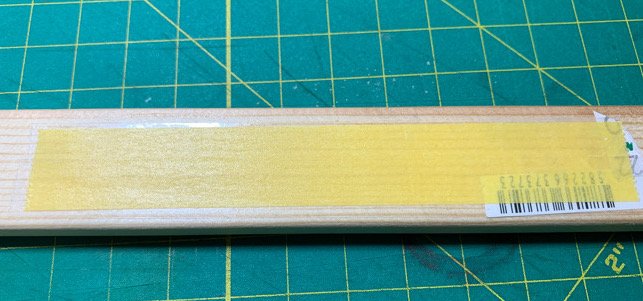
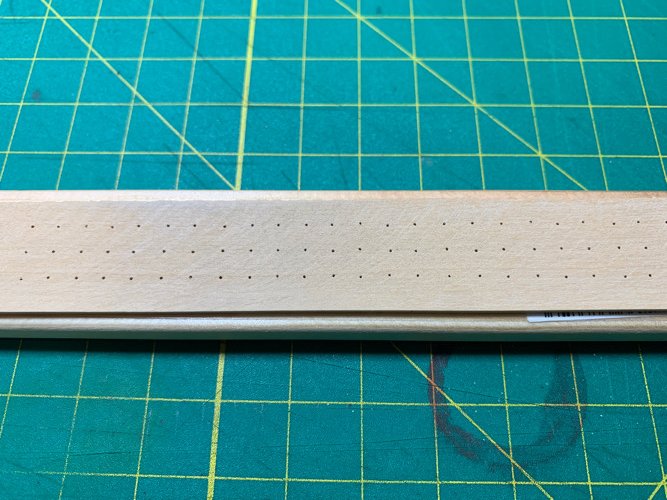
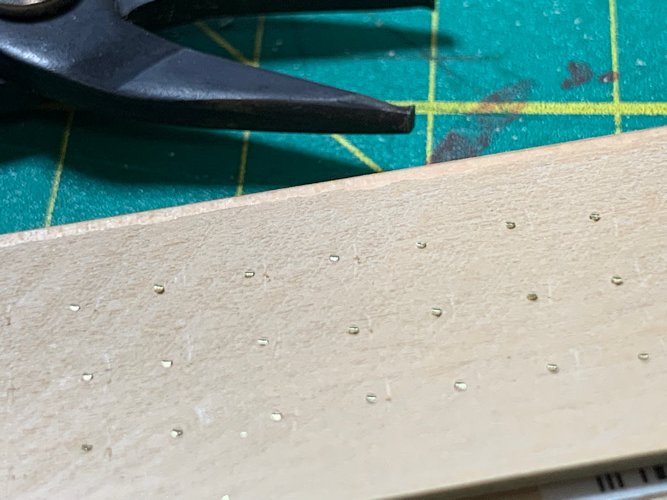
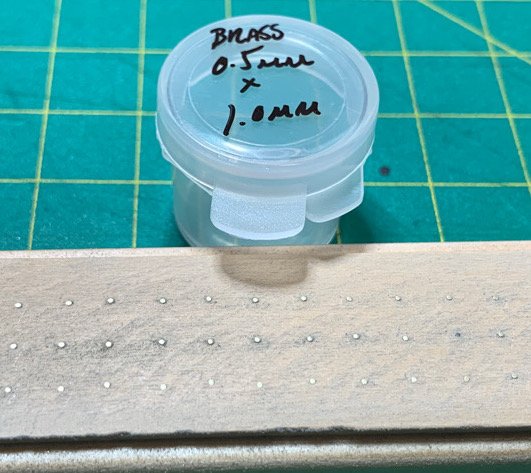
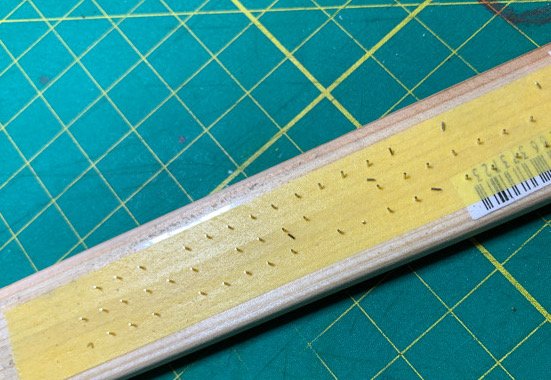
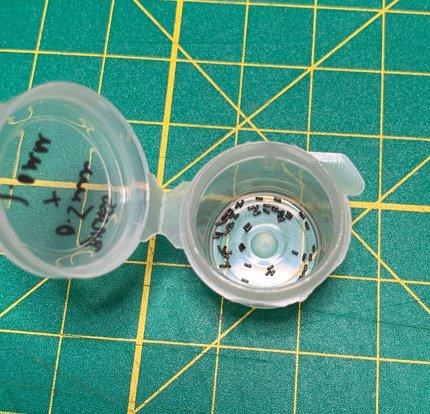
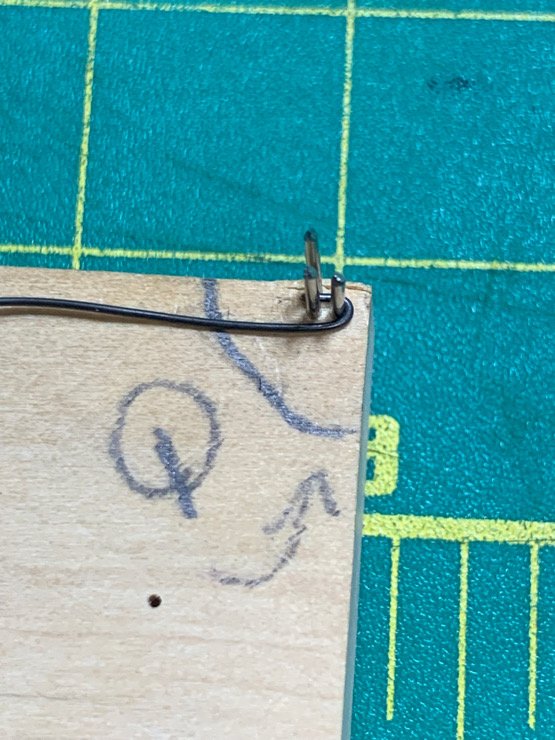
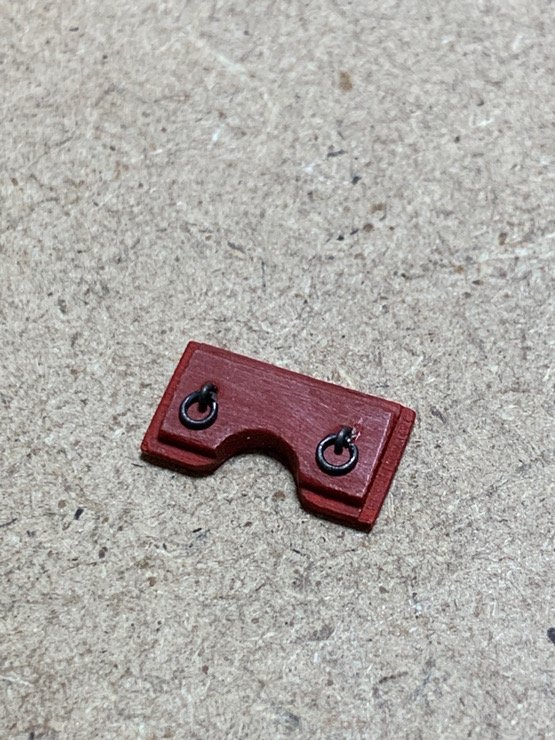
So...redoing the sweep port doors. Thought I'd try to remove the hinges from the old doors and put on new hinges/hingpins. Destroyed one of the doors during hinge removal, but no biggy. The remaining 7 are in good shape. The inboard sides are already painted red and are test fit to their respective doors in the plans...so it helps me save a bit of time. The hinges had been painted black...but since I wanted to try to trim down the width where the simulated hinge pins will be located, I stripped them down and then used a rotary sander to thin the arms up a bit similar to how Chuck did in his practicum. Sadly, I don't have the manual dexterity to get them down as thin as he did, but they looked better versus their shape before thinning (see bottom hinge in pic below). Also, rather than painting, I decided to try using a blackening agent for the hinges and pins I will be making (both are brass). JAX blackener was cut 3:1 and it worked nicely. Hinges turned out much cleaner looking. I was struggling how to make the tiny (0.5mm x 1mm) simulated hinge pins reproducibly. Finally decided to use a scrap piece of 1mm thick basswood I had in my wood bin...drilled out some holes, and mounted it on another piece of wood with some double sided tape. I used an end nipper to clip the wire after I pressed it into the hole(s). After filling the template, I sanded the exposed end...figuring having one polished/square end would help align the look on the hinges. I pulled up the wood and the little hinge pins stayed stuck (mostly) to the tape. Some blackener and the pins were done and fairly clean and consistent. So...the end result should hopefully look something like this once put on the sweep port doors. Not bad...fingers crossed. Moving on...


-
In other news...after really taking stock of the Syren...having lain fallow for 2 years...I am now more comfortable with the copper patina. It actually aged pretty evenly (for my first try). So, I won't redo it. Decision made. Second thing...those sweep doors with he wooden hinges I made did NOT travel well. I need to redo the sweep doors after I'm done with the gun port doors. But I won't be too sad about it...I was never really happy with he sweep doors anyway. So I'll be redoing them. Decision made. And that frees up my mind a bit. Part of my hesitation in jumping back on the Syren was the question of whether I would need to backtrack and redo some things...the answer is No and Yes. So...progress and pics to come. Moving on...
-
Hey Dave…good question. A couple reasons. 1. Viscous CA was easy to manage with these ridiculously small bits. 2. The back of the doors won’t be seen by anyone so I was going for quick and easy. 3. It’s all I had at the moment and I didn’t want to wait for a trip to the Japanese hardware store. 4. I really needed to start getting some progress on the ship as well as do something to take my mind off the recent earthquake. (Yeah…we are on the southern tip of Japan.) 😎
-
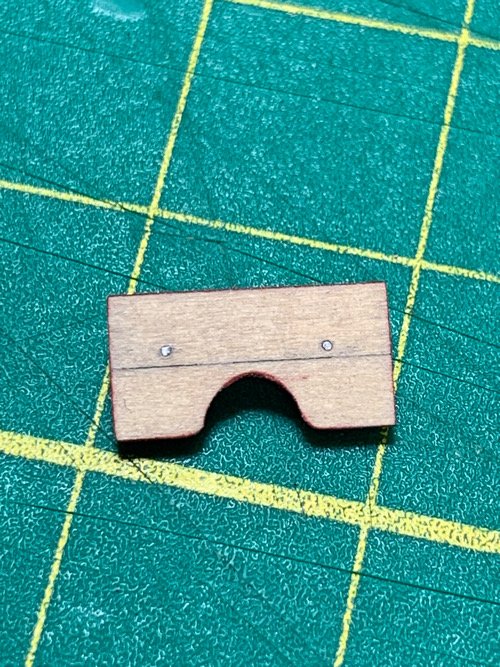
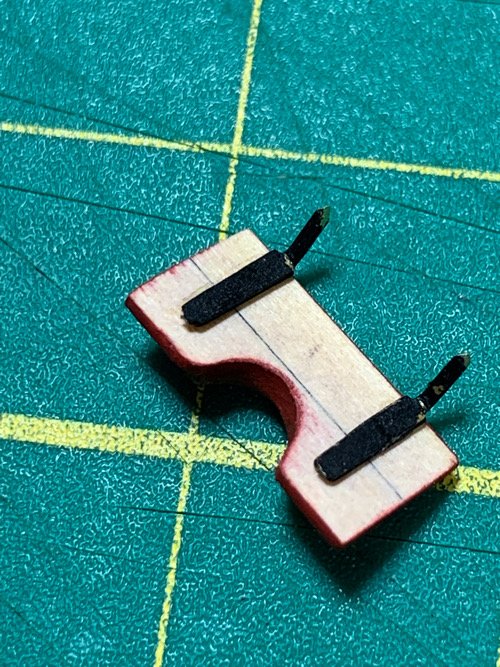
The practicum wasn’t as visually descriptive on finishing and mounting the doors. So I thought I’d give my little contribution. Took the metal straps, painted them, then bent them at 60degree angle. Makes it easier to handle and glue on the little suckers. Putting them on the doors was pretty straightforward. The metal from the hook makes an easy marker so I could put them on consistently. You can see I also filed a small point in the tip of the metal straps. I figure it will make mounting them in the drilled holes on the window sills a bit easier. Here they are. Made a couple extra. The metal hinges (bits of wire) are next. But here is the current progress. Moving on…
-
Ok…been so long, I can’t remember what the heck I was doing on the ship before I packed her up to move. So decided to attack the gun port hatches. Decided to try to make the little rings with a simple hook hanger. Made a little jig to make the hooks, and a ton of rings using annealed wire. Effect isn’t that bad…still have to put on the metal straps and hinges. Not certain if I’ll hang them…figuring I’ll get them all setup and the holes drilled then put them on later with the quarter galleries. (I don’t trust myself not to knock the bloody things off when I’m fiddling with the chain plates/etc.) Pics below…cheapie 3 min bending jig for bending the wire to form the ring hooks. 😎 Moving on…

-
Yeah…once I get back to Japan! I’m all energized after Mannitowoc!!!
-
Take a look at my build for the Syren. I left the waterways off my Sultana for the same reason you mentioned. But I found an elegant way of making them diagonal for my Syren.
-
We’ve been doing renovations on our house and I’ve been learning how to drive on the left side of the road! But ship yard is together and I’m starting to eek back into my build!!
-
Believe it or not…I had to repack and unpack the shipyard…sigh. We are finally in our newly acquired home in Kirishima. I can thankfully restart my hobby without fear of having to move again. (He said hopefully) My next post will be a progress update with pics … so help me God!
-
Just a quick update to keep my thread alive. Shipyard is repacked. Moving again for (hopefully) the last time. If anyone has kept count…this will be the fourth time in the last year we’ve moved! But our new house and my future little shipyard is around the corner!
-
@CPDDET Thanks, Dave. Let me know. I’m coming in June for family business and plan to present at the MMS meeting. Are you able to attend that one?

