


Overworked724
-
Posts
1,263 -
Joined
-
Last visited
Content Type
Profiles
Forums
Gallery
Events
Everything posted by Overworked724
-
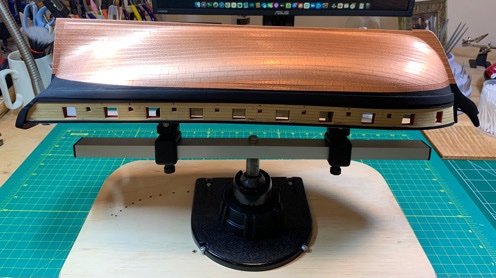
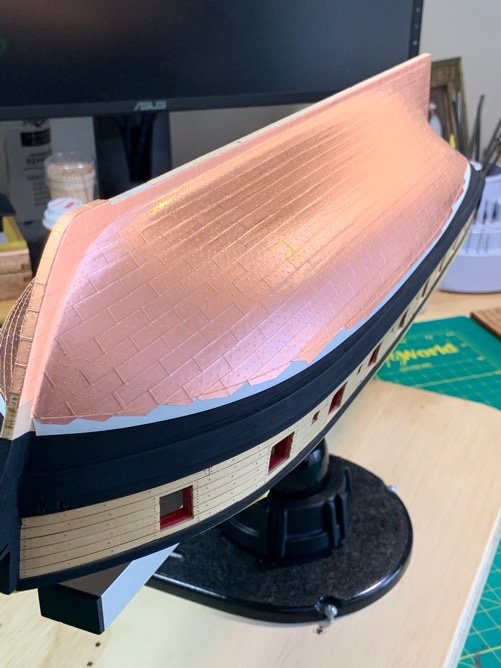
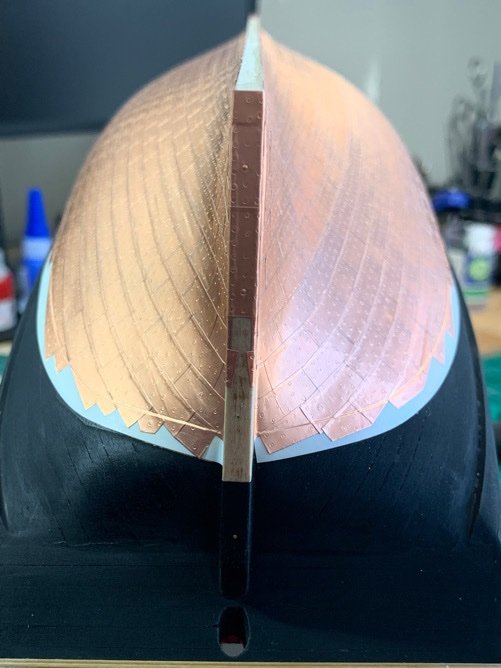
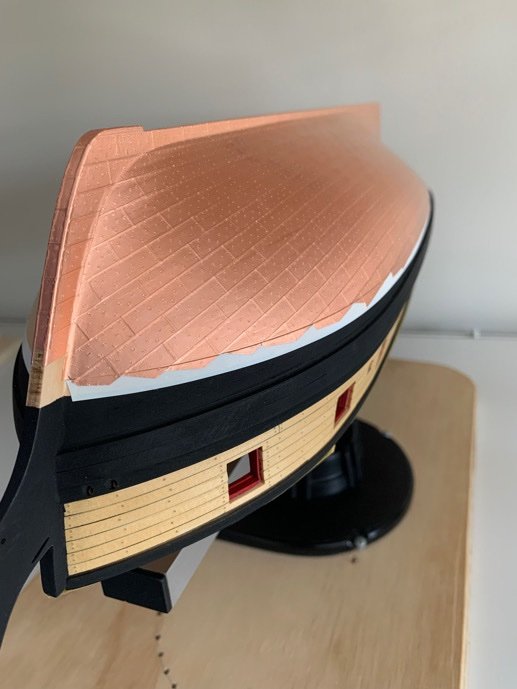
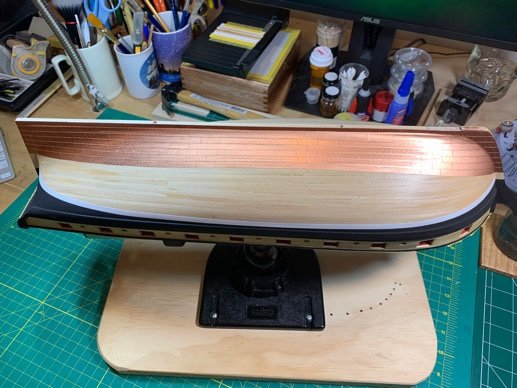
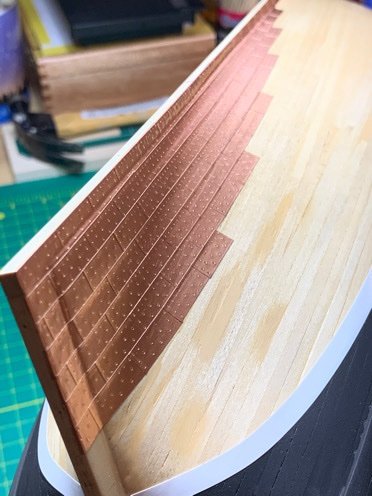
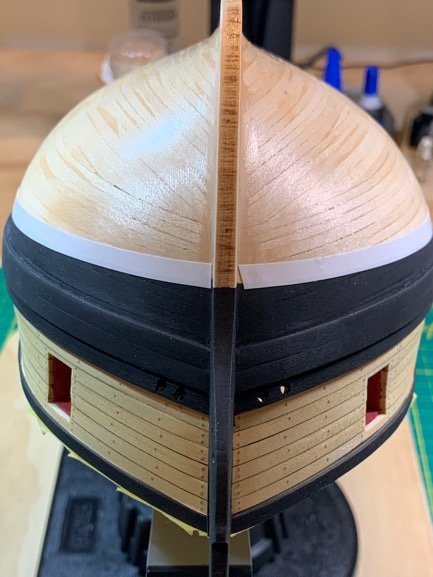
 Coppering is complete! Cutting away the tape was a bit more difficult than I expected. Doing it this way made it easy to visualize the waterline, but it left a nasty edge to the existing copper plates. However, the copper tape was wider than the stripping tape, so installing the upper belt was a breeze. A few of the copper plate edges have popped up, but nothing major. So I’ll call this finished and move on to the rudder.
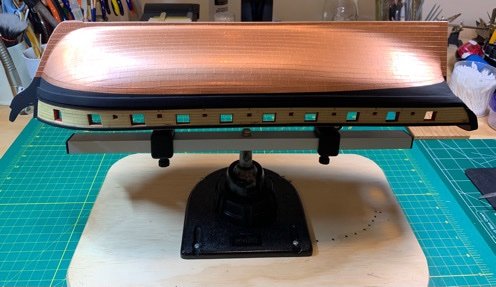
-
Thanks for the kudos, @Justin P. Justin! Deeply appreciated. Actually, I almost changed my mind to go with the Amati plates when I saw how beautiful your hull came out. But, I spent so much time making those stamps, I felt ‘pot committed’ with regards to using the kit supplied tape!!! 🤣
-
Thanks, @WalrusGuy! Your build continues to be one of my ‘go to’ blogs. I’m not done with this chore yet, but I am hopeful I can get the top belt on without too much damage. 🤞 Then it’s on to the rudder and the P&G’s…which are waiting in the wings. Got some momentum…looking forward to looking at the deck sometime soon! 🤣
-
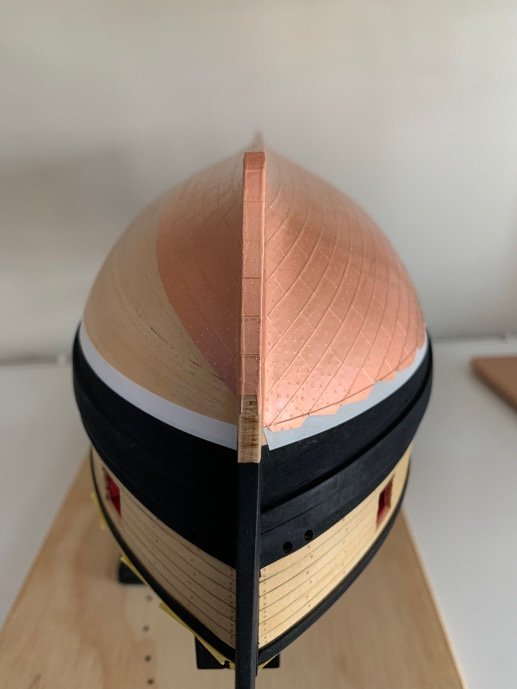
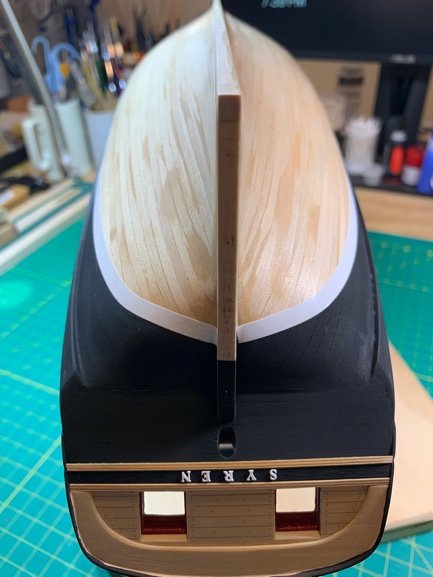
The hull is fully coppered. I still need to cut away the tape and lay in the upper belt. This is why I left out the topmost trim pieces for stem and stern piece. I figured I might brutalize that area with my exacto and didn’t wish to repeat any coppering due to ‘slips’. In all, the coverage is symmetrical and consistent. I’m pretty happy it came out as clean as it did considering I eyeballed the entire thing! I was also pleasantly surprised at how easy it was to make subtle adjustments as you lay in the individual plates. I was nervous about the wrong things. Now I just need to gather the courage to cut that upper tape away. 😜 Taking a break today!!! That is one monotonous chore!!! Like others, I survived by binge watching a TV series during this process. The survival series, ‘Alone’ was my choice! 😁
-
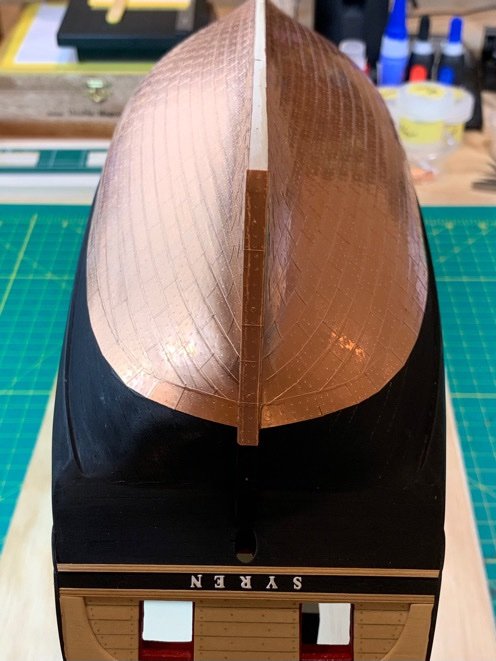
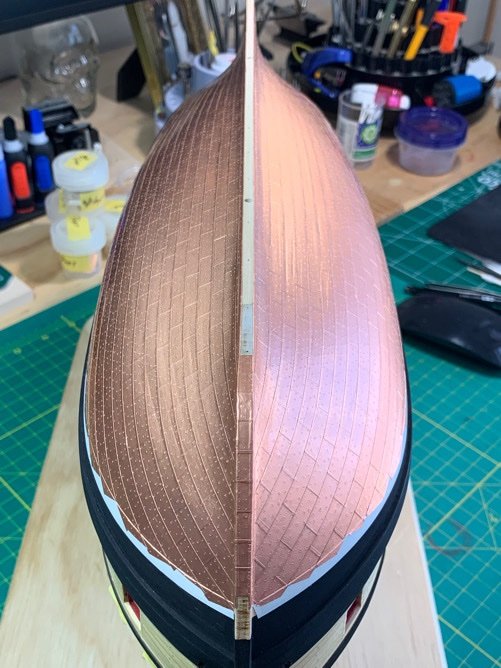
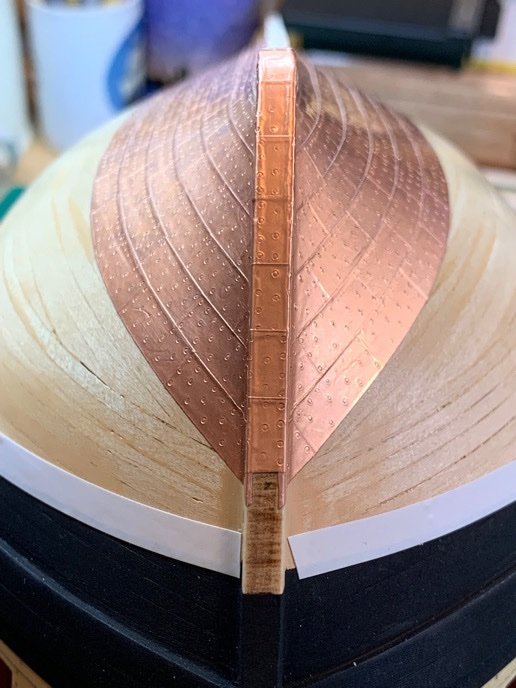
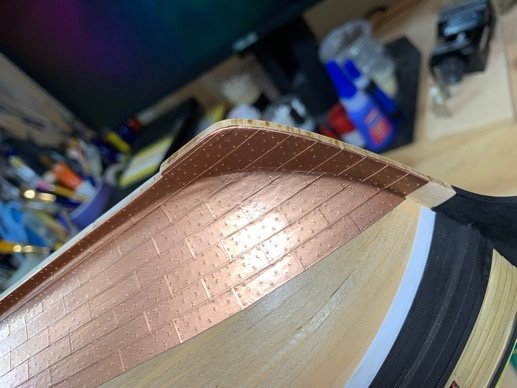
Good question @CiscoH. Frankly, I have been prowling through every build log and Chuck's practicum. The photos don't really go into the curvy corner area at the stem. It was driving me to distraction trying to find how people got such great results at the 'seam' where the stem juts out from the hull. The Syren plating plan shows that the plates don't (and frankly can't) seamlessly 'bend' to lie in across that curvy angle. Lacking any specific directions, I went with simple - and winged it. The first two plating rows starting at the keel going up can be plated straight across from stern to the stem (overlapping). The subsequent rows I cut the plates for the stem and left a bit of an overhang into the 'corner' which the edge of the last plate on the hull would lay across. They are, frankly, cut to fit as closely as possible...and I had a lot of removals and redos in this area to ensure things looked 'consistent' even if it not historically accurate. Hope that helps. 3 books are: 'Tall Ships - History Comes to Life on the Great Lakes', Kaitlin Morrison 'The Sailing Frigate - A History is Ship Models', Robert Gardiner (GREAT BOOK...and excellent compliment to the build log for the Syren!) 'The Miniature Ships of August and Winnifred Crabtree', Vincent P. Scott
-
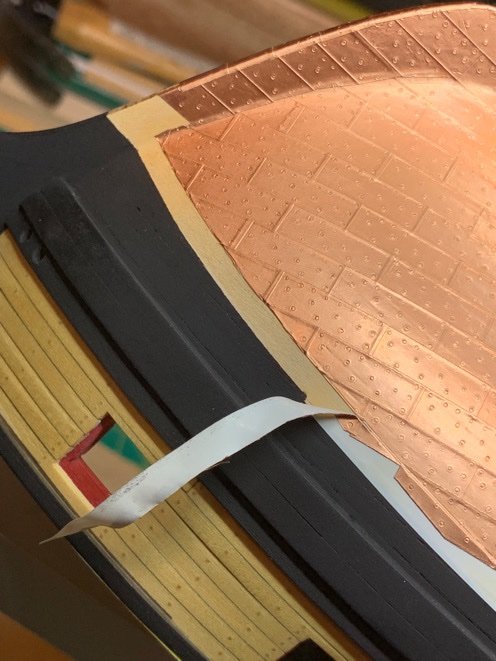
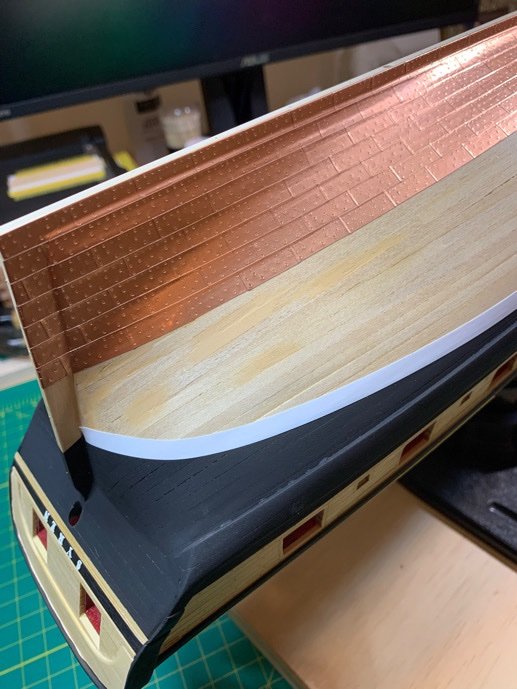
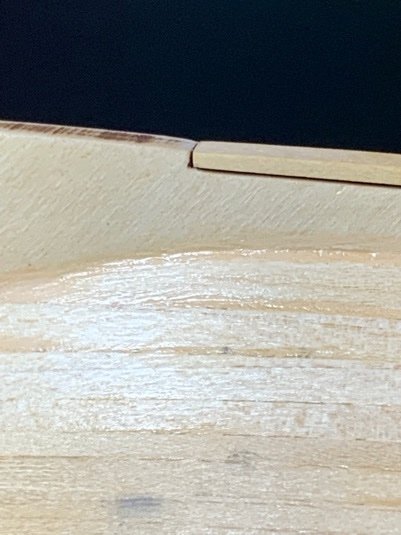
About 70% there. One side is done up to the upper belt. You can see where I still need to cut away the tape strip marking the waterline to put in the belt. A bit nervous about doing that…so will take the joy of at least completing both sides up to the belt before cutting away the tape and finalizing this job. Fingers crossed. Moving on…
-
@CPDDET Dave, to be honest, this might be my last copper hull! 🤣
-
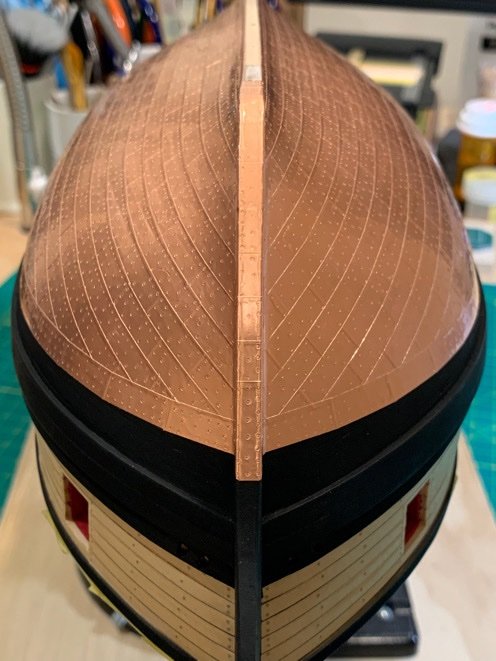
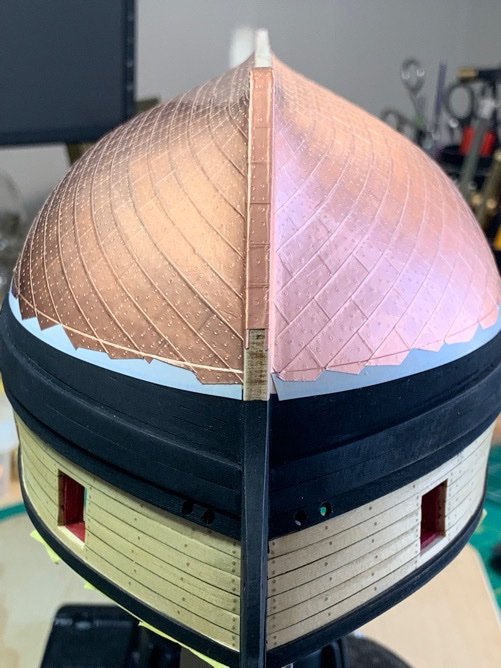
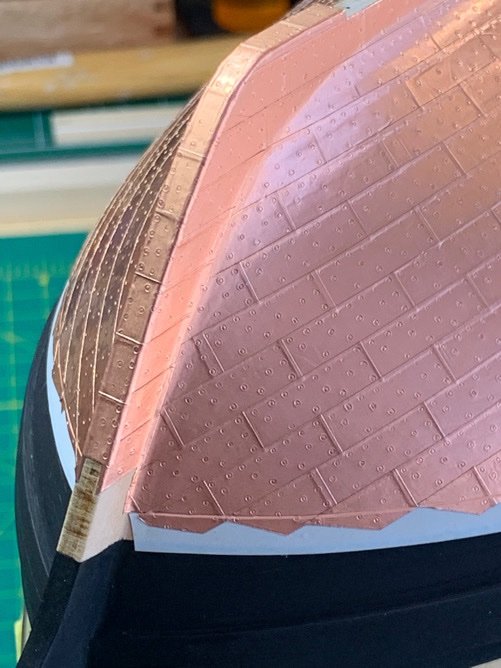
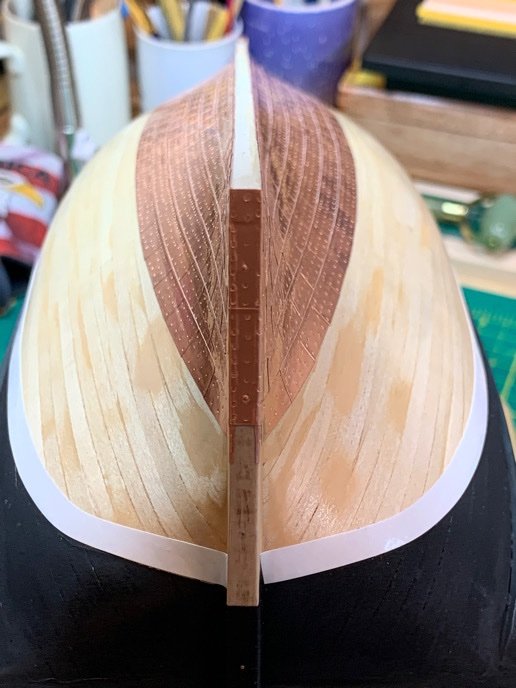
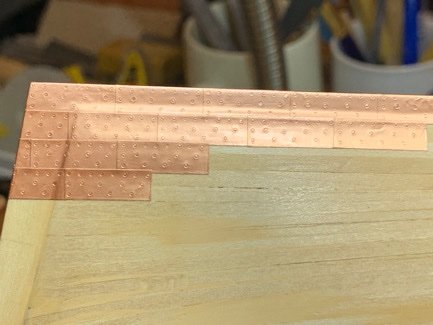
Coming along. Showing these pics for the benefit of those yet to do this part. Got in the first 7 rows on each side. Spent a lot of time on the bow. Really no way I could think of to get the copper plates to seamlessly blend into the stem. Did my best but it’s a patchwork quilt. I’m about 50%…the remaining bands should be a bit easier than fiddling with the bow. Moving on….
-
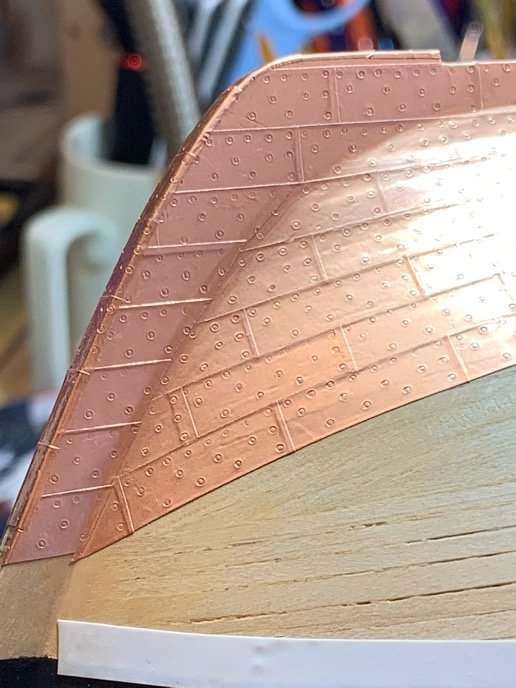
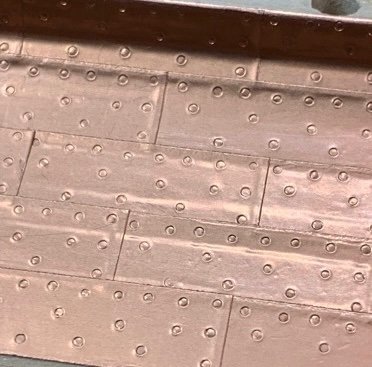
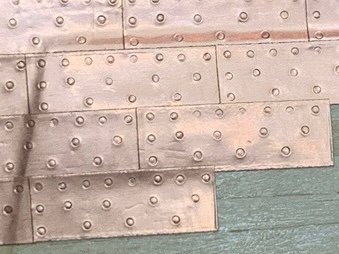
About 1/3 of the way done. Really trying to focus on laying these little suckers down consistently. One thing I’m really happy about is the nail pattern. Doesn’t show up on the photos above, but the effect is really nice. The bolts actually show up nicely! It’s moving much faster now. But I feel like I’ll be making plates until Easter.
-
Thanks, @CPDDET, @Gahm Guys! I’m doing my level best. One thing I’m watching very carefully, and another reason I’m going so slow…is to watch for peeling. The copper foil tape was hit or miss…I’ve seen many builds where the plates started to peel shortly after install. Thus far, they are staying put (knock wood). So 👍🏽 Alright!! I am glad I spent the extra time smoothing out the hull and putting on a couple coats of wipe on poly. I think it makes a huge difference in adherence. These plates are on like glue…and they adhere so strongly that if I wish to remove one misplaced plate, I have to slowly and gingerly pry it off. Moving on…
-
Quick coppering update. I’m now a pro at making copper plates and tearing off the backing without crimping the foil. New skill set. First 7 rows on the port side are on. They look fairly decent. Again, not overthinking here, just trying to be consistent. Laying them on cleanly is not as hard as I had thought it would be. If I don’t like how a plate looks, I rip it off and repeat. The stem post was a bit difficult. Had a couple of plates that forced me to adjust a bit. Moving to starboard to get the first 7 rows in and do my best to make sure things line up. The grind continues. 👍🏽
-
Captain’s log, Star Date 12282021: My foray into coppering the Syren hull has met with some small amount of success…based upon current estimates, I’ll be done sometime next Christmas. Will refrain from additional posts on coppering until I have the final pics of the finished job. it’s a SLOOOOW process.
-
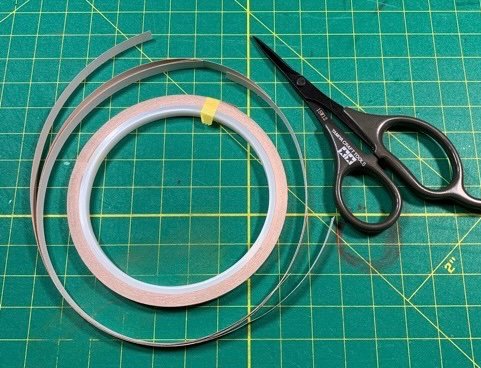
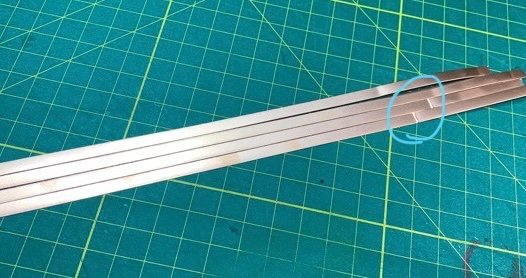
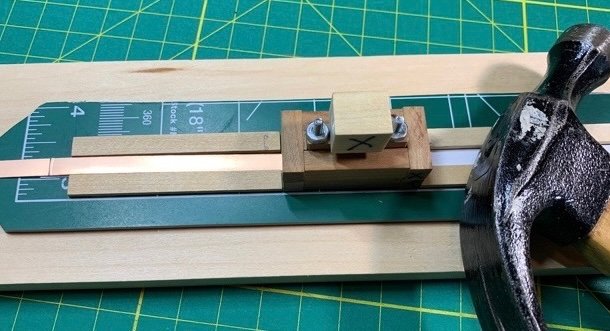
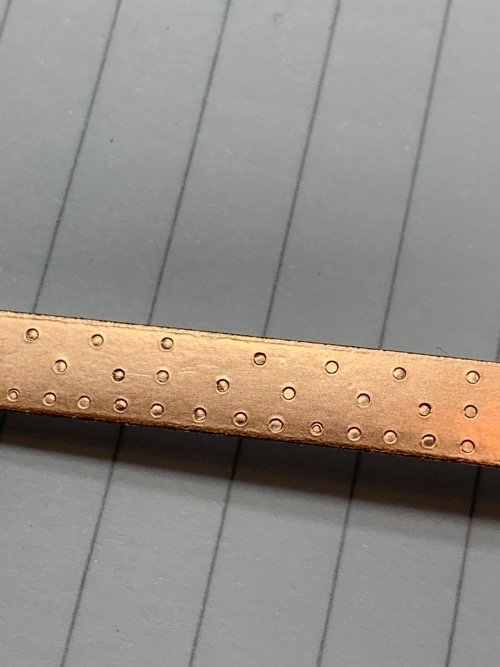
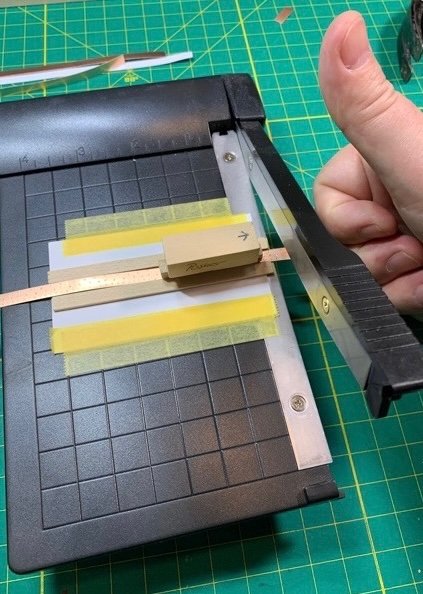
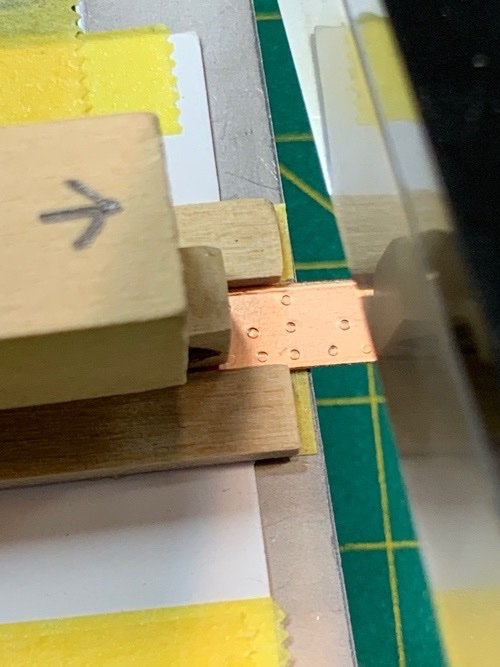
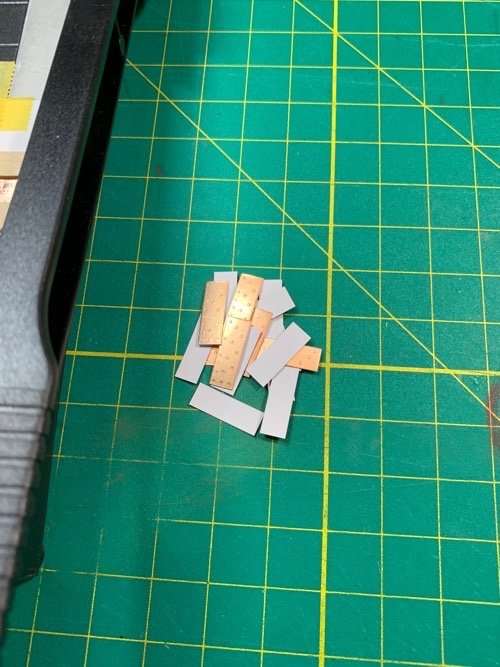
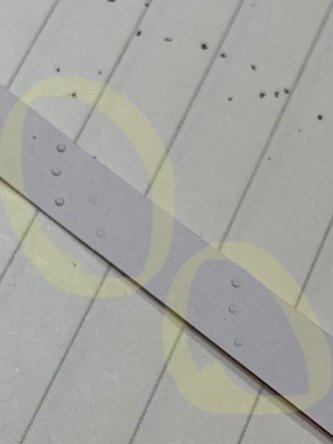
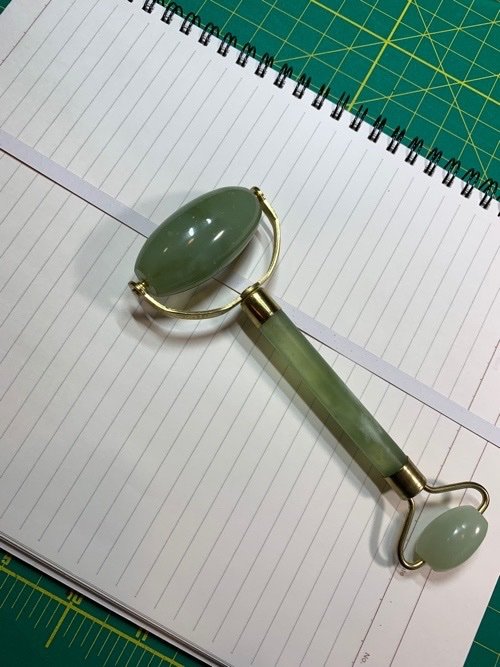
Yeah....so everyone has a method for making these plates. The foil is so fragile! In retrospect, I am really glad I made my stamps a while back. The process I use is efficient and doesn't take much time to crank out plates. The nice thing I've discovered is that the paper backing removal is really something you need to work out for yourself...I managed to figure out a way to do it without crimping the foil....which is bloody easy to do. Here is my plate process: 1. Cut ~ 12" strips. This is basically one wound off the tape spool. The strips are curly at first. 2. Simply pull the strips gently between your fingers a few times and the strips will straighten out. They may crimp in one or two spots, but that's ok. 3. Stamp the plate pattern into the strip. I used the old 'whack a mole' method with my high tech hammer. 4. The nails will be 'indented' into the strip. Rather than trying to straighten these out (burnish) after cutting and placing the plates on the ship, it made more sense to me to 'push' the dimples back in before cutting apart the individual plates. 5. Here is the back of the strip...clearly showing the protruding nail ‘dimples’. Note the background...I'm using an old notebook as a 'backing or support’ which is soft, smooth, and has a bit of 'give'. 6. Using an old 'roller' - can't remember where in the heck I got this thing. It's about 6" long and has stone rollers. I just rolled it along the back of the strip to push in the nail dimples. 7. This is what the strip looks like after #6 above. Nice clean strip...no protrusions. 8. Got this ridiculously small paper cutting gizmo. Actually, I think I got this at a dollar store, not Amazon. But I know they sell them on Amazon. I put in a track to keep the strips aligned. ...cut up the sections. This part goes very very quick. I get about 15 or so plates from one strip. I make about 5 strips at a time...only take a few minutes. 9. Remove the plates from the paper backing and gently apply to the ship...hard not to ding the plates, but at least I was able to create a process which doesn't crimp them before I get them on the ship. The nail pop effect is what I was hoping for....yes, they are not 'to scale' but I'll take my little victory! The marathon continues....

-
One thing I’m doing differently is ‘burnishing’ the copper strips before I cut them. I got a cheapie roller I use to roll over the strip after I’ve stamped in the bolt patterns. It flattens out the pattern nicely. Then I use a mini paper cutter to chop the sections. I will post pics a bit later.
-
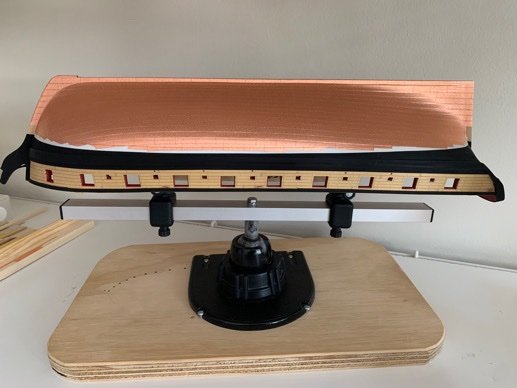
Did my best to retape the waterline to make the upper belt consistent. Fingers crossed 🤞. Got my system in place for making/cutting/removing the foil plates. It will be a marathon. I’m going to (again) try not to overthink it. Started port side… Since this will take a while, I break up the monotony with deck furniture and stern cannon… Moving on…
-
Sorry, Ken. Hope I didn’t offend. Was meant to be supportive as I talk myself into jumping in my own coppering! (A bit nervous) Happy New Year!!
-
Not a bad result, Ken. 👍🏽 Remember she’s not going to be mounted belly side up! Besides, you get to start working on the little fiddly deck bits now! Onwards!!!
-
Ok…being an open book to my family, I ended up with 3 ship modeling books for Xmas. 🤣🤣🤣
-
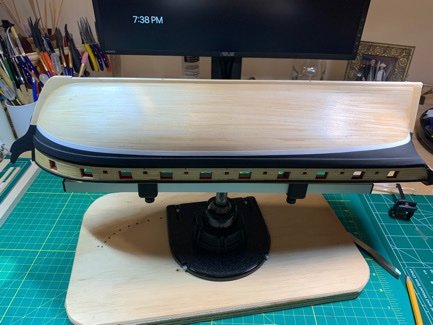
Good advice. Actually, I’ve already done this…a buddy of mine has a great lathe and we were able to take some brass pedestals (not the kit supplied…found some slightly larger alternatives) and grind them to appropriate height. 👍🏽
-
Your work is marvelous!!🎄👍🏽
-
Holy crap…those close ups really magnify the wood filler! I have to start my coppering. 😳
-
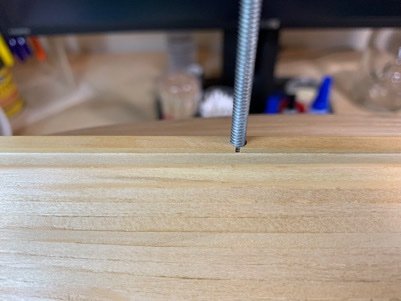
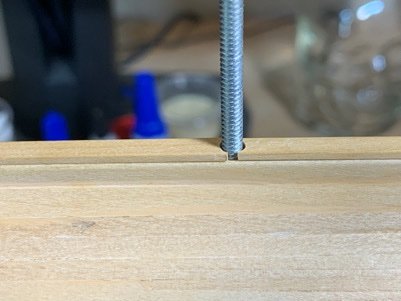
P&G’s are tucked in for later…even have a sneaky and easy way to mount them without (knock wood) causing too much damage to the copper once applied. Last thing I wanted to do was prep the false keel. Since the mounting screws go up through the keelson, making the false keel in one piece is possible but tricky. Decided to break it up into sections. The gaps at the mounting screws will be cleanly hidden by the pedestal mounts. Again…just didn’t want to overthink this one. Moving on….
-
@Gahm, @abelson, Thanks guys! I can honestly say, getting kudos from you two means a lot! Your builds are constant crutches for me…so I must be doing a few things right. 😁
-
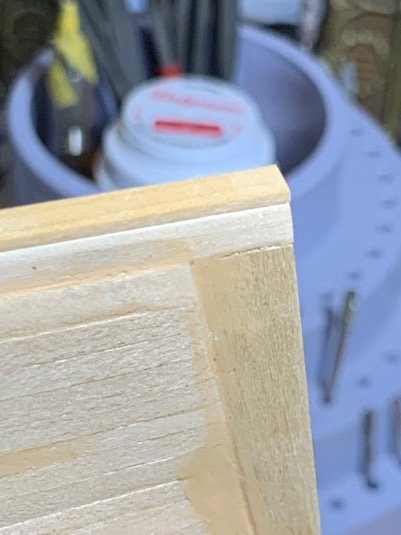
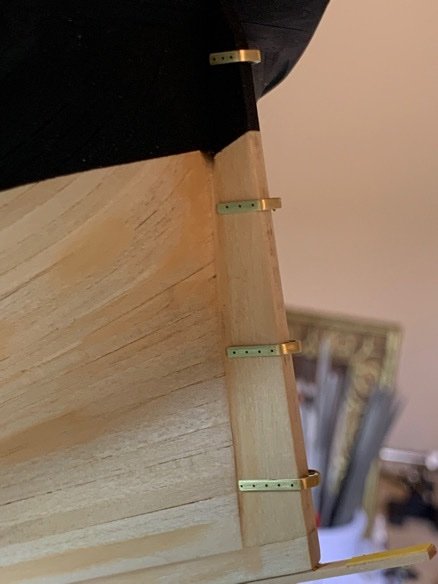
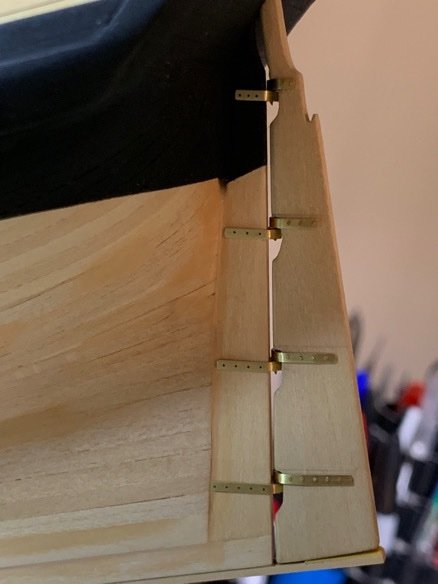
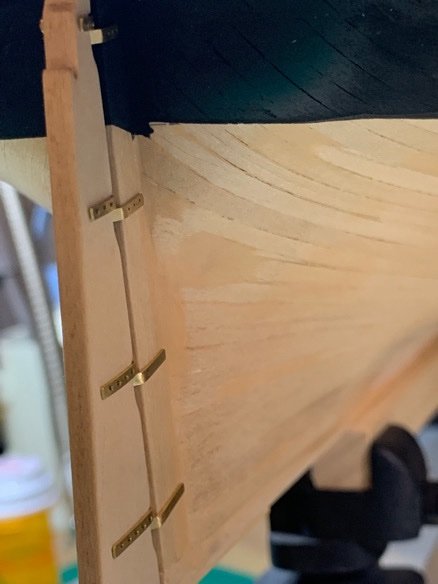
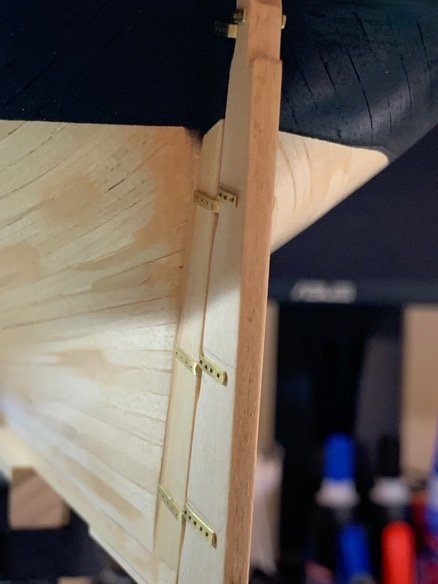
Finished up the other ladder. Yes, some folks mentioned the ladders are a bit ‘thick’. What the hell. 😁 It’s better than my first ladder I made for the Sultana. Also pre trimmed and test fit the gudgeons. I made the decision to trim the gudgeons not to extend beyond the stern piece. Yes, it’s a deviation but not a big one. A lot of brigs (US brigs included) in this era did not wrap the gudgeons out beyond the stern piece. It also saved me from trying to bend around the ‘fat’ planking which I did not sand level with the stern piece. So…lesson learned. The fit looks good…and if I mount them as accurately after coppering, the rudder will both functional and removable. 👍🏽 Moving on….

-
Please tell me you haven’t given up on your Syren! 🙏🏻 Merry Christmas and happy flying!!!!


