tennfox
-
Posts
50 -
Joined
-
Last visited
1 Follower

Recent Profile Visitors
686 profile views


-
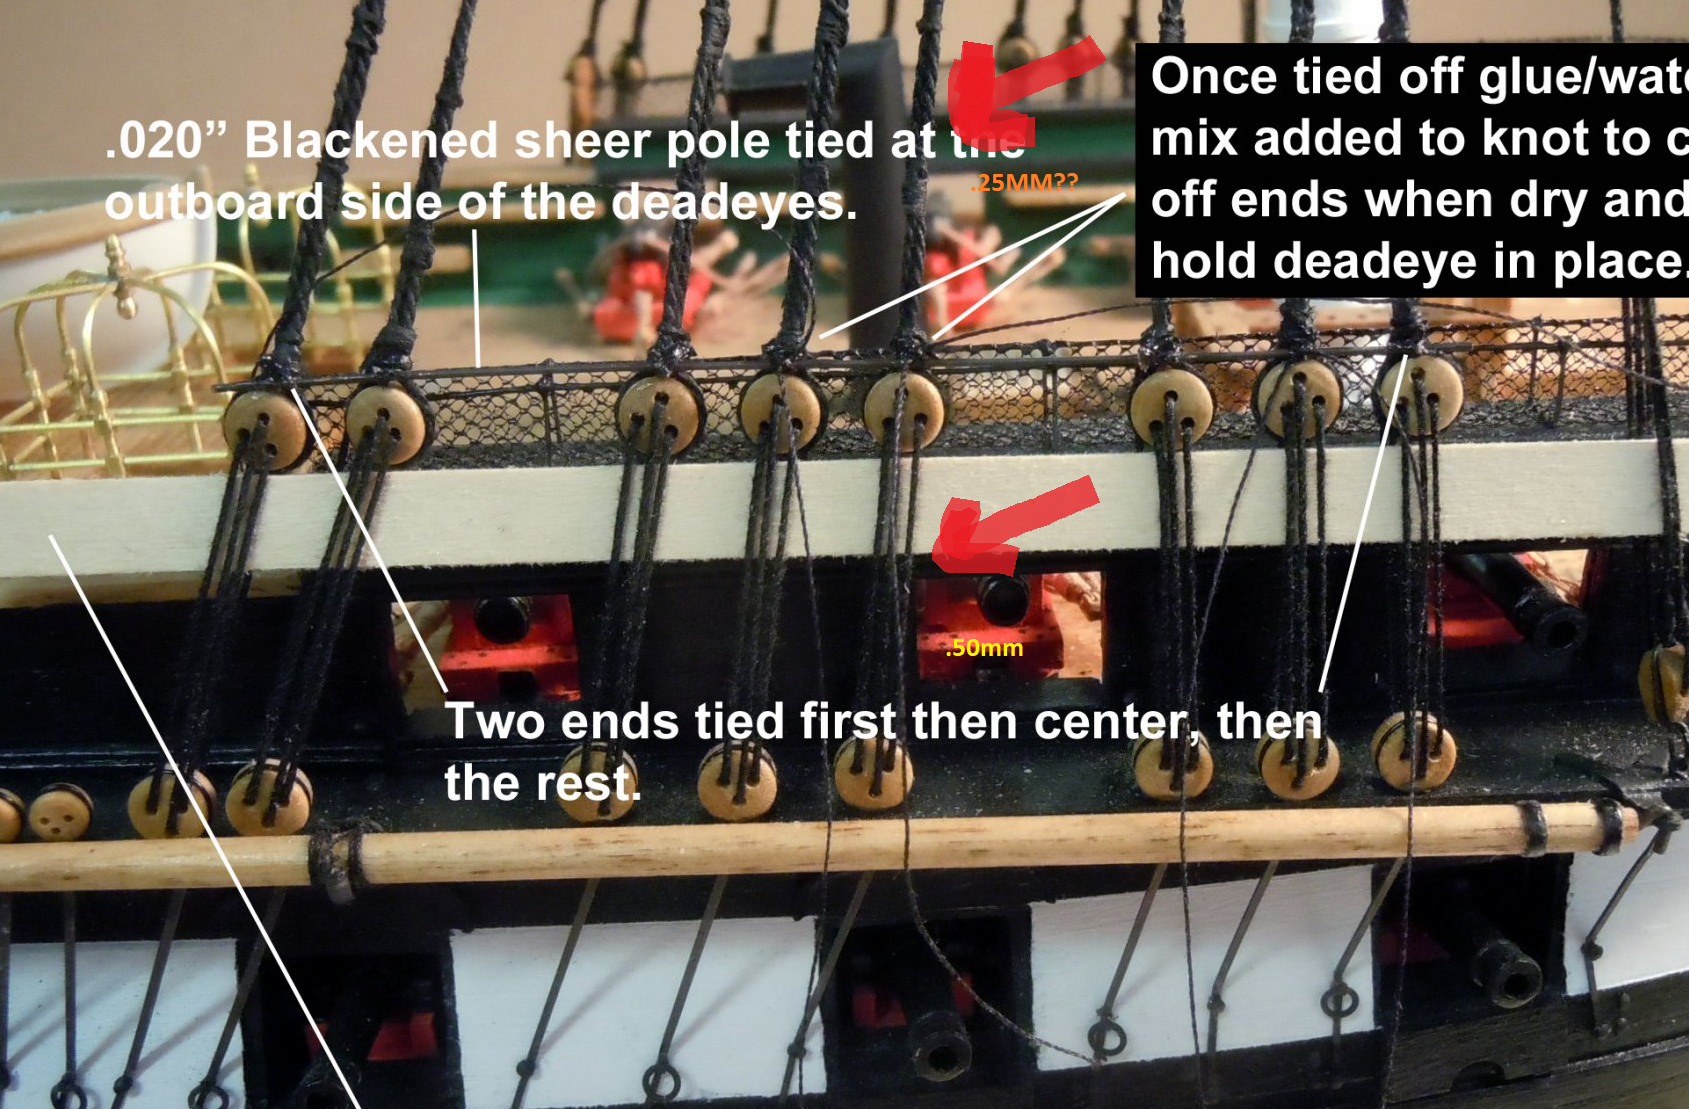
Im starting to do the deadeyes and ratlines on my 1:100 Greyhound. Tan cord came with the model, but Id like to do black on them instead. Does anyone know the diameter of the in between the deadeyes, and the diameter of the upper deadeye up for this scale? Then diameter of the ratlines for this scale? Im thinking .25mm and .50mm but Im not sure. Ive also seen people use wire for the lower deadeye to the hull.. What gauge/diameter is usually used?

-
 mtaylor reacted to a post in a topic:
1779 Frigate color scheme
mtaylor reacted to a post in a topic:
1779 Frigate color scheme
-
Canute reacted to a post in a topic:
1779 Frigate color scheme
-
Chuck Seiler reacted to a post in a topic:
1779 Frigate color scheme
-
1779 Frigate color scheme
tennfox replied to tennfox's topic in Painting, finishing and weathering products and techniques
thank you so much... this does help... -
mtaylor reacted to a post in a topic:
1779 Frigate color scheme
-
tennfox reacted to a post in a topic:
1779 Frigate color scheme
-
Im in the process of building the 1740 frigate The Greyhound by Corel as a 1779 Frigate The Protector. The ships design are similar enough. My question is in the coloring of the whales. Historically speaking, which is correct for this age of ship? The Protector was built in Mass and is contemporary to the Boston. or The whales are black and above the ports, or are they natural? did they make them both or is the black the more accurate version? The wood is yellow and not paint. just trying to figure it out before I finish the 2nd planking .. Thanks
-
GrandpaPhil reacted to a post in a topic:
HMS Greyhound by tennfox - Corel - 1:100 - building as USS Protector
-
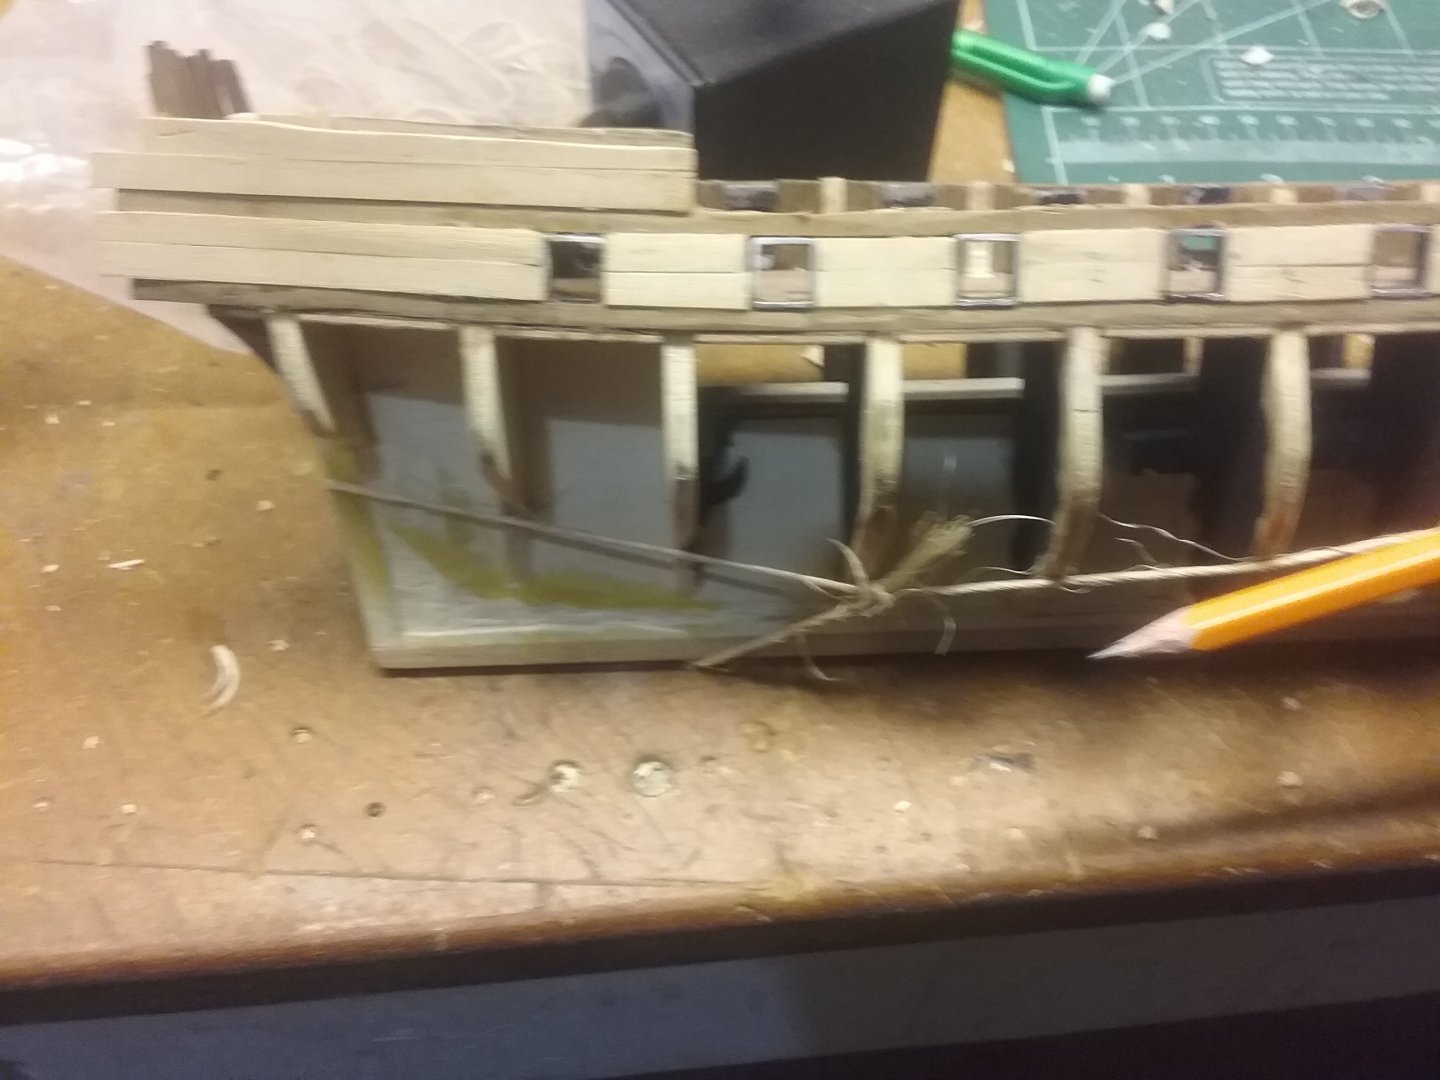
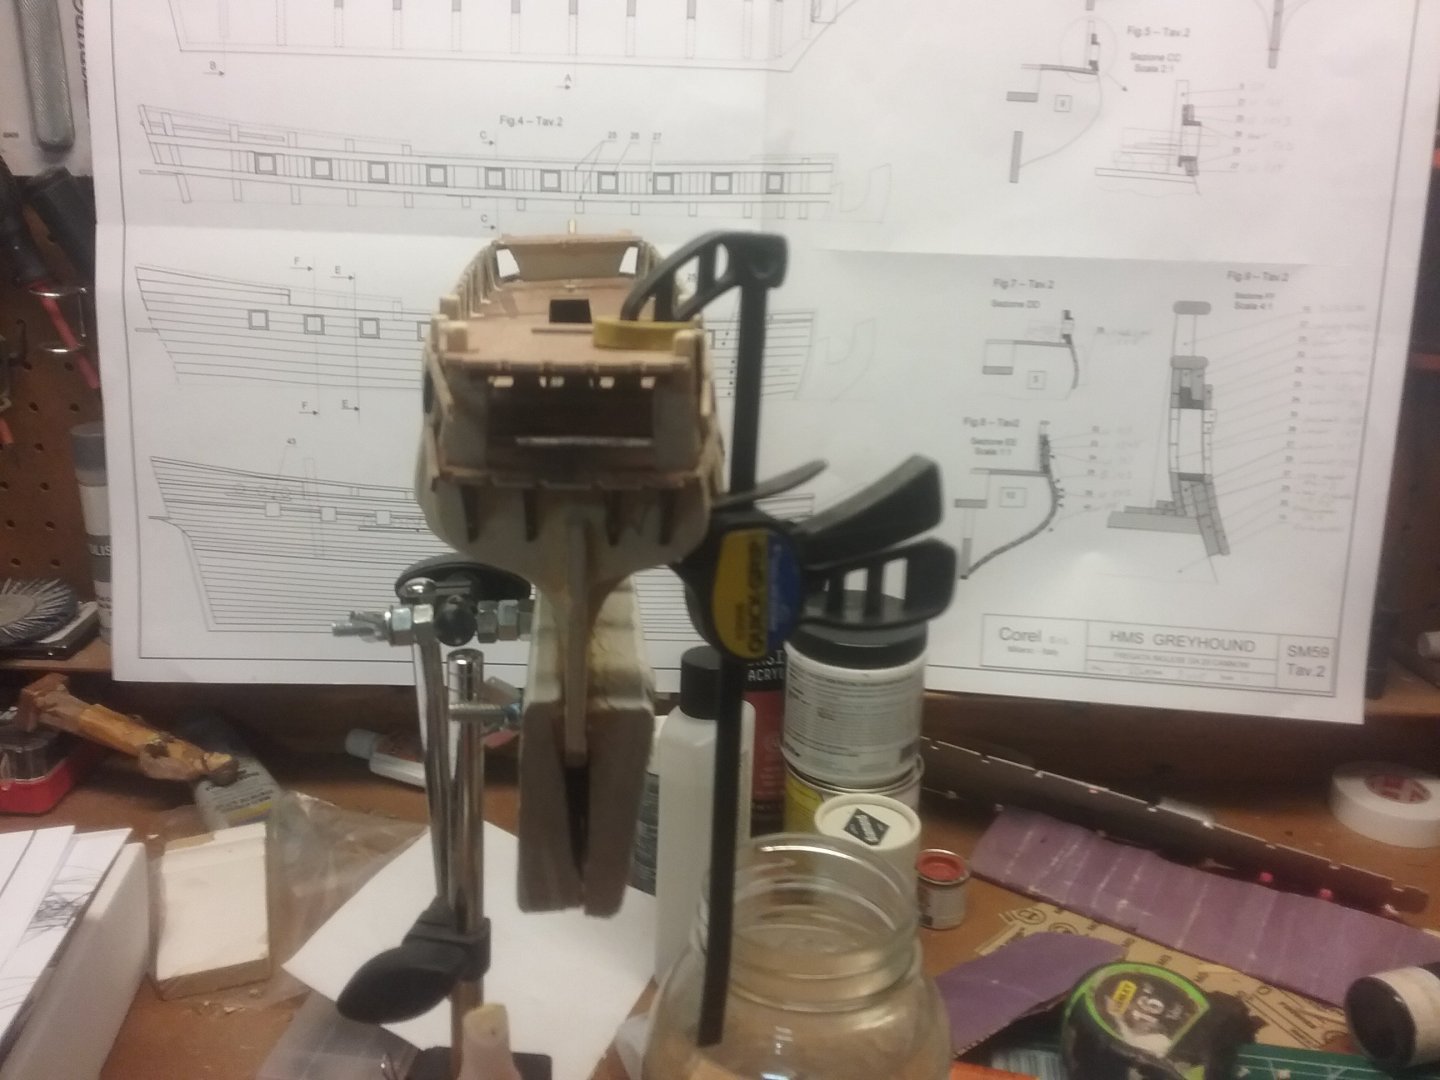
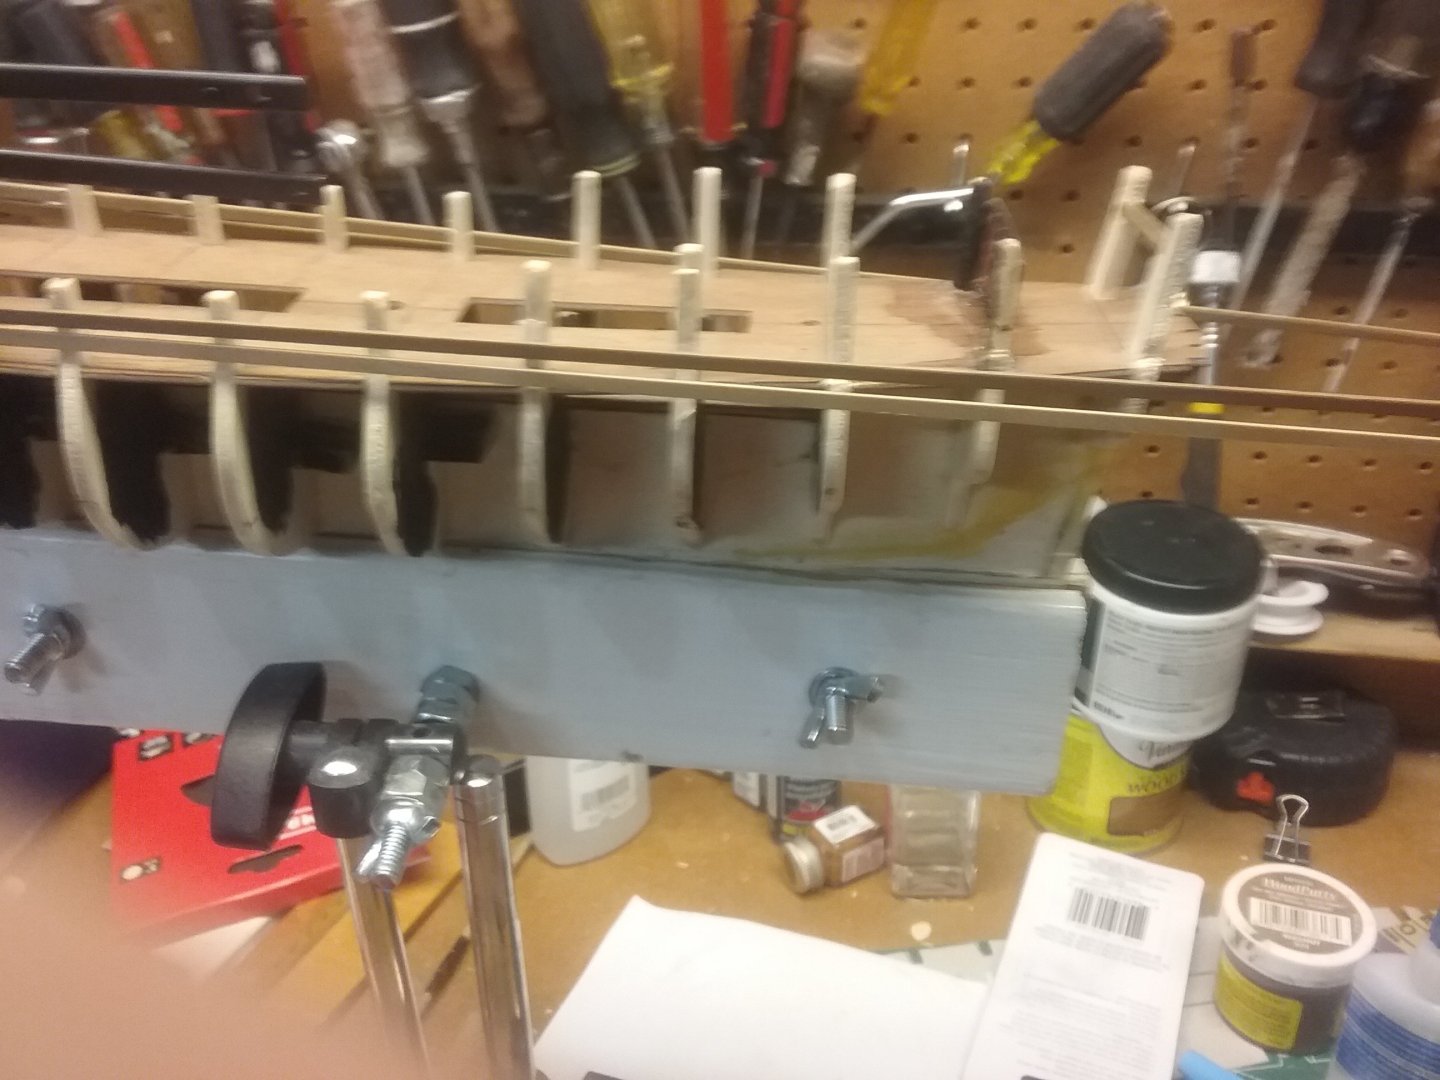
I first attempted top use rubber bands on the bow and keel. Snapped the bow just like @Old Collingwood. Glued it ball and tried using twine thru the ports at the bow and around the rear keel. Used a pencil to tighten. As you can see, its a lot straighter. My thought is to try to plank the middle of one side ((after I get it all laid out), first , to hold the new shape then remove the twine and continue planking. I'll keep you posted


-
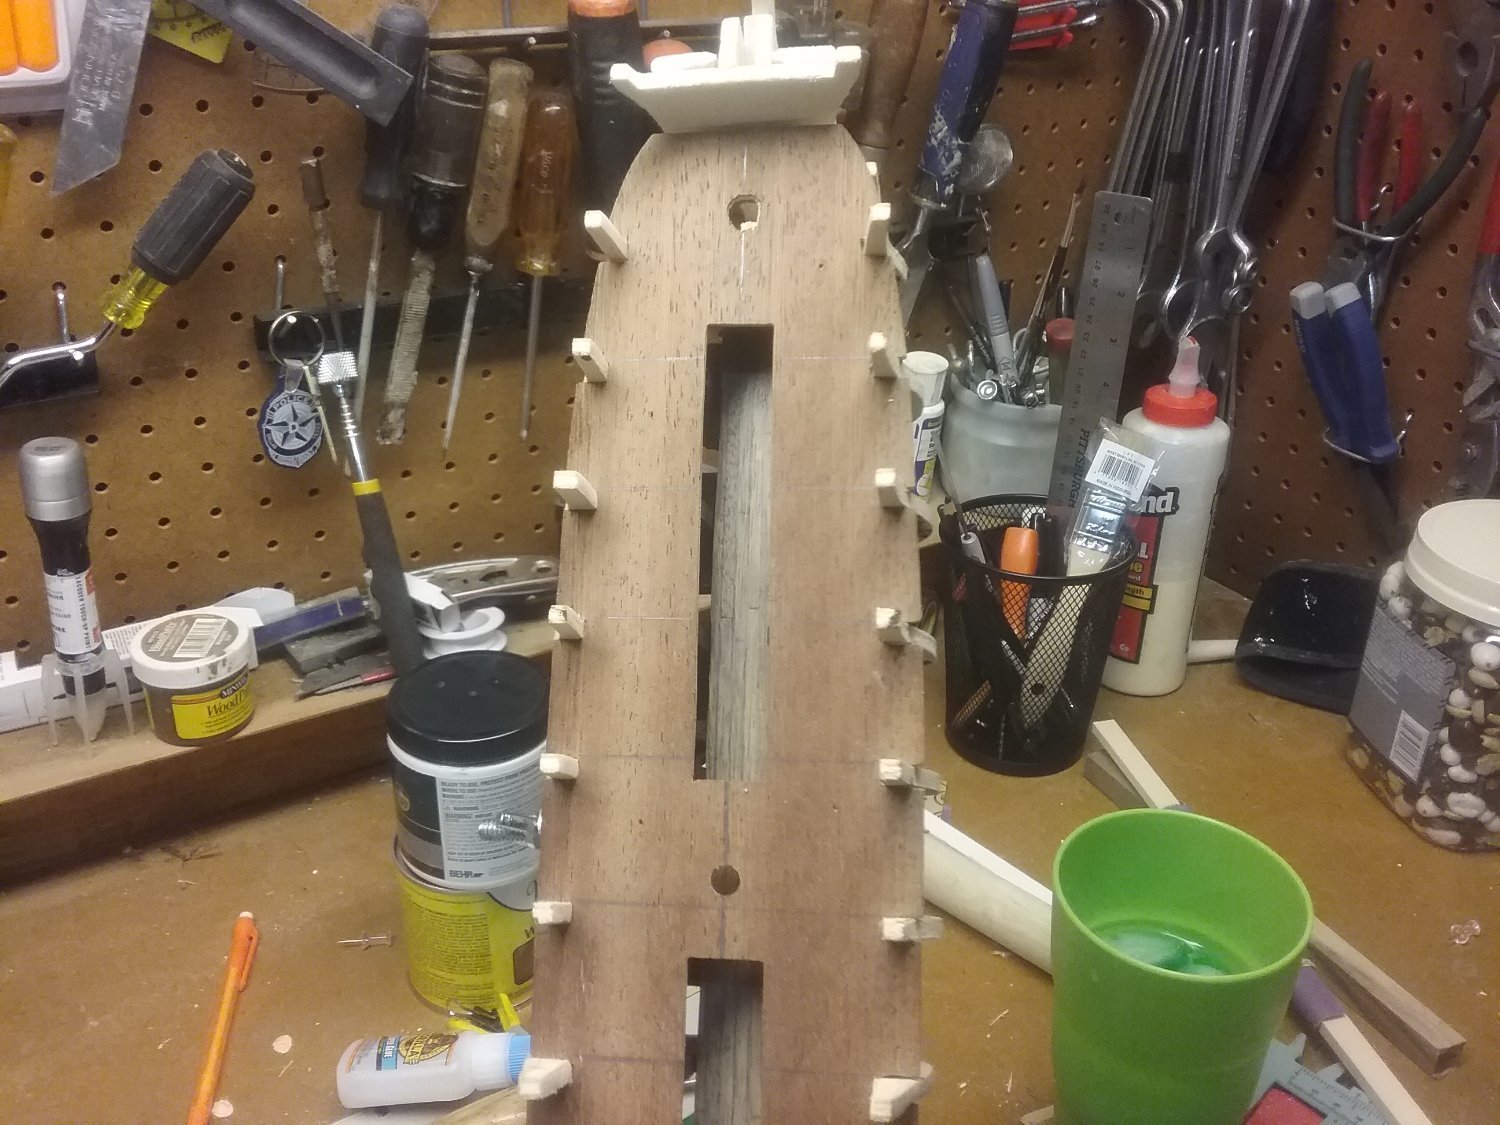
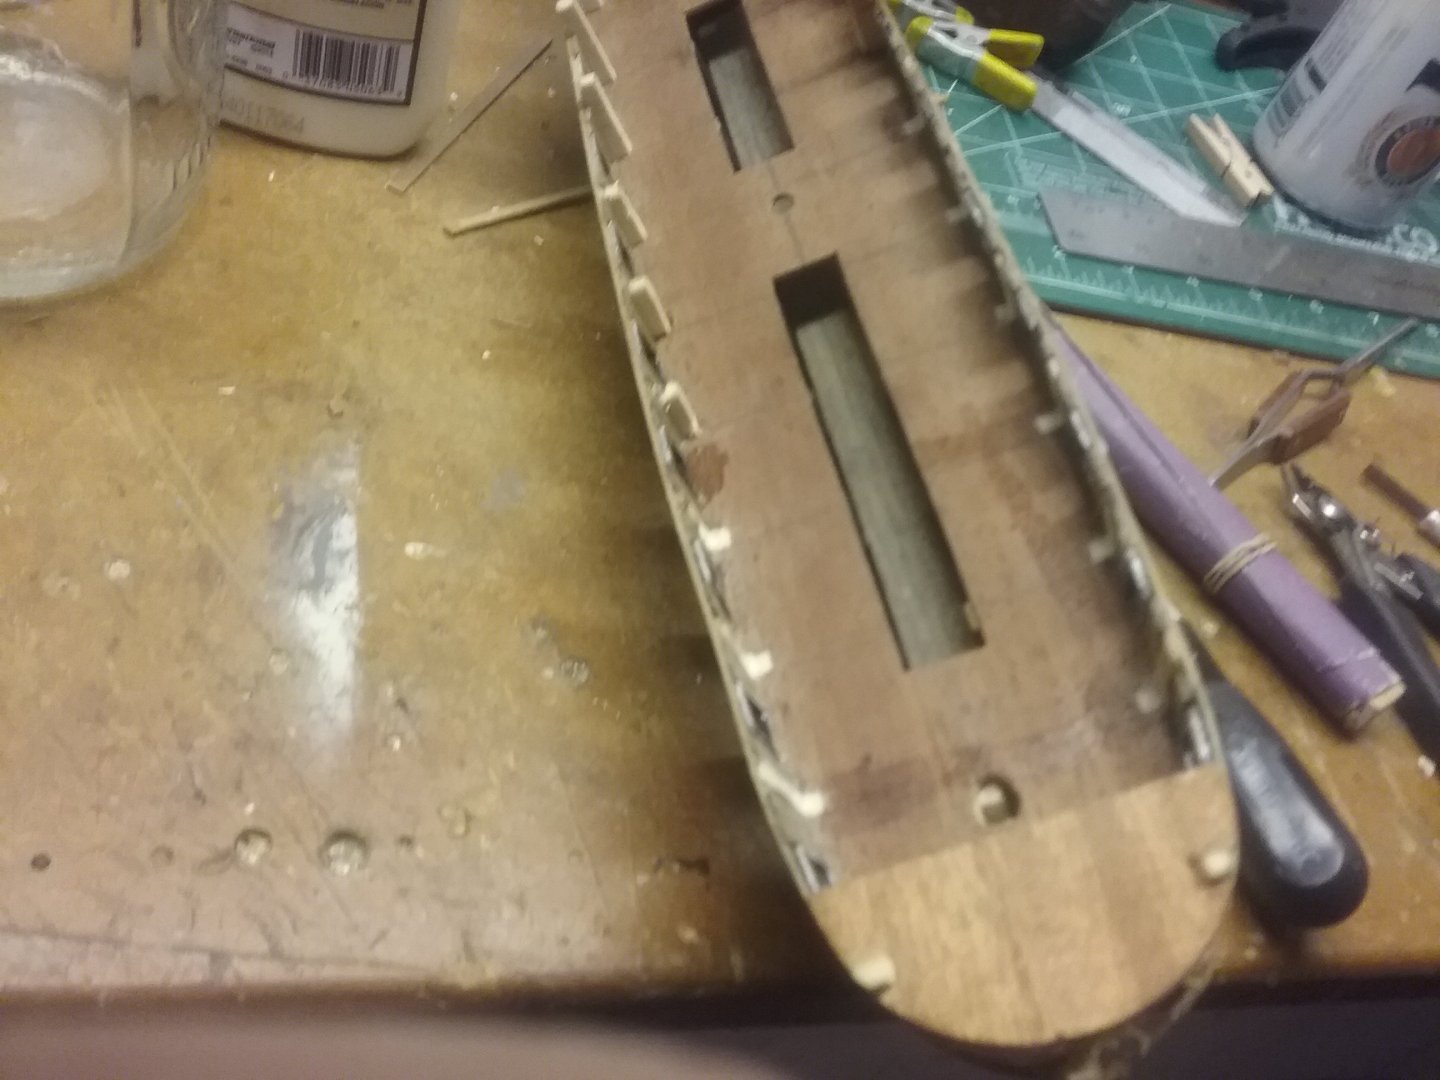
I've been working on the ports and getting ready for the first planking. One question. I notice i have a little twist in the frame. I'm sure i can straighten it or during the hull planking. Is there a trick to hold the twist straight while you plank? I'm sure I'm not the first to encounter this.

-
tennfox reacted to a post in a topic:
HMS Greyhound by tennfox - Corel - 1:100 - building as USS Protector
-
Old Collingwood reacted to a post in a topic:
HMS Greyhound by tennfox - Corel - 1:100 - building as USS Protector
-
Old Collingwood reacted to a post in a topic:
HMS Greyhound by tennfox - Corel - 1:100 - building as USS Protector
-
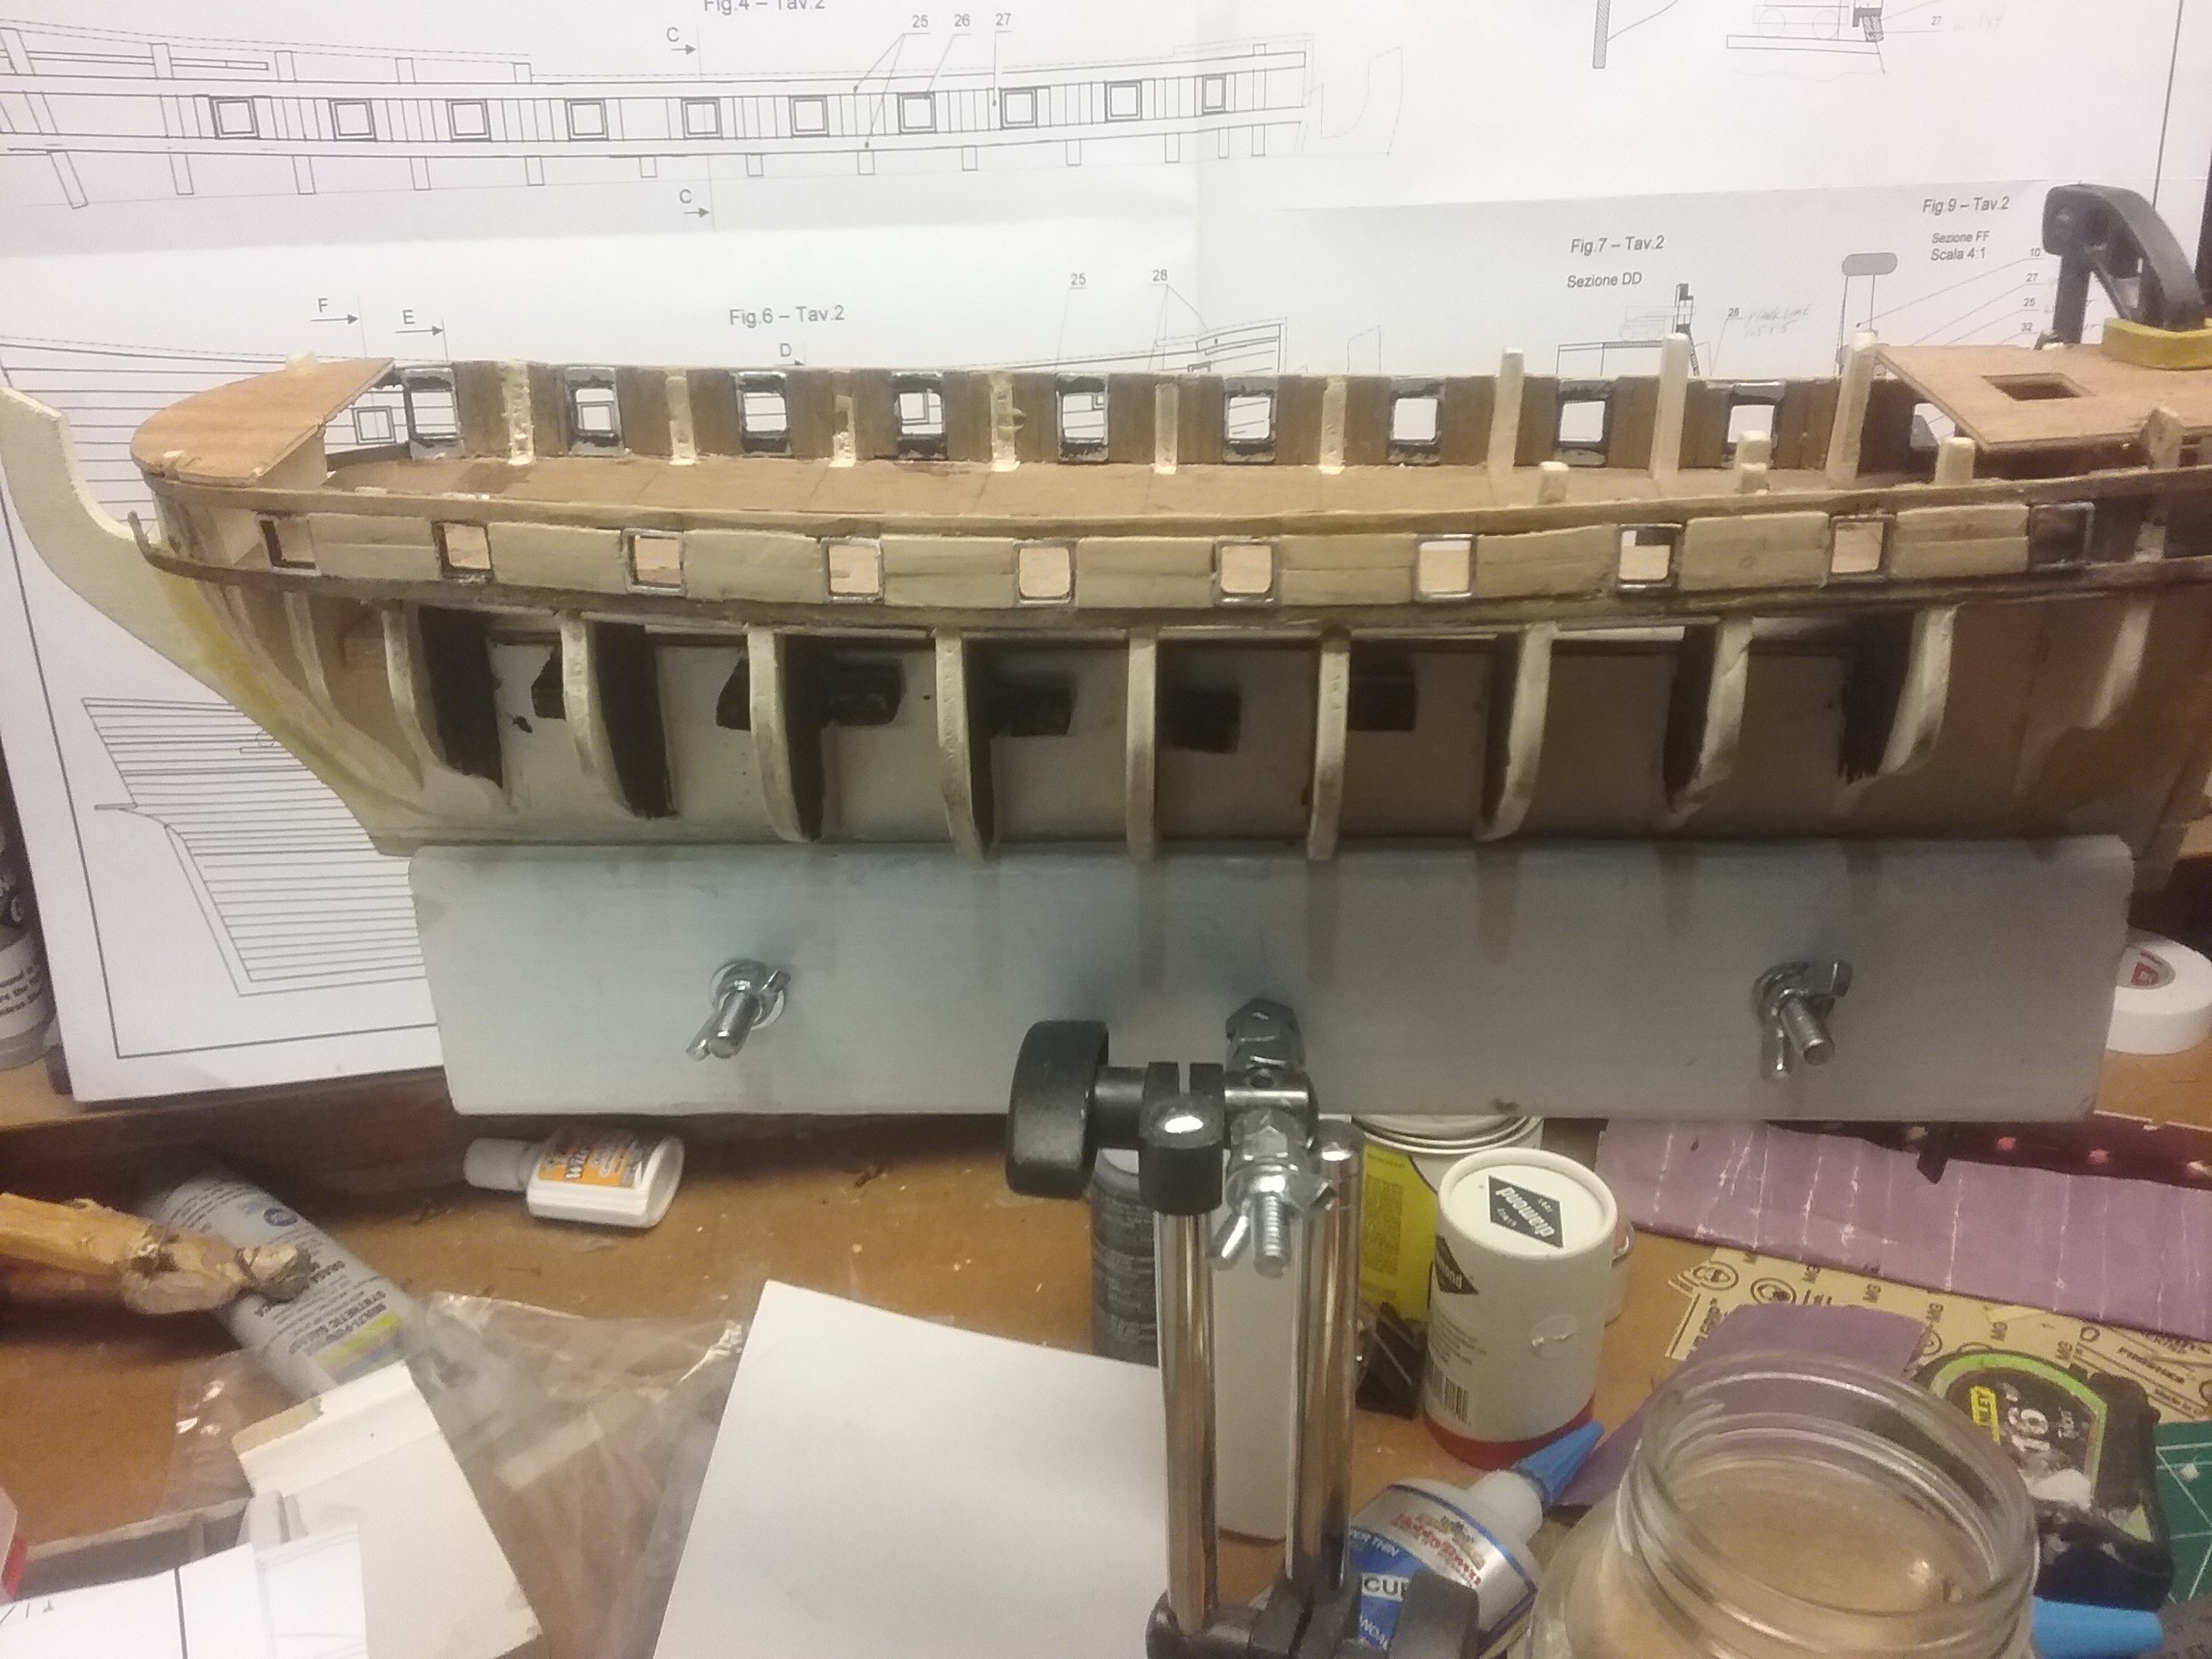
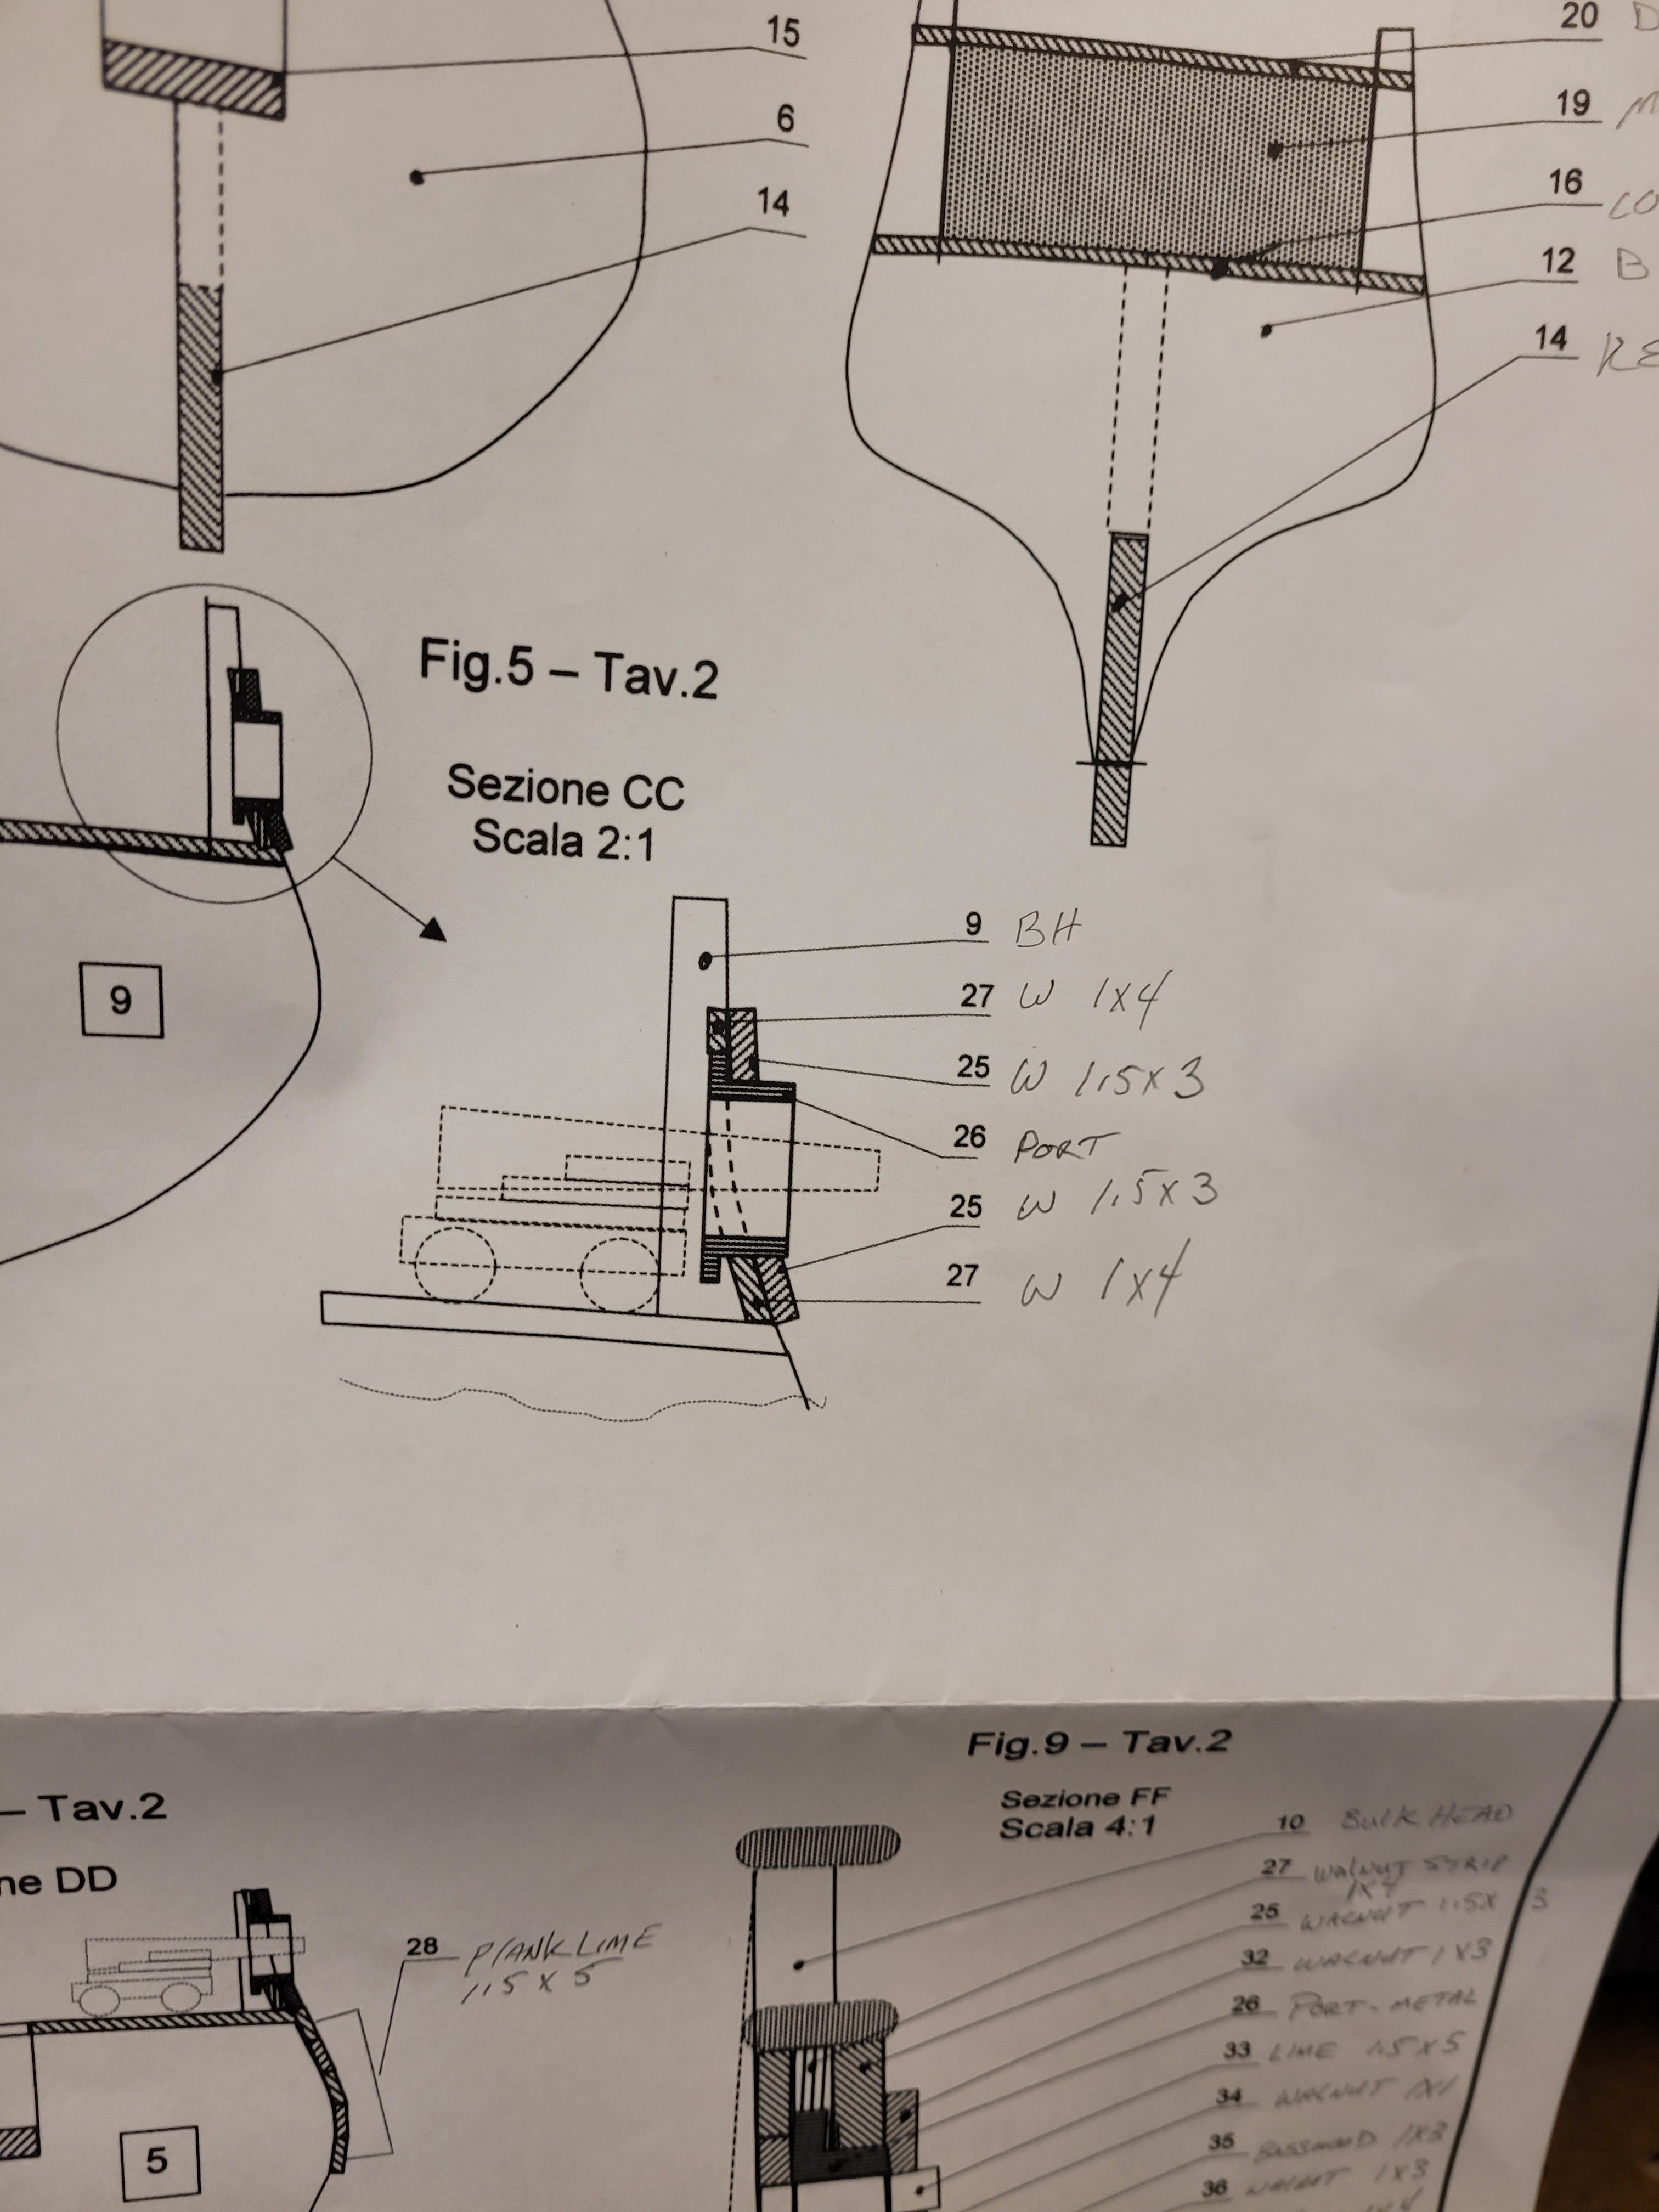
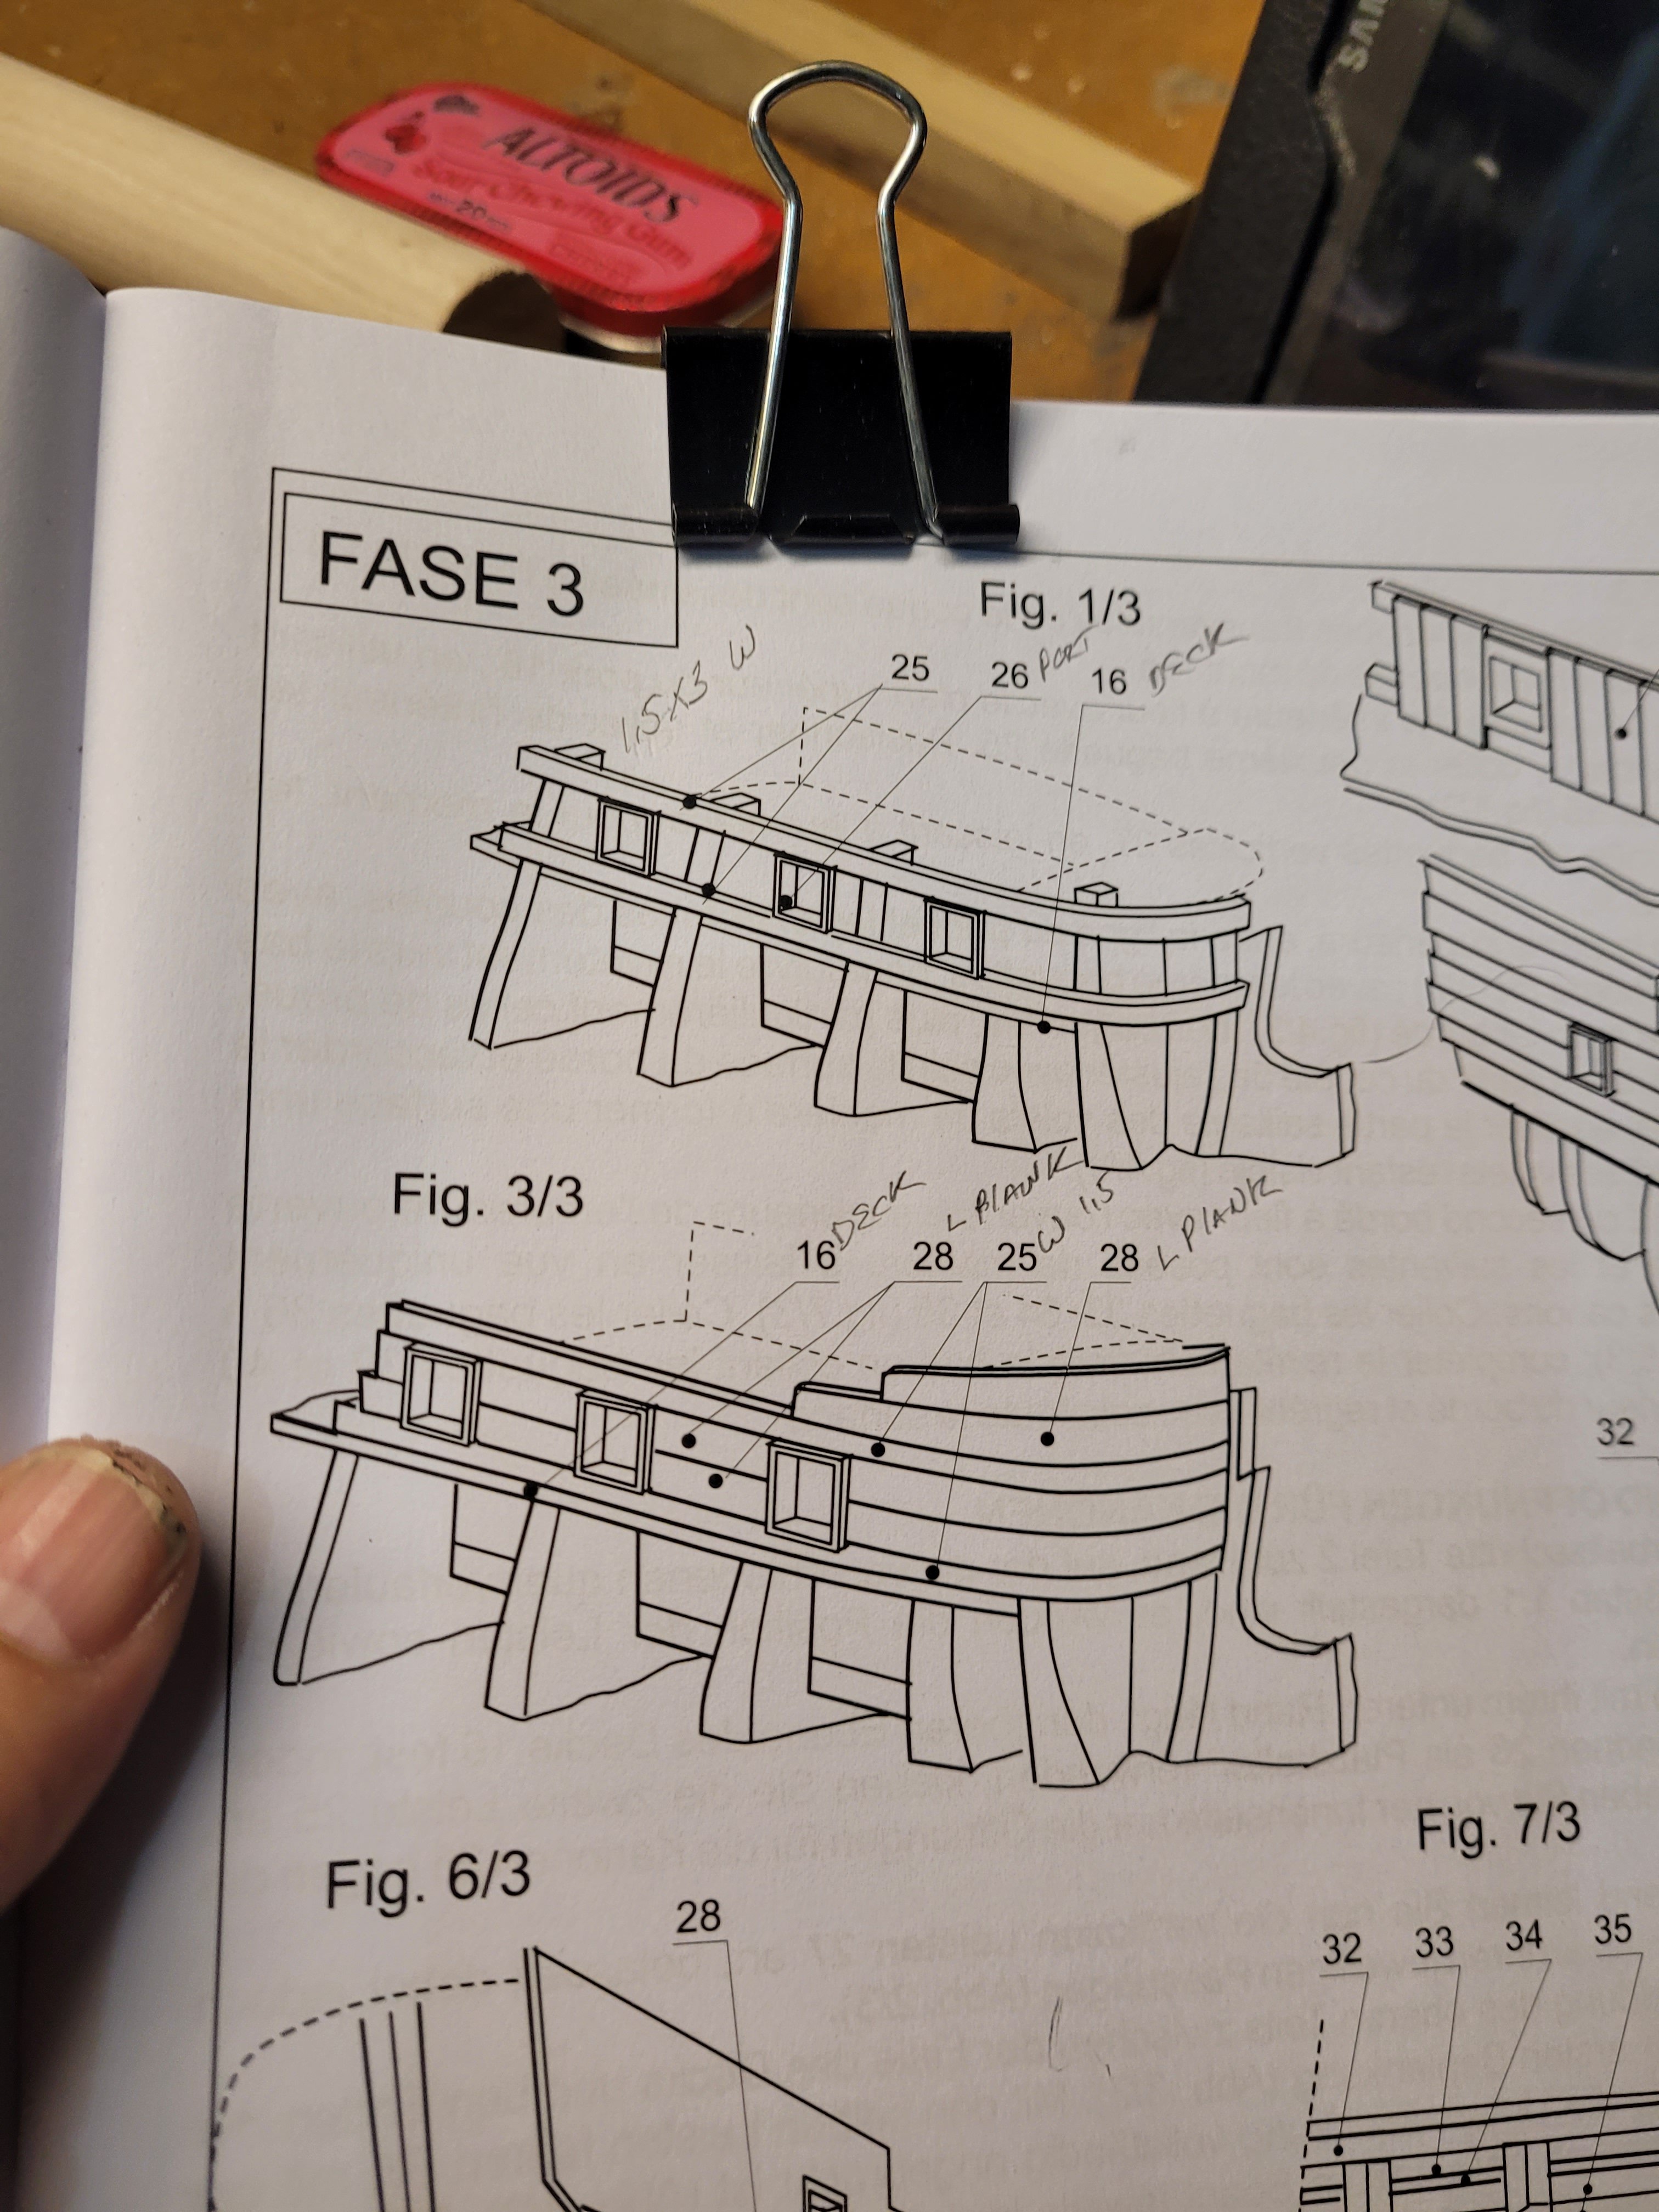
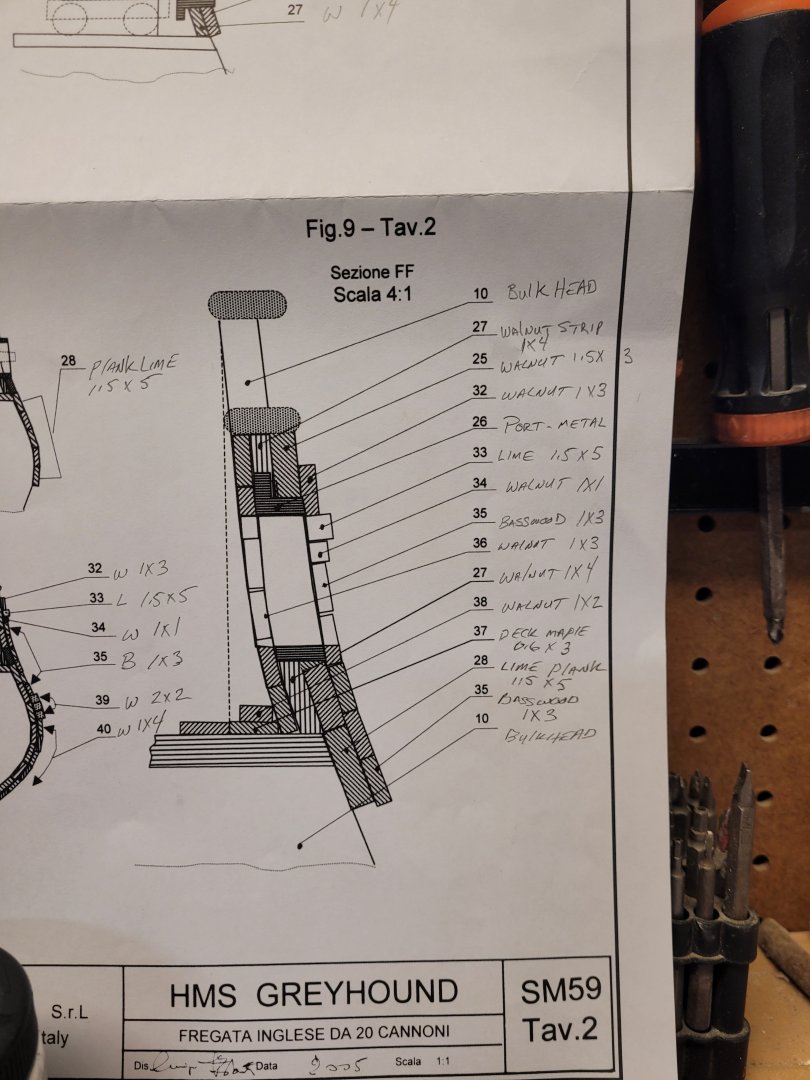
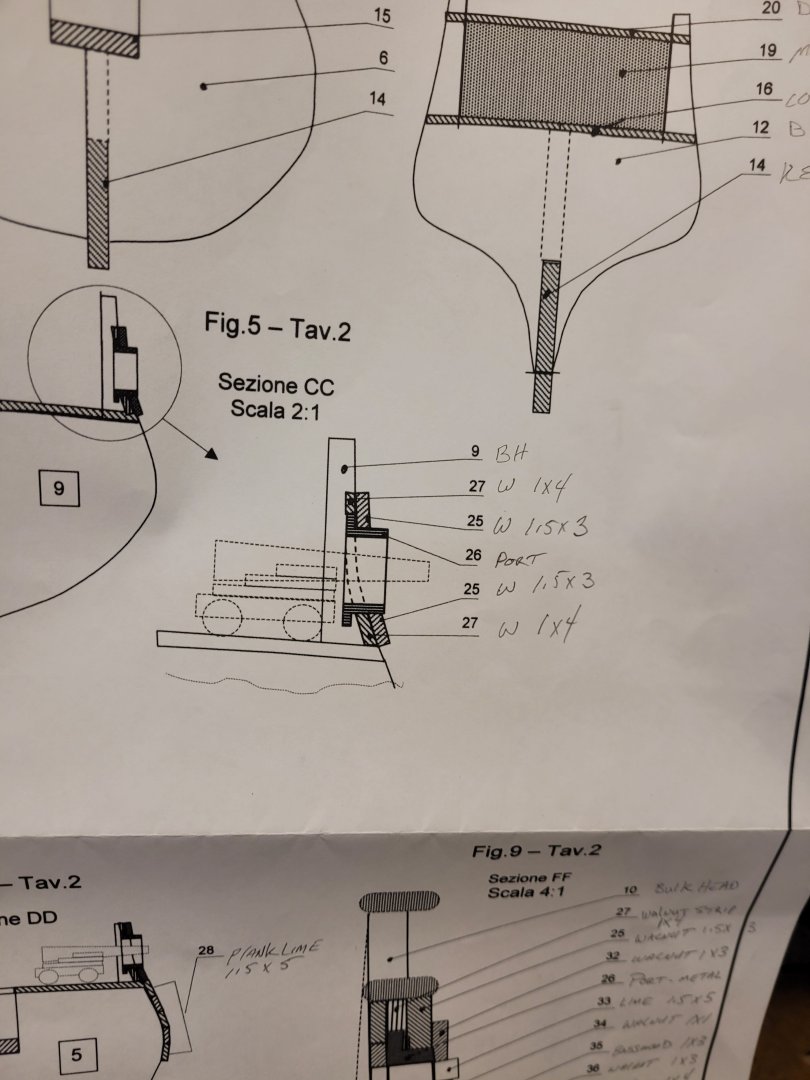
This is getting to be frustrating. @Srenner @Old Collingwood @hamilton Can you lend me a hand? Ive looked at yalls builds and it looks like Im doing the same as you. Using 1.5 x 3 for the starter strip for the ports. BUT, The instructions say 2 different things. The instructions photo1 say 1.5 x 3, but the big fold out papers (Map) show 1x4 then 1.5 x 3 on top. I transferred the item to the number to keep things clear, and its even more confusing. The instructions dont have any of the other things the "maps" have. w = walnut, b=basswood, l=lime. Can you give me a little insight on how to proceed? Ive glued the bottom 1.5 x 3 walnuts in already, but I can acetone them off if I need to use the 1x4.

-
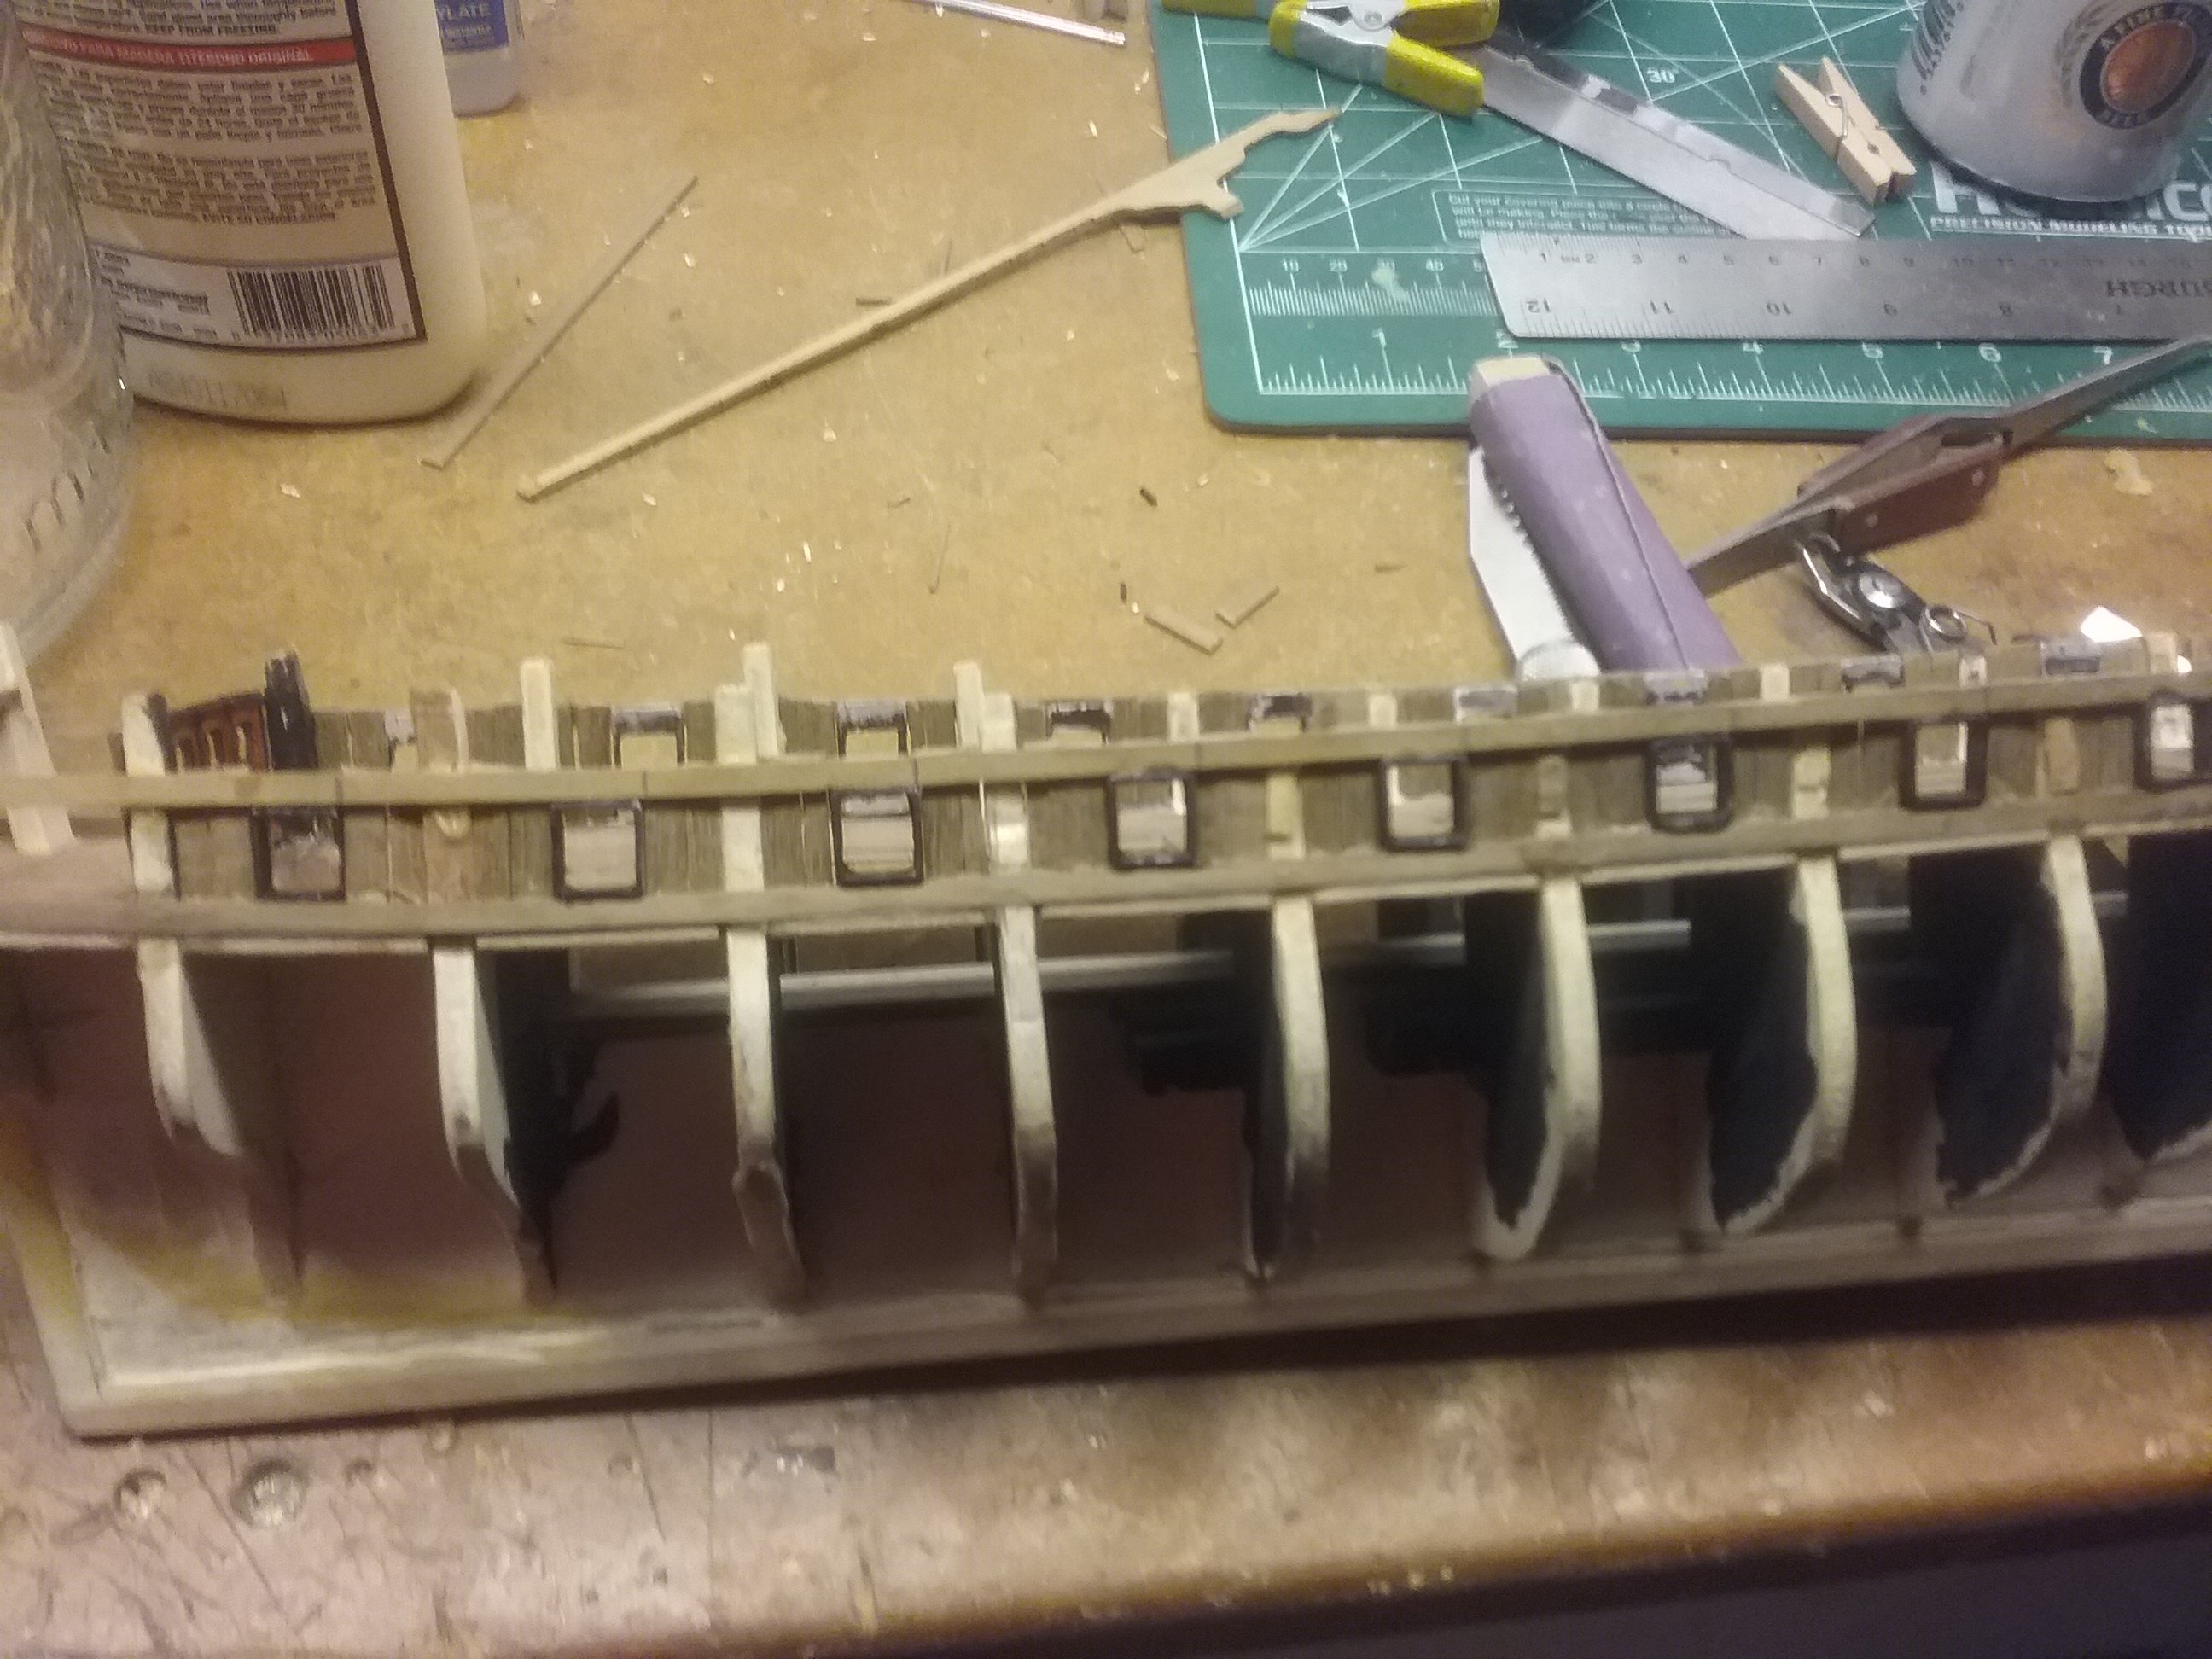
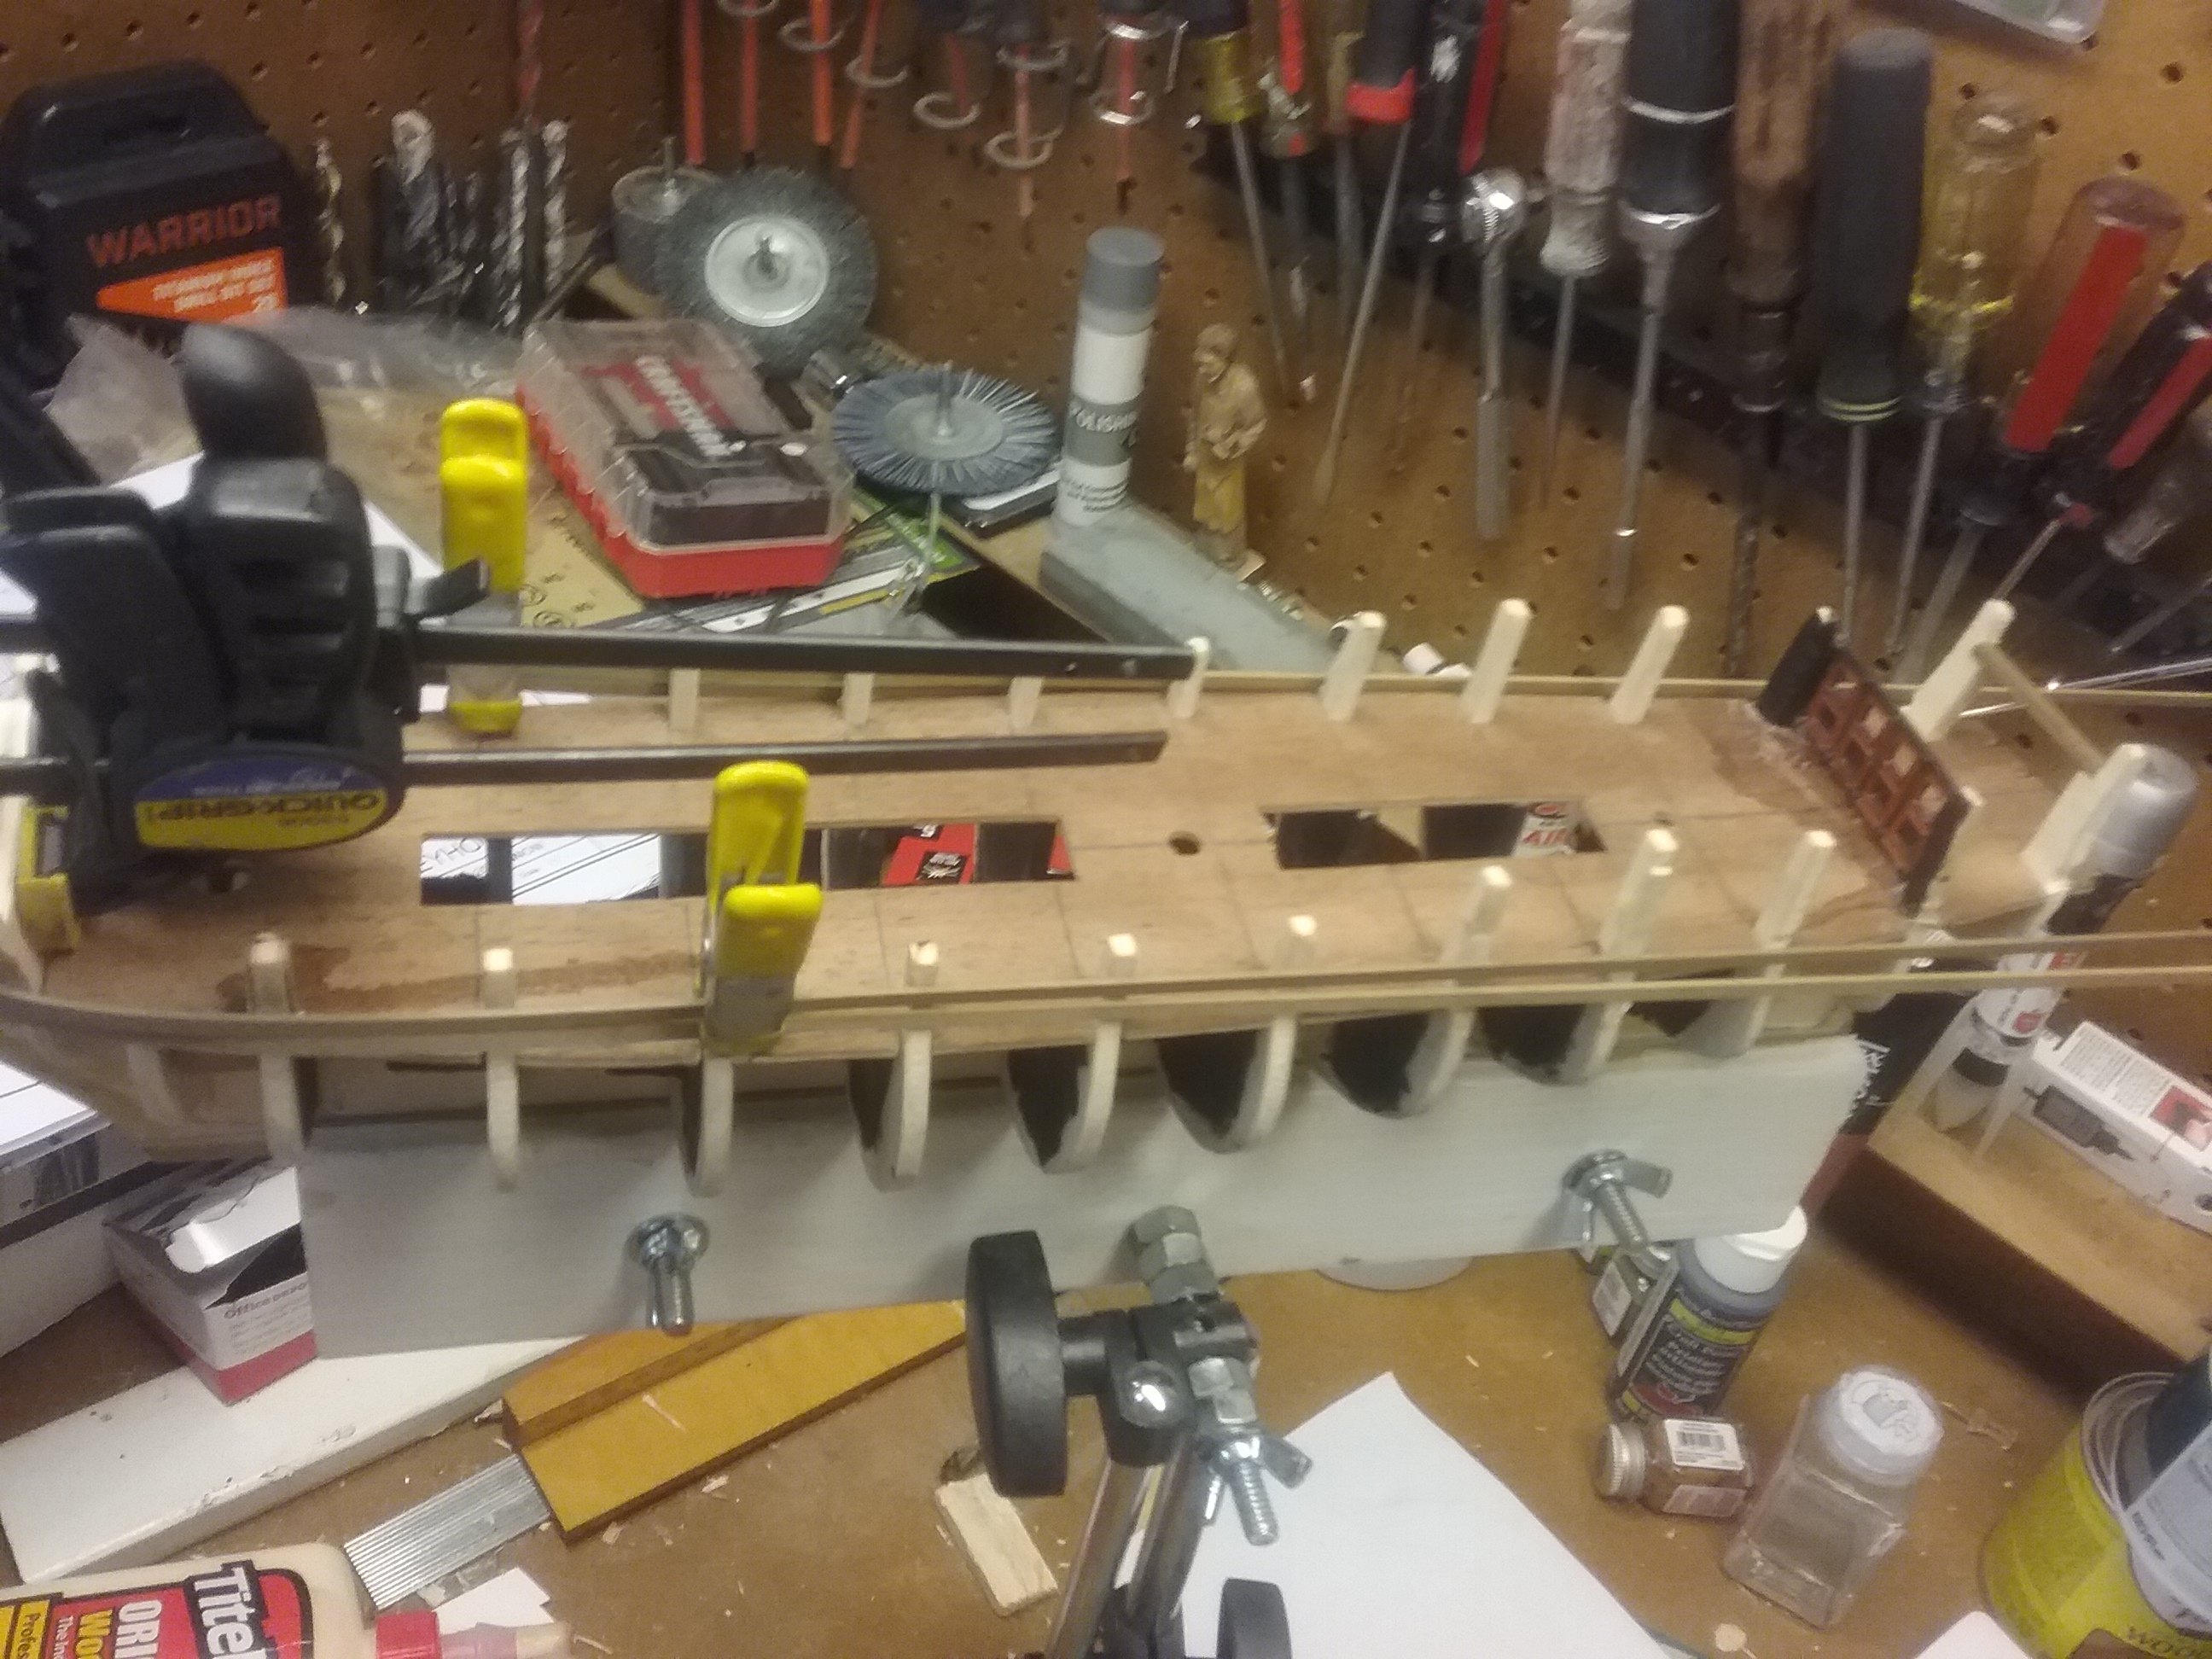
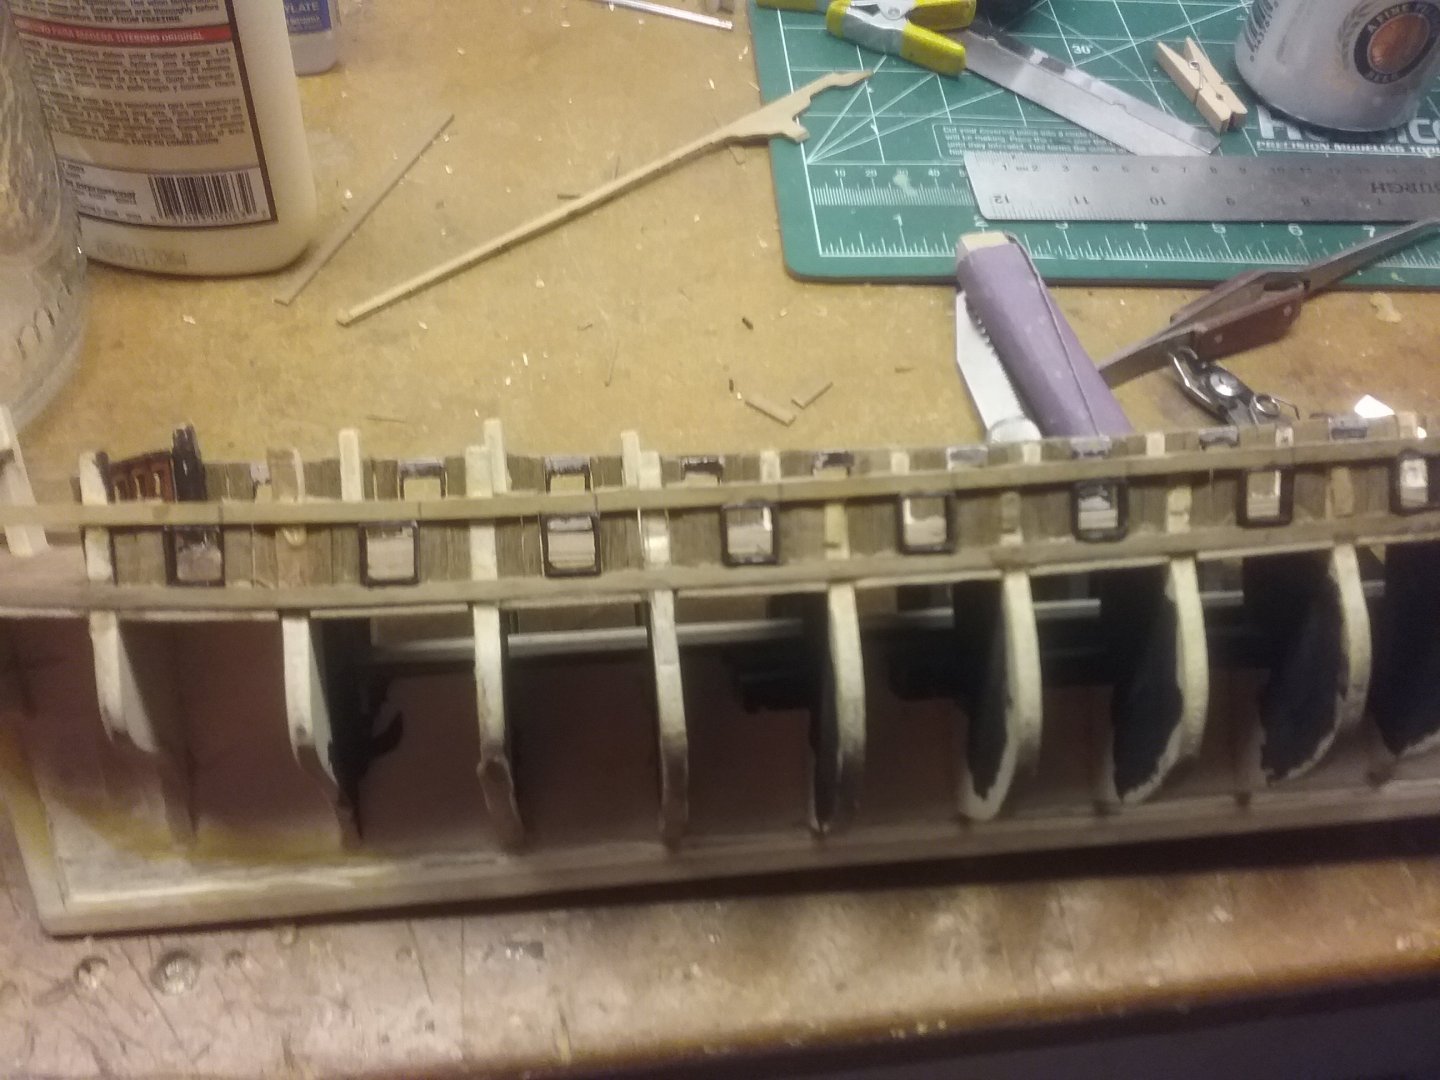
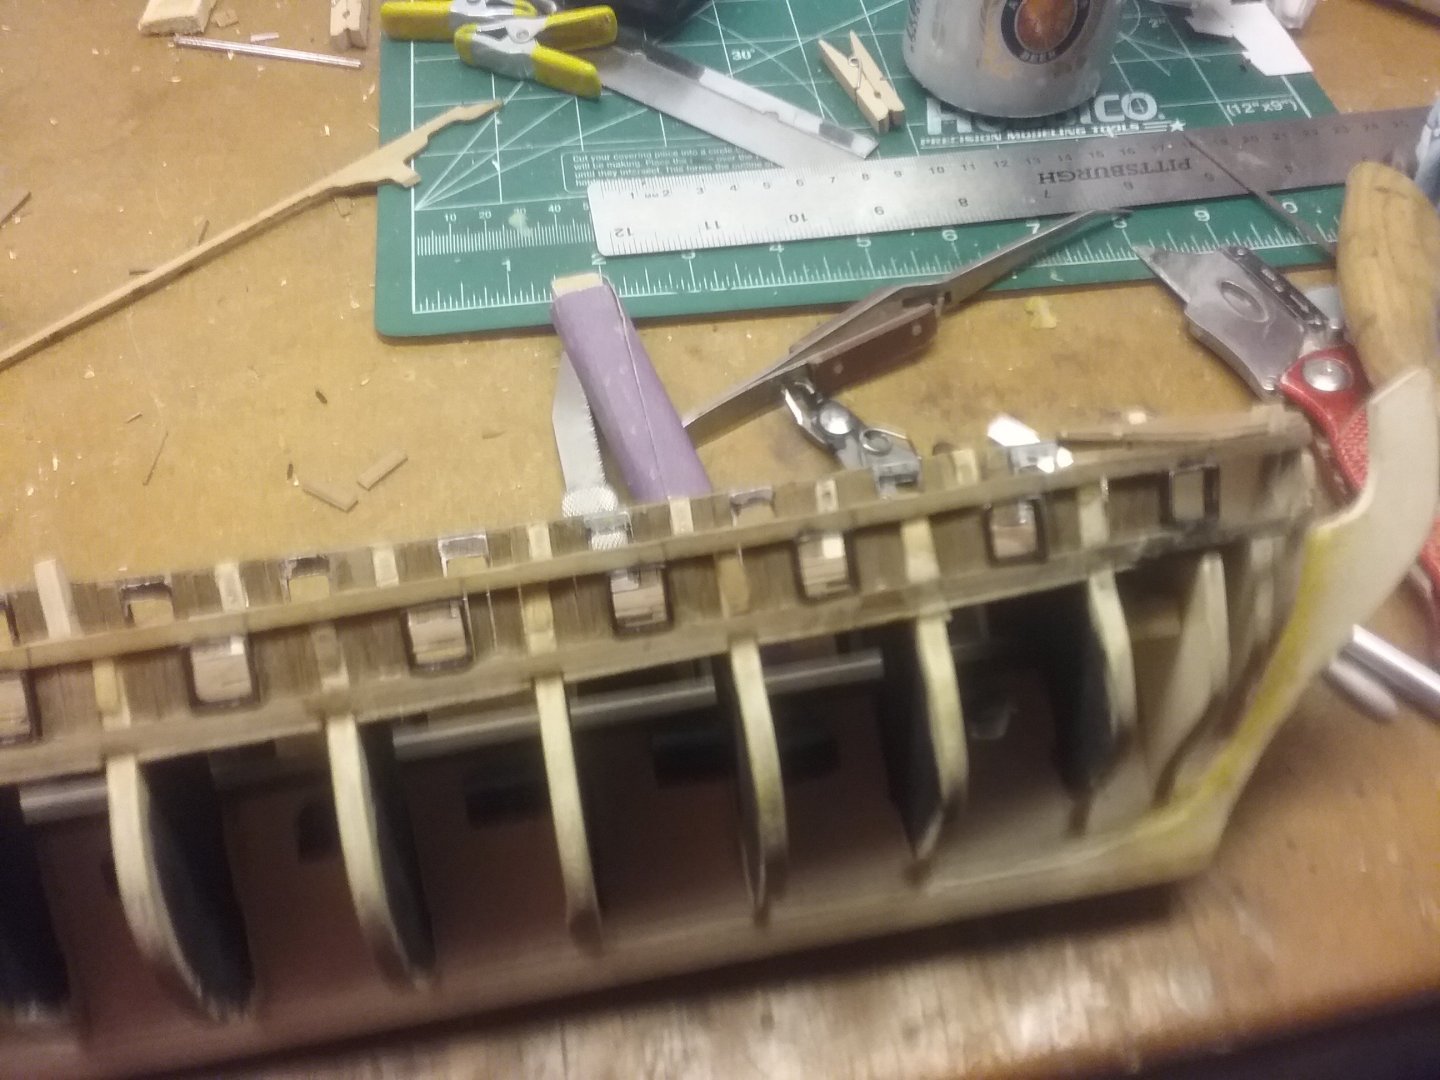
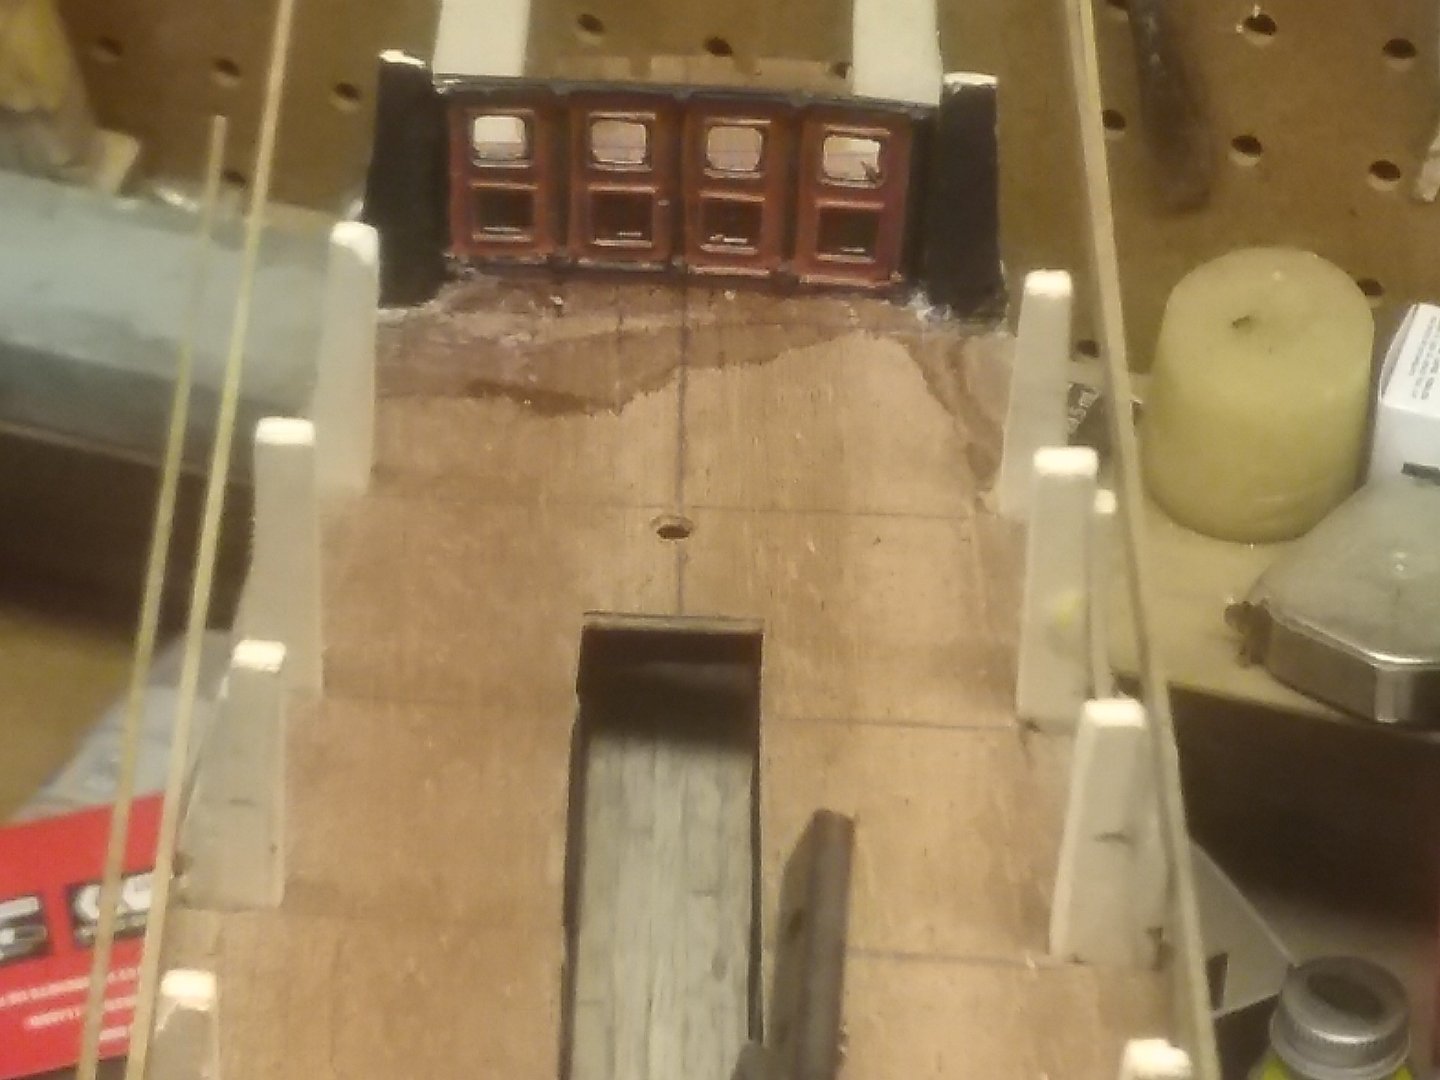
Back at it. Had to redo the rear rabbit. Now bending the walnut to frame the gun ports. Taking it slow and trying to dry fit one or two steps ahead before I glue.

-
ccoyle reacted to a post in a topic:
HMS Greyhound by tennfox - Corel - 1:100 - building as USS Protector
-
Im still working thru everything... The protector did not have a coppered hull so I have to figure out how to taper. Ive been reading up on planking and plan on using a 'fan' to mark off the hull.. but I am very open to any help anyone can give to save me any frustration with this.
-
Old Collingwood reacted to a post in a topic:
HMS Greyhound by tennfox - Corel - 1:100 - building as USS Protector
-
honestly this ship is so.......(not for virgin ears)... that I think any way you get it done is the right way......
-
tennfox reacted to a post in a topic:
HMS Greyhound by tennfox - Corel - 1:100 - building as USS Protector
-
gotcha... as I was thinking on it I think I may build the smaller ones and sand the deck back on the others that are almost right. Little bit of both. BH2 is really slim and needs to be built up, but 4-5 may need a bit of sanding and filling... Im just going to lay the planks and fill or sand to them. I still have to cut a rabbit and fair the hulls..... just trying to get my game plan down. Thanks again!!!
-
I test fitted the 1 x 3 strip and noticed bh 2 3 4 5 6 were recessed already while the rest were even with the deck. Im thinking I've either got to shim those or trim the deck back to be even . Working thru it in my head ... If I shim, I'll have to shim a large portion of each bh. That will definitely screw up the lines and flow of the hull. I'm still trying to see if trimming will do worse...glad I'm not in a hurry

-
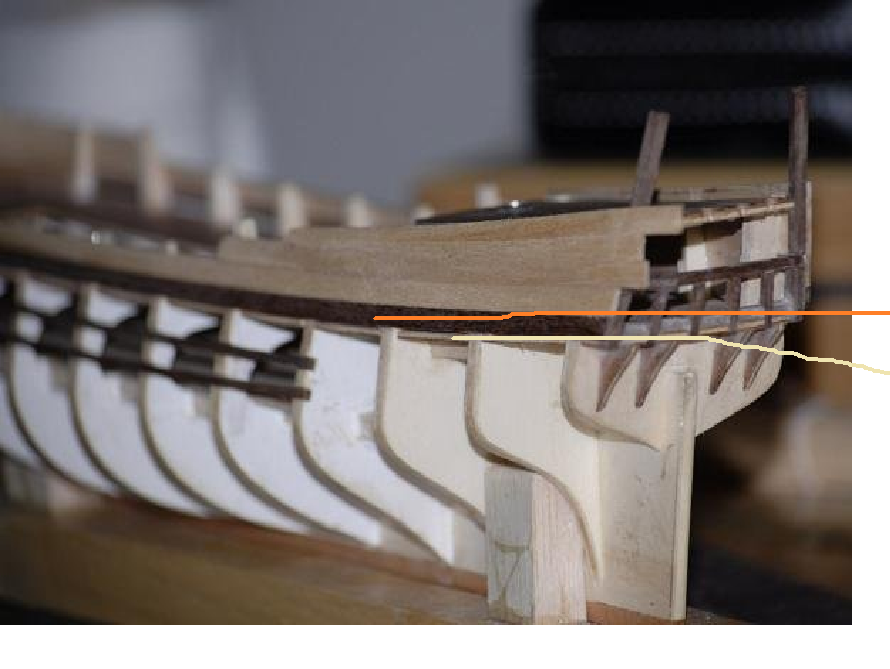
Heres a better explaination of what im looking at This is OC model and the right one is Srenners. It looks like Srenner cut into the BH and set the first walnut strip into the BH on top of the deck. The top walnut looks the same. I see that OC did not cut in and planked over the top. Im trying to figure out which way worked better down the line. if all the planking's will smooth out at the end or did they need a little tweeking? I know OC didnt make the greyhound standard, but the planking is the same. Im trying to avoid any pitfalls you all encountered. Thanks
-
tennfox reacted to a post in a topic:
HMS Greyhound by tennfox - Corel - 1:100 - building as USS Protector
-
Im starting see what you mean... It looks like your bottom picture.. The walnut strip (1st one) is recessed into the BH and laying on top of the deck so the walnut is flush with the deck and BH. Did you have to soak that strip to get the bend for the bow so you could mark it or was clamping it sufficient?? by cutting into the bh, doesnt that mess up the transition from the double planking of the hull since those planks are not recessed? As always you are tremendous help...Thank you
-
tennfox reacted to a post in a topic:
HMS Greyhound by tennfox - Corel - 1:100 - building as USS Protector
-
ok.. gonna have to process that a while..trying to figure out how that looks.... if i see it i can do it. is that first piece of walnut supposed to be even or inline (looking from above) with the edge of the deck? is that why the instructions show it cut out?
-
ive glued the deck down and ive been looking at everyone's build logs for my next steps. Should the outside of the bulkheads be even with the deck? and the first strip of wood for framing the ports goes on top or even with the deck? i believe i have to notch the bh and the strip will become even with the bh? is that correct? heres Hamilton's start the bh looks even with the deck.