mojofilter
-
Posts
160 -
Joined
-
Last visited
Content Type
Profiles
Forums
Gallery
Events
Everything posted by mojofilter
-
 Hi Hamilton - It looks like you had very good lock with your bulwark planking idea. I just glued the first course to the upper frames, followed by the second course. Then I cut them off level with the sub-deck. The severed frame tops then just kinda popped off the inner bulwark. I cleaned it up with sandpaper. The little 2mm batons (?) laid vertically against the inner bulwarks at 10mm intervals covered a multitude of sins. I like the look of the 3 butt shift in the deck planking. I never thought about it and just followed the Mamoli plans for the decking. My log shows some pictures of the modern replica America. It's a beautiful deck but I doubt they even tried to be true to the original. The kit has 4mm planking which translates to 264mm (about 10.4" @ 1:66 scale) wide. I think I read somewhere that the original deck had 5" wide planking. I'm considering 2mm for the Cutty Sark (assuming I ever get there). That will translate to a little over 6" @ 1:78 of the Mantua kit. The trouble with these scales is that you can "realistic" yourself right into invisibility. Anyway, keep up the beautiful work. -Tim
 -
Hi Hamilton - The "treenails" are my 0.5mm technical pencil, HB lead + lots of black coffee... Do you (or anybody else) know what these are? Thanks for the kind words, - Tim
-
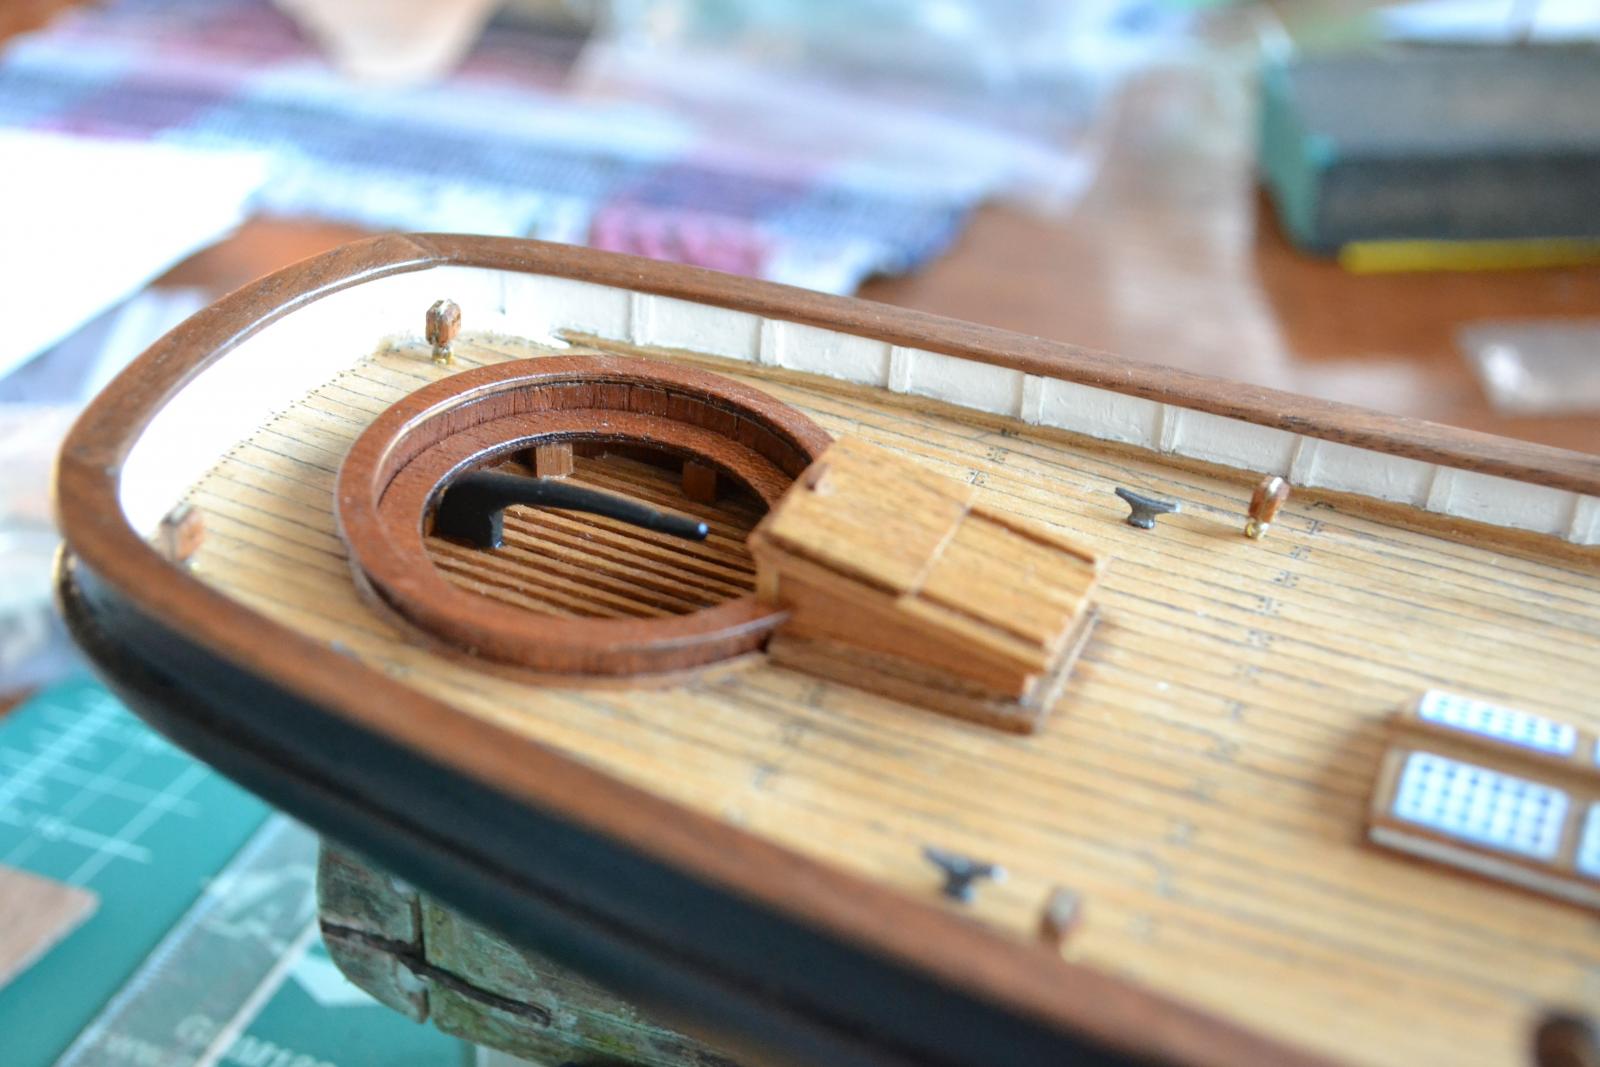
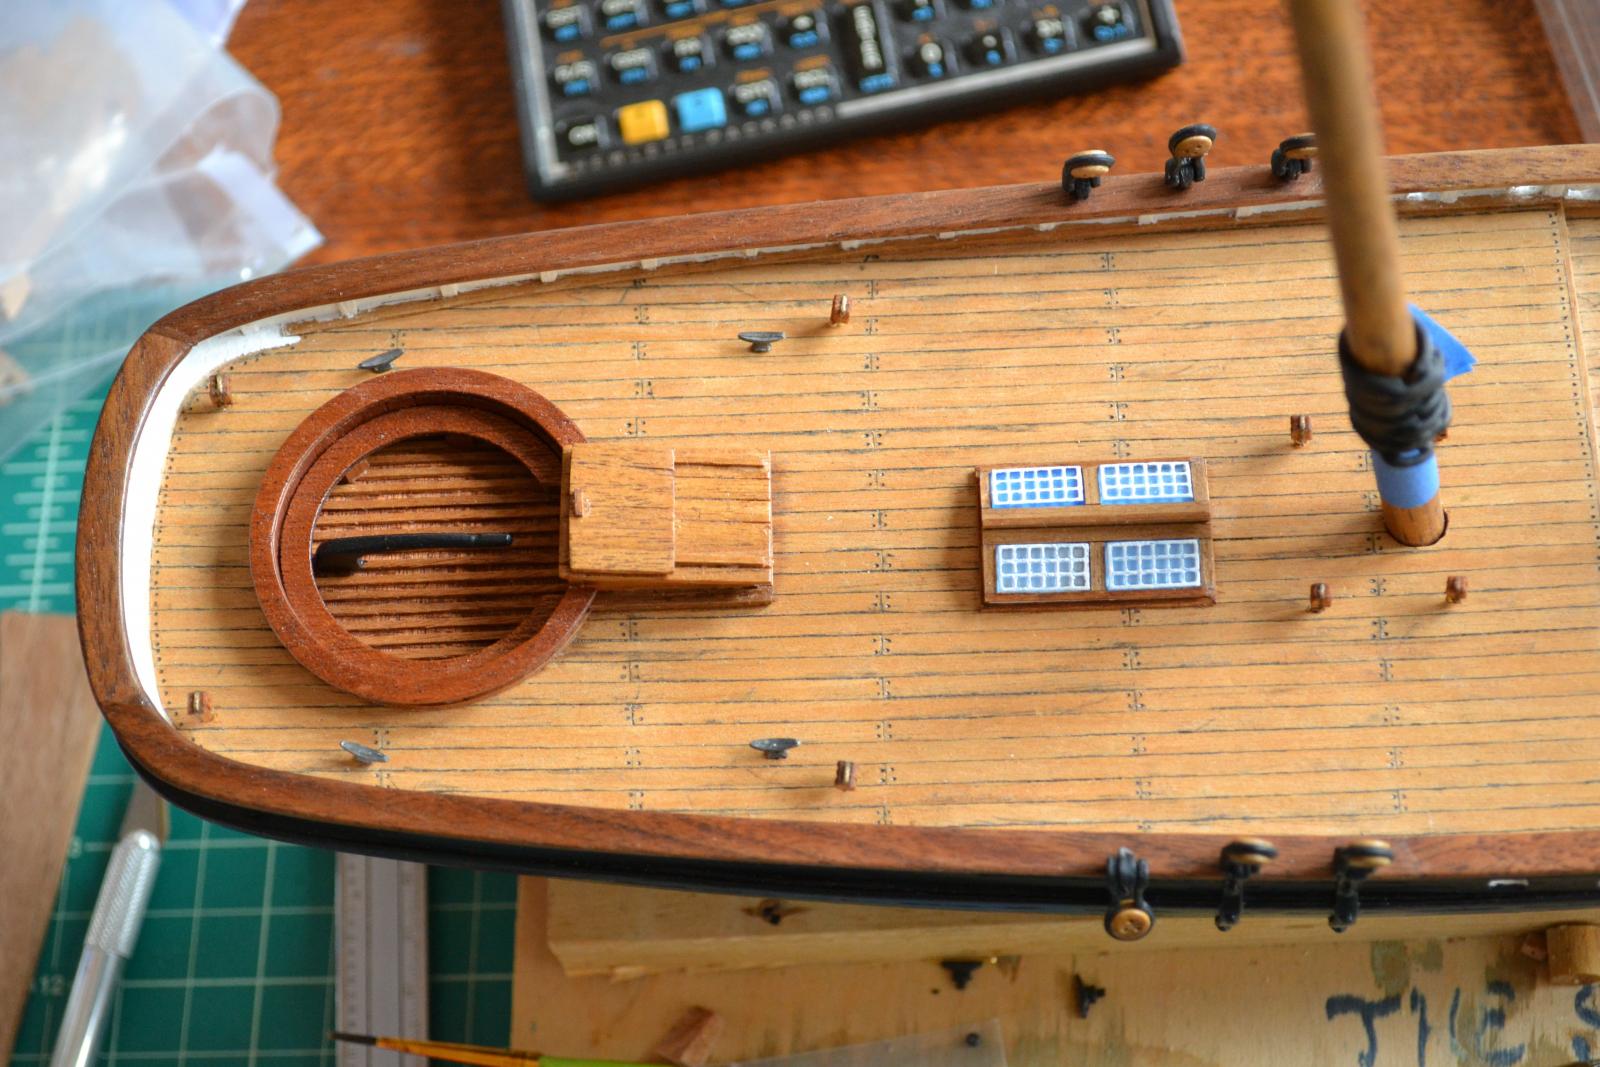
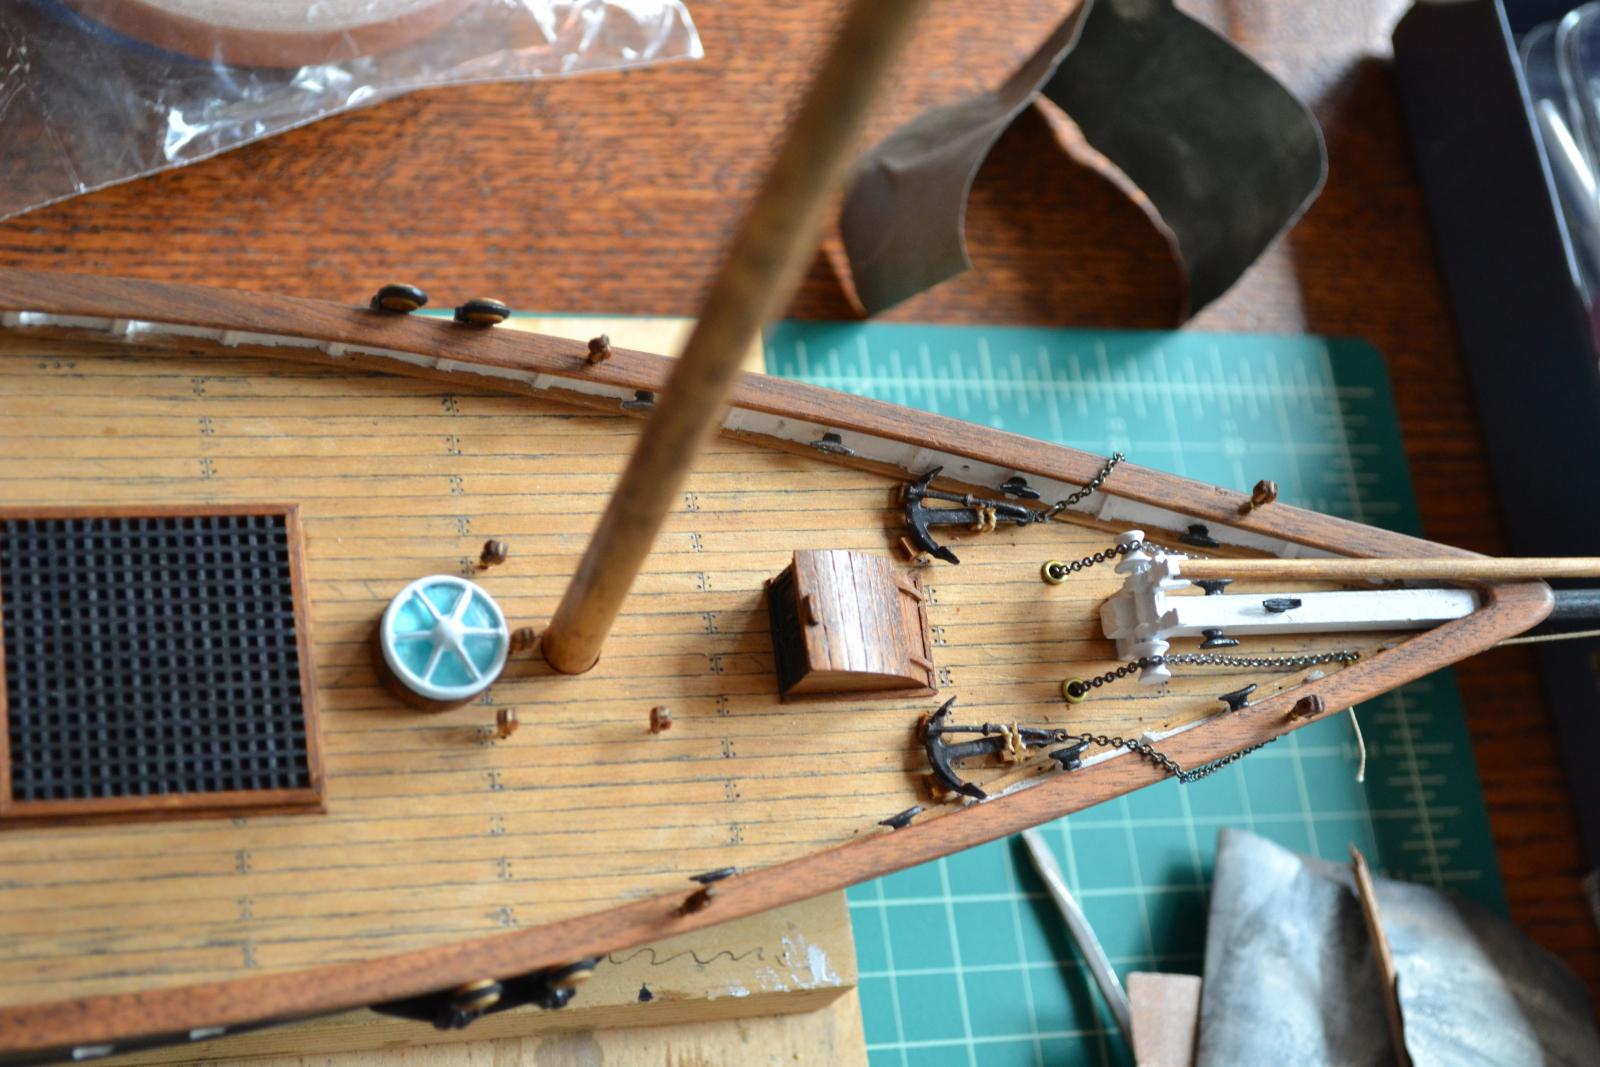
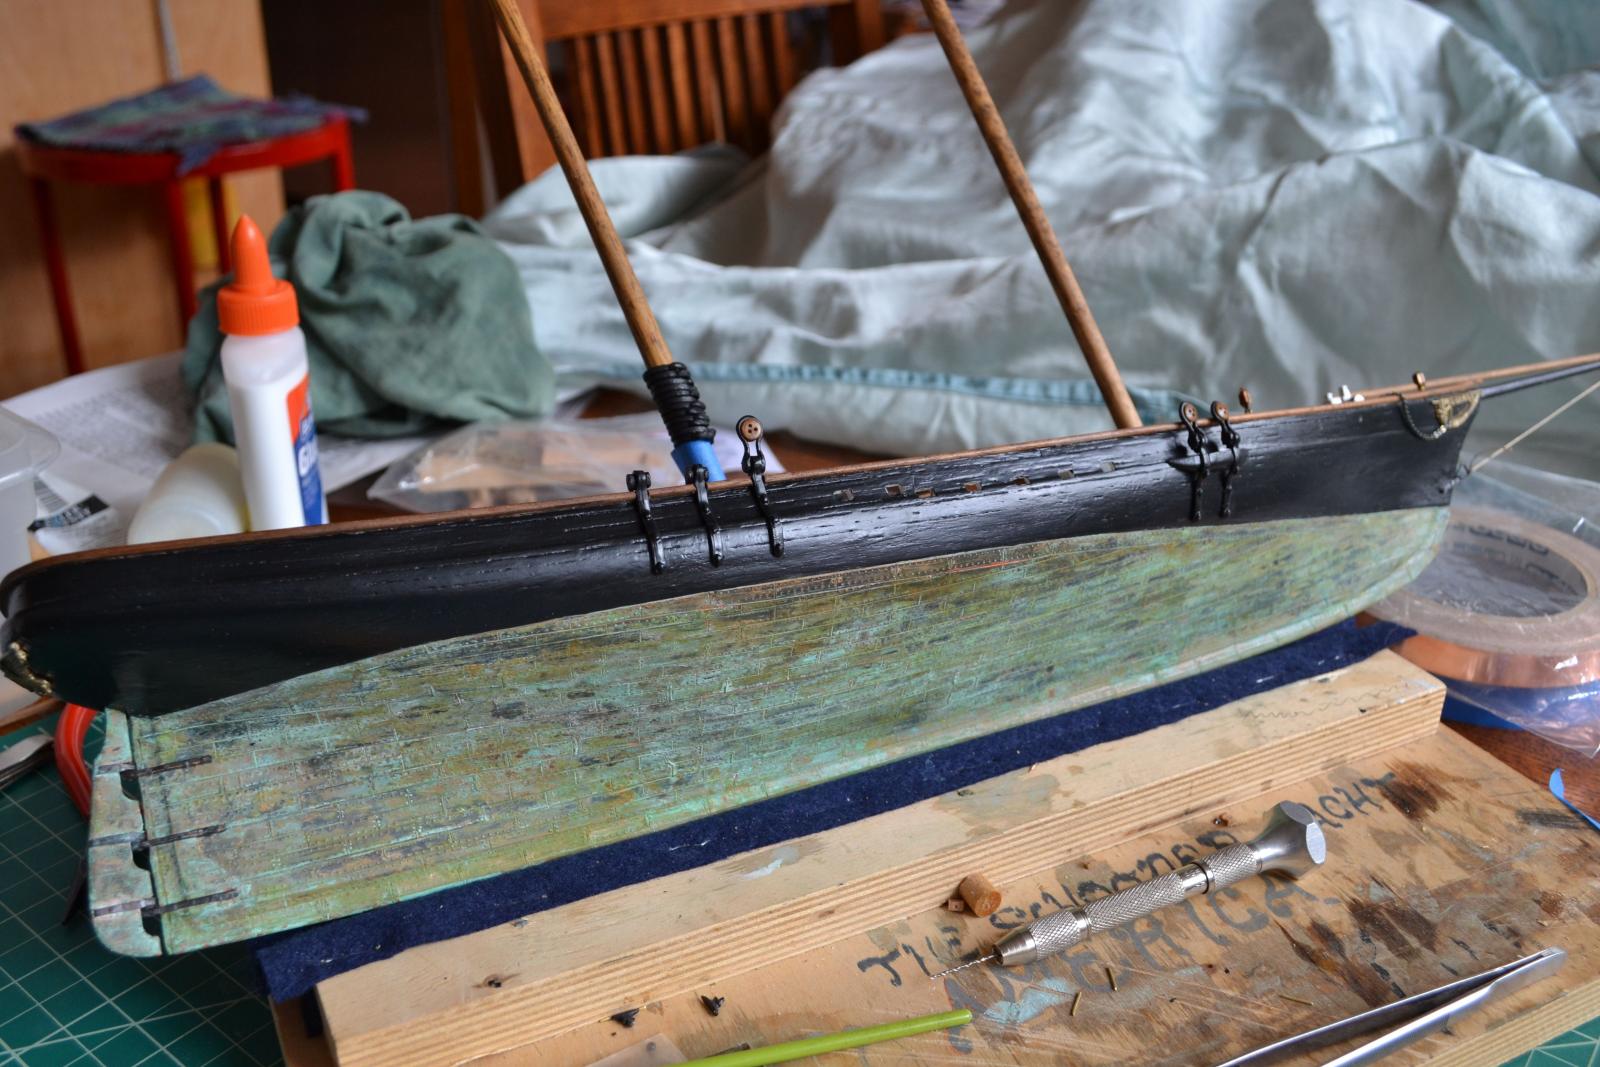
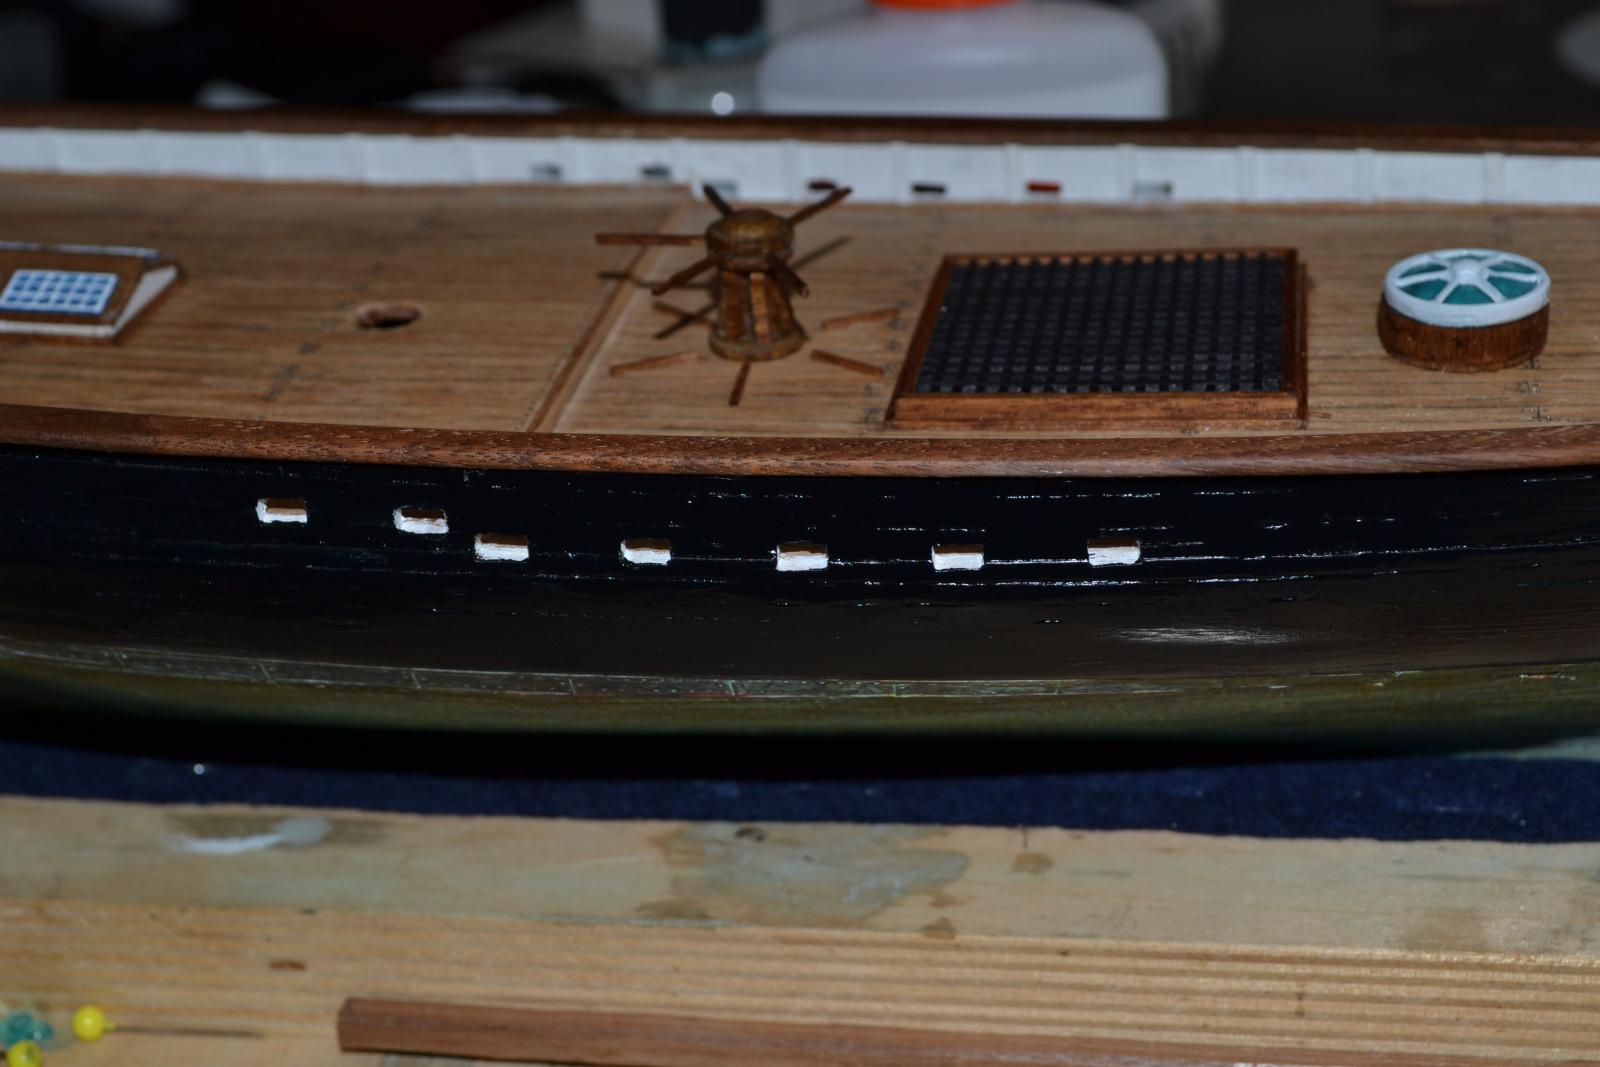
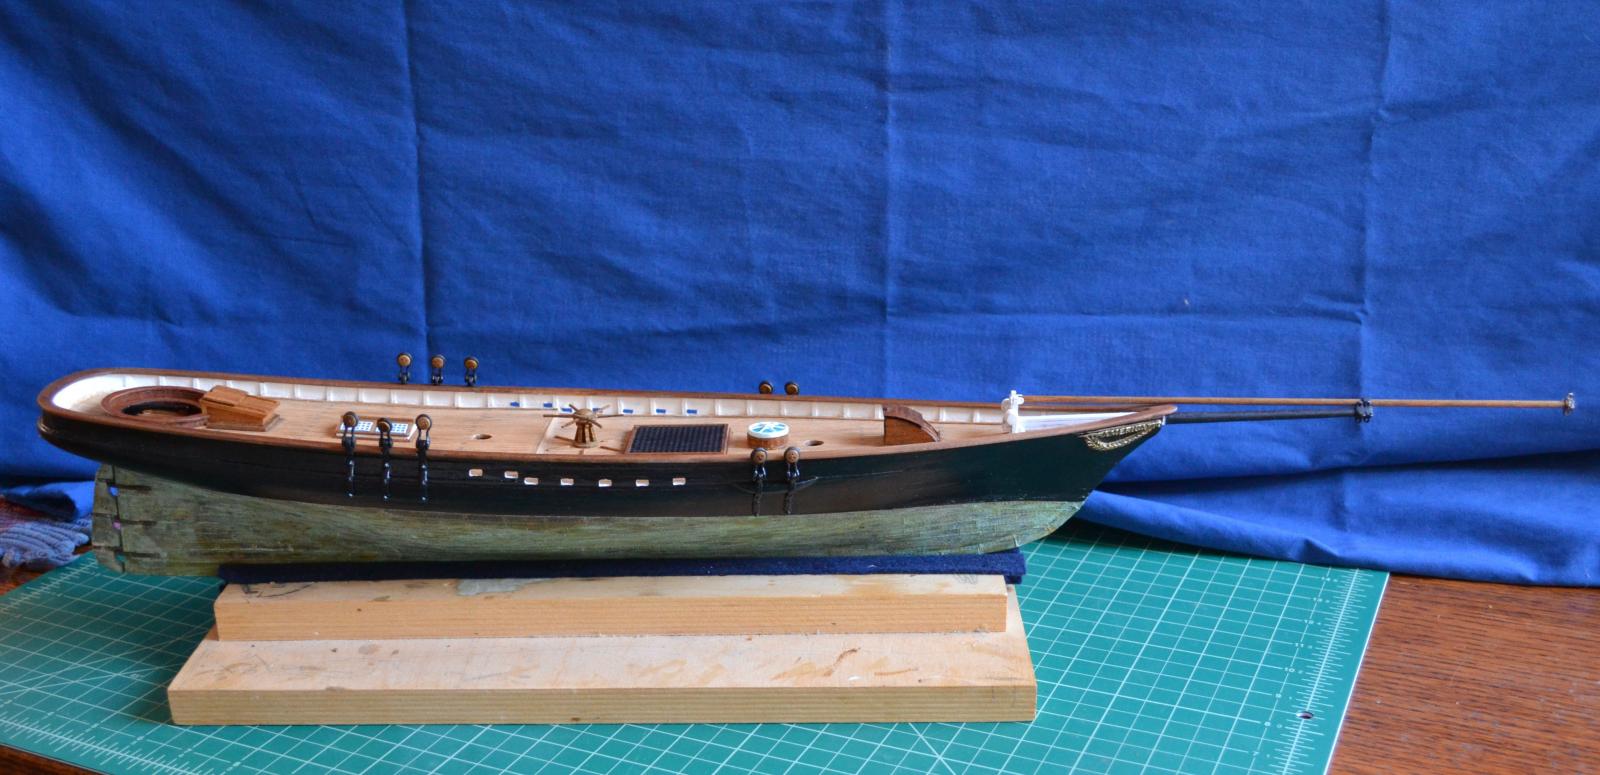
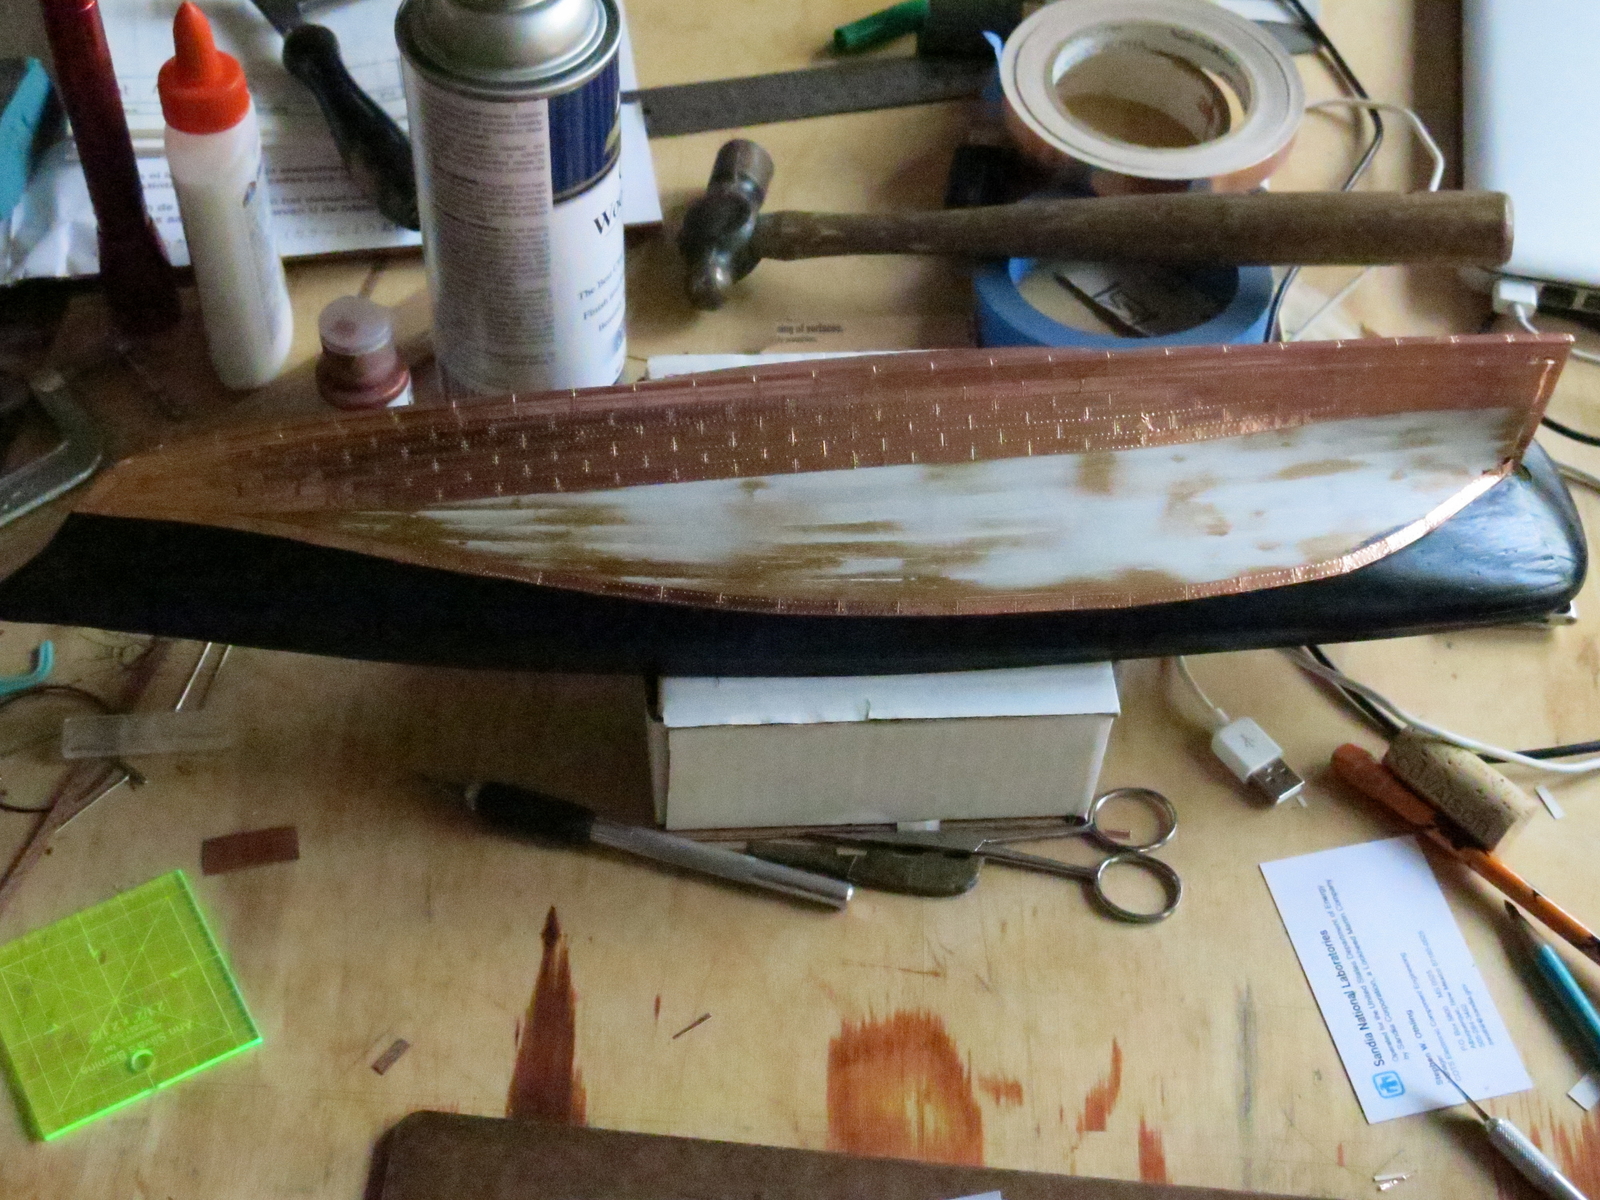
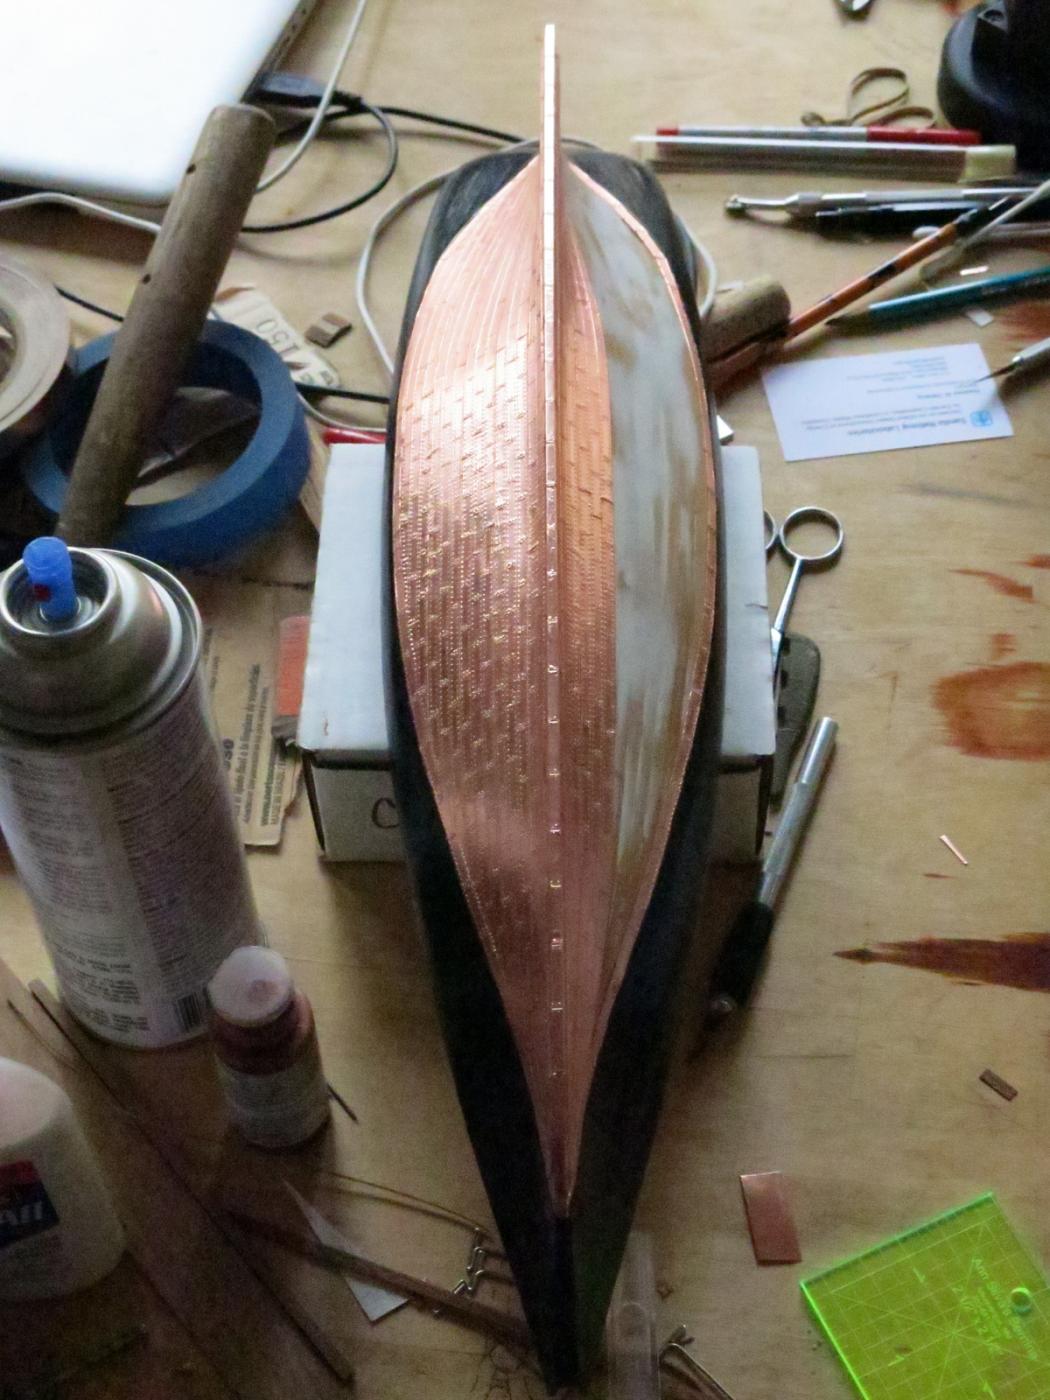
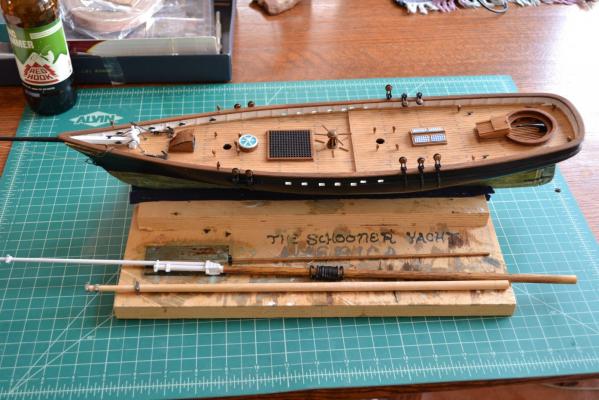
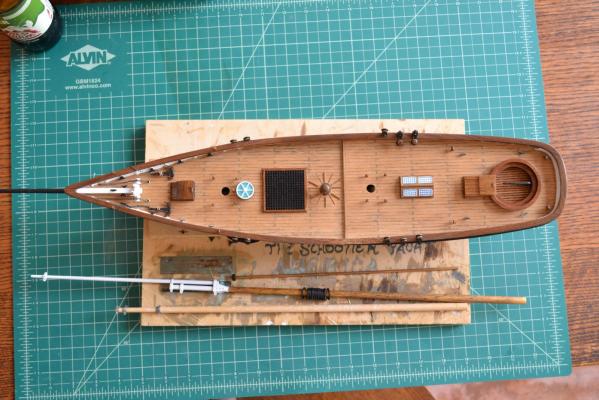
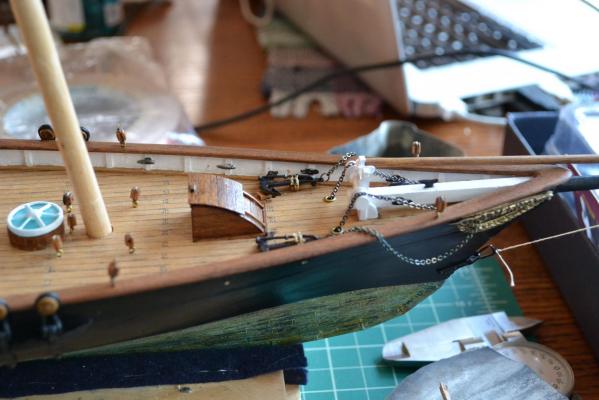
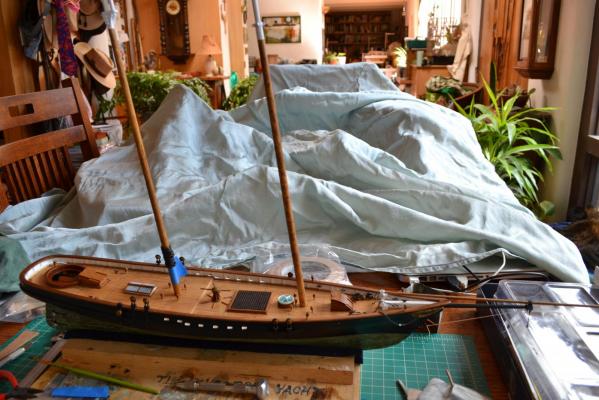
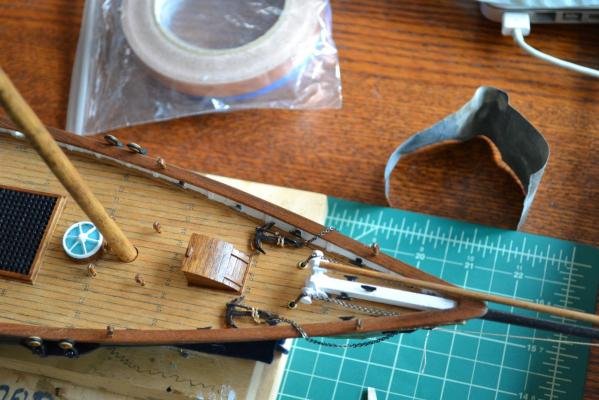
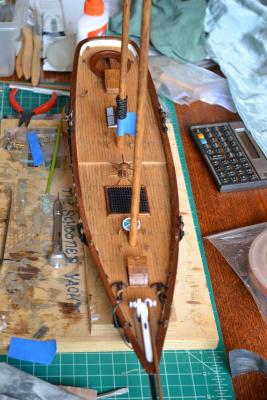
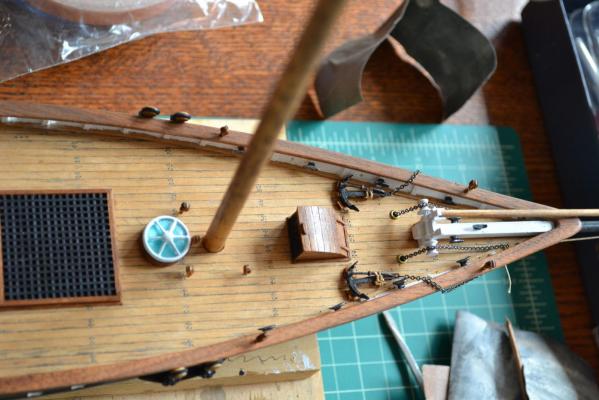
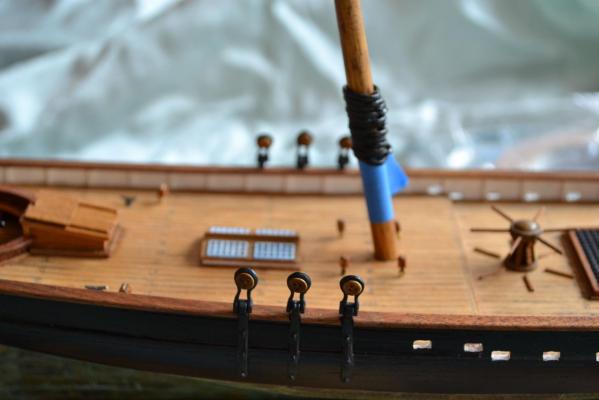
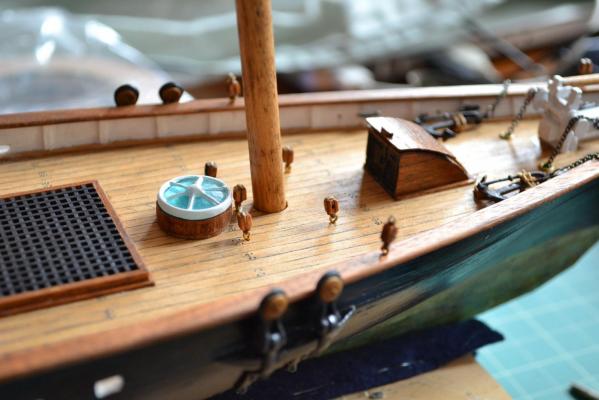
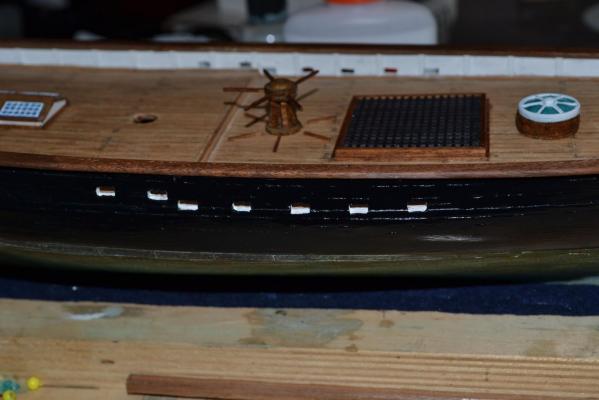
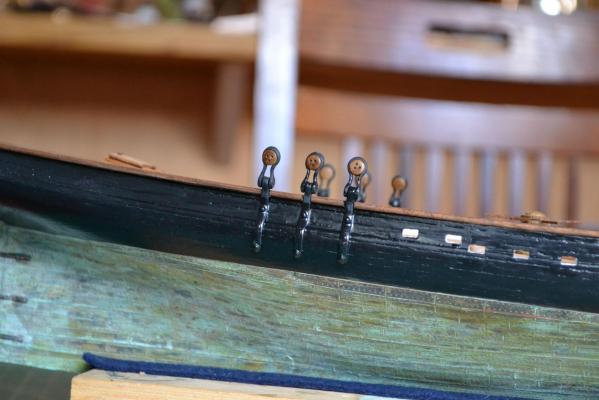
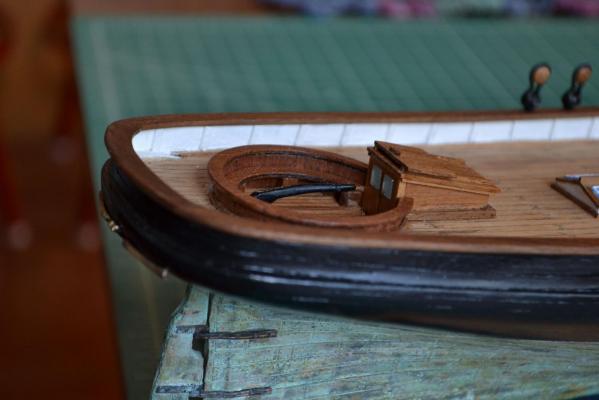
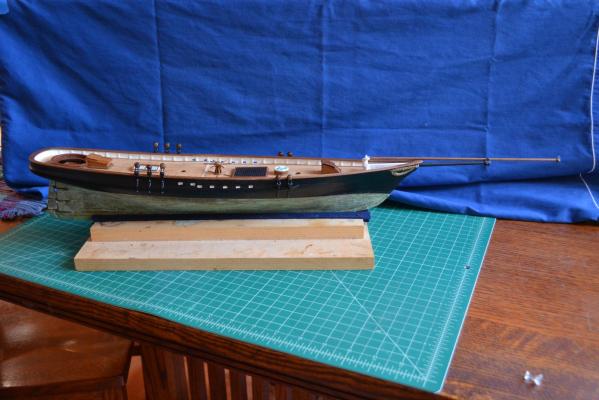
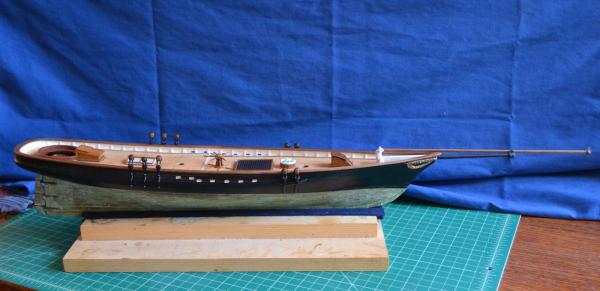
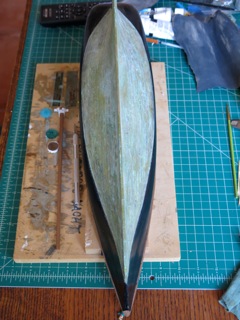
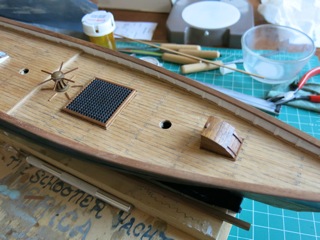
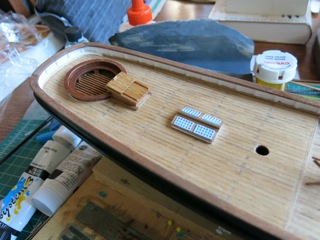
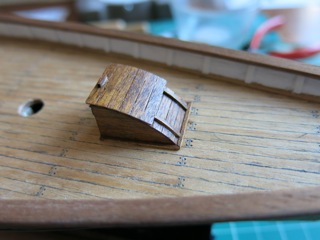
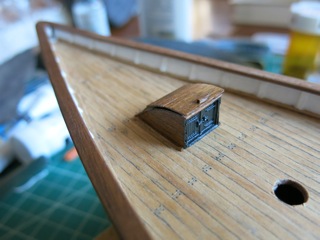
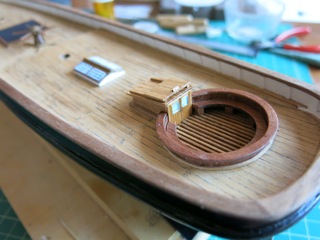
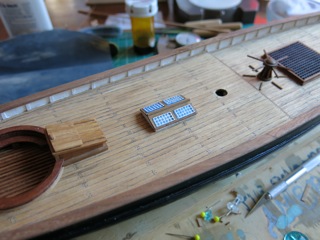
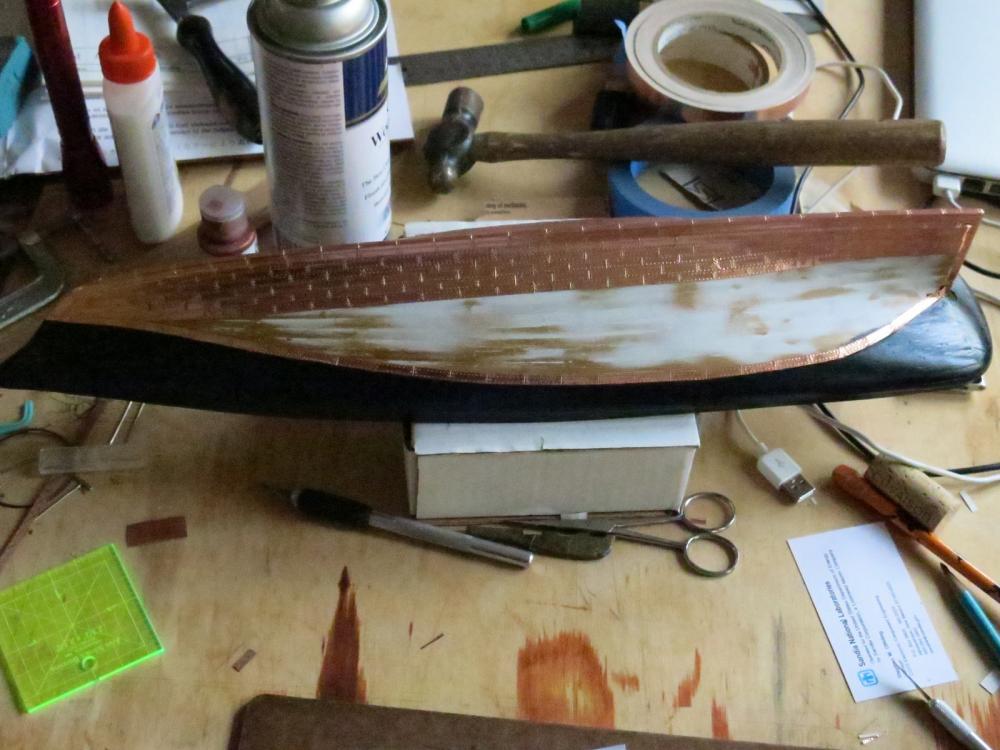
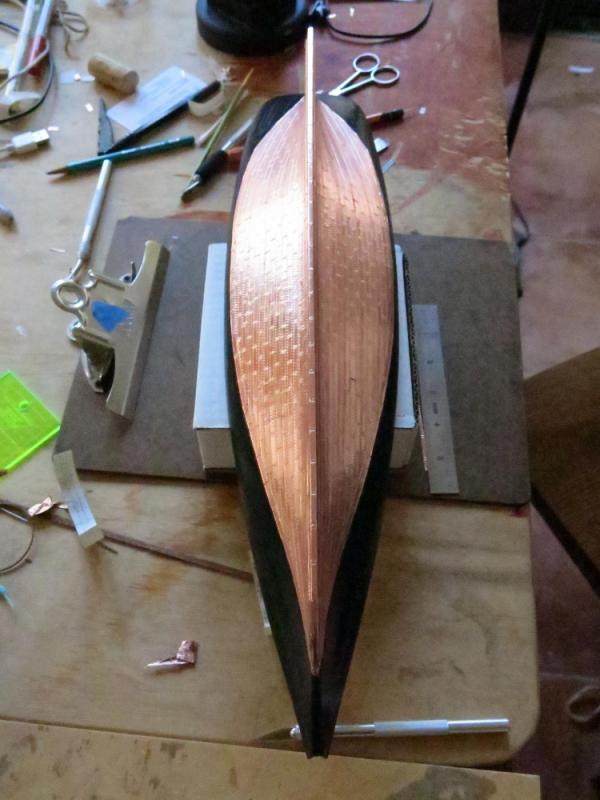
So - a little more progress on America... (In spite of the grog) All of the remaining deck fixtures/cleats etc. installed - The anchor chain ways going the the chain locker seem a little too far aft . . . Mamoli's America kit has a stepped mainmast - I've noticed some kits (and paintings/drawings) do not. . . Pretty rough job on the scupper holes - I'll do better next time. The mast foot plates and belay pin anklets will be next. They will take a bit of file work as they are quite a bit smaller than the 8mm masts. I've posted a couple of times on the subject of copper hull plate patina. Good? Bad? Too much? After reading the fantastic post on the repair/refit of the USS Constitution, and seeing the hull in dry dock, I think I like the look here. I wonder if her being out of the water and her bottom dry causes the green, and when she is back in seawater the patina disappears? - Tim


-
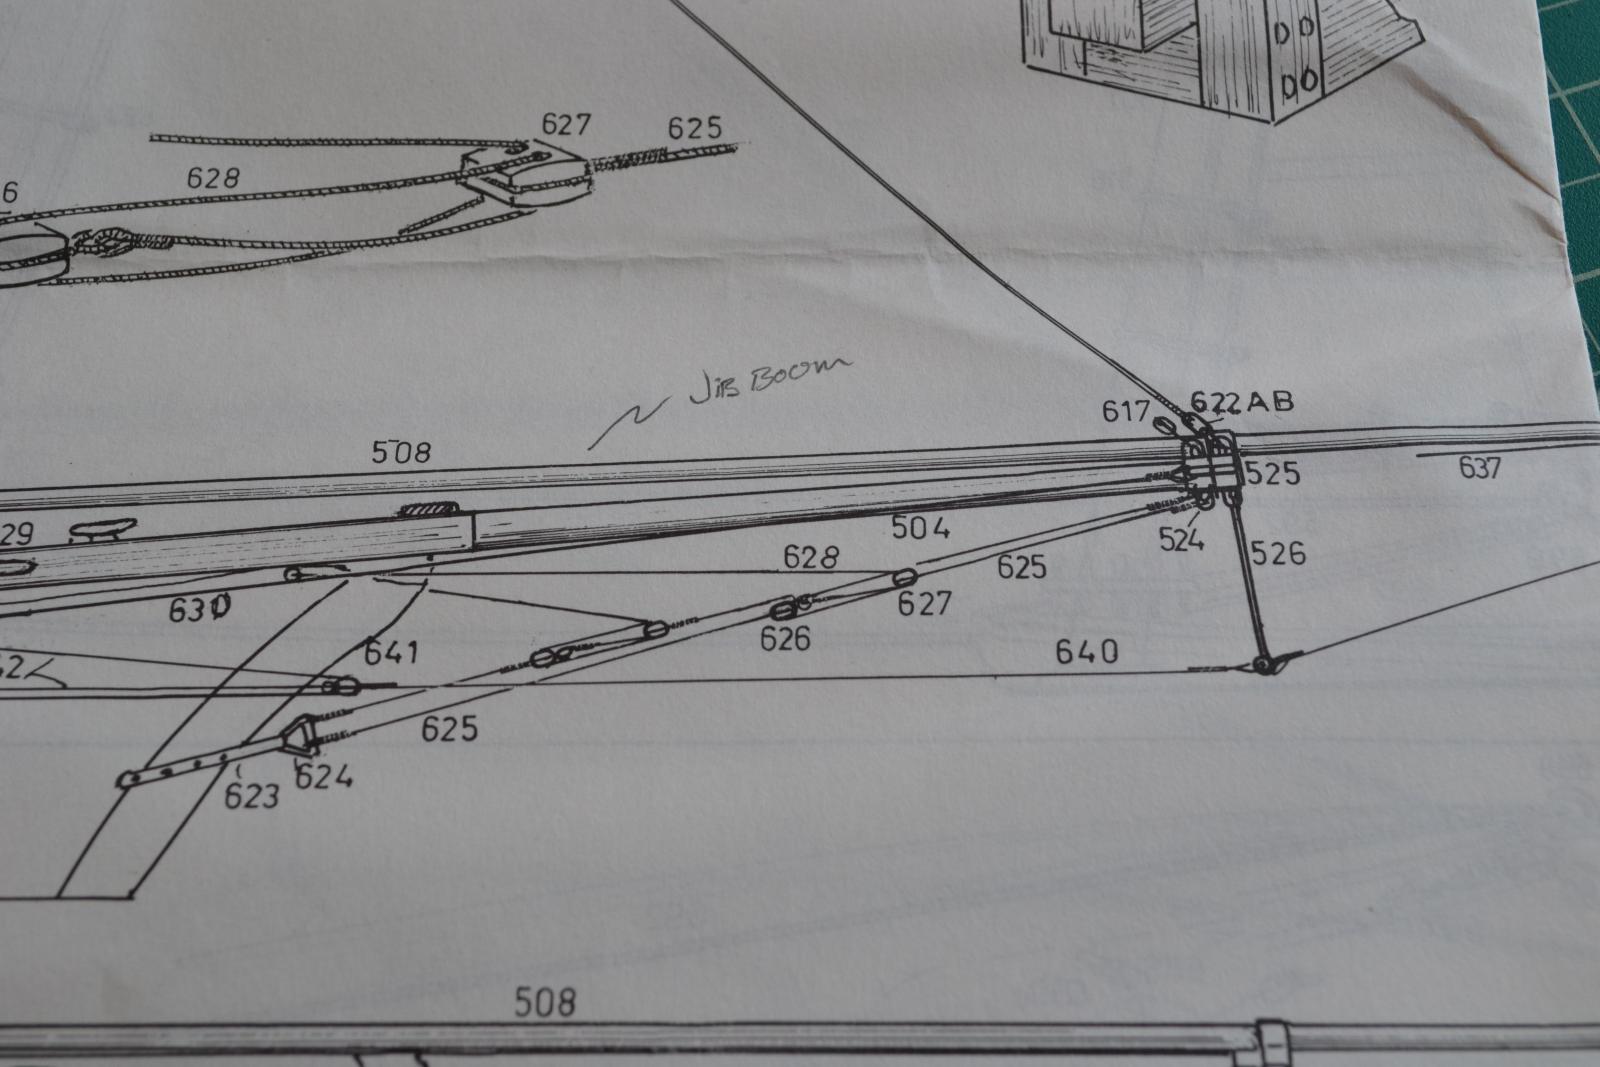
So I guess I got an answer to the jib boom question (did she or didn't she have one). I just received the Arthur C. Montgomery plans from BlueJacket. A statement on the Sail and Rigging Plan states: "Prior to race, Ratsey made an outer jib, jib boom and martingale. This addition was carried away early in the race and was never replaced." I've learned that the term "carried away" means blown or washed away. Bummer. I imagine the crew would have to scramble forward and cut away lines/sheets etc. to free her up. I don't know what a martingale is - I've seen references to horse tack, and betting strategies... Evidently Mamoli decided to include it (jib boom) in their kit. I like the look so I'll stick with it. Again, a major discrepancy between the Mamoli plans and the Montgomery plans: Montgomery shows no companionway forward of the foremast, Mamoli has one, and a "boobyhatch" where the Montgomery shows the forward companionway just aft of the forward skylight. I've decided to mellow out about these details. I'm not sure if I'd ever get the definitive deck arrangement on America so I'll just go with the Mamoli plans. - Tim
-
MicroMark has these: They just call them "metal" - they don't look like aluminum to me.
-
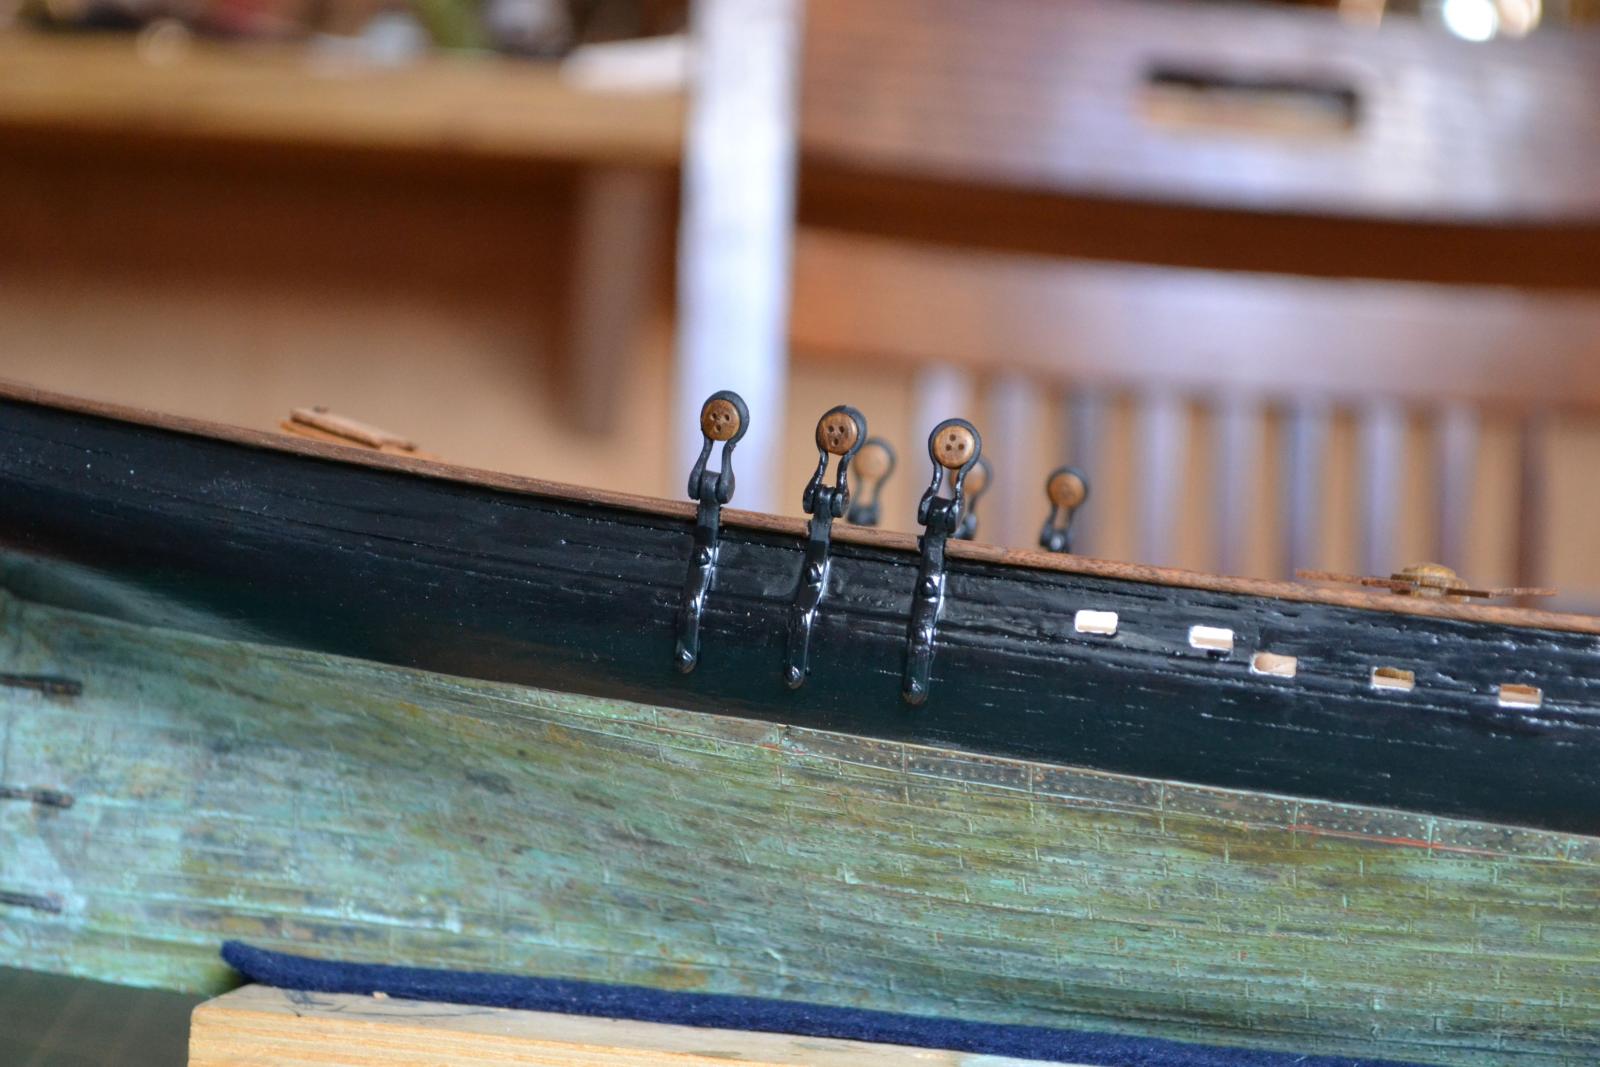
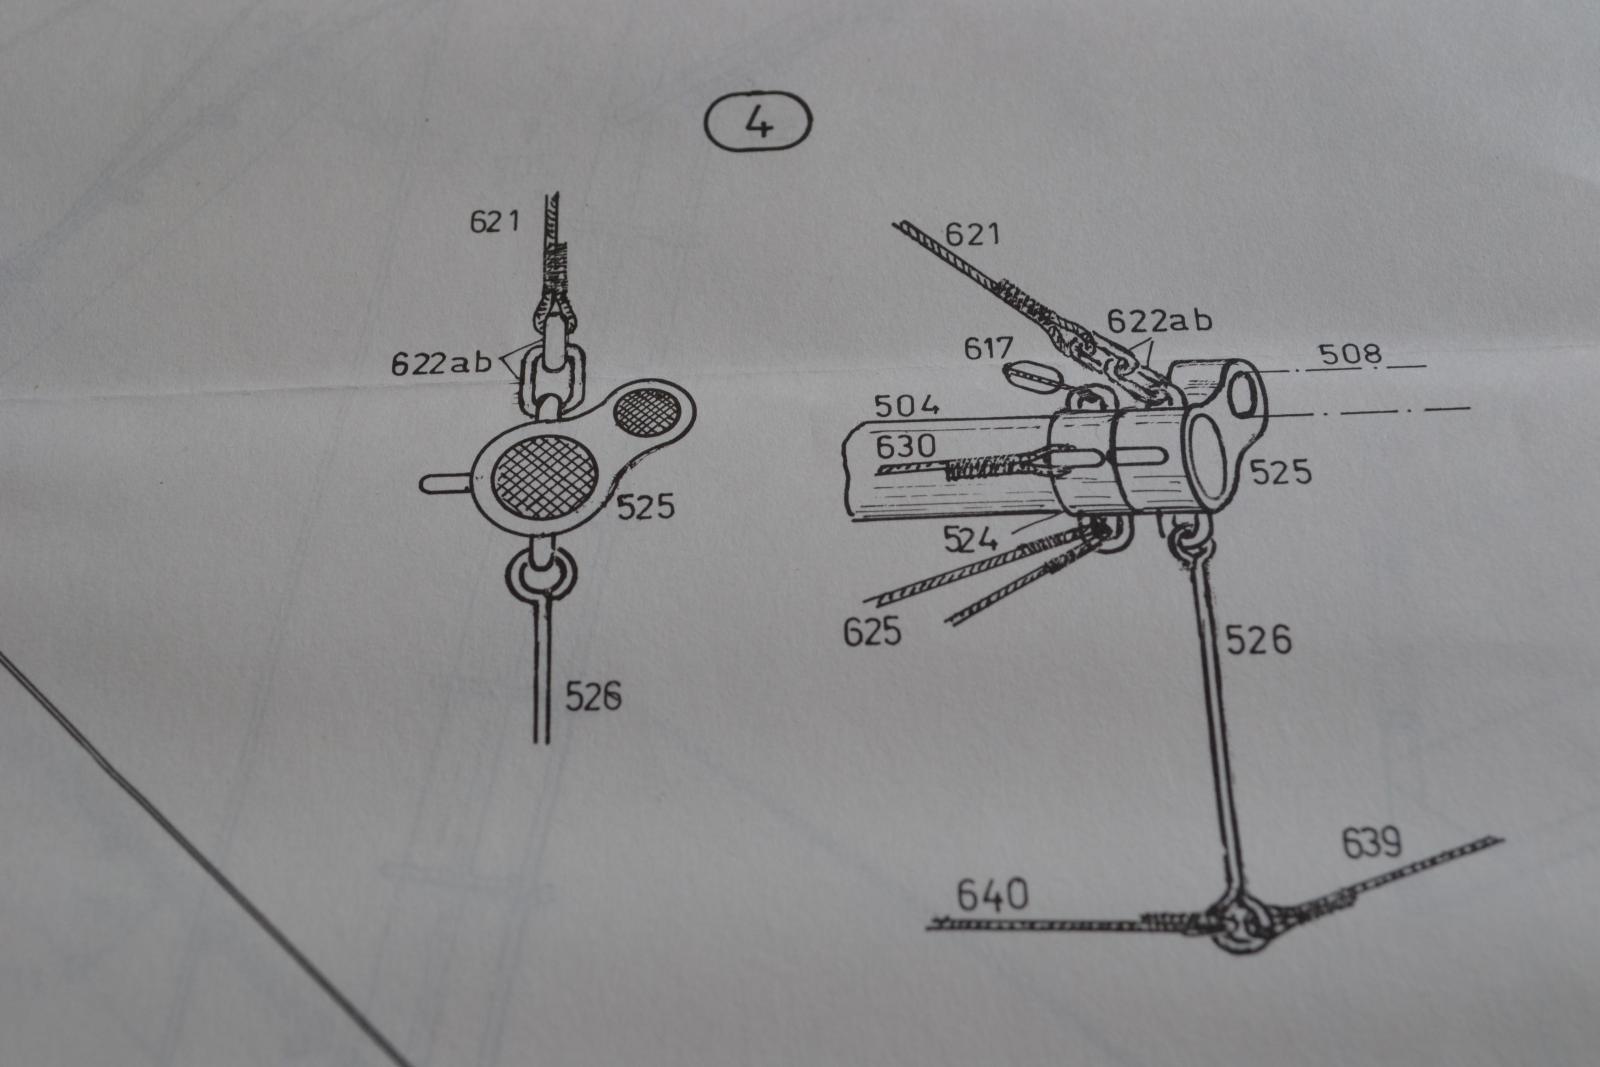
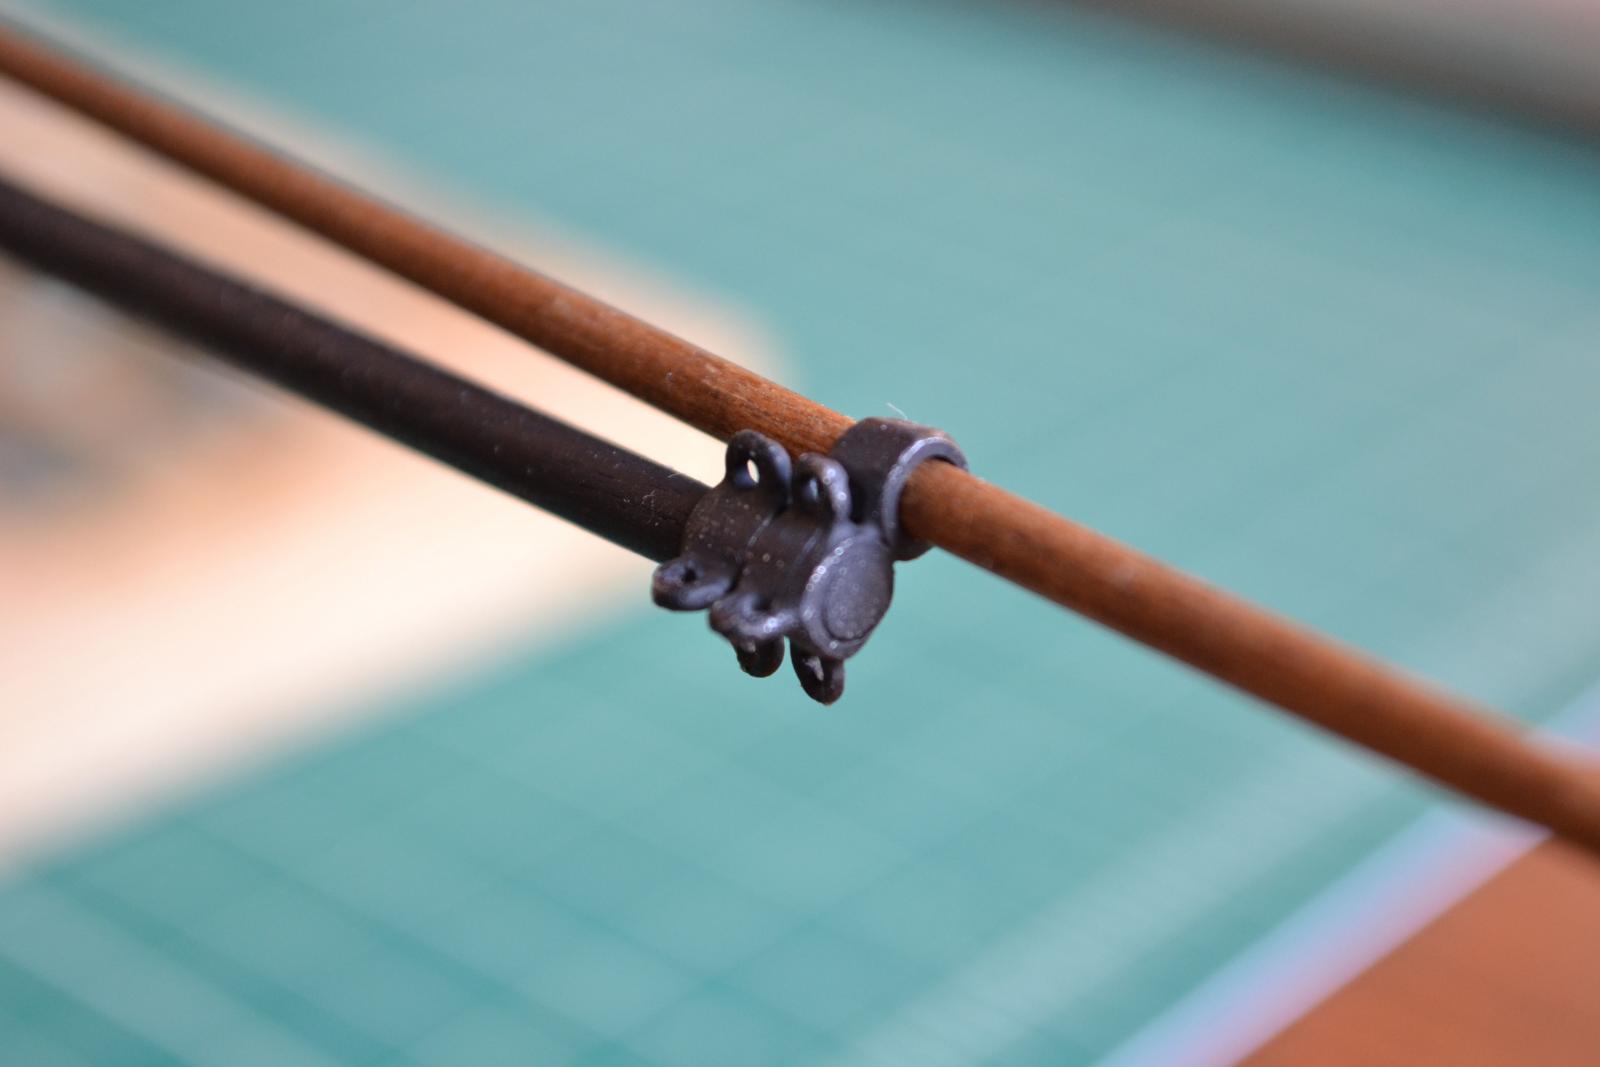
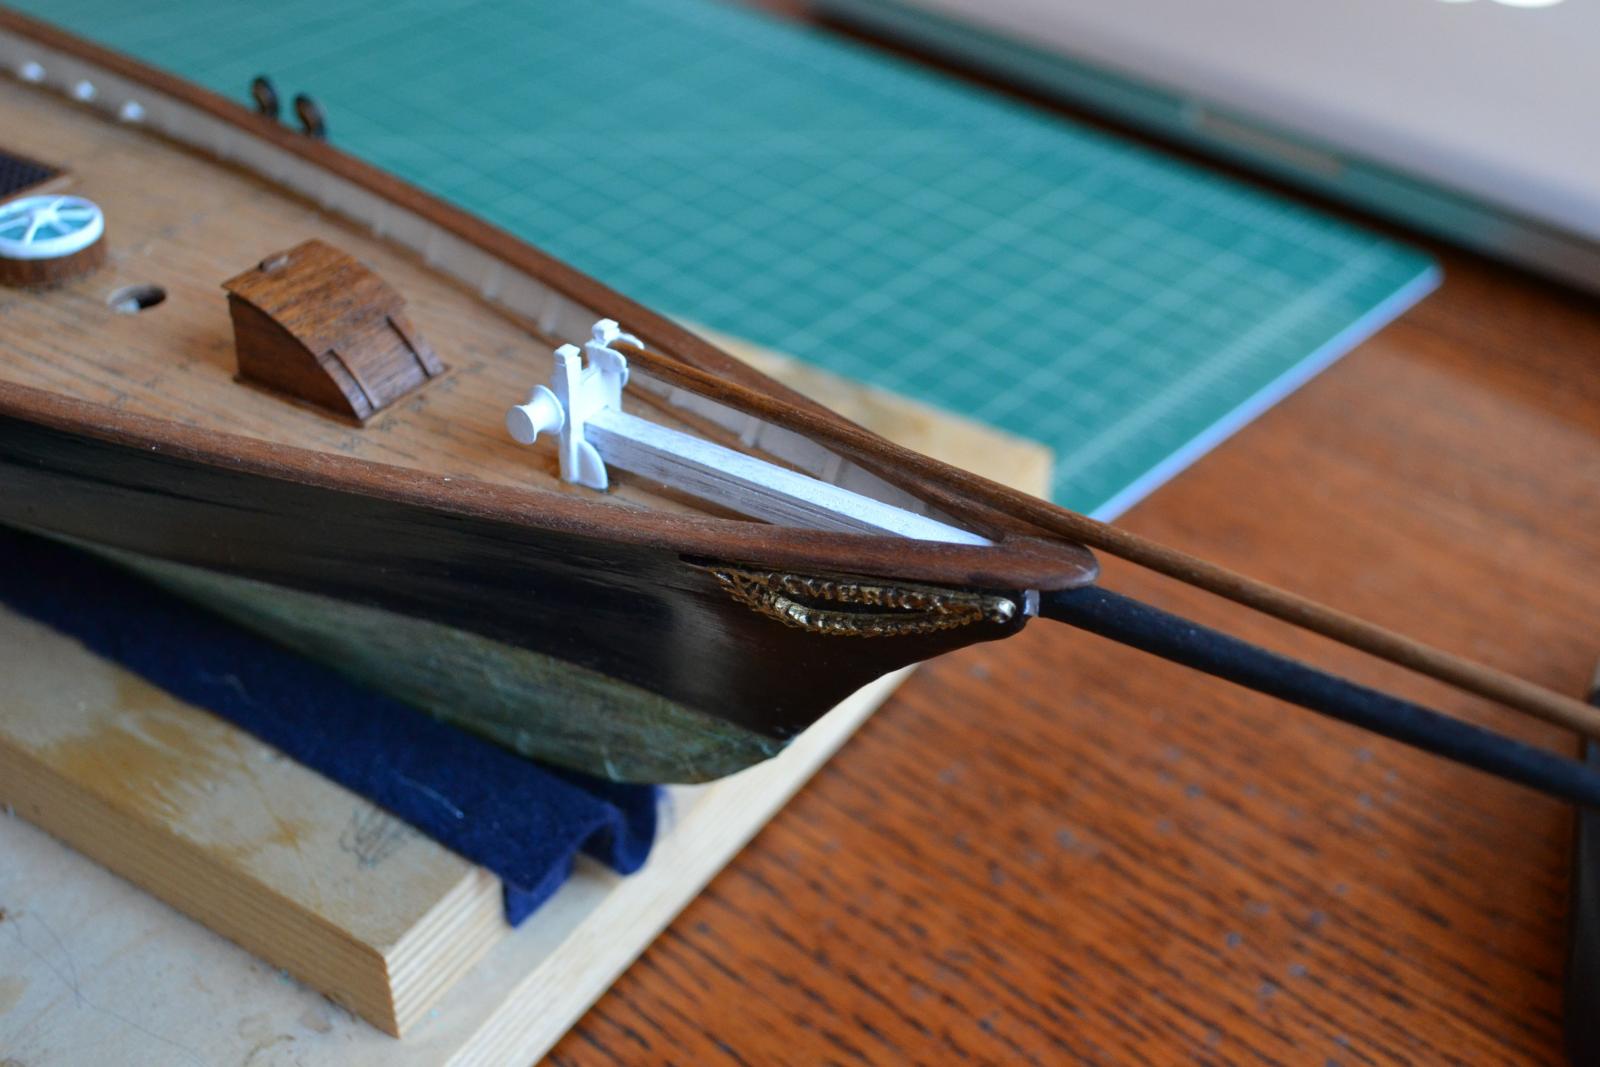
Hi Hamilton - correction, the part missing from my kit was (525). Incidentally, I have noticed that a number of America kits, as well as paintings and other depictions show America with no jib boom at all. Same with the replica America out of San Diego. - Tim
-
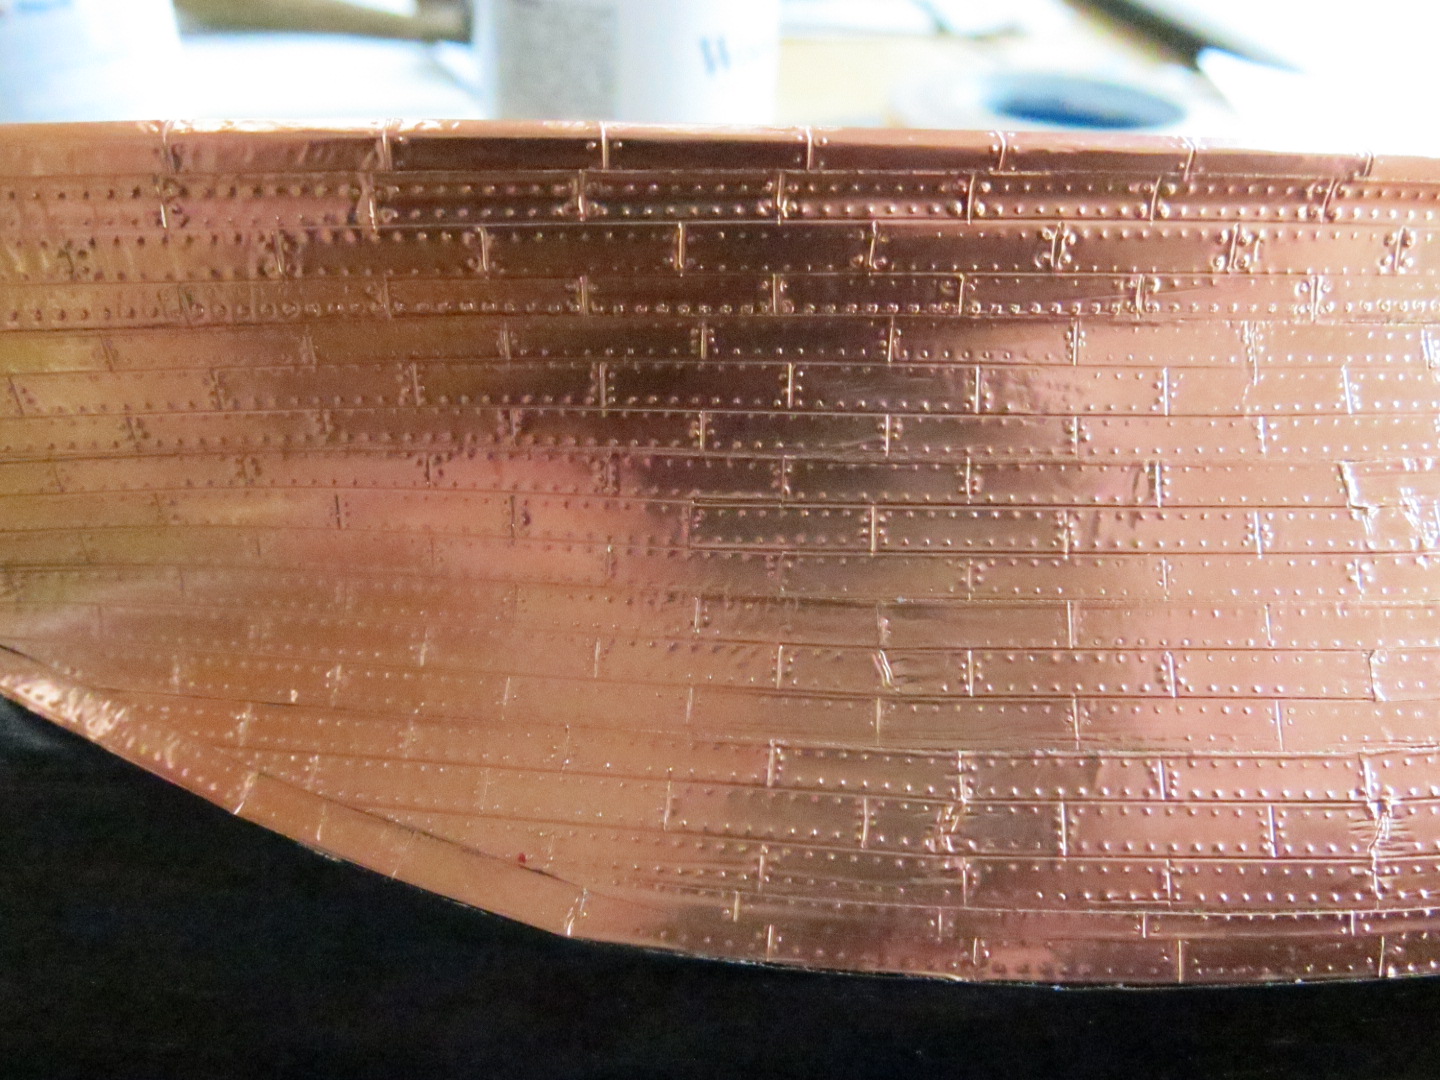
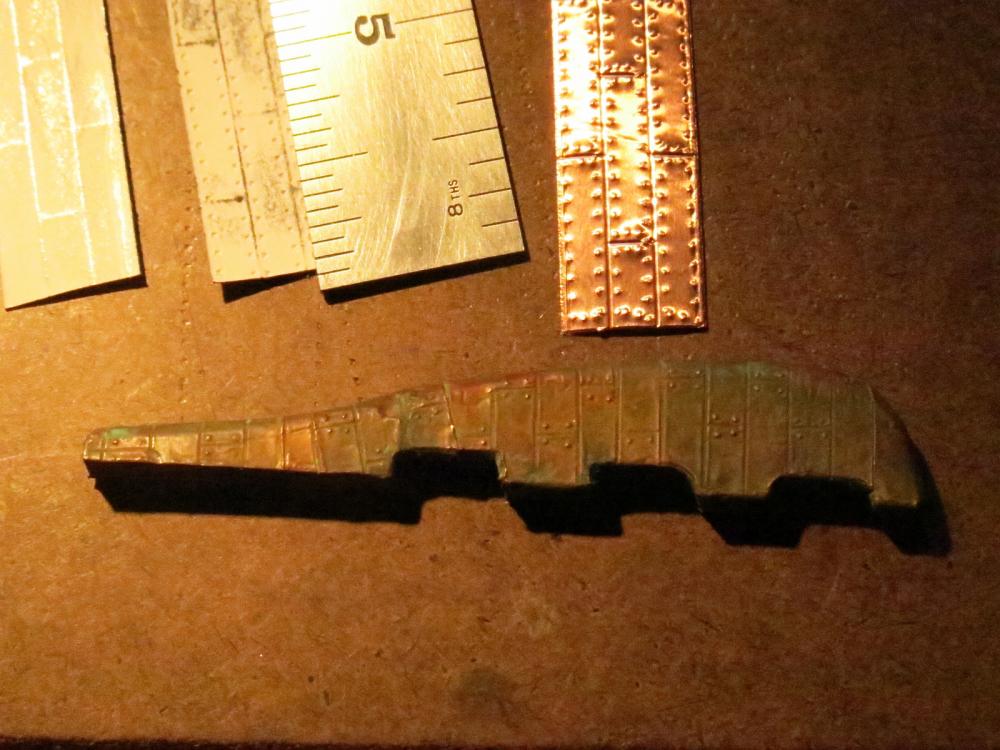
Hello Hamilton - Extremely nice job!! I am just finishing the final hull details on my Mamoli America. I'm not sure if this the proper way to link to a build on this forum, but I think you can see it here: http://modelshipworld.com/index.php/topic/13201-america-by-mojofilter-mamoli-scale-166-1851-first-wooden-ship-build/ I did not take anywhere near the care you took with the bulkhead framing - and I paid the price! I basically just glued it all up and then began adjusting/shimming/cutting/filing/filling... I followed Mamoli's instruction for planking the first layer - staring at the top of the bulkheads (inside of the bulwark) and working down. By the time the second planking was on, the bulwarks were plenty strong and I could cut off the top of the frames and rotary-file/sand the bulwarks with no problem. I too decided to copper the hull. I used 1" wide self-adhesive copper tape which I scored from the front side with a very dull Xacto knife into "plates", and the using a pounce wheel from the back side, created the rivets. I was able to cover a lot of the hull this way but of course had to get down to individual rows of plates in the gores. I did not like the look of the raw copper - way too shiny, and I wanted to spray lacquer on the hull to help keep the copper from coming off, so I used Jax patina fluid to 'age' the copper. I now think that it went too far. When I do Cutty Sark (next), I will do as suggested elsewhere in the forum, and "let nature take it's course". If the copper is left uncoated, it should darken down to a nice 'old penny' brown. If you look in my build log you will see a problem I ran into with the bowsprit. The plans call for the bowsprit to be turned down to 3mm at the end, but the plans show what looks to be 4mm at the end. The kit did not have the fitting called out as (501) I believe, so I didn't have the part to reference. I ended up making my own part (couples the end of the bowsprit to the middle of the jib boom). Anyway, keep up the really good work!! - Tim
-
Thanks so much for the photos!! As you said, many differences. Some of the most noticable are: Height of bulwarks - not even knee high on the replica. She has a wheel as opposed to a tiller (and an engine evidently). The main mast appears to have only two shroud lines. Beautiful deck!!! The fitting is outstanding! As with most kits of this scale, the kit decking is certainly not to scale. 4mm wide deck planks would be almost 10 1/2" wide in real life. I've seen folks change to 2mm wide planks but I don't think it shows as well. Clearly the replica has been adjusted for sailability, safety, etc. Not knowing any better at this point, I'll stick to the kit plans. I would however be very interested in any referances/photos of the original (circa 1851-1860). Thanks again! - Tim
-
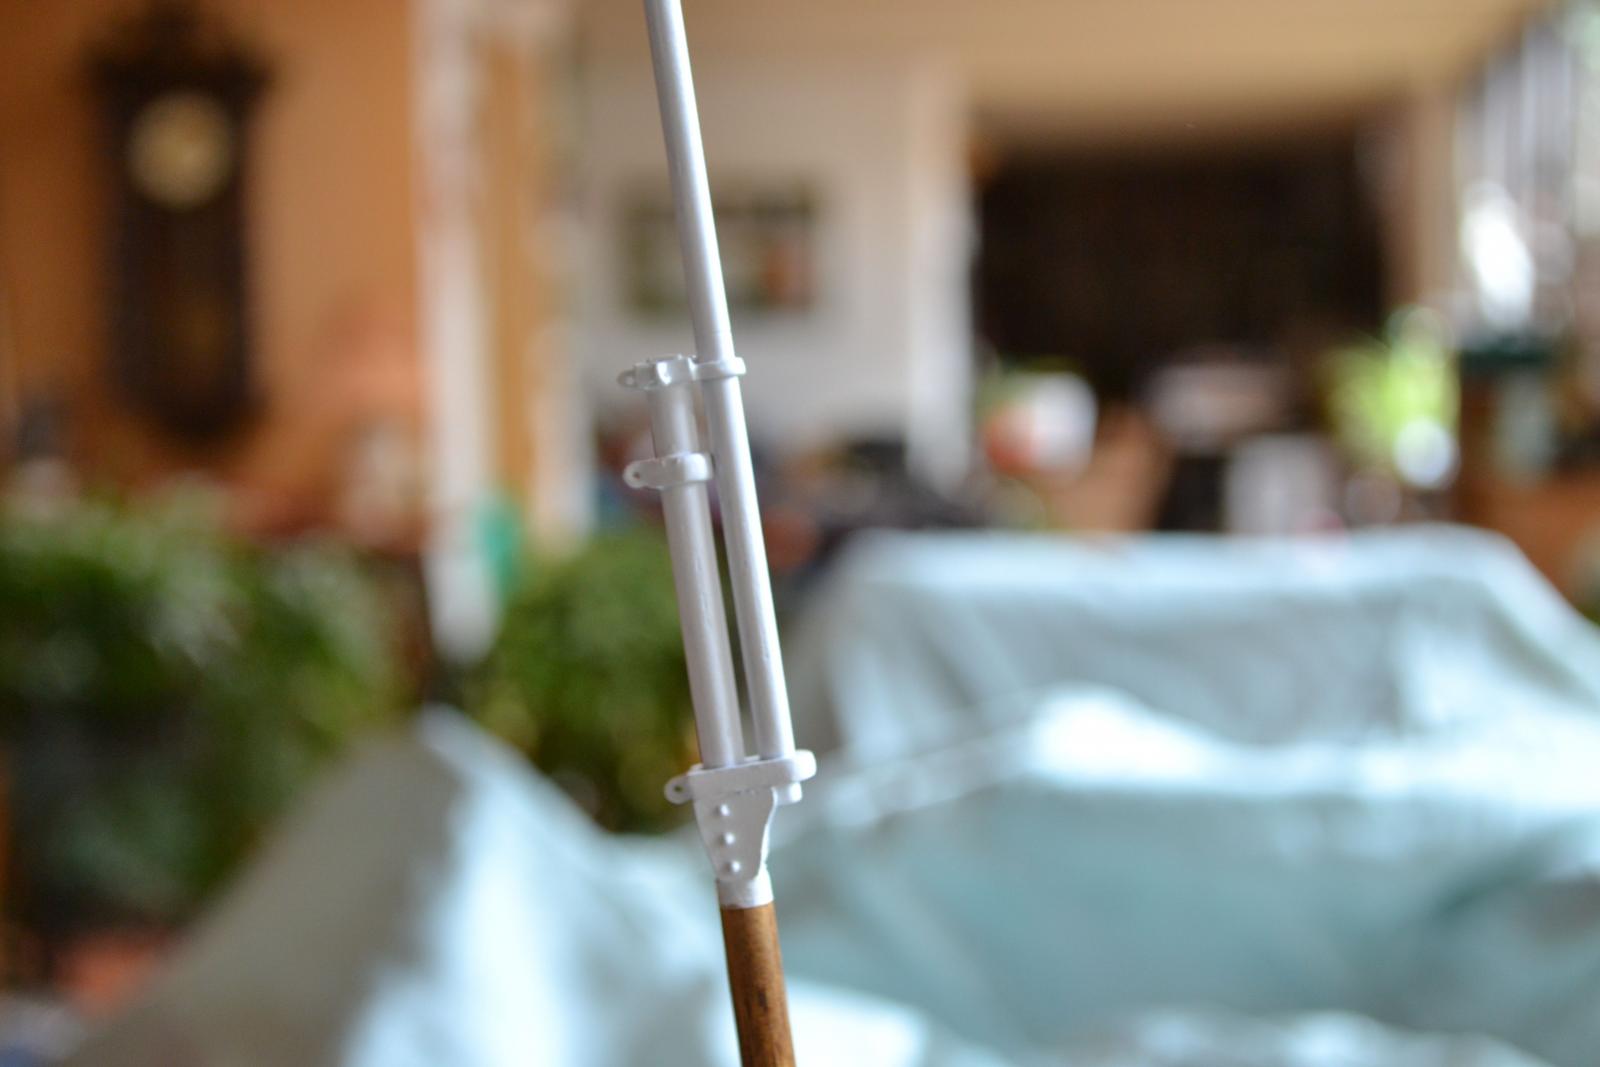
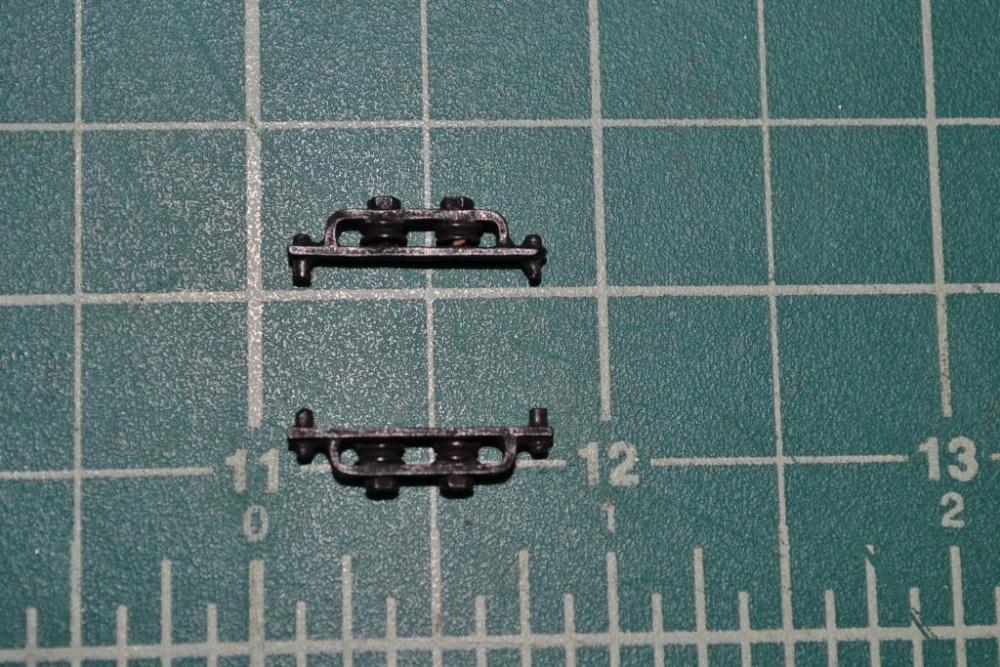
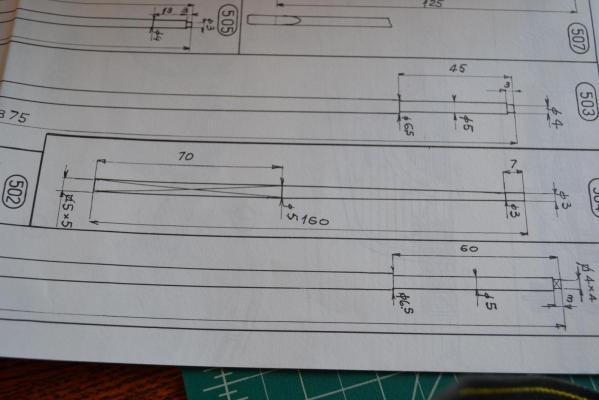
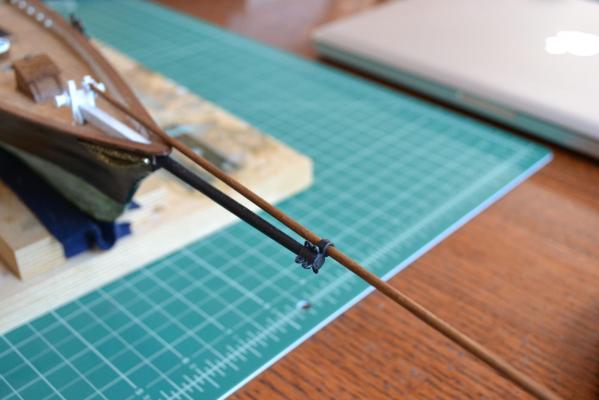
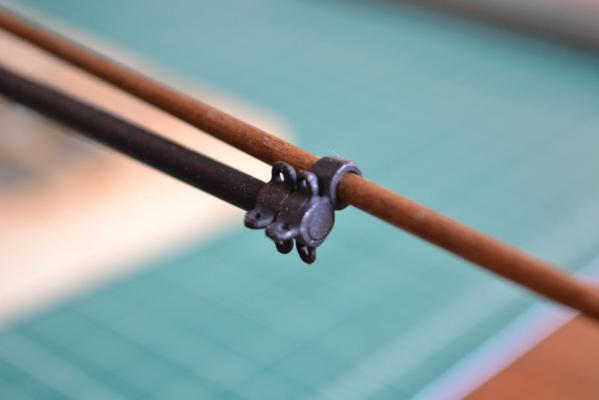
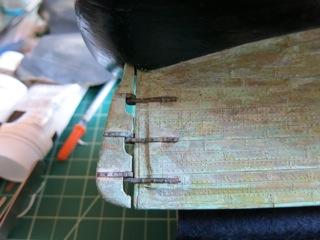
A little more progress - Got the drain holes (? insert nautical term here) in the bulwarks, and the lower deadeyes mounted. Note broken off capstan bar. The supplied pot metal tiller bar did not survive cleanup of the flashing - snapped in two. I fashioned another out of walnut. A lot of the spars, booms, gaffs, etc. need to be turned down to tapers, including the bowsprit. I threw down and bought a little mini lathe from Harbor Freight - the larger of the two Central Machinery lathes. Works pretty good, although it's been a long time since I've turned anything. Turned down the bowsprit per the drawing: Note that the drawing (second from bottom) calls for the the tip to be turned down to 3mm. This contradicts other places in the drawing. The coupling between the end of the bowsprit and the jib boom, which is a straight 3mm along its entire length , shows two different sizes: The coupler is part (525). The bowsprit is (504), and the jib boom is (508). Clearly the bowsprit and jib boom are different diameters. This is OK because the part (525) was missing from the kit. I made my own. If I had known this I would have turned down the end of the bowsprit to 4mm. Anyone building America should beware of this - although I understand Mamoli has gone out of business... Next will be all the rest of the cleats, blocks, and everything else on the hull or deck, then a light coat of satin lacquer. More later. - Tim


- 93 replies
-
- 10
-

-
Nice start to the copper plating David!! Do you plan to keep it shiney (i.e. coat it right away), let it age (oxidize) naturally, or patina it somehow? I have Cutty Sark in the hopefully near future, and the Constitution after that. Both with real copper plates, so I'm looking for people's methodes. I will be following your log with interest. Thanks, - Tim
- 117 replies
-
- 1
-
-
- constitution
- model shipways
- (and 1 more)
-
Hello all - This will be my first posting to the forum. I started the 'America' several years ago and got the first planking on and the deck layed down, and put her away. Around Christmas I pulled her out and started in again. I got the second planking on and coppered the hull. I used 1" wide self-adheasive copper tape (electronic cable sheilding tape). I marked the individual plates from the front with a dull Xacto knife, and used a pounce wheel from the back for the rivets. I did not like the look of the shiney raw copper so I used a patina fluid (Pax I think). It went further than I wanted. I was looking for more of a brown penney color. Most of the deck furnature is on. Deadeyes for the mast shrowds are next. I've updated this first post (2016-07-07) to show coppering of hull before patina was applied I'll get some more picks as I progress. - Tim


- 93 replies
-
- 14
-