mojofilter
-
Posts
160 -
Joined
-
Last visited
Content Type
Profiles
Forums
Gallery
Events
Everything posted by mojofilter
-
 Great to see another America starting up. I'll pull up a chair and watch. She's a beautiful ship and hope you have fun with her. - Tim
 -
Hi Ed - looks to be a 4-fluke carbide end mill? Regular metal cutting? What RPM? Doesn't appear you have any tear-out issues. Remind me what kind of wood this is? Thanks, - Tim
- 3,618 replies
-
- 2
-

-
- young america
- clipper
- (and 1 more)
-
Please help! What to buy.
mojofilter replied to semorebutts's topic in Metal Work, Soldering and Metal Fittings
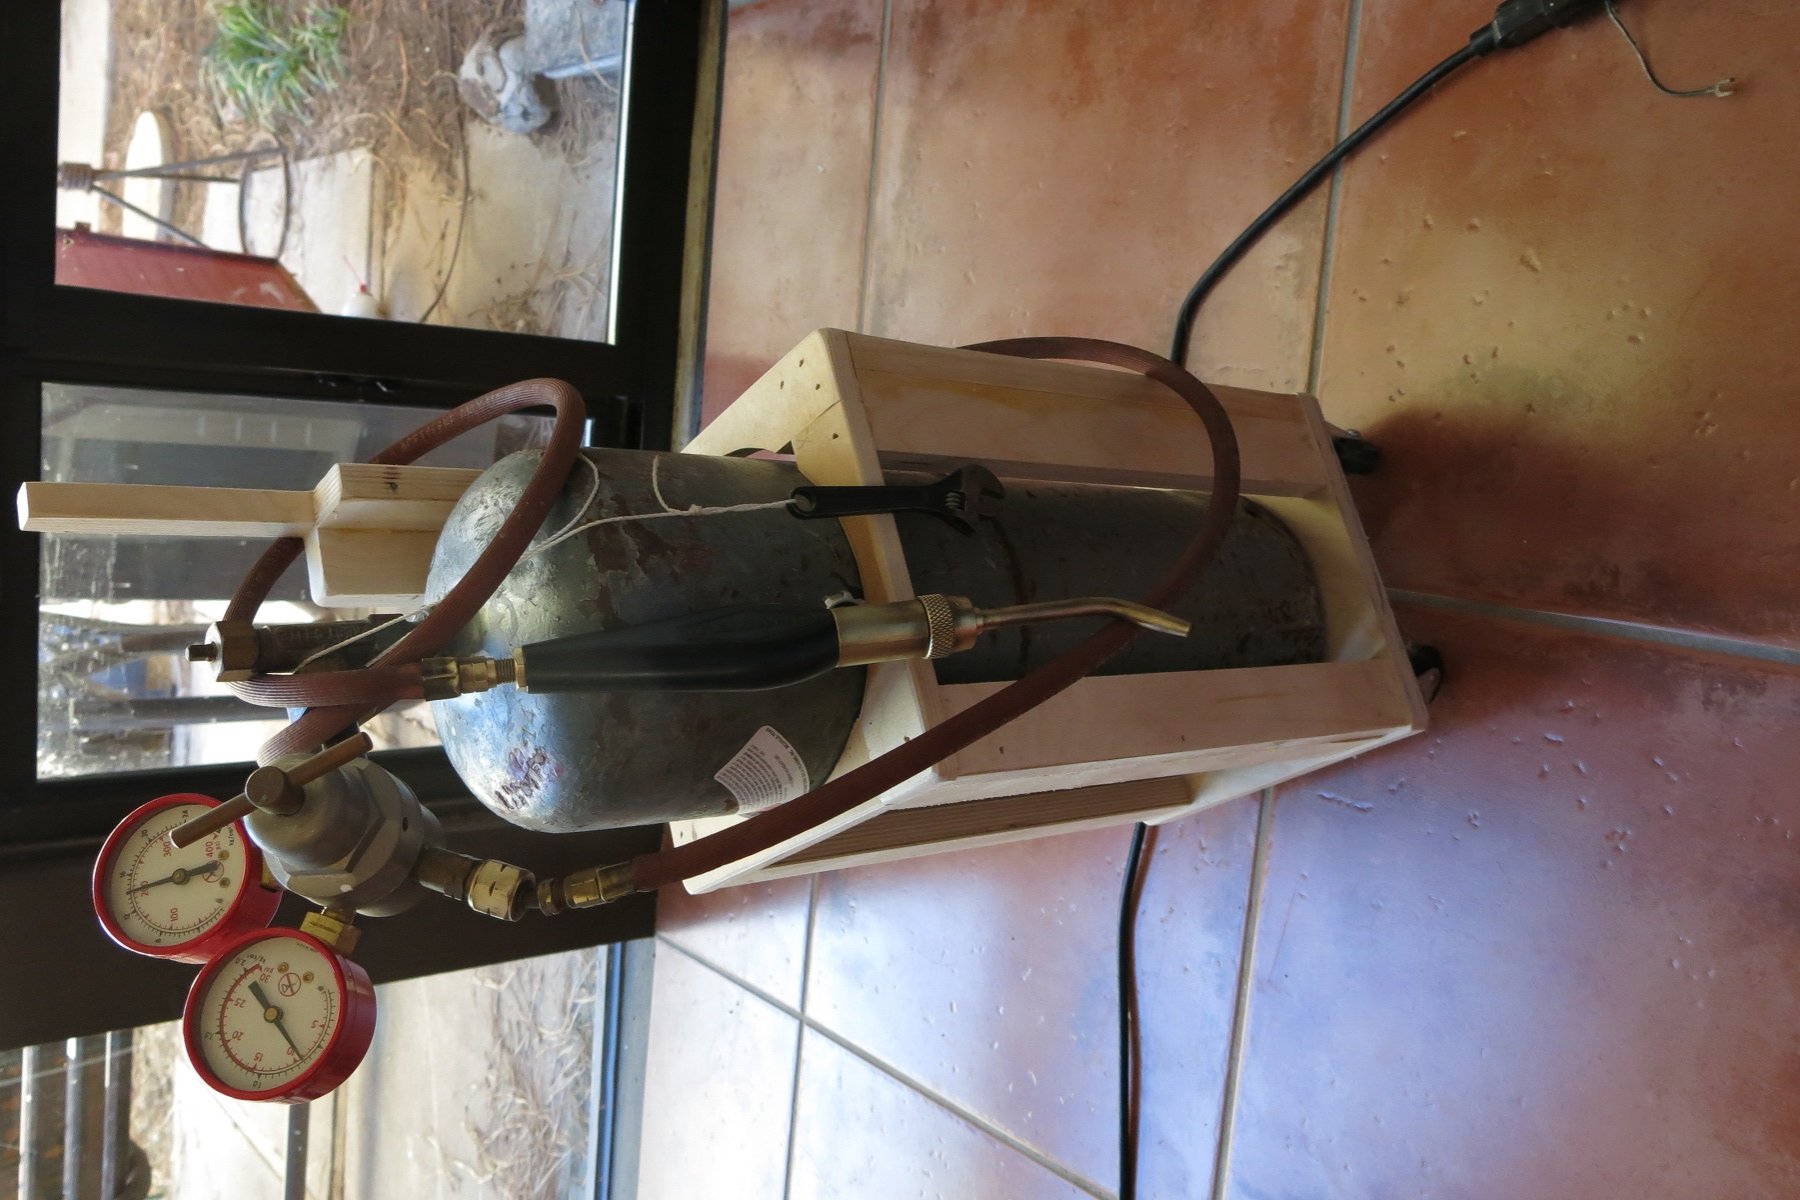
I use an acetylene/air torch and silver solder. Takes practice. In many (most?) cases tin/lead rosin core solder and a good pencil tip soldering iron is fine. Which ever method you use, cleanliness is the most important factor in the quality of your bond. 2c - Tim -
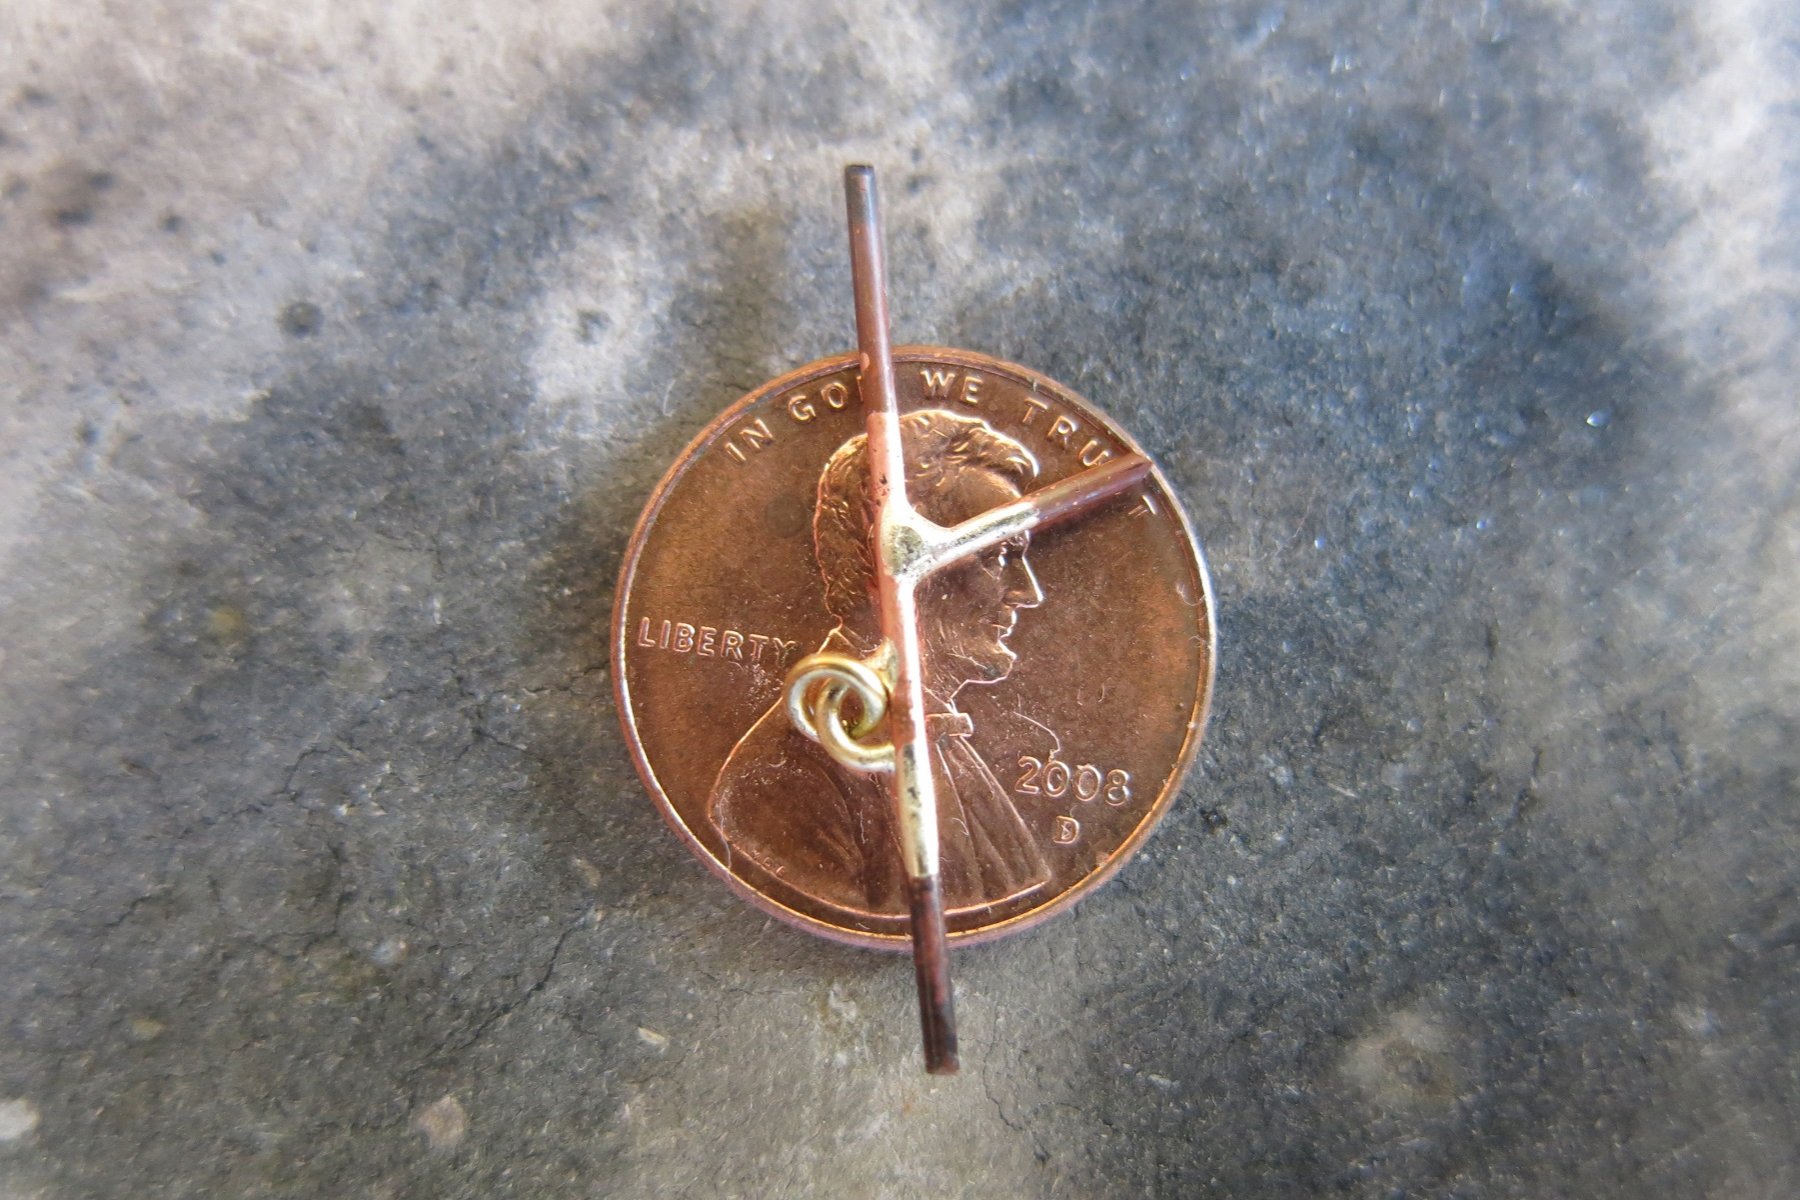
I know I'm kinda jumping around a bit but I built a caddy for the old Prestolite torch. Cleaned everything up a bit. The Admiral is not thrilled at having the thing in her dining room - I'll wheel it into a dark corner and sneak it out when I need to. It's not the fire and flame - she is a silversmith - it's just that the shipyard looks like it's taking over . . . Can't seem to rotate the picture. I'll be making a lot of parts of brass. Silver soldered. Here is an attempt at a stanchion. It's 18 gauge so it's probably out of scale. The rings are 20 gauge - I'll try some smaller material. Only 51 more of these


- 55 replies
-
- 3
-
-
- cutty sark
- sergal
- (and 2 more)
-
Hi Lou -
Hope you don't mind the PM.
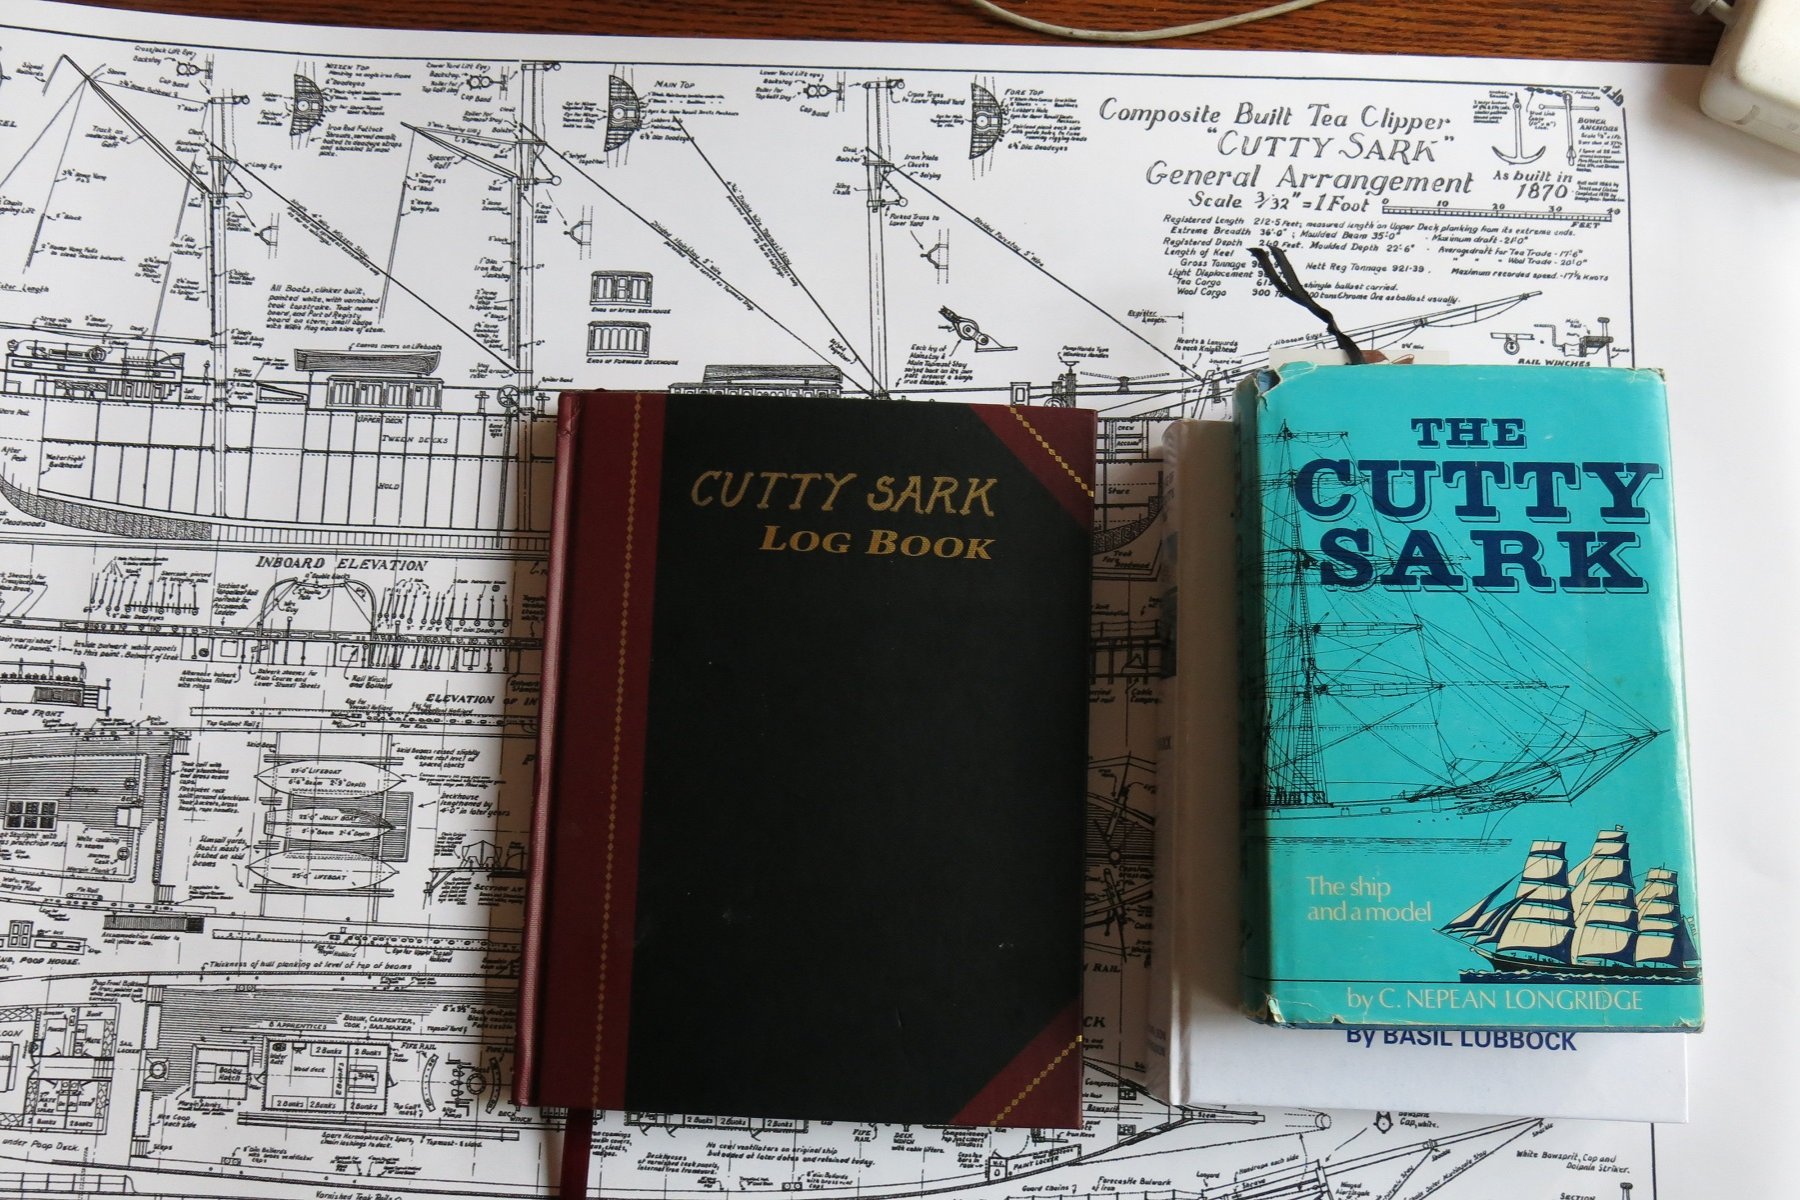
I am re-reading Nenad's log around the end of 2013 and learning to be more casual about exact details. She changed so much over the years. Generally I'm trying to follow the Campbell plans (and I have Longridge book as well). You provided Nenad with several links that don't seem to work anymore. I wonder if you can point me to them?
One was Dec. 4, 2013: " This document summarises the known history of the fabric of Cutty Sark, culled principally from the ship’s logs and survey reports. It draws substantially on research undertaken by the former master of the ship, Captain Simon Waite, with additional research by the Trust’s Research Assistant, Simon Schofield"
The other is Dec. 9, 2013: "Nenad, I'm not sure what you are looking for but I once made some pictures during repair work on the bow that might be helpfull. You can see them on (and download from) Skydrive, they are among the bottom ones."
No worries if you can't, just need all the help I can get!
Thanks,
- Tim
-
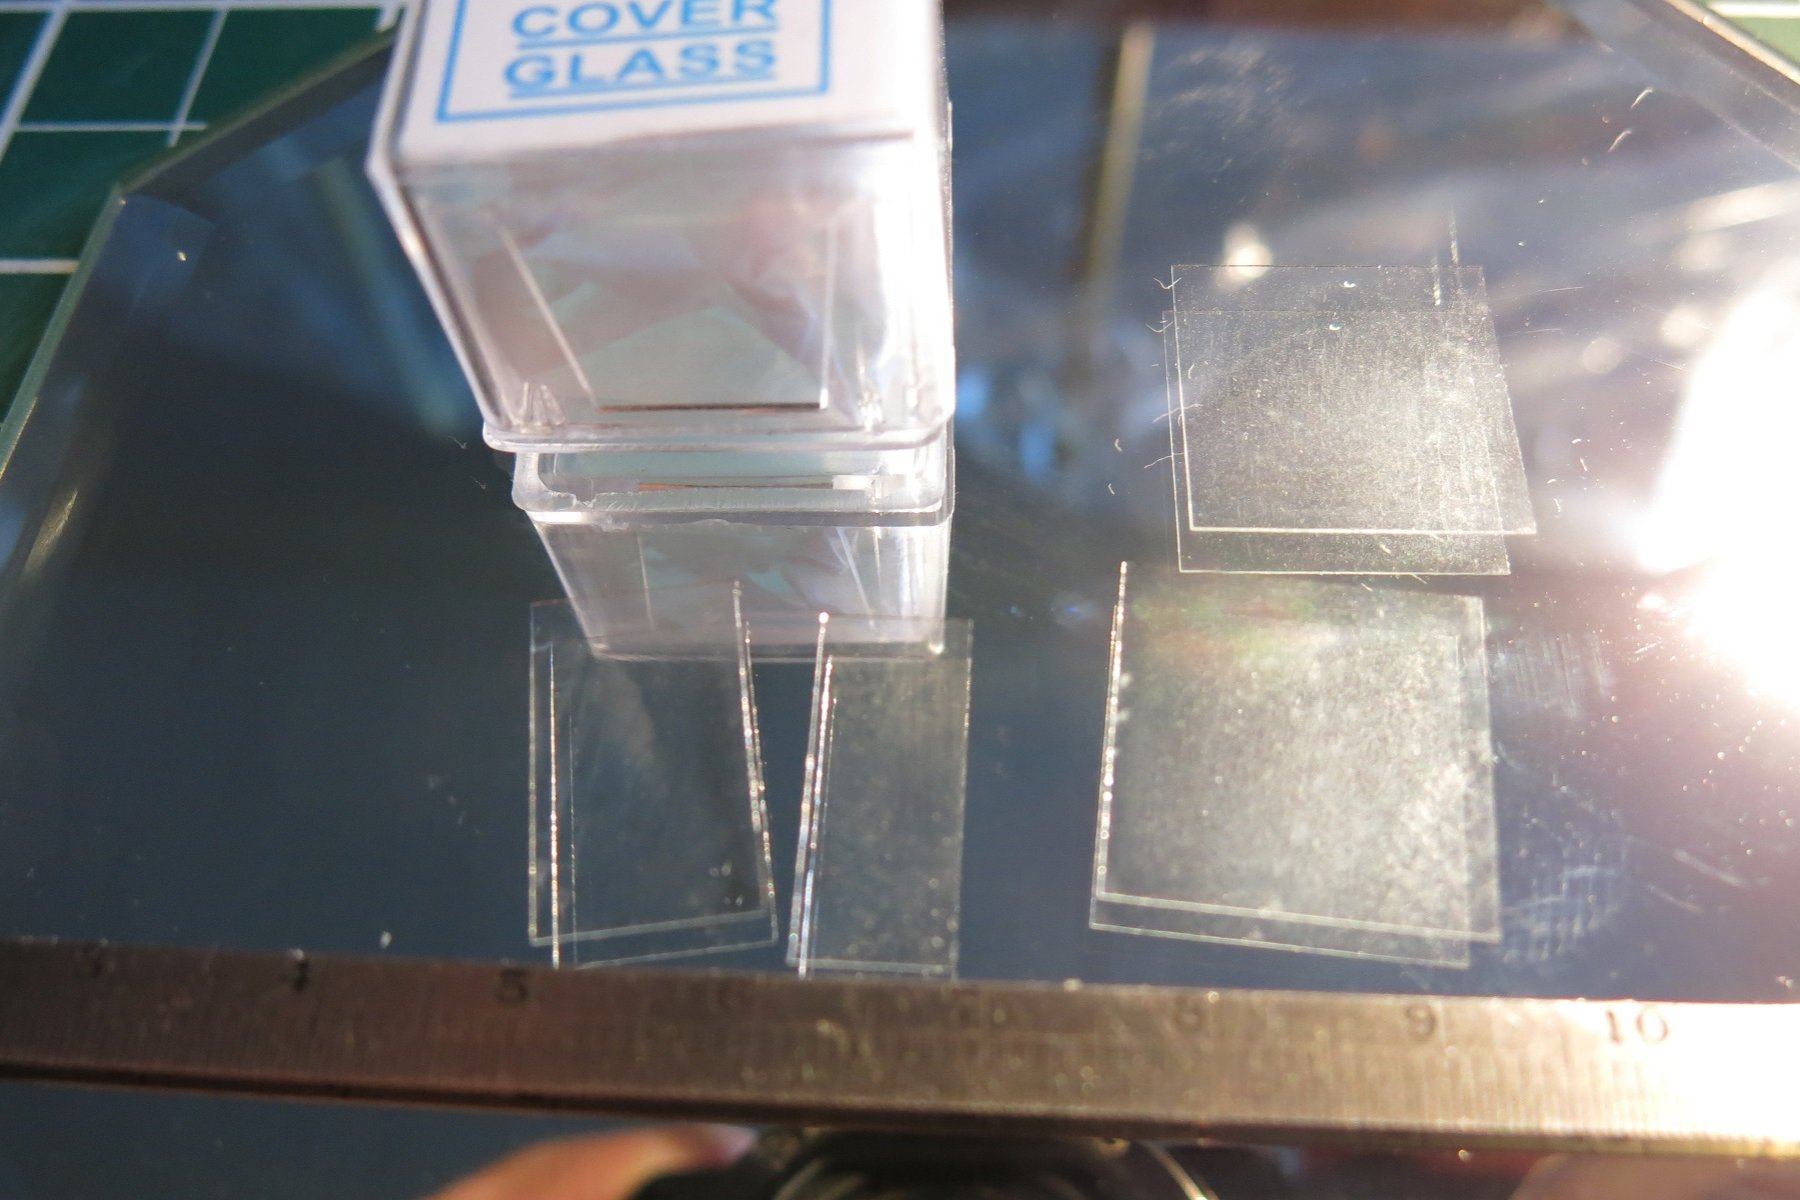
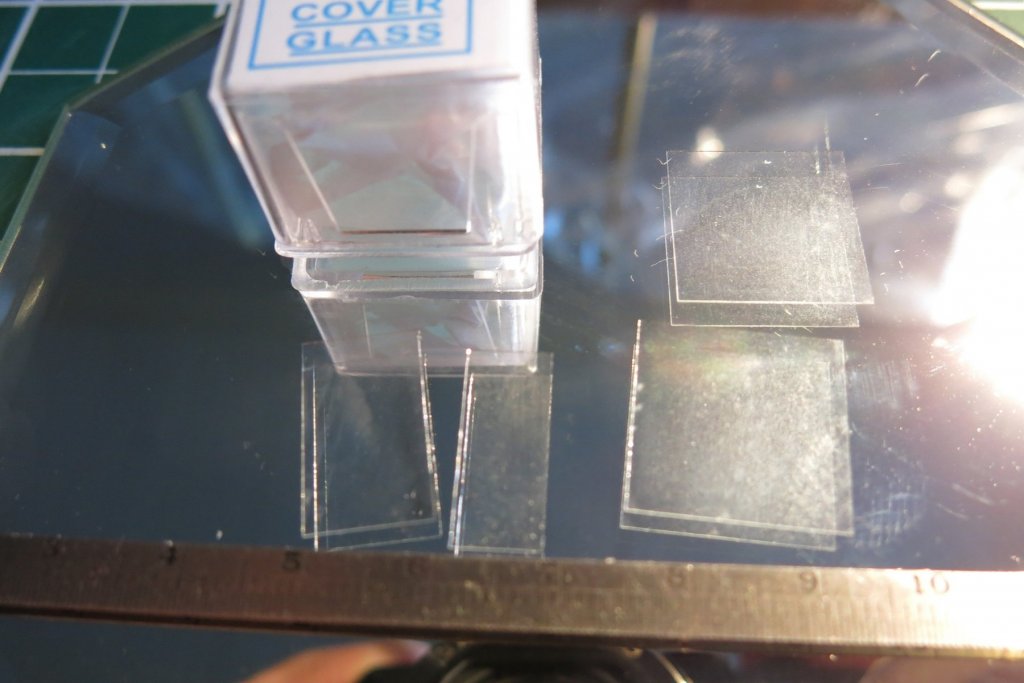
Two things - I am working on the deck fixtures; deck houses, mast coats, pumps, windlass etc. in order to define mitered borders around these for decking. Looking at stock of pictures of the real ship (thanks again Nenad!), I don't see mitered decking trim at the base of the deck houses. At least not the modern version. Was there? The other question is skylights - certainly one on the poop deck house, either 6 or 8 lights. One on the aft deck house? Or two? I saw somewhere here the use of real glass for the lights. Microscope cover slide. Incredibly thin at 0.007". My first attempts were with a regular glass cutter. shattered shards. A search showed to use a carbide tipped scribe with gentle, consistent pressure. Viola!! (the French version). The secret is to apply a drop of isopropyl alcohol.
- 55 replies
-
- 3
-
-
- cutty sark
- sergal
- (and 2 more)
-
Gary - When the time comes to consider sails, have a look at hamilton's America. His are very nicely done.
-
Nenad - A while back on keelhauled's log, you posted: "Marc, if you are interested, I could send you a link to my Gdrive where is my collection of CS photos ( couple od hundreads) Edited June 30, 2015 by Nenad" Do you still have this link available? Thanks, - Tim
- 55 replies
-
- 2
-
-
- cutty sark
- sergal
- (and 2 more)
-
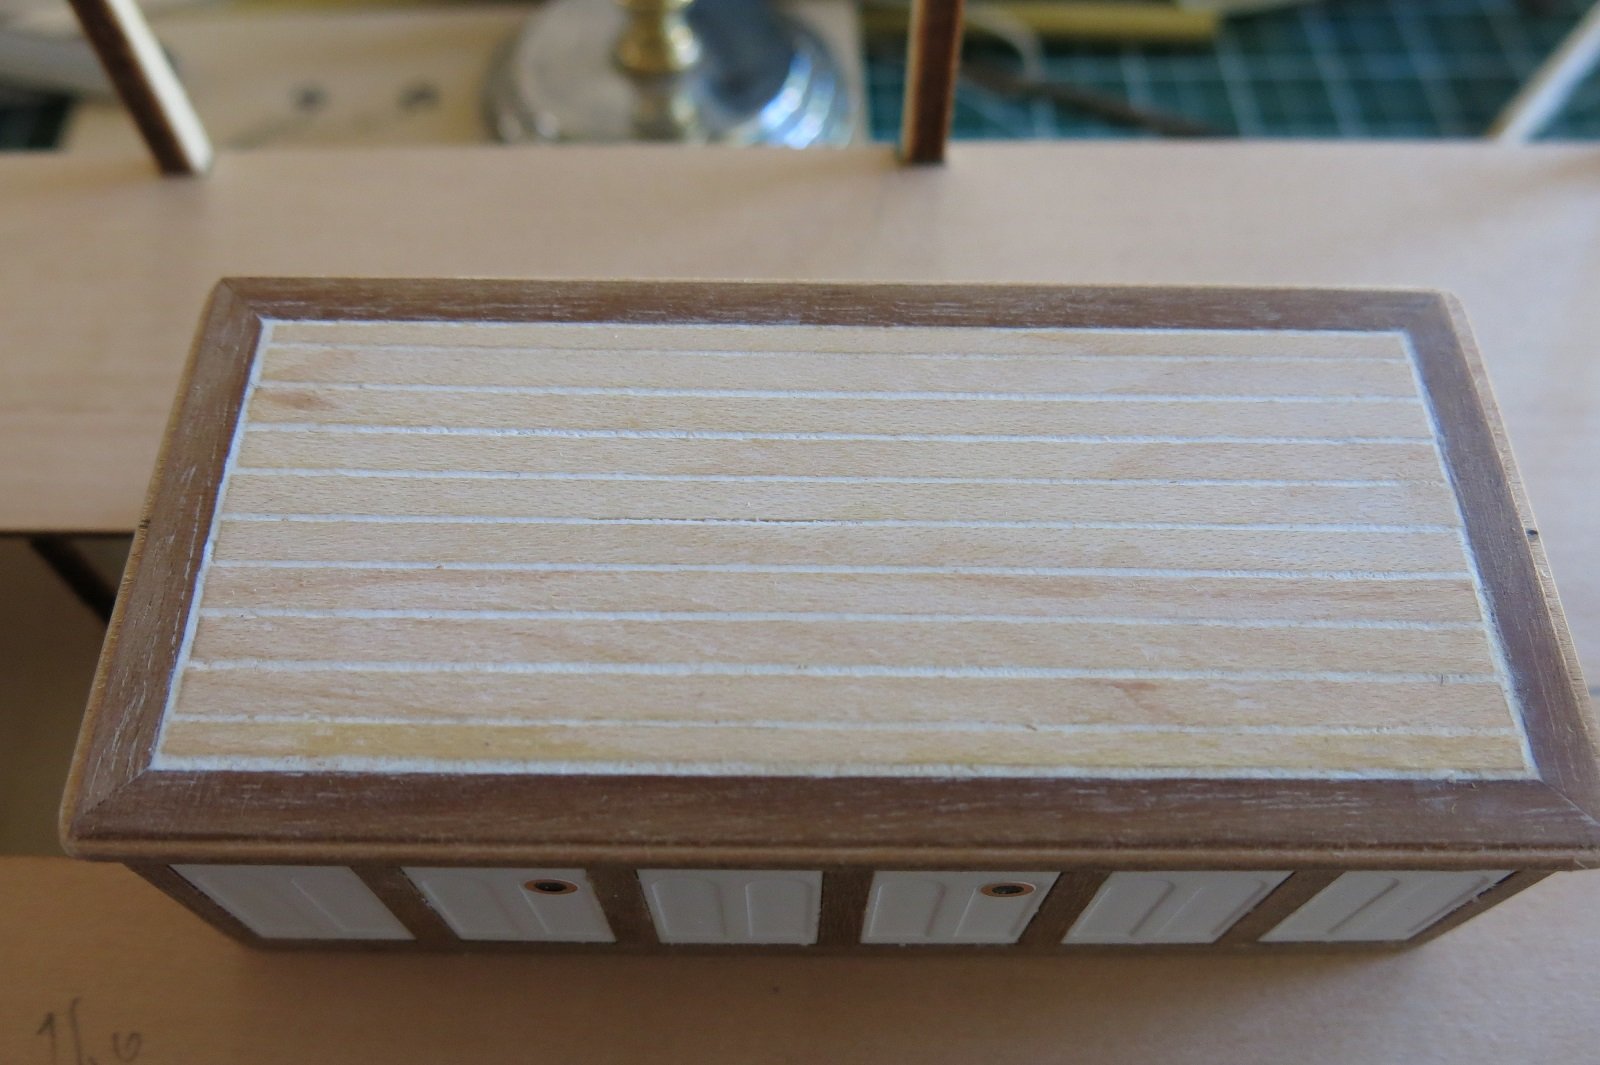
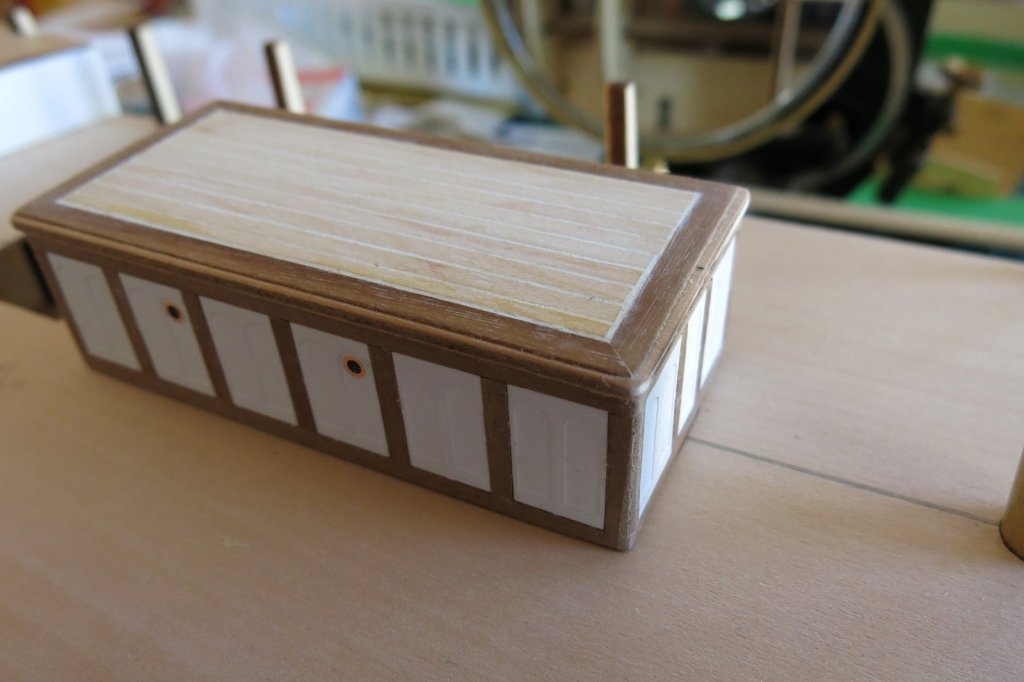
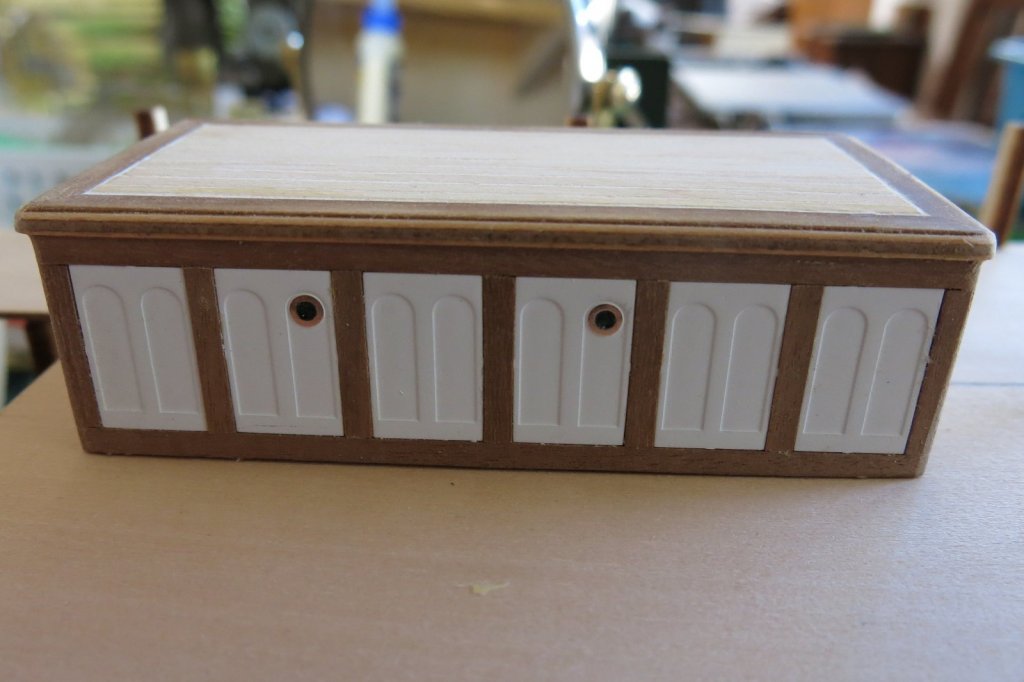
Hamilton, the deck house panels are etched brass that I painted flat white. I scraped off the paint around the port holes. They are not accurate according to Campbell plans or Longbridge book. I think they look OK so I don't really care. They come in a strip that I cut apart, between which I inserted walnut strips (can't find teak). Hof, Looks like these pictures were before the topgallant rail was applied? Is the brass strip one piece? Is it a solid strip from the deck to the underside of the topgallant rail? And from the knighthead to the poop? Looks like it ends back there somewhere? The warped fore deck: I live in New Mexico and we have very low humidity - we can use evaporative (swamp) coolers effectively. The laminated plywood of the fore deck is not happy with the fluctuations though. It looks like the aft end of the deck runs to the fore side of the WCs and attaches there? Again, beautiful execution, even at this early stage! Thanks for the pics! - Tim
- 55 replies
-
- 2
-
-
- cutty sark
- sergal
- (and 2 more)
-
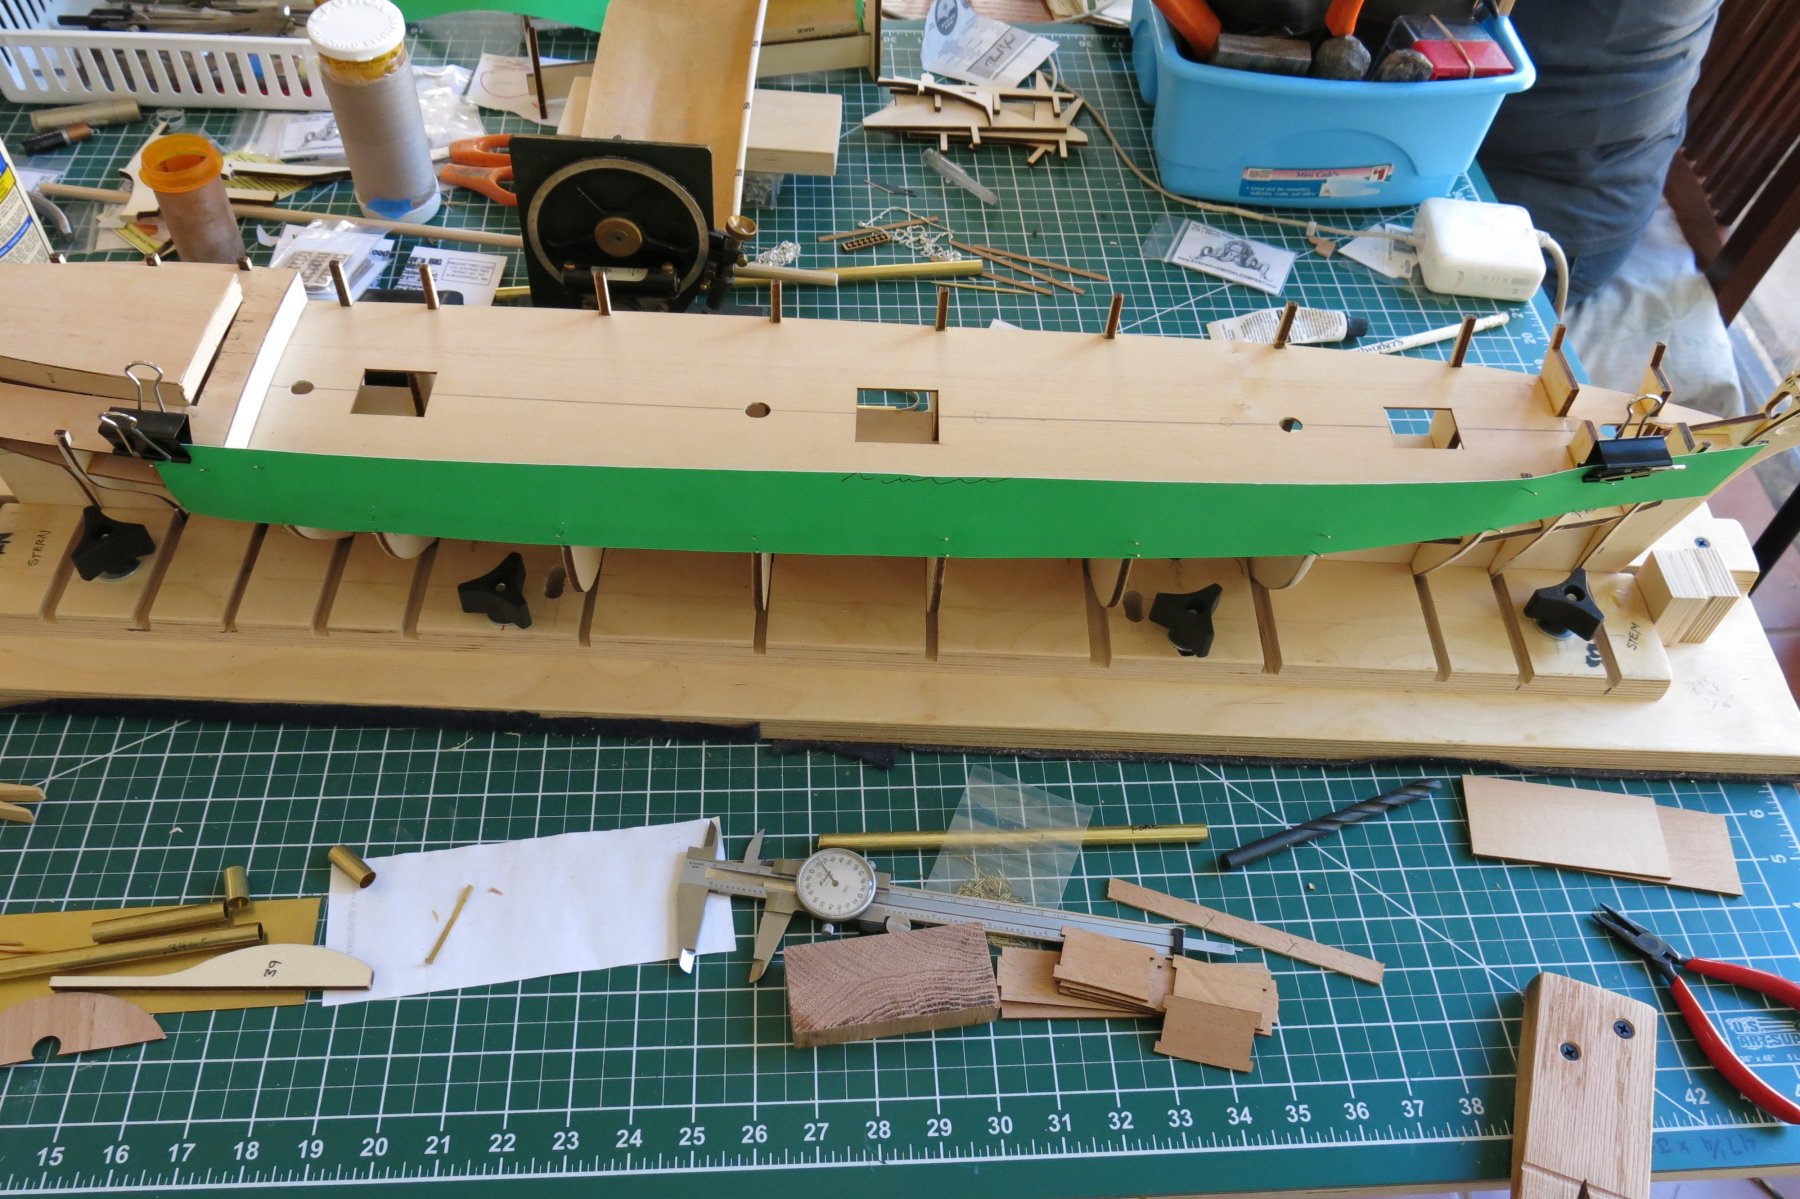
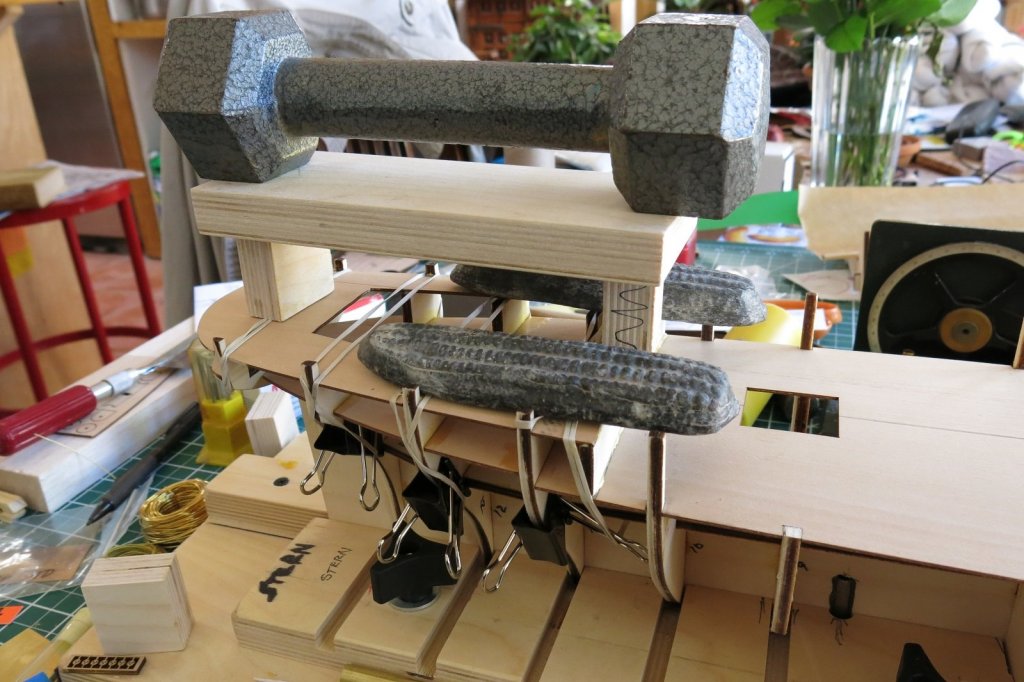
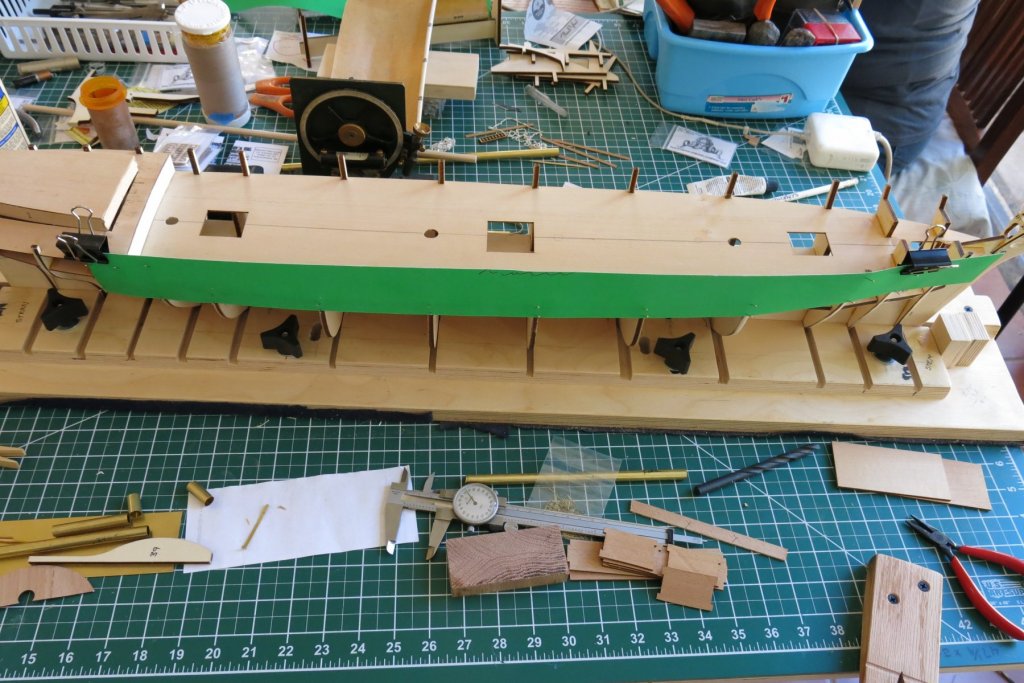
Thanks ragrove - next time I have her off the jig I'll snap some pics. Thanks Hamilton - I try to keep it fun, mainly by not thinking about the magnitude of this undertaking. I've got a few pics here... I'm gonna do the main deck first. Gluing down - nobody breath . . . As I mentioned I'm going to do the bulwarks in solid brass, simulating the 5' by 15' iron plates. Don't quite know how to cut them out yet. I've seen cross section drawings of the bulwarks where there is the bulwark itself, attached at the lower edge to an iron sheer strake. I thought I'd just extend the brass down below the top of the timber strakes and attach the brass to the bulkheads. I need help on how to treat the transition from the main deck bulwark, forward to the sides of the fore deck, and aft around the poop. Pictures of the iron work in these areas would be nice. m Building some of the deck furniture so that I can miter around their base. The aft deck house still needs some trim paint. Still need to glue down the fore deck. In spite of my efforts. it is still trying to curl up like a potato chip. I need to figure out what the aft edge of the deck attaches to. I think the main rail is supposed to run from the top of the lower bulwark, straight onto the fore deck and poop deck (??). - Tim


- 55 replies
-
- 6
-
-
- cutty sark
- sergal
- (and 2 more)
-
Hi Gary - Just found your log. I shall pull up a chair and watch if I may. I built the Mamoli America POB at 1:66 scale. I passed on the Bluejacket because they said it was a solid carved hull. Didn't know it was sliced like this. Intriguing. 1:48 will be nice. If I may offer a couple of suggestions, take a look at Syren Ship Model's (www.syrenshipmodelcompany.com) boxwood rigging blocks and their selection of scale rope. Both are superior items (especially compared to what came in the Mamoli kit). Their rope is fuzz-free and came in black, which I used for shroud rigging, and tan for the rest of the standing rigging. I also bought their serving machine for serving the shroud lines. Cheap and works like a charm. I would highly recommend coppering the hull. I used adhesive backed copper tape and a ponce wheel to simulate rivets. Probably not exactly true to the original plates but it looked pretty good. There are a couple of books that I mentioned in my log - don't quite remember the titles but they had some good drawings and paintings, and even some actual photographs. Do you plan on doing sails? Anyway, your work looks fantastic!! Please keep it up and post pictures. I can't wait. - Tim
- 162 replies
-
- 2
-
-
- america
- BlueJacket Shipcrafters
- (and 1 more)
-
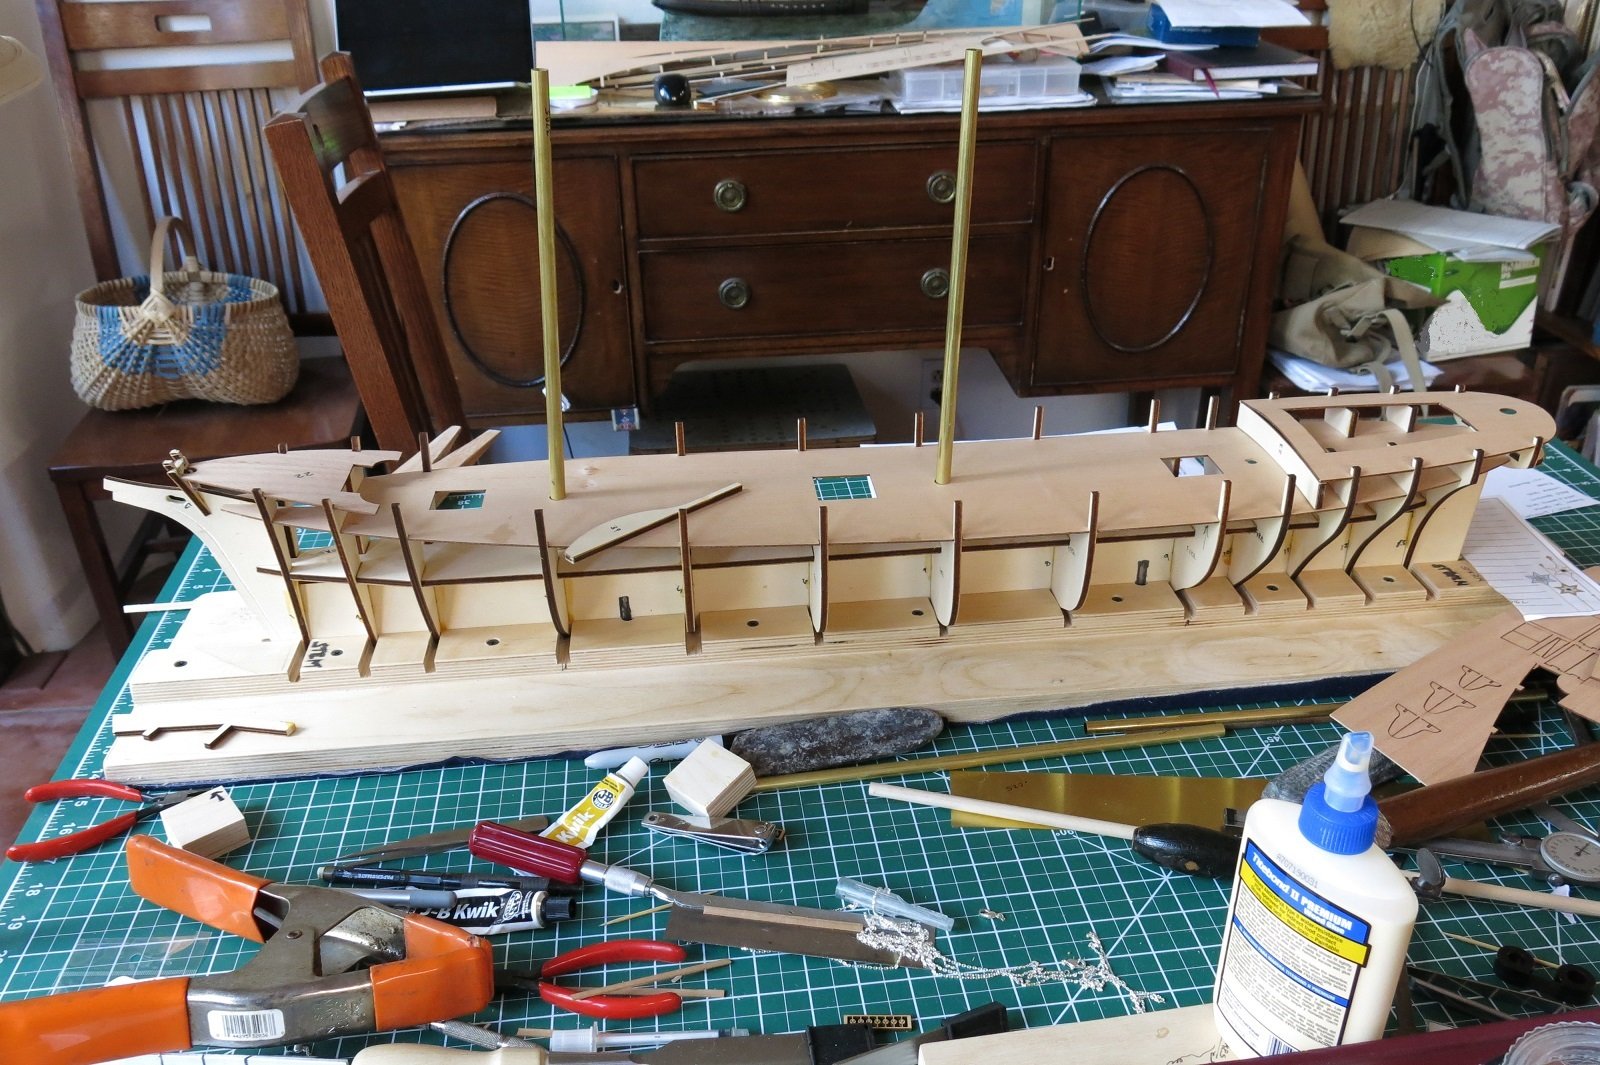
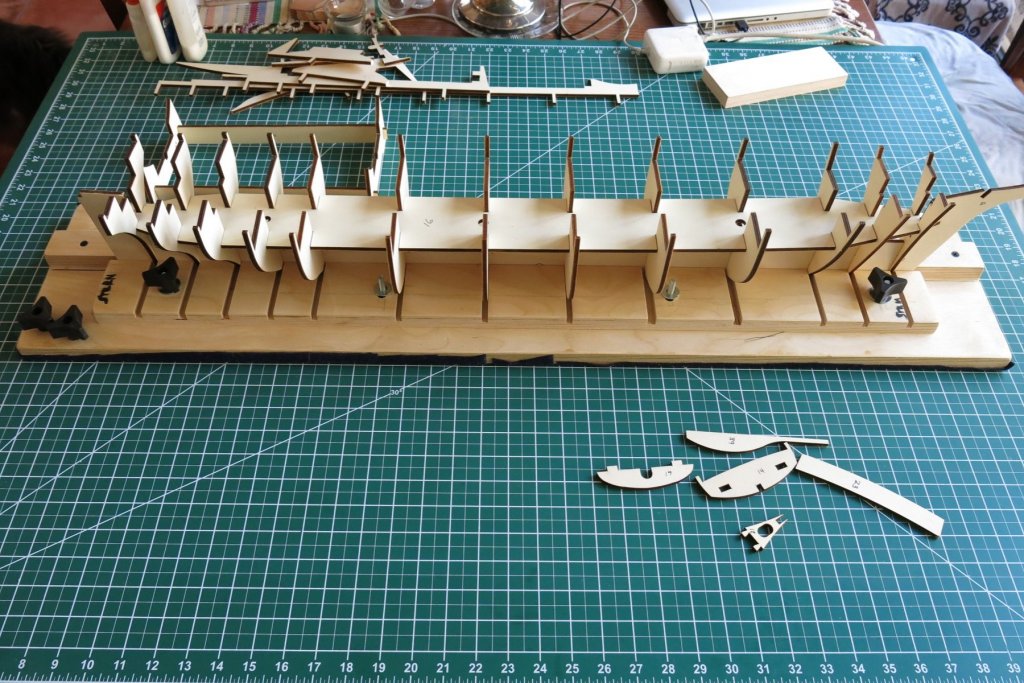
I am at this point here - the sub-frame is glued in and all the bulkheads trued. The sub-deck is just laid on for now. My plan is to use brass sheet for the bulwarks. I wasn't going to have any wood inside the bulwark under the main rail. I am planning to solder up the stanchions per Longridge and solder them to the joining butt straps. I don't know if I can pull off real rivets to attach them - if not I'll solder them. I am considering gluing down the sub-deck, cutting off the bulwark risers, and then planking the deck up to the waterways. Actually just short of them, and adding a margin board. I intend to joggle the decking up to the fo'c'sle deck (up there too). I will use 3mm maple deck planks per bonedoctor51's approach as I agree 2mm would be too busy. I've read in at least one thread that planking is way easier before the bulwarks are in place, at least on the main deck. Trying to decide if I need to put down a strake or two at and below the maindeck level first. - T

- 55 replies
-
- 4
-
-
- cutty sark
- sergal
- (and 2 more)
-
Hi Lou - Just reviewing your work - really nice. Wondering if you planked the deck before doing the bulwarks? (I'm at that point) Also, will you do the little ladders up to the fore deck? Can't wait to see progress on masting and rigging. ... And pictures! - Tim
- 42 replies
-
- 1
-
-
- Cutty Sark
- Sergal
- (and 1 more)
-
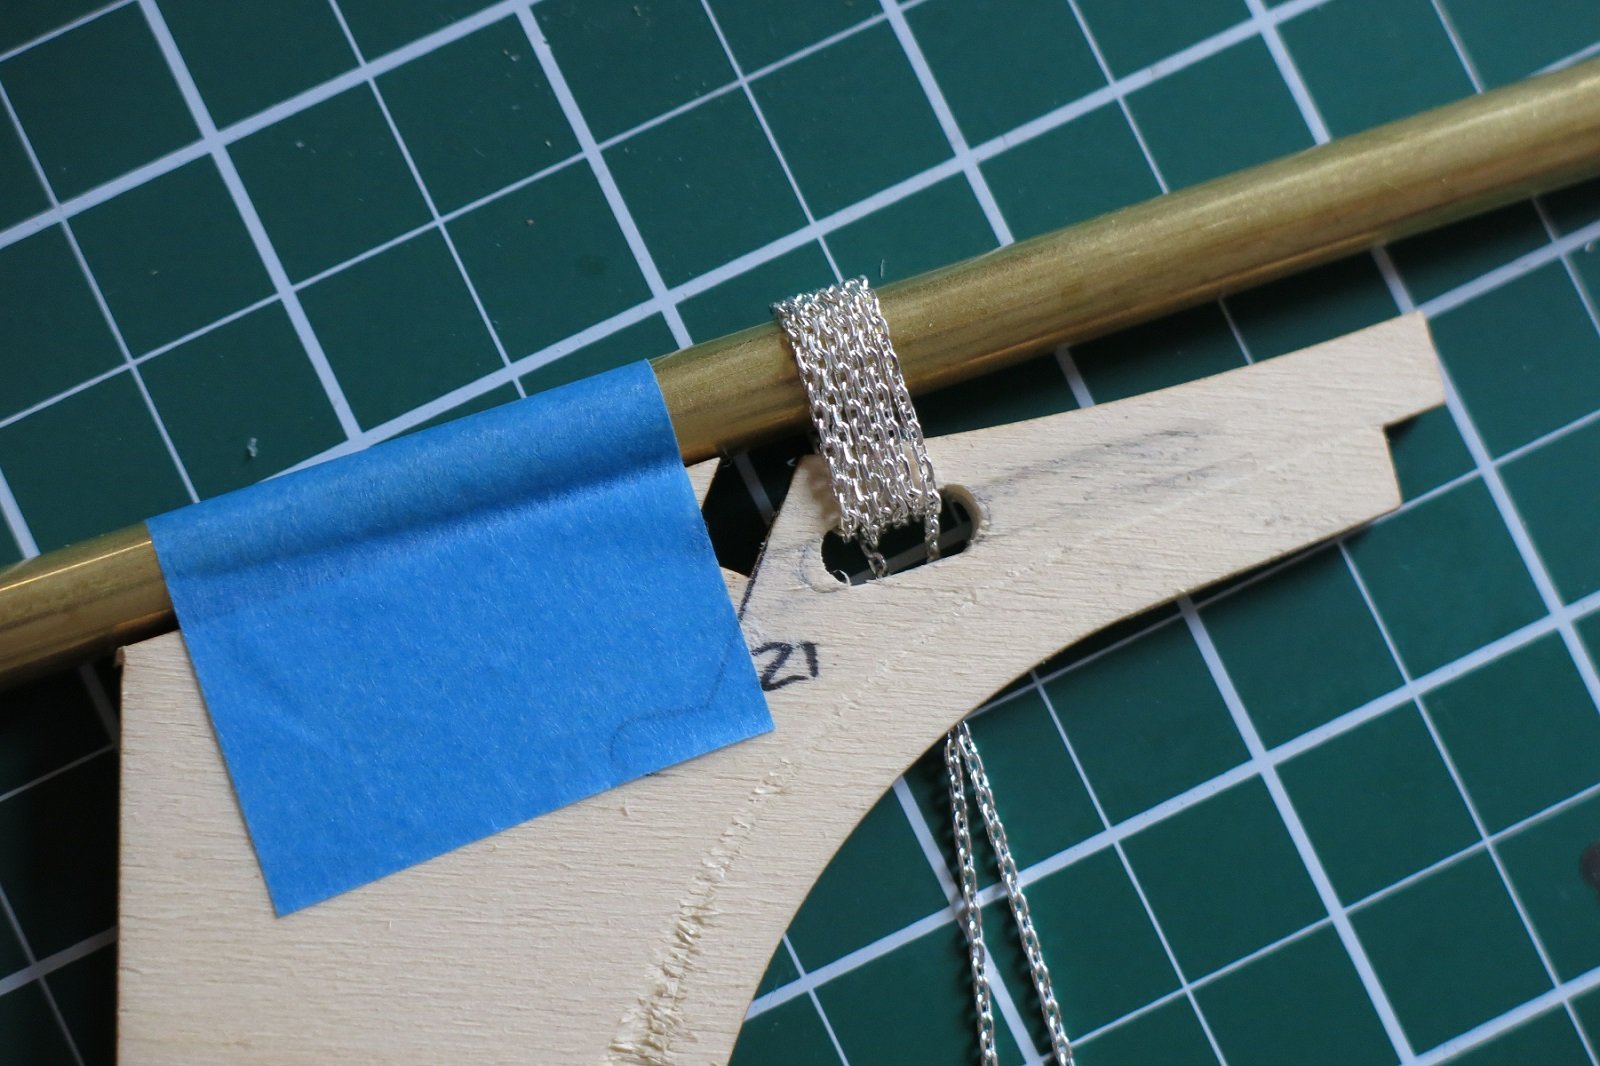
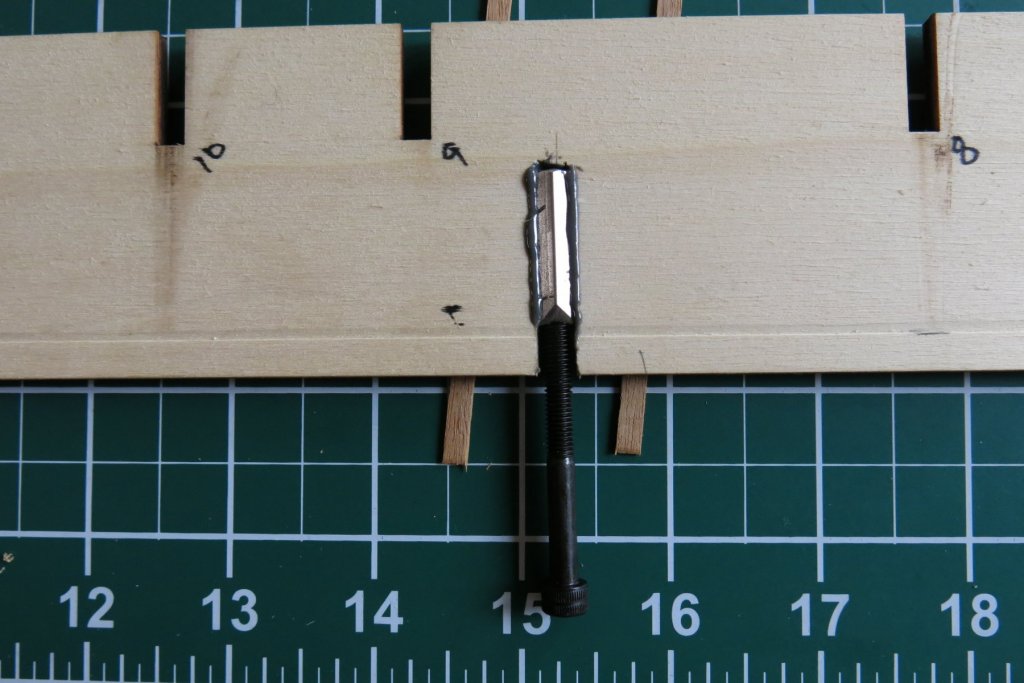
So here is the slot for the Gammoning chain. The chain seems the right scale. It is silver plated brass which should go black with liver of sulfur. I used 10-32 X 1" threaded stand-offs epoxied into the keel. These will be the final pedestal mounts, but should also come in handy for holding her in different positions during the build. Now that all is done (?) to the keel while it's flat, on to the bulkheads.

- 55 replies
-
- 2
-
-
- cutty sark
- sergal
- (and 2 more)
-
Very nice coil Ed, don't think you could get much more line on that pin. Did you make those pins or find them somewhere? The pins supplied with my 1:78 Cutty are totally wrong scale. And you've probably covered this before but how do you treat your rope for coiling? - Tim
- 3,618 replies
-
- 2
-
-
- young america
- clipper
- (and 1 more)
-
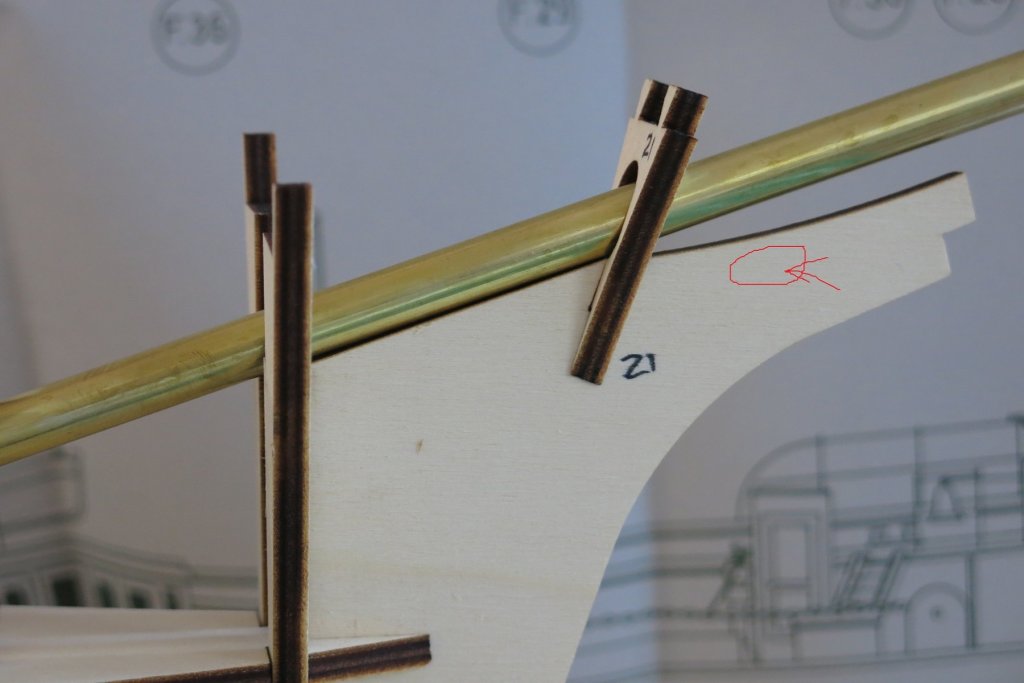
Right Hof - I should have said "in relation to the jib boom end". Longridge mentions a band or strap at the top of the bowsprit, going about the top quarter way round, that acts as a stop for the chain (to keep it from sliding down). Longridge shows the bowsprit laying right on the false keel in this area. The kit has the false keel dipping down forward of the knighthead. All this butted against the knighthead as you say. I will do the hinged jib boom band like yours. My bowsprit will be 11/32" brass tube, so I will solder the band(s) to the bowsprit. - Tim
- 55 replies
-
- 1
-
-
- cutty sark
- sergal
- (and 2 more)
-
Thanks Hof - Looks like your gammoning chain is at (under) the end of the jib boom and forward. Beautiful by the way! - Tim
- 55 replies
-
- 1
-
-
- cutty sark
- sergal
- (and 2 more)
-
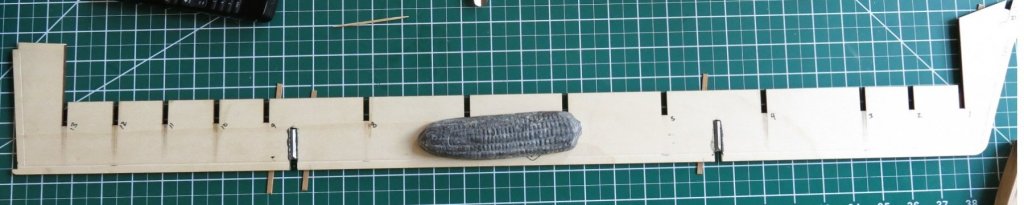
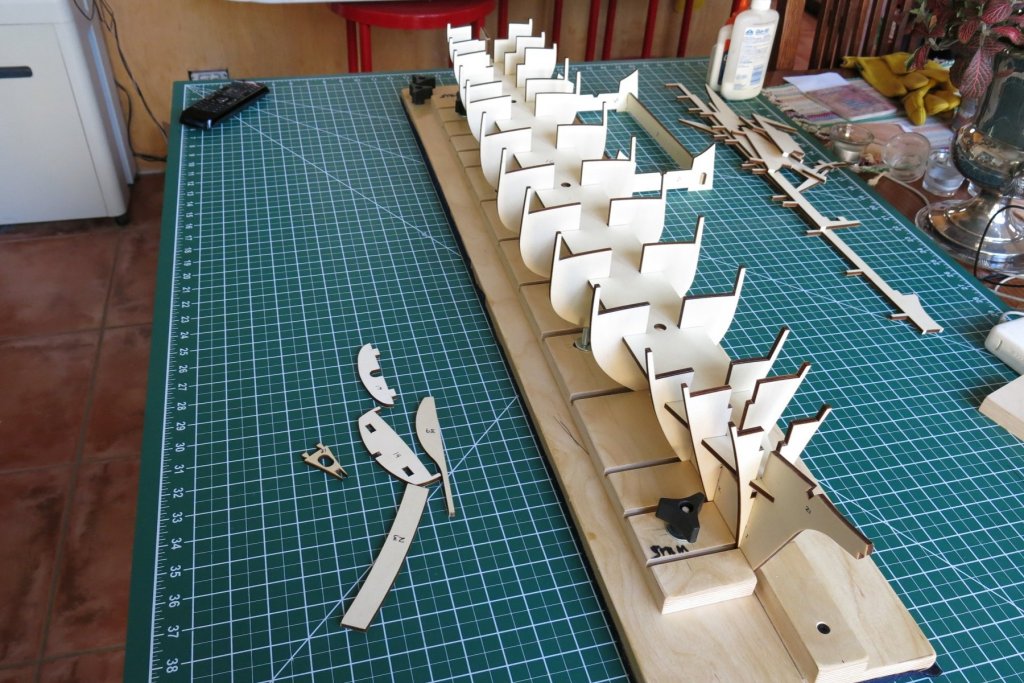
So, research has begun in earnest. Rather than mark up my Longridge with the 1:48 to 1:78 conversions, I started a notebook for these, and also a paper log. The new build-board is done. I will apply posts spaced at mast locations for upside down work. Longridge (and many of you) have a gammoning chain applied. It looks like it is centered about 5mm forward of the end of the jib boom. Any suggestions on exactly where (on this 1:78 Manoli kit)? I plan to also install 10/32 X 1" threaded standoffs into the keel for eventual display mounts. And I'm considering Longridge's set screws under the mast steps for final adjustment of shroud and stay tension. Masts will be 3/8" brass tube for main and fore masts, 11/32 for mizzen mast and bowsprit. I must say that the K&S Precision Metal tubing is perfect for nesting sizes. the 0.3785 fits perfectly over the 0.3465 for rings about the bowsprit and mizzen mast. The 0.408 fits perfectly over the 0.3785 for rings etc. over the main and fore mast. I want to get everything milled on the keel before I fix the bulkheads. I'm wondering if rabbeting a bearding line groove on the keel for the garboard strake and the strake ends is desirable and/or necessary? - Tim

- 55 replies
-
- 3
-
-
- cutty sark
- sergal
- (and 2 more)
-
No worries Marc - I've just laid the keel on my CS and heavy into research. I've picked out the top six CS builds on MSW to study and like it or not, you're one of them. Like a kid in a candy store... - Tim
- 525 replies
-
- 1
-
-
- cutty sark
- mantua
- (and 2 more)
-
You have done an outstanding job so far! Would really like to see more photos of your progress. With spring in the air, maybe? . . .
-
Hi Tom - Backing up to your treatment of the blocks (and I presume deadeyes), what grit paper do you use in the sanding drum? I can't find the grit information on Model Expo's site. Thanks, - Tim
-
Outstanding!! And from a purely selfish perspective, an invaluable resource for my future builds!! - Tim
-
Thanks Lou - I did. So I'll posts on our blogs - my progress on mine and questions to you on your's as your knowledge and techniques will benefit all. Sounds like your masts will be very close to scale. I haven't looked too hard for metric size brass tube - I should be able to find 8 & 10 mm. Thanks, - Tim