Modeler12
-
Posts
1,716 -
Joined
-
Last visited
Content Type
Profiles
Forums
Gallery
Events
Everything posted by Modeler12
-
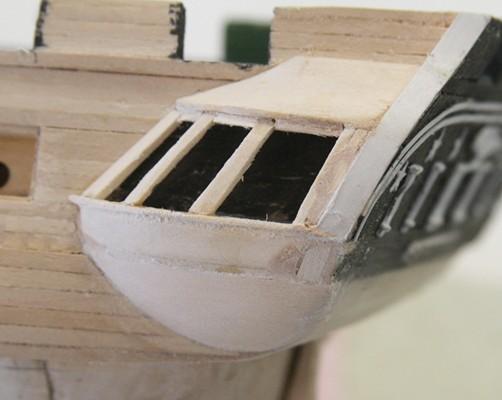
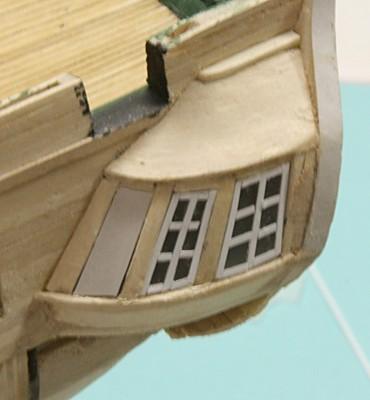
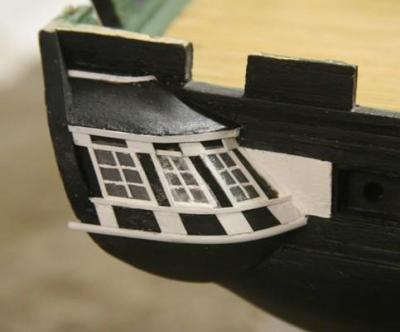
 Let’s continue with some ideas and pictures. I will not go through every step. One tricky part was the gallery, the aft section with the officer’s potty and lookout windows. I had a heck of a time getting that right and am still not happy with the final pieces. For example, on hind sight I could have used very narrow white tape for the window panes. It is available in widths down to 1/32 inch. I ended up painting mine and the close-up shows it. My old hands are just not steady enough. For more details of all of this go to my web site shown below and check the section “Hull Construction’.
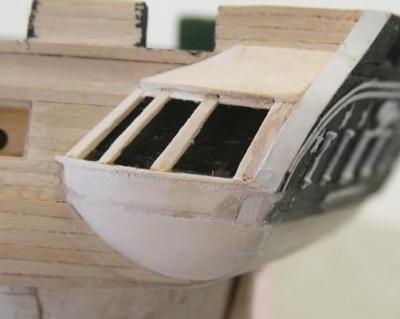
-
Jeff is right about the rivet size. Some have said that .035 inch is too big for the rivet heads (it translates to more than 2.6 inch actual), but when all the deck furnishings are in place the rivet size is not too noticable.
- 732 replies
-
- 1
-

-
- constitution
- model shipways
- (and 1 more)
-
What is your favorite hand tool(s)??
Modeler12 replied to Modeler12's topic in Modeling tools and Workshop Equipment
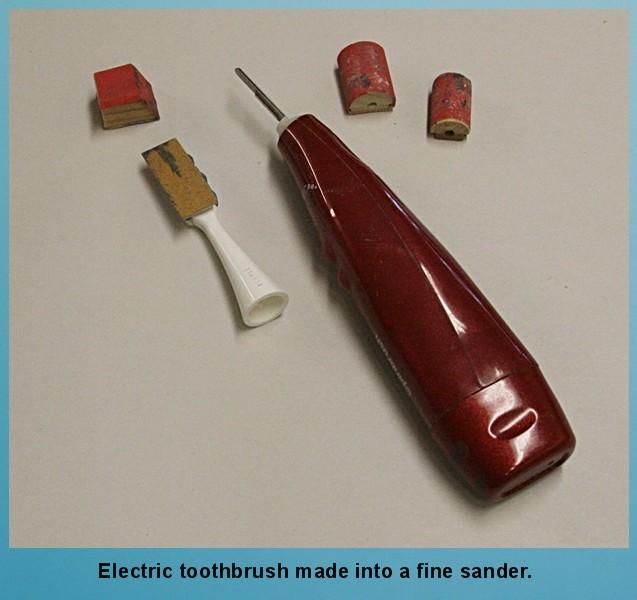
For those of you who want to try this toothbrush idea let me add a couple suggestions. Mine has a 1/8 inch diameter shaft with a flat section at the end. This keeps the tip from rotating but also requires the hole in the attachment to have a similar shape. To do this I made the round and square pieces to the length I wanted, drilled a 1/8 inch hole and then cut part of that away. I glued on another flat section to give me that flat spot. The sandpaper was just glued on with carpenters glue. I can make these pieces quickly and make new ones instead of stripping off the old. The picture above barely shows the two part construction. I am not sure if other models have the same shape. But I thought I just pass on this info. I am now also looking into using an electric knife and see if I can adapt that the same way. It would give me more power for larger surfaces and still not be as clumsy as the bigger sanders (including the Black&Decker 'Mouse').
-
Good to see you back Alistair. Your Sharon is a prize to behold. I assume she has a prime spot in you beautiful home. Just make sure the cat cannot get to it. Jim and I have been going back and forth about this new format and how to insert pictures along with the text. I still have some problems. Perhaps my brain is catching up with my old age.
-
Thanks Jim for the insight. I was not aware of the details but did try to copy and paste a section of a word document. Then when I pasted it in this forum I got the little box where the picture was supposed to be. At that point I gave up. Now I can try it again. Your build log looks great and you are ready to continue where you left off. I got a long way to go with updating mine but I am also trying to include some suggestions that I found good for the Conny build.
-
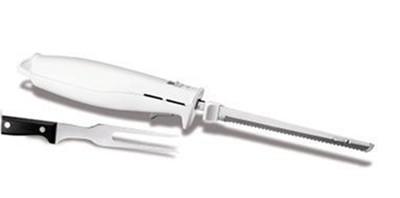
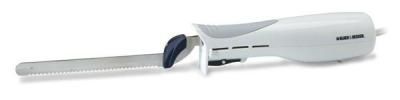
Mark here is another possibility. Look at the electric knives below. The handle is about seven inches long. The second model by Black&Decker sells for about $13. In fact I may check this out for a stronger sander.
-
Mark, I don't think the micro sander or toothbrush would have much umpphhh for the saw blades even if they are small. I have considered using an electric hair clipper. That would give you plenty of power, does require an extension cord, but to adapt it to a sanding pad or the saw blade is tricky. The oscilating blade of the hair clipper goes sideways, not back and forth. I have one of those trimmers for sideburns, and other facial hairs, but again they have no power. Perhaps there are other small appliances that are better.
-
Mark, this micro sander looks a lot like my electric toothbrush sander. Mine costs about $15 versus yours at about $100. See another post on this subject.

-
I have a question for you, Jim. I noticed that you were able to post text and then insert a picture and then text again. I have not been able figure out how to do that with this new format. HOW?? I like the previous format where you could add some text underneath the picture or attachment. But that has been deleted. Yours would allow me to do that. HOW??
-
Hi Jim, It was a good idea of yours to save what you could prior to the '2013 collapse'. I remember your dorries and the one 'floating' outside the hull of Bluenose. Great work on the details, my friend. I will keep an eye out for this buildlog.
-
A small hand-held power sander
Modeler12 replied to Modeler12's topic in Modeling tools and Workshop Equipment
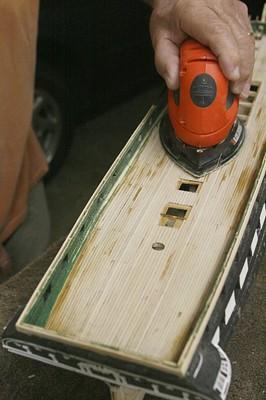
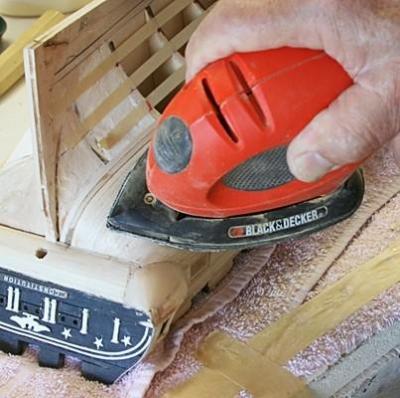
John the sander is very light and vibrations are minimal. I have never had a problem having parts vibrate loose. Keep in mind that this thing is not like you typical 'power sander'. It is designed for refubishing scroll sawn furniture pieces. It comes with different attachments that refine the type of contours you can sand. You might do a web search under Black & Decker, Mouse to see more. One of the pictures I showed above was when I decided to redo the deck of my Conny. I did not like the scratches and gouges I had and used the mouse to completely strip the deck. I did have to repaint the green bulwarks towards the bottom, but that was not too bad. I might add one more comment. One of the reviews on the web mentioned that the person burnt out the motor. I think that is because some people put too much force on the little guy thinking that more pressure does a faster job of sanding. That, of course, is false. You should let the sander do its job and just guide it along. It comes with different grades of paper, etc.. etc.. -
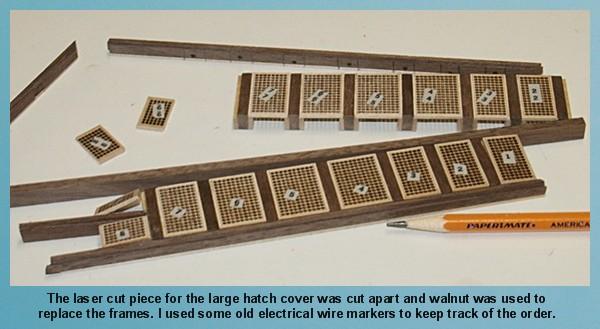
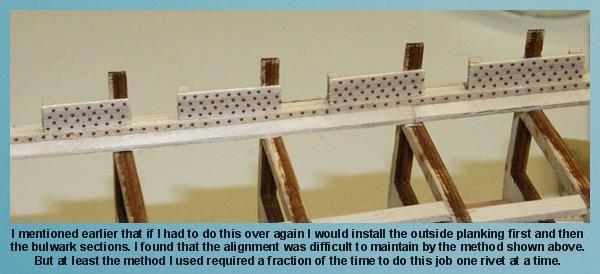
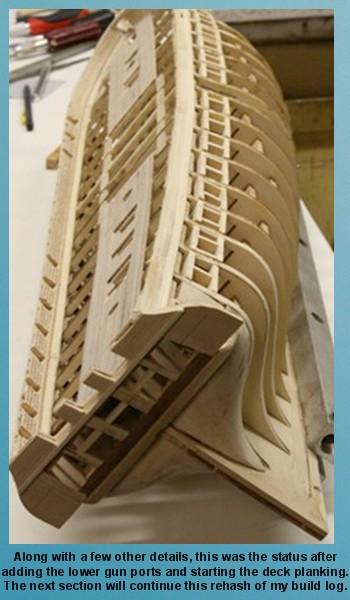
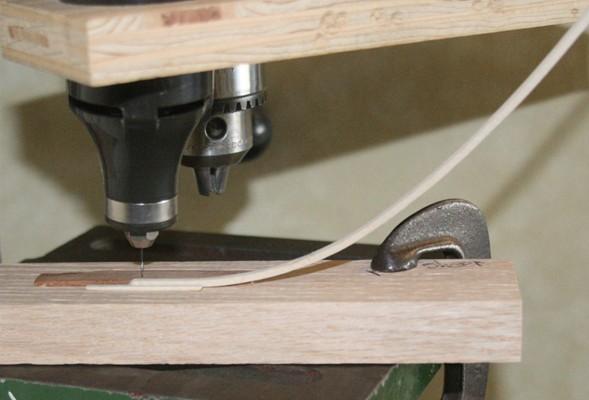
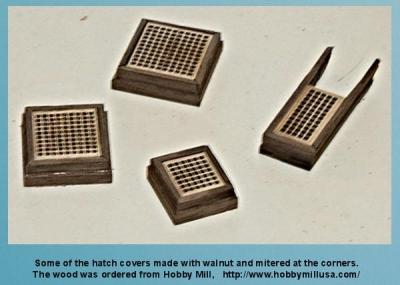
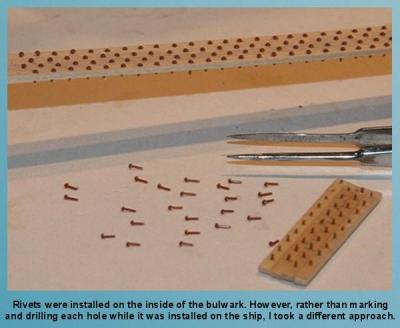
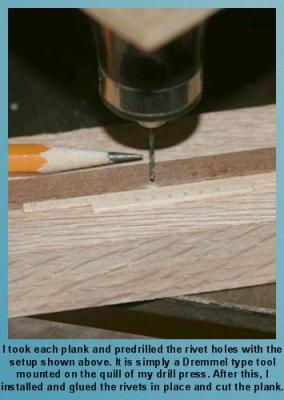
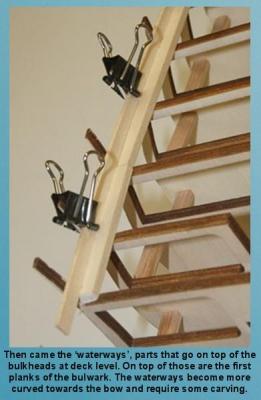
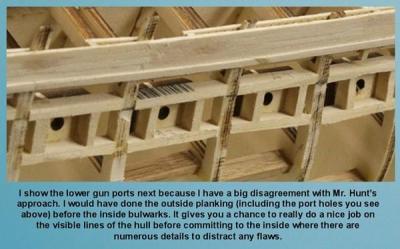
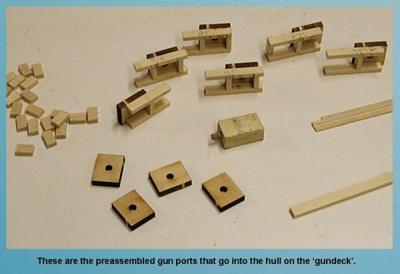
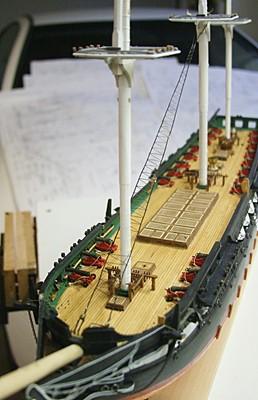
Thanks Jim. I will have to check your progress next. But let me continue with a couple comments about the next steps on my Conny. First a suggestion about the hatch covers. They come as laser cut pieces framed with baswood. I decided to replace that with walnut that I bought from Hobby Mill. I also used simple miter cuts for the corners. See below. Installing the rivets for the bulwark was going to be a tedious job. The cookbook said to do this one by marking and drilling one hole at a time after the planks were glued in place. Wrong!!!] I decided to predrill the holes in each board using the setup on my drill press with a Dremmel type tool mounted on the quill. This took a fraction of the time. I then glued four of these board edgewise and glued in the rivets. Now I could cut this into sections as shown below. I should also have installed the outside planking of the hull before the bulwark because the alignment of the little posts and sections between the port holes was not all that great. It would have been better to have a smooth looking outside hull.


- 732 replies
-
- 2
-
-
- constitution
- model shipways
- (and 1 more)
-
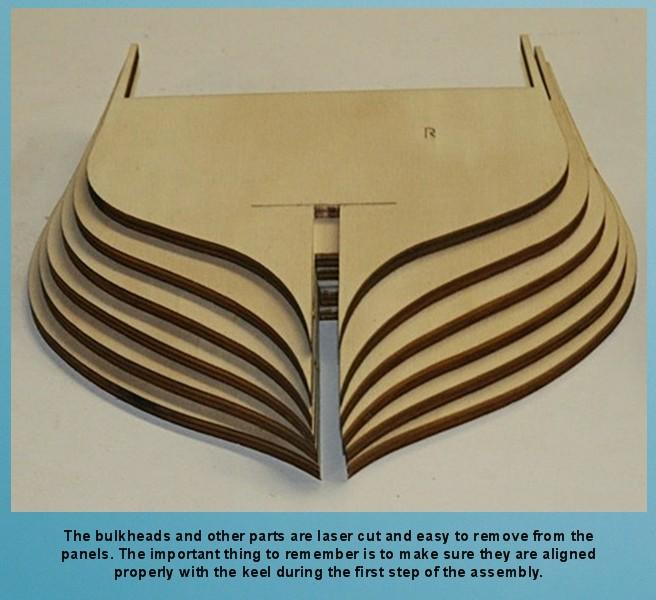
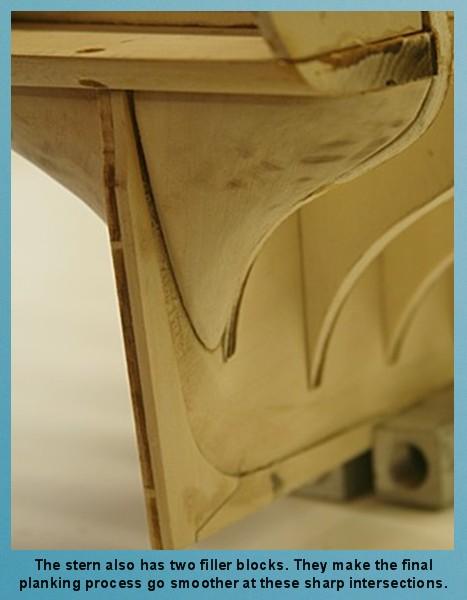
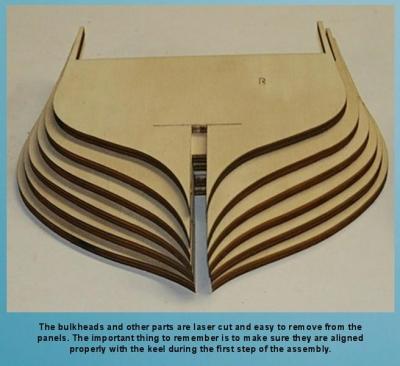
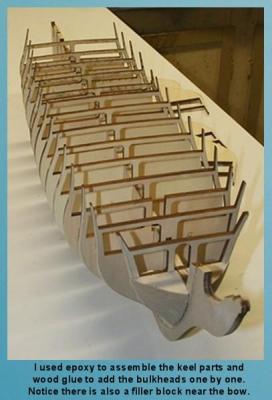
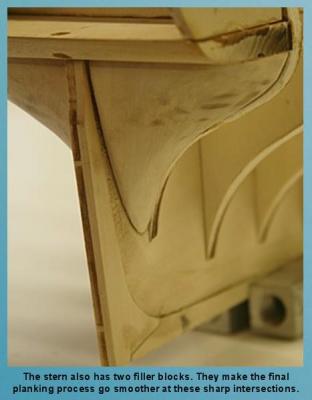
This an honor I don't deserve, but let me begin with a few highlights of my log. Again for more details go to my web site. The kit contains the various laser cut parts such as the bulkheads and keel pieces. The first step (besides learning what this is all about and sorting out the numerous parts) is to assemble the basic hull. Nothing new, and as many of you know this is a rather critical step because any misalignment will cause grief and lots of extra work later on. The pictures that follow below have some comments because it gets confusing if I were to just show all the pictures I have taken thus far without a label. I may also have to split this part up into a few sections and point out some pitfalls I encountered (as well as some short cuts that I think will help). I should also add here that I started with the cookbook published by a Mr. Hunt. It really helped me in the beginning, but I soon found out that there are better ways to do some of his 'instructions'.


- 732 replies
-
- 1
-
-
- constitution
- model shipways
- (and 1 more)
-
What is your favorite hand tool(s)??
Modeler12 replied to Modeler12's topic in Modeling tools and Workshop Equipment
OK Wayne. Since you like your toothbrush, how about this one? I took an electric toothbrush, cut the bristles off and glued on a piece of sandpaper. I made some more out of wood, drilled a hole so they could be mounted on the vibrating shaft, and voila . . . another tool to keep things clean and smooth. Oh, be sure to use a vibrating toothbrush, not the rotating type.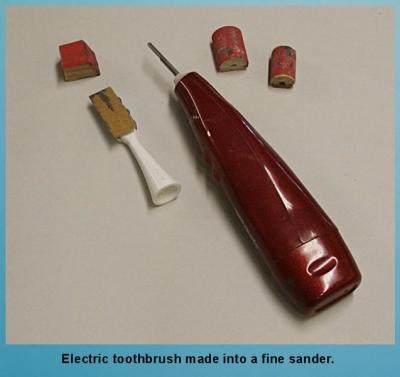
-
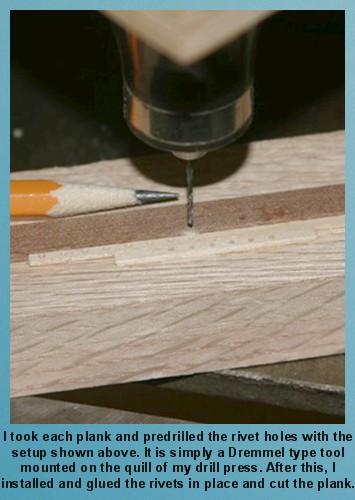
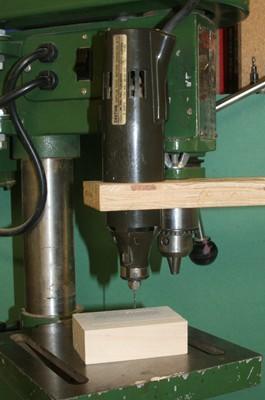
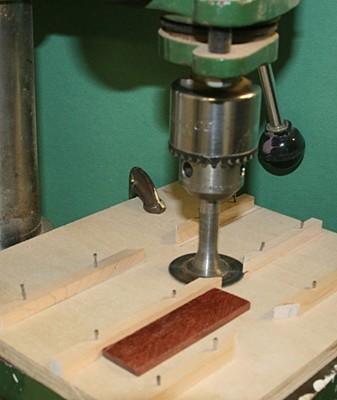
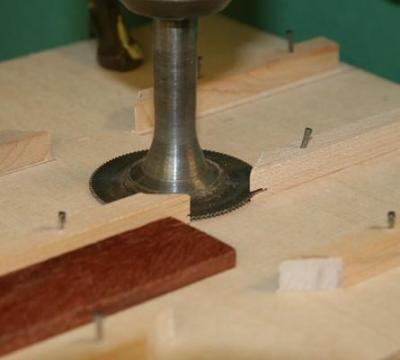
I am curious how some of you may have adapted other 'tools' to your drill press. Here are a couple that I have made and used several times in the past. I posted this before, but perhaps it is worth repeating. Mounting a Dremmel type of high speed tool to the quill. I used a 3/4 inch piece of plywood and mounted that to the quill as shown below. The Dremmel (actually an old Monkey Ward unit) tool fits snugly in a large hole and that way I can drill tiny holes rapidly and more accurately than doing this by hand. This came in very handy when I had to drill numerous 'rivet holes' in the bulwarks of my Conny. See below. I have also adapted a circular saw blade (made by Thurston http://www.thurstonmfg.com/) to my drillpress. This allows me to cut wooden strips to various thicknesses.

-
I like it. Clever design. I may have to do something like this. Perhaps I can addapt it to my old Shopsmith. I made a small table saw for that tool so I can cut thin strips of lumber. But sanding afterwards would be a good addition. Do you have any problems of the sandpaper grabbing the work piece and throwing it out the end? Do you simply hold the part at both ends as it goes through?
-
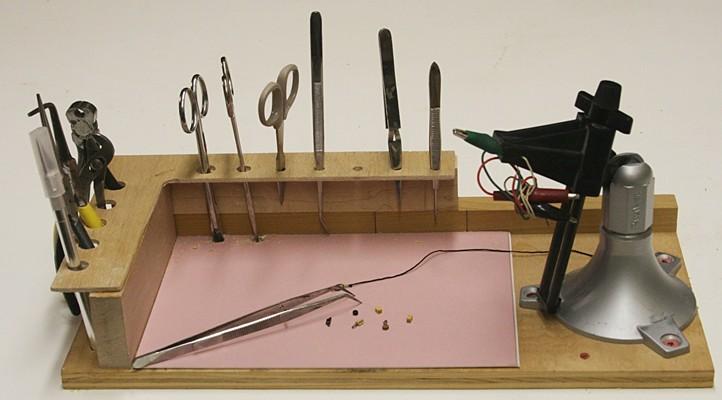
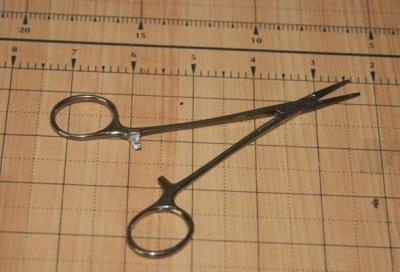
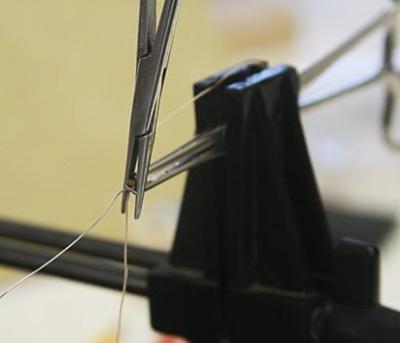
I am sure we all have a favorite. I, for one, like the hemostats I have. Although I use tweezers a lot, I find that a hemostat works better to hold tiny parts such as blocks, rings and pins. I can grab a piece and clamp in the jaws, then let go of the handles and mount the thing in a vise or hold it for sanding etc. I have three of them (two straight, one curved). To allow me to grab things that are a bit larger than the hemostats can handle, I have bent the handles of one so the clamping force is not severe. I have found this to be much better than using the aligator clips, for example.

-
Being a wood worker, one of my old tools is a 'mouse', a small power sander that comes in handy for sanding hulls and decks. It is not designed for large sanding jobs, and because of that it has had some bad reviews. But I really like this little guy for delicate sanding into corners, etc. It is made by Black & Decker and last time I checked it was available at Home Depot for about $35.
-
Indeed, that is an option. I am not familiar with this particular product, Sarge, but the company I mentioned above makes a similar product. Go to http://www.dharmatrading.com/topnav/transfers/ for details of both types. I have not tried printing on the fabric and am wondering if the image is clear enough to be seen on the back side. The intended use of these products is mostly to show a design on a tee-shirt or other garment. Perhaps you have or have seen this on low cost tee-shirts. I don't like it when the applique becomes stiff, but in the case of making flags it works to an advantage in that the flag can be shaped. The extra thickness did not bother me for these small flags and banners.
-
This is just an introduction to the new build log for my Conny. I will shortly add details about my current status and highlights of my past log. Please, bear with me while I am getting used to the new format and revisit my memory banks.
- 732 replies
-
- 5
-
-
- constitution
- model shipways
- (and 1 more)
-
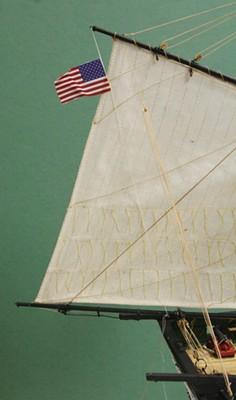
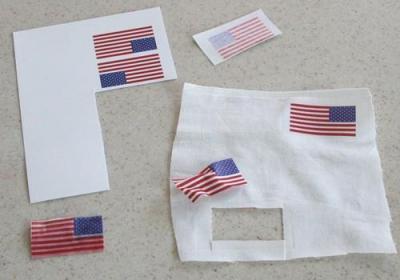
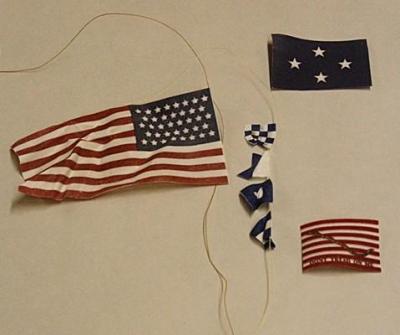
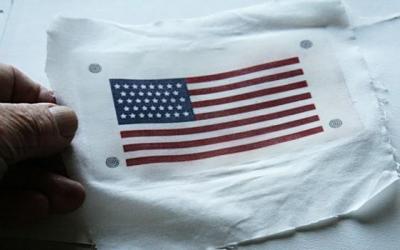
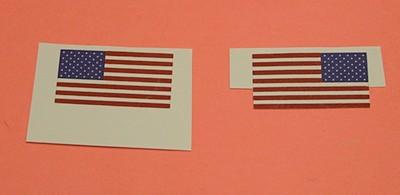
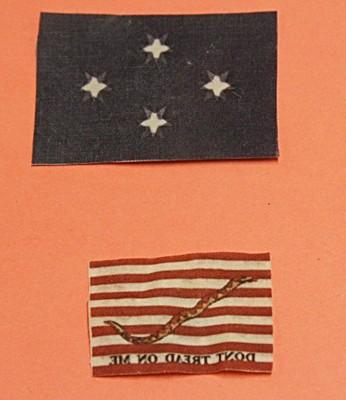
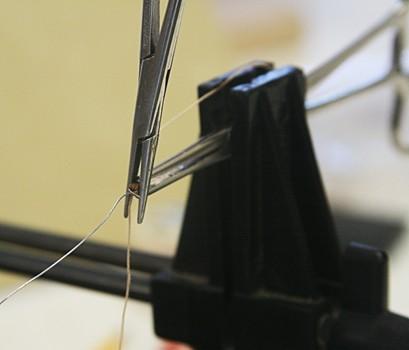
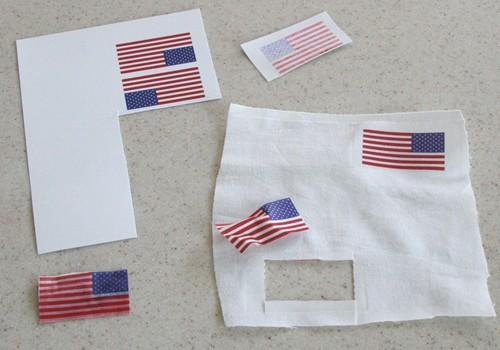
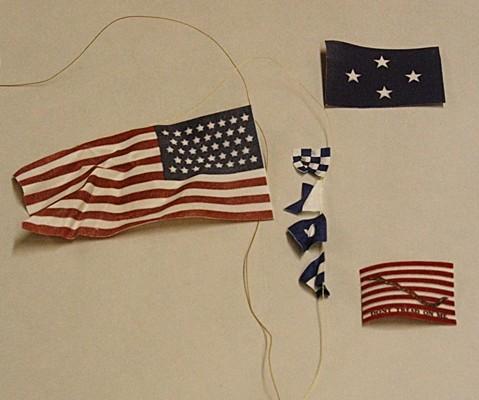
Let us rebuild. But where to start? Prior to the ‘2013 collapse’ we had a section dealing with making flags. Let me refresh what at least my approach was after receiving input and help from other members of this forum. I am terrible with names, but one fellow in Hilversum, the Netherlands, led the way with his approach. Here is what followed: A flag printed on one side of a sheet of paper was the start, but not very interesting. See first picture below. Other suggestions on the forum dealt with hand painting and even using crumpled cans. But the one that I liked best was to use transfer paper. The idea is to print the mirror image of a flag on this special paper and transferring it to a piece of light weight cloth using a hot iron with lots of pressure. The first pictures below show the paper flag and my first tries using the transfer paper made by the Dharma Trading Co. It took some practice and several rejects. Printing on one side of the cloth did not transfer well to the back. Our Dutch friend (help me Lou) showed how he had done this process on both sides. That led me to the following approach. Scale the flag to the size you want and make one real and one mirror image. Print both of these on a sheet of the transfer paper. Take one and with a very hot iron (your wife’s will do) and no steam, press the image onto the cloth. Carefully slide the iron across to make sure the whole area is pressed uniformly. After the recommended time, let the cloth cool and remove the blue backing. You should have a clear image on the cloth. Trim the second image part way as shown below. This makes it easier to index and position the second pressing. Lou made four targets which I tried also but did not need. After the second pressing has cooled, peel off the backing and now you should have a nice flag that can be trimmed and folded (wrinkled) or whatever you decide to do with it. A couple comments about ‘mistakes’. If the flag has printed words, print one image with the mirror image of the words and deleted the words on the second side. It is very difficult to align both sides. Be sure to align front and back in the same order. The blue admiral flag below was flipped the wrong way and the result did not look like stars.