HOLIDAY DONATION DRIVE - SUPPORT MSW - DO YOUR PART TO KEEP THIS GREAT FORUM GOING! (78 donations so far out of 49,000 members - C'mon guys!)
×


Modeler12
-
Posts
1,716 -
Joined
-
Last visited
Content Type
Profiles
Forums
Gallery
Events
Everything posted by Modeler12
-
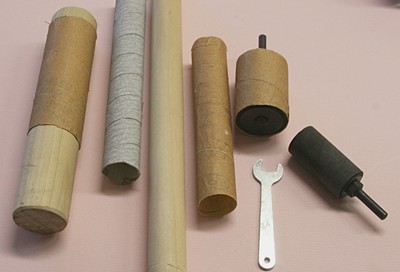
Here is another way you can go with the drums. I bought two rubber drums from Woodcraft. One is one inch in diameter, the other 1.5 inches. They have a screw through the center that expanses the rubber to grab the sanding drums. You can see the nut at the end of one. I found that the type that has a slot and wedge tended to wobble too much. These are symmetrical and run fine for me. I make my own sanding drums by spiral wrapping sandpaper around a wooden dowel. It took some practice but I ended up with the 1.5 inch drums coming out pretty good. The inside has two layers of filament reinforced wrapping tape (sticky side against each other). I then had a layer of double back tape to hold the sand paper on top of that. All of the tapes were cut about one inch wide and spirally wrapped around the dowel. I had coated the dowel with some wax. If anyone is interested, the rubber drums are Woodcraft items 128458 and 128459 and cost less than $6.00 each. You can buy sanding drums but they are all way to coarse for what I wanted.
-
Try this
-
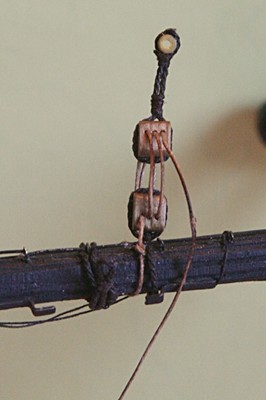
 Correction about the truss tackle shown above. The blocks were not 2.5 mm but 3 mm. But the line was still .015 inch diameter.
 -
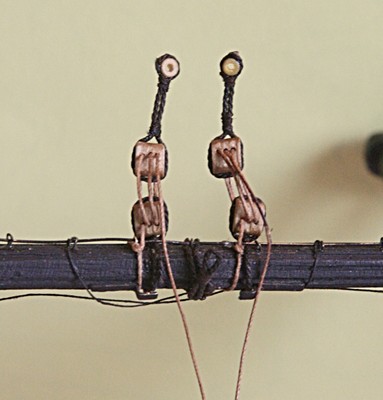
I used 2.5 mm single and double blocks. They translate or convert to about 3/32 inch or 7.5 inches actual size. Like I said, I used rope that was .015 inch diameter which comes to a little over an inch actual. That to me looked reasonable. I used those same sizes on the truss tackles I just put on and I think you saw that. What I am finding is that the more I work with those little rascals, the more confident I get. Making hooks, stropping and whipping a line around them was hard the first time, but now it is a bit easier.
-
Jeff, I don't care about you guys. It is the admiral who doesn't like it when I change my mind all the time. Thanks to both of you Geffs (????) But now that I look at that sheave block I need to modify it slightly. The line should be a bit more aft so it looks like it actually goes around a wheel on the inside. A sliver of wood and glue should fix that.
-
Just after I said that I was not going to add the trusses to the jack and masts, I changed my mind. I guess I am allowed to do that at least once. I had not yet stepped the foremast and decided to add the port and starboard trusses. I wanted to see what they would look like. To position them, all I had to do was add the little sheave block underneath the top. I am going to paint that block white and I think that by the time all the shrouds are put on, these blocks and lines will be hidden from view. I did use Floyd's 2.5 mm single and double blocks for the tackle. (correction they were 3 mm) The main and mizzen have already been glued in place so I am not going to bother with them. Perhaps only I will know the difference.

-
Jeff, may I make two suggestions. When you start using the tiny blocks from Floyd, you will find that the holes are very small. I ended up drilling them a bit larger with a #70 drill (.020 "). I used a line that was about .015" diameter (I believe). Also the grooves for the strops are shallow and have a sharp transition at the ends. I used a triangular file to deepen them. You and Harvey were talking about carving the bow decorations. I have not done those either yet, but I believe Geoff Matson has. I wonder if he cares to comment. Then there is the fellow who used Corian, a hard plastic material from DuPont that is used for kitchen counter tops. Have a look what incredible things this guy has done with that stuff. http://mysite.verizon.net/ELLshipmodeler/corian.htm I have a piece of Corian and will give it a try one of these days.
-
That is a neat idea Tom. I like it and next time I make molding, I will keep that in mind. Thanks for your comment about our web site. It has been going for several years and started as a way for the two of us to share ideas, travel pictures, etc with our friends and relatives. I found it was a great way to 'communicate' and, yes, I have fun creating new additions, such as my 'build log'. To me it is amazing how many people have done the various 'Walking Tours' in Europe, and I still get emails from people about the ones that are listed on our first page. The only people who don't like them are the tourist guides in those cities .
-
To come back to rigging the cannons on your Conny. You will be happy that you are getting better blocks. I thought they were much better looking for the cannons. When you think about it, some of us are not creating 'museum pieces' and the average person seeing the model is going to zero in on: Sails, Overall rigging, and Cannons! Maybe even not in that order. But in my opinion, the cannons should be done well. Even including cannon balls make it even more 'whow'. Ok, so it is not the person who sees the model that you are concerned about, but by the same token, we are all interested in making it look good. Keep up making it look good, Jeff. Just like you are doing.
-
Good Geoff and a good idea Jeff. BTW for us 'foreigners', do you pronounce those two names the same way? If I were learning English from scratch they would confuse the heck out of me. I made my last comment about mirage images with "tongue in cheek' (another confusing idea). But when I actually made the new tackles I found that you really have to pay close attention to how the rope is laid through those two blocks. It is easy to get them threaded so they look parallel but to make a mirror image takes a bit of thought. No pictures this time.
-
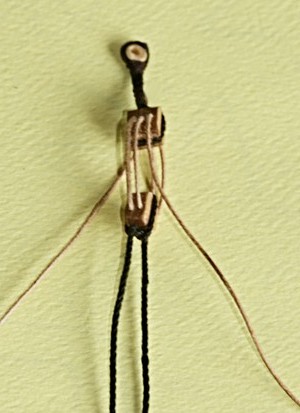
Here is what it looks like using a double and a triple block for the jeer. The three lines to the right go around the spar and the one to the left goes down to the deck. Now what I need to figure out is how to make a mirror image And I mean a real mirror image, not just a picture image.
-
Yes, that is correct. It is not possible to cut the holes with a laser the final way. The holes are sloping, so you have to file both to make them fit. Maybe the rough sketch below might help.

-
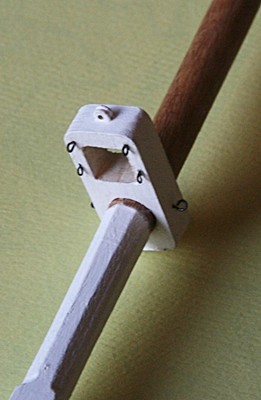
Geoff, the tenon for the bowcap is square on the bowsprit. But it is round for the flying jibboom that fits above that. I guess that is what you had in mind??
-
Dave, you are correct. The drawings that we are following (one of which is shown by Geoff above) clearly showed the two triple blocks and I just went ahead and used them that way. But as you can see from the last picture also, the line that goes around the spar should have come from above or the triple block and by-passed the double block. I have done the fore mast, but I can still make the change on the mizzen and main. I will give that a try. Thanks Dave for pointing out.
-
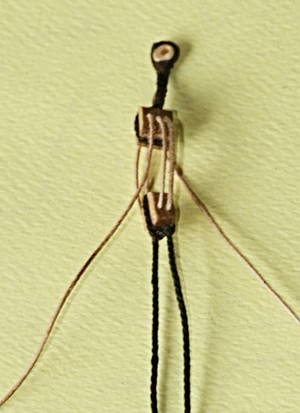
One little detail about the jeers. I had threaded the triple blocks and the strops before attaching them to the jack. What I should have done is to thread them in pairs and make them symmetrical. That is, I should have had the rope come out on the left on one and on the right for the other. You can see below that both are threaded the same way. I am not going to redo this one because it is glued in place already. But I will redo the other two sets of jeers. Like I said it is a minor thing and will not be noticed, but I will remember this little detail.
- 732 replies
-
- 1
-

-
- constitution
- model shipways
- (and 1 more)
-
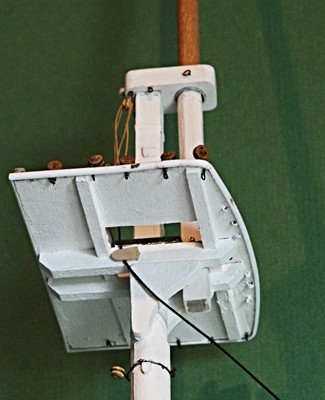
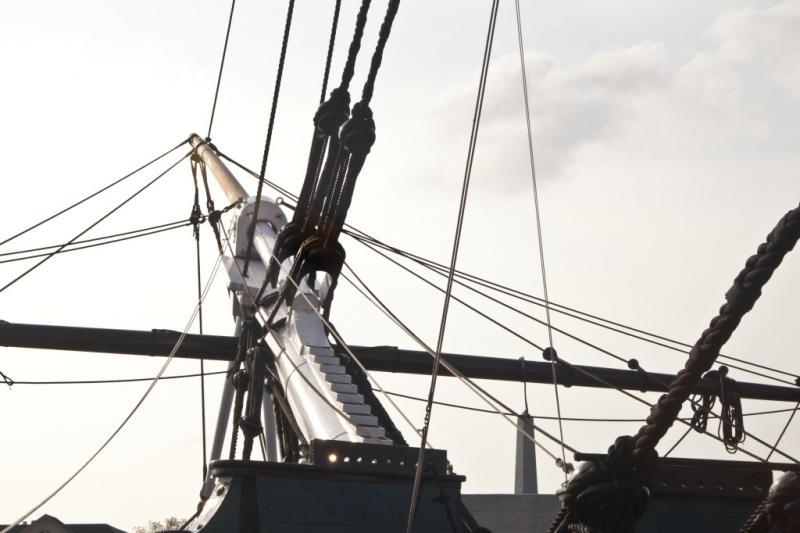
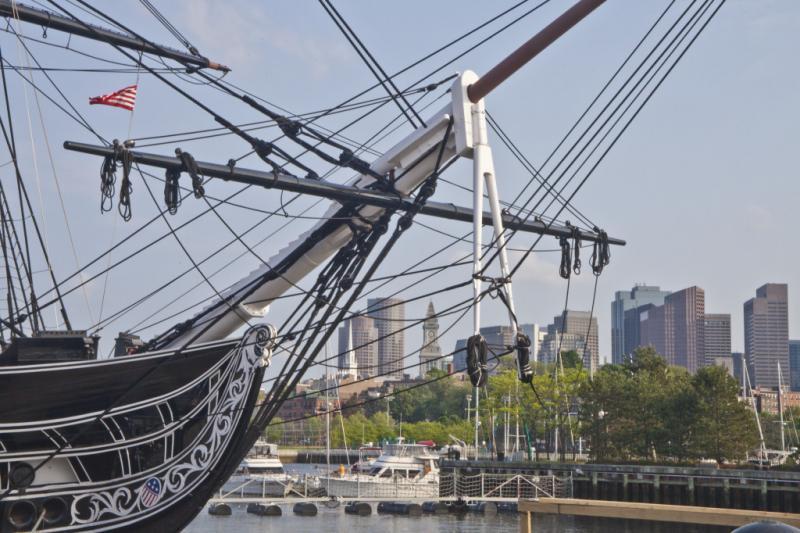
This is the way I see the shape: The top side for the full length is straight and it is the bottom side that is 'tapered' or contoured. If you hold a straight edge along the drawing you can see that. That also makes it easier to add the long series of steps. Toward the tip, the main bowsprit goes from round to square. That is where the 'bees' are attached. I don't fully understand the functions of these bees, other than to give more lateral support to the bow-cap. The bow-cap is a laser cut piece and because it is vertical (while the bowsprit is slanted upwards), the holes have to be filed at an angle. Below is another picture that shows the bees and a stay running right through it. This is going to be fun.
-
Geoff, credit for showing the picture belongs with Jcoby. I have not yet made the bowsprit, but all of the comments and pictures will help me also. Thanks Jcoby. Besides the historical pictures, there are a good series shown on the Conny museum web site. http://etc.usf.edu/clippix/pictures/uss-constitution-museum/ I show one example below.
-
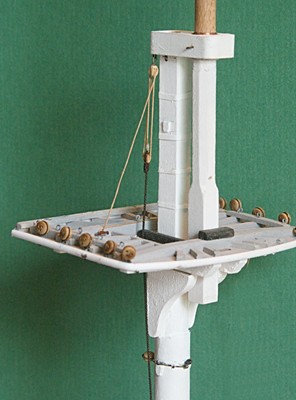
OK, I just shot my good intentions of starting on the bowsprit. There are several more details to be done on the masts and spars before they are to be mounted on the ship. The caps have several eyebolts for the rigging and a guide up front for the stays. So I added those (including the eyebolts on the sides for lifts, which I may not include).Then there are the slings and jeers on the jacks. Below I show only one jeer but there will be another one to the left. Both the sling and jeers will have another line going through the loop and then around the mast, but that will be done during the actual installation. Notice I am still using the triple blocks that came with the kit, instead of the better shaped ones from our friend in Utah. When it comes to doing the shrouds etc. I will use the better blocks because they are more visible. Not yet added are the two trusses (one on each side of the mast). These were used to hold the spar against the mast when the course sail was raised. To keep things a bit less complicated I will not add the trusses at this point.
-
coloring handmade rigging line
Modeler12 replied to davec's topic in Rope Making/Ropewalks's Discussions about Rope Making
For the standing rigging I use the color 'Espresso', a stain by General Finishes. My wife called it black, but is not quite black. The picture below shows the slight difference. I use the 'brown' thread for serving and it is very close to the Espresso.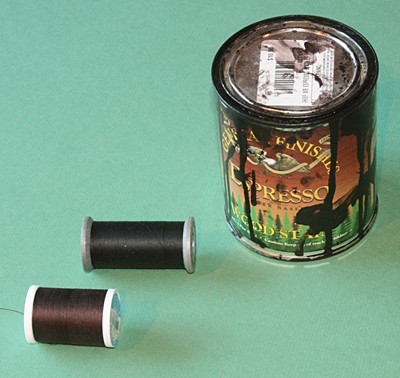
-
I have found that the fuzz disappears during the staining. I hand draw the rope through a water-based stain (different colors for standing and running rigging, General Finishes products) and right after hanging the rope between two points and while it is still wet, I run a rag or paper towel along the line. That removes the excess stain and also seems to remove fuzz. If you look again at the first picture above you see no, or hardly any, fuzz. The reason for the 'kinks' is that after drying the line is wound on a spool similar to what some use while flying kites. I could use a large diameter round spool, but I know I can remove the kinks any way, so I am not concerned. I don't know this for a fact, but hope that the stain gives some protection from any acid in the beeswax I do know that the stain penetrates the cotton threads very thoroughly. If I unravel a piece it shows uniform coloring.
-
Mike, when you get your burnishing tool don't just think of it for use on the scrapers. Yes, you should use it to put a 'hook' on the edge of the scrapers and do that from time to time, but also use it to hone a sharp edge like chisels, etc. I have used the same straight scraper for more than thirty years building furniture and it is still going strong The main difference is that with cutting tools you don't want to have a 'hook'. So you have to hold it almost parallel with the edge you are honing.
-
Good question. Personally I would not bother waxing the seizing afterwards. I assume that the thread for seizing is nylon which does not need to be waxed. However, just like before, I would not wax the line that is underneath the seizing. So take it or leave it
-
Nice work, Jeff. I like the detailing you are doing. Keep it up, my friend. Everything looks crisp and there are no flaws that I can see.
-
Jeff, I like to be one of your friends.
-
What is your favorite hand tool(s)??
Modeler12 replied to Modeler12's topic in Modeling tools and Workshop Equipment
Here is the list thus far and they are not in any order other than the most favorites first. I just hope that any new ones are not going to be influenced by this grouping!!!!! Tweezers 9x Magnifier headset 7x #11 blades 3x Hemostat 3x Diamond sharpener 2x Ruler 2x Block plane 2x Bright light 2x Chissel Toothbrush sander Tooth brush cleaner Files Fretsaw Sandpaper Drawplate (for treenails) Boombox (classical please ) Can (bottle) opener Plus we had a hobby knife and a scalpel which should, maybe, go with the #11 blades to keep the list short (not added yet). Sorry I was wrong when I said the magnifier seemed to be the most popular. But that was 'hindsight'.