reklein
-
Posts
1,285 -
Joined
-
Last visited
Content Type
Profiles
Forums
Gallery
Events
Everything posted by reklein
-
Yes my mistake was to use the heavier cloth available. I used to know that 40 years ago when I was building RC. Its just gonna have to do. I bought the Trumpeter HMS Hood for my next big project so No worries. Thanks for the shots. Bill
-
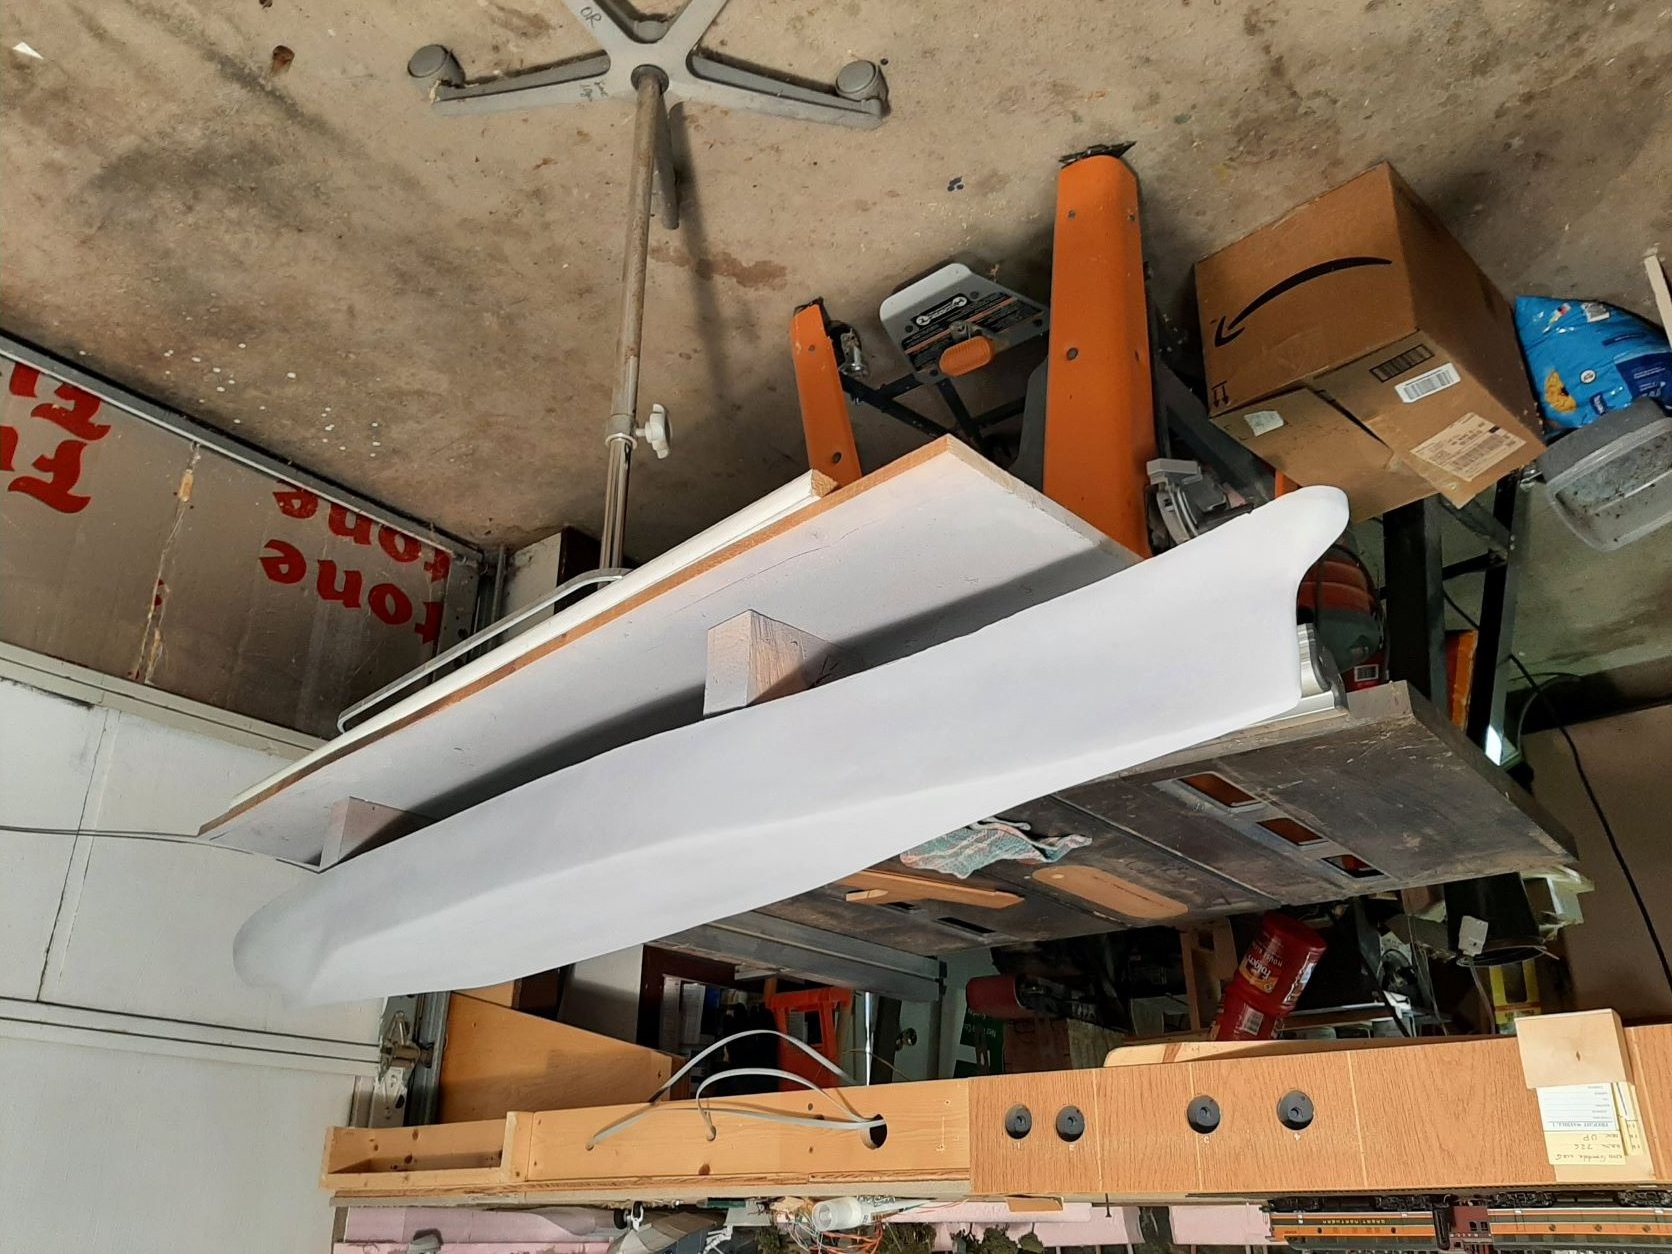
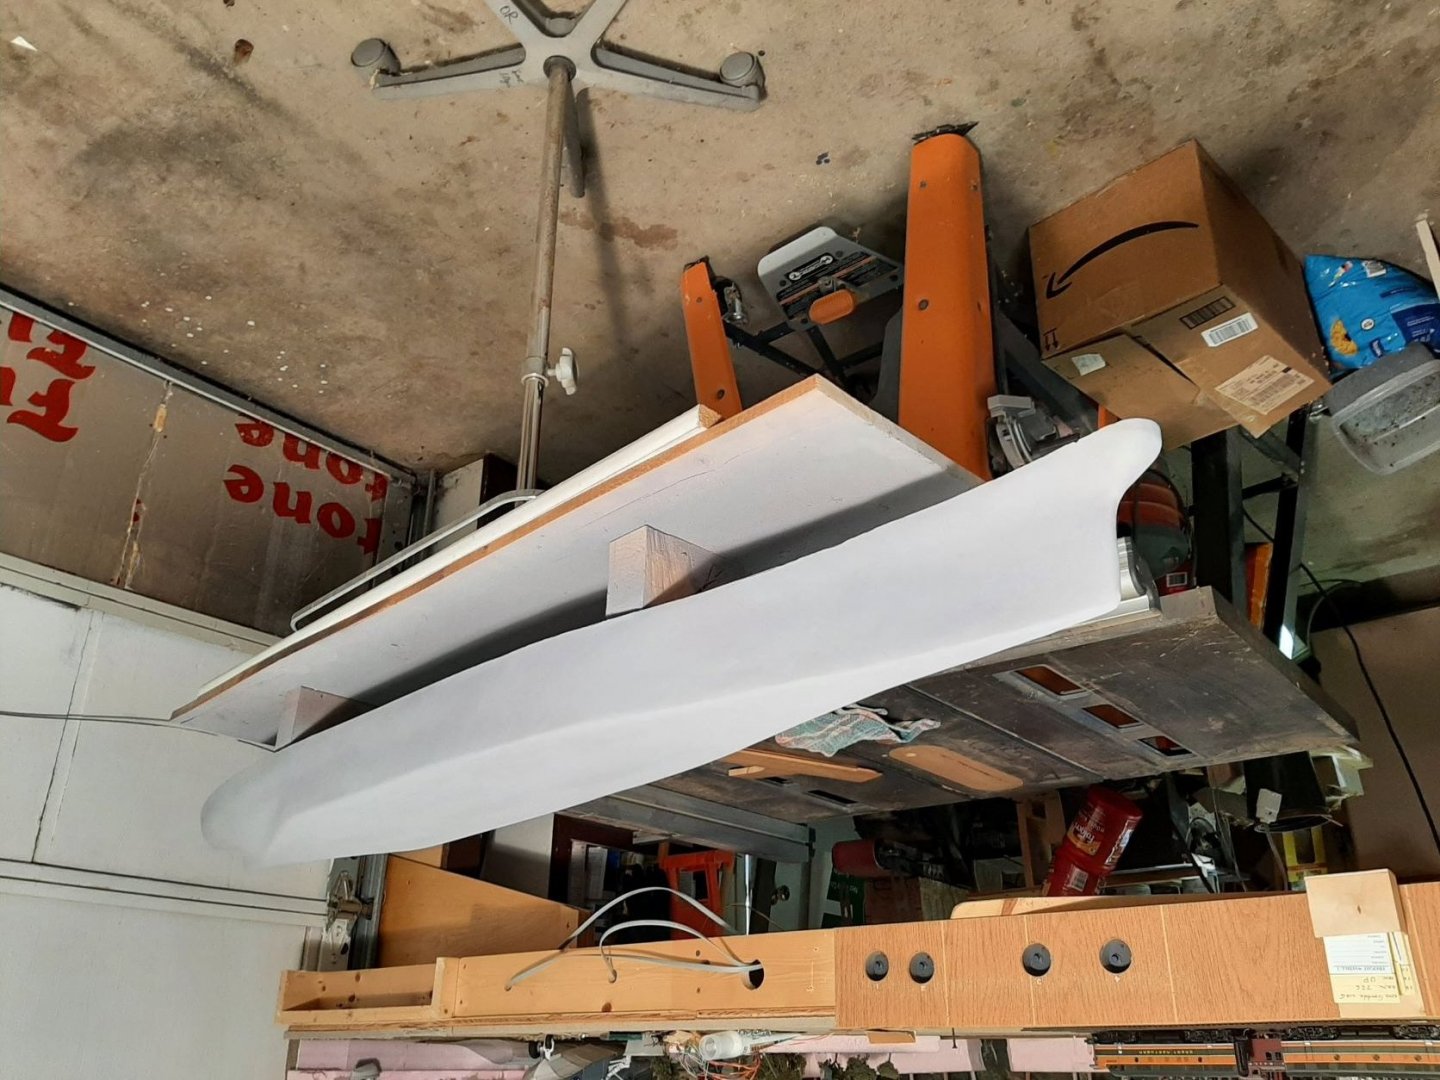
I decided to build for static display. The hull was really tough to get finished properly and still isn't really up to snuff. Its just one step above scratch building. I almost trashed it out and build a new hull bread and butter style. All the superstructure is built up ply and balsa along with the main gun houses. the 5" mounts are balsa blocks. We'll see how this goes. I have the 40s and oerlikons built so now I have to press on. Next is prop shafts and mounts. then decks and real paint.
-
Well here we are Four coats of rustoleum prime and still lumpy,but it doesn't look too bad in the photo so I guess it wil have to do.
-
Very interesting thread. I'm happy you got a great deal on this.
-
I'll have to say that from the beginning the MM sander did not have much power. It would barely take off a 64th at a pass. I'm thinking about removeing the driven pulley aand chucking up the shaft in my 3/8th Ridgid Drill motor. All kinds of Ideas about getting a free sander outta the deal. Oops didn't see that no free lunch statement. Bill
-
To be sure the Micro Mark motor is DC, not sure about the voltage. Its 150 watts,1.8 amp and 4000 rpm. It plugs in to 110V and powers the motor through a rectifier. Yes ,I do have a lathe and have just reviewed an article that describes turning it into a thickness sander. I've also seen articles turning ones drill press into a vertical thickness sander. So theres all sots of ways to go with this. I also have the tools to make this happen. So we will see what comes of this. Thanks all for your input. Bill
-
Jaeger,I think you are right . I couldn't get signed into Ali baba the company that supposedly deals in those motor. Grizzly has a little lathe with that motor but their tech support won't answer the phone. Its just been a cluster all 'round. So if I want another I guess I'll have to go the byrnes route. I know his rep is impeccable. Its just I'v had some unexpected expensive hobby expenses. We should probably go to PM if we talk more about this but it may have interest for someone looking for something similar. Bill
-
I think I found a replacement motor. Using the mysterious letters ZYT I discovered its a Chinese electronics company associated with Ali Baba. I found the motor with the same specs in their online catalog,so I will try to order today. Will be interesting to see what happens. Not cheap at $135 plus shipping.
-
The specs I gave are from the label on the motor. If it comes to parting out I may have to do that. I found a lead with Grainger company who deals in such thiings. I may have to remove the motor anad take it to the branch to get a new one. But yeah the MM sander has its shortcomings.
-
Anybody know where I could order a motor from? Not getting any response from MM after a phone call and an e-mail to customer service. Its a 12 V. 1/8th hp 4000rpm motor. Bill
-
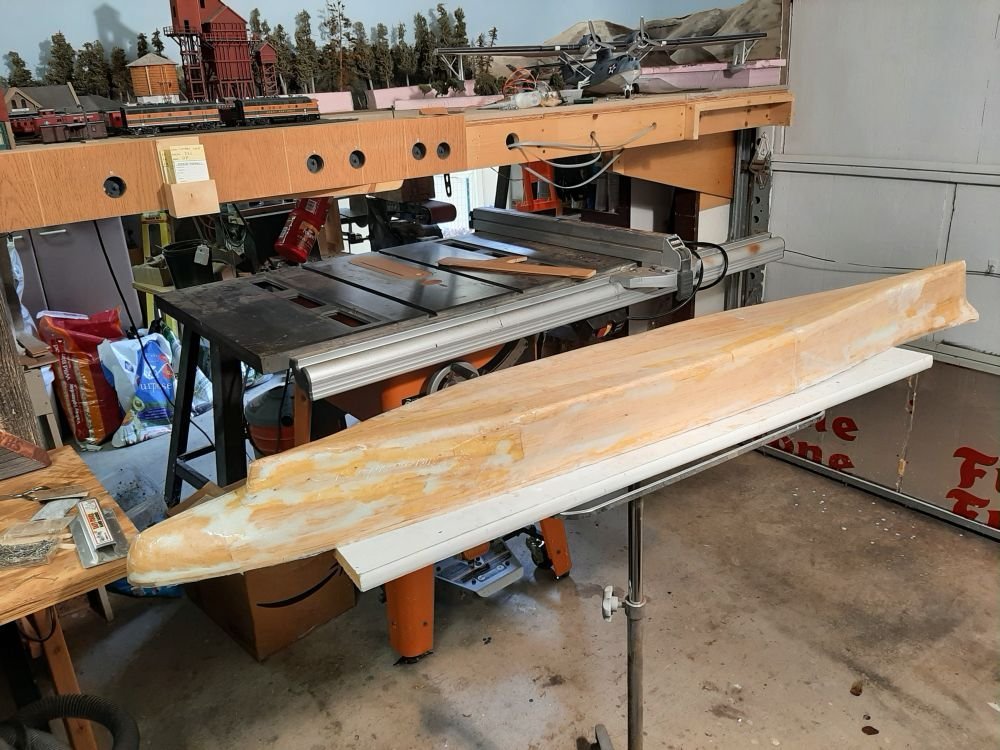
OK, I got the Epoxy fiberglass coat on the hull. I had mixed messages on the application technique and didn't get good adherance. So be forewarned that when applying the heavier cloth to paint a coat of resin on the wood first then apply the cloth. You get about a half hour working time and it gets messy when you have to cut slots in the cloth to get it to lie flat. I'm sure if I did this ,say 10 times more I'd get better at it.
-
A good filler for harder surfaces is micro balloons mixed with epoxy. You mentioned using epoxy as an adhesive . So it must be compatible with the material you are printing with. Be sure to mix the microballoons fairly thick. The thicker you mix it the easier it is to sand. I've had bad luck with Gesso as it is sooo hard to sand. You should be able to get microballons at a good hobby shop which deals in R/C or online
- 460 replies
-
- 5
-

-
- Finished
- Flower-class
- (and 1 more)
-
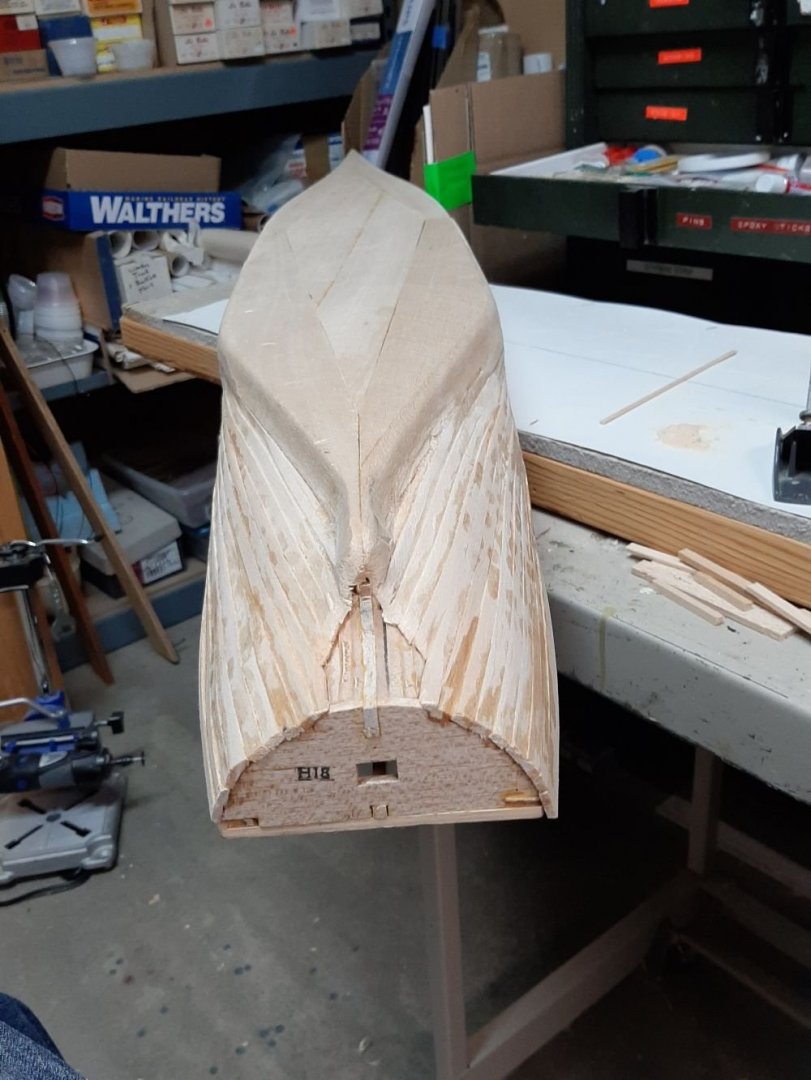
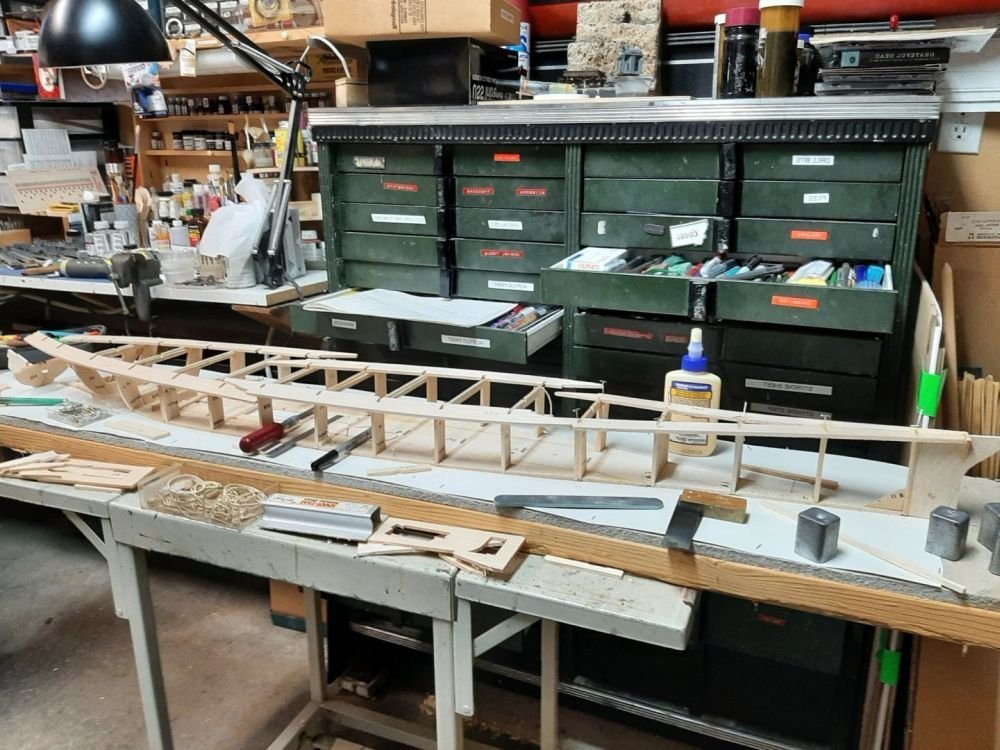
Stern planking is finished. Now for filling and sanding. Looks terrible at this point. Can't decide weather to stick with plastic wood filler or go to spackle. I think automotive filler would be too hard. There's a big stern block to be glued on too. Think I'll do that last thing of the day so I can continue in a couple days. Gotta make a supply run to Spokane tomorrow. BTW I did all the gluing with thin and thick CA. That way I could build " in the air" so to speak and not have to use many clamps. After gluing I went back inside and filleted along the formers with the thick CA. The whole hull at this point probably doesn't weigh more than a couple pounds.
-
Thanks for the offer Lou. I have a couple of books coming with computer 3D drawings that should fix me up. I actually visited the Mo when she was in mothballs at Bremerton back in 1965. I had the run of the ships weather decks with no tour guide or other supervision. Too bad I didn't know much about her except that she was the site of the surrender. I typed this message a couple days ago then forgot to submit it. Sorry.
-
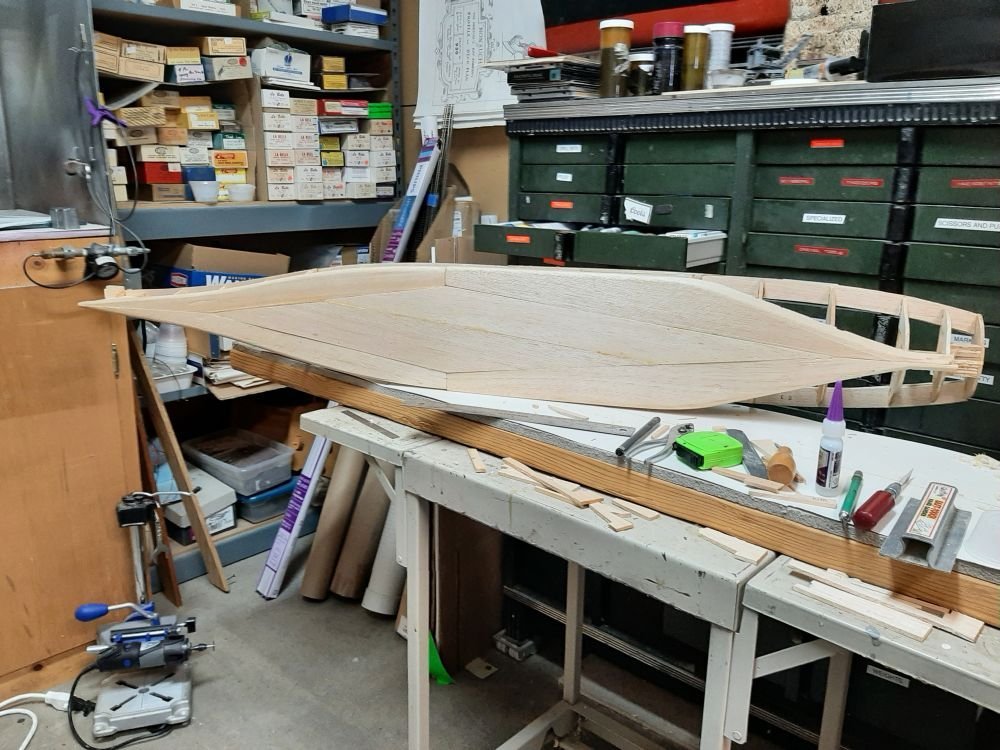
Maybe on the R/C. Yes for the strong smooth hull. The planking supplied in the kit is very soft so I guess it will just be there to hold up the epoxy till it sets. I may have to dig into my stash of balsa to get something tuff enough to hold up to the twisting and bending required. The shape of the stern is vague and I don't have good drawings of the Mo. Bill
-
Work continues with side skins and bow planking. Since the hull will be glassed over I'm not following traditional hull planking pattern.

-
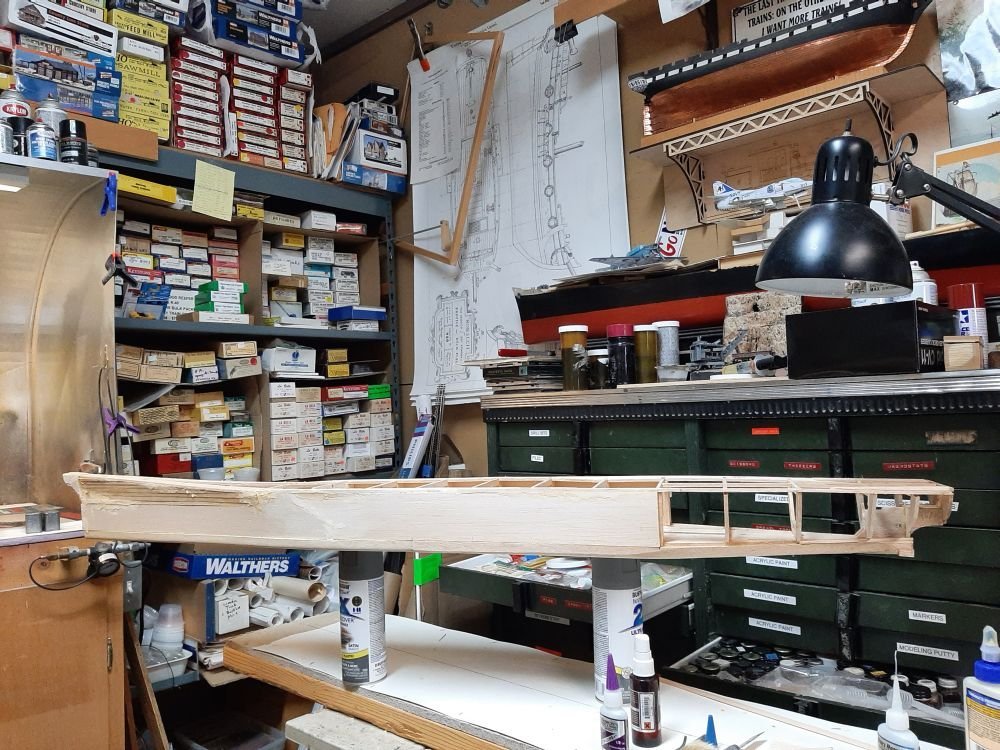
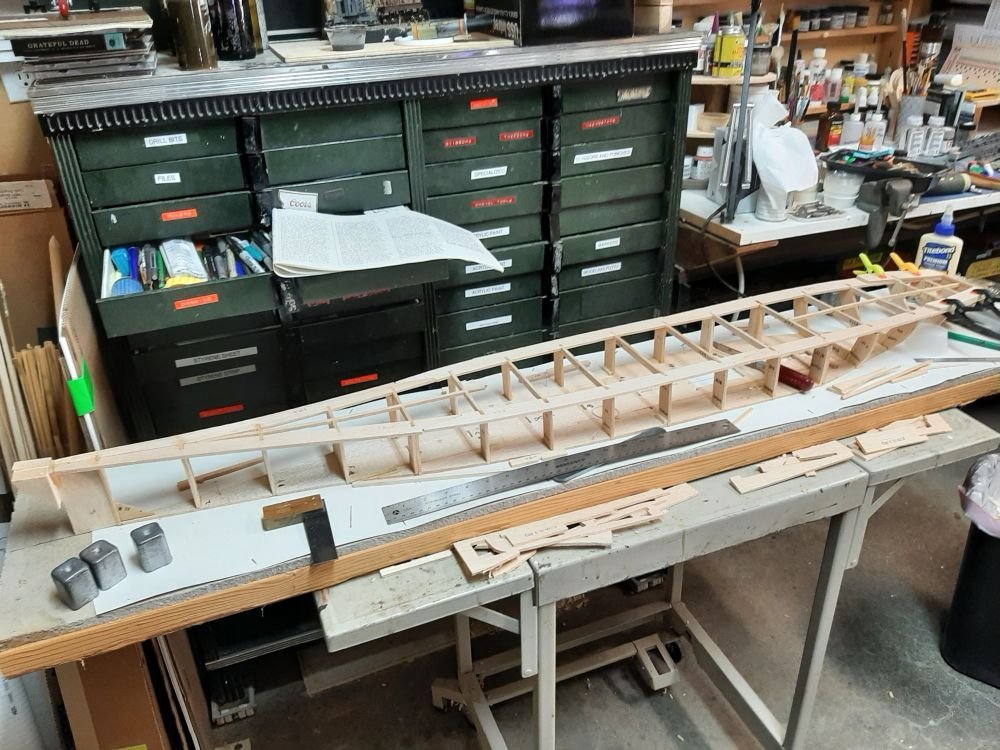
Work continues with framing,bottom planking and a shot of whats left of the kit and a plans sample. The instruction book is fairly complete but lots of fine print and takes some study. I'd say experience is required with this kit.
-
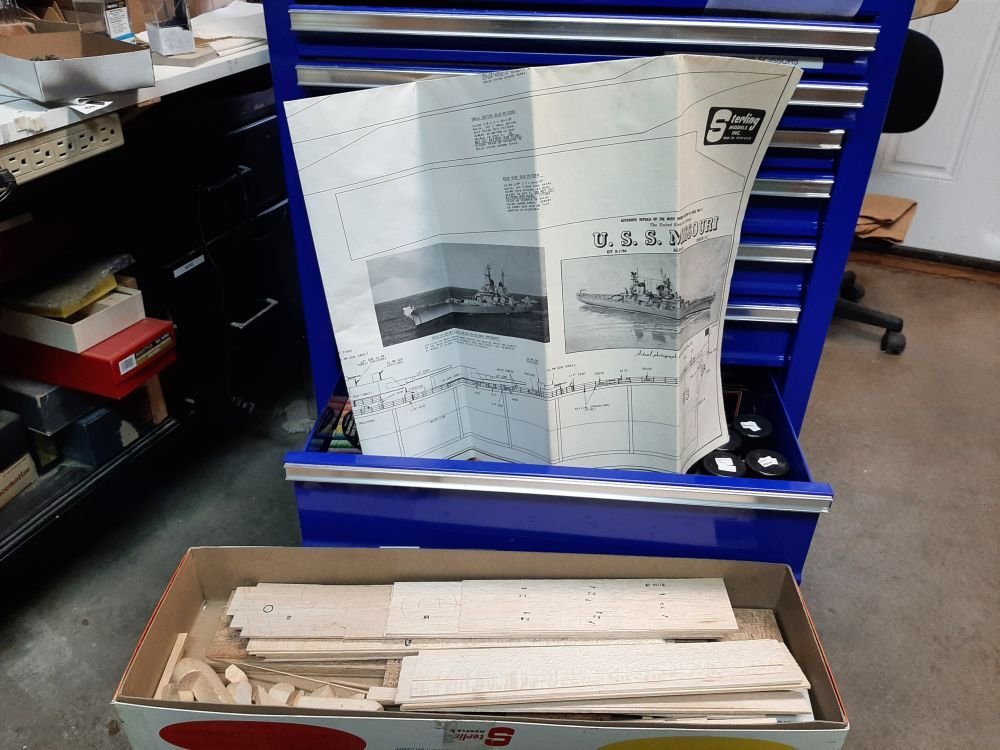
Mark, you are correct, it is a kit. The Sterling plans are not complete enough to build from.
-
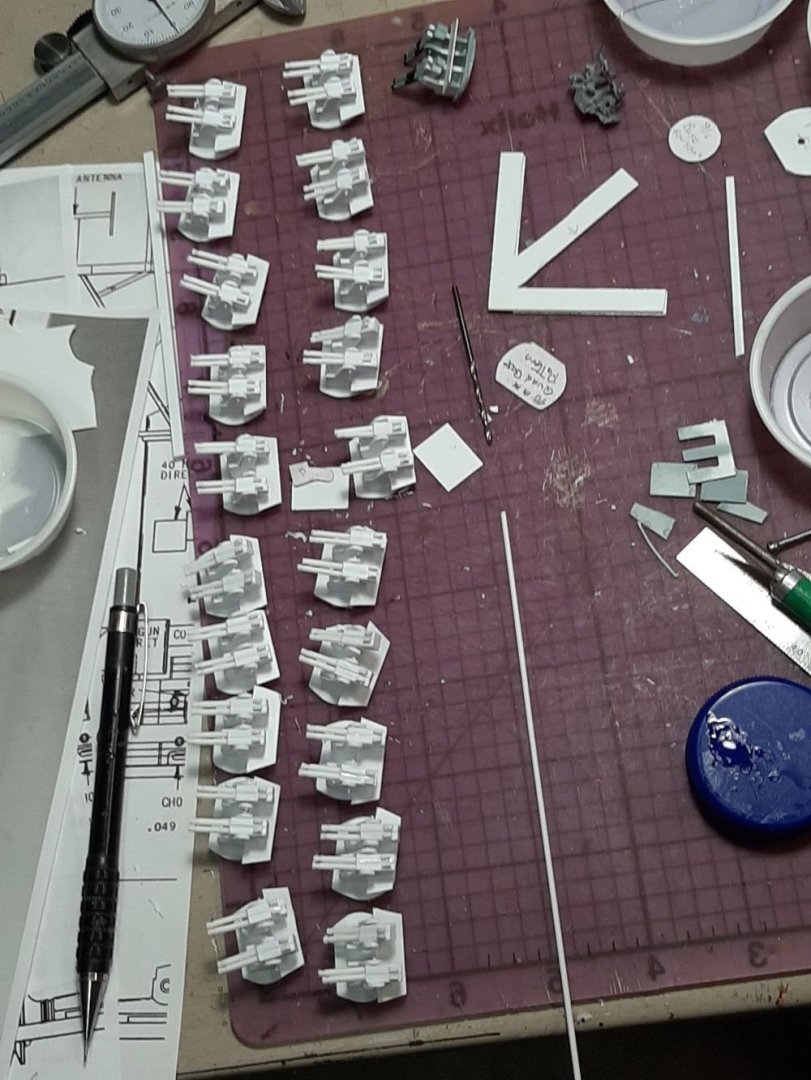
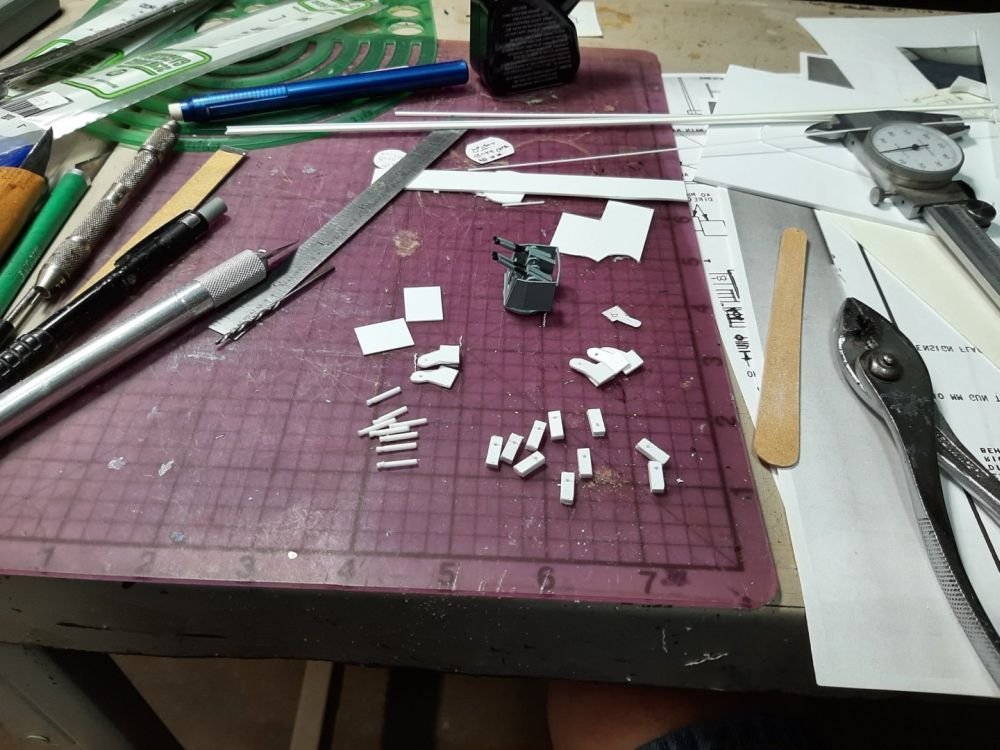
This will be a build log of the Sterling kit of the USS Missouri on 1/192 scale. I began with the AA gun arsenal as a way to avoid tedium late in the build Then I started framing up the kit.
-
Hi Dale, Ive been a modeler since I was ten when my mom started me on diecut balsa flying models. Since then I've almost always had a model going with the exception of my college years and the first few working years after that. When I finally settled down I built and flew R/C models for 25 years. My eyesight changed and cant fly well any more so I'm back to building ships and train models with the occasional aircraft and plastic model thrown in. My S Syren is half built. I stopped working on it when it came time to drill 50 holes in it to accomoddate cannon and rigging. It is still out on the bench waiting. I'll see if I cN FIND pic and update my profile.
-
Amazing crisp build! This is a winner for only your second ship. Keep up the good work. I'll try to keep track of this one.
-
Nice work on the Hearse Kevin. Its a little unusual for these to be modeled but nonetheless they are quite common in the museums that deal with carriages and old cars at least across the the west. Cardston AB has a world class carriage museum. If Canada ever opens up I would recommend you visit there. Its close to GLacier park in the US anad the Waterton park and Banff in Canada. I'd recommend the Breyer horse too. They aren't quite so wild looking as the Lindberg ones. You want something quiet and dignified for a person's last ride.
-
Sooner or later everyone gets a ride.
-
The white flecks in the wood may indicate teak. As it is known to have flecks of calcium imbedded in the wood. This also makes it hard on woodworking tool edges. Luan is used on certain types of ply for floor underlayment as it is knot free so will avoid dents in the floor.
-
A rule of thumb is three teeth on the thickness of cut. To few and there will be tear out,too fine and the blade won't be able to remove the sawdust quickly enough and binding may result. For your thicknesses Olson makes a crown tooth blade that cuts cleanly on both surfaces of the wood.