HOLIDAY DONATION DRIVE - SUPPORT MSW - DO YOUR PART TO KEEP THIS GREAT FORUM GOING! (89 donations so far out of 49,000 members - C'mon guys!)
×


RGL
-
Posts
5,539 -
Joined
-
Last visited
Content Type
Profiles
Forums
Gallery
Events
Everything posted by RGL
-
 Bugger!!!! I finished mine some time ago, I once sneezed a mouthful of black coffee over a battle ship
 -
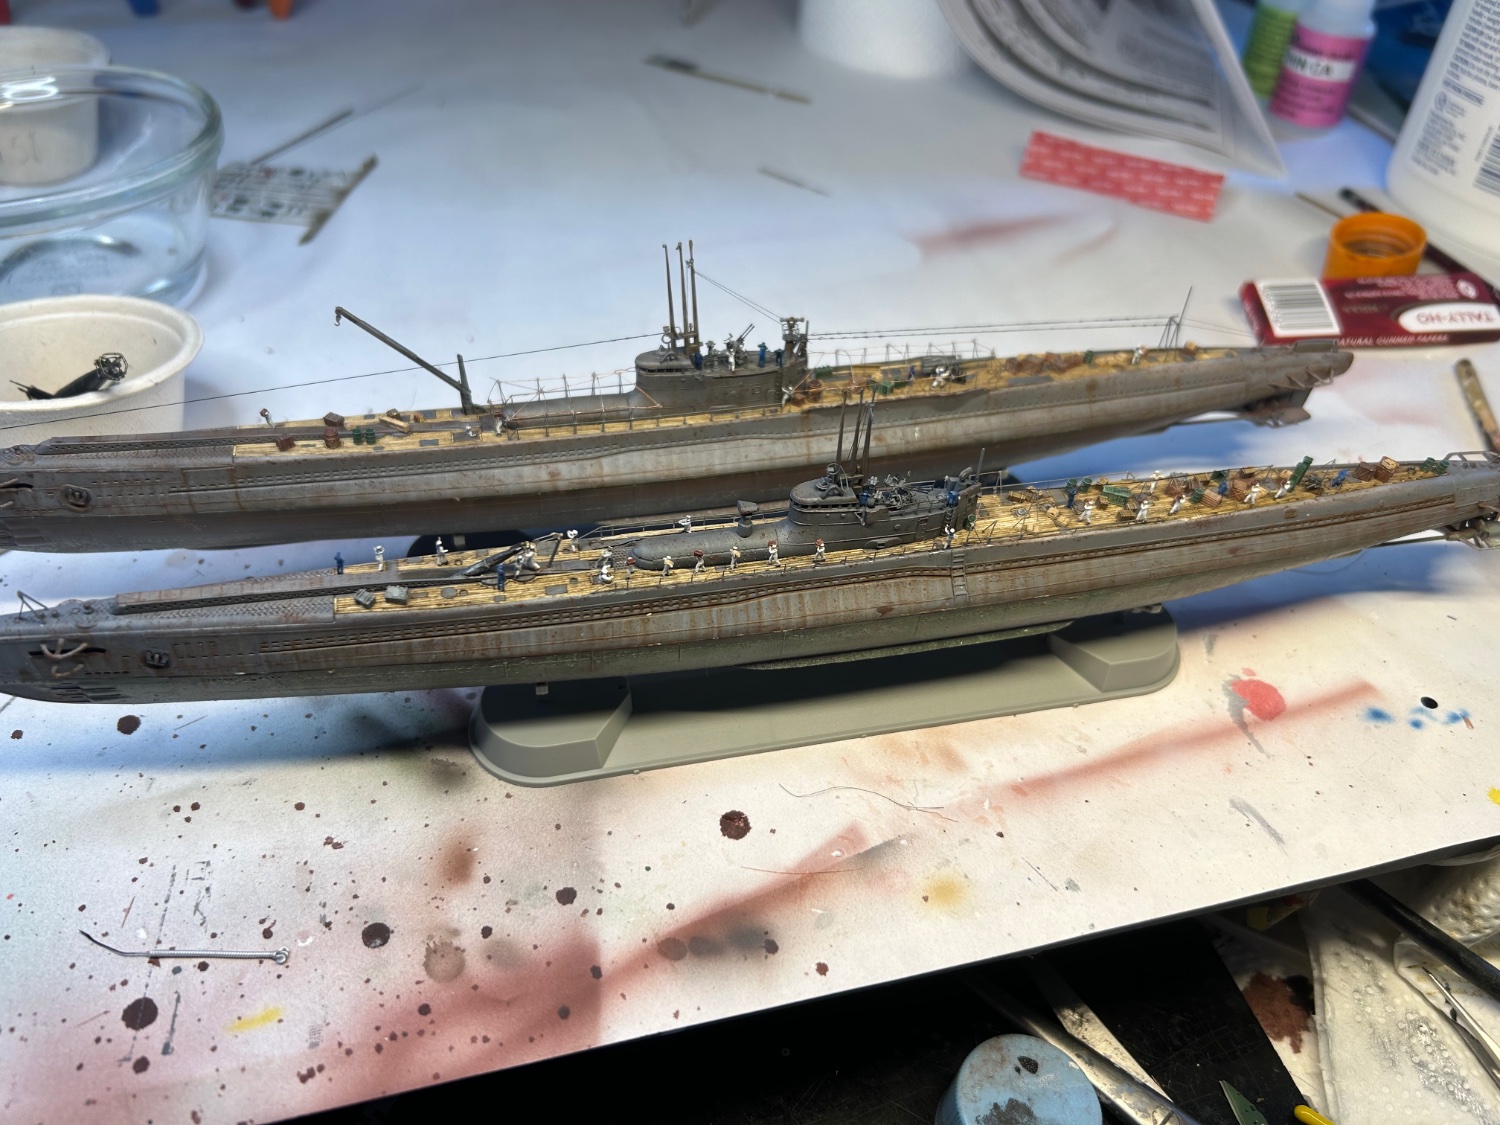
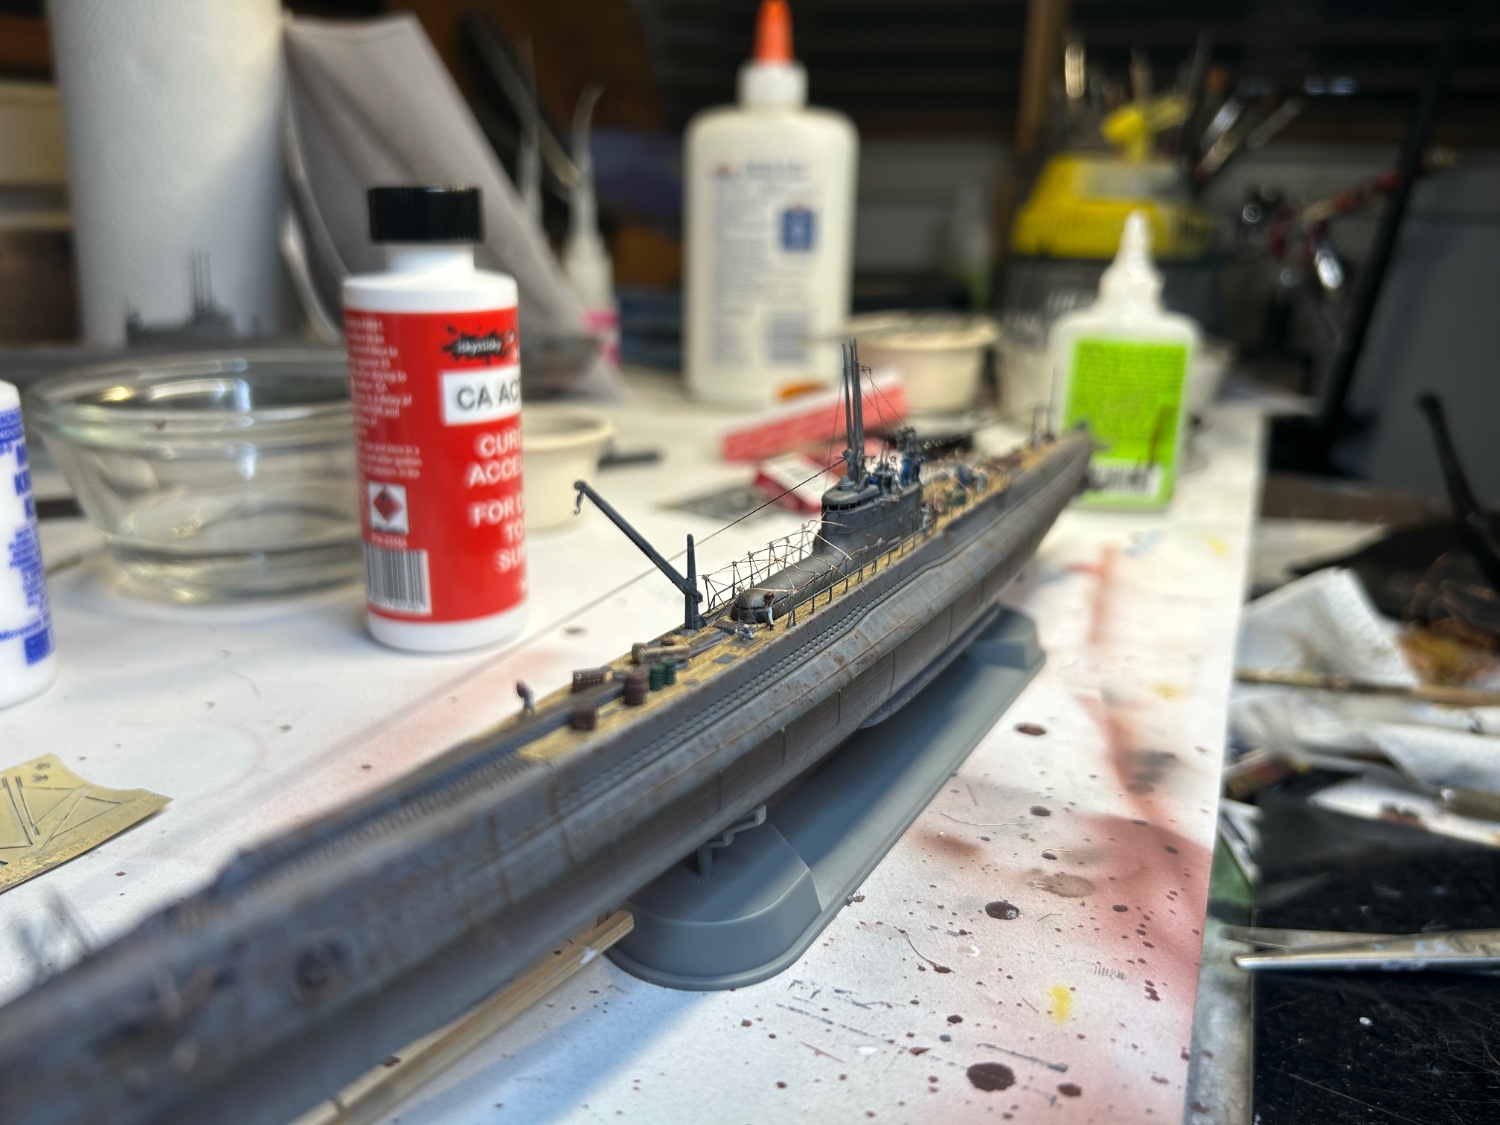
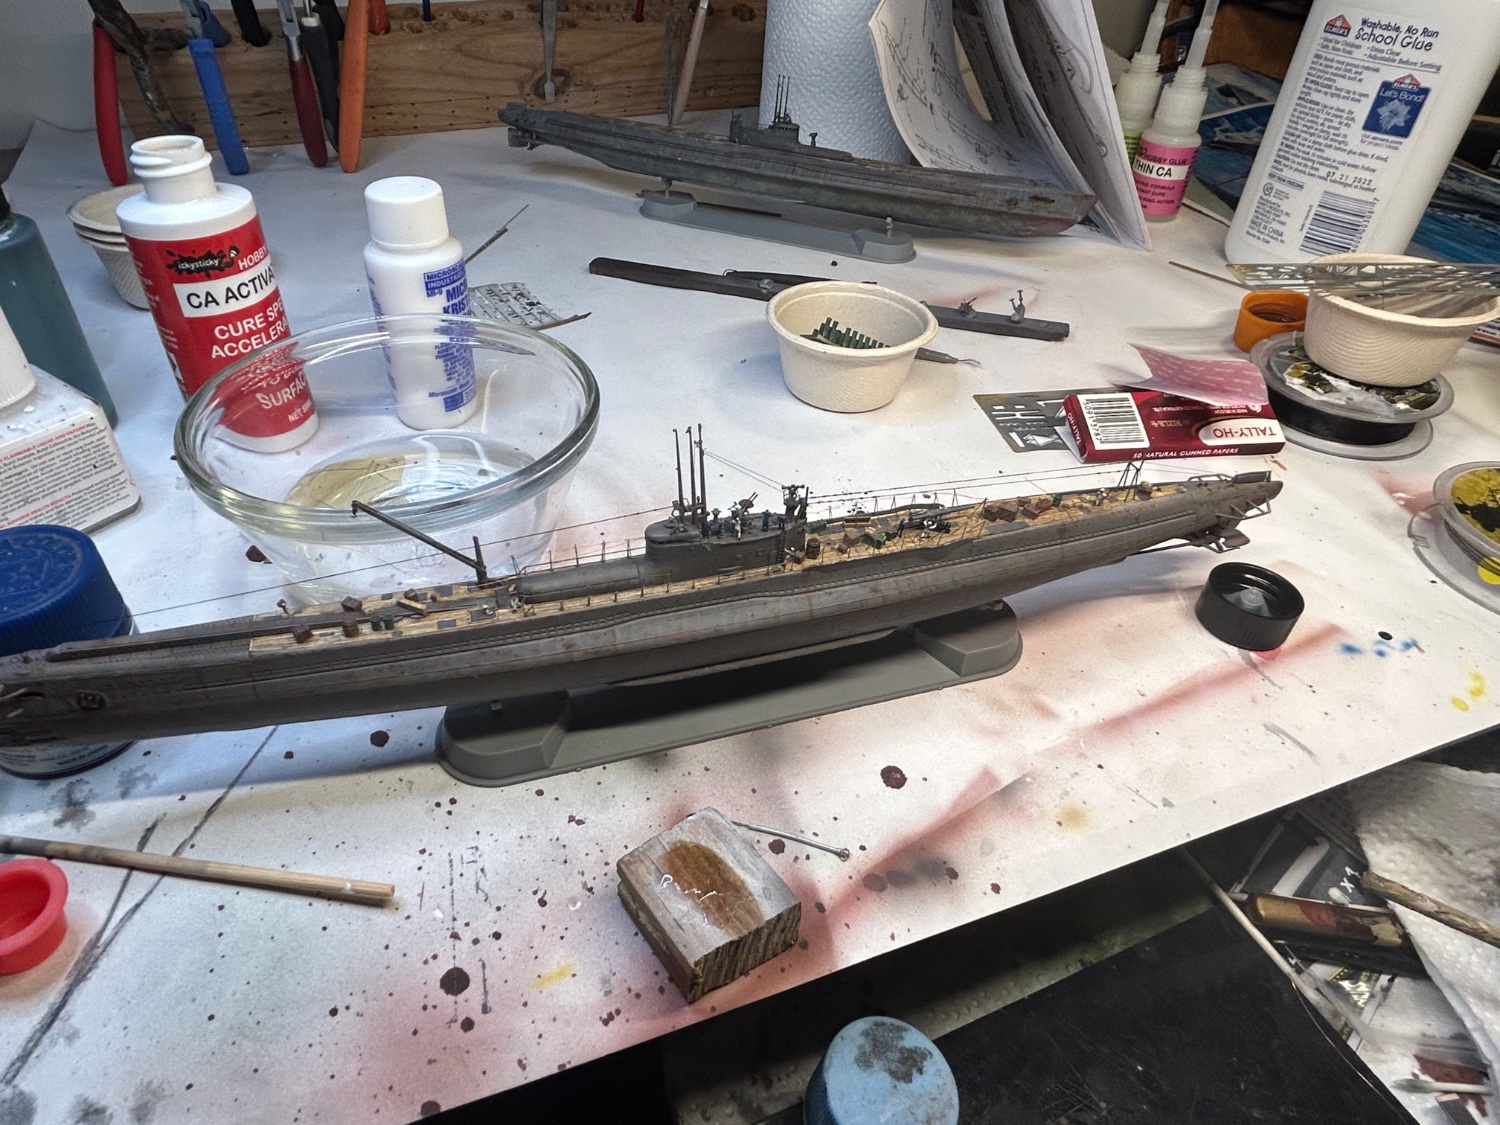
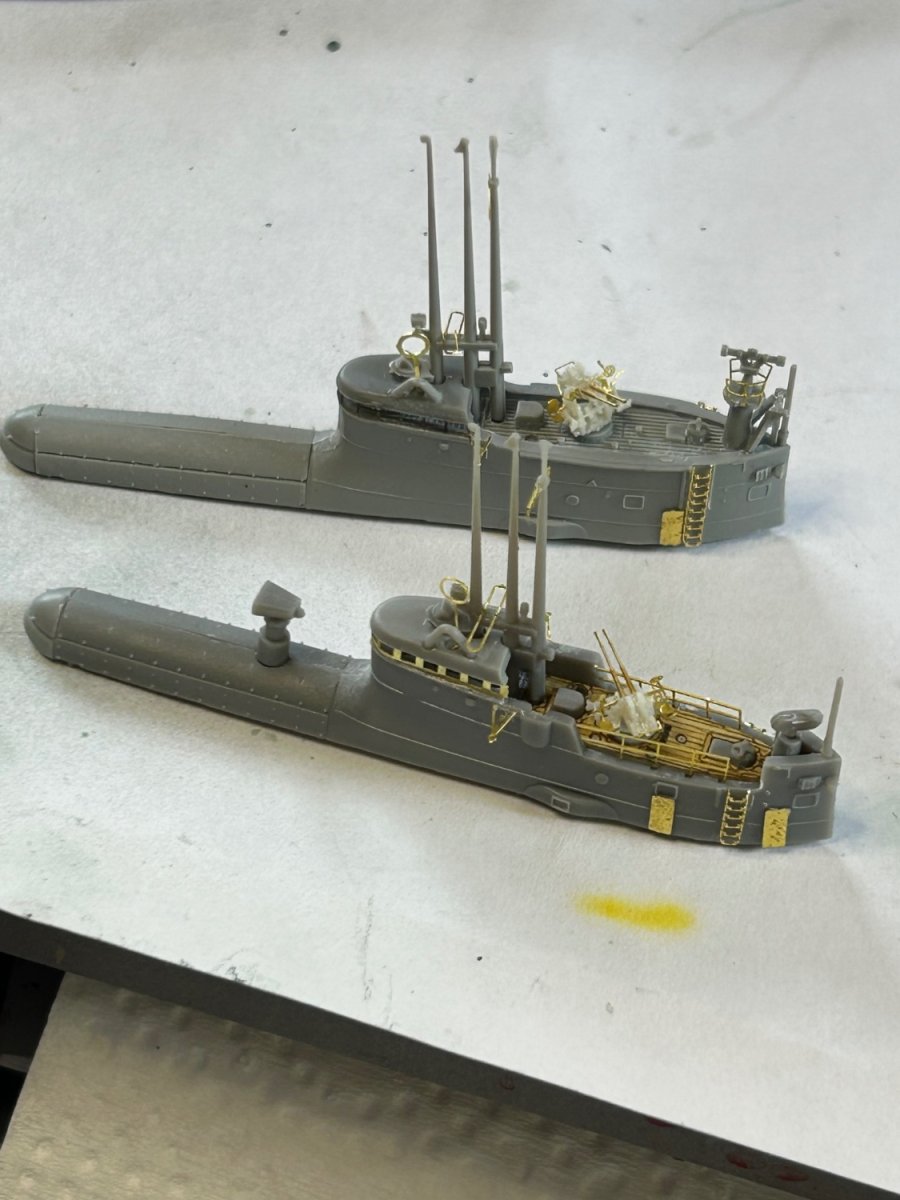
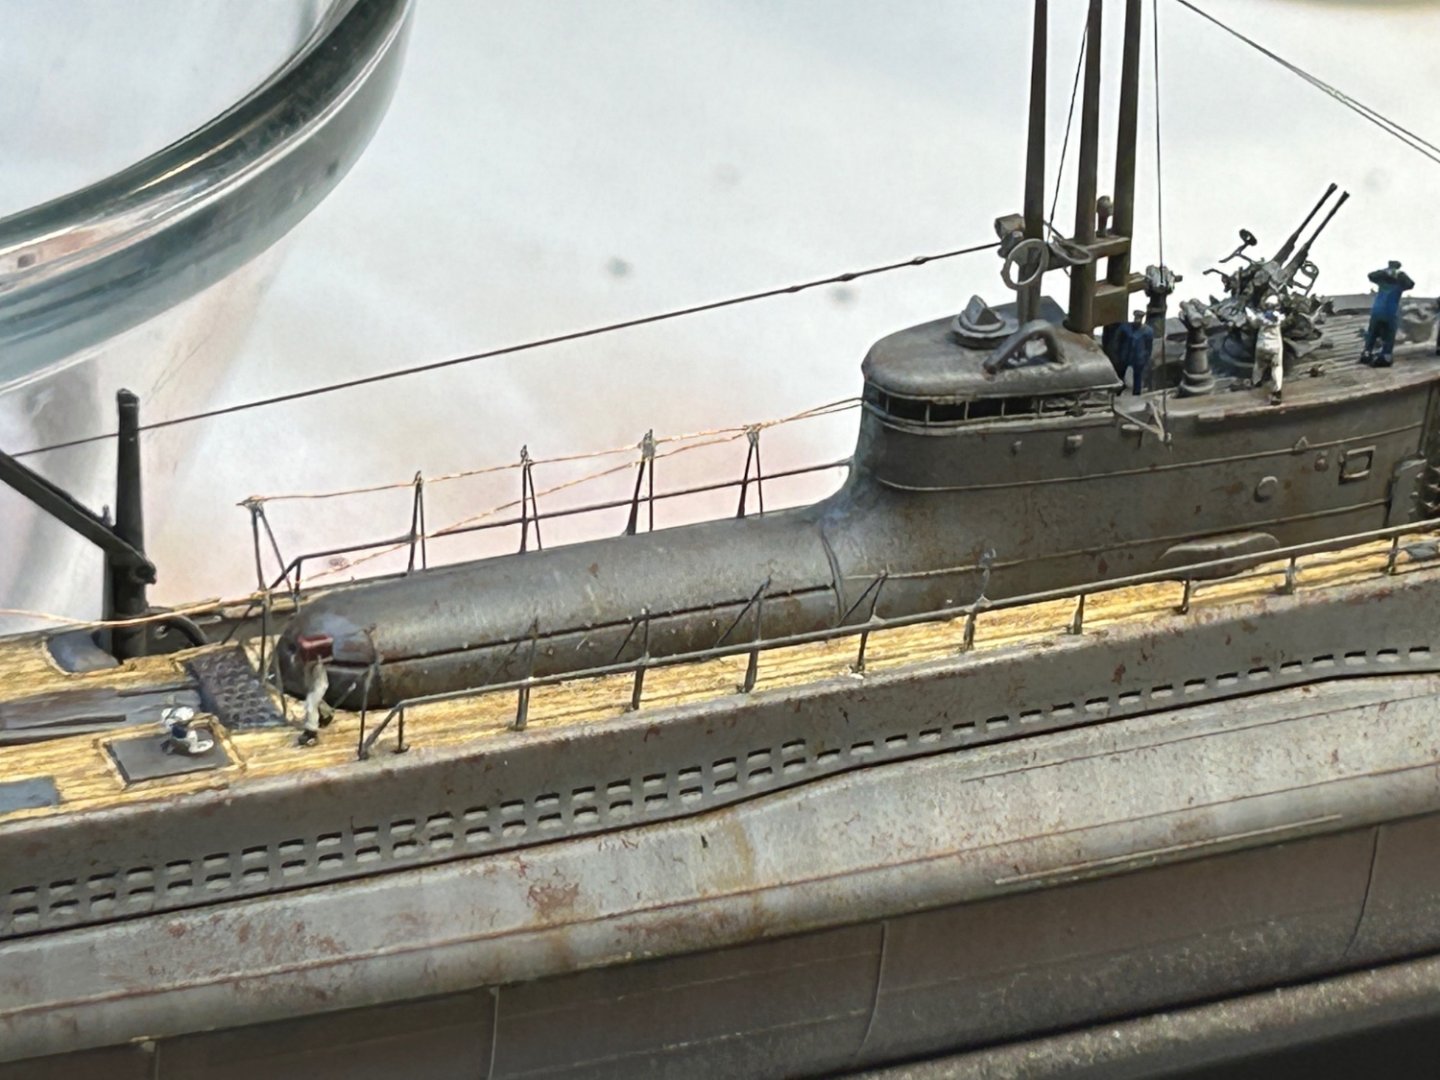
So I’ve finally got a bit of time to finish the framing, I’ll do a smaller one on the other sub then use cigarette paper like in the Zara


- 200 replies
-
- 10
-

-
- Transport No. 103
- Hasegawa
- (and 4 more)
-
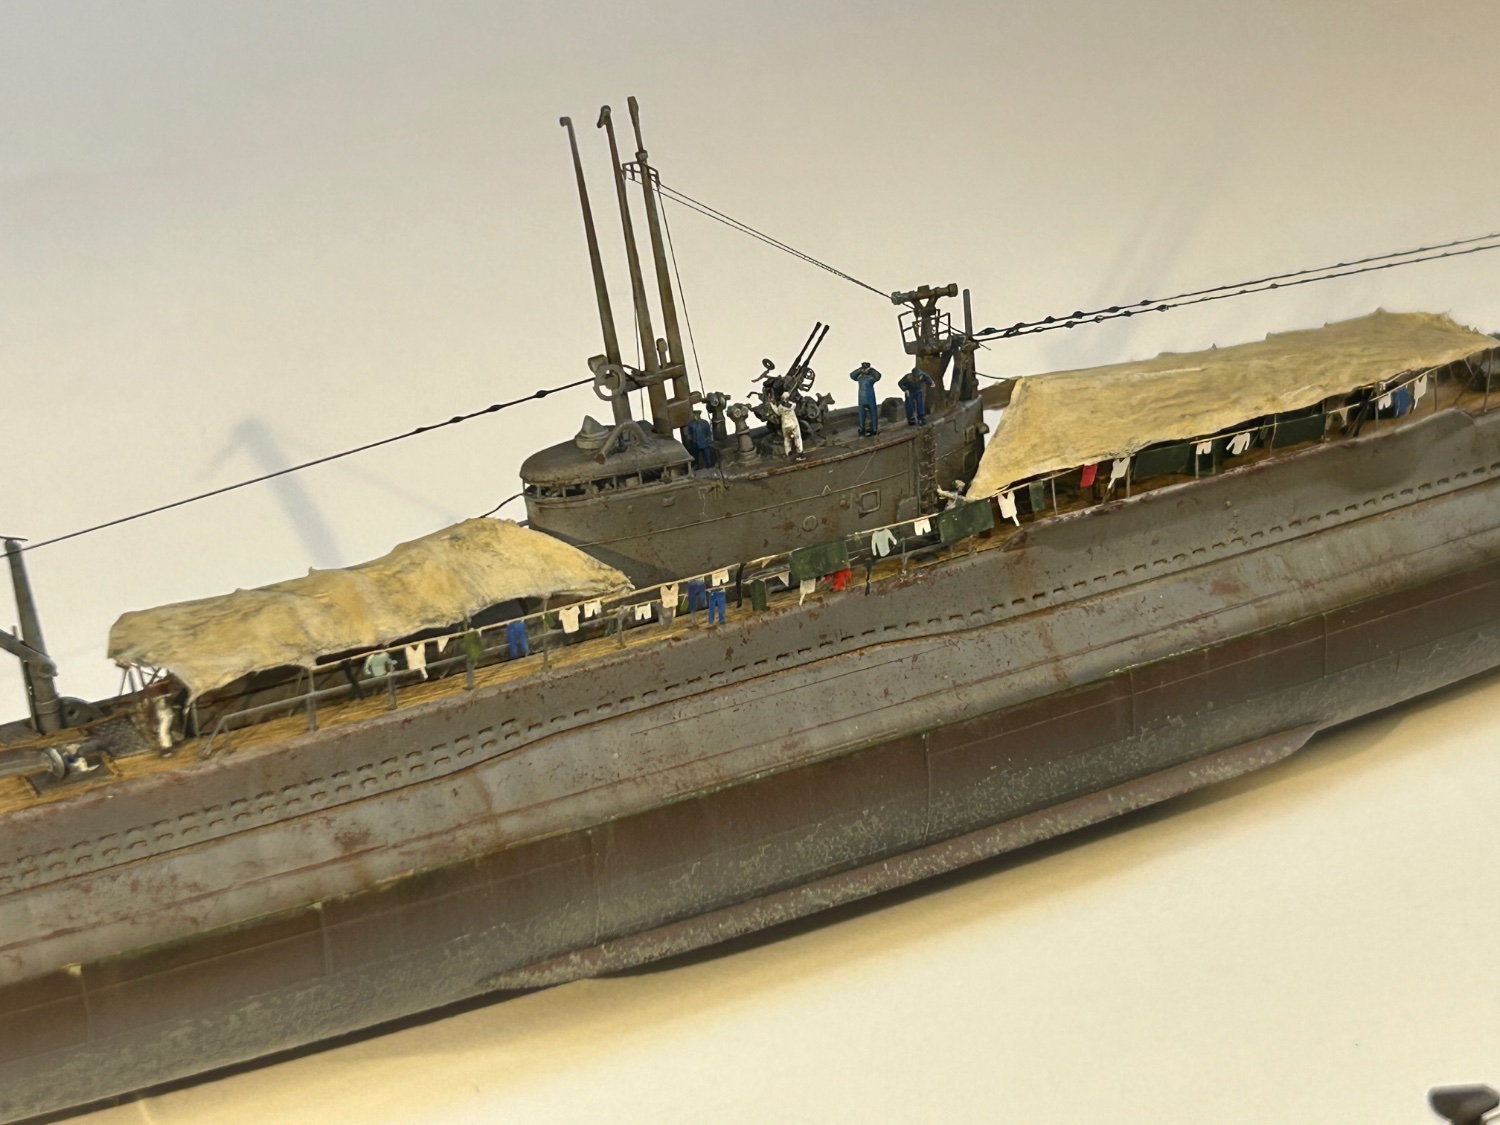
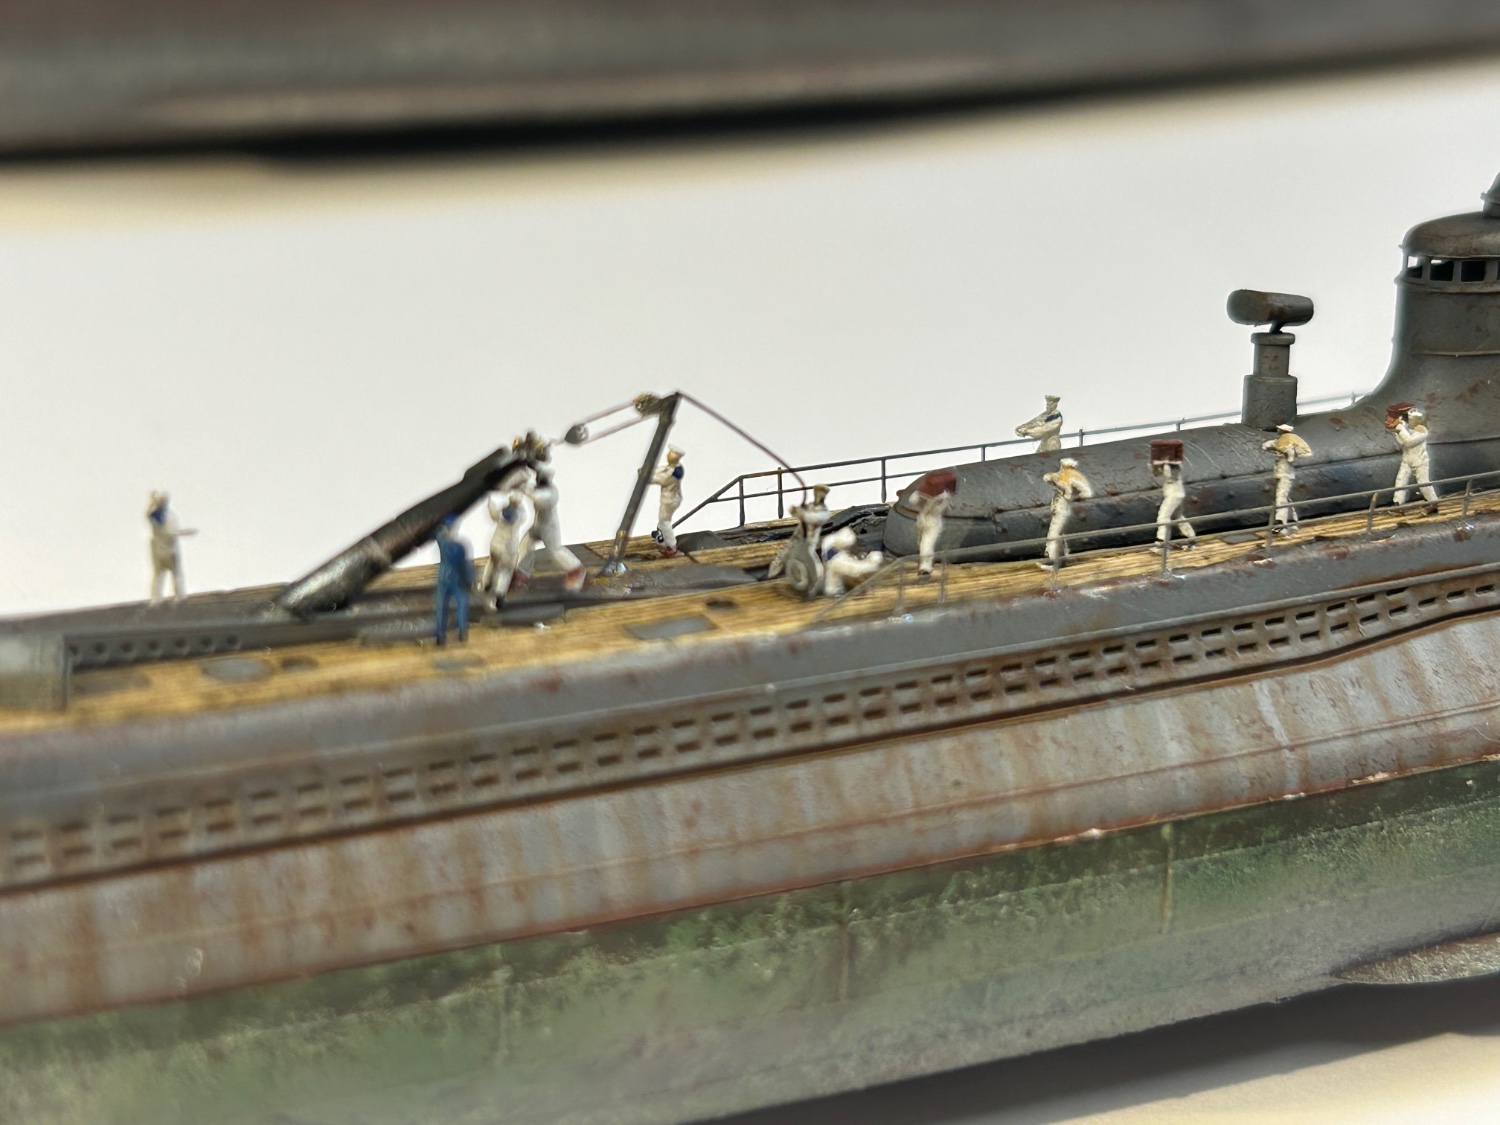
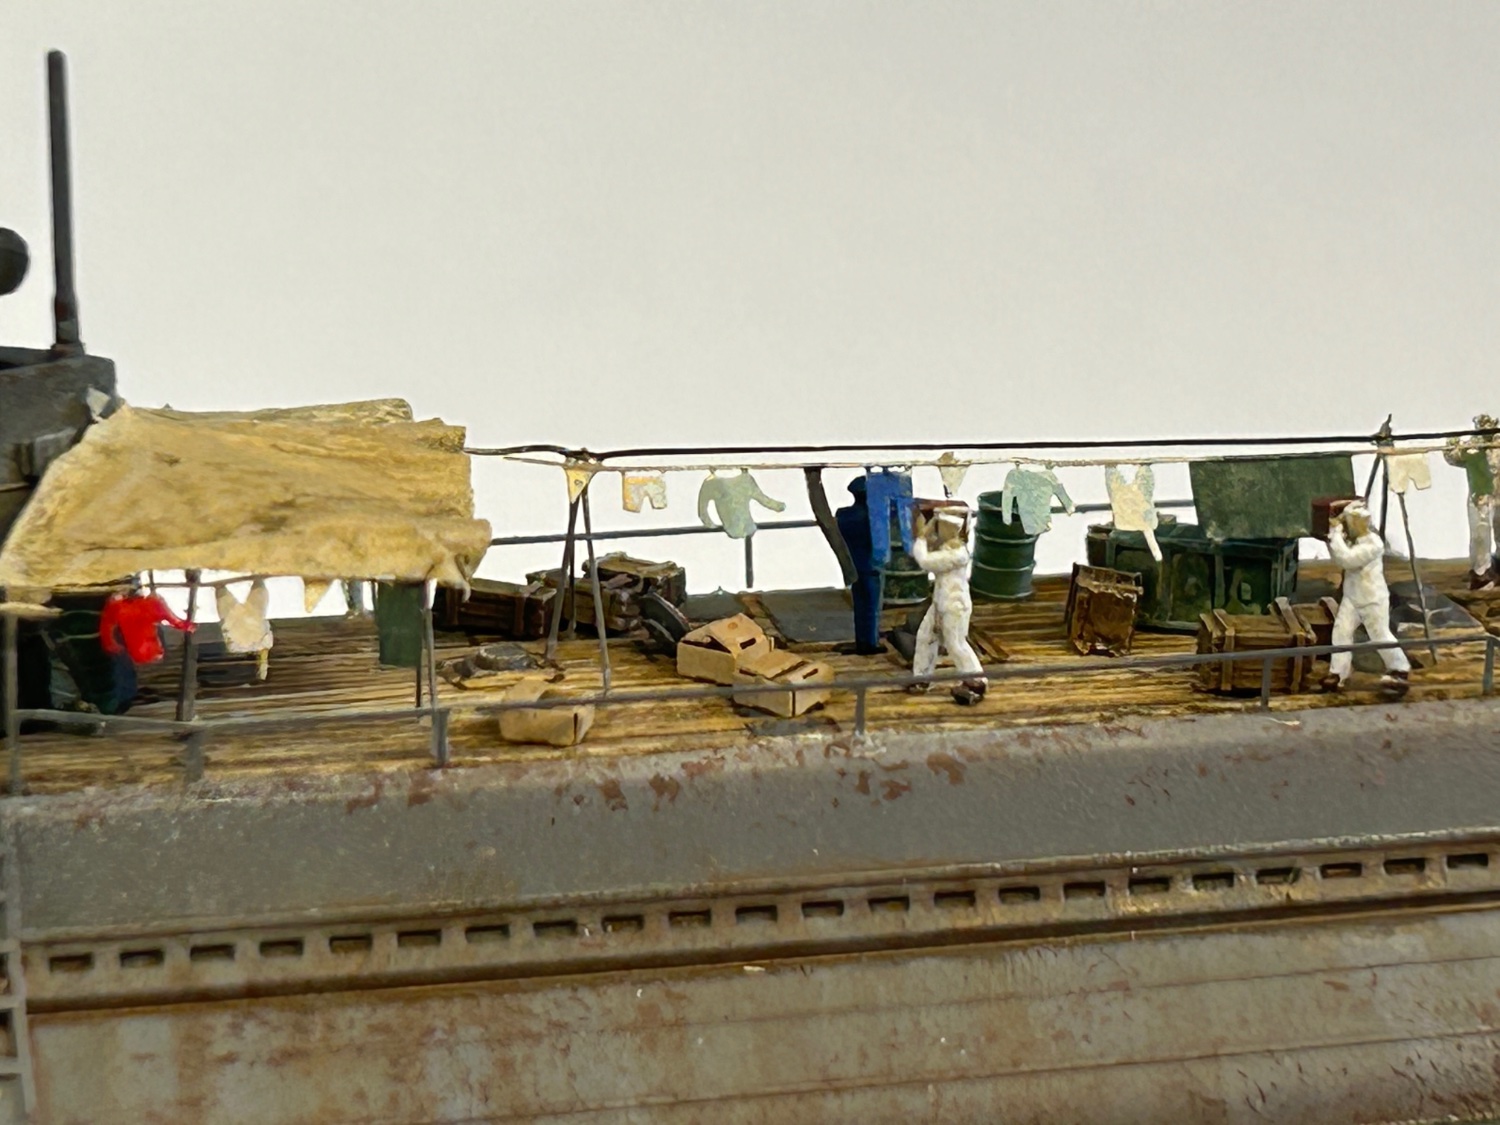
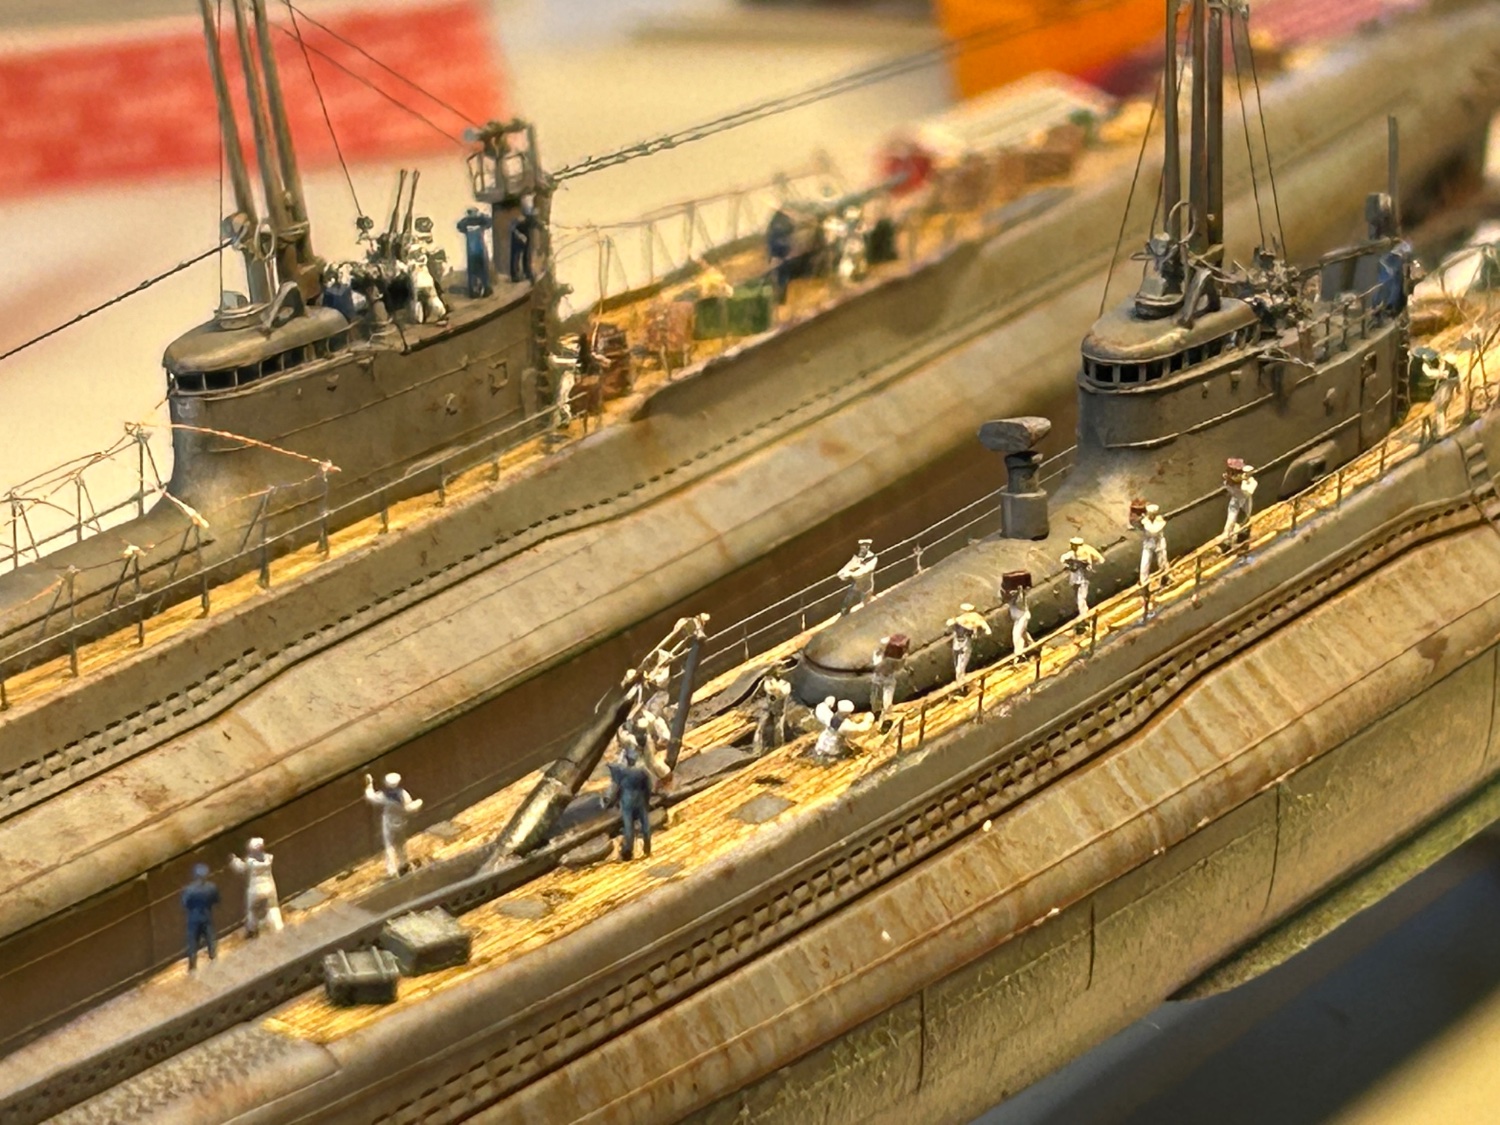
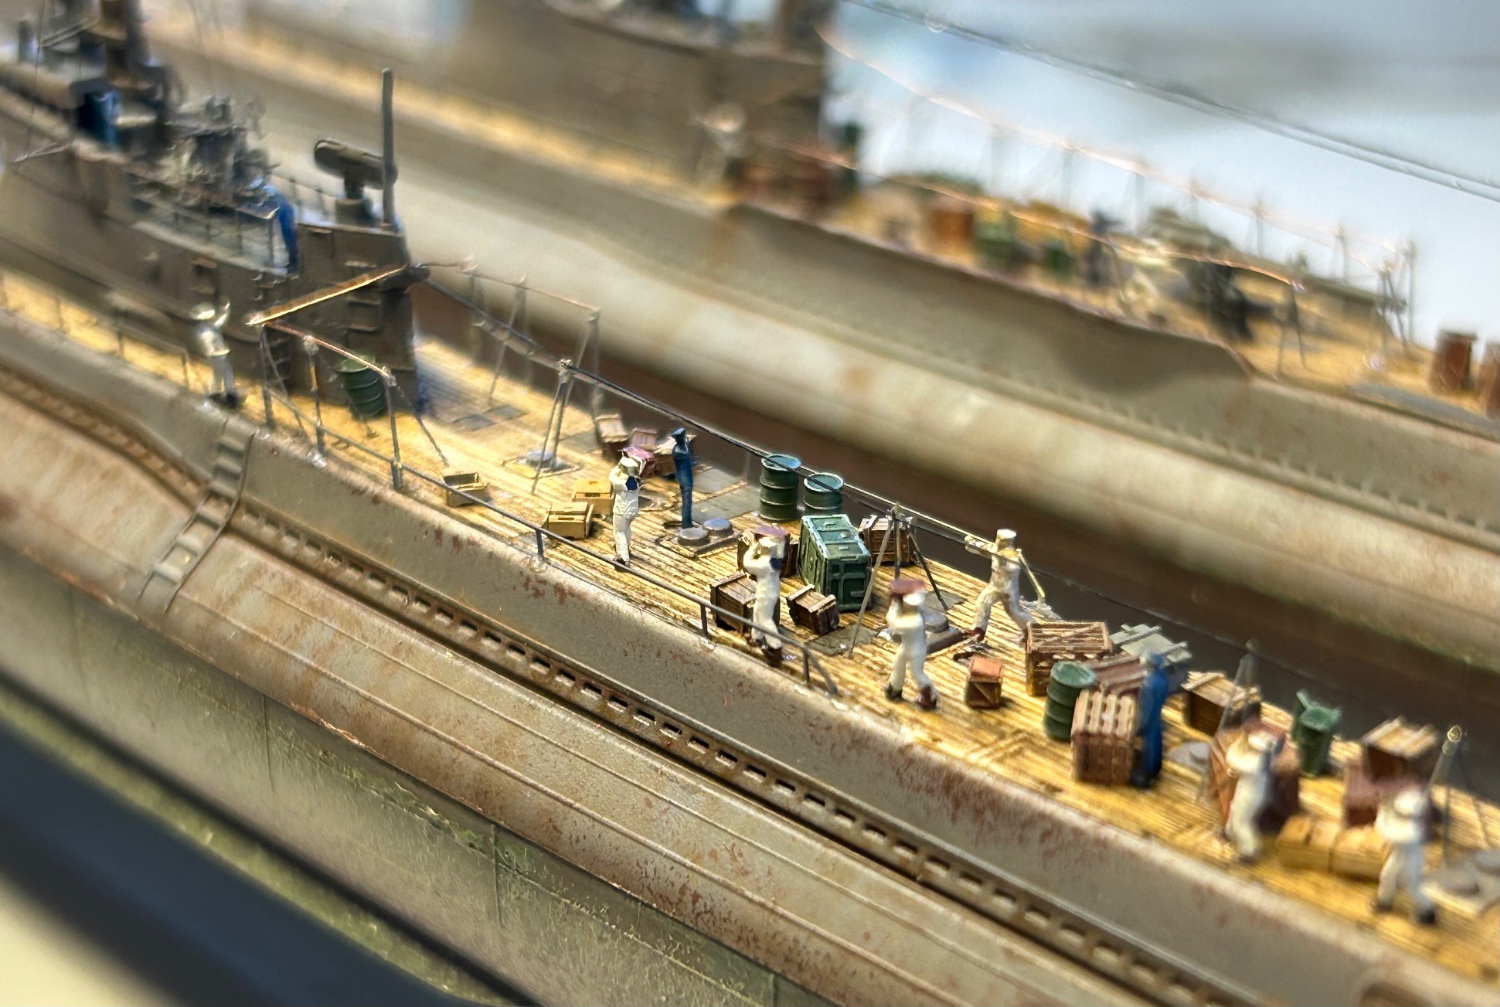
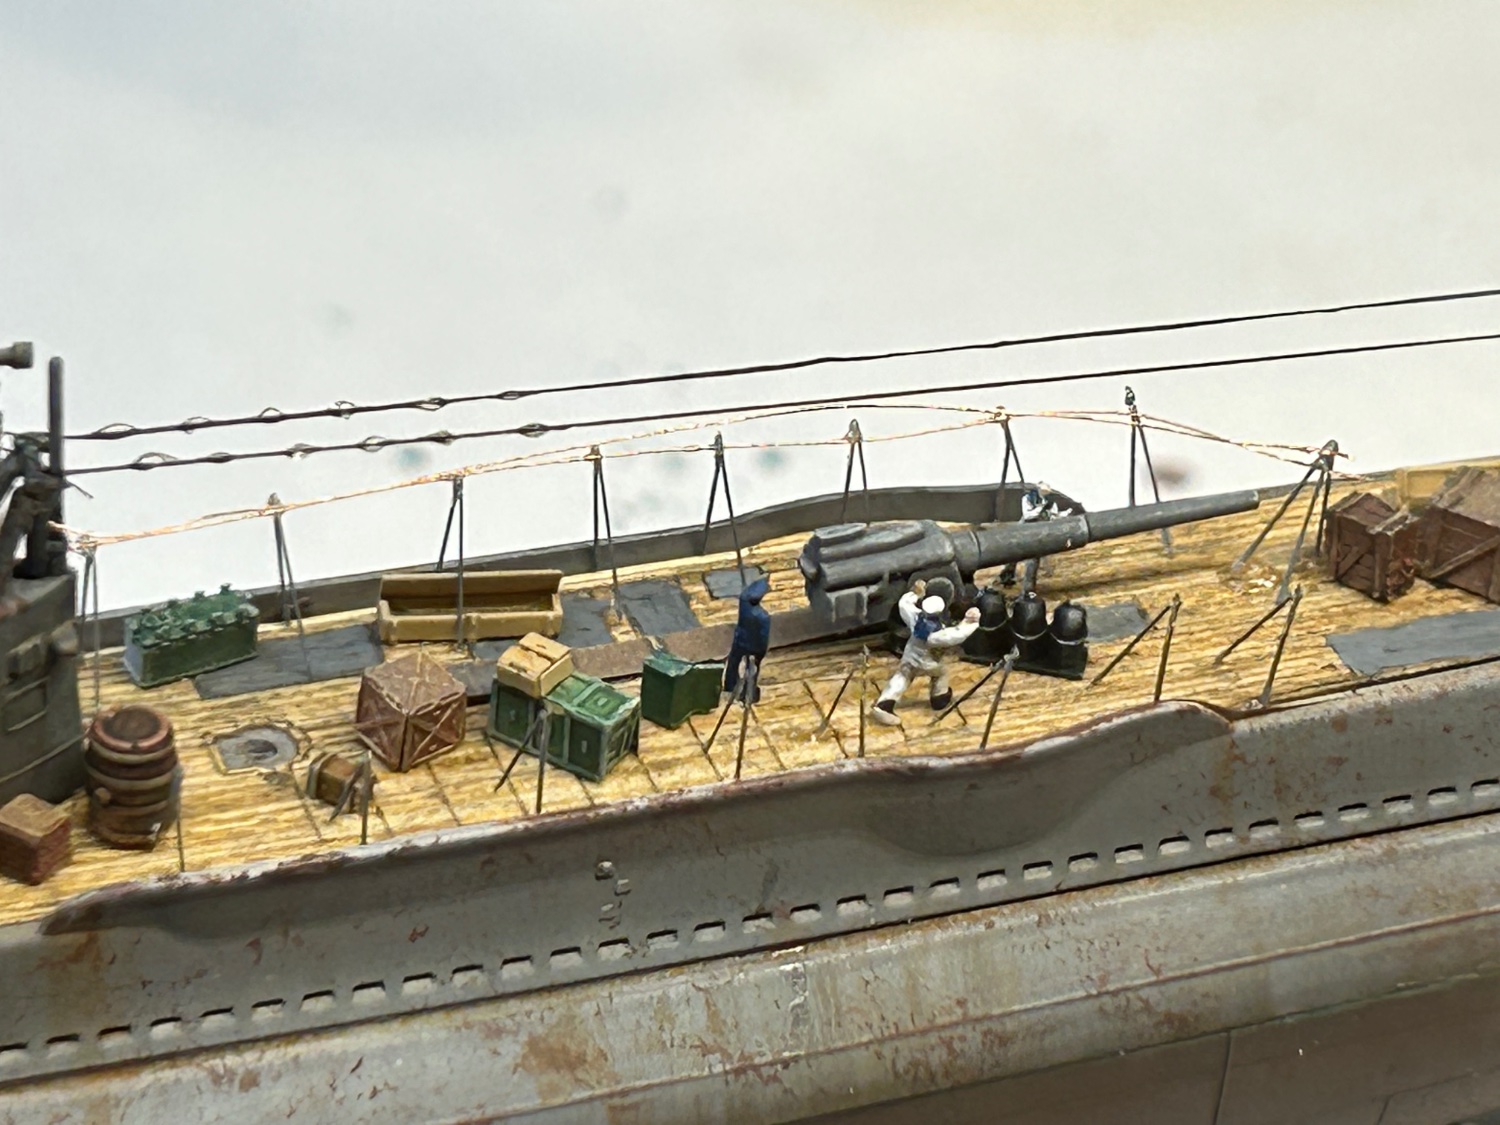
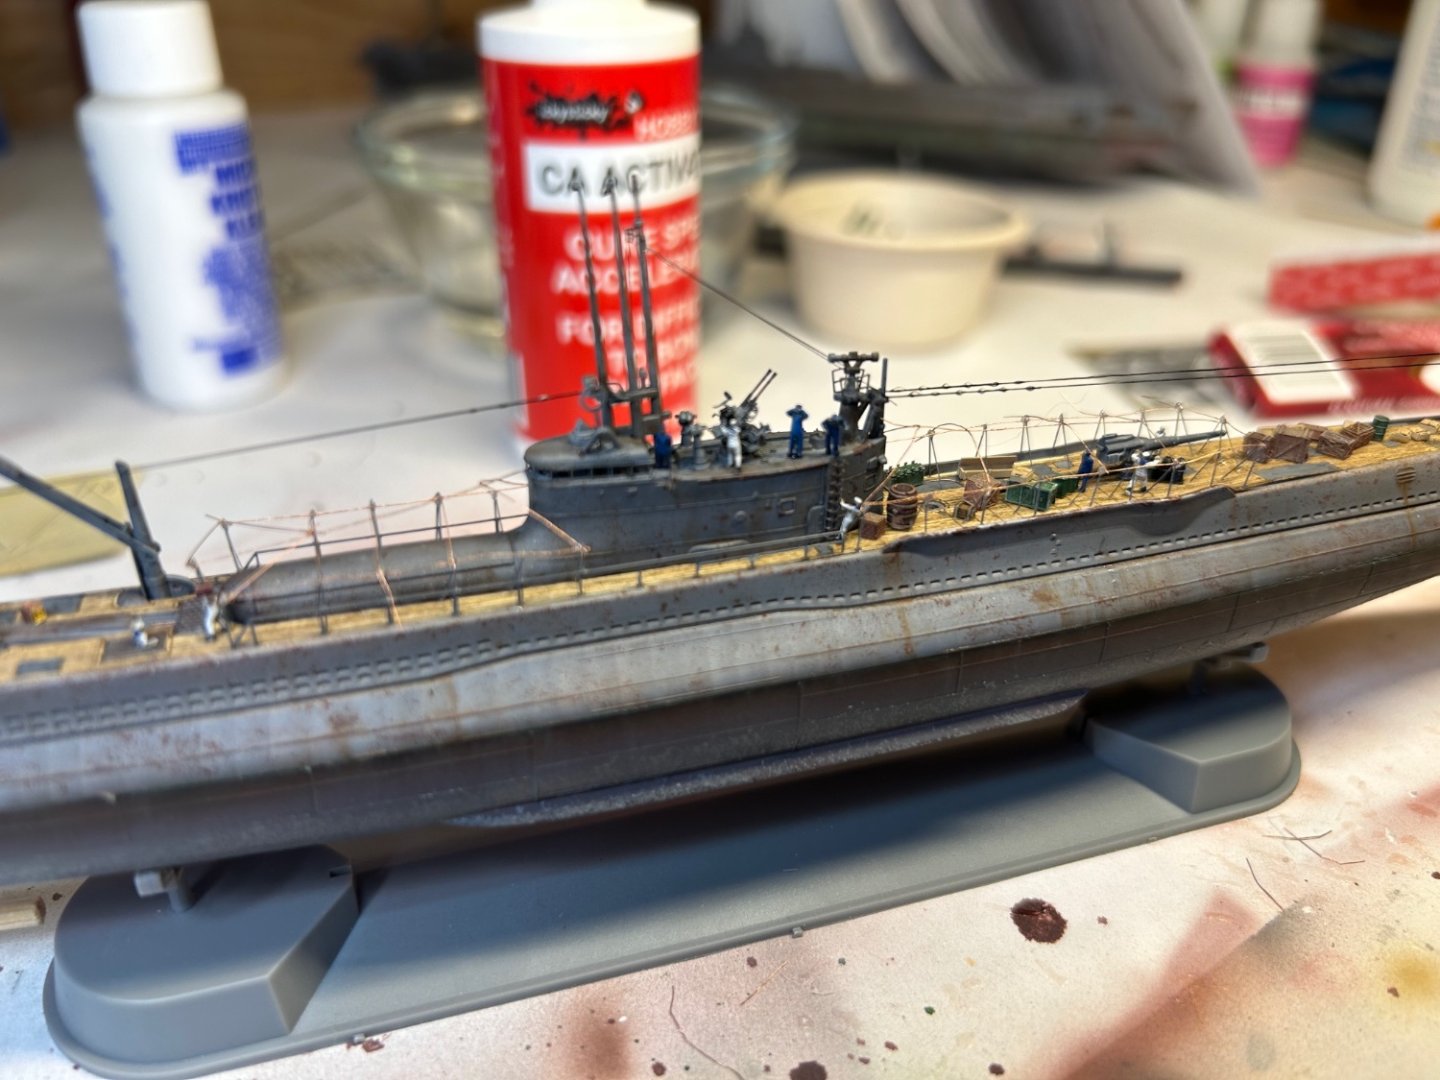
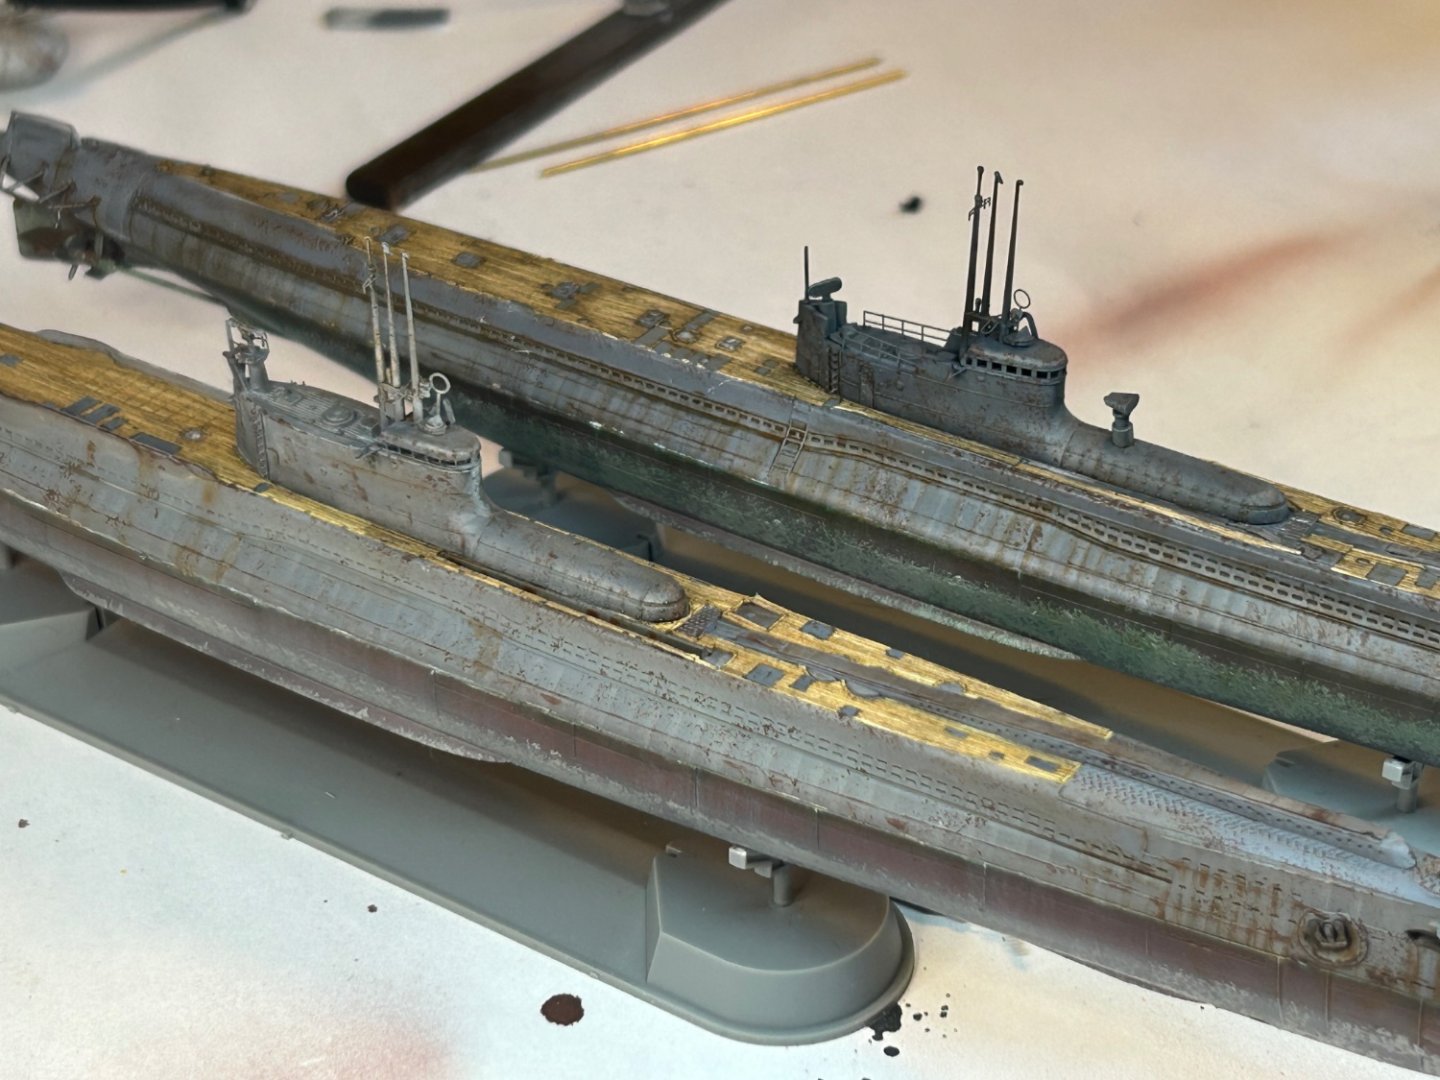
Now the detail work, stores, rigging and starting to rig the shade awnings


- 200 replies
-
- 10
-
-

-
- Transport No. 103
- Hasegawa
- (and 4 more)
-
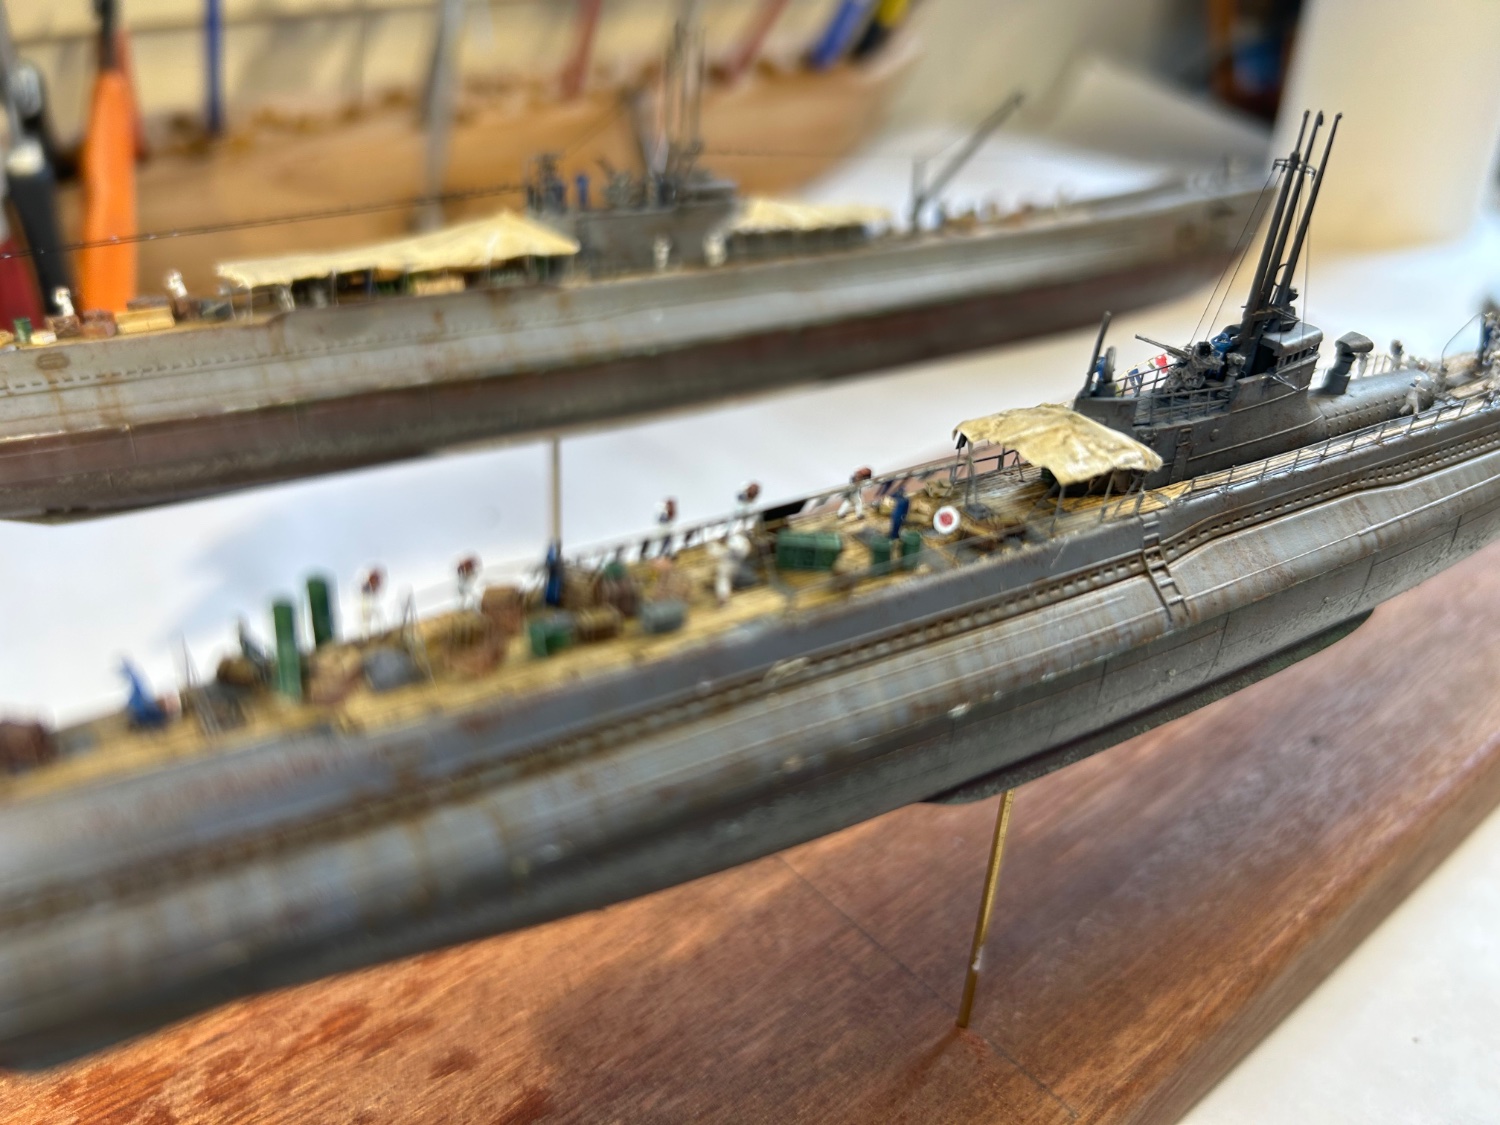
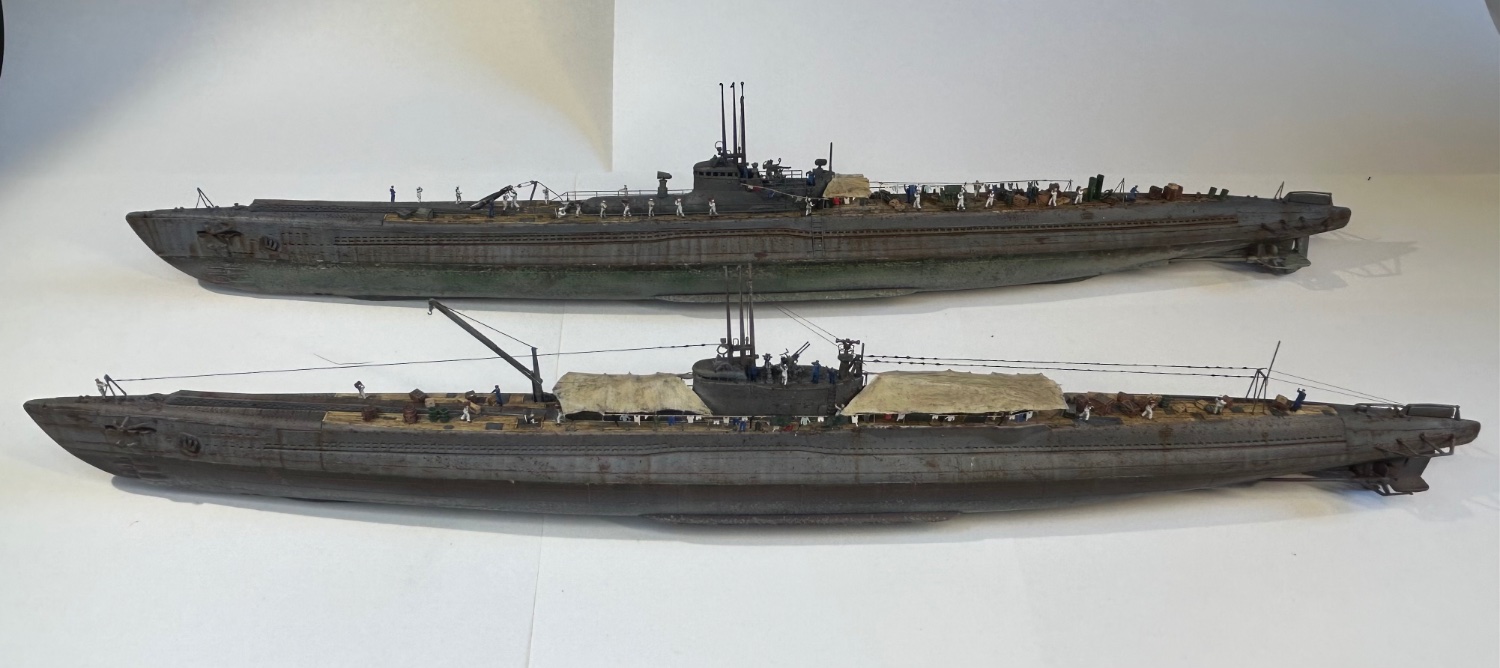
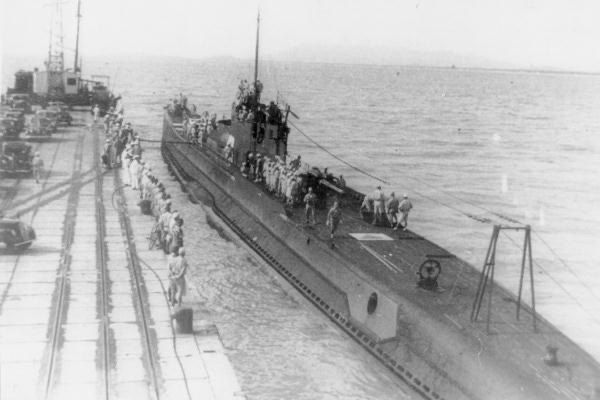
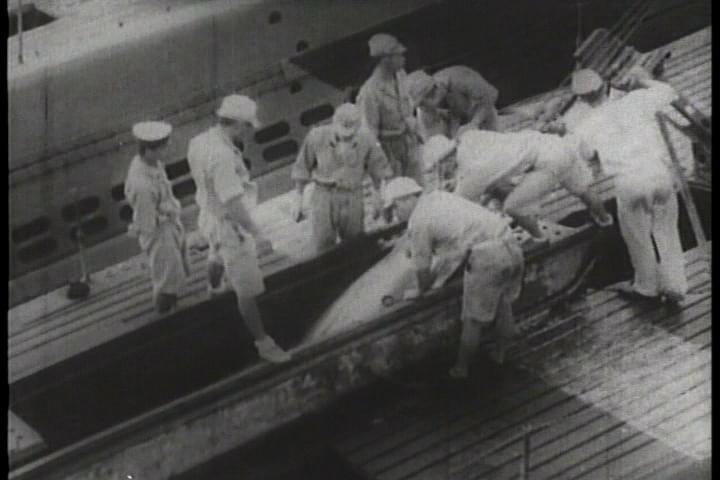
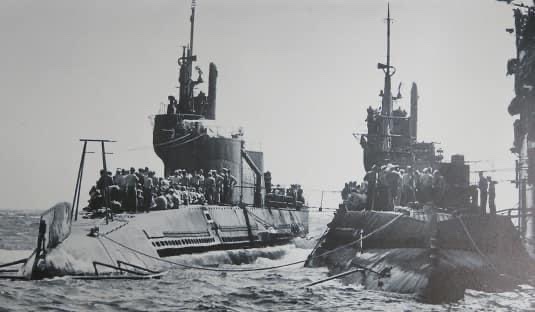
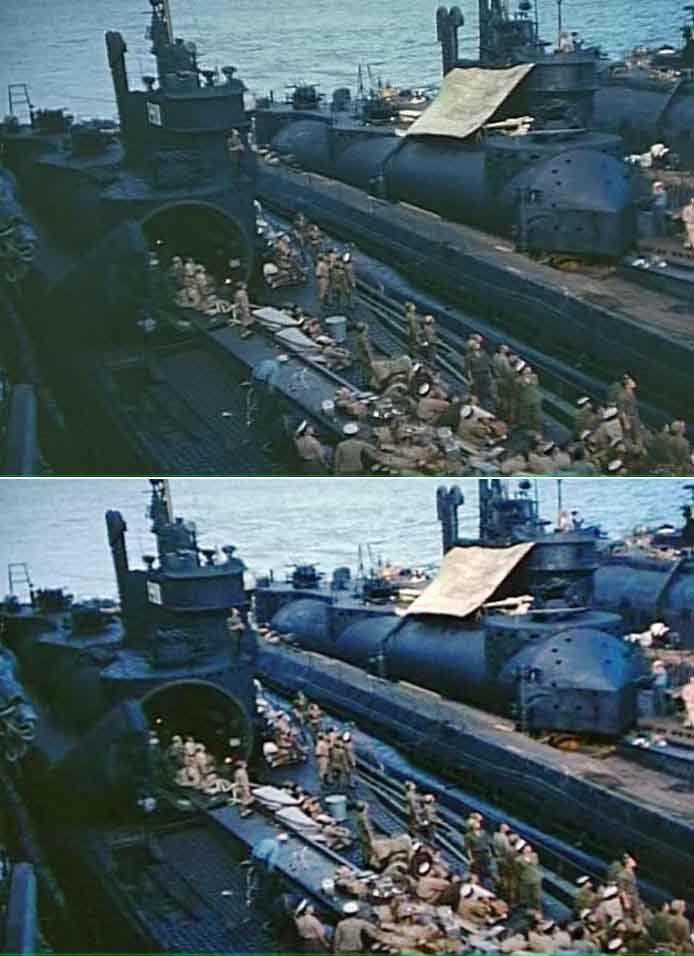
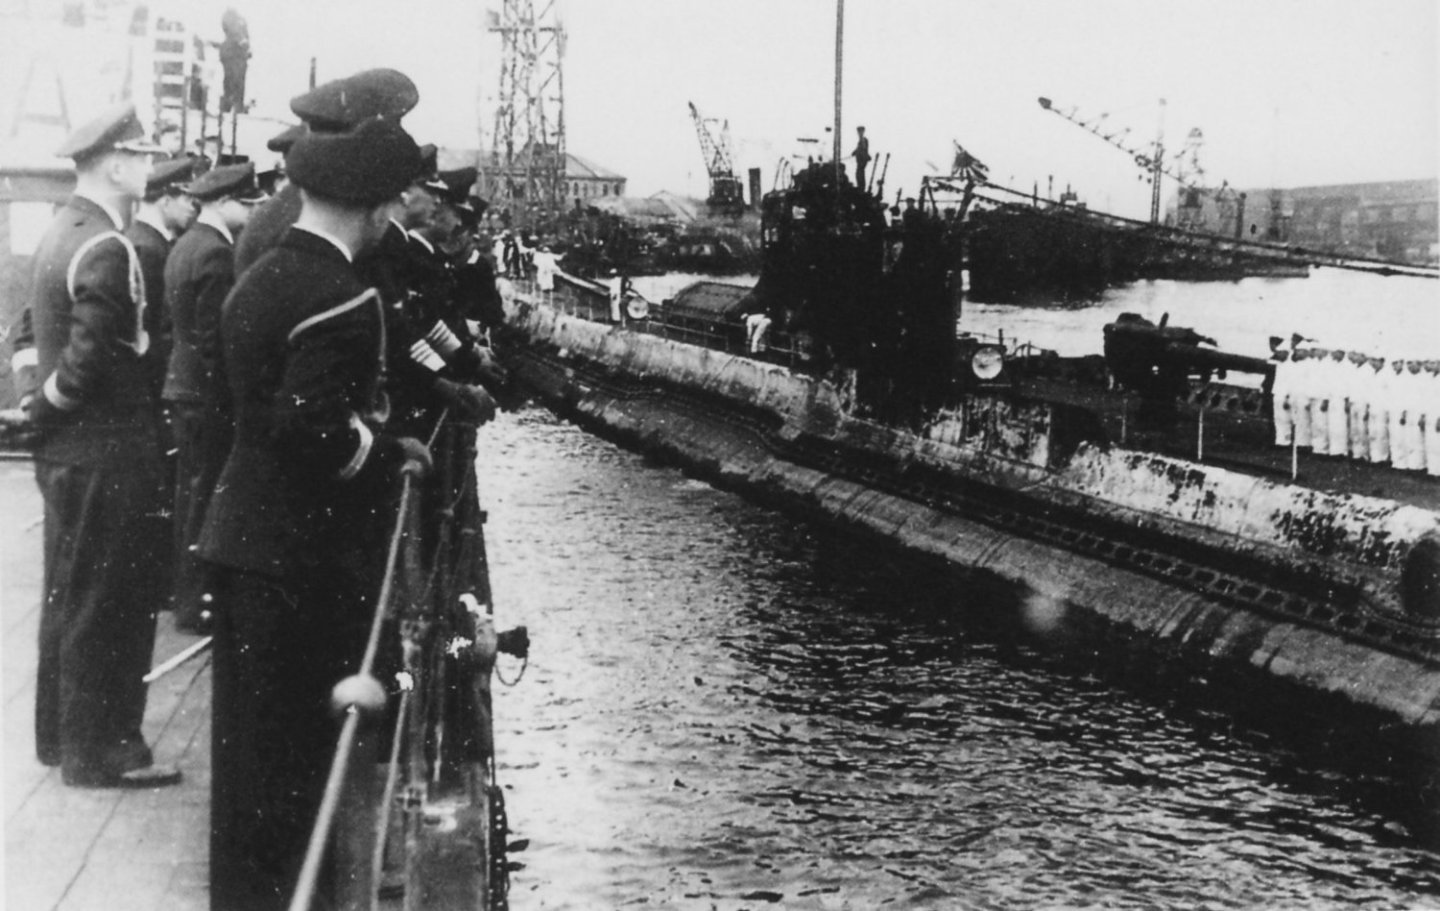
So looking at the old B&W images of IJN Subs, they were filthy things. So many images cover the big I400 class, and the older subs in 1/350 are not available anywhere in the world at a sensible price. My intention is to have one loading a torpedo, and lots of activity on the deck that one would expect for a replenishment operation.

surrenderedatMaizuru1945NihonnoGunkanv12.jpg.dc4872cd114368d0e6705e06cd50b528.jpg)

- 200 replies
-
- 6
-
-
- Transport No. 103
- Hasegawa
- (and 4 more)
-
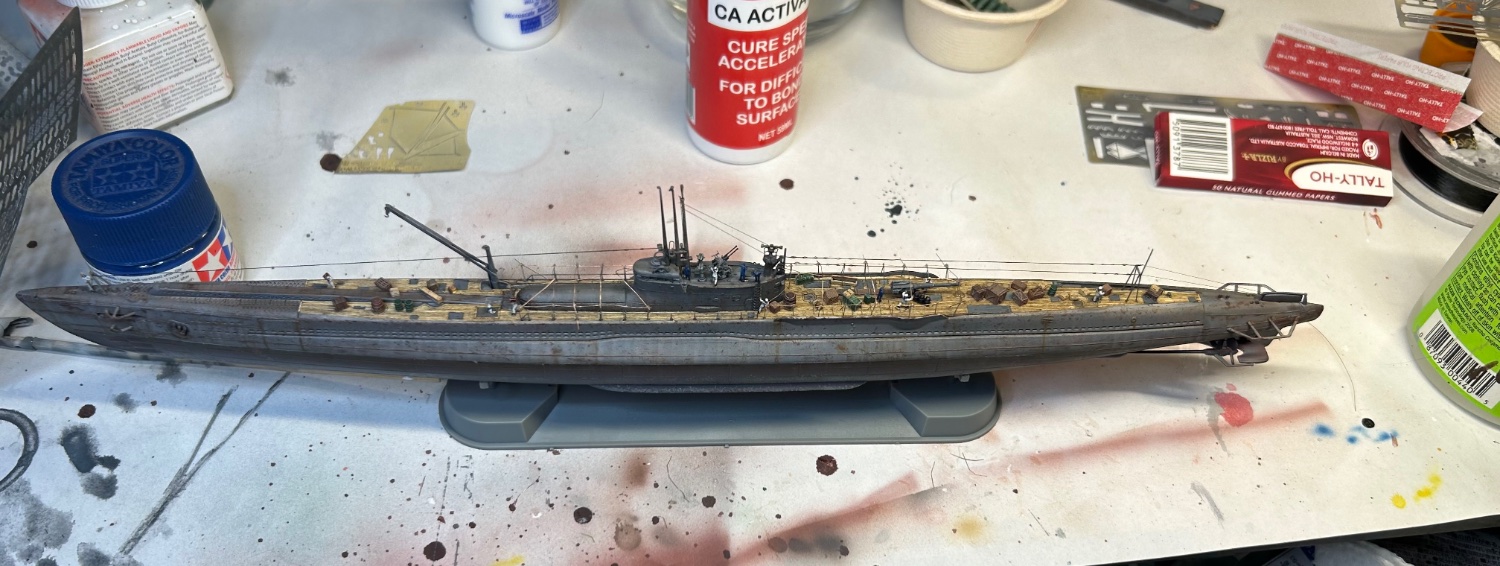
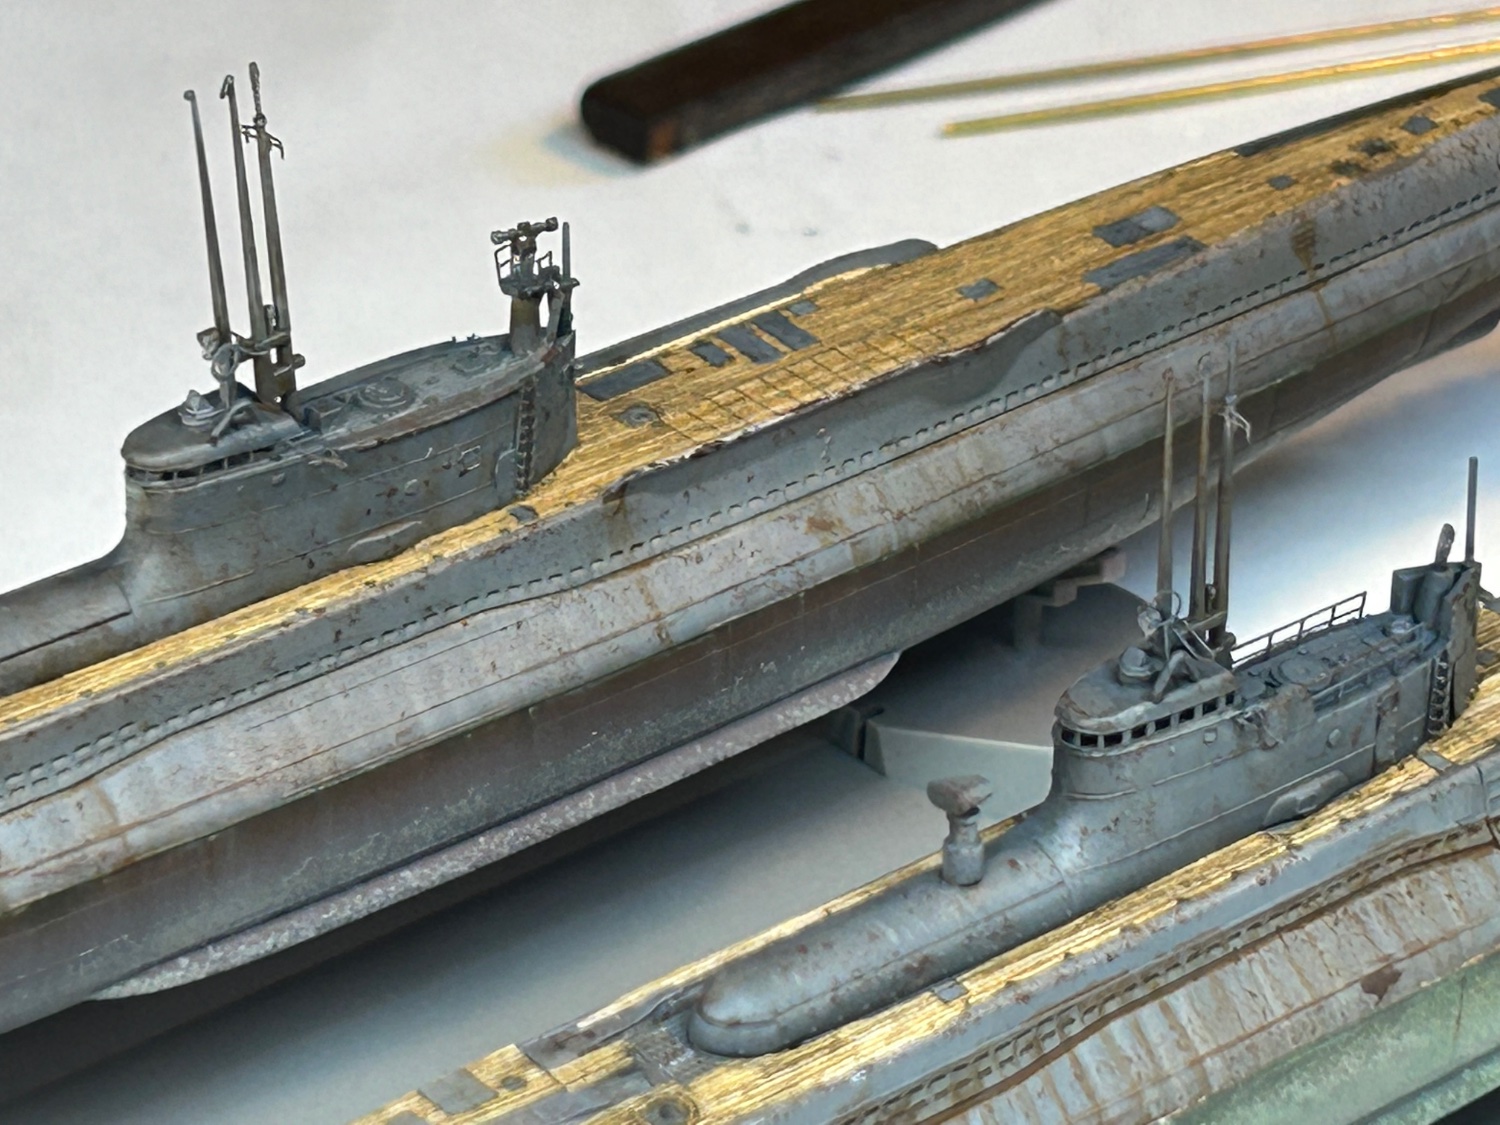
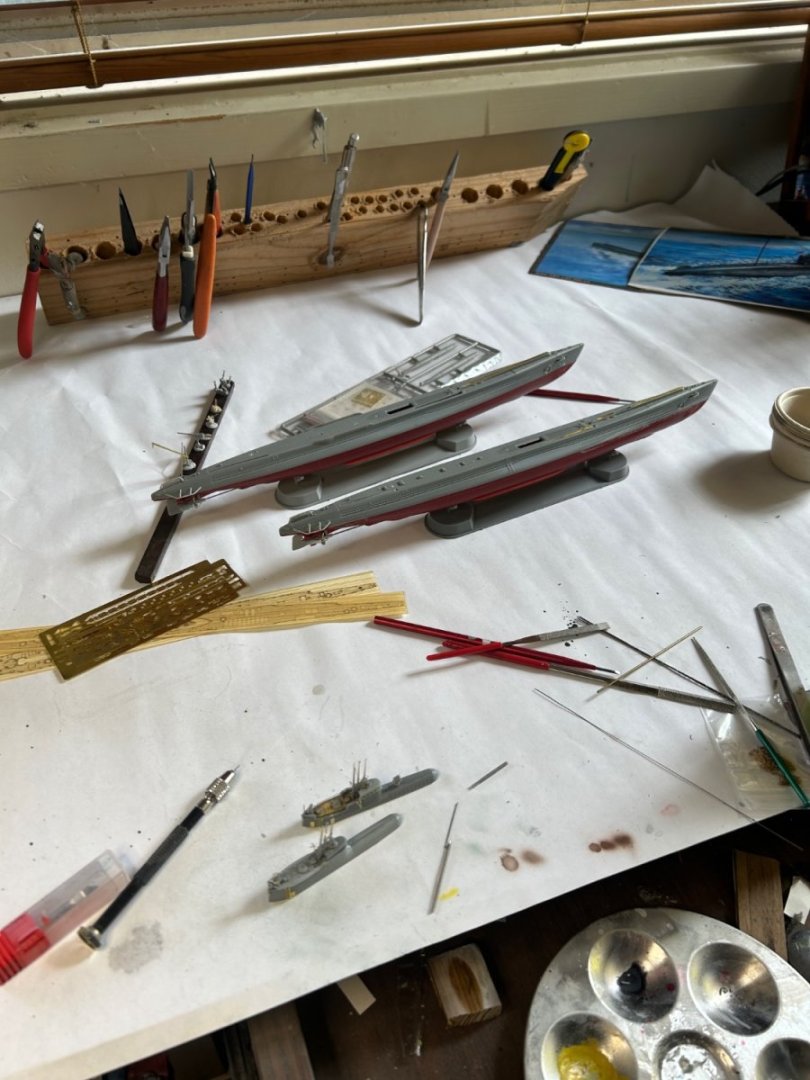
Bridges added, so I reckon I’m about 70% done now, I need to add guns, cranes, railings, tarps and figures

- 200 replies
-
- 7
-
-
-
- Transport No. 103
- Hasegawa
- (and 4 more)
-
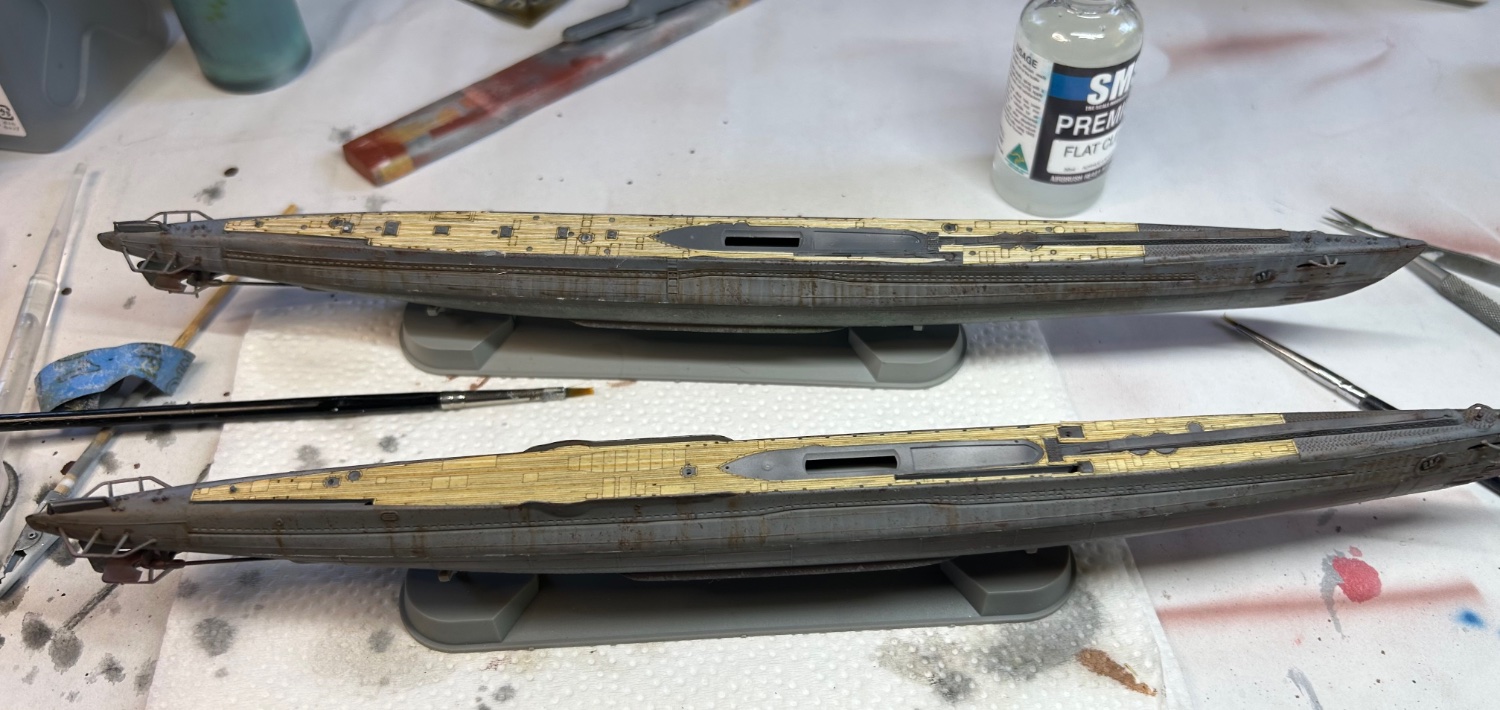
Deck on, I’ve given it a clear matte coat before weathering

- 200 replies
-
- 7
-
-
- Transport No. 103
- Hasegawa
- (and 4 more)
-
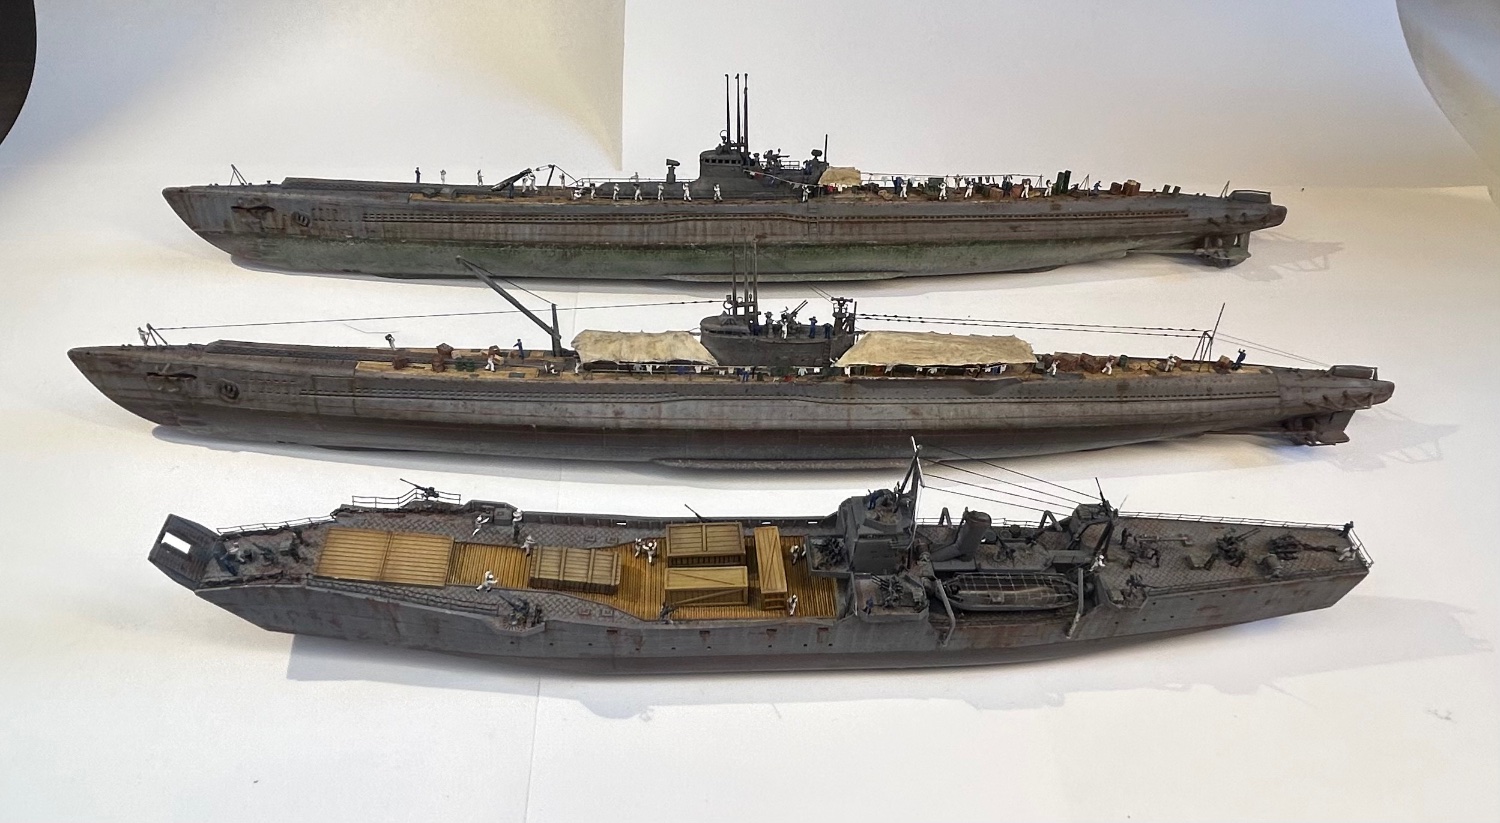
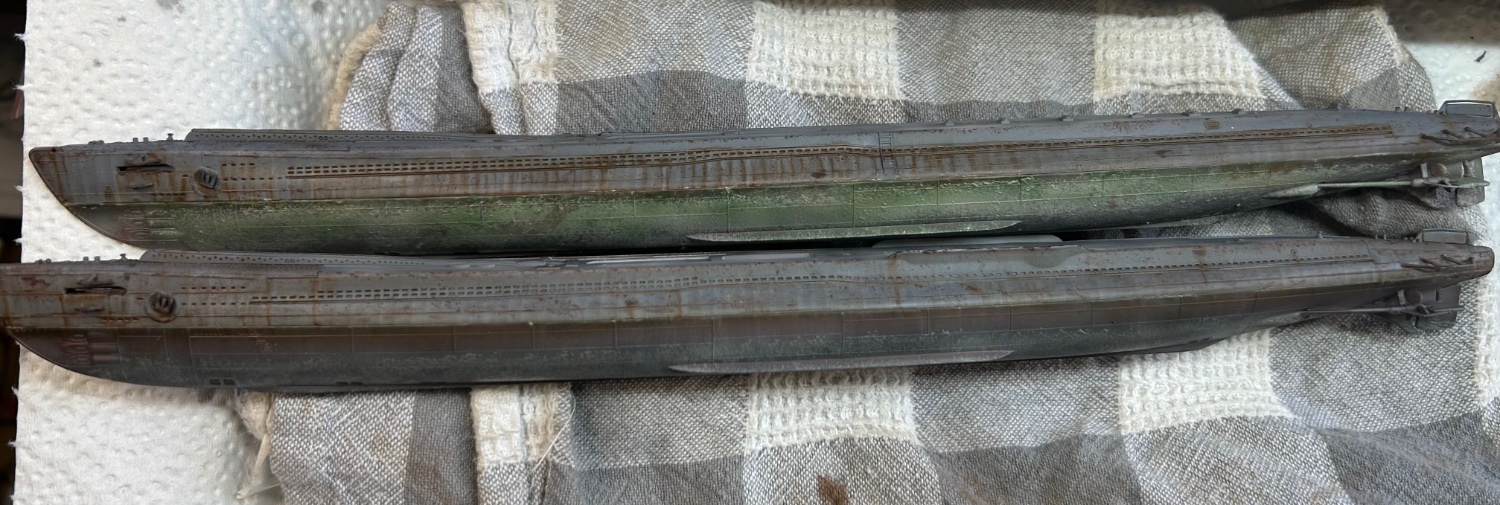
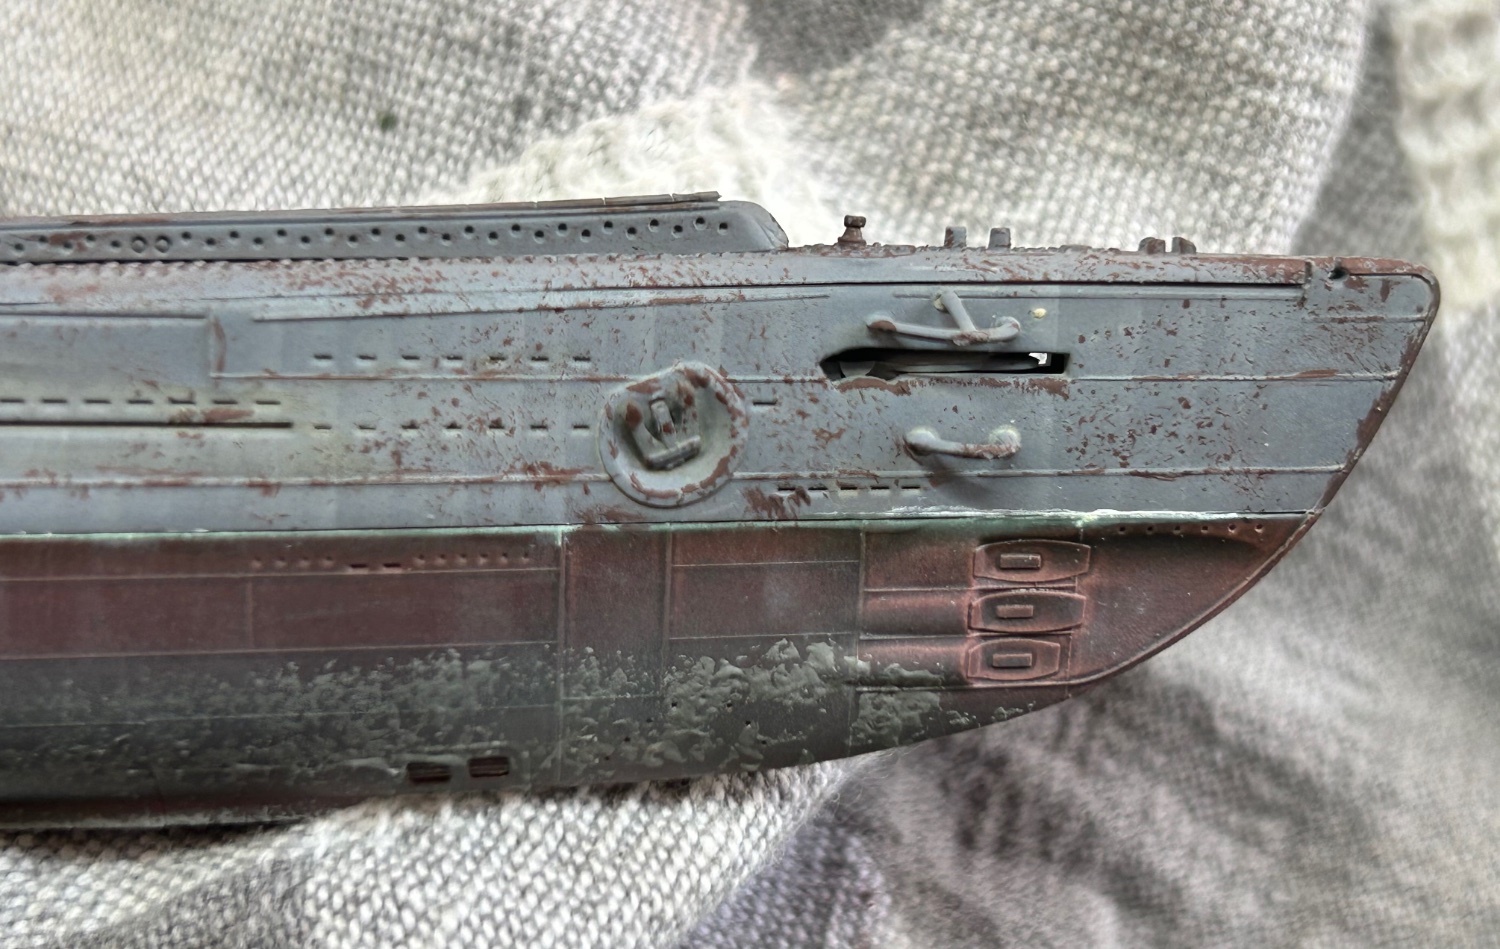
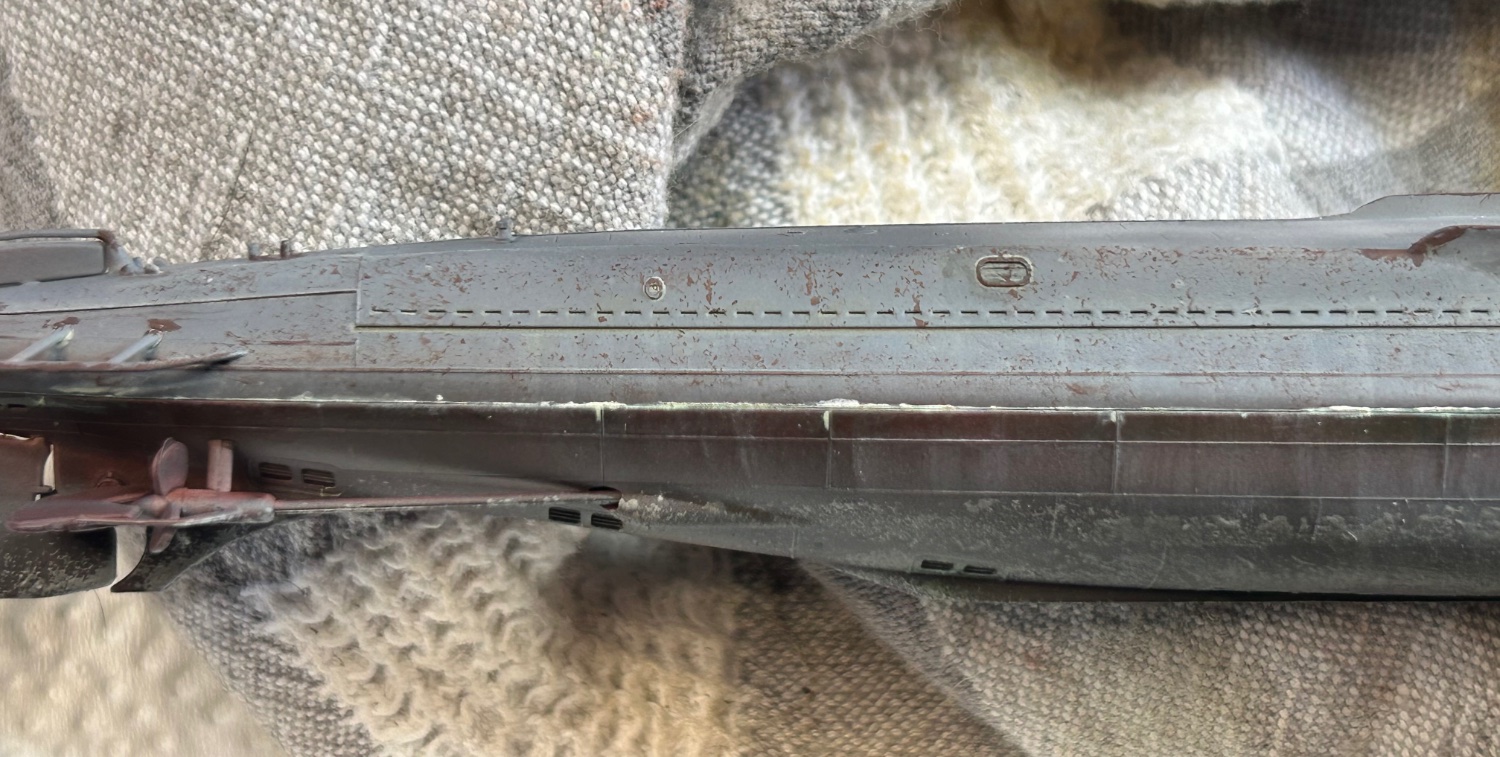
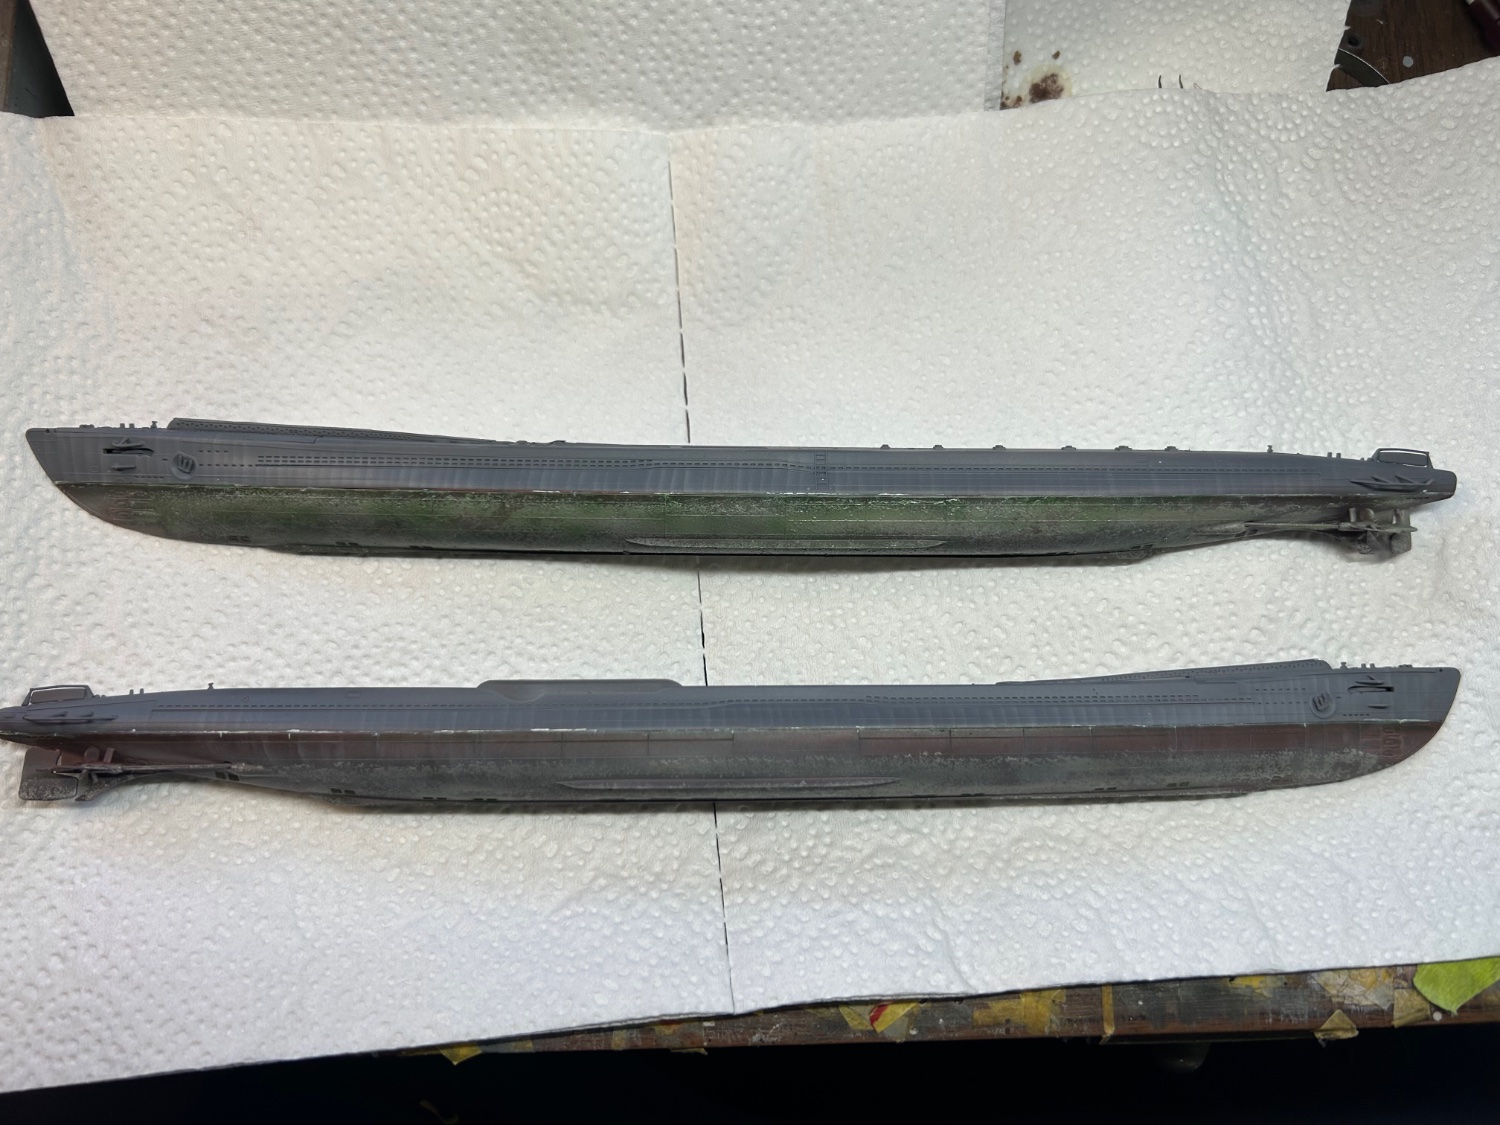
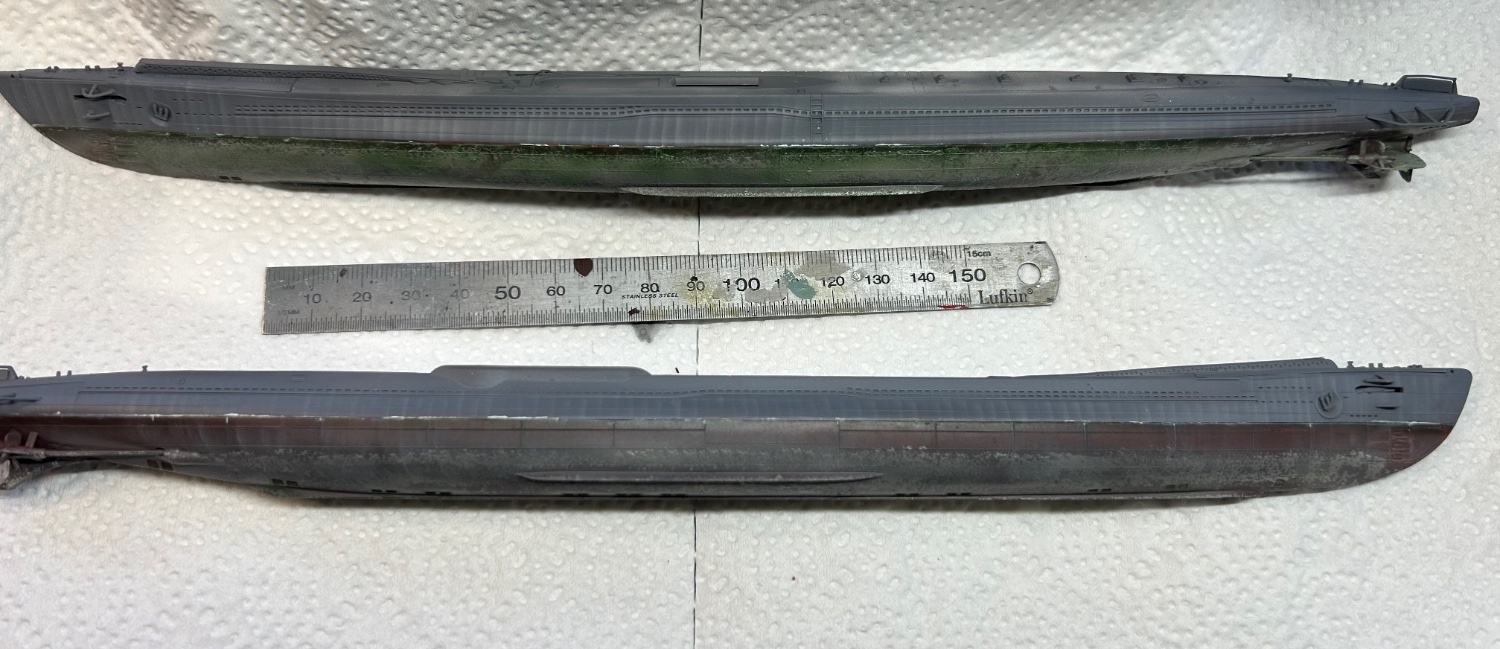
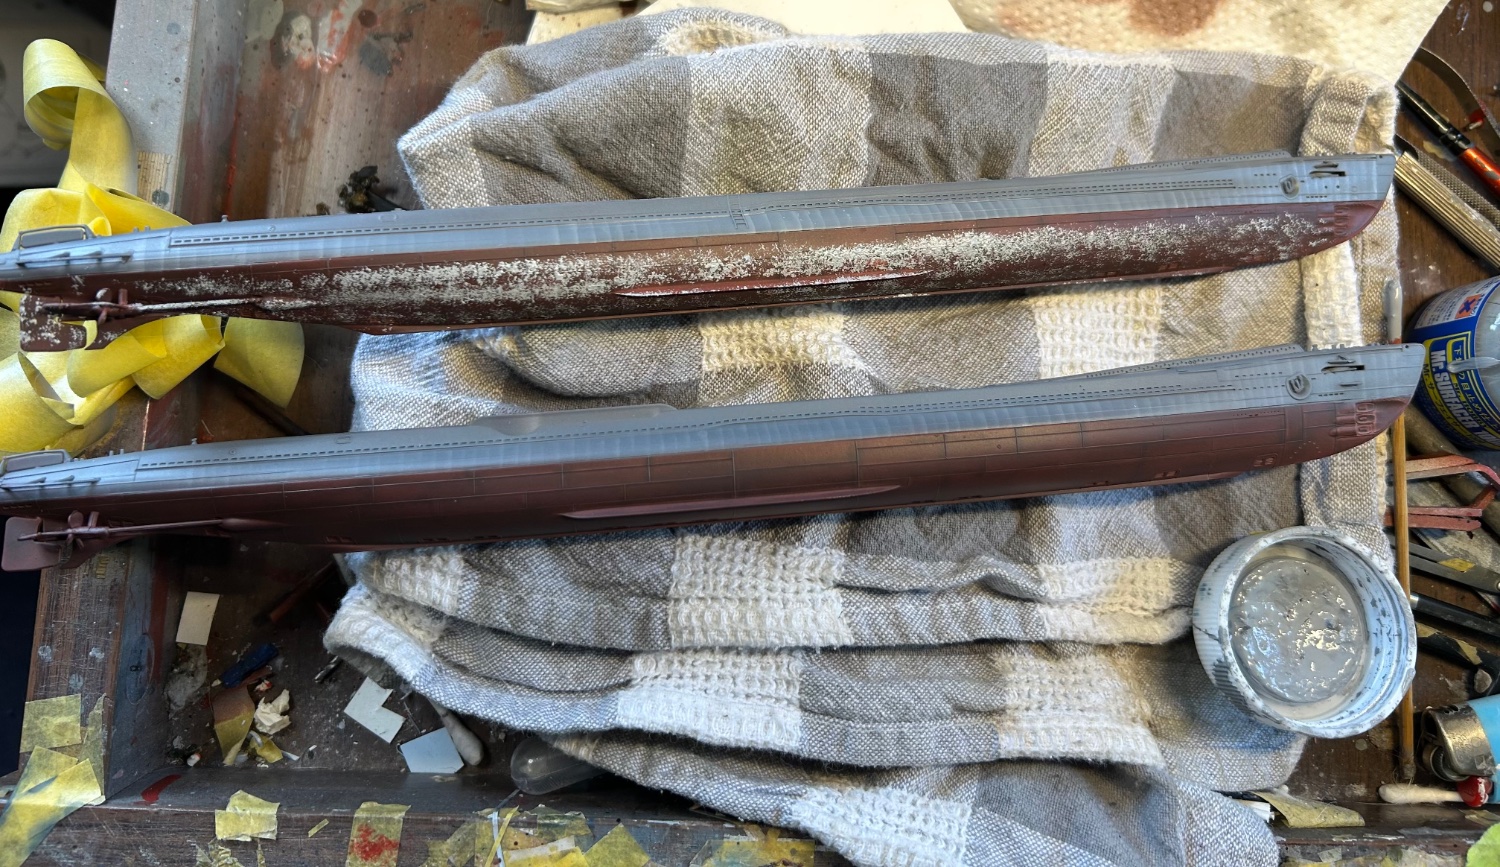
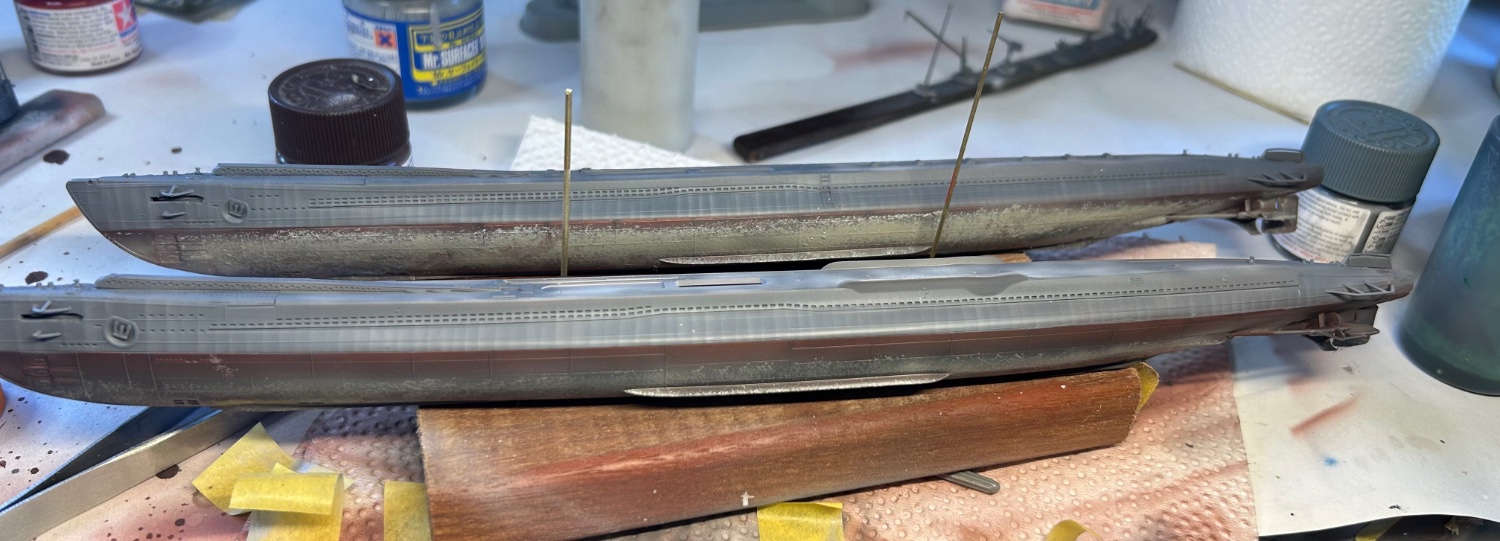
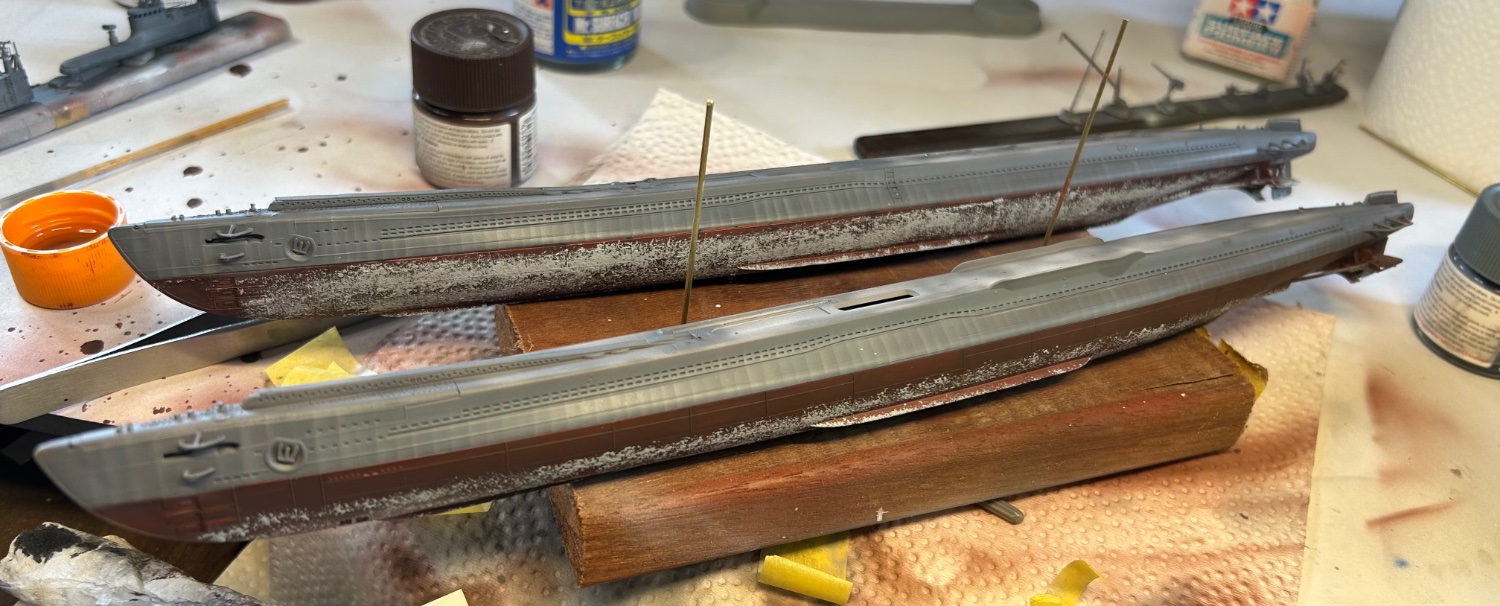
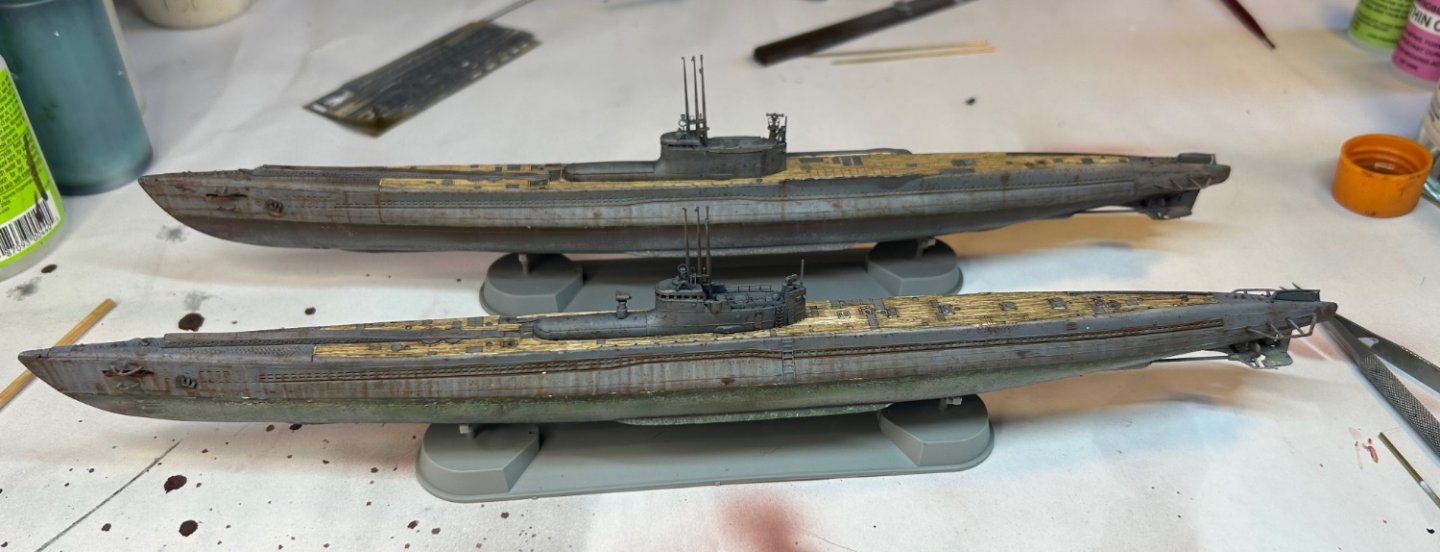
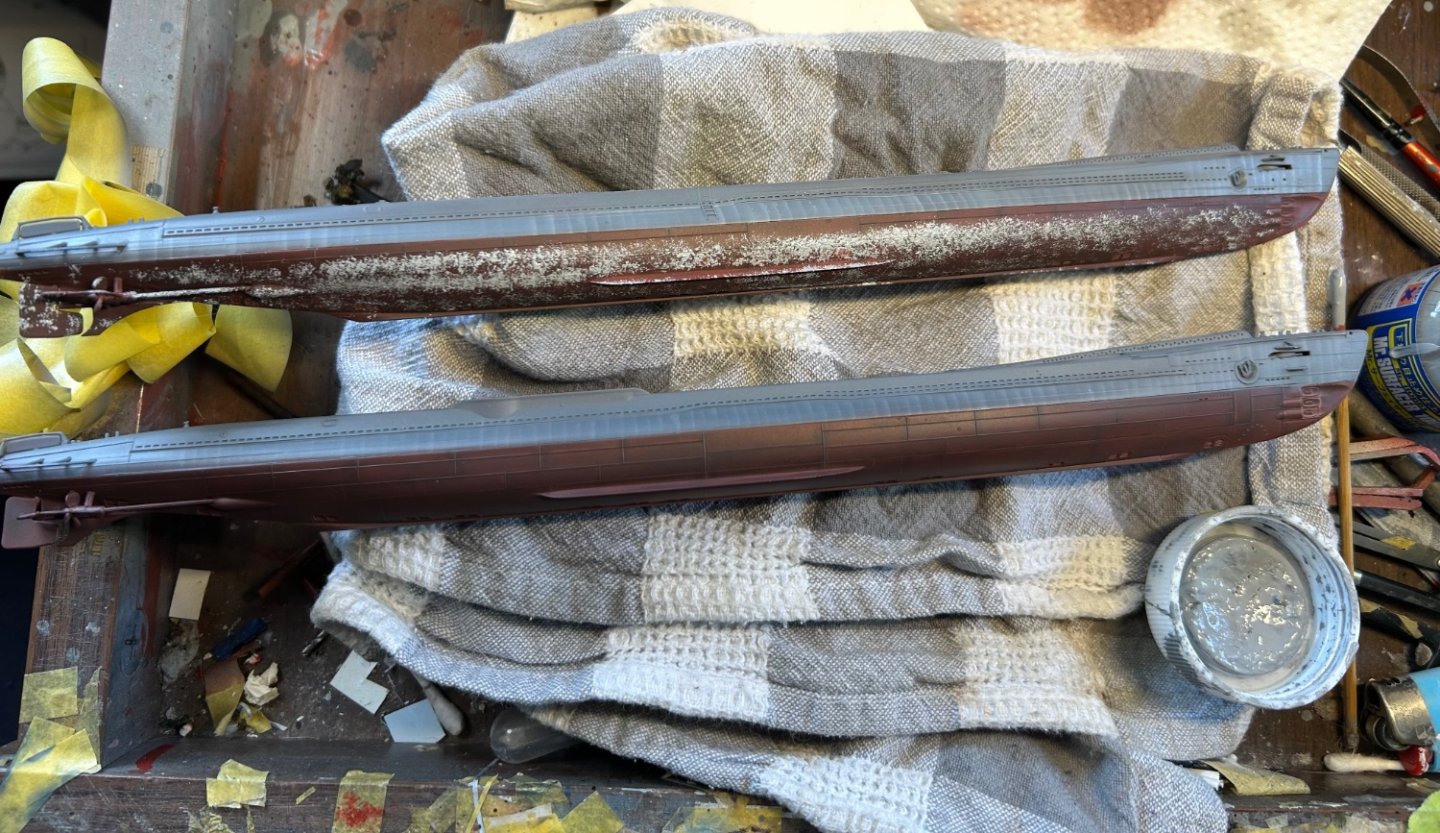
Grunging the lower hulls, first sponge on some old Mr Surfacer 1000 then a grey coat overspray followed by a black then a tan I wanted to make them a bit different to show different times out on mission. I will not add numbers to the hull as they were temporary anyways


- 200 replies
-
- 8
-
-
-
- Transport No. 103
- Hasegawa
- (and 4 more)
-
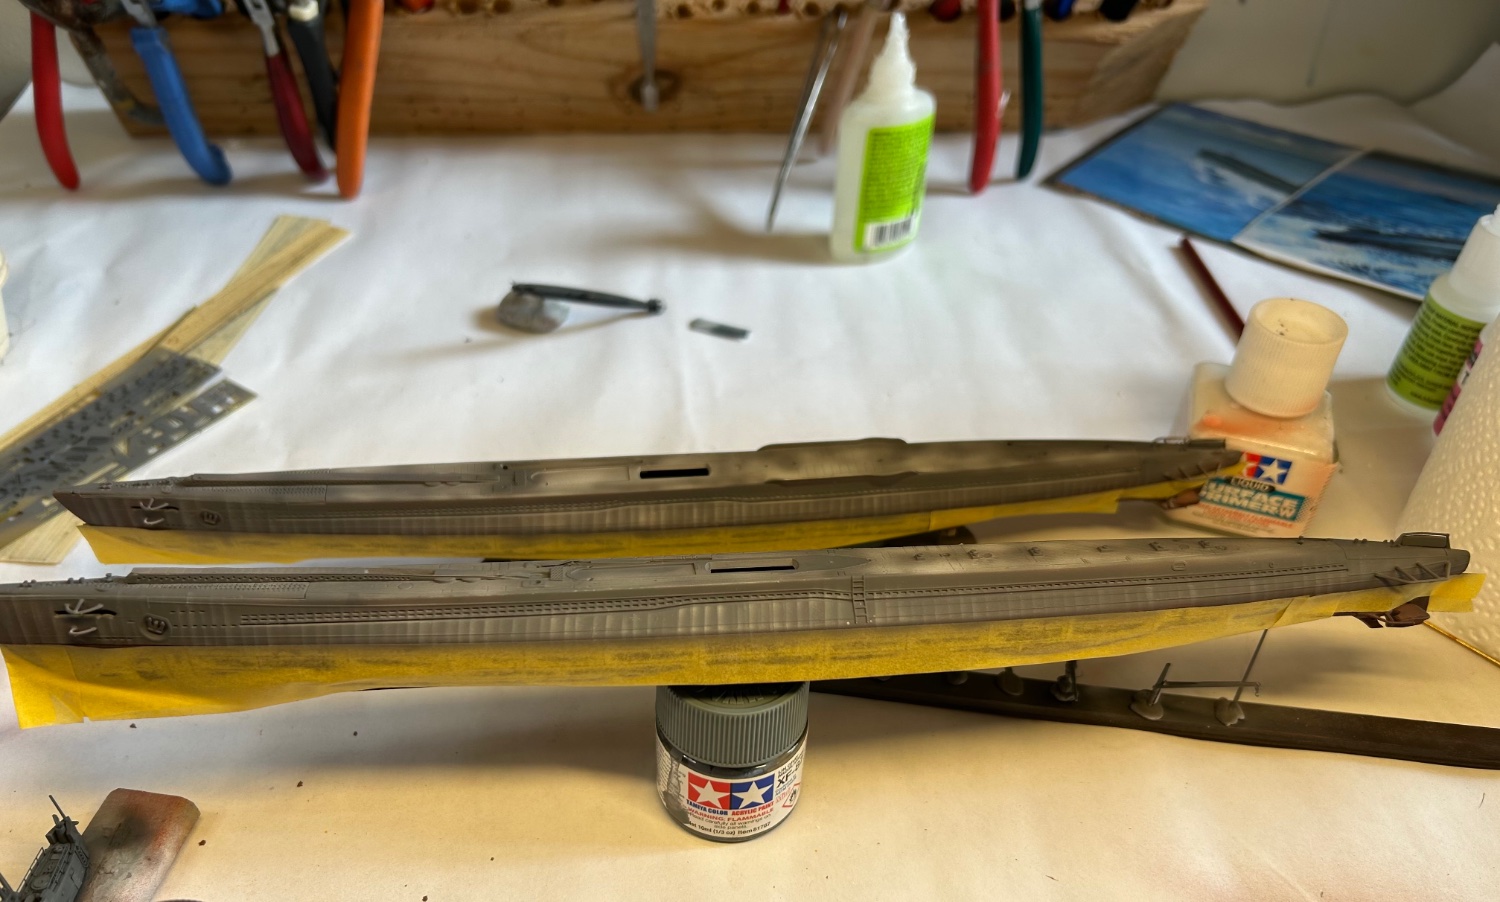
Ready for a base coat to look for errors. I have cut a hole in the float plane ramp so I can model a torpedo being loaded

- 200 replies
-
- 11
-
-
- Transport No. 103
- Hasegawa
- (and 4 more)
-
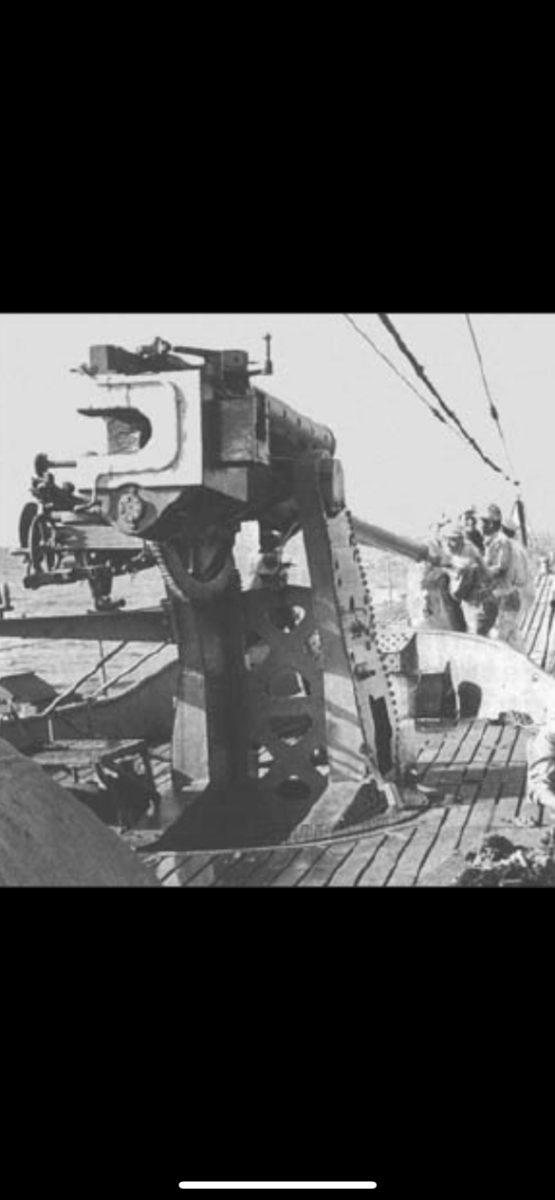
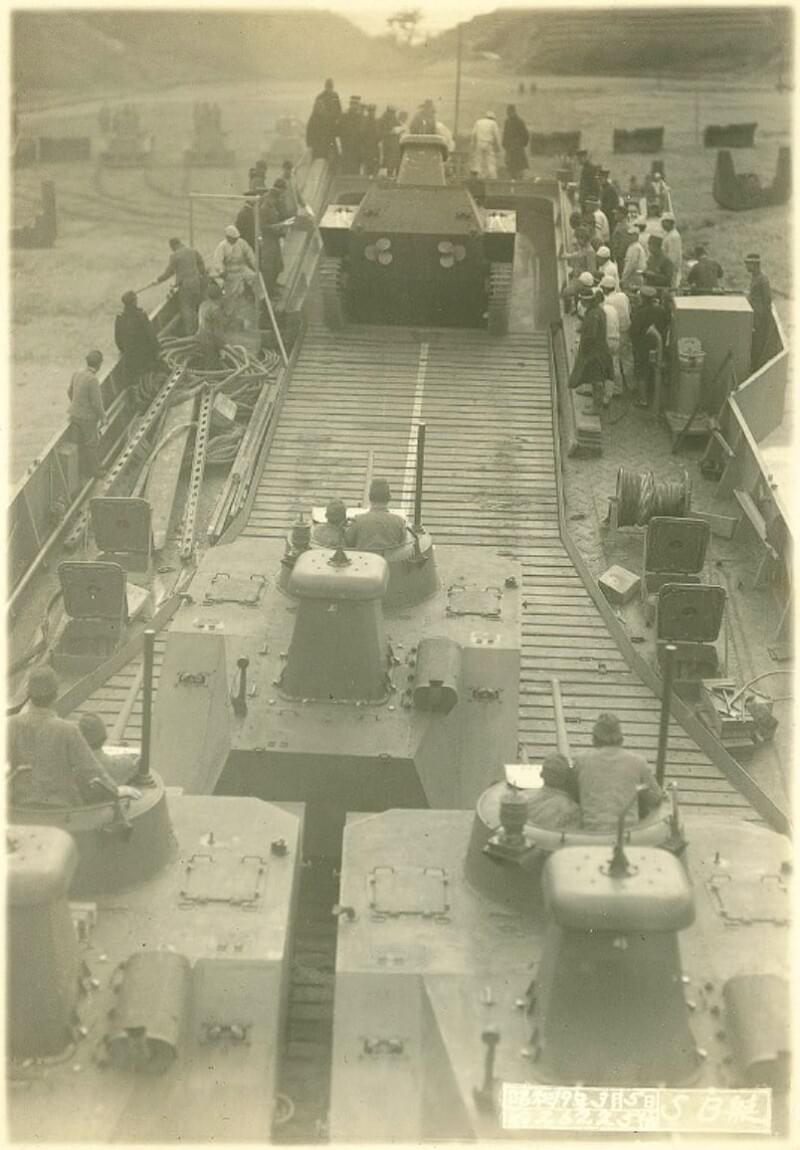
And a final and new photo is not seen of the deck of a landing craft which I wish I had of seen before

- 200 replies
-
- 4
-
-
- Transport No. 103
- Hasegawa
- (and 4 more)
-
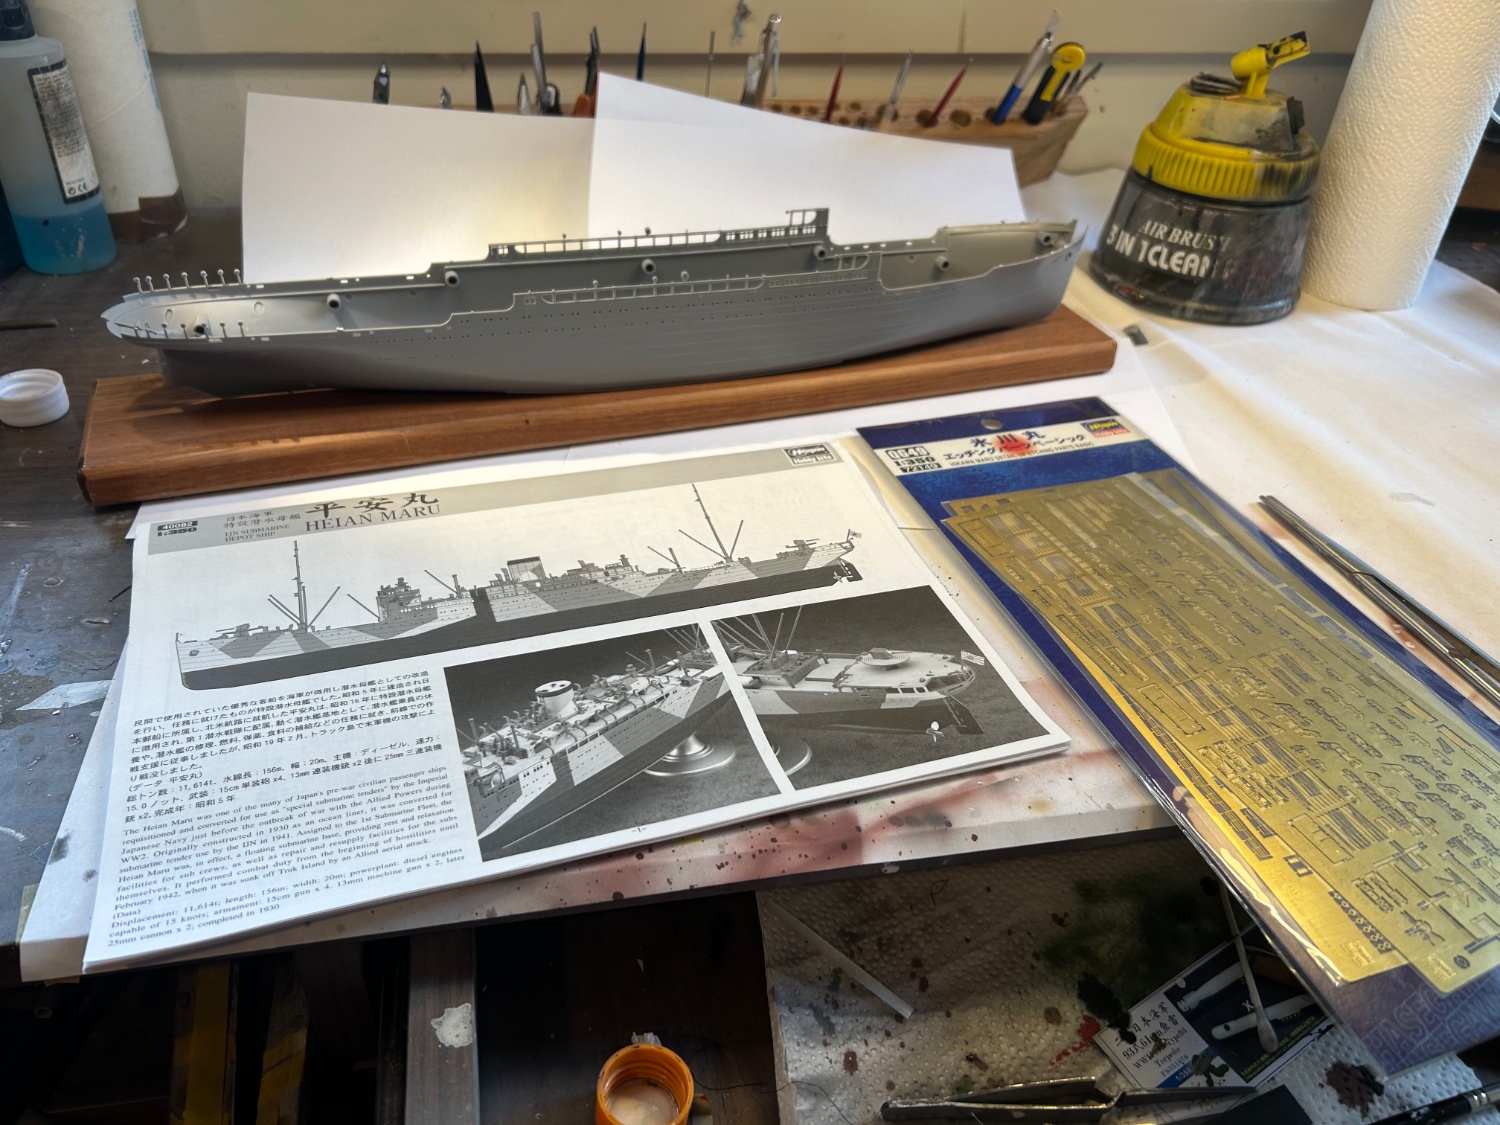
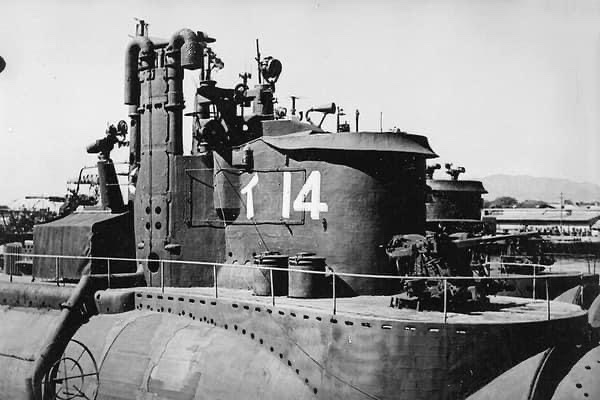
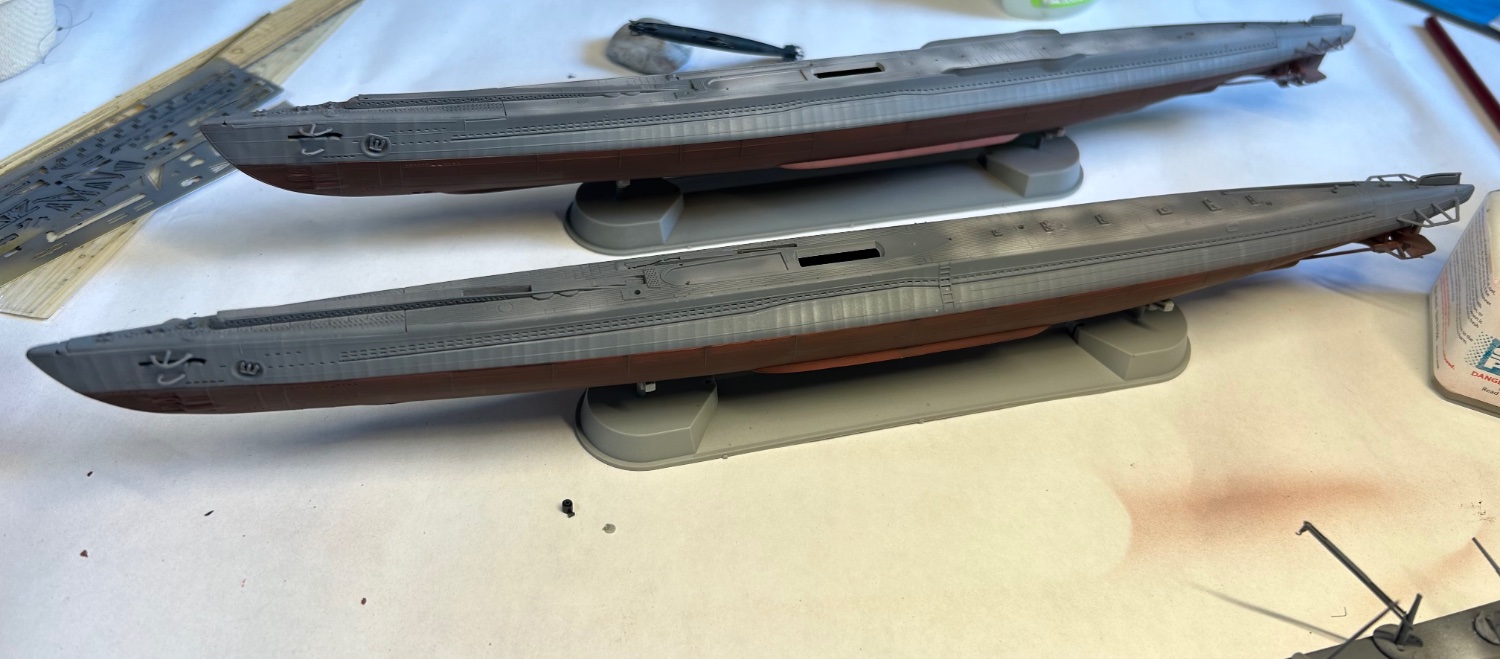
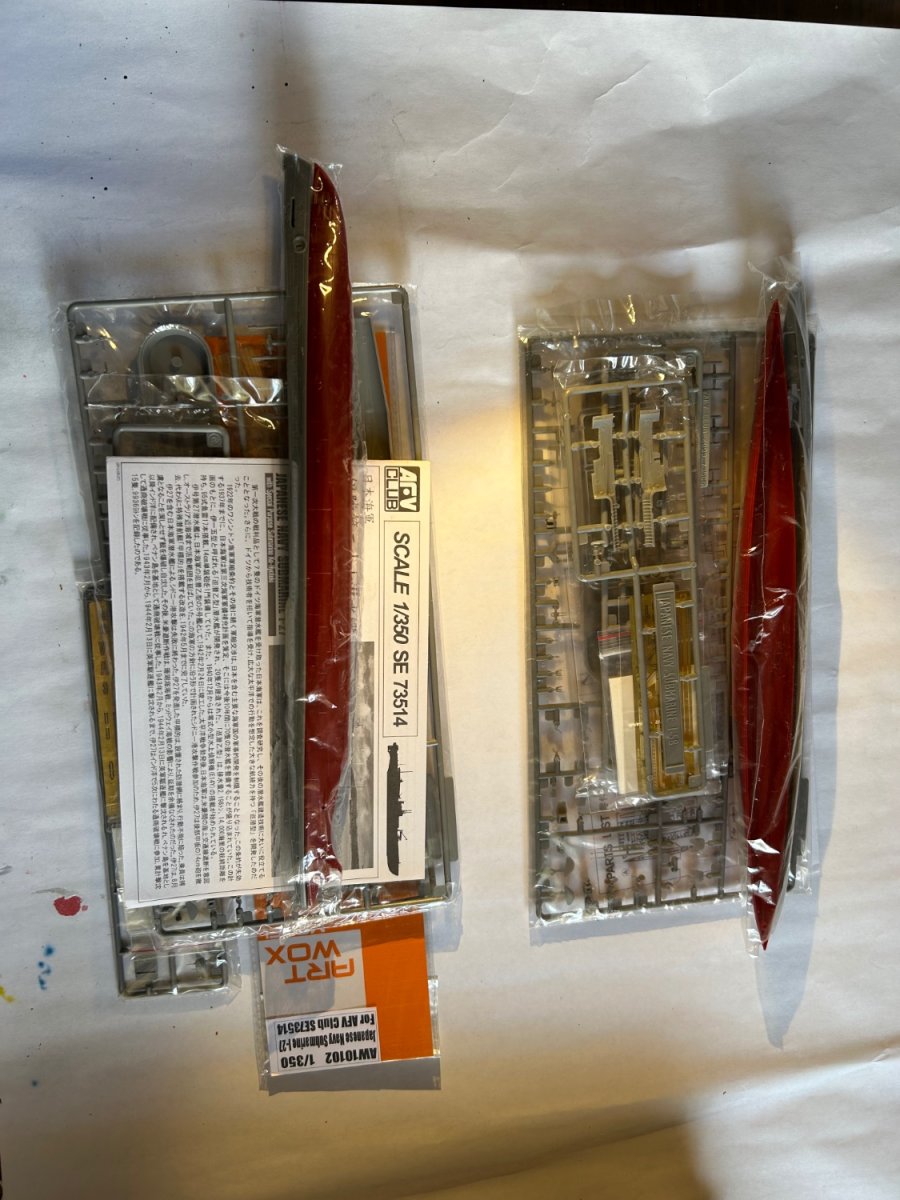
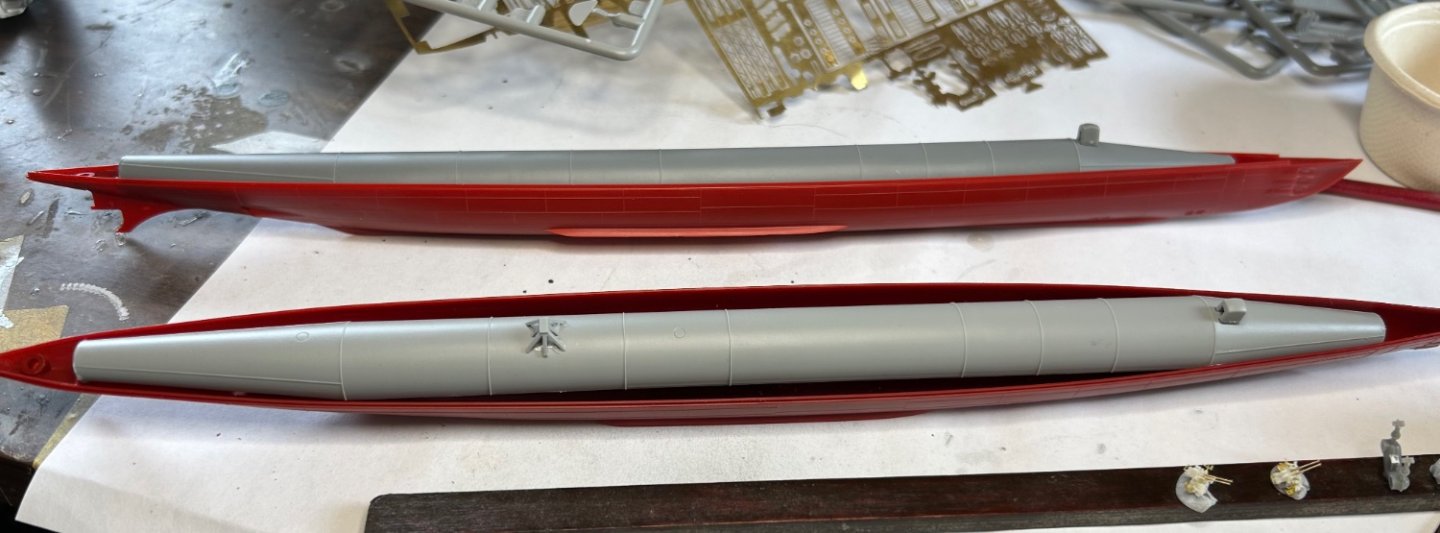
The pressure hulls, the forward housing is the torpedo loading hatch which I intend to do on these ones loading torpedoes.
- 200 replies
-
- 6
-
-
- Transport No. 103
- Hasegawa
- (and 4 more)
-
Camel by RGL - FINISHED - Machinen Krieger - 1/20
RGL replied to RGL's topic in Non-ship/categorised builds
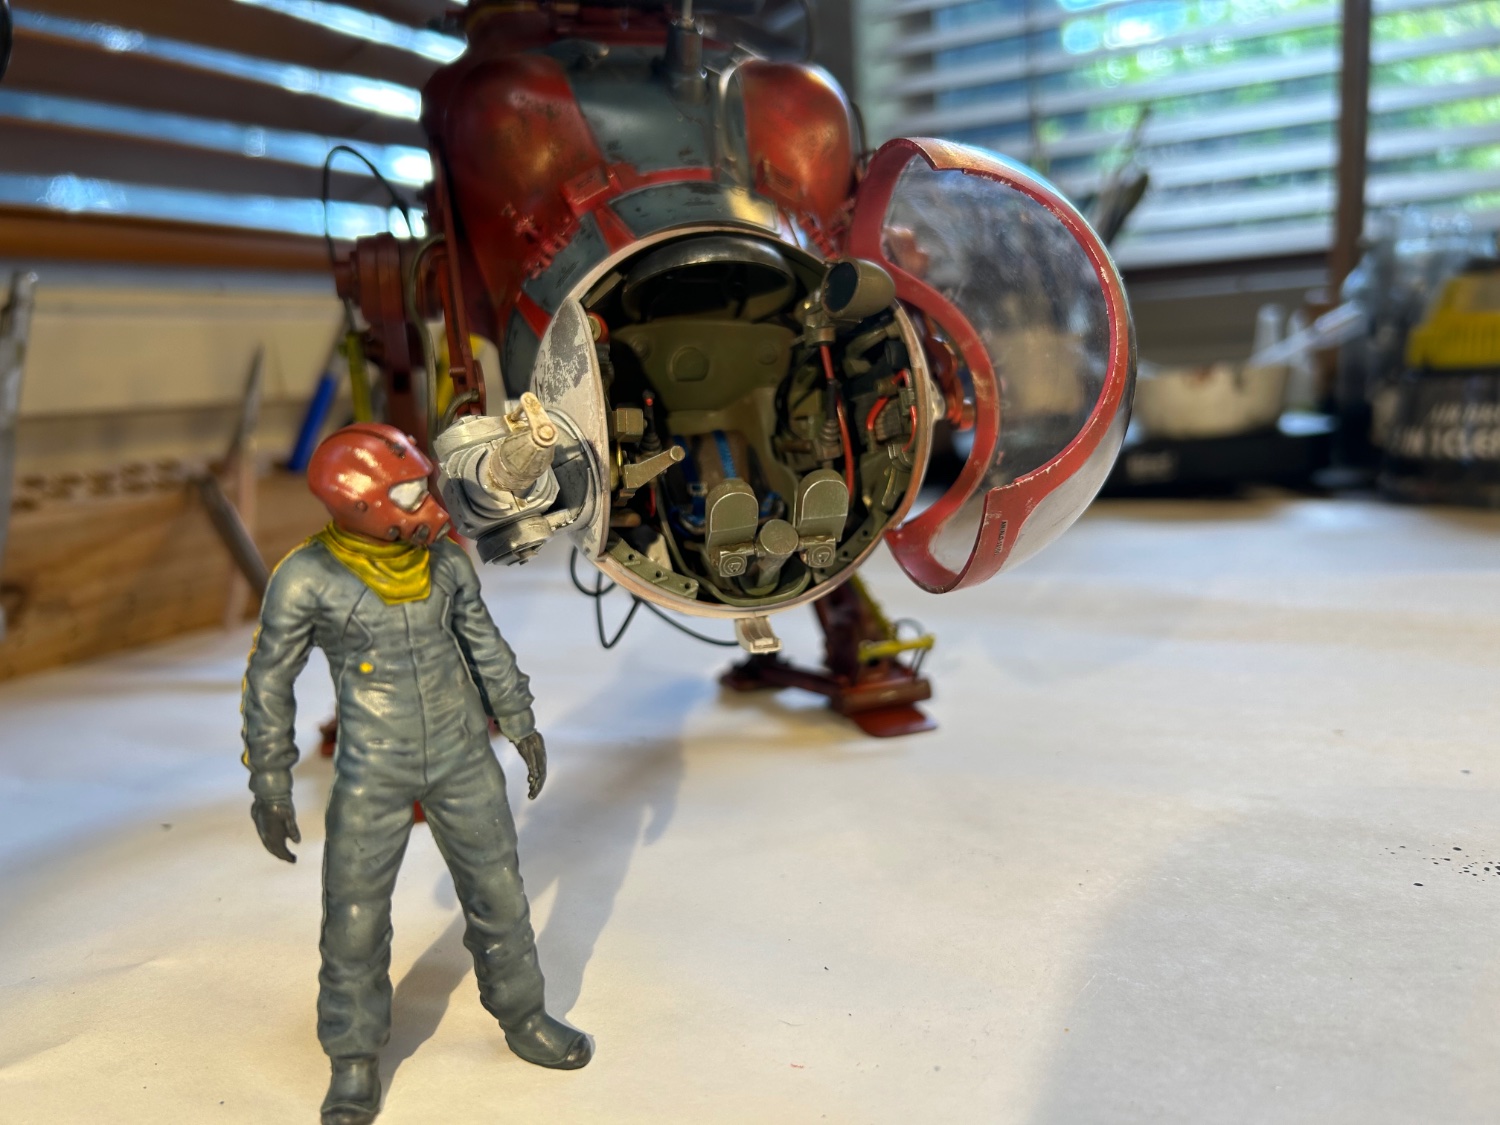
I watched a Video on U-tube. -
Camel by RGL - FINISHED - Machinen Krieger - 1/20
RGL replied to RGL's topic in Non-ship/categorised builds
I did some 1/35 in the 1980’s really badly, airbrushes make a big difference -
Camel by RGL - FINISHED - Machinen Krieger - 1/20
RGL replied to RGL's topic in Non-ship/categorised builds
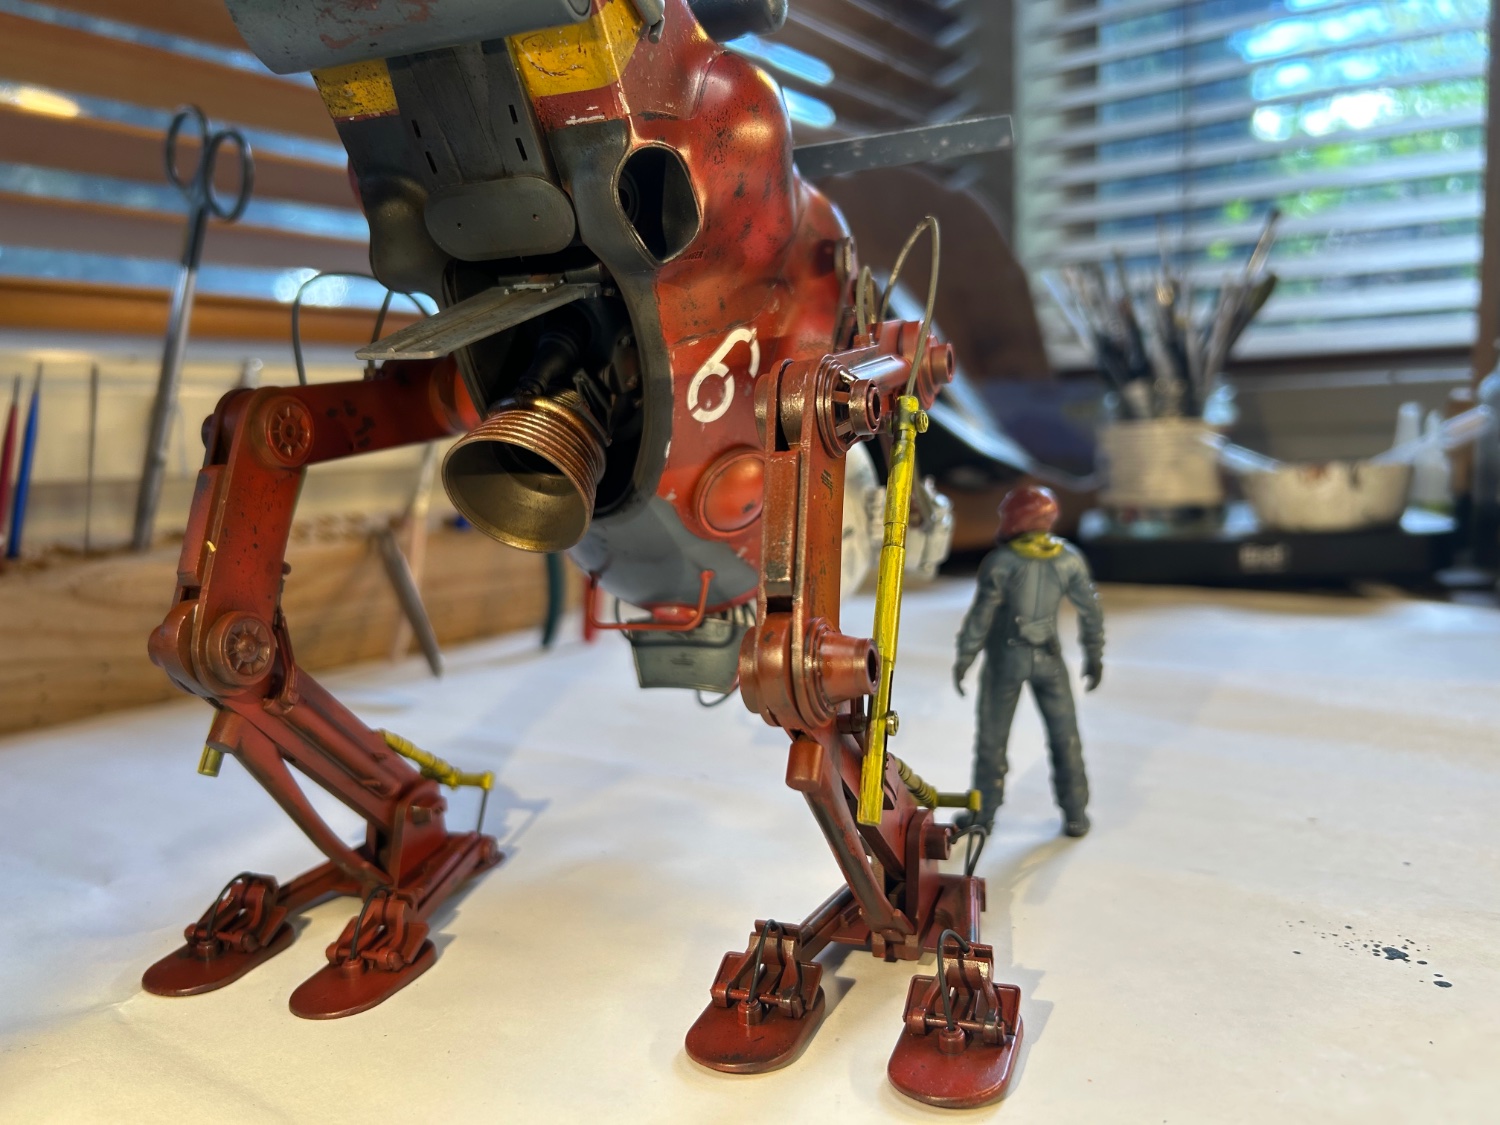
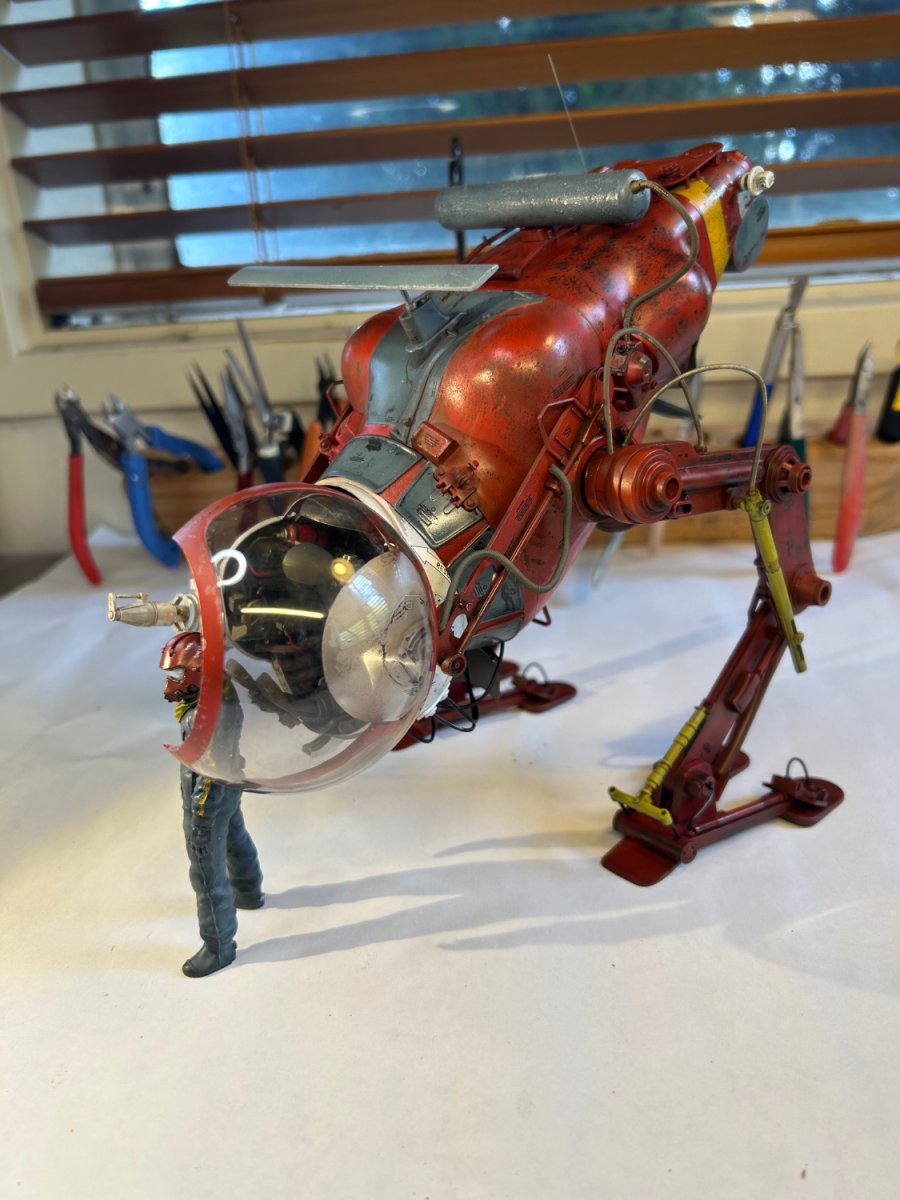
So I’ve bought a base for it, but pretty much done. Back to ships ….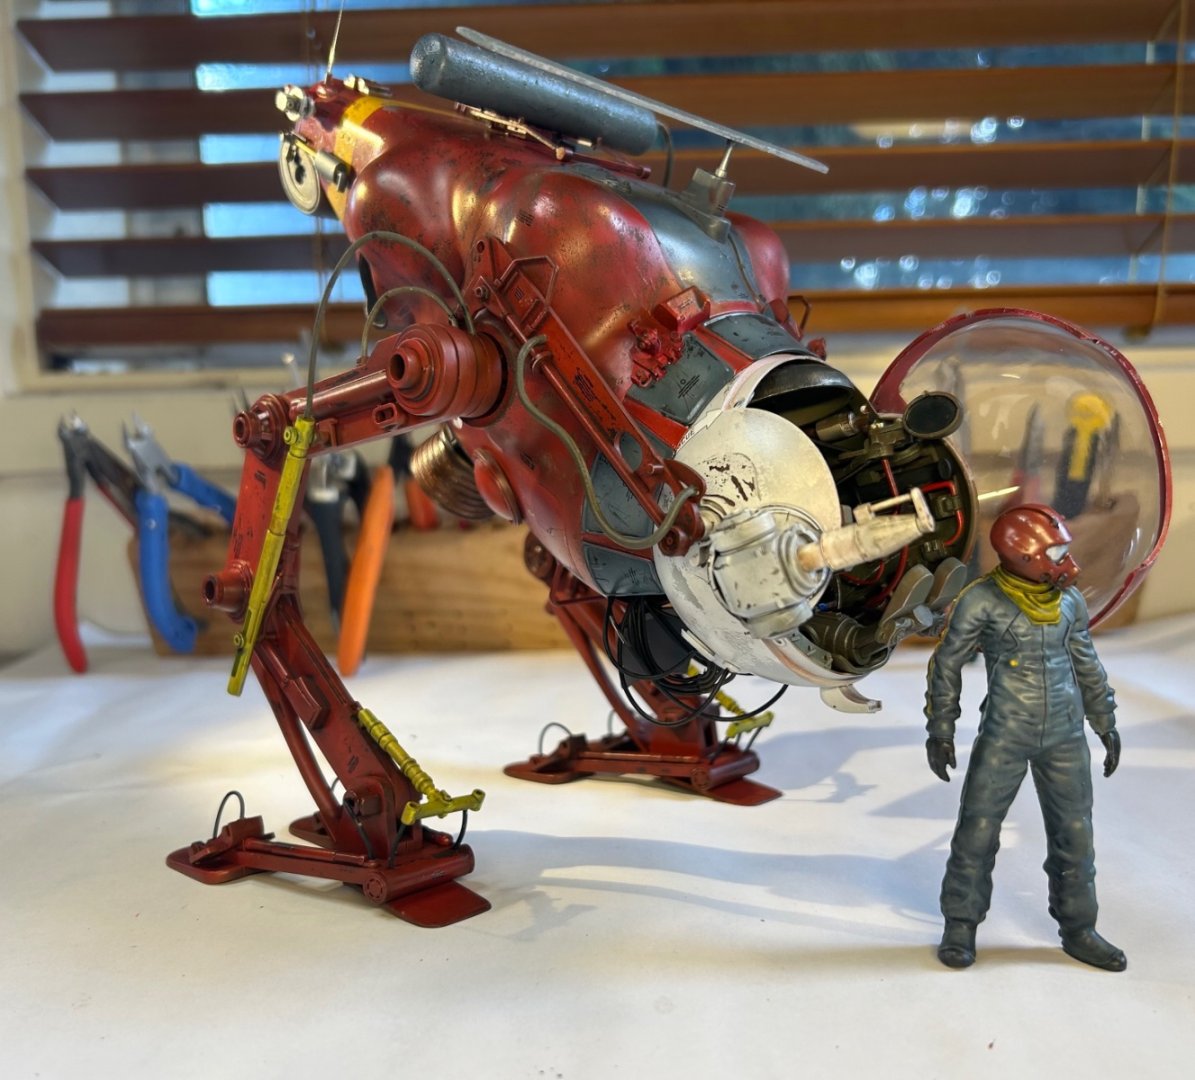


- 47 replies
-
- 18
-
-
-
Camel by RGL - FINISHED - Machinen Krieger - 1/20
RGL replied to RGL's topic in Non-ship/categorised builds
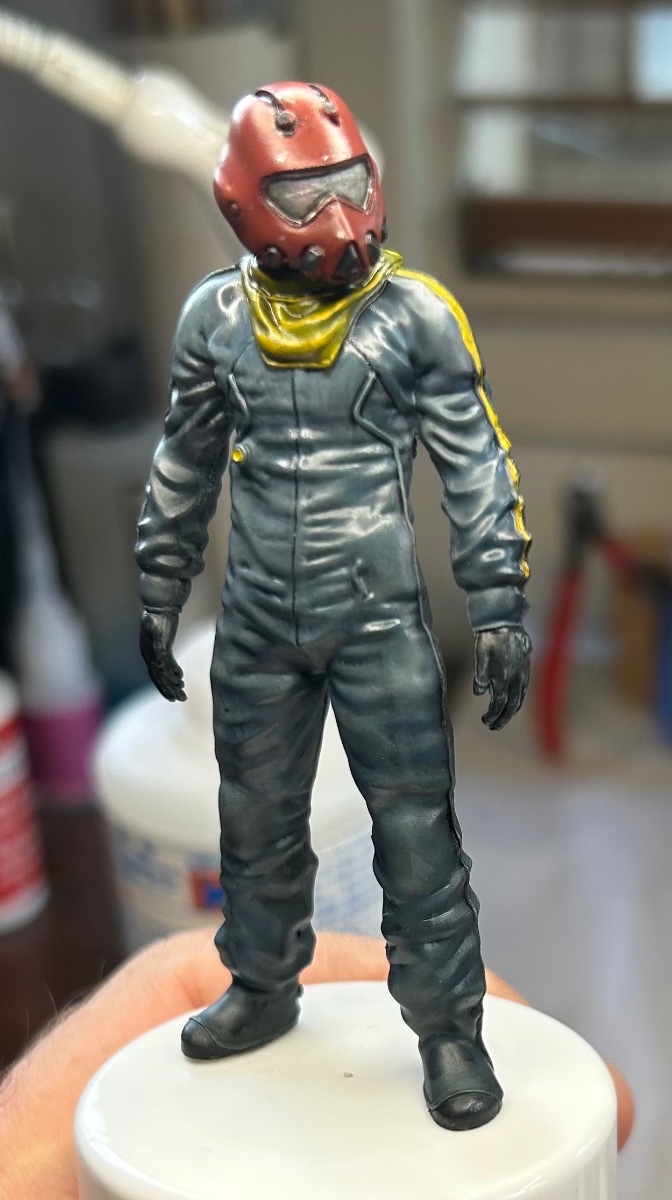
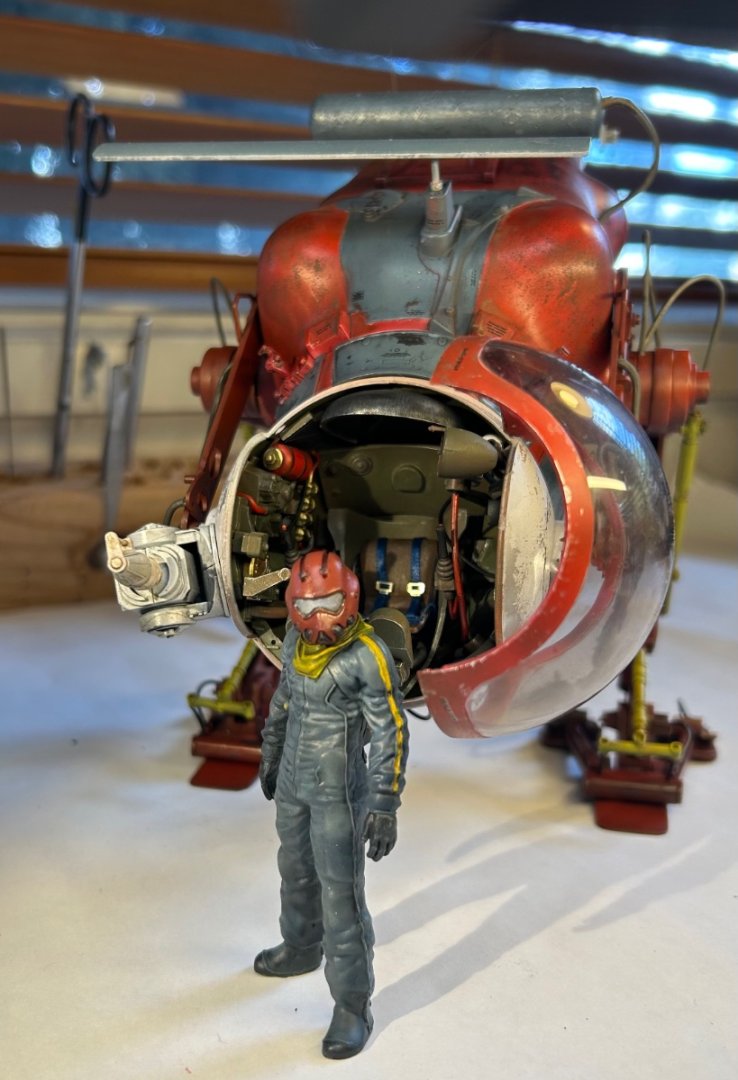
So my first attempt at a figure this century. I’ll come back to it tomorrow to do some touch ups then a matte coat.

- 47 replies
-
- 11
-
-