

Walter Biles
-
Posts
356 -
Joined
-
Last visited
Reputation Activity
-

 Walter Biles got a reaction from popeye the sailor in Bismarck by Dan Vadas - FINISHED - GPM - 1:200 - CARD and PE
Dan, I am wondering what the T pipe behind the bridge boat storage might be. The only thing I have come up with might be some sort of detection device.
Walt
-
 Walter Biles got a reaction from mtaylor in Bismarck by Dan Vadas - FINISHED - GPM - 1:200 - CARD and PE
Dan, I am wondering what the T pipe behind the bridge boat storage might be. The only thing I have come up with might be some sort of detection device.
Walt
-
 Walter Biles got a reaction from Dan Vadas in Bismarck by Dan Vadas - FINISHED - GPM - 1:200 - CARD and PE
Dan, I am wondering what the T pipe behind the bridge boat storage might be. The only thing I have come up with might be some sort of detection device.
Walt
-
 Walter Biles got a reaction from cog in Bismarck by Dan Vadas - FINISHED - GPM - 1:200 - CARD and PE
Dan, I am wondering what the T pipe behind the bridge boat storage might be. The only thing I have come up with might be some sort of detection device.
Walt
-
 Walter Biles reacted to Nirvana in Bluenose by Nirvana - Model Shipways - Scale 1:64
Additional three pieces for the rail was attached this evening. Using Titebond II and heat from my hand, the part set hard and fast. Even though I made scarf joint, they are now hidden under the new putty.
-
Walter Biles reacted to Nirvana in Bluenose by Nirvana - Model Shipways - Scale 1:64
So I tried various varnishes for my deck on separate planks.
Fell for one that enhanced just a notch, here is the fore-deck still wet.
I think together with the grey waterway and white inside of waist and stanchions it will turn out okay.
This is a lighter varnish, and maybe gives me a chance to make it darker if I like.
-
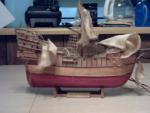
Walter Biles reacted to popeye the sailor in T78 Norden by popeye the Sailor - FINISHED - Billing Boats - 1:30
I already did John...... that's the extent of what I'm going to do
I did spend a little time at the table yesterday evening. to start off with, both masts are cut and sanded.
the main mast has already begun to be assembled. there are these two side boards near the base.
the aft mast and brackets...
after....the mast got some paint
I also started to paint the winch and smoke stack. I still have half a mind to put a shield on the muffler.
the last thing I did was to cement the raft locker n place
one day down and two more to go...I get done with the work week, and then I can get back to her thanks for look'in and and the likes!
-
 Walter Biles got a reaction from Omega1234 in T78 Norden by popeye the Sailor - FINISHED - Billing Boats - 1:30
Hi, Popeye,
It's looking pretty good! Keep up the good work.
-
Walter Biles got a reaction from popeye the sailor in America by Walter Biles - scale 1:48 - RADIO - POF schooner from BlueJacket Shipcrafters plans
Popeye,
yes, Blue Jacket America is the plans I got on the 1/4" scale, and I had hoped to get the frame built and get ahold of the kit one day, and use the kit parts to do all the finishing. When I saw the old kit on there, I figured I might get most of what I wanted from that. The bid closed about 10 minutes before I got back online to follow it out. $375 is a lot of money for the new kit. From what I have seen of those frames, the grain all runs side to side on all of them, I can't see unless they are plywood, how they would hold up to the building. I had intended to make them all in a 7 part frame each such as the real ones would be. I figured if I could get a CAD model plan drawn, that once I build the 1/4" scale one I might do one in nearer to 1/2" scale for RC. I really prefer my models built as much like the real ones as I can.
I found out early on, that I did not like staying alone. I invited my younger sister to come here to live. She is on disability, and never could afford a place of her own. We get along pretty well, and seem to tolerate each other quite well. She appreciates the freedom to live here. As a non-cook myself, but a fair house keeper, we each have skills to give.
-
Walter Biles got a reaction from Omega1234 in America by Walter Biles - scale 1:48 - RADIO - POF schooner from BlueJacket Shipcrafters plans
Hi, Popeye,
No, since Linda's passing, I have still been overwhelmed by work to catch up here at the house. Also, I bought a 10" parabolic mirror and have also been preparing to make a telescope with 2" eyepiece adjuster, to study some stars. I still need to finish the modification to my garden tractor bucket, and get the shop cleared out of excess stuff. During the kids screening what they wanted from their mother, my shop got filled back up with stuff. I am slowly digging out.
I put an Ebay bid on one of the older America BJ kits to get the frames to check against mine, but I got outbid at the last of the bid time. I had really hoped that with that old kit, I would be able to supply the boat I'm making with the deck furniture and rigging. OH WELL!
-
 Walter Biles got a reaction from Elijah in T78 Norden by popeye the Sailor - FINISHED - Billing Boats - 1:30
Hi, Popeye,
It's looking pretty good! Keep up the good work.
-
Walter Biles got a reaction from Omega1234 in America by Walter Biles - scale 1:48 - RADIO - POF schooner from BlueJacket Shipcrafters plans
Popeye,
yes, Blue Jacket America is the plans I got on the 1/4" scale, and I had hoped to get the frame built and get ahold of the kit one day, and use the kit parts to do all the finishing. When I saw the old kit on there, I figured I might get most of what I wanted from that. The bid closed about 10 minutes before I got back online to follow it out. $375 is a lot of money for the new kit. From what I have seen of those frames, the grain all runs side to side on all of them, I can't see unless they are plywood, how they would hold up to the building. I had intended to make them all in a 7 part frame each such as the real ones would be. I figured if I could get a CAD model plan drawn, that once I build the 1/4" scale one I might do one in nearer to 1/2" scale for RC. I really prefer my models built as much like the real ones as I can.
I found out early on, that I did not like staying alone. I invited my younger sister to come here to live. She is on disability, and never could afford a place of her own. We get along pretty well, and seem to tolerate each other quite well. She appreciates the freedom to live here. As a non-cook myself, but a fair house keeper, we each have skills to give.
-
Walter Biles got a reaction from mtaylor in America by Walter Biles - scale 1:48 - RADIO - POF schooner from BlueJacket Shipcrafters plans
Hi, Popeye,
No, since Linda's passing, I have still been overwhelmed by work to catch up here at the house. Also, I bought a 10" parabolic mirror and have also been preparing to make a telescope with 2" eyepiece adjuster, to study some stars. I still need to finish the modification to my garden tractor bucket, and get the shop cleared out of excess stuff. During the kids screening what they wanted from their mother, my shop got filled back up with stuff. I am slowly digging out.
I put an Ebay bid on one of the older America BJ kits to get the frames to check against mine, but I got outbid at the last of the bid time. I had really hoped that with that old kit, I would be able to supply the boat I'm making with the deck furniture and rigging. OH WELL!
-
 Walter Biles got a reaction from Piet in T78 Norden by popeye the Sailor - FINISHED - Billing Boats - 1:30
Hi, Popeye,
It's looking pretty good! Keep up the good work.
-
Walter Biles got a reaction from popeye the sailor in America by Walter Biles - scale 1:48 - RADIO - POF schooner from BlueJacket Shipcrafters plans
Hi, Popeye,
No, since Linda's passing, I have still been overwhelmed by work to catch up here at the house. Also, I bought a 10" parabolic mirror and have also been preparing to make a telescope with 2" eyepiece adjuster, to study some stars. I still need to finish the modification to my garden tractor bucket, and get the shop cleared out of excess stuff. During the kids screening what they wanted from their mother, my shop got filled back up with stuff. I am slowly digging out.
I put an Ebay bid on one of the older America BJ kits to get the frames to check against mine, but I got outbid at the last of the bid time. I had really hoped that with that old kit, I would be able to supply the boat I'm making with the deck furniture and rigging. OH WELL!
-
 Walter Biles got a reaction from Old Collingwood in T78 Norden by popeye the Sailor - FINISHED - Billing Boats - 1:30
Hi, Popeye,
It's looking pretty good! Keep up the good work.
-
Walter Biles got a reaction from mtaylor in T78 Norden by popeye the Sailor - FINISHED - Billing Boats - 1:30
Hi, Popeye,
It's looking pretty good! Keep up the good work.
-
Walter Biles got a reaction from popeye the sailor in T78 Norden by popeye the Sailor - FINISHED - Billing Boats - 1:30
Hi, Popeye,
It's looking pretty good! Keep up the good work.
-
Walter Biles reacted to popeye the sailor in T78 Norden by popeye the Sailor - FINISHED - Billing Boats - 1:30
...need a big table.....hmmmmmmm........I wonder if king Arthur wouldn't mind........
anyway........this morning was kind of a bust. I had to make up for lost time. I did do a couple of things Friday evening, before I got ready to hit the bunk for work the next day. I made up the roof for the companionway, and I cemented the forward structure to the deck.
the roof for the pilot house was painted as well. in checking the fit this afternoon, I found that it was too short......no way to center it, so there would be a sufficient overhang. I attempted to cement a strip of wood on the end of it, but the corners are rounded, and it would be terrible to fill in the gaps. so I went to the box and got out the part of the sheet where the roof was laser cut....of course another part was to close in one area, leaving a serious void near an end. I cut off the bad part and cemented what there was onto the roof. another small piece was trimmed to fill in the rest of it, adding not quite 1/4 of an inch to it.
this was sanded and painted, rounding off the corners again after. when dry, it was cemented to the pilot house. I started doing something else, that was good 'n hostile......I stripped all the wire out of the red hose. I know why it was left in there, but I wanted the ends to be hollow, so to better attach the hose to pins I'll need to create.......the other end I'll have to make a sprayer nozzle. how.......I don't know......but I'll do something
this is when I realized that I hadn't sealed the deck, or the pilot house. all my lacquer is in spray cans......I would need to decant them. not wanting to have a debacle with lacquer turning white on me, I decided to use the leftover Poly Urethane I had kick'in around. it left the deck and pilot house 'flat', but it deepened the grain and made it look a bit darker.
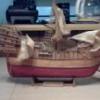
I hurried this up a tad.......gotta remember to lessen the solder lump near the ring. as mentioned, the anchor is a bit too large...it also would look better on a clipper ship, or similar. on the model {which I was going to show two diagrams, but forgot to post them}, the overhead view shows the stock removed from the anchor, and laid on the deck.
the dark shadow is the stock
this is the only visual of the the two cold bins hatches on both sides of the deck, as well as what looks like a large hold in the center. for now I will be working with the anchor.......replacing it with a grappling hook style anchor.
most of these boats would use a smaller anchor.....like a sand anchor.
my first attempt turned out to be too large.........adjusting the scale in my head {no....I'm not stepping on a cat's tail}........
I though that larger diameter brass rod would work better. I fidgeted like crazy trying to get them lined up......I ended up wrapping them in wire that I got from other kits, and then soldering over it. now that I knew what to do, I used the smaller diameter rod. it looked better after trimming the shank length. the ring you see wasn't the one used......I soldered on a smaller one, and I got this.
I got too much solder at the top by the ring........gotta fix that. comparing the two together, I think the grappling hook look better.
...and the comparison on the model.
all it needs now is the sampson post and some rope. another thing I considered is, why do they have an anchor? they are dragged onto the beach.....an anchor is not needed for mooring at a dock, and while fishing is going on, the boat merely drifts with the current......the net goes out....the boat can't be still, it has to move. don't get me wrong.....it's good to have one in the event it needed. but, in normal operation, it's not needed. oh.....here is another shot of the pilot house base winch. it's not a windlass, or used for the anchor. I'm still stumped what it could be used for.
-
Walter Biles reacted to popeye the sailor in T78 Norden by popeye the Sailor - FINISHED - Billing Boats - 1:30
thanks John.....the margins made it easier to plank. I didn't have to do all that cutting around the posts. doing it this way does present problems...one of these days I'll figure out a better way to overcome it. I would try and replace that 1 mm strip, but it can get very messy, so I'll just leave it be.
both sides of the mid ship was done this morning.
......and I started to close up the bow section.
this makes for some unique plank cutting. the forward structure was dry fitted, as was the pilot house, to unsure a good fit.
the mast cap was cleaned out, so it will accept the mast. I will need to make a couple of supports for the aft mast behind the pilot house, since there is no hole for it in the deck. it didn't take long to finish the bow section.
although, I will need to make a tiny addition to the starboard side front corner {inside the open area}.
before I cement the structures in place, I'll go around the edge with flat black, so no sign of the underlayment can be seen.
-
Walter Biles reacted to popeye the sailor in T78 Norden by popeye the Sailor - FINISHED - Billing Boats - 1:30
yes.....I got right back to work......the admiral wasn't home.......it was quiet. the front of the pilot house was fleshed out.
all it needs now is some minor sanding and a lacquer coat. I hadn't had enough of the planking.....so I started on the deck. usually I begin at the bow.....but this time I though I'd go from back to front. I'm using an archive pen to simulate the calking. I have 2 new ones......this is my old one, that I had filled with India Ink, when it dried out on m the last time. it's still alive and kick'in
of course, I'm jumping back and fourth between planking and reading logs.......johnnyreg asked about the interior of the pilot house. as mentioned, being a small structure, I'm not going to do much with it. the tint doesn't darken it enough though...and looking in, I can see satin brown paint blotches around the doors. I gave it a coat of flat pale gray.
done with the area behind the pilot house, I ran two solid planks in the center of the deck, from the front of the pilot house base, to the forward structure. in cleaning out the mast hole, the planking broke up! DRATZ! now what the heck am I gonna do. there's only one thing that will fix it.....a mast collar! I cut the bad part off the planking.
I have this strip of wood in the pile on the table...I think it's Obetchi 2 x 6 mm. a piece was cut off, a 3/16 hole drilled through it and trimmed to fit between the planking and the forward structure. I painted it flat pale gray when done.
working my way around the pilot house, I had to do some fancy cutting to negotiate the base.
I drew lines at most of the bulkheads, except the few at the bow and stern.......those I'll just run straight {most will be short pieces anyway}. I figured I'd cheat a little.....I ran a pair of 1 mm strips to the front of the outline for the base.
Once I worked my way to the mid ship, I wanted to make sure the pattern was right. so I cut and dry fitted planking to the center plank on one side.....OK.....I'm good. so I ran the pattern from the center planks. darned if that 'cheat' didn't come back to haunt me! for the port side, I ended up running a 1 mm strip all the way from the base, to the forward structure.
before I started this area, I had cemented the mast collar in place. now with that 1 mm strip, I should be good, as it brought the planking flush with the strip I cheated with. I figured that I'd be doing the same thing with the starboard side.......no, not exactly. for some crazy reason, the 1 mm strip fell short of being flush......you figure I'm using 3 mm thin strips......with the added 1 mm, it falls short?......OK....fine! I did some test fitting, and I ended up using two 2 mm strips together to match up with the deficit. what I did though, was mark them for cutting the butt joints, but when I did the calking, I didn't do one of the sides, lengthwise. I did them opposite one another, and when they were put side by side {cut and butt jointed to follow the pattern}, they almost look seamless. once sanded, it may be hard to notice
thinking about this......I could have done the same thing to the port side, and it probably would have looked better. anyway.......I continued with the port side planking.......I did a little more to the starboard side, before changing sides. a good portion of the deck is done.......not much more to go.....then a lot more fancy cutting capping in the forward structure. it's late my friends........I've been up since 4 AM. I think it's time to hit the bunk
if only i had thought of that remedy sooner
-
Walter Biles reacted to popeye the sailor in T78 Norden by popeye the Sailor - FINISHED - Billing Boats - 1:30
so......as I mentioned in an earlier post, the two stern blocks are in place. the adjustment made to the bulwarks came out well.
I noticed the grain is running differently on the starboard side block......I changed that before it had time to dry. when the time comes to trim them down to the point where I can sand them to shape, this will be to my benefit. more sanding was done along the rest of the hull.......this got rid of more imperfections and cleaned up along the bulwarks some more.
the port side has more fill work than the starboard side.
the hull really isn't too bad....compared to some that I've done before. the blocks have been trimmed and sanded.....came out quite well .
now it the time for filler........I went over the entire outer hull. it sands quick.......I'll be removing most of it, without taking any more of the wood.
I'll let this set for the rest of the day, so it can fully dry elbow grease time tomorrow
-
Walter Biles reacted to popeye the sailor in T78 Norden by popeye the Sailor - FINISHED - Billing Boats - 1:30
thanks Bob......this is the part of the build that I tend to feel more critical about. I've always said that the time before the model sees paint, they always look terrible and a bit ugly. then it's getting rid of all the imperfections........I wonder if the hull will survive. I'm confident that I can turn 'er around
I'm glad you found me Mobbsie......now I can truthfully say ALL my friends are look'in in talk about troubles.......jeeze, the planking splintered like it was brittle........and I just took another look at the other assorted strips {after knocking them on the floor with a wipe rag}, some of them aren't cut too good. not a problem though......I have plenty of wood in inventory. the main part of the boat is assembled now, so I'm past that stage. I had to run out to take the admiral to her doctor's appointment....but when we got back, I cemented the stern blocks in place. when they are dry I can trim them to shape. I hope to have another update soon.......I hope to have them done. happy to have you following along what's the hold up with your project? dying to see more
-
Walter Biles reacted to EdT in Young America 1853 by EdT - FINISHED - extreme clipper
Young America - extreme clipper 1853
Part 262 – Fore Lower Topsail Yard Truss
When a double topsail (or double topgallant sail) arrangement was adopted, the lower yard position on the mast was fixed, and therefore this sail was not reefed. Any reduction in overall topsail area was done by taking in the upper topsail. Under the Howe patent, the arrangement most likely followed when Young America adopted double topsails in 1854, the lower yard was supported from the forward end of the lower mast cap by means of an iron truss that allowed the yard to rotate in two planes like the lower fore yard below.
The first picture shows the installed sling band with a double bracket that will fit over a shaft on the truss itself.
The band is pinned through the yard and the underside drilled for the sheet block eyebolt. The band is octagonal, made from .010" (about ¾" at 1:72) copper sheet. The band was soldered first. A U-shaped bracket was then formed from .015" copper, and drilled to accept the truss shaft. Both parts are shown in the next picture.
The u-shape was used to assure that the bracket holes would line up after assembly. The joining top piece will be removed later. The next picture shows the two pieces being set up for soldering.
After soldering, the assembly was set up in the vise as shown below to file off the end of the U and shape the brackets as shown in the last photo below.
The U was formed over a wood block that was kept in place when the bracket holes were drilled. In the above picture a small piece of this block is inserted to allow the bracket to be clamped for filling.
The truss itself is shown in the next few pictures. To start, two pieces of telescoping tube were soldered together then soldered to the top of a copper block that will be shaped to the truss configuration. Using tube avoids drilling aligned holes and assured a match with the hole in the mast cap boss. This initial assembly is being marked in the first picture.
The truss was then cut and filed to its overall shape shown in the next picture where it has been temporarily mounted to check fit.
In the next picture the truss shaft is being filed round..
In the picture the 5" shaft is being rounded from a sized square, to an octagon to a round – as was done in making the spars. In the last picture, the full truss assembly is temporarily mounted with the yard.
The forward end of the truss shaft will be fitted with a retaining cap and cut off. This will be done later after the other yard ironwork is fitted. All will then be blackened and the yard given some finish as was done before.
You may note in this picture that the ratline work on the topmast is still in progress.
Ed
-
Walter Biles reacted to EdT in Young America 1853 by EdT - FINISHED - extreme clipper
Thanks, everyone. Two weeks between posts seems like a long time. It has been good to get back to some sawdust for a change.
Wefalck, I started looking through the posts for the height gauge but decided looking through the photo files would be easier, so here are two pictures.
It is a simple device made from some square telescoping brass tube. The inner tube is 1/8". The sliding outer section has a reinforcing strip soldered on one side to give more thread depth. This side is tapped for a 4-40 knurled screw. Square tabs are soldered on as shown at the ends. The primary purpose for this was measuring the heights between beams so supporting pillars could be cut to size. Works well for this and other simple tasks.
Hello, Guy. Good to hear from you. Thank you for your comments. I hope that sharing the rigging work on YA will benefit builders of a variety of ships of the period. I can definitely say that the rigging work and therefore the posts on rigging will not be lacking in detail - some quite excruciating I'm afraid.
Thank you, Pat. Not always as crisp as one would like, but I guess we are our worst critics.
Cheers,
Ed