Hubac's Historian
-
Posts
2,950 -
Joined
-
Last visited
Content Type
Profiles
Forums
Gallery
Events
Everything posted by Hubac's Historian
-
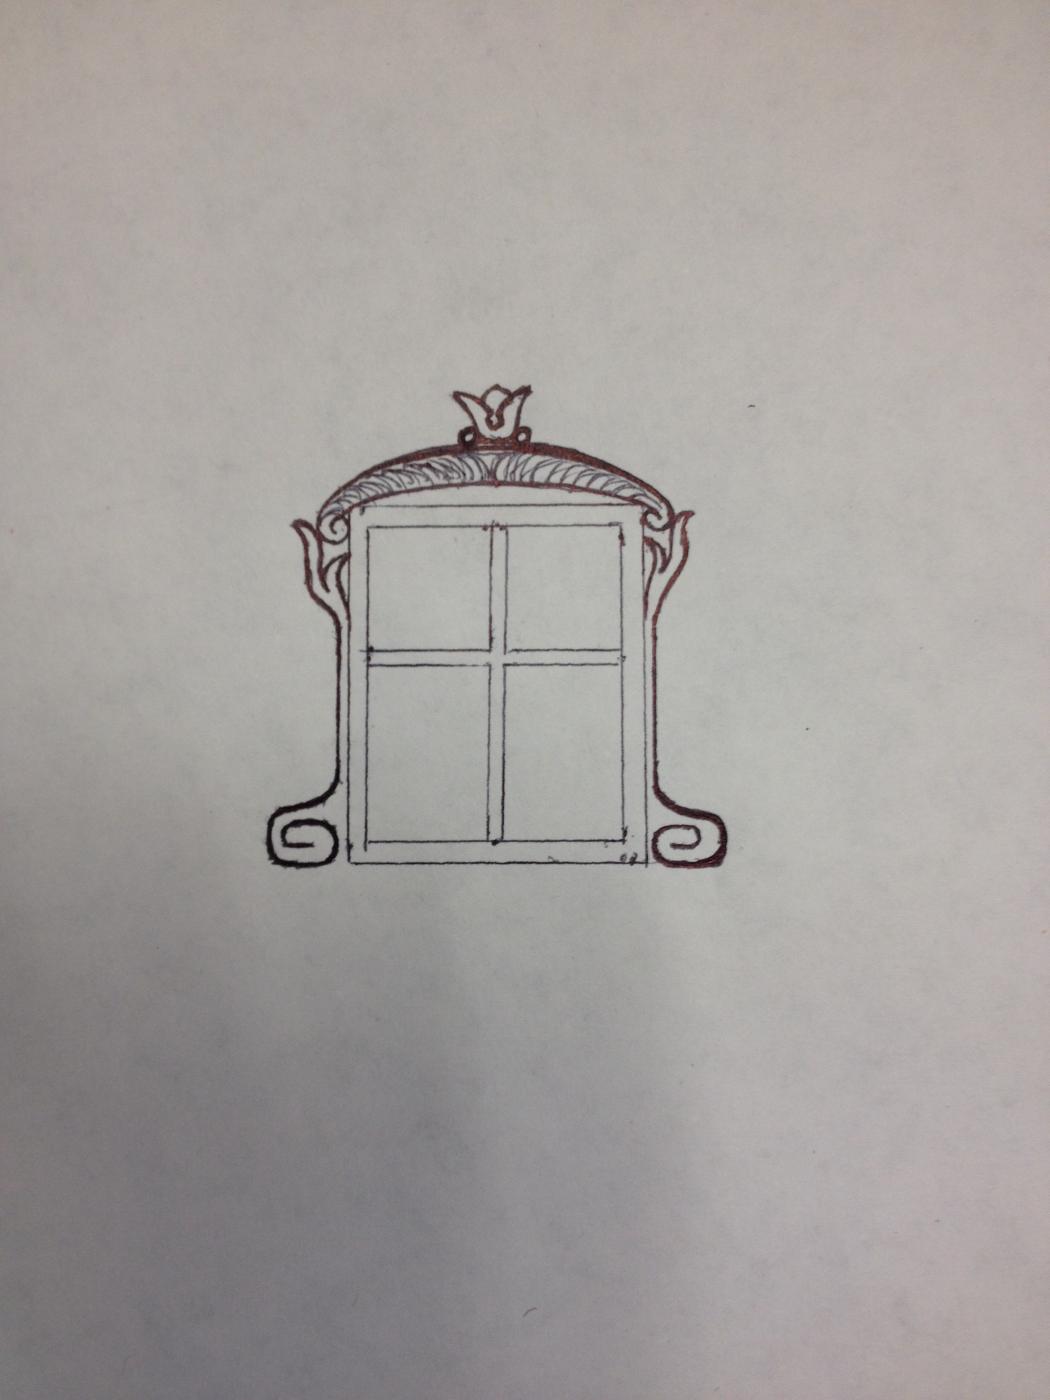
 It just isn't baroque until all sides are embellished! Not sure why, but the image orientation changes from portrait to landscape when I import image from my phone. Too aggravating to correct on the device. You get the idea.
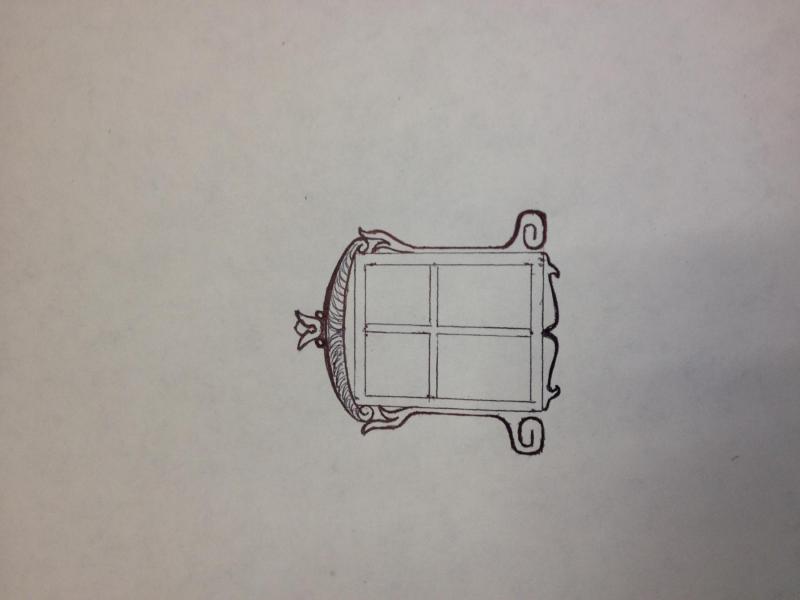
- 2,444 replies
-
- 4
-

-
- heller
- soleil royal
- (and 9 more)
-
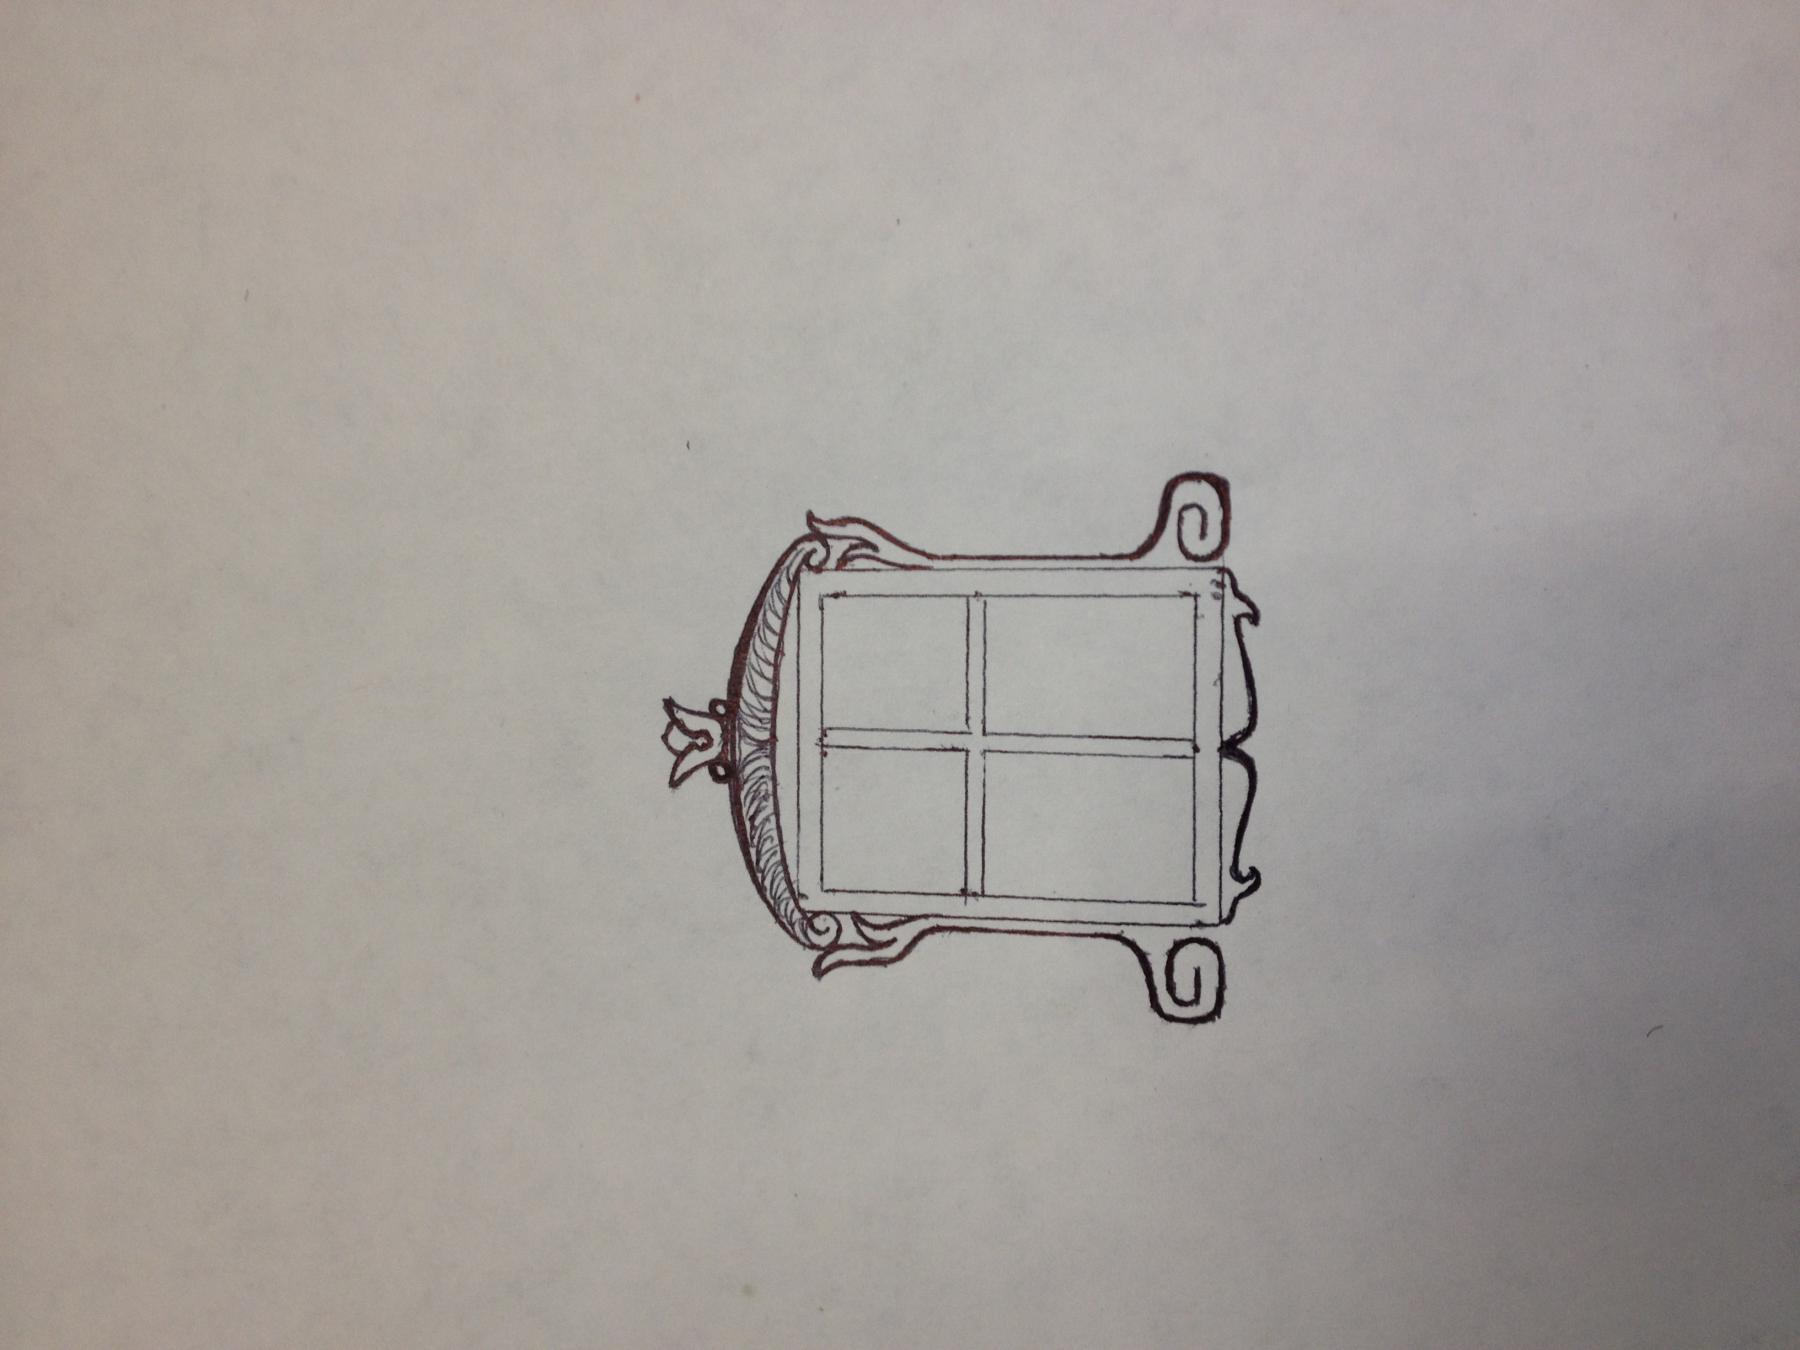
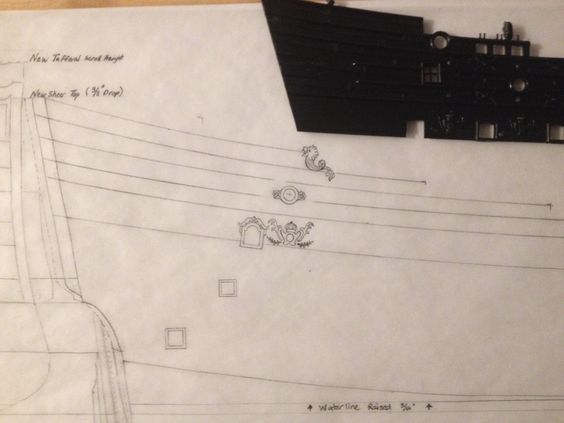
I have been toying around with ideas to give a little shape and dimension to the rectangular window that is moulded into the upper stern, just forward of the quarter galleries. They are kind of plain, as is, and lack shape and dimension. For the time being, below is one preliminary idea that I kind of like. It isn't drawn to scale, but just roughed-in on a piece of scrap paper.
- 2,444 replies
-
- 3
-
-
- heller
- soleil royal
- (and 9 more)
-
Tonight, I was hypothesizing about how I might go about laying out the new upper bulwark frieze. My initial plan was to simply scrape away the existing shells, fleur-de-lis, and knotted rope twists - as well as the raised sheer strakes - and just build it up from scratch. I think that is ultimately what I am going to do. What was fascinating to me, though, was the realization of just how directly Heller pulled inspiration from the color rendering of the ship. If you really study the pressing for the kit upper bulwarks, it becomes apparent that the placement and alternating arrangement of the shells and fleur-de-lis is a direct takeoff from the drawing. The knotted rope twist things are simplified representations of the lattice-like grid, into which the shells and fleur-de-lis are placed. It's all simplified, but it is there. It's just not as profuse and continuous as depicted in the color draft of the ship. I still think that the way to go is to scrape it away and build it up from scratch. Perhaps I can preserve sections of the sheer strakes, but only in so far as they flesh out the raised, horizontal elements of the frieze; there will necessarily be breaks in these strakes where the grid drops down to intersect between levels of sheer strakes. Inevitably, though, after scraping away portions of the raised sheer strakes, the shells, the fleur-de-lis and the rope twists - no matter how carefully and completely it's done - their ghost image will remain in the plastic. My hope is that the overlay of the new frieze will completely minimize whatever trace clues remain. I think that part of the answer, here, is to use the existing placement of elements to layout the new frieze, so that new more detailed elements take the place of the old.

- 2,444 replies
-
- 5
-
-
- heller
- soleil royal
- (and 9 more)
-
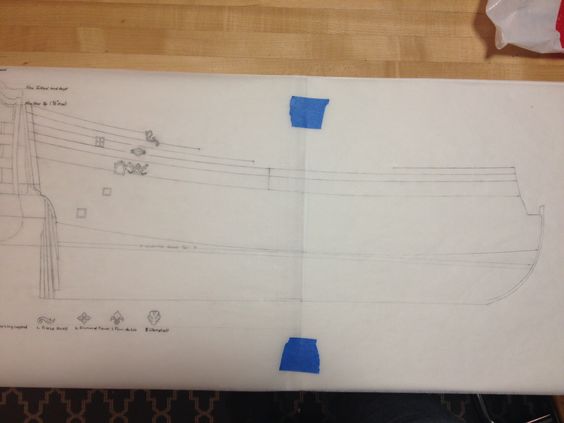
So, tonight I made pretty good progress on the bow drawing. It was a little frustrating, at first, to realize that I made a mistake very early in this process, while establishing the draft of the hull below the waterline. While it is true that what happens below the waterline won't matter on this model - references I was drawing upon from the waterline, in order to locate the upper wales, were not accurately established in the first place. Consequently, the location of my lower main wale was not correct either. So, I corrected all of that, and now my drawing accurately represents the kit moulded draft. This is enough of a scaled "area" drawing to digitize and flesh out the plan. I will, however, trace in the kit cutwater and the knee of the head because I know from my first SR that the space between these two elements is not perfectly parallel, and that will ultimately affect the layout for the shell and fleur-de-lis trail board that fills this space. While I'm at it, I will probably lay that detail out by hand and draw it in before digitizing. I re-drew the shell for the frieze legend. It's still a bit taller than I would like, but I can trace it into the program and more easily manipulate the proportions of the thing in the computer. I will probably also do a really good line tracing of the Apollo frieze for the tafferal, directly from Berain's drawing. Like the shell, this is something that can be scaled to fit the available space more easily, once it is traced into the computer. We are getting there! Thanks to all who visit my build. Your interest and likes are greatly appreciated.
- 2,444 replies
-
- 4
-
-
- heller
- soleil royal
- (and 9 more)
-
Here is the last of the frieze legend: Each of these elements will be scaled down to about a quarter of the size shown here, and placed upon the lattice frieze of the upper bulwarks. The fleur-de-lis will be scaled, also, for the lower and middle deck gunport lids. The shell is a great example of something that is almost easier to draw with the tools, as it will have more of the undulating surface of a clam shell, than the hard crease that is drawn here. I suppose I should change the edge detail of the shell to reflect that. Anyway, that is pretty much it, as far as the stern drawing is concerned. Next, it's onto the bow, which should not be nearly as involved because it shares most of the same repeating elements as the stern drawing. Then, it's digitization time. Then, it's build time.

- 2,444 replies
-
- 4
-
-
- heller
- soleil royal
- (and 9 more)
-
I'd be curious to see if I could find these plans, myself, Richard. I'll have to check out the Lahoche website.
- 2,444 replies
-
- 3
-
-
- heller
- soleil royal
- (and 9 more)
-
Hello Richard! Thank you for the reference. Until your post, I knew nothing about who made this model, but I am familiar with it and find it to be one of the more complete models of SR. I particularly like the head rails on this model. Thank you for your encouragement. I expect this to be a long journey, but I am enjoying myself, immensely, so far.
- 2,444 replies
-
- 3
-
-
- heller
- soleil royal
- (and 9 more)
-
Okay, Ofencer. I'm going to give the Musee a few weeks to respond. They'd be doing me a huge solid if they were able to give insight into any of my questions. My hope was that Mr. Saunier would be able to help fill in the blanks, or refute/confirm whatever it is that I might learn from the museum. Earlier tonight, I was Google Translating Michel's back and forth on another modeling site, Forumpro.FR. There are five pages of the log, in which he discusses a bit of what is known about SR's early history and the refit, and the relative tangle of information that surrounds her, which is certainly daunting to anyone who attempts a serious effort at modeling her. I haven't finished reading it yet, and of course, the translation is not nearly perfect, but good enough to get a strong sense of his thinking. To be quite honest with you, I would like to address Mr. Saunier in French, but I know that my skills in your native tongue are too rudimentary to sound like anything more than "where is the bathroom?" Do you think he will be open to speaking with me in English?
- 2,444 replies
-
- 3
-
-
- heller
- soleil royal
- (and 9 more)
-
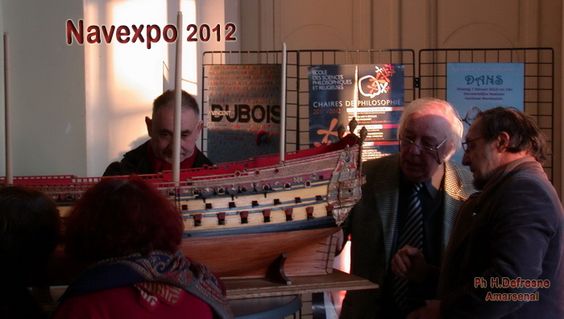
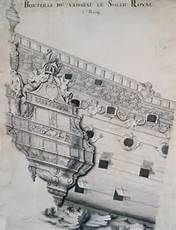
These are the pictures of the Tusset model I was referring to earlier: The reduced sheer, the relatively broad beam, the placement of the channels, the vertical timbers in the waist, and the arrangement of the quarter galleries are all things that I envision for my build. This is what I was referring to, in an earlier post, when I was describing an open walkable tier in the middle quarter galleries. Although, as I mentioned in that post, I do not believe that the open gallery, on this middle tier, wraps to the stern on SR, as it does for Mr. Tusset's model. I would love to know what is happening with this model and whether Mr. Tusset and Mr. Lemineur are indeed in the process of producing a monograph of it's construction. Has anyone else out there seen this model before? If you drag your cursor, so that Mr. Tusset's waterline sits on the horizon of your monitor, so to speak, this is very nearly the impression that my modified SR waterline model with make. This is the presence I am after.
- 2,444 replies
-
- 5
-
-
- heller
- soleil royal
- (and 9 more)
-
I would very much like to speak with Mr. Saunier. Before I contact him, though, I would like to hear what the Musee in Paris has to say in response to my inquiry. I'm sure their response will generate additional questions that I could then ask Mr. Saunier about. If I reference you as the link between us, shall I say that "Ofencer" suggested I contact him, or do you have a different screen name on the Modelisme site?
- 2,444 replies
-
- 2
-
-
- heller
- soleil royal
- (and 9 more)
-
So far, my attempts to inquire through Ancre's website, as to whether this proposed monographie might soon be available for purchase, have gone un-answered. I will try to post these pictures here: At the moment, I am unable to do that. I will see, later, if I can upload them from my Pinterest page, where I have copies of them. The model really is fascinating and confirms a number of things that I am trying to do with this build. It would be incredible to have legitimate scholarship backing a monographie, complete with a sound hull form for this early time in French naval architecture. More later. Thank you, again, for your interest, your likes and thoughts.
- 2,444 replies
-
- 2
-
-
- heller
- soleil royal
- (and 9 more)
-
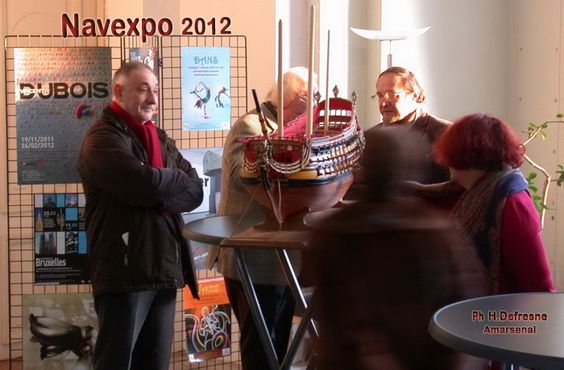
Hi Ofencer! Yes, you are absolutely right that there are no absolutes when it comes to modeling the first SR. All we can do is build upon the work that is out there and draw upon the existing 17th C. ship portraits of SR's contemporaries that we know to be reliable. Only then, can we hope to arrive at some semblance of truth, but we'll never know her true appearance completely. That is, not until the Van de Velde grissaille of her emerges from behind someone's aweful paint-by-the numbers picture of whatever - where it has been hiding and long forgotten since the days of Hitler's art pillaging of Europe. I like to imagine that if that drawing exists, it is in a scenario like this where, one day, someone's wife asks their husband "can we please throw away that terrible picture!?" And only then, when the poor belleagured husband takes it from the wall where it has sat, undisturbed for the past 80 some years does he realise that there is something far more interesting on the other side. It's a nice fantasy. I will say, however that I got really excited, earlier this year when I stumbled upon an inage search that included pictures from NAVEXPO 2012. I will try to post these pictures from my phone, but I probably won't succeed. What I found was a large model of a 90-gun ship from the second marine of Louis XIV. The model was complete to the upper bulwarks, with the lower masts stepped. It is the work of a man named Jose Tusset, who it appears, is making this model in collaboration with Mr. Lemineur, who is assembling a monographie of the vessel. Let me post this much.
- 2,444 replies
-
- 3
-
-
- heller
- soleil royal
- (and 9 more)
-
I did a little bit of drawing for my "frieze legend" tonight, but I spent most of the evening cozying up with a tumbler(s) of Powers and reading through Druxey's build log for his Greenwich Hospital Barge. I was relatively sober, at the start, but thoroughly intoxicated with the achievement of his build, by the end. Also, Powers is named that for a reason! What struck me so much, aside from Druxey's master skill and intuitive feel for the correctness of these boat shaped things, was his graciousness towards all who come to visit his build log. I understand that, at first glance, anything with "Heller's SR" in the title might provoke eye-rolls among some modelers, and I can appreciate why. That is why I really appreciate all of you who have come to visit my log, and who are taking an interest in what I am doing. It is often said that no one attains a level of achievement without the help and guidance of others. Thank you all, for your advice and encouragement! Your collective talent and achievement are providing me with ideas and inspiration every day. All the best, Marc
- 2,444 replies
-
- 5
-
-
- heller
- soleil royal
- (and 9 more)
-
Druxey, I am just so awed by what you have accomplished with this build. There really isn't anything I can say that hasn't already been said more succinctly. But, I'ma go ahead and try... First of all, your presentation of a build-log was really so informative to me, who is new to the site. You are un-failingly gracious and your log structure, for any given entry, is so perfectly focused on illustrating the particular challenges, solutions, mis-steps, and course-corrections that such a challenging build necessitates. Your writing, also, is excellent! The choice of subject was such a pure distillation of what attracts most people to wooden boats, in the first place. Absolutely engrossing. Your execution is really remarkable - even, I'm sure, under the closest scrutiny and the highest resolutions. Thank you for teaching me so much!
- 641 replies
-
- 5
-
-
- greenwich hospital
- barge
- (and 1 more)
-
I hear what you're saying about the full scratch-build Druxey. I do. From my perspective, though, that seems like infinitely more work just to produce a hull form. Let's assume, for a moment, that it's still a waterline build, but that I'm going to do the least involved hull construction: bread and butter lifts. I first have to come up with a suitable lines plan because, currently, nothing verifiable exists for French naval architecture, circa 1669. Let's say I adapt the lines for L'Ambiteaux. I still have to configure the guns, which likely means lengthening the hull in the waist. I would, then, have to draft a full set of plans. Finally, it's a whole lot of wasting, shaping and fairing before I can even think about mortising for the ports and planking and setting the main wale. Lastly, I would have to re-create all of the ornamentation. What I'm proposing involves a certain amount of hull modification, however - even accounting for the fact that I've never attempted anything like what I've laid forth here - it is still a lot less work because I'm starting with 99% of the hull shell, right away. Ports all located. The largest carvings - good, as is; head rails, figurehead - all perfectly useable. Also, this is a sort of mock-up for my concept, so that I can do a fully designed scratch-build in wood. When your framing, in wood, is wrong - backtracking is significantly more laborious. If I don't like what's happening in styrene, i can just cut it out and try something different. The process is literally more malleable. Your sentiment, though, is one that any reasonable person must consider.
- 2,444 replies
-
- 6
-
-
- heller
- soleil royal
- (and 9 more)
-
My guess is that it should be workable after the lower hull and stem have been cut away, and the 5/16" addition I need in the bow should be obtainable from the first 1/2 of the hull because it is essentially a flat piece there. I may have to do some fairing in around the stem, or possibly some heating of the casting to re-shape it a little. Any which way, it should be easier than building up and bending in these additions out of sheet styrene, which was my original intent.
- 2,444 replies
-
- 2
-
-
- heller
- soleil royal
- (and 9 more)
-
I've been reading around and watching YouTube videos on how to cast resin parts. Eureka! This morning it dawned on me that I can make perfectly mating bow extension pieces, with perfectly matching plank lines and grain detail by casting the first half inch of the hull, at the bow. Theoretically, that should work perfectly without any problems or difficulties, at all, because that's just how life works. Easy button! I could apply the same technique to the stern for my 1/4" add-on piece, and then i'll have the added benefit of perfectly matching tumblehome. Awesome! I'll have to do two castings for the upper and lower stern. I'll also have to rig up a means of holding the hull half and upper stern plate vertically, so that I can dip their ends - again, about a 1/2" into a mould box. A long cardboard box with one short end cut out, and a dowel through a gunport opening should do the trick. Geez - I wonder what could possibly go wrong. Thoughts?
- 2,444 replies
-
- 4
-
-
- heller
- soleil royal
- (and 9 more)
-
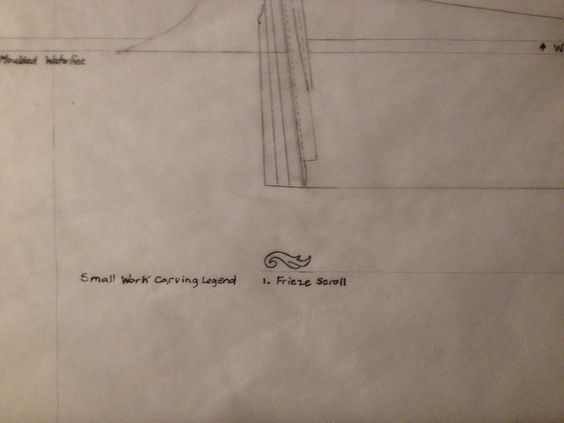
Tonight, I drew the Antler escutcheon carving that goes between the main deck guns. This is one aspect of the kit that I will not be altering. It was a witch to draw, and it is still only a reasonable facsimile, but I only need it as a spacer for the full rendering. Having it in place will give me a better sense for the entire composition of added details. What I find interesting about this process of first renderings for repeated details is that now, with an example of the Antler carving and the sheer cap carving in position, relative to each other - it seems as though maybe the scale of the sheer cap is too big. Considered on it's own, though, it seems just right. The truth is, I probably won't really know until all of the detail is filled in around it, with Corel Draw. The program will allow me to make minute changes in scale, after first tracing my renderings in a larger, workable scale. Towards that end, I've begun listing a legend of the small carving details that make up the frieze. The first is this leafy scroll that is placed on all of the transitional corners of the frieze. In actuality, it will be quite small. But after fiddling with it for a while, I like this shape: There are a number of other small details that I will add to this legend: a diamond cartouche thing, a shell, and a fleur-de-lis that can be re-sized for the three different applications where it is needed. The real value of Corel will be in layout out the arc-ed grid of the frieze because the sections of the grid will vary, in length, according to whatever is going on around them, in the way of fixed detail. By hand, this would be a nightmare of messy erasures.
- 2,444 replies
-
- 7
-
-
- heller
- soleil royal
- (and 9 more)
-
Hey Dan, I will definitely look into Alumilite - thanks for the tip. As for stamping into clay moulds, my thought was to use regular earthenware clay - and not the polymerized stuff - and maybe some kind of light release agent that wouldn't interfere with the curing and detail of a product like Alumilite. I figure that, in the worst case scenario, if the castings don't come cleanly from the clay, you could just scrub them clean and stamp a new mould. Worth an experiment, anyway. Where the Fimo/Sculpy will come in really handy is for the large, one-off carvings like Apollo and his horse-drawn charriot. Failing that, I know the RTV will work, just a little more slowly.
- 2,444 replies
-
- 3
-
-
- heller
- soleil royal
- (and 9 more)
-
Hi Matt! I'm new to the site, but I've been perusing build logs and your work here on the Latham is truly stunning. The treenailing really came off well without appearing over-wrought. And your deck furniture is wonderfully detailed but just softened enough to look like a real work boat. Very impressed!
-
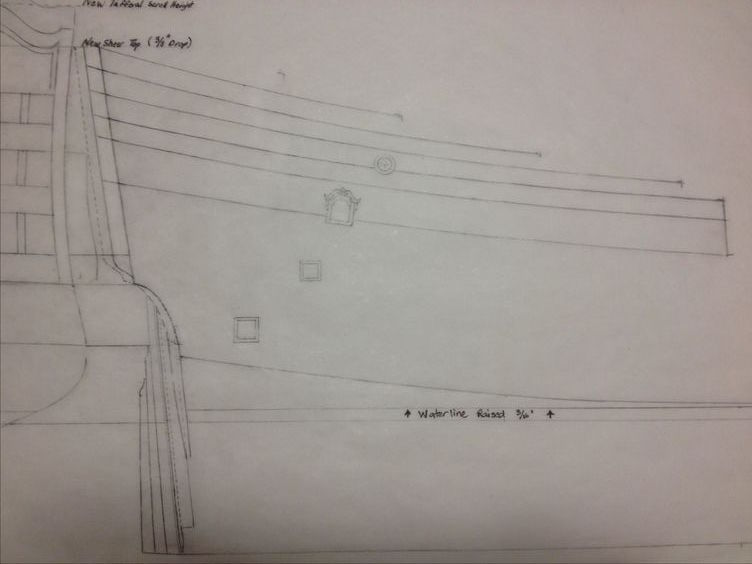
A few more renderings, tonight. I was having a hard time getting the scale of the bell flower additions right for the round ports. This revision makes the ports seem a little over-wide, but I can scale this more easily in Corel Draw. I just wanted to get the shape of the thing right. I like the shape of the sheer rail caps, though. Because of the positioning of the Heller kit's round ports, I don't think I will be able to do the small scalloped cutout into the planking, just inside the sheer cap, nonetheless, these pieces will go a long way toward providing a more elegant transition from one sheer step to the next. As it is, on at least one step of the stern sheer, I'll have to inlet this cap, partially, into the rounded framing of one port. If it's done with care, it should still look good and intentional.
- 2,444 replies
-
- 6
-
-
- heller
- soleil royal
- (and 9 more)
-
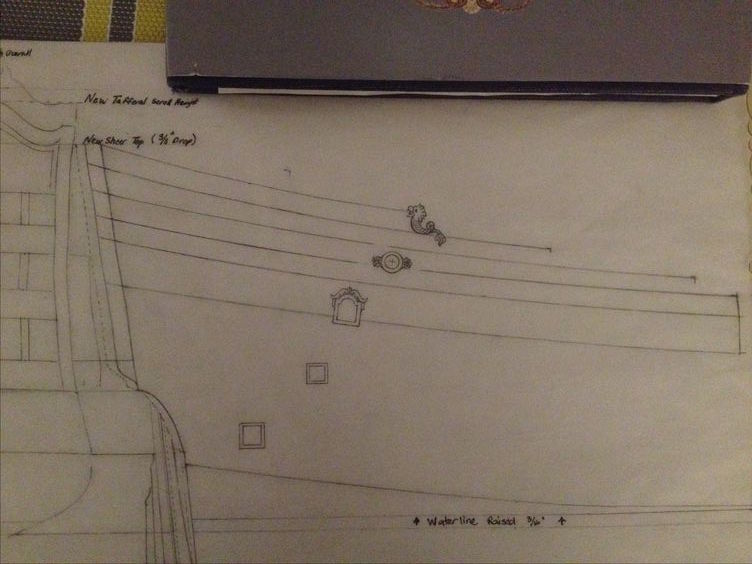
So, tonight, I drew in the sheer line and sheer strakes. I also did a simplified embellishment of the square domed ports of the main deck guns. There isn't enough room to do the double scroll acanthus carvings, below the port, and there's barely enough room to do a simplified fleur-de-lis at the center, top of the port. Although it probably won't show that well in this picture, I think it looks nice. Tomorrow, I'll experiment with a bell-flower accent to both sides of the round ports, but the stern drawing is just about ready to digitize. The more I think about it, the full 1/4" extension to the stern will buy me some much needed space for laying out these quarter galleries: Maybe that main deck port right next to the quarters won't look so cramped now. With your cursor, drag the waterline down to the edge of your screen, so that you can get a sense for the reduced sheer. To my eye, this is more ship-like.
- 2,444 replies
-
- 7
-
-
- heller
- soleil royal
- (and 9 more)
-
Beautiful Caroline, Ofencer. Fimo for the carvings?
- 2,444 replies
-
- 2
-
-
- heller
- soleil royal
- (and 9 more)
-
Thanks for the tips, Ofencer! I will check out Fimo.
- 2,444 replies
-
- 3
-
-
- heller
- soleil royal
- (and 9 more)