Hubac's Historian
-
Posts
3,314 -
Joined
-
Last visited
Content Type
Profiles
Forums
Gallery
Events
Everything posted by Hubac's Historian
-
 It has been some time since my last visit to the Vasa Museum. I was there back in 2003, and even if I weren’t obsessive about wooden ships of the period - I would still have walked away thinking that was the best museum I have ever been to. They really manage to bring the ship to life. I hope to bring my kids there, someday, as there is really nothing else quite like it. As remarkable a salvage as the Mary Rose is, obviously, the completeness of Vasa puts her in a class all her own. I wonder if King Gustavus is out there somewhere in the cosmos, laughing about the tragic loss of the ship; his loss is posterity’s gain.
 -
I feel you, man - project fatigue sometimes draws the line for you. I like the idea of the additional figures, if the spacing works out. Whichever way you go, though, you have certainly crafted a first-class model that you will always be justifiably proud of. And thank you, of course, for your kind words. I'm not really a historian - I just like to study pictures for a ridiculously long time . Anyway, I just wanted to say that I really enjoyed following along on your build. It was immensely informative, and I learned a lot.
-
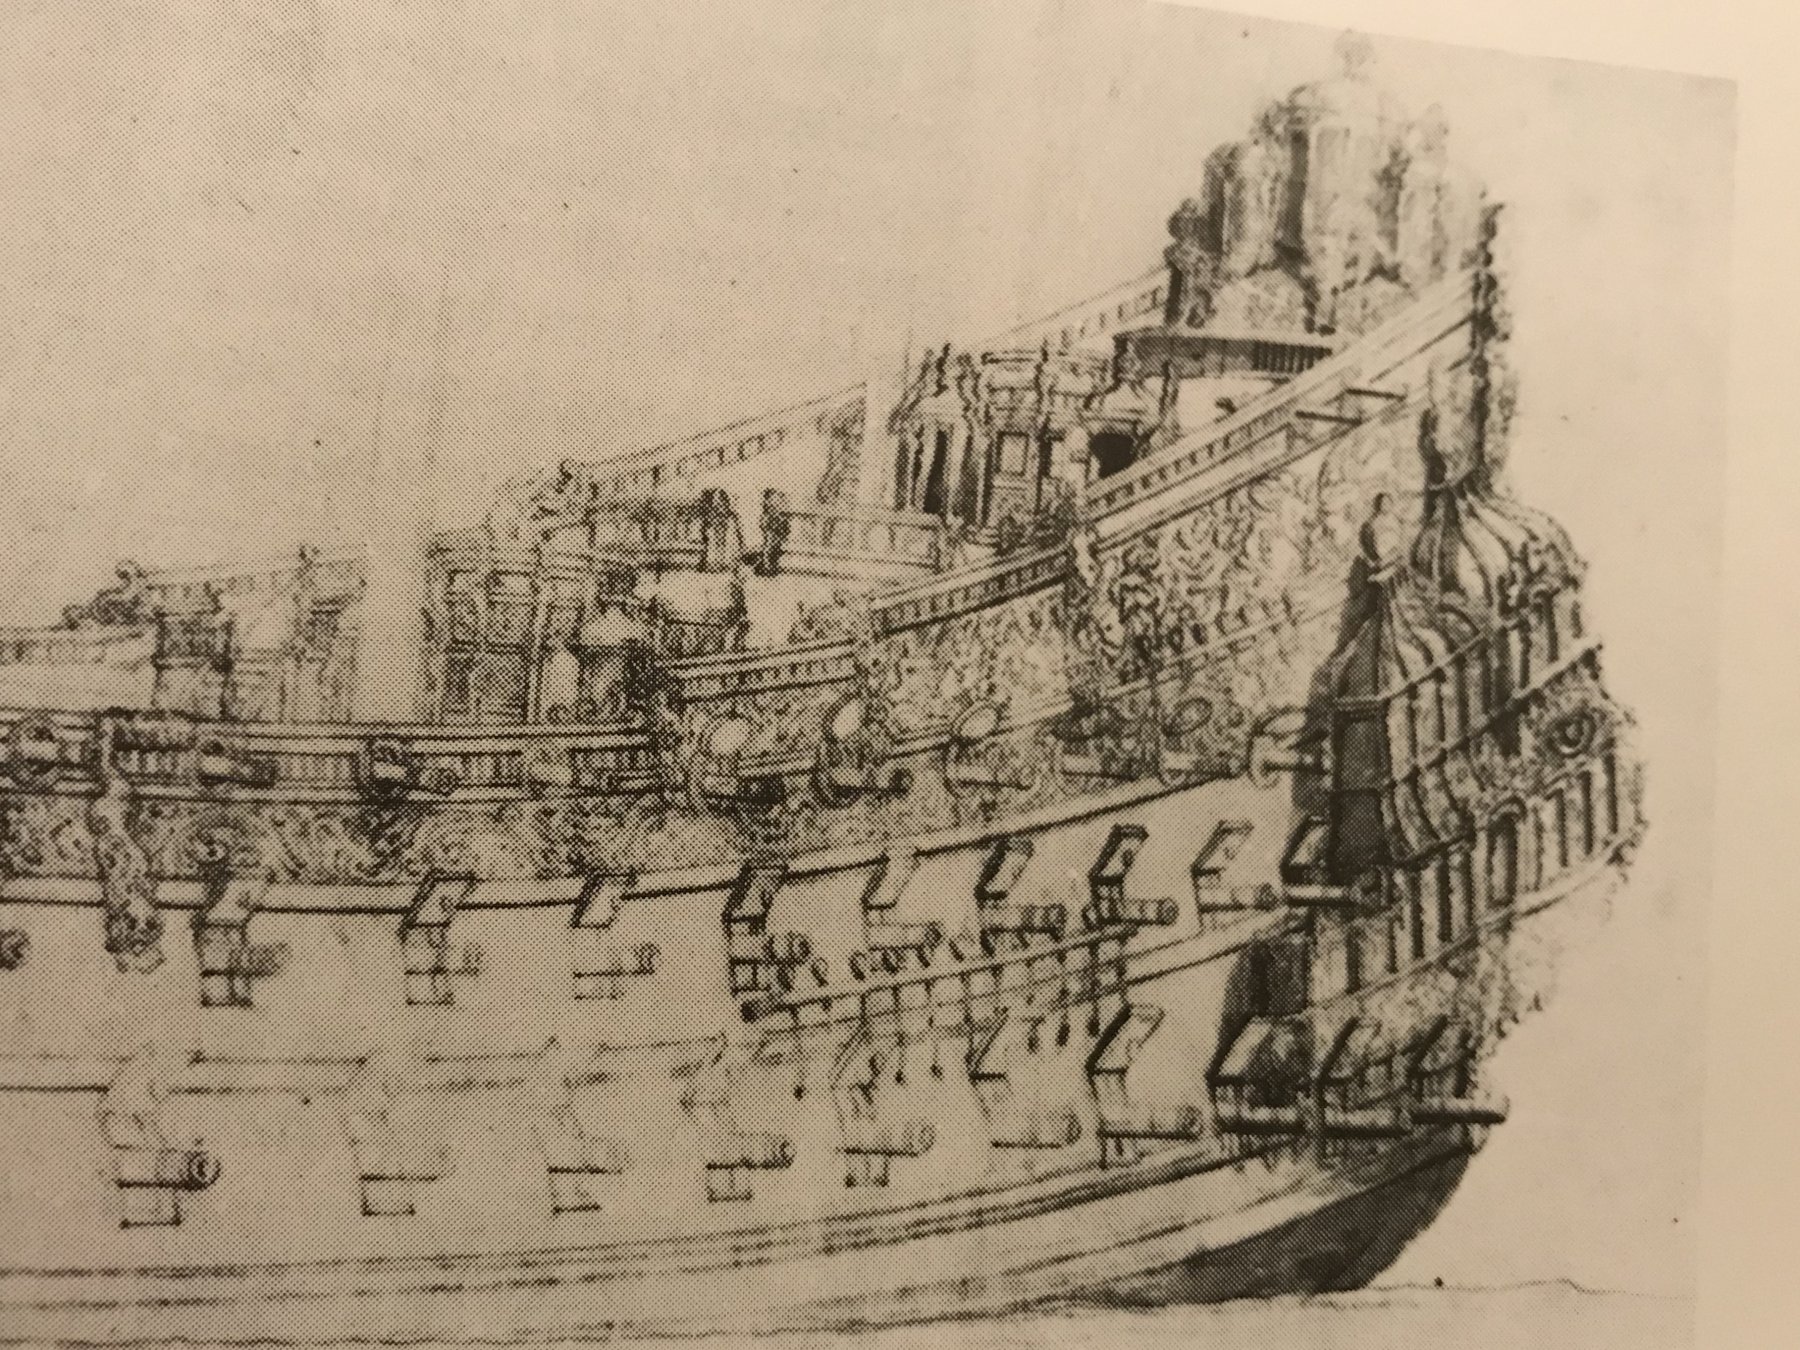
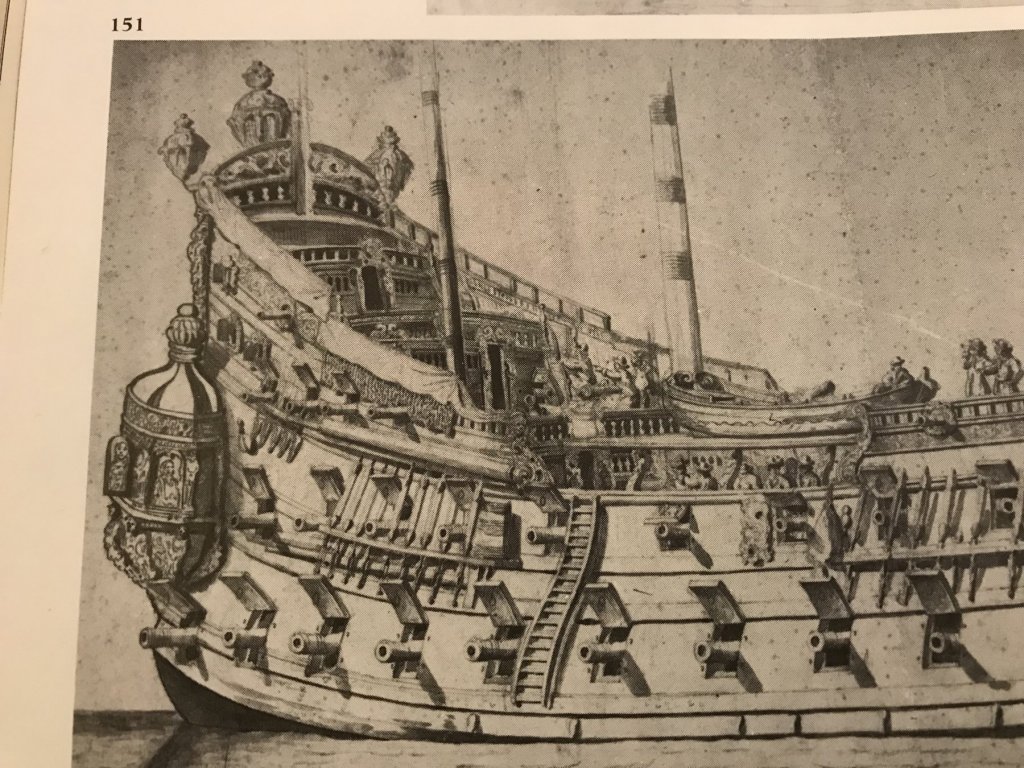
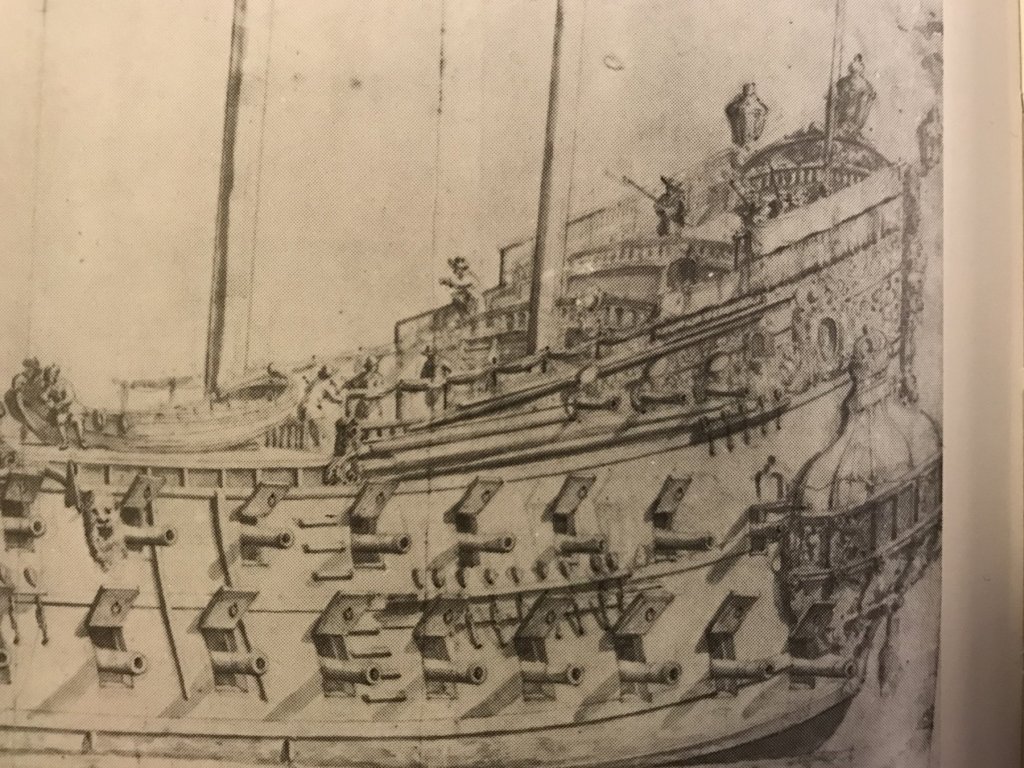
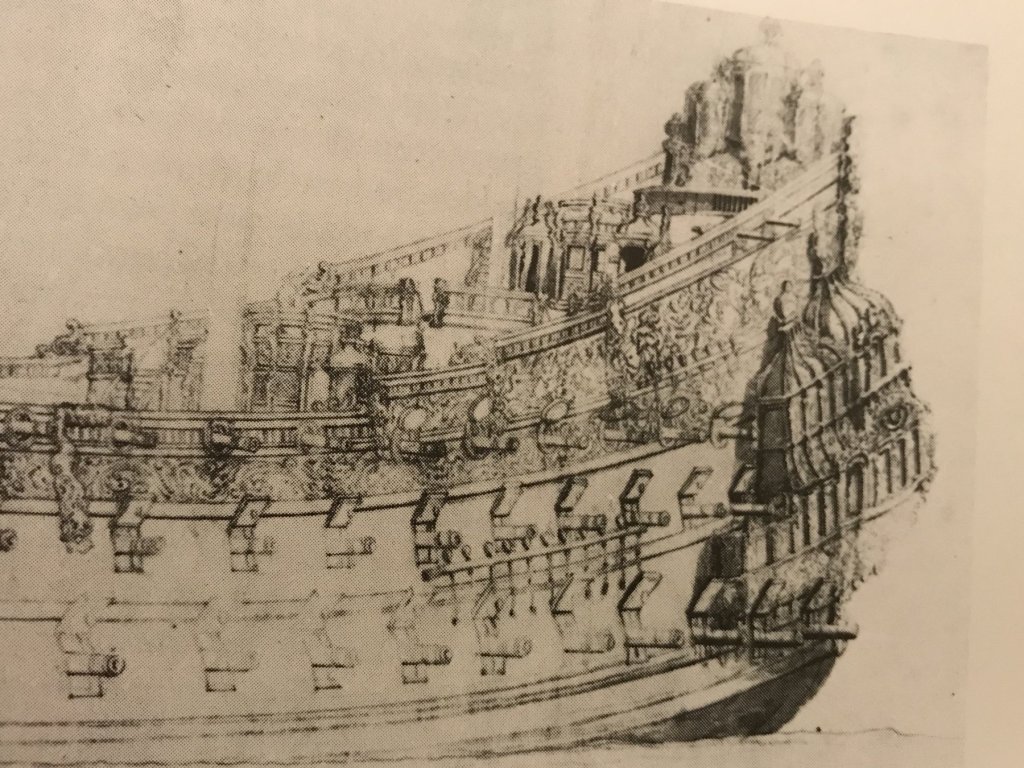
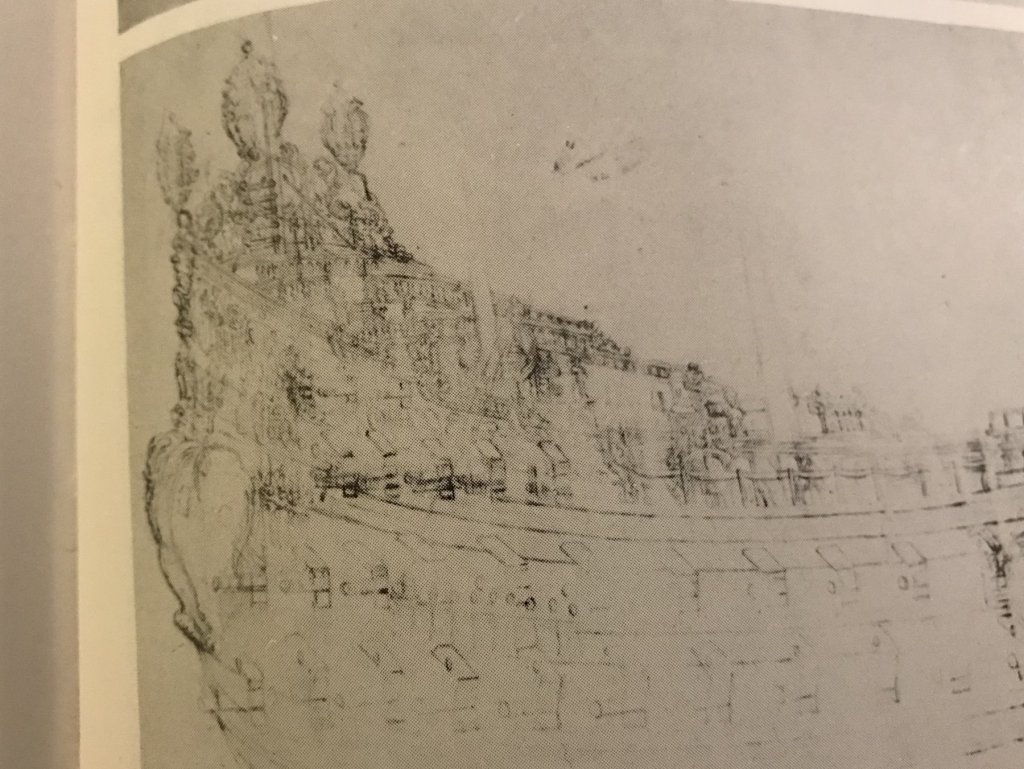
Here is a little more food for thought. These are all Danish ships, about 20 years later than the Vasa, but built in the Baltic and beneficiaries - I would definitely say - of the cross-pollination of European shipyards; witness the deliberate similarities between the incredibly impressive Sophia Amalia and the Royal Sovereign. If anything, what these drafts might confirm is the relative size of the stern lanterns, a degree of mimicry of the lantern/quarter gallery finial (Tre Lover, in particular), and the ornamental inclusion of caryatid figures between the lantern lights. The Tre Lover The Hannibal The Sophia Amalia The Fredericus Tertius Mr. Hocker notes that nothing of the lantern has been salvaged, but I have to wonder whether the lantern might have been a symbolic early retrieval by the salvage crew who initially retrieved most of her guns. In any case, it seems appropriate to me that Vasa’s lantern would be highly ornamental like the rest of the stern. I appreciate that you can take a little constructive criticism in stride. I only want the best for you and your model, which is such a shining example of what can be done to make a good kit great.
-
You are welcome, Vince! I have a number of really excellent books in my collection, but this one is my most treasured because of the variety and clarity of the VDV images, and also because the historical context of each ship is wonderfully explained. I like that you are doing a progression of Prince and Royal William. There is no shortage of really great examples of both, right here on MSW.
- 2,699 replies
-
- 2
-

-
- heller
- soleil royal
- (and 9 more)
-
Thanks, EJ. You are definitely right that form always follows function on a sailing ship, and on this sailing ship which is so encrusted with ornamentation it is a distinct possibility that similar accomodations were made in full practice. Clearly, though, if you are designing the build from scratch you have complete discretion as to the way those additions and subtractions take shape.
- 2,699 replies
-
- 1
-
-
- heller
- soleil royal
- (and 9 more)
-
In the meantime, here’s a link to a photo essay of the model: http://www.arbeitskreis-historischer-schiffbau.de/e328/e443/e15552/e15556/media_photoView?i=img14
-
Please forgive me for saying so, but I encourage you to either make your own lantern from scratch, or to source a better one. This lantern you are showing is not up to the high standards of your build. I think that it will look out of place on the model and will be distracting. Later, when I get to my home computer, I will post an image from a really excellent scratch build if the Vasa, which shows a nice example if a lantern that would be appropriate.
-
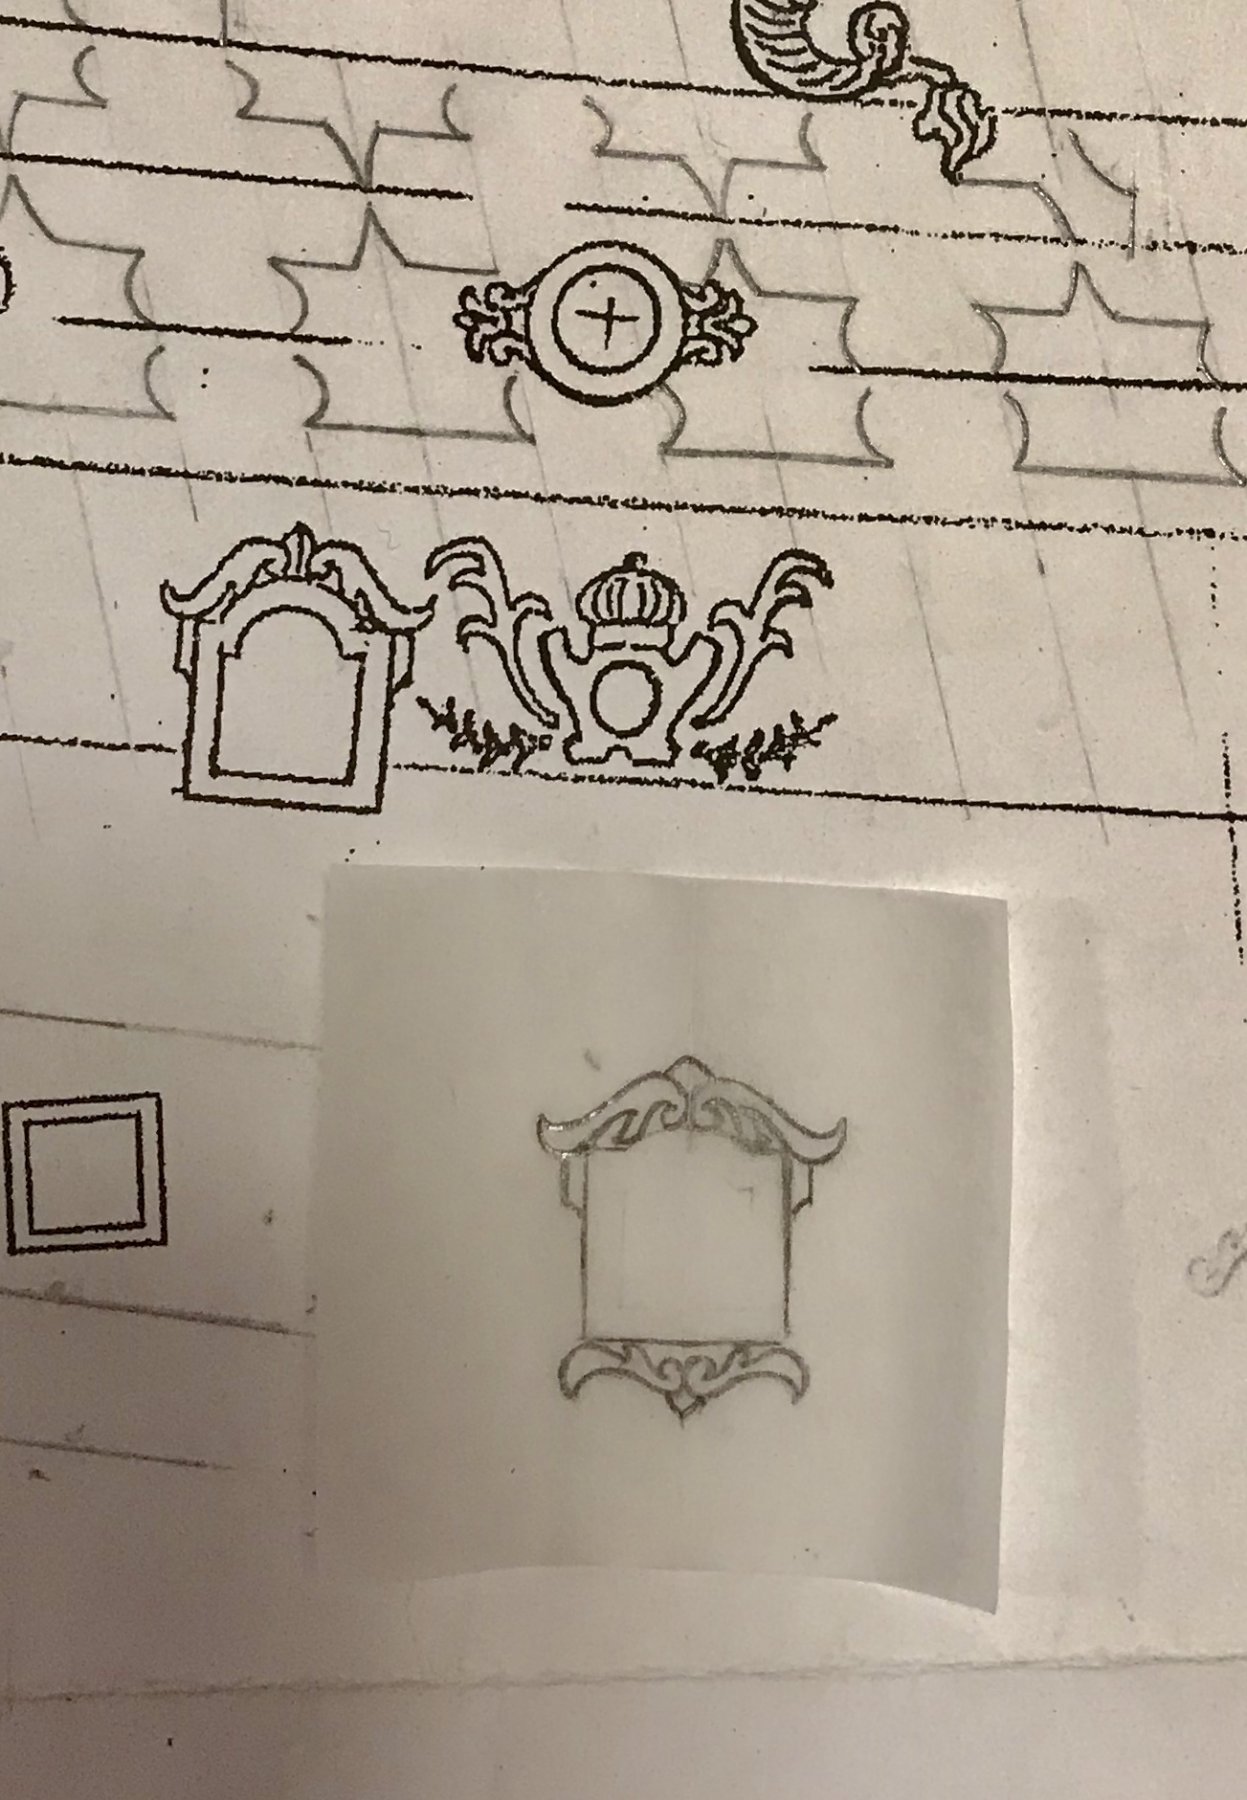
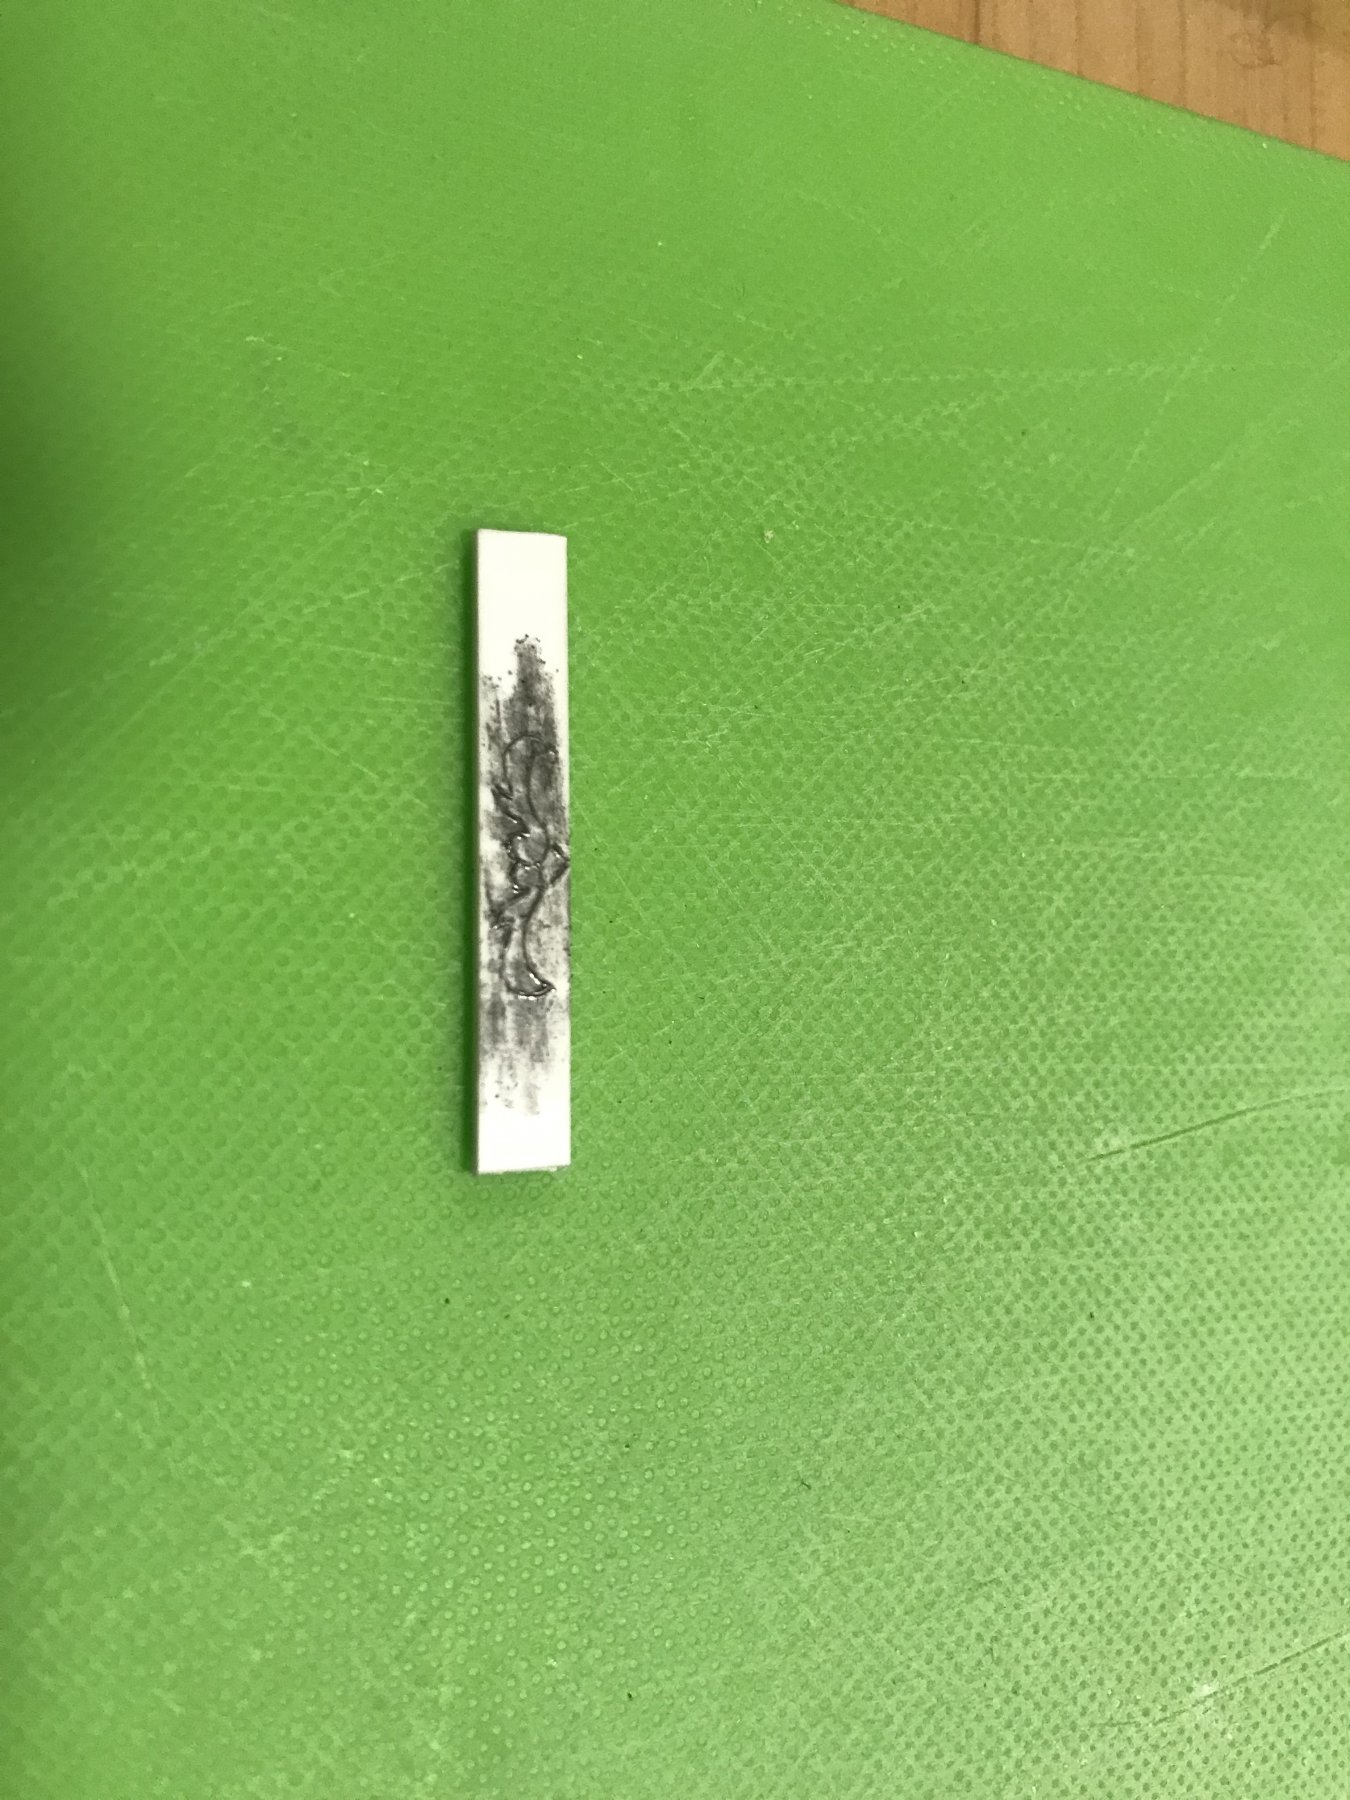
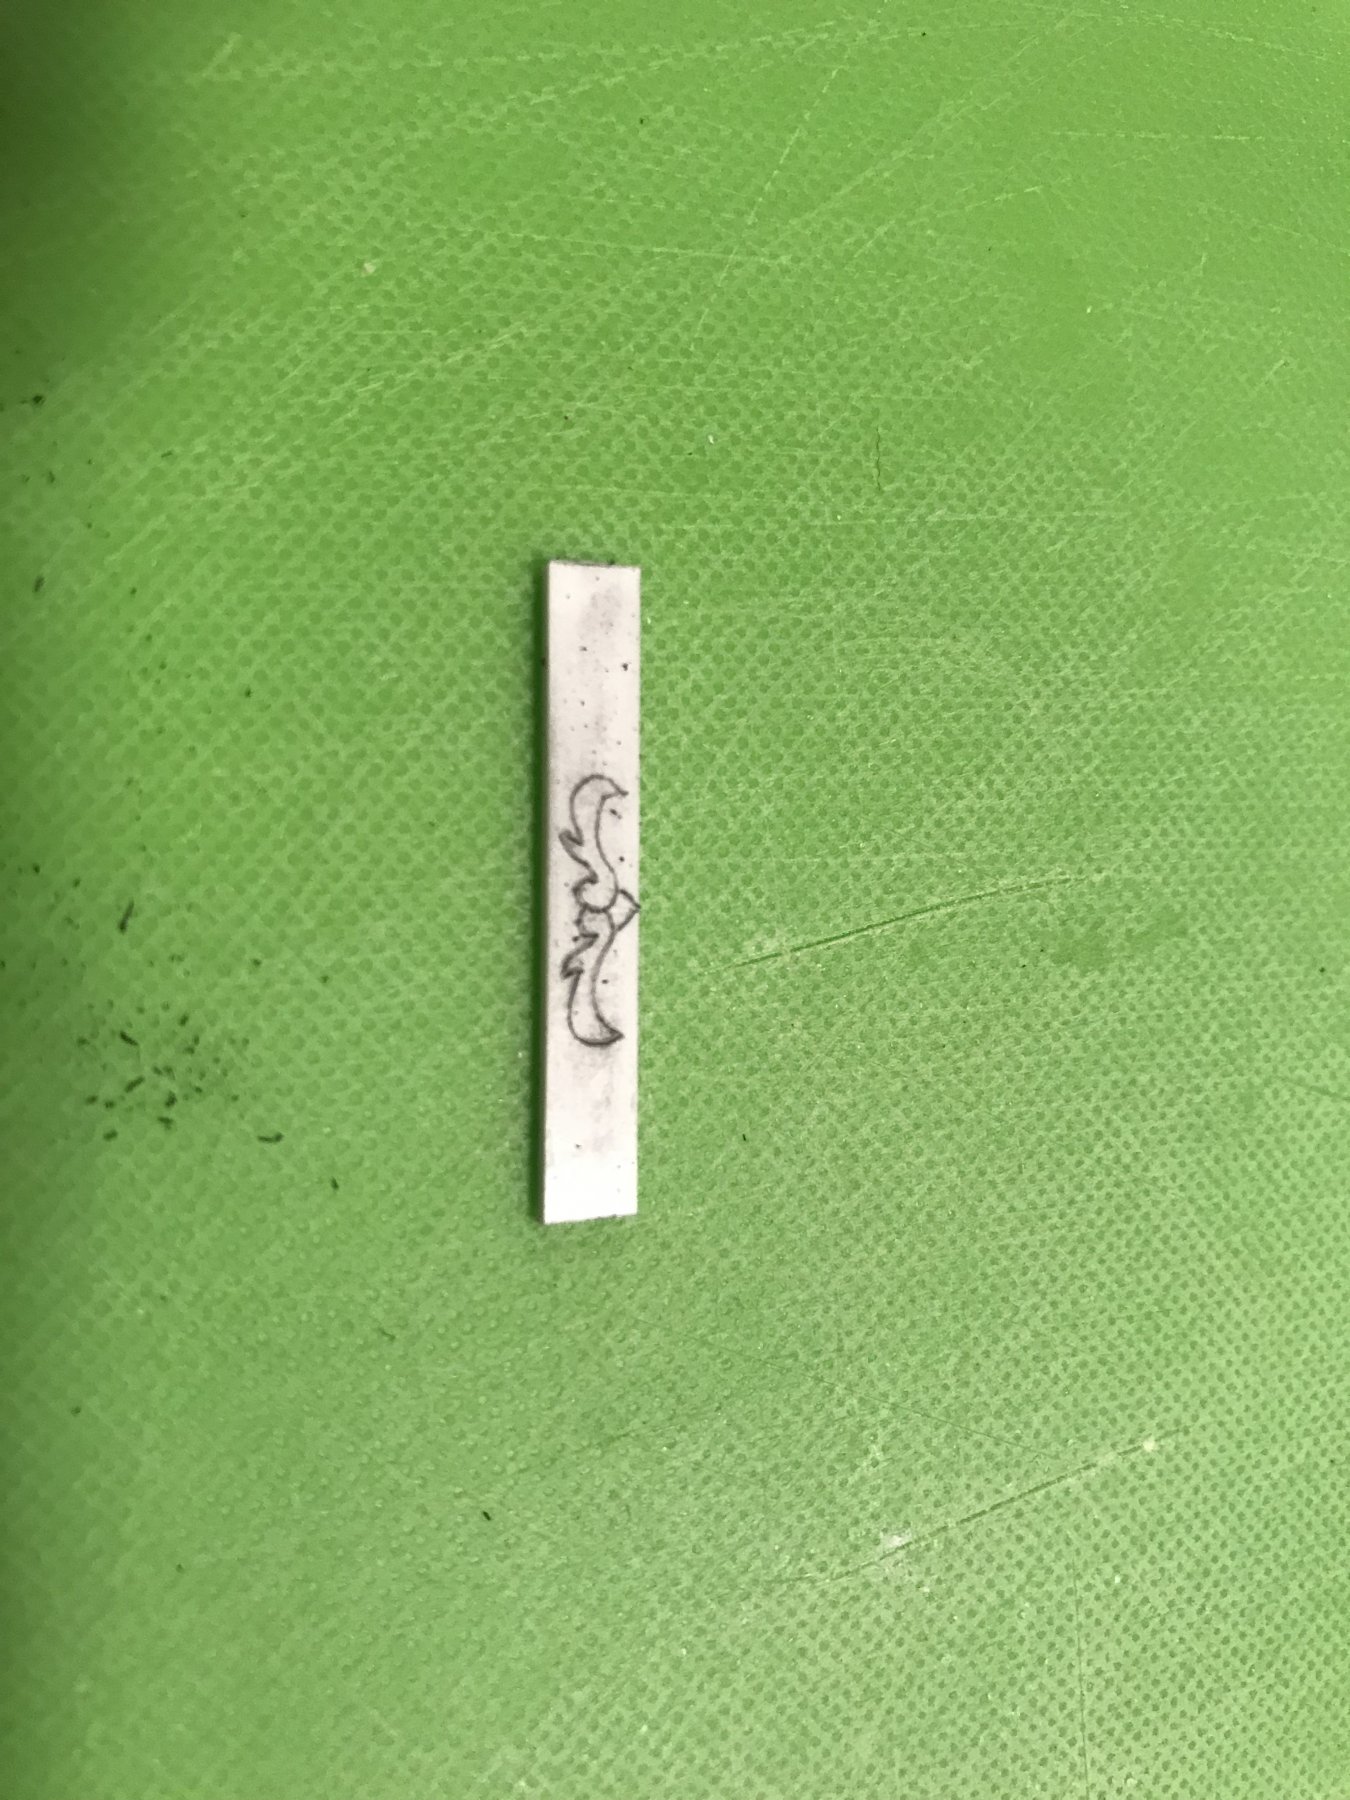
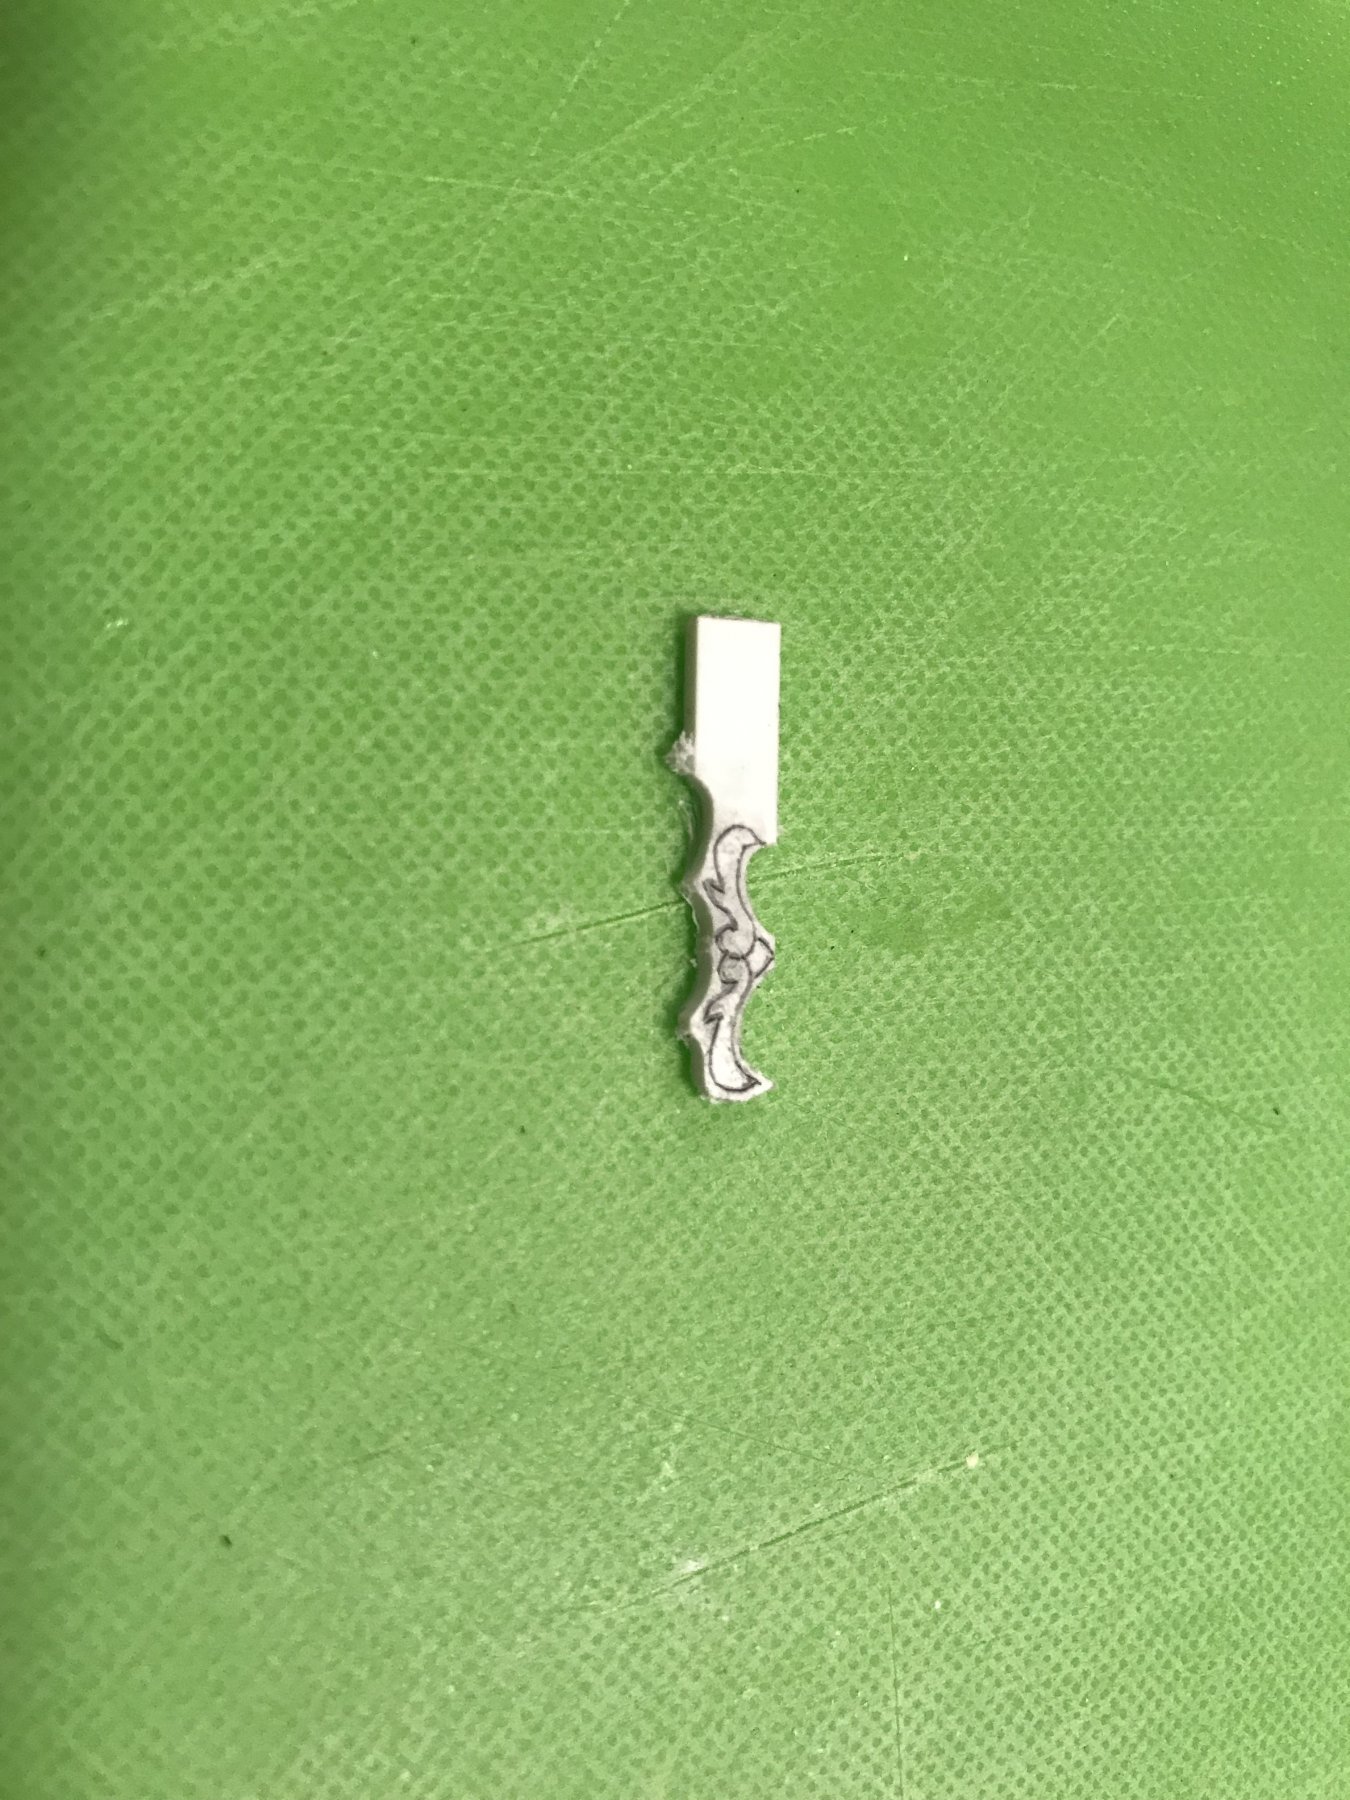
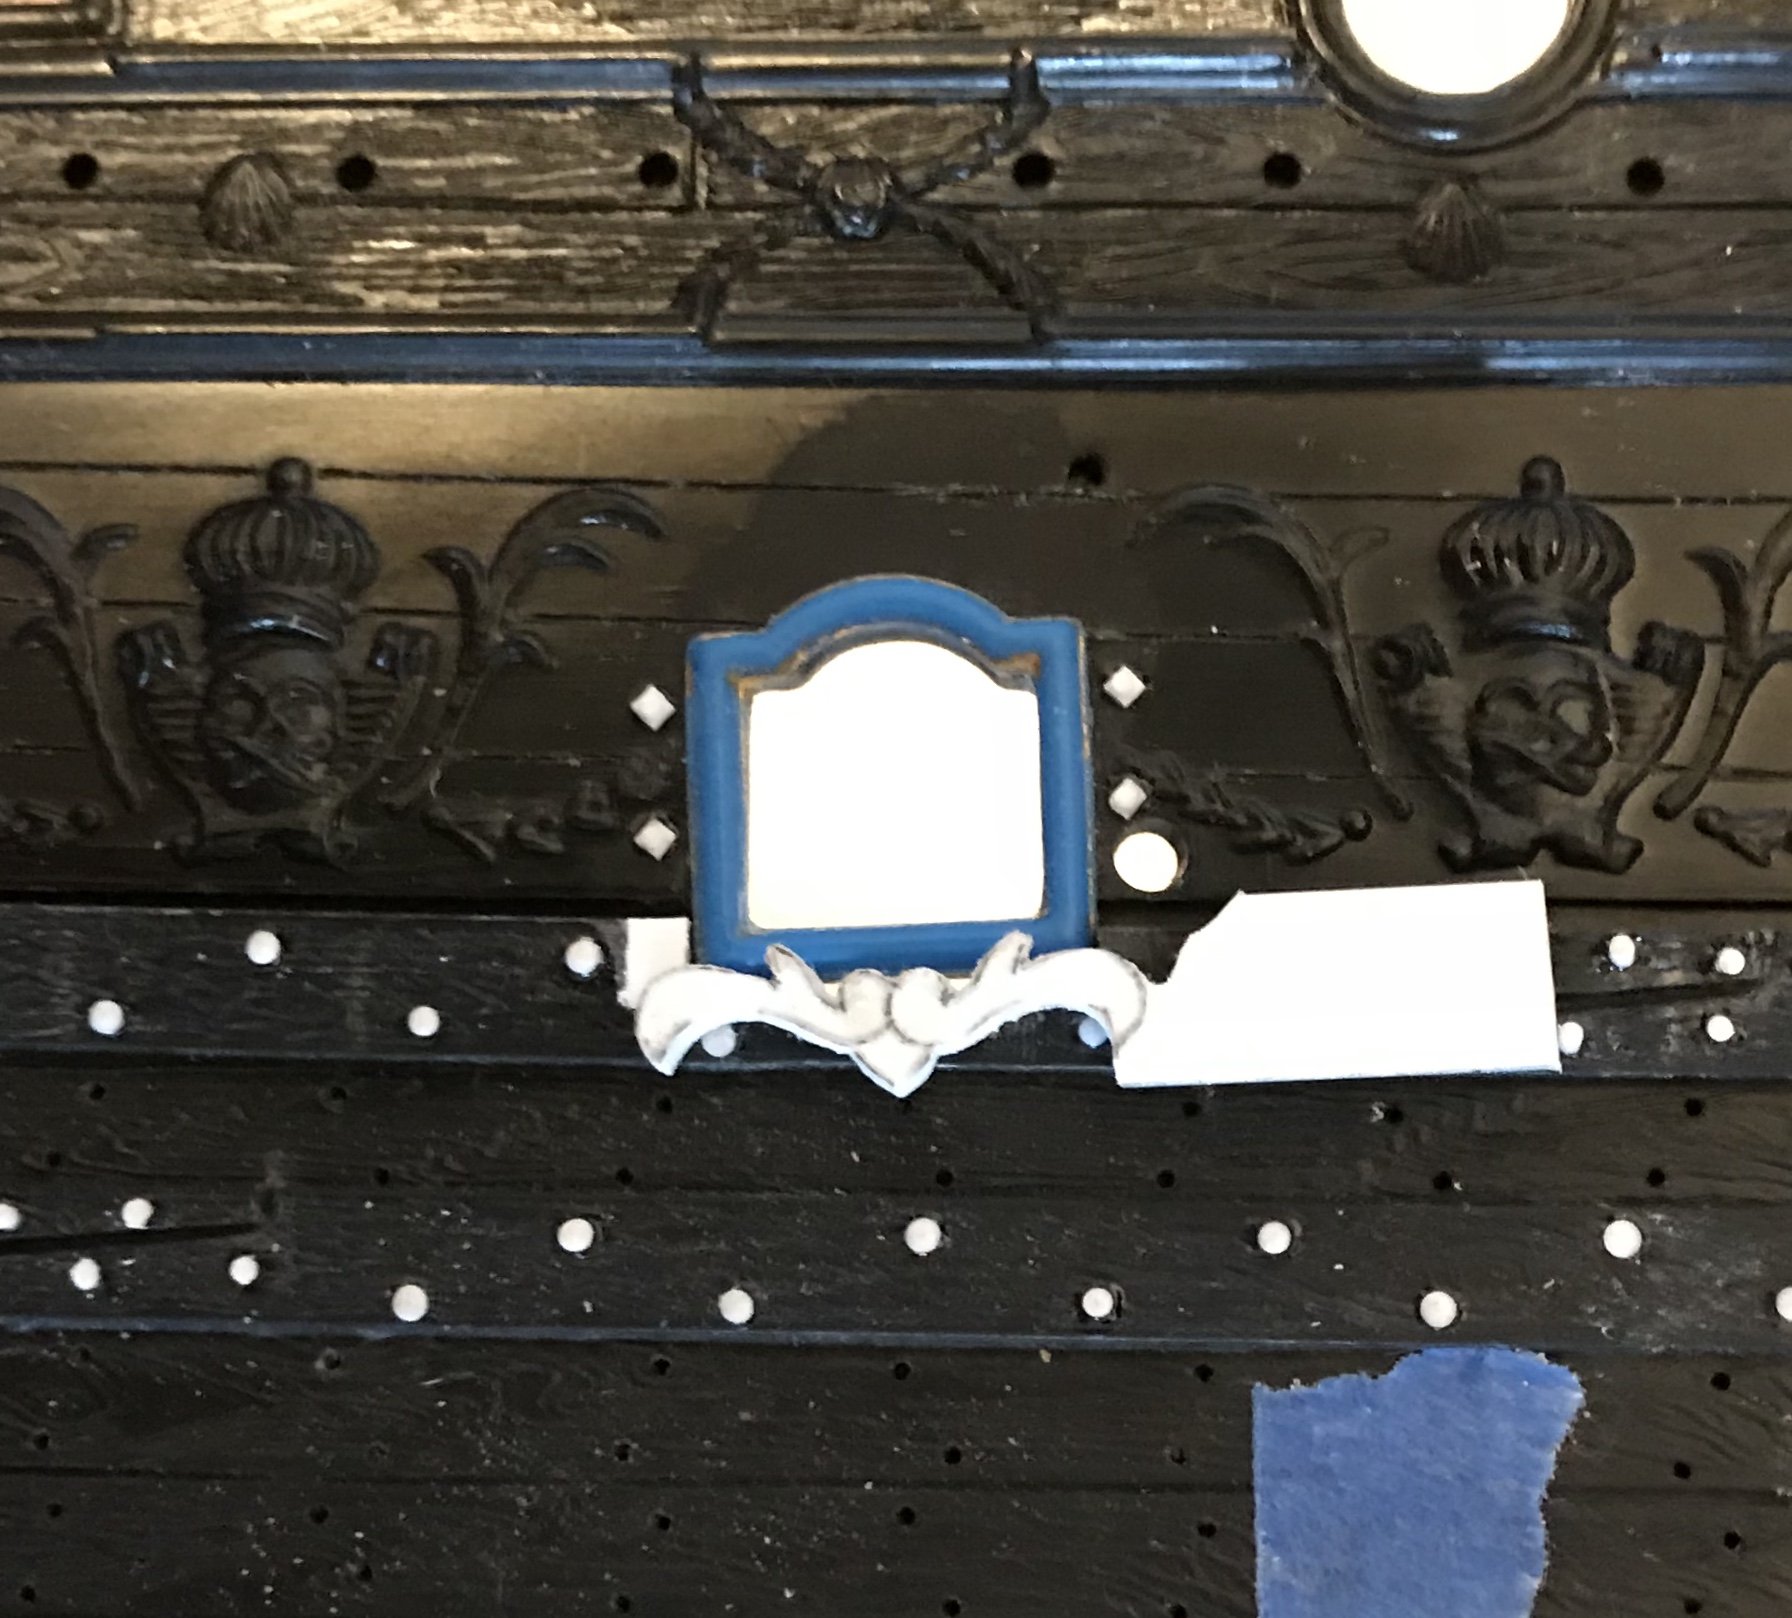
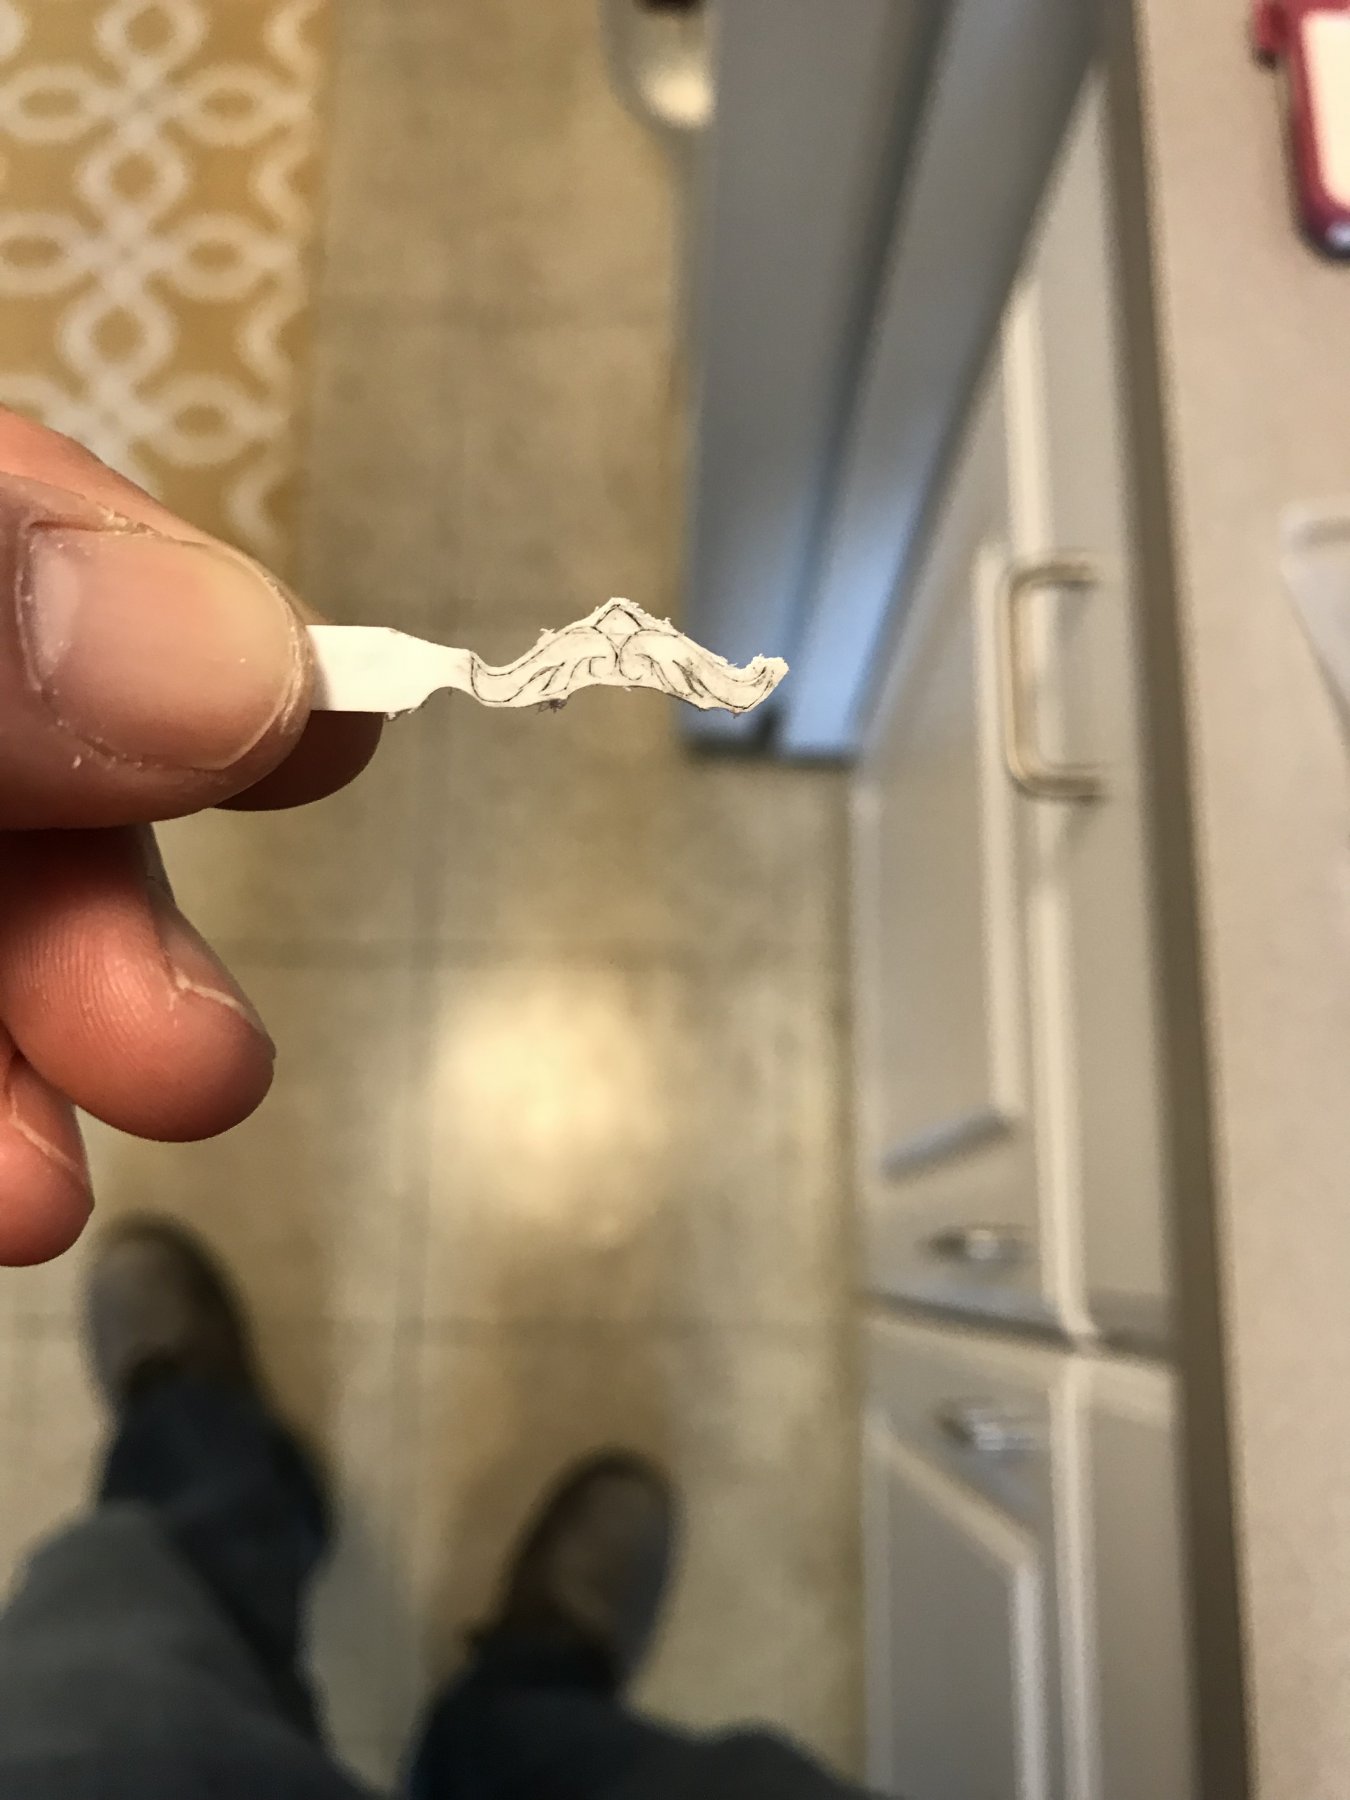
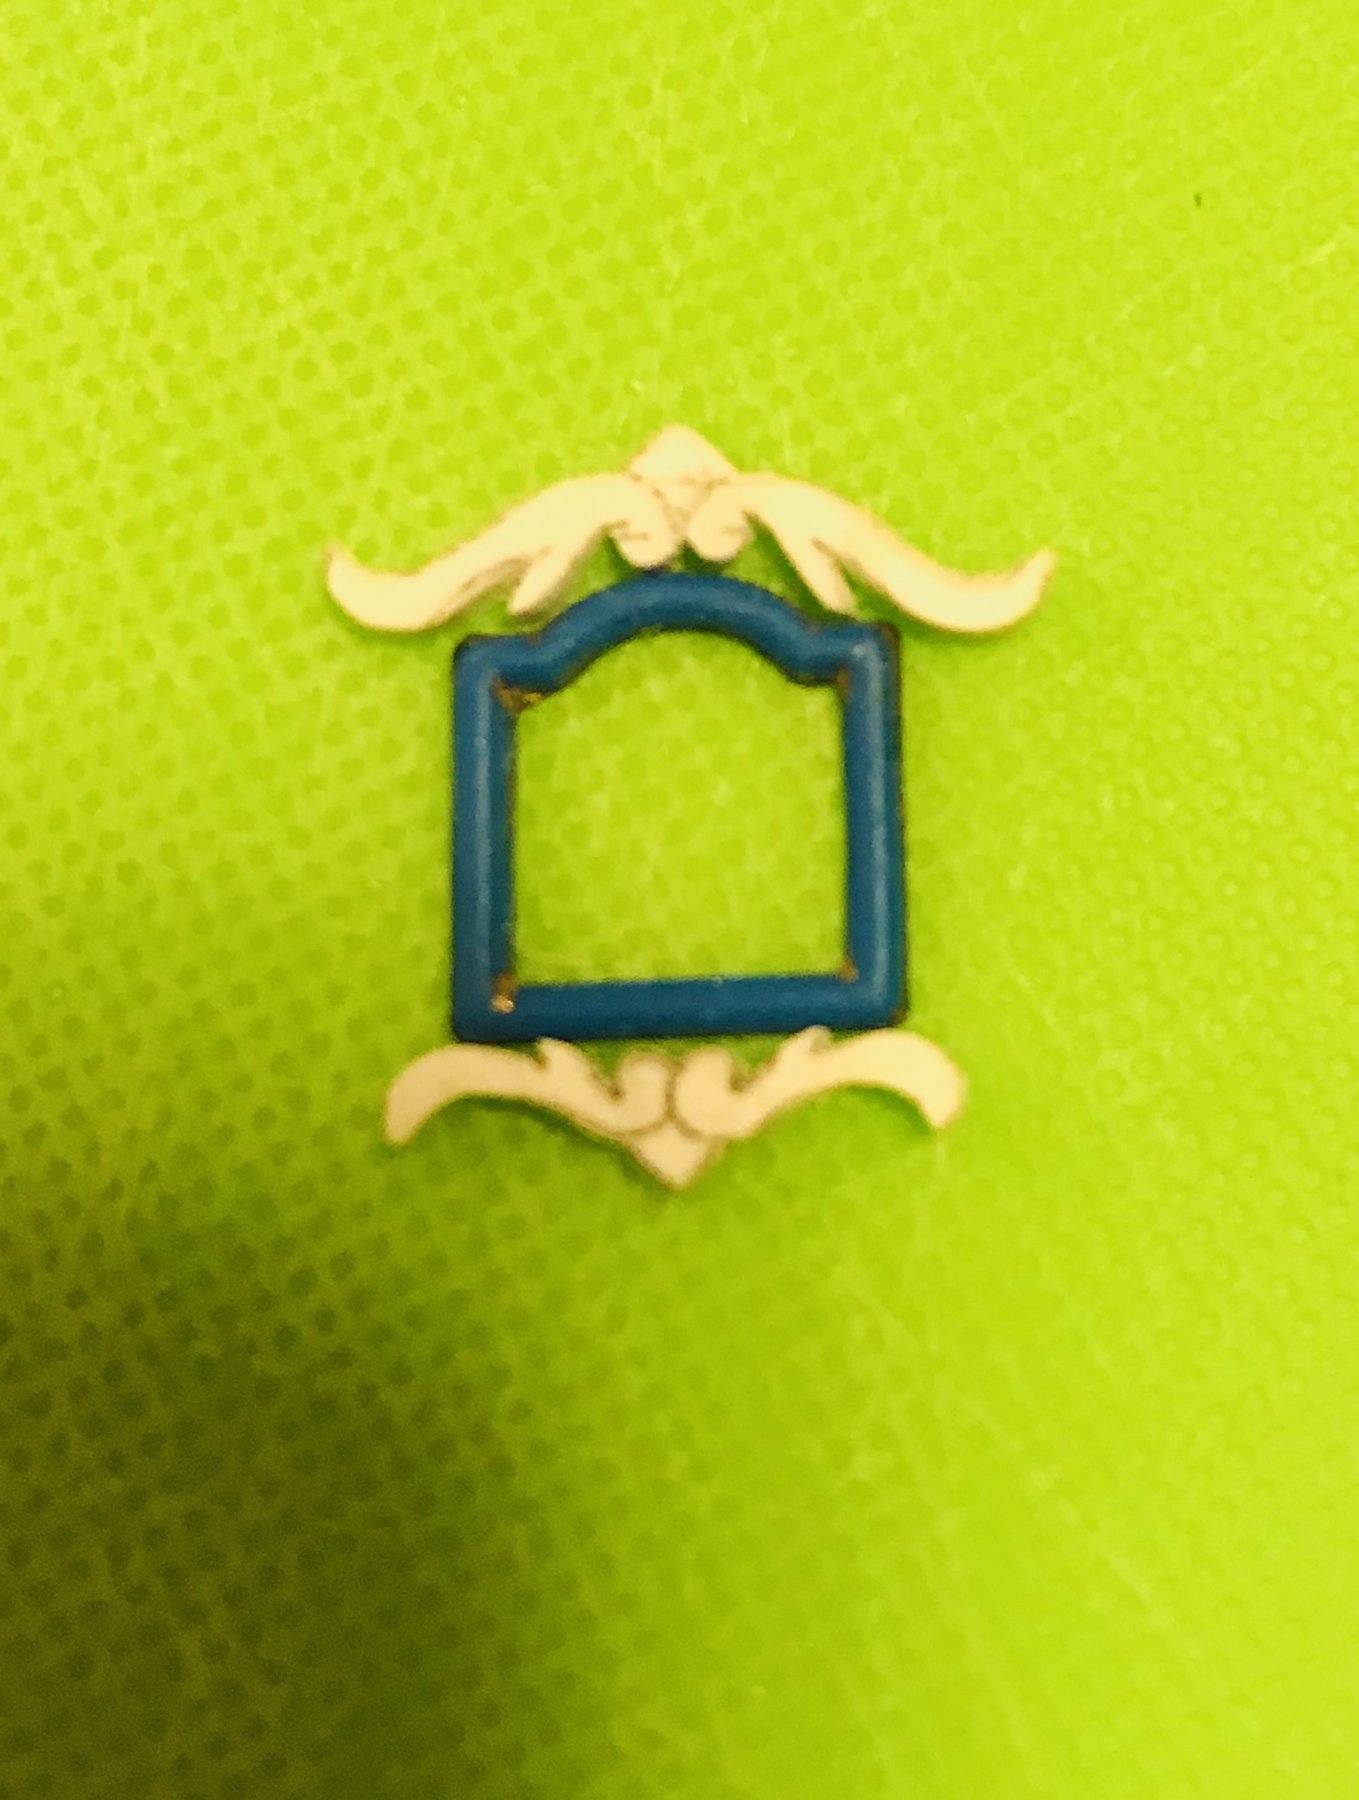
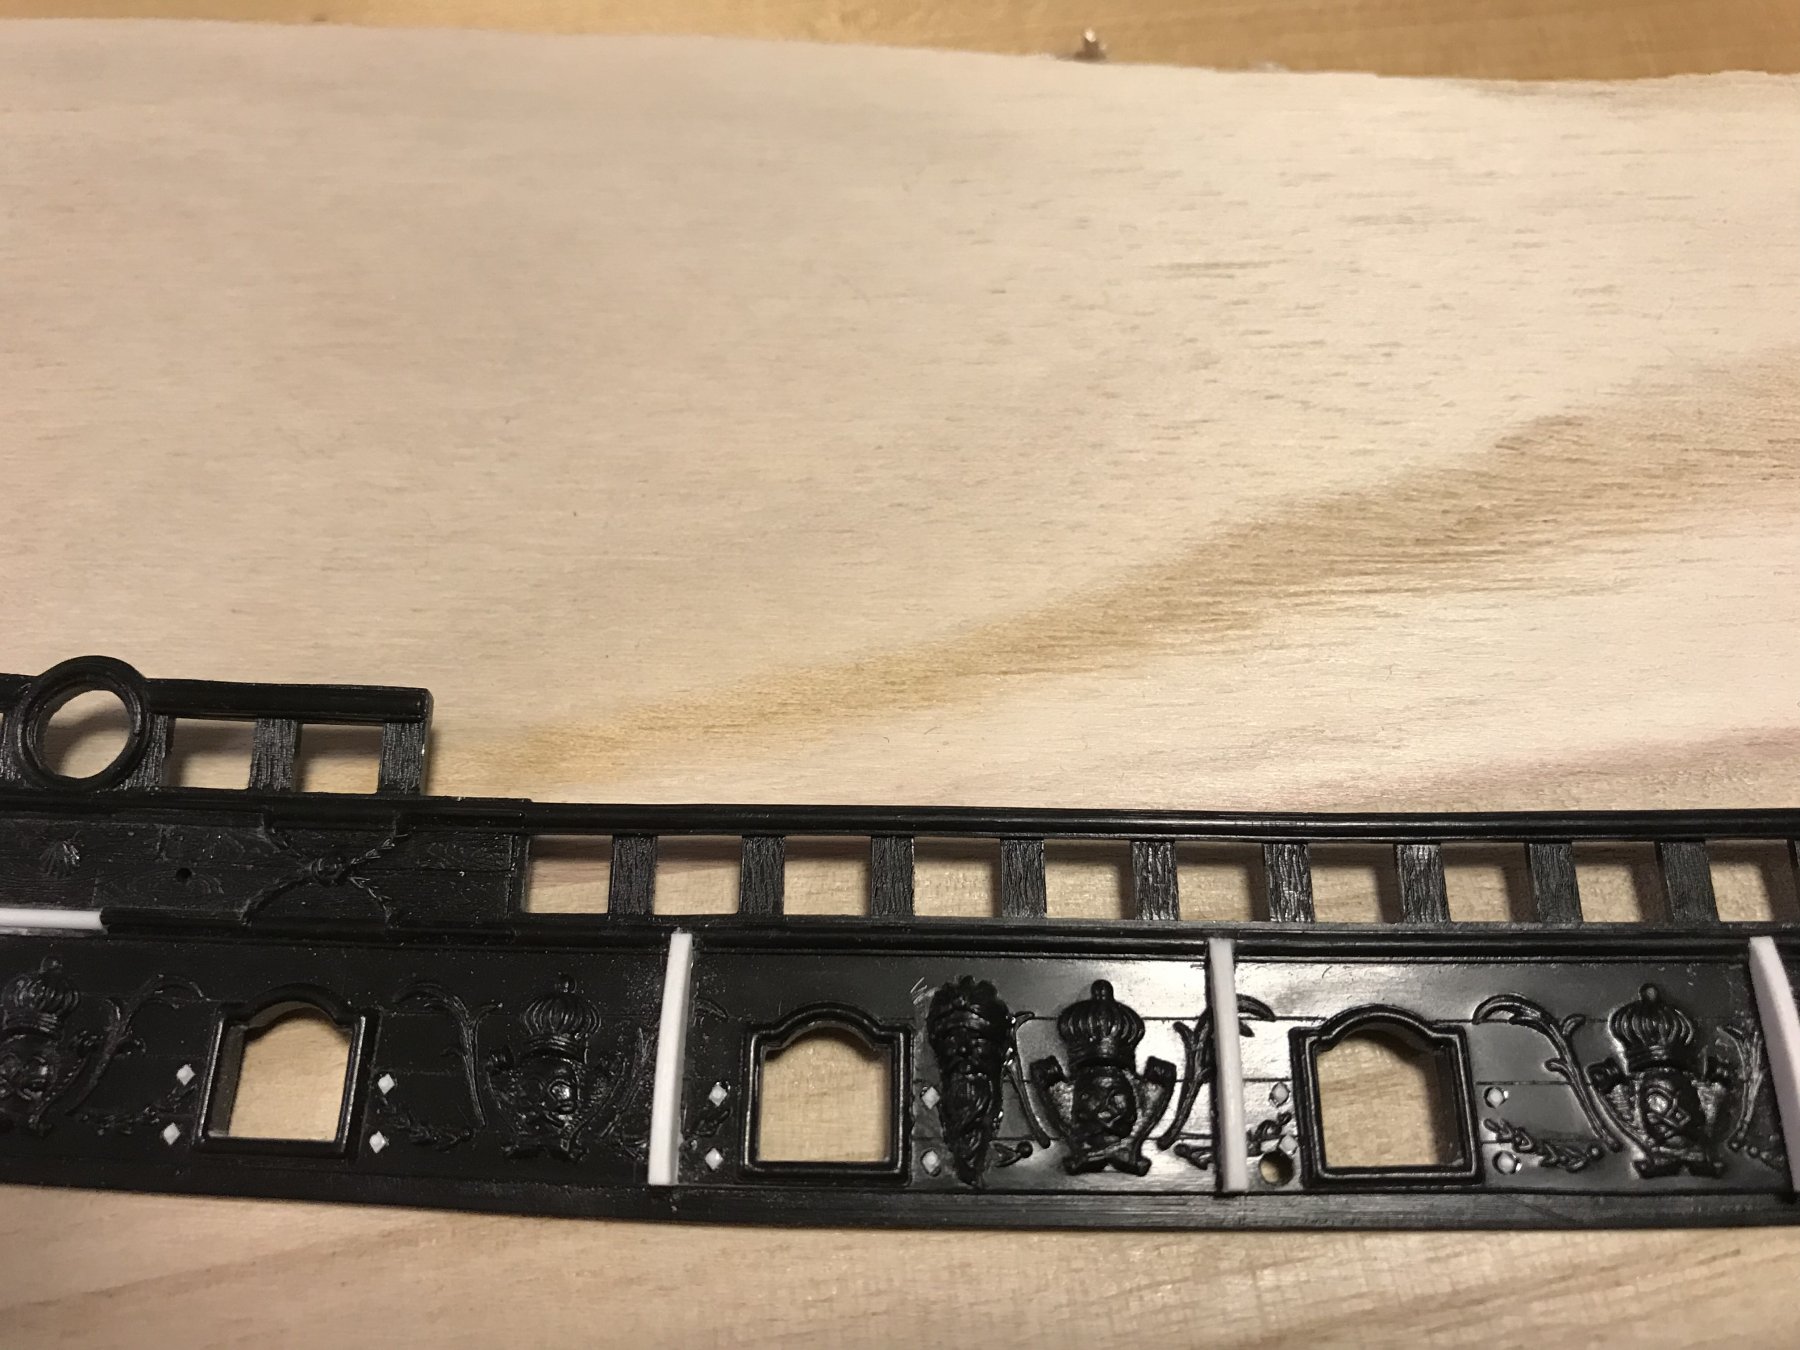
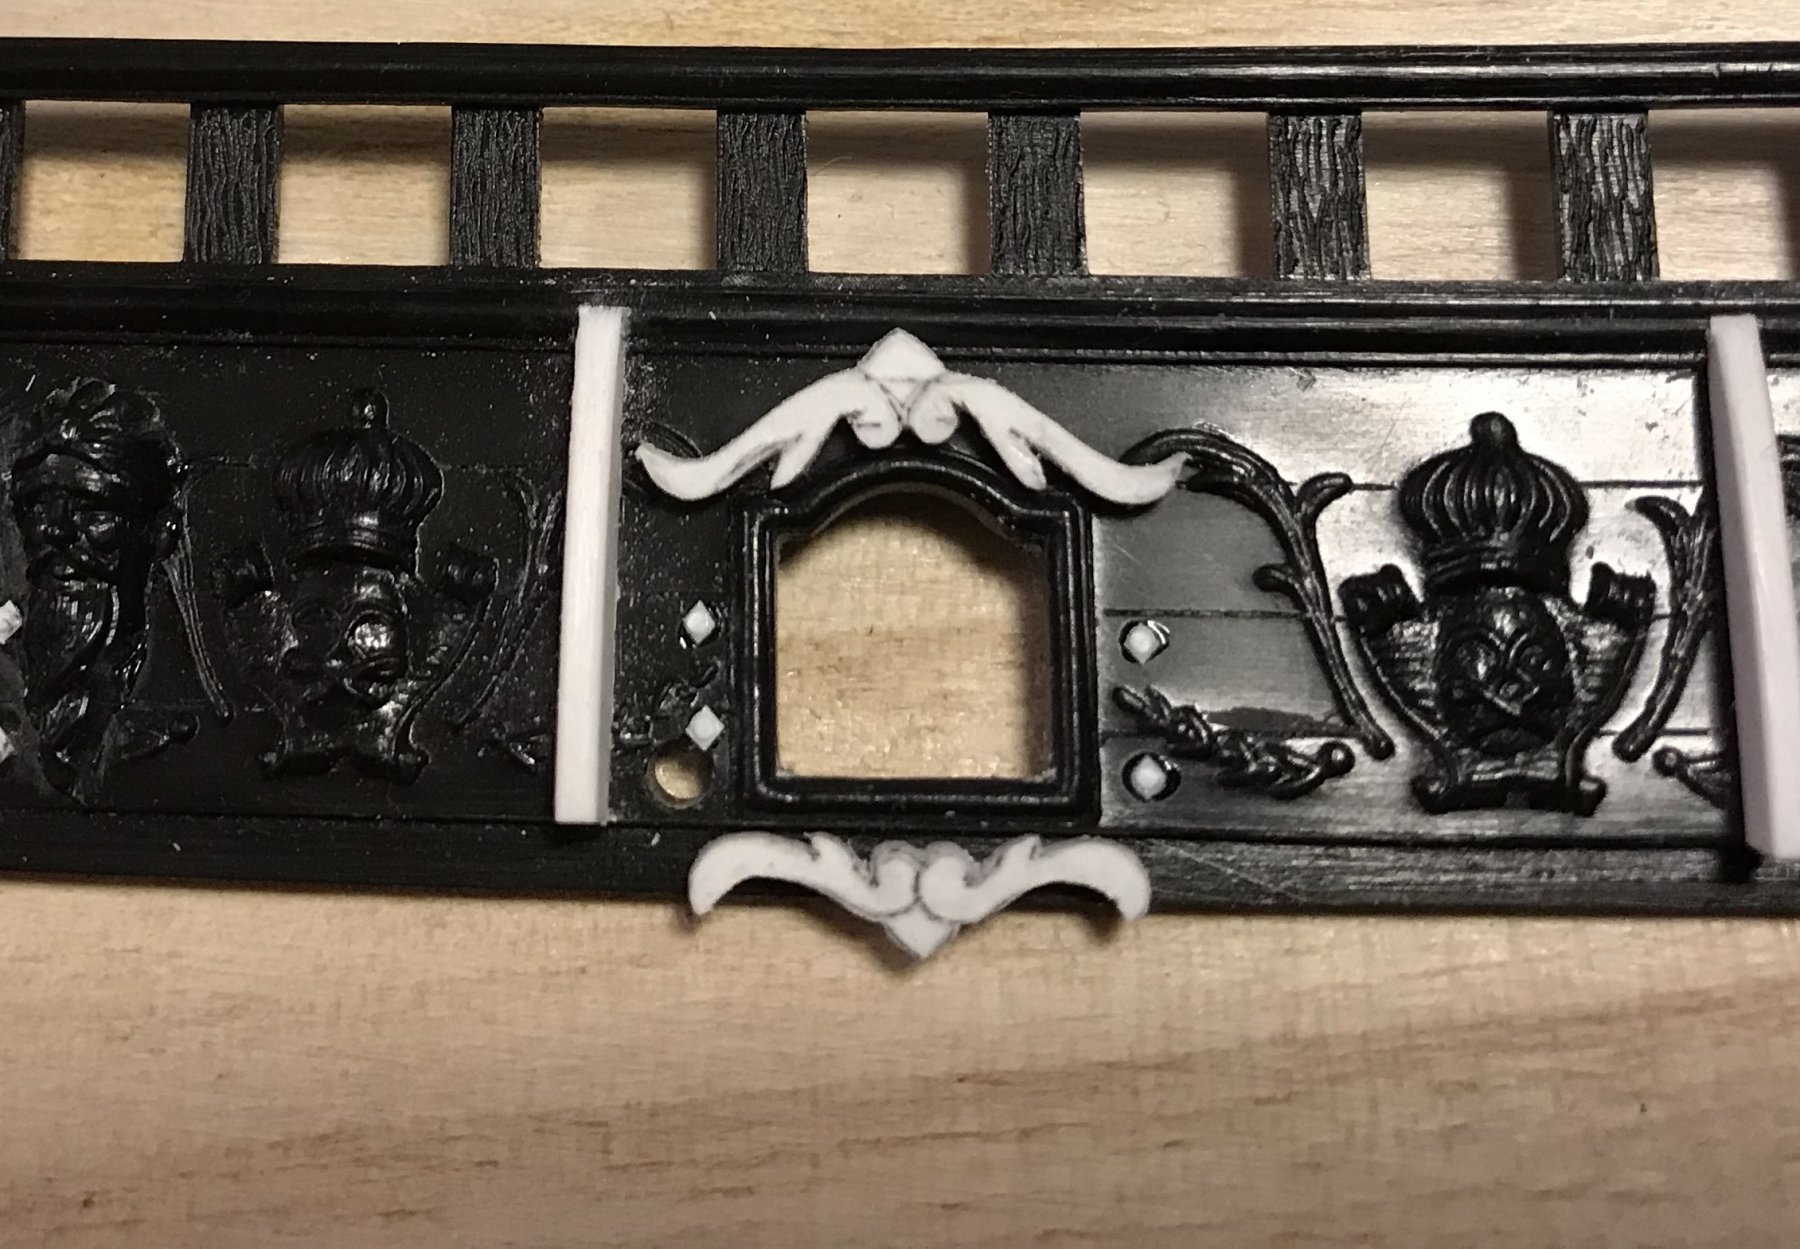
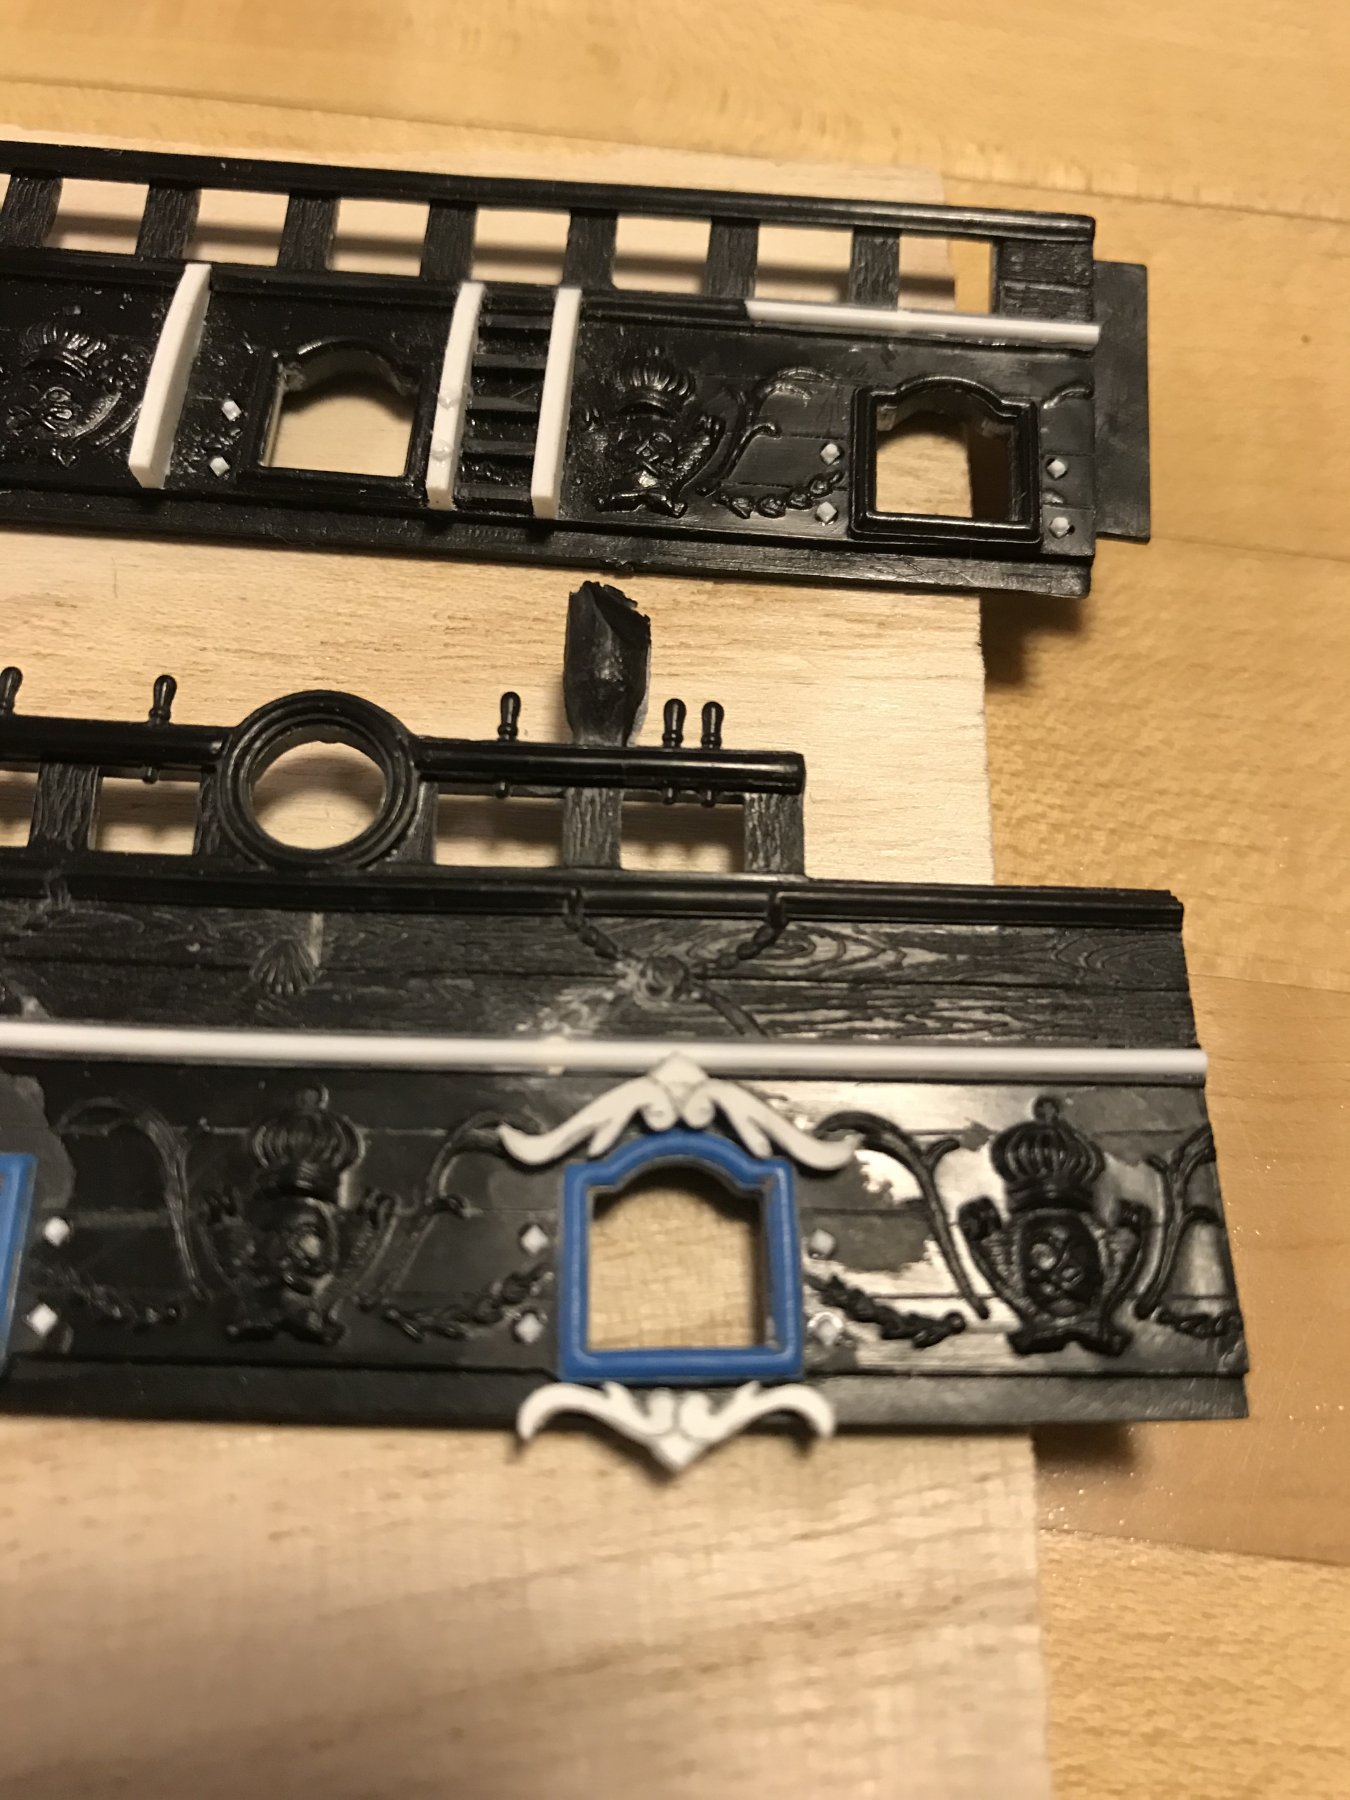
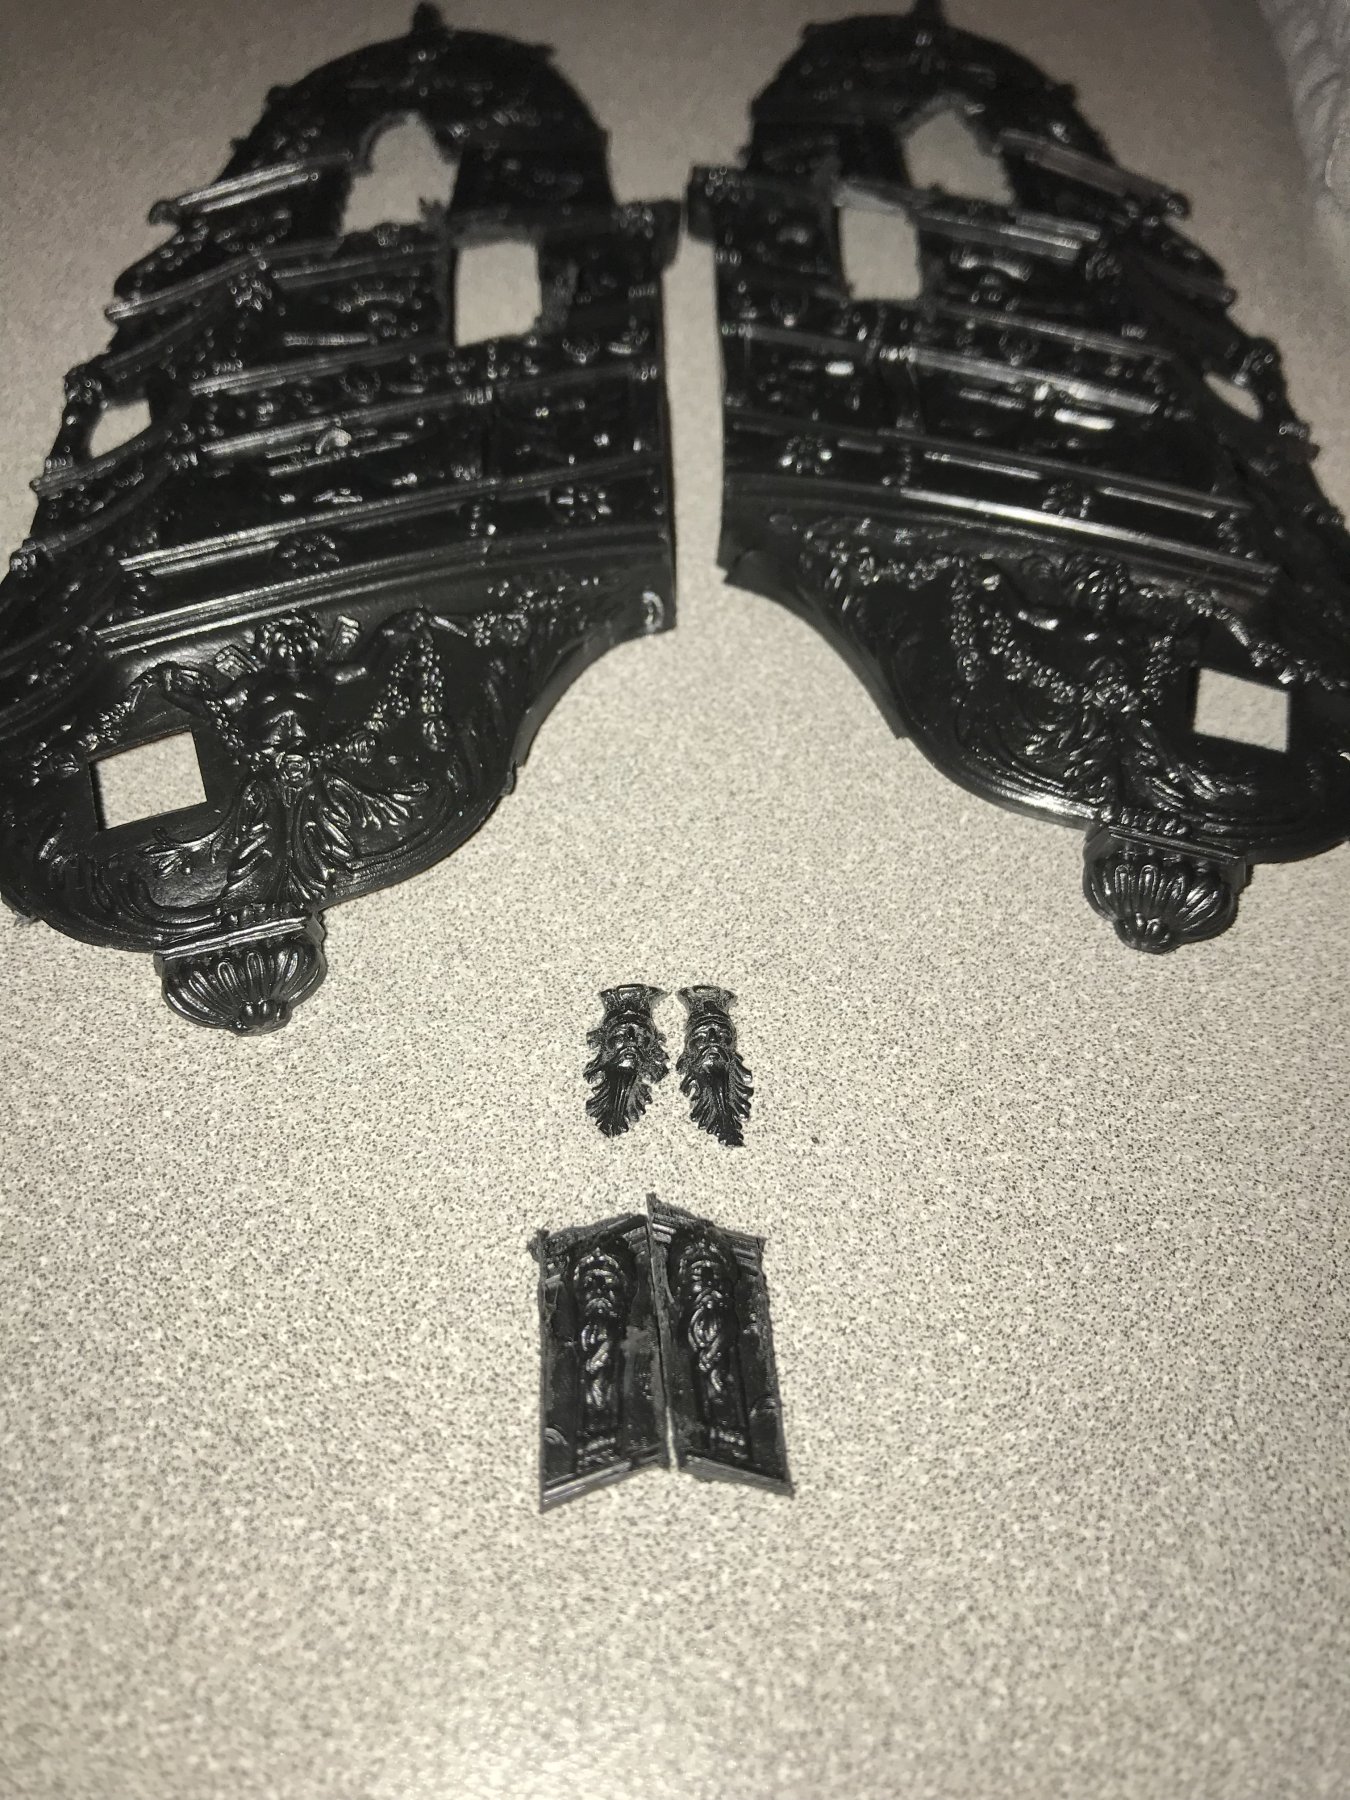
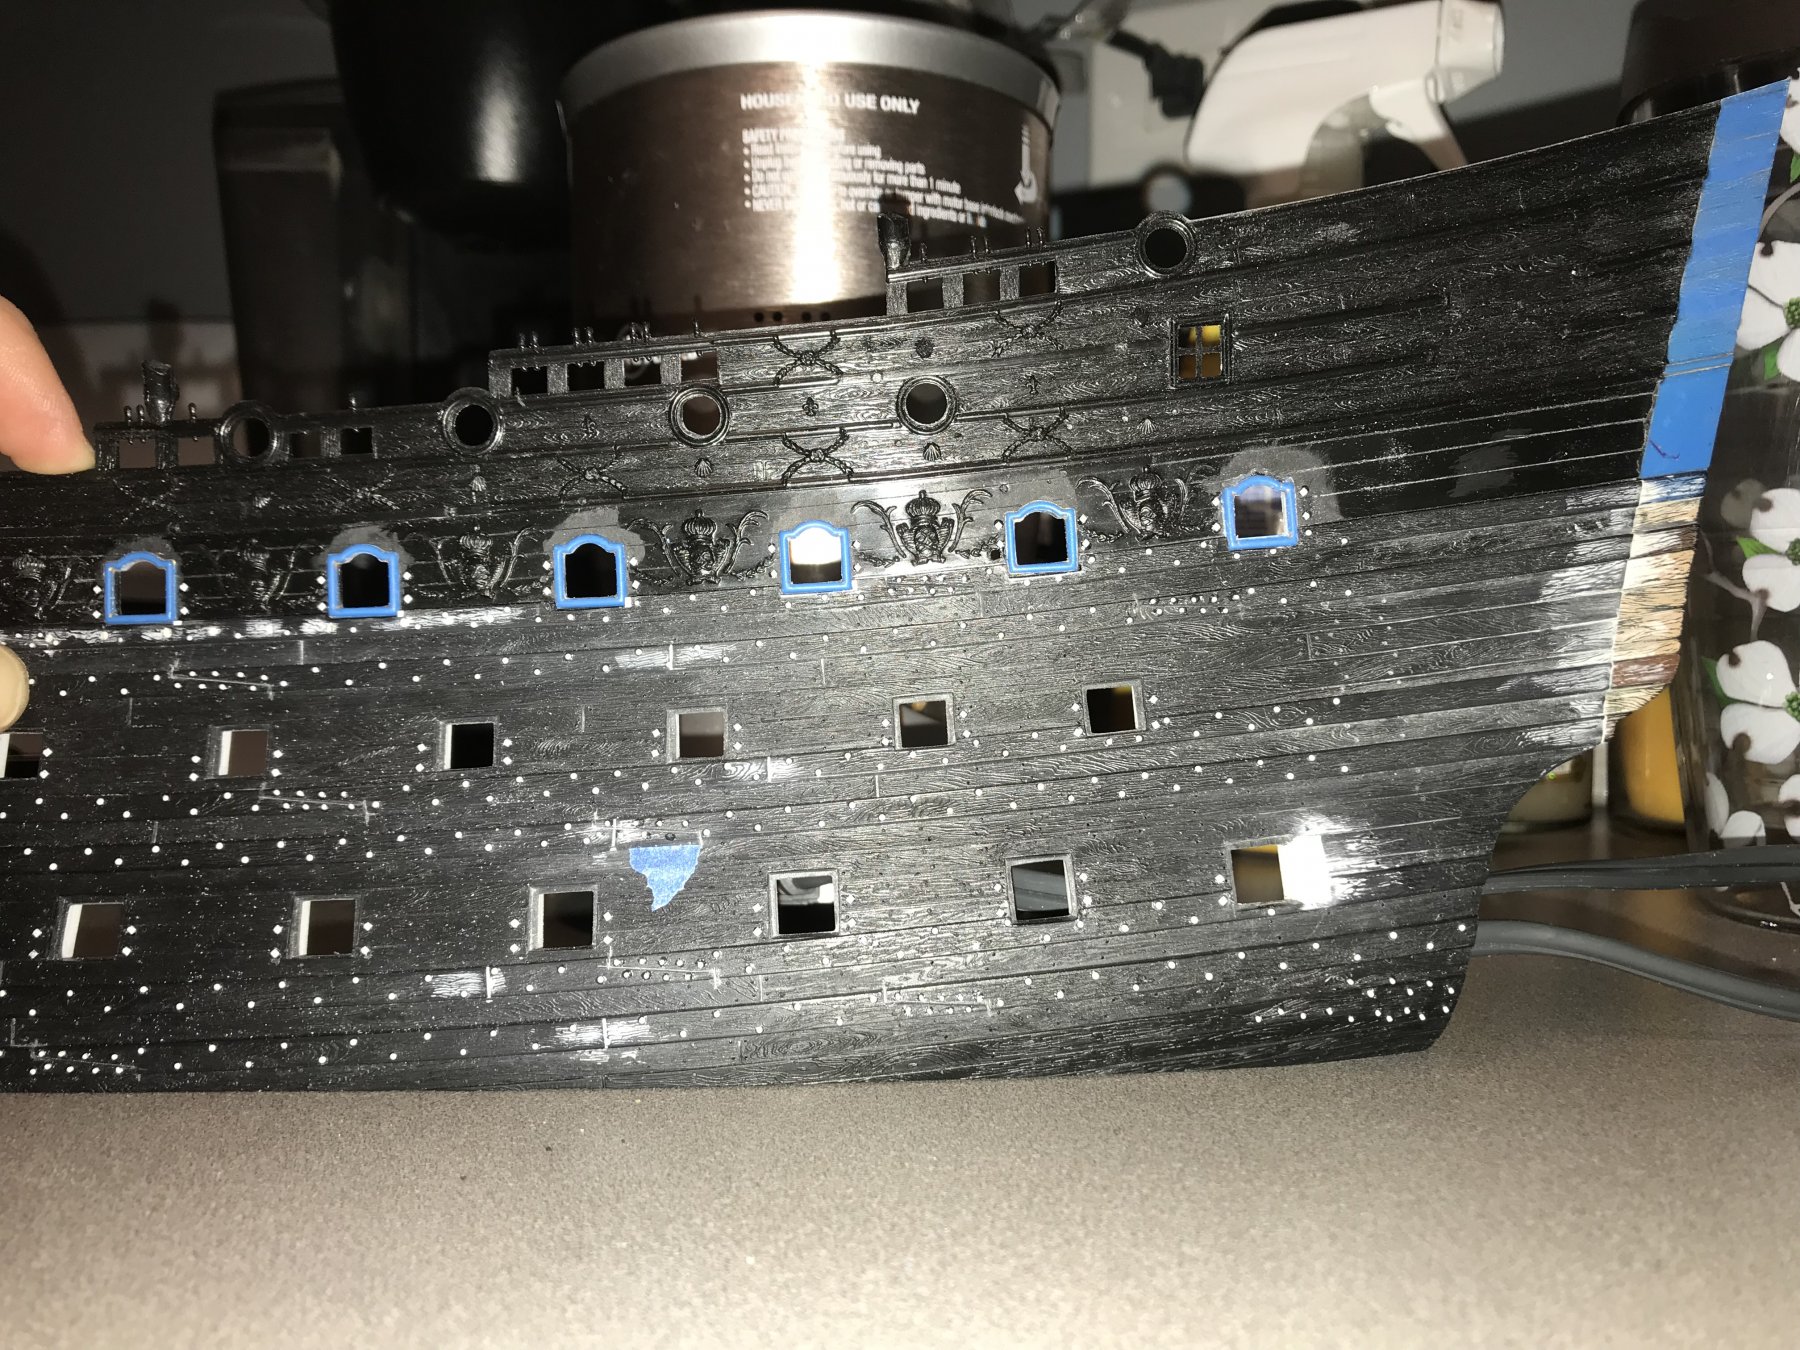
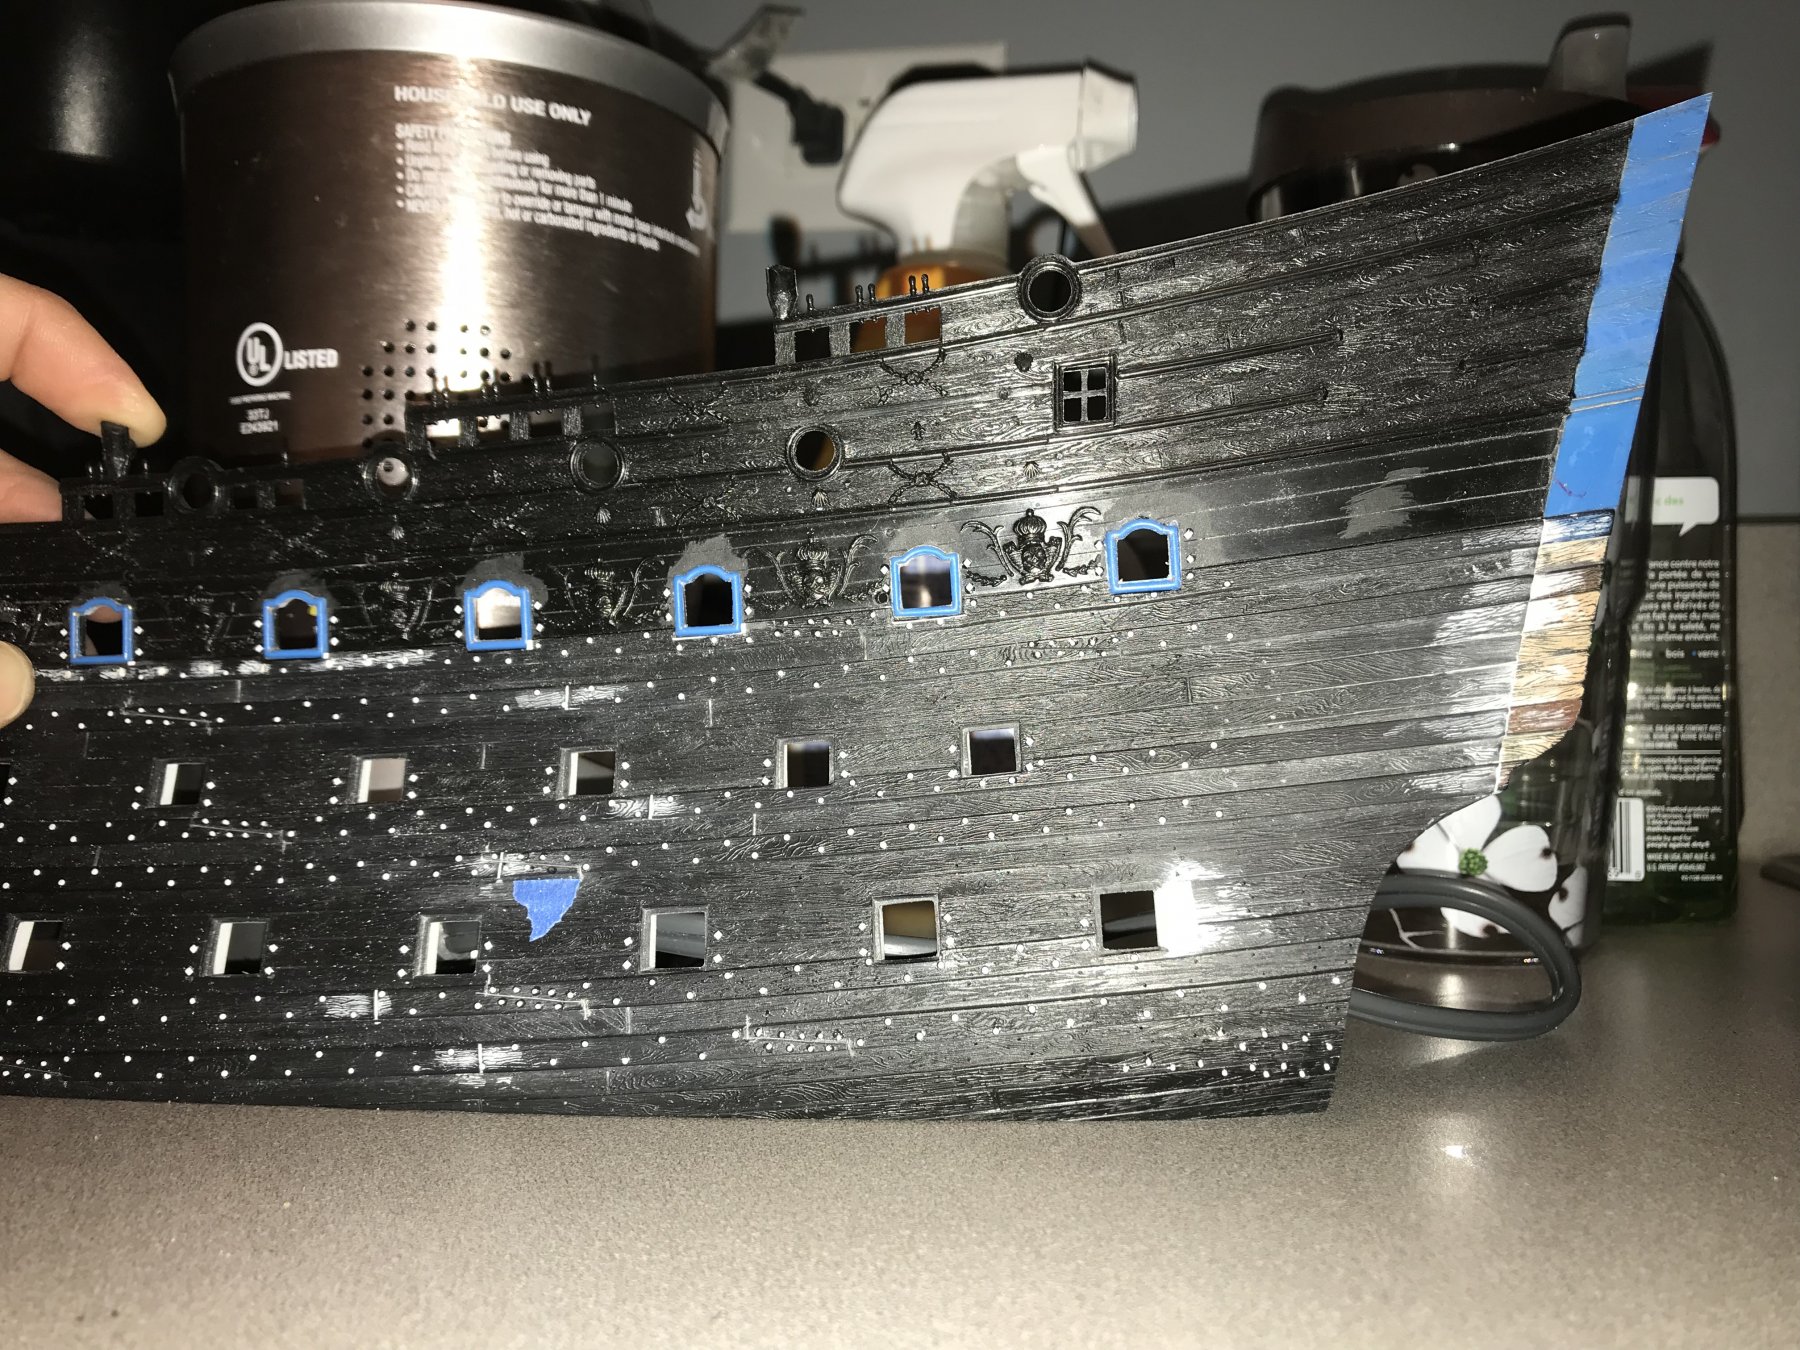
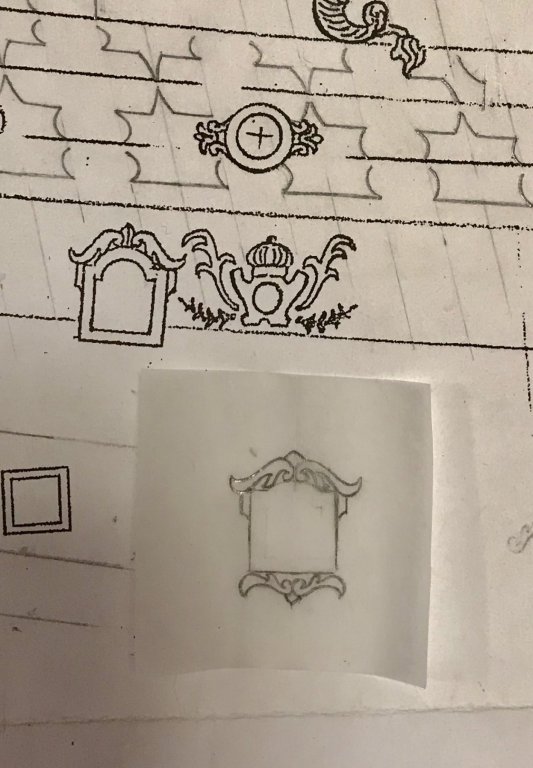
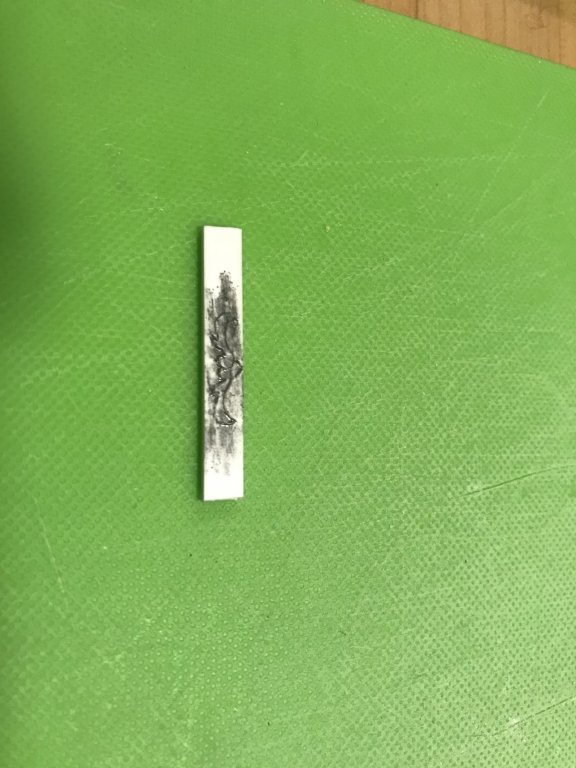
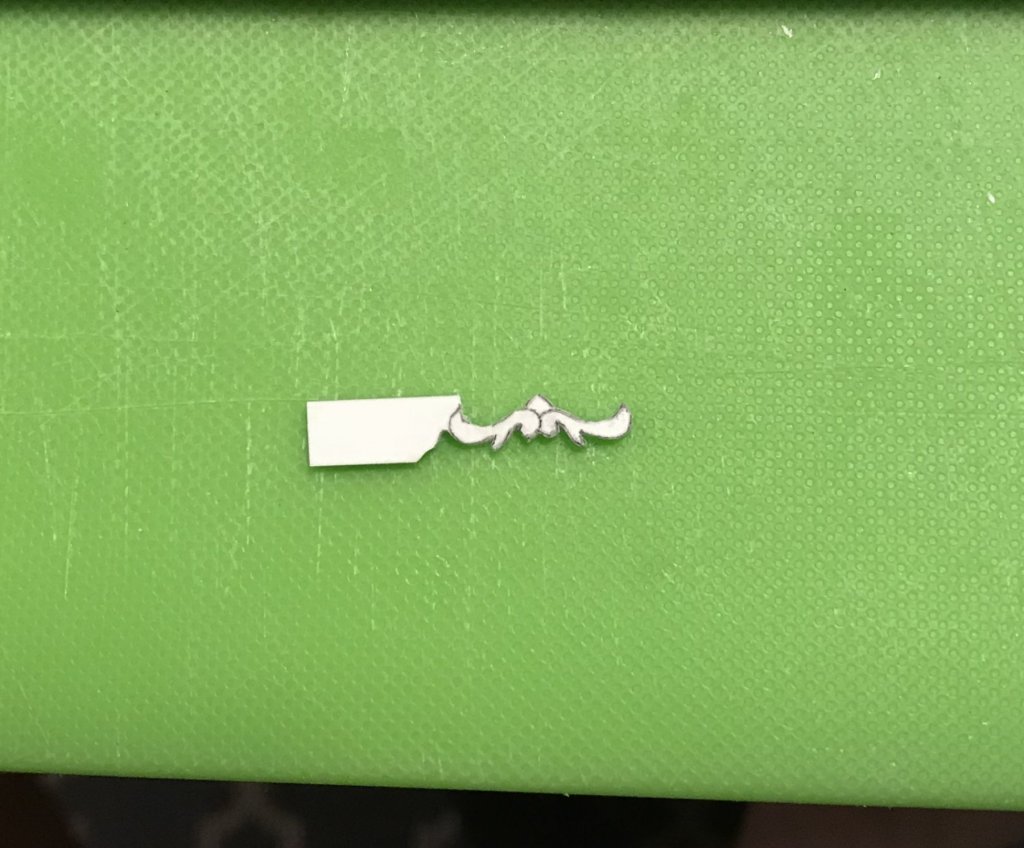
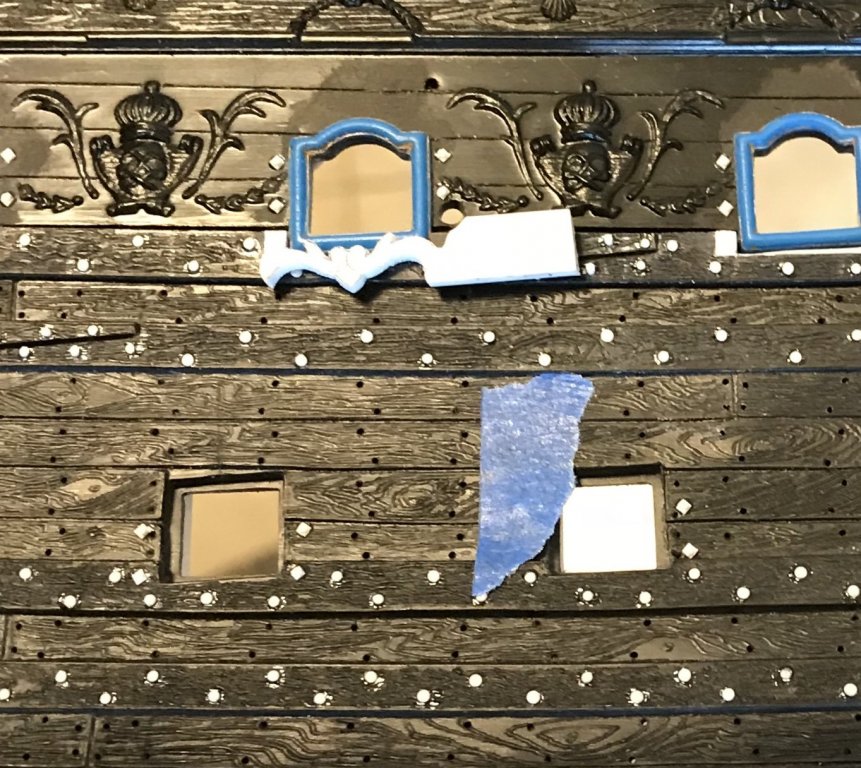
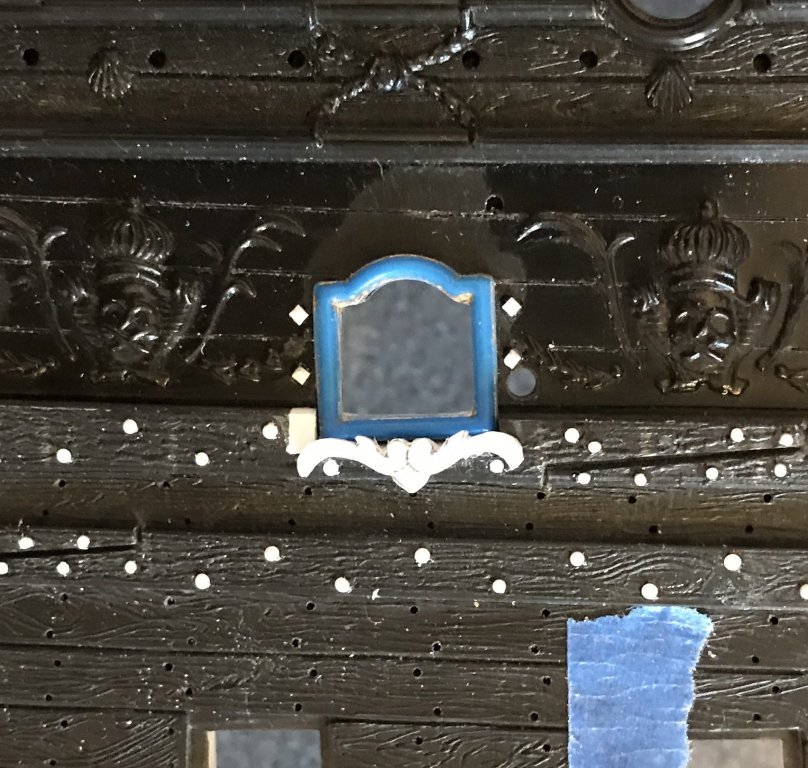
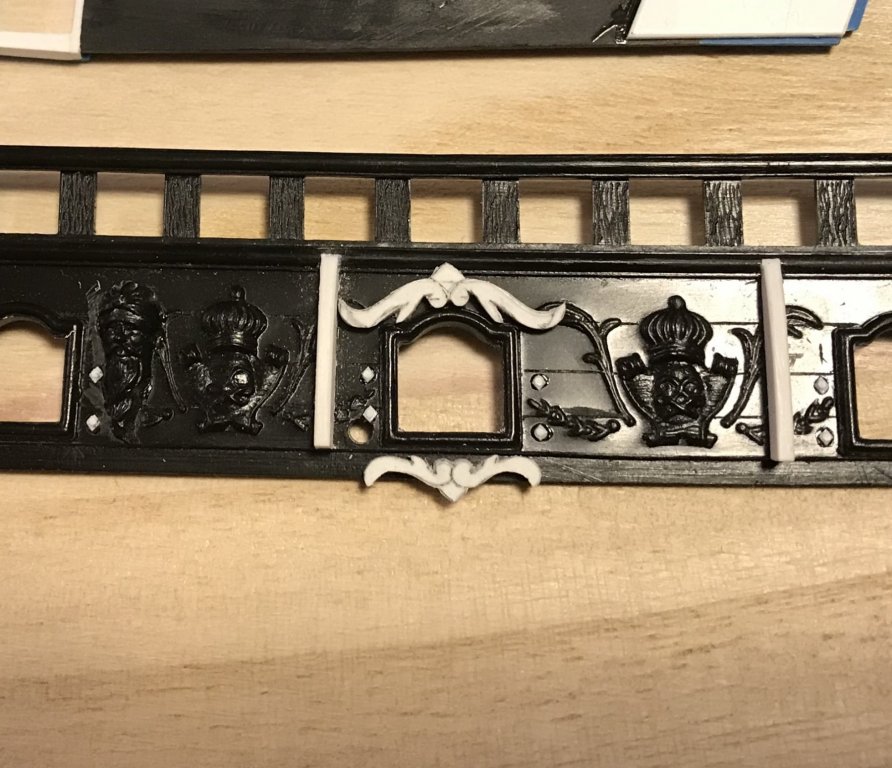
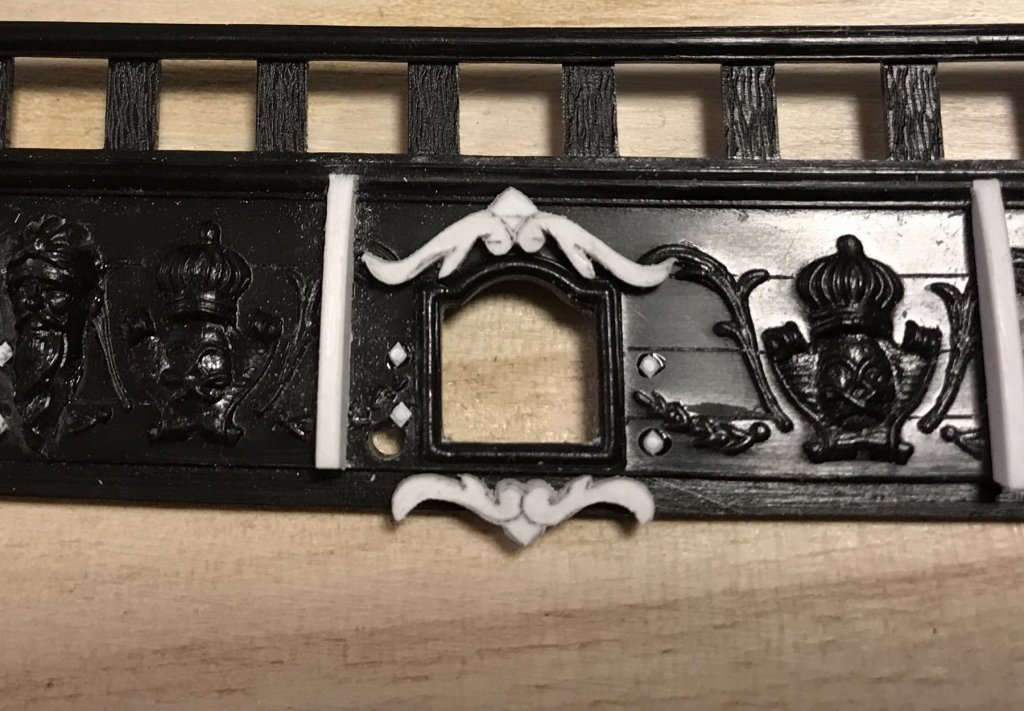
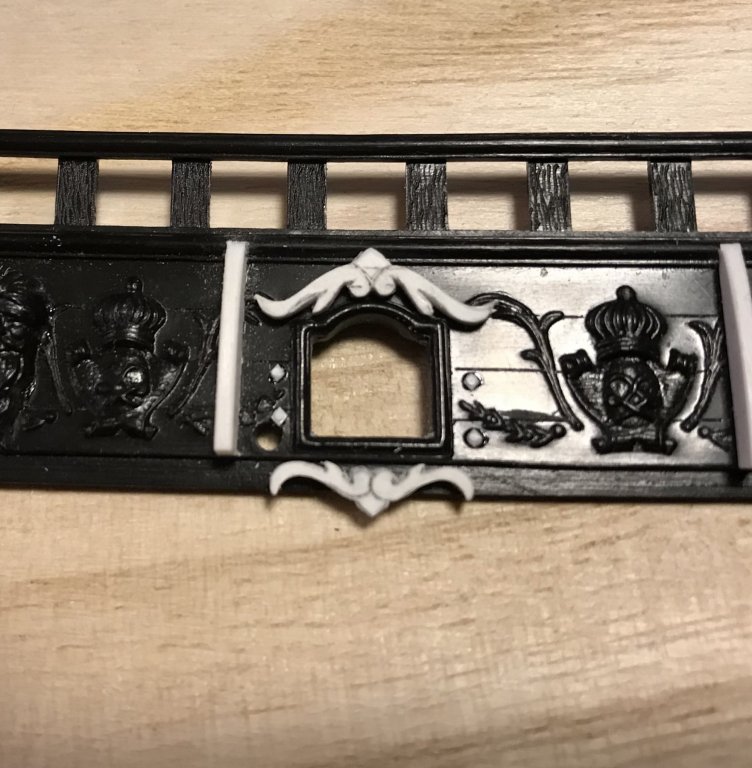
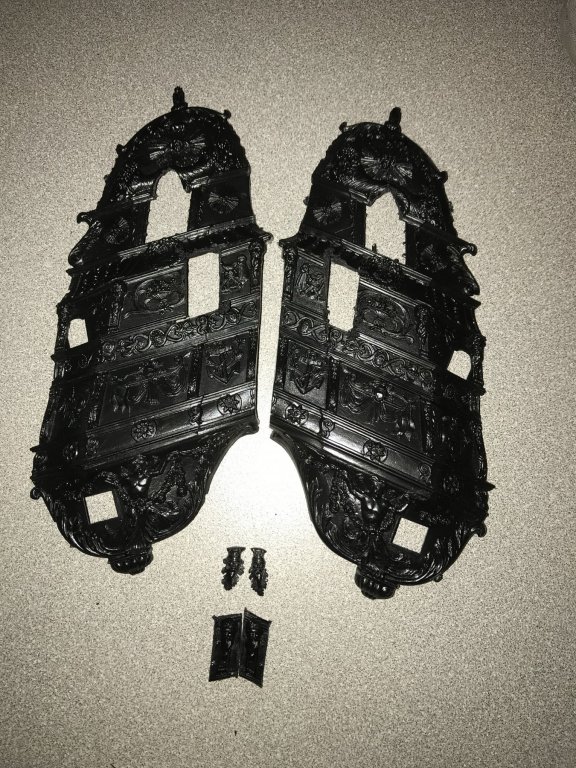
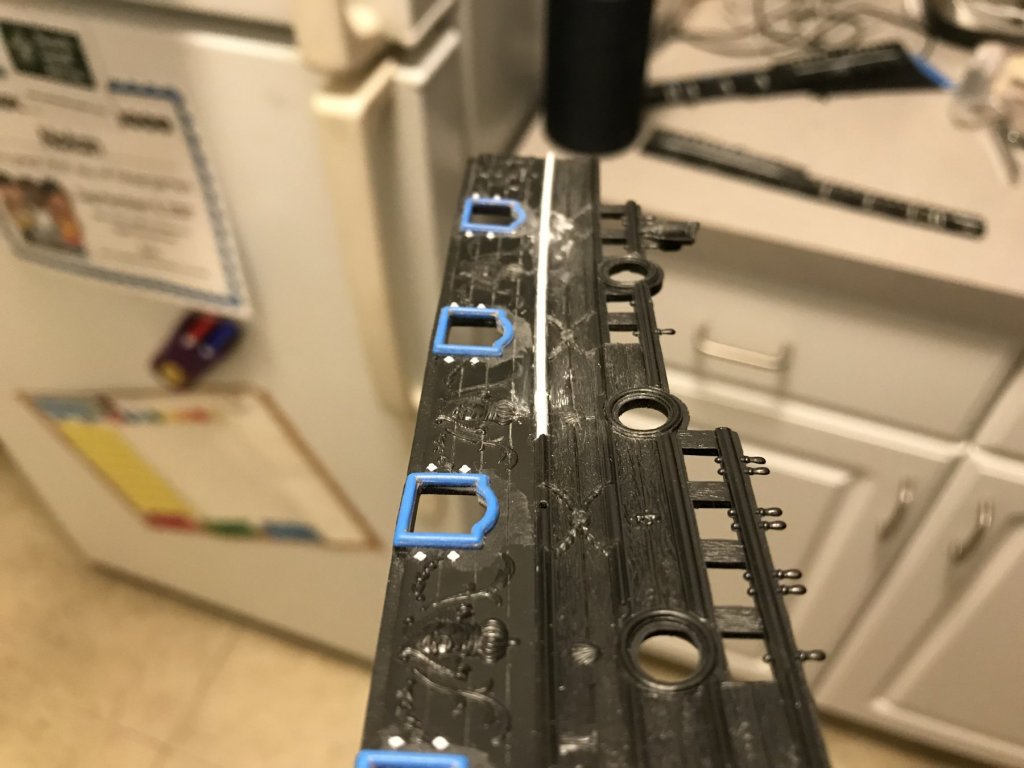
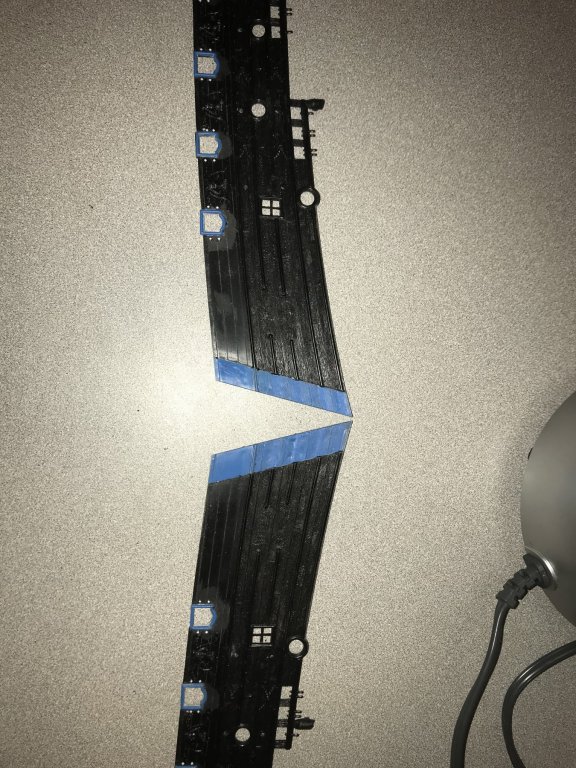
Work on the upper bulwarks continues. I’ve re-inforced the stern extension pieces: I have trimmed the chesstree pieces and mounted, but not drilled them: Following all of that, it was time to turn my attention to one of the more fun aspects of this build, which is to create upper and lower port enhancement carvings for the main deck guns. This is a bit of a squirrely task, as the top sheer of the ports is not perfectly consistent in relation to the attenuated fronds of the acanthus escutcheon carvings. Ultimately, my objective here is for the downward pointing tips of the acanthus fronds to be cupped by the upward sweep of the top port enhancement scrolls. My idea is to make one upper and lower master, carved from white styrene, that I will then experiment with making simple castings - first in earthen clay medium with a release agent, if necessary - or then, in a conventional latex mold. The first option, if it produces clean, mouldable impressions in the clay, allows me to cast the whole lot in one go. The second method necessitates making incrementally larger latex moulds to cast more and more pieces. This experiment in methods is well worth it, when I consider the sheer number of fleur-de-lis (in several different sizes) that I will need for the frieze and gunport lids, not to mention shells and small leafy scrolls of the ornamental frieze. My digital drawing is still a cumbersome puzzle that I obviously made some mistakes in my initial set-up of the workspace because the default tracing is about 1/5 the size of what it needs to be. I’ve fiddled around with that a bit, but I still haven’t quite figured out how to make the drawing printable. So, for the time being, it was back to pencil and vellum. it turned out to be very handy that I still had a spare port frame that I could then trace and draw in the ornamentals around it. My initial drawing of the domed port, it turns out, is significantly more exaggerated than reality: Once I had a shape I was reasonably happy with, I glued the vellum (with craft glue sticks) to styrene blanks, and then scribed through the lines with an Exacto #11. Following that, I cleared the waste paper and scribbled across the scribe lines with soft pencil and then erased away the surface graphite: What you are looking at is the lower port enhancement. Next, I used the Dremel to waste away, reasonably close to my lines, while leaving myself a handle with which to manipulate the piece: Then I used a series of needle files and fine blades to fair to the lines and get into all the tricky corners: This looked like a good shape until I held it in several locations along the upper main wale, when I realized that the aft sheer of the wale is such that the ports dip into the wale, leaving not enough space for this ornament to reasonably sit: And, so, I decided to shorten the two spurs and flatten the outward extending scrolls a bit: This seemed like a reasonable accommodation that still resulted in a nicely shaped ornament. Next, I repeated the process for the upper port enhancement: Here is what I thought, at first, to be two very complementary port enhancements around the spare frame: But, then, I began to try the upper enhancement in different locations along the upper bulwarks. And there were problems: The positioning, here, is mid-ships where the available space for the top port enhancement is most narrow. I expect, in a few places here, to let the pointed center of the ornament into the sheer strake moulding directly above it. This isn’t ideal, but a compromise I can live with as there are only 3 or 4 instances per side. It is apparent to me in this picture, though, that the top port scrolls extend outward too far, and negatively cross over too many and too much of the acanthus frond tips. So, I shortened the scrolls and thinned them: Having done this, the upper enhancement now nestled neatly along most locations of the upper bulwarks. In only a few instances will it be necessary for me to tweak either the acanthus fronds or the port scrolls. This is good, and workable. I then realized that the scrolls of the lower enhancement seemed too heavy, in relation to those of the top, so I reduced their thickness: Reasonably satisfied with all of this, I tried the combo in a number of different locations: I can see now that the proportions of these ornaments will work as originally intended. Next, I will sculpt their surfaces a bit before mounting them on sticks to make casting impressions in the clay. When it comes time to finally mount these ornaments, there will be several instances where other added details interfere, such as the skids and the newly added chesstrees. Although it is not ideal, I will prioritize these instances into a game of ornamental rock/scissors/paper, where the dominant ornament wins and remains fully intact. For example, chesstree is paper; upper port enhancement, which abuts chesstree, is rock; paper covers rock, so the port enhancement will be coped to the chesstree. This is, once again, the difficulty of reverse-engineering a kit to fit a very different vision of the ship, but on the whole, I think the addition of these details enhances the impression of the model far more than these small compromises detract or distract. There are ears that drop down from the upper port enhancement, and surround the upper sides of the port, but I will add these separately from strip styrene. Placing them so that they don’t interfere with the gun carriage tackle bolts is not a one-size-fits-all proposition, so they will have to be dealt with individually. In my next update, I will have carved port enhancements and the results of my first casting experiments. Thank you all, once again, for looking in, your likes, and your thoughts!


- 2,699 replies
-
- 9
-
-
- heller
- soleil royal
- (and 9 more)
-
Beautifully done, Michel! What is your plan for the seats of ease at the head? It has always seemed to me that the roundhouses on the Tanneron model really belong in the 18th century, and not the latter 17th C. Has your research pointed you in any definitive direction? Would the arrangement of Frolich's L'Ambiteaux be more appropriate, for example?
-
I am sure you are frustrated by that, Mark. In the grand scheme of things, though, these small differences won’t matter.
-
My operating theory is that gold would have been used sparingly, but for important details like the ship’s name - yes, gold. The bulk of the rest would have been yellow ochre.
- 487 replies
-
- 3
-
-
- ship of the line
- 80 guns
- (and 1 more)
-
Sorry for muddling things, Drazen. When I memtioned a banner “below the chase guns” I am referring to a banner I am considering adding to my own model of Soleil Royal. This would be a bit of fictitious license, on my part, but it would allow me to incorporate Louis XIV’s slogan “nec pluribus impar” into the build. Anyway, that is where this conversation about a following sea and carved ornament originate. On the Provincien, there is no debate that this detail is above the chase guns. Sorry for not being more clear.
- 487 replies
-
- 3
-
-
- ship of the line
- 80 guns
- (and 1 more)
-
Hi Drazen, I don’t think that either approach would be wrong, however, specifically as it relates to the Provincien, the VDV shadow lines do seem to suggest a full relief carving. One argument against a relief, that I have encountered on my build, was that if one were to place this sort of banner relief too low on the transom (below the four chase guns, in my example), then the carving might be vulnerable to being sweapt away by a strong following sea. The validity of that line of reasoning is debatable, however, the position of the Provincien’s banner is up high enough where following seas would not be any more an issue than for any of the other stern carvings. I think a relief carving is the correct approach here.
- 487 replies
-
- 2
-
-
- ship of the line
- 80 guns
- (and 1 more)
-
I second what Russ just said. Your joinery is impeccable, Mark!
-
Feel better, EJ! The balconies are coming along nicely. Your attention to detail is really paying off.
-
I think it must! This reminds me of a very special car that is often parked just outside an auto-repair shop in my neighborhood. It’s a Dodge Challenger, of recent vintage, with custom wide racing stripes running across the hood, roof and trunk. The tinted back window has the following emblazoned in big white letters: STAY HUMBLE. Sage advice, for sure. Sometimes, in life, I find it useful to remember the humble hemi, as I make my way through the day.
-
I knew I could count on you, Henry, for sound rigging advice! I like your suggestion for the spritsail sheet. Definitely workable.
- 2,699 replies
-
- 3
-
-
- heller
- soleil royal
- (and 9 more)
-
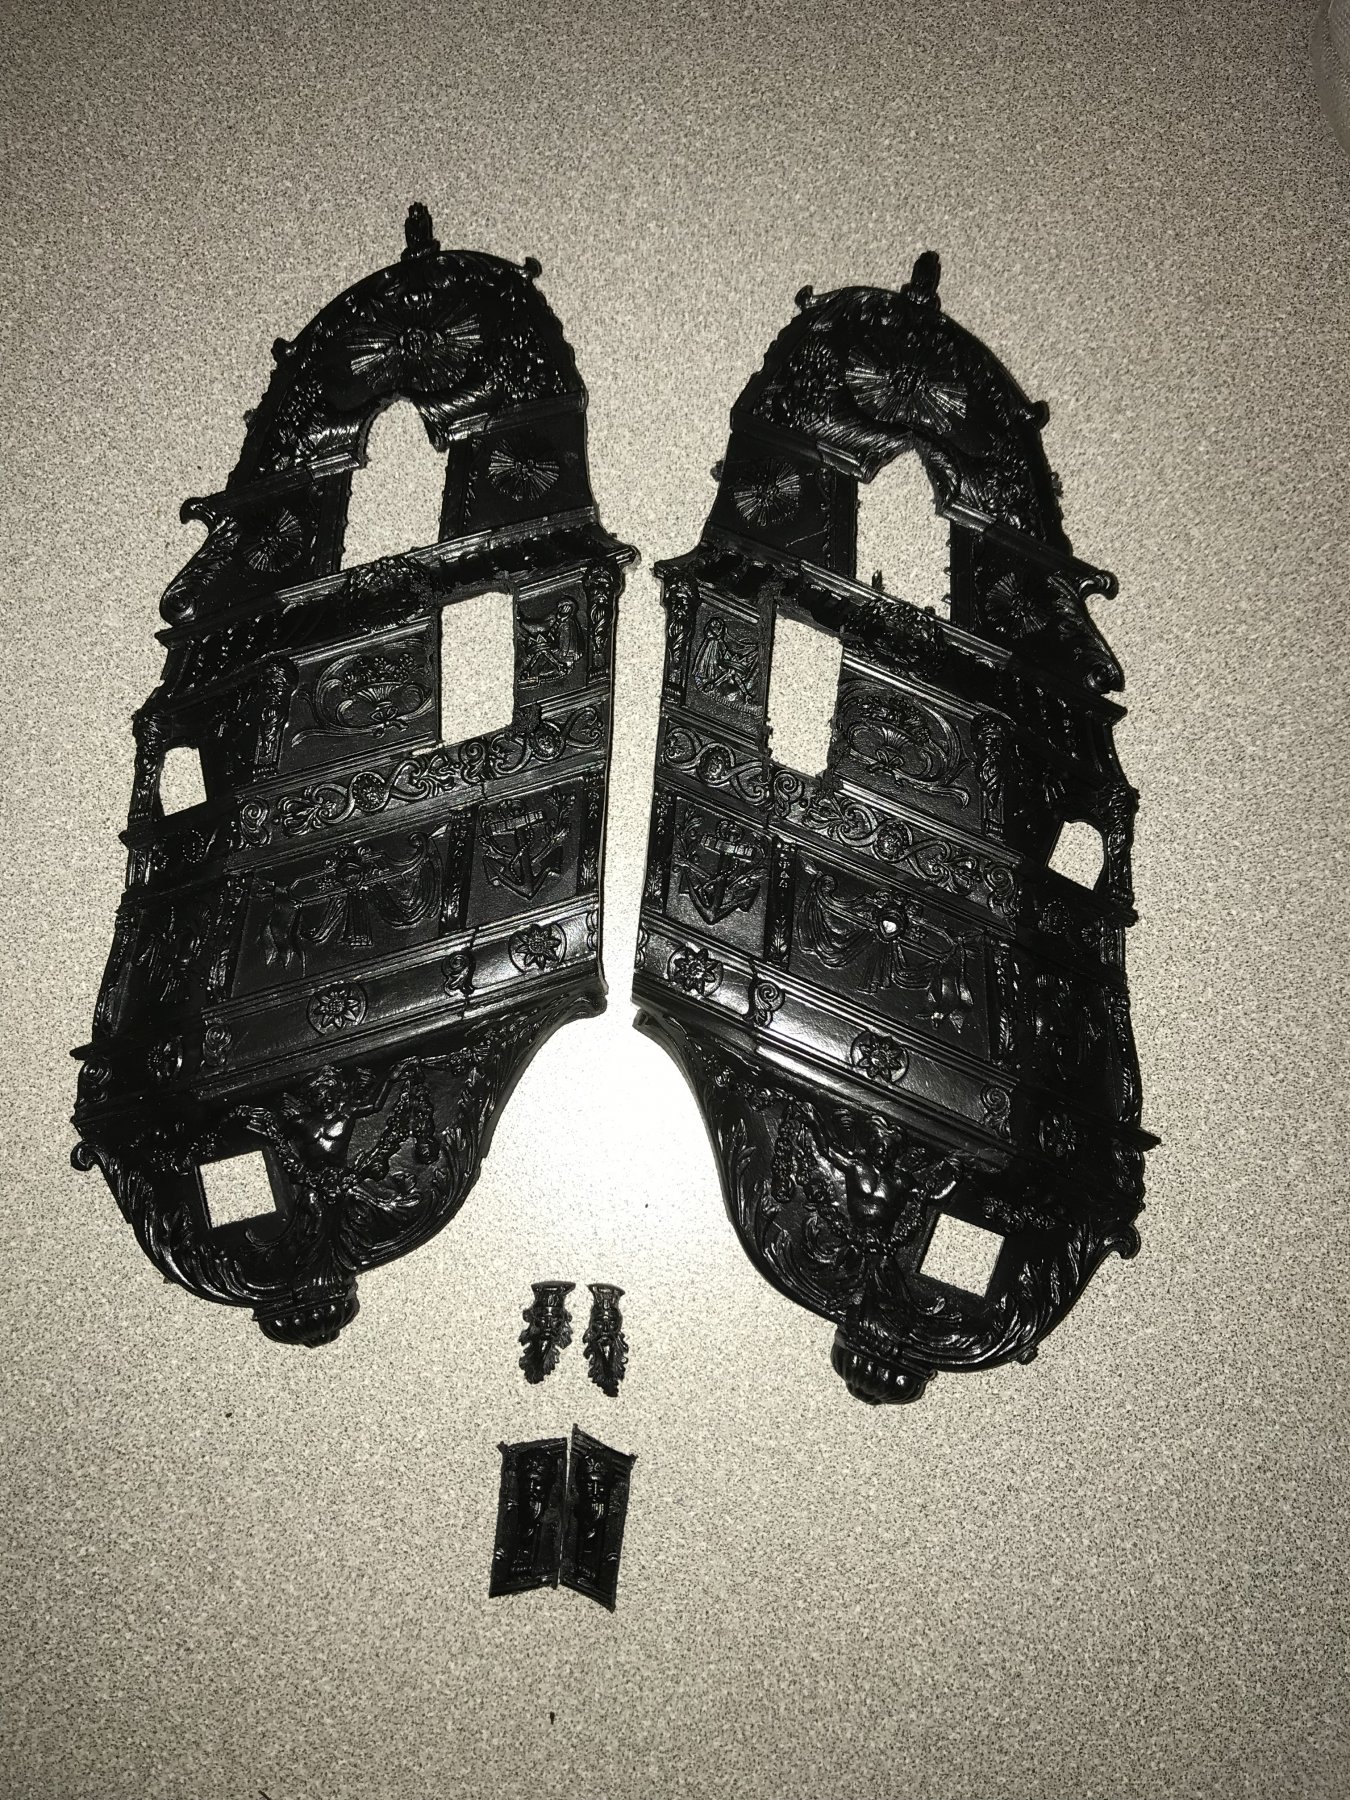
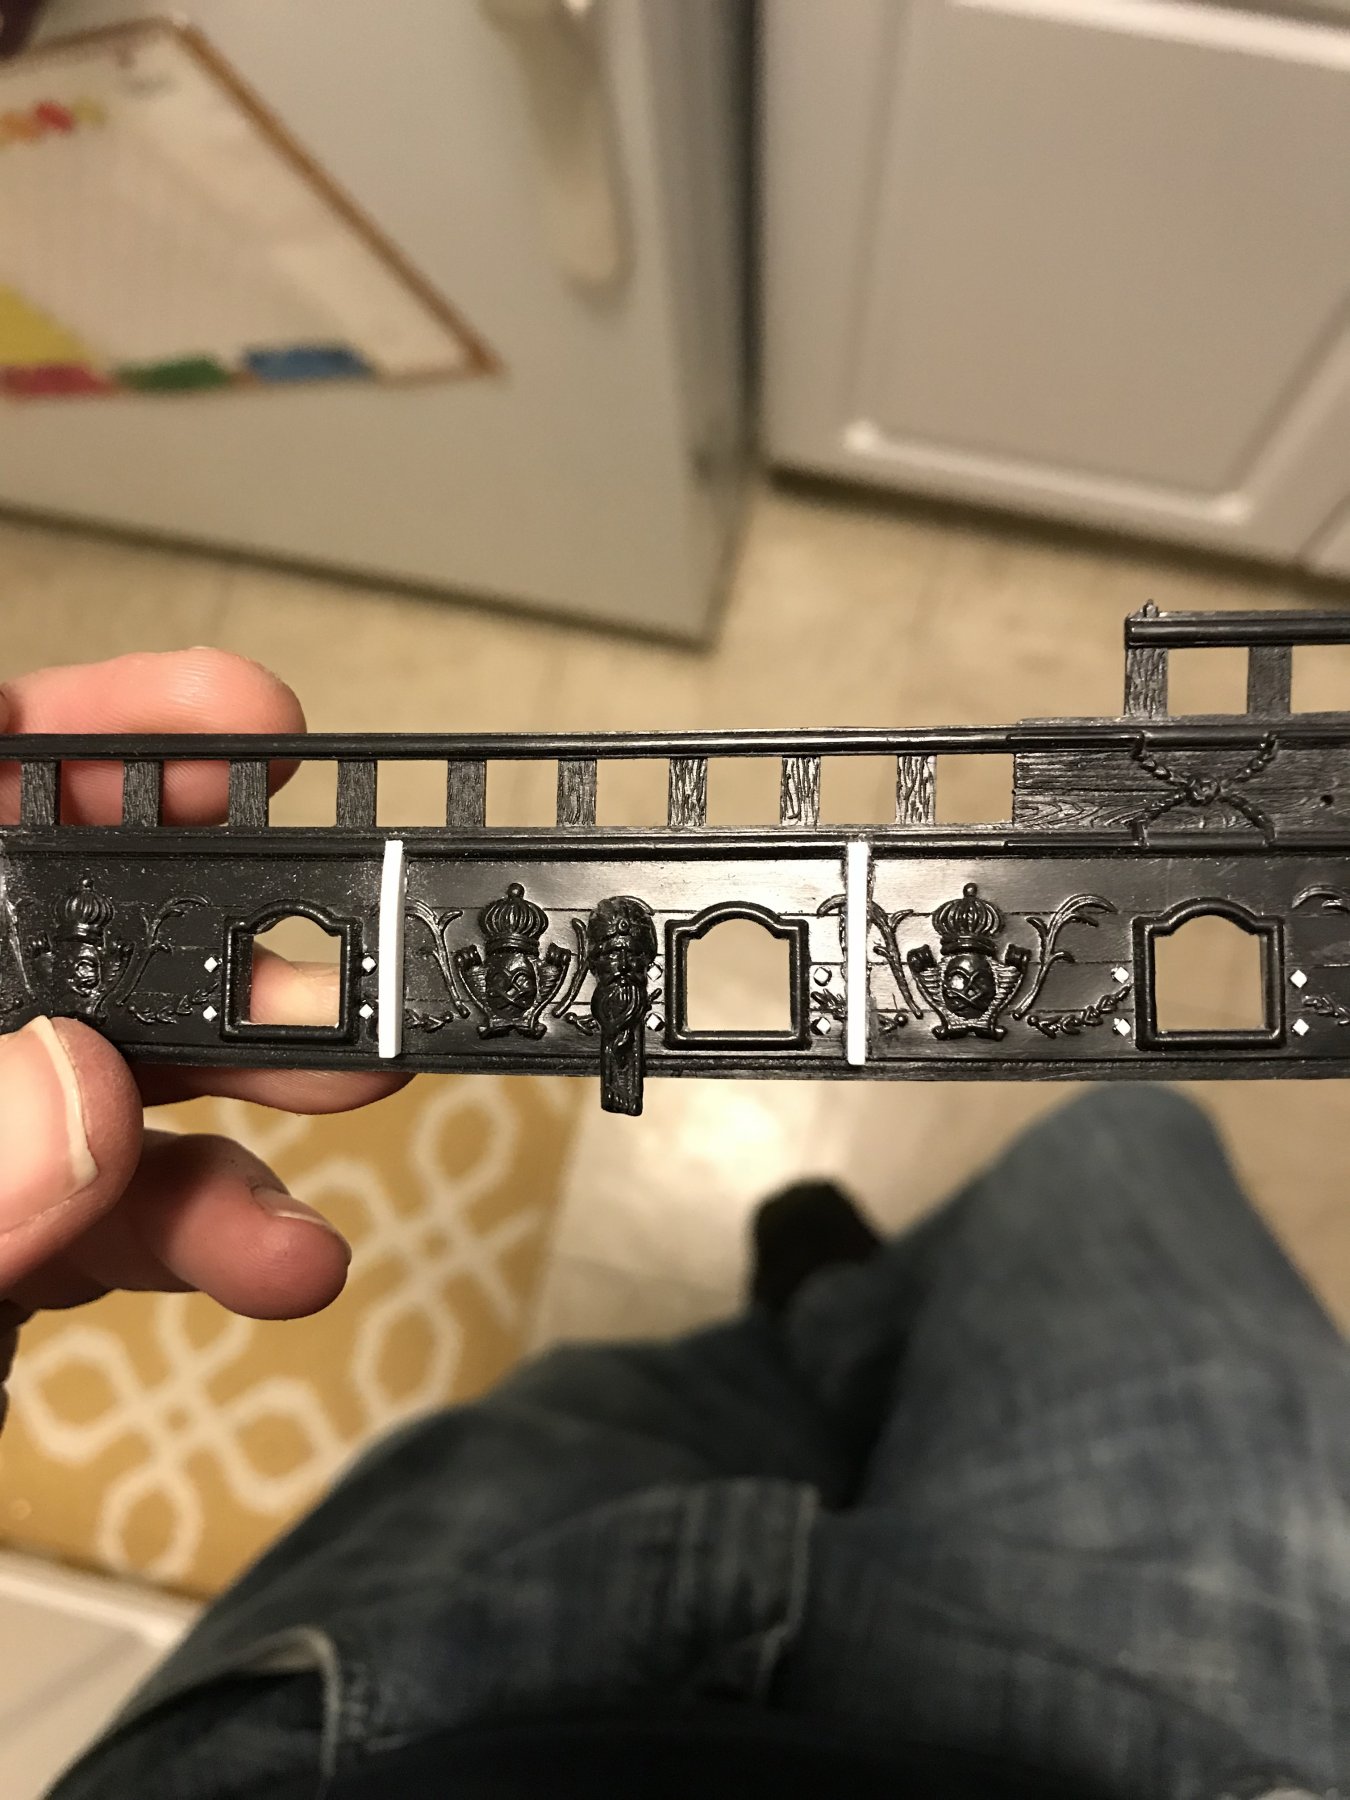
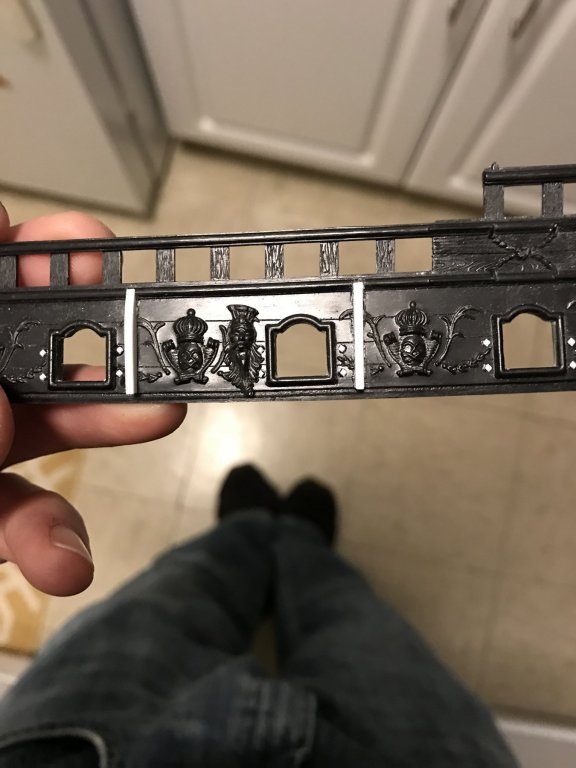
So, just continuing to work through the small details of my modification, here. Adding the stern extension pieces, as well as eventually moving the main and fore channels down to the main deck level, have necessitated a little bit of filling-in where the moulded sheer strakes are missing. To accomplish this, at the stern upper moulding, I first layered a piece of flat strip stock (.010 x .060”) onto which I centered a piece of half-round (.040”) styrene moulding. The depth and profile of these profiled styrene strips perfectly matches the kit’s moulded detail. The old mounting places for the fore and main channels had to first be reduced in thickness so that the flat, to either side of the domed center of the sheer strake, matched. Then, I cut simple scarfs into the fore and aft edges of the kit moulding to accept the new half-round. The next idea I have been playing with is to salvage chesstrees from the fantastic ornament of the kit’s stock quarter galleries, which I will not be using. To my mind, there are two plausible possibilities. I first extracted the “greenman” face from the quarter-deck window. After cleaning away the waste, though, the figure looks too busy next to the acanthus escutcheon carving, which will have to be partially scraped away to accomodate the new chesstree. My next thought was to take one of the caryatid pillars from the main deck level. Although, I will likely remove the lower pillar section, surrounding the beard, this makes more sense to me. For all practical purposes, the actual hole will probably be drilled just below the mouth, into the beard, because the overall alignment allows me to include the full beard this way. It would be nice, structurally, to keep the lower pillar, however, it would interfere with the step-out of the main deck top wale. Anyway, an elongated chesstree would not be consistent with what I understand to be French practice for the period - a simple face or lion. The extended pillar is more Dutch. I also think that the caryatid option may not interfere with the eventual scrolled port enhancement of the main deck ports, whereas, the greenman’s crown will definitely get in the way. Is all of this exactly right? No, but I think it’s a solid kit-bash solution to including a detail that should be there, instead of a simple hole through the upper bulwarks.


- 2,699 replies
-
- 7
-
-
- heller
- soleil royal
- (and 9 more)
-
Very nice metal work, Charlie! Your solution to the problem of the wheels is quite ingenious.
- 362 replies
-
- 4
-
-
- active
- revenue cutter
- (and 1 more)
-
Hi Daniel - thanks for reading through the build. Even without modification, this Heller kit is a fun build. I suppose it depends upon what you are after. If you want a model that represents SR1, it’s going to be a fair amount of work to make that happen. With much more modest modification to the stern and QGs, I think that one can arrive at a pretty reasonable approximation of SR2, using most of the stock parts. I think you should take a stab at building it, Daniel, instead of selling it. The crafting of the thing is the fun part, IMO.
- 2,699 replies
-
- 2
-
-
- heller
- soleil royal
- (and 9 more)
-
Nice progress, Mark! I’m looking forward to seeing what you have in mind for these guns.
-
Fortunately, EJ, I do have the benefit of making those direct comparisons with my first SR sitting right on the dresser. Just the simple attempt to represent as much of the iron fastenings as I can, changes the impression of the model tremendously. Ultimately, though, it will be the lower waterline and broader beam that give the model a much better sense of stability as a gun platform. Thank you, everyone, for stopping in and for your likes and comments 👍🏻👍🏻
- 2,699 replies
-
- 3
-
-
- heller
- soleil royal
- (and 9 more)
-
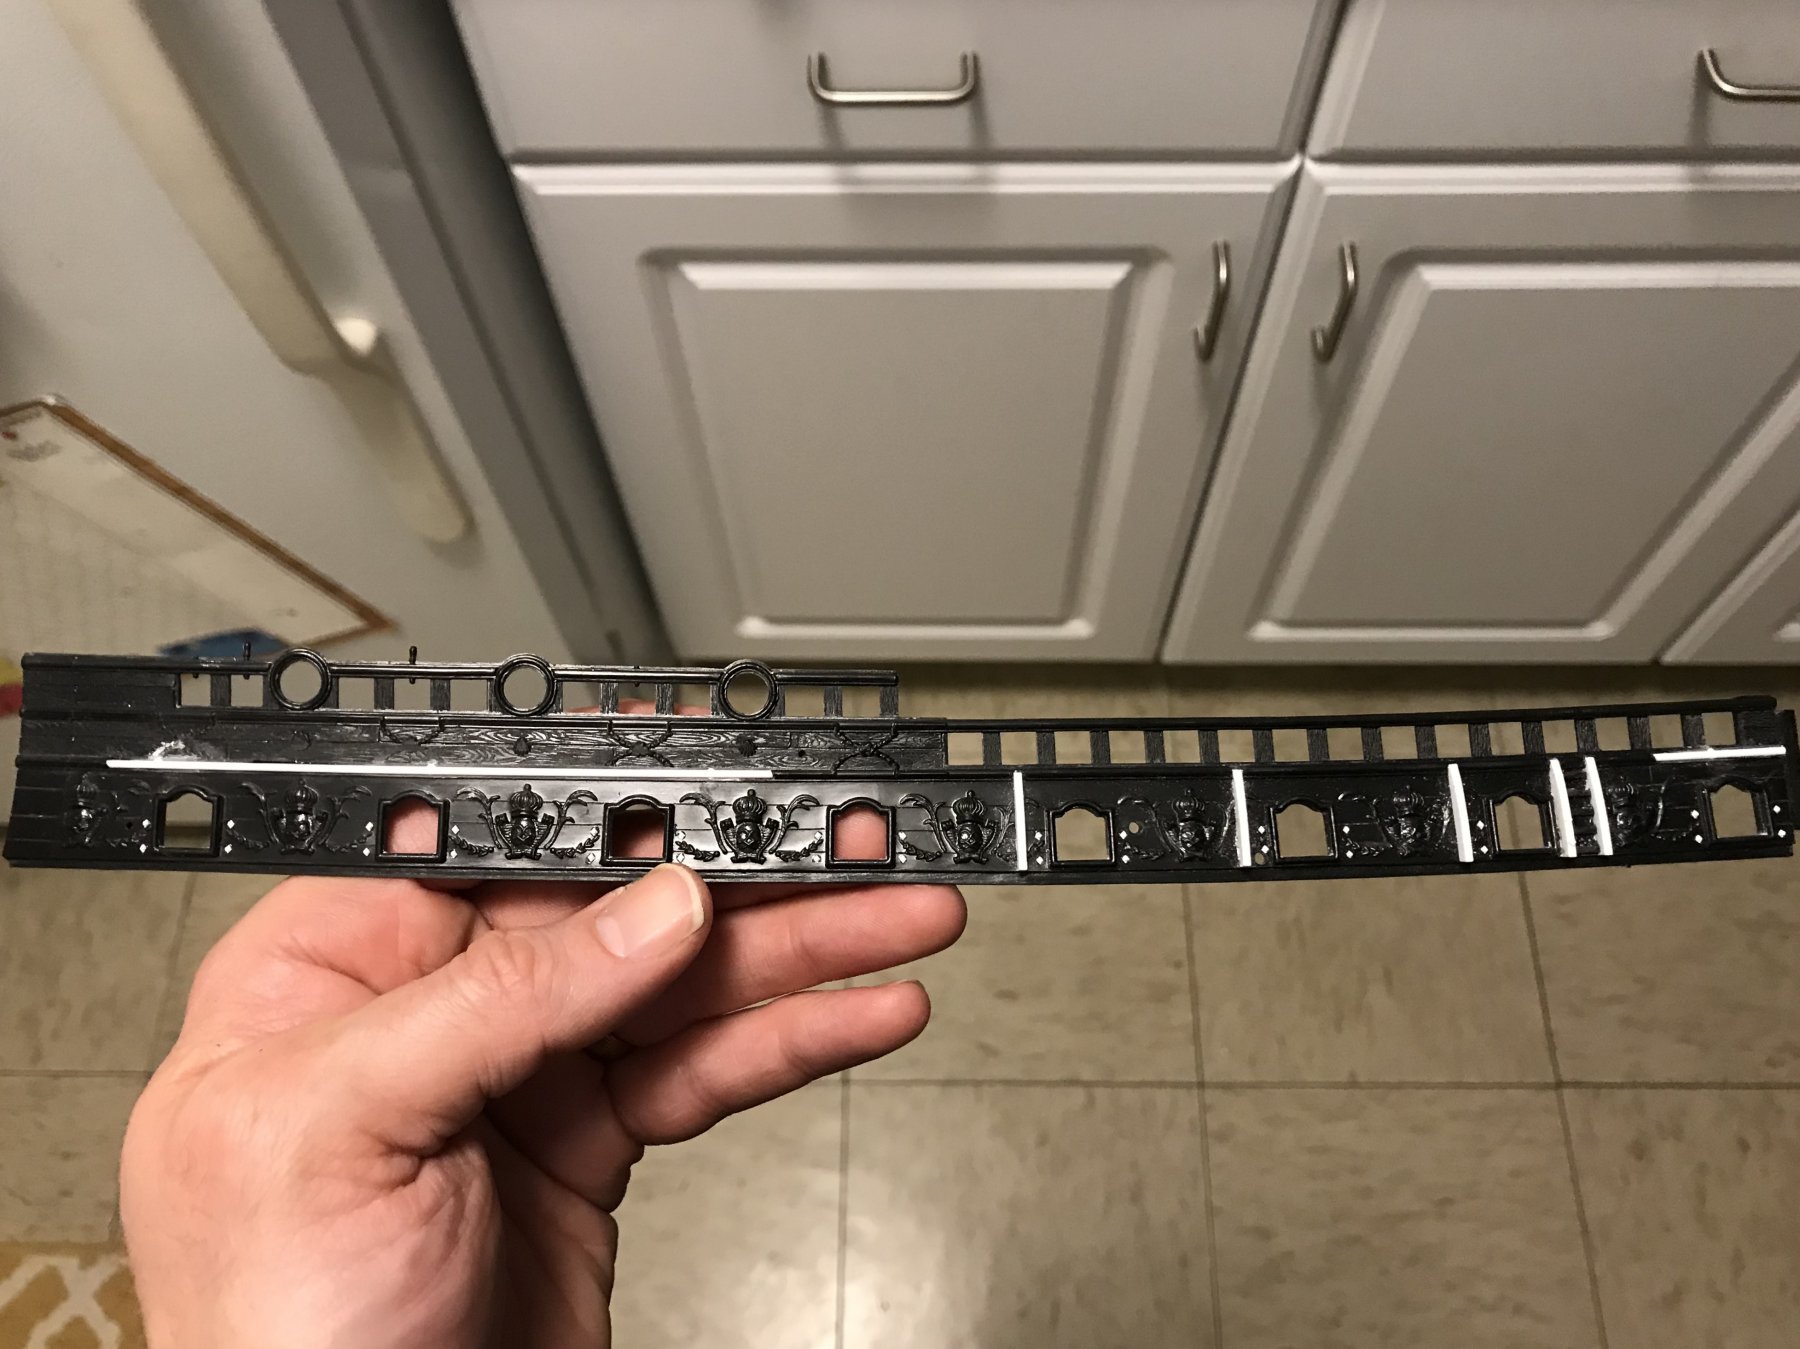
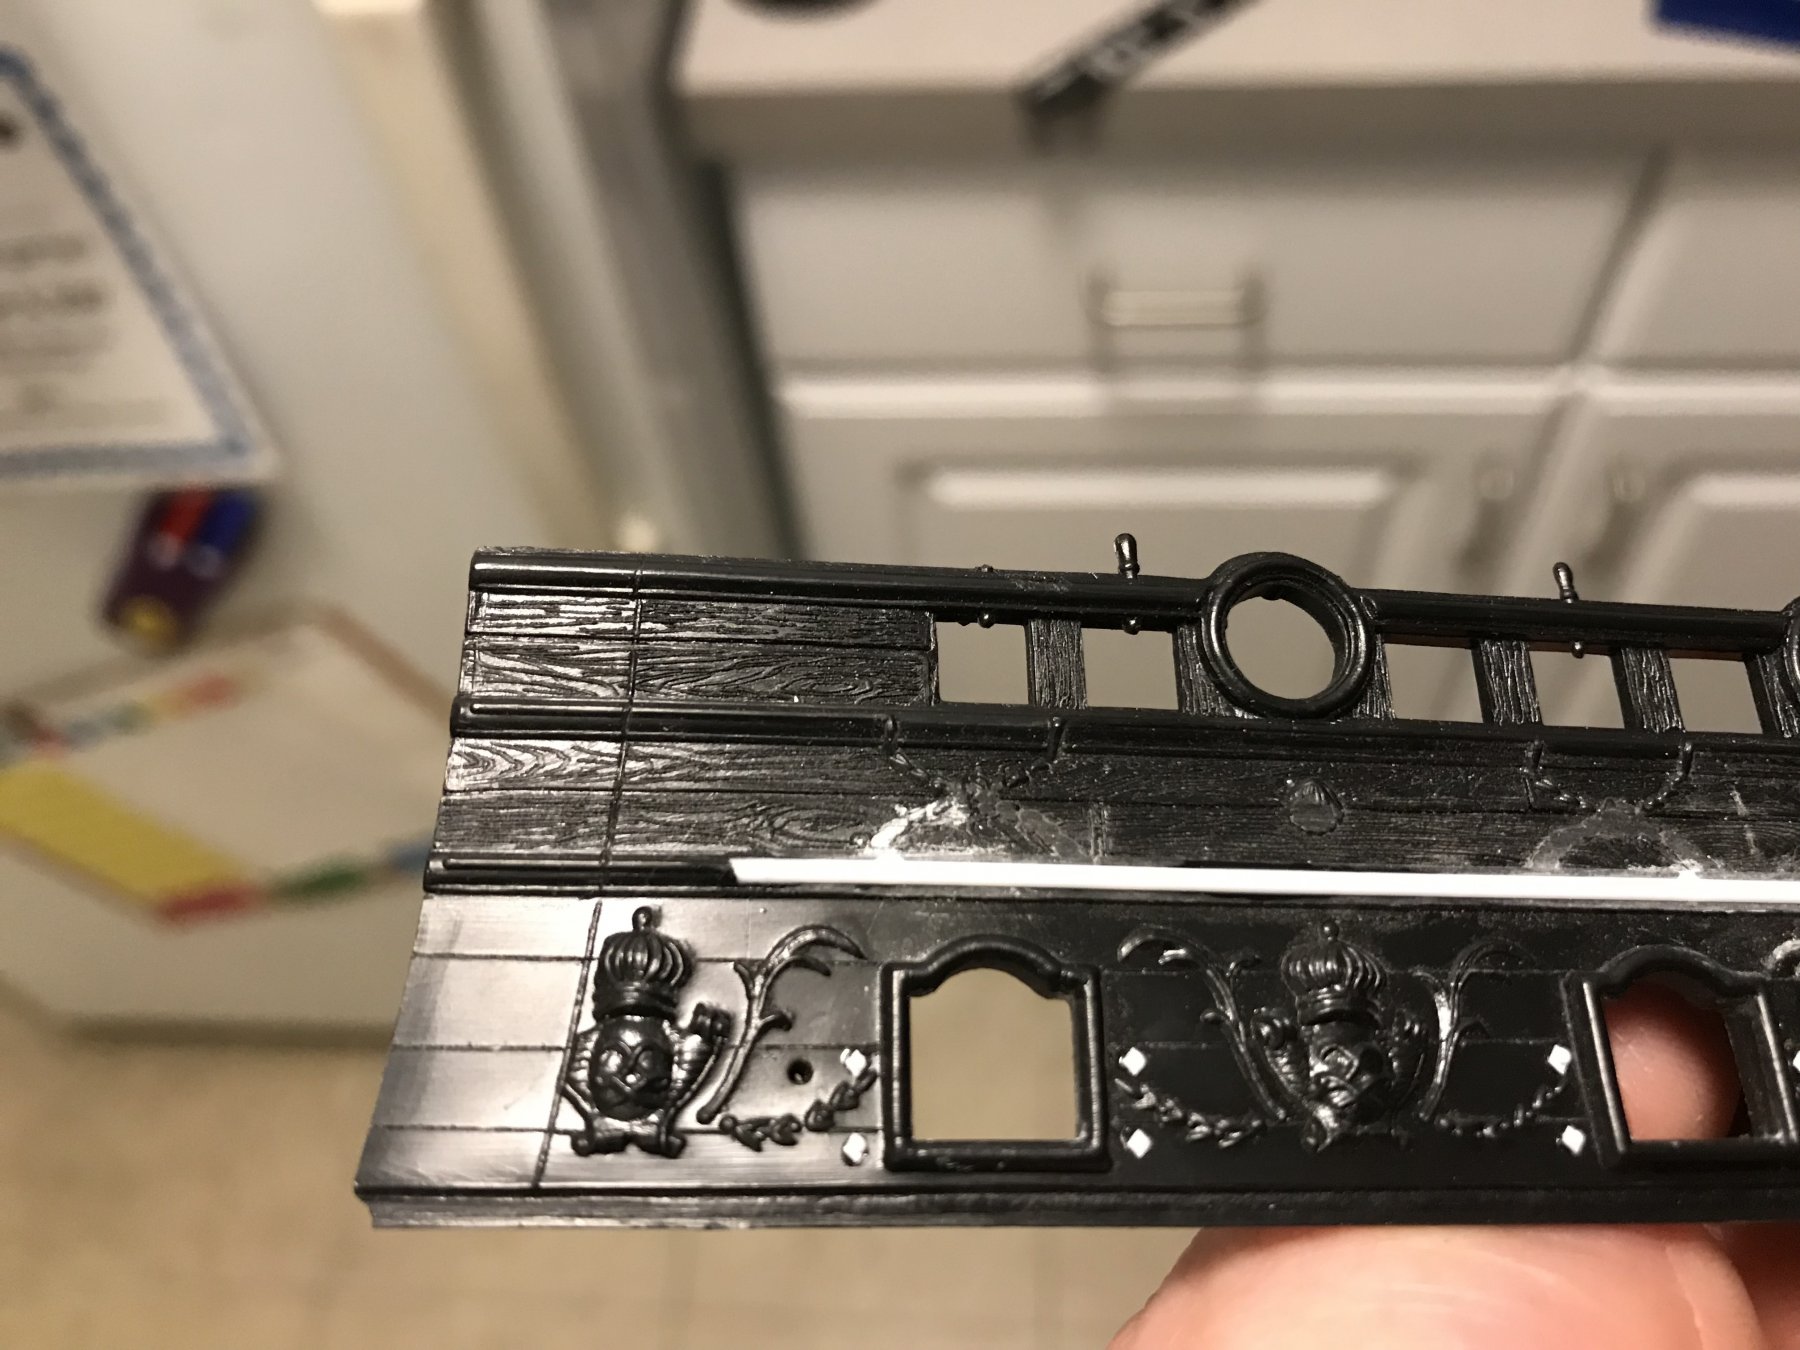
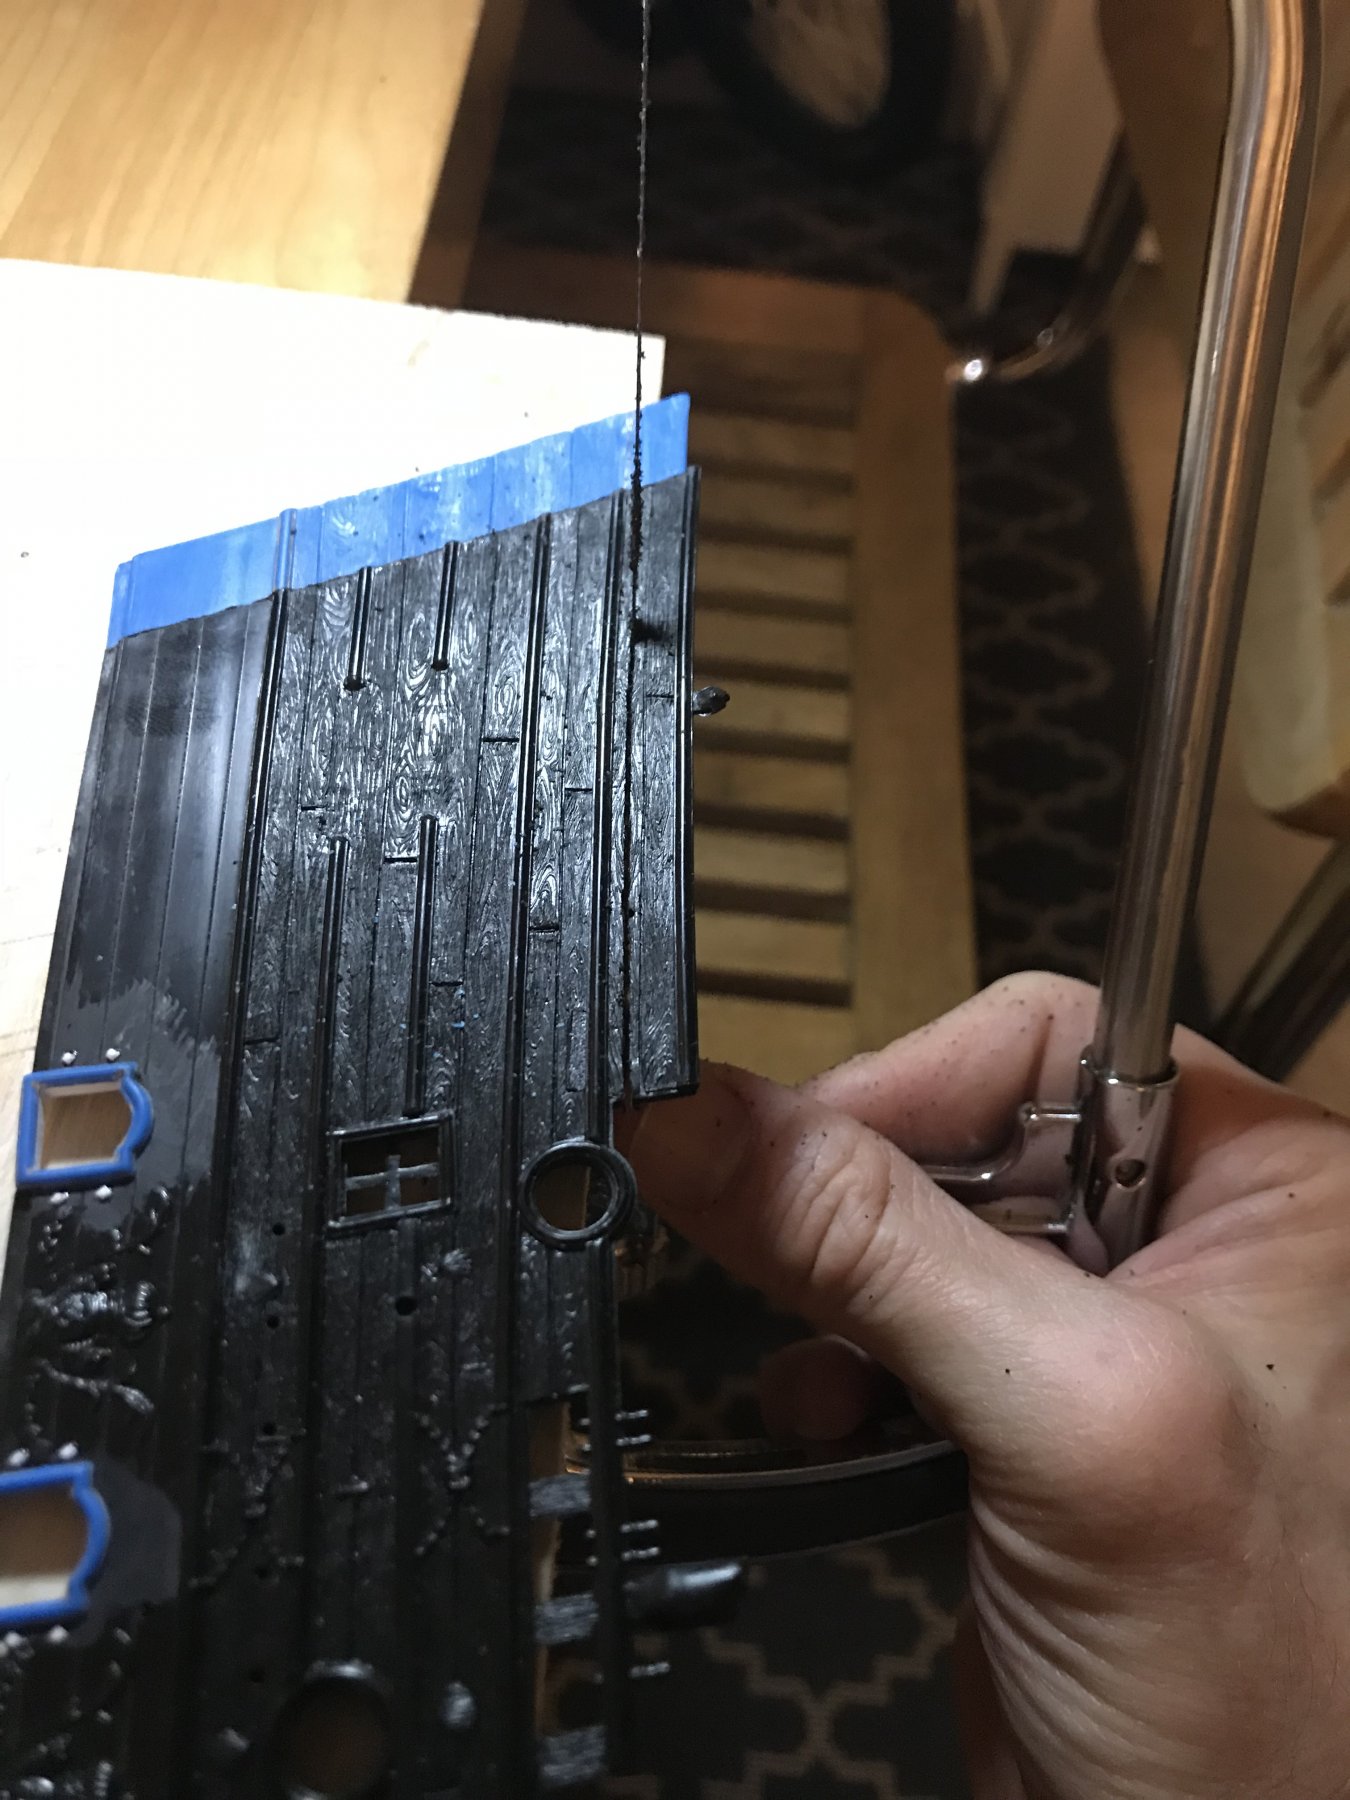
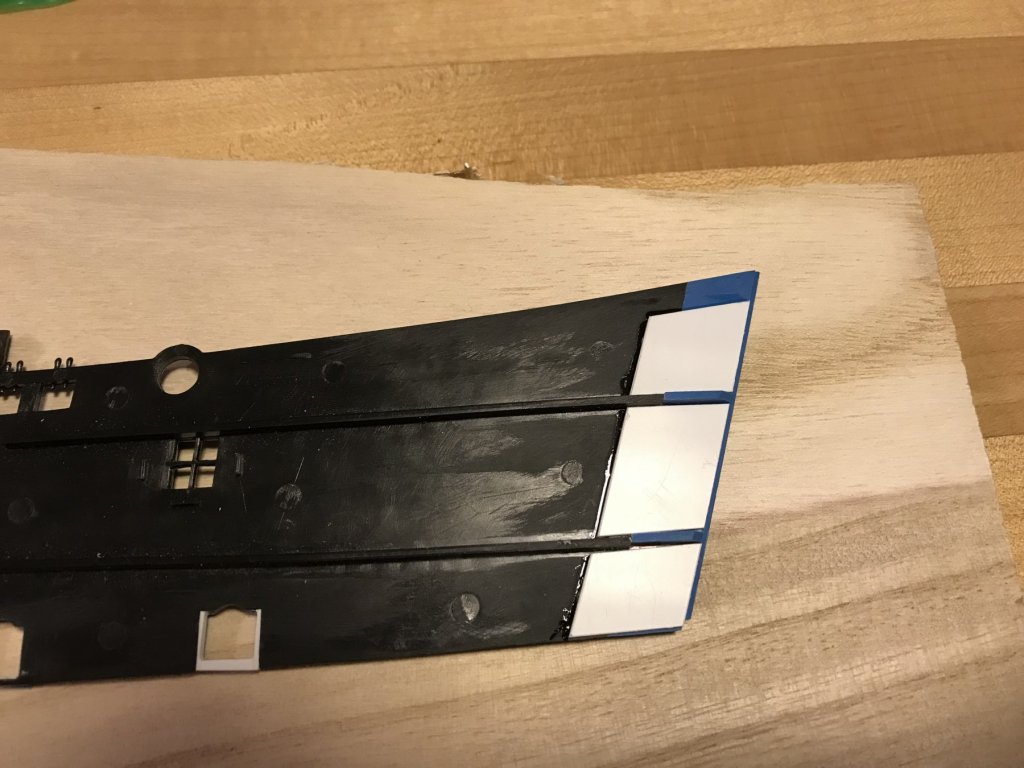
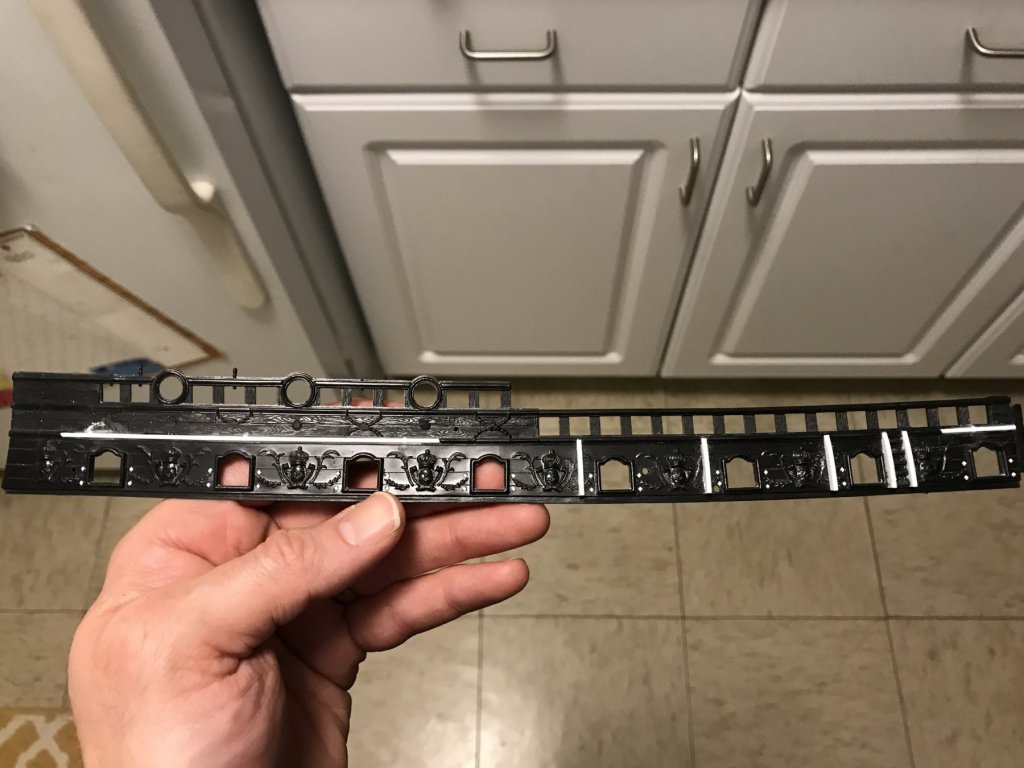
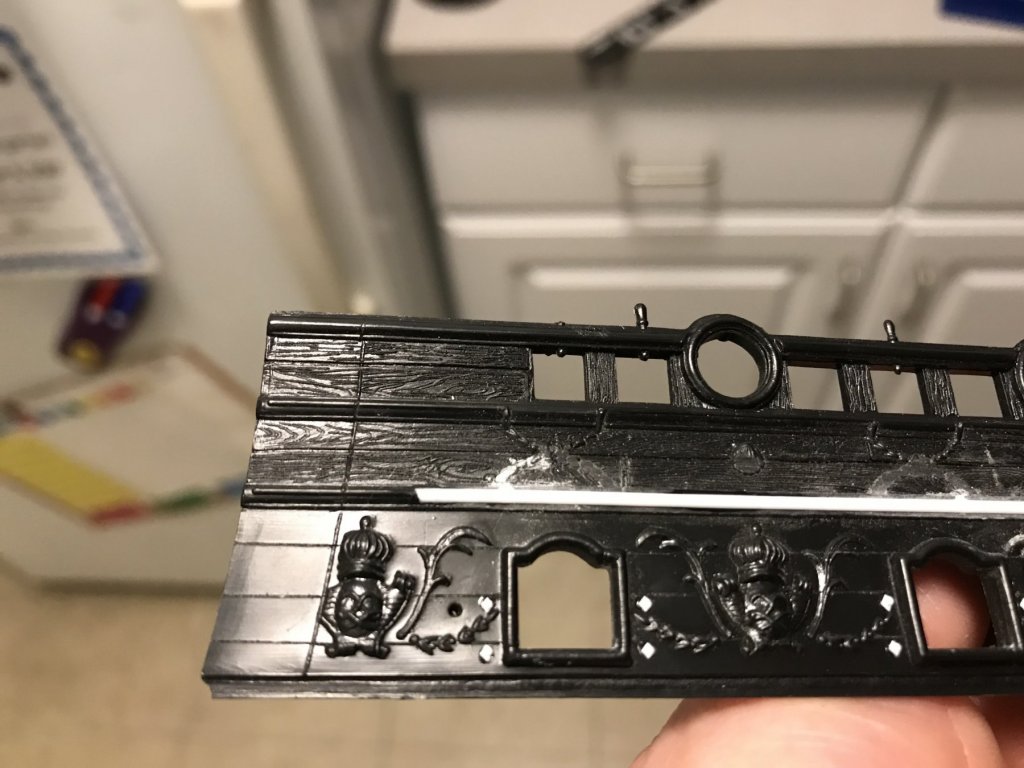
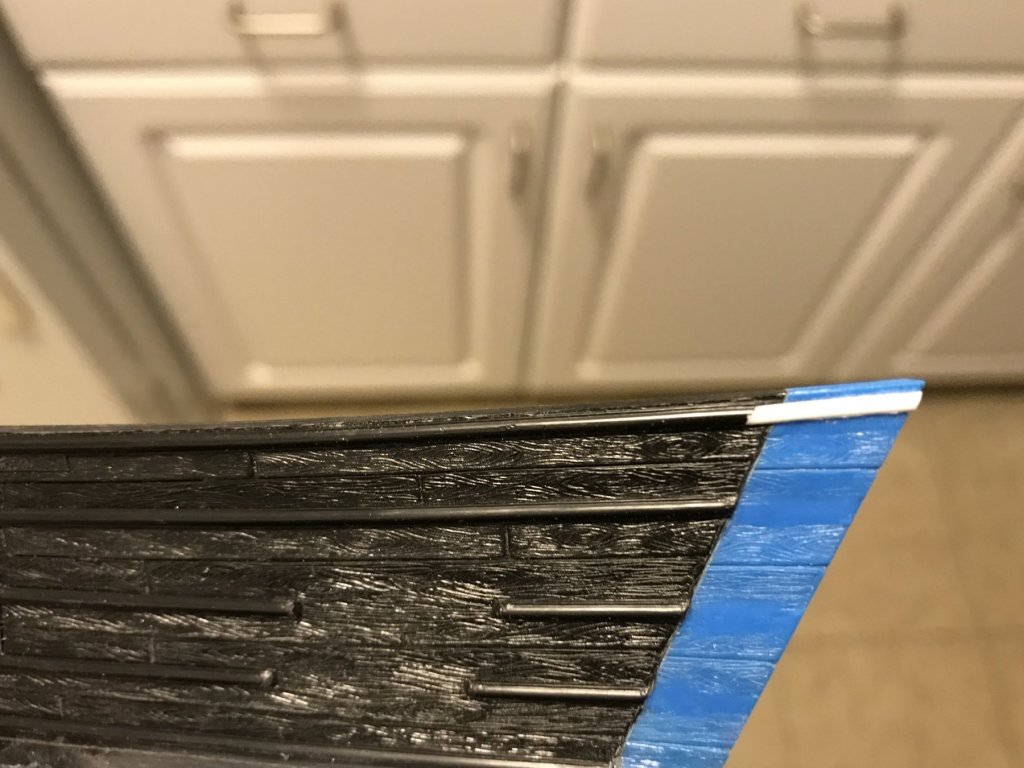
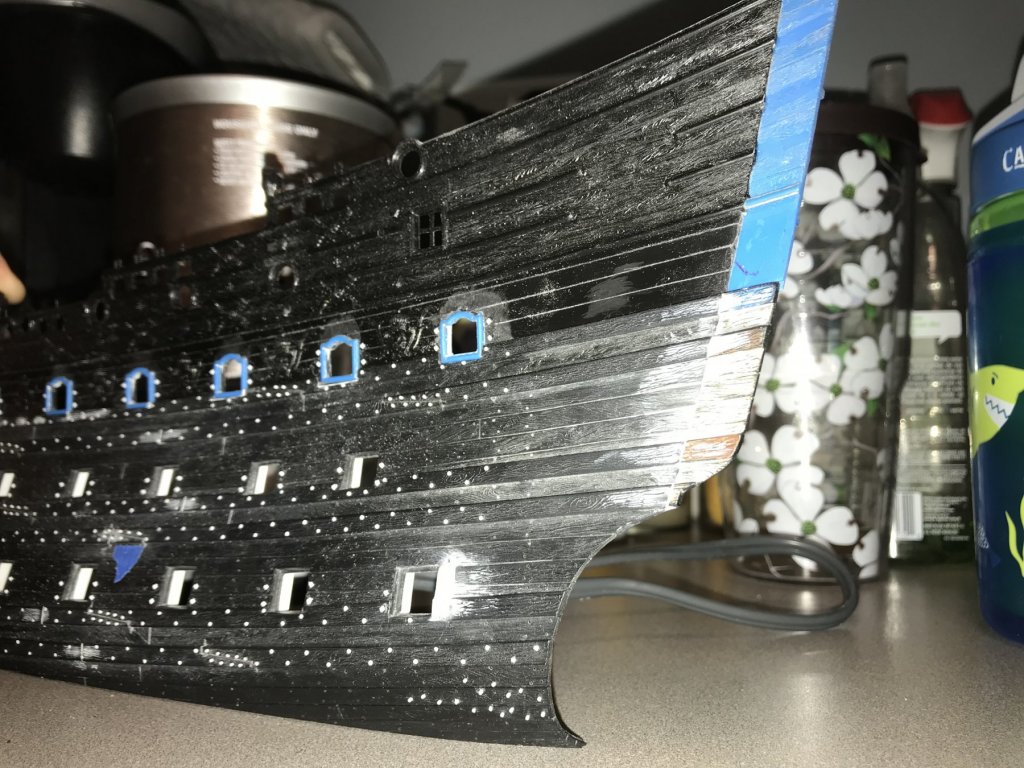
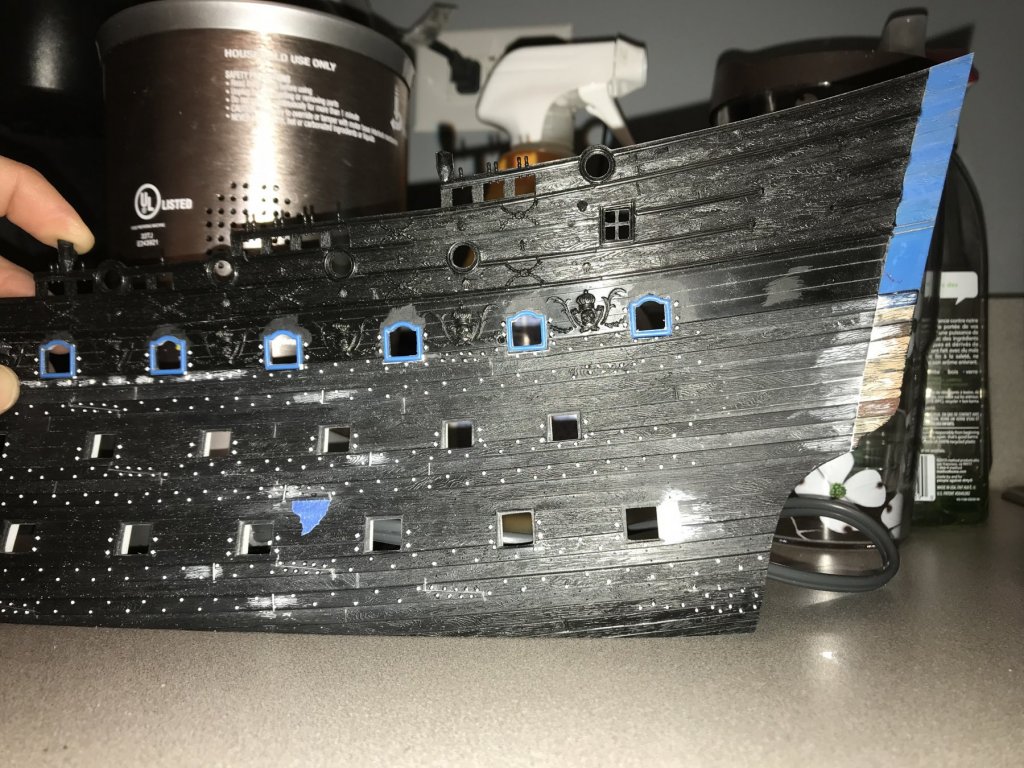
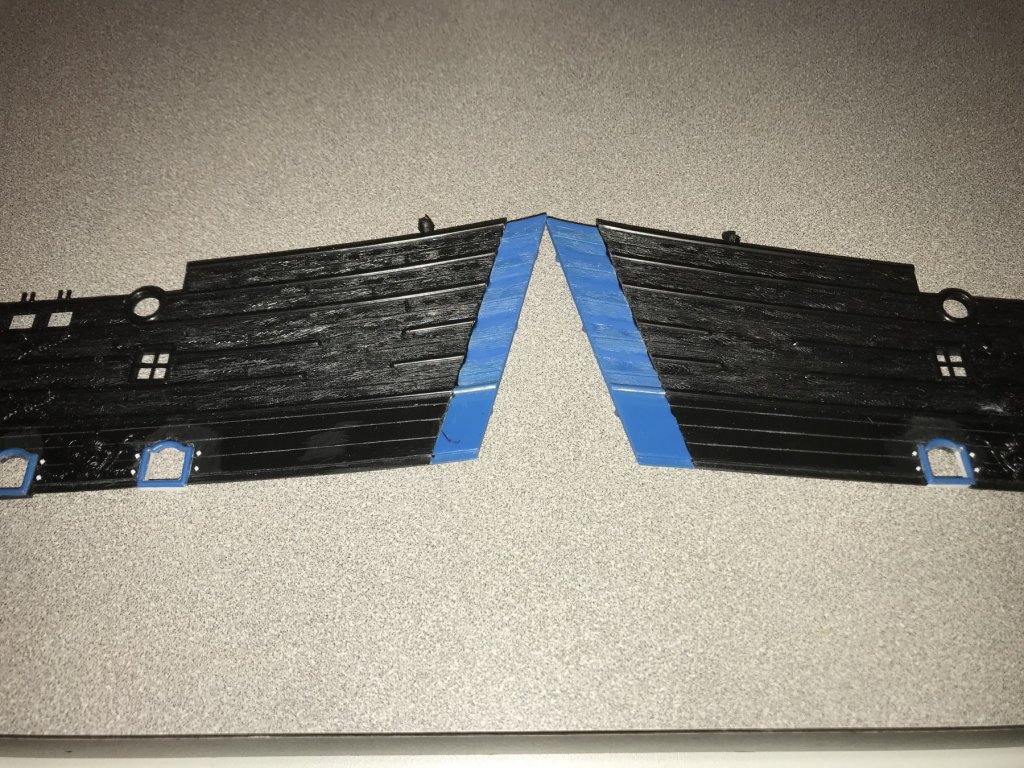
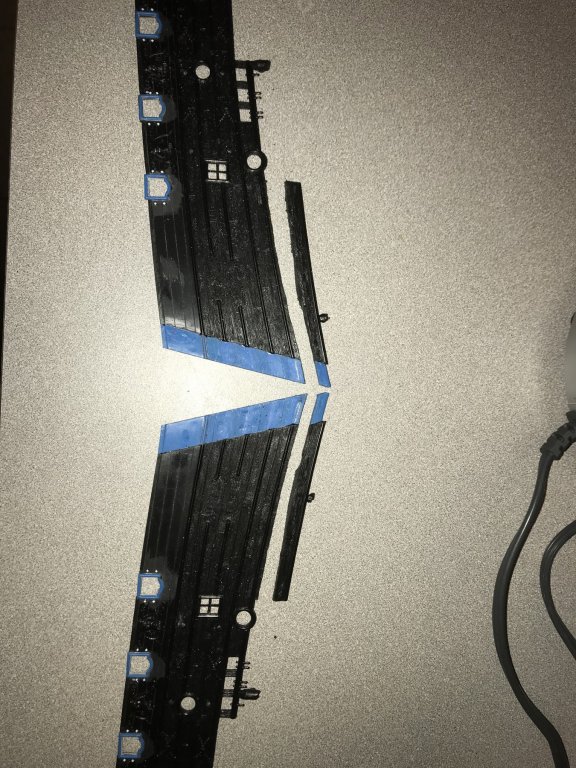
My work on the upper bulwarks continues. After thinning and detailing the beakhead bulkhead plank edge, I decided to tackle the 3/8” stern extension pieces for the upper bulwarks. As is apparent, here, all of my fitting and adjusting so that the upper bulwarks would align neatly with the waist ladder, necessitated adding back a little extra material to the starboard upper bulwark. The port side is the minimum 3/8”, but starboard is nearly 1/2”. It may not be readily apparent in the pictures, but I had scraped away the thin sheer strakes from the extension pieces because, with the exception of the lowest strake, none of the others were going to align with those of the upper bulwark; this owes to the sharp rise in sheer, in the last half inch, or so. While I was able to use the Dremel to waste away most of the sheer strake mouldings, I can now see that I have quite a job ahead of myself to remove the bulk of these sheer strakes from the upper bulwarks, in order to clear a field for my custom bulwark frieze lattice. I use a fine, curved blade to manually scrape down what was left, until I get down to the grain-moulded planks. As was the case with all of the other extension pieces, getting good mating joints that didn’t disrupt the fairness of the hull was a challenge. This picture might not be the best; the extensions do appear to flair outwards, but in fact, they fall neatly in line with the extension pieces of the lower hull. With that much settled, I decided to dispense with the upper-most sheer step, as that is one more sheer step than was ever typically constructed before 1693. Here I am cutting it away, and the following series of pictures show me fairing the new line of the upper sheer. I really like this slight reduction in the top-hamper, although it should be noted that I will be adding back a low sheer rail that runs the full length of this third sheer step. Although, I will have to lower and shorten, somewhat, the poop royal deck, there is still ample room to do so. Here are a few shots of the upper bulwark piece in place on the lower hull. Little by little, we are getting there!


- 2,699 replies
-
- 9
-
-
- heller
- soleil royal
- (and 9 more)