mtbediz
-
Posts
1,346 -
Joined
-
Last visited
Content Type
Profiles
Forums
Gallery
Events
Everything posted by mtbediz
-

USS Constitution by mtbediz - 1:76
mtbediz replied to mtbediz's topic in - Build logs for subjects built 1751 - 1800
Thank you so much Geoff. -
USS Constitution by mtbediz - 1:76
mtbediz replied to mtbediz's topic in - Build logs for subjects built 1751 - 1800
Thank you Greg. For now, it is in line with the tick marks, but there will definitely be deviations in the future. Because it is very difficult, almost impossible, to do the tapering exactly right at this scale. I will definitely need to correct the deviations. -
USS Constitution by mtbediz - 1:76
mtbediz replied to mtbediz's topic in - Build logs for subjects built 1751 - 1800
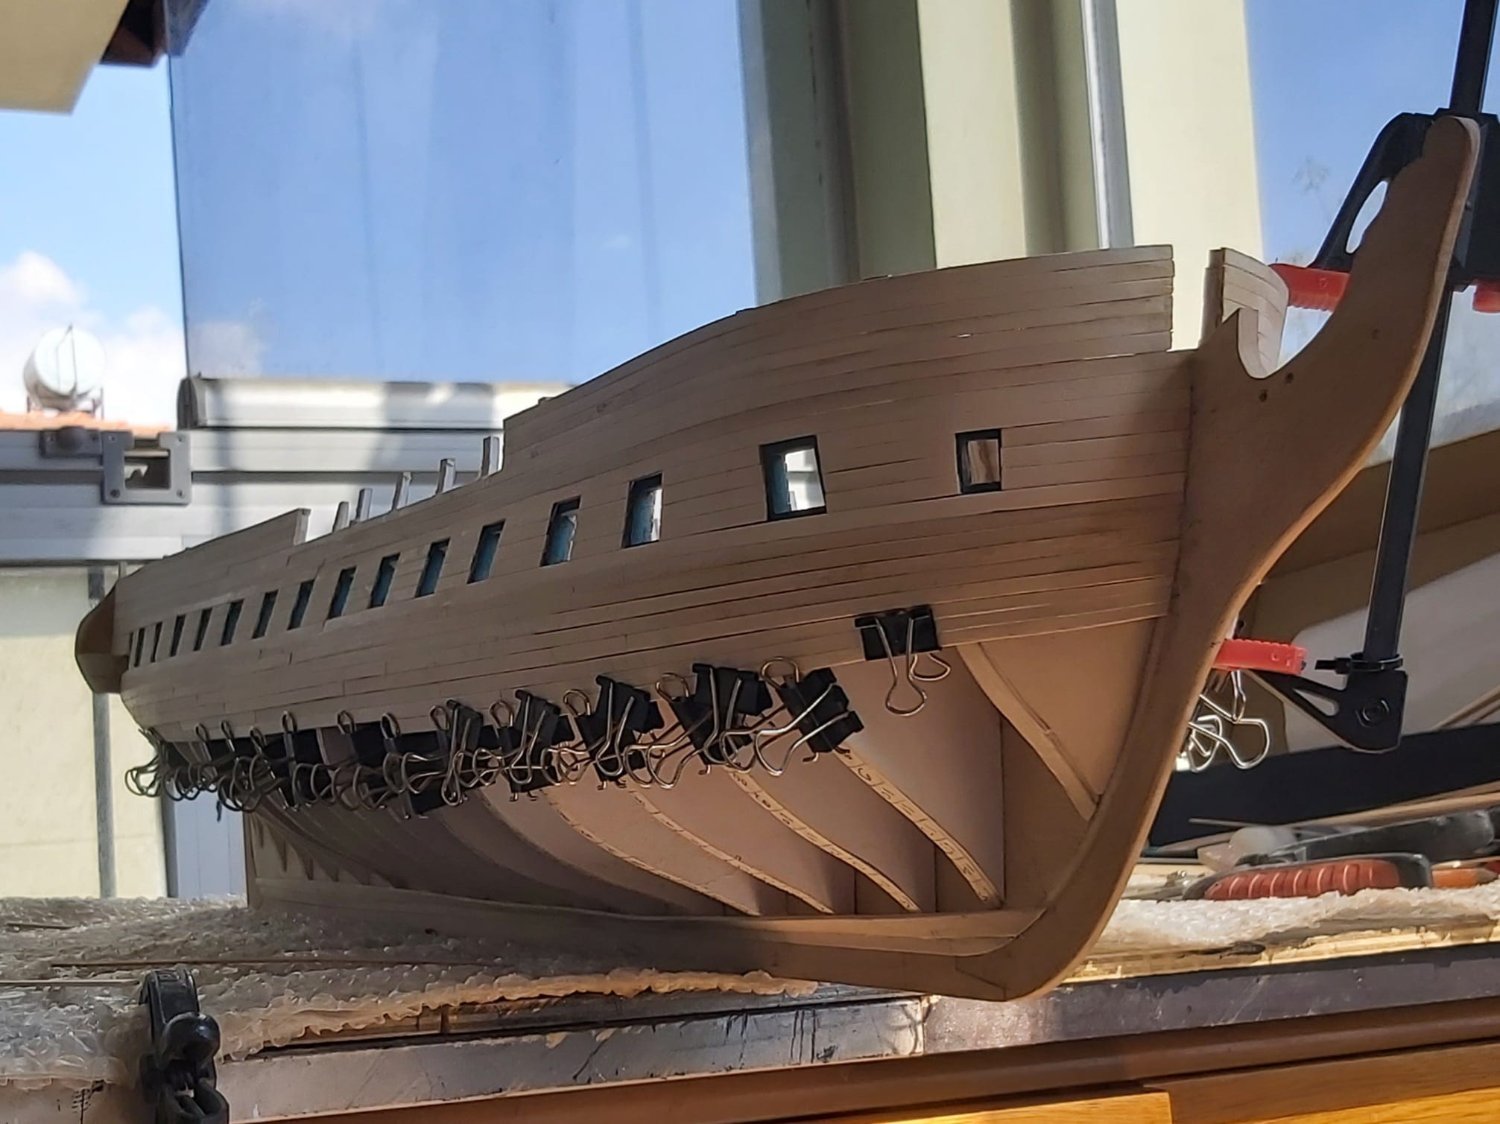
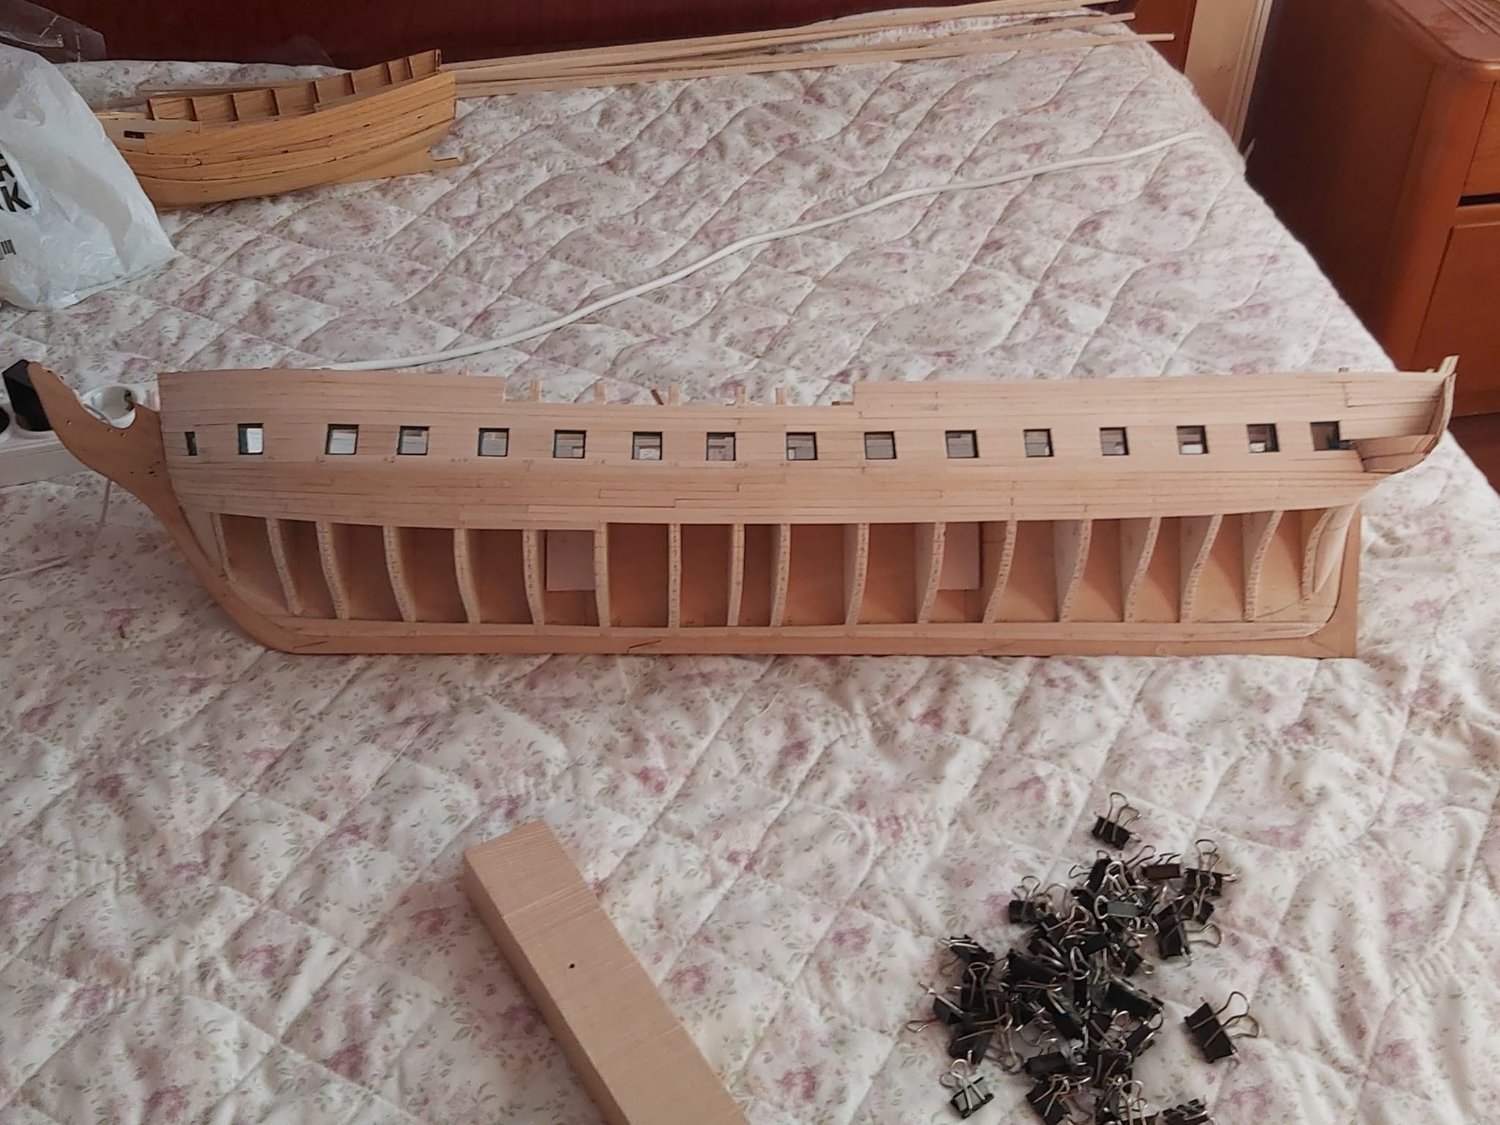
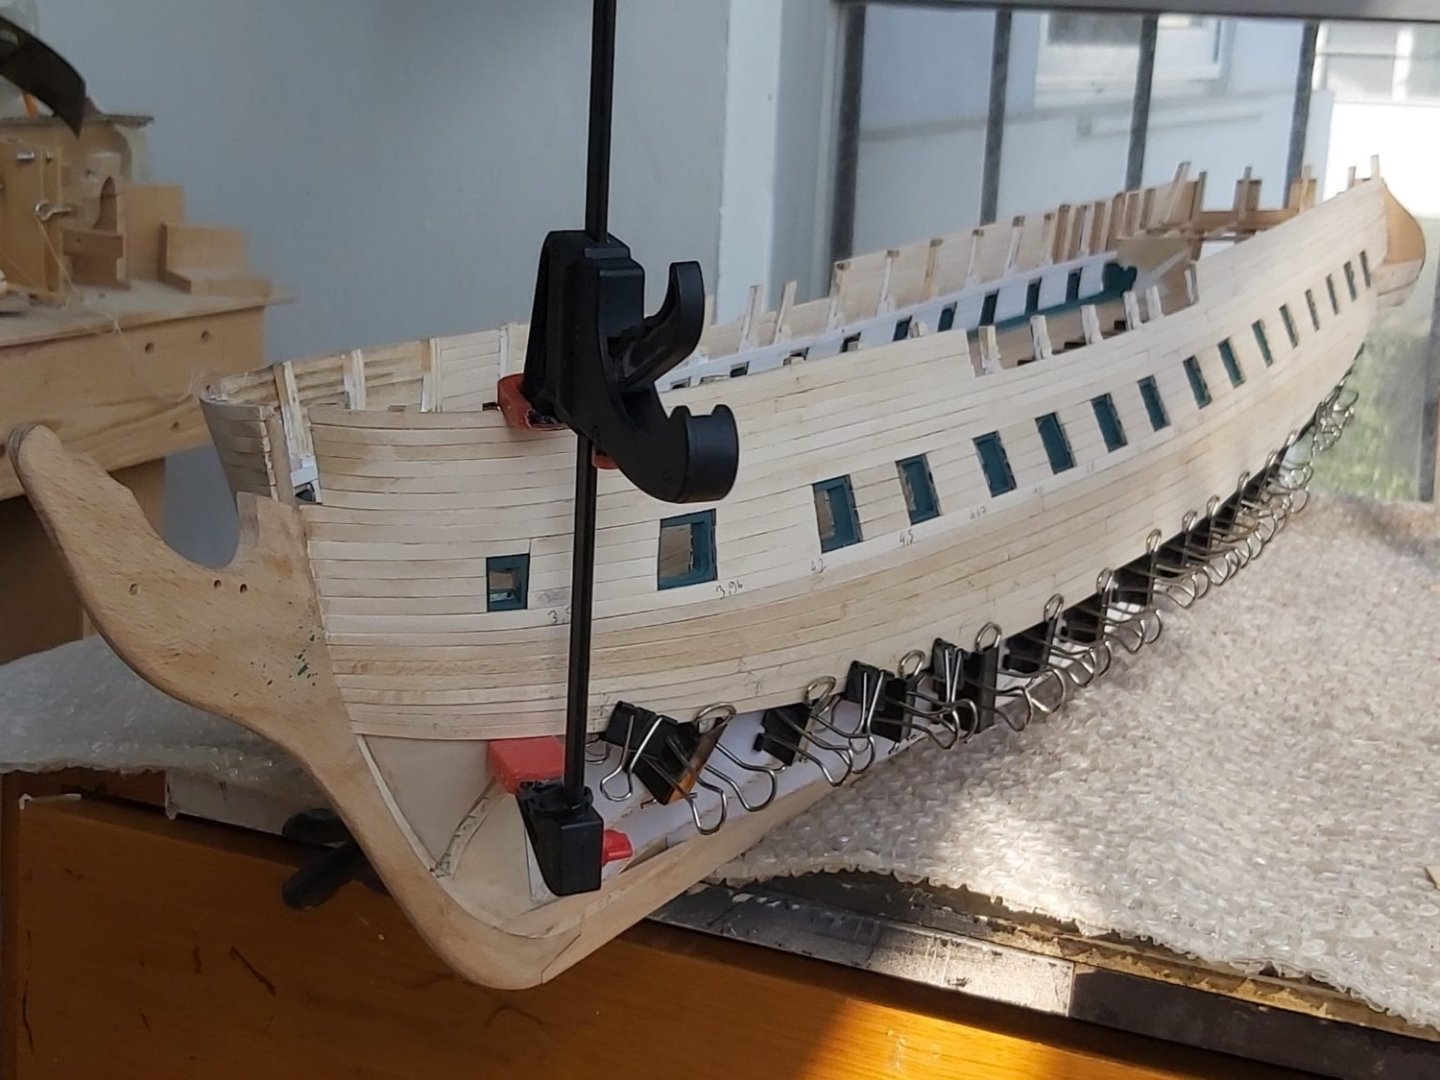
Hull planking continues. Since each plank is prepared separately and glued into place with PVA, the progress is a little slow.


-
USS Constitution by mtbediz - 1:76
mtbediz replied to mtbediz's topic in - Build logs for subjects built 1751 - 1800
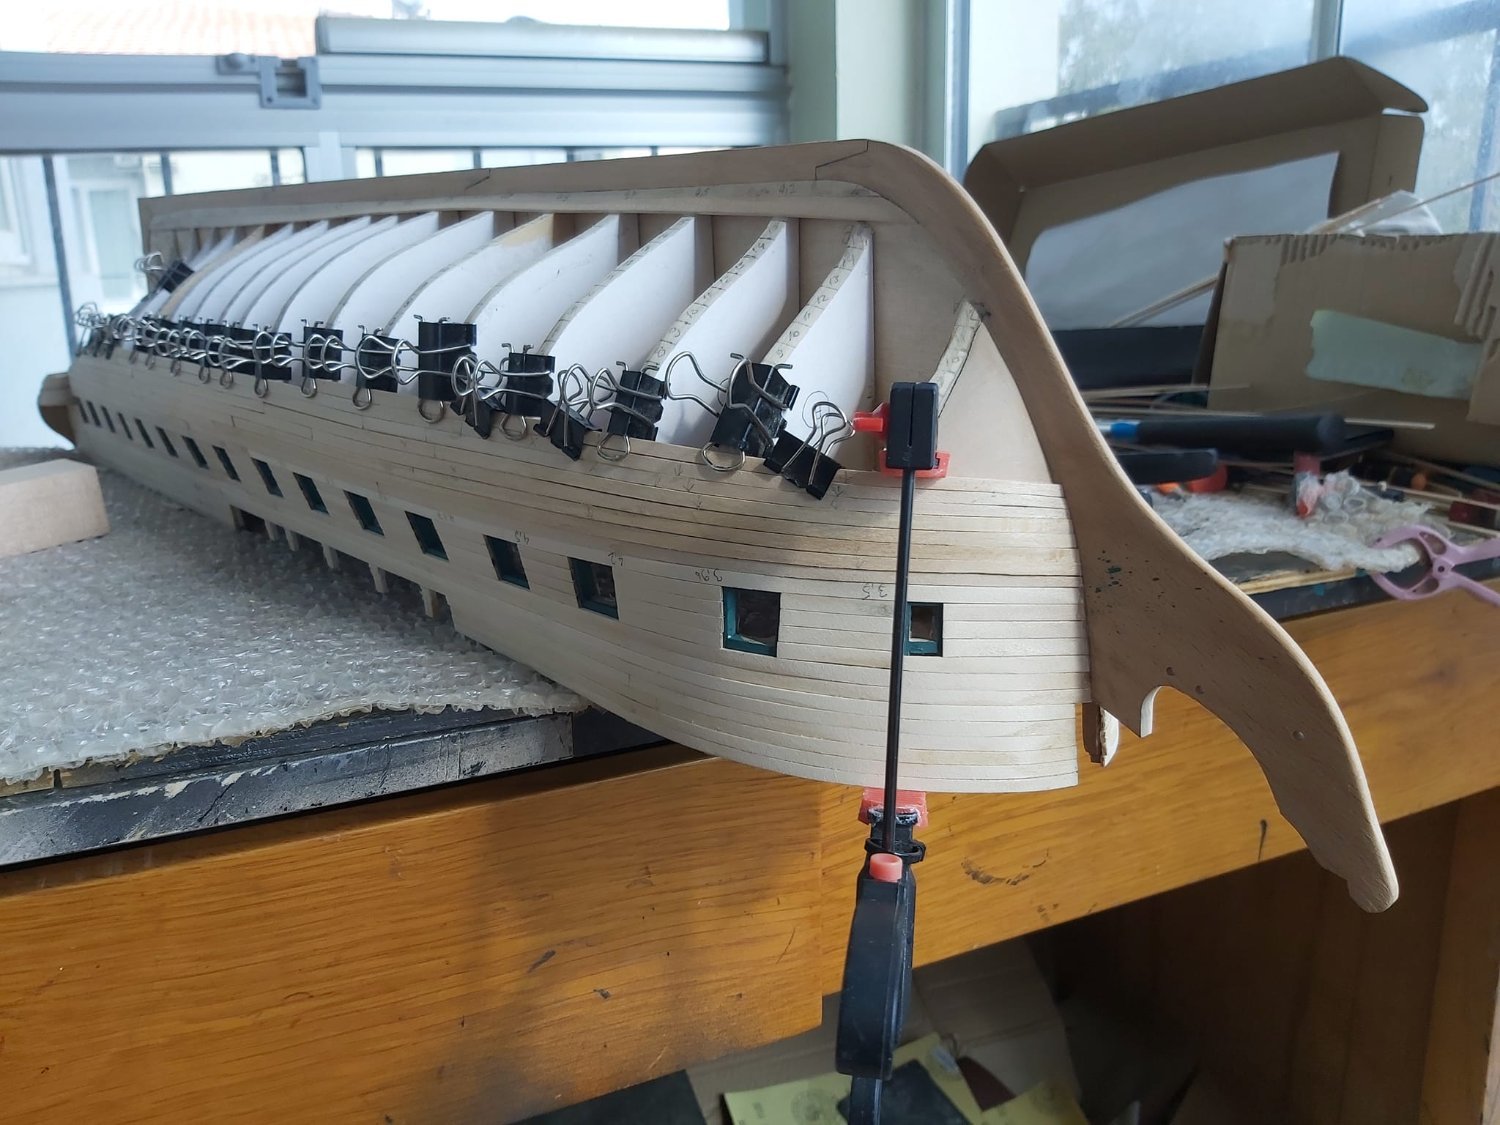
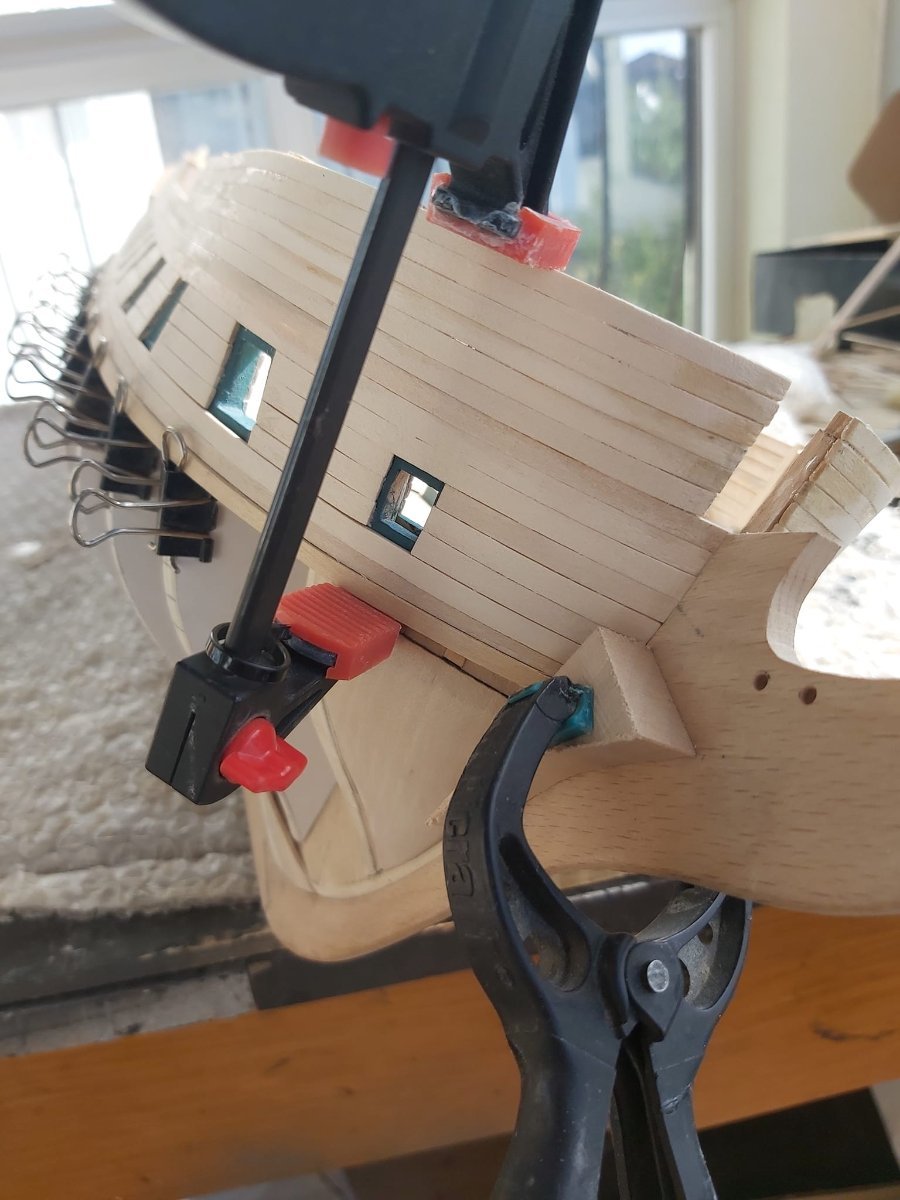
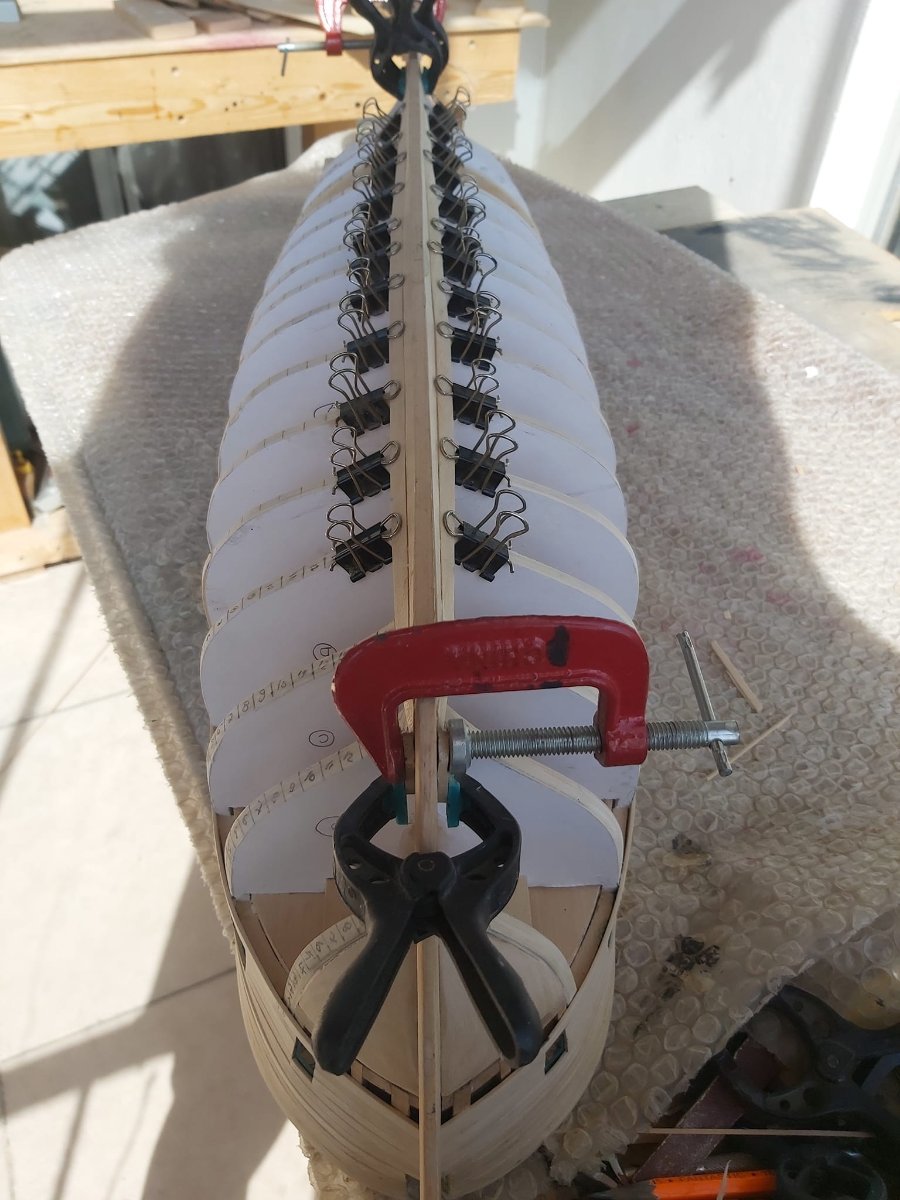
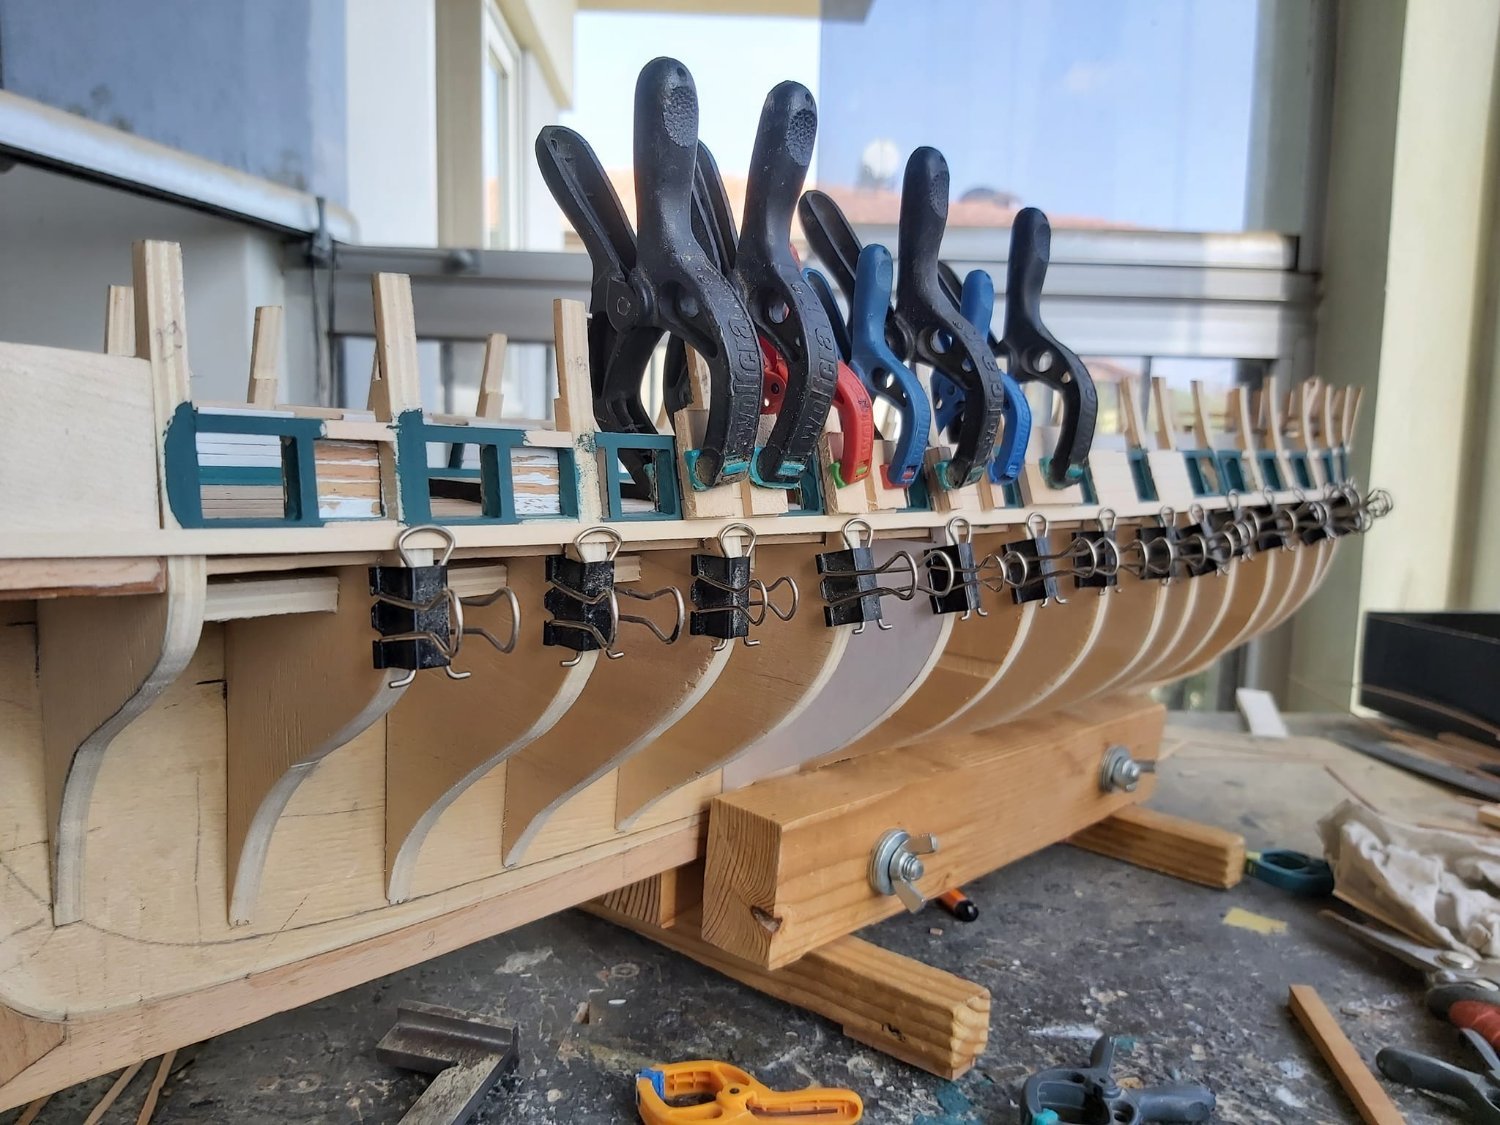
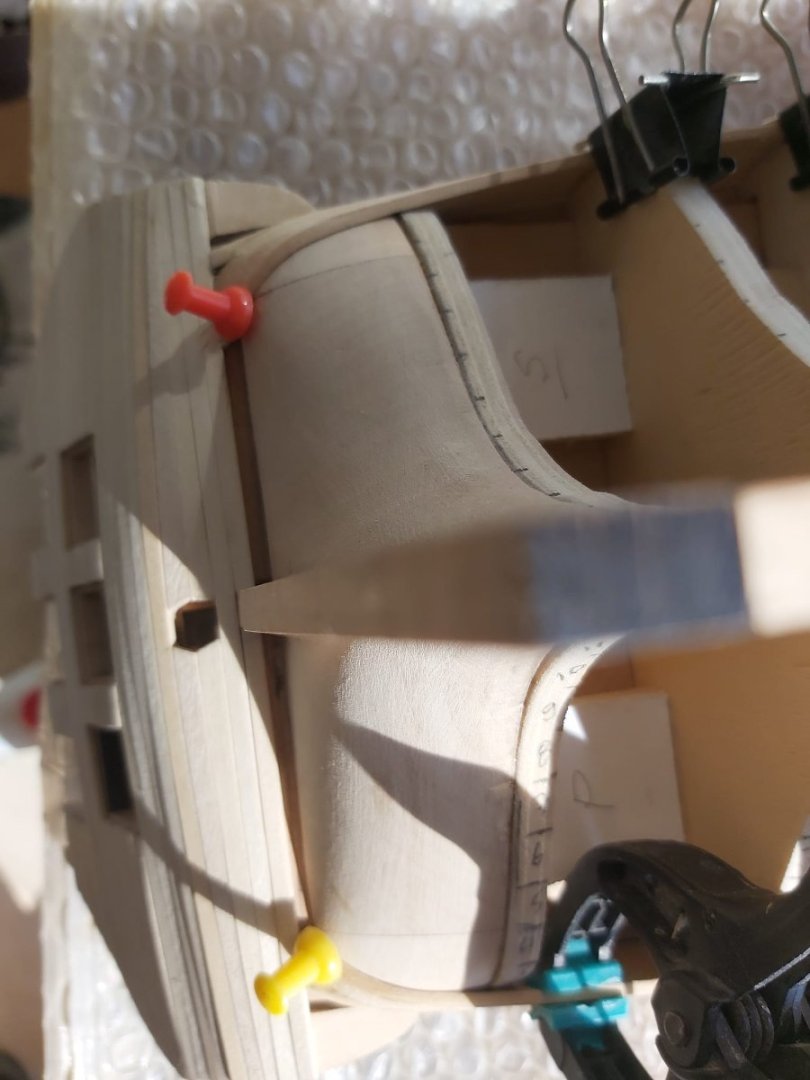
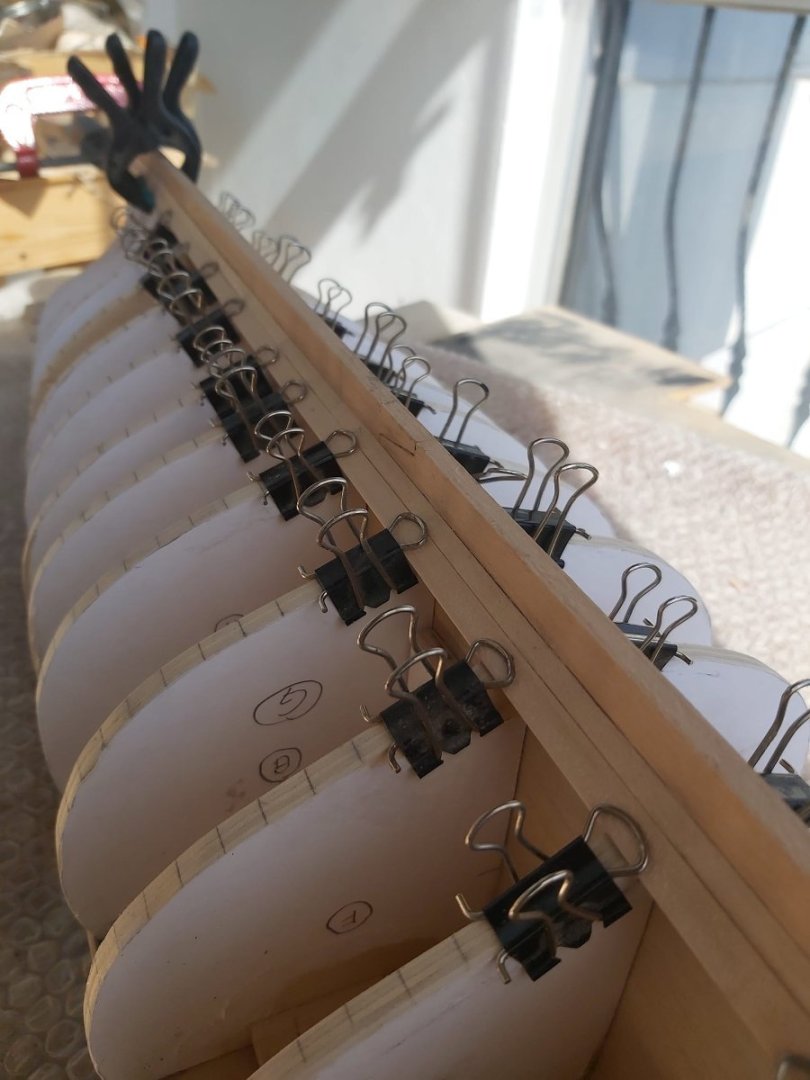
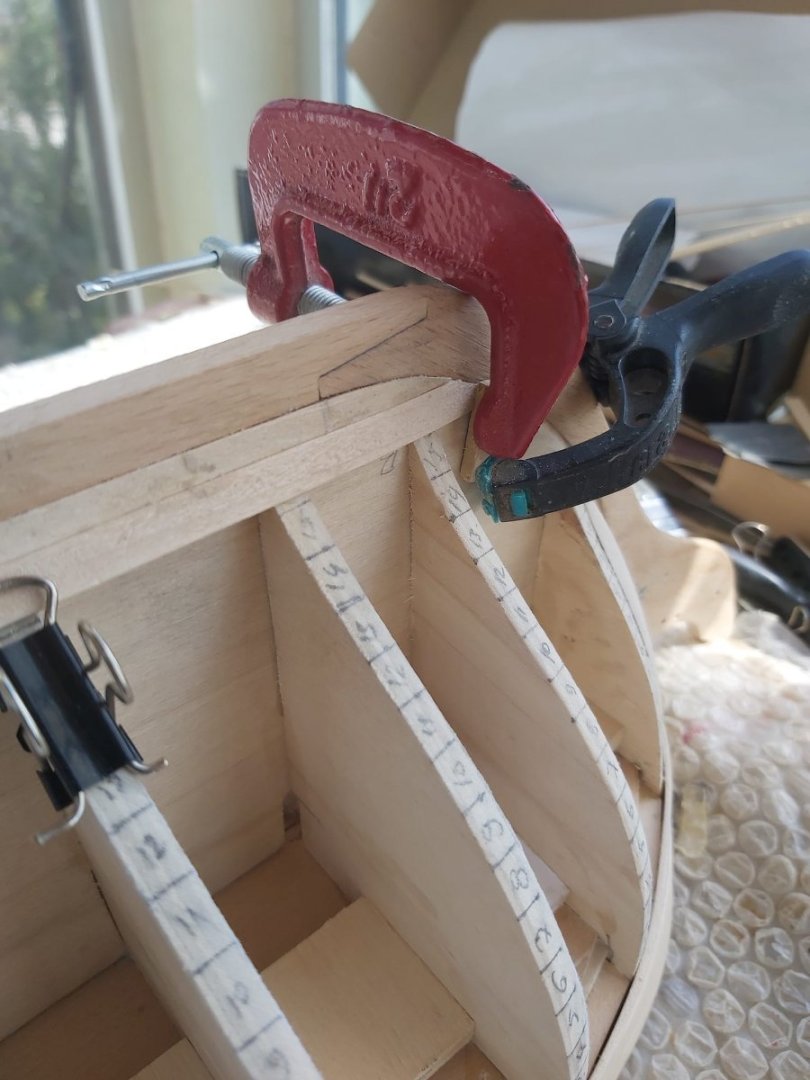
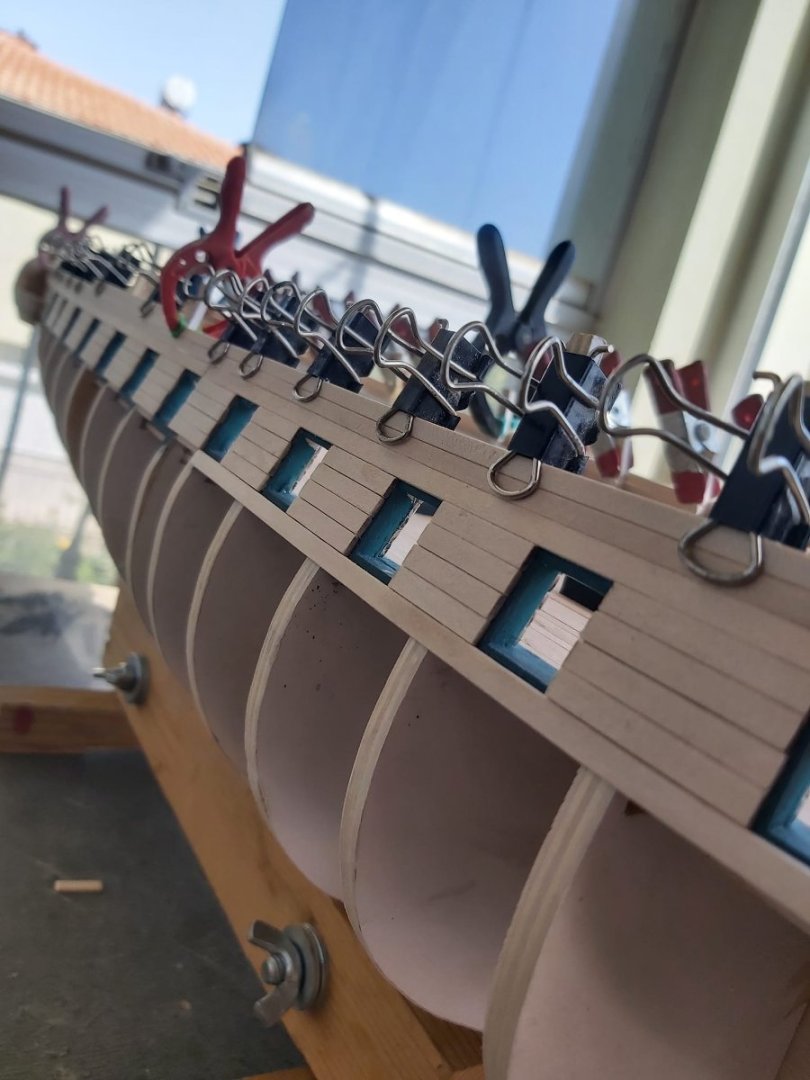
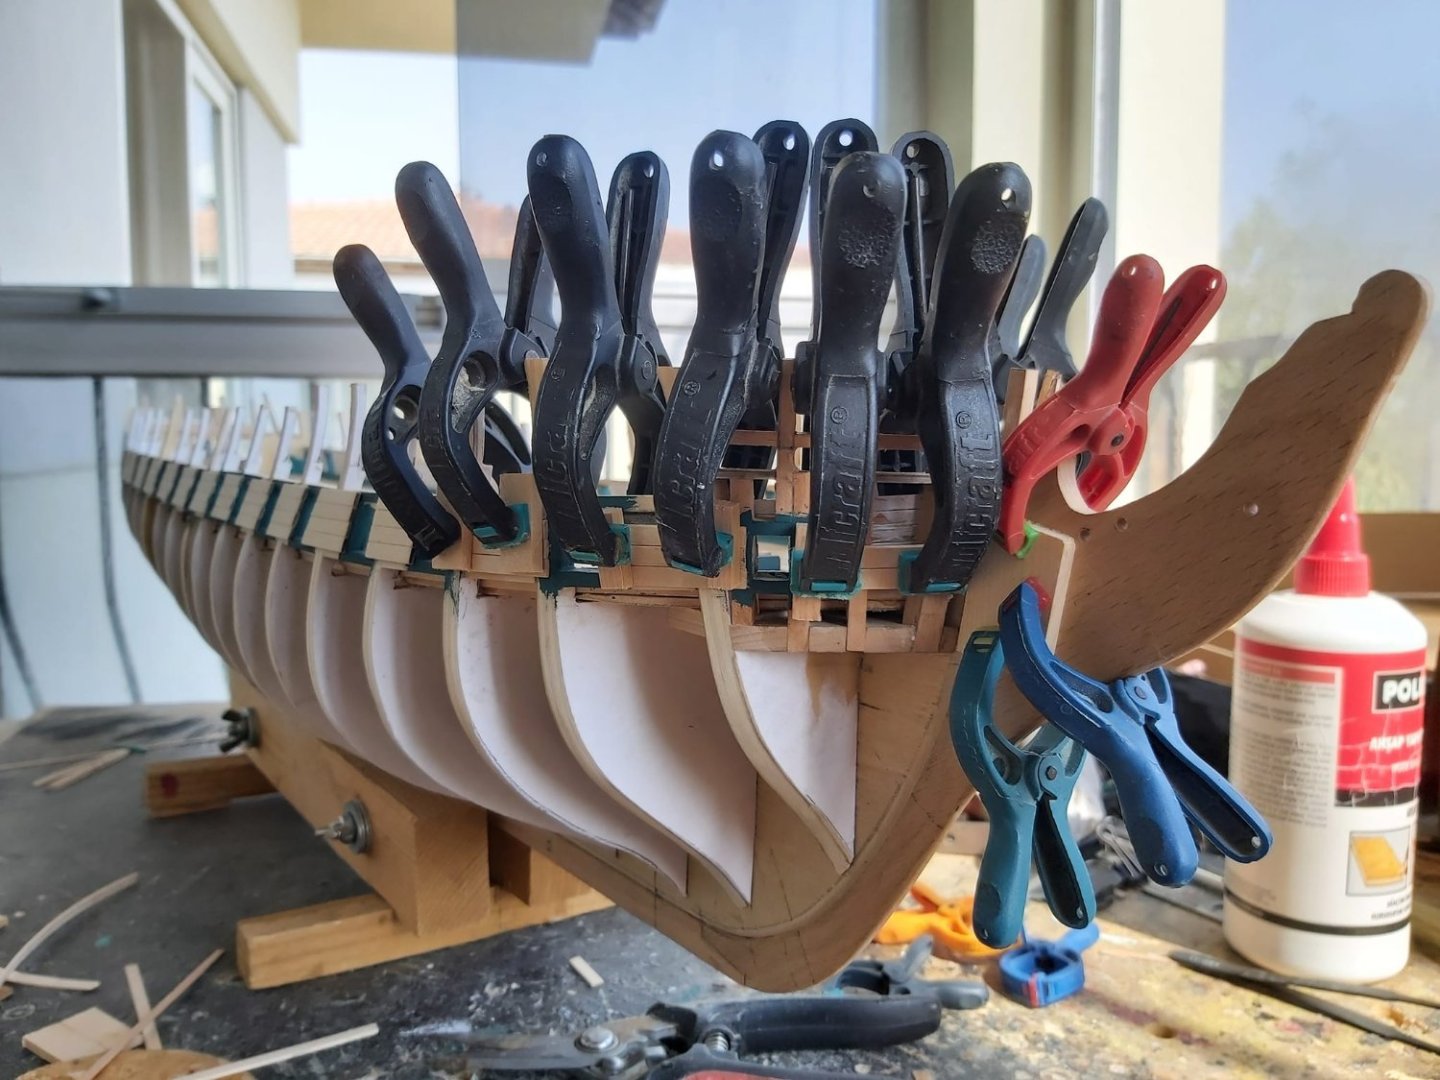
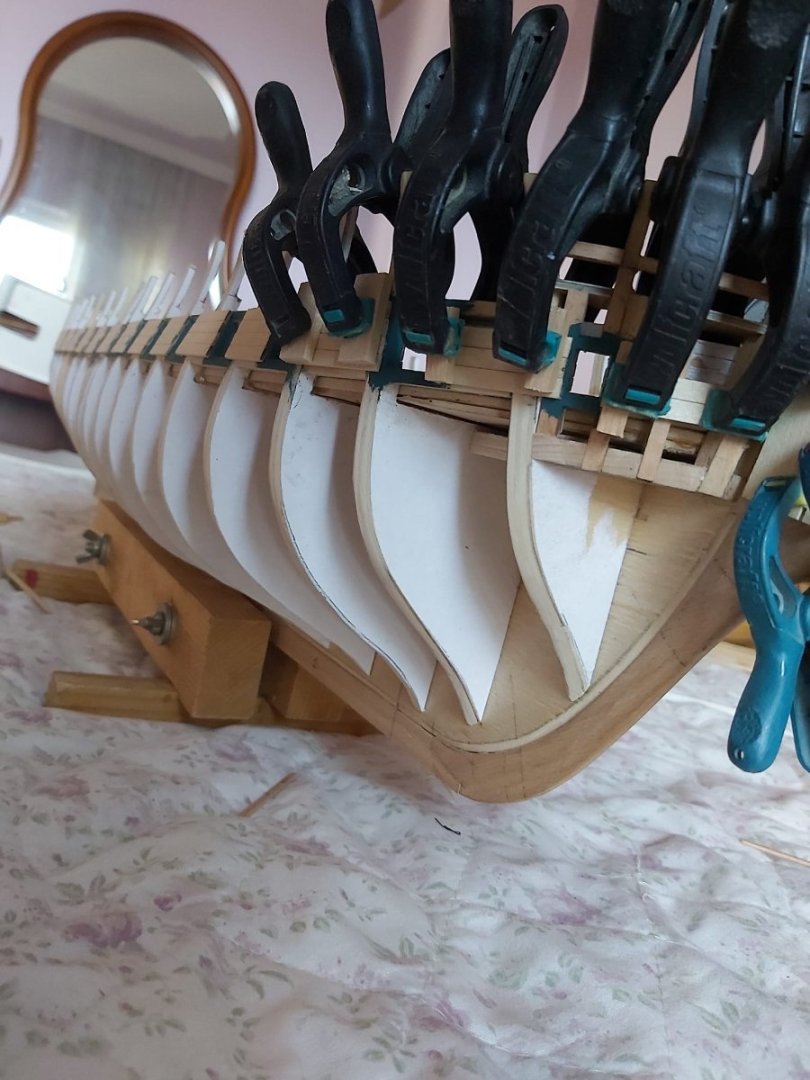
I have started preparing the wales and gluing them in place. I make the wales using 2x5 mm basswood planks. The planks are tapered a little at the bow and stern, and then, after being kept in boiling water for about 10 minutes, they are fastened in place with clamps and pins. After drying and taking shape, the planks are glued into place.


-
USS Constitution by mtbediz - 1:76
mtbediz replied to mtbediz's topic in - Build logs for subjects built 1751 - 1800
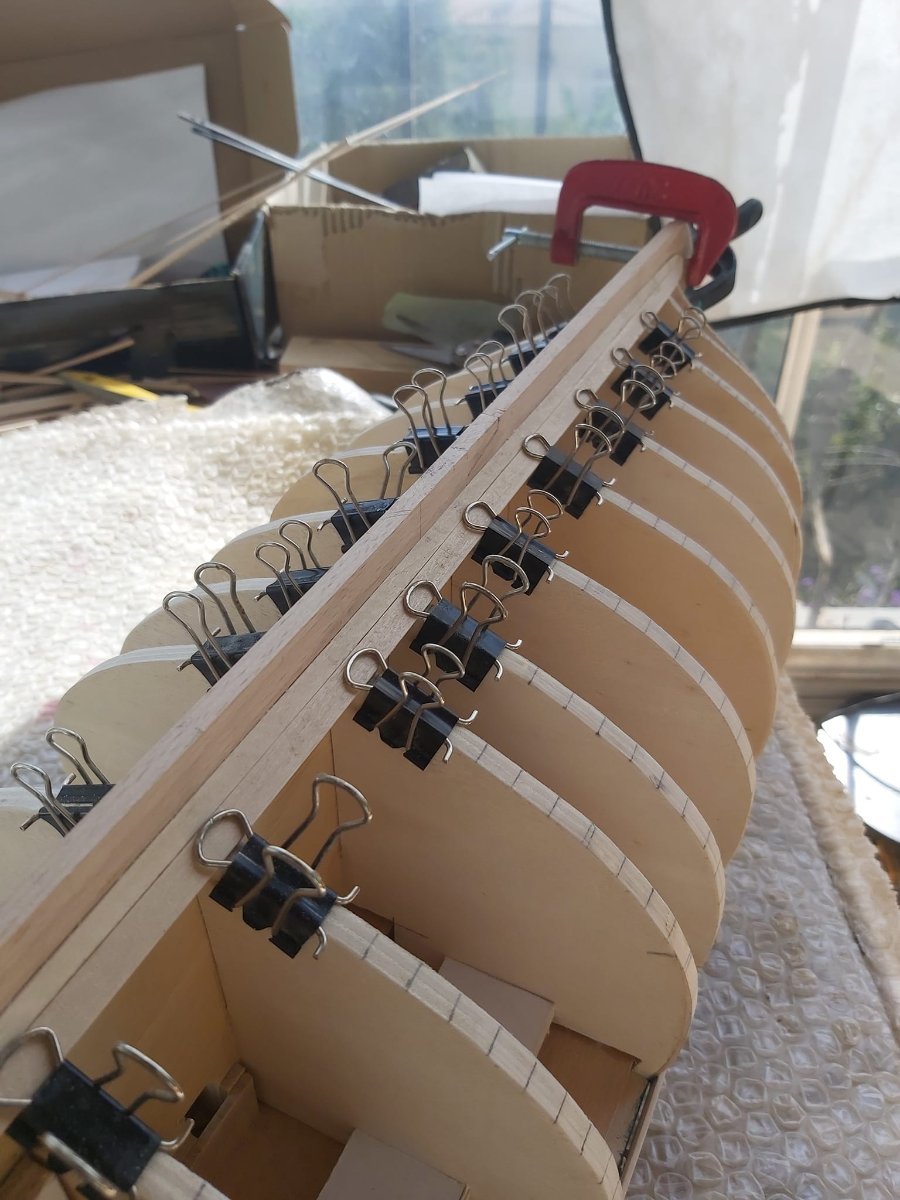
I glued the filler blocks to the bow and stern then I started the hull planking..First, I put the garboards on both sides and then added another plank next to them. From now on, I will continue the planking from the top towards the keel.


-
USS Constitution by mtbediz - 1:76
mtbediz replied to mtbediz's topic in - Build logs for subjects built 1751 - 1800
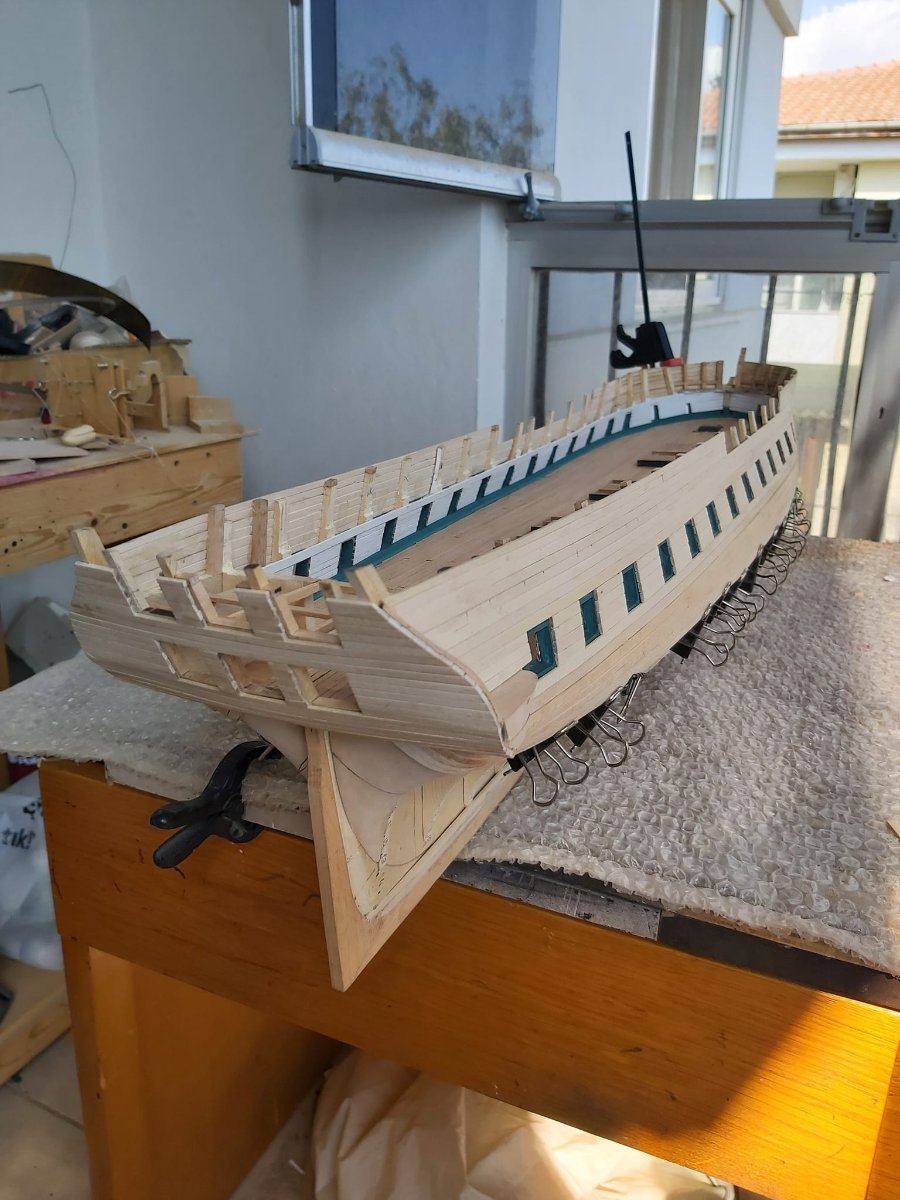
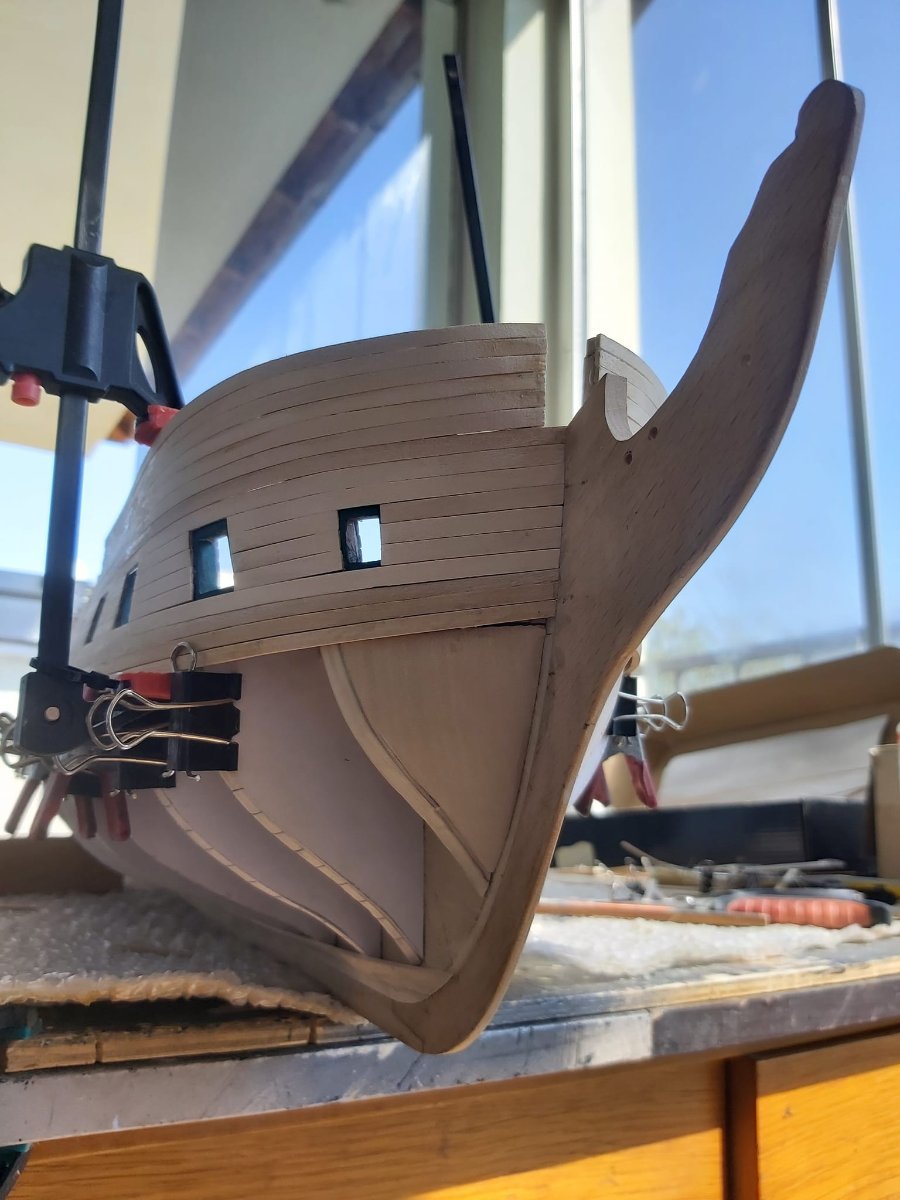
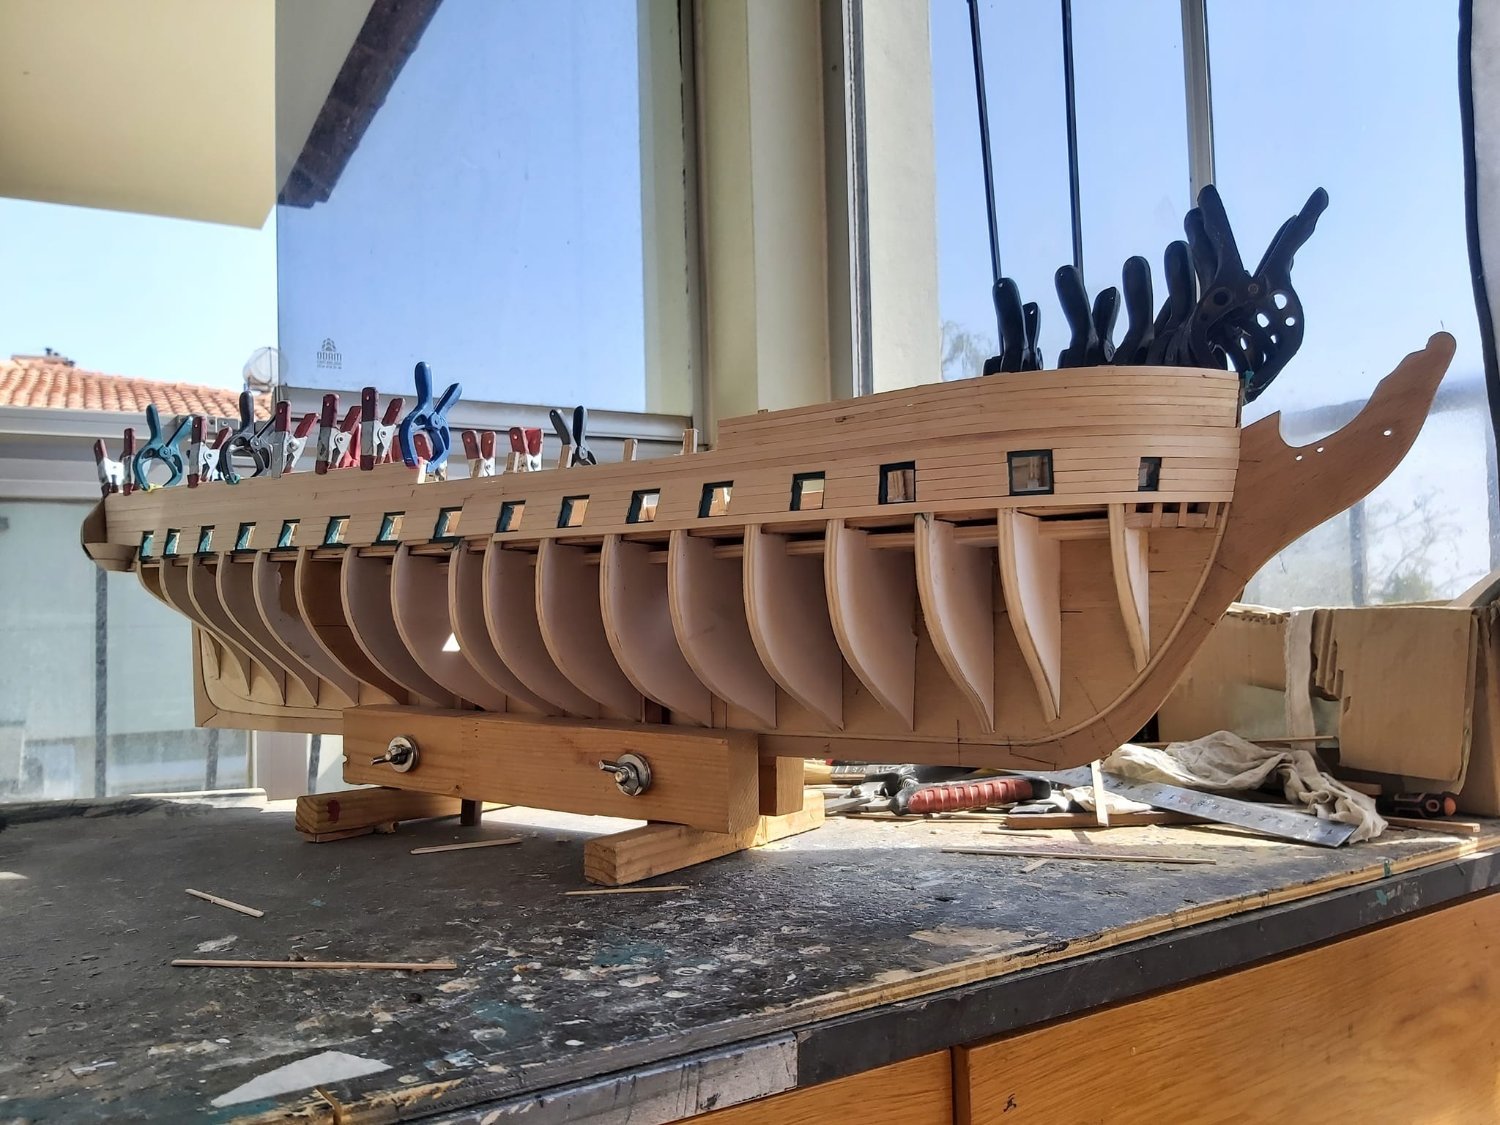
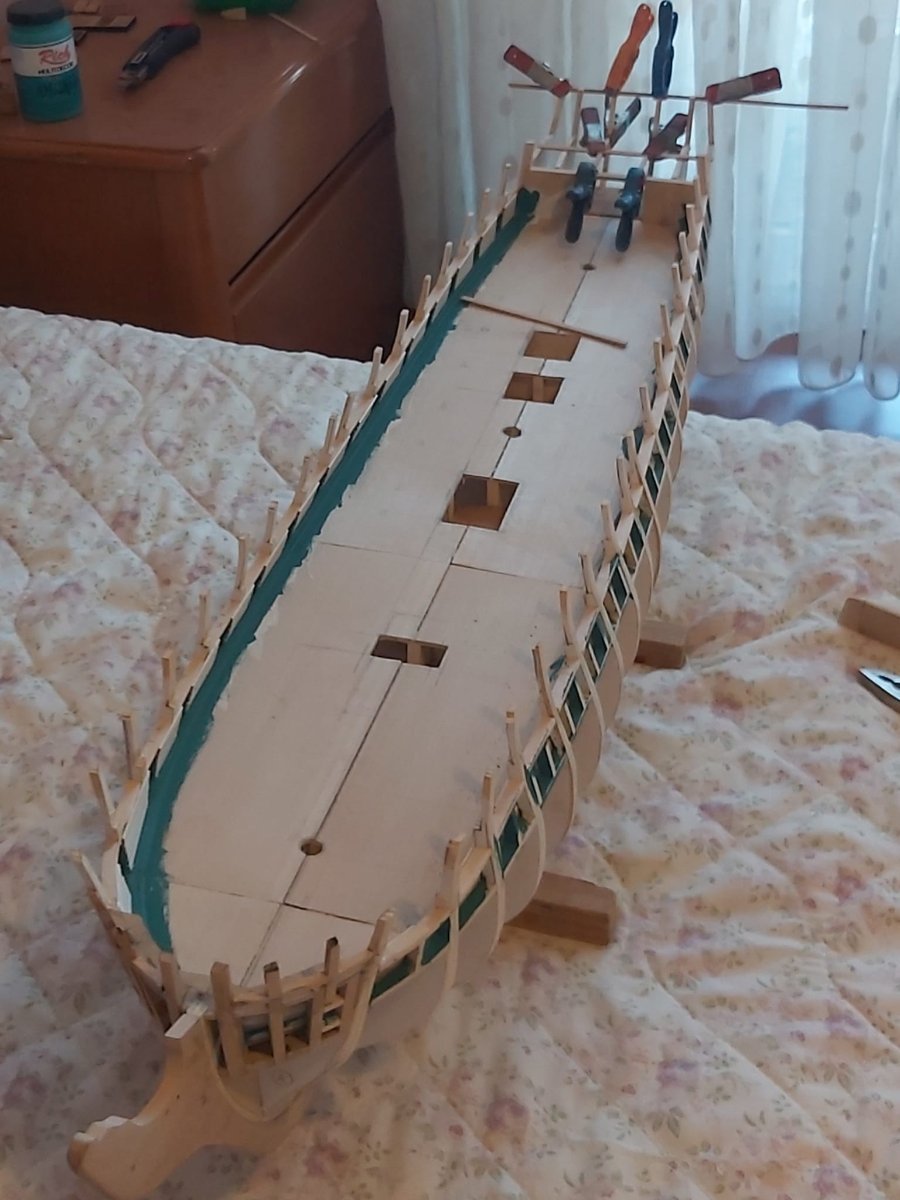
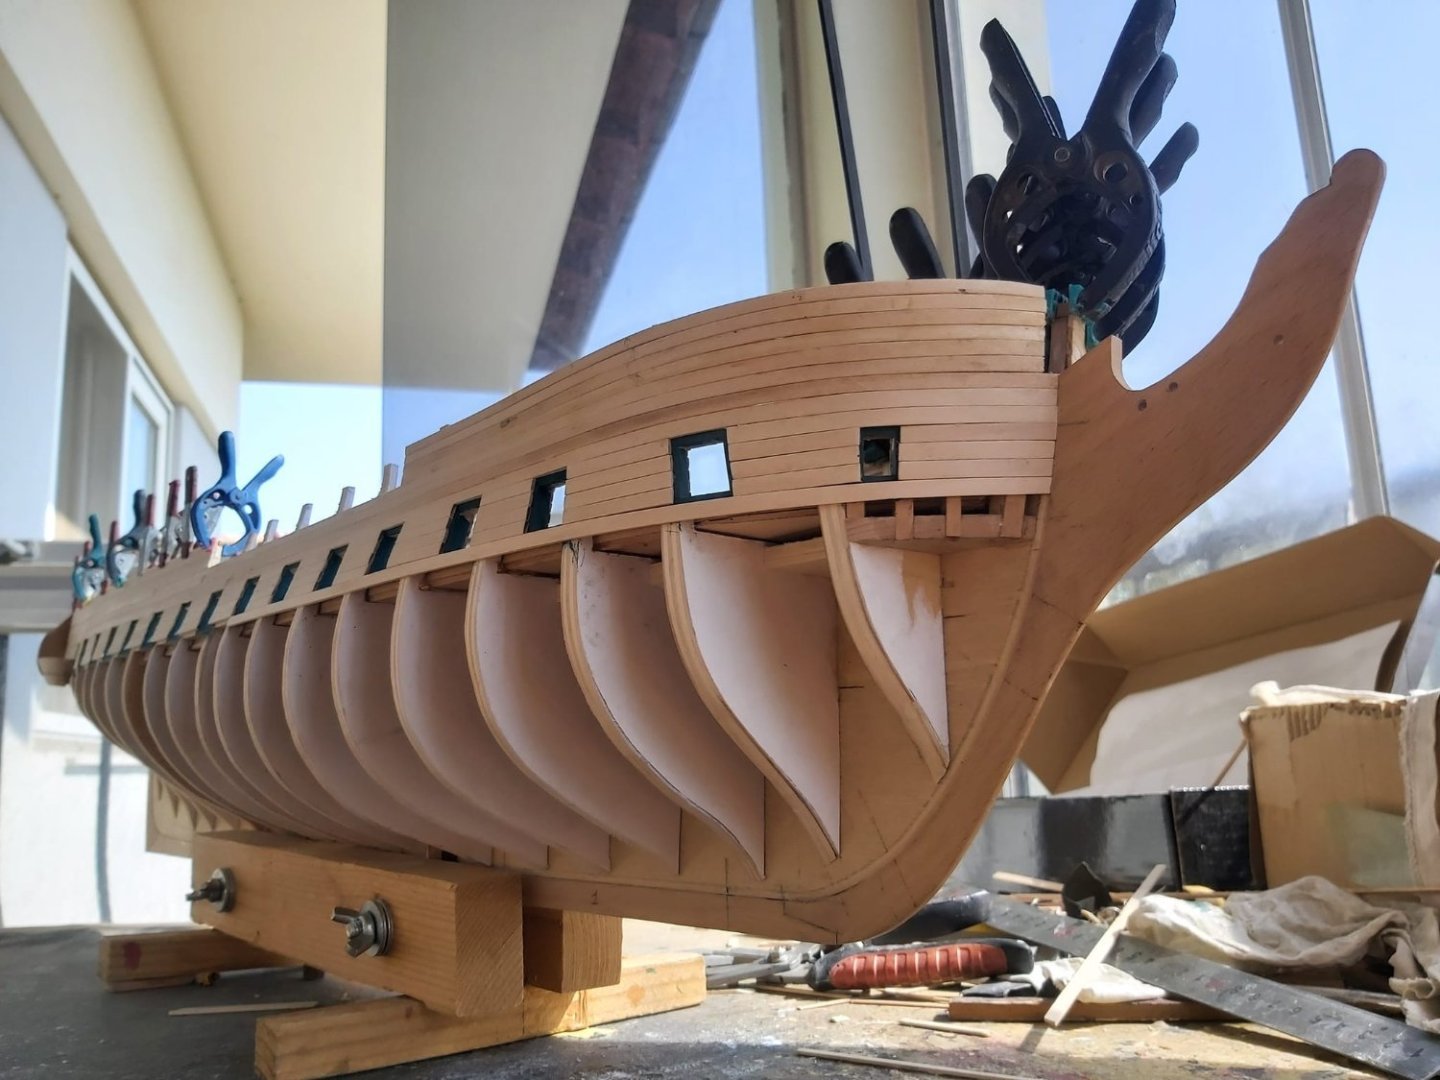
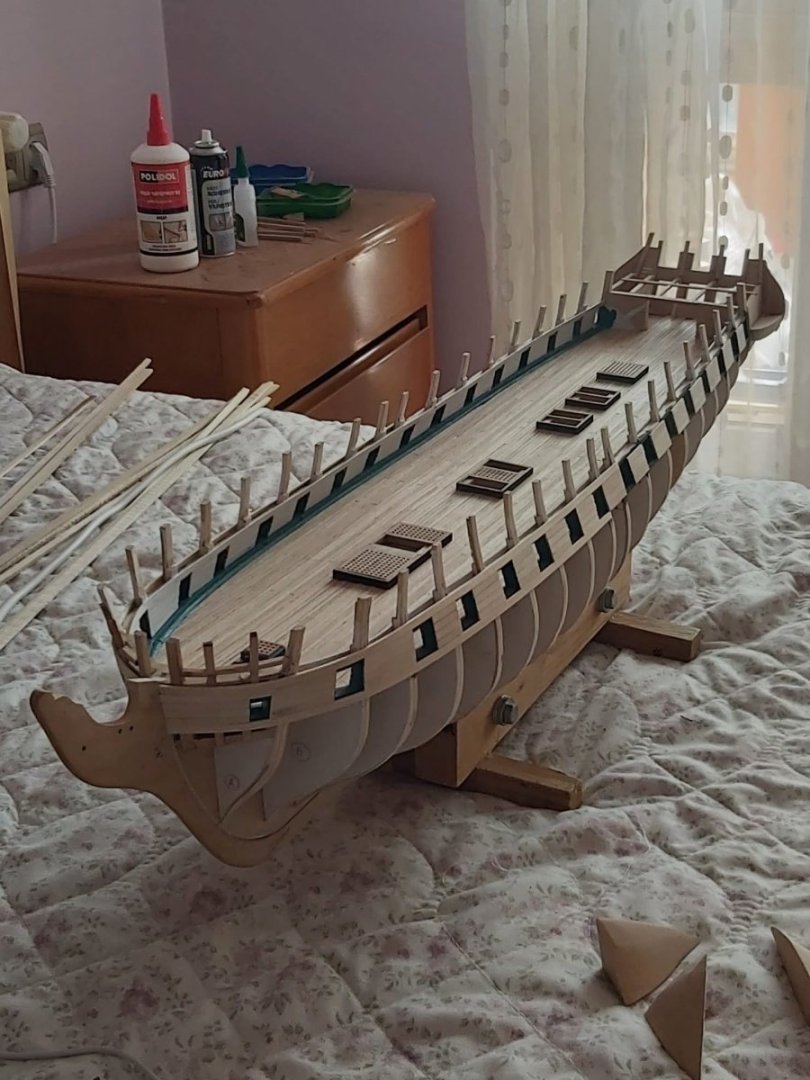
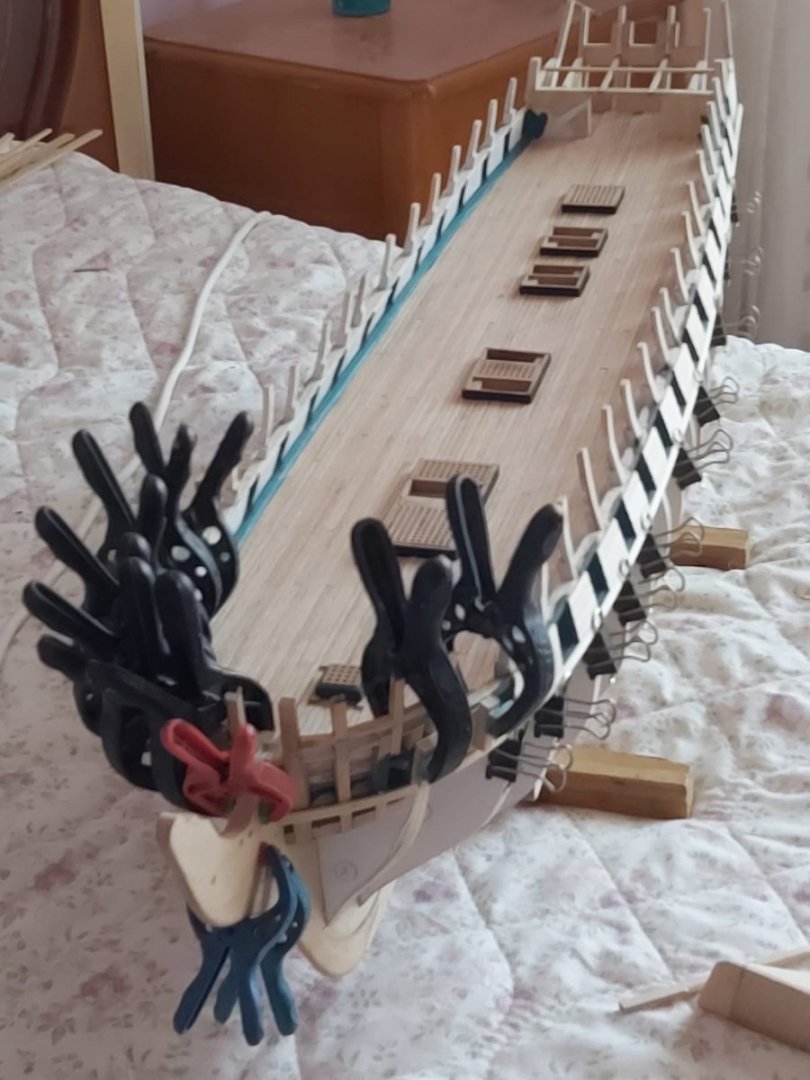
I completed the upper hull outer planking. I will cut out the spar deck gunports later. Now it's time to turn the ship upside down and hull planking.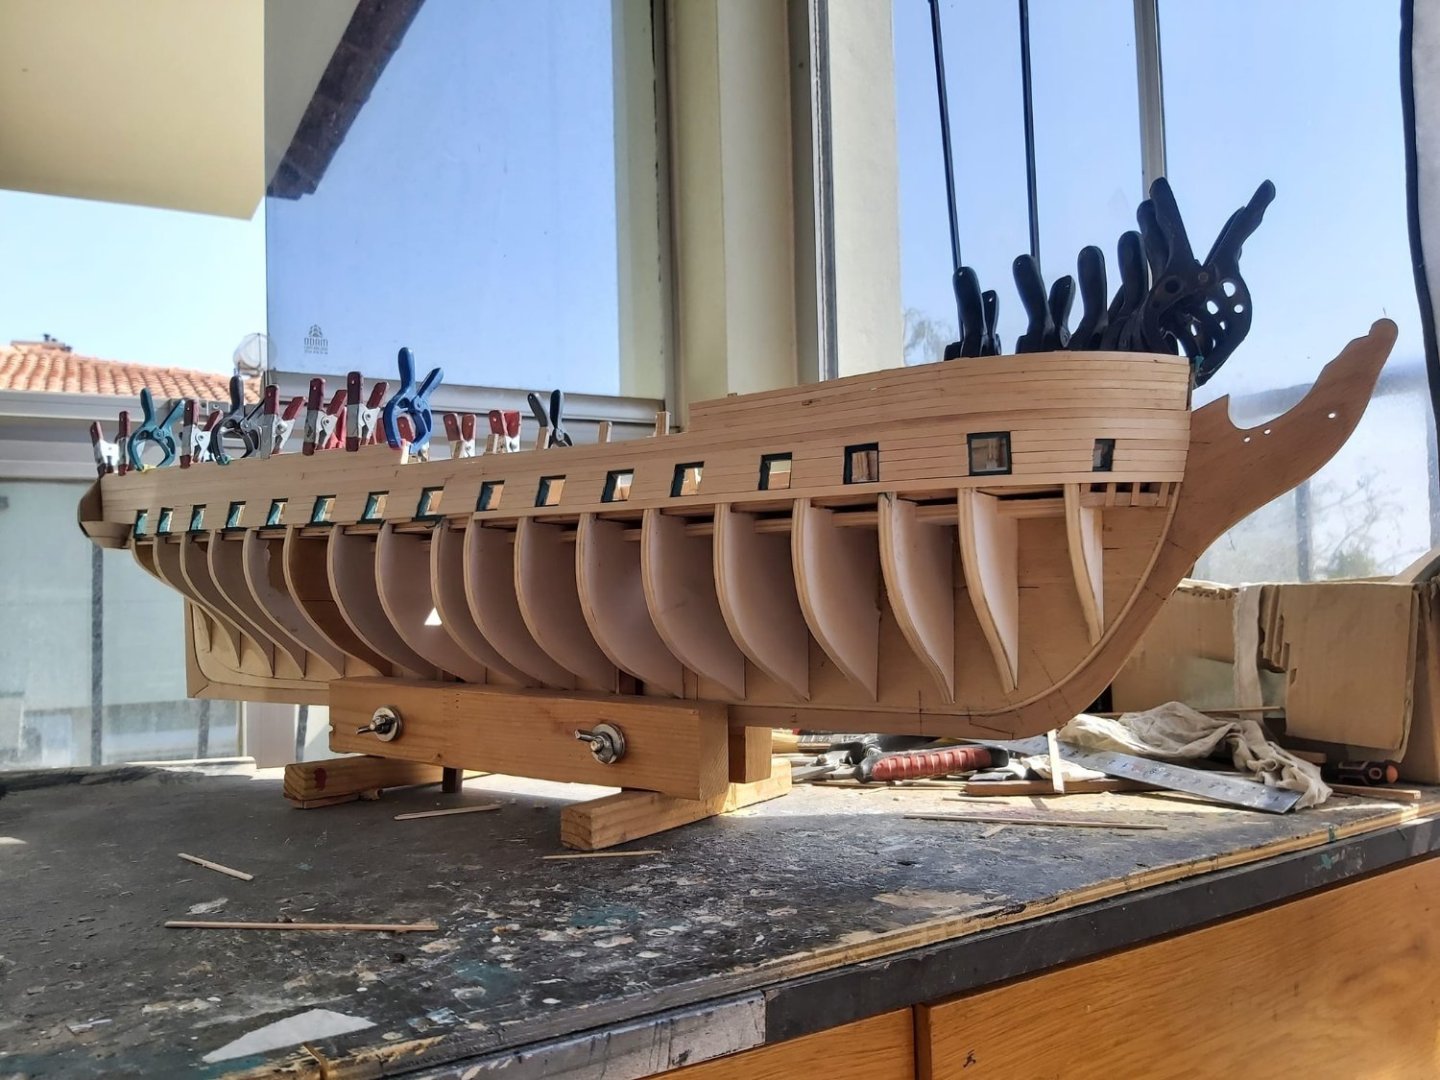

-
Your build is progressing very nicely. I am following with a big interest.
-
USS Constitution by mtbediz - 1:76
mtbediz replied to mtbediz's topic in - Build logs for subjects built 1751 - 1800
Thank you for your concern, Greg. Increasing my followers makes me happy and increases my motivation. -
USS Constitution by mtbediz - 1:76
mtbediz replied to mtbediz's topic in - Build logs for subjects built 1751 - 1800
Thank you for your interest. I follow your build log too. I'm sorry you had to re-cut your bulkheads and keel, but I'm glad you were happy with the result. Since I do everything from scratch, I can move forward by correcting the mistakes in the plans. -
USS Constitution by mtbediz - 1:76
mtbediz replied to mtbediz's topic in - Build logs for subjects built 1751 - 1800
After completing the planking of the spar deck gunports, I plan to start planking the hull.

-
USS Constitution by mtbediz - 1:76
mtbediz replied to mtbediz's topic in - Build logs for subjects built 1751 - 1800
Thank you. -
USS Constitution by mtbediz - 1:76
mtbediz replied to mtbediz's topic in - Build logs for subjects built 1751 - 1800
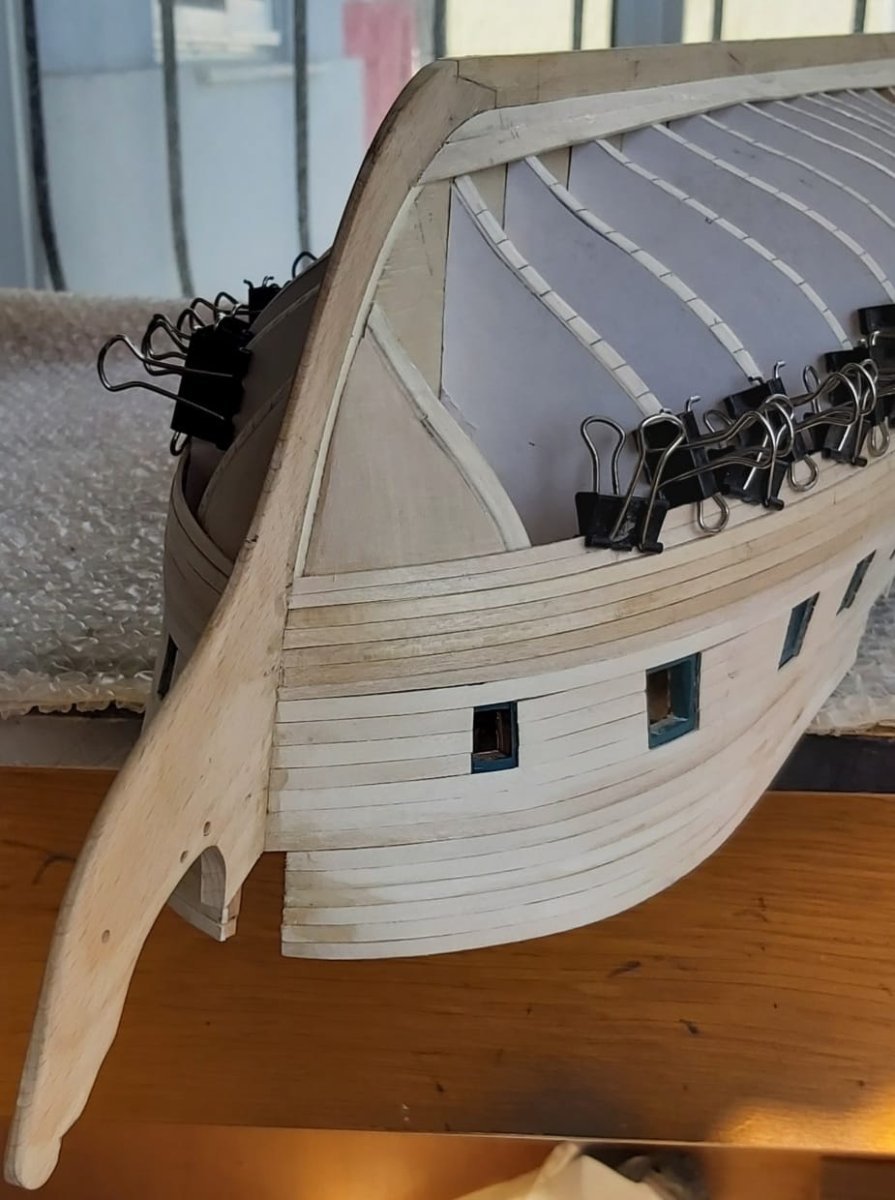
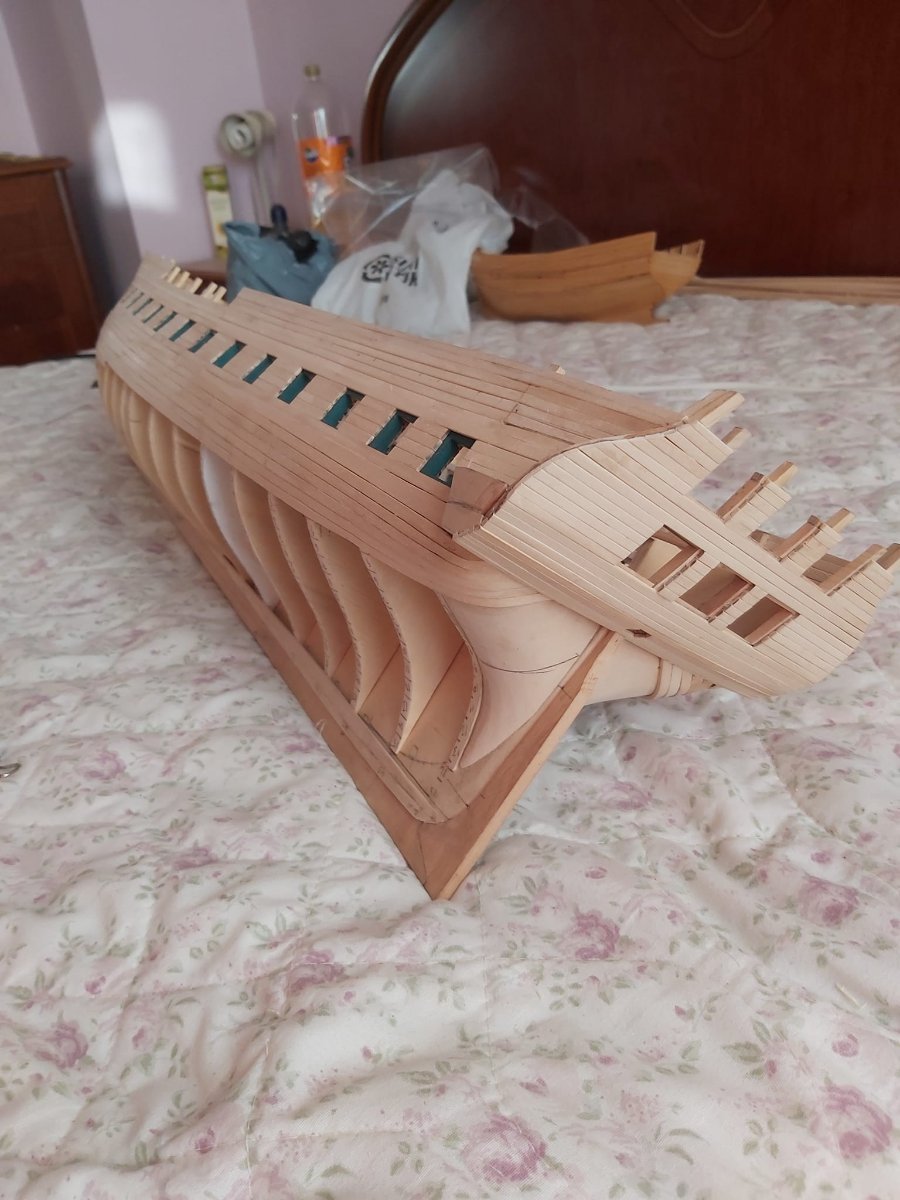
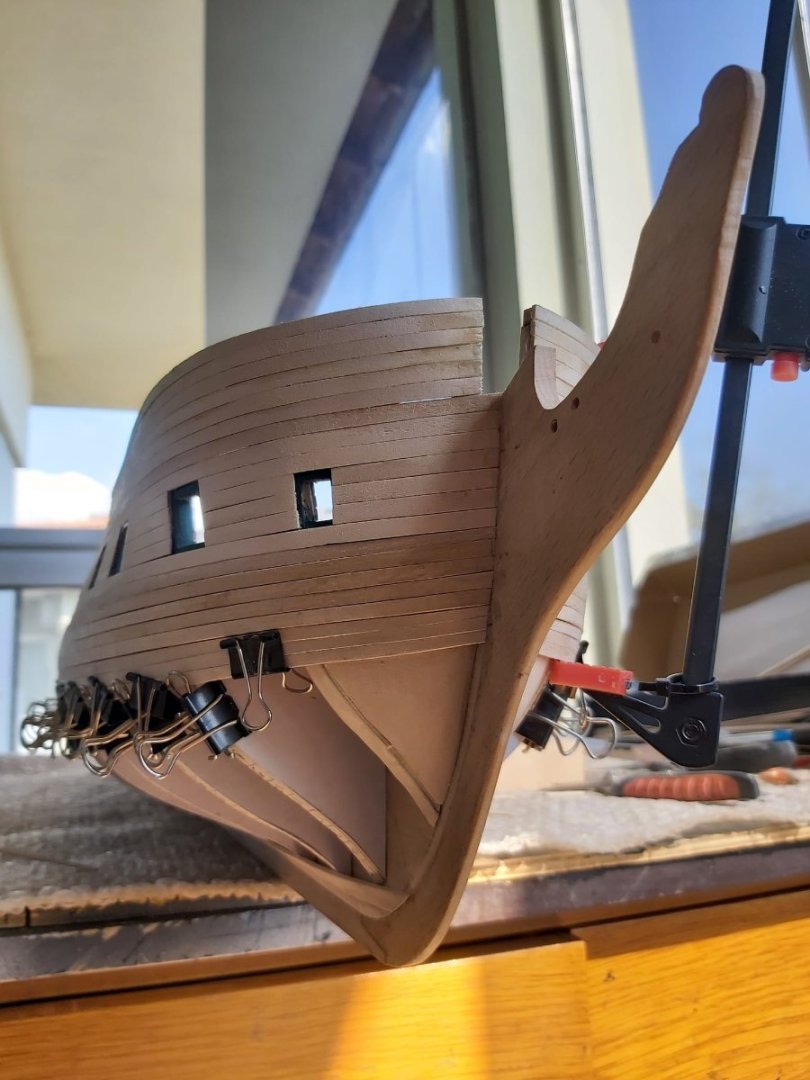
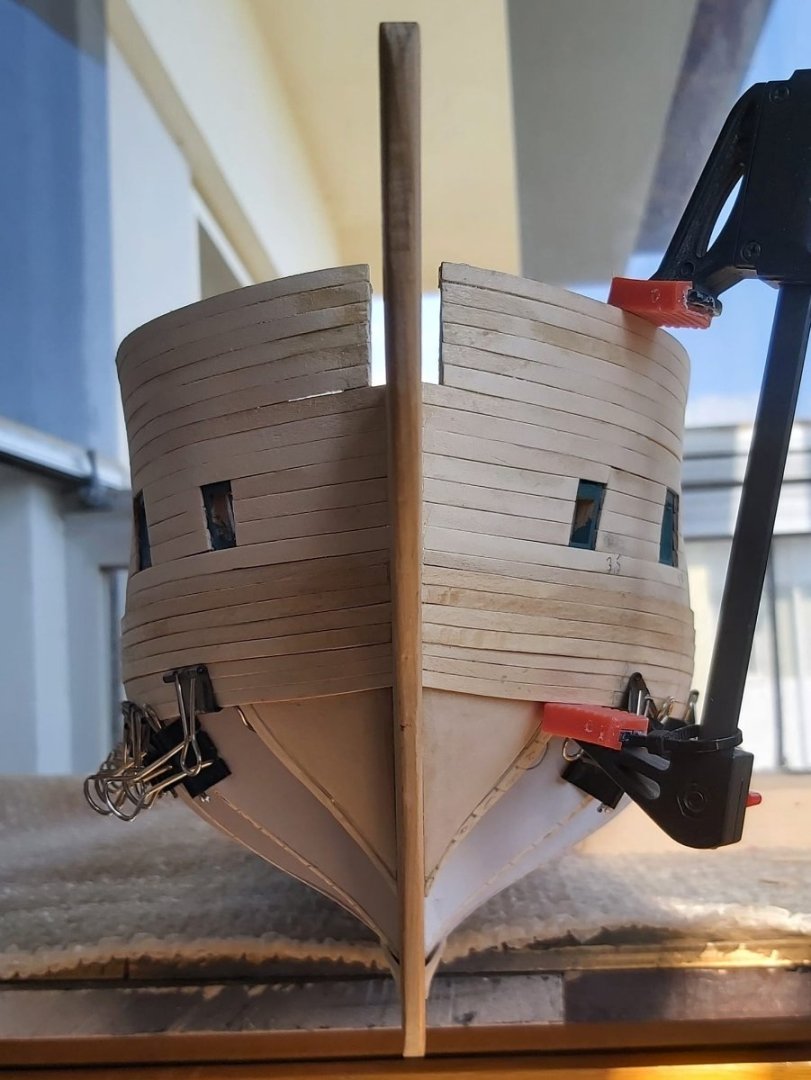
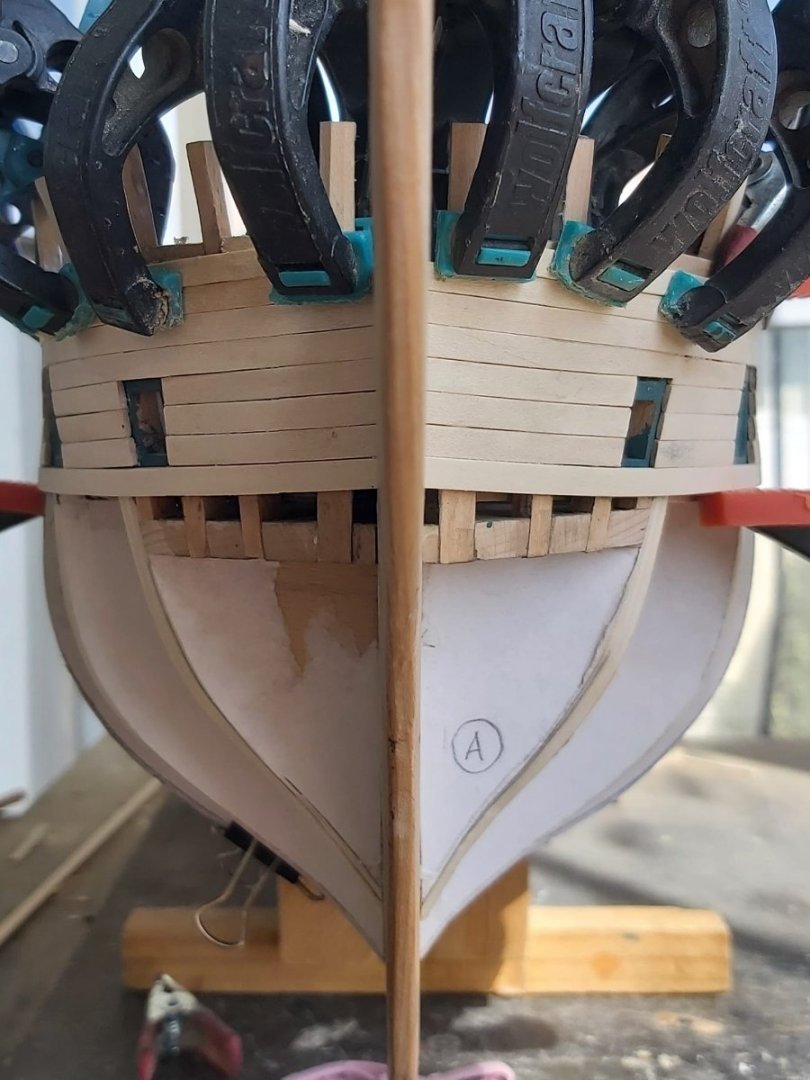
Transom planking done.
-
USS Constitution by mtbediz - 1:76
mtbediz replied to mtbediz's topic in - Build logs for subjects built 1751 - 1800
Thank you. -
For a first try, I think you did it pretty well. It will get better with practice.
- 562 replies
-
- 3
-

-
- vanguard models
- alert
- (and 2 more)
-
USS Constitution by mtbediz - 1:76
mtbediz replied to mtbediz's topic in - Build logs for subjects built 1751 - 1800
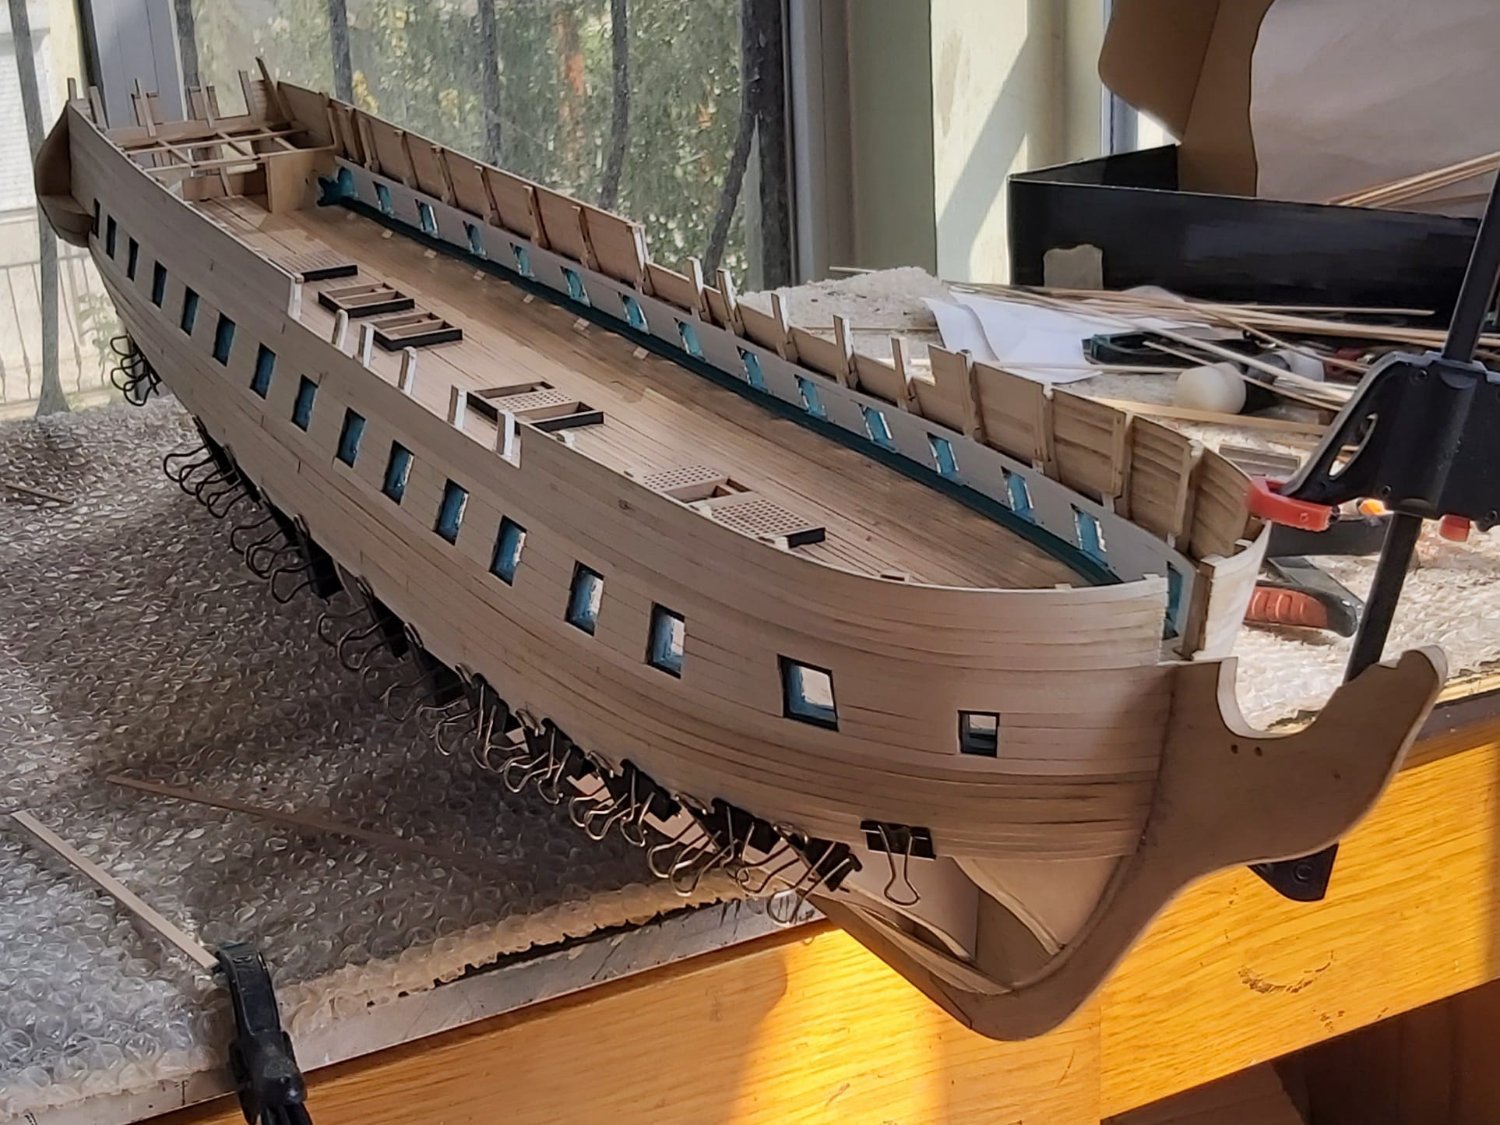
I've started planking the upper hull. First, I am making between the gun ports. To guide me in aligning the planks, I temporarily clamped a plank running from bow to stern.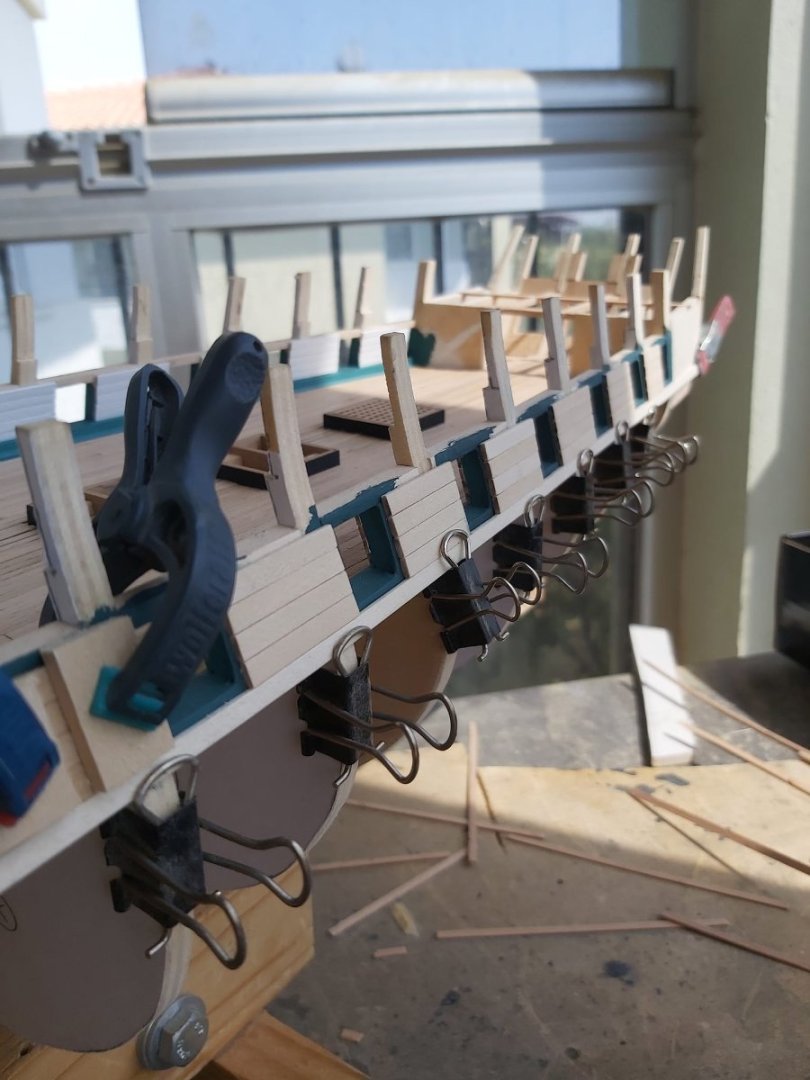


-
USS Constitution by mtbediz - 1:76
mtbediz replied to mtbediz's topic in - Build logs for subjects built 1751 - 1800
Gun deck planking has been completed. I will do the outer planking of the upper hull. Meanwhile, the frames of the spar deck gun ports will also be made.


-
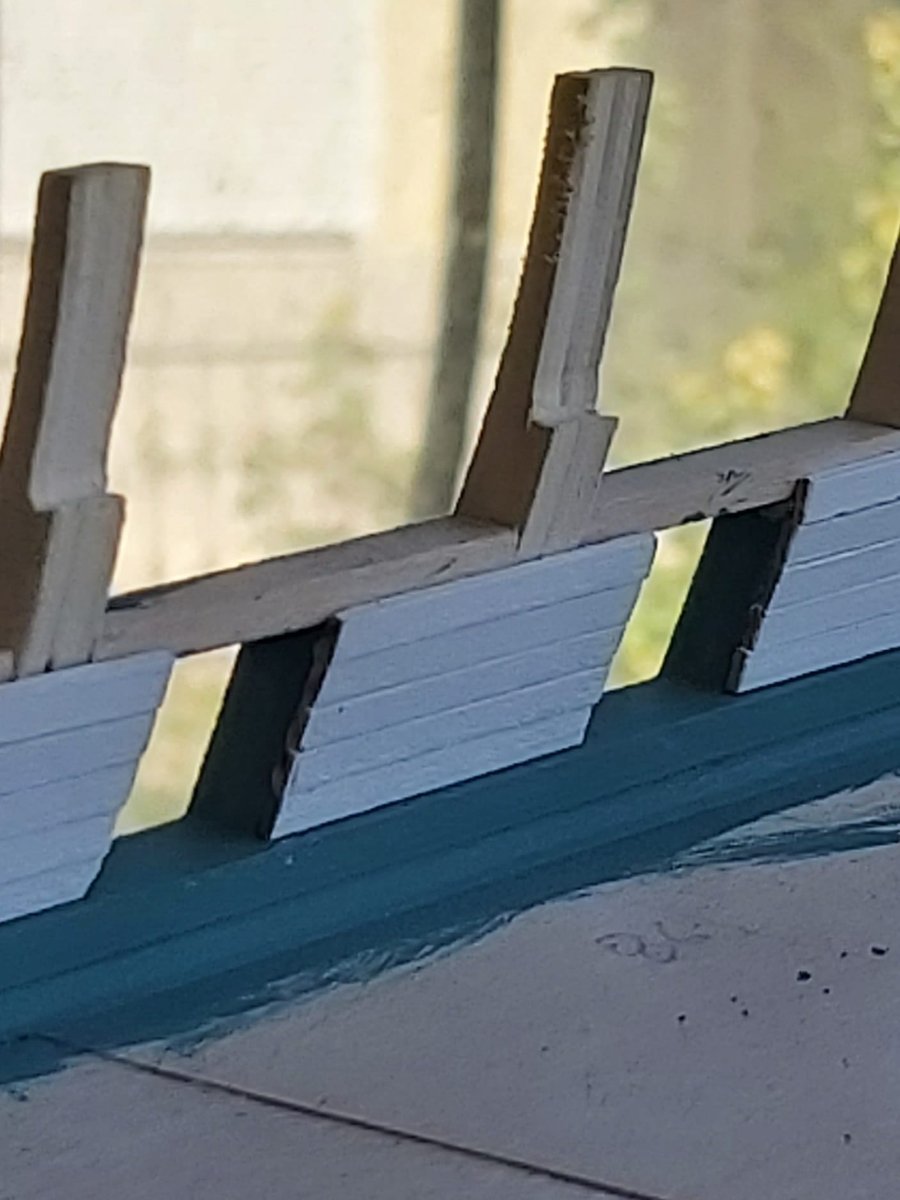
Peter Goodwin calls them guardrail stancions in his Alert book. By the way your Alert looks awesome.
- 562 replies
-
- 5
-
-

-
- vanguard models
- alert
- (and 2 more)
-
USS Constitution by mtbediz - 1:76
mtbediz replied to mtbediz's topic in - Build logs for subjects built 1751 - 1800
I’ve started planking the gun deck. I am using 1x3 mm hornbeam strips and PVA glue.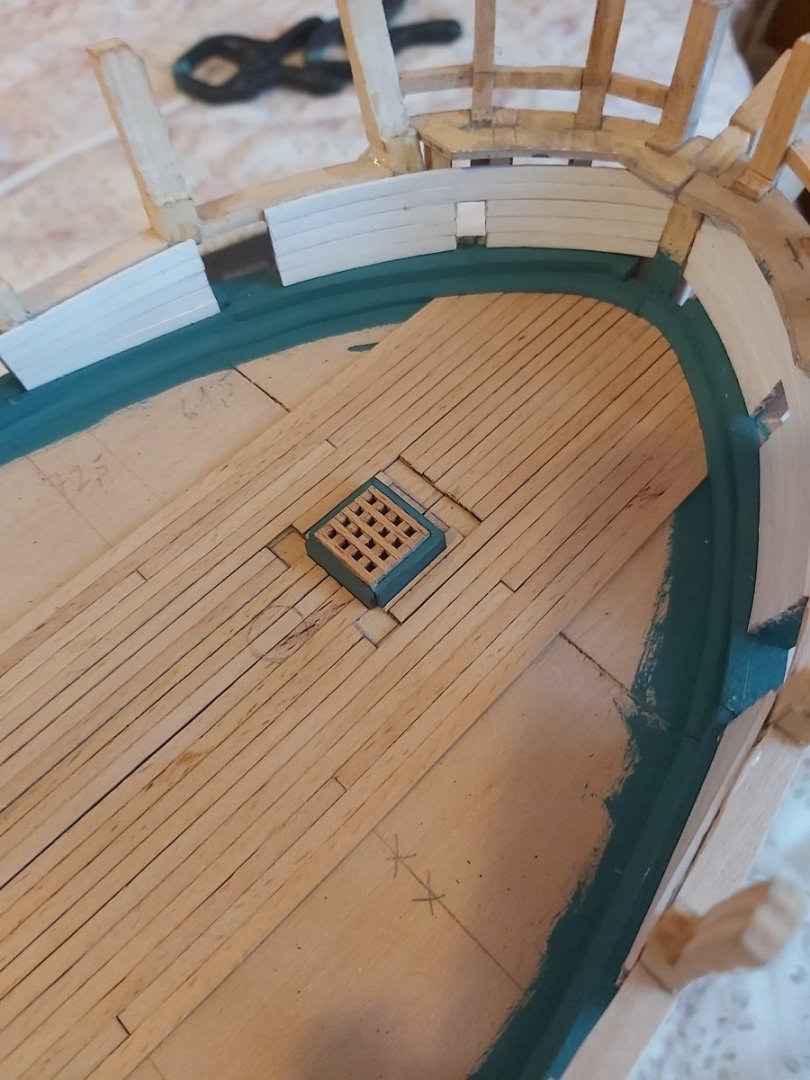

-
I've been following your build with interest and I'm also building a Conny from scratch by adding a gun deck. Each of your posts gives me a new source of inspiration. Thanks for your detailed sharing Jon.
-
USS Constitution by mtbediz - 1:76
mtbediz replied to mtbediz's topic in - Build logs for subjects built 1751 - 1800
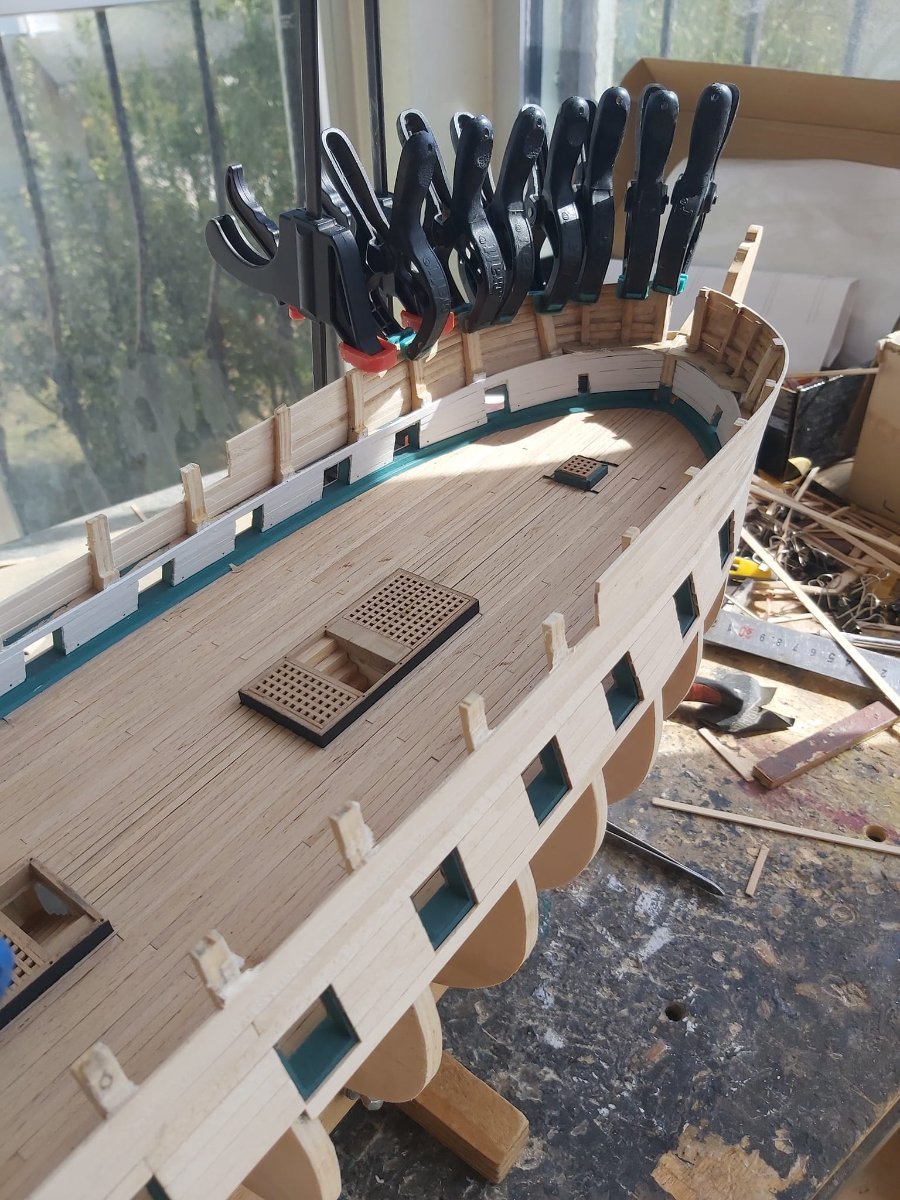
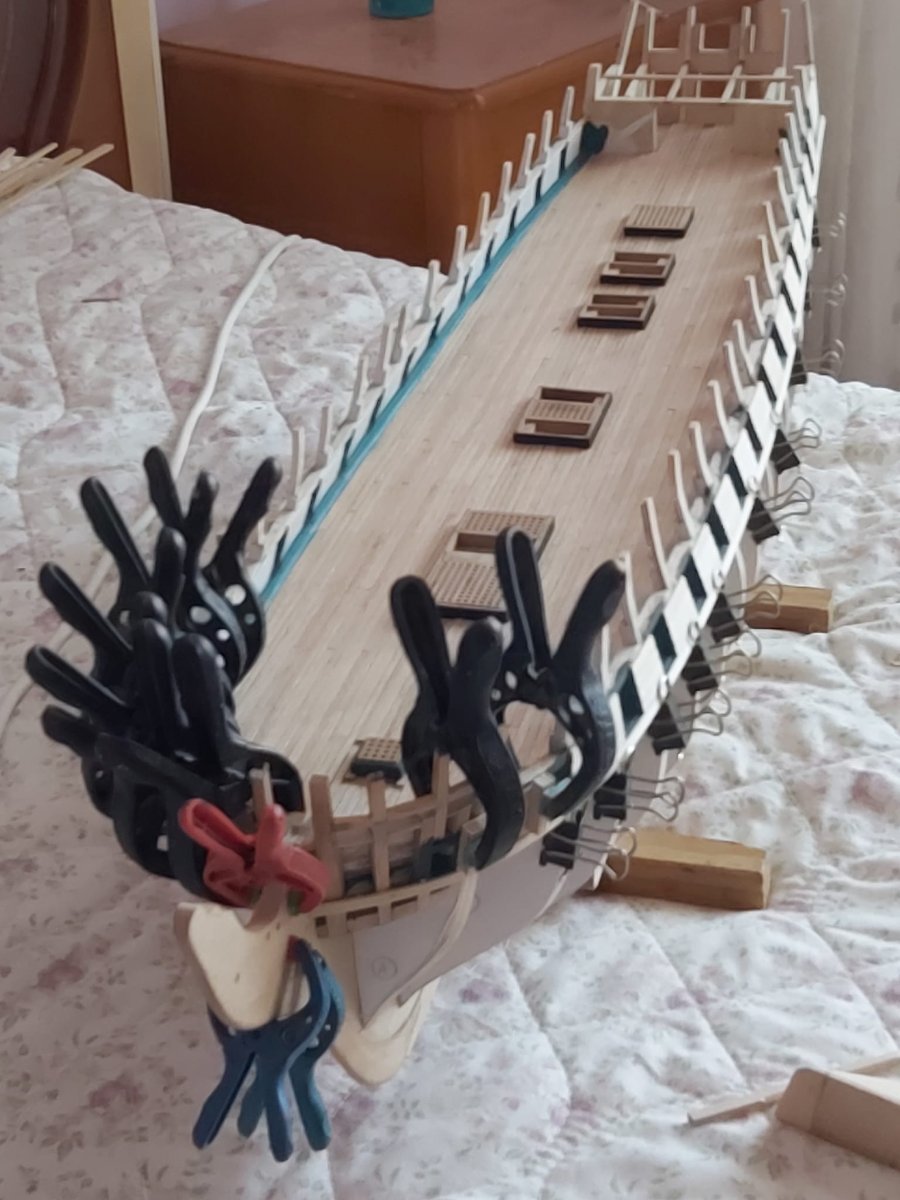
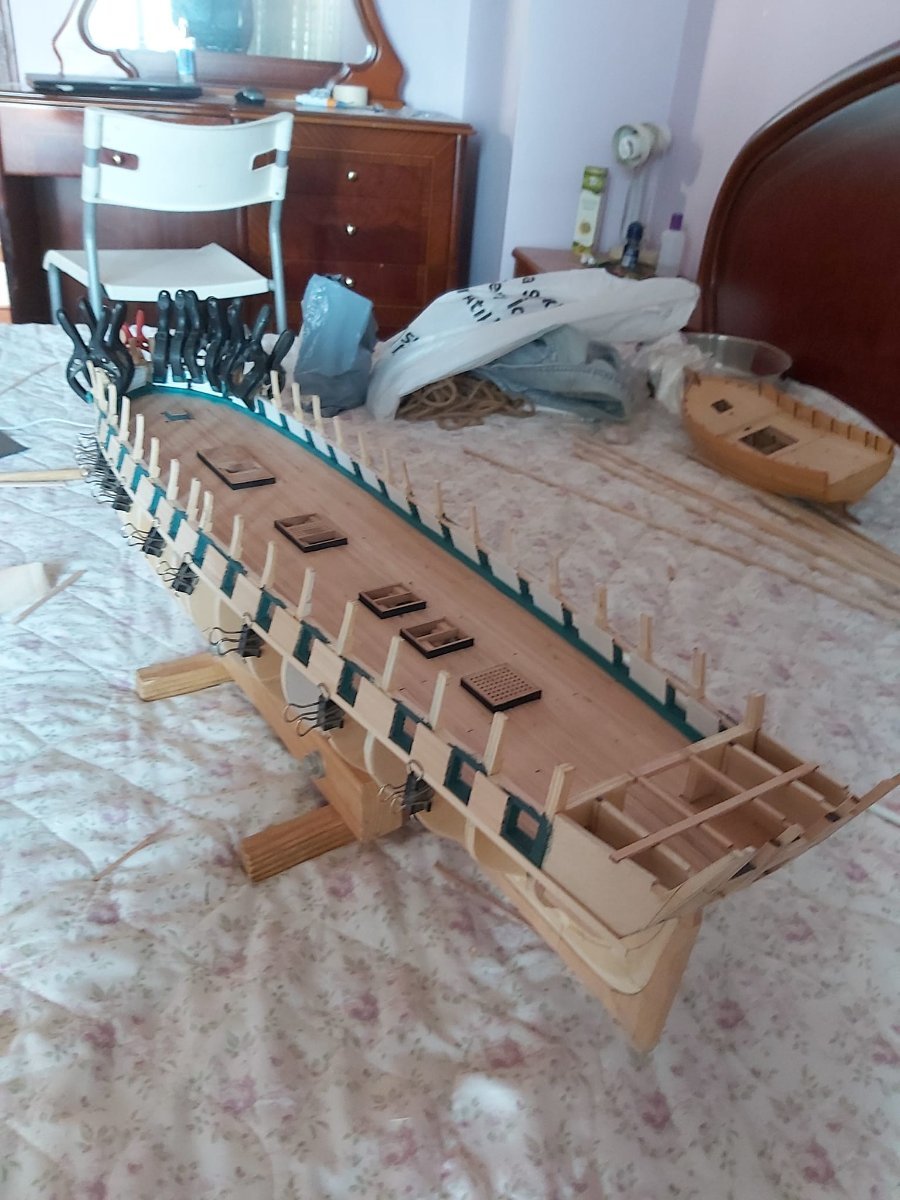
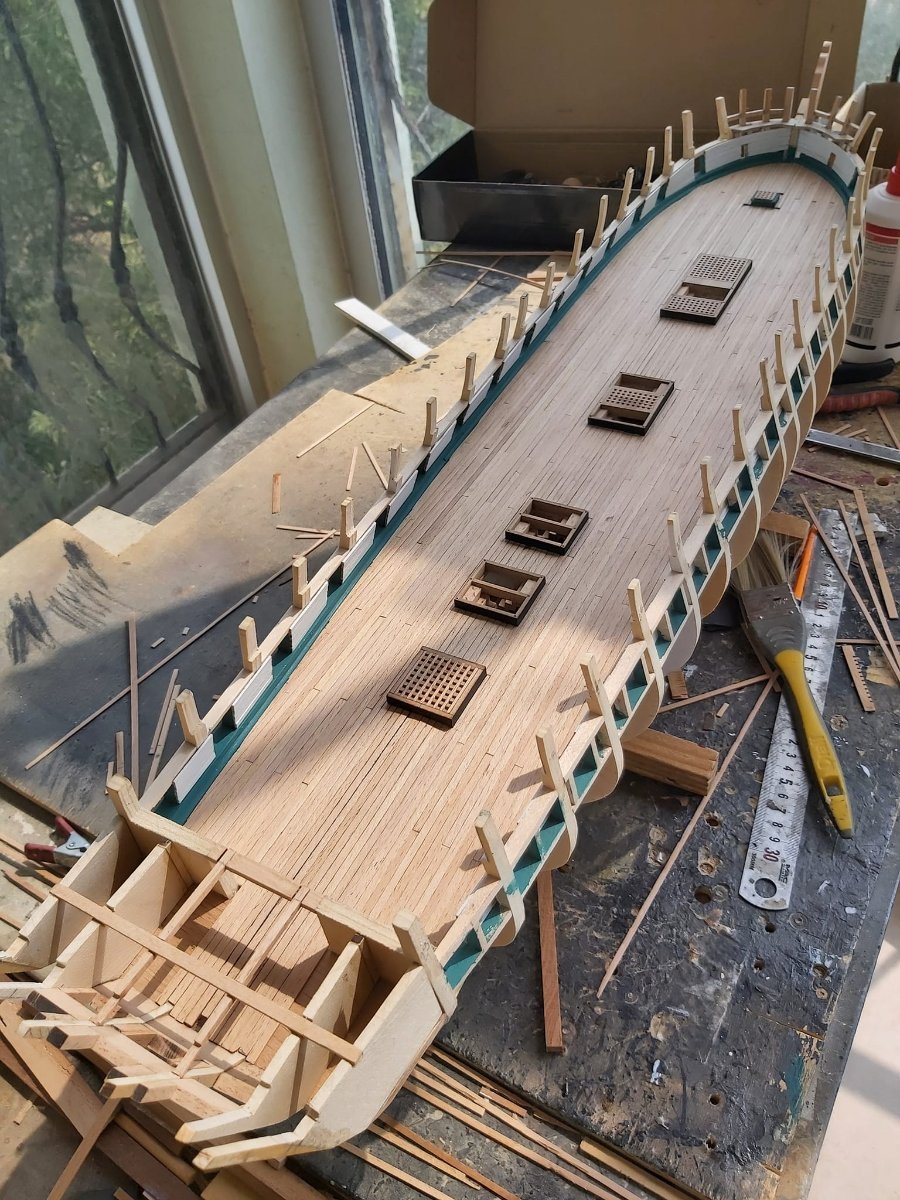
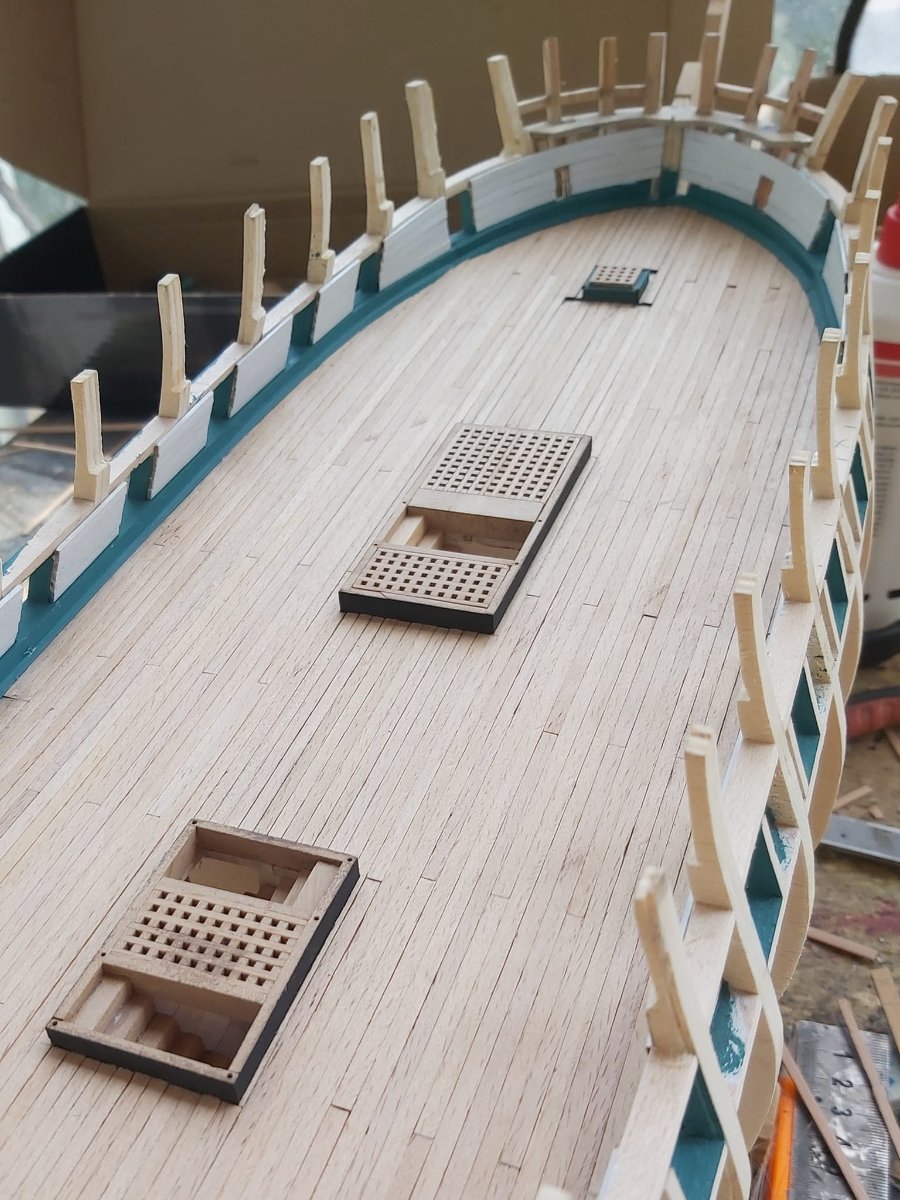
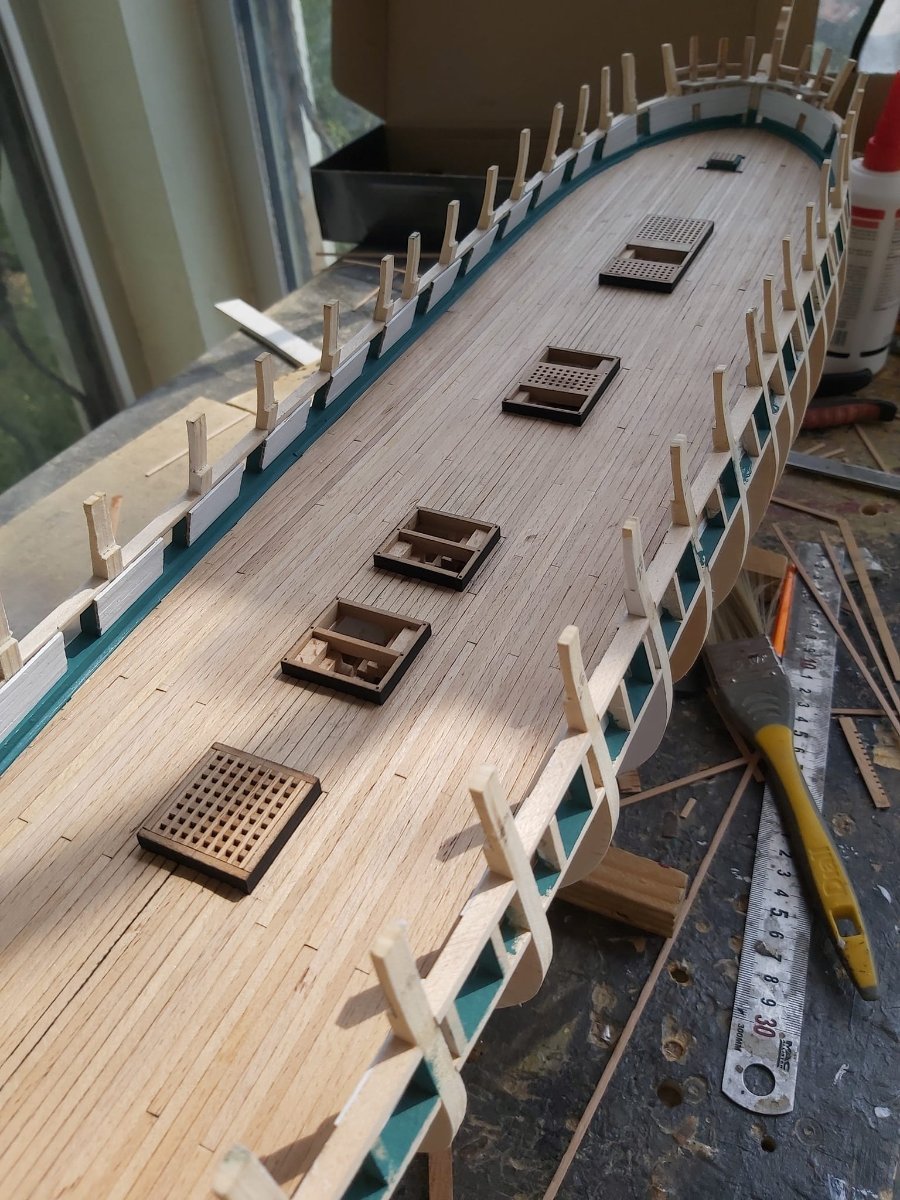
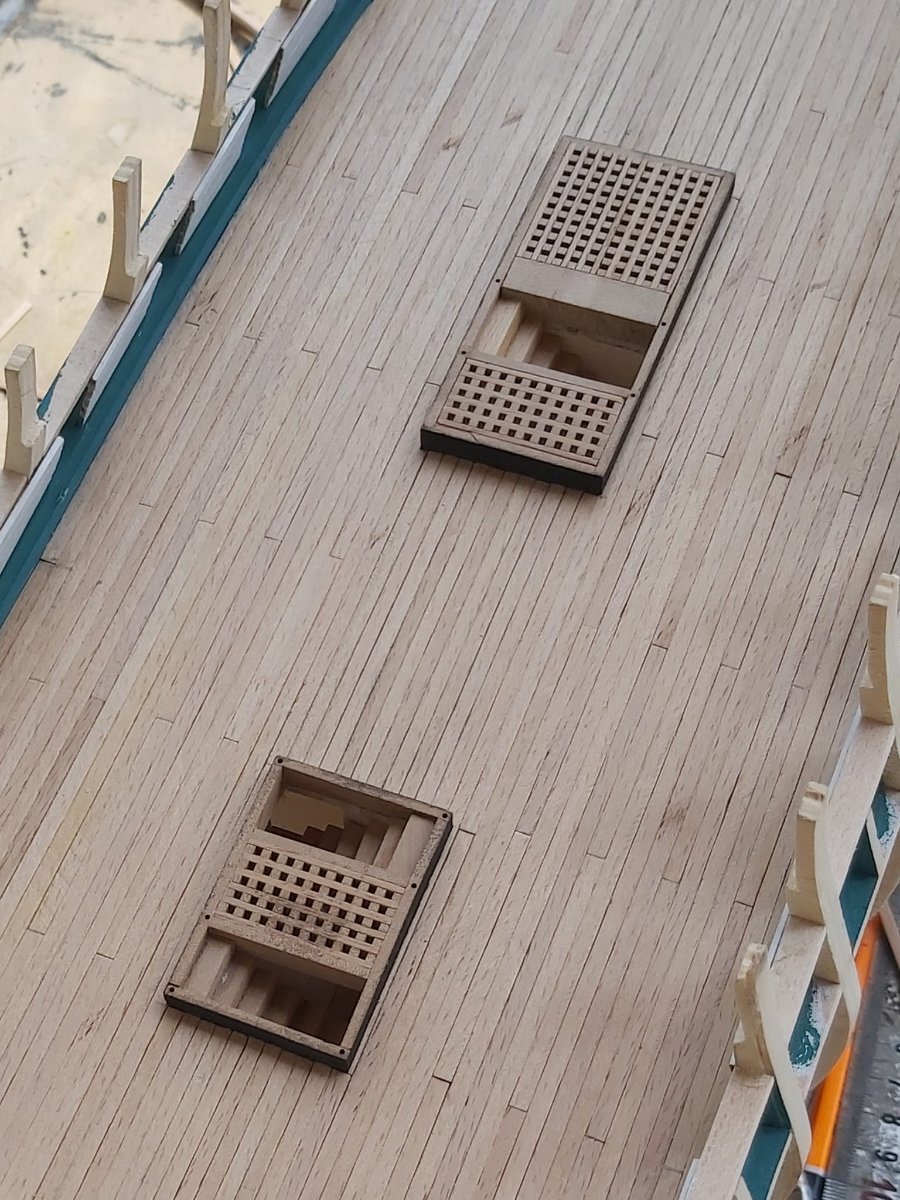
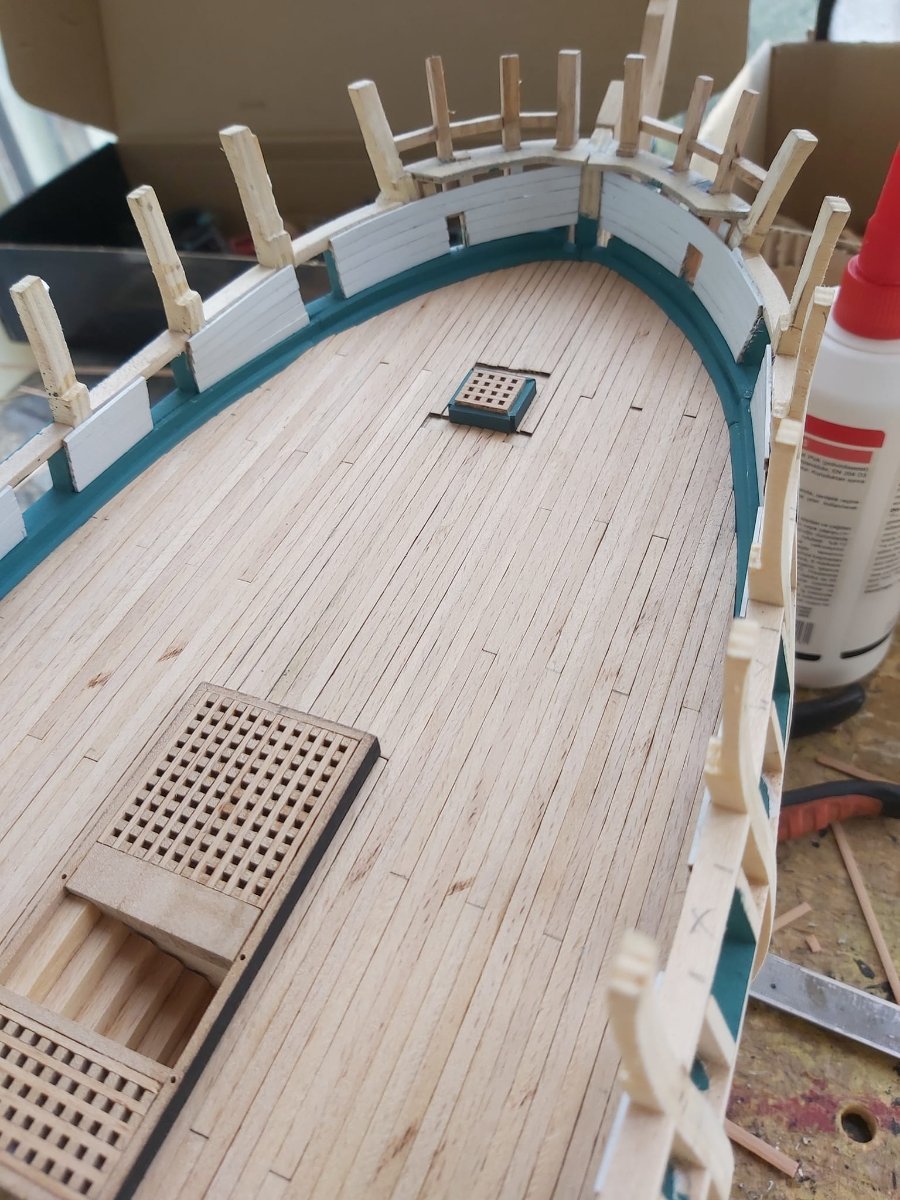
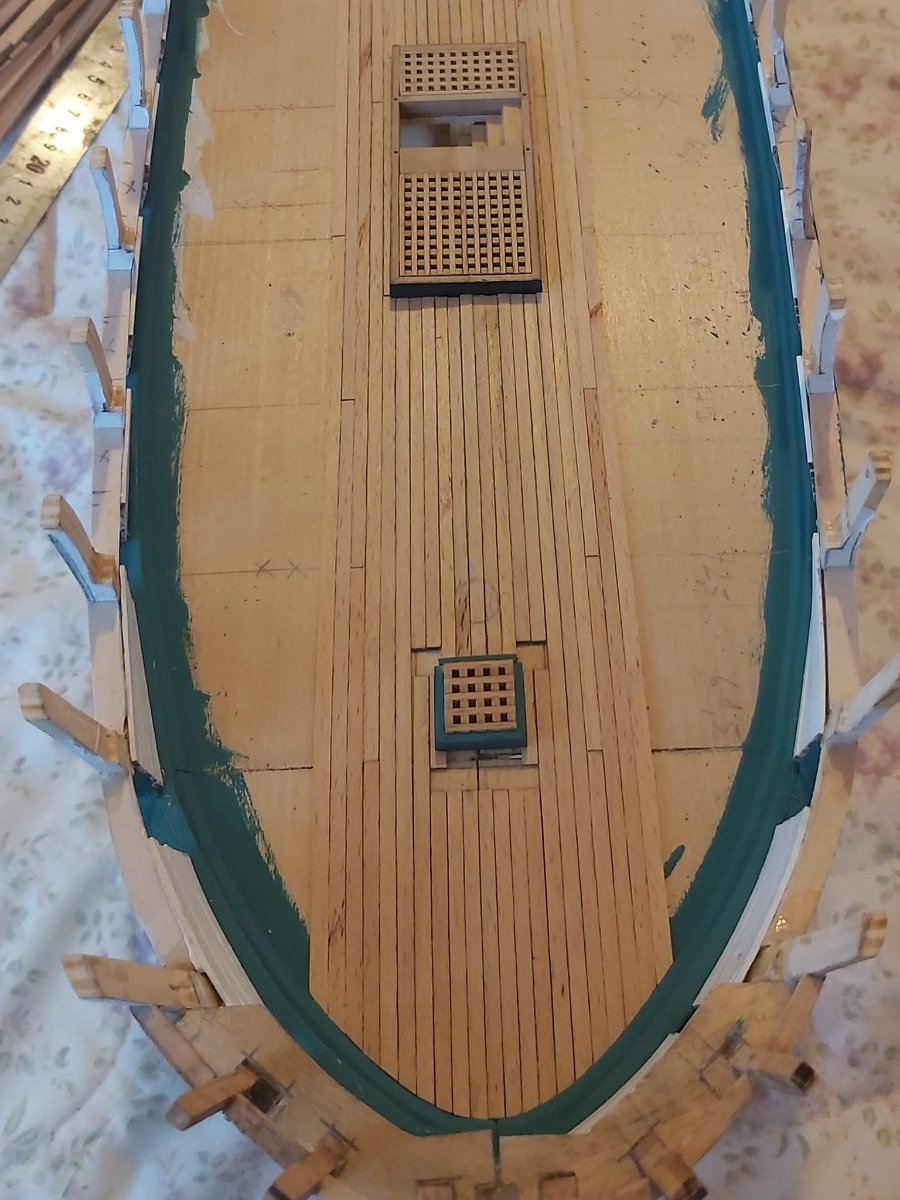
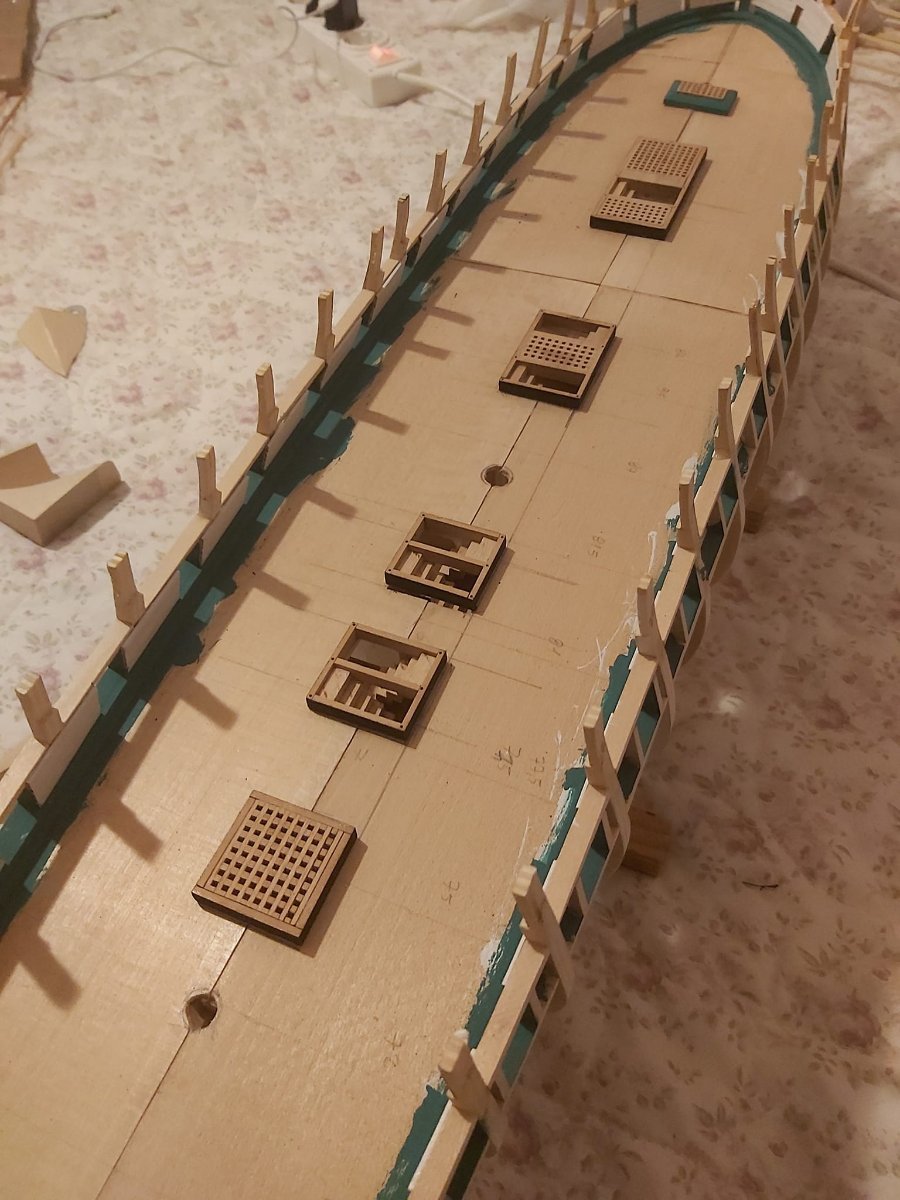
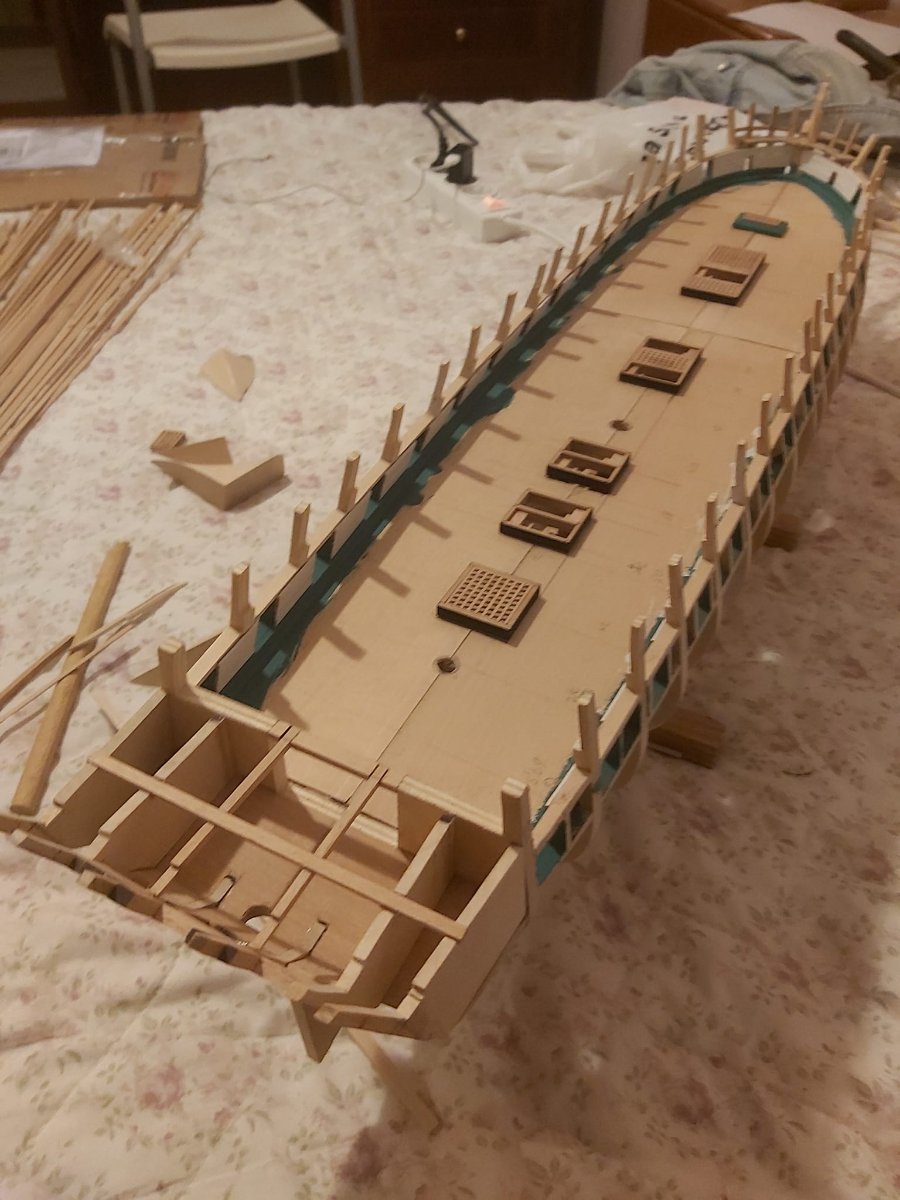
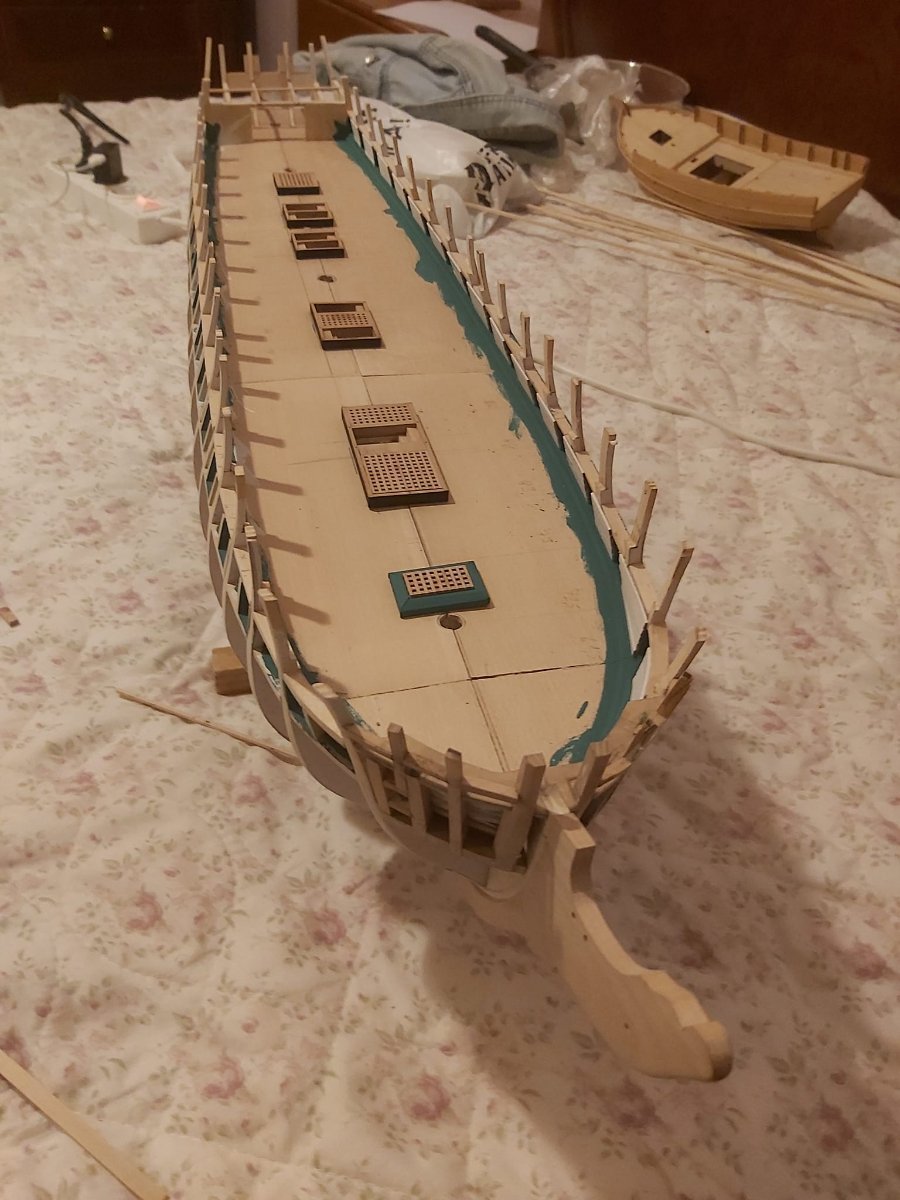
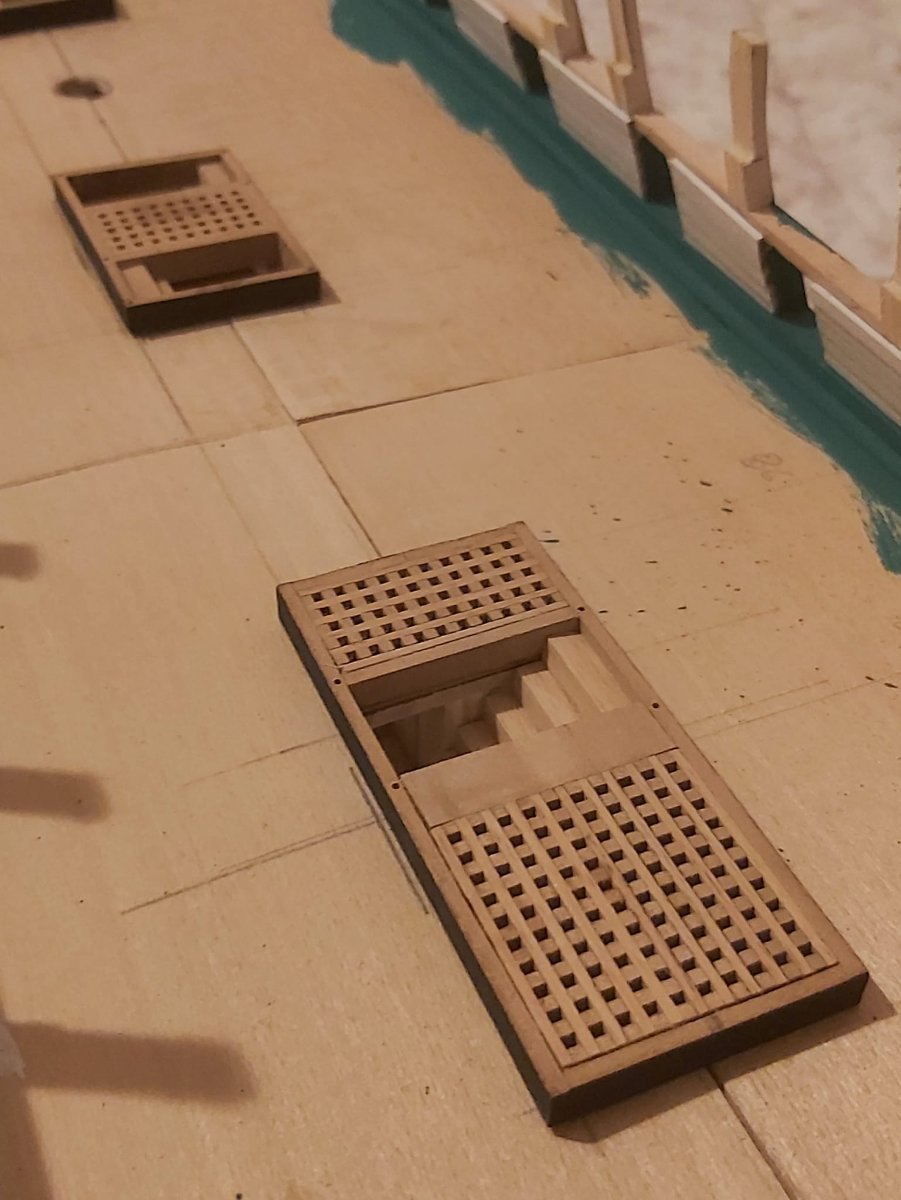
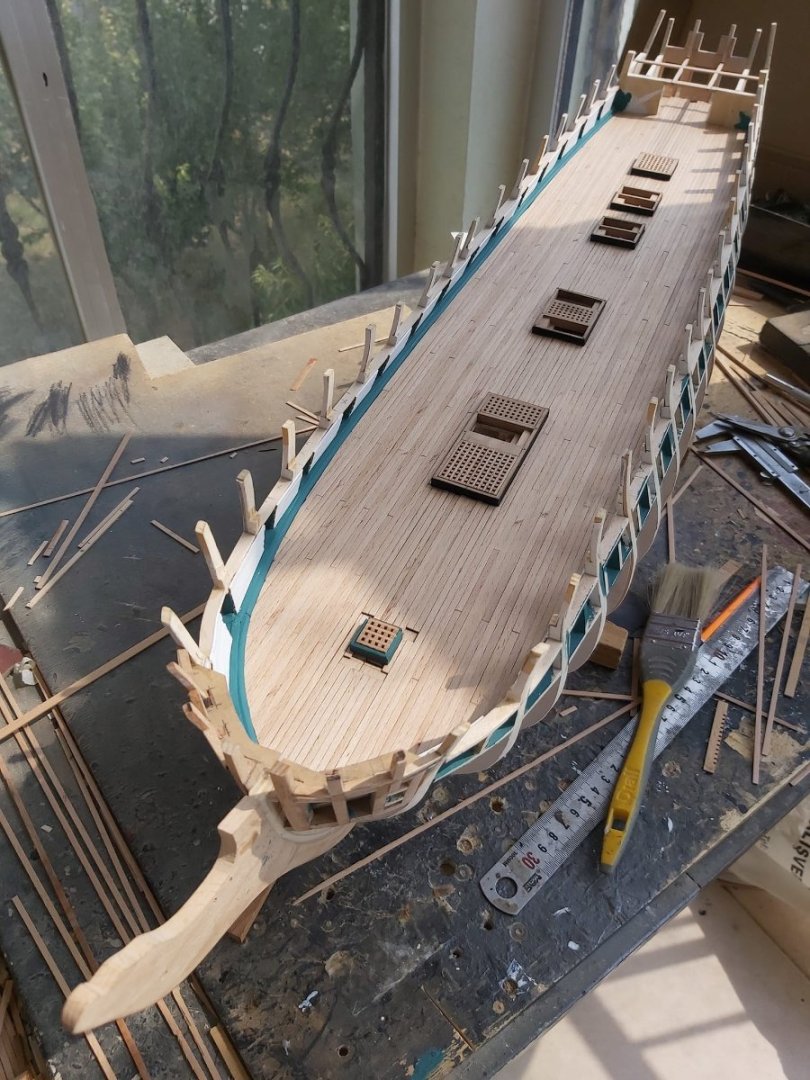
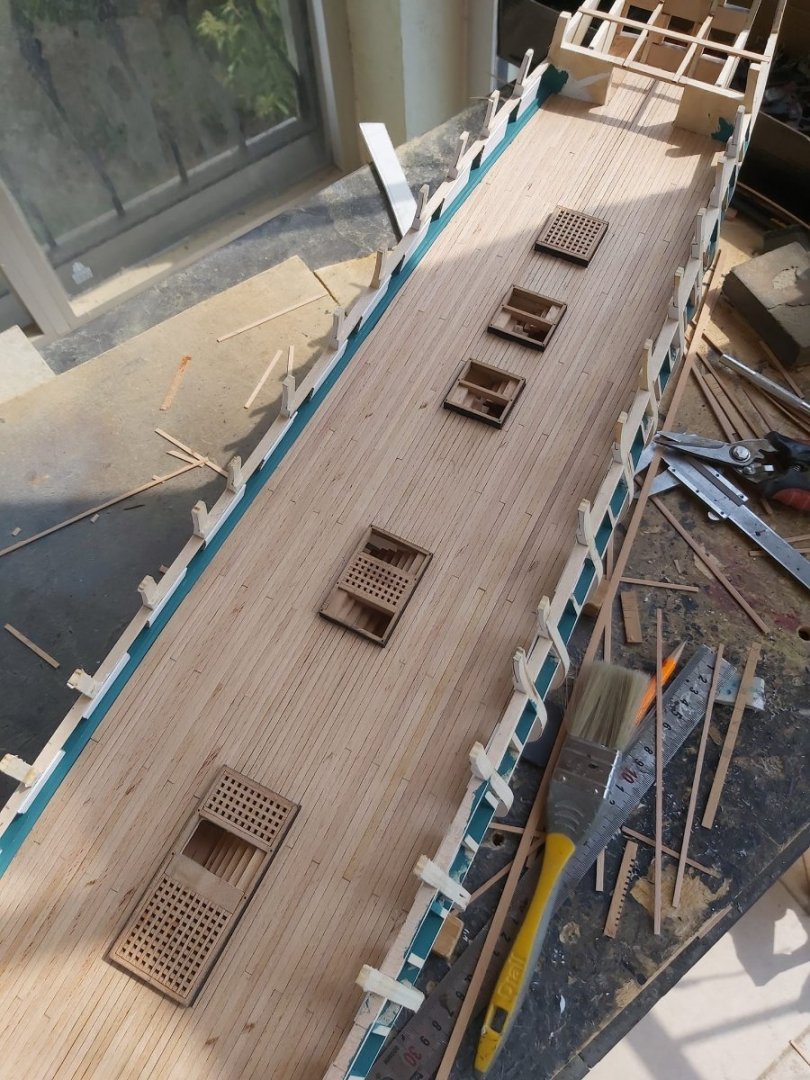
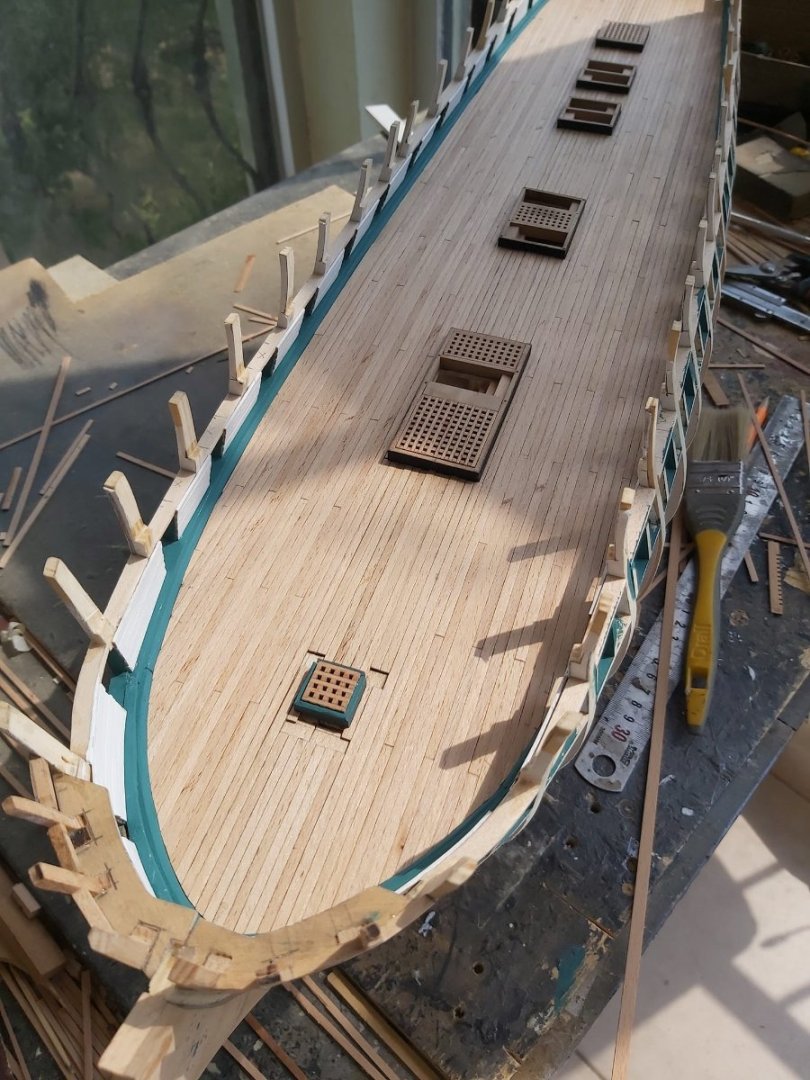
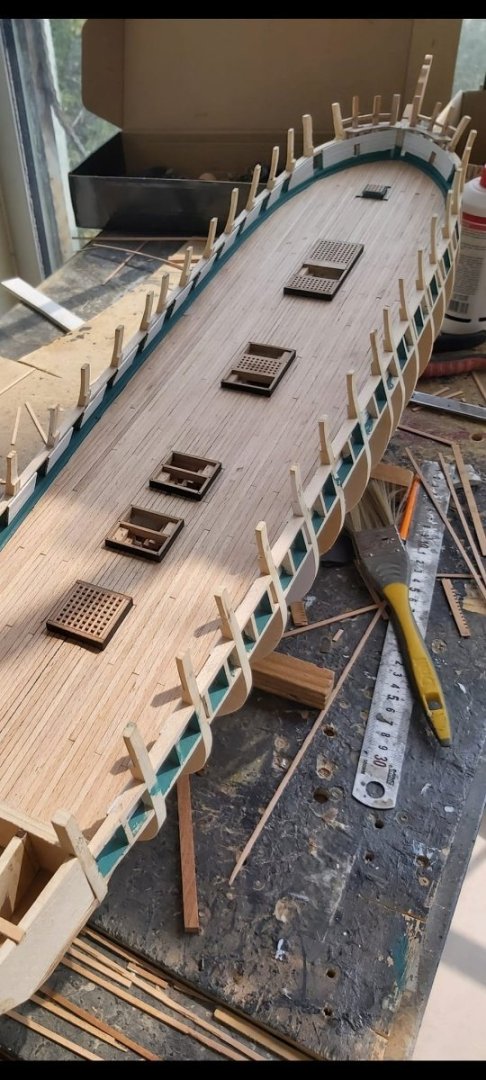
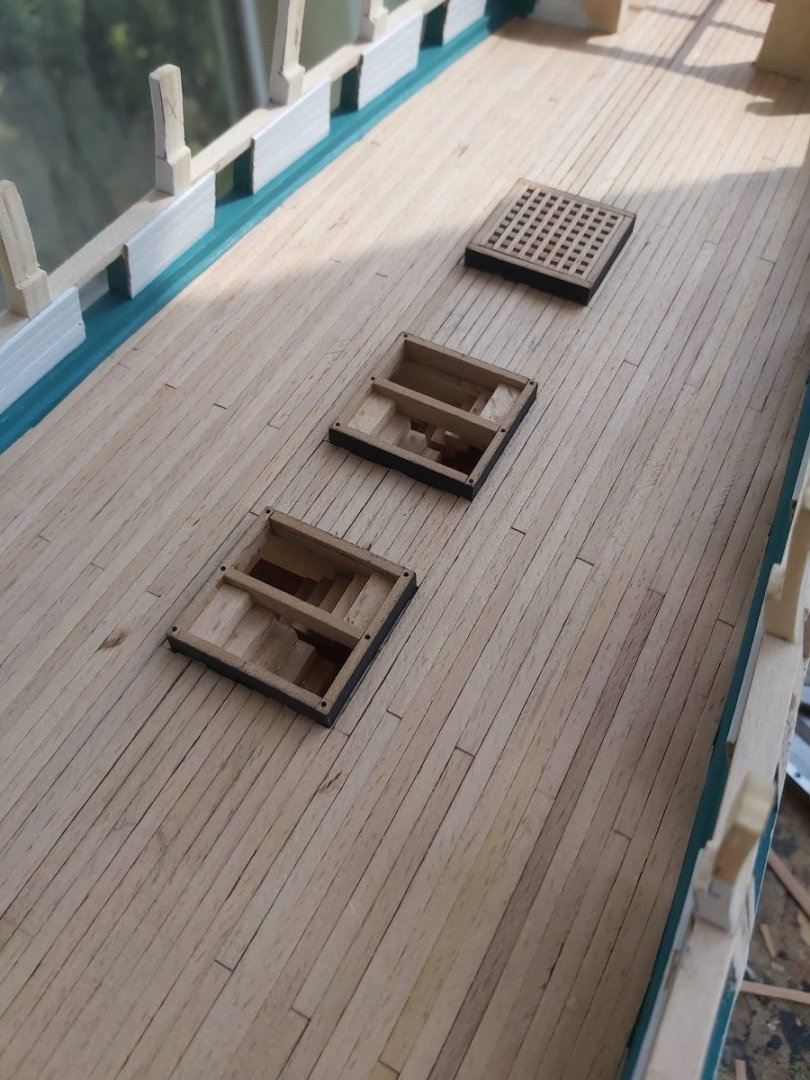
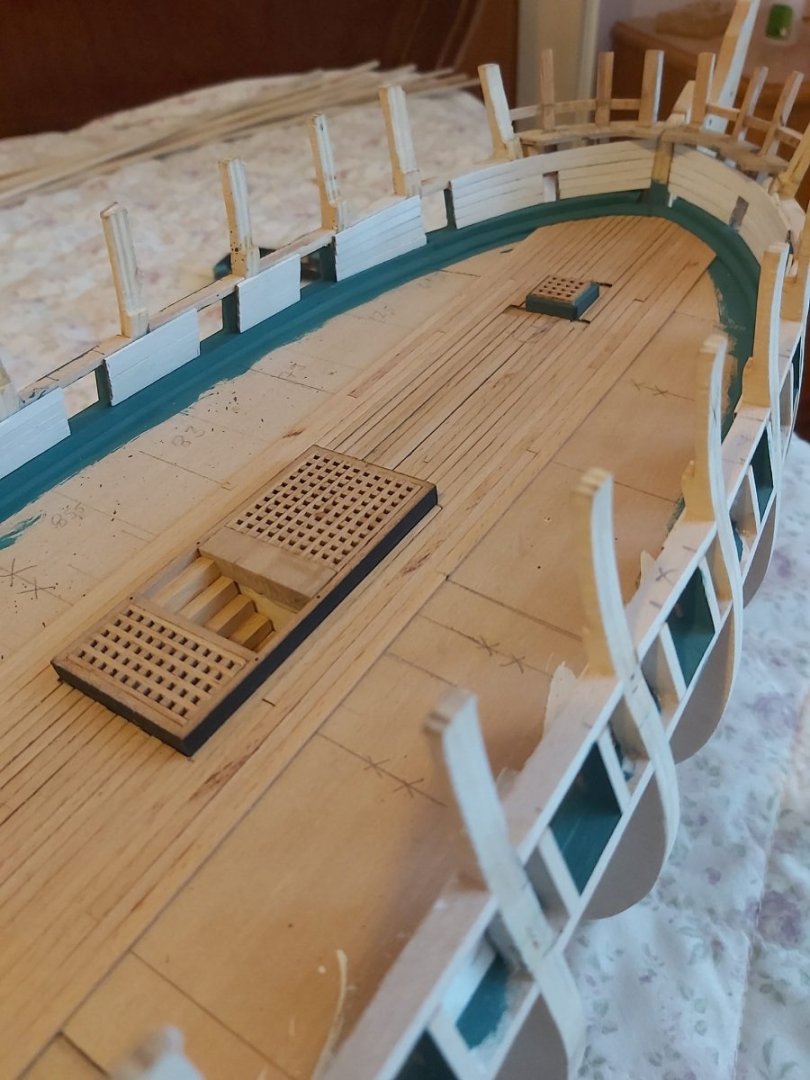
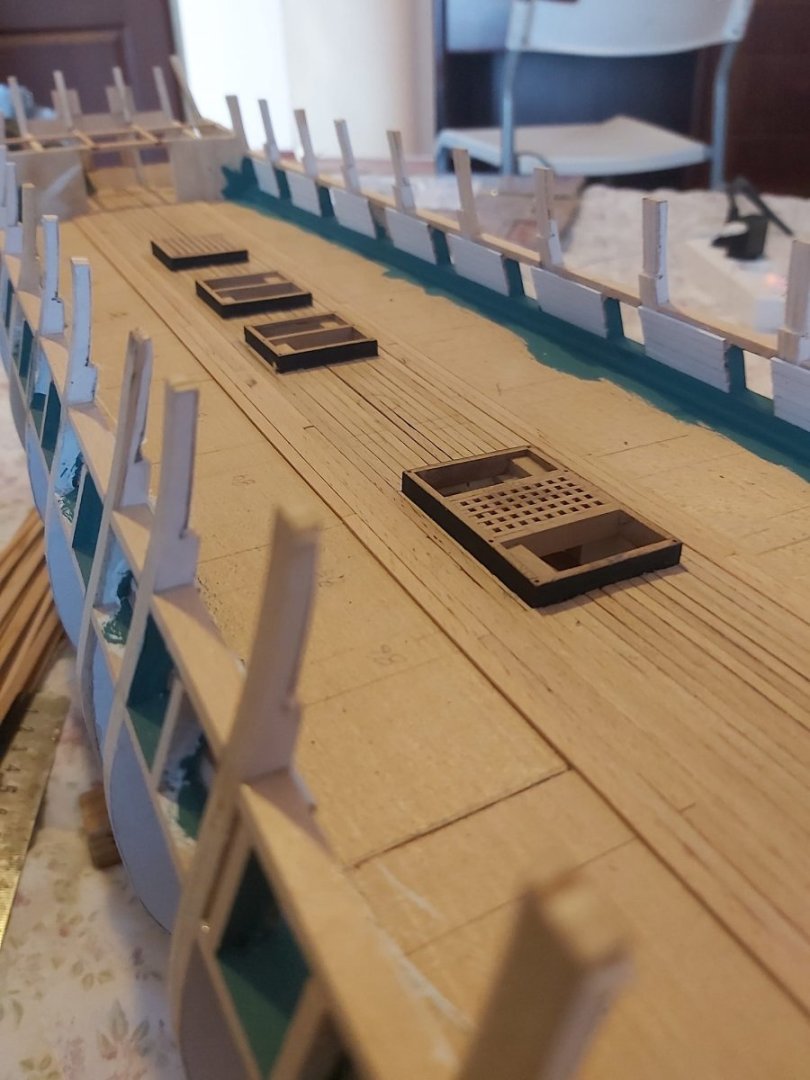
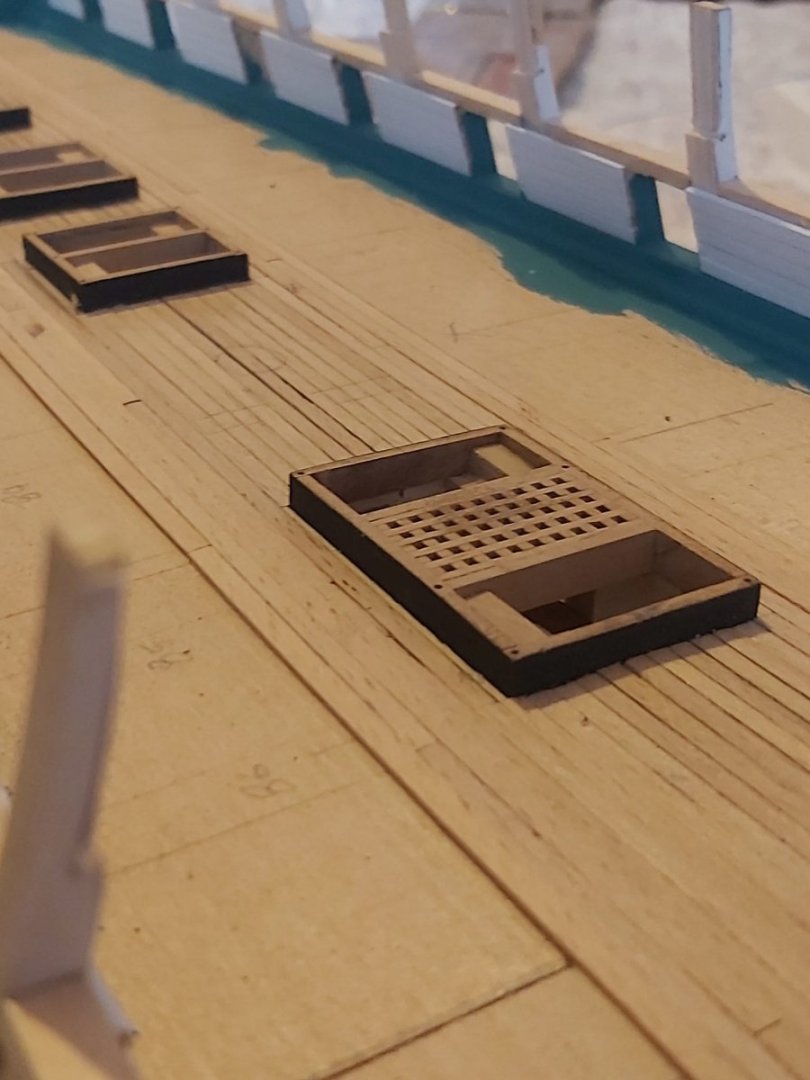
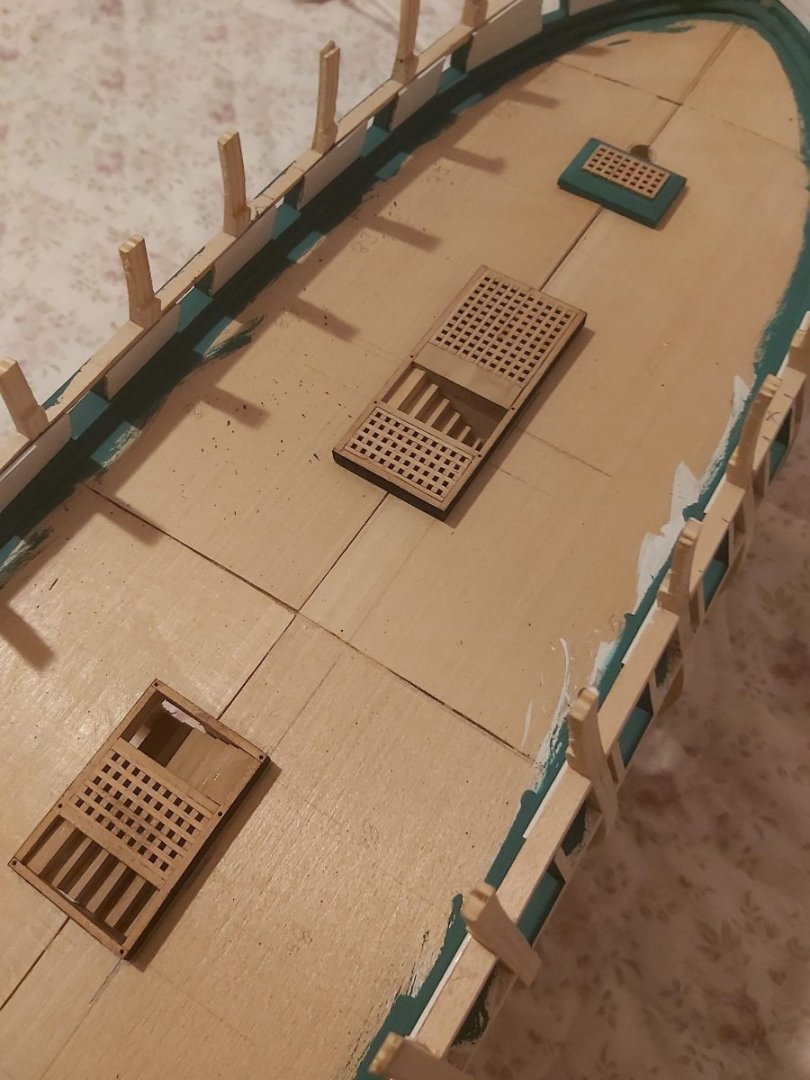
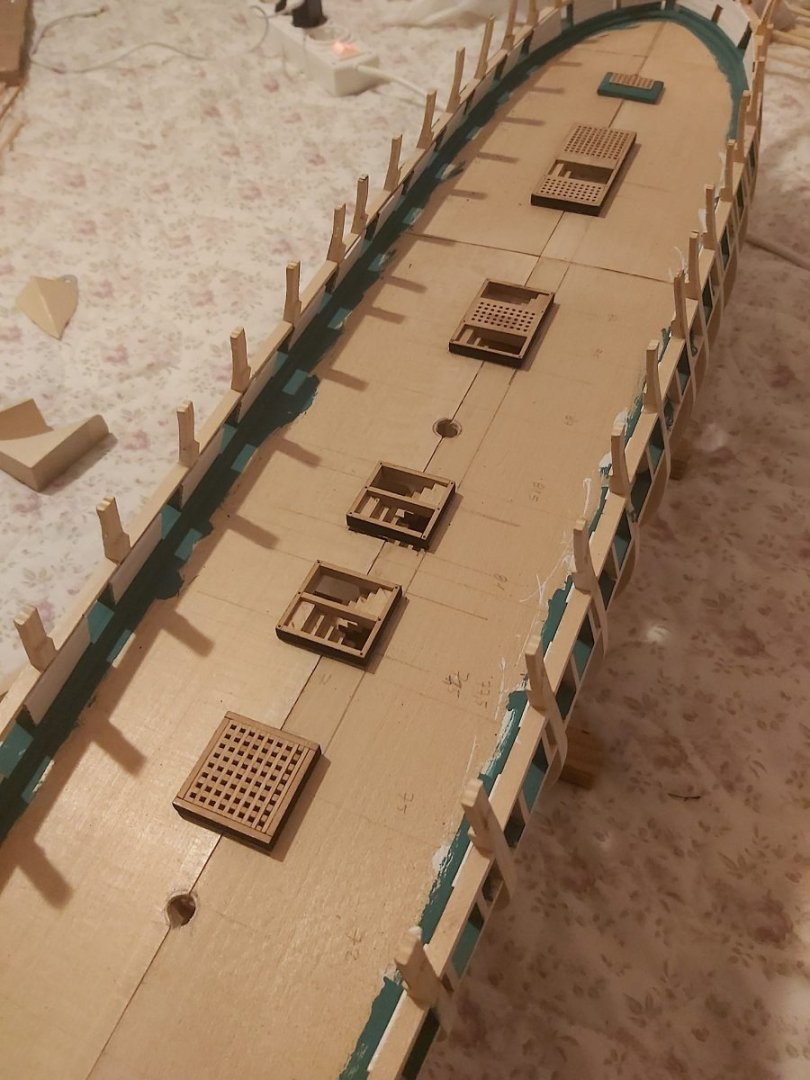
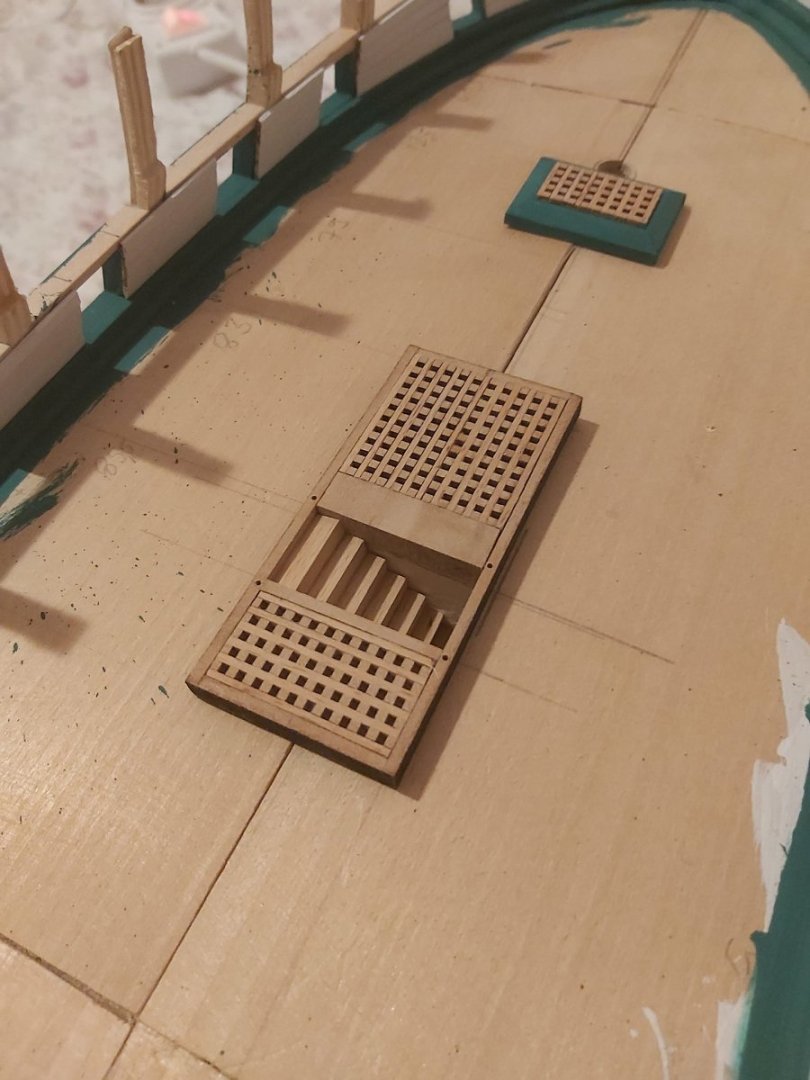
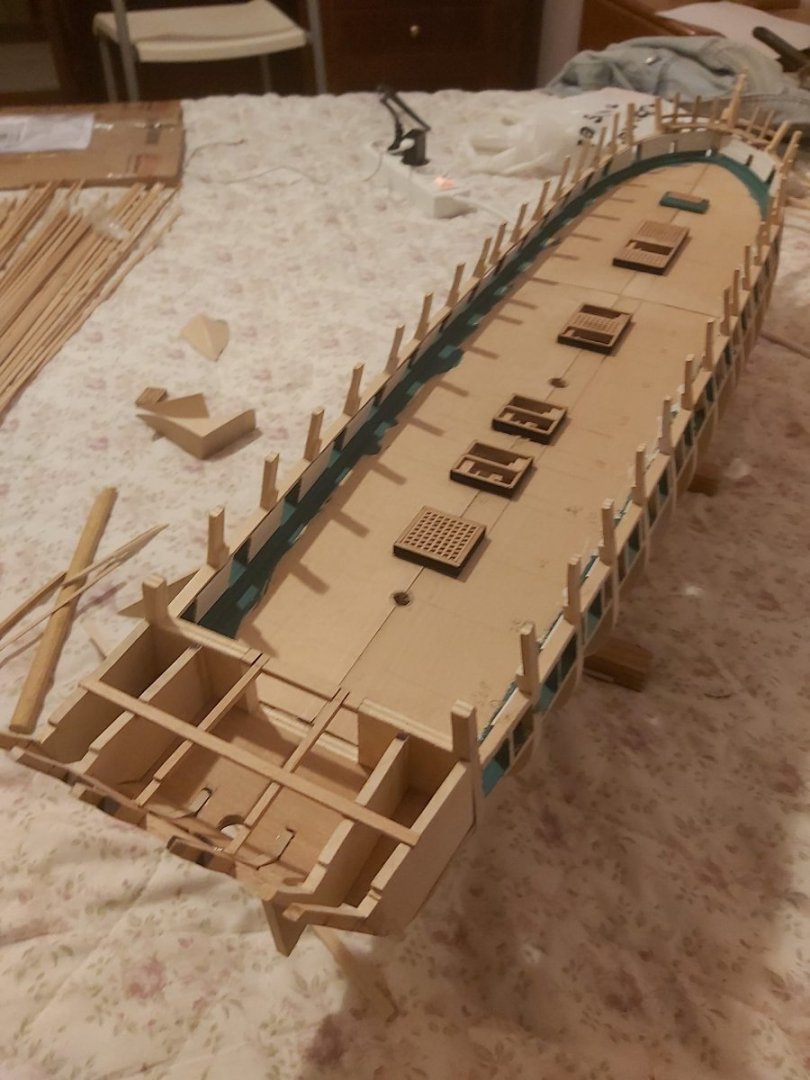
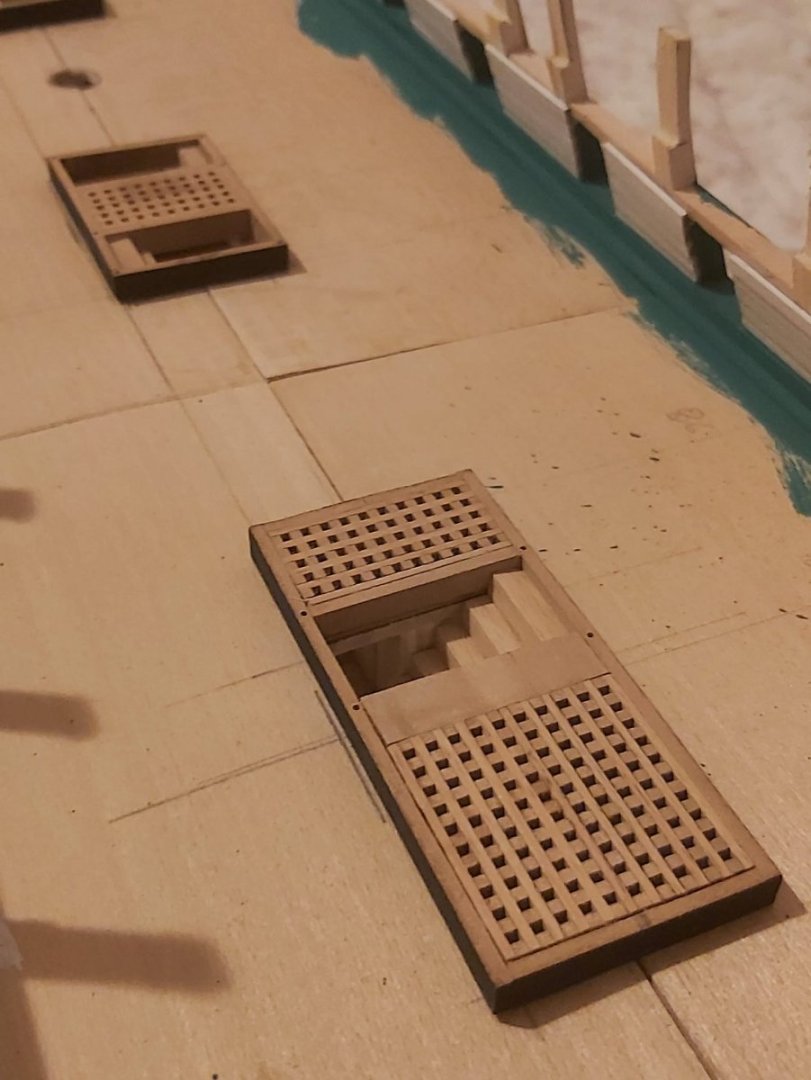
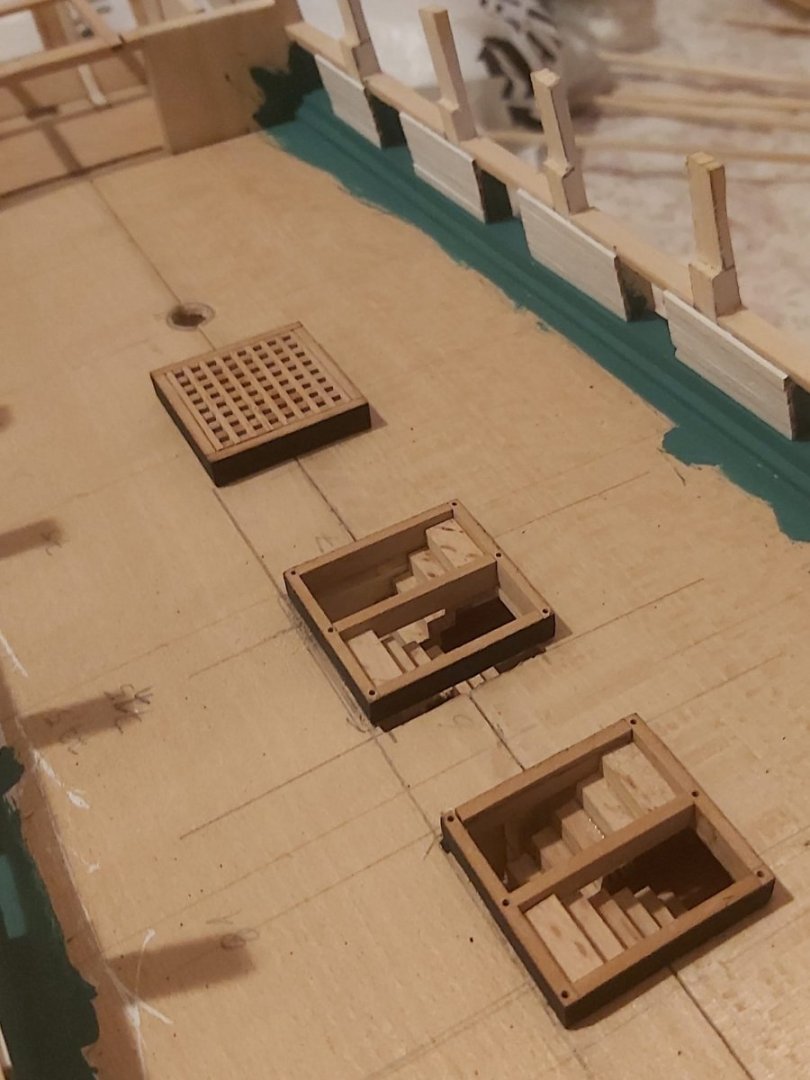
The gun deck hatches and ladders have been installed, I think it is time to install the gun deck planking now.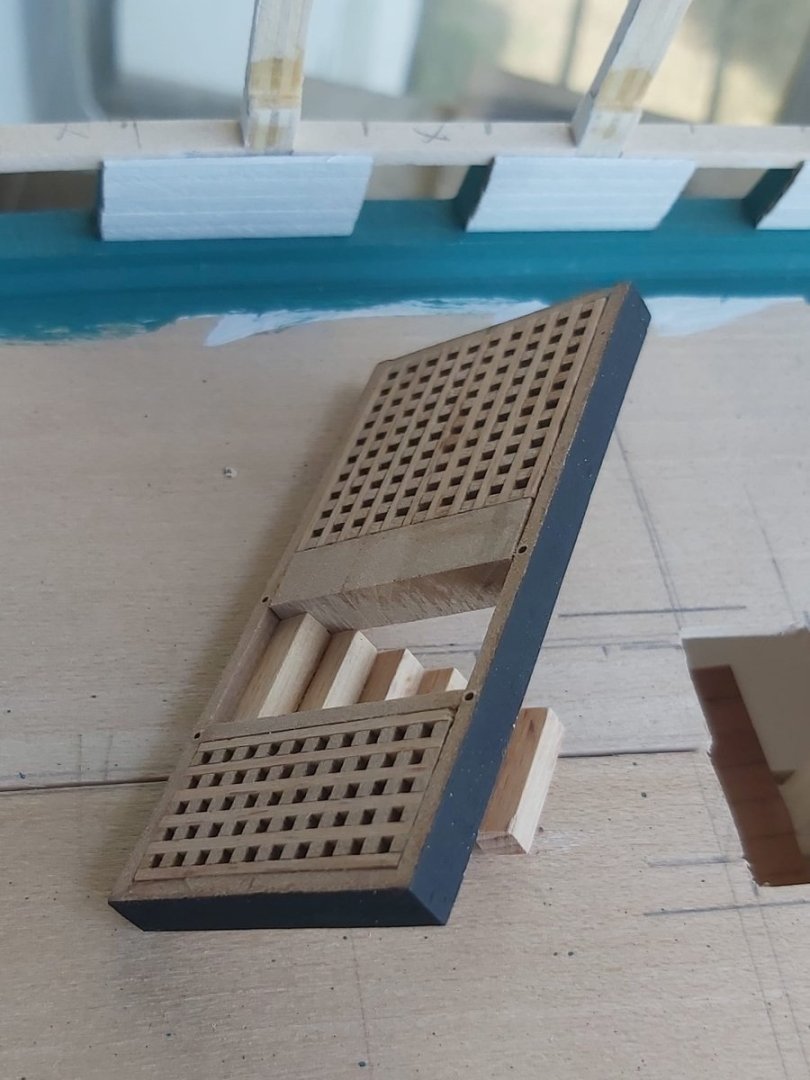


-
USS Constitution by mtbediz - 1:76
mtbediz replied to mtbediz's topic in - Build logs for subjects built 1751 - 1800
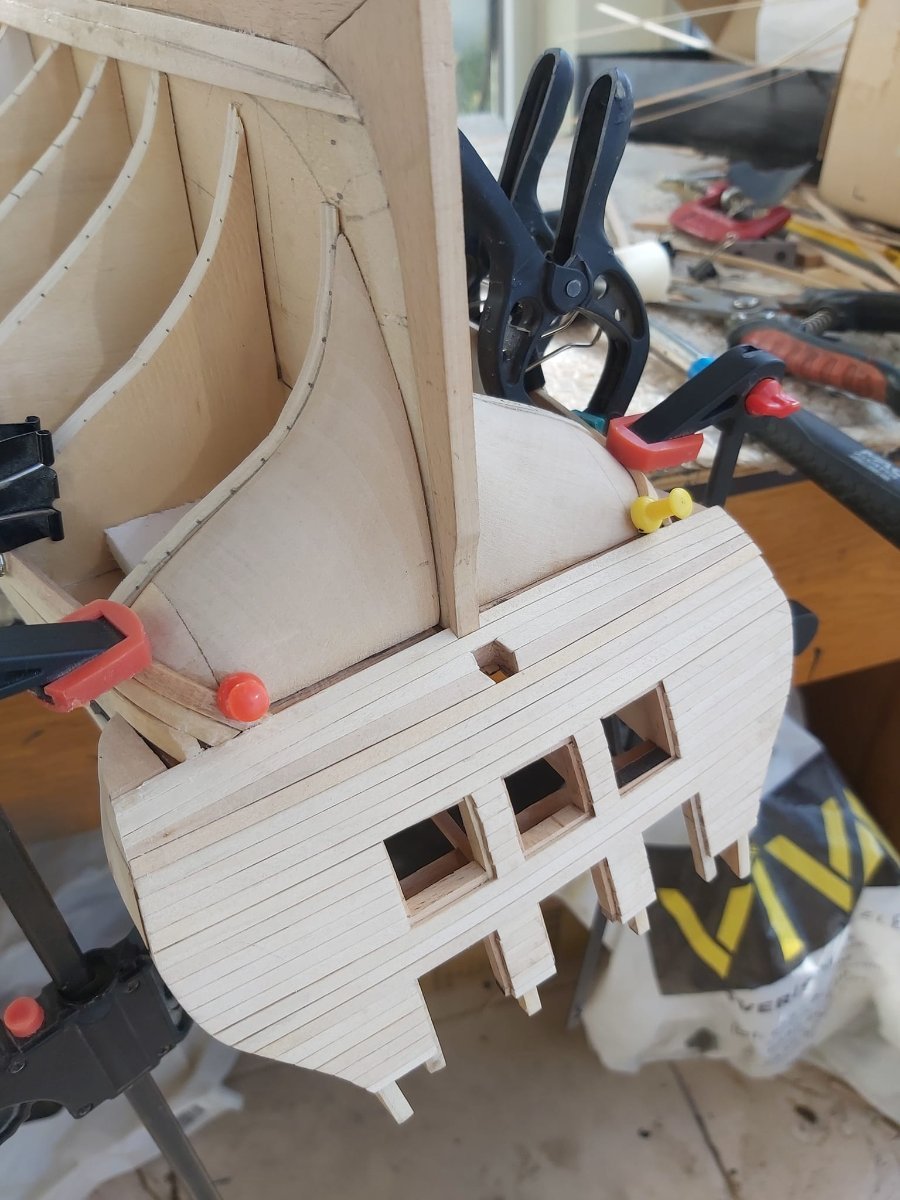
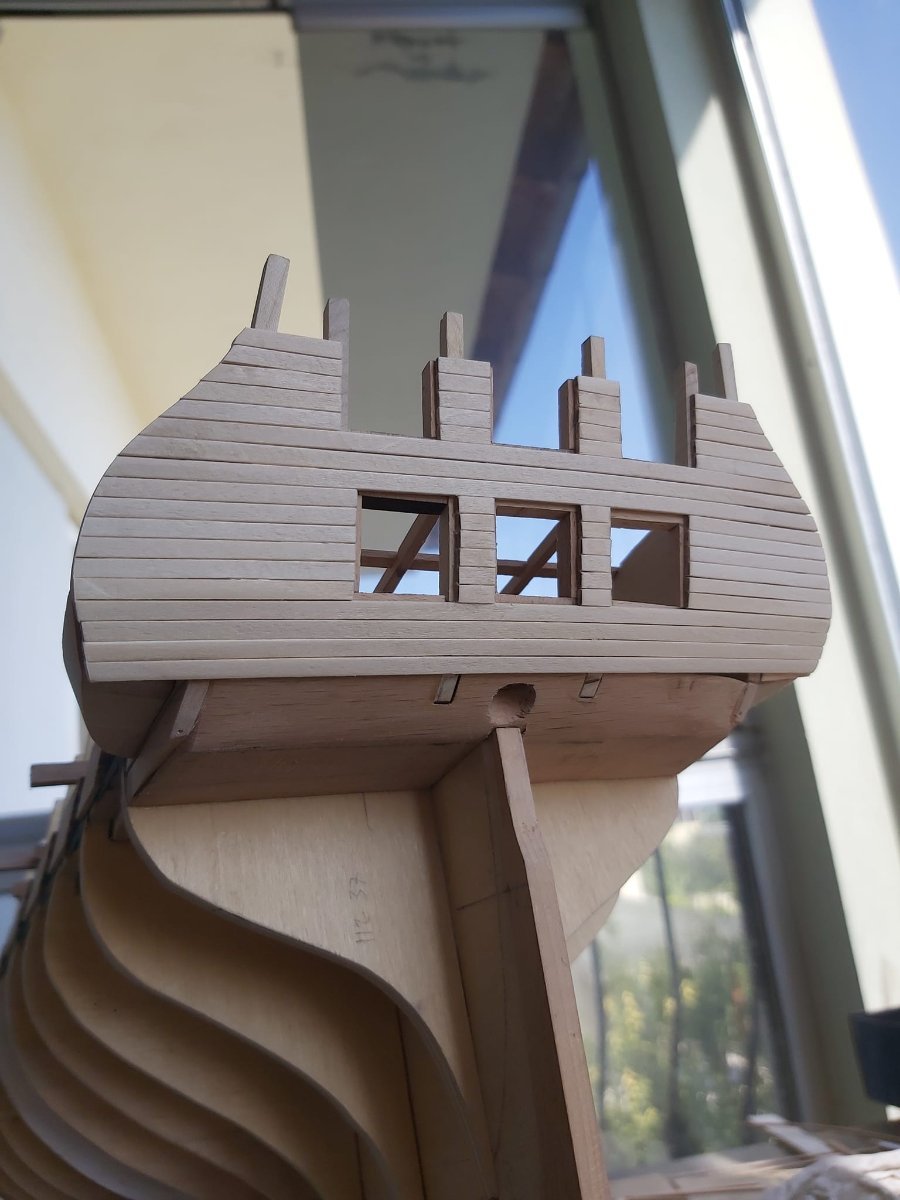
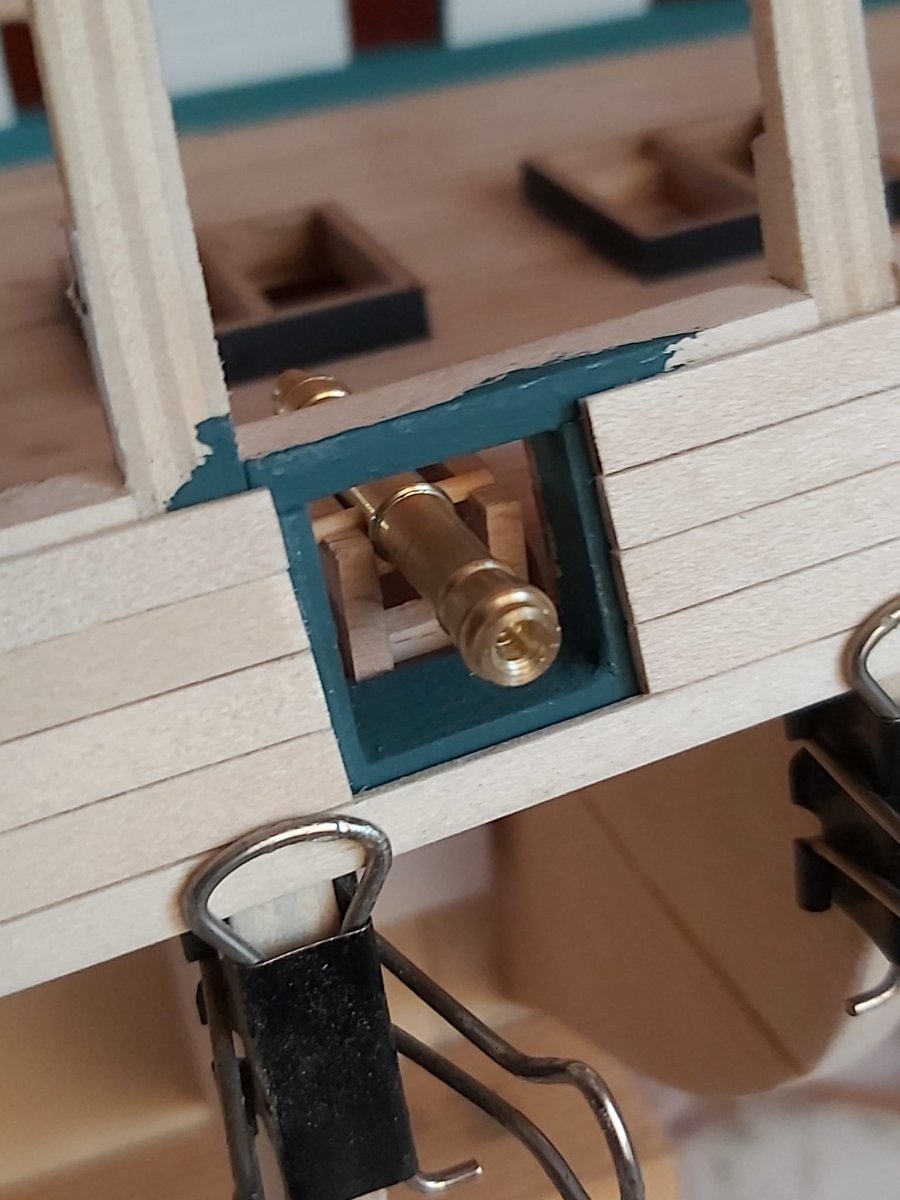
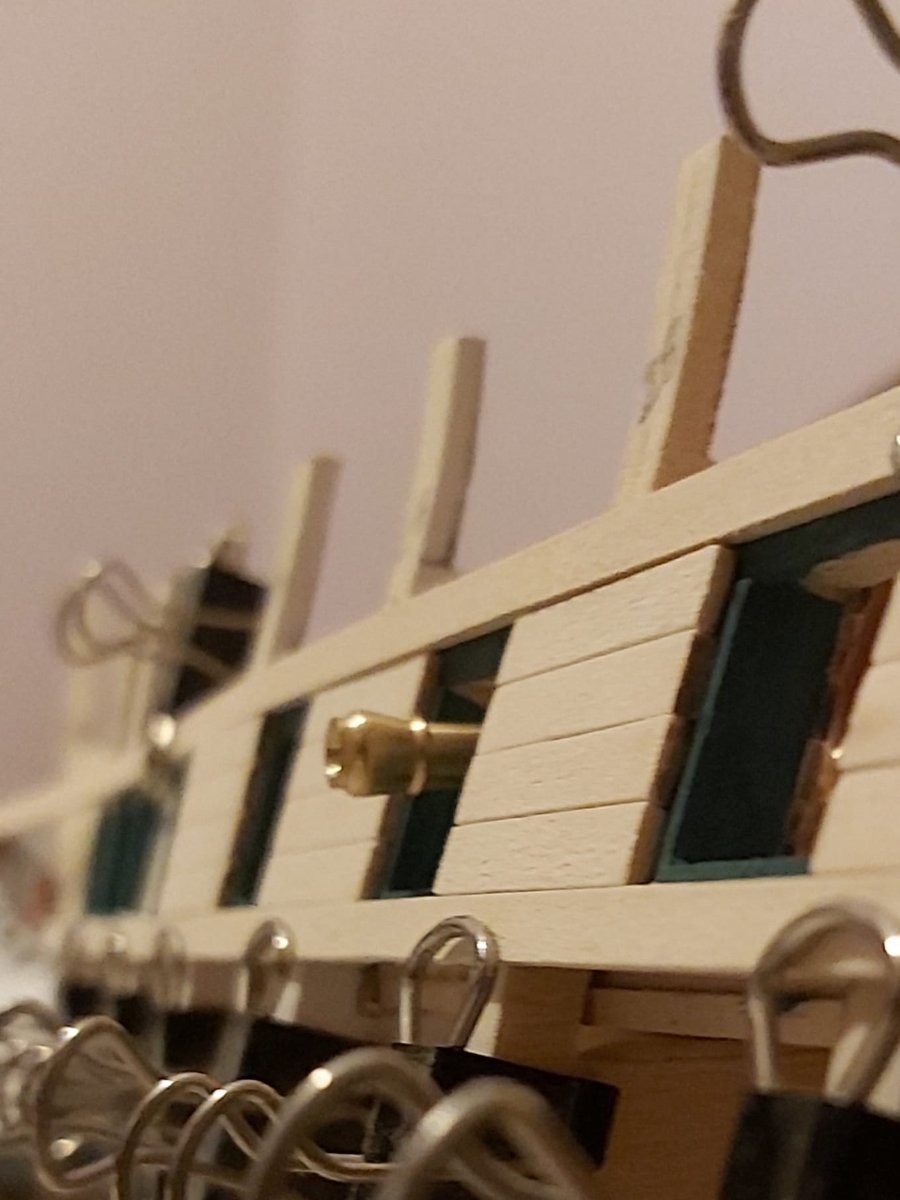
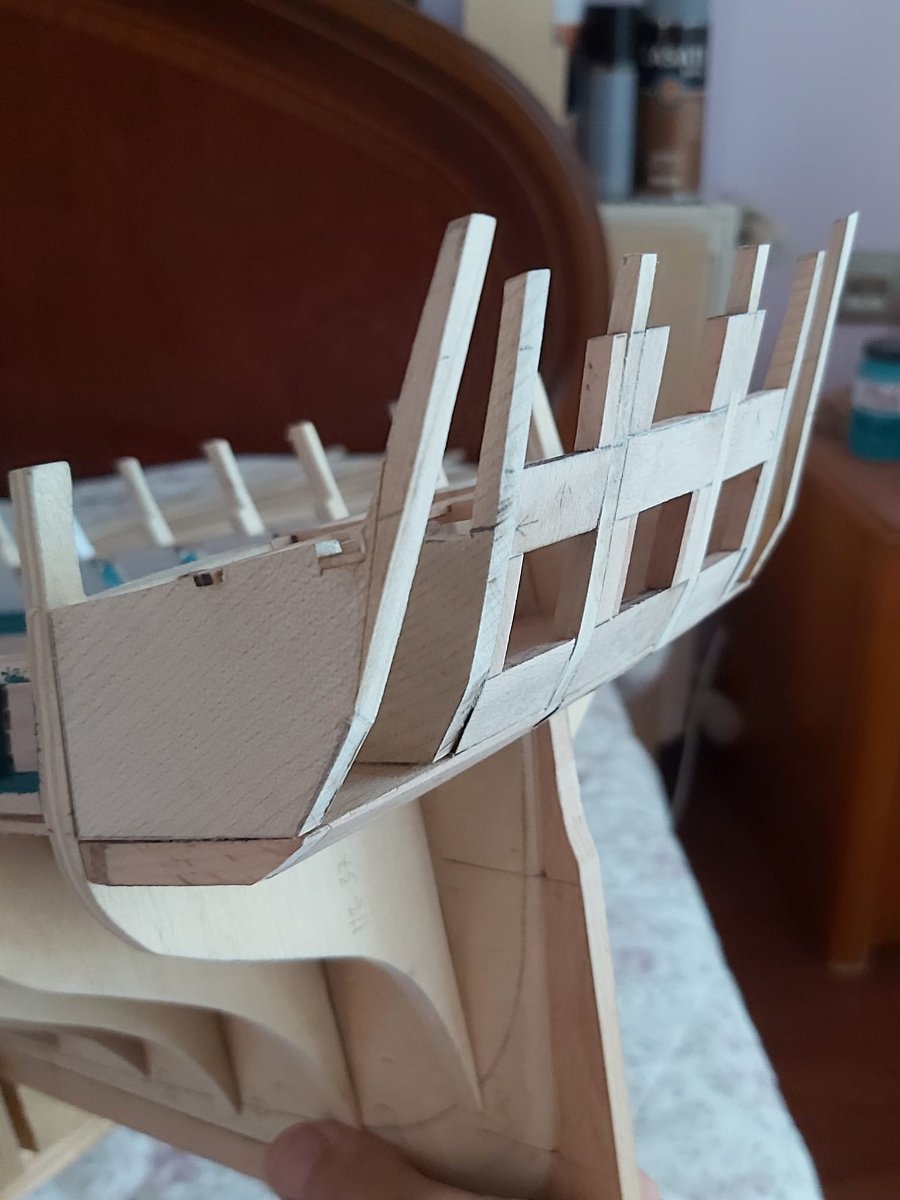
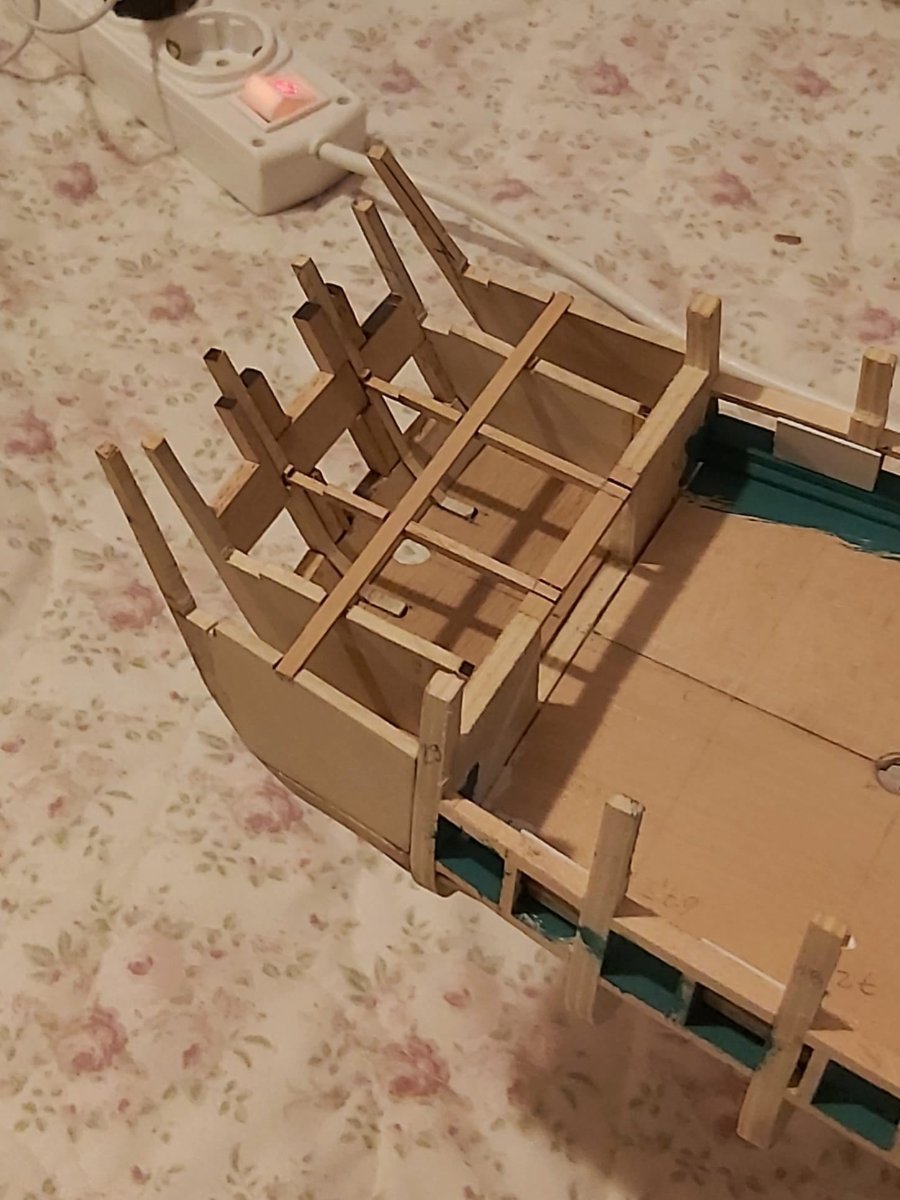
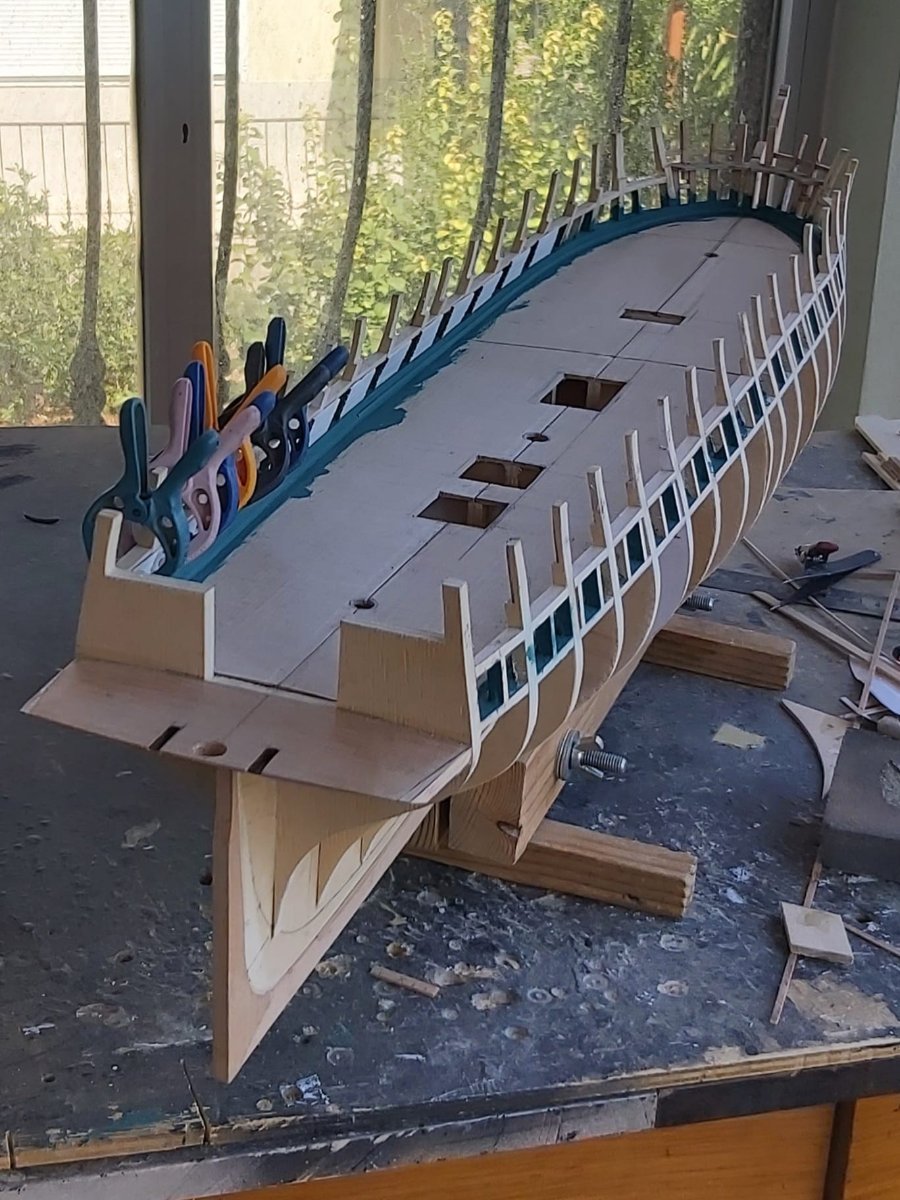
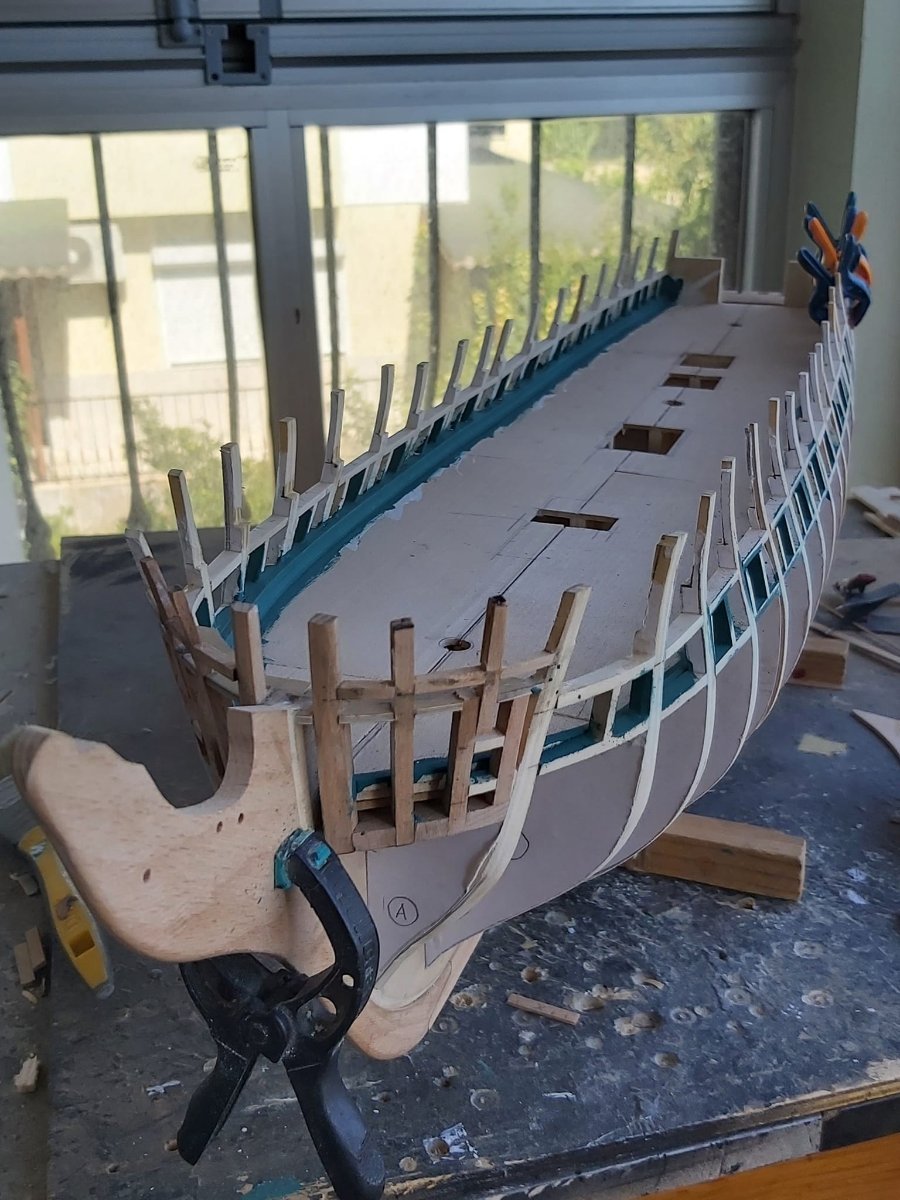
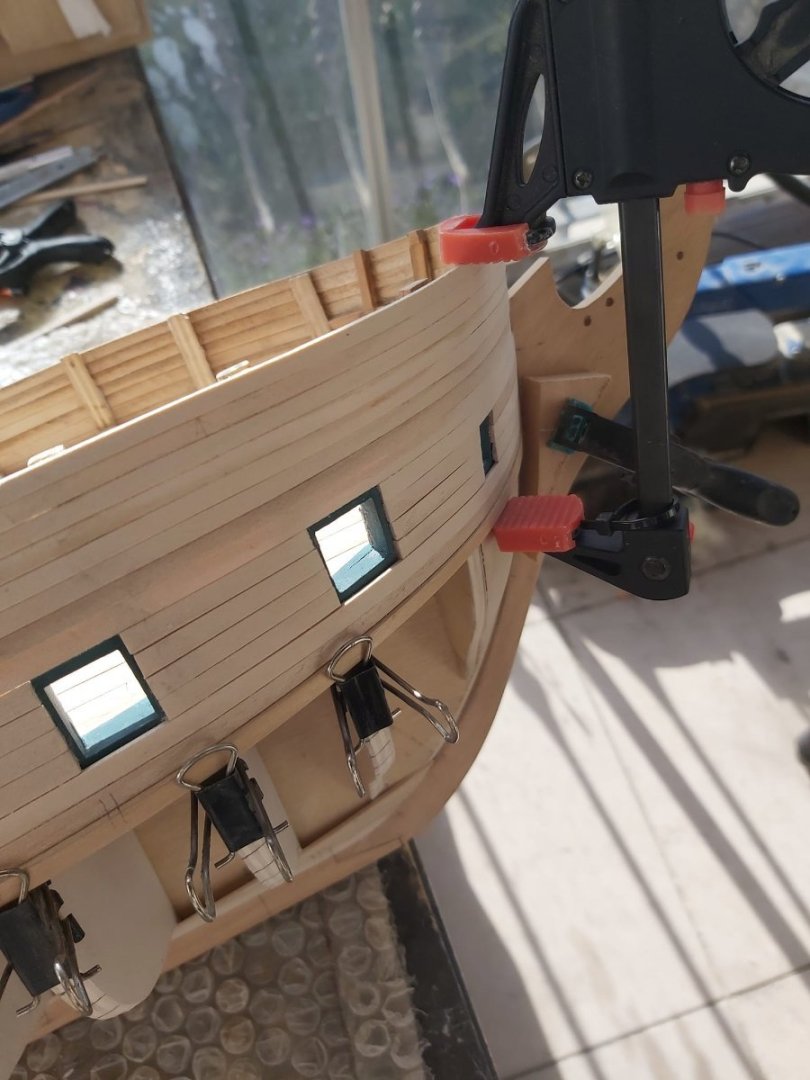
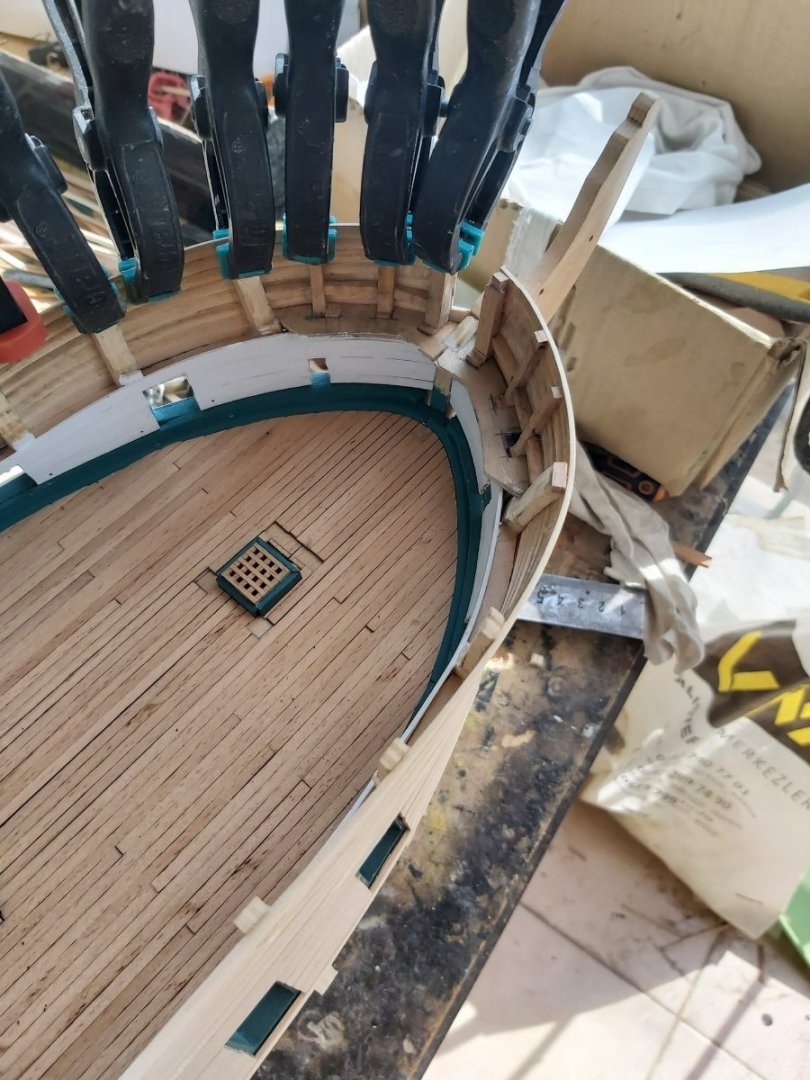
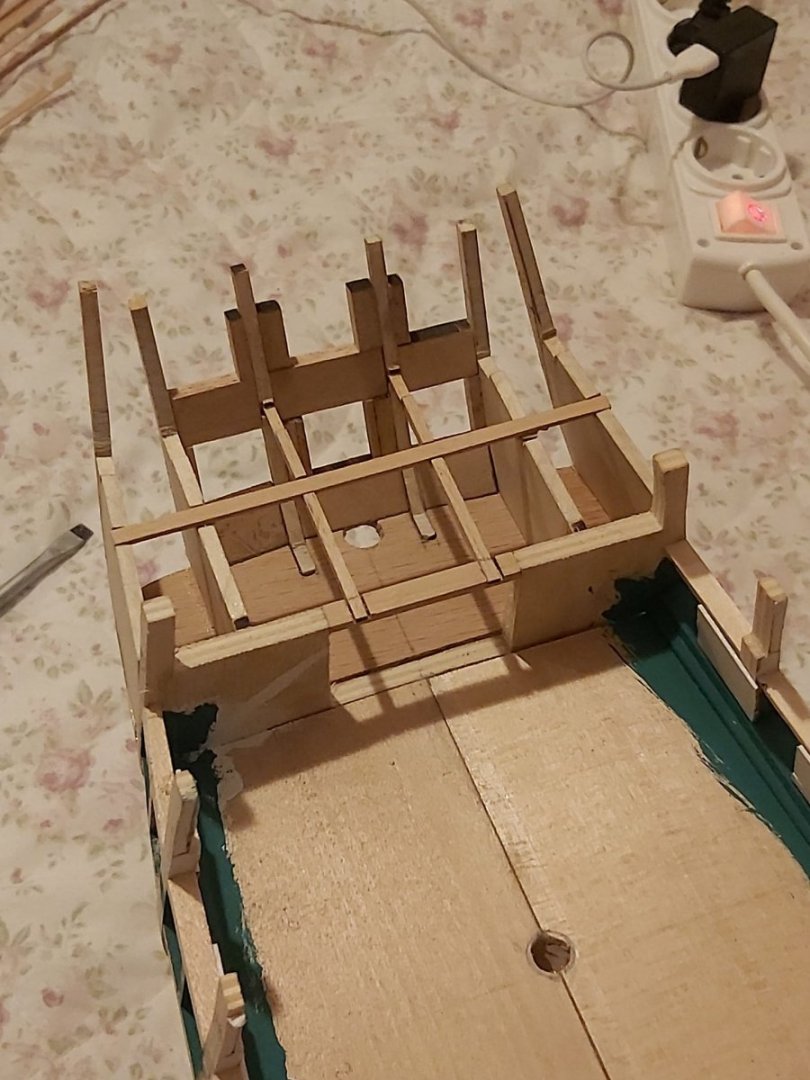
I built the framework for the stern windows and ports for the gun.

-
USS Constitution by mtbediz - 1:76
mtbediz replied to mtbediz's topic in - Build logs for subjects built 1751 - 1800
Thank you Phil. -
USS Constitution by mtbediz - 1:76
mtbediz replied to mtbediz's topic in - Build logs for subjects built 1751 - 1800
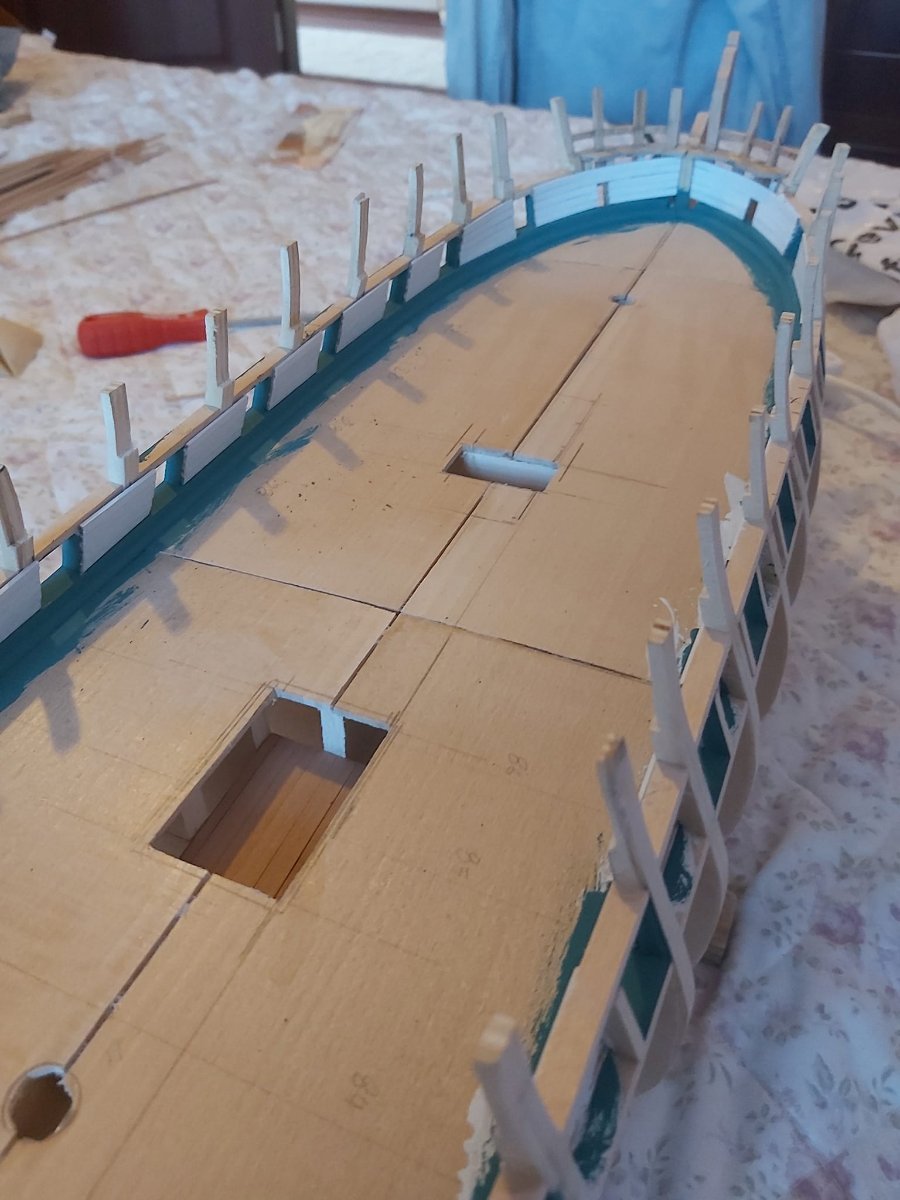
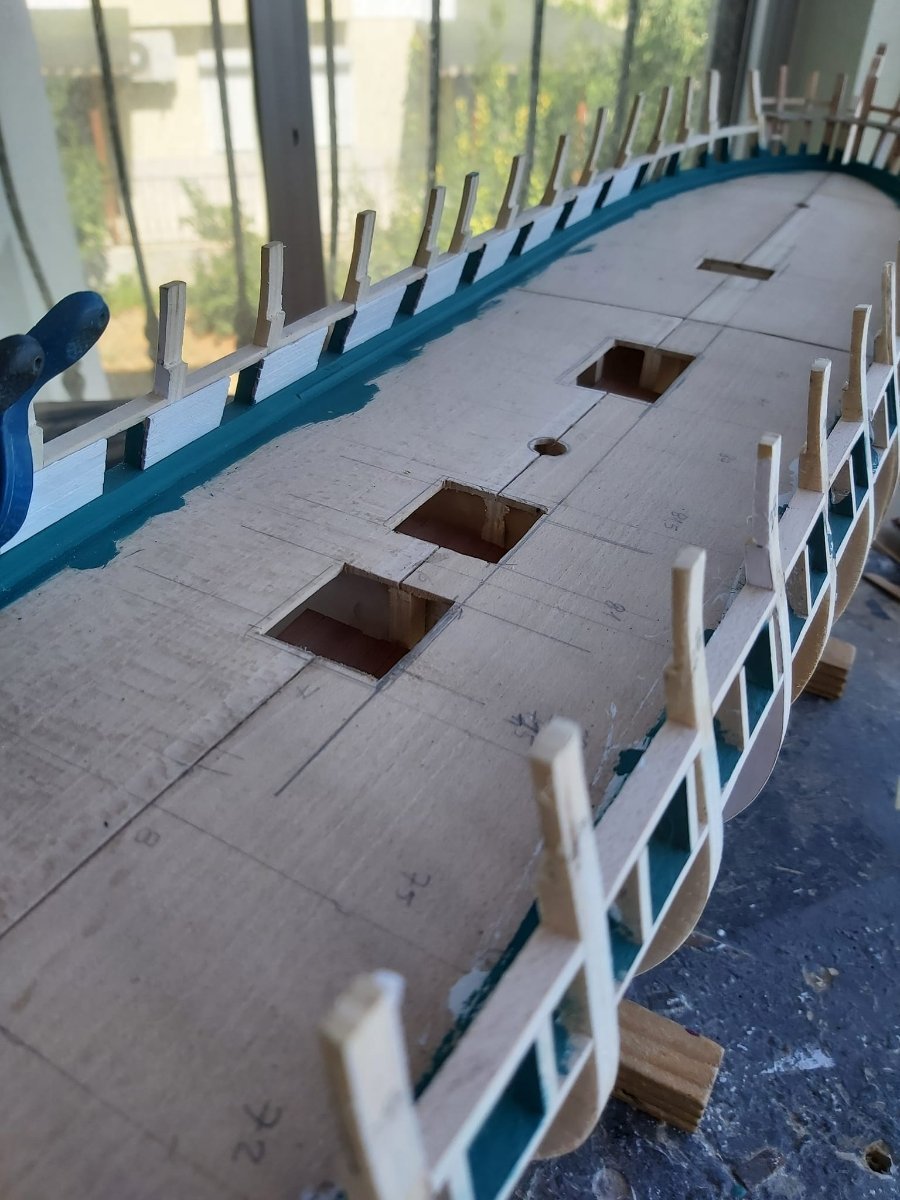
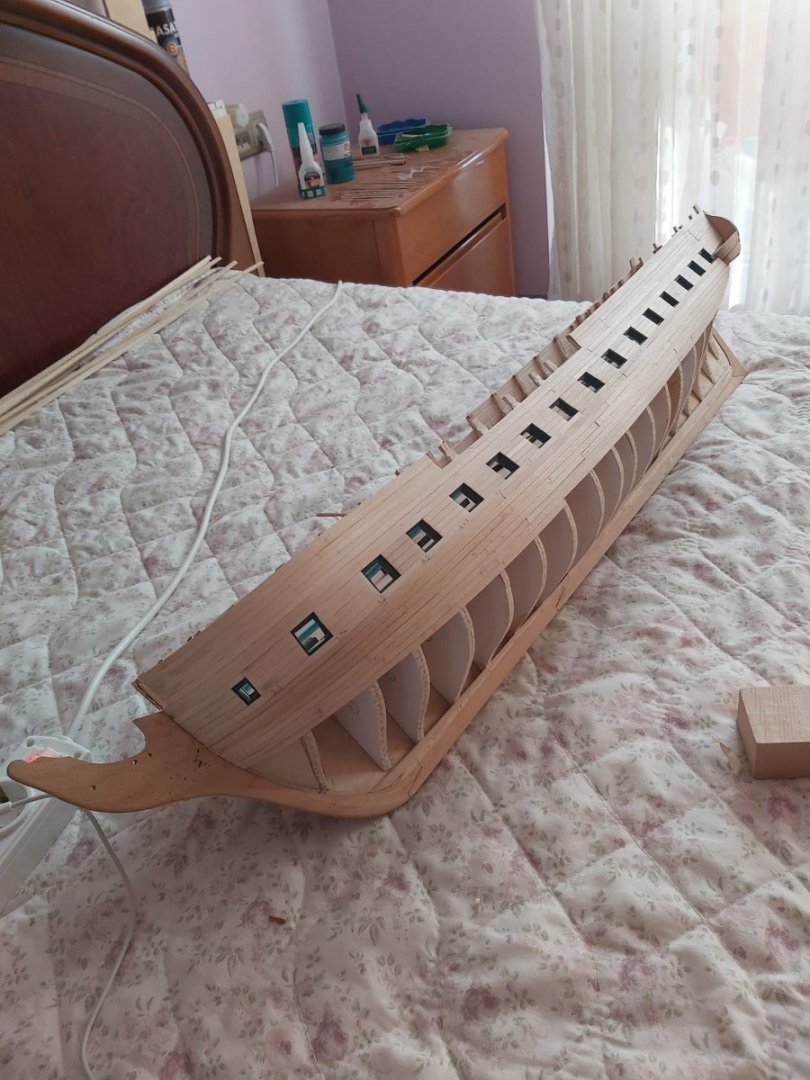
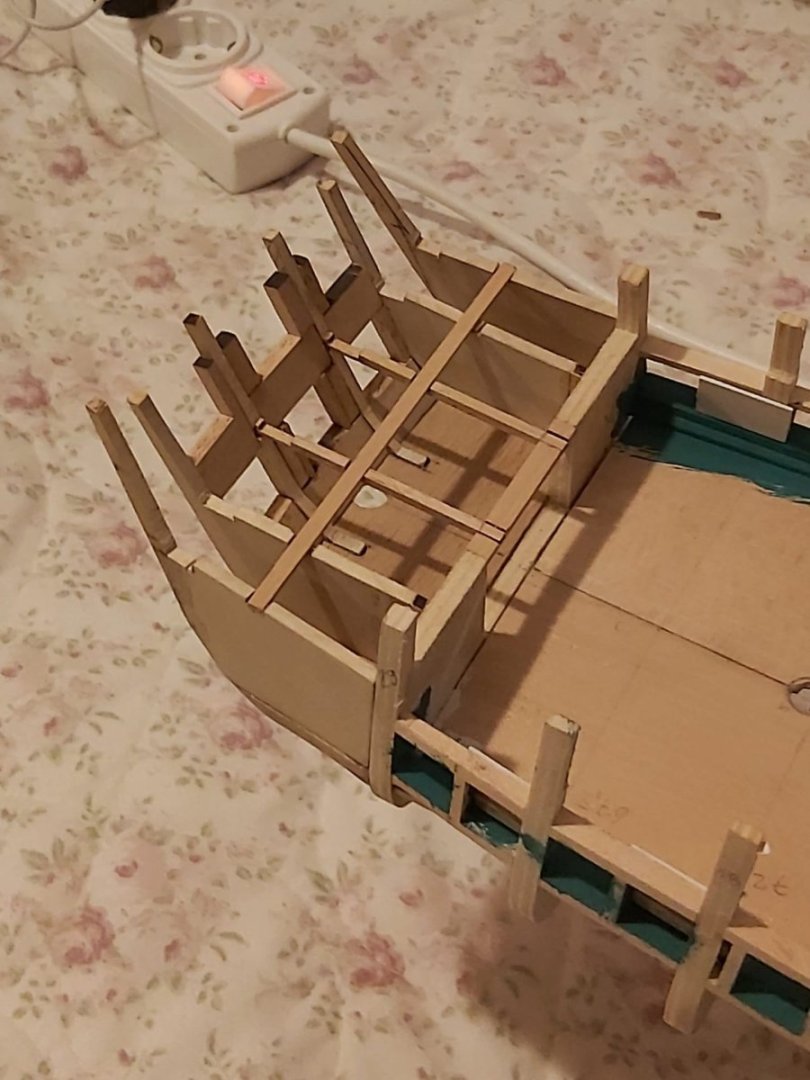
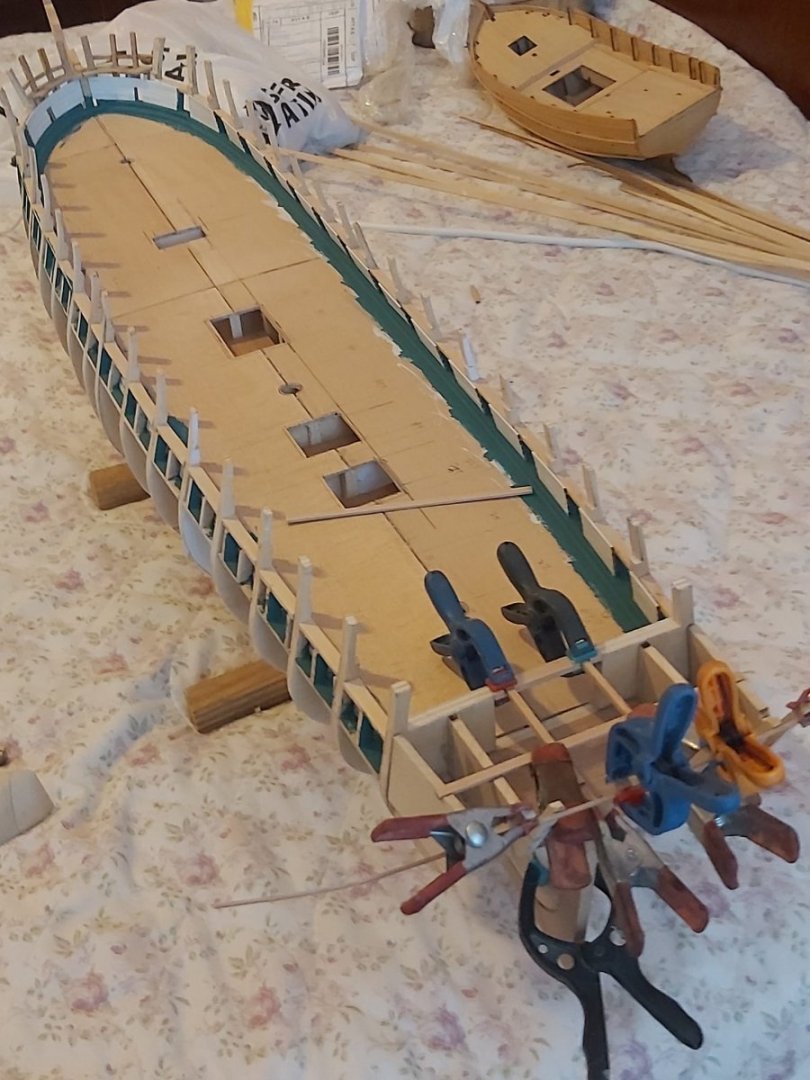
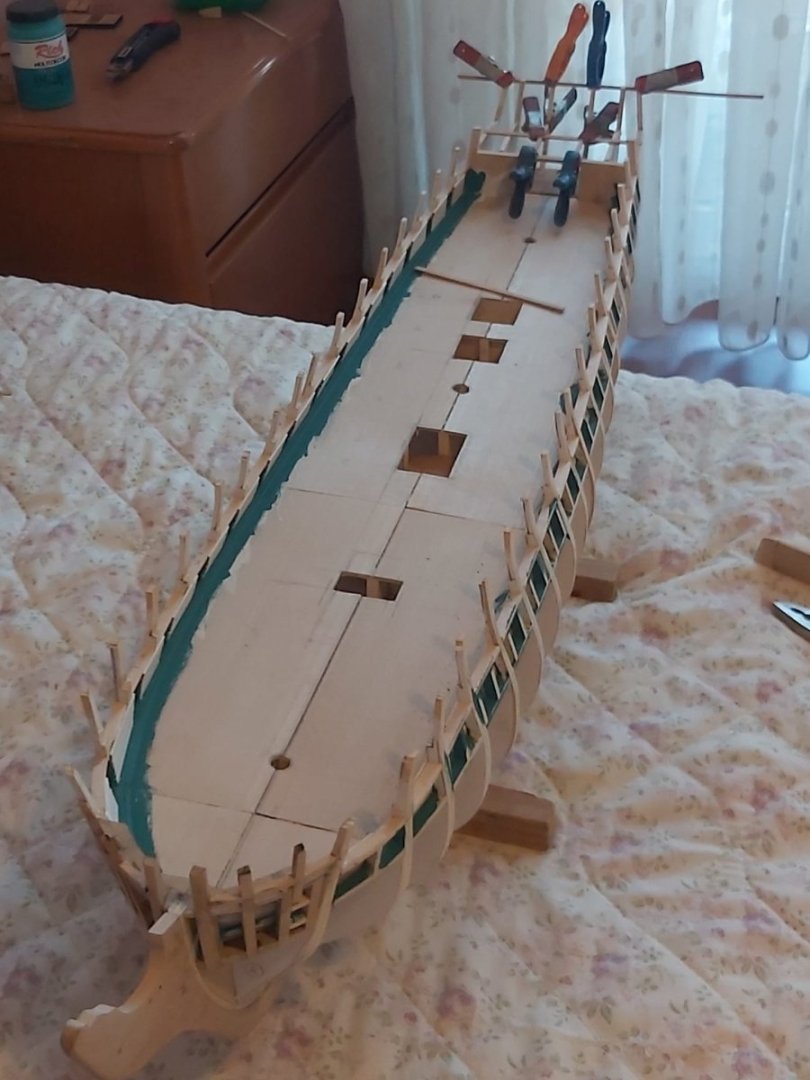
Most of the modelers who built the kit for this model mentioned the incompatibility of the stern frames in their build logs. I had to modify the outer frames on both sides, which was really incompatible, and align it with the others. Meanwhile, the inner planking of the deck side walls has been completed.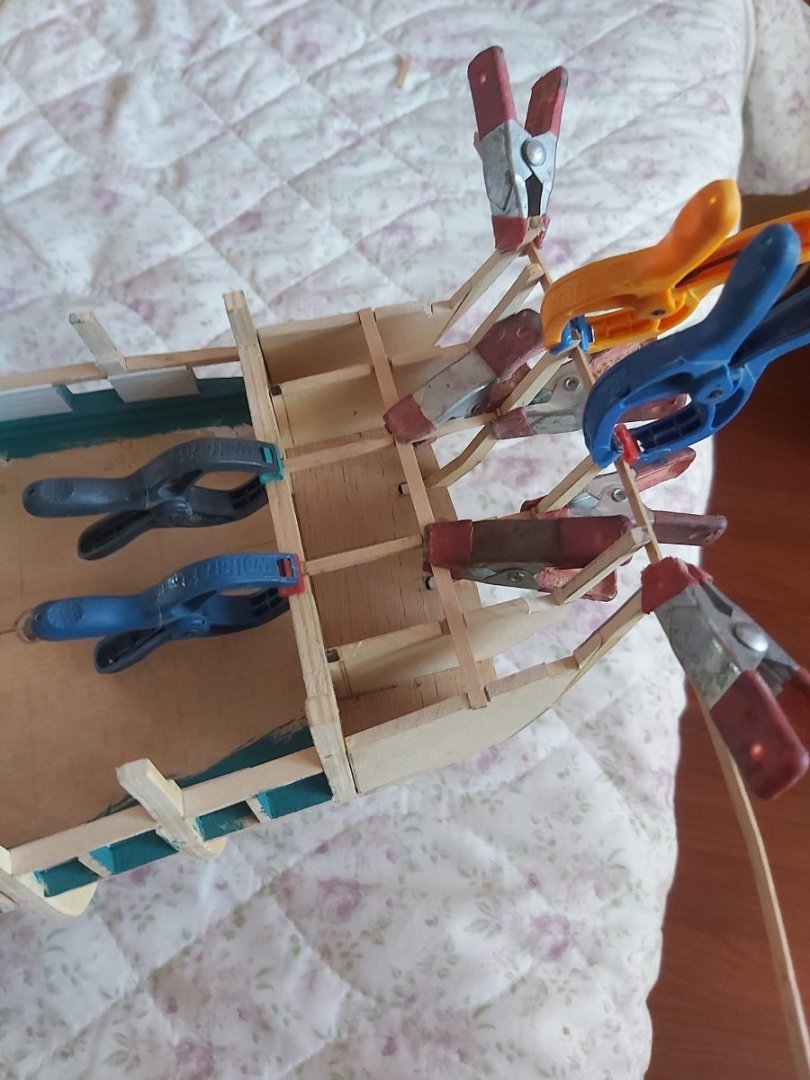

-
USS Constitution by mtbediz - 1:76
mtbediz replied to mtbediz's topic in - Build logs for subjects built 1751 - 1800
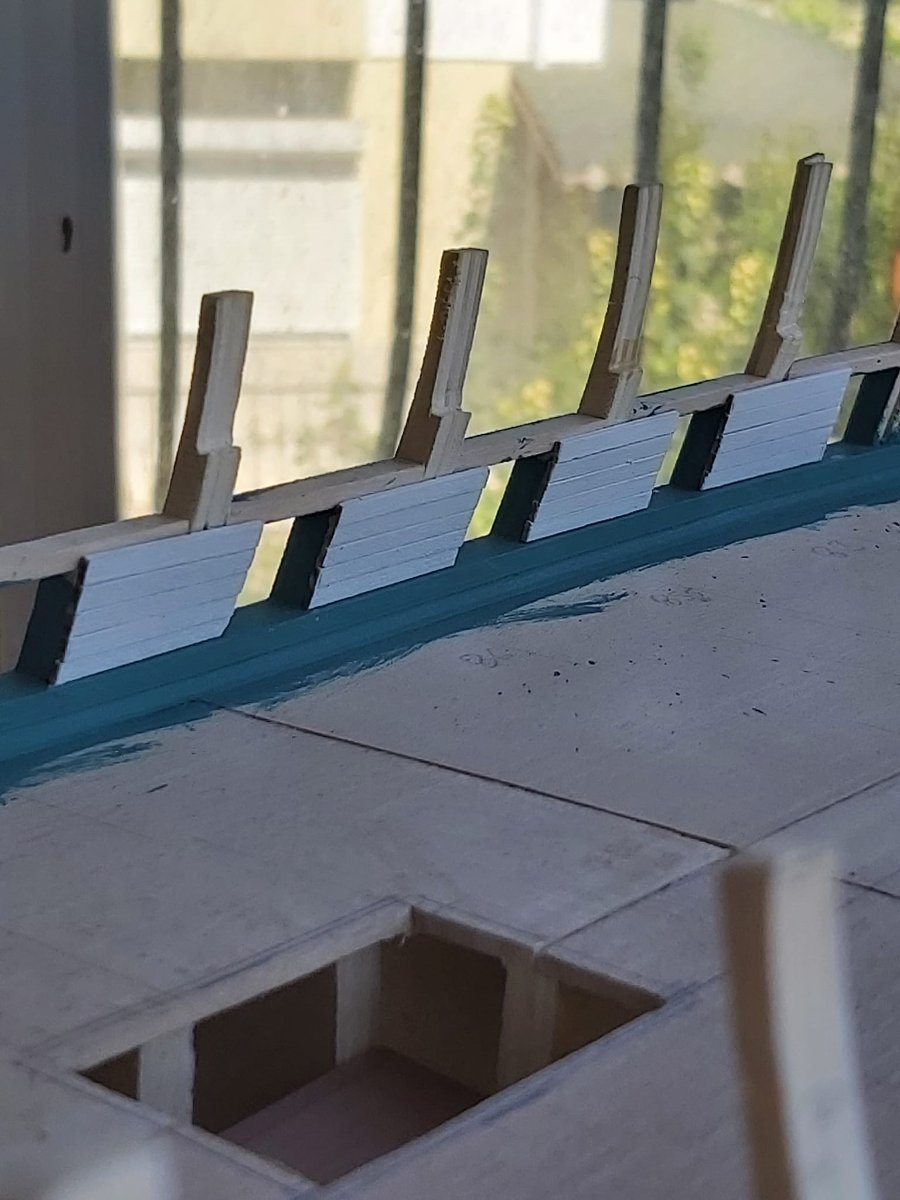
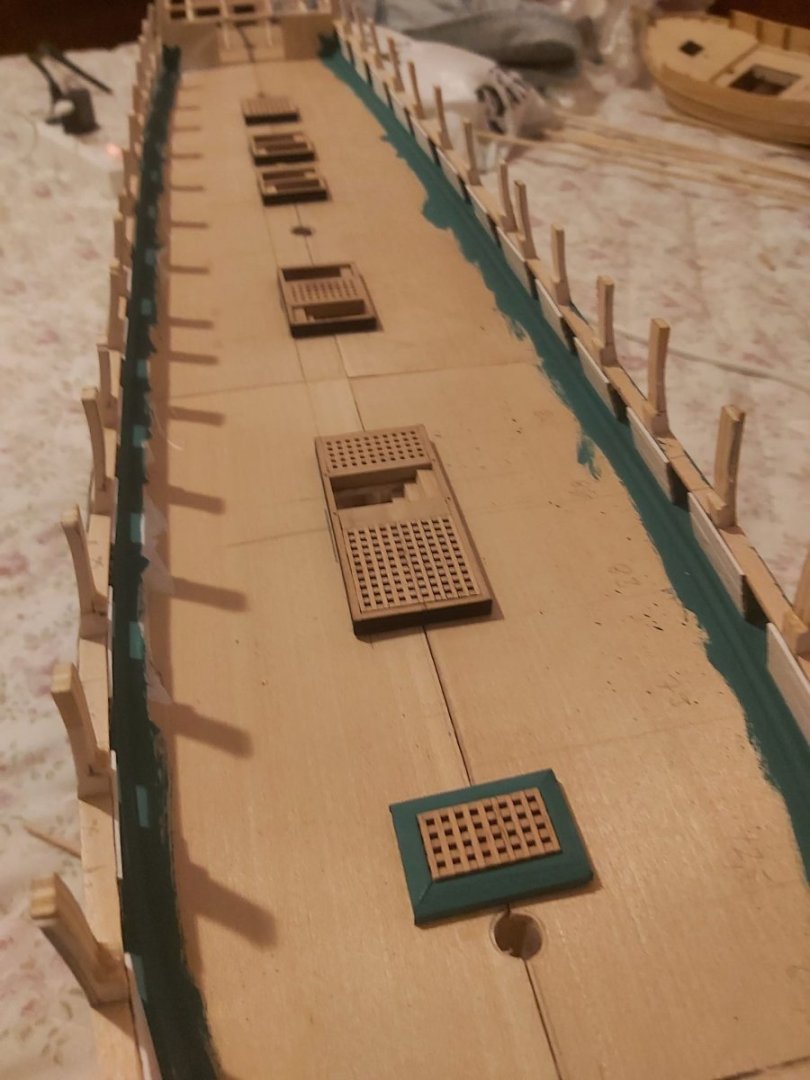
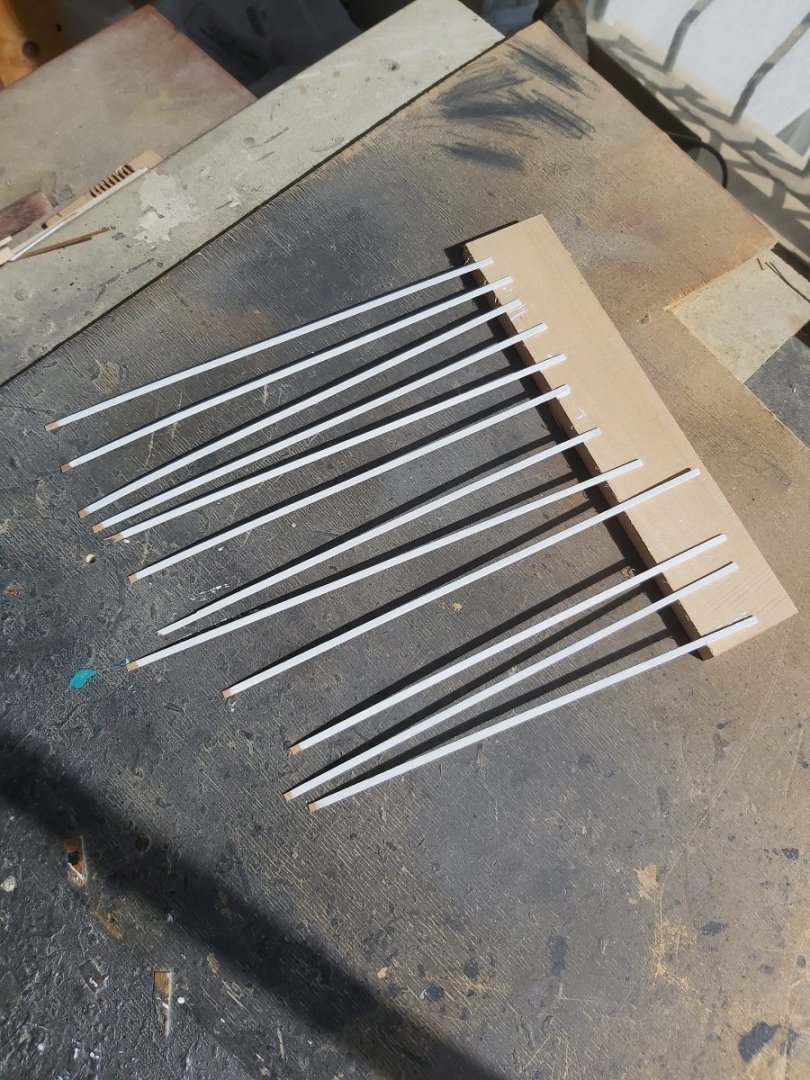
I painted the gundeck waterways green. The color looked different in the photos due to the lighting, but it is actually a darker green. I started doing the inner planking of the gundeck side walls. First, I cut the planks to the same size, paint them white and glue them between the gun ports.


-
USS Constitution by mtbediz - 1:76
mtbediz replied to mtbediz's topic in - Build logs for subjects built 1751 - 1800
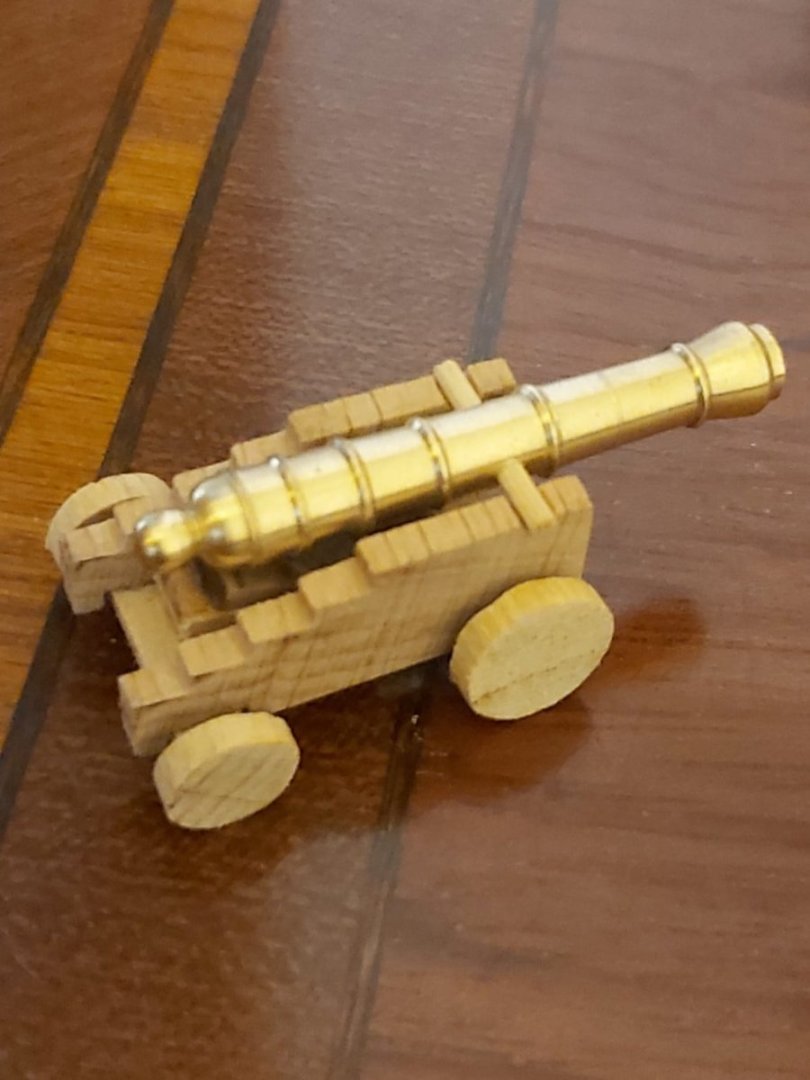
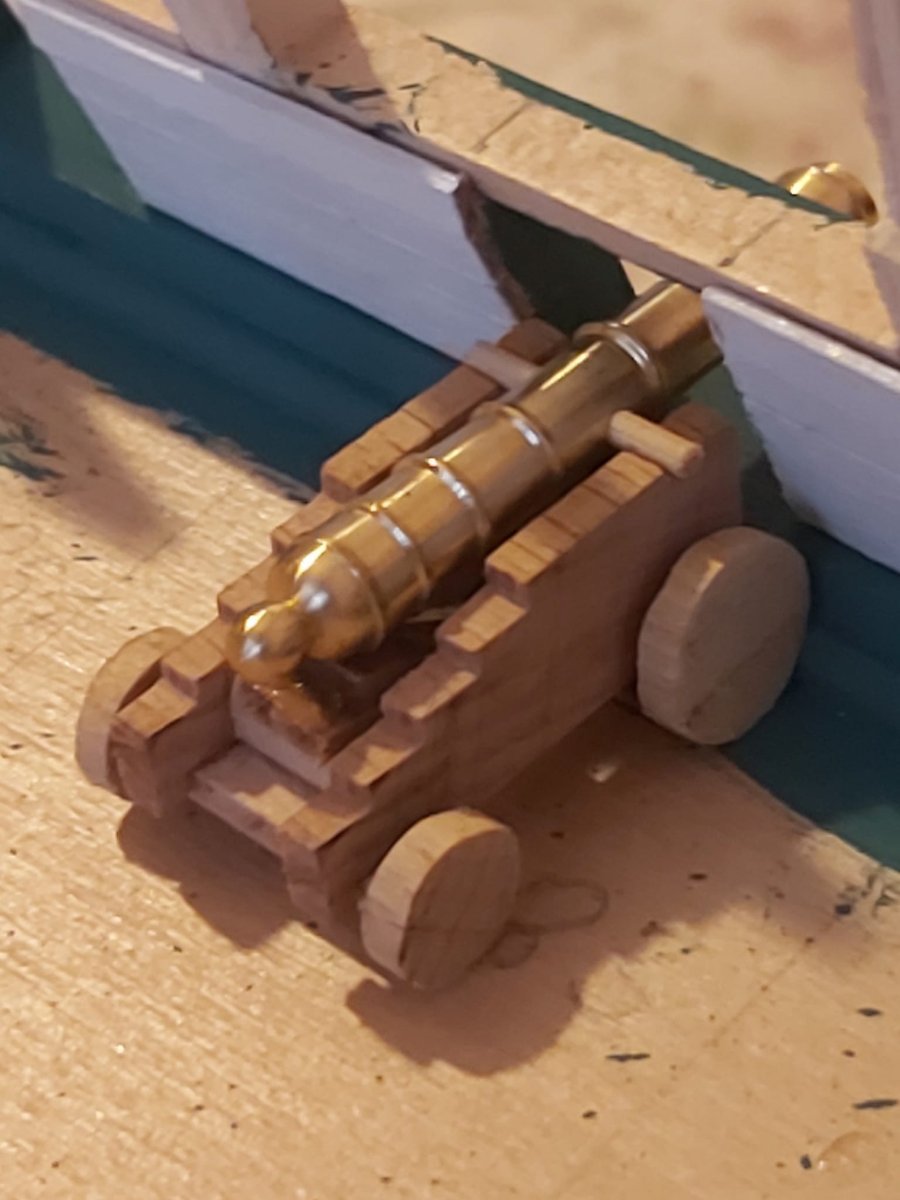
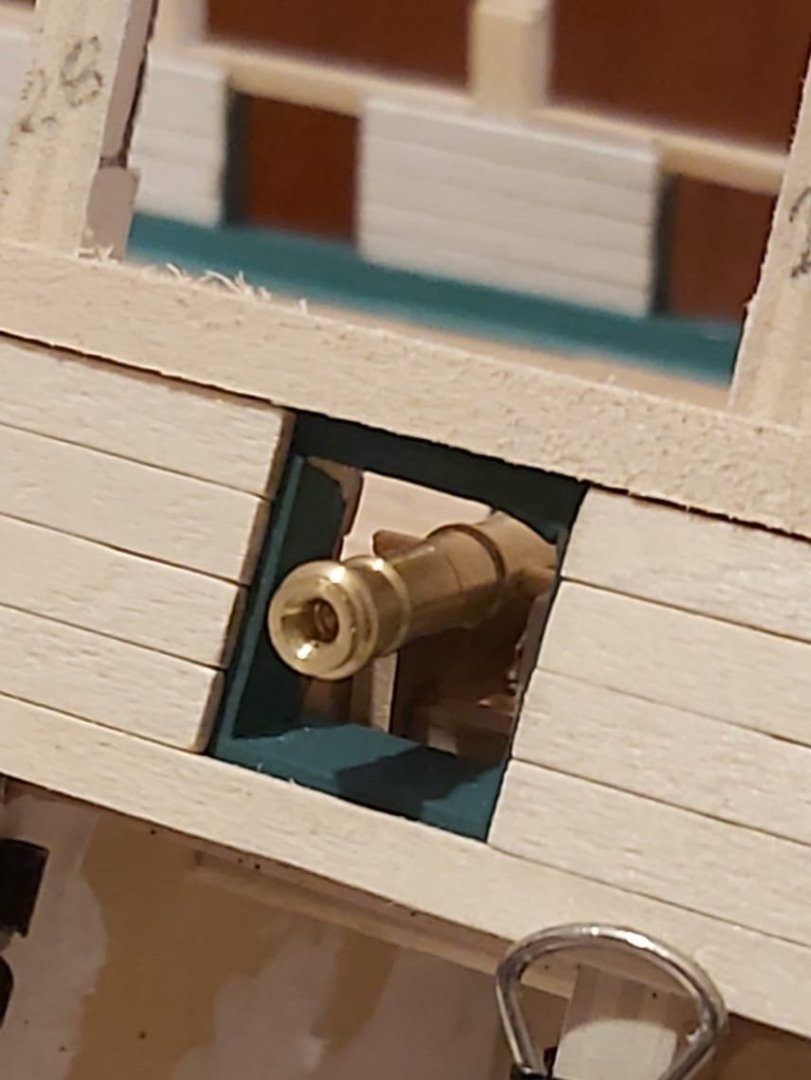
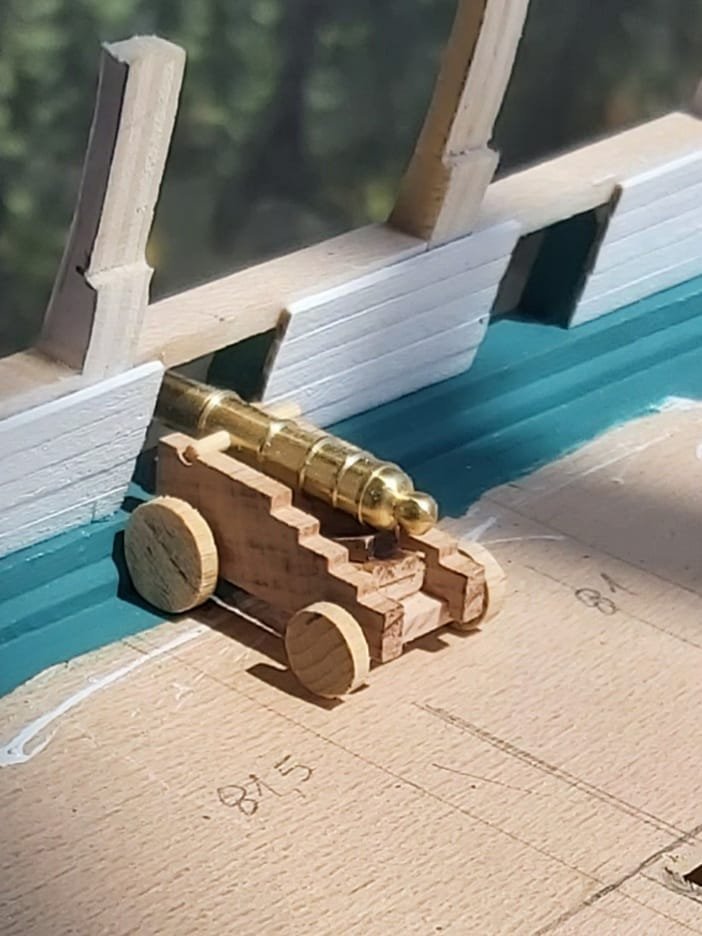
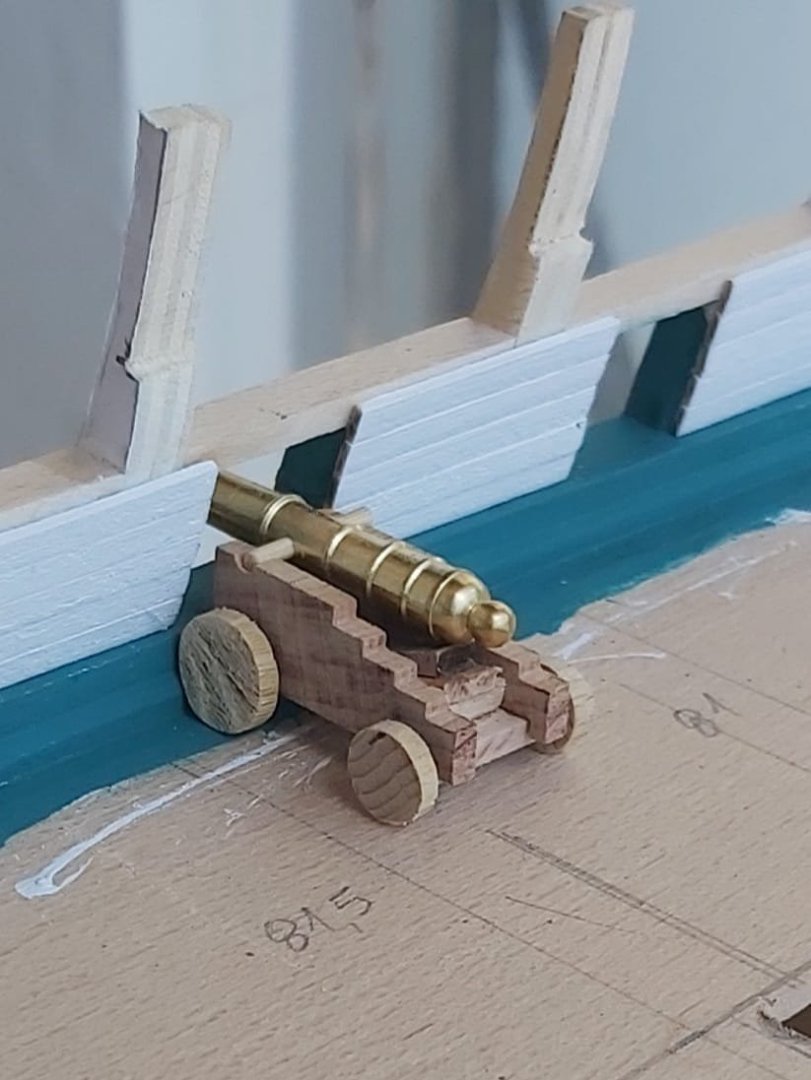
By the way, I wanted to make a prototype cannon carriage and test it.