mtbediz
-
Posts
1,362 -
Joined
-
Last visited
Content Type
Profiles
Forums
Gallery
Events
Everything posted by mtbediz
-

USS Constitution by mtbediz - 1:76
mtbediz replied to mtbediz's topic in - Build logs for subjects built 1751 - 1800
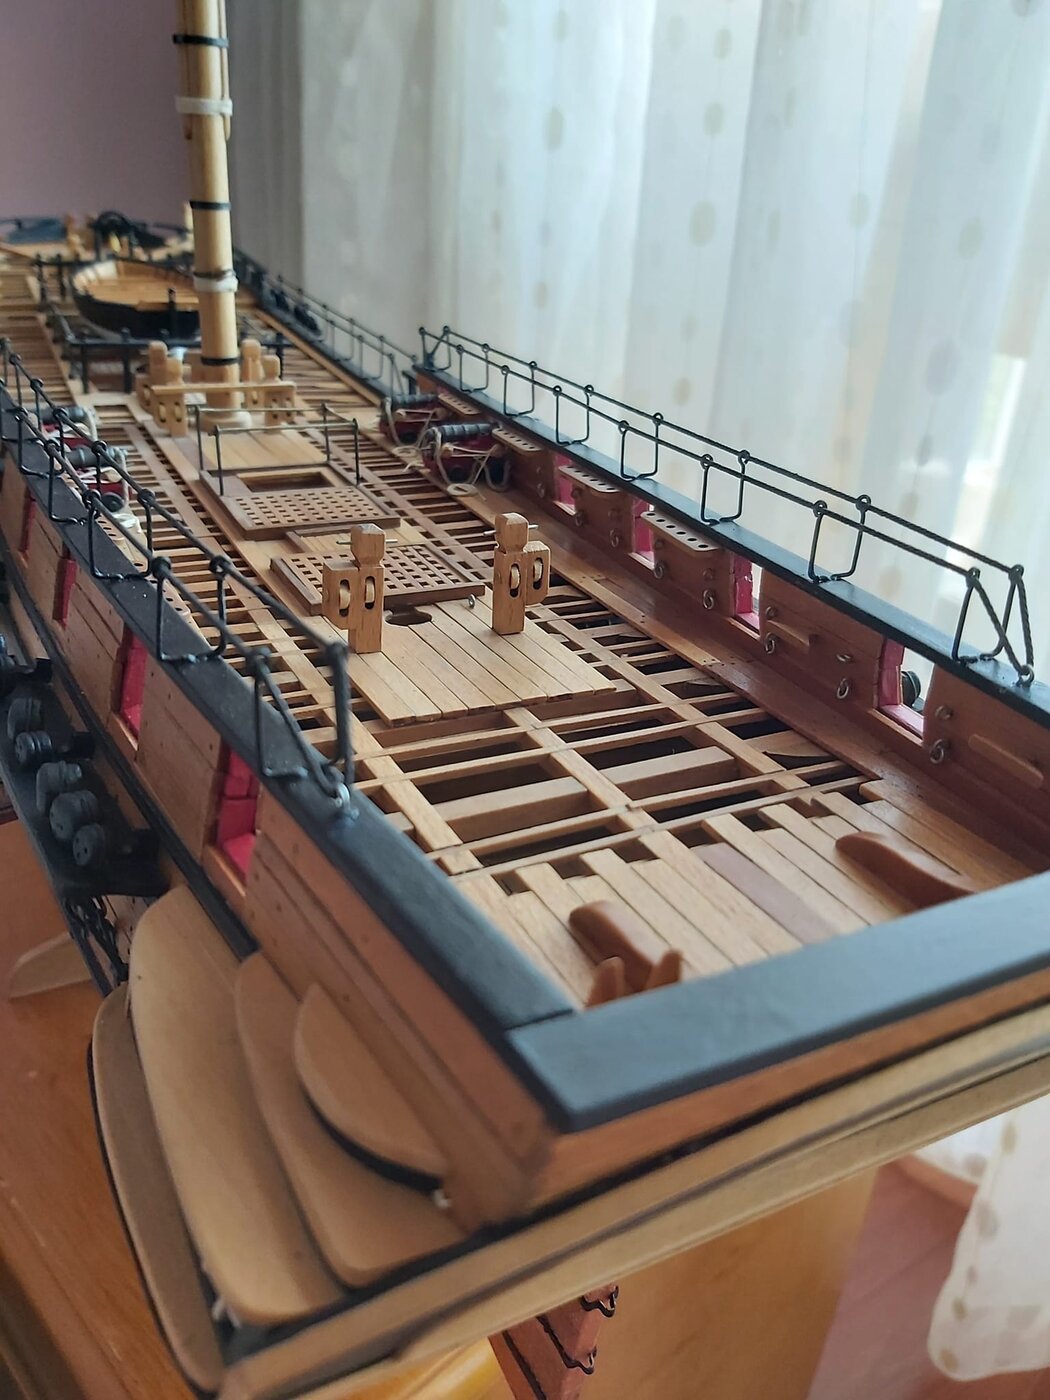
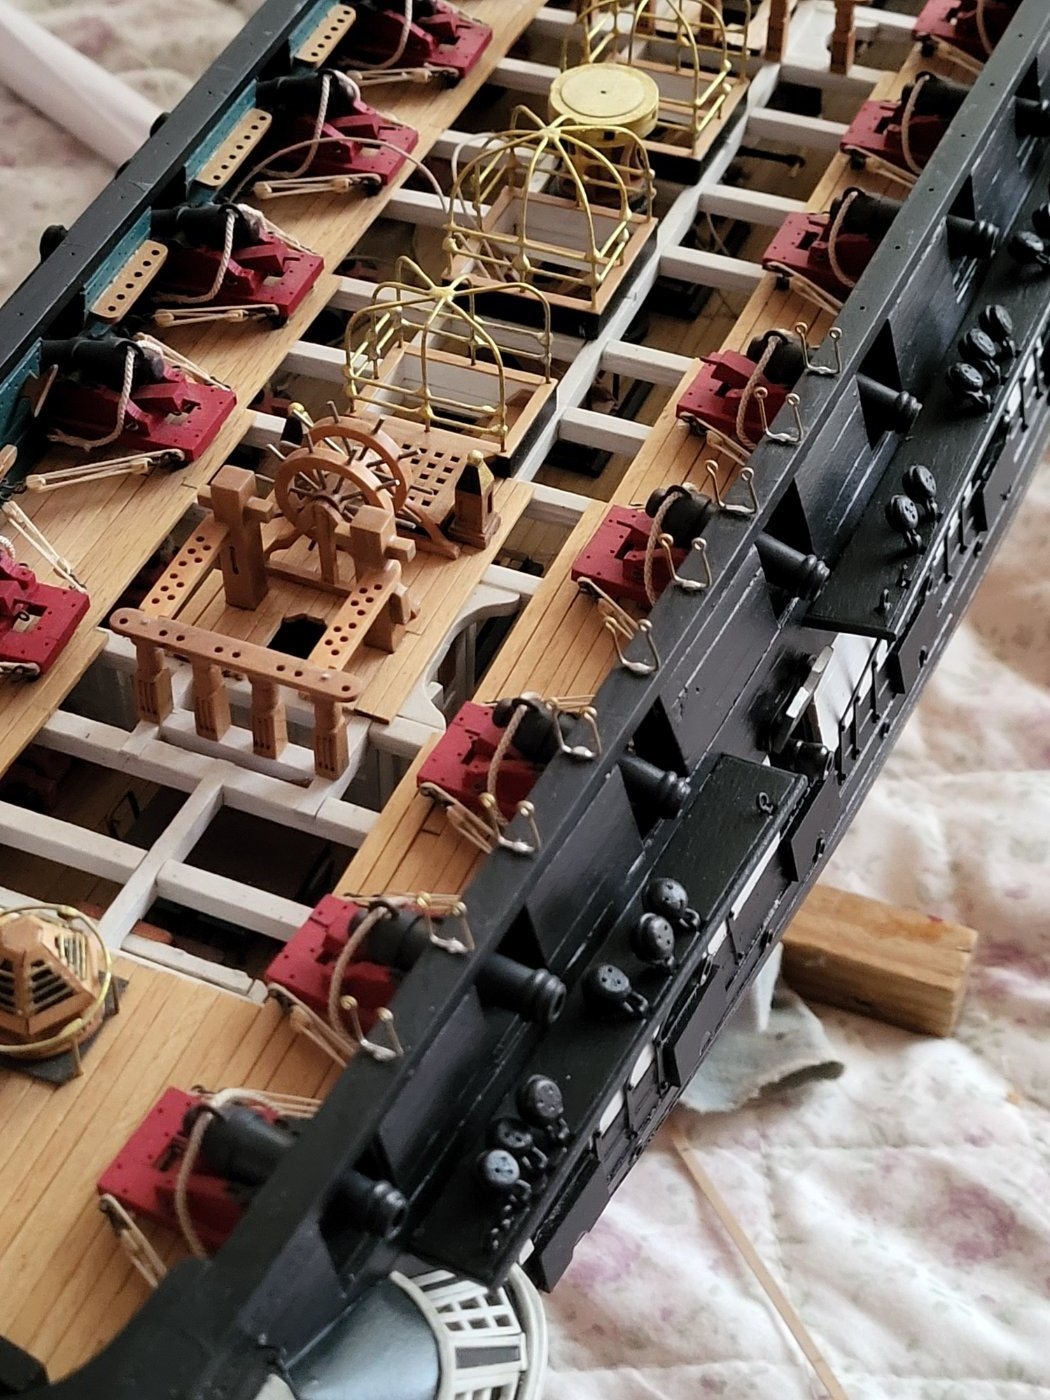
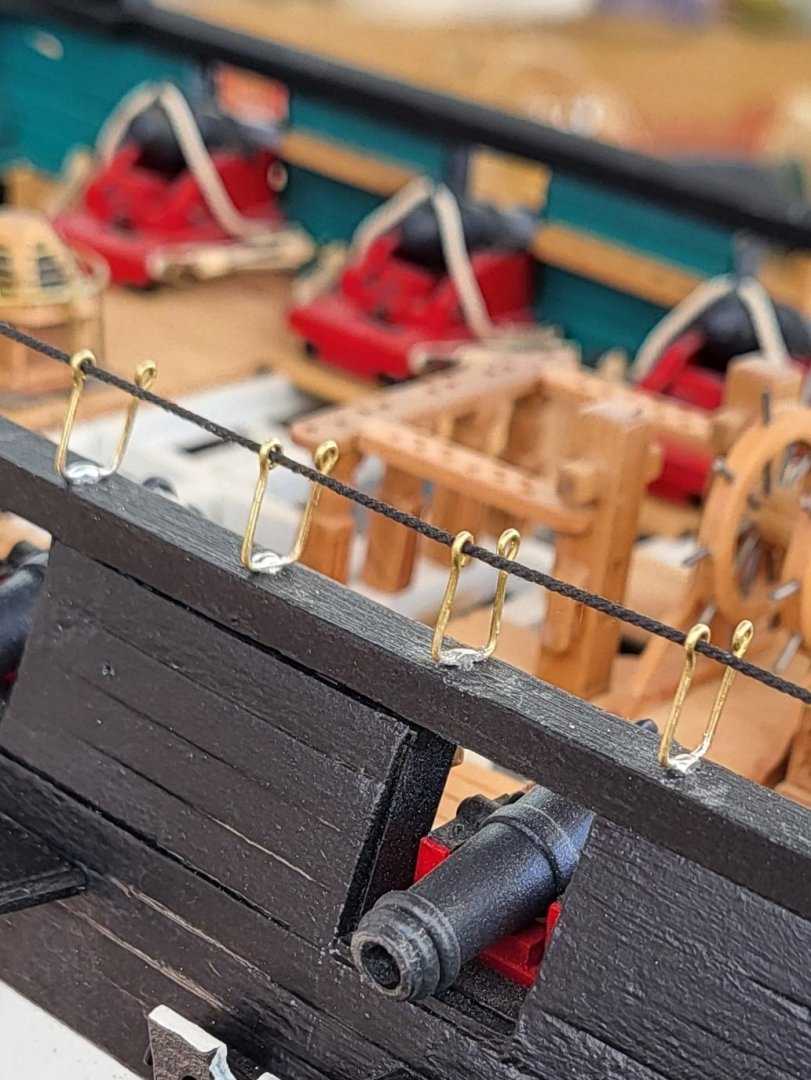
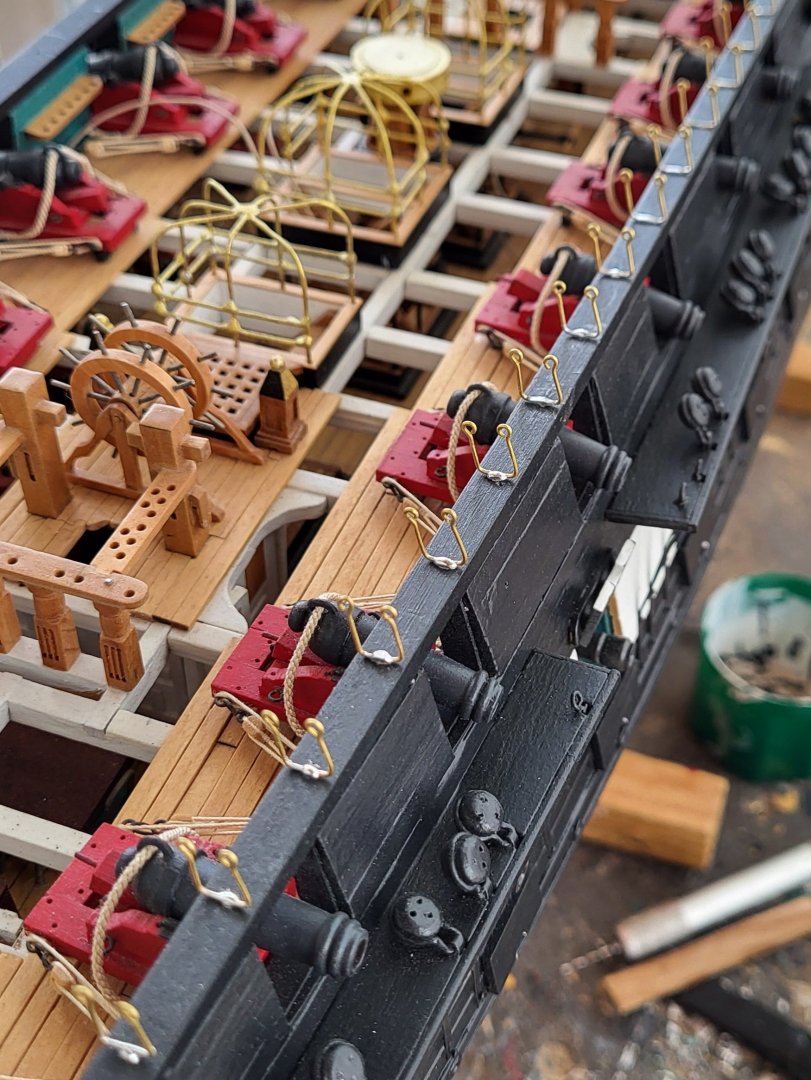
Thanks Peter, a few years ago, before I had the luxury of soldering, I made similar stancions of my Essex model like the ones in the photos. I can't show you how I did it or what kind of jig I used because I didn't take any photos but It probably wouldn't be too difficult to design a jig or jigs to do this. I'm sharing this with you to give you an idea.

-
USS Constitution by mtbediz - 1:76
mtbediz replied to mtbediz's topic in - Build logs for subjects built 1751 - 1800
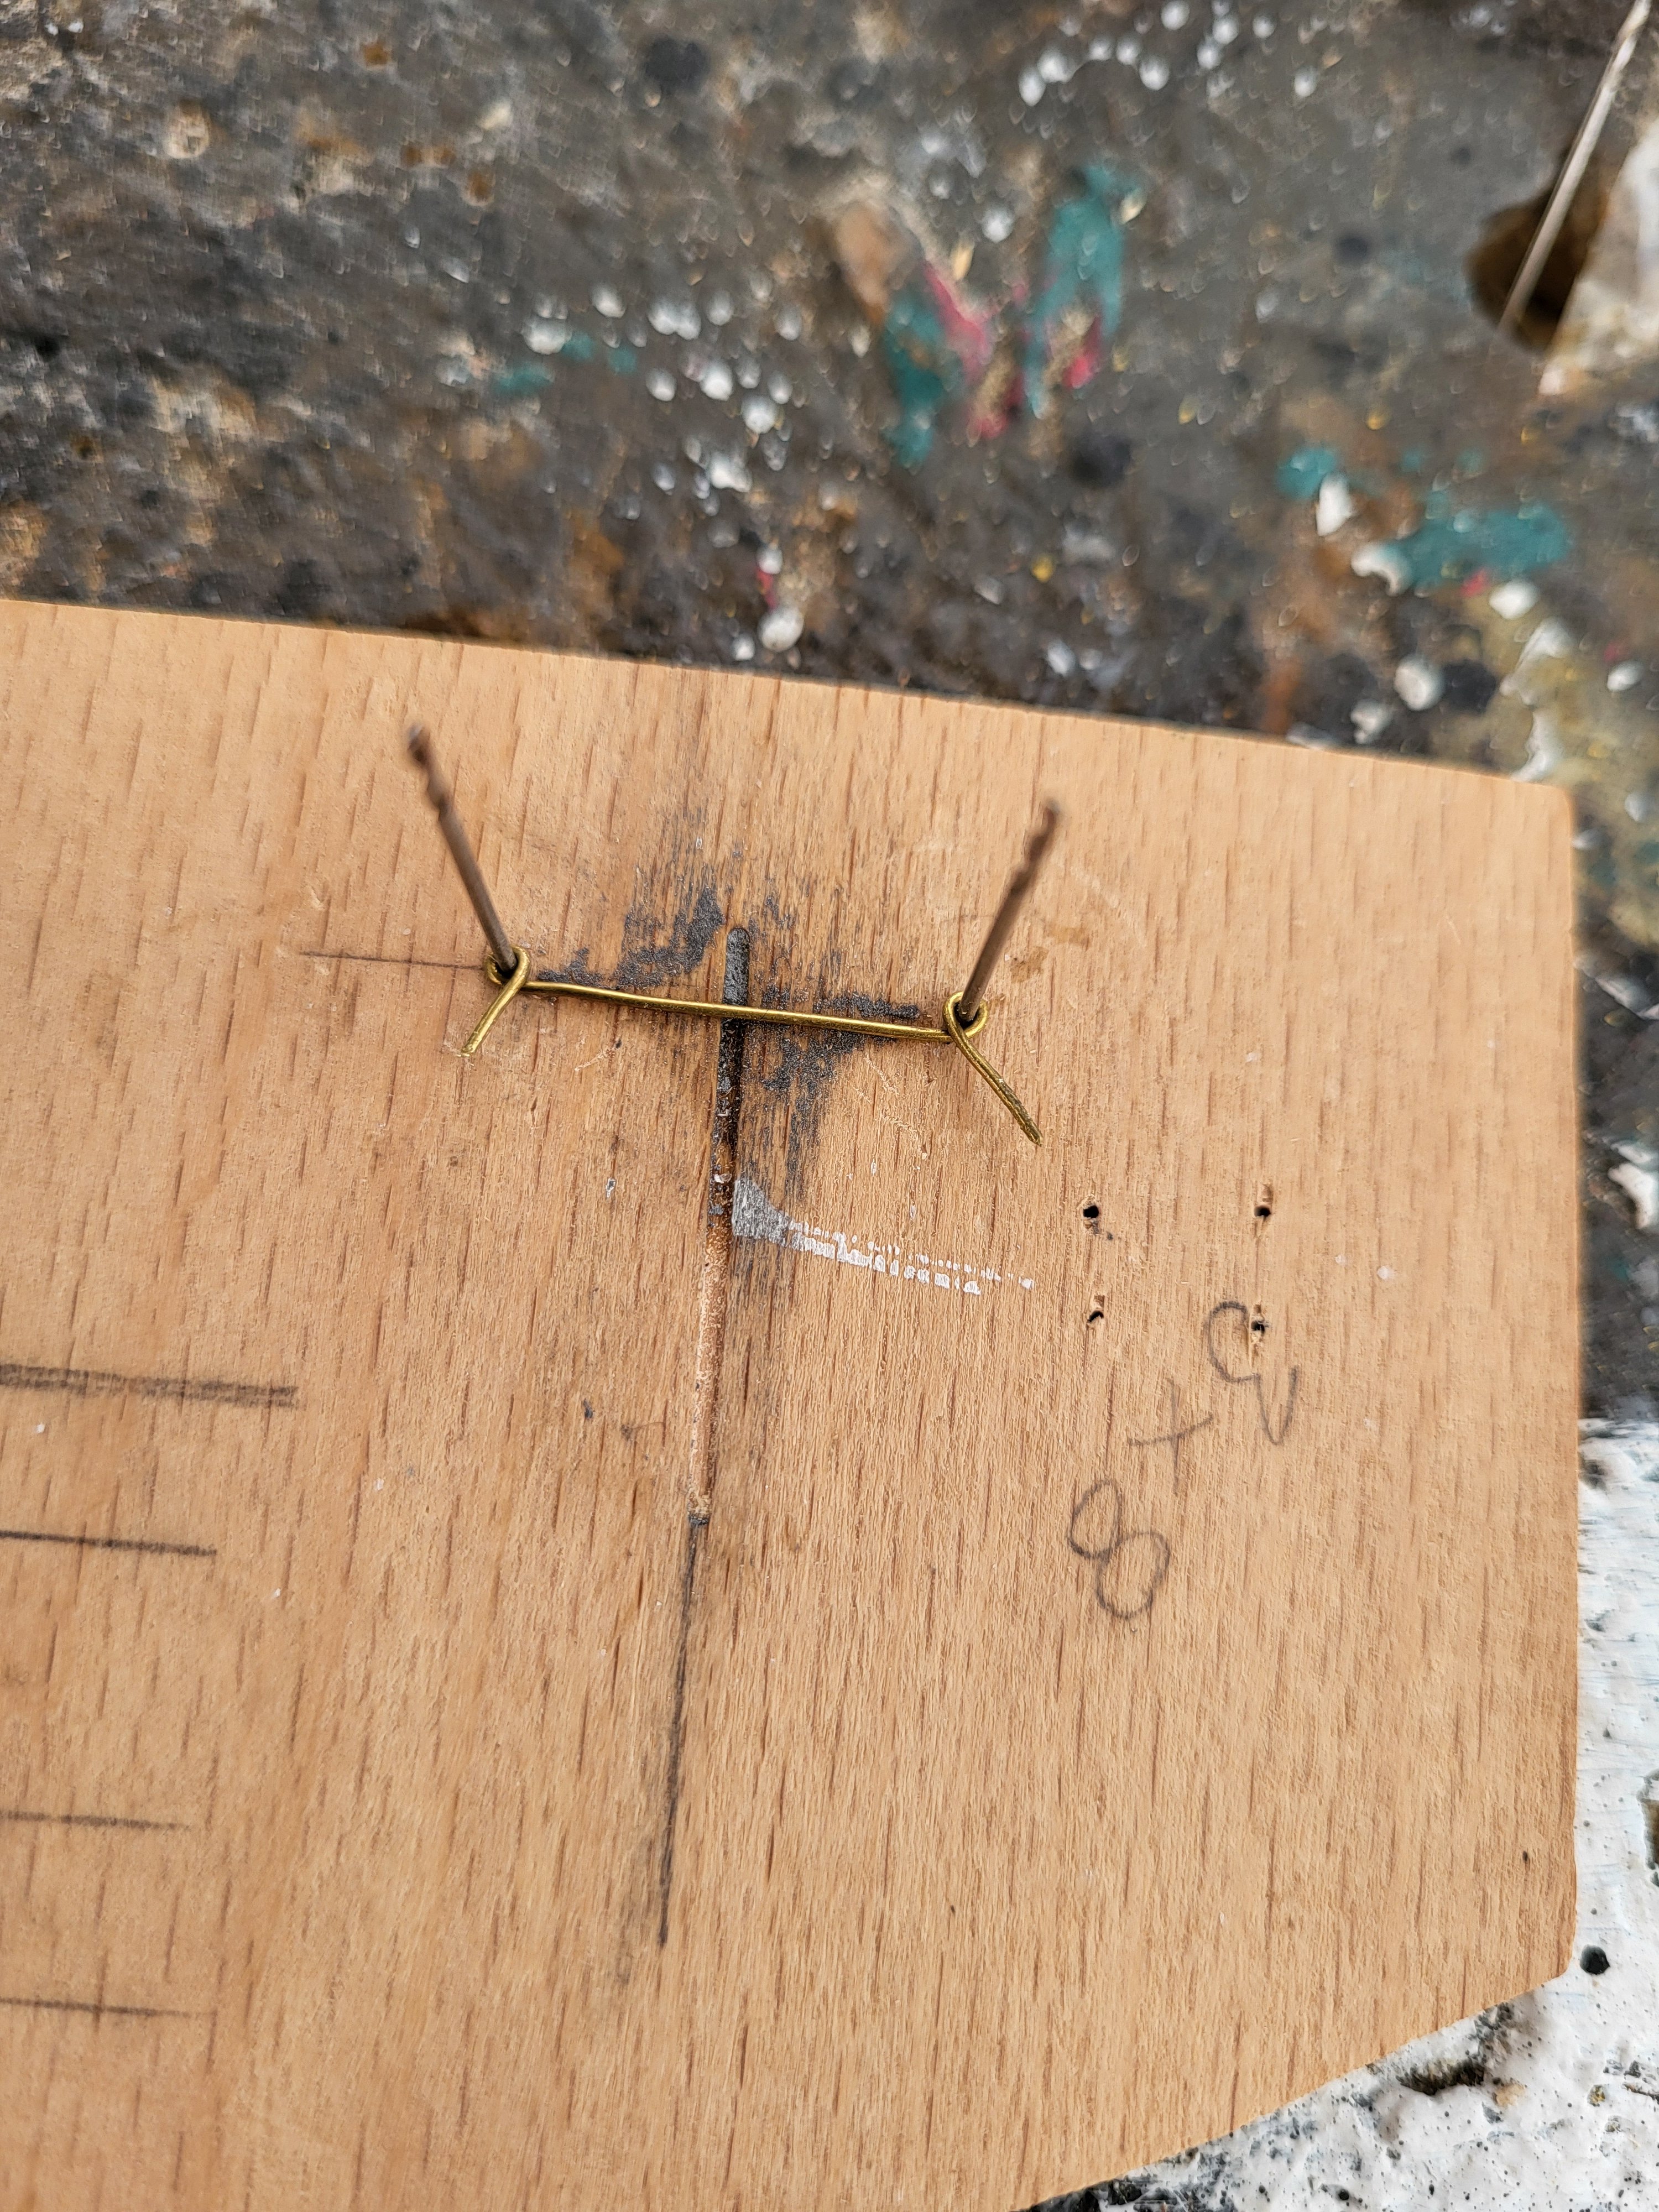
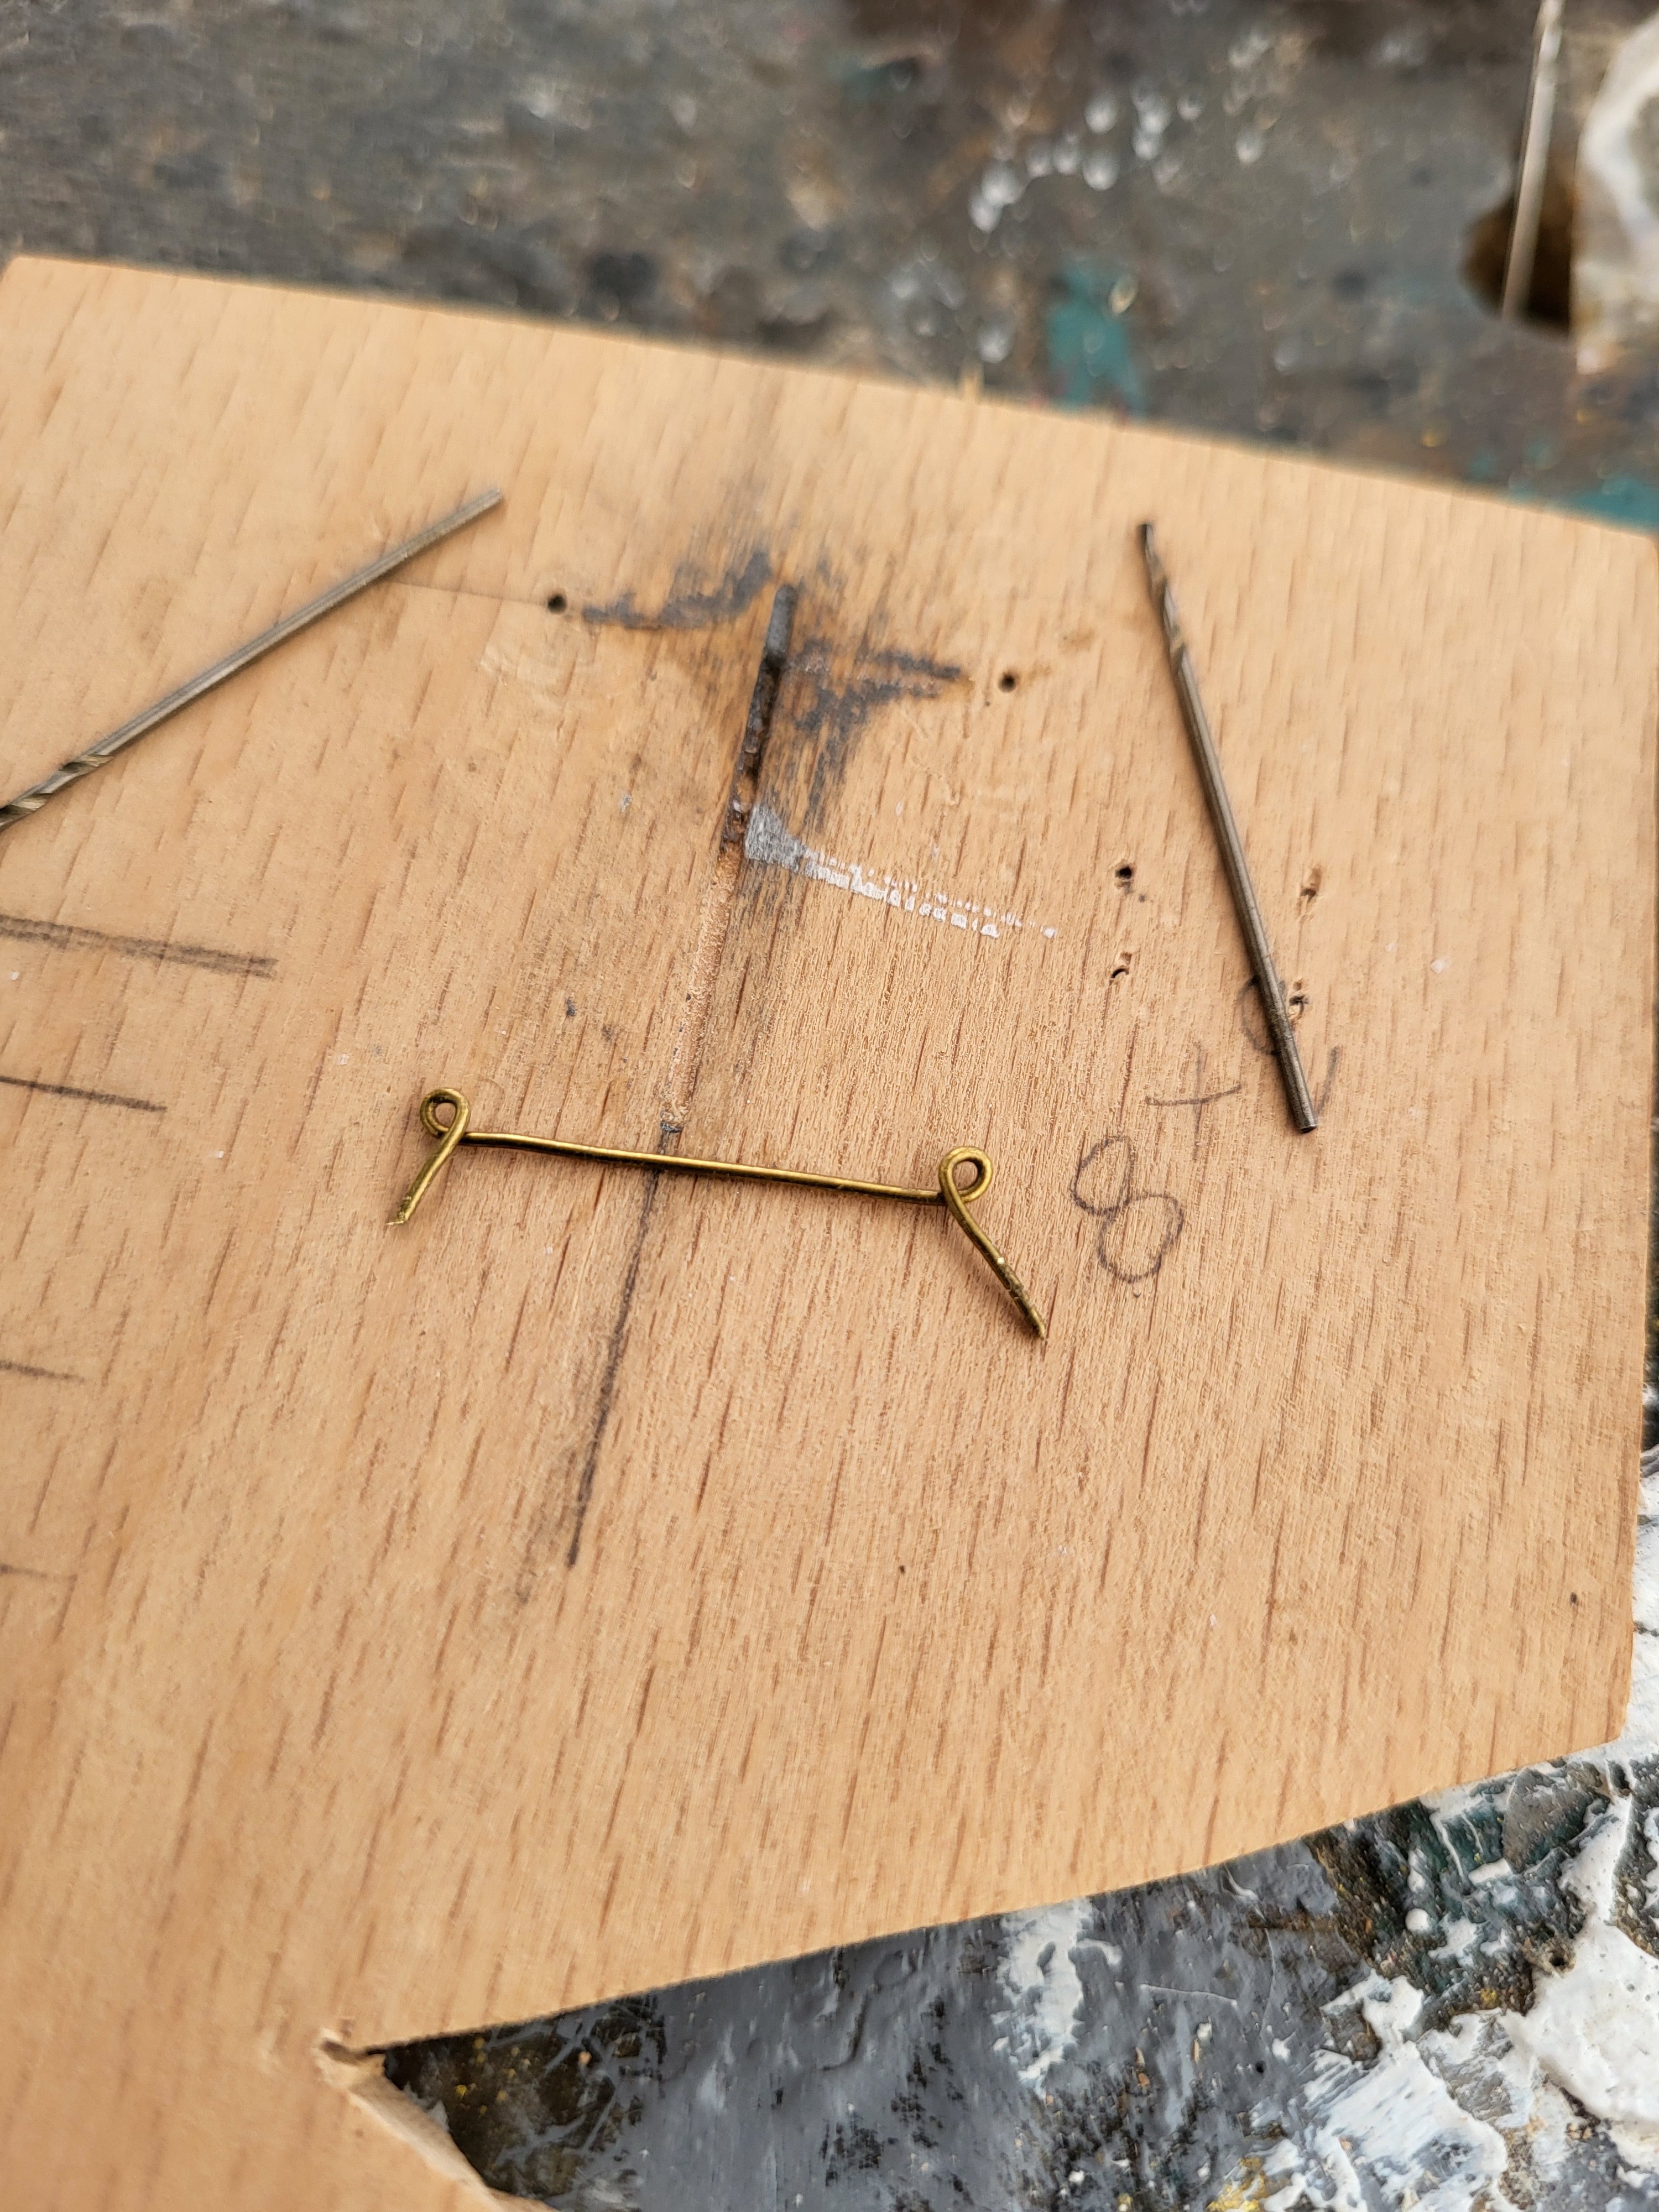
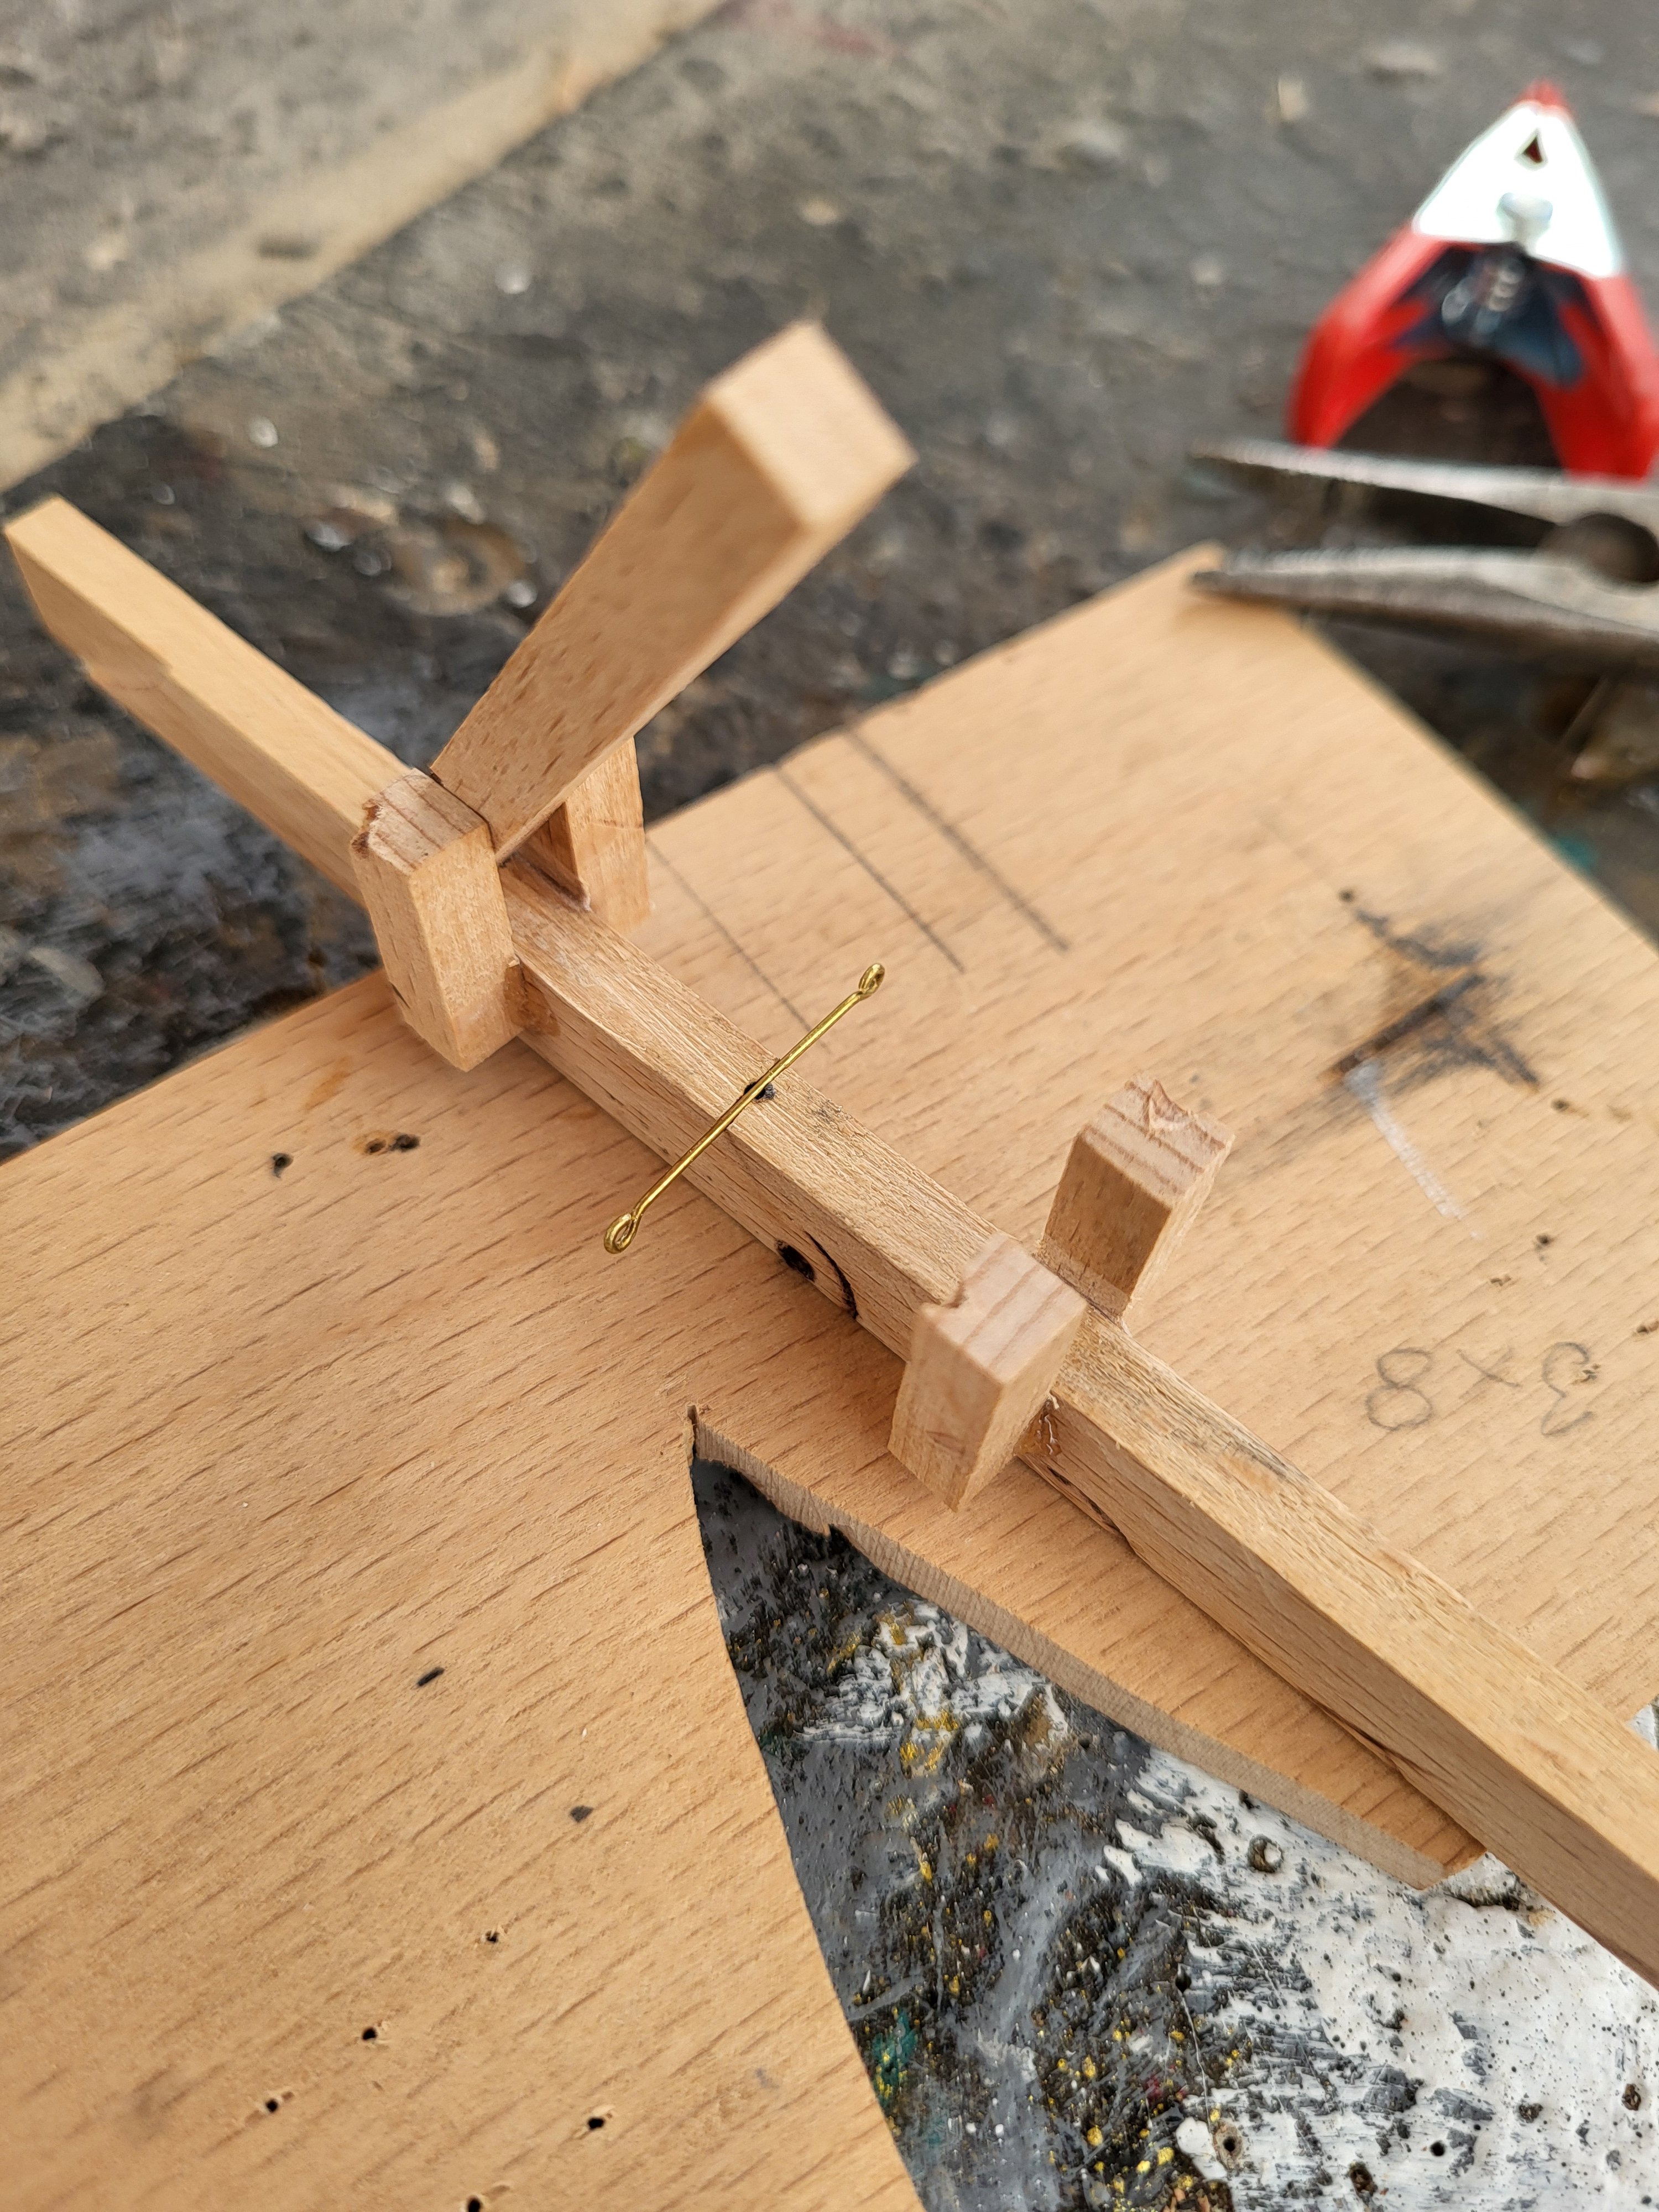
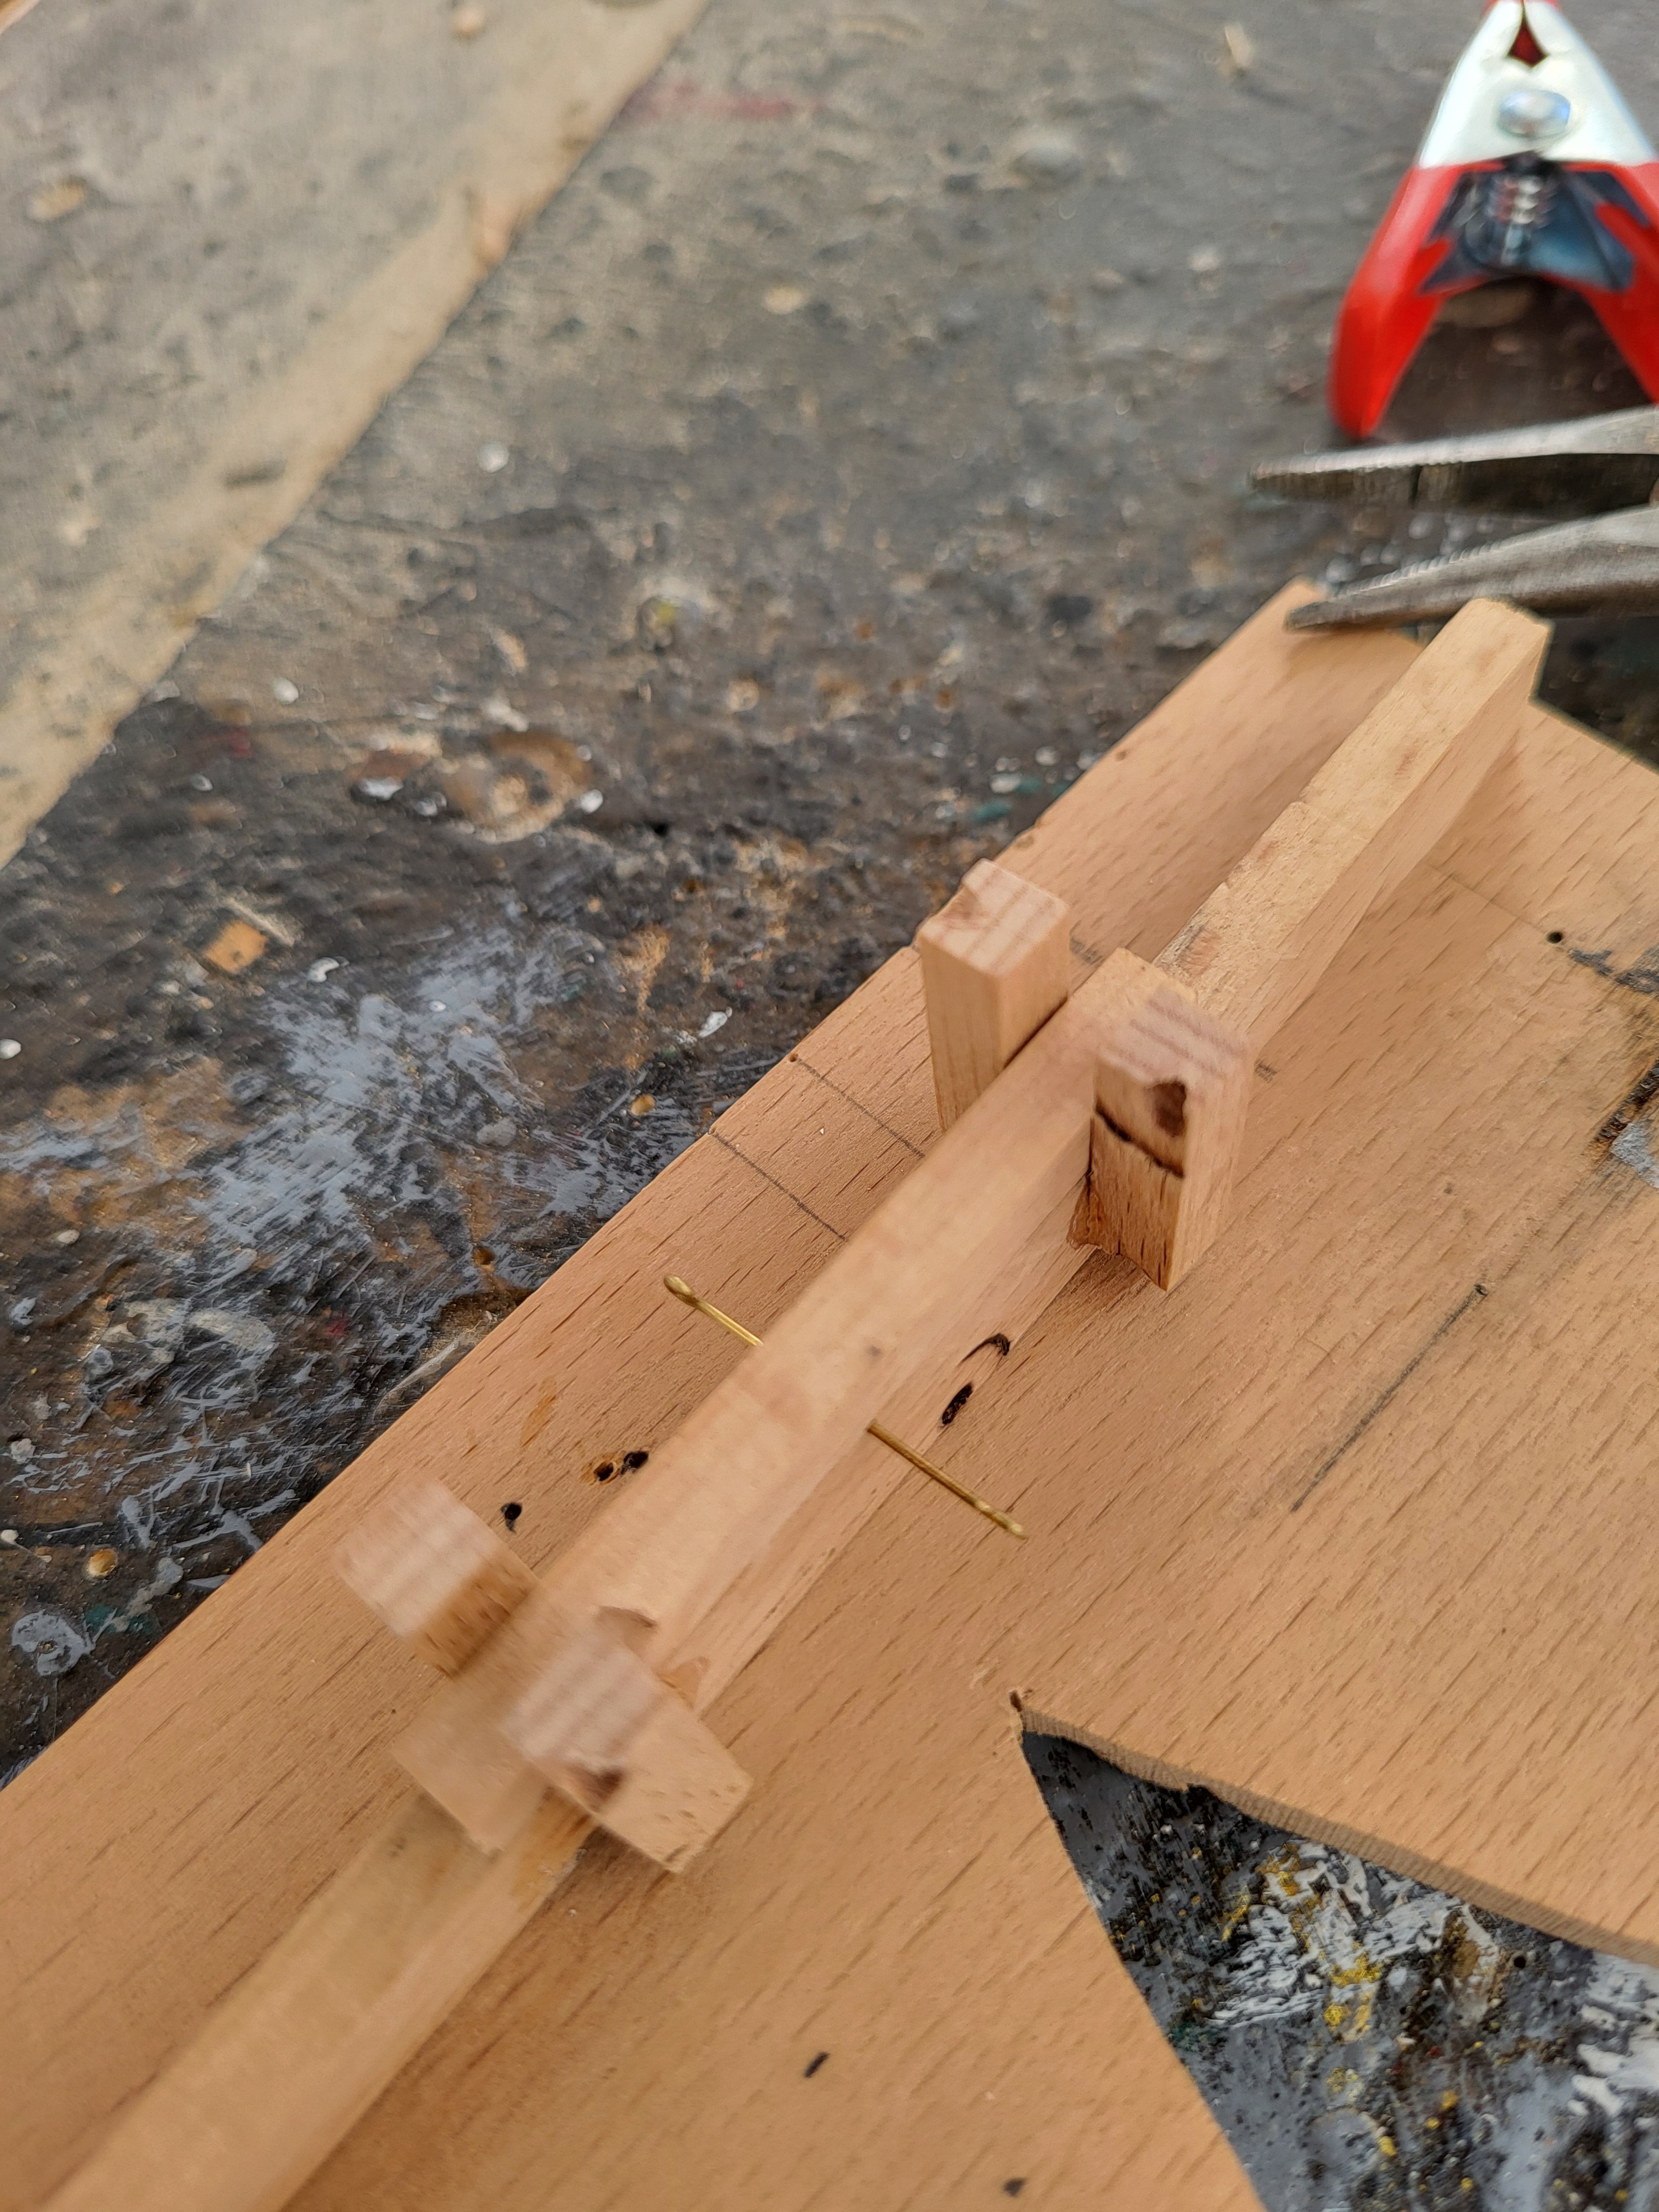
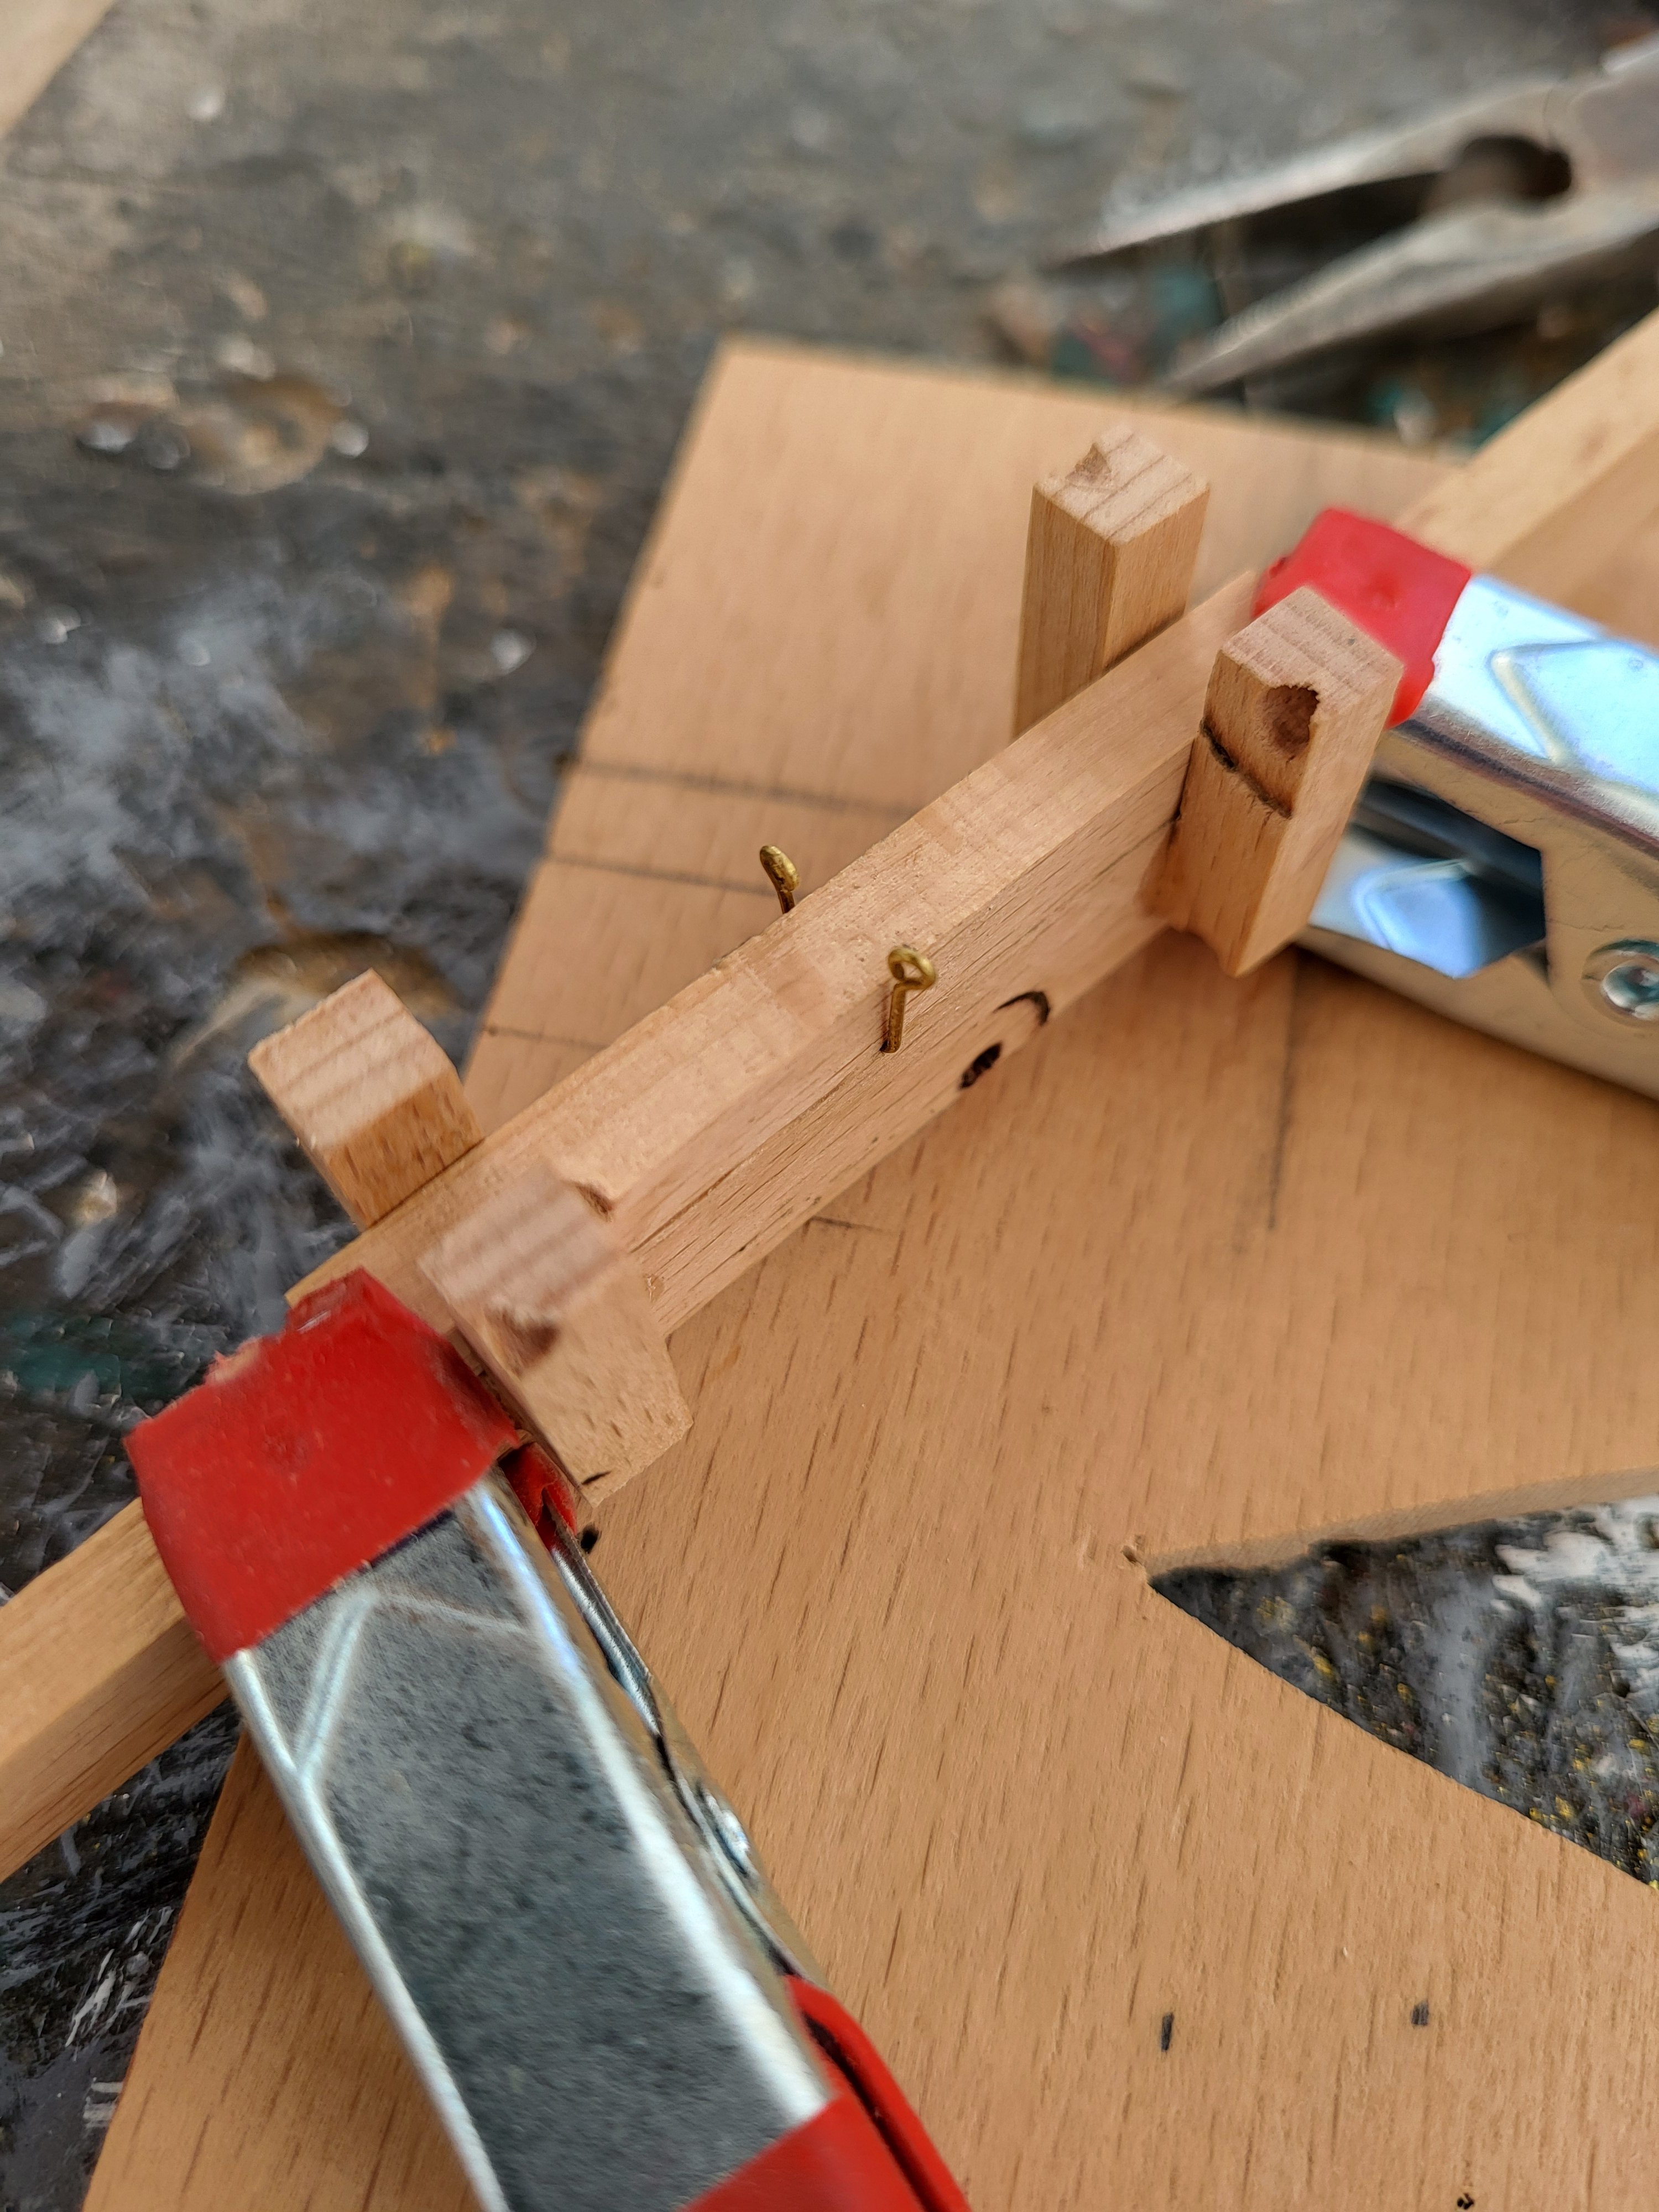
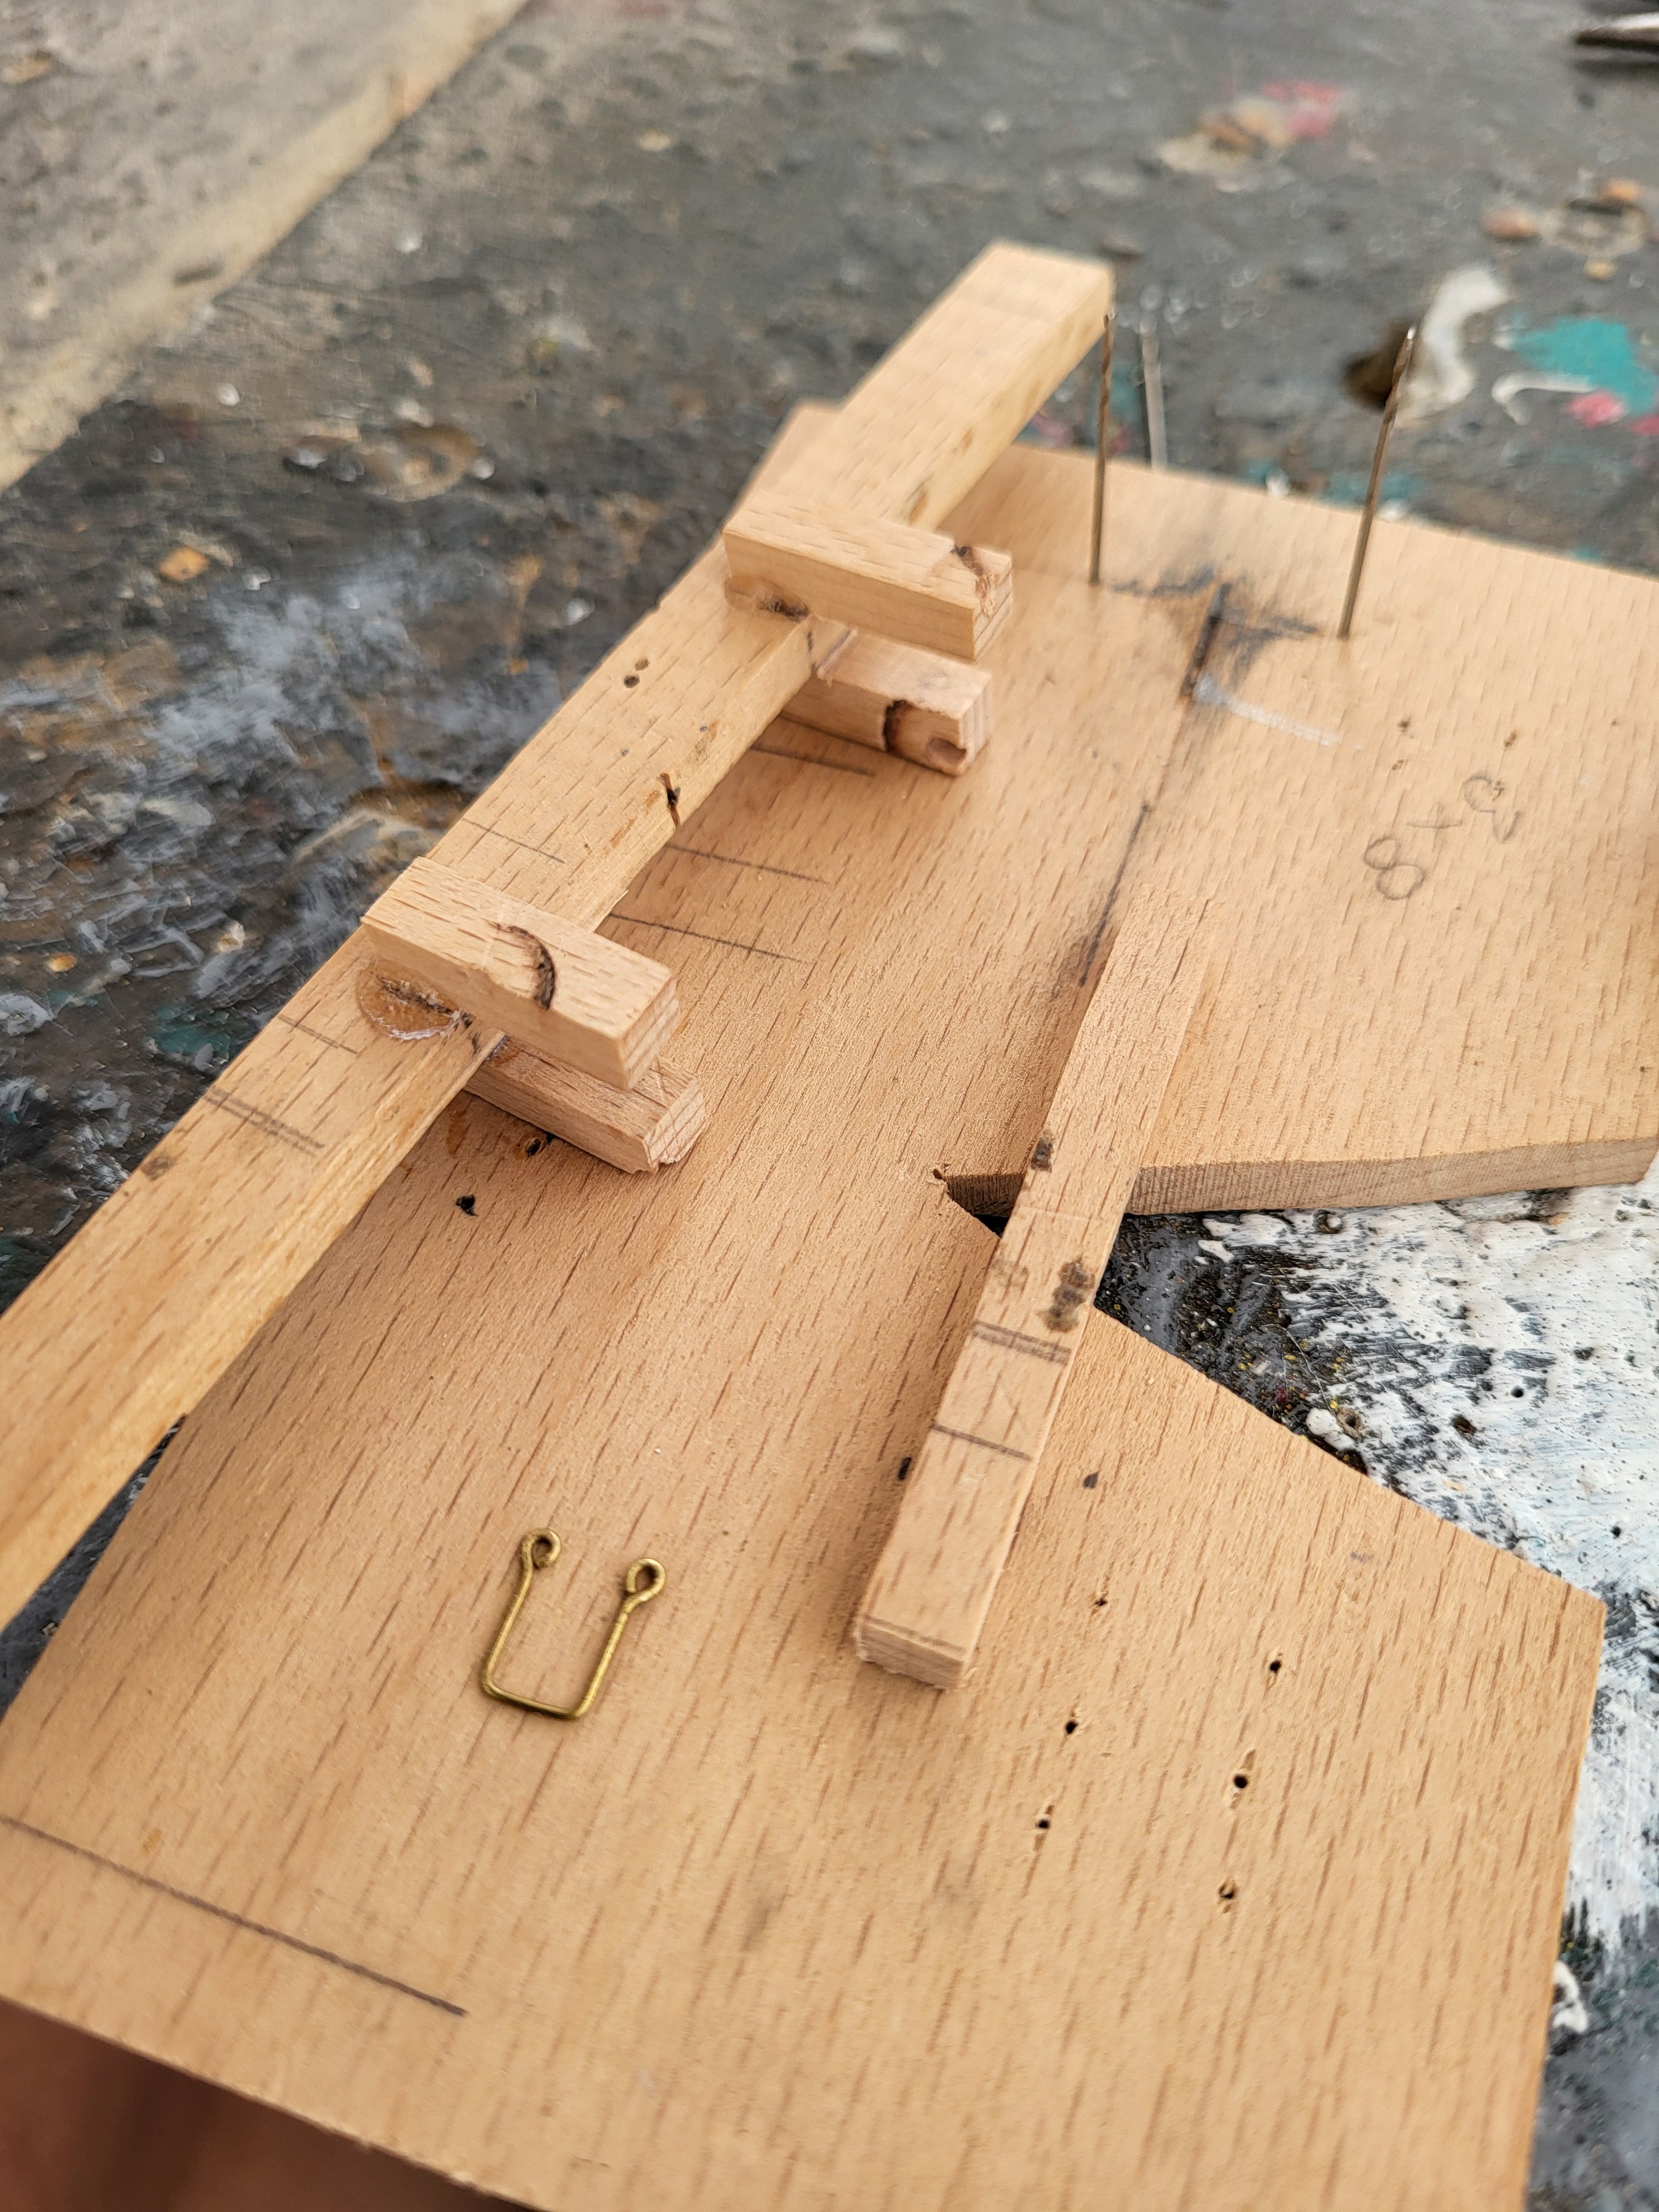
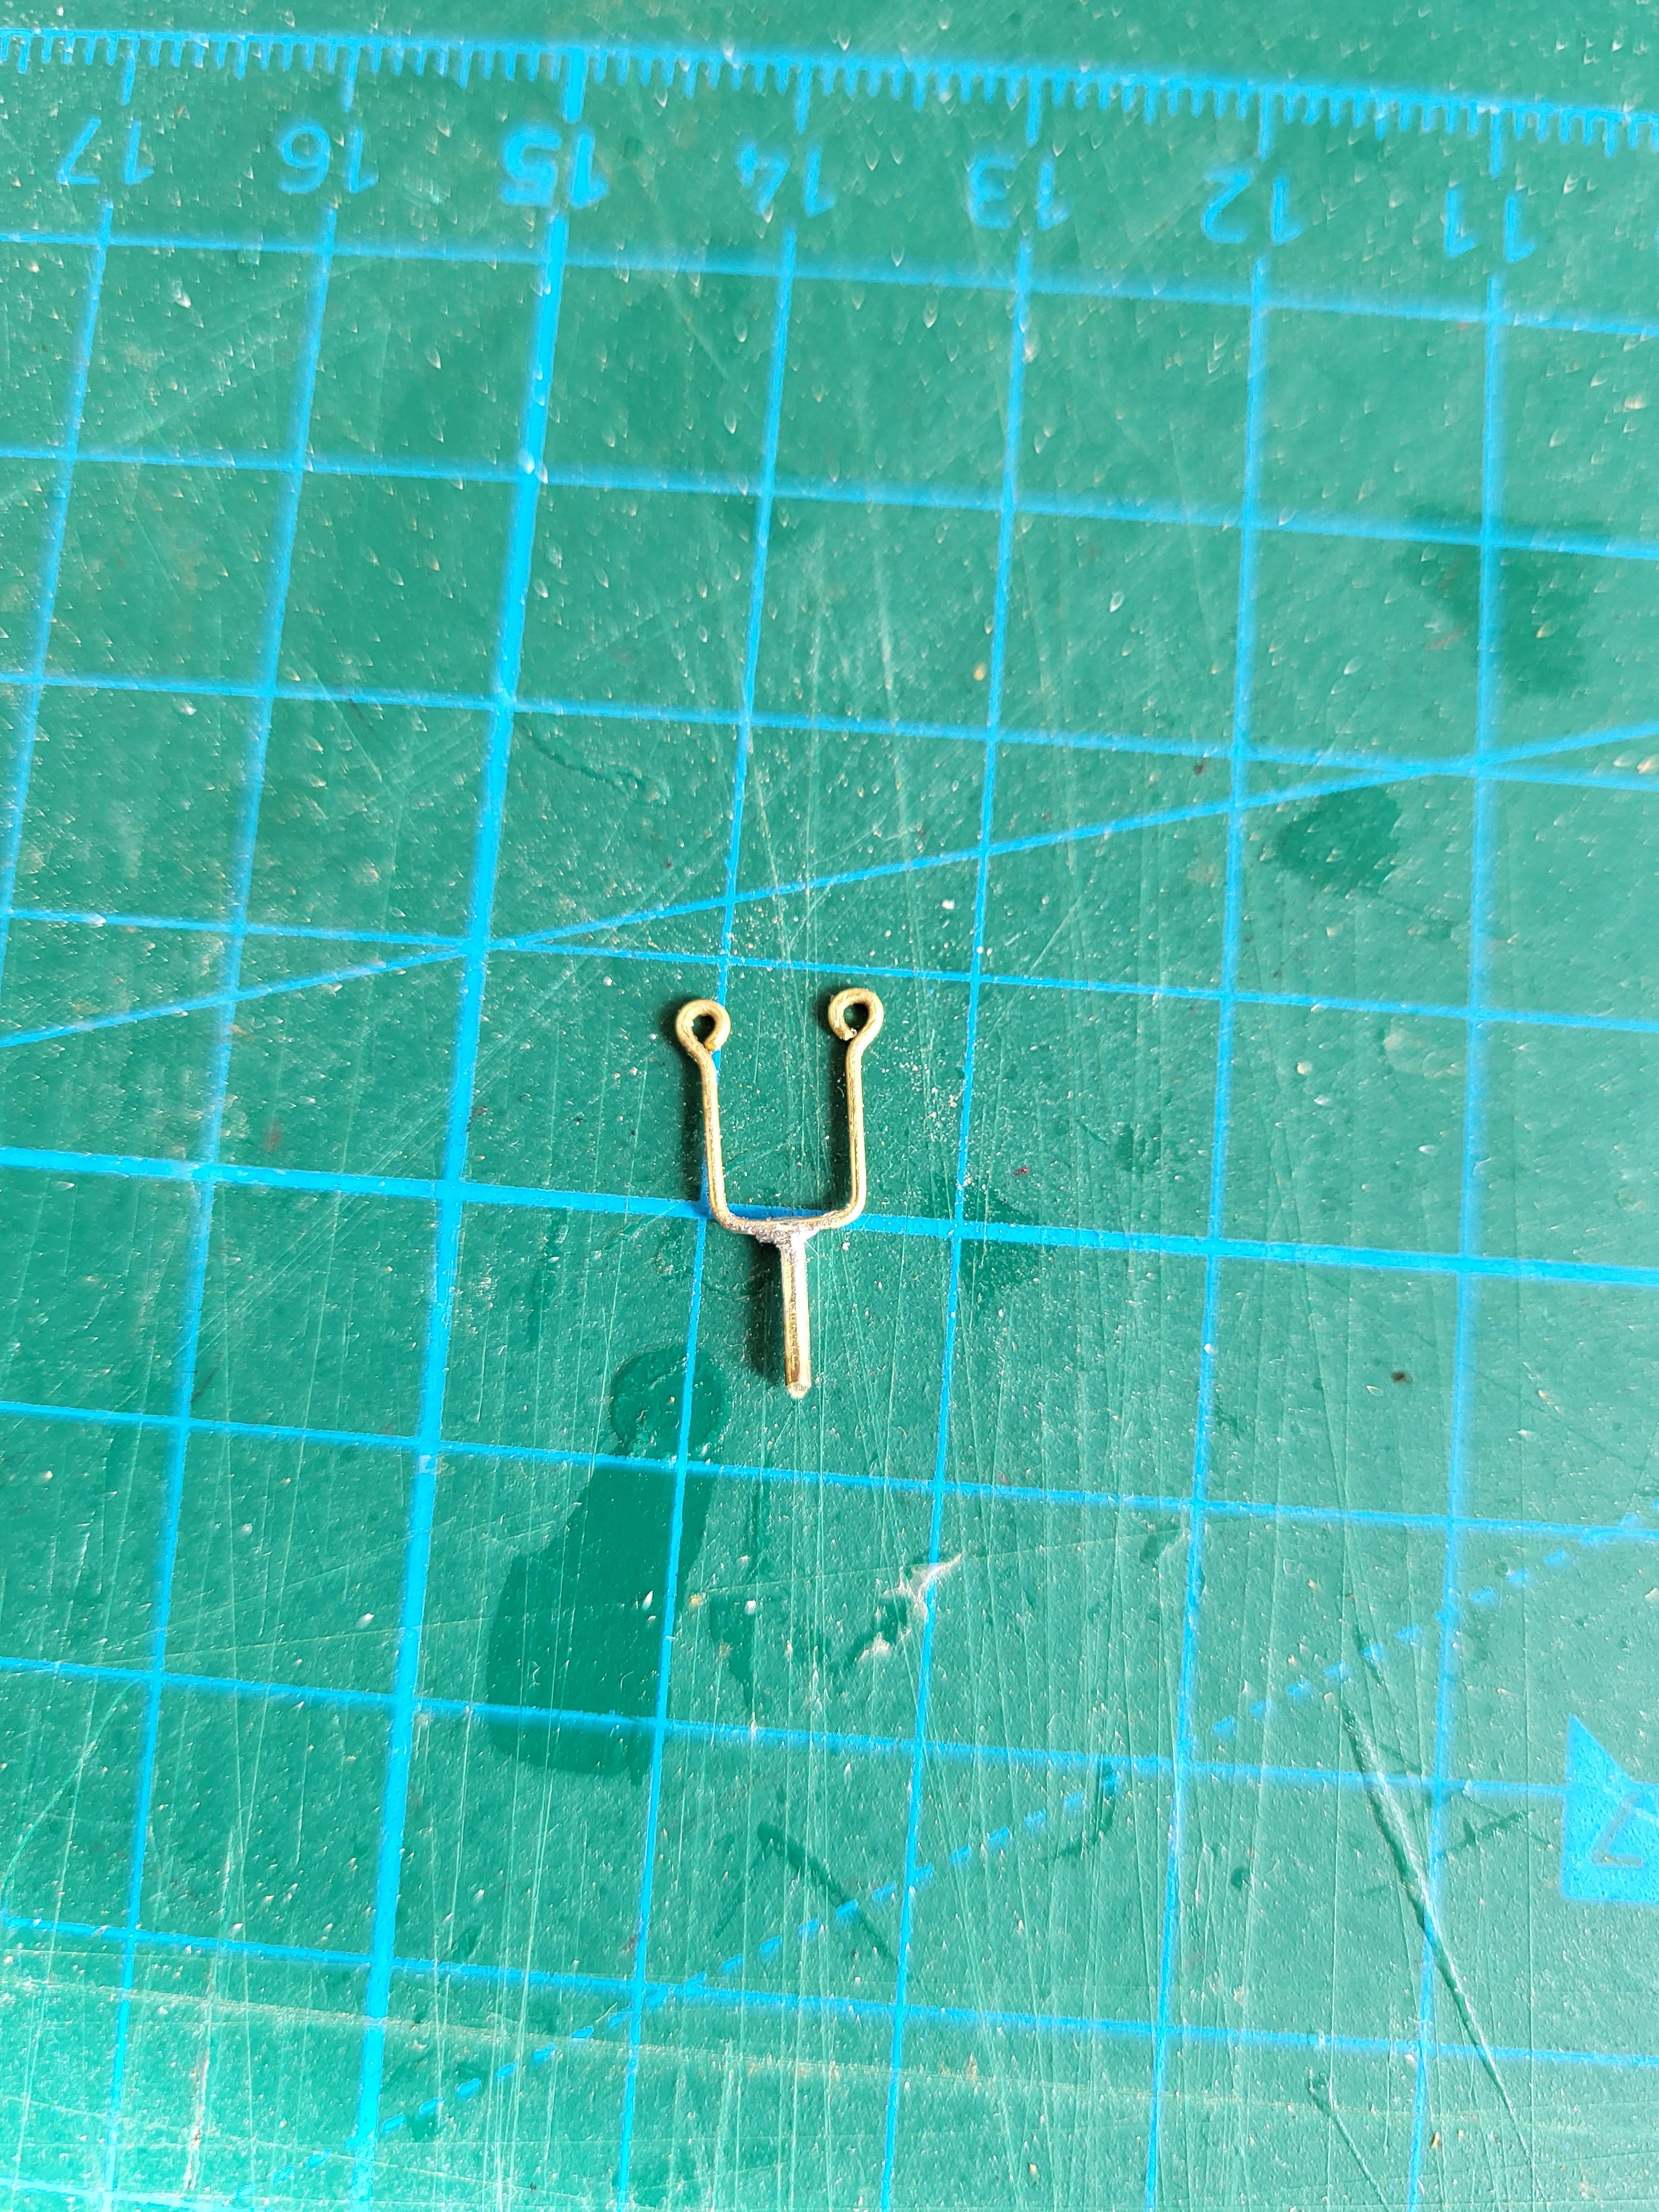
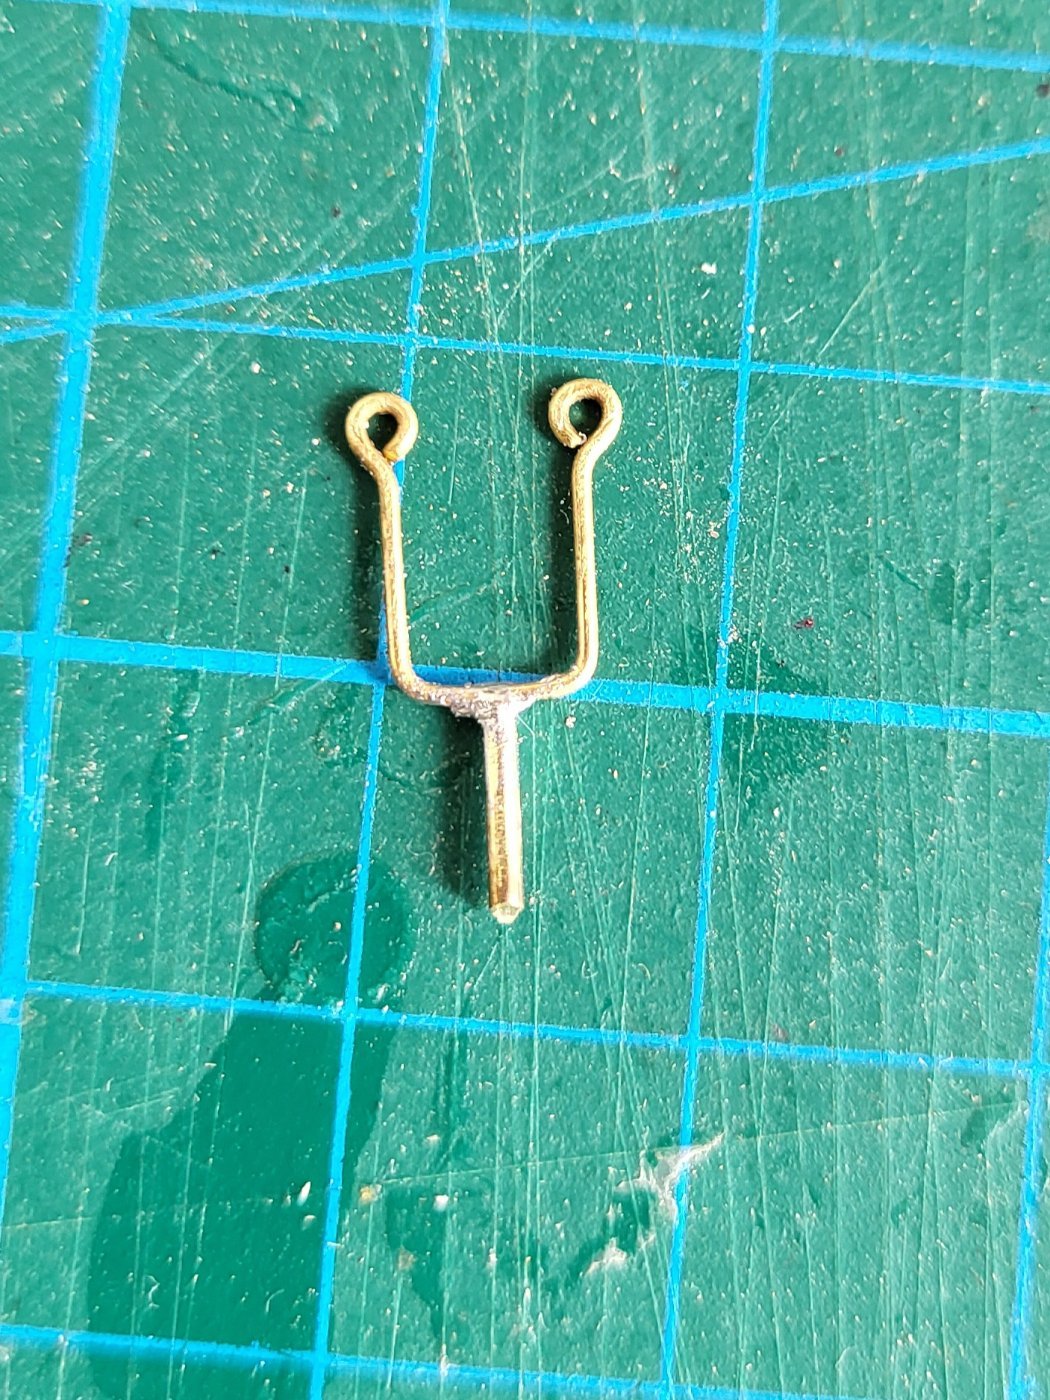
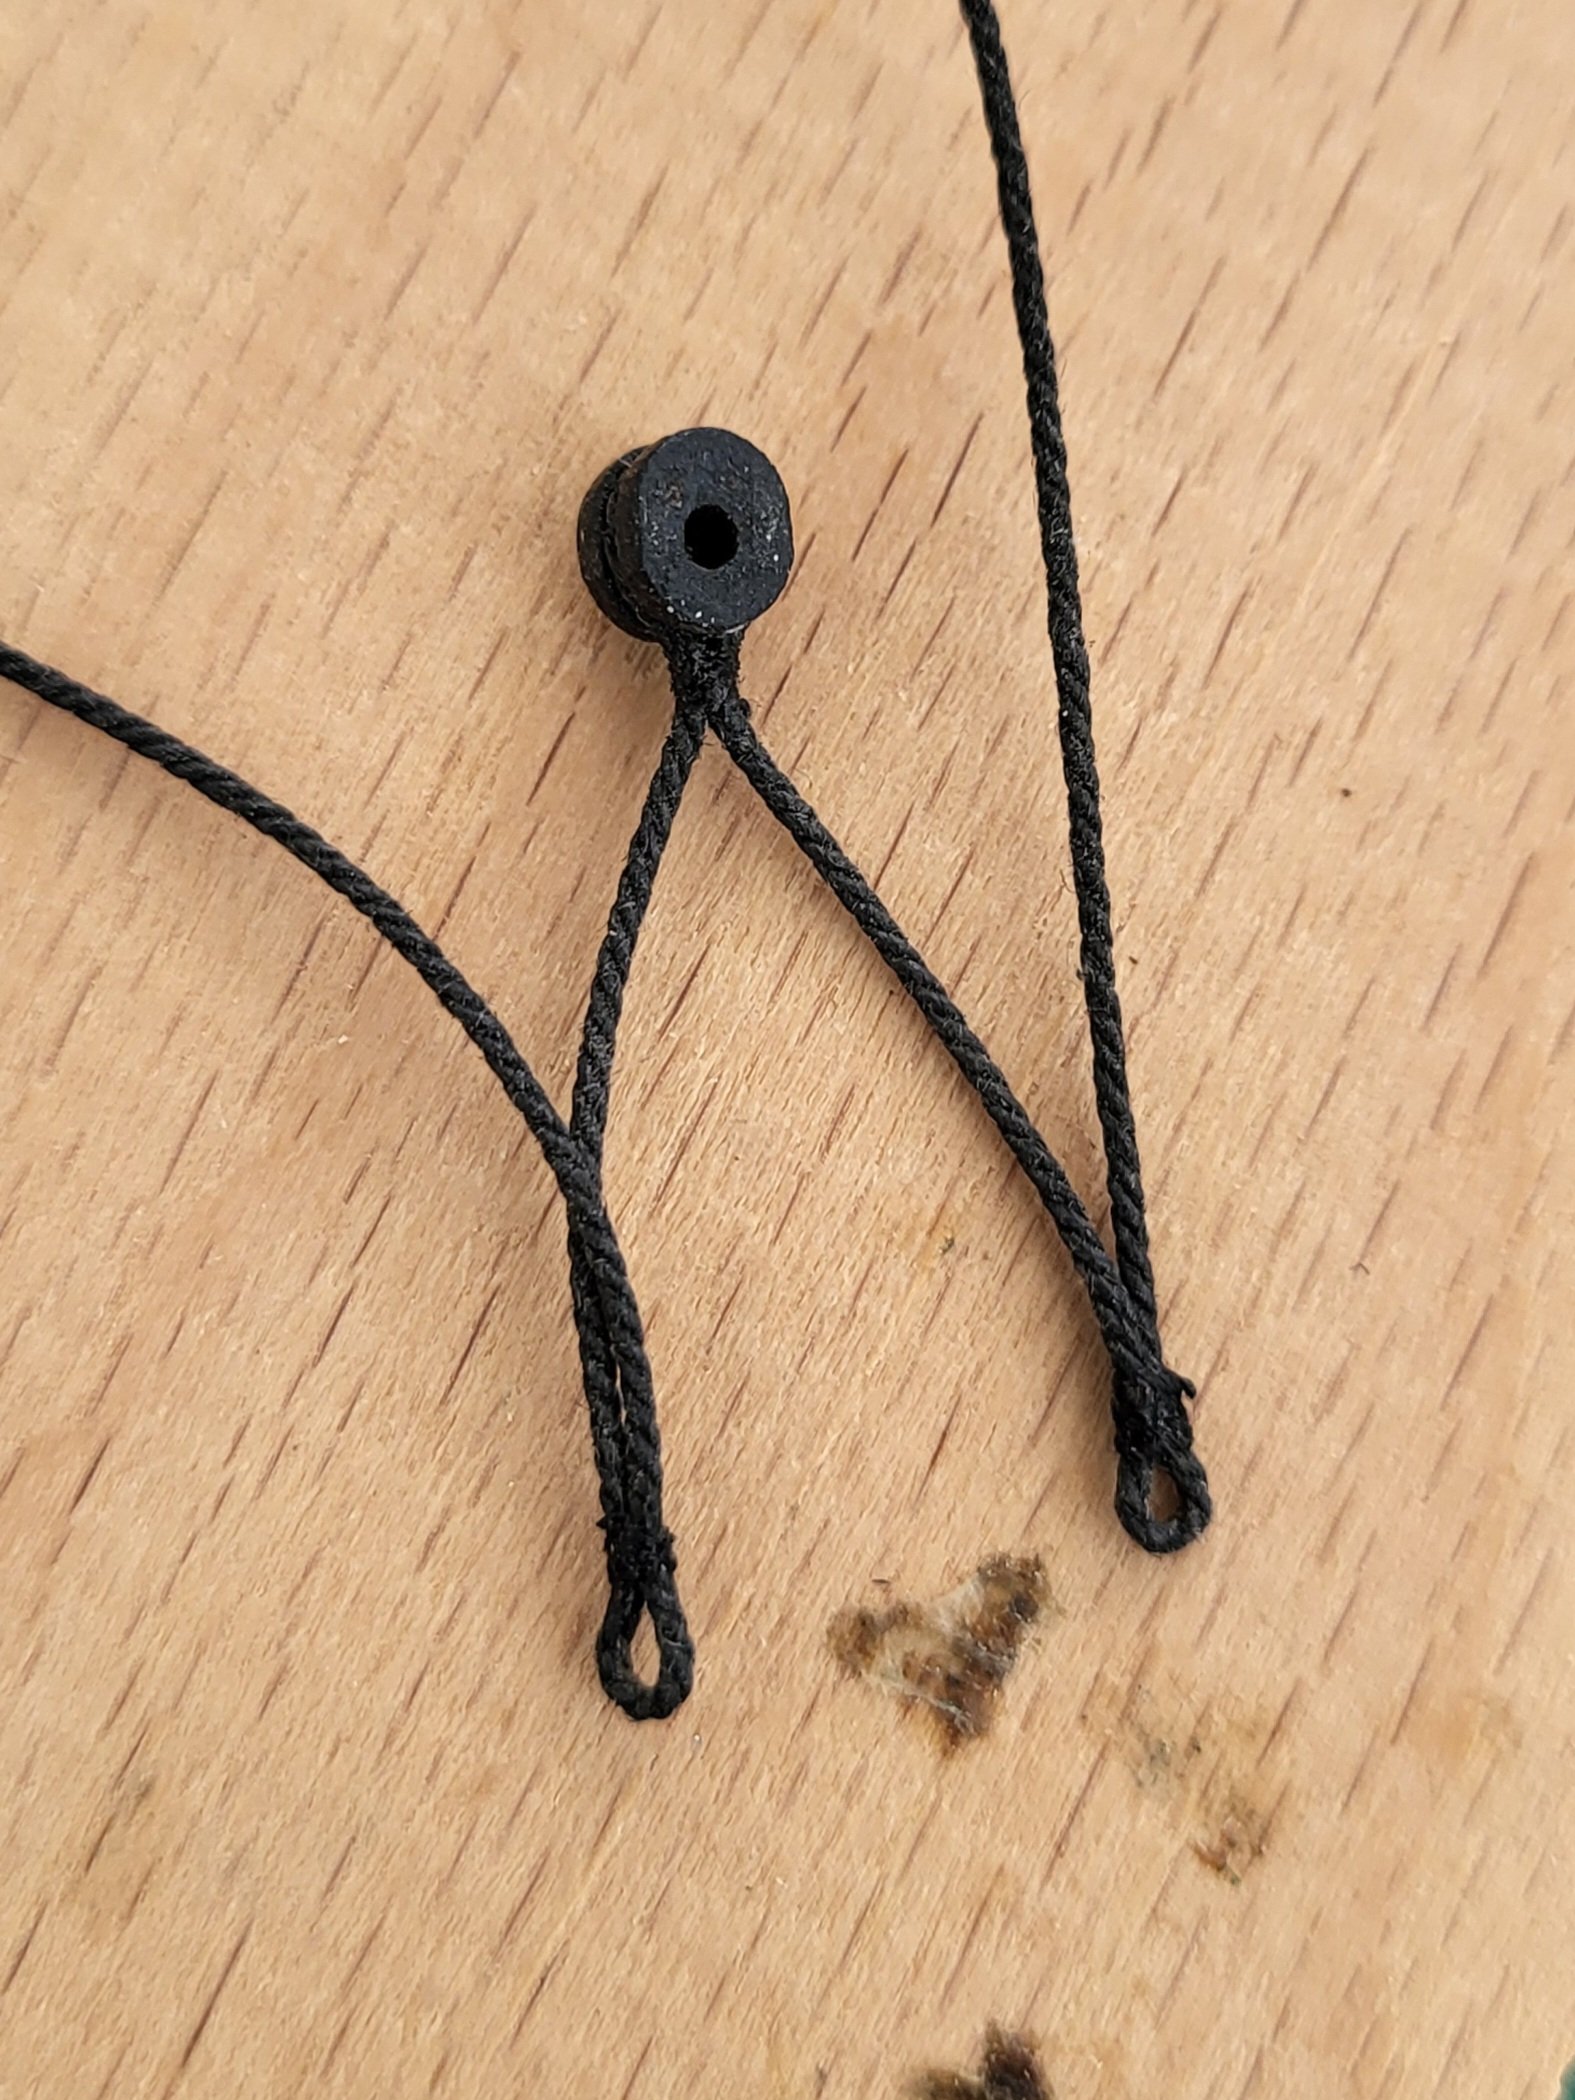
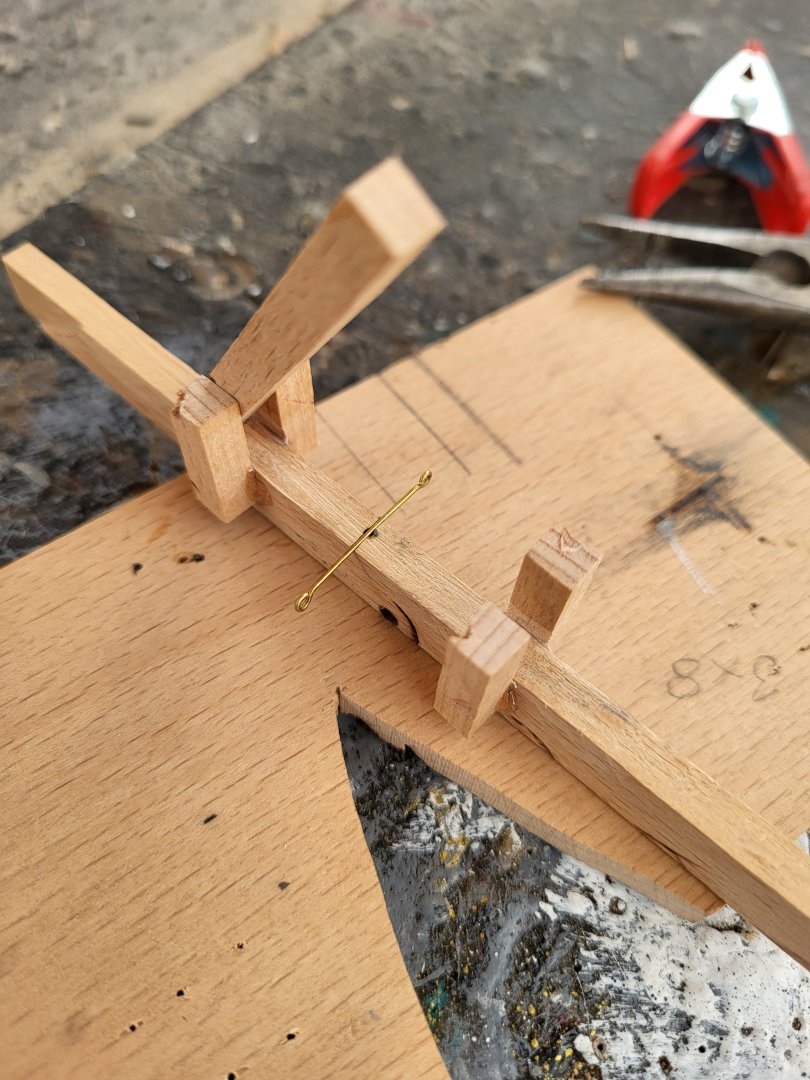
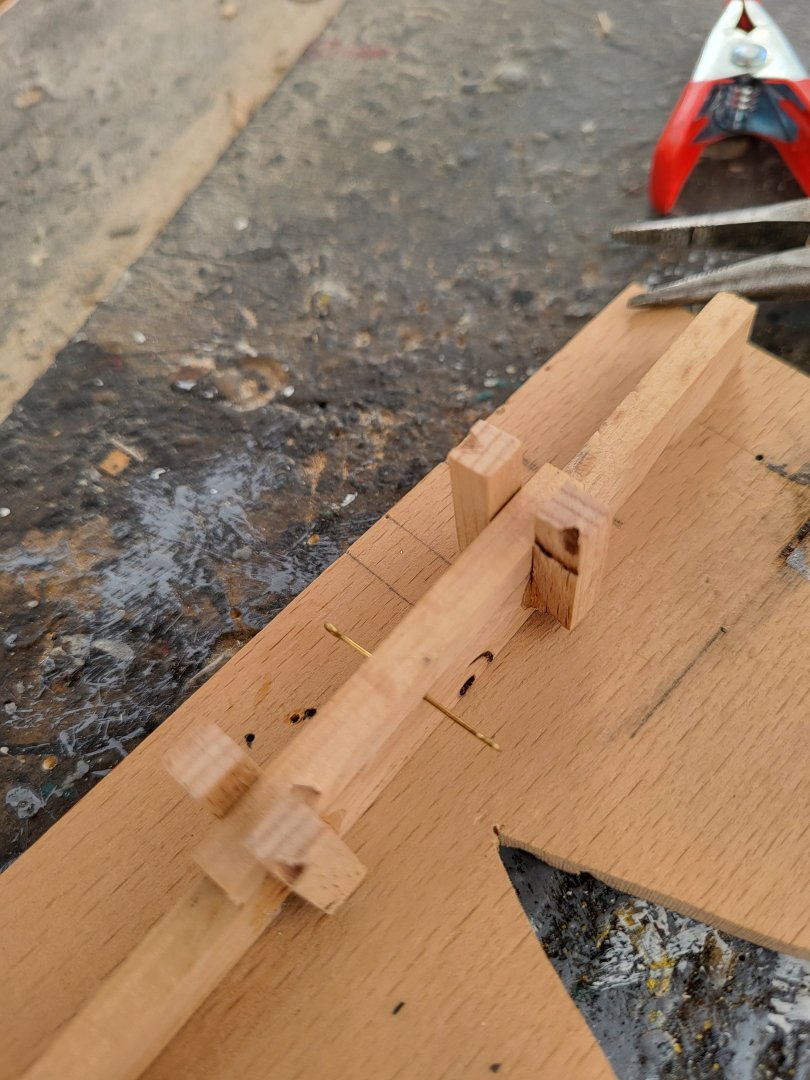
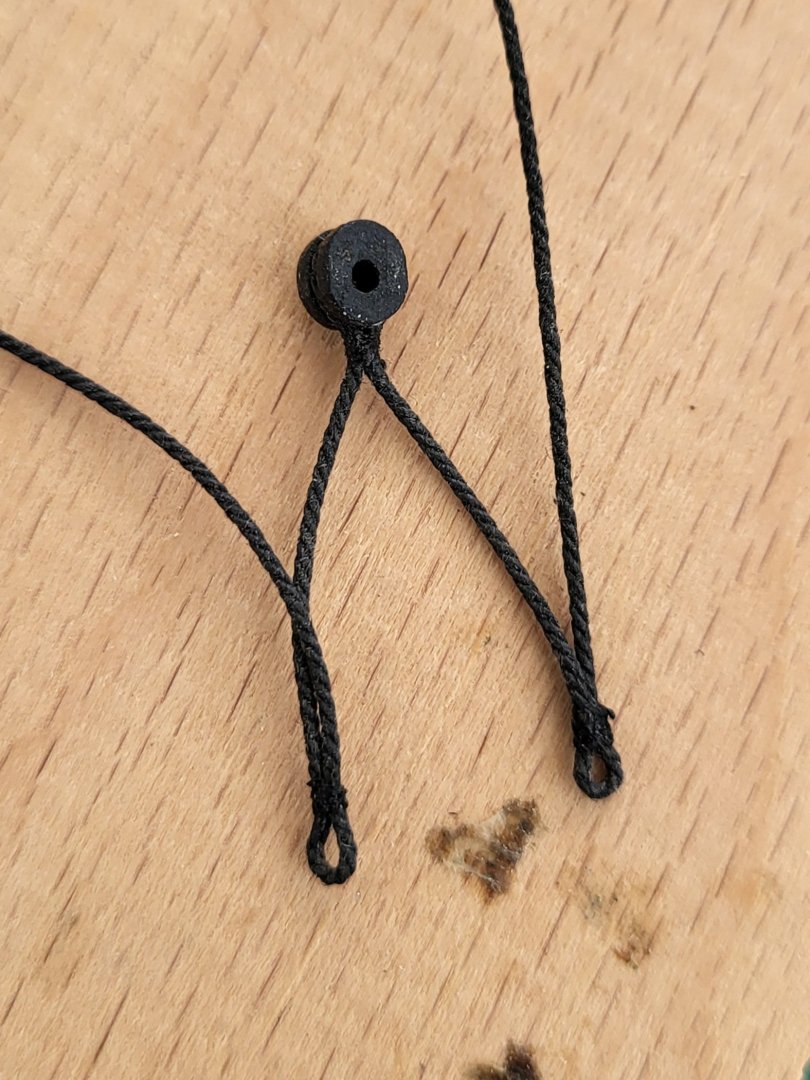
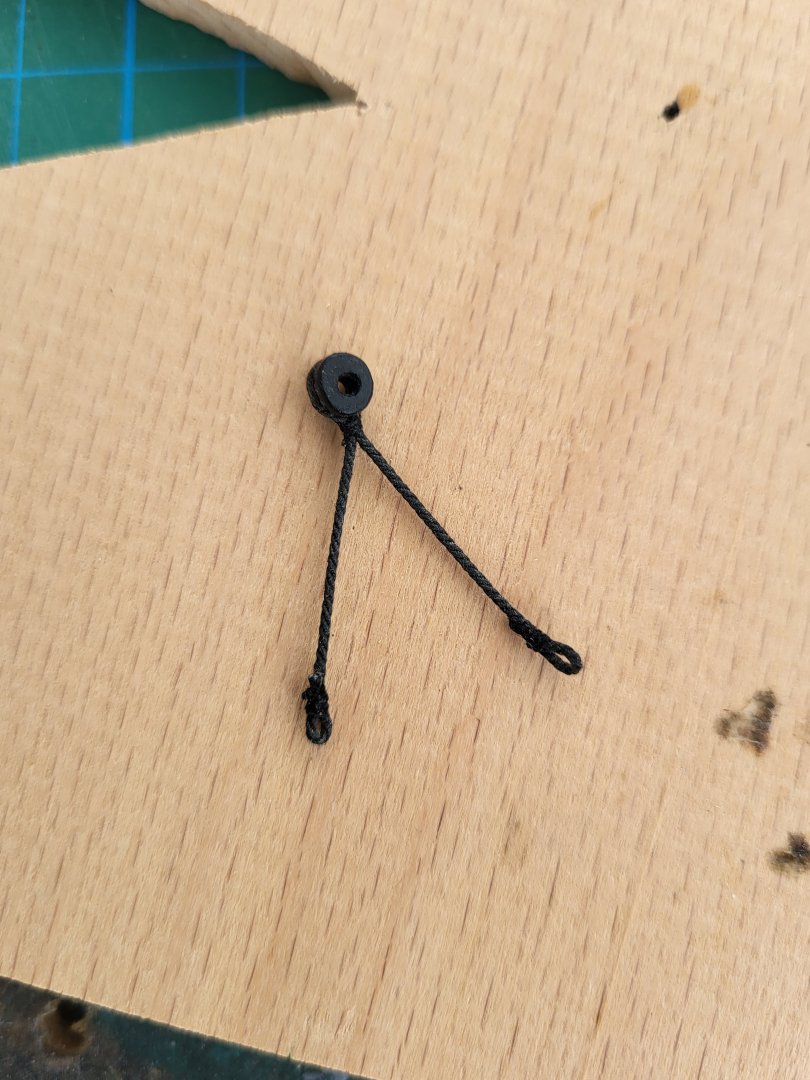
Thanks, Thomas. I used two jigs to make the stancions. One to create the loops and another to create the frames. I had to make these jigs because I needed to make 54 stancions, and they all had to be the same shape and size. Finally, I soldered the extensions.


-
USS Constitution by mtbediz - 1:76
mtbediz replied to mtbediz's topic in - Build logs for subjects built 1751 - 1800
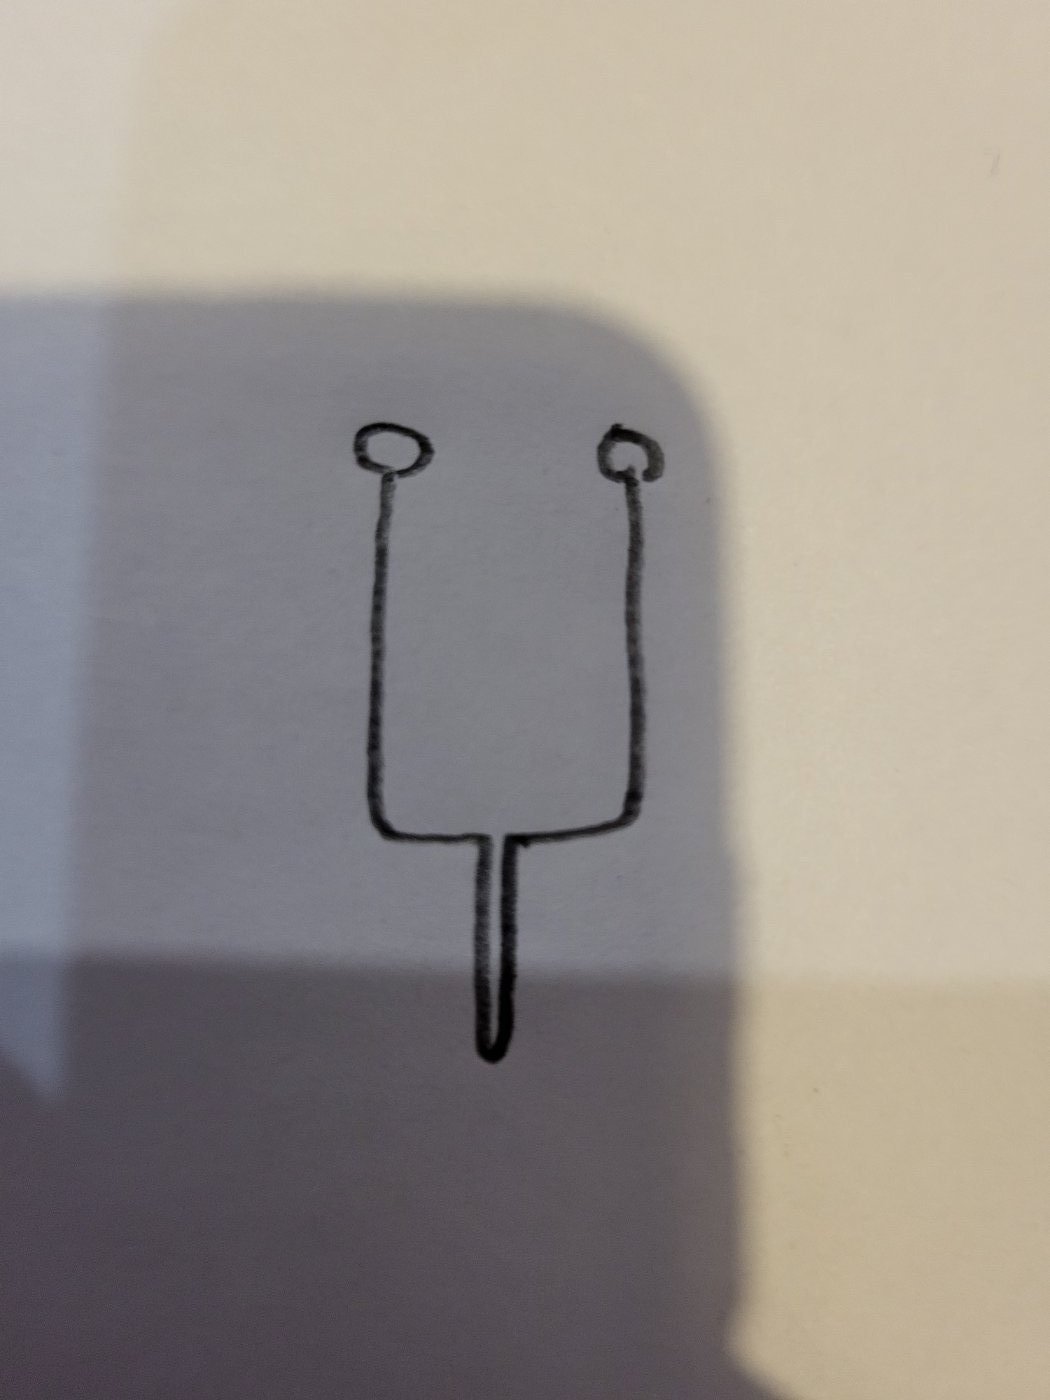
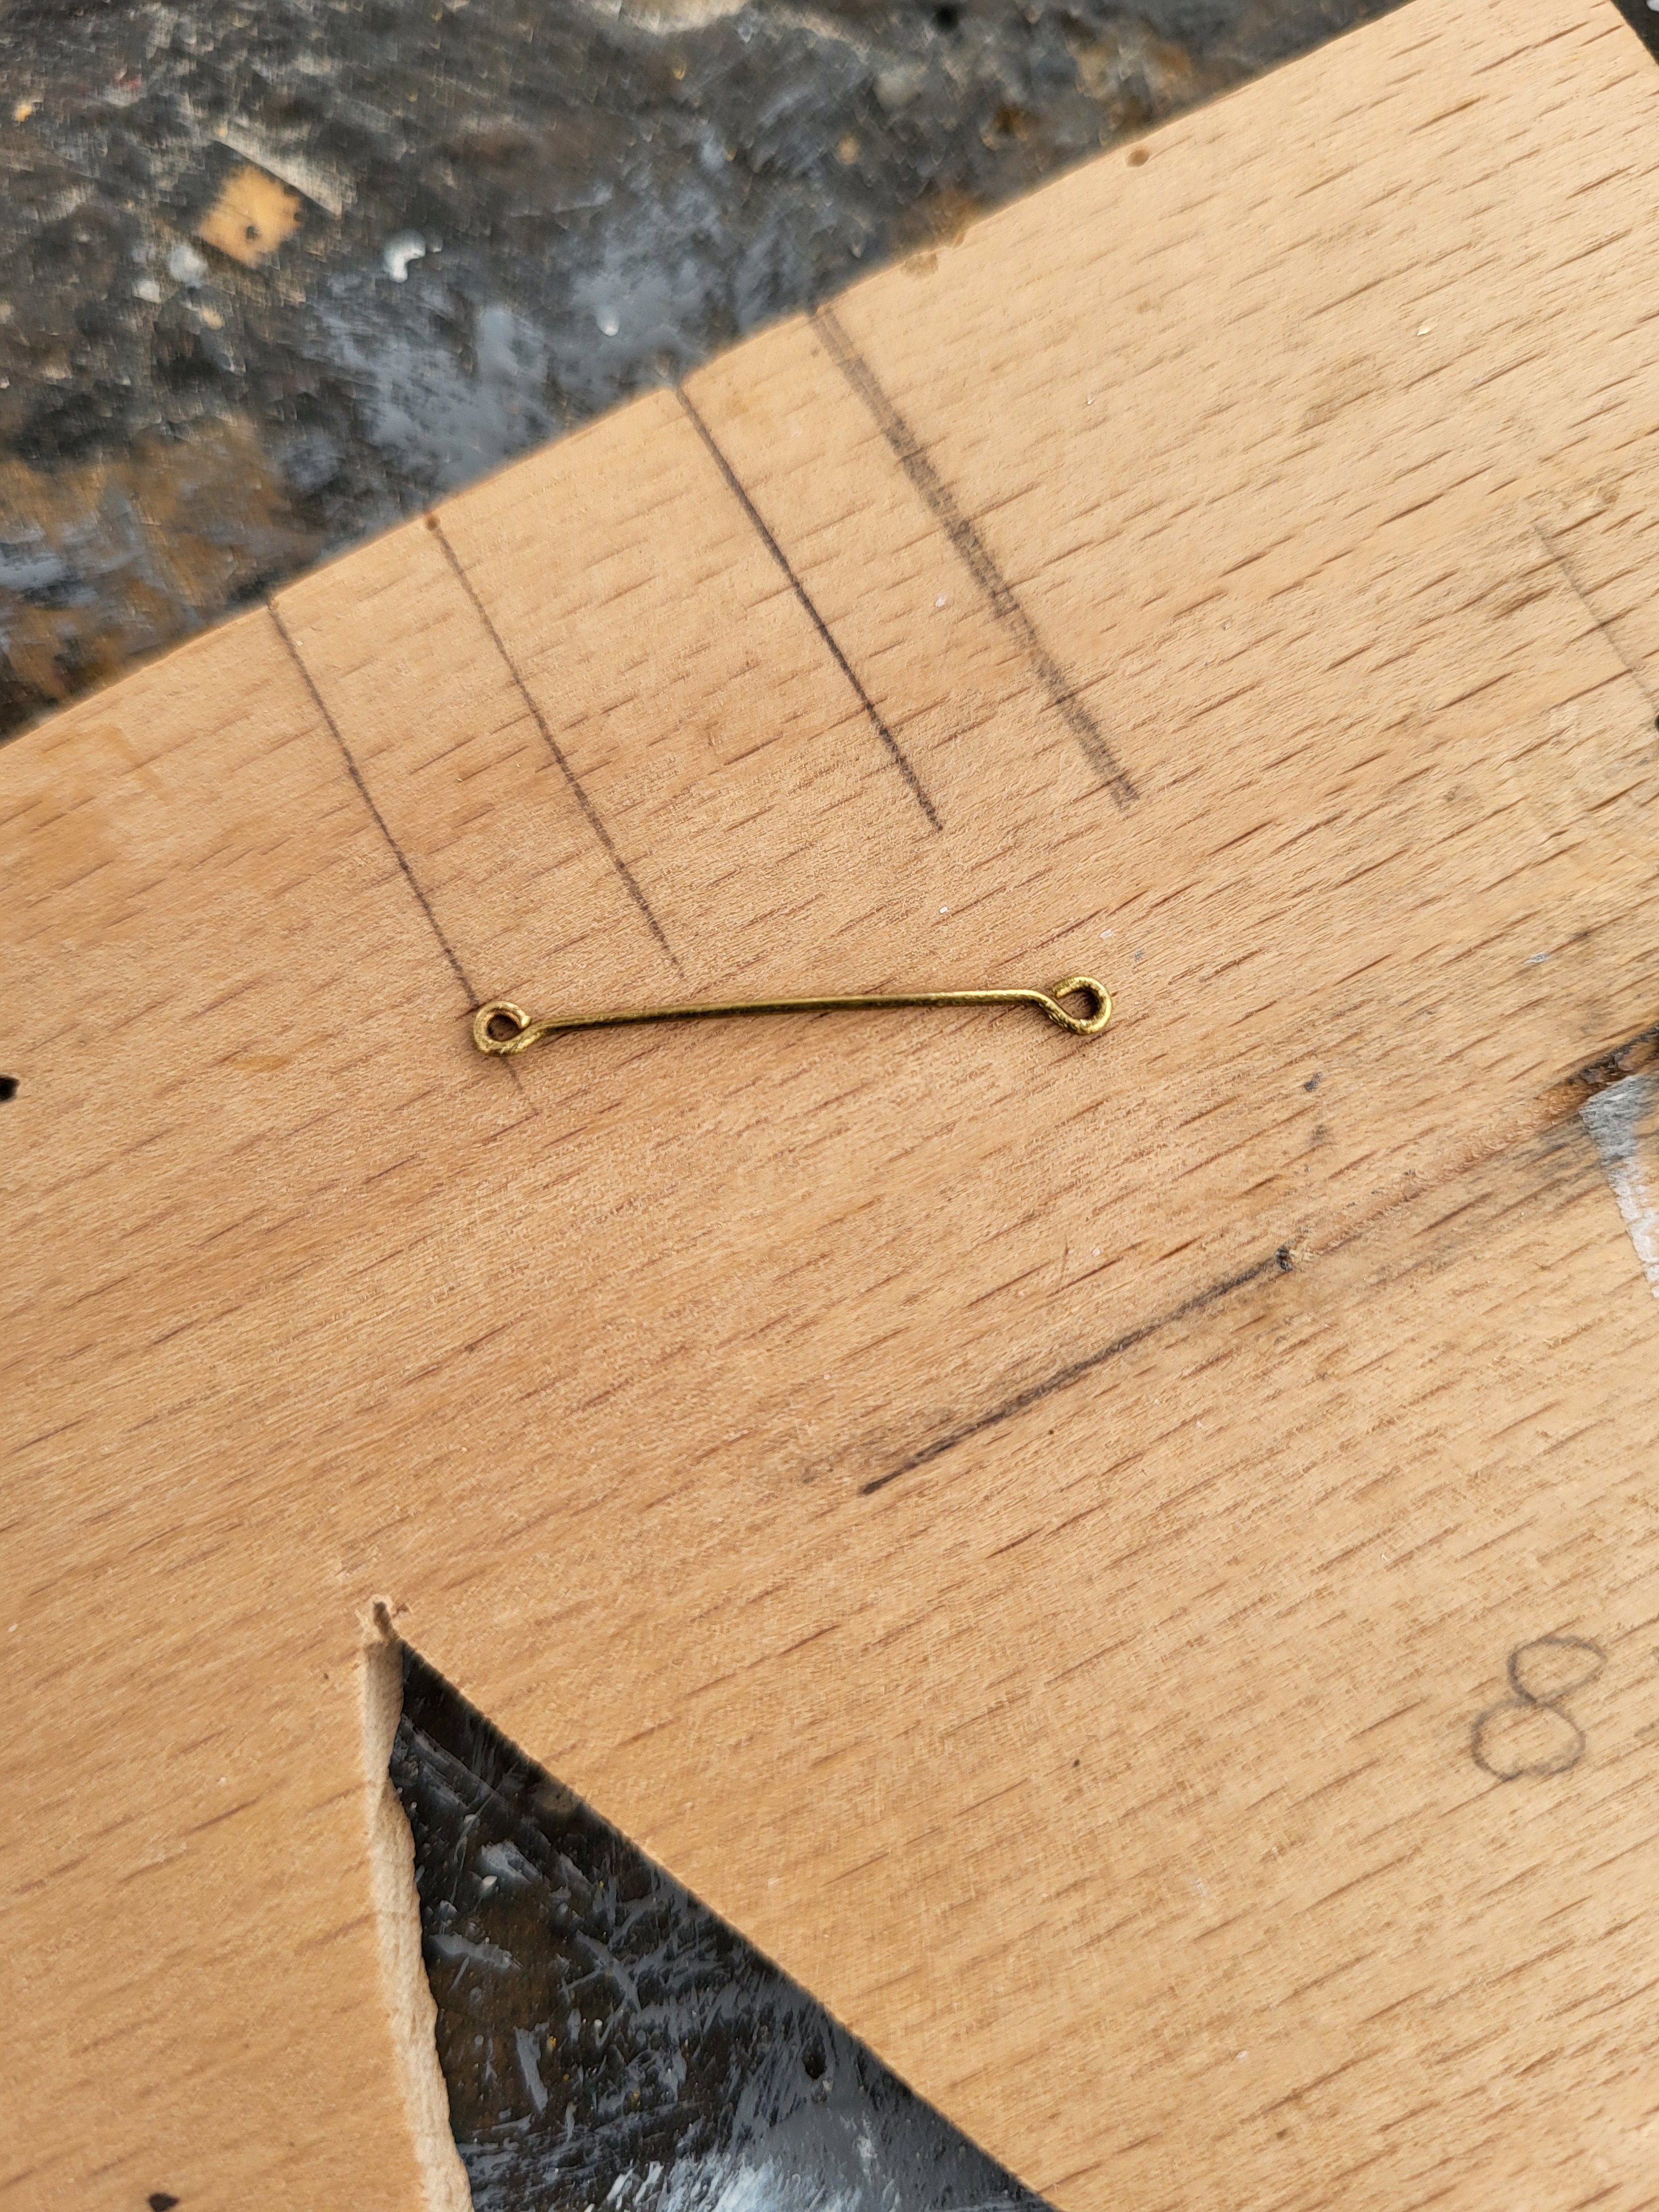
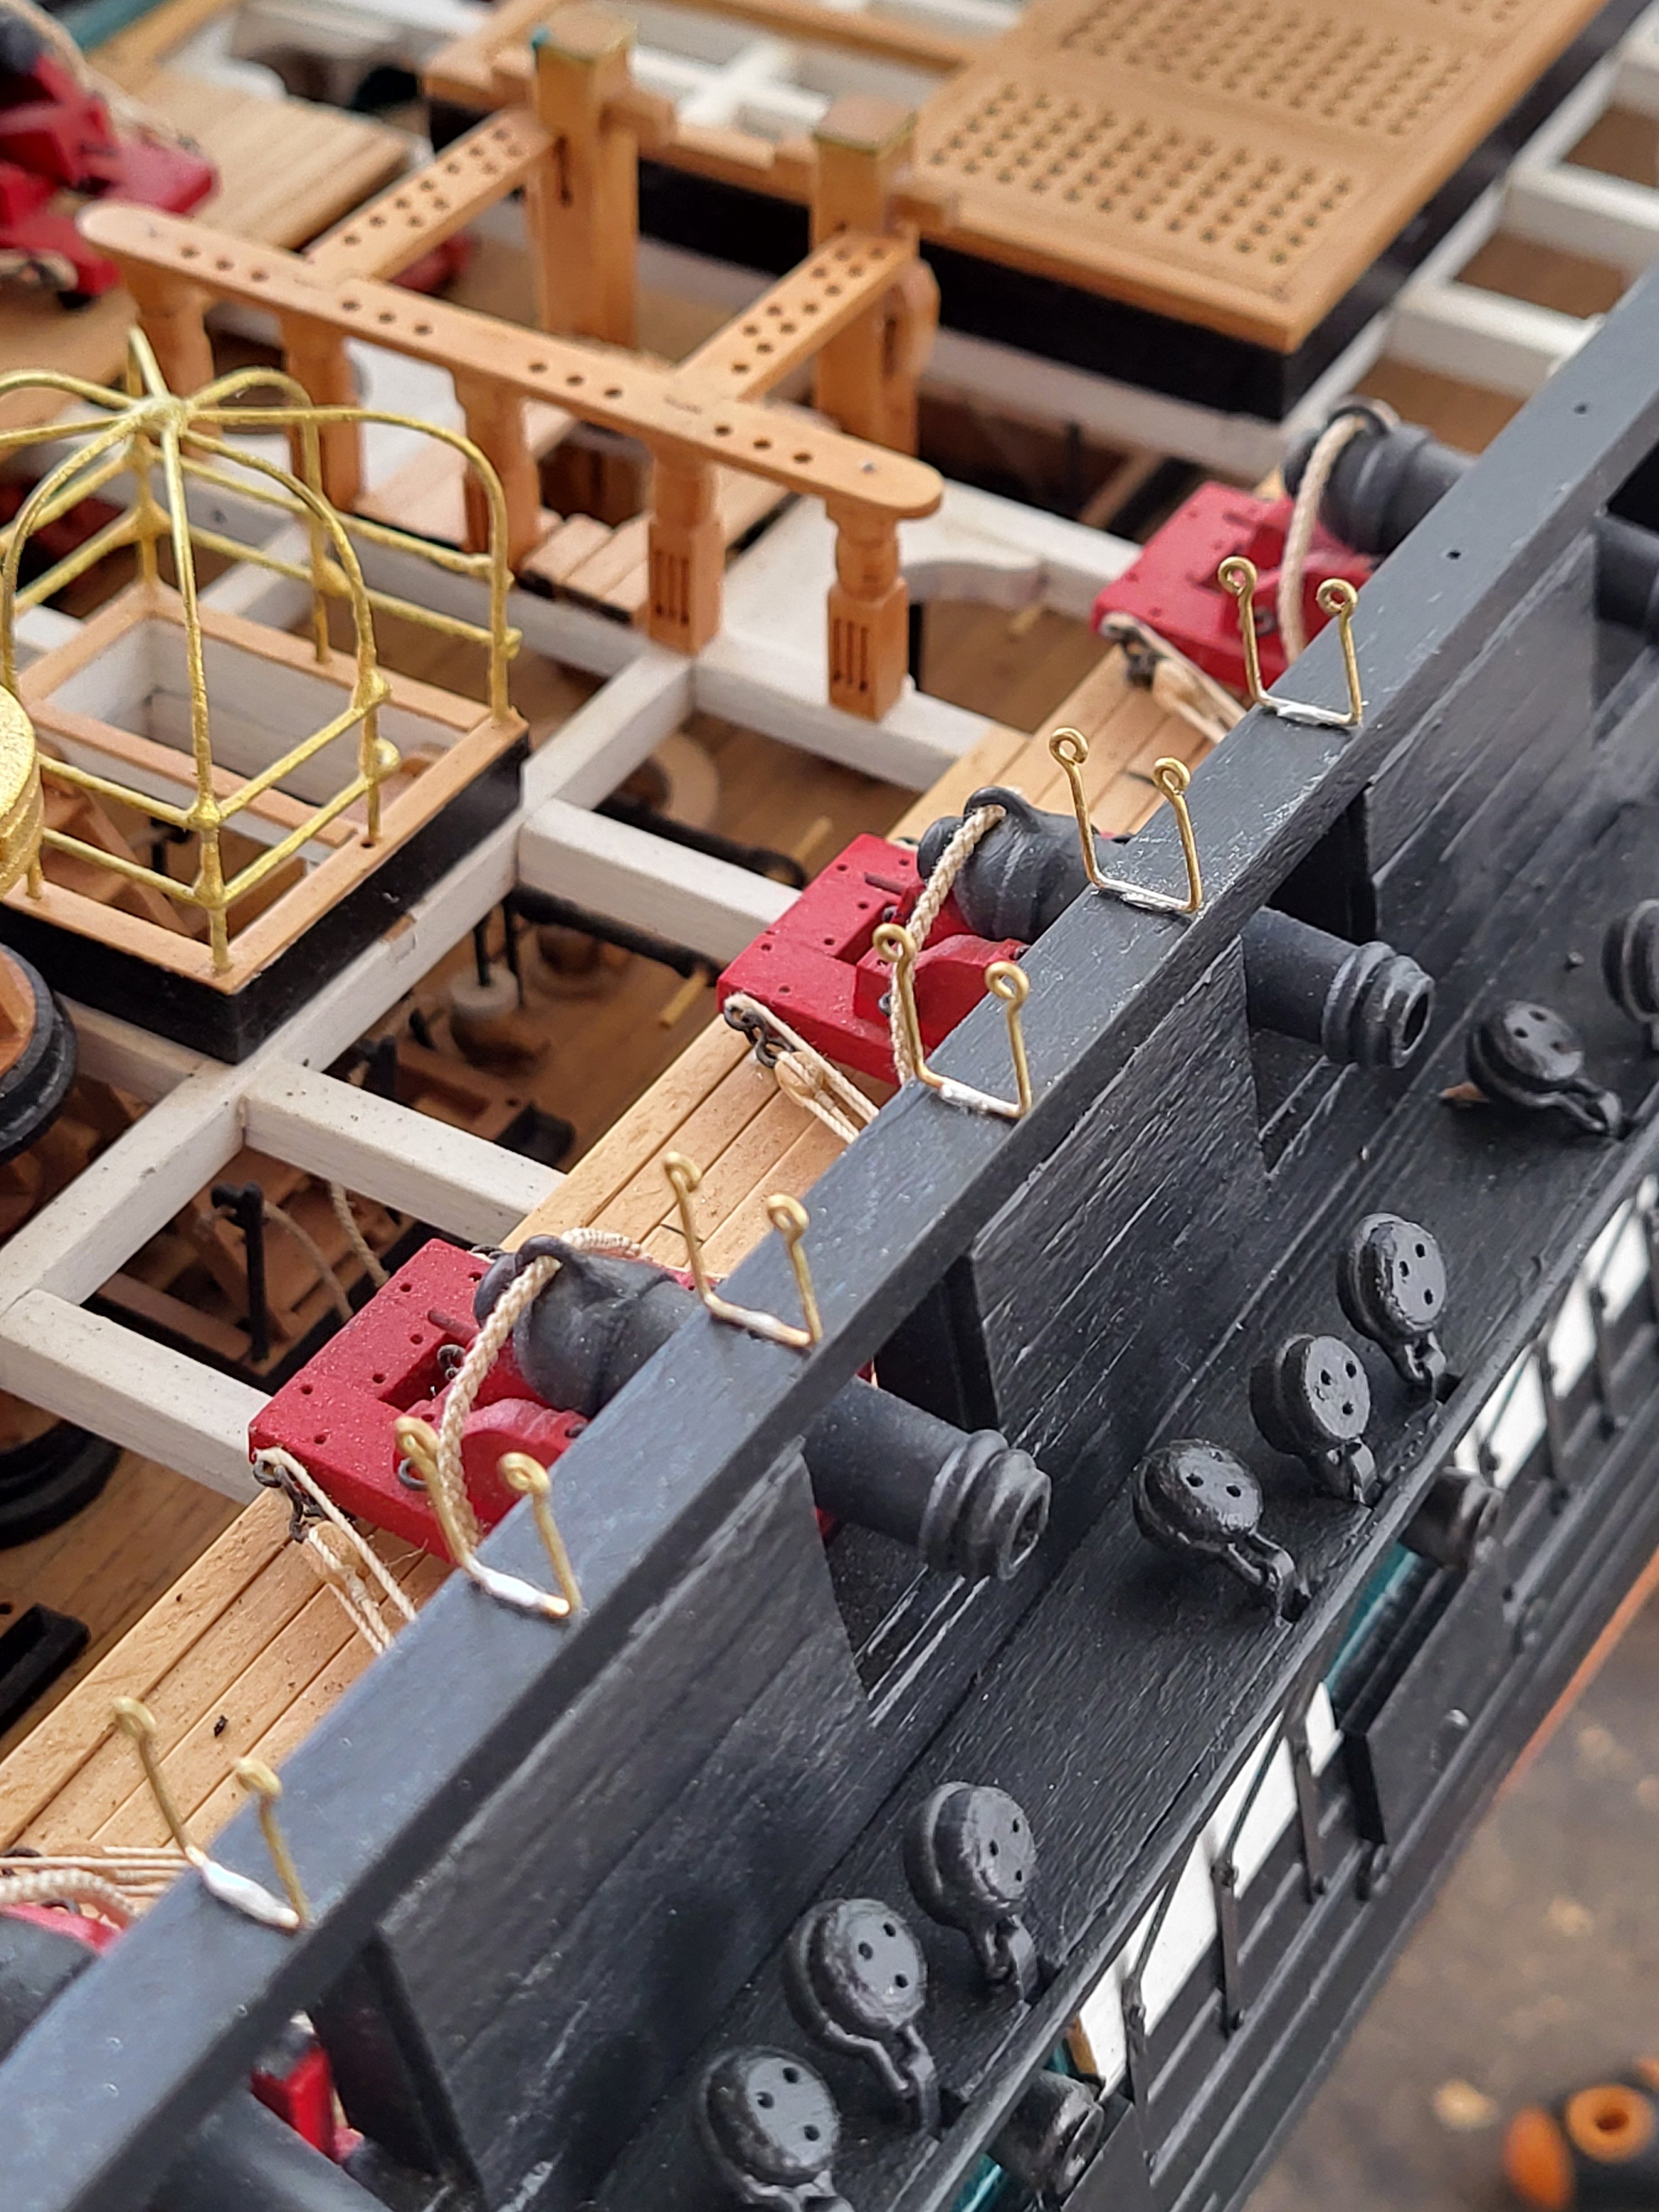
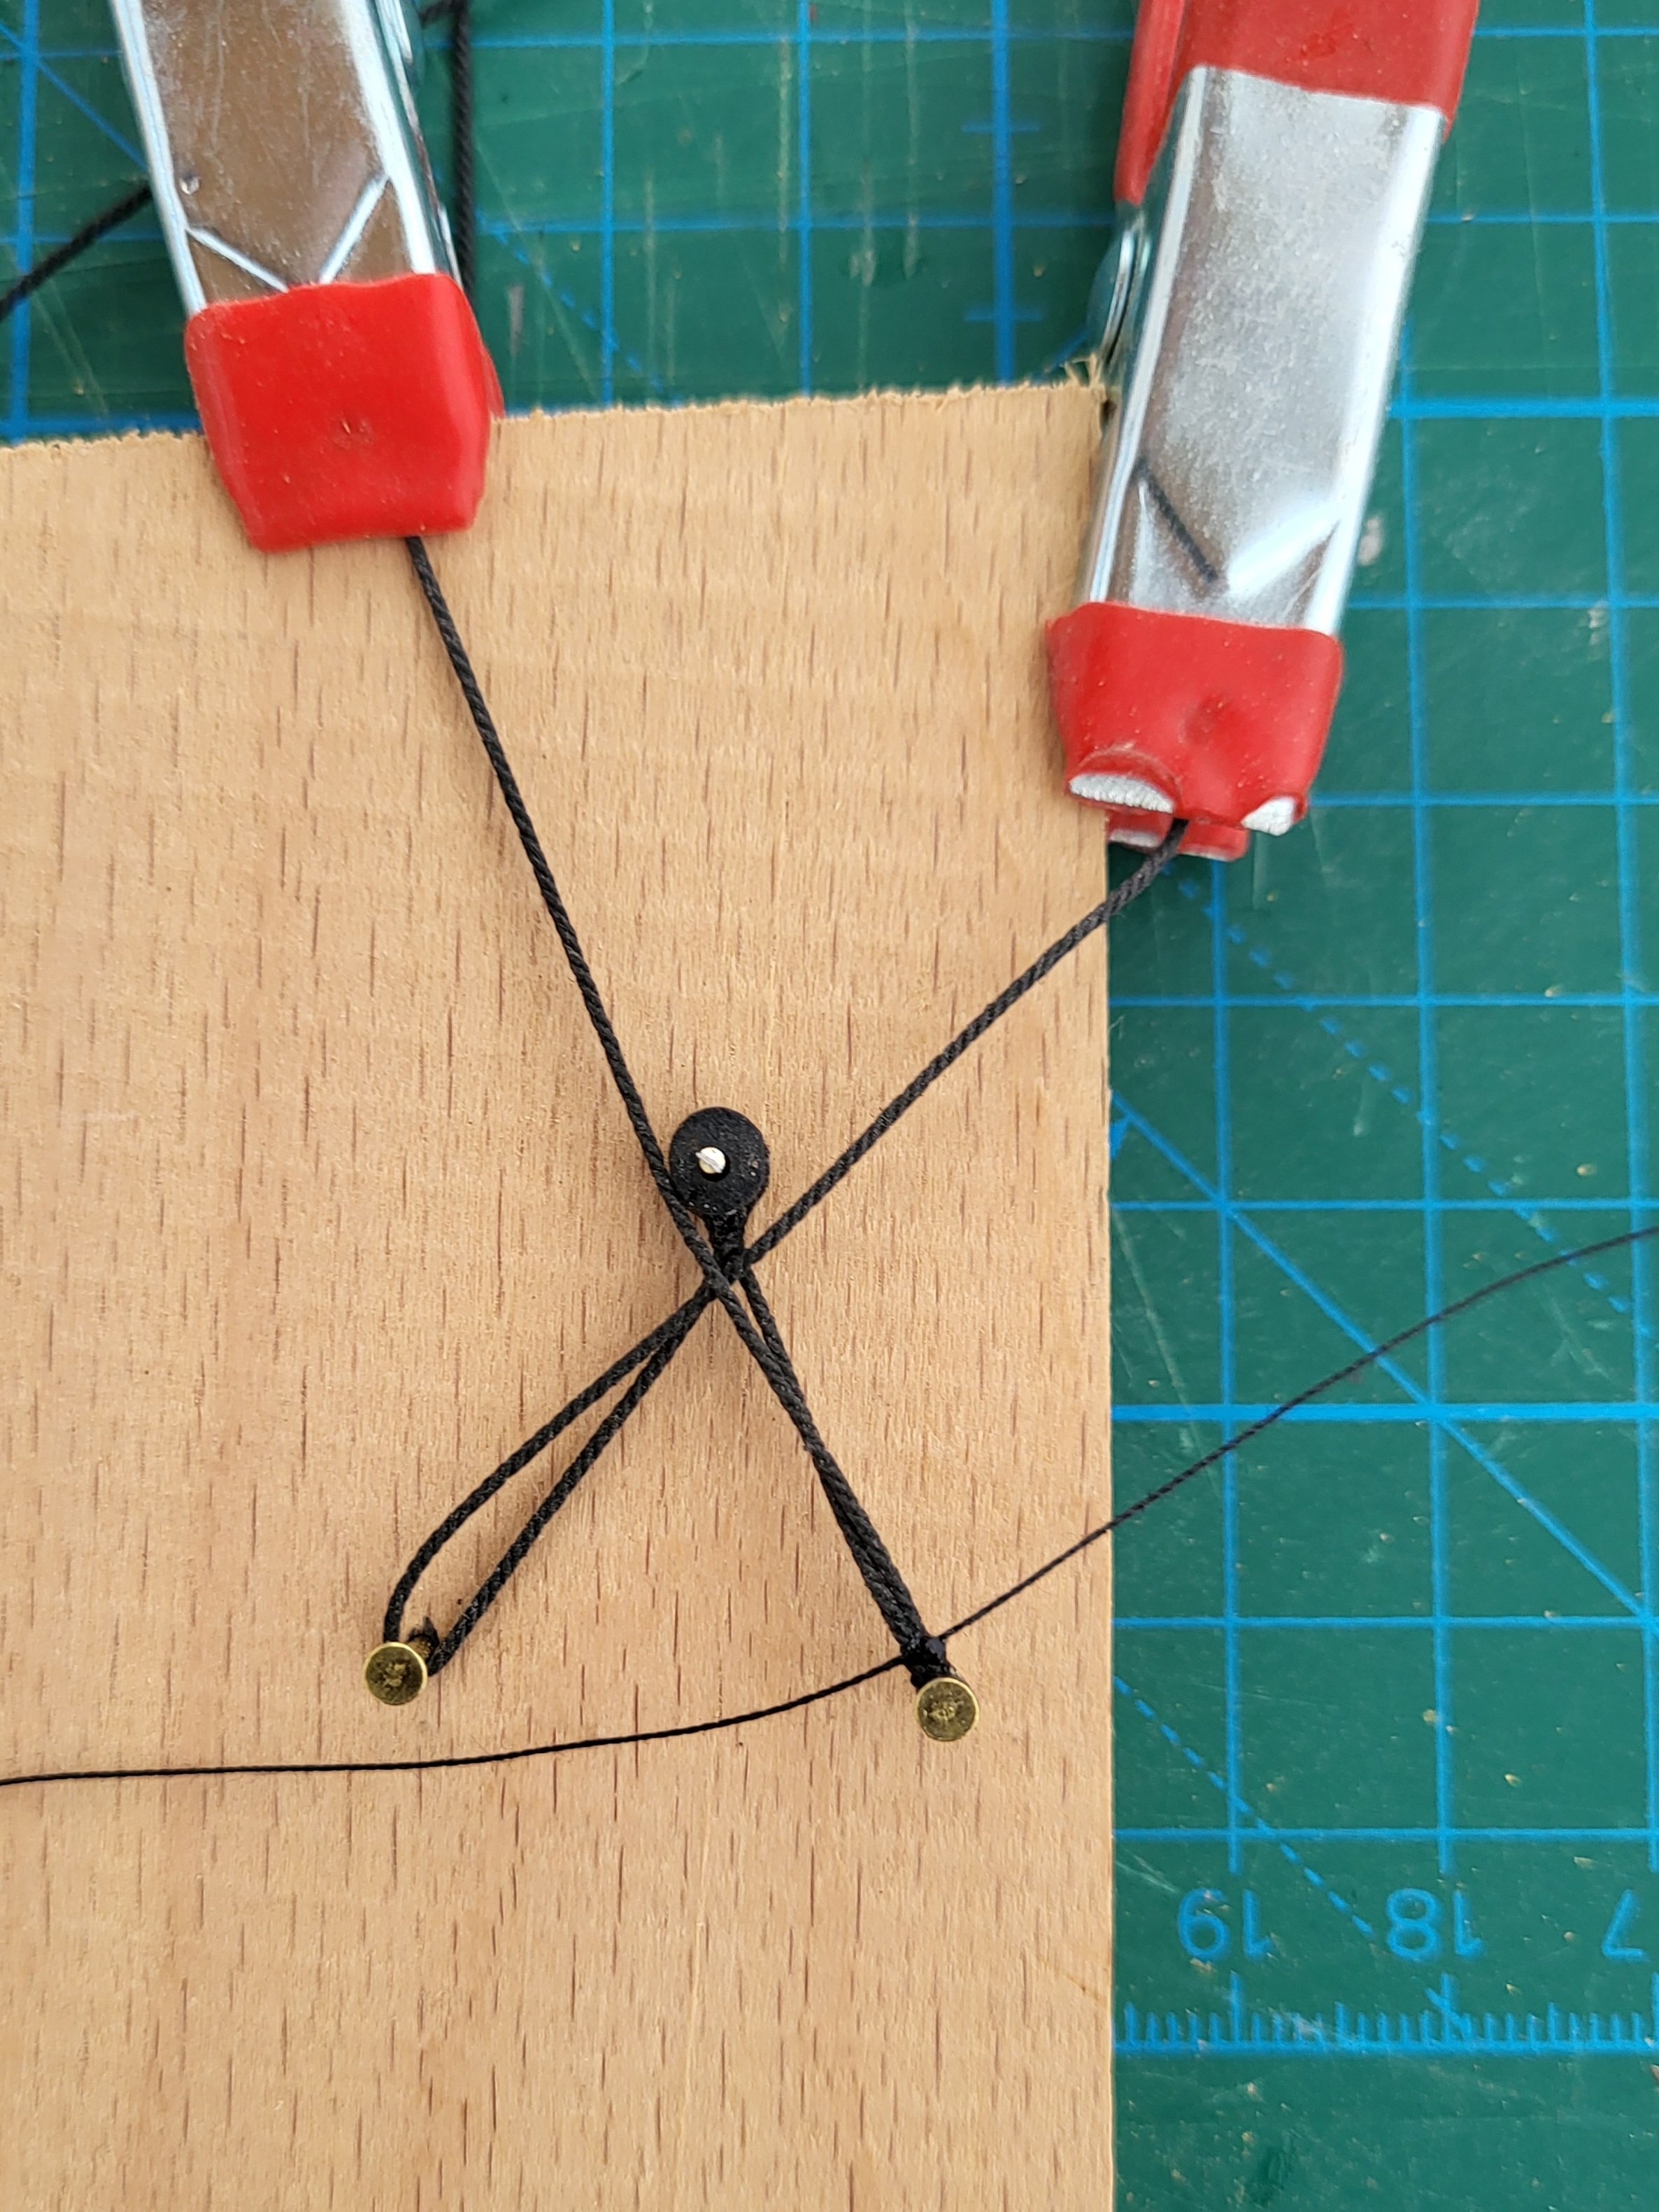
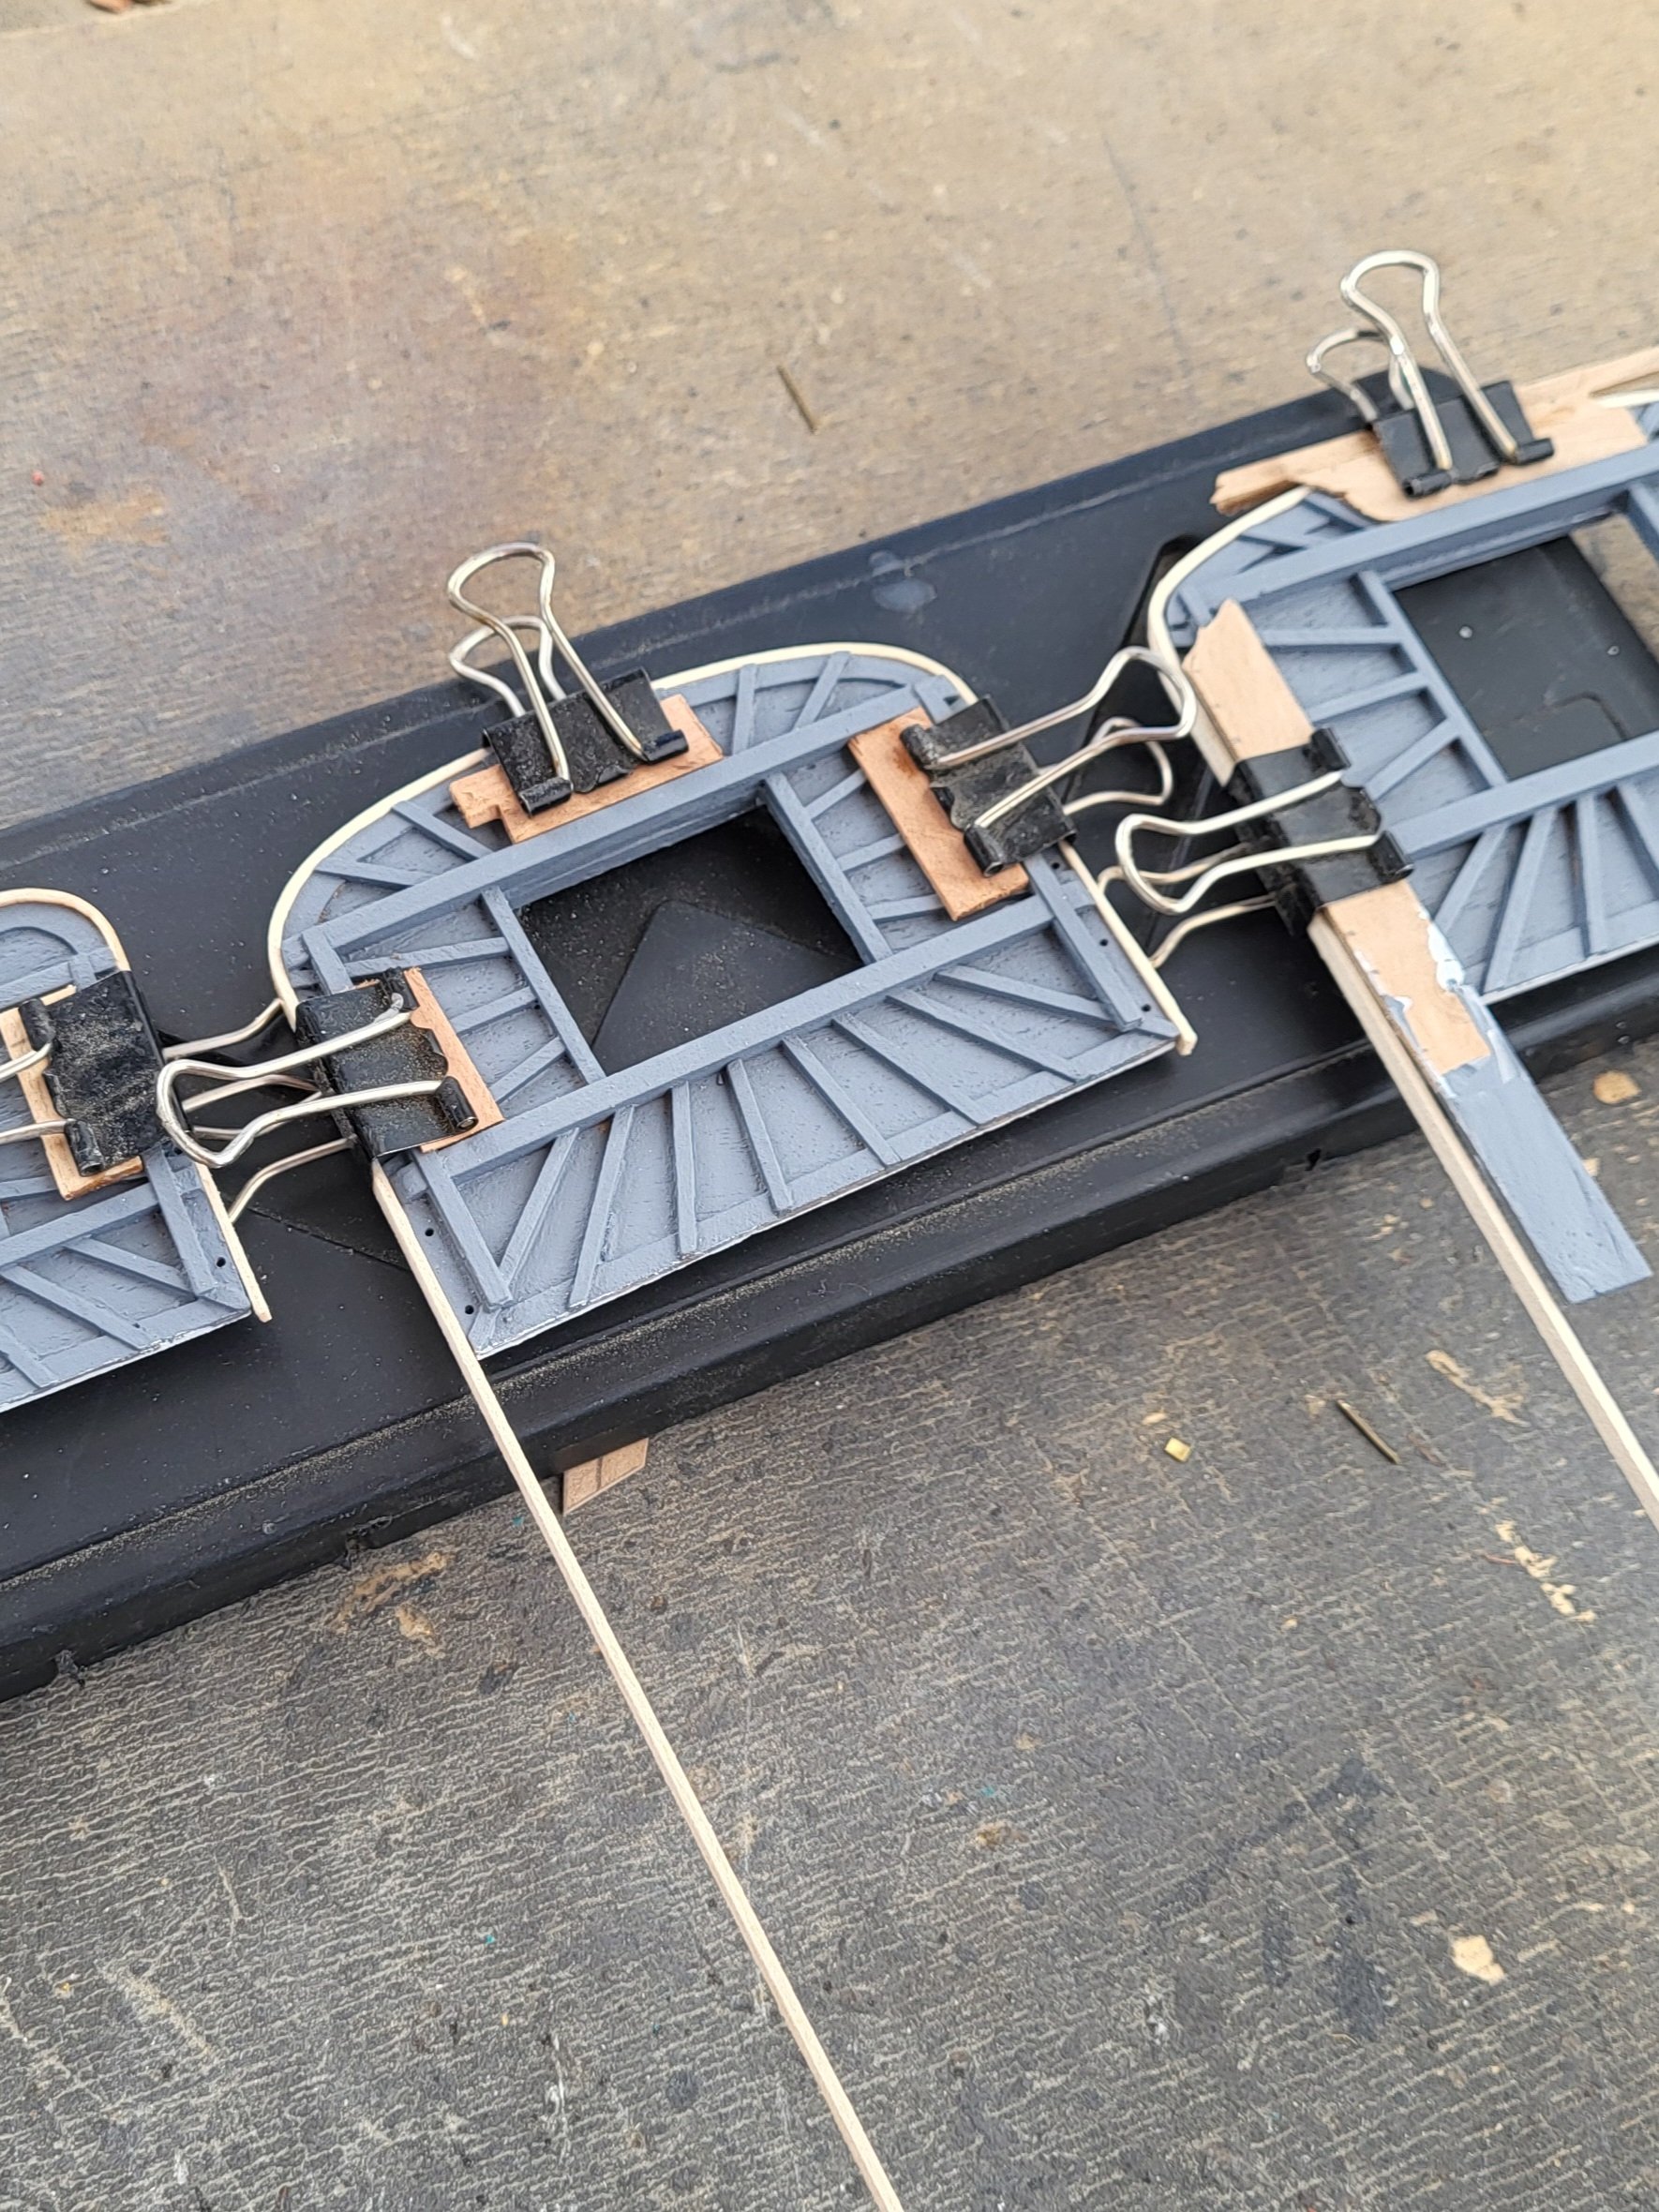
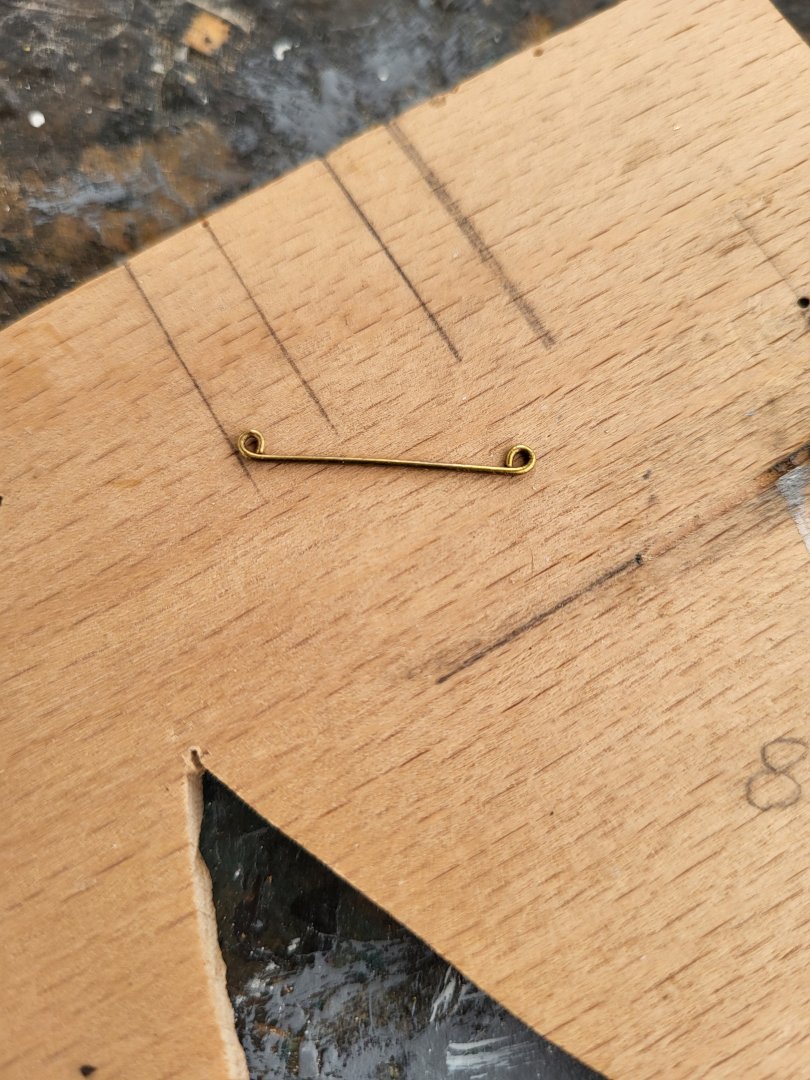
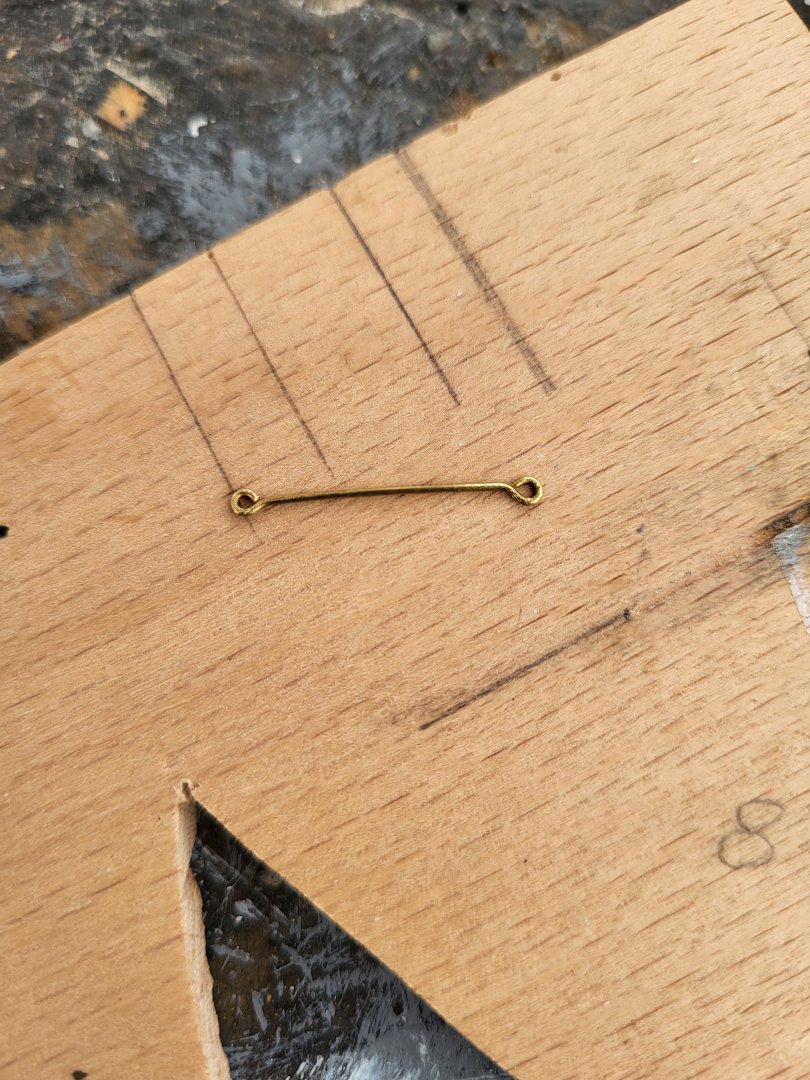
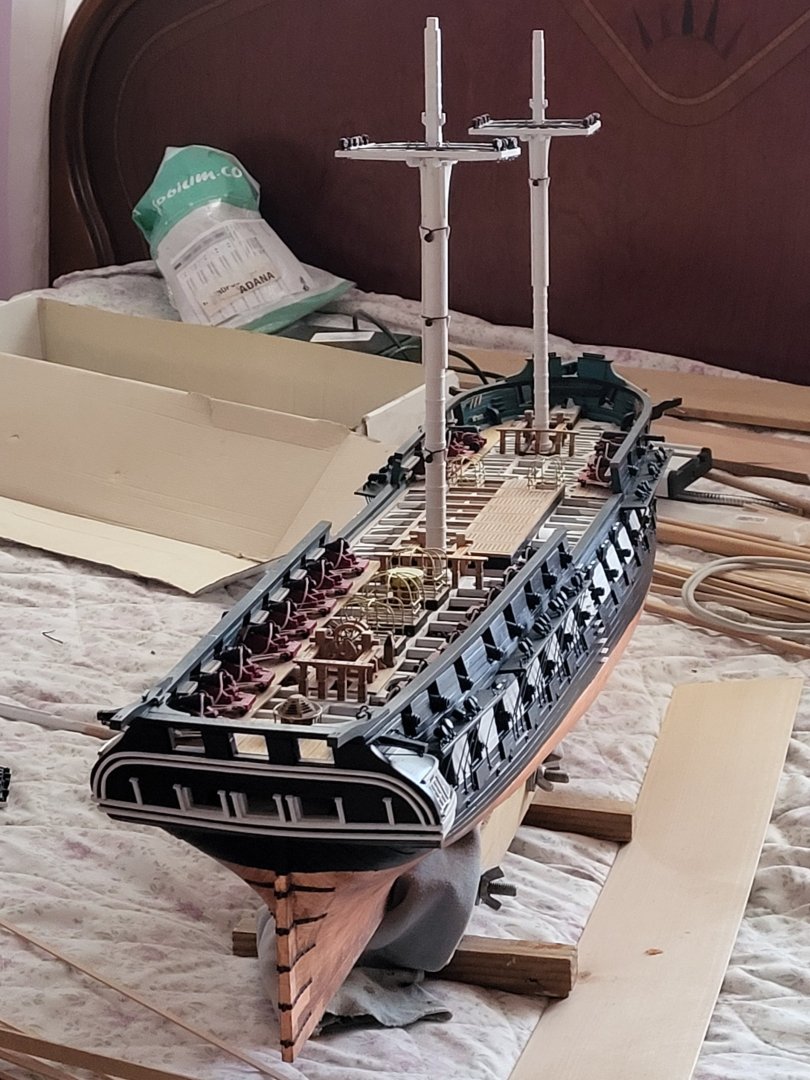
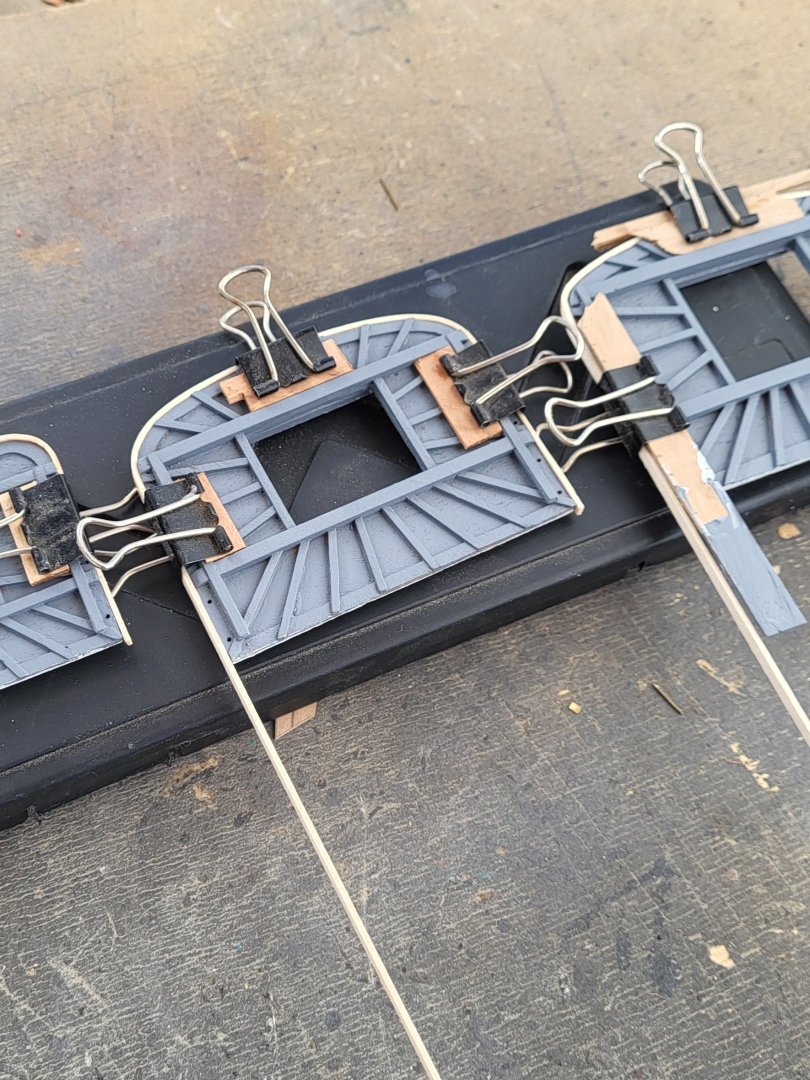
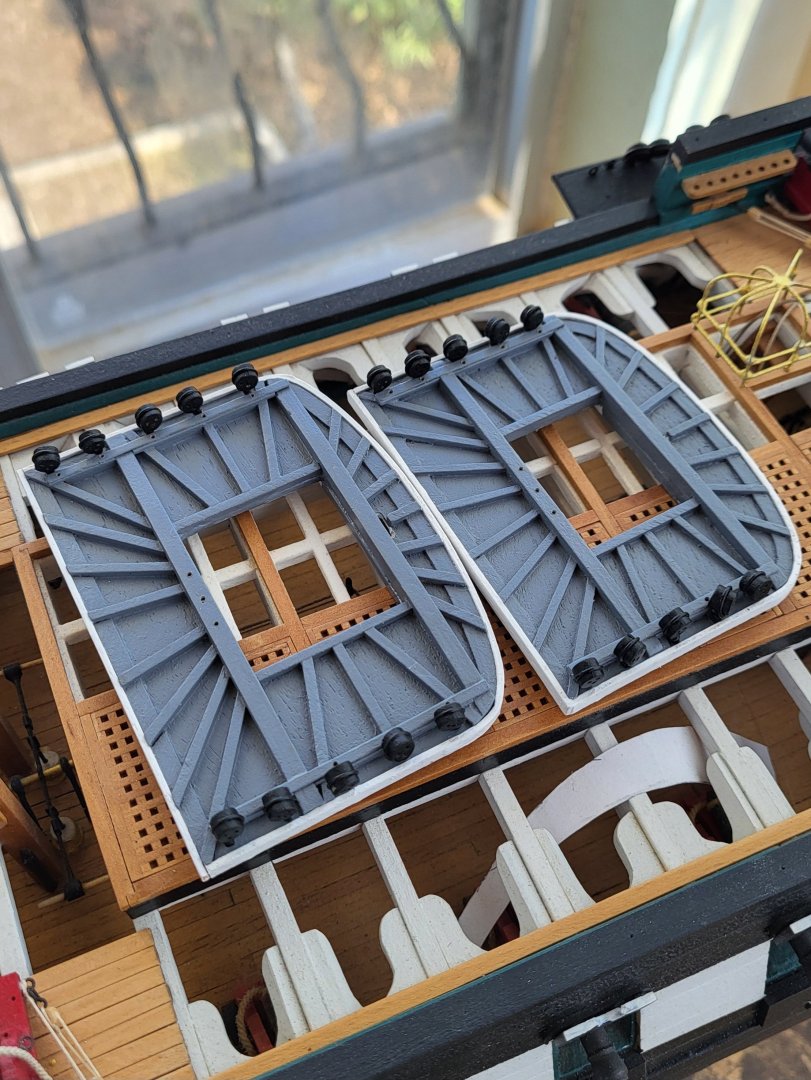
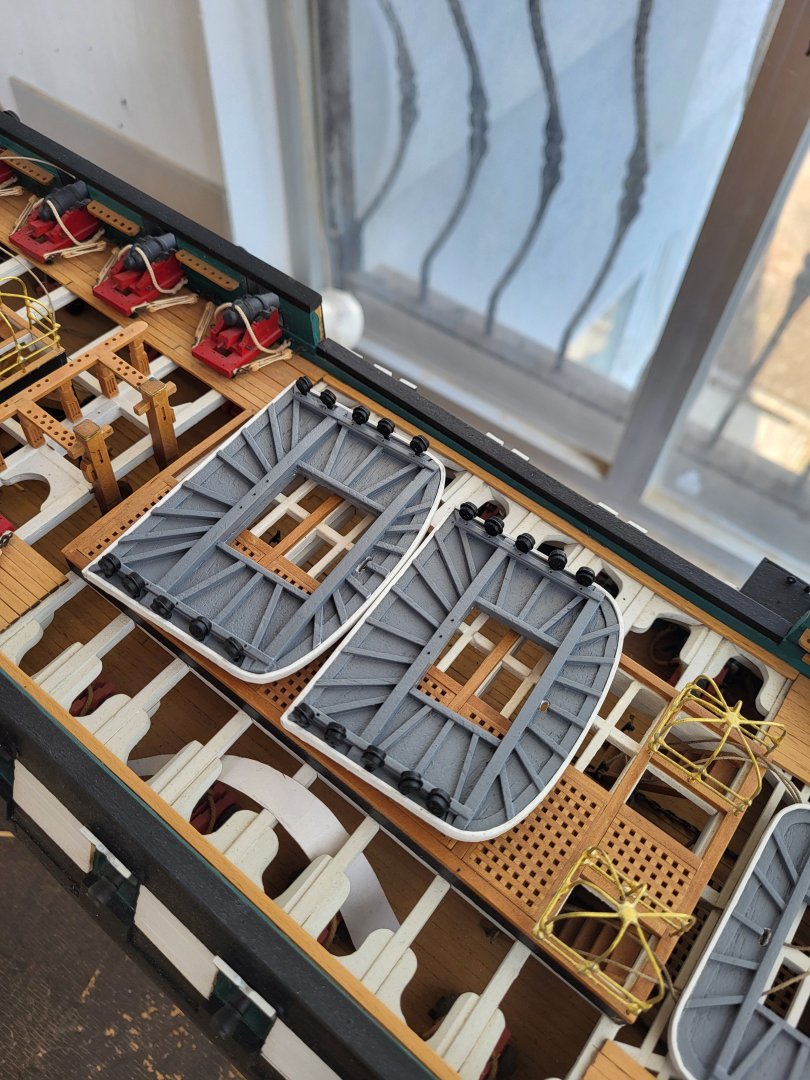
Before attaching the shrouds, I decided to make and install the hammock net frames. Once assembled, they will be painted black. The frames on the actual ship are made of square section forged iron, but since I don't have square-section brass wire, I am making them from 0.55mm round brass wire.There will be 54 of these made, and they all have to be the same shape and size. I'm using jigs to make them.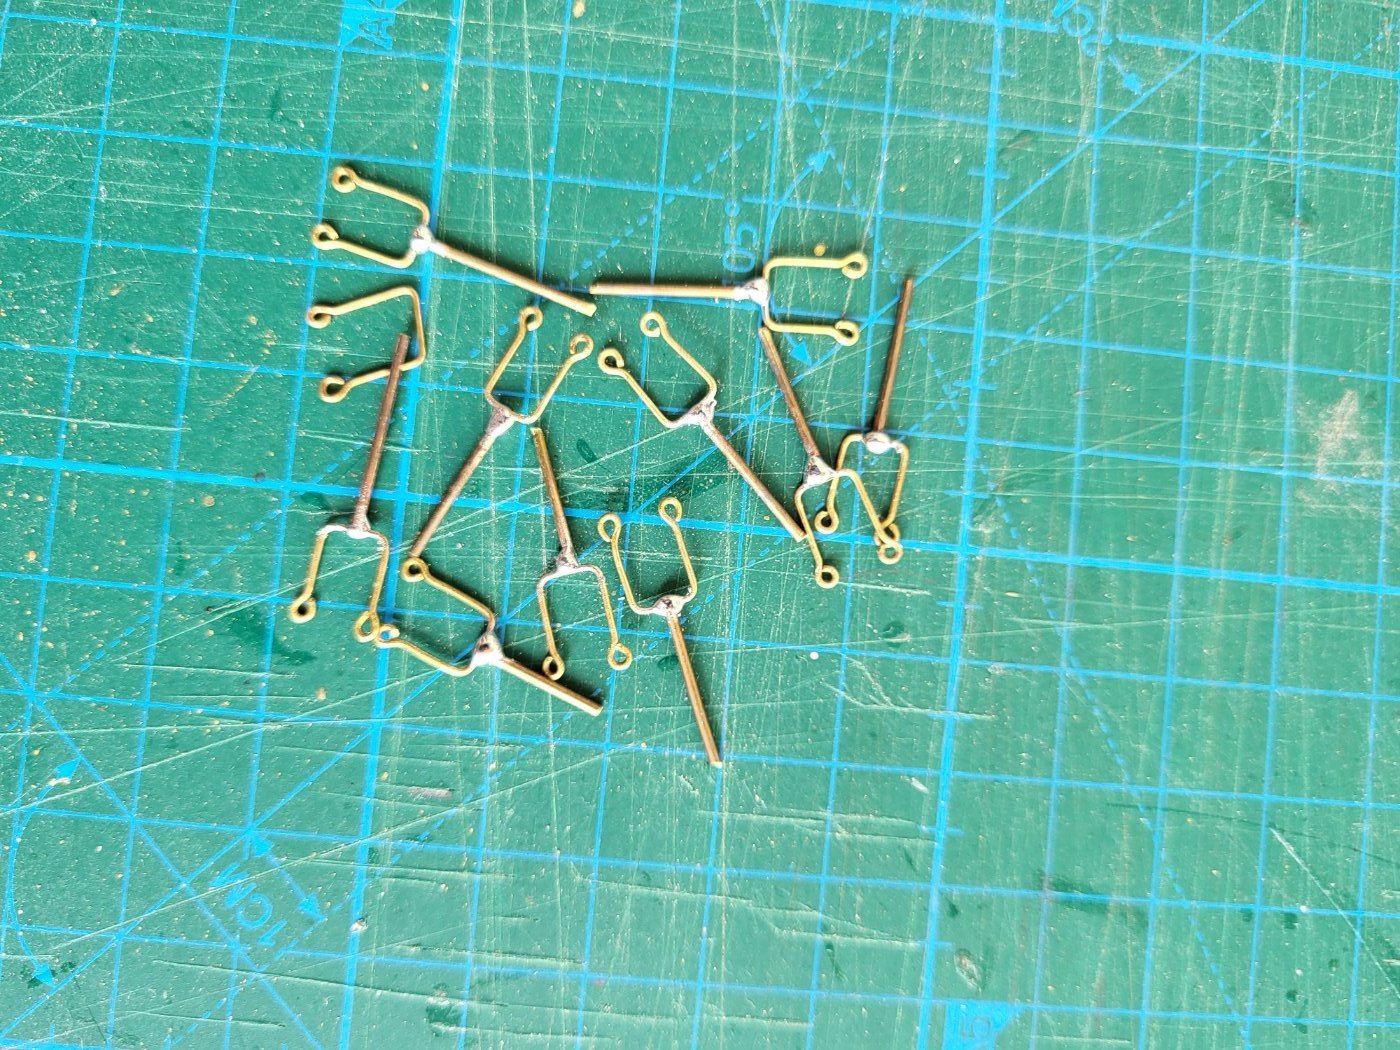


-
USS Constitution by mtbediz - 1:76
mtbediz replied to mtbediz's topic in - Build logs for subjects built 1751 - 1800
Thank you, Jon. Proxxon really manufactures highly precise machinery. Using their milling machine, I can achieve cutting accuracy down to 0.05 millimeters. -
USS Constitution by mtbediz - 1:76
mtbediz replied to mtbediz's topic in - Build logs for subjects built 1751 - 1800
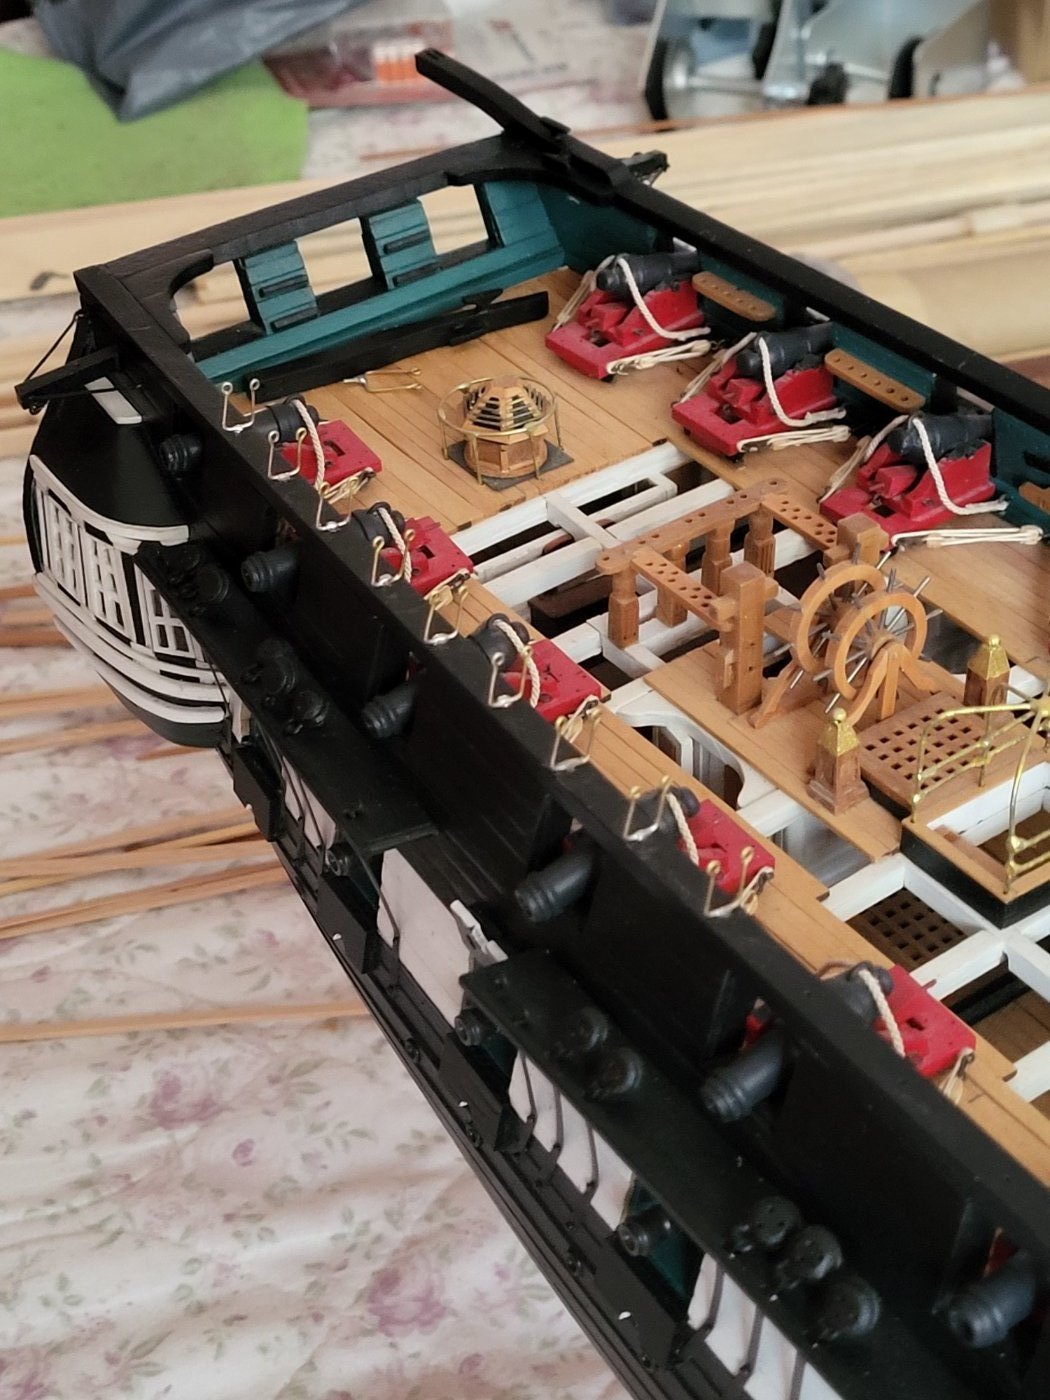
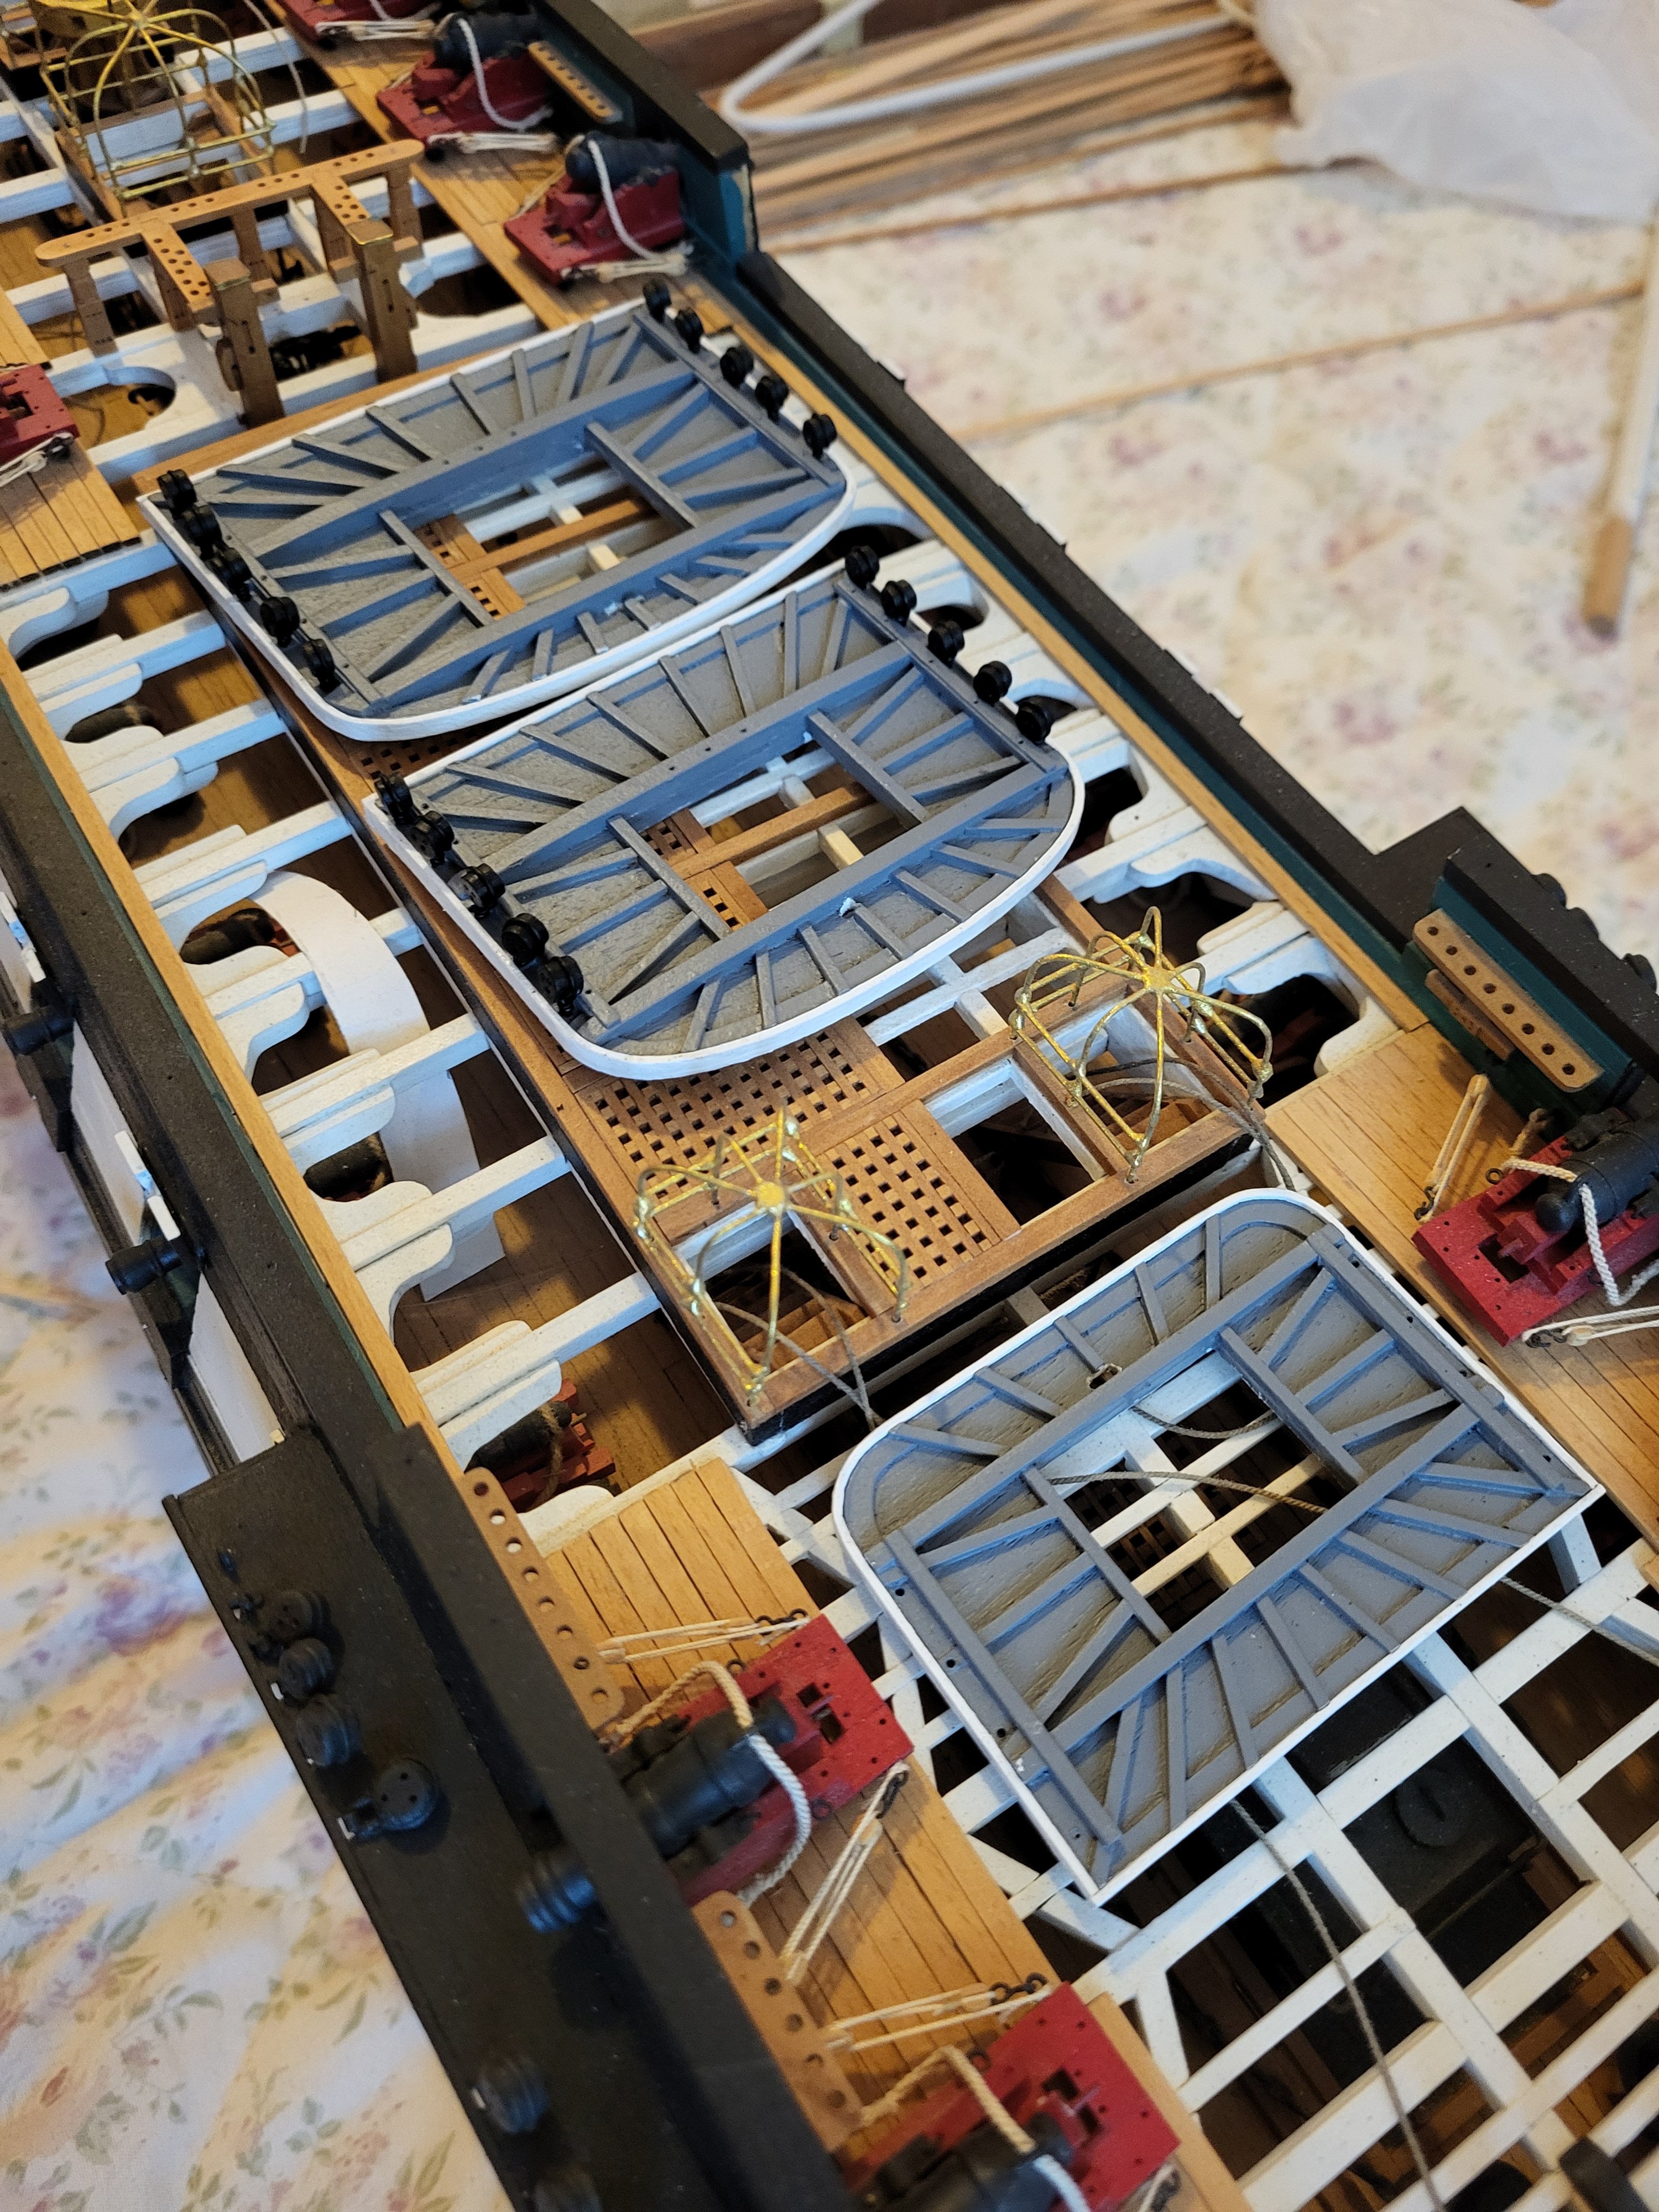
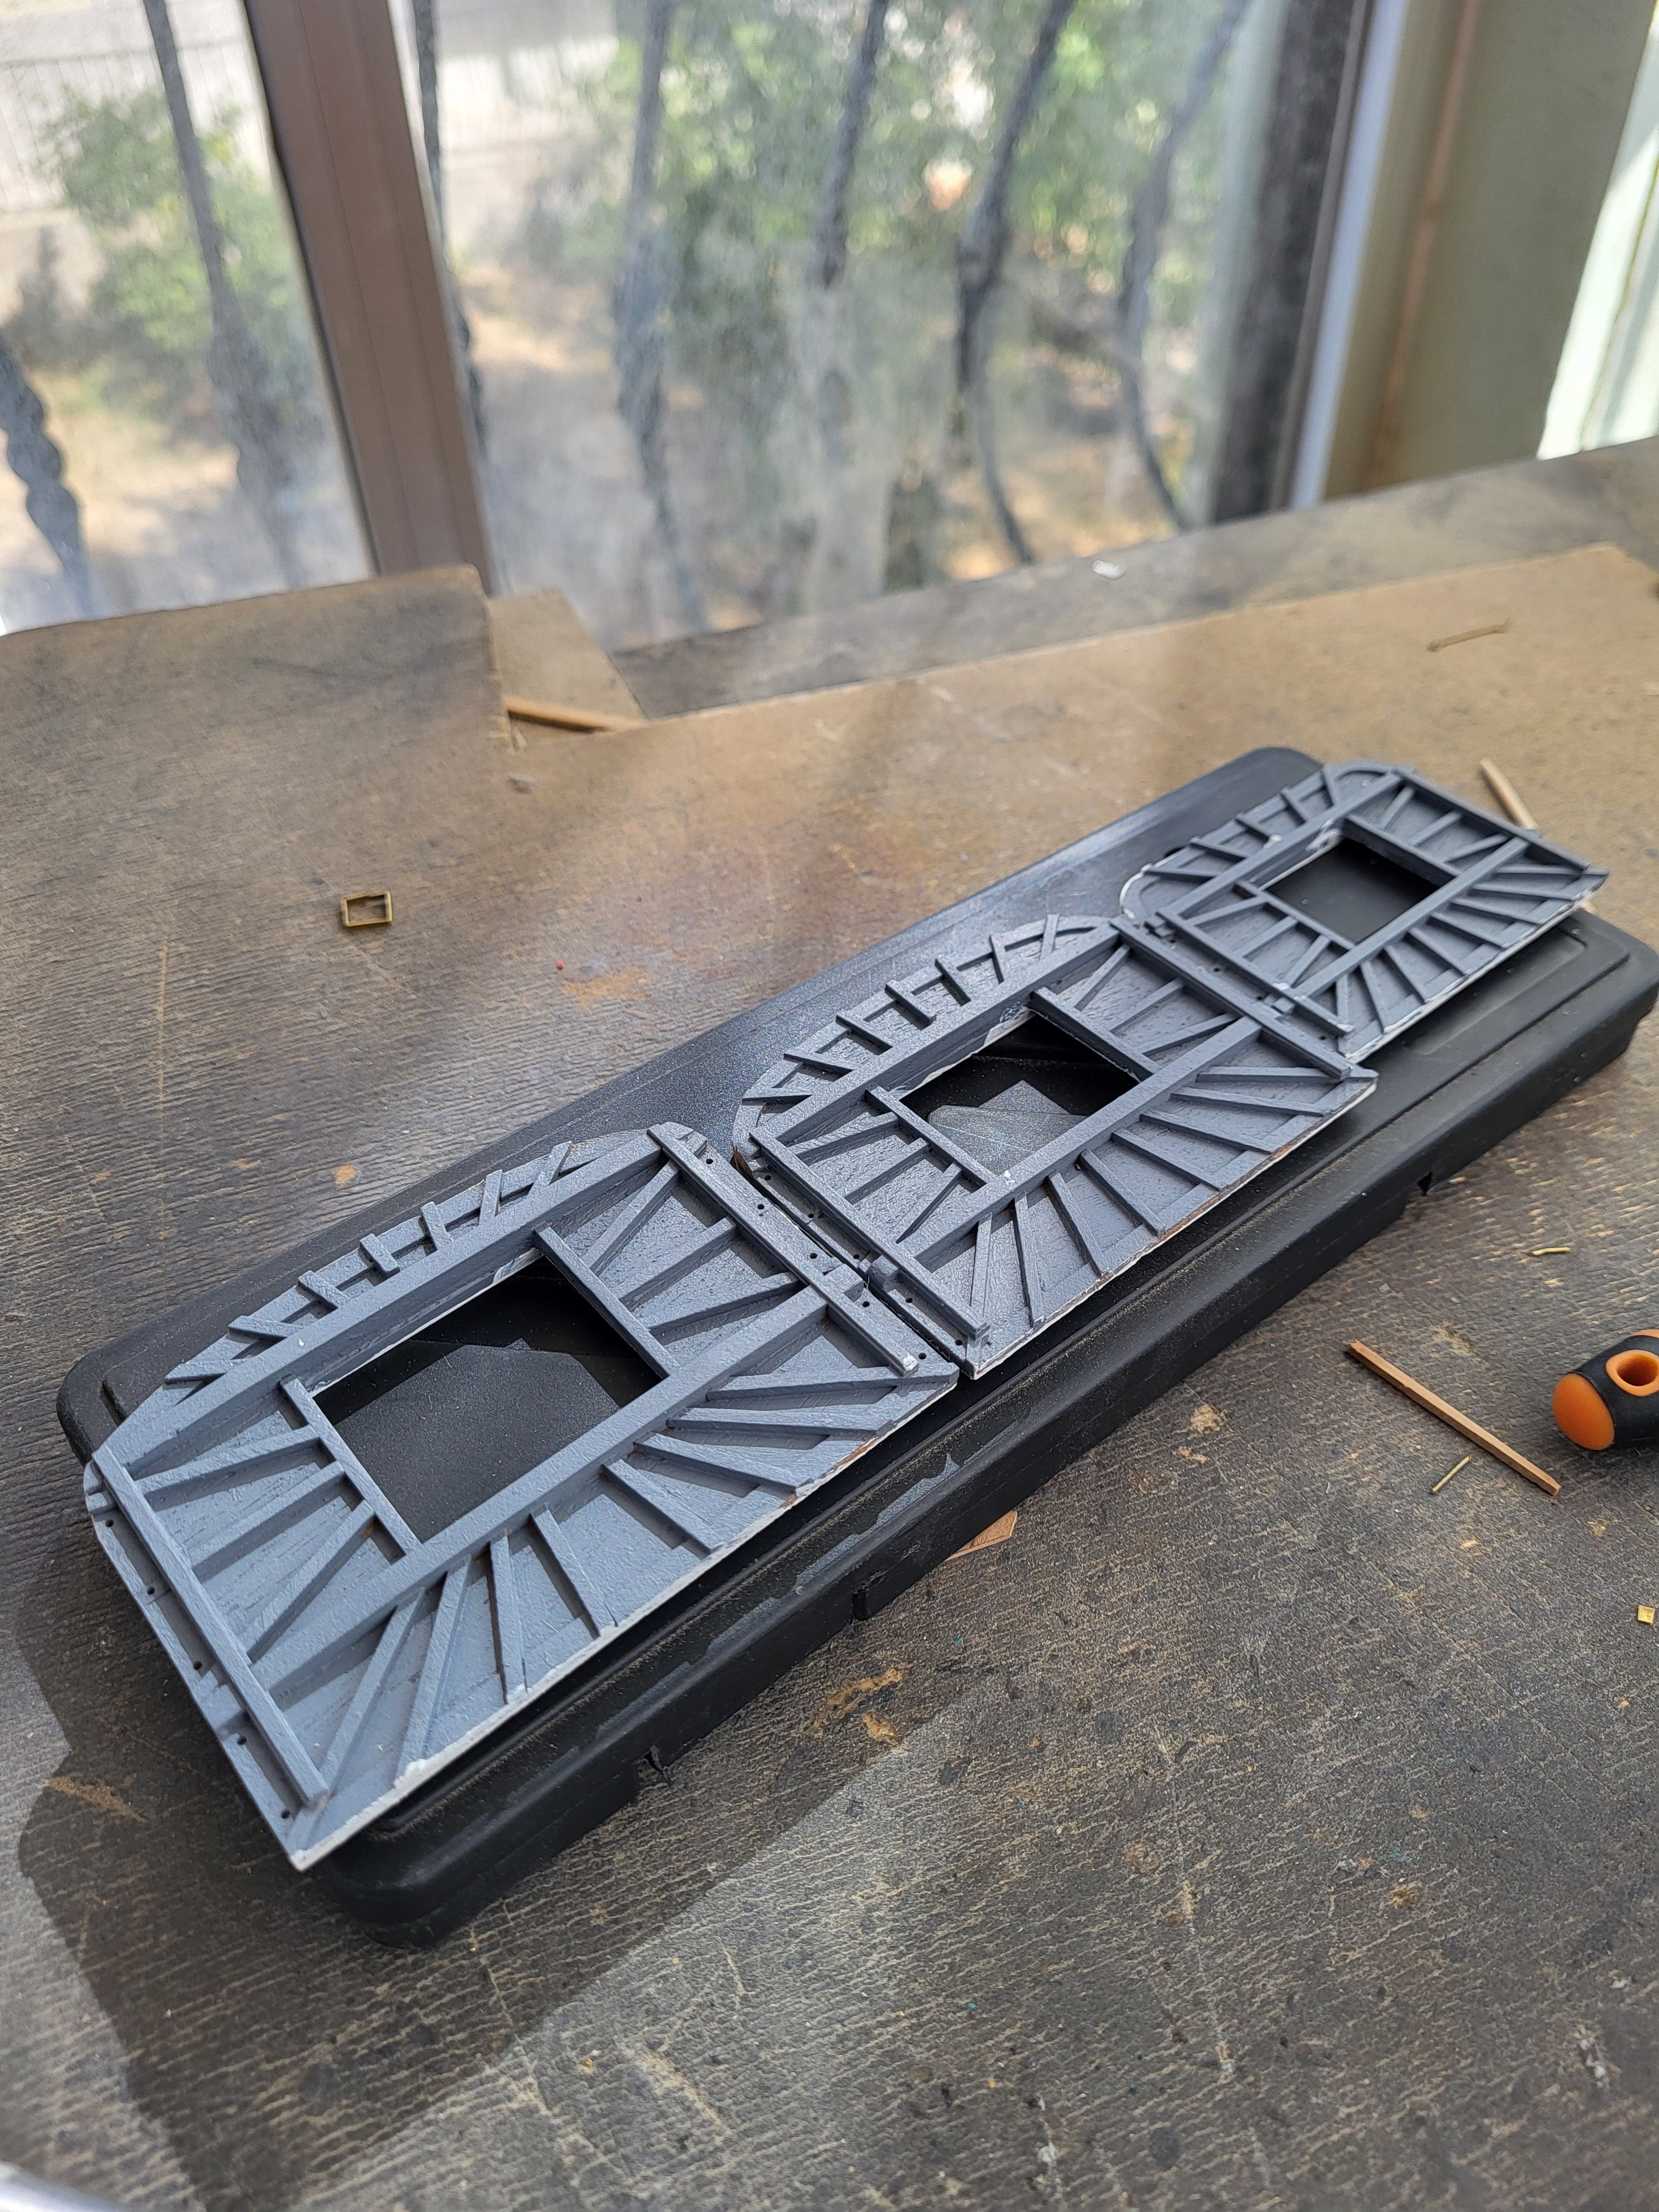
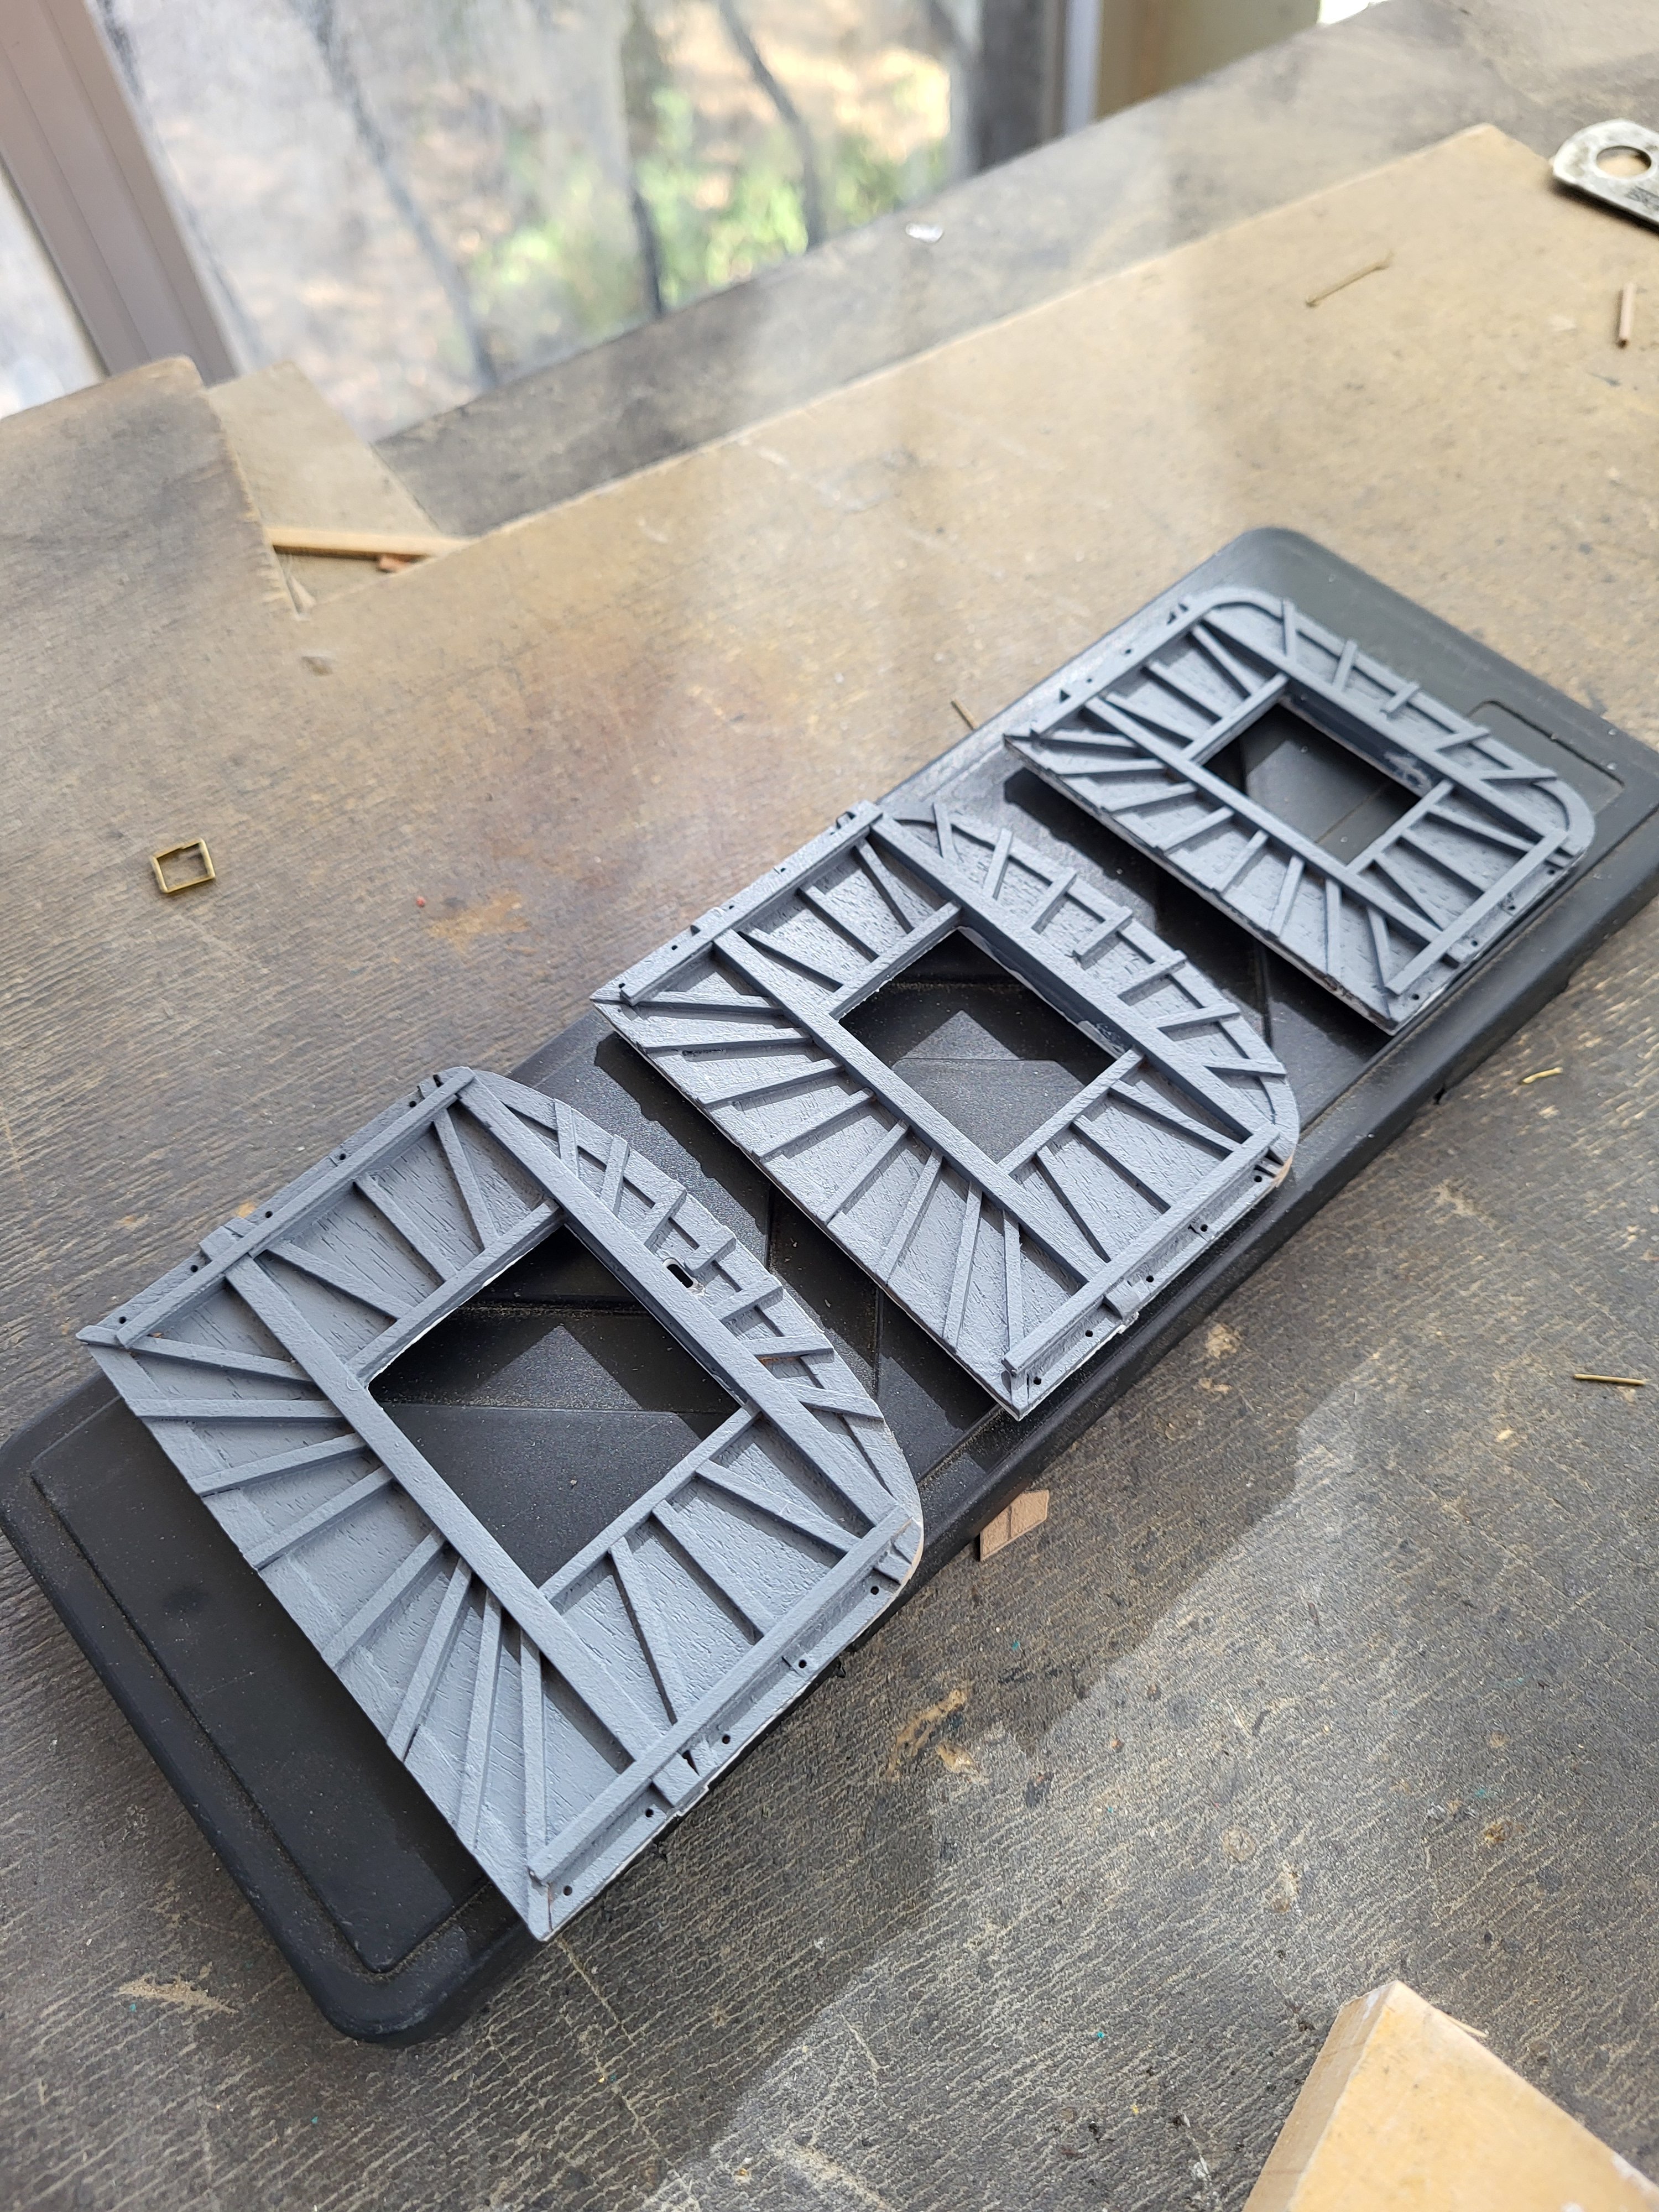
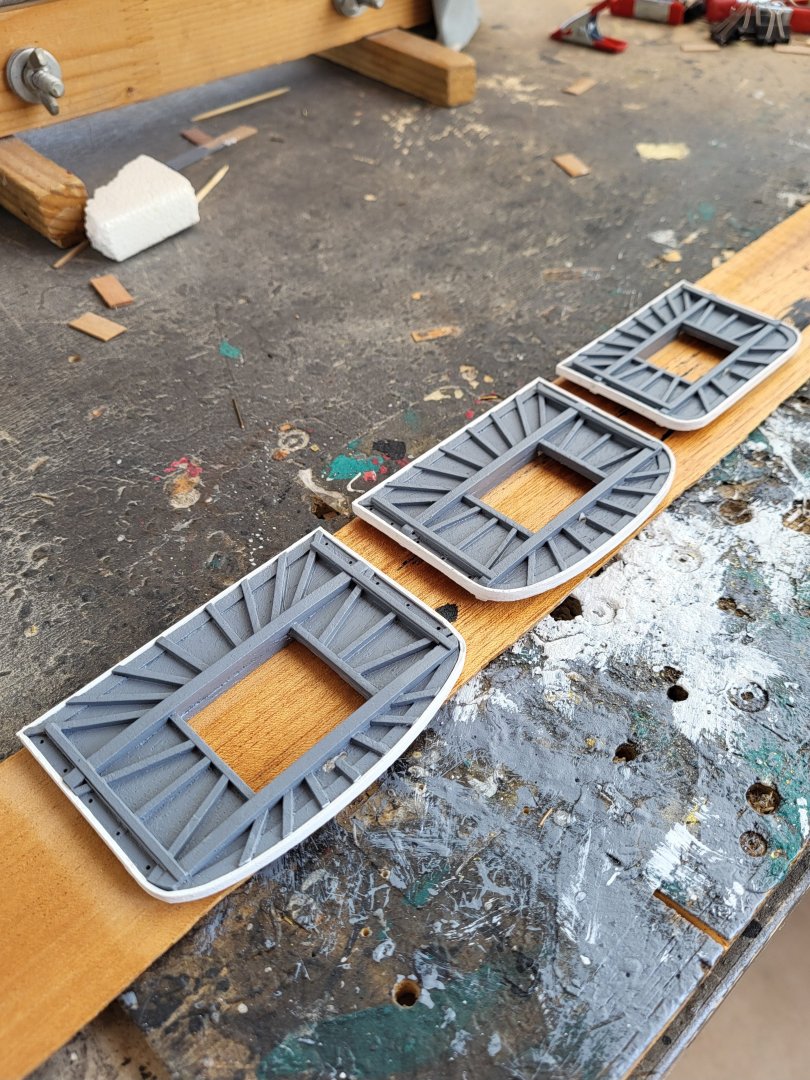
Thanks, Greg. I plan to build all the boats and put them in place. I think I'll make the ones on the main hatch unfixed so they can be removed if needed. -
USS Constitution by mtbediz - 1:76
mtbediz replied to mtbediz's topic in - Build logs for subjects built 1751 - 1800
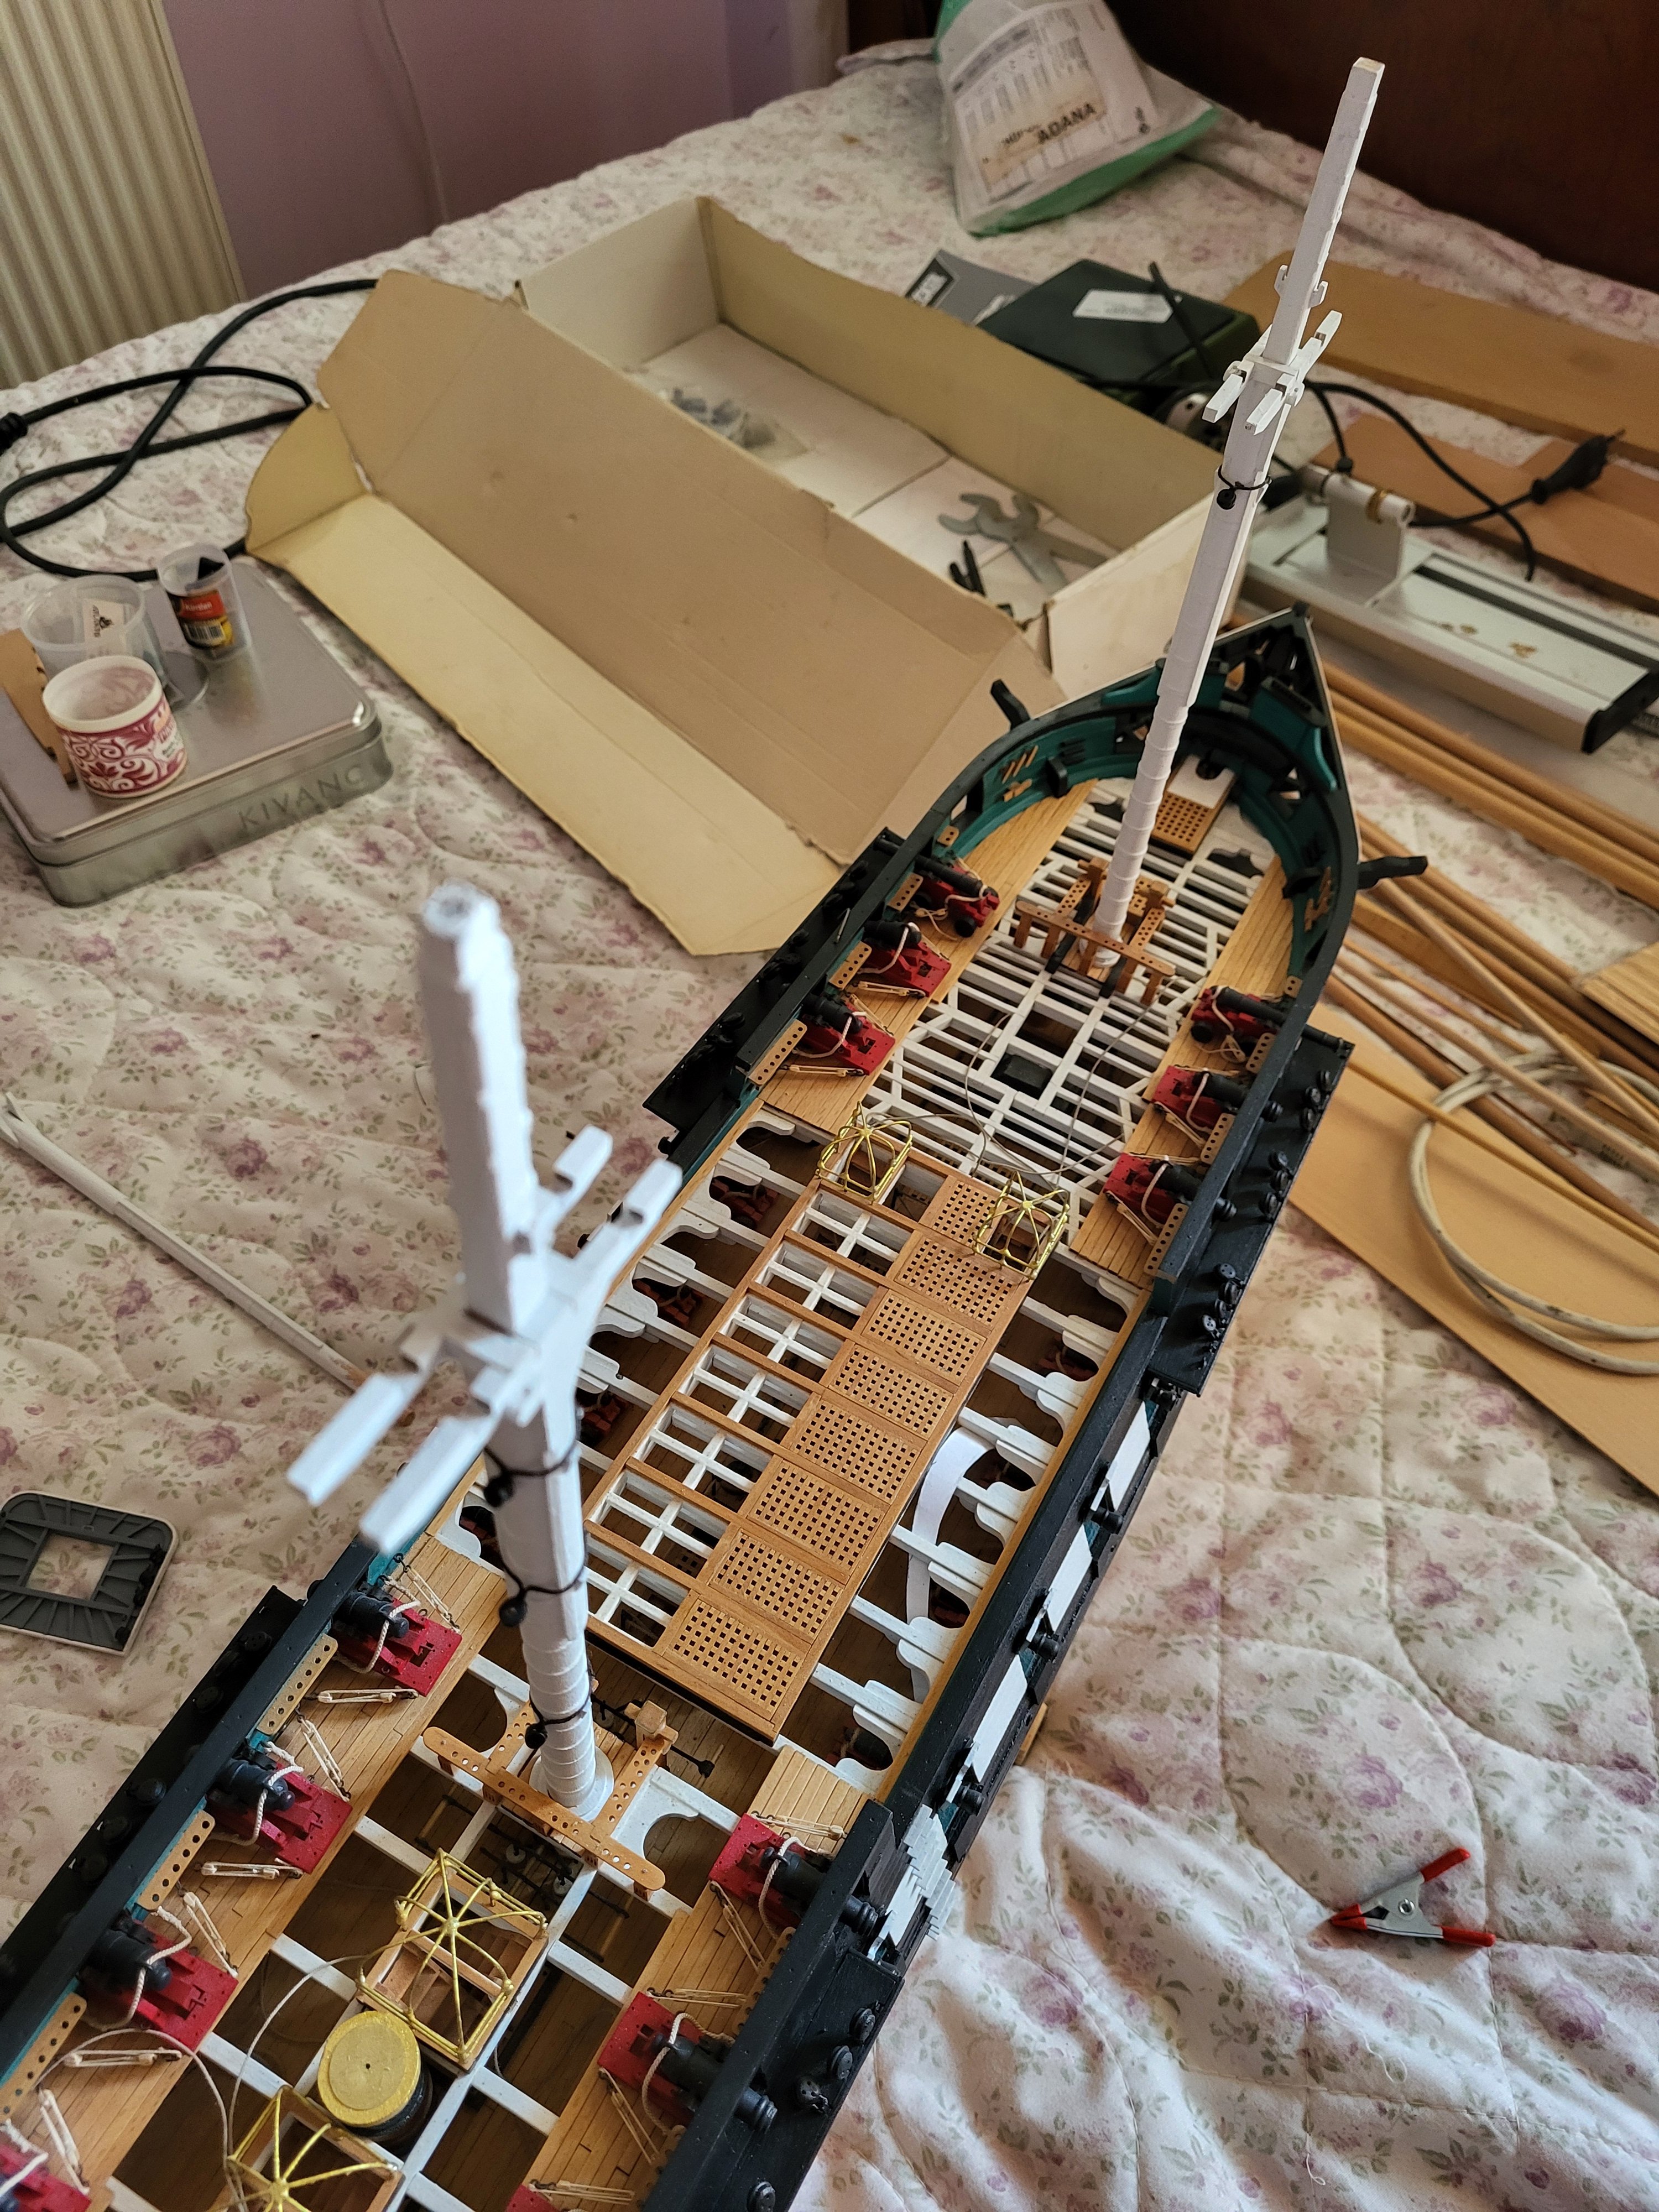
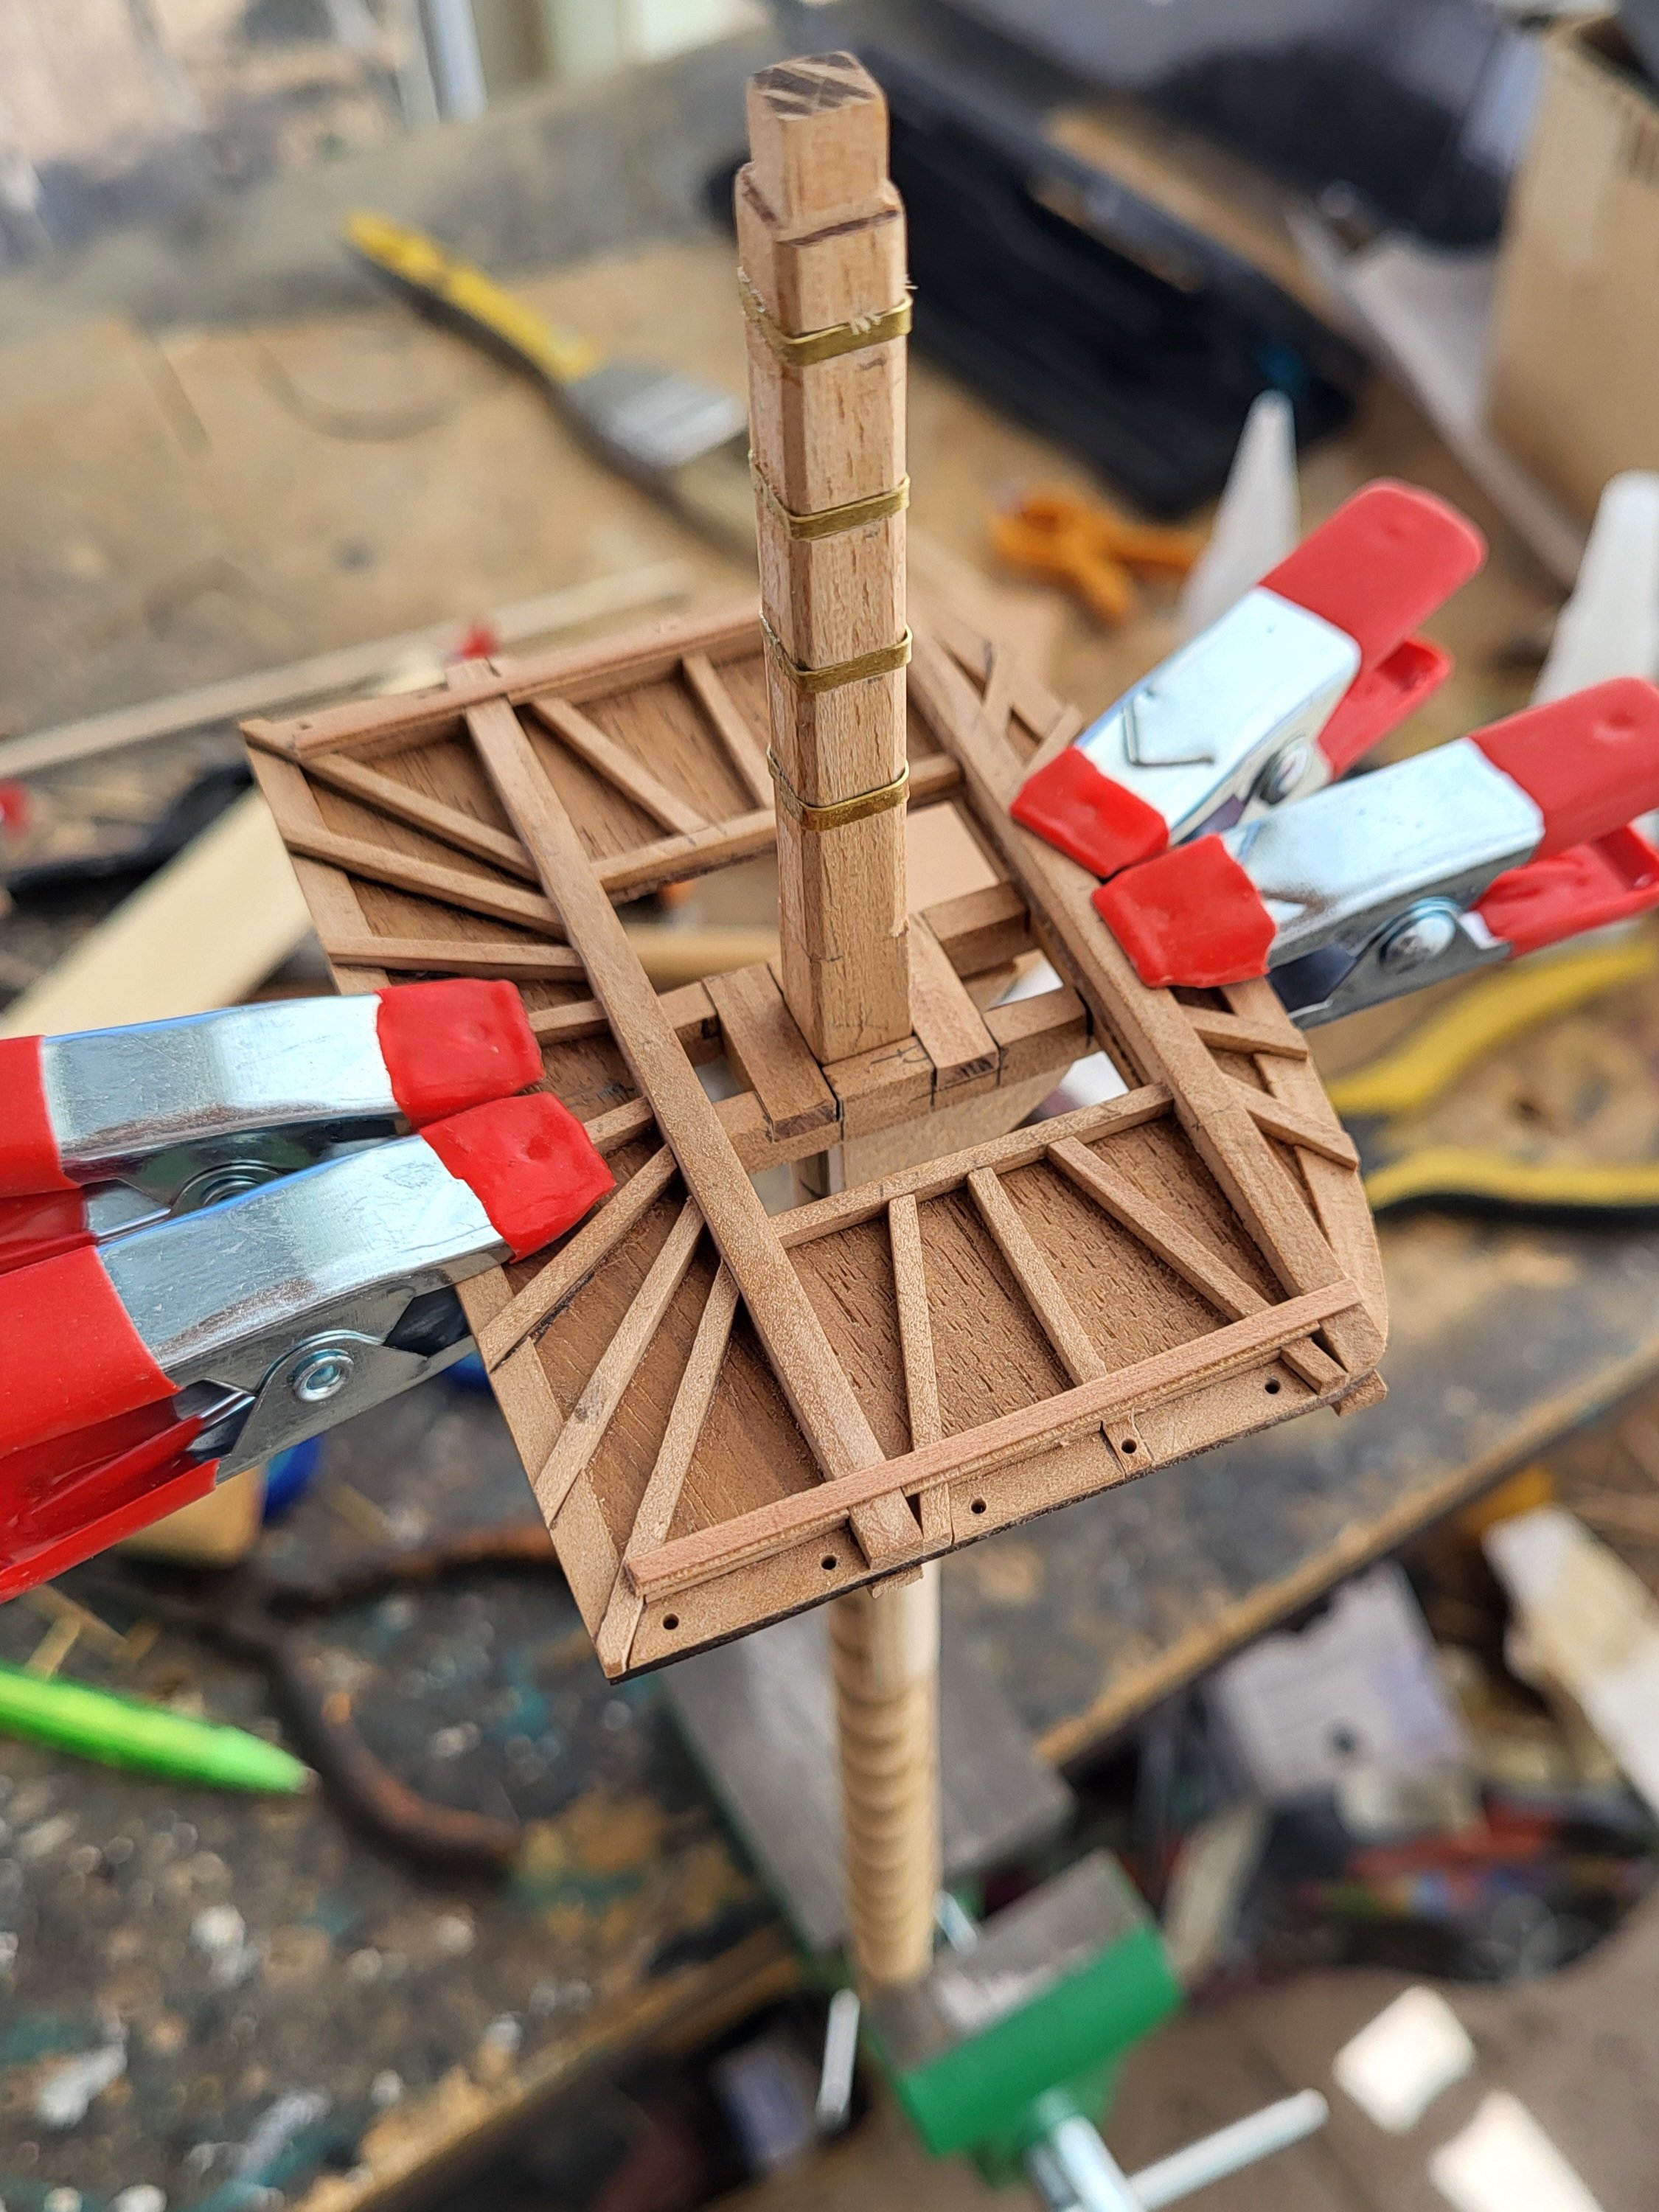
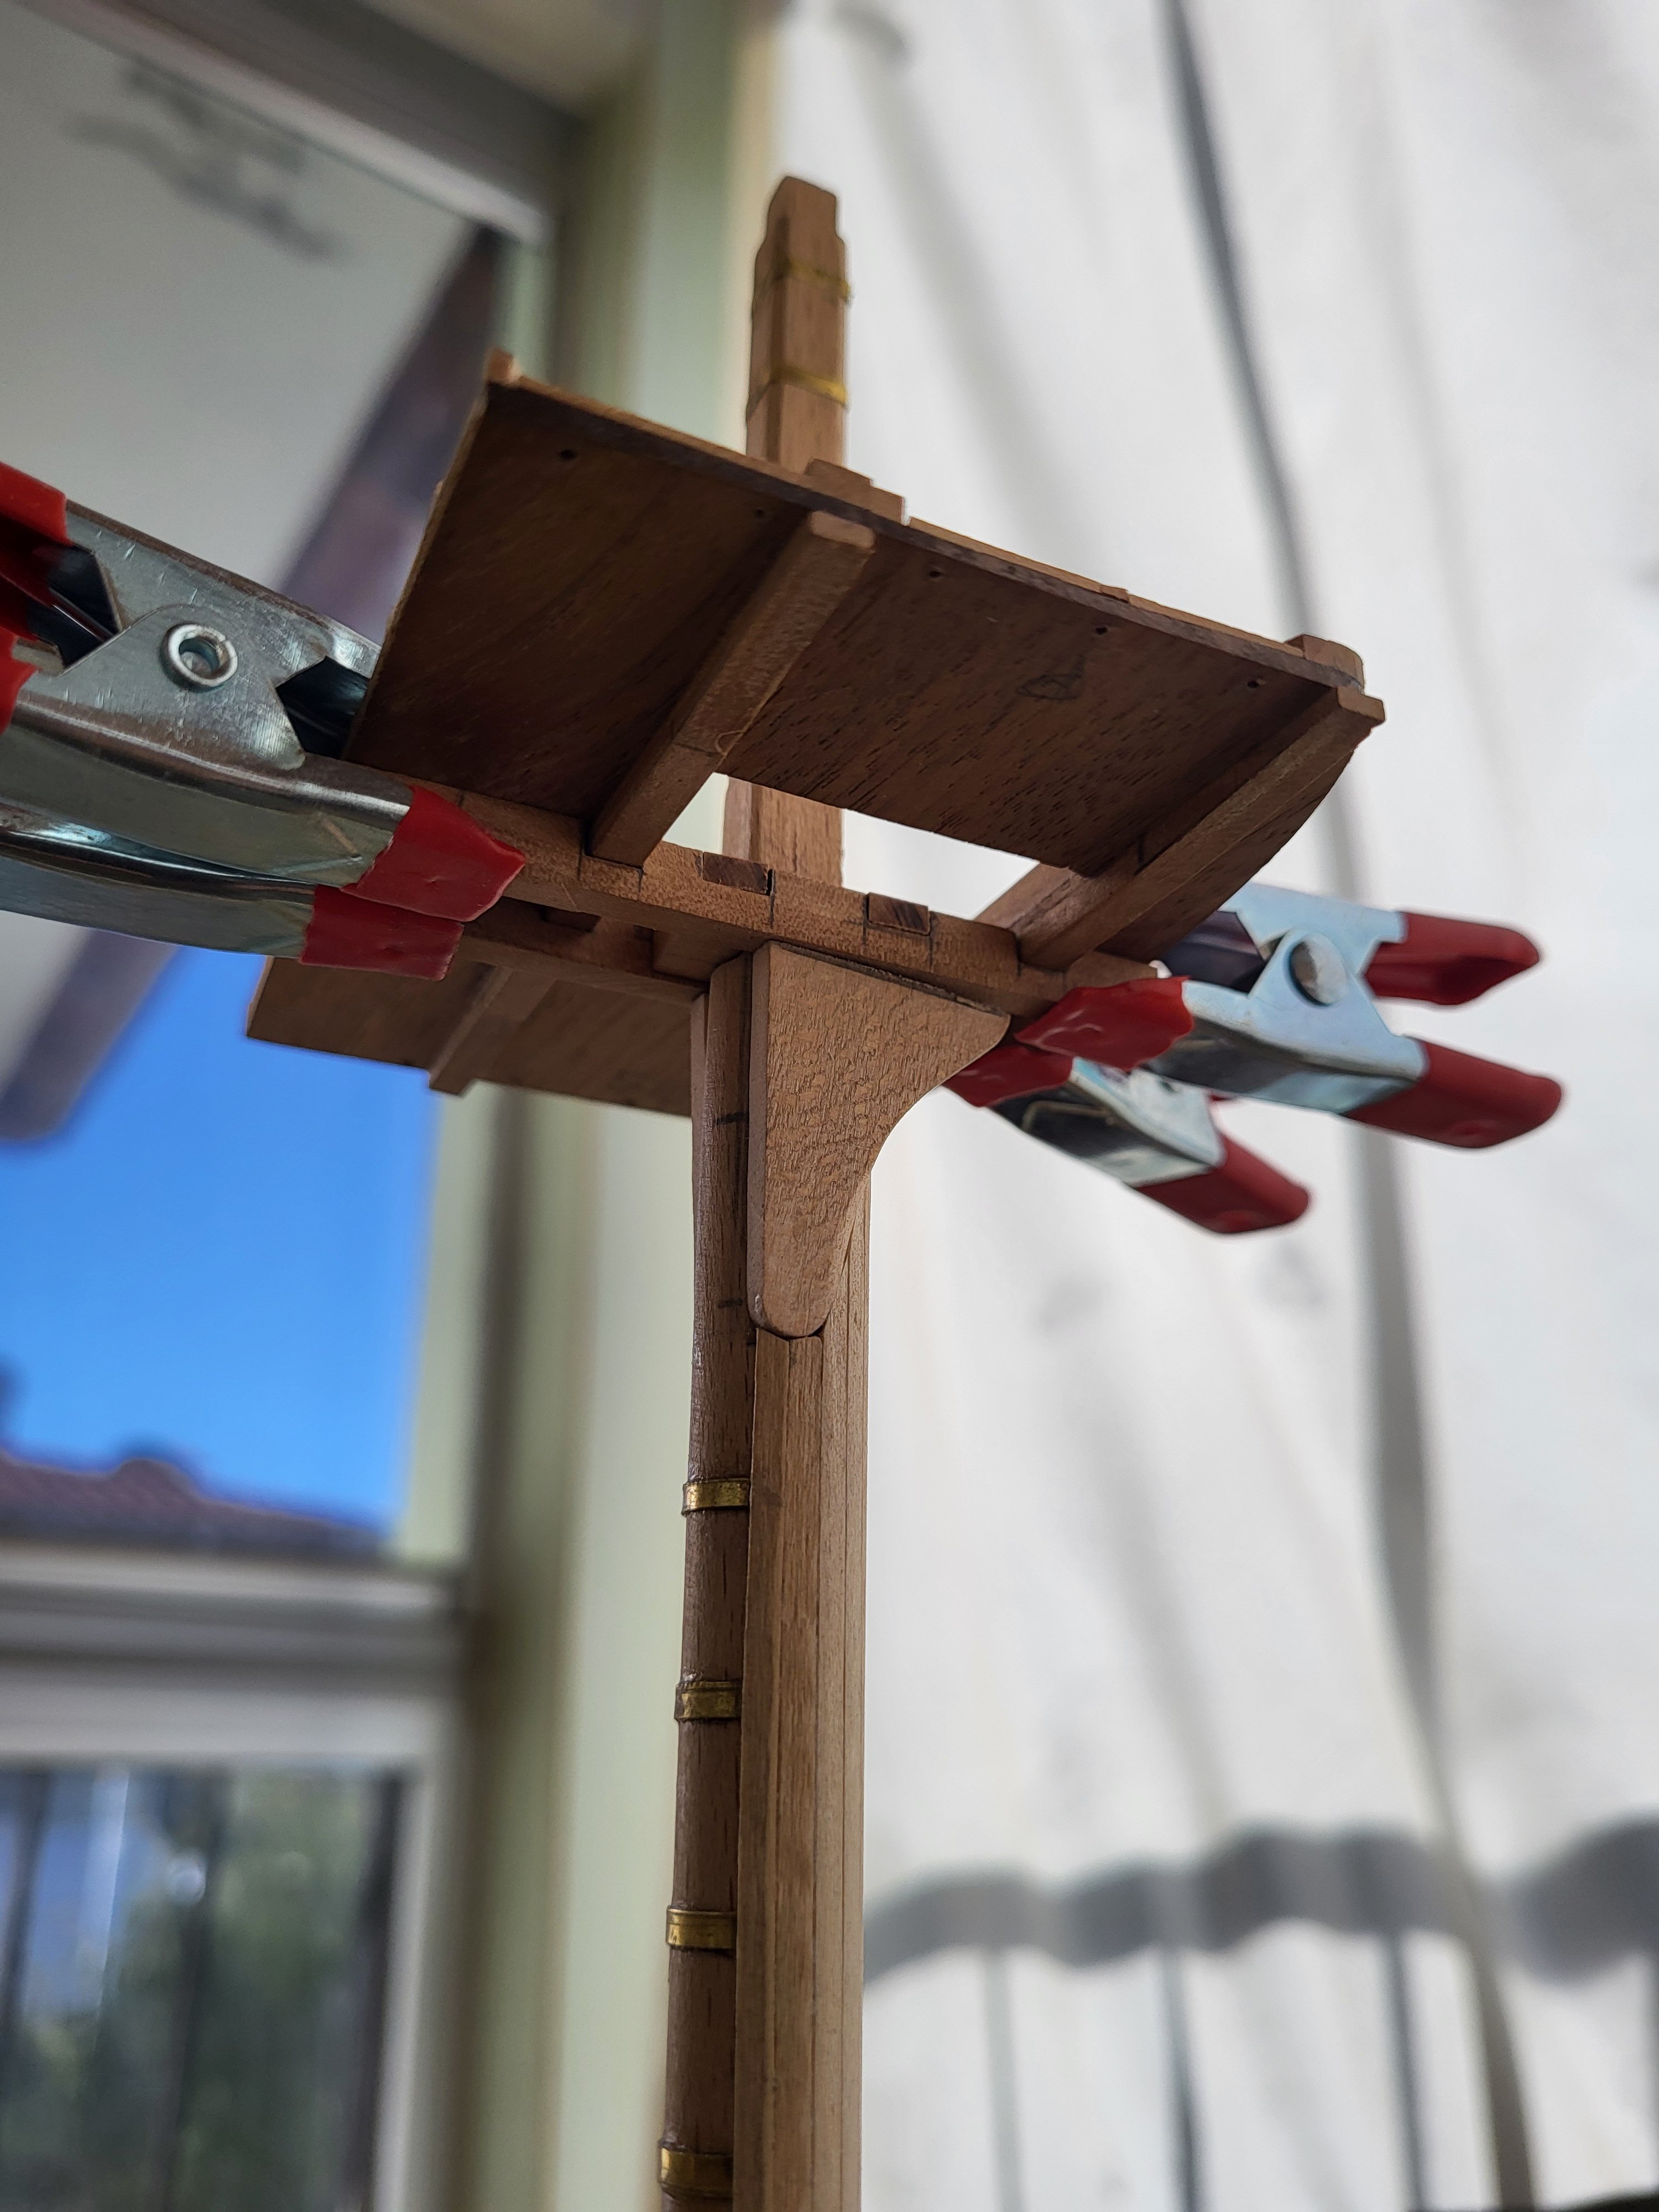
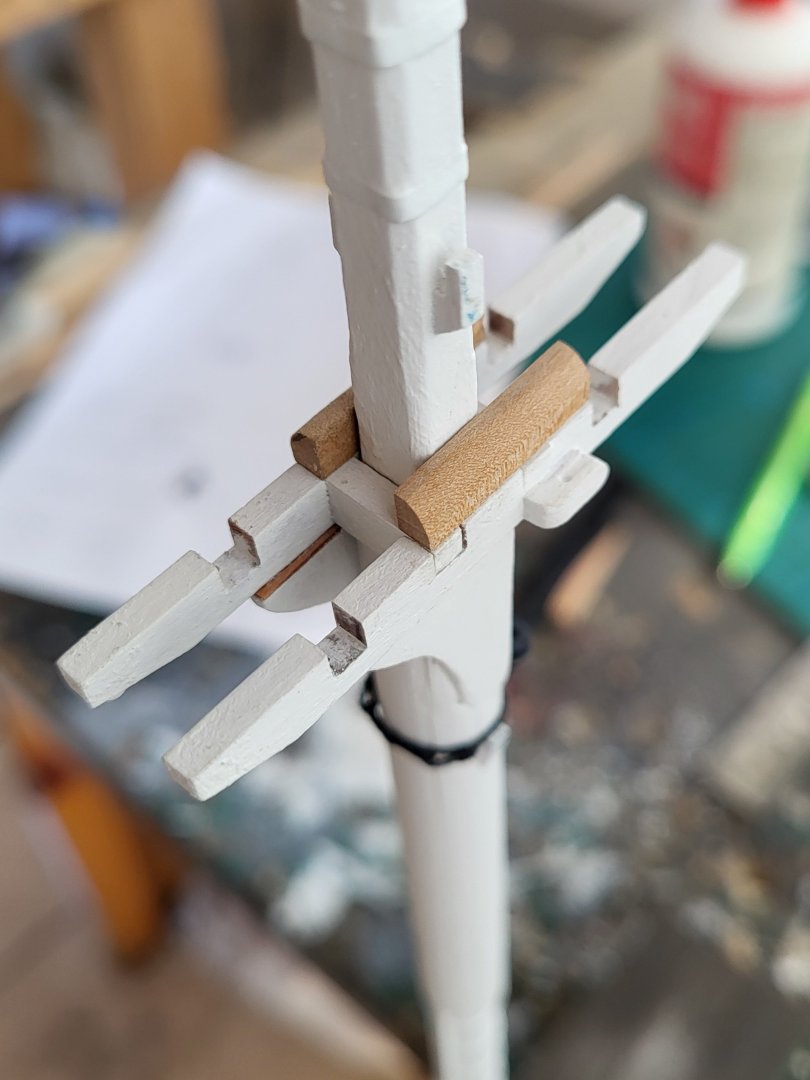
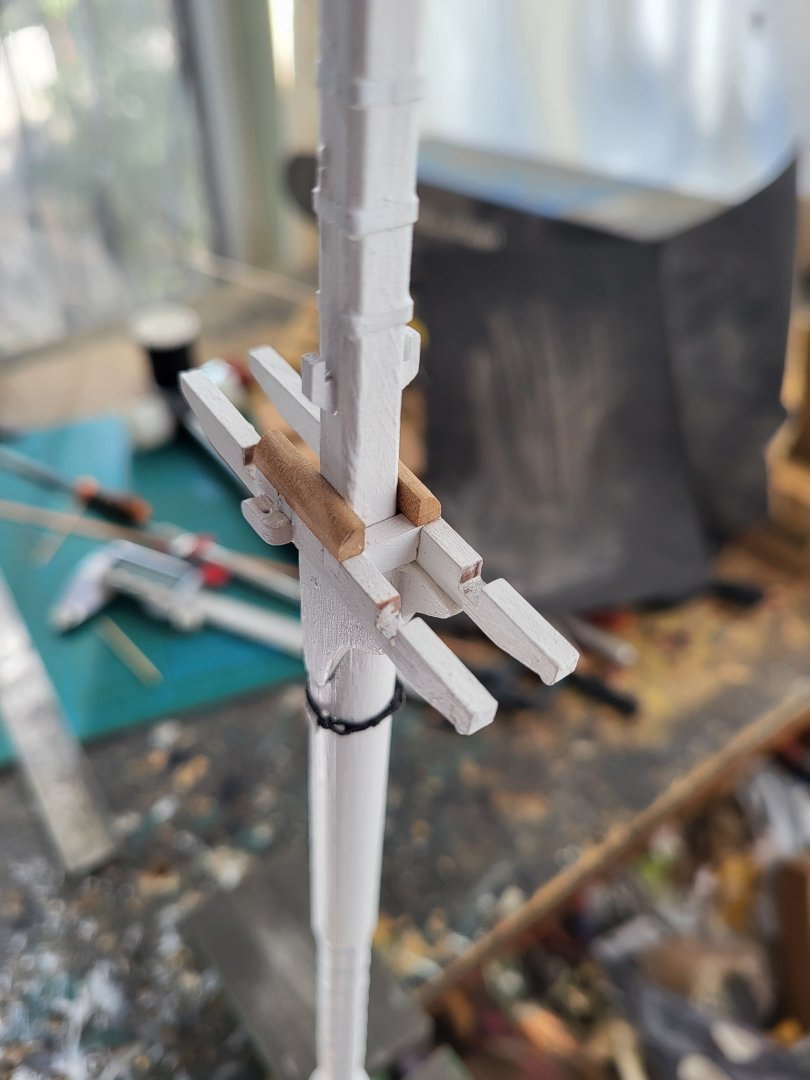
Thumb cleats, blocks with sheaves inside them, and bolsters were fabricated and fitted to the trestle trees today. As I always do, I drilled a small hole and a shallow channel to represent the sheaves. Once these fittings were in place, the main and fore trestle trees were glued to their respective masts. The platforms, however, have not yet been glued, they will remain separate until the shrouds are completed.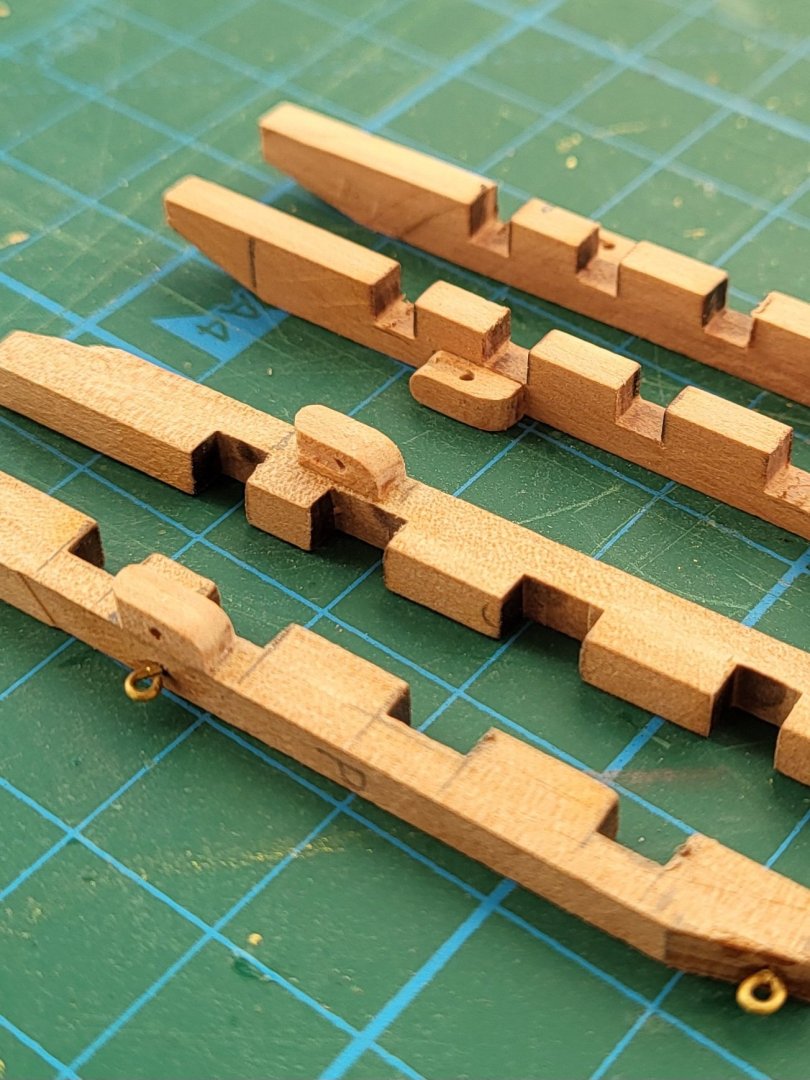


-
Your Conny looks amazing Peter! Congratulations!
-
Hey Greg, you're making great progress. You're probably aware of this, but I still want to remind you that most of the work and details you'll be doing on the gun deck from this point on will be compatible with the details on the spar deck. You'll have a little more time to get there, but I want to remind you now, as mistakes made now will be painful later. You've cut all the beams on the bulkheads, something you should have done anyway. But if you reattach these beams in the same locations, some of them won't match the details on the gun deck and spar deck. If you check out post 968 in Jon's build log, you'll see what I mean; this is just an example. The placement of the spar deck support beams should be carefully chosen throughout the ship. You also know you'll need to add additional beams.
-
USS Constitution by mtbediz - 1:76
mtbediz replied to mtbediz's topic in - Build logs for subjects built 1751 - 1800
I'm lucky to have a completed Conny build here. XKen is a really good modeler. -
USS Constitution by mtbediz - 1:76
mtbediz replied to mtbediz's topic in - Build logs for subjects built 1751 - 1800
Thanks Jon! -
USS Constitution by mtbediz - 1:76
mtbediz replied to mtbediz's topic in - Build logs for subjects built 1751 - 1800
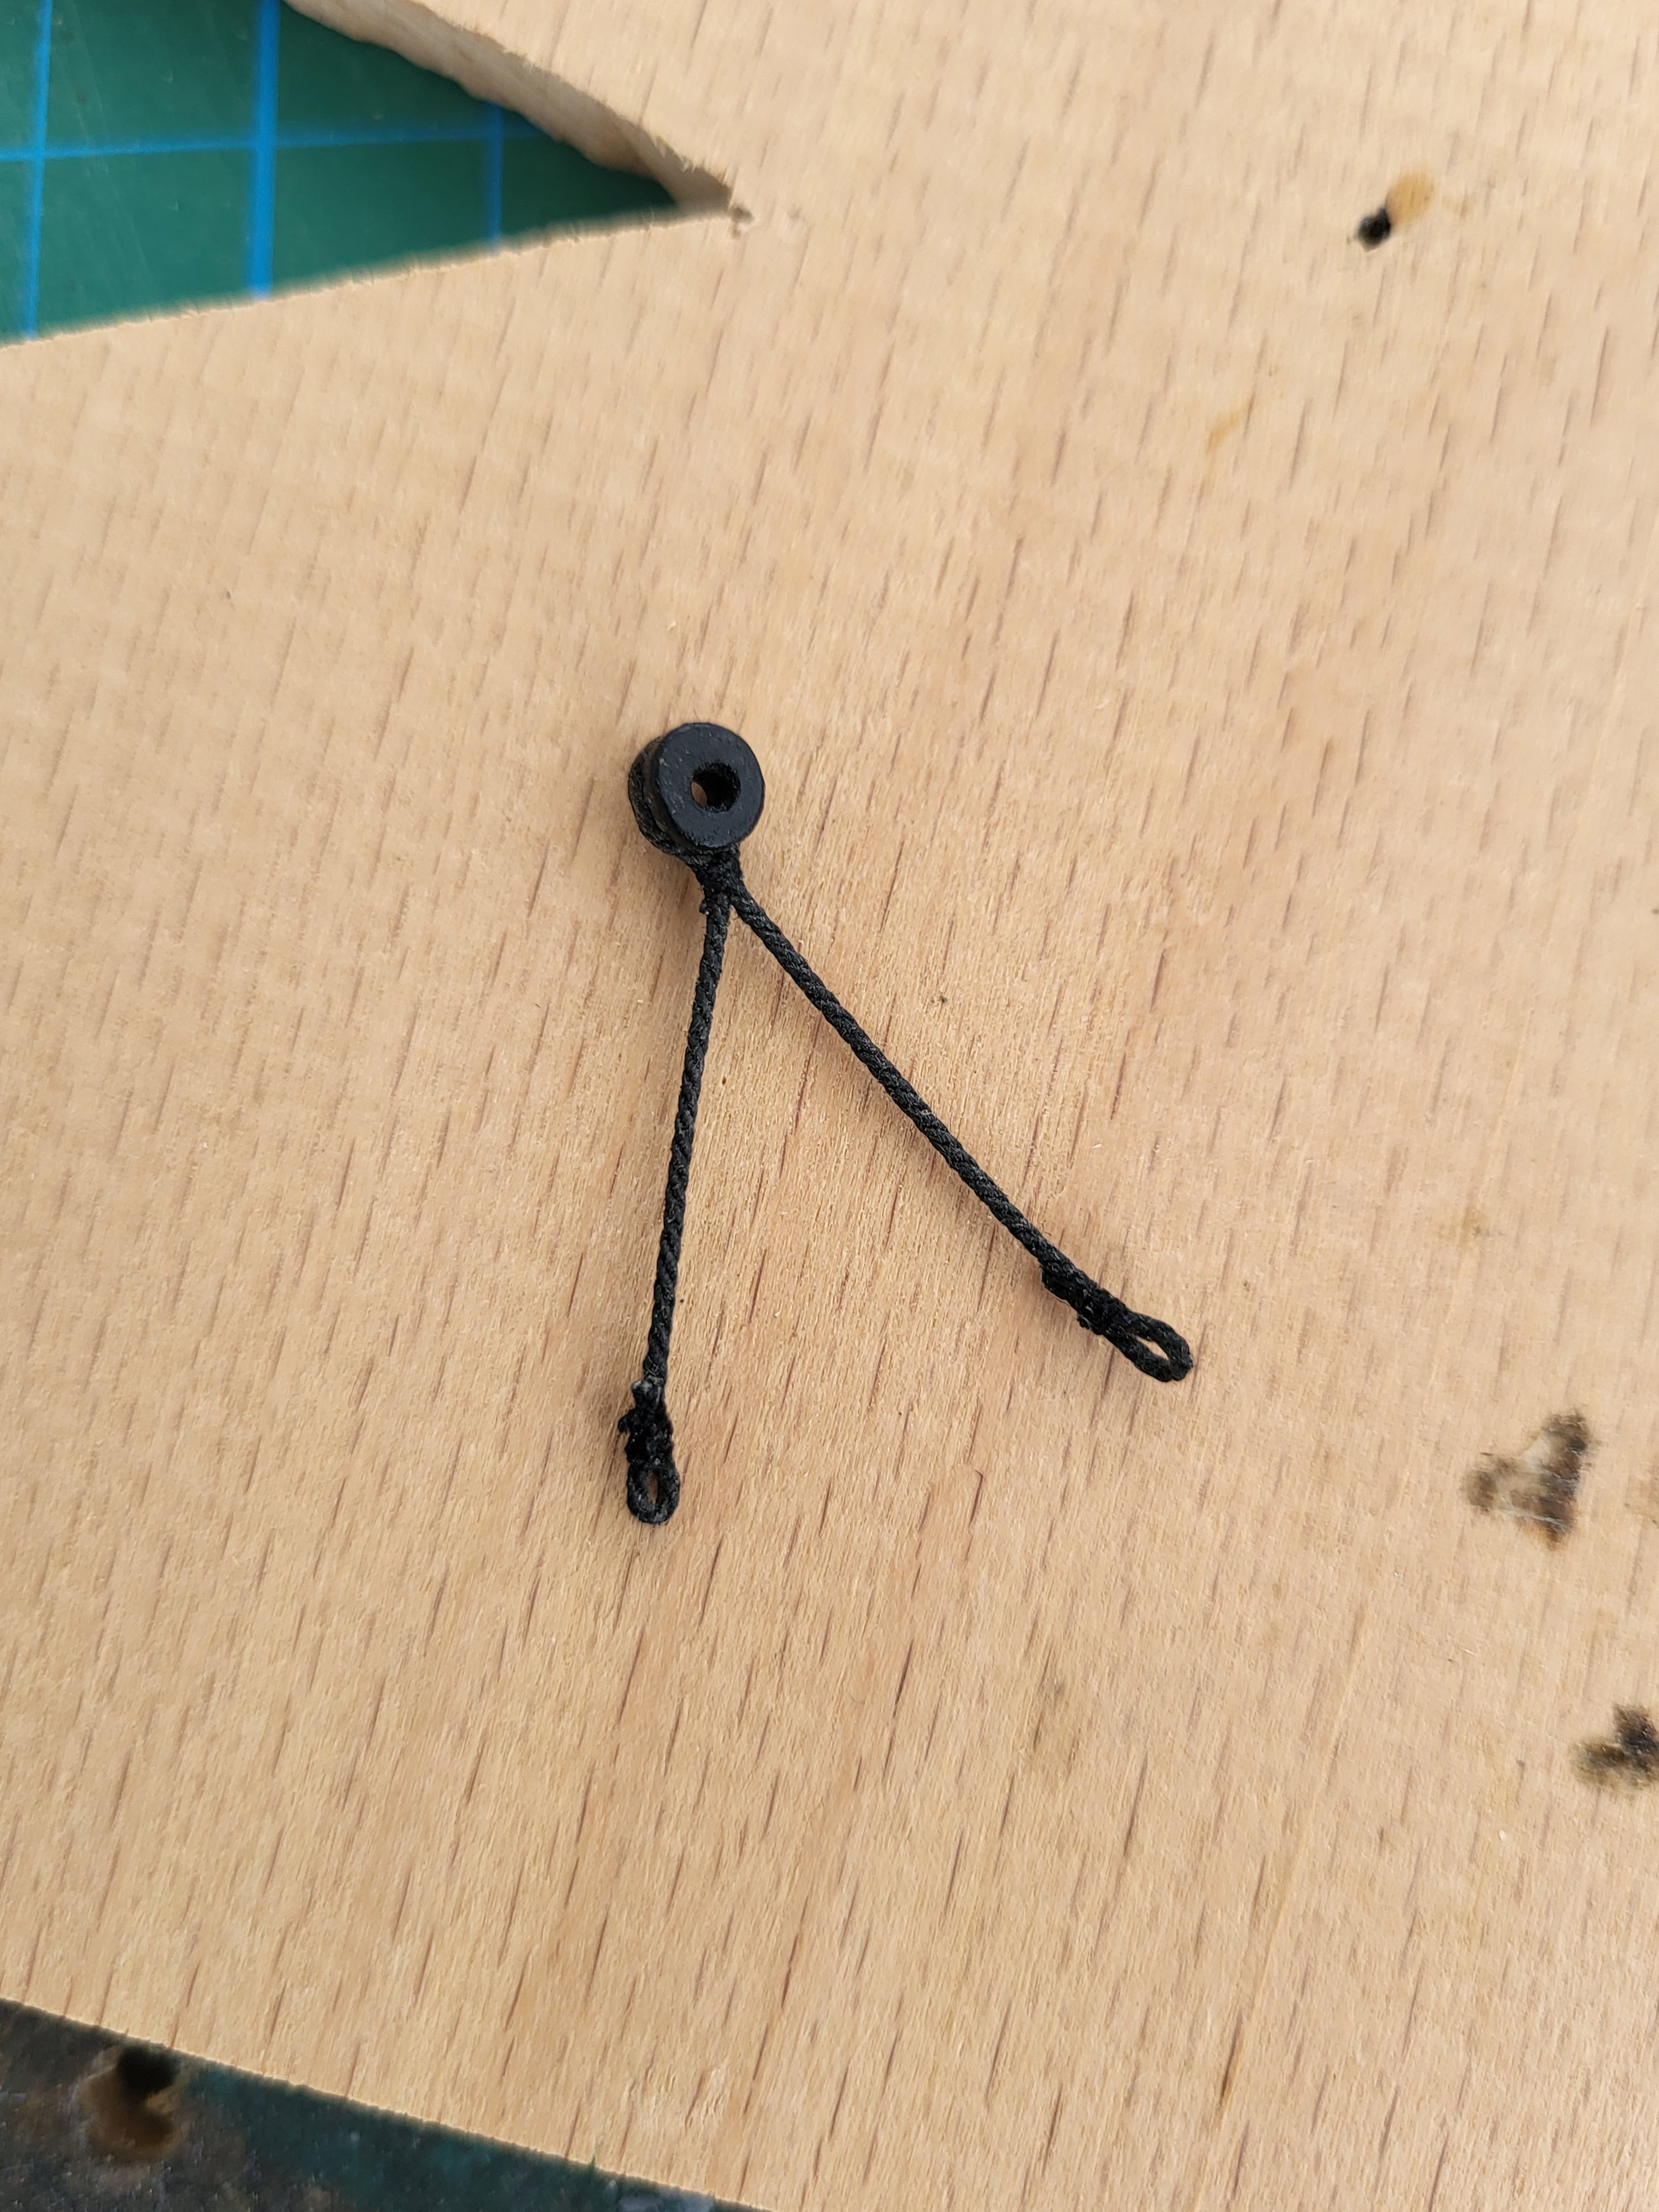
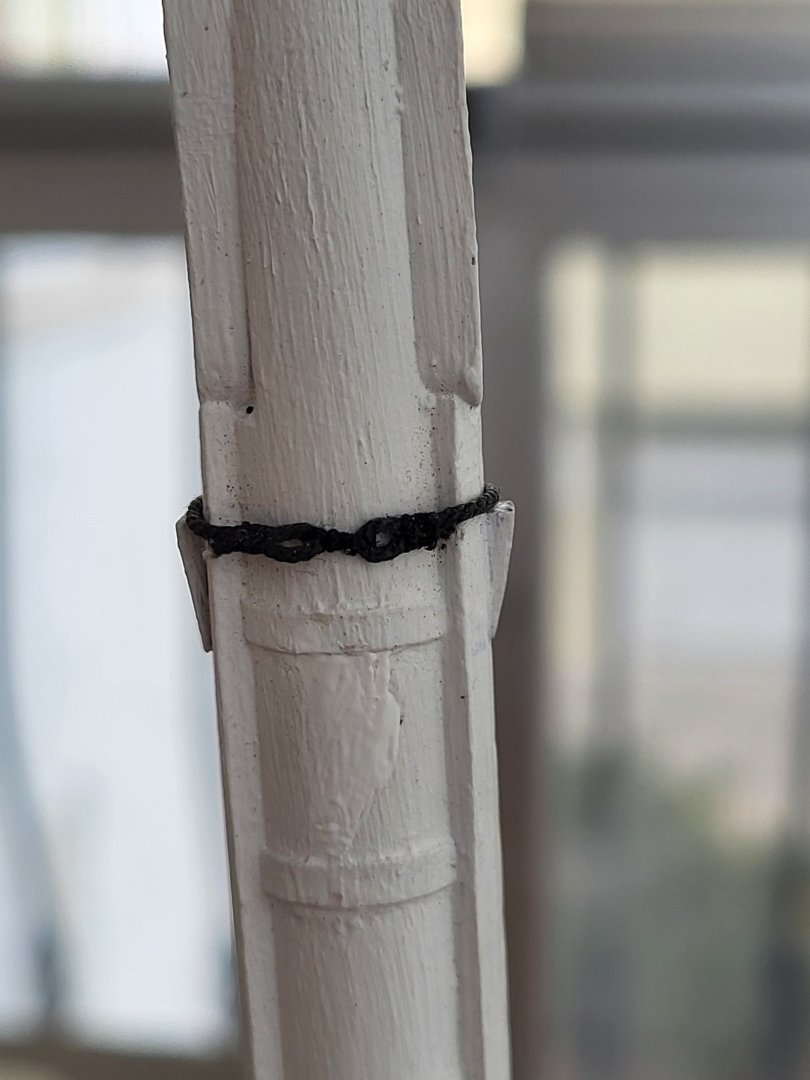
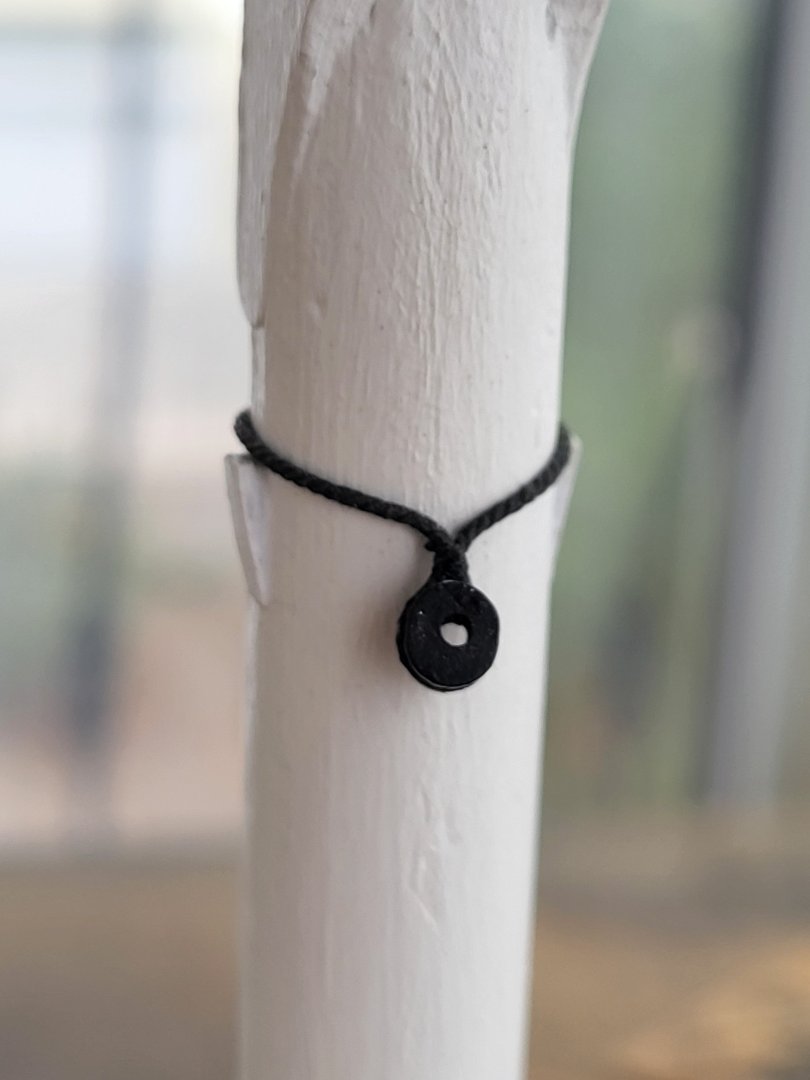
For trial purposes I formed a bobstay collar for the mast using a jig. I glued all the seizings with CA and trimmed excess ends. The result is good enough for me. I may have stolen some ideas from XKen.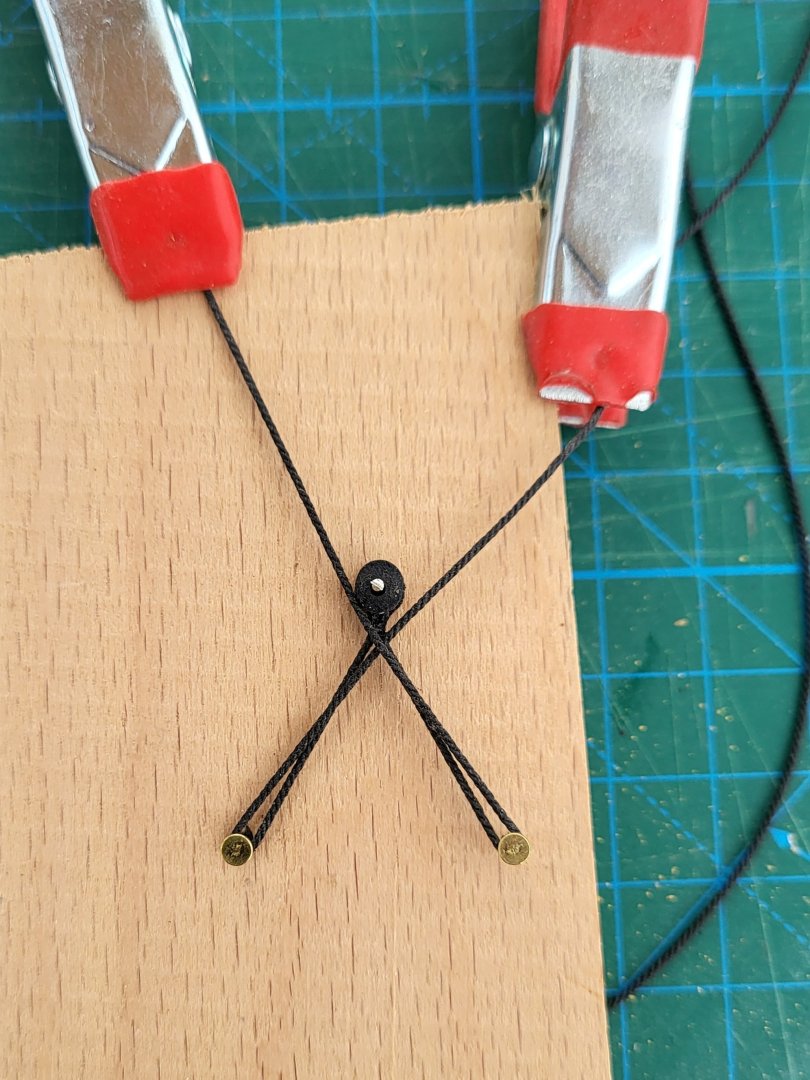

-
USS Constitution by mtbediz - 1:76
mtbediz replied to mtbediz's topic in - Build logs for subjects built 1751 - 1800
They appear to be elliptical openings rather than circles. -
USS Constitution by mtbediz - 1:76
mtbediz replied to mtbediz's topic in - Build logs for subjects built 1751 - 1800
Yes, Jon, you're right. I actually needed to make channel-shaped openings in the fighting top for the deadeye connections, but I chose to just drill holes. -
USS Constitution by mtbediz - 1:76
mtbediz replied to mtbediz's topic in - Build logs for subjects built 1751 - 1800
Peter, I attached the deadeyes the same way you did using brass wire; after feeding the free end through the hole in the fighting top, I bent it into a small loop underneath.
-
USS Constitution by mtbediz - 1:76
mtbediz replied to mtbediz's topic in - Build logs for subjects built 1751 - 1800
Thank you so much Frank. -
USS Constitution by mtbediz - 1:76
mtbediz replied to mtbediz's topic in - Build logs for subjects built 1751 - 1800
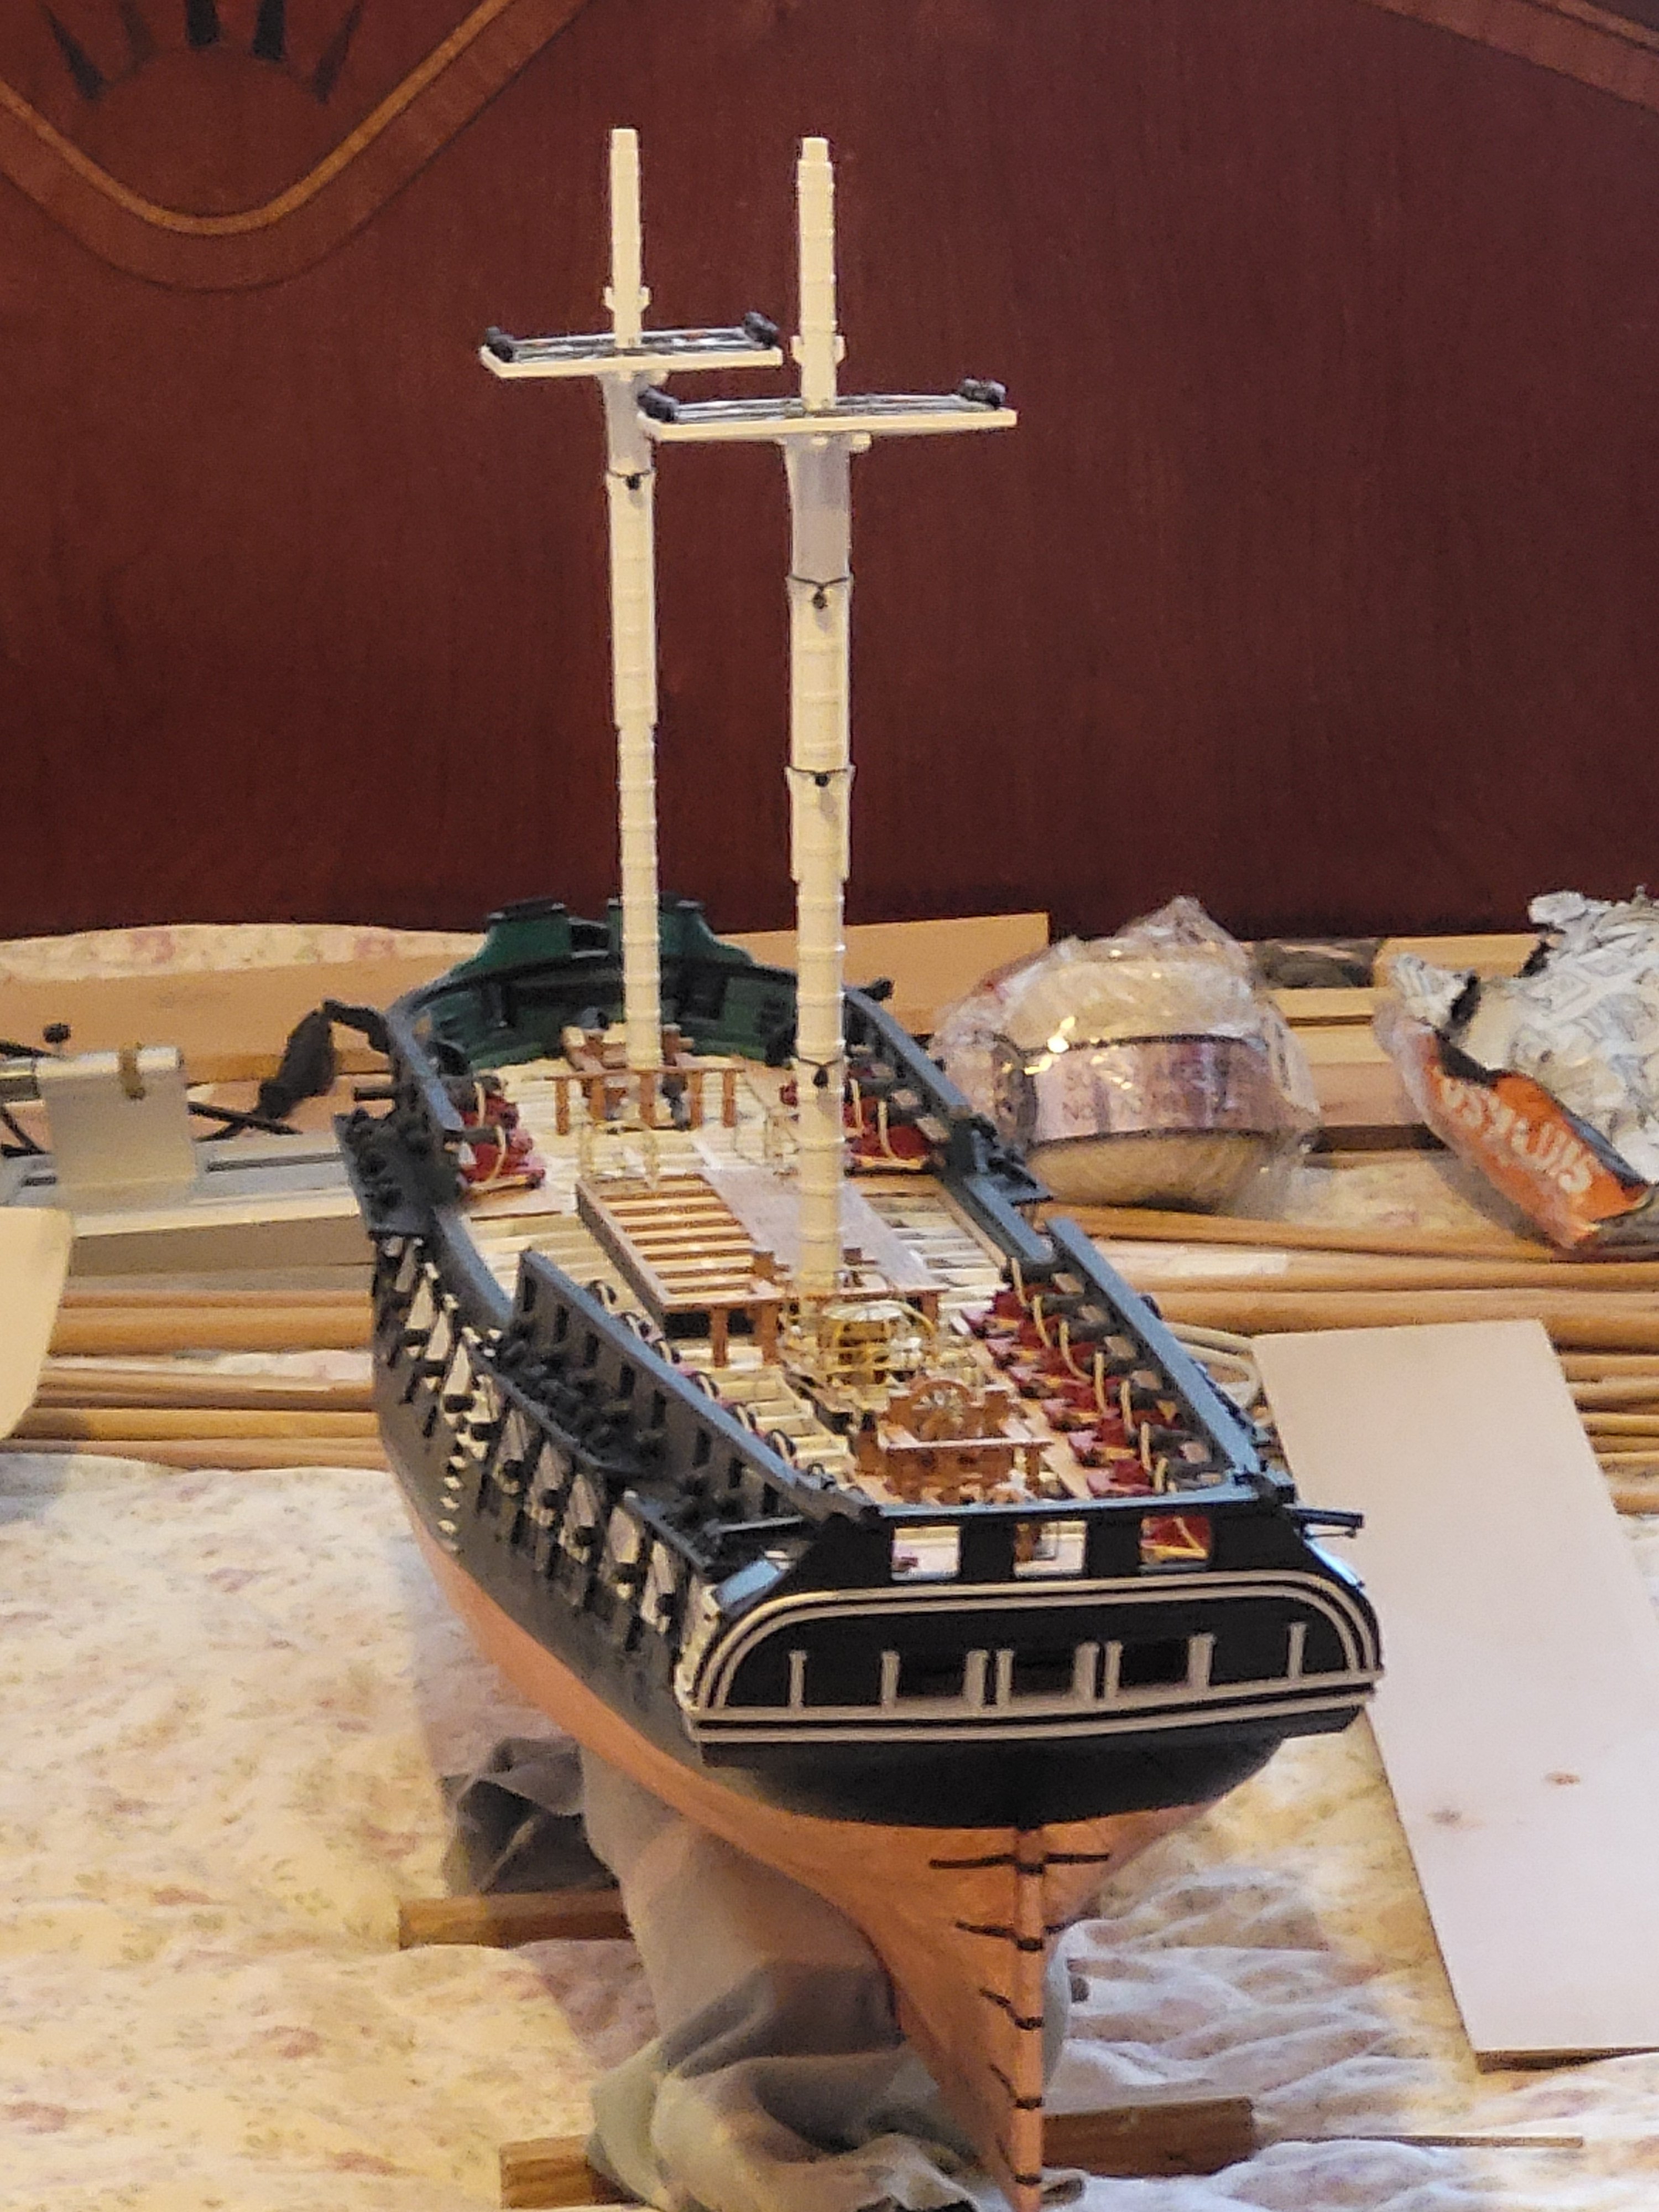
I turned back to the fighting tops. The tops were painted gray and the bottoms white. The strip surrounding the top was soaked in boiling water for about 10 minutes and then held in place with clamps. Once dry, it was removed and, after being painted white, glued back in place. I finished today by installing the deadeyes that I had previously prepared for the top mast shrouds.

-
Great start, Greg. You've made it even harder by choosing a 6-window transom version for the USS Constitution, which is already a difficult model to build. That's some commendable courage!
-
USS Constitution by mtbediz - 1:76
mtbediz replied to mtbediz's topic in - Build logs for subjects built 1751 - 1800
Sorry Peter, I just noticed your post. I don't know why, some posts appear much later in my build log. I guess this is one of them. No, I didn't taper the channels. I didn't even know they needed to be tapered. -
USS Constitution by mtbediz - 1:76
mtbediz replied to mtbediz's topic in - Build logs for subjects built 1751 - 1800
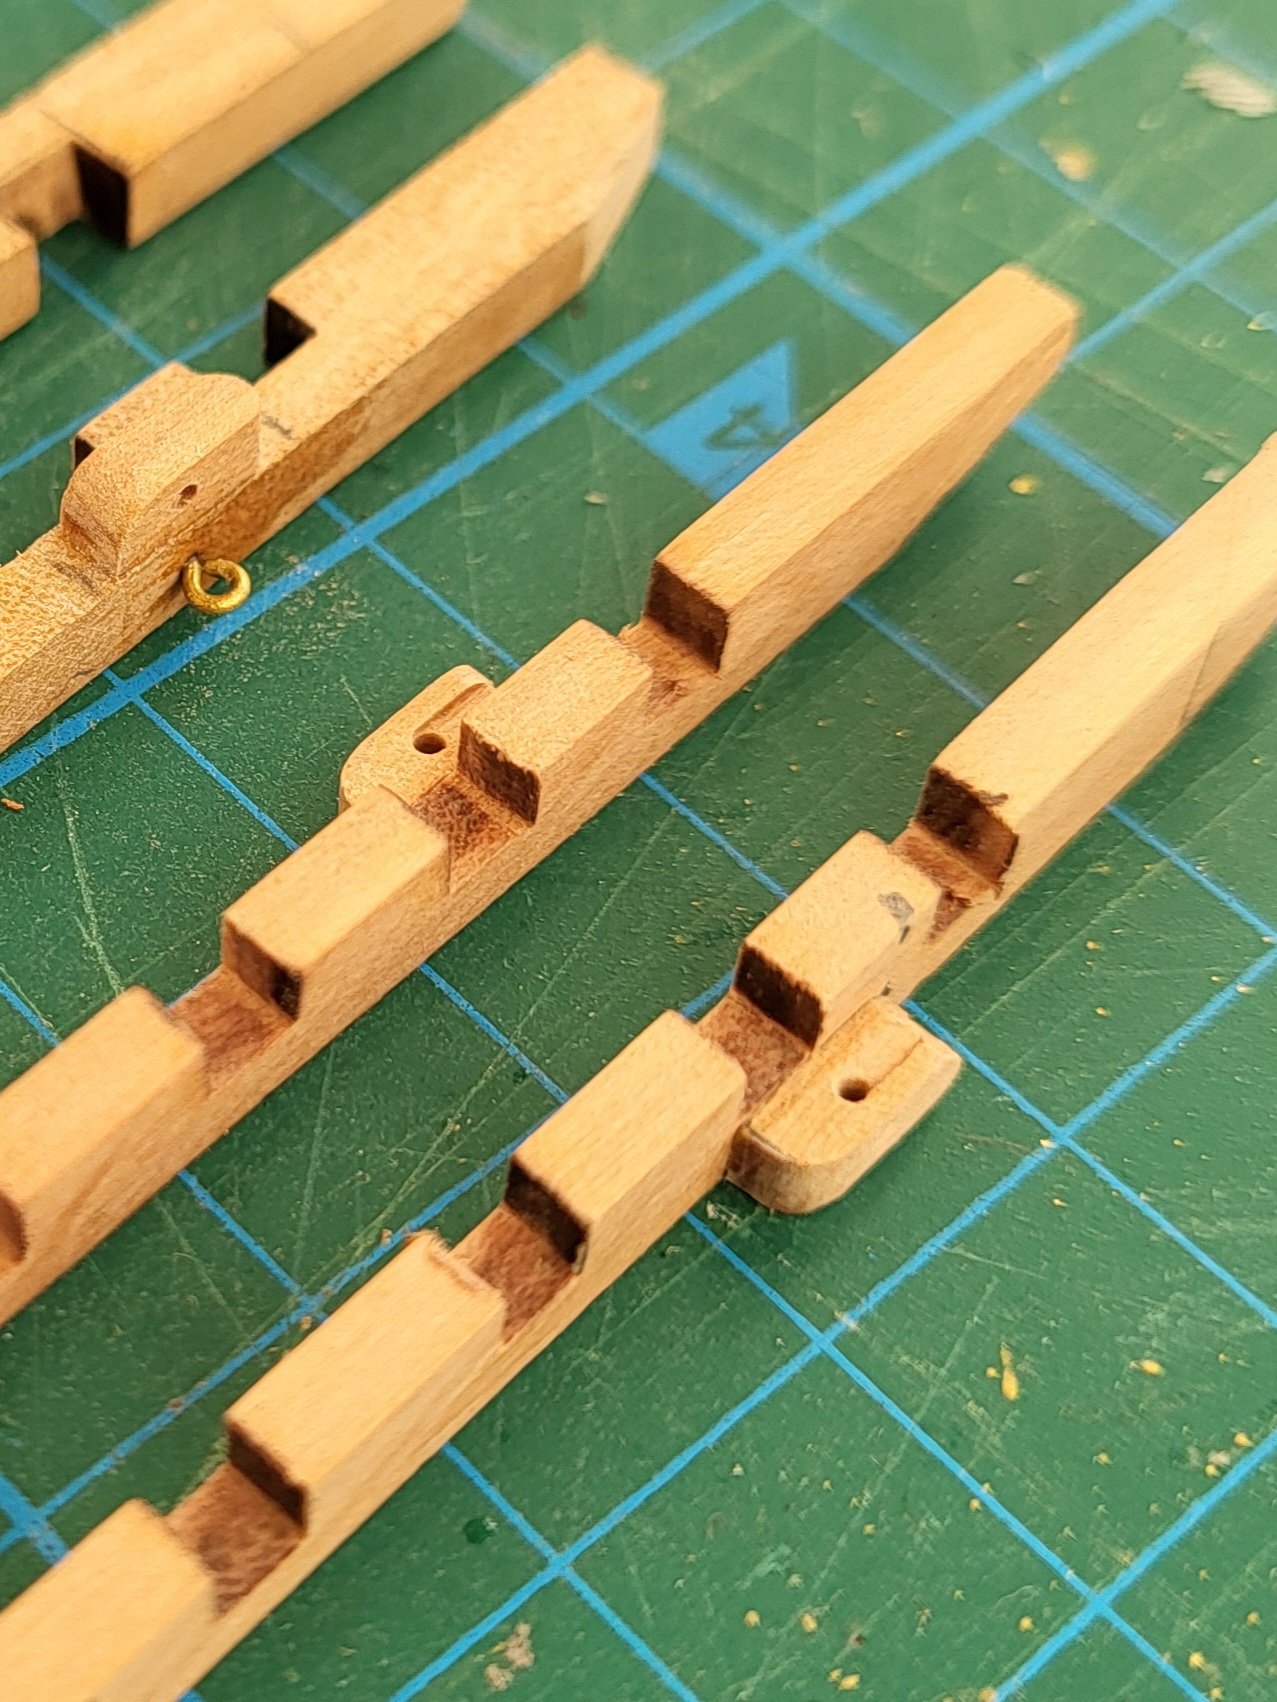
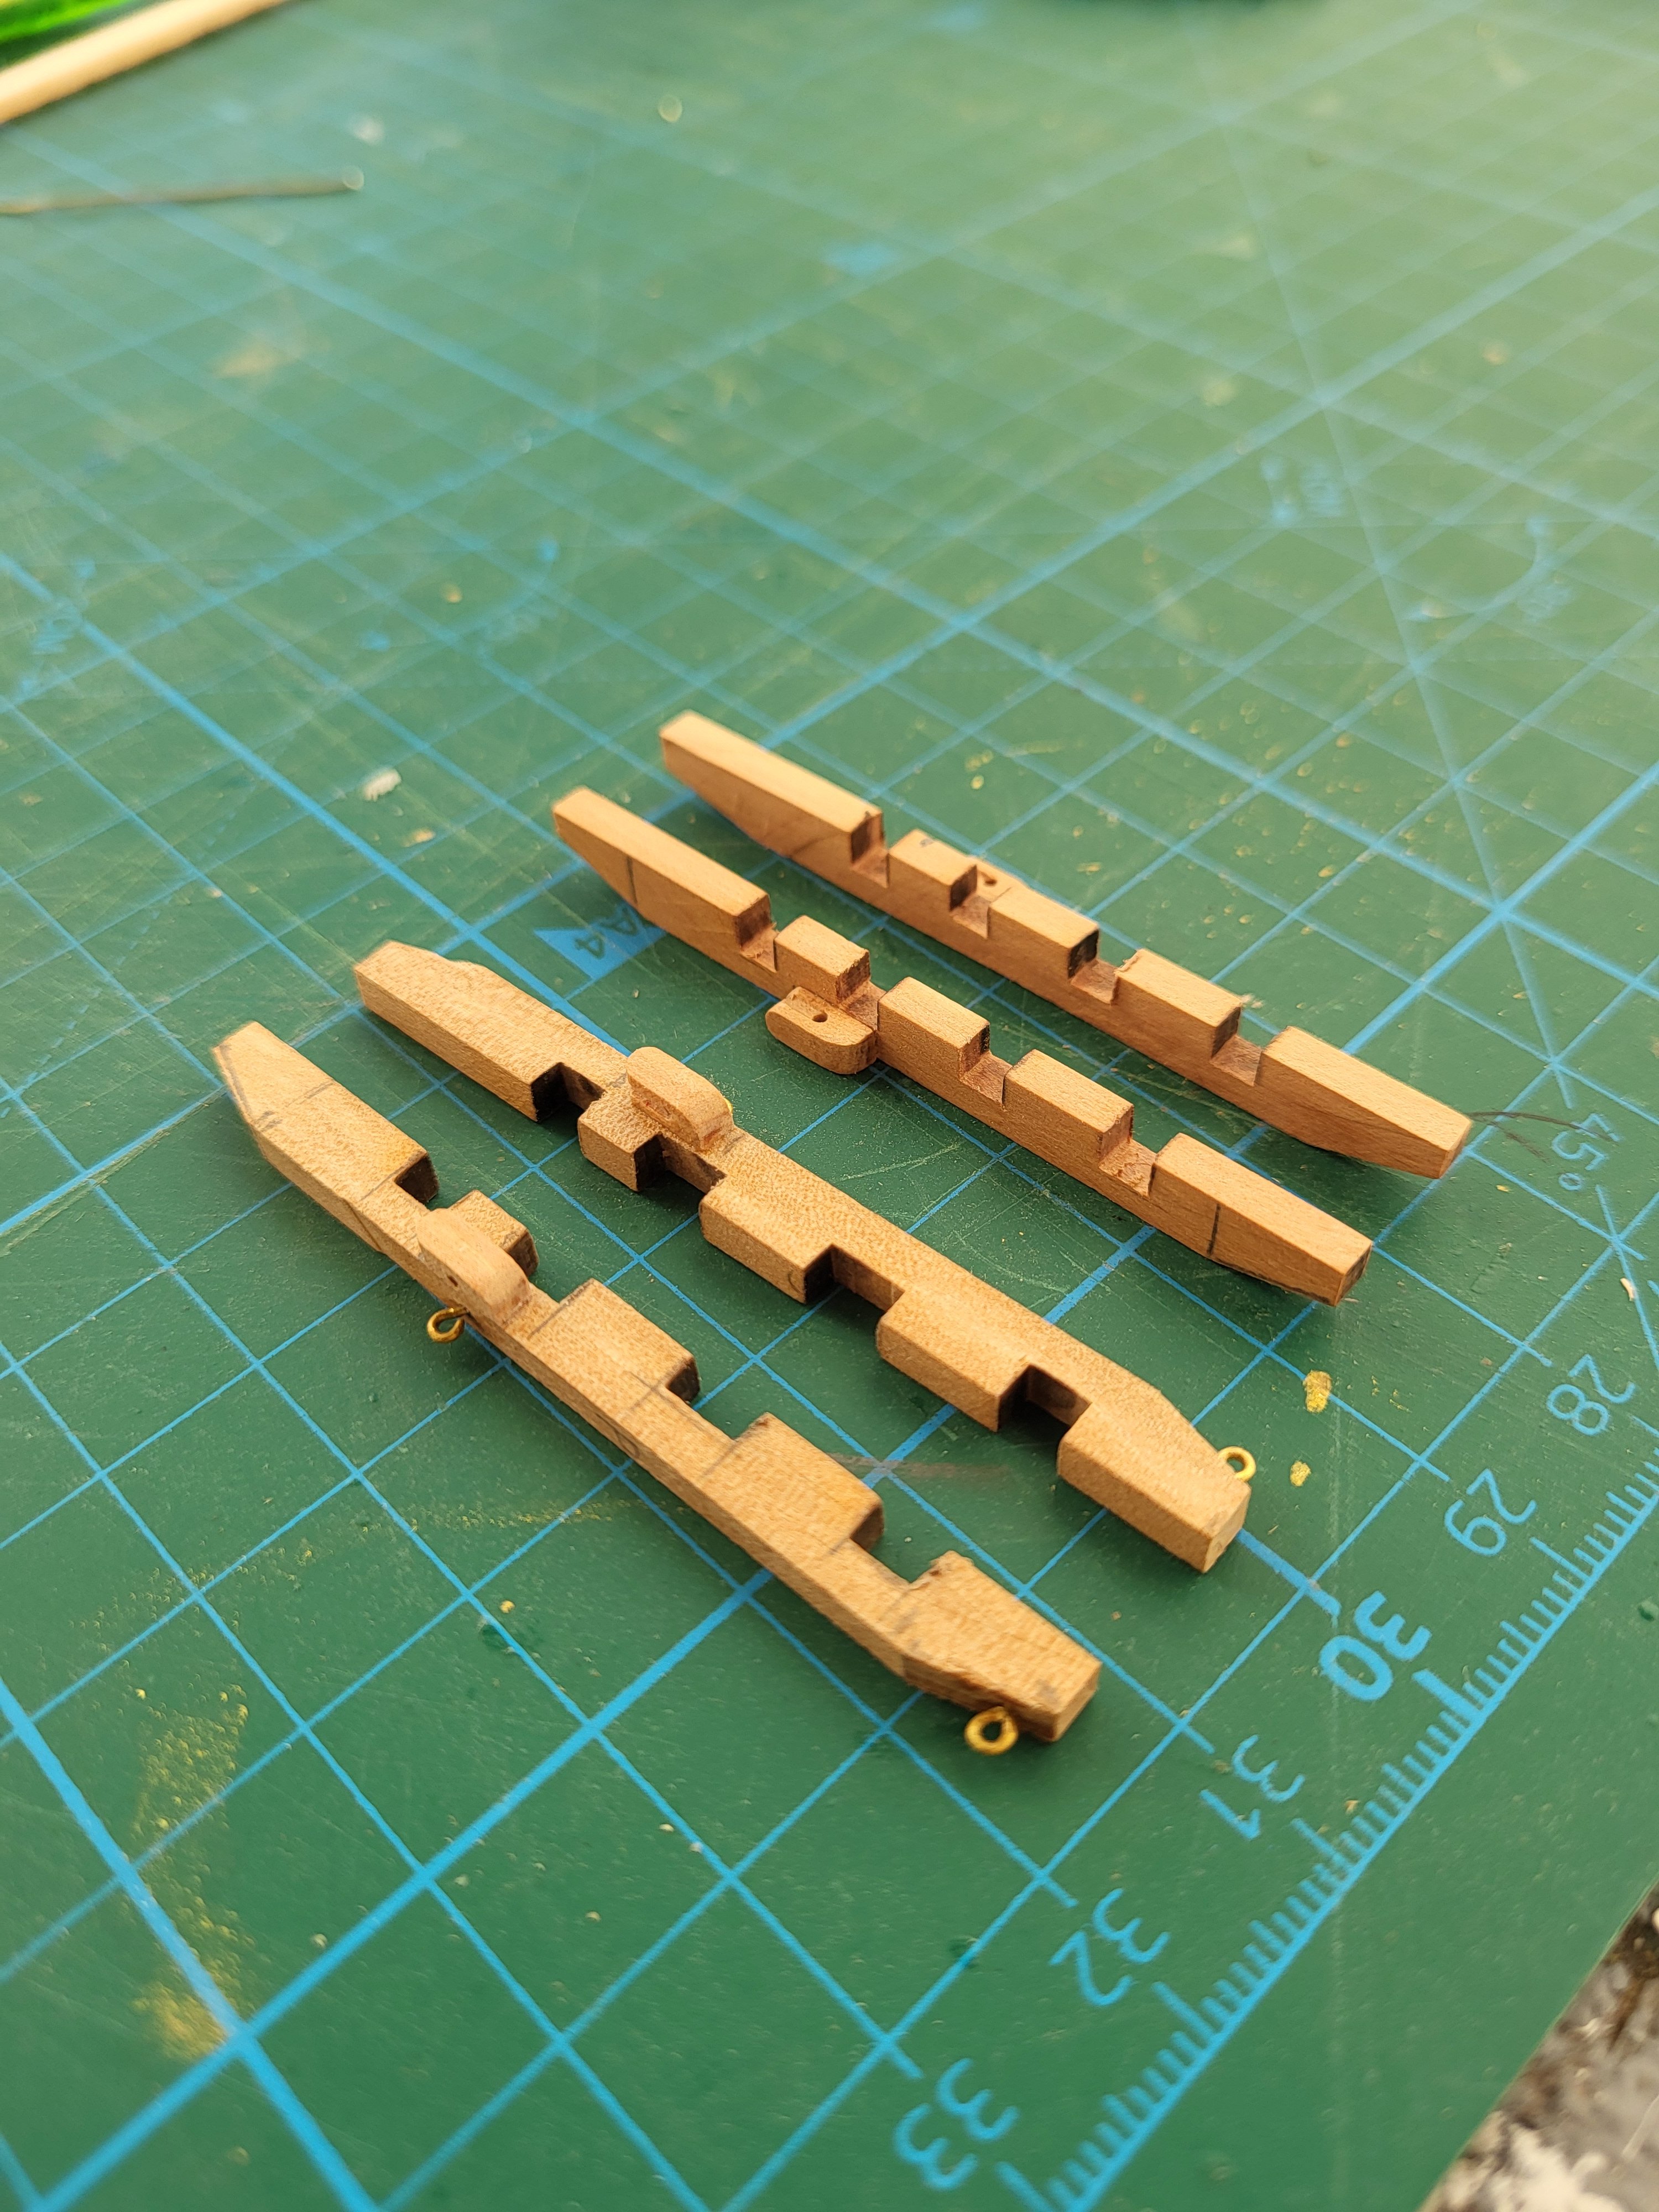
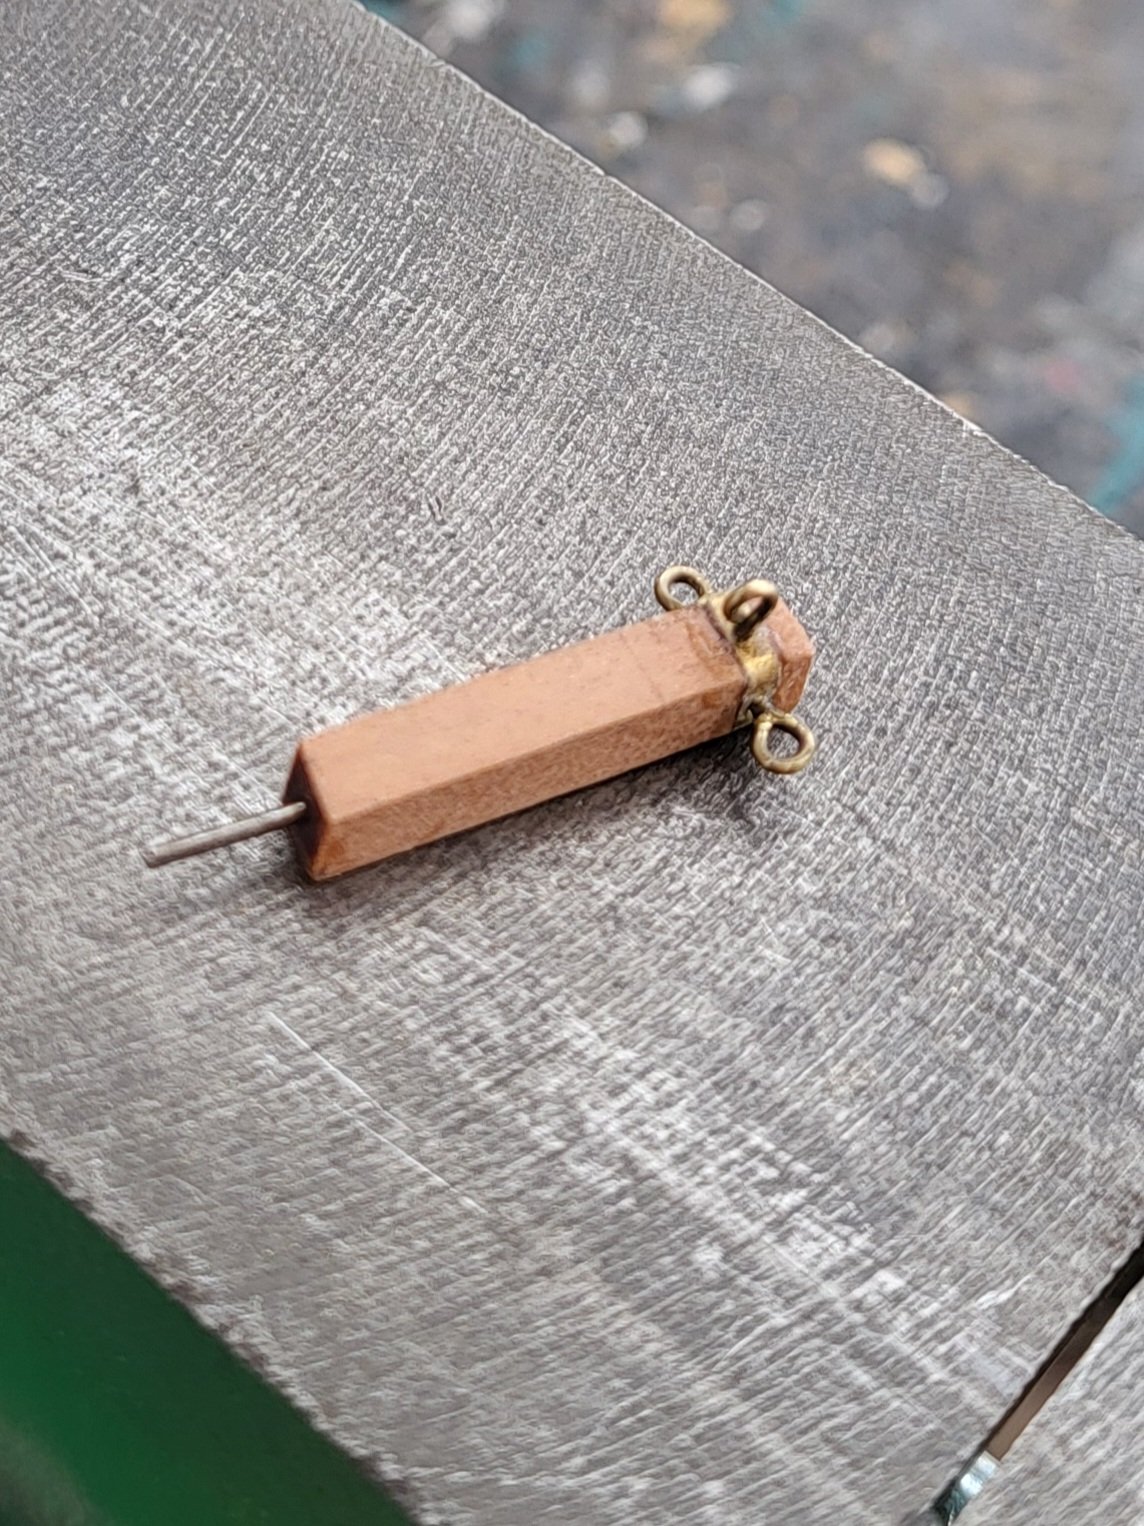
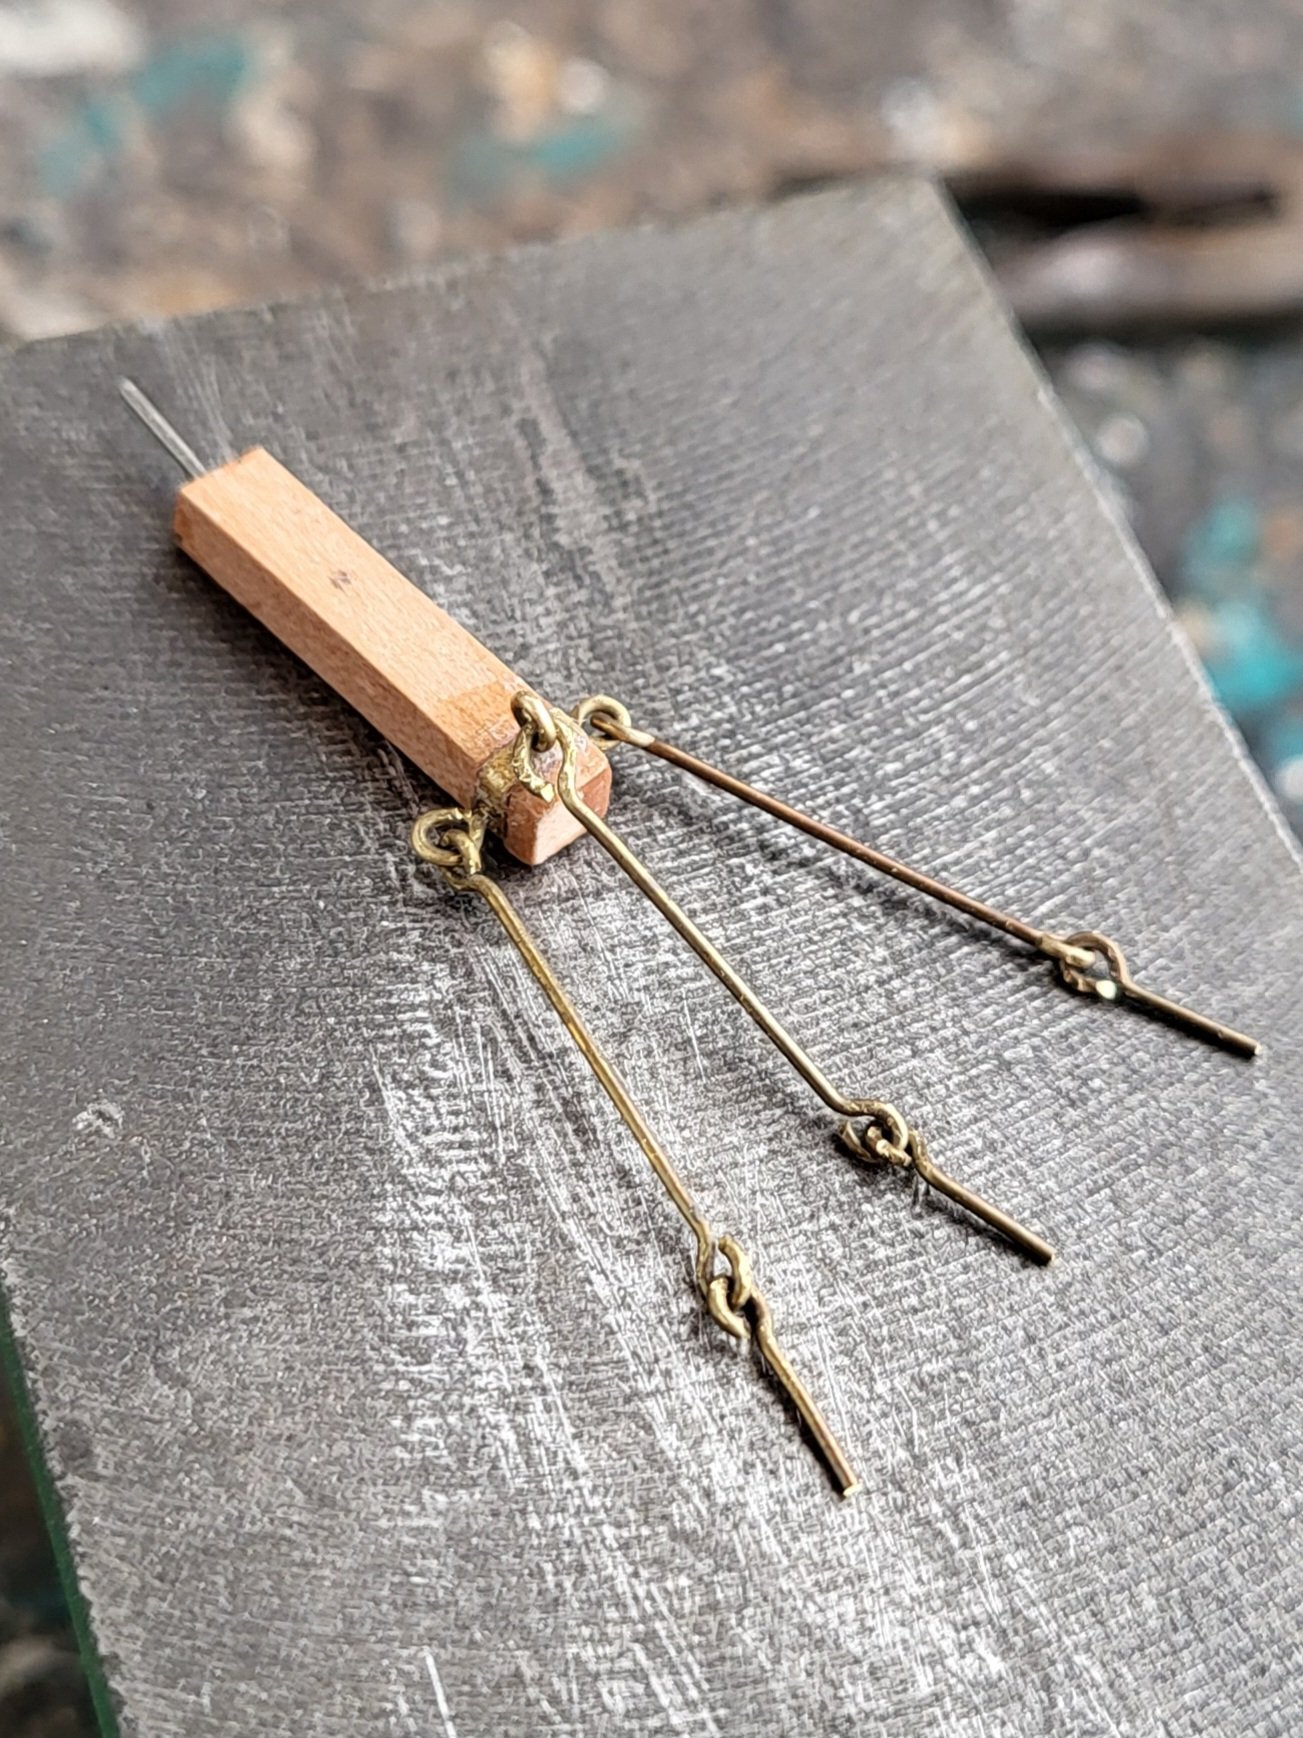
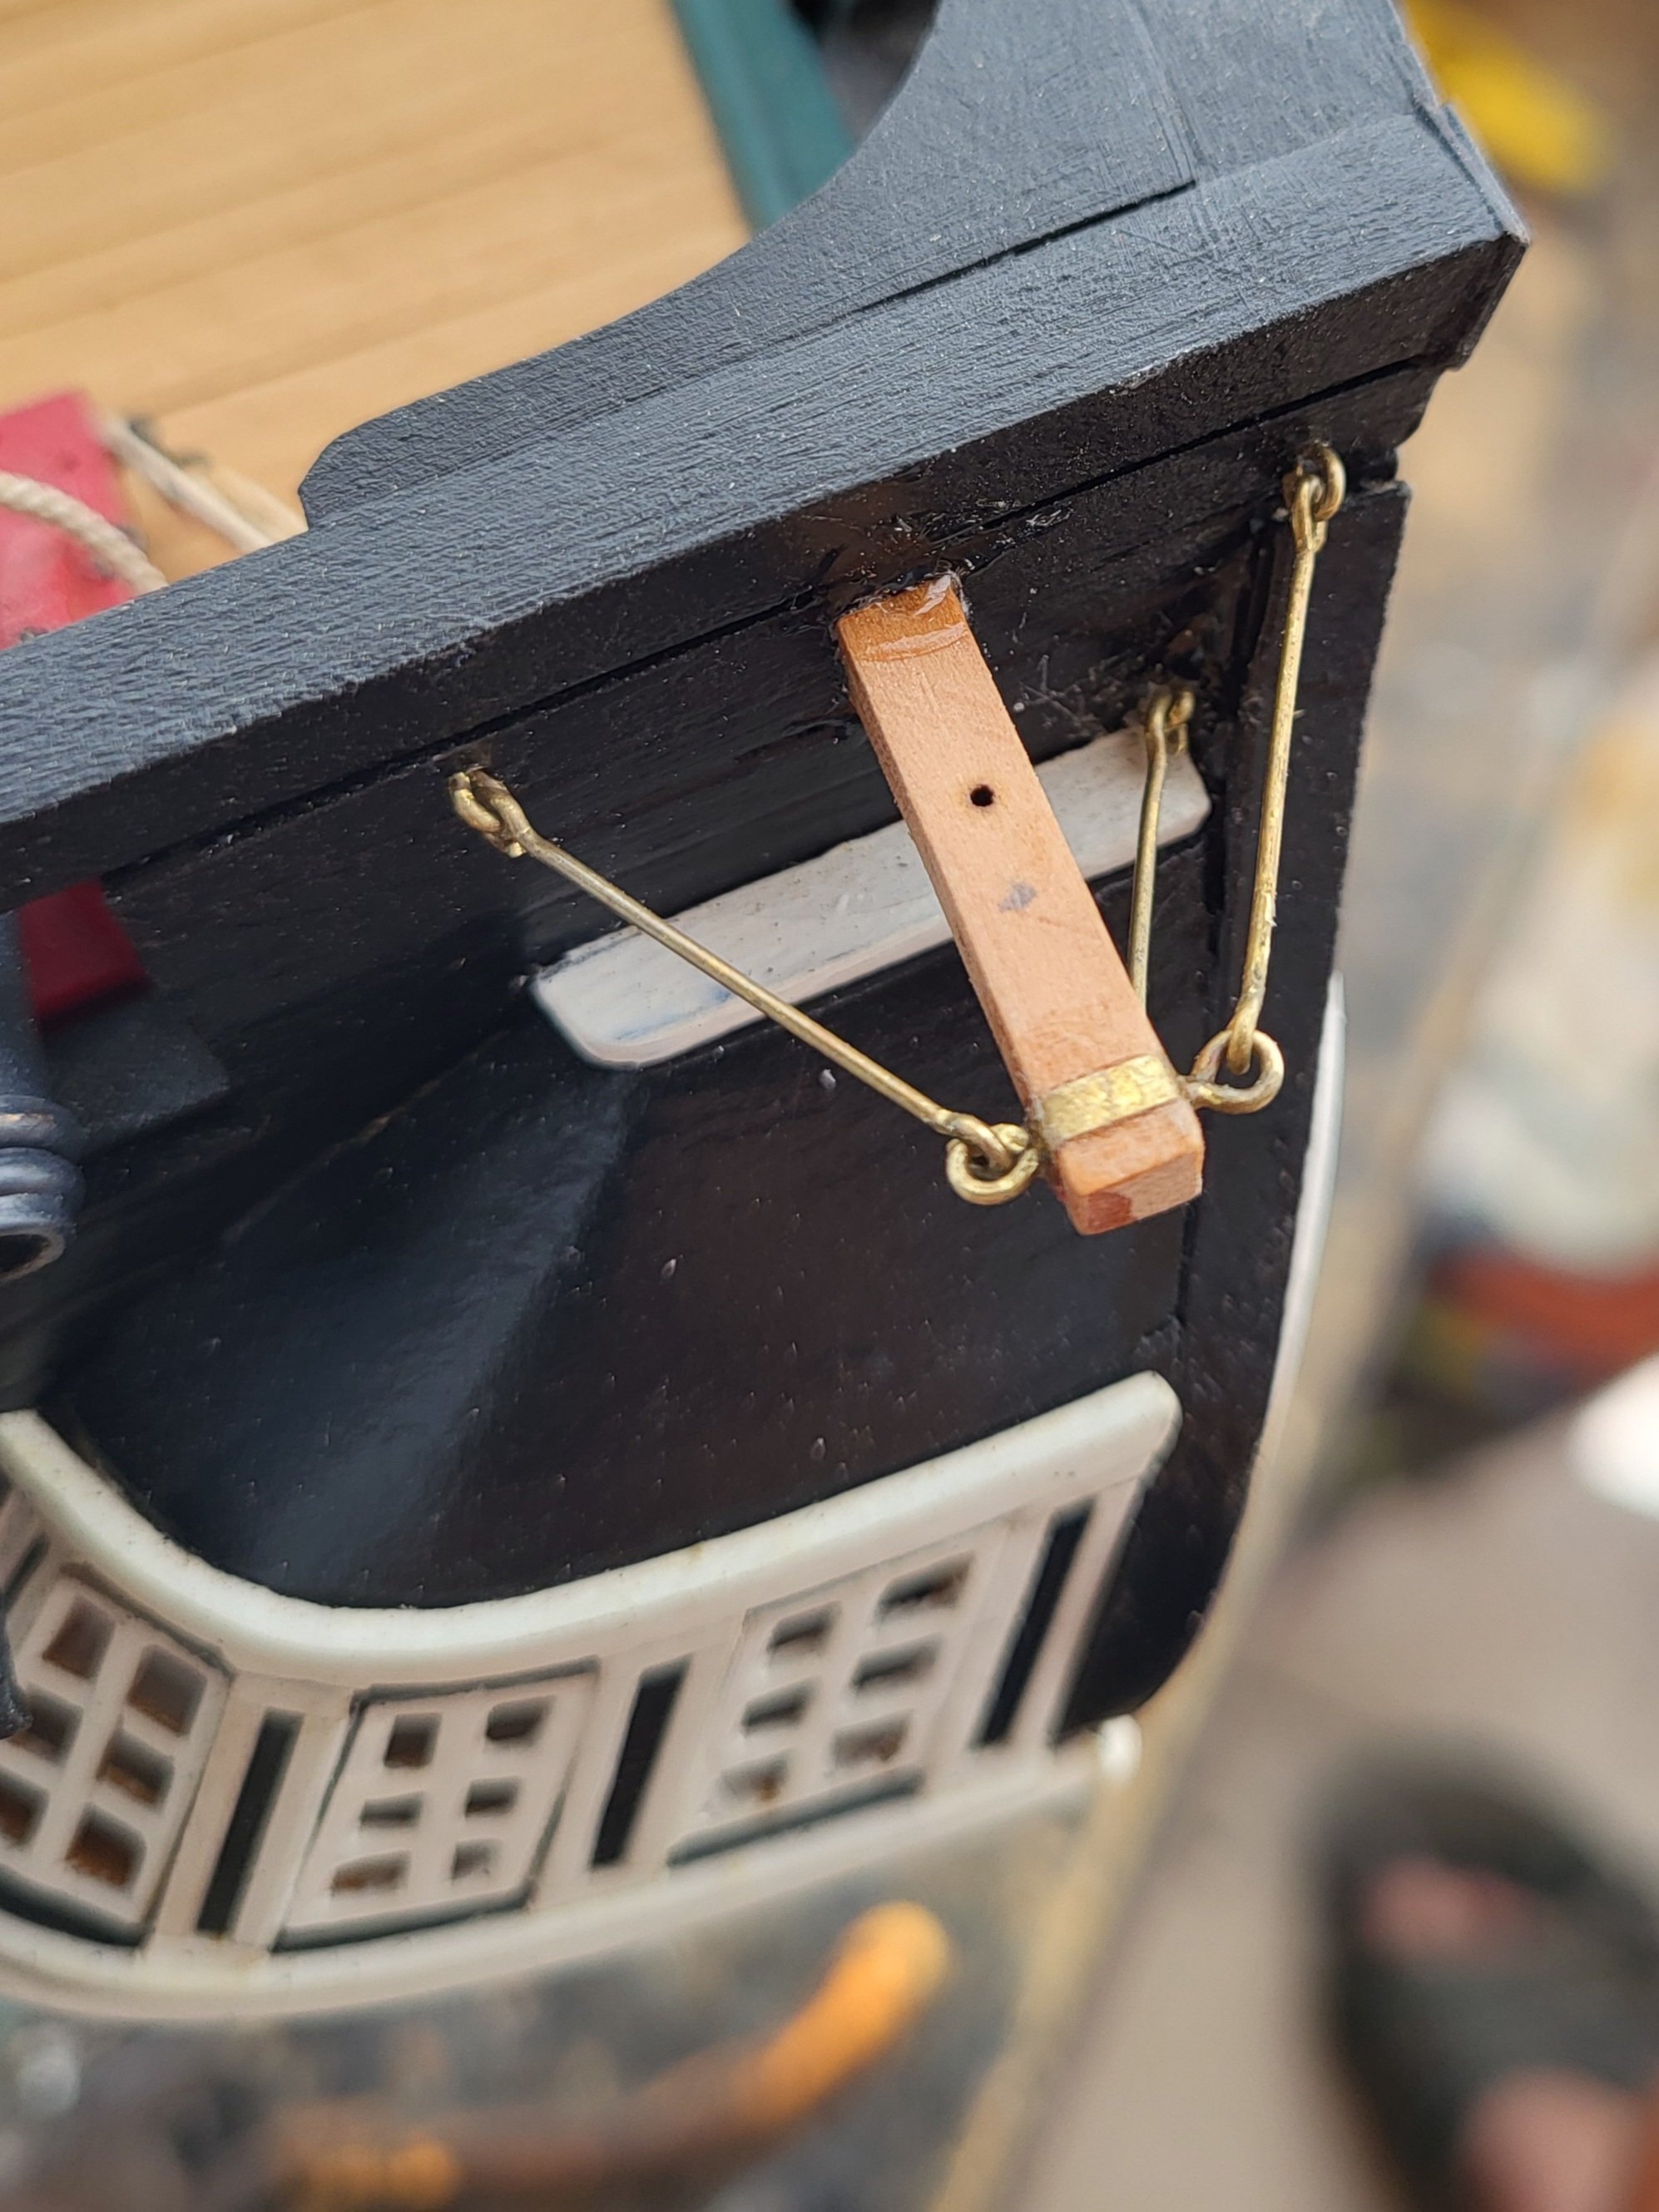
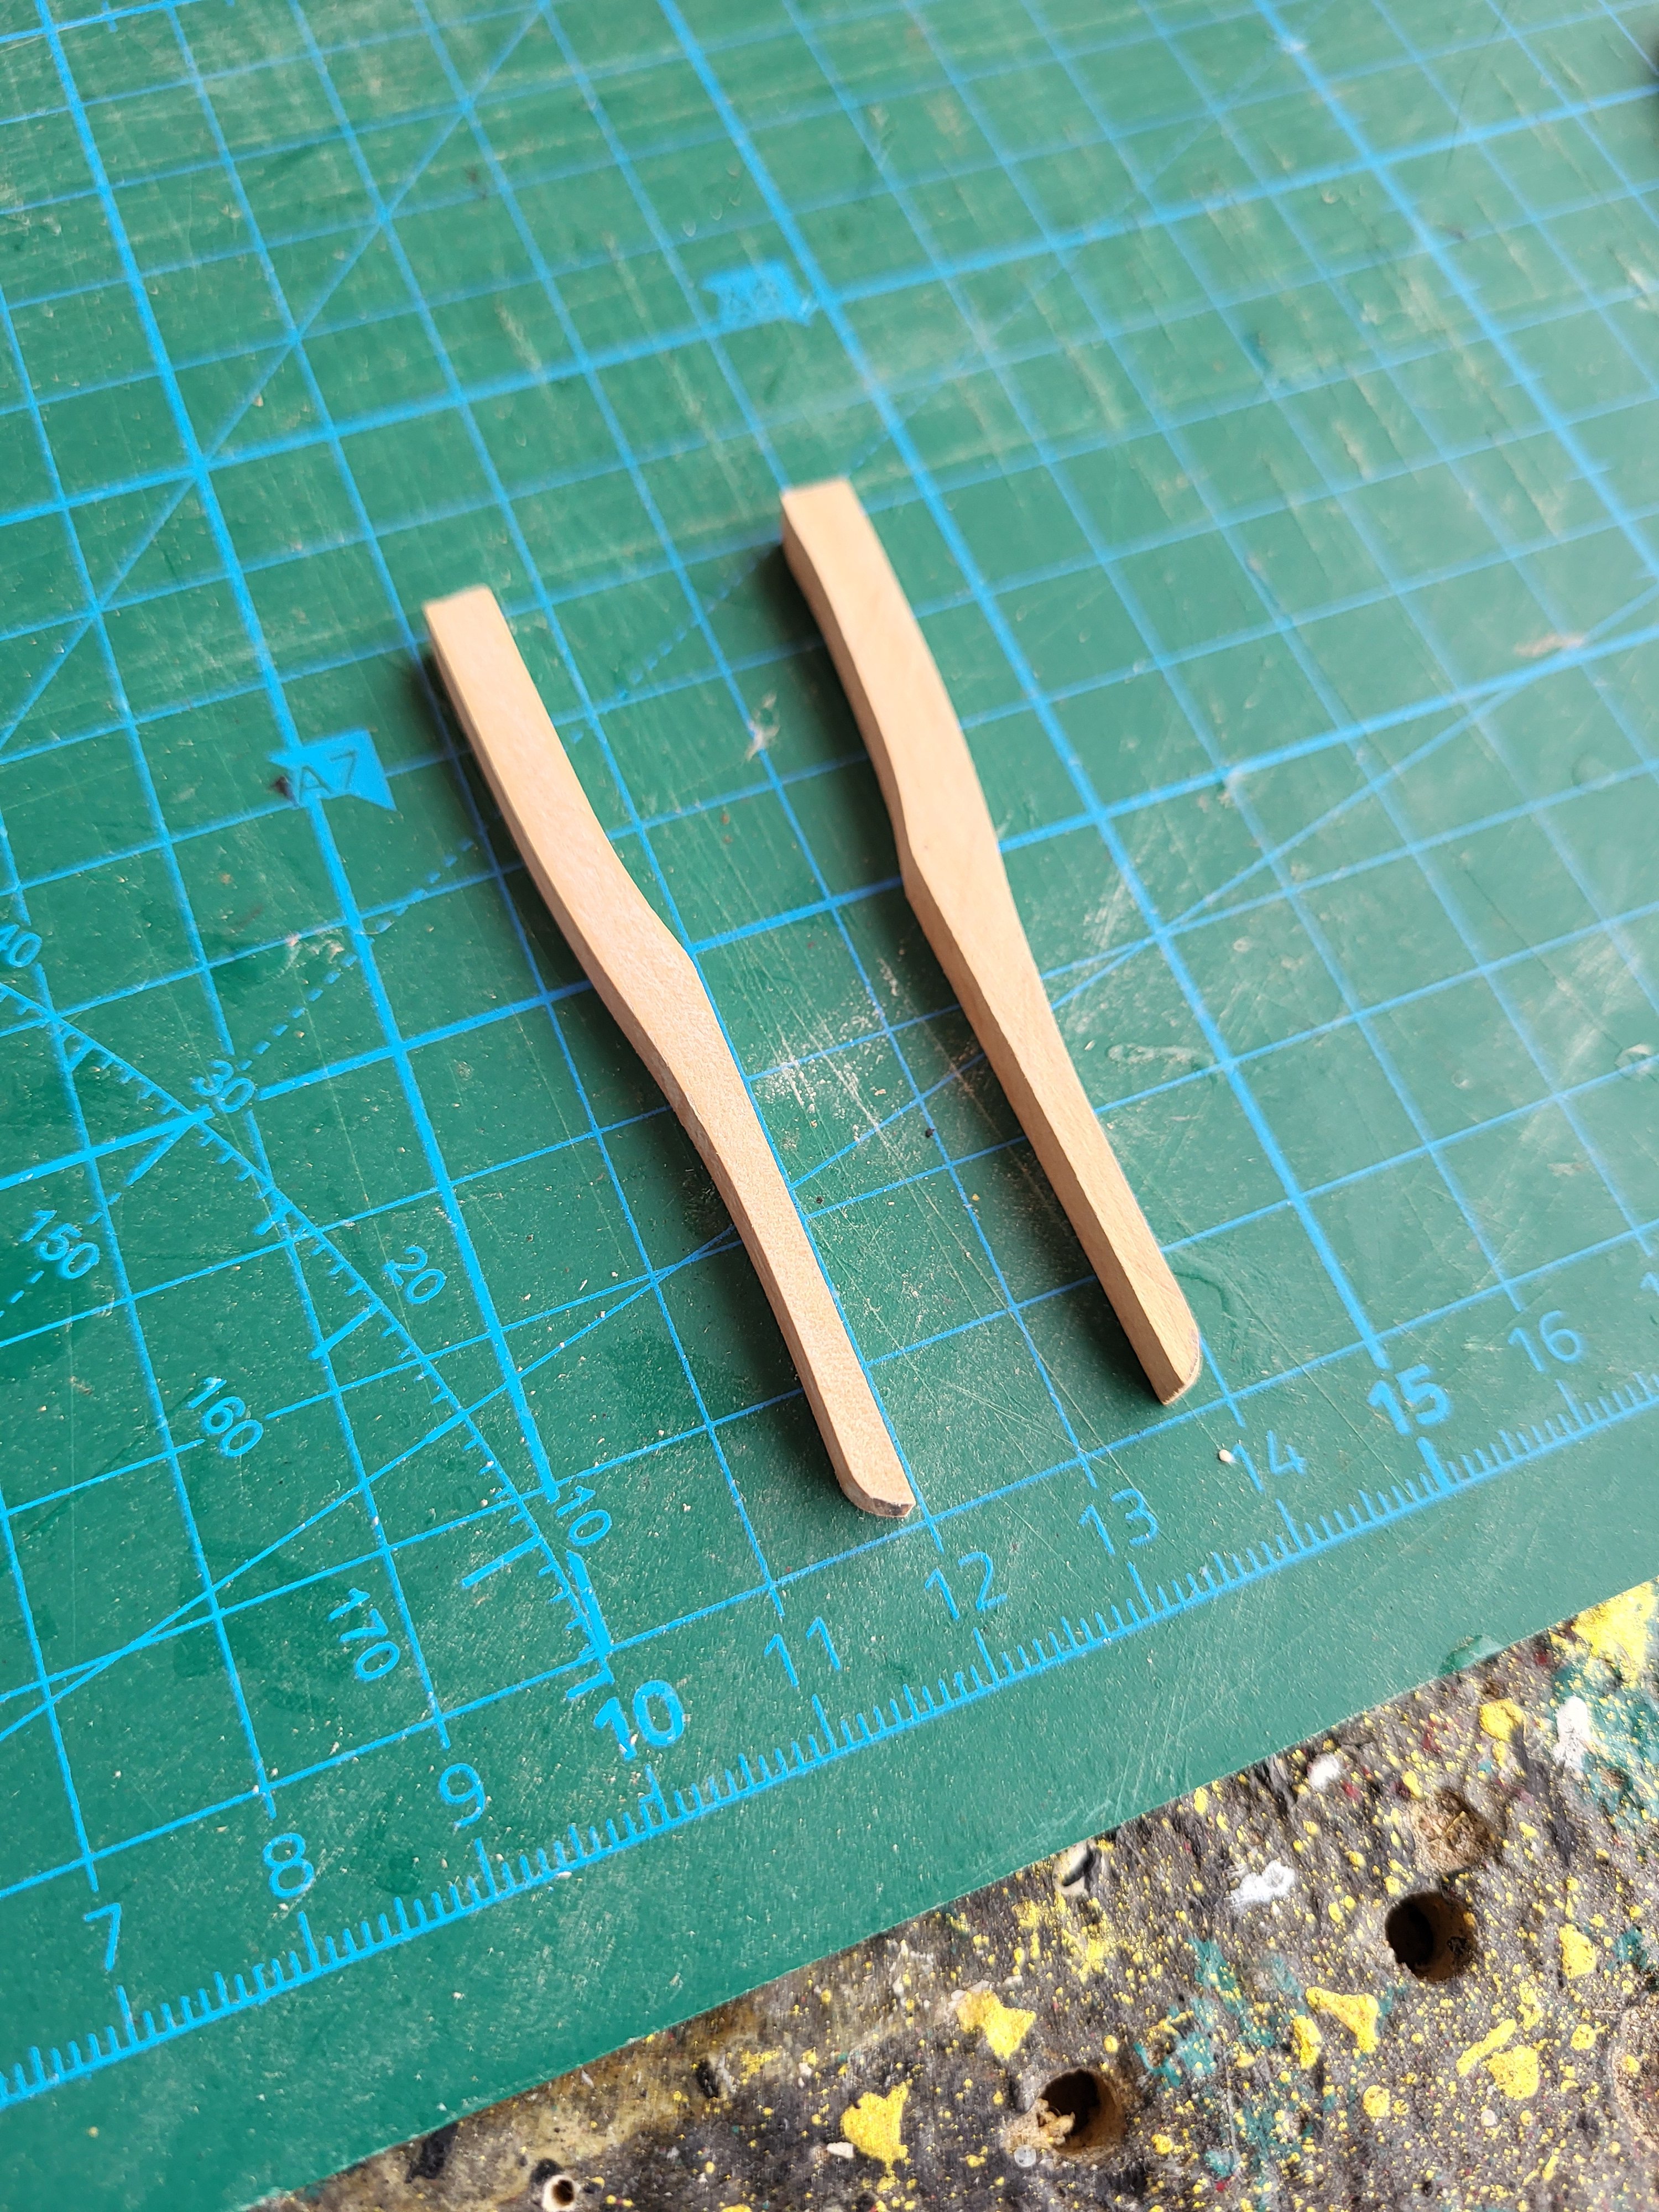
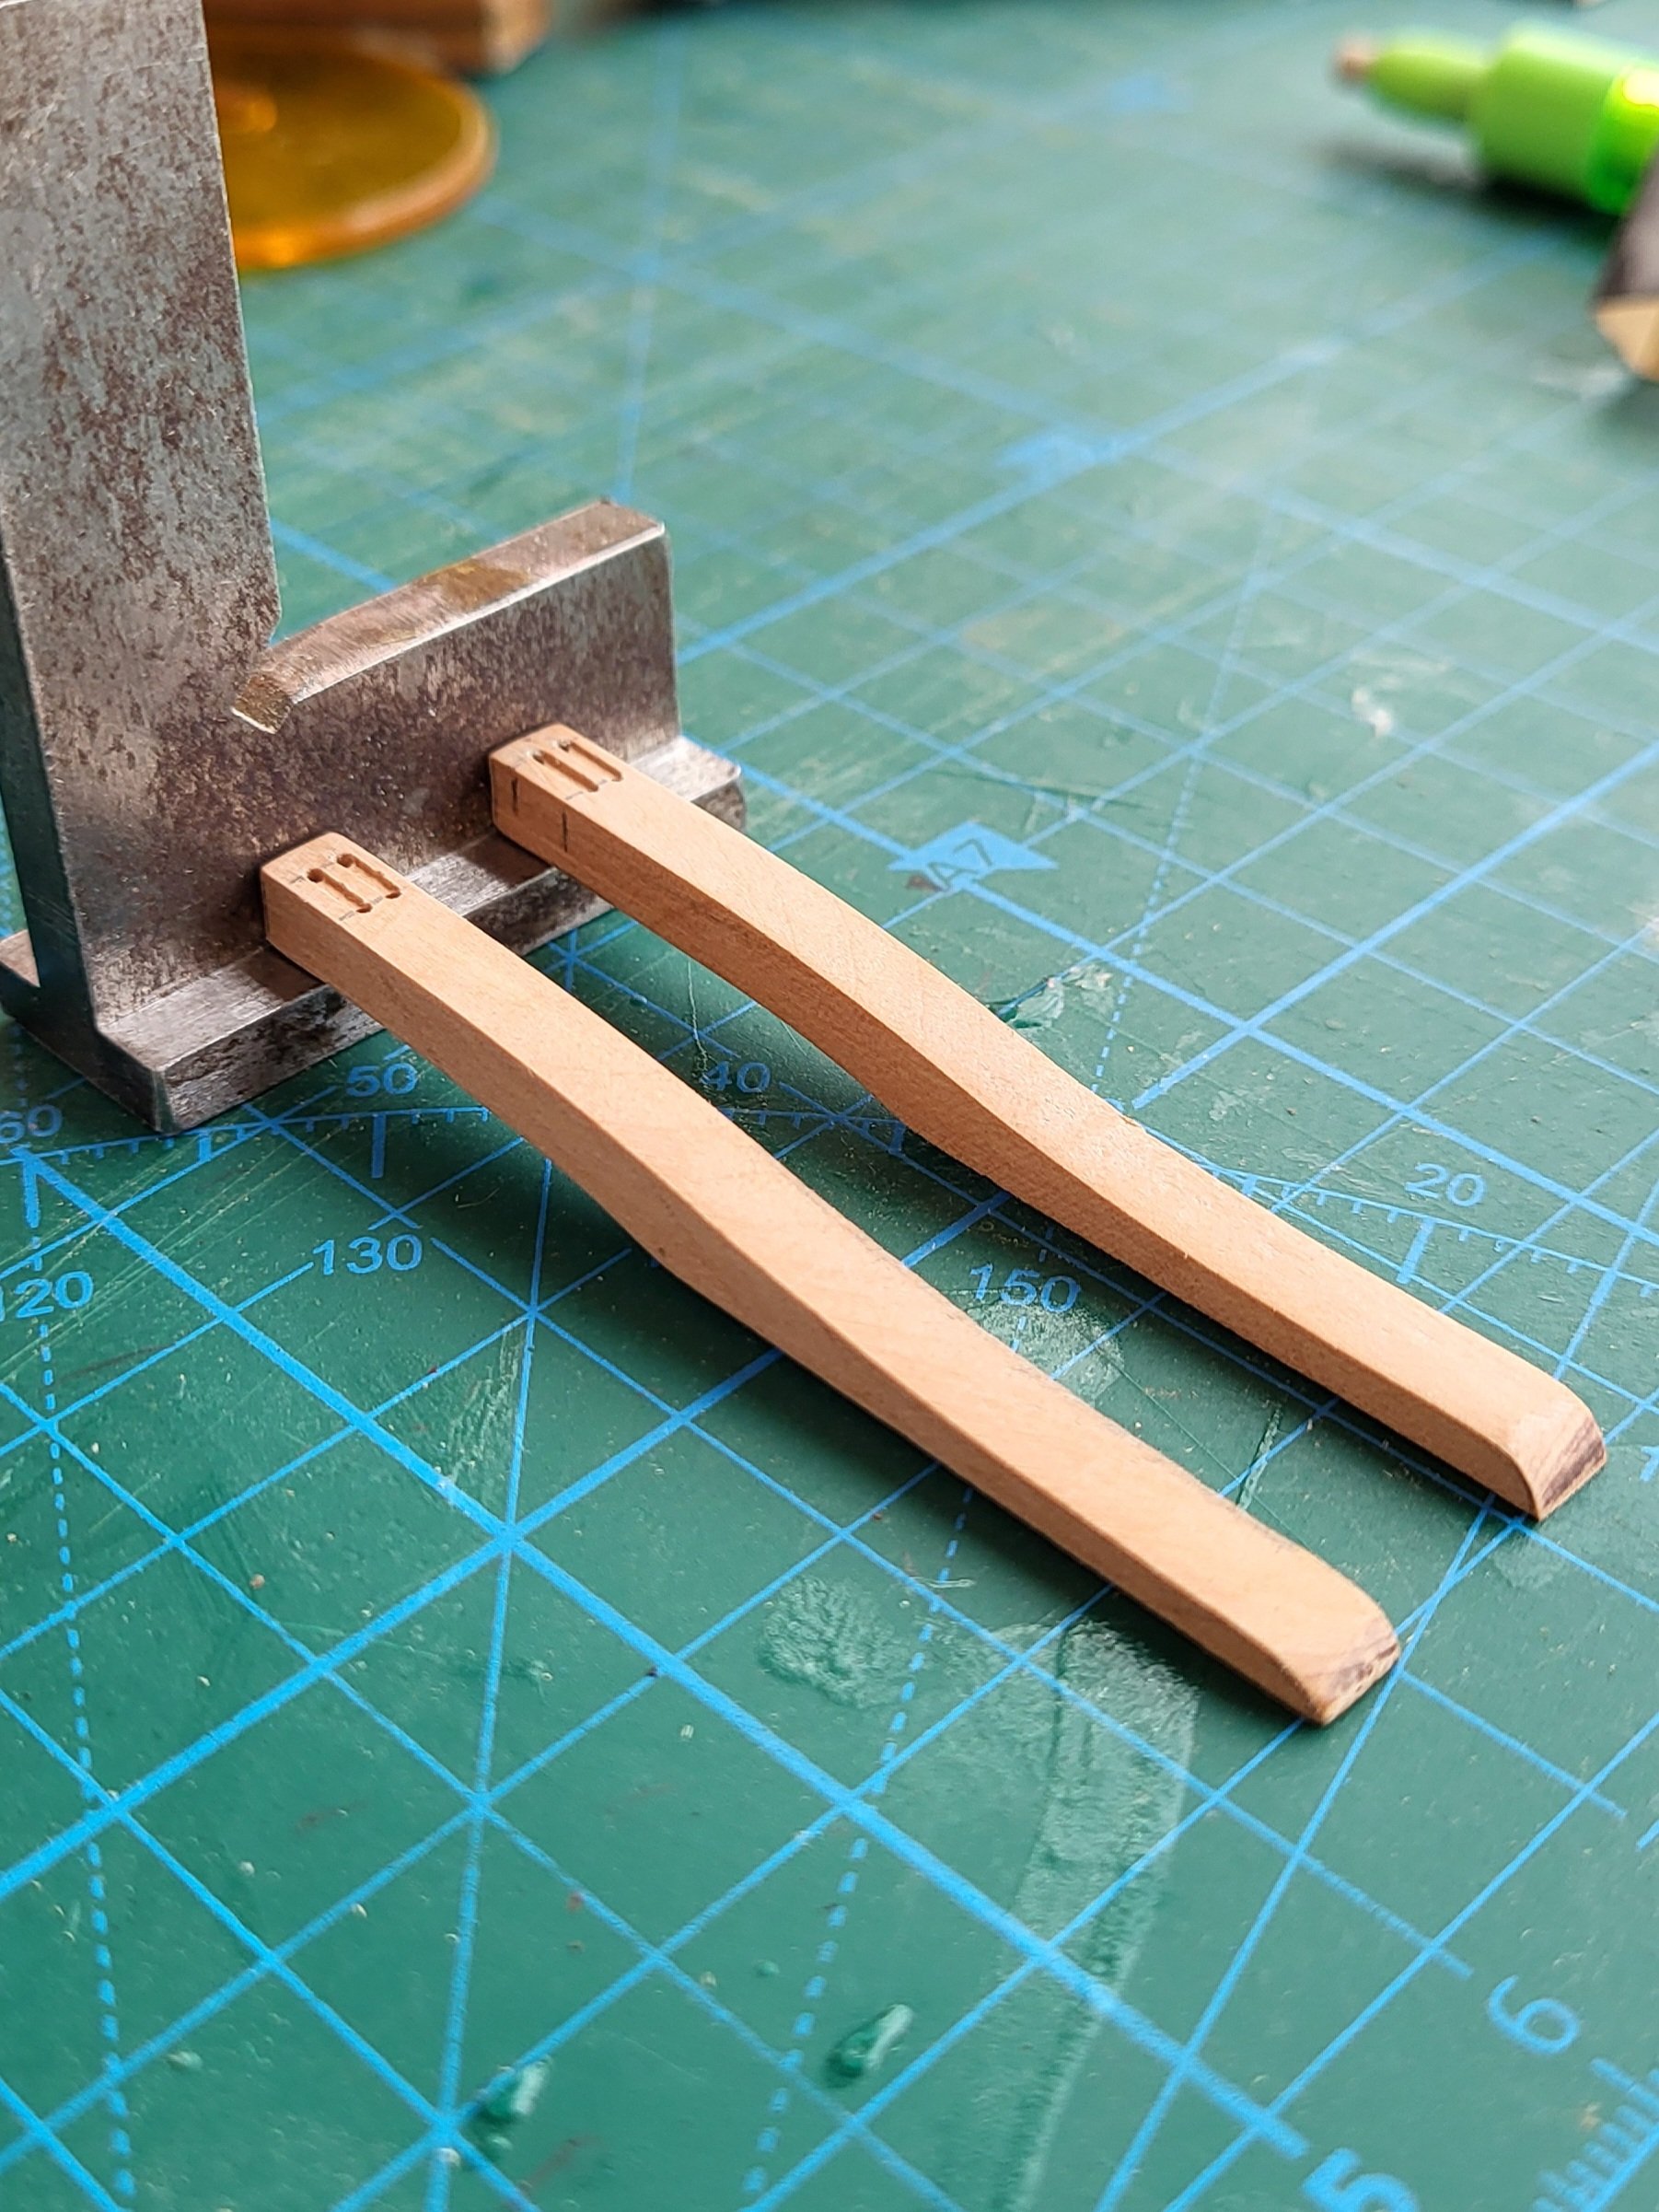
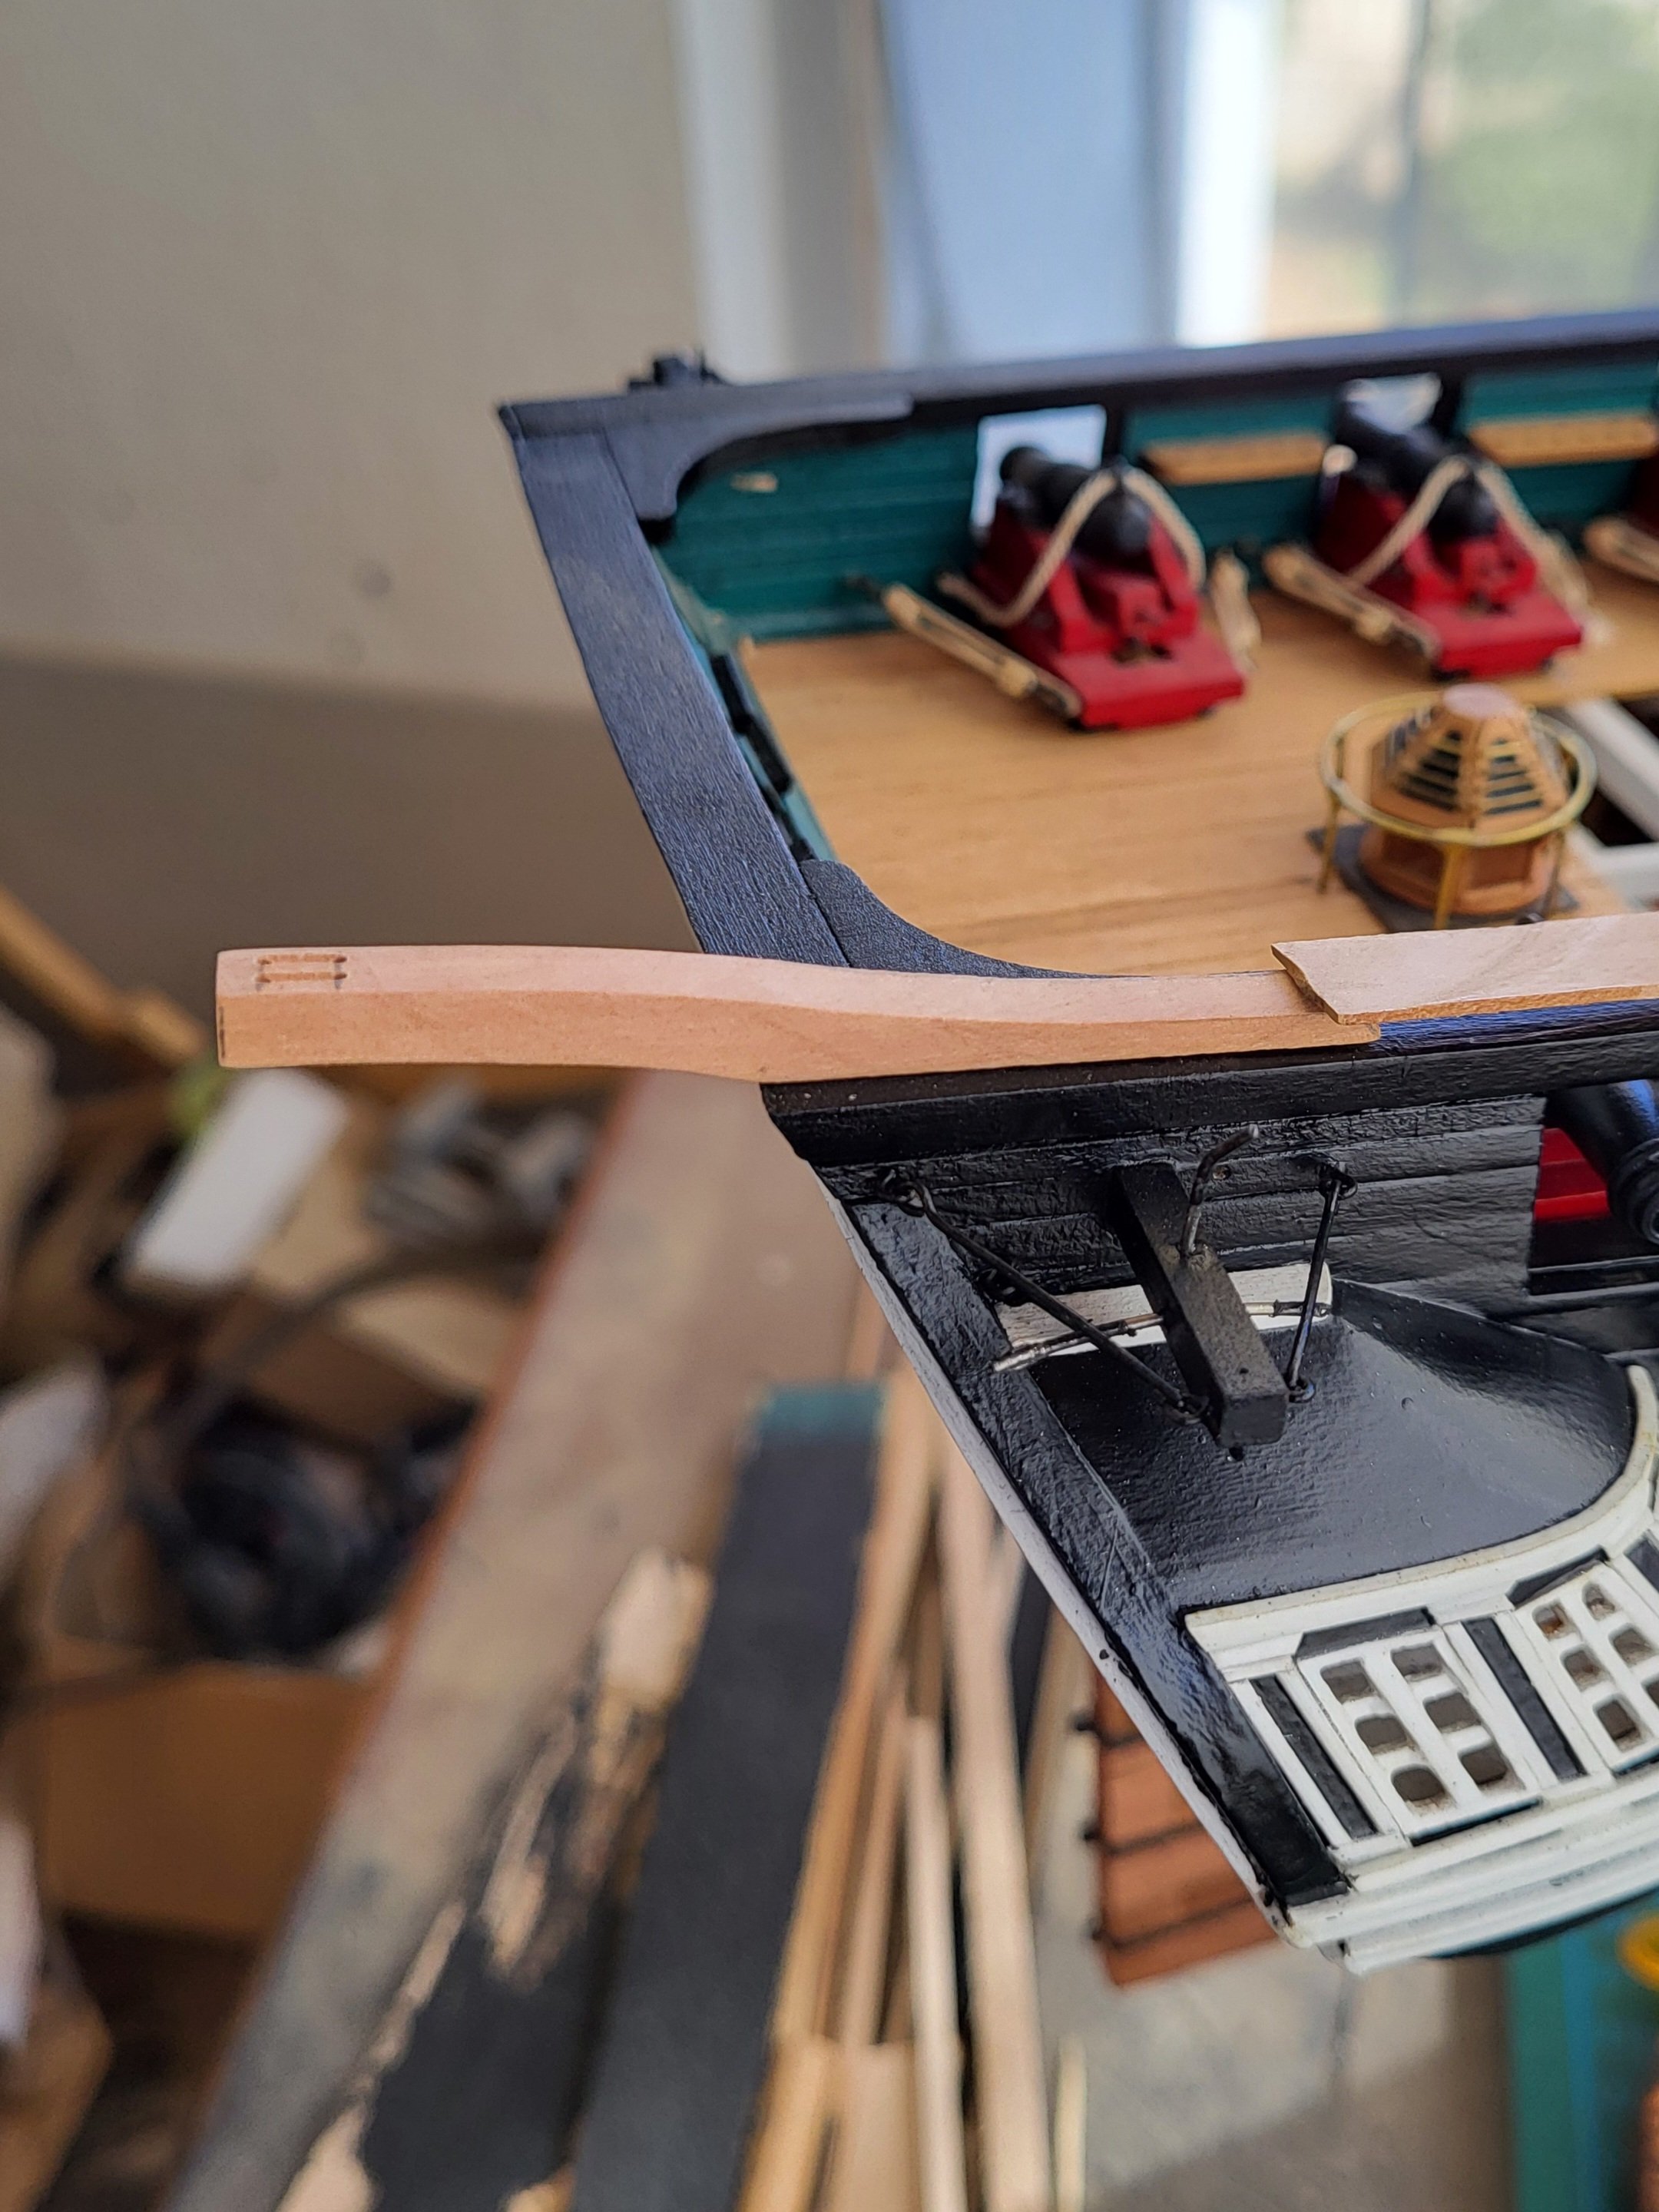
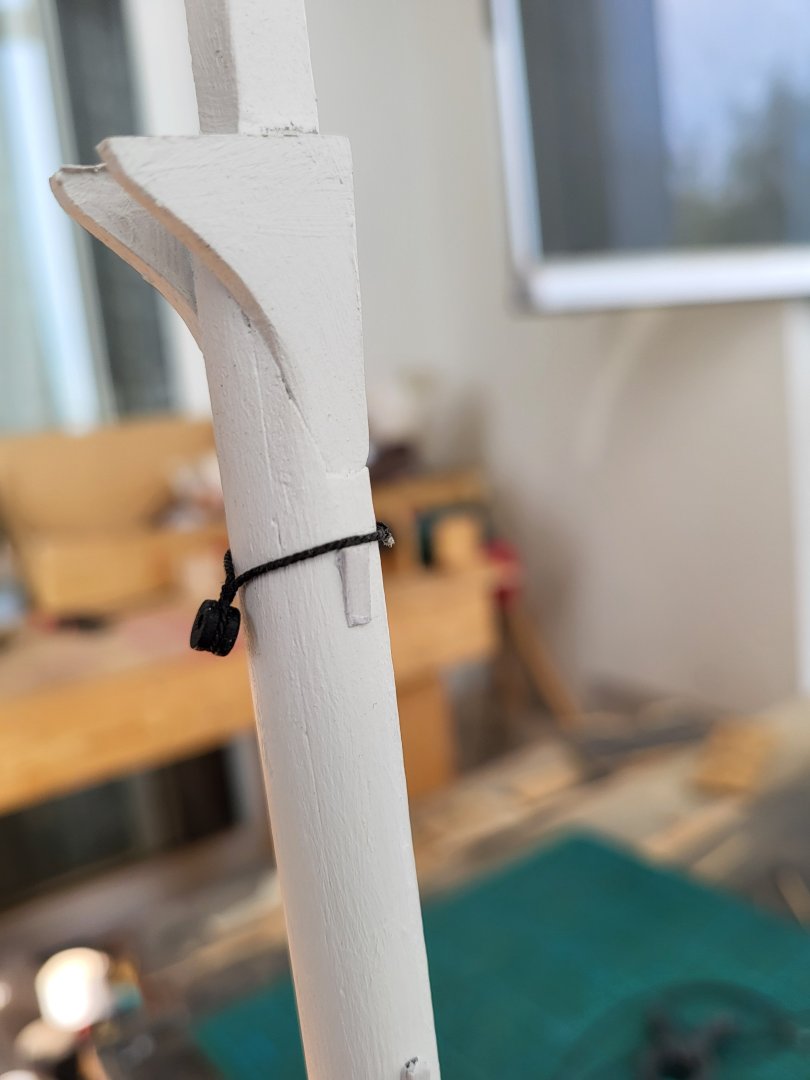
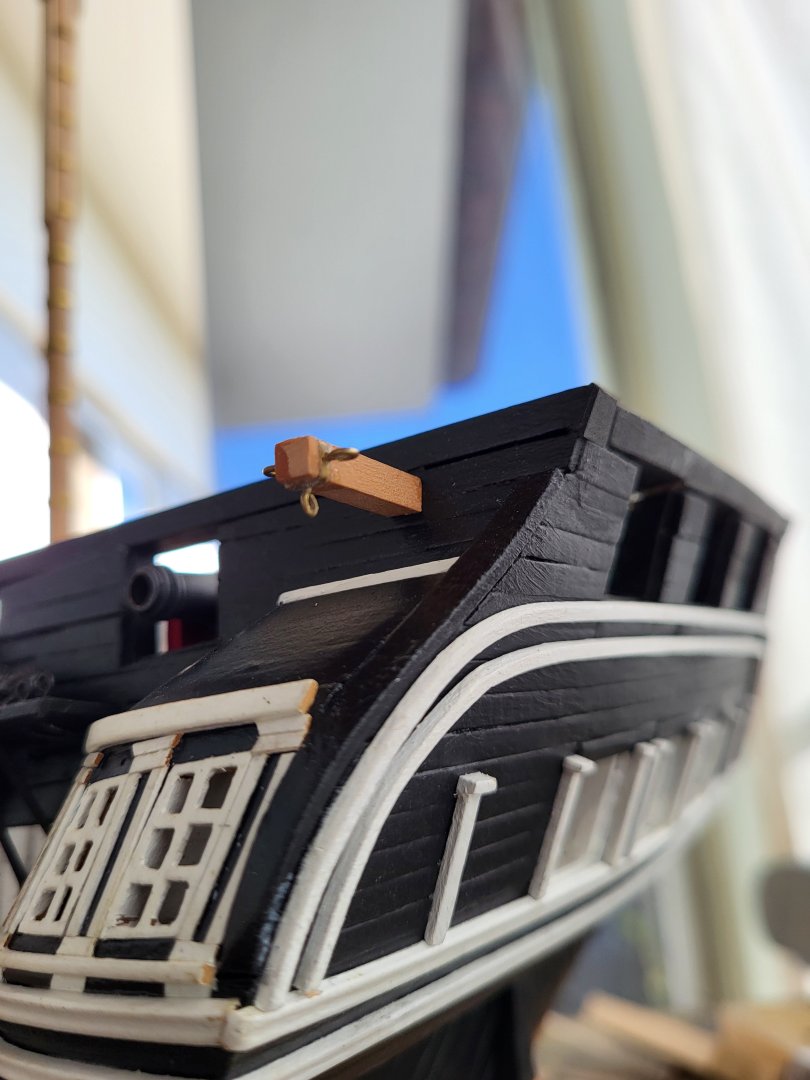
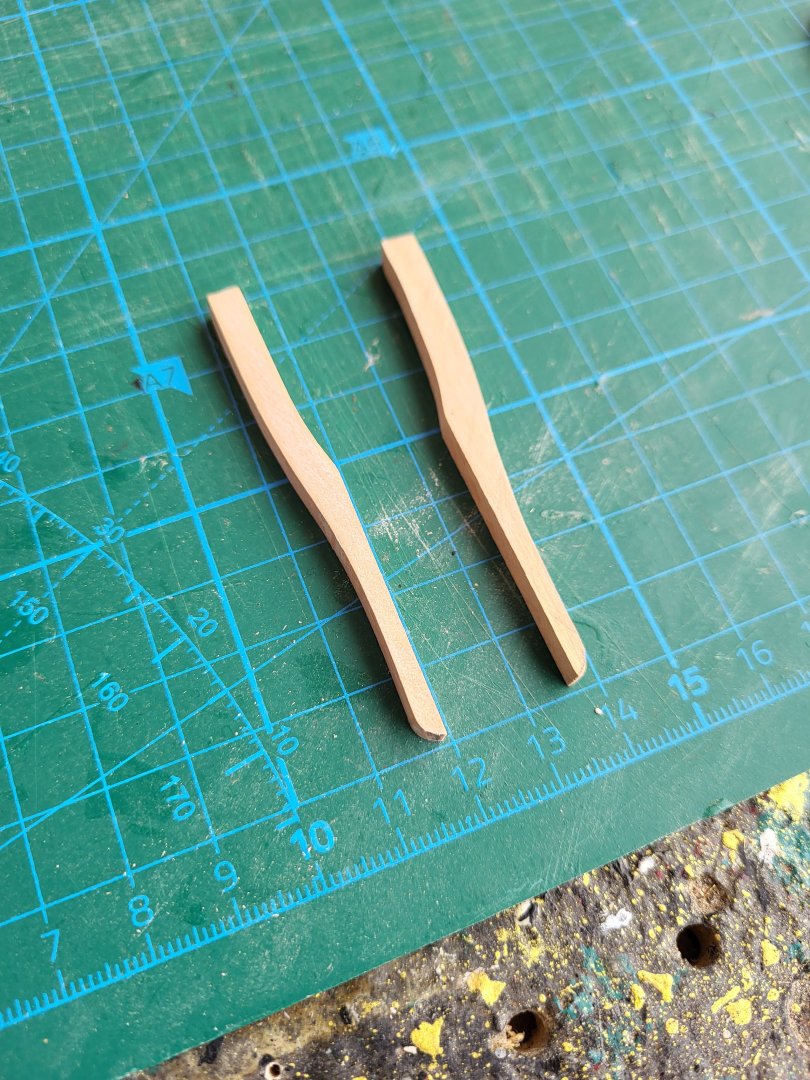
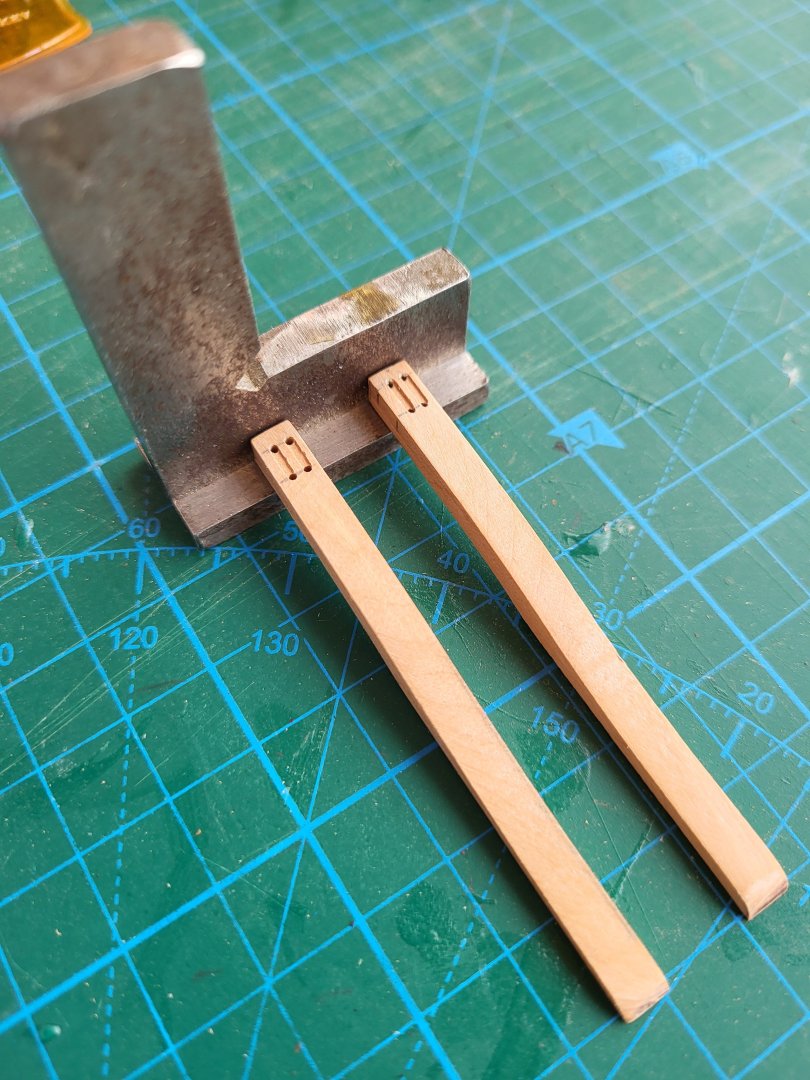
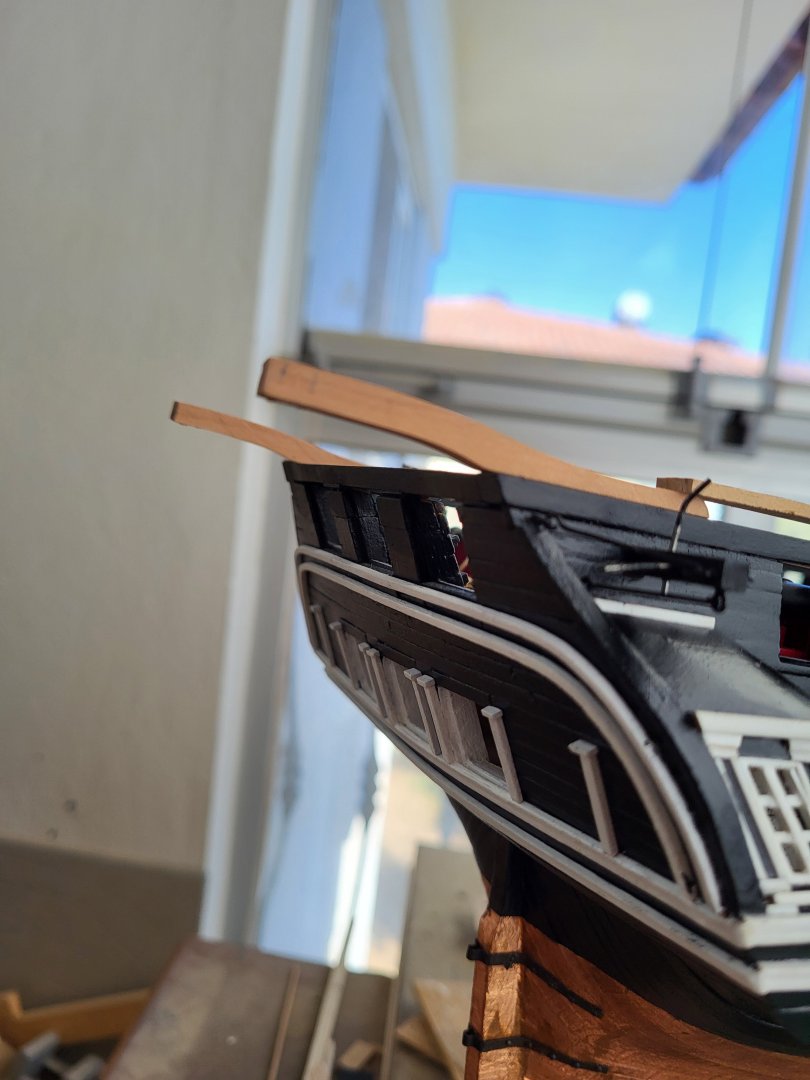
I'm taking a break from working on the masts and tops for a while to complete some of the other missing parts. Right now, I'm fabricating the main brace bumpkins and the stern boat davits.


-
USS Constitution by mtbediz - 1:76
mtbediz replied to mtbediz's topic in - Build logs for subjects built 1751 - 1800
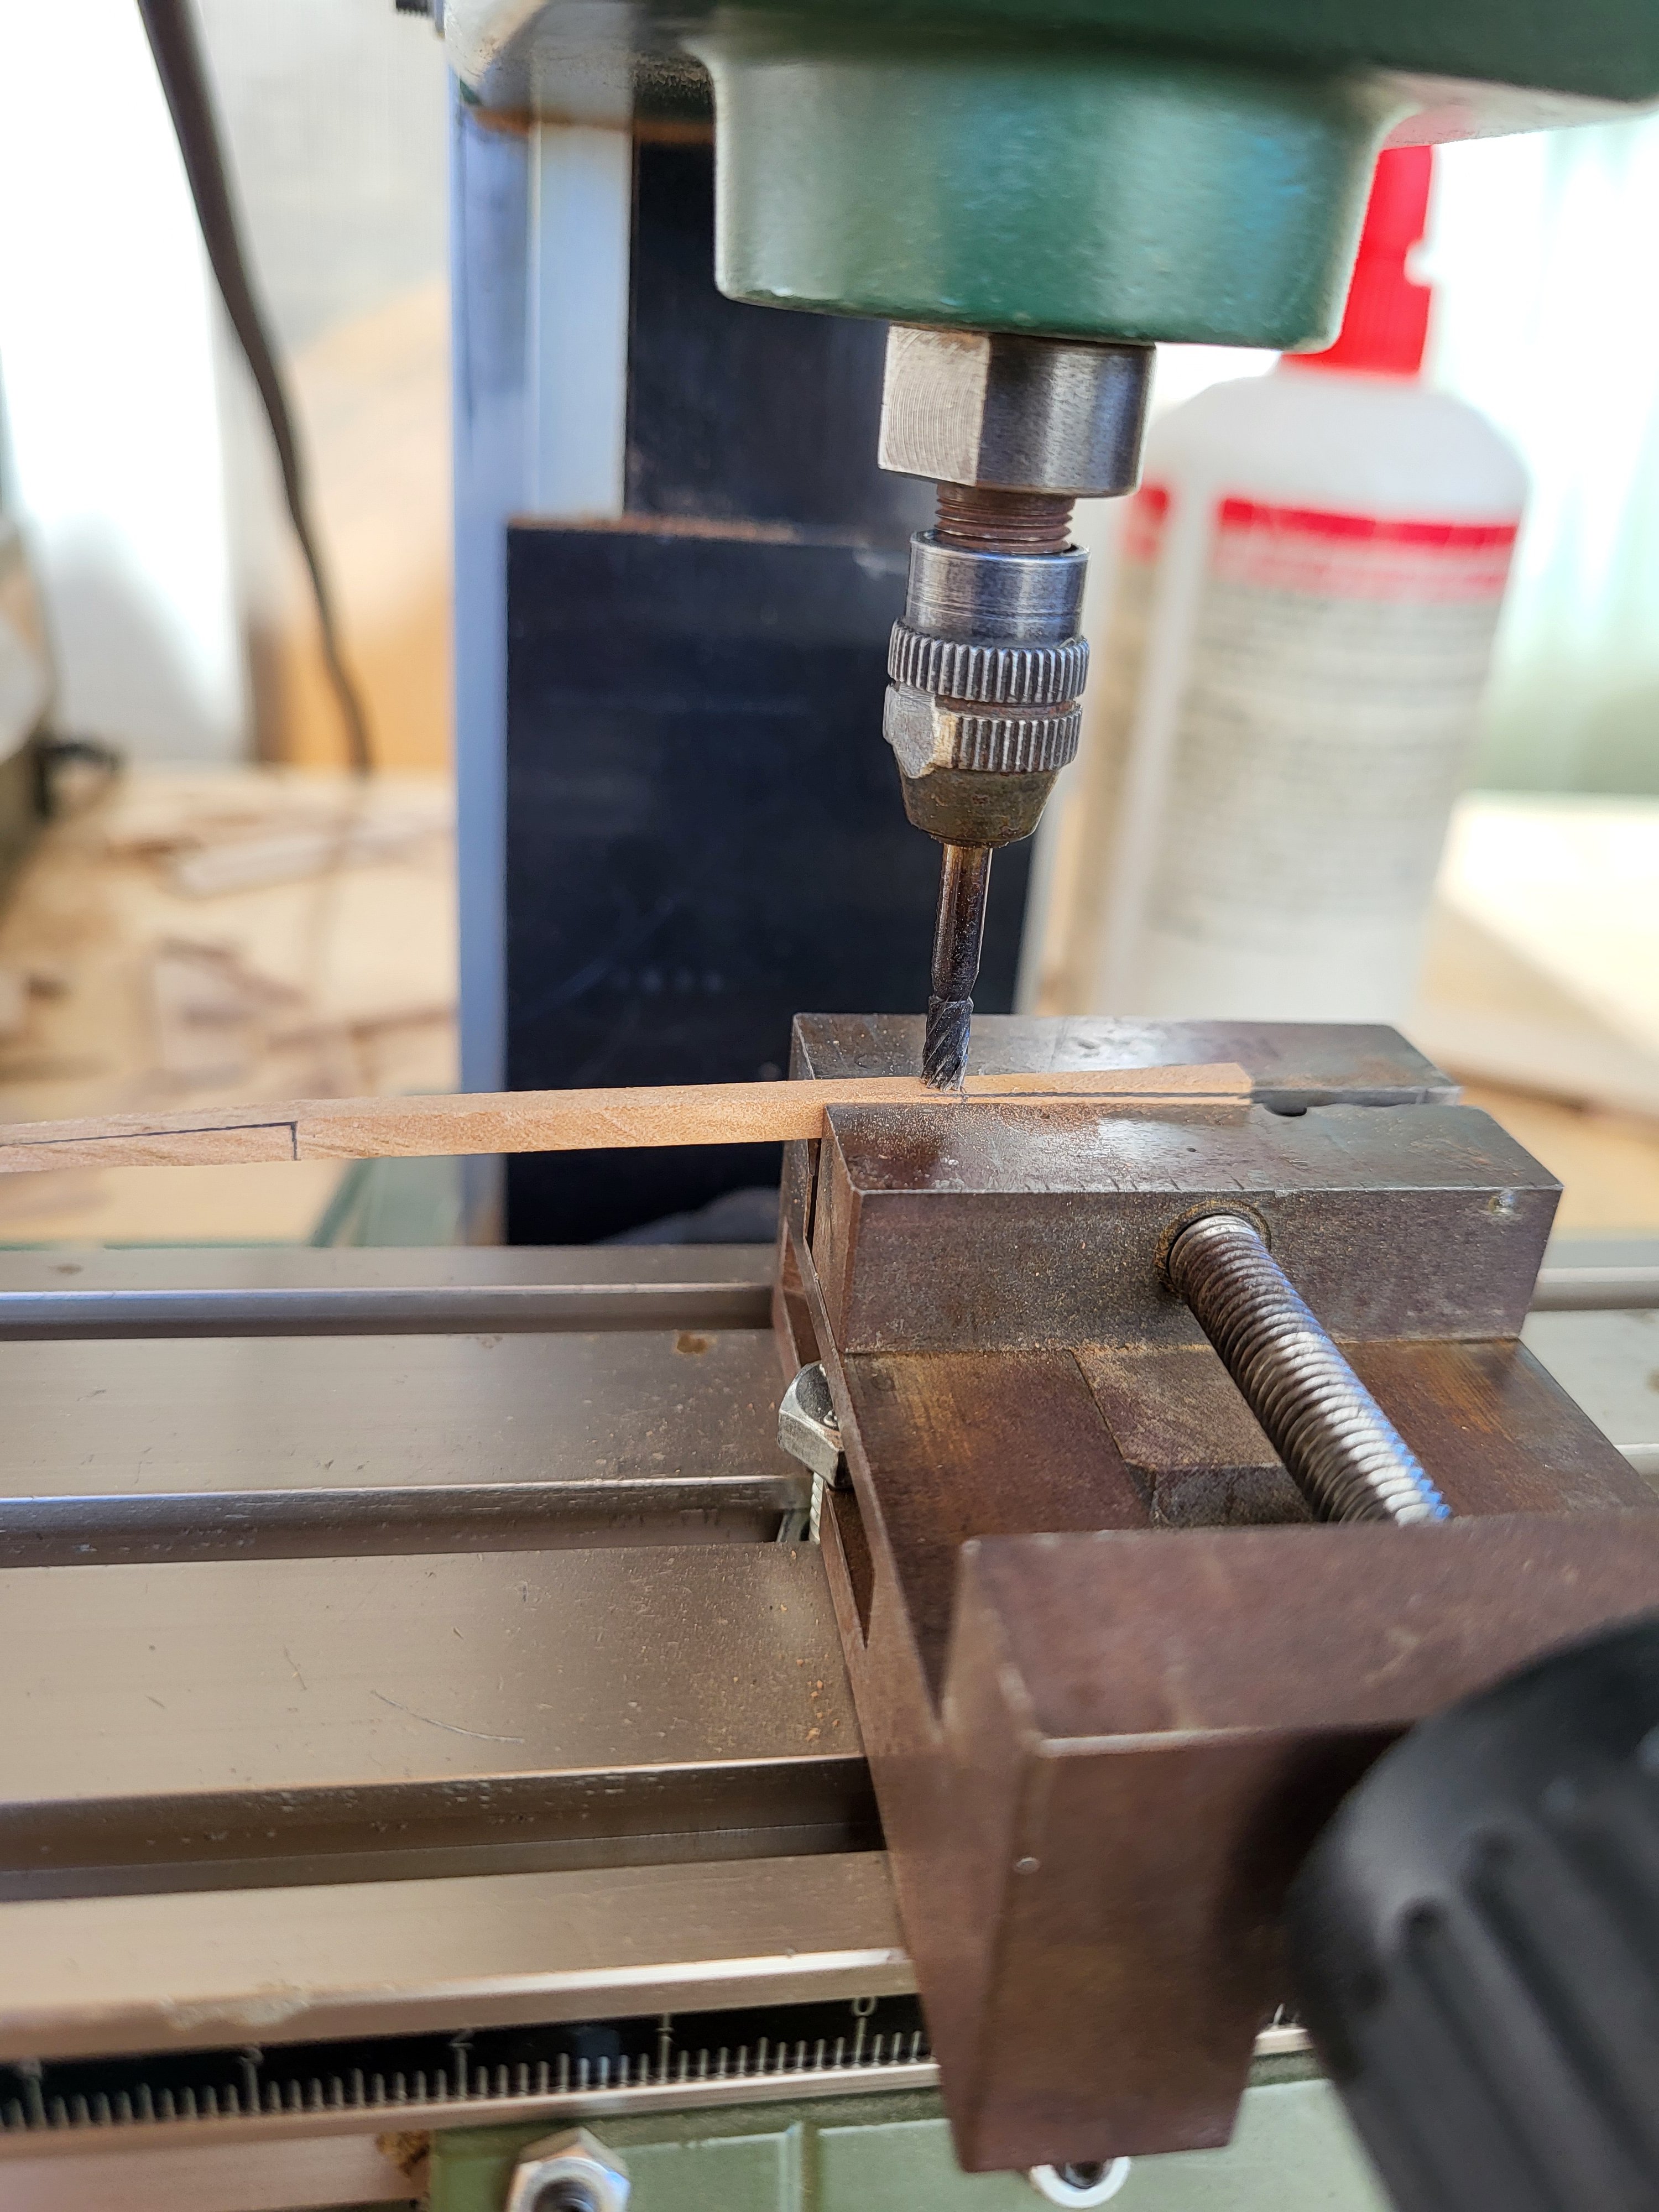
Thanks! With my milling machine, I can get these joints looking sharp and clean. -
USS Constitution by mtbediz - 1:76
mtbediz replied to mtbediz's topic in - Build logs for subjects built 1751 - 1800
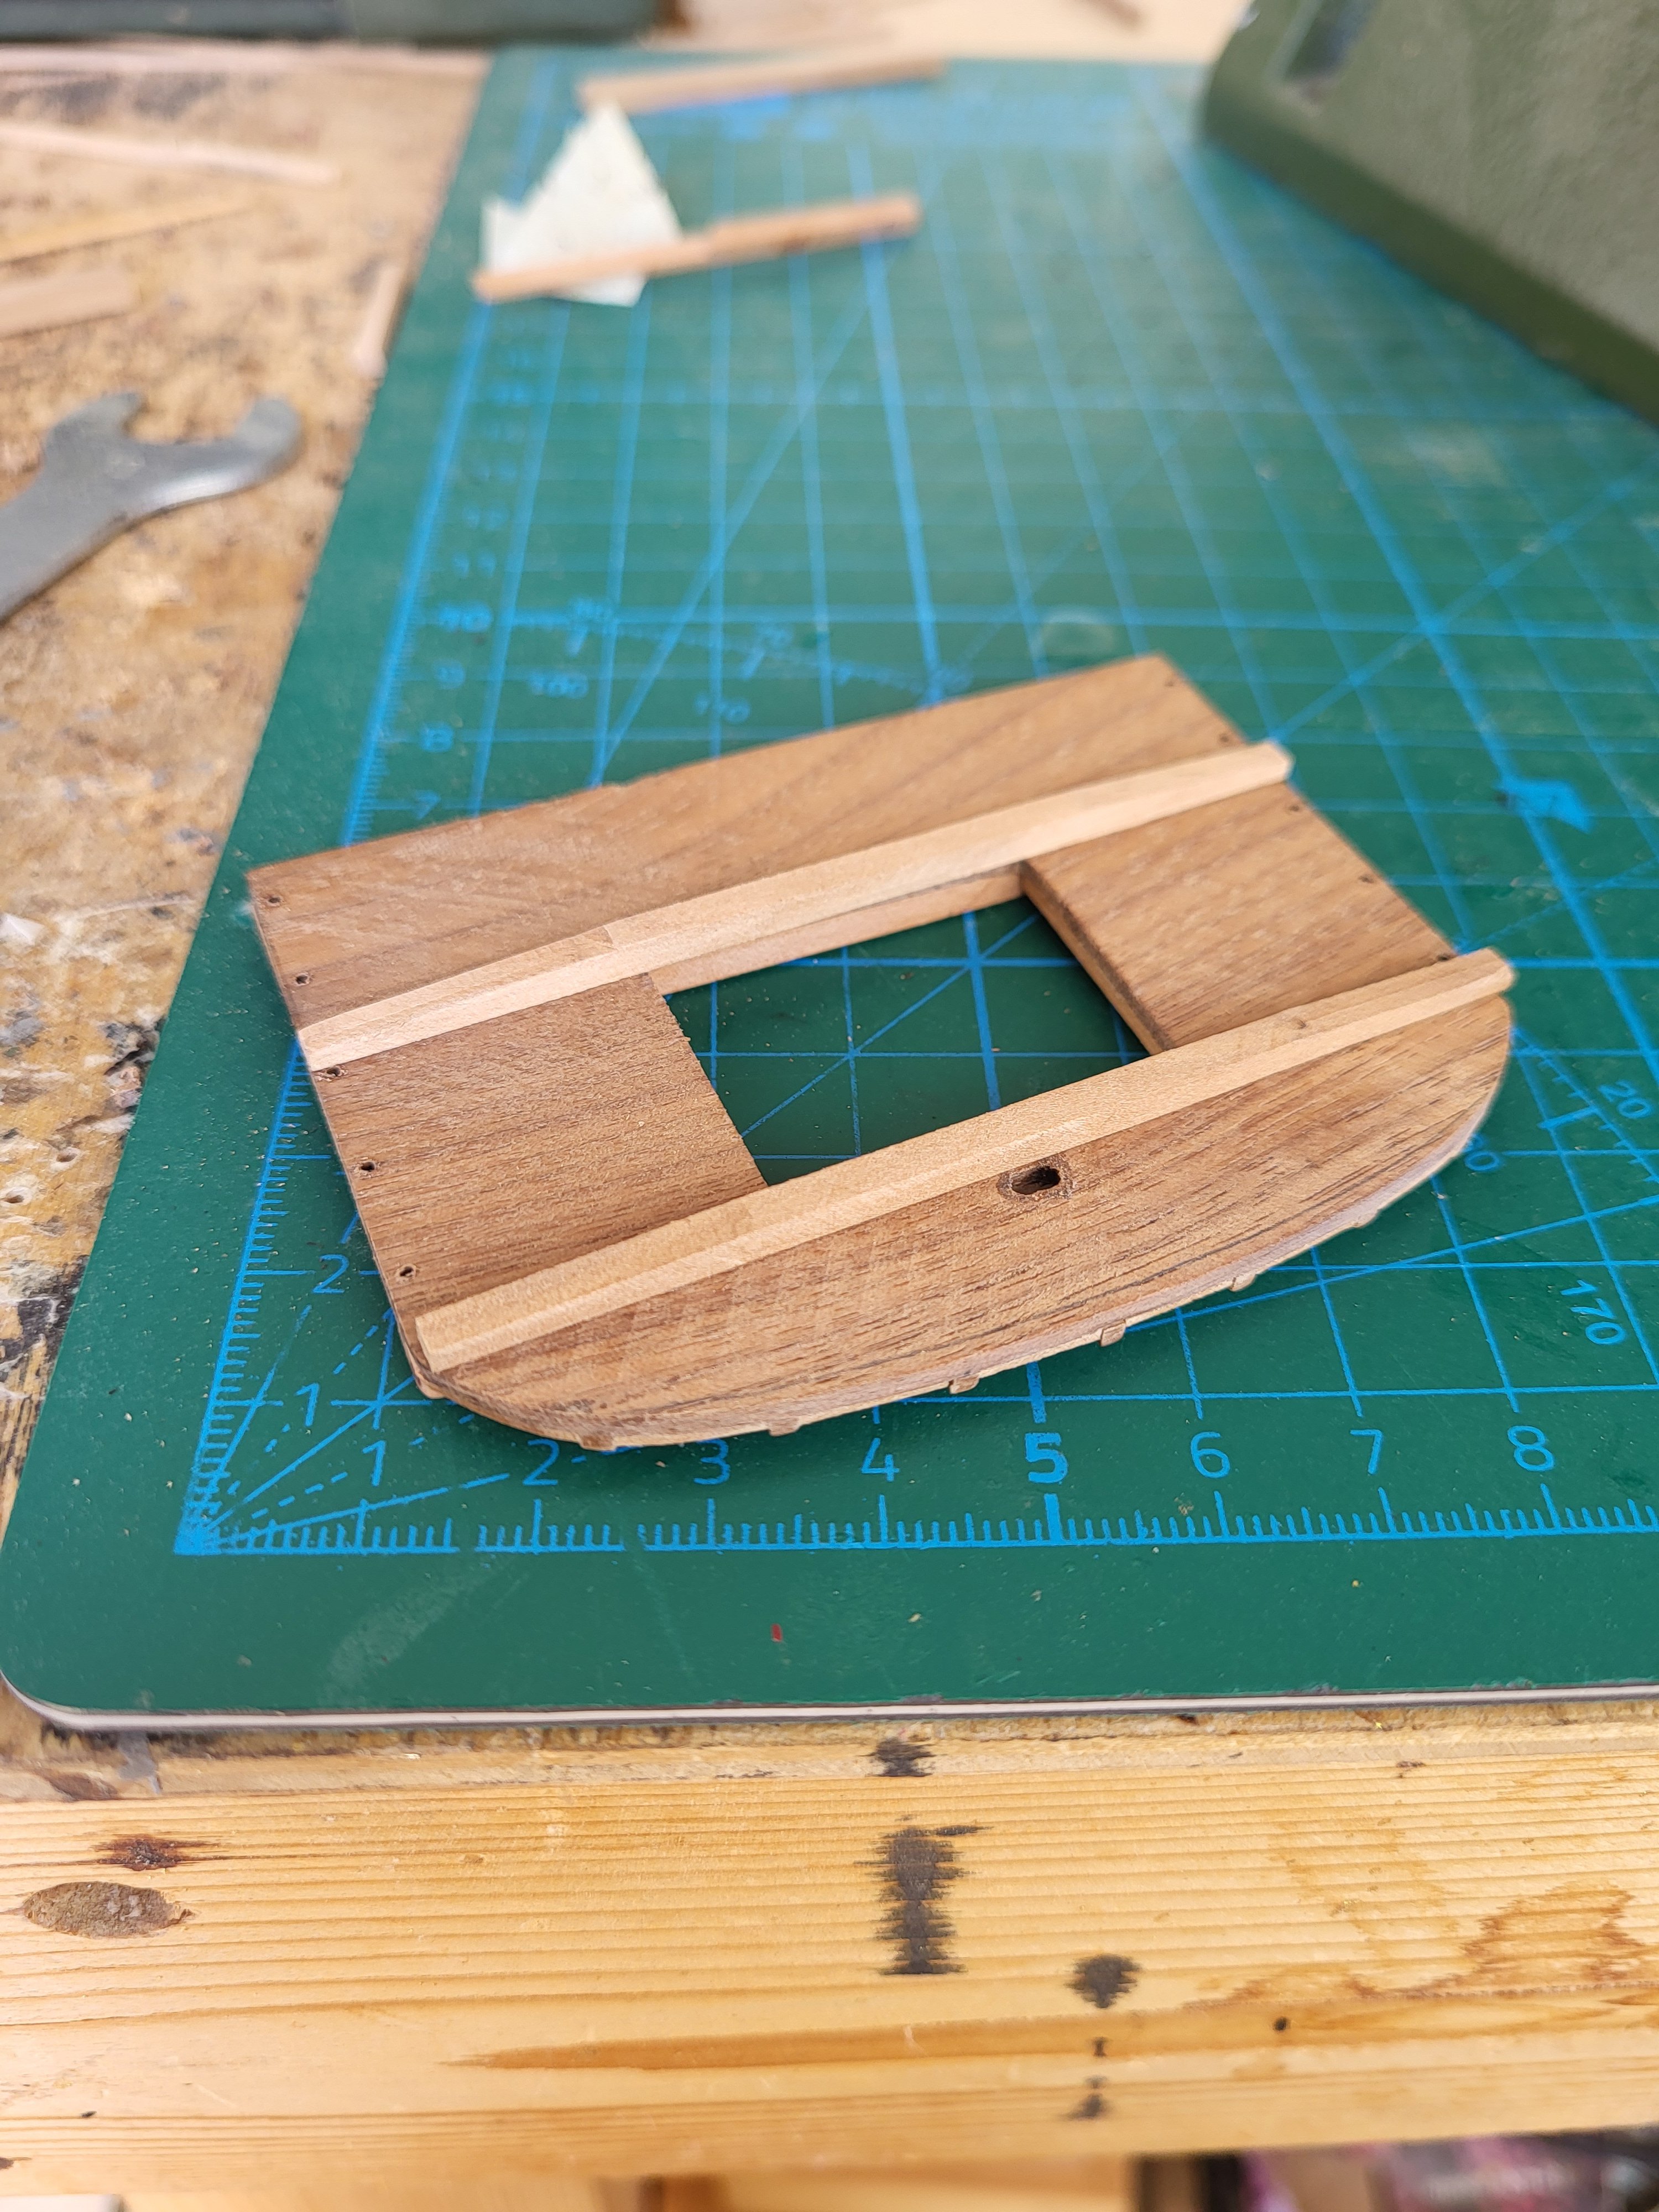
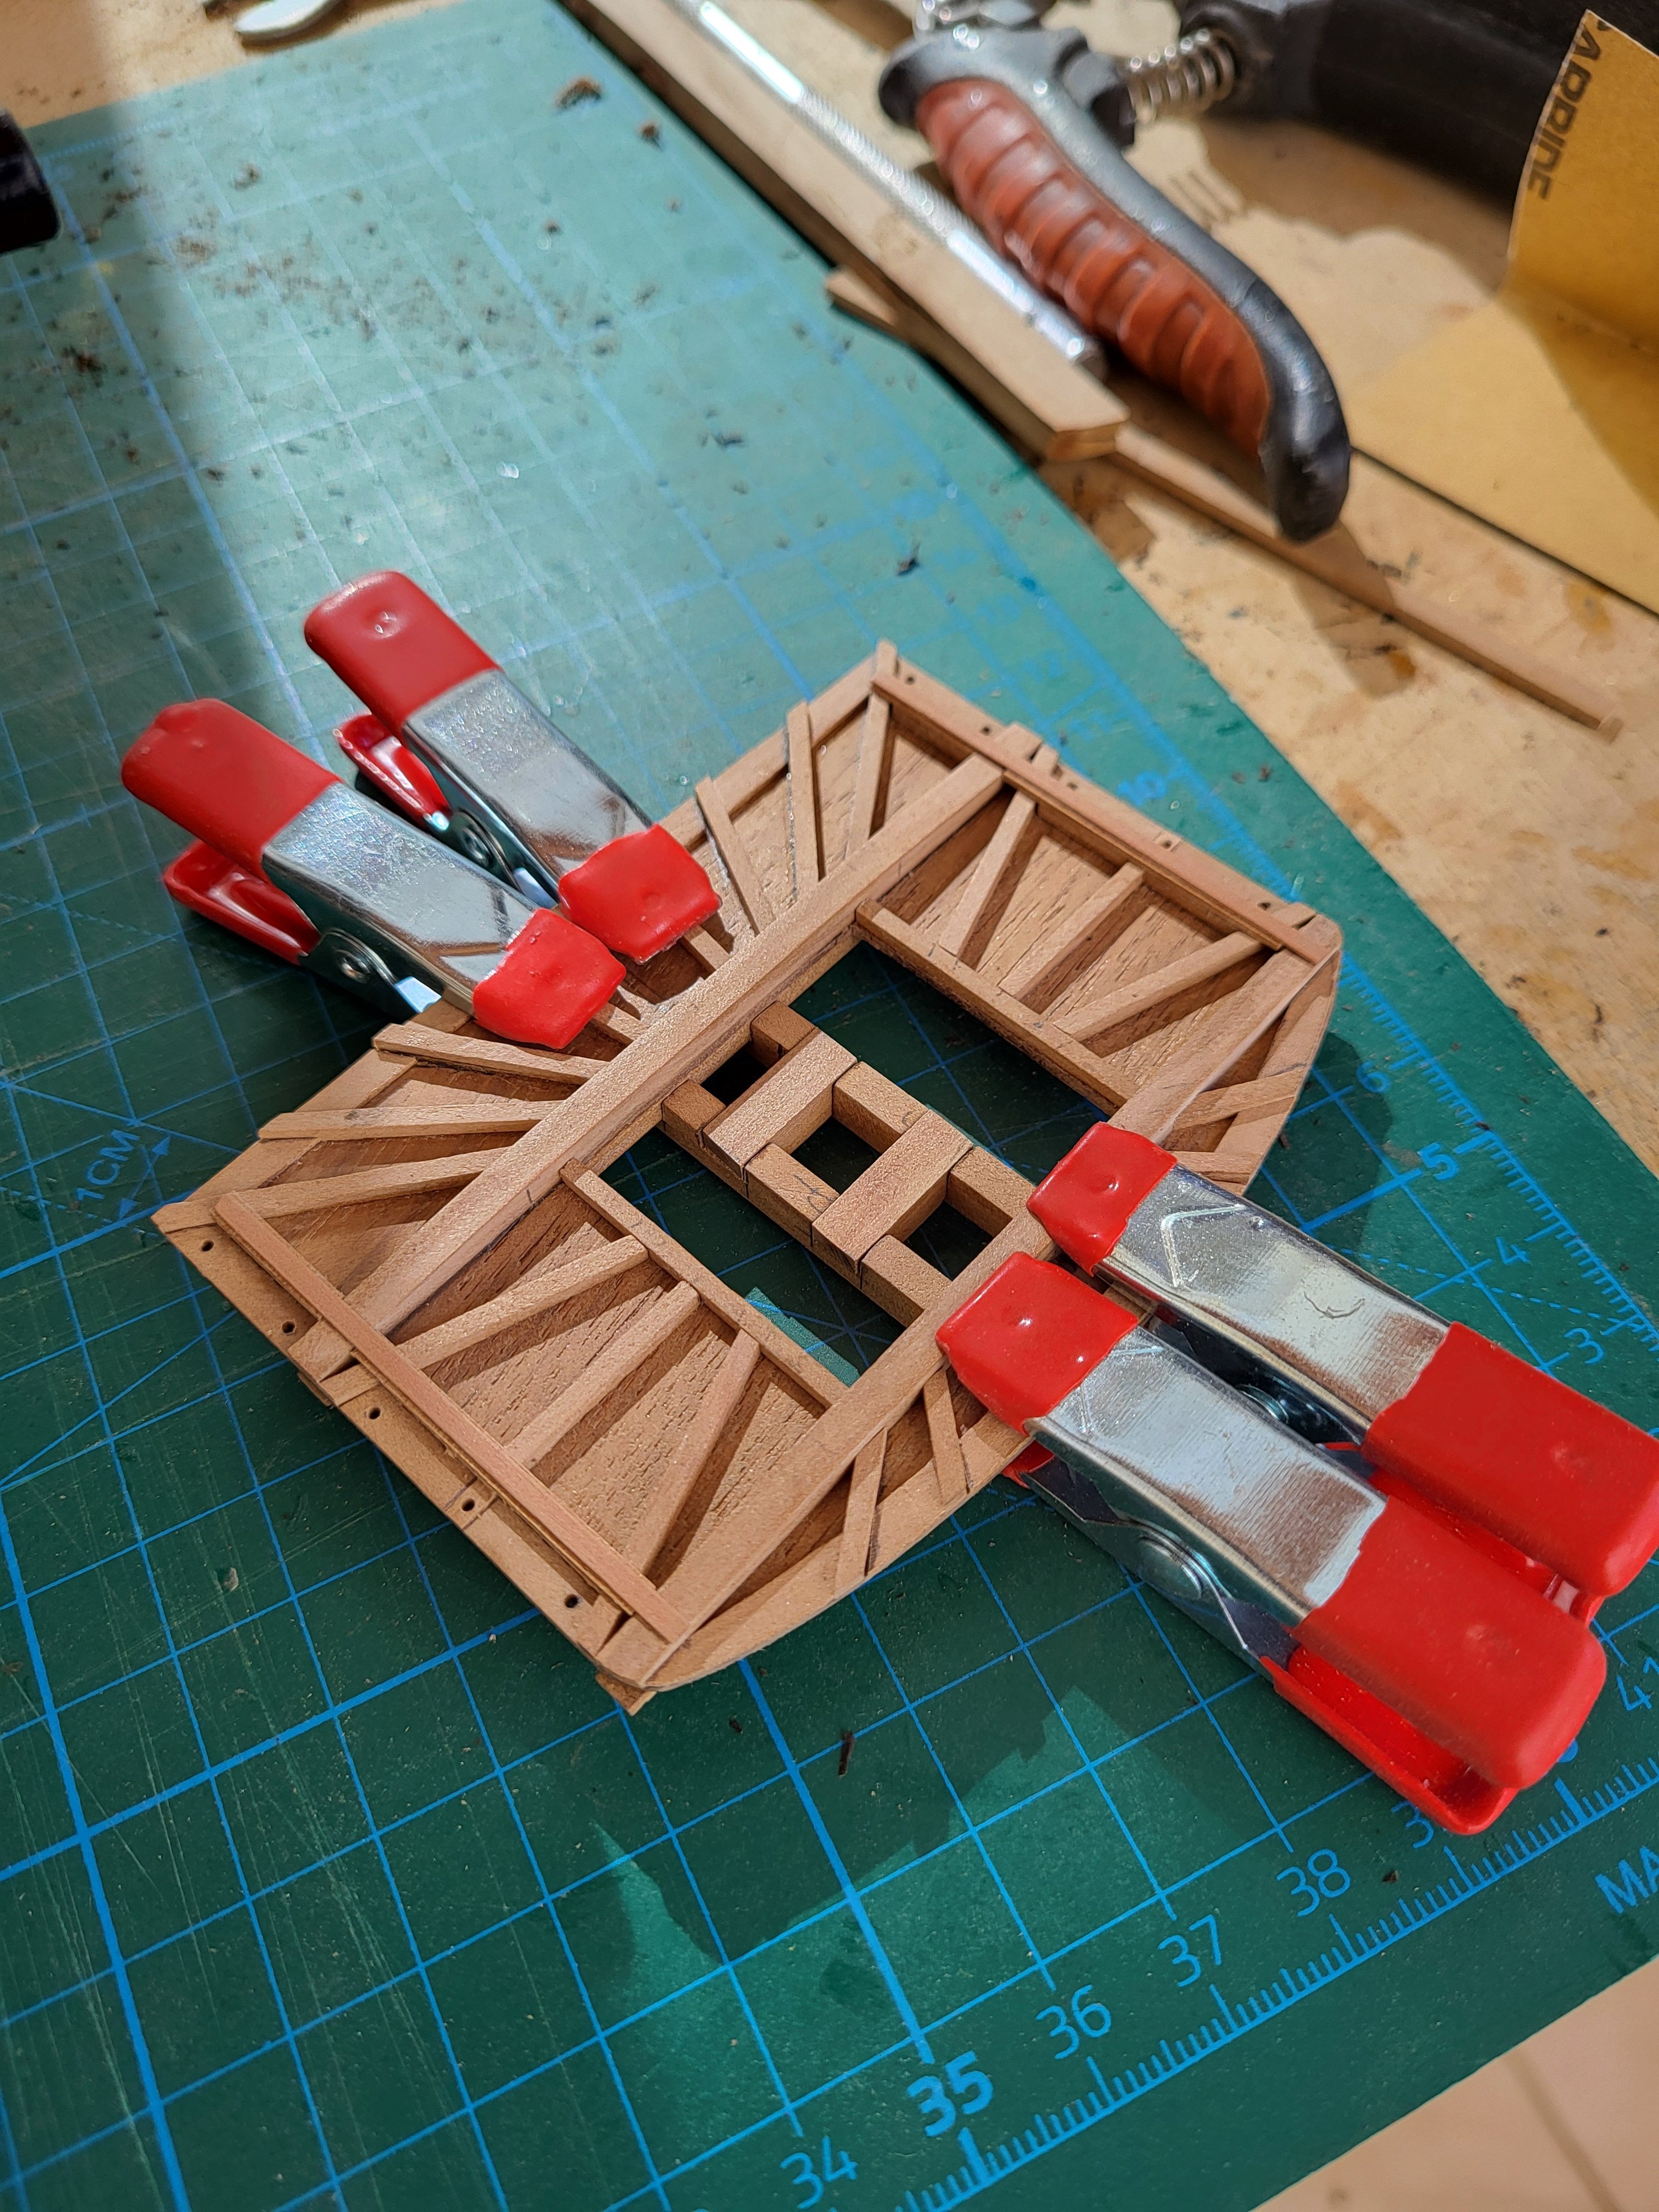
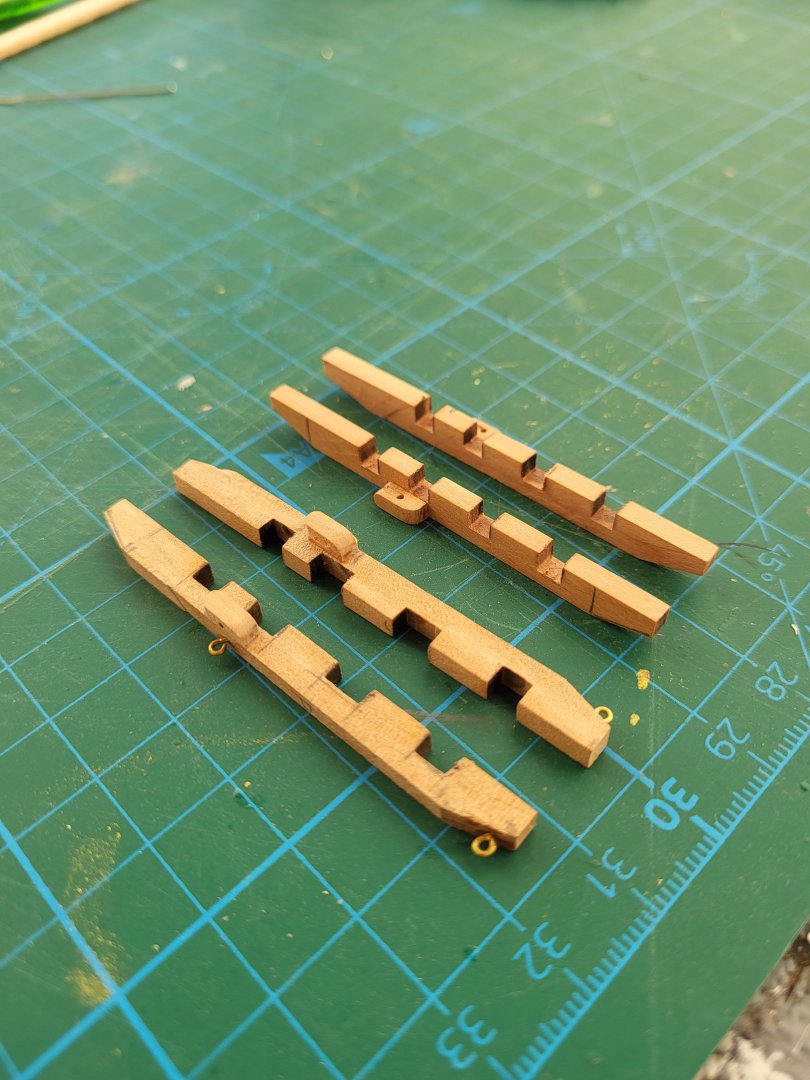
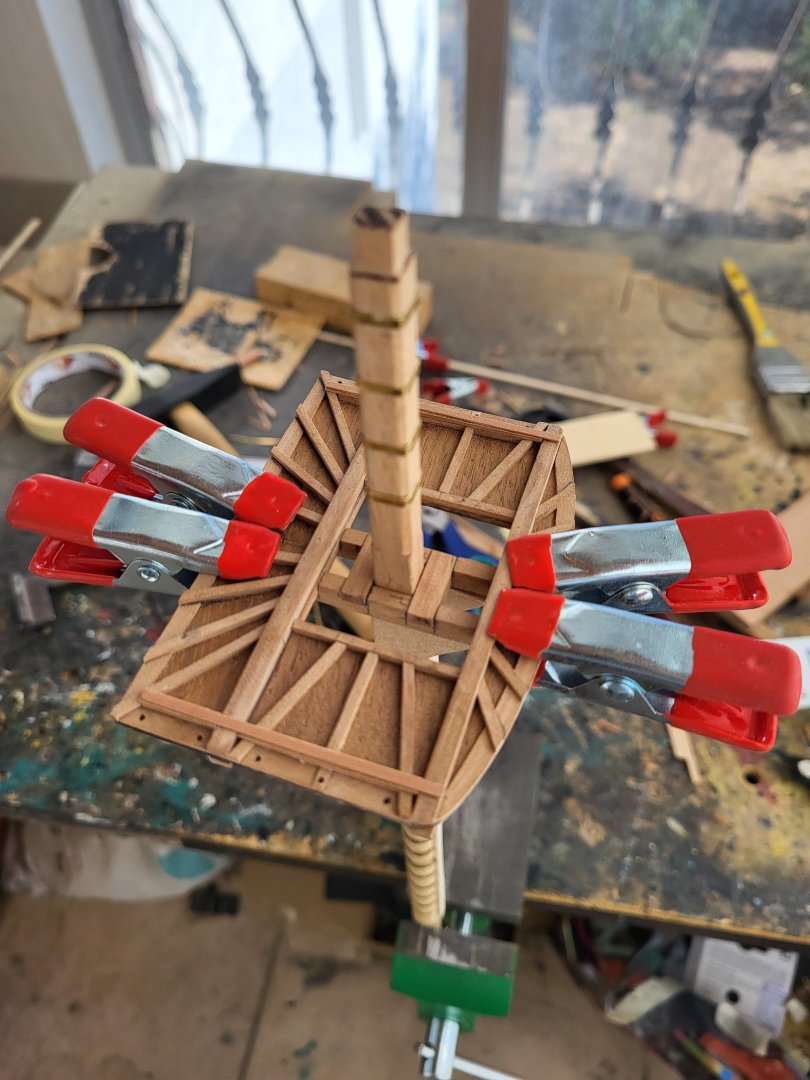
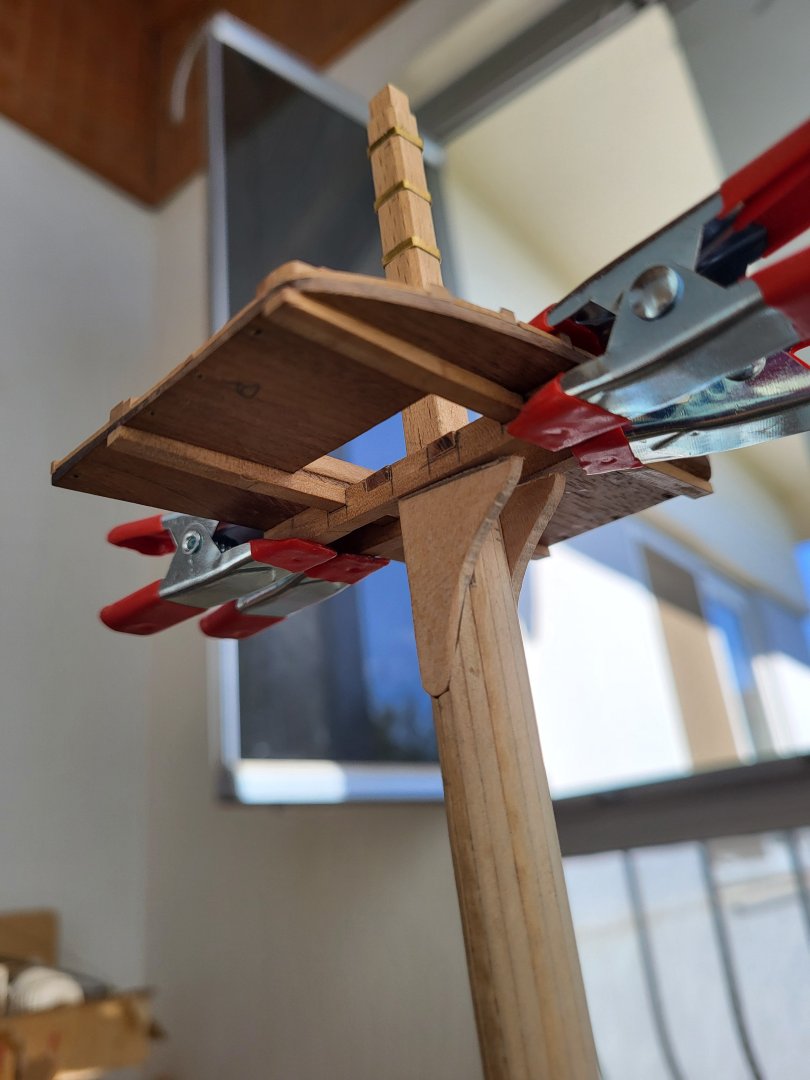
I am making the lower crosstrees and trestle trees of the fighting tops. The trestle trees haven't been glued to the platform yet. Once all remaining details are completed and the top is painted, the gluing will be done directly on the mast. If I had glued the trestle trees earlier, I wouldn't have been able to lower the top into place due to the protrusions of the brass bands on the square section of the mast.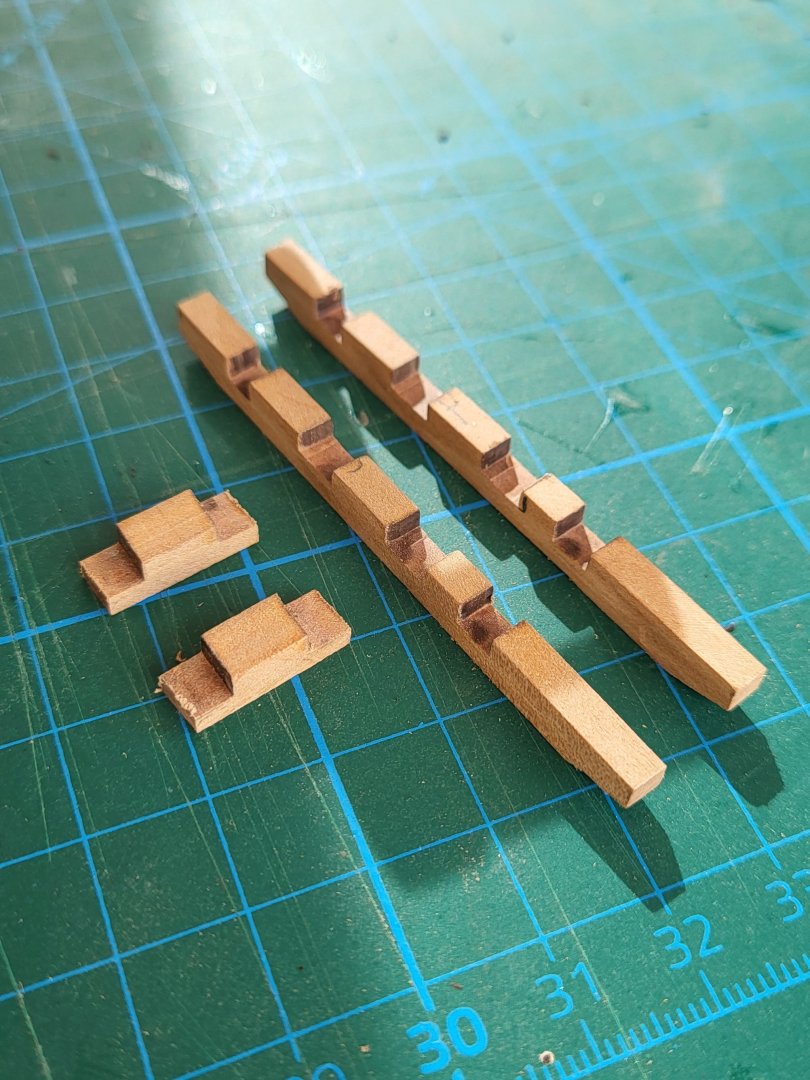


-
USS Constitution by mtbediz - 1:76
mtbediz replied to mtbediz's topic in - Build logs for subjects built 1751 - 1800
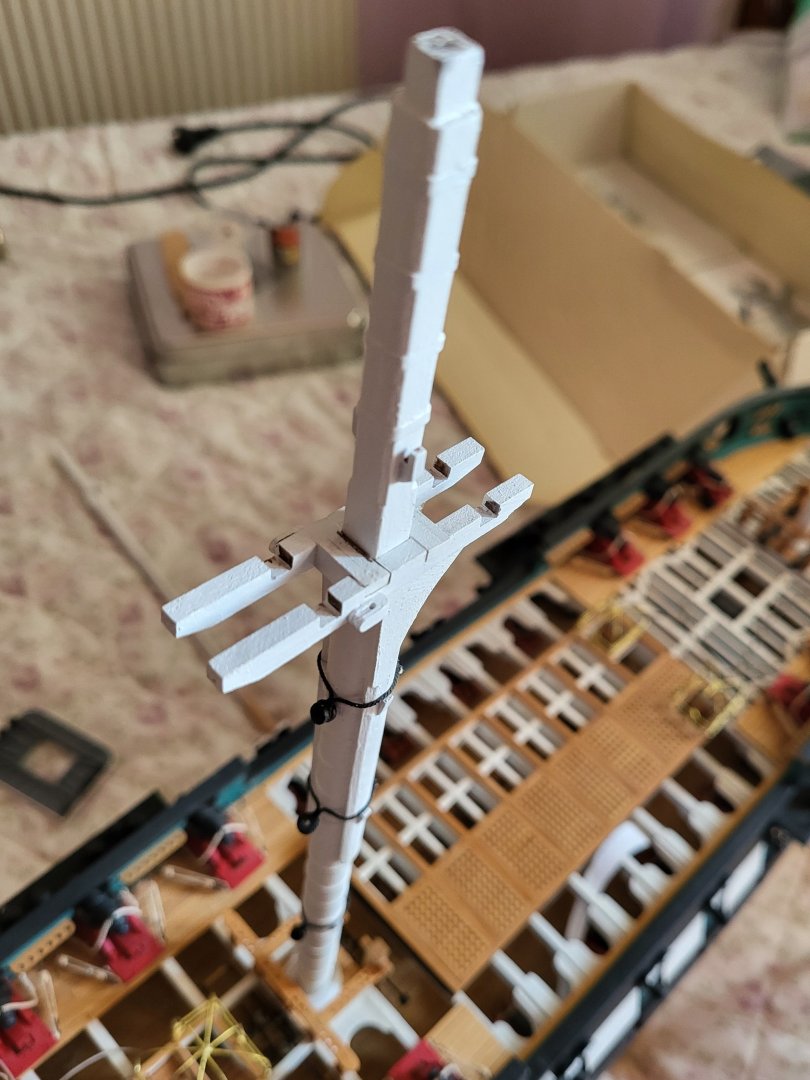
I’m fitting brass bands around the square tops of the masts. I milled 0.2 mm deep grooves, bent 0.3 mm brass strip to shape, and fixed it in place with CA glue.


-
USS Constitution by mtbediz - 1:76
mtbediz replied to mtbediz's topic in - Build logs for subjects built 1751 - 1800
Thanks Greg, it's been a while since we've seen an update on your Conny build. Are you working on it? -
USS Constitution by mtbediz - 1:76
mtbediz replied to mtbediz's topic in - Build logs for subjects built 1751 - 1800
I promise I won't tell anyone Yes, the plans you sent me also show 7 braces. Perhaps they removed the middle half brace because they figured it didn't have much of a function. In the photo, as if I see that they also removed the 7th brace on the fore top.