


mtbediz
-
Posts
1,190 -
Joined
-
Last visited
Content Type
Profiles
Forums
Gallery
Events
Posts posted by mtbediz
-
-
4 hours ago, JSGerson said:
Beautifully done as I would expect. I have only one comment. Some time ago you mentioned that your model is based on what the real ship looks like TODAY. However, and I really hate to mention this as it would mean changing what you just did, today's ship does NOT have the bow topgallant rail ("bow rail") anymore since the ship's last restoration in 2015-17. Of course I could be wrong in your intensions; I do hope I'm wrong.
Thanks for the info Jon. Yes, you are absolutely correct. I mentioned earlier that I was building the ship as it looks today because until you mentioned it I didn't know about the 2015-2017 restoration and I thought the ship looked like it does today in the 3D virtual tour online. I will continue without removing the bow rail as I will continue to use the 3D Tour as a reference.
-
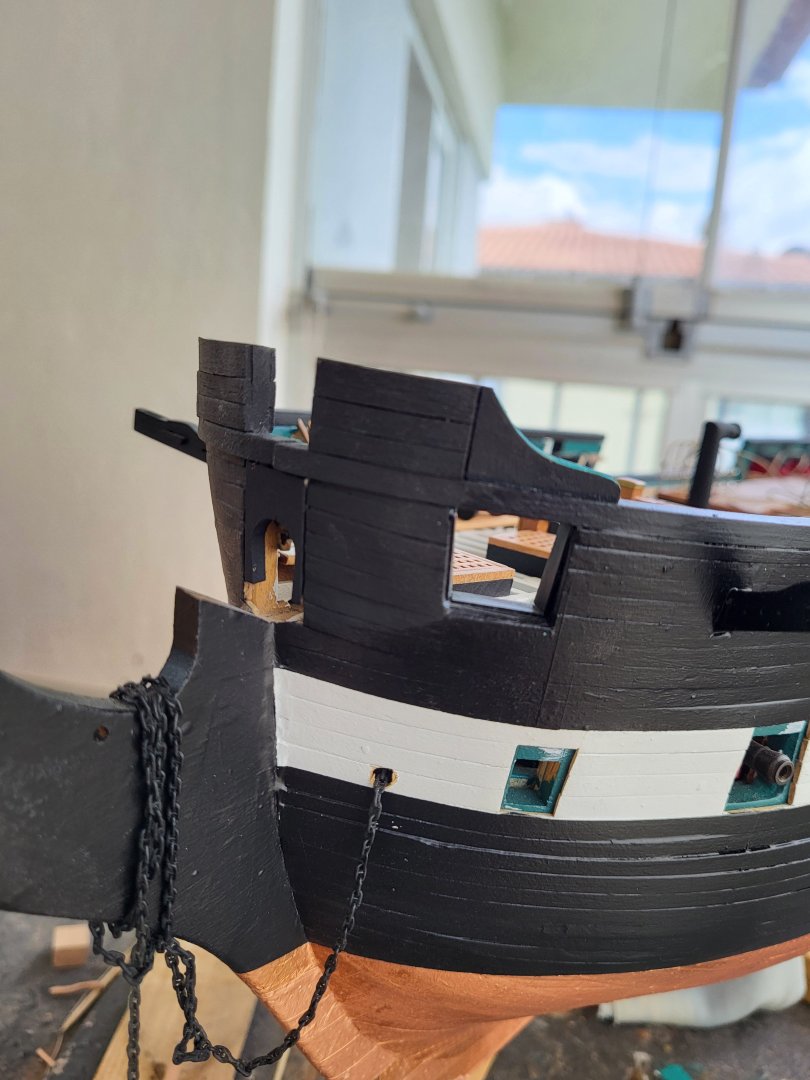
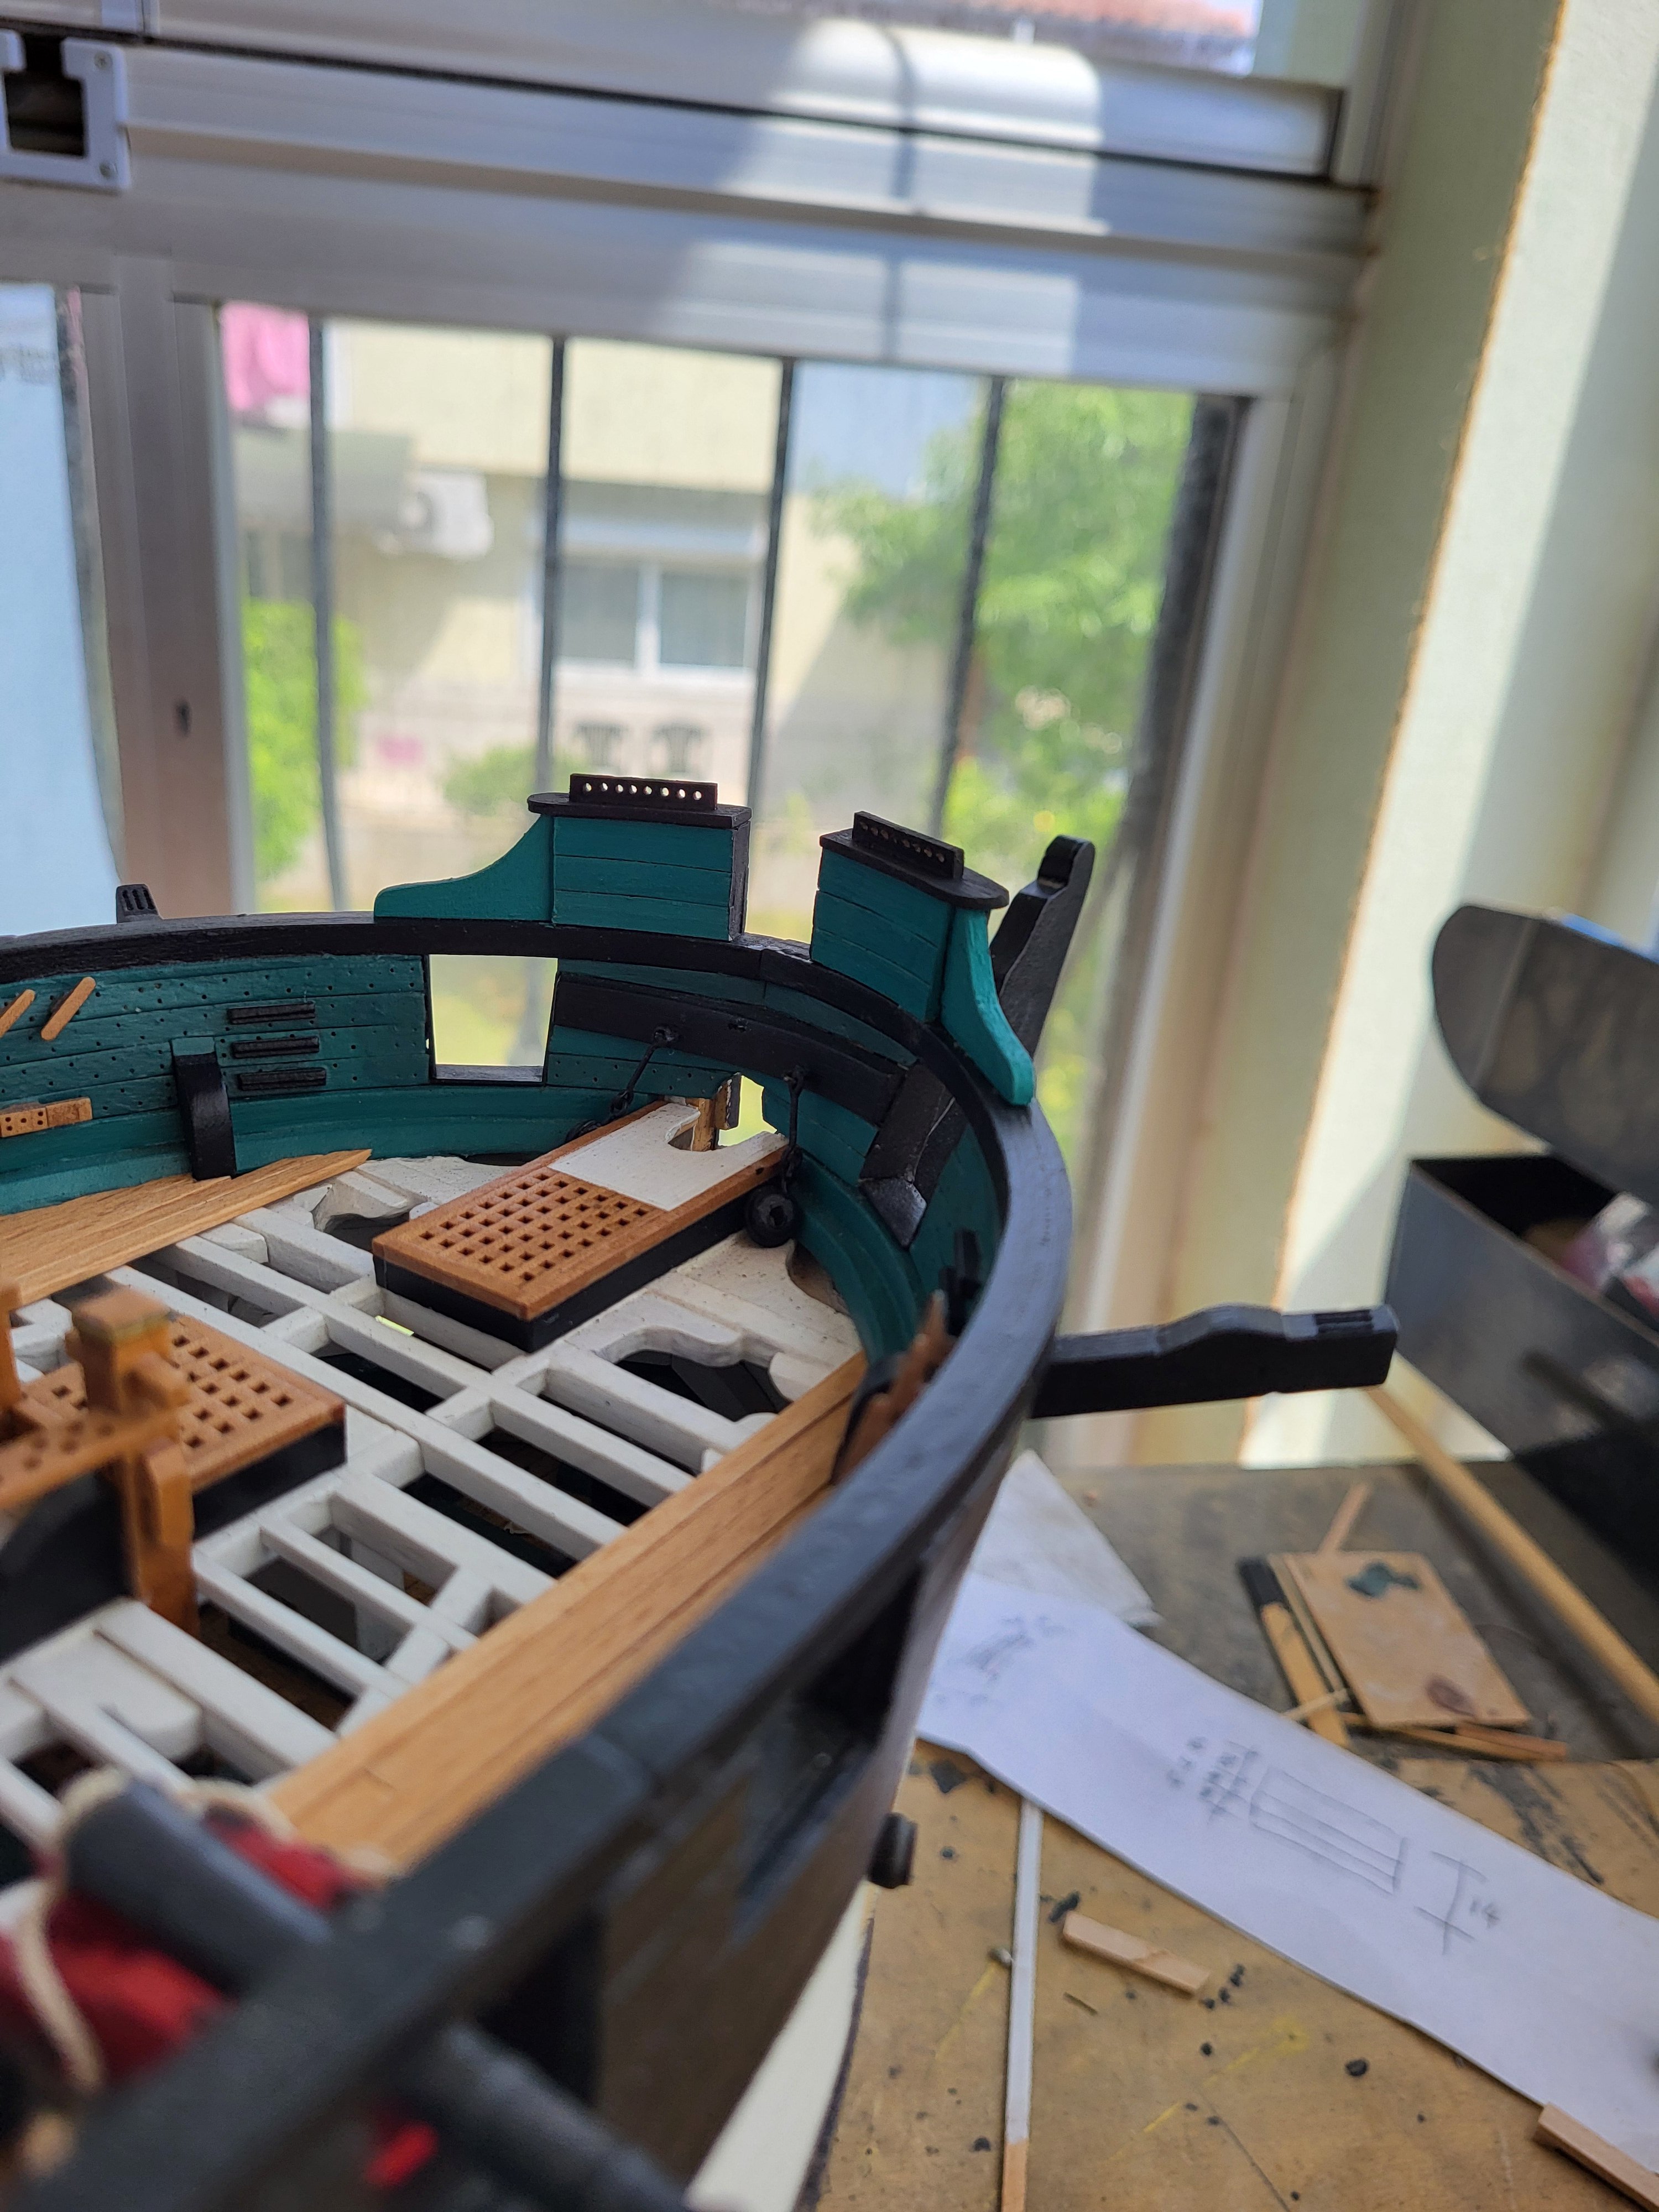
I added the bow rail.


-
-
4 hours ago, JSGerson said:
Nice, clean, and precise...your usual excellence!
Jon
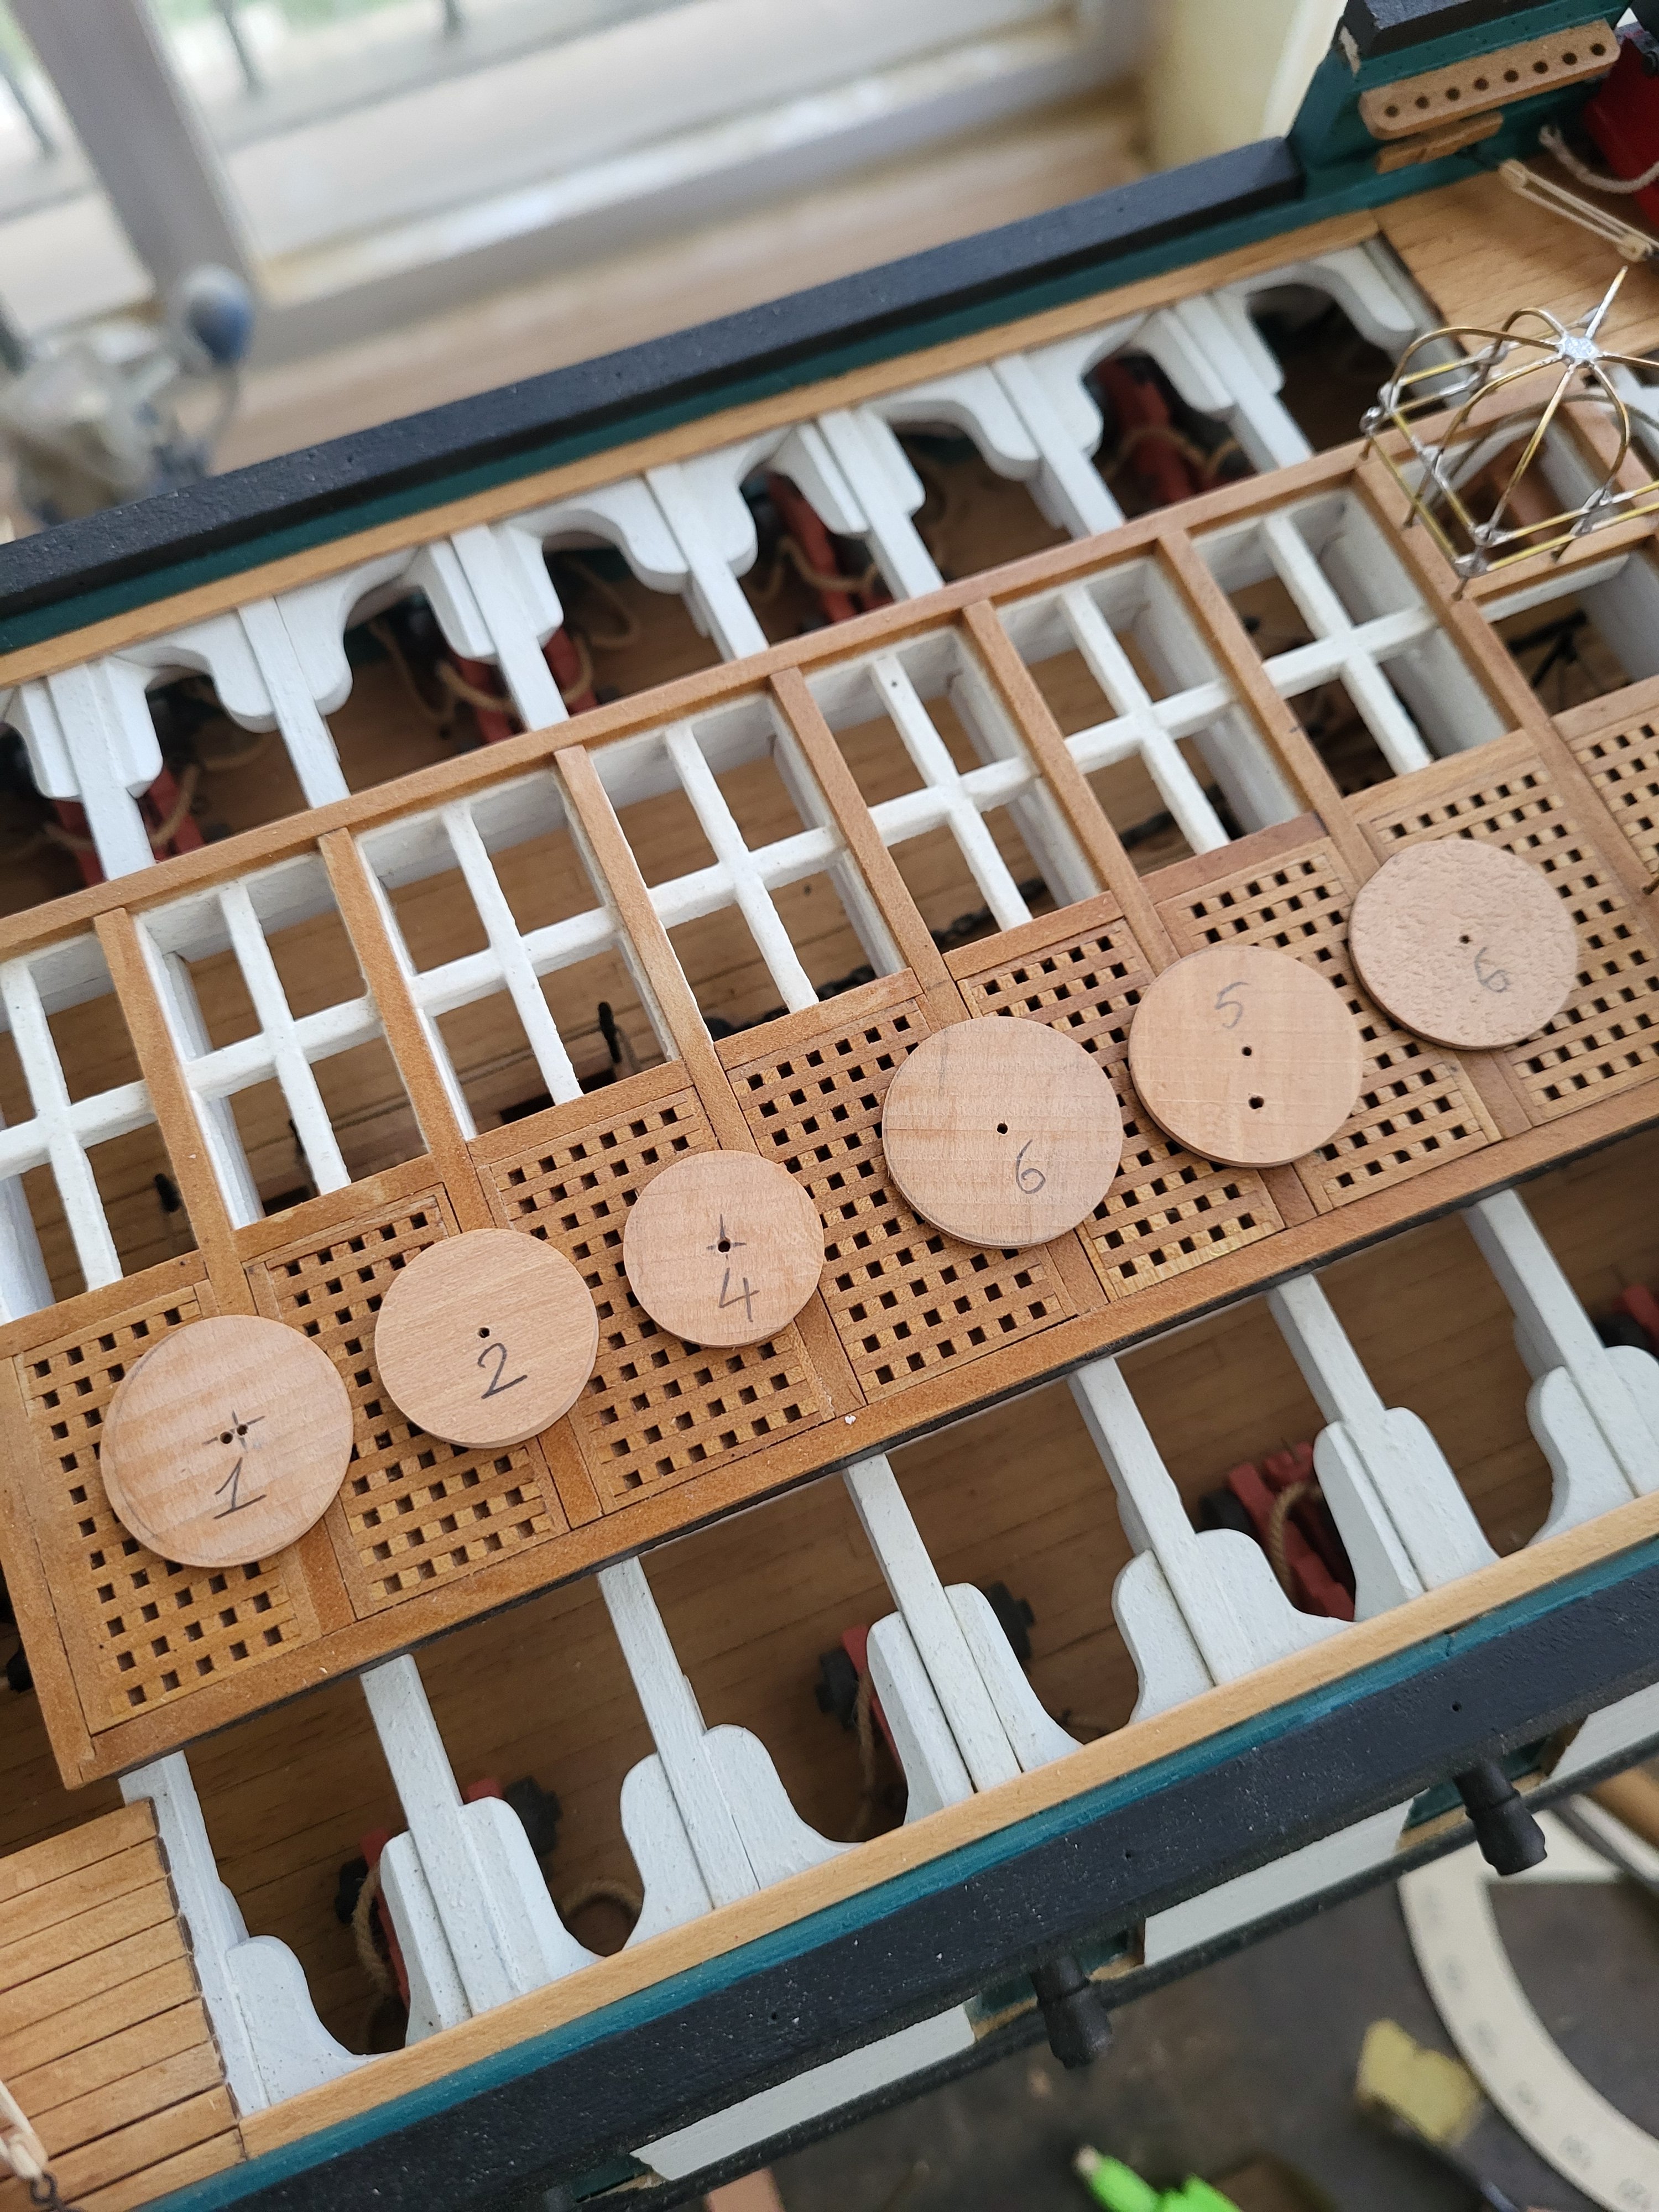
Thanks Jon. I was supposed to paint the bottom two round pieces black before gluing them but I forgot. Now I'm trying to figure out how to keep the paint from spilling over to the other side when painting them

-
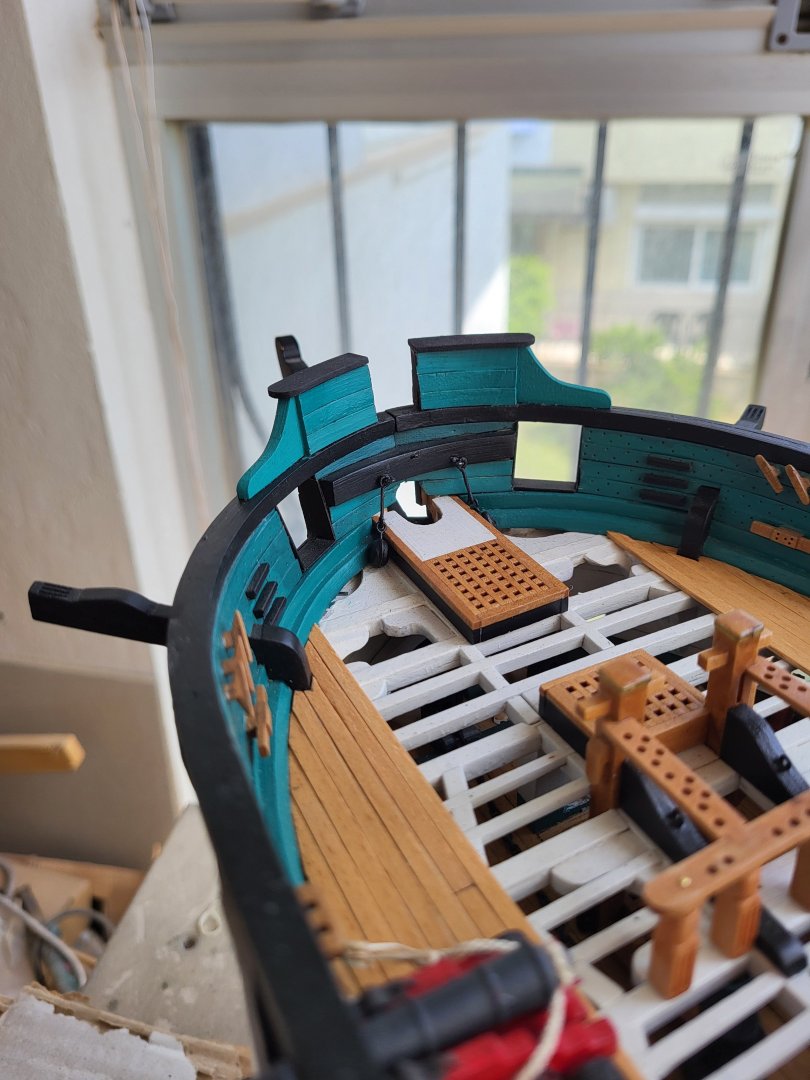
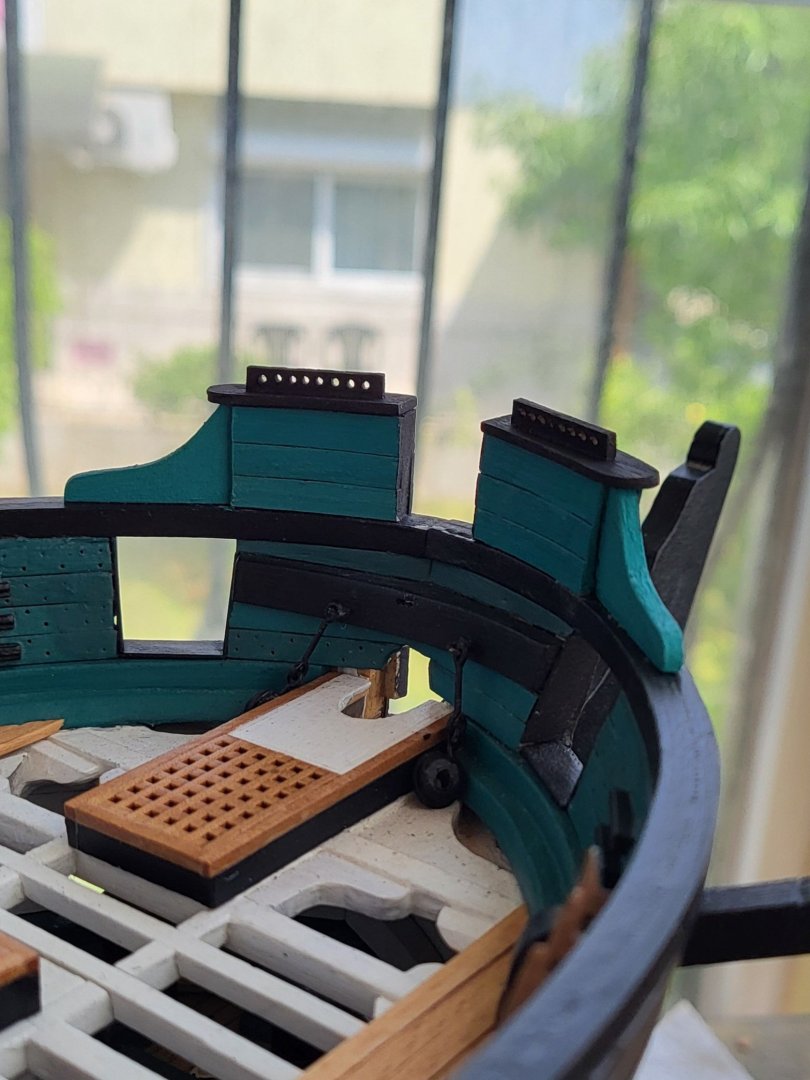
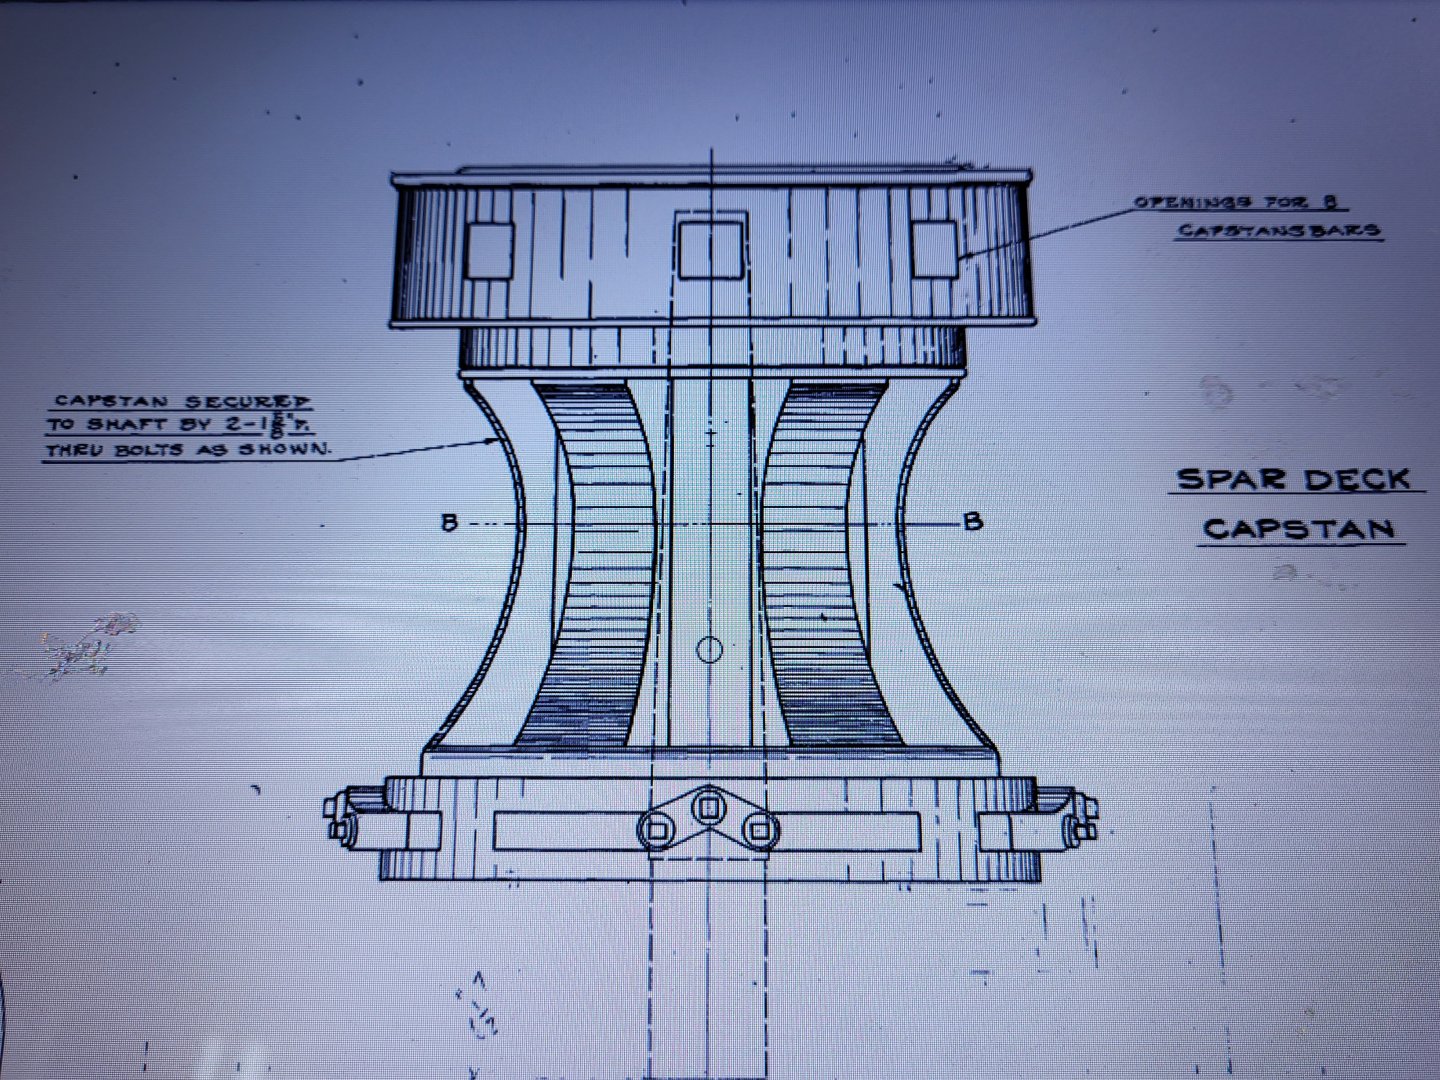
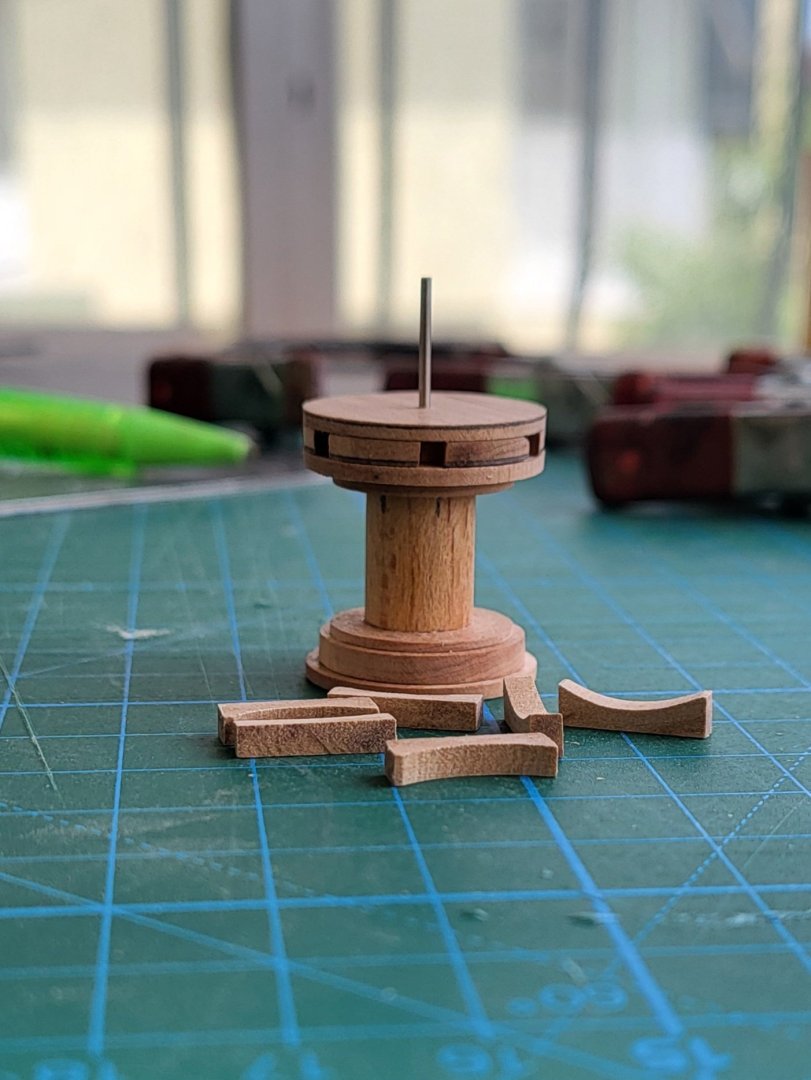
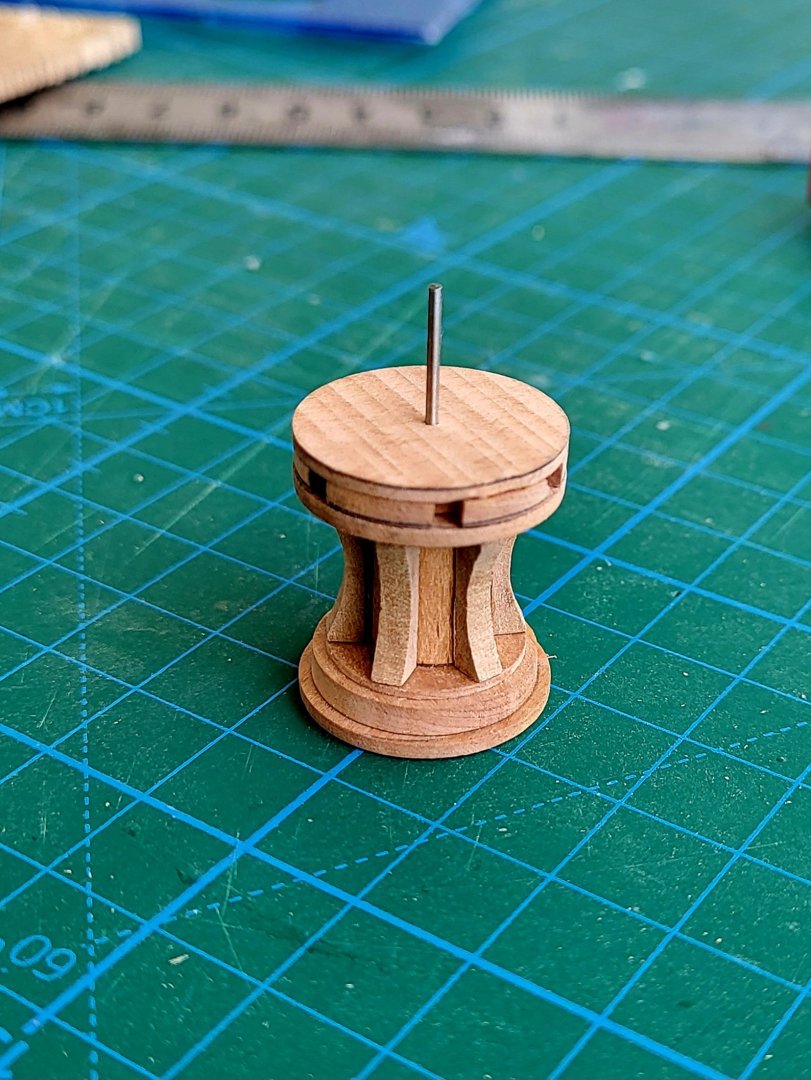
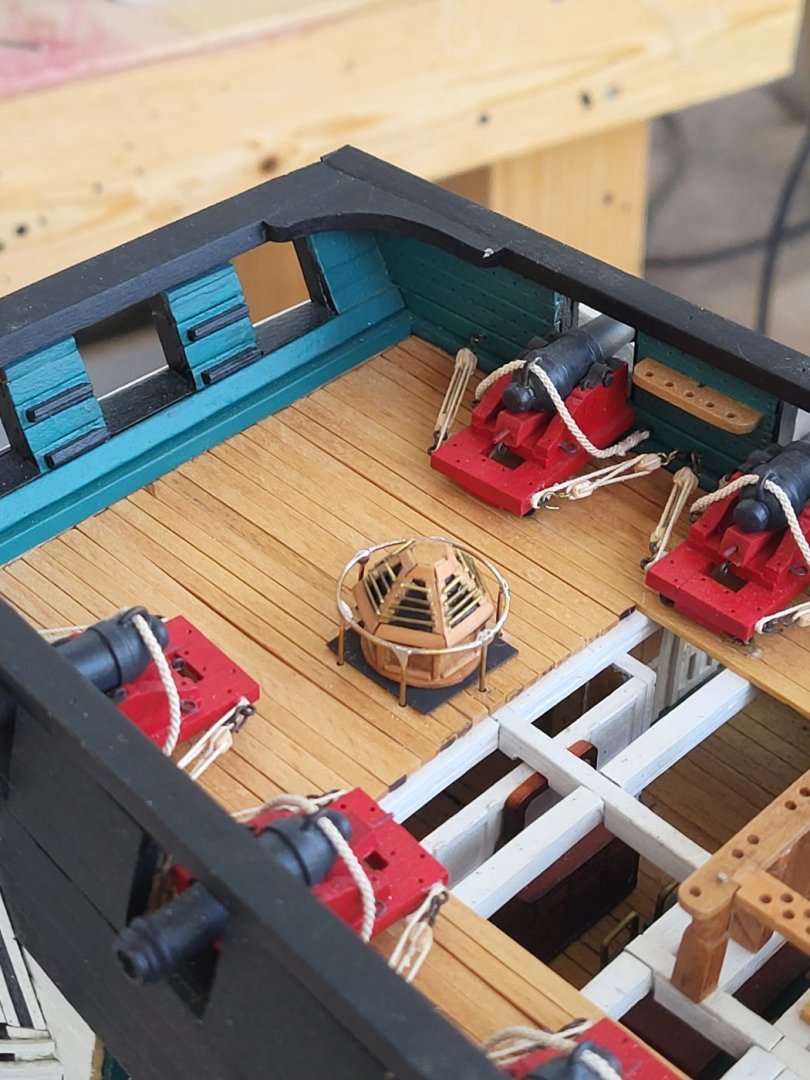
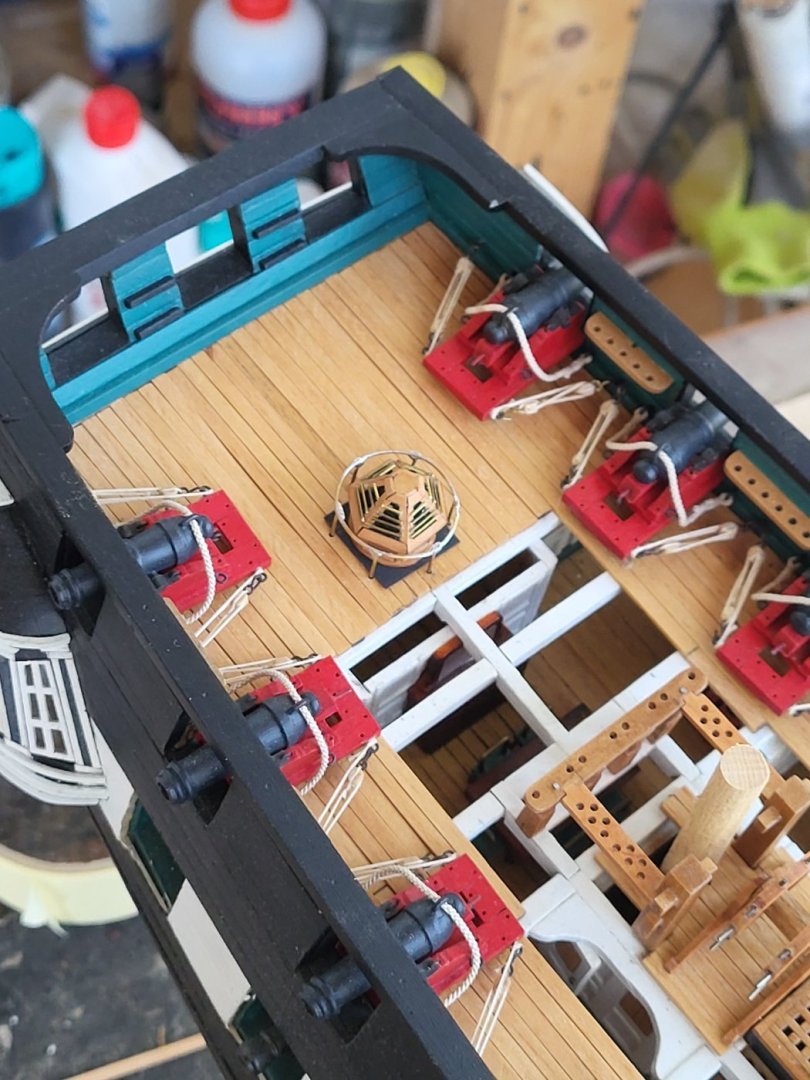
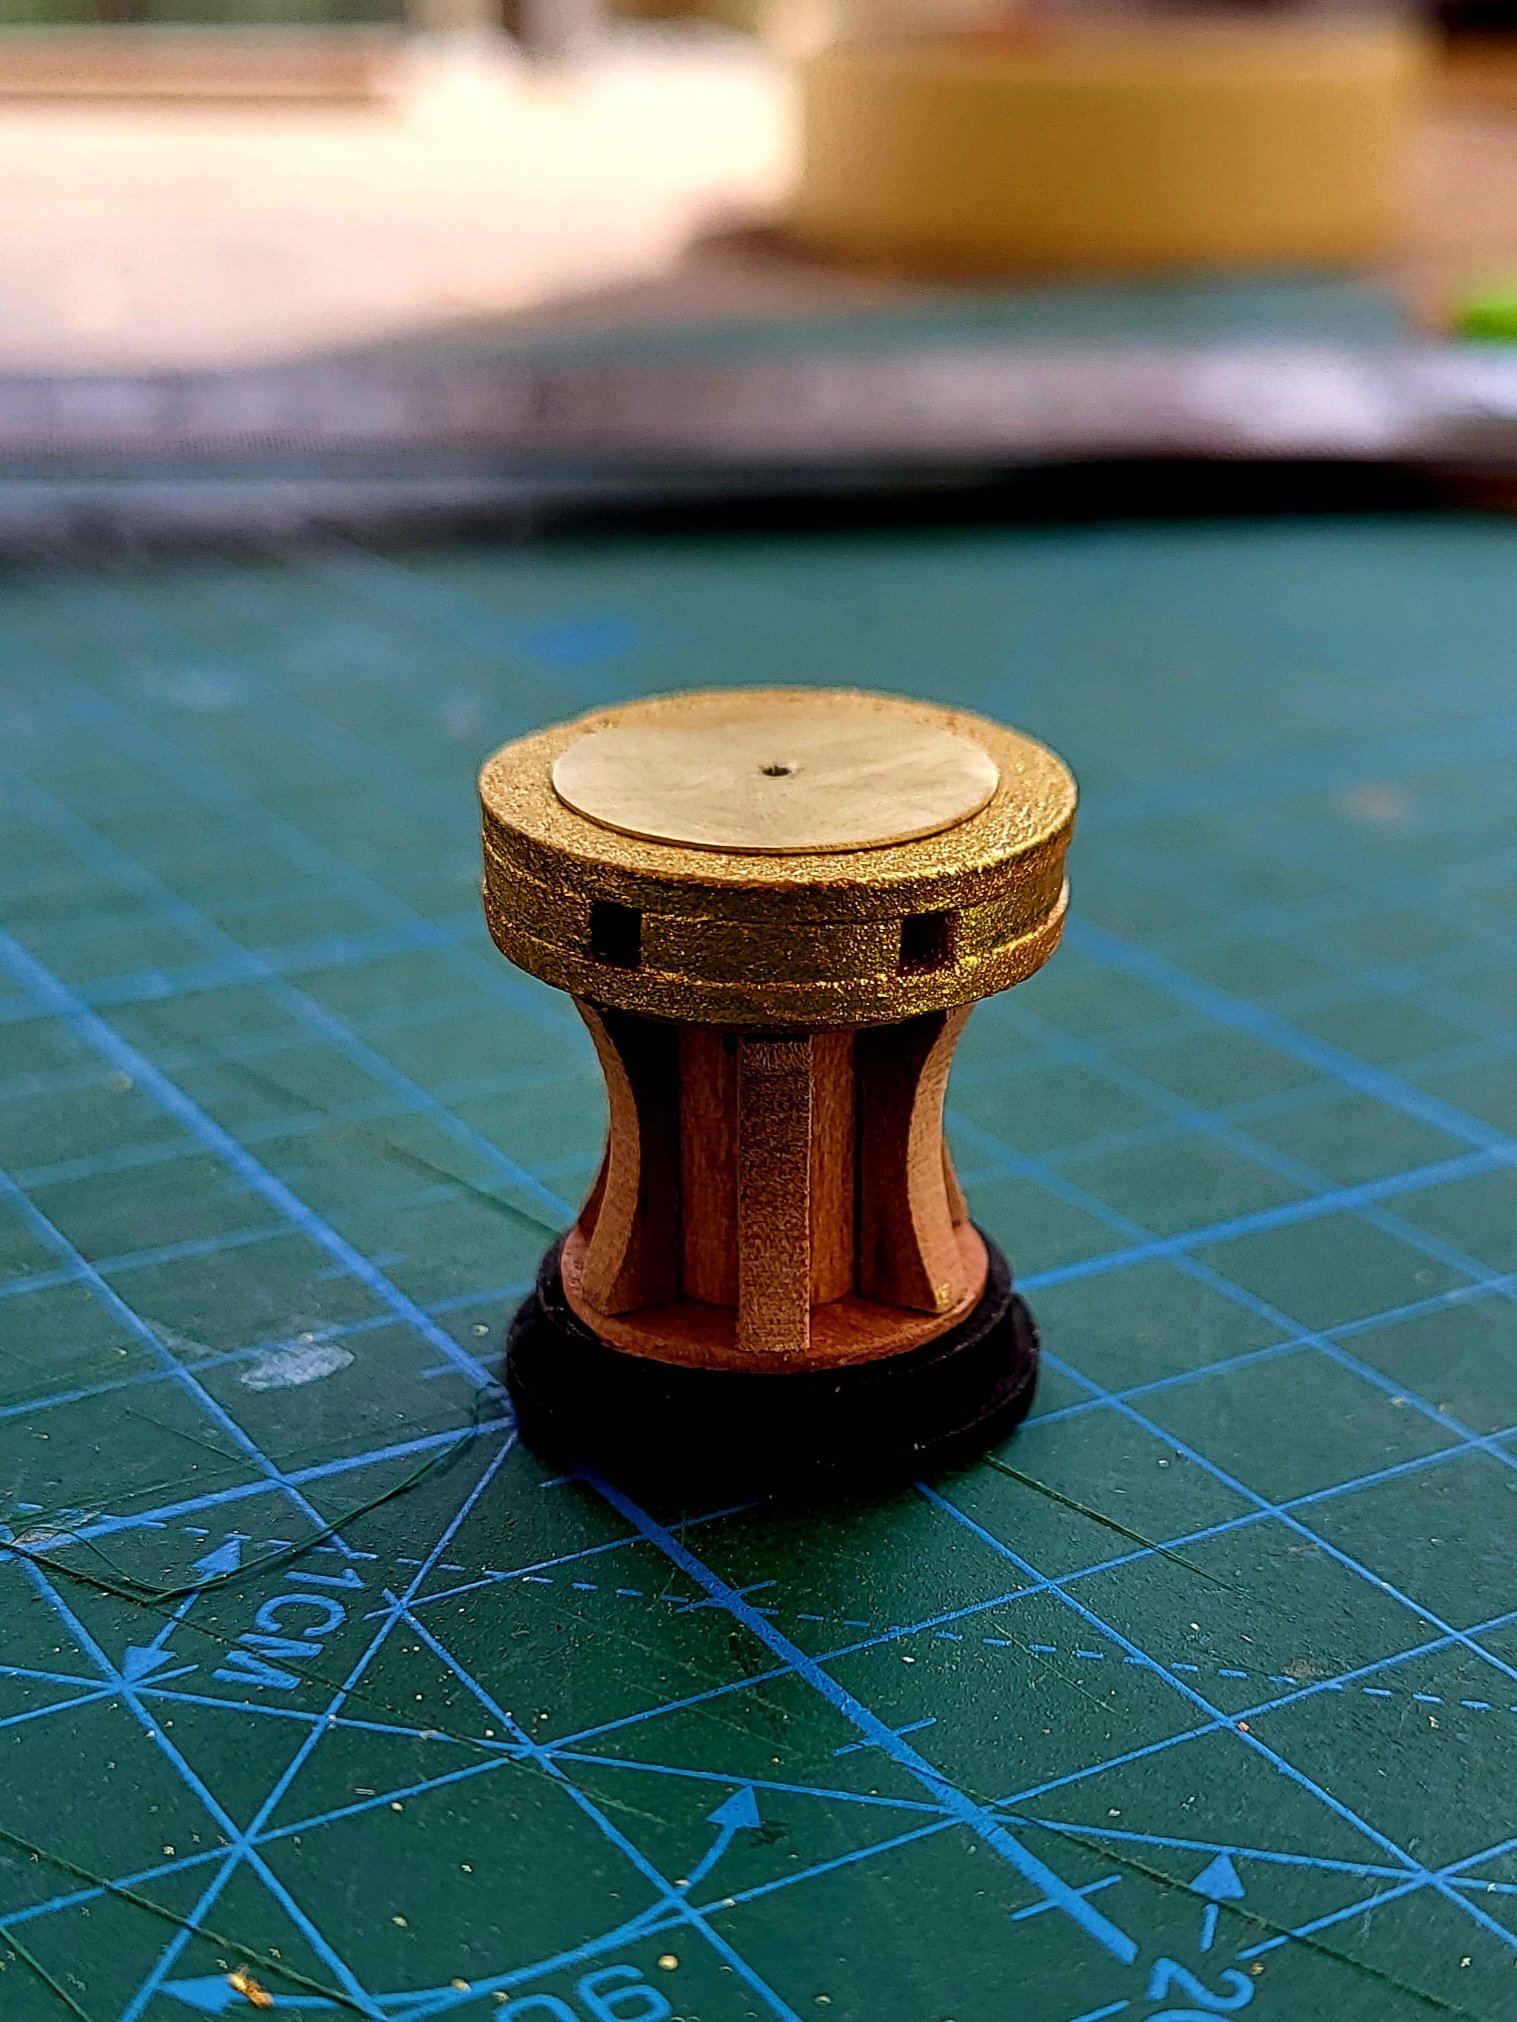
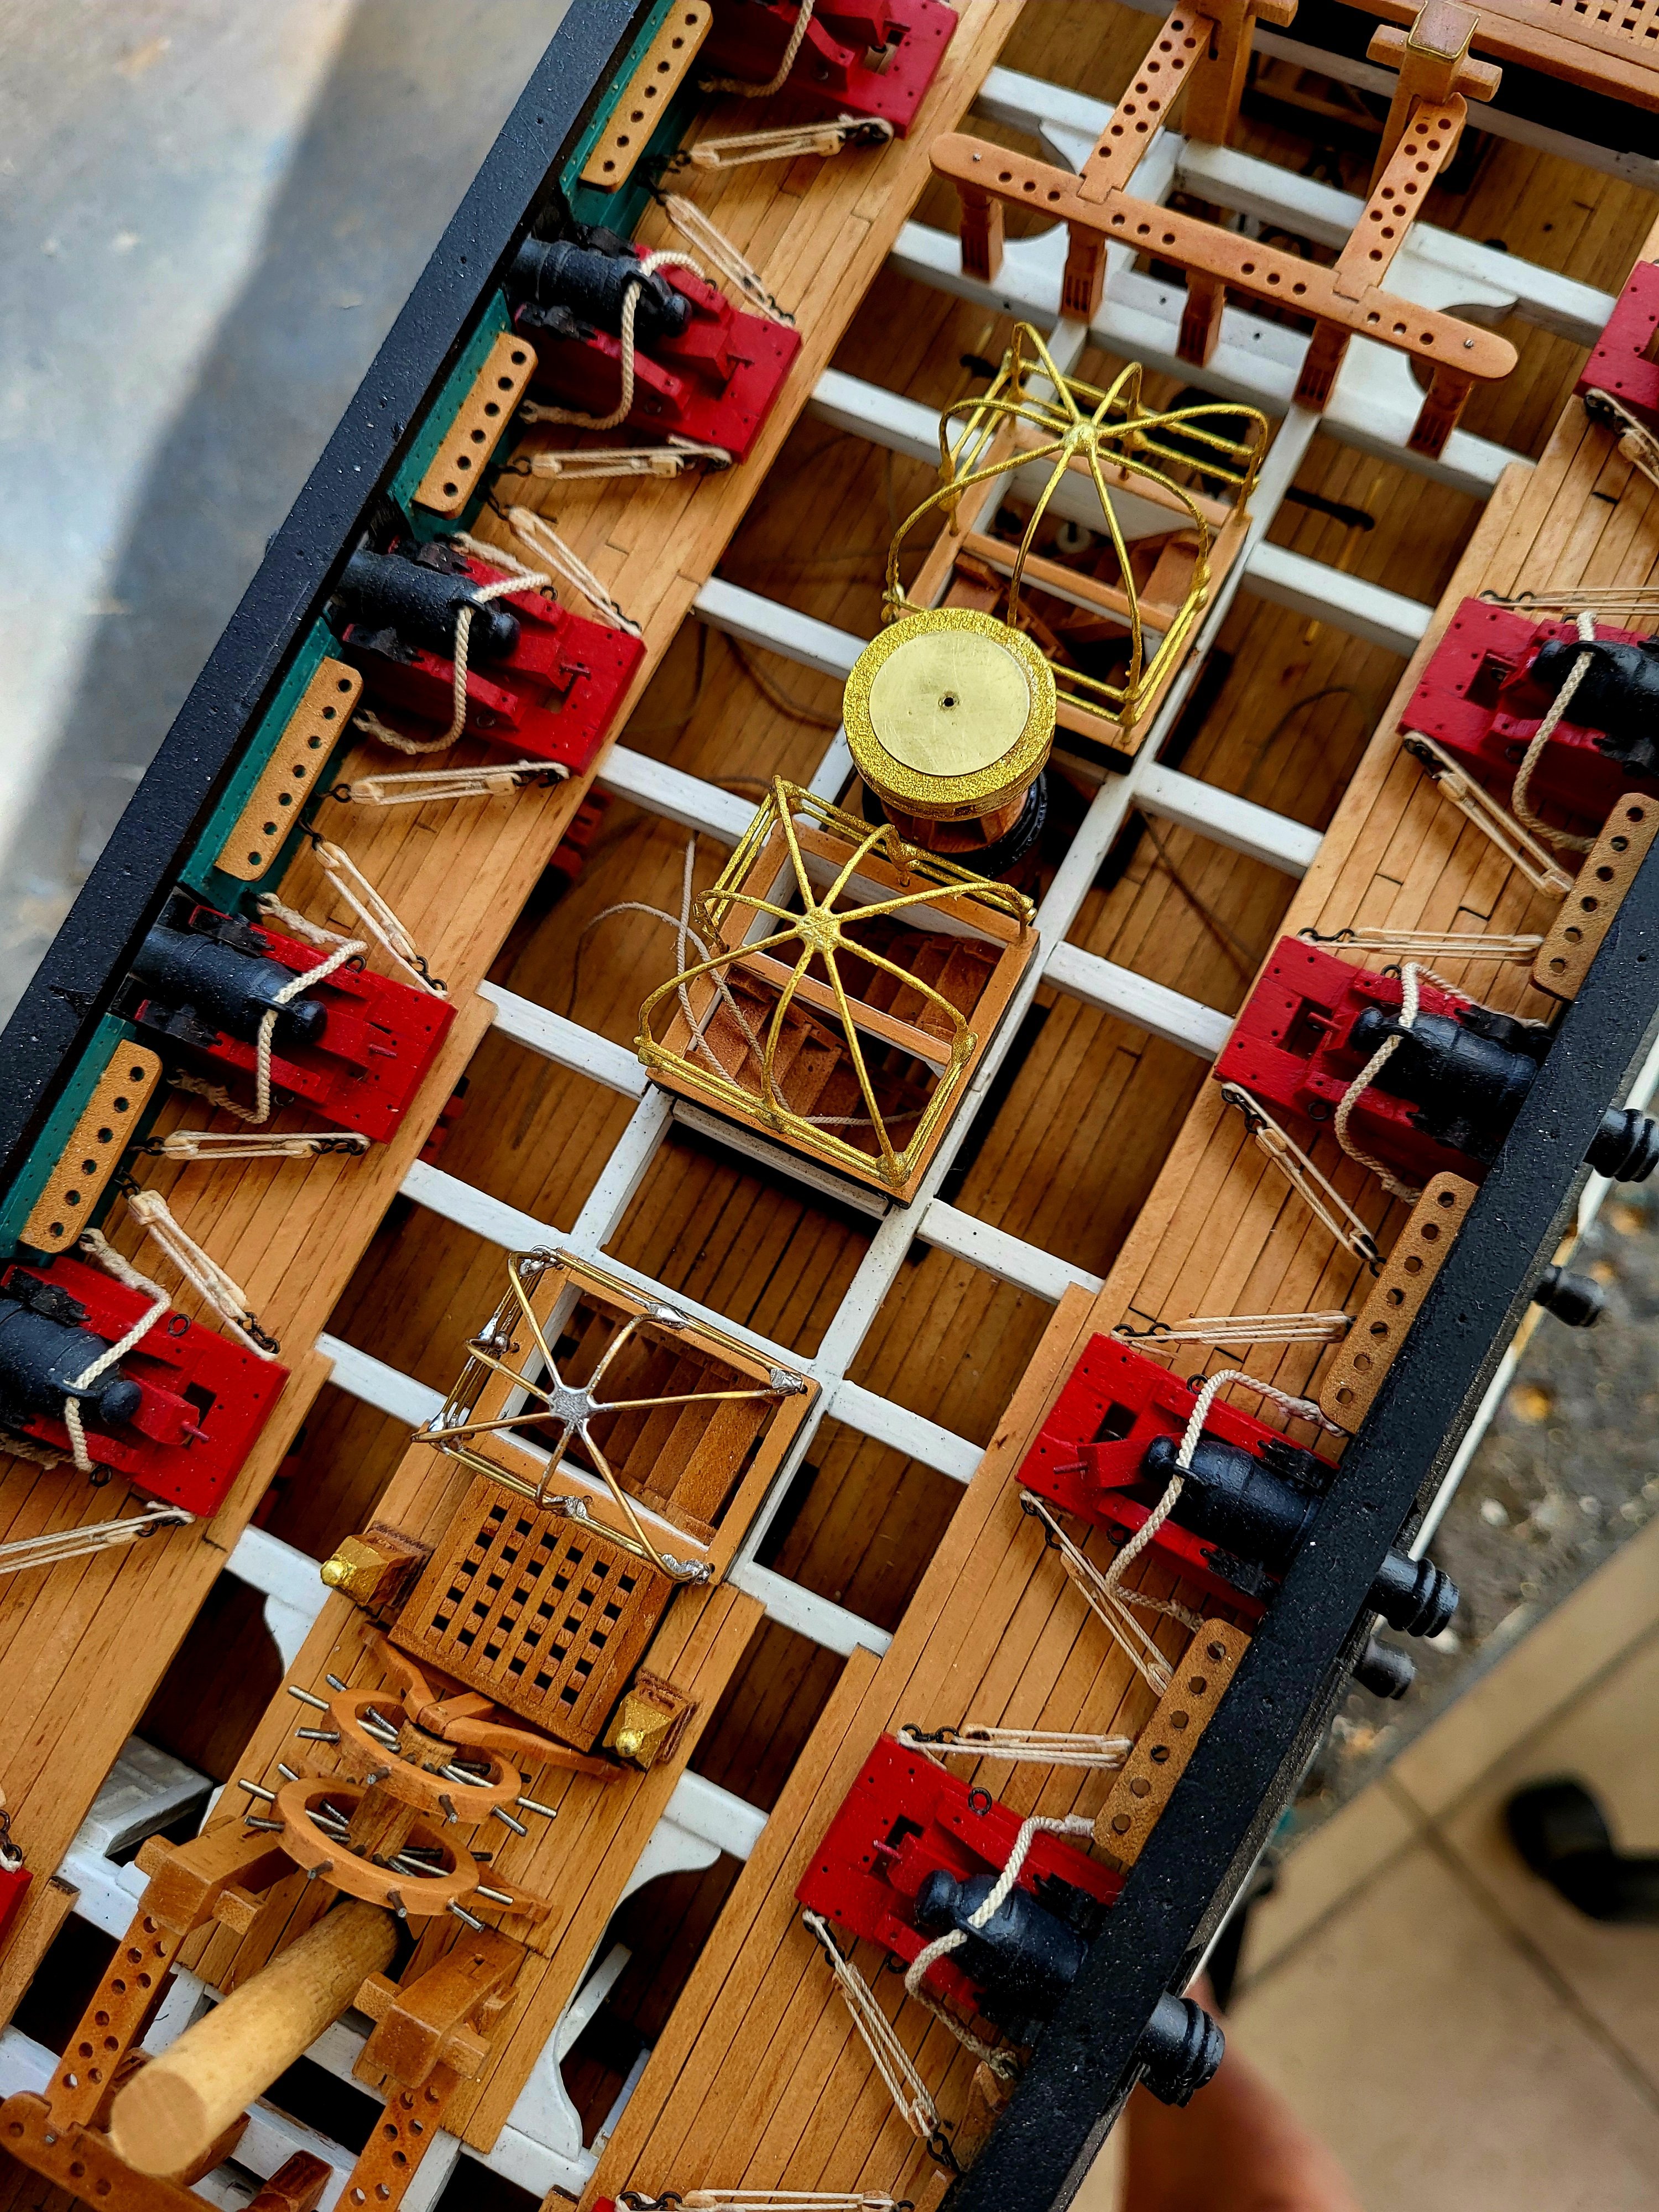
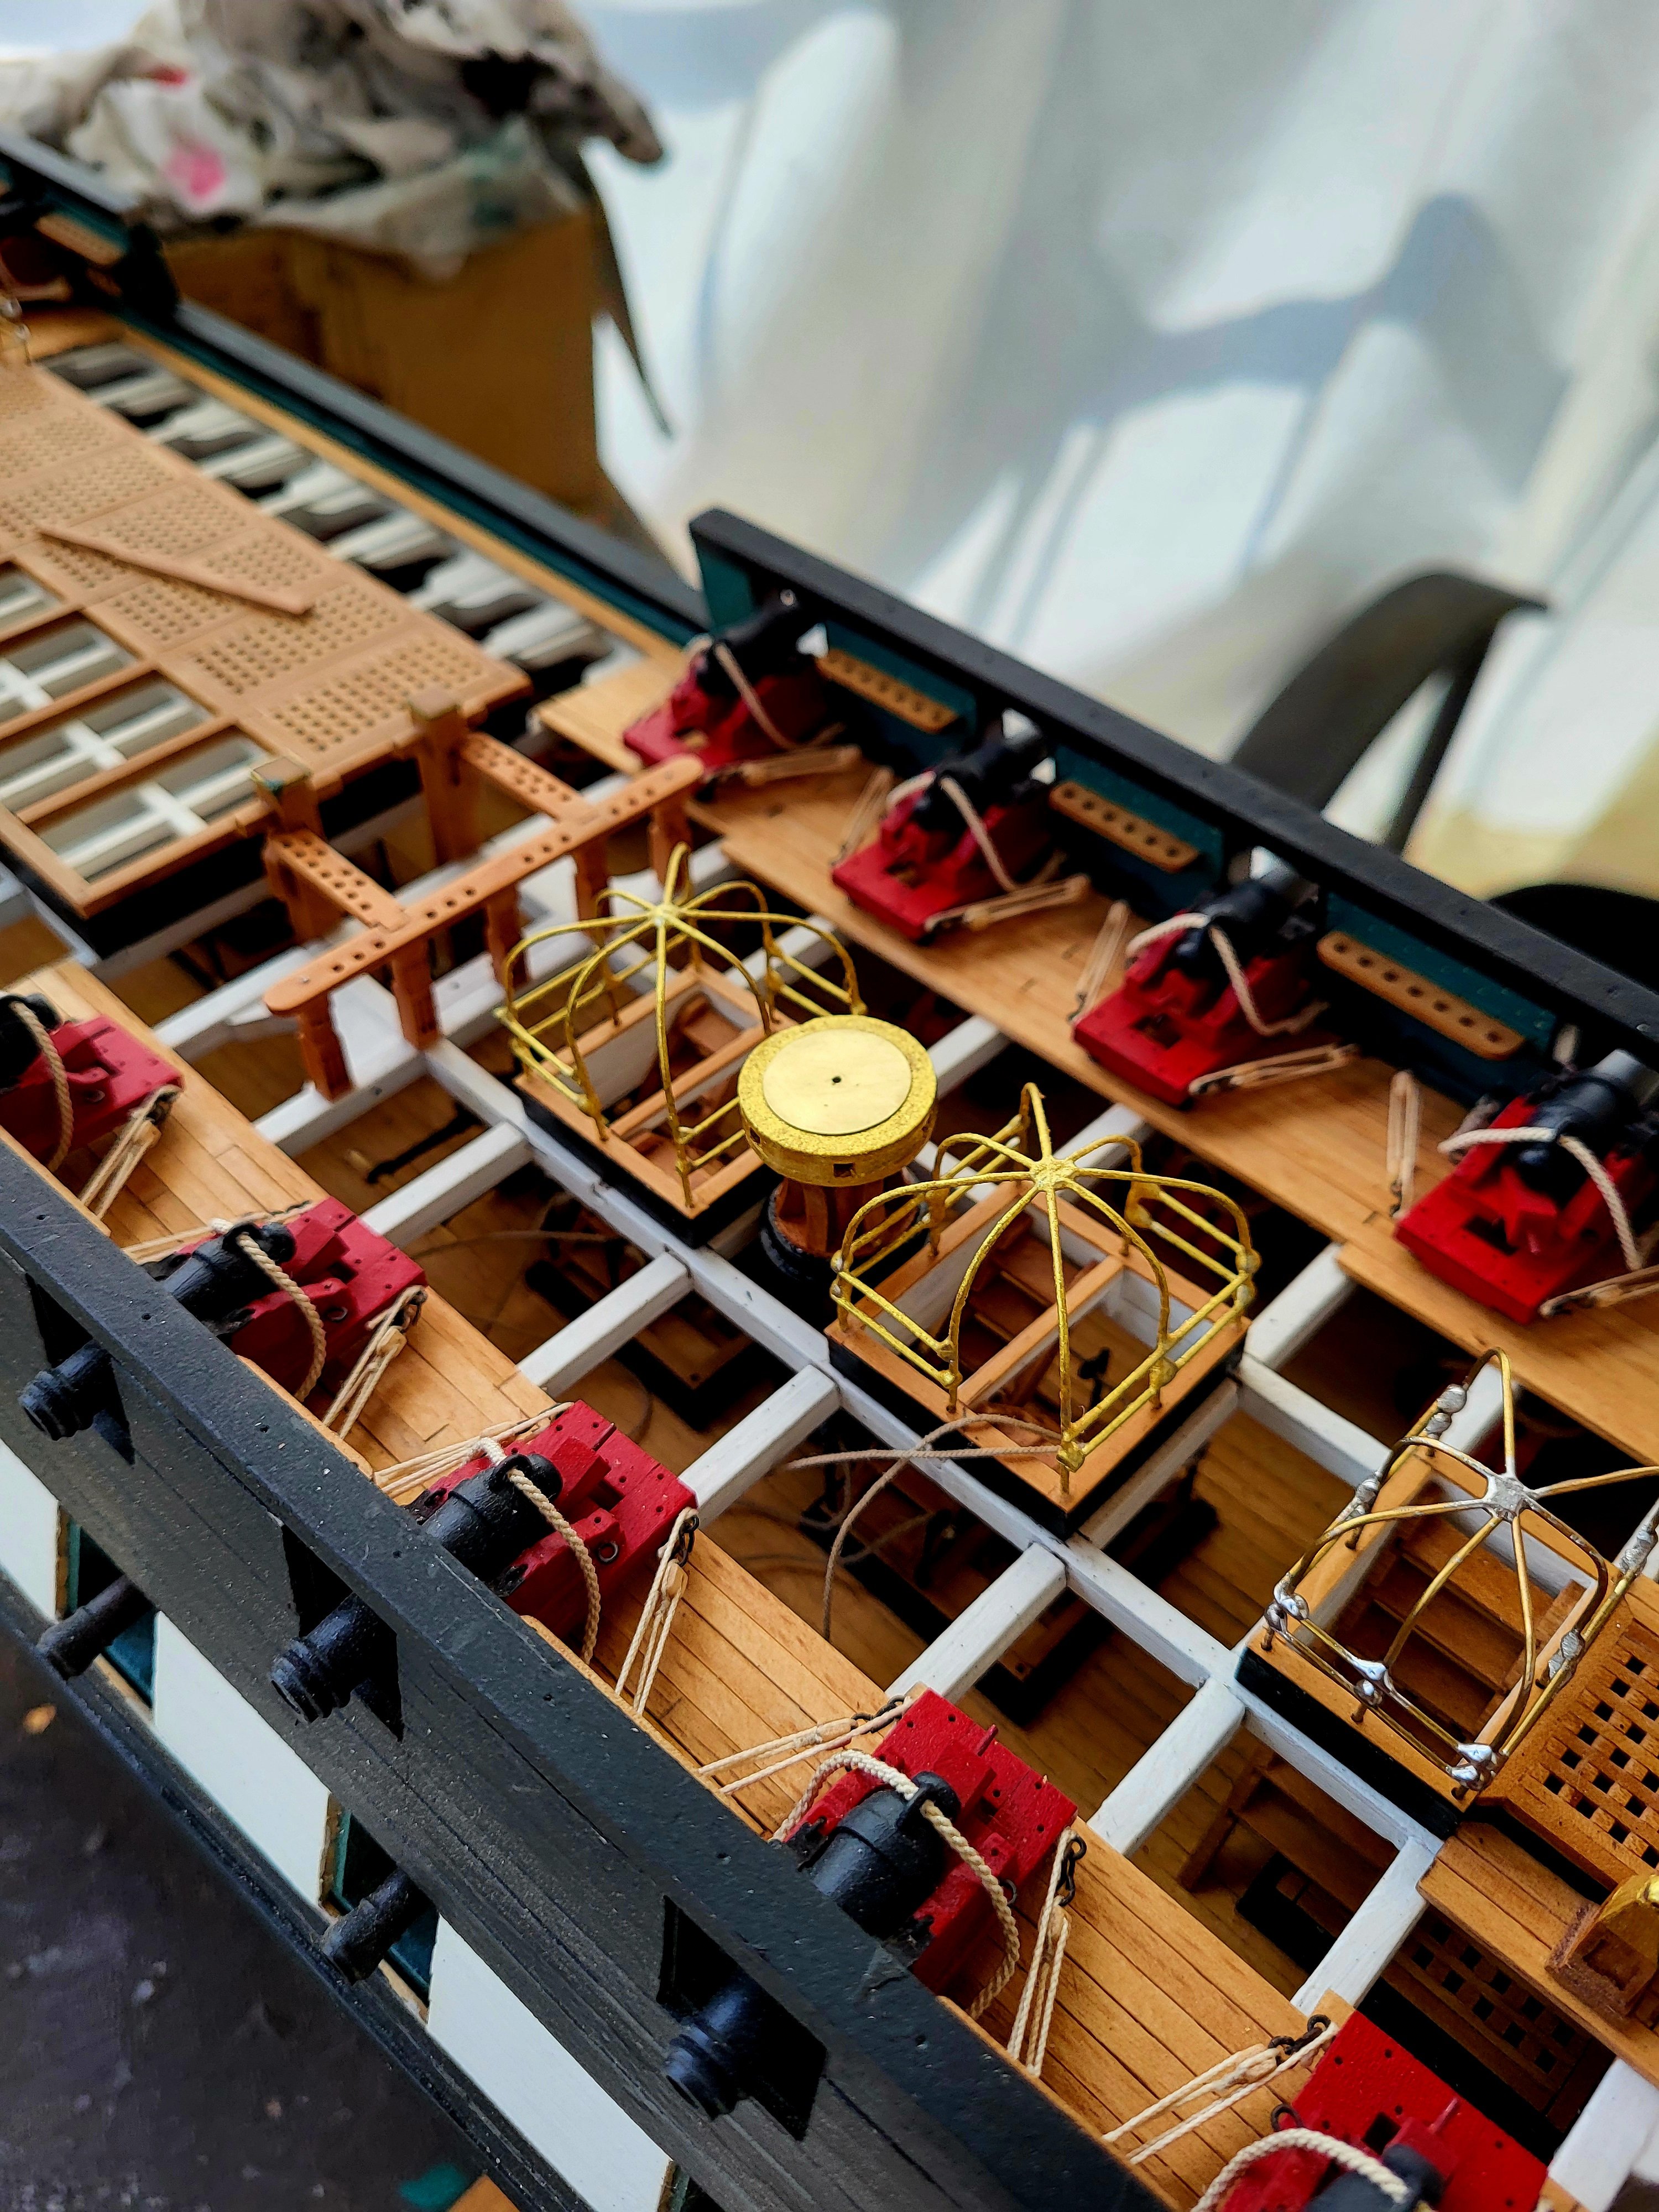
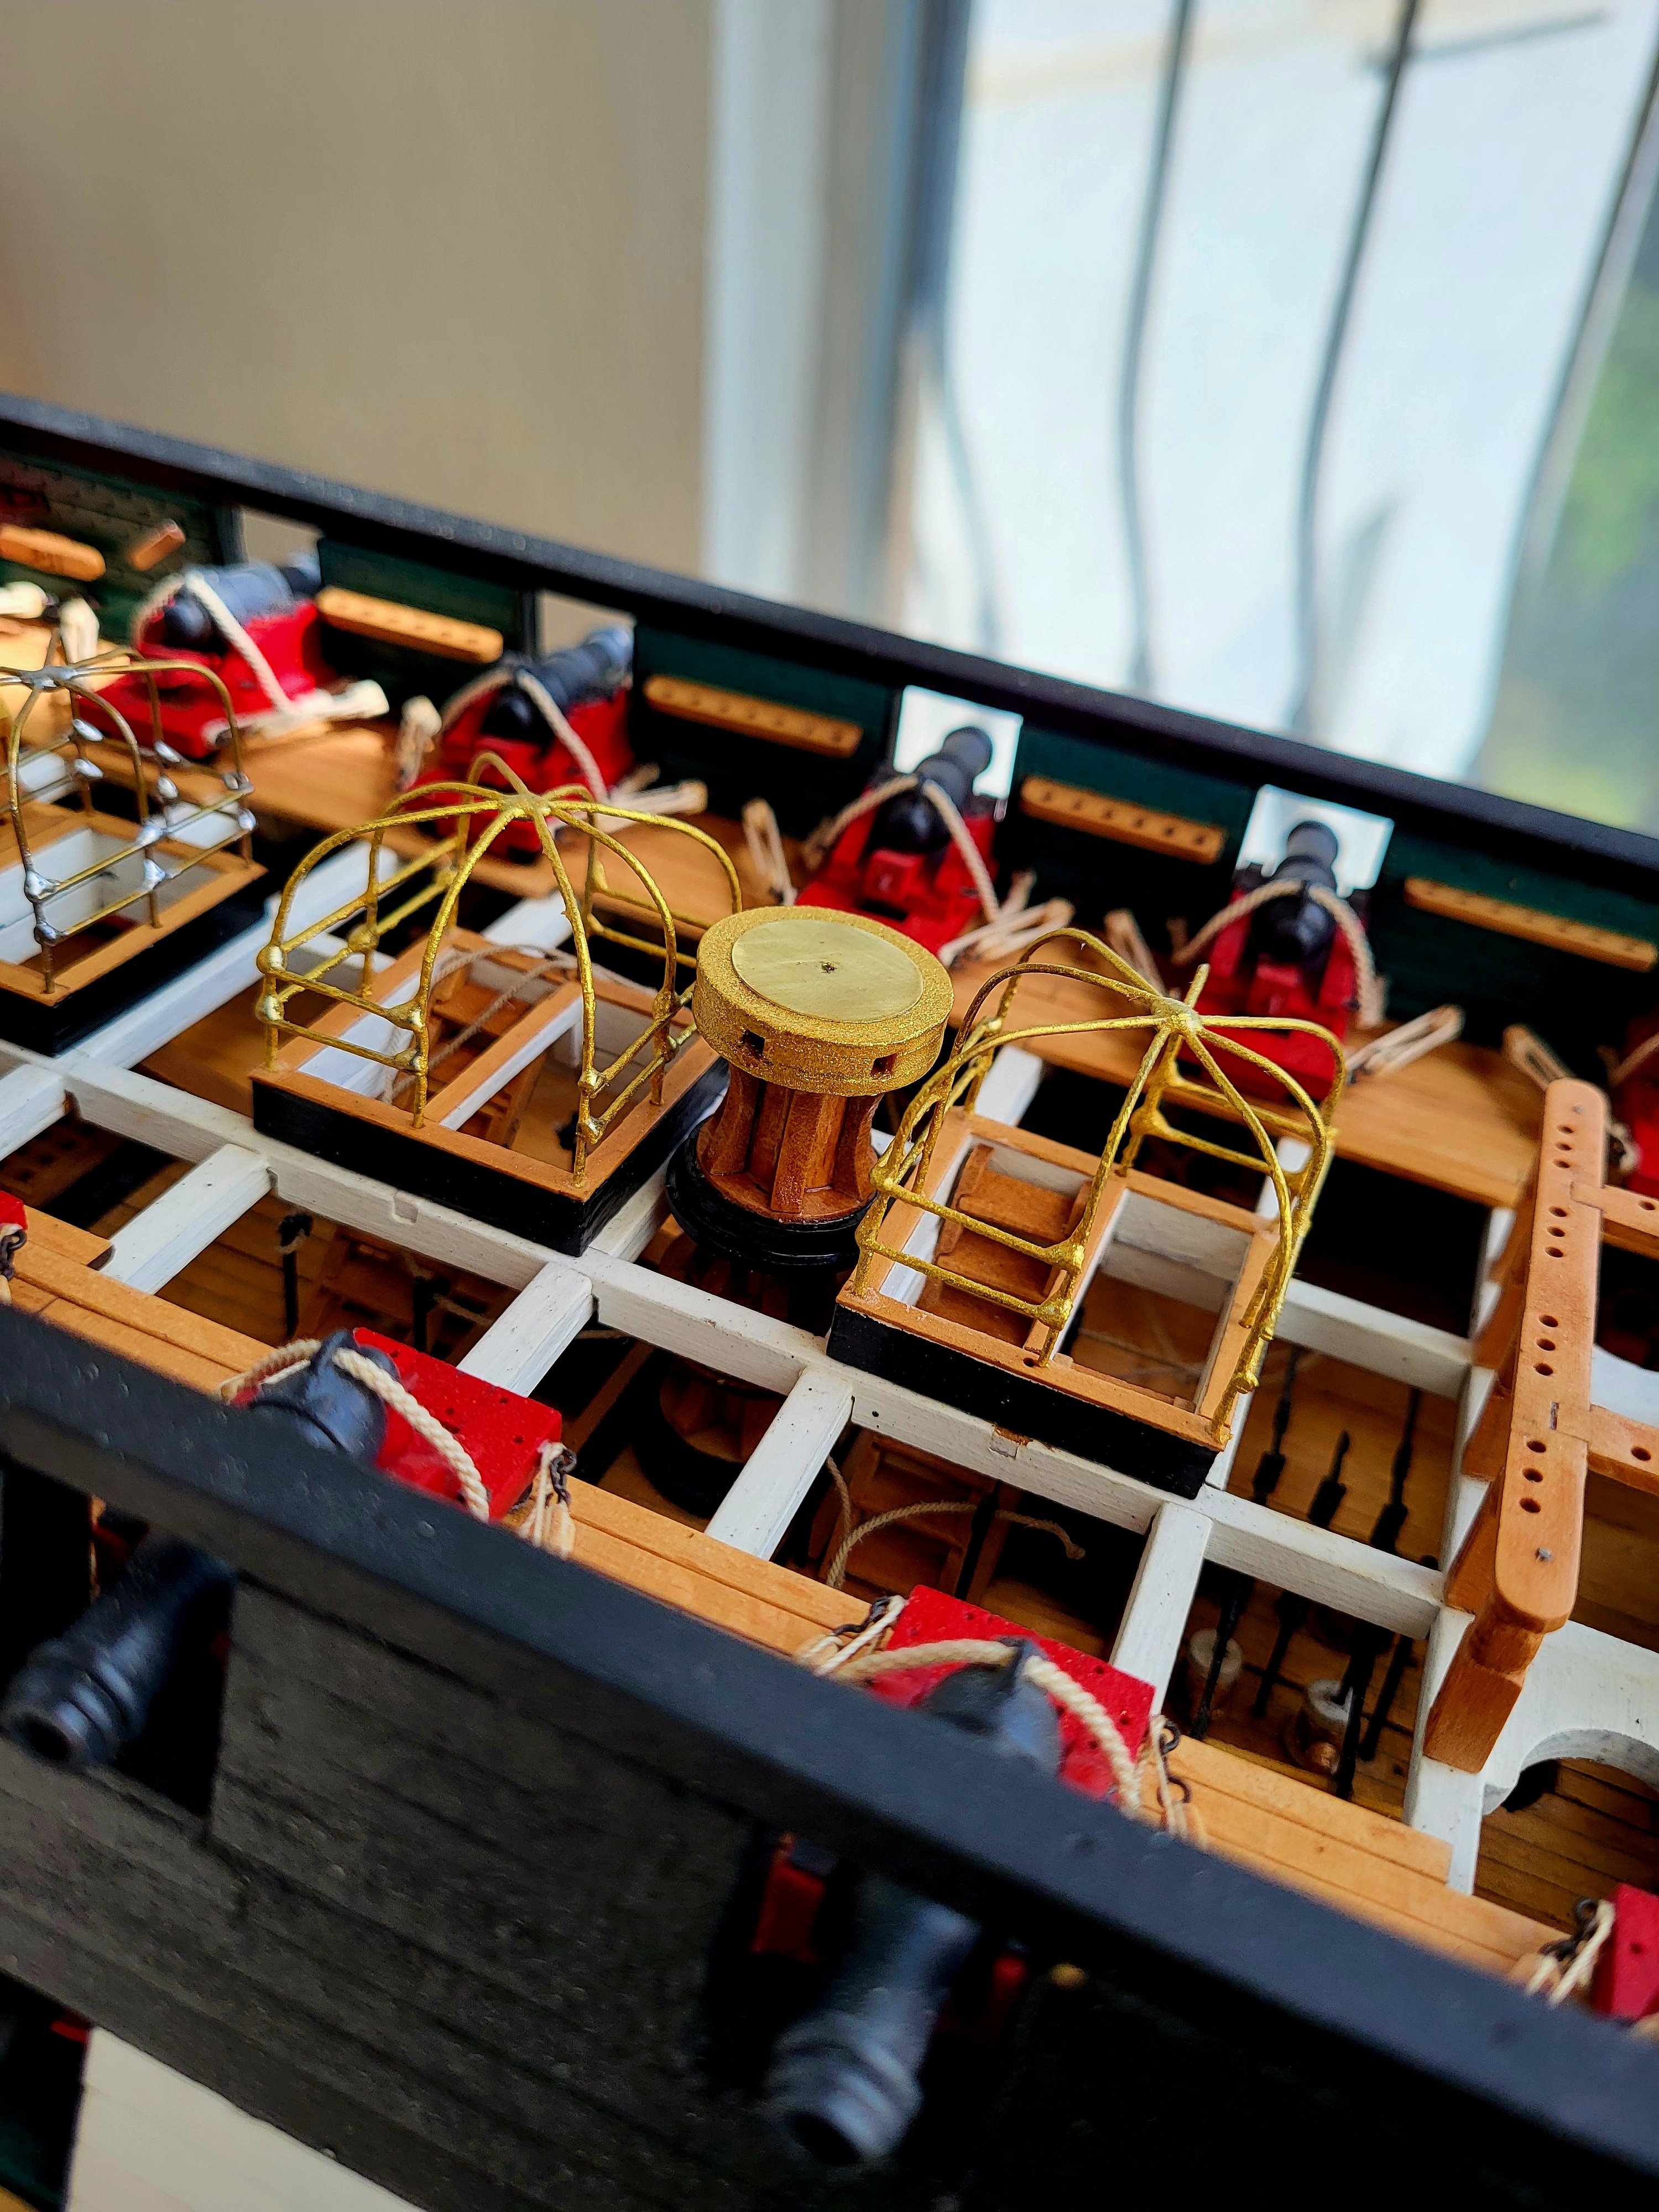
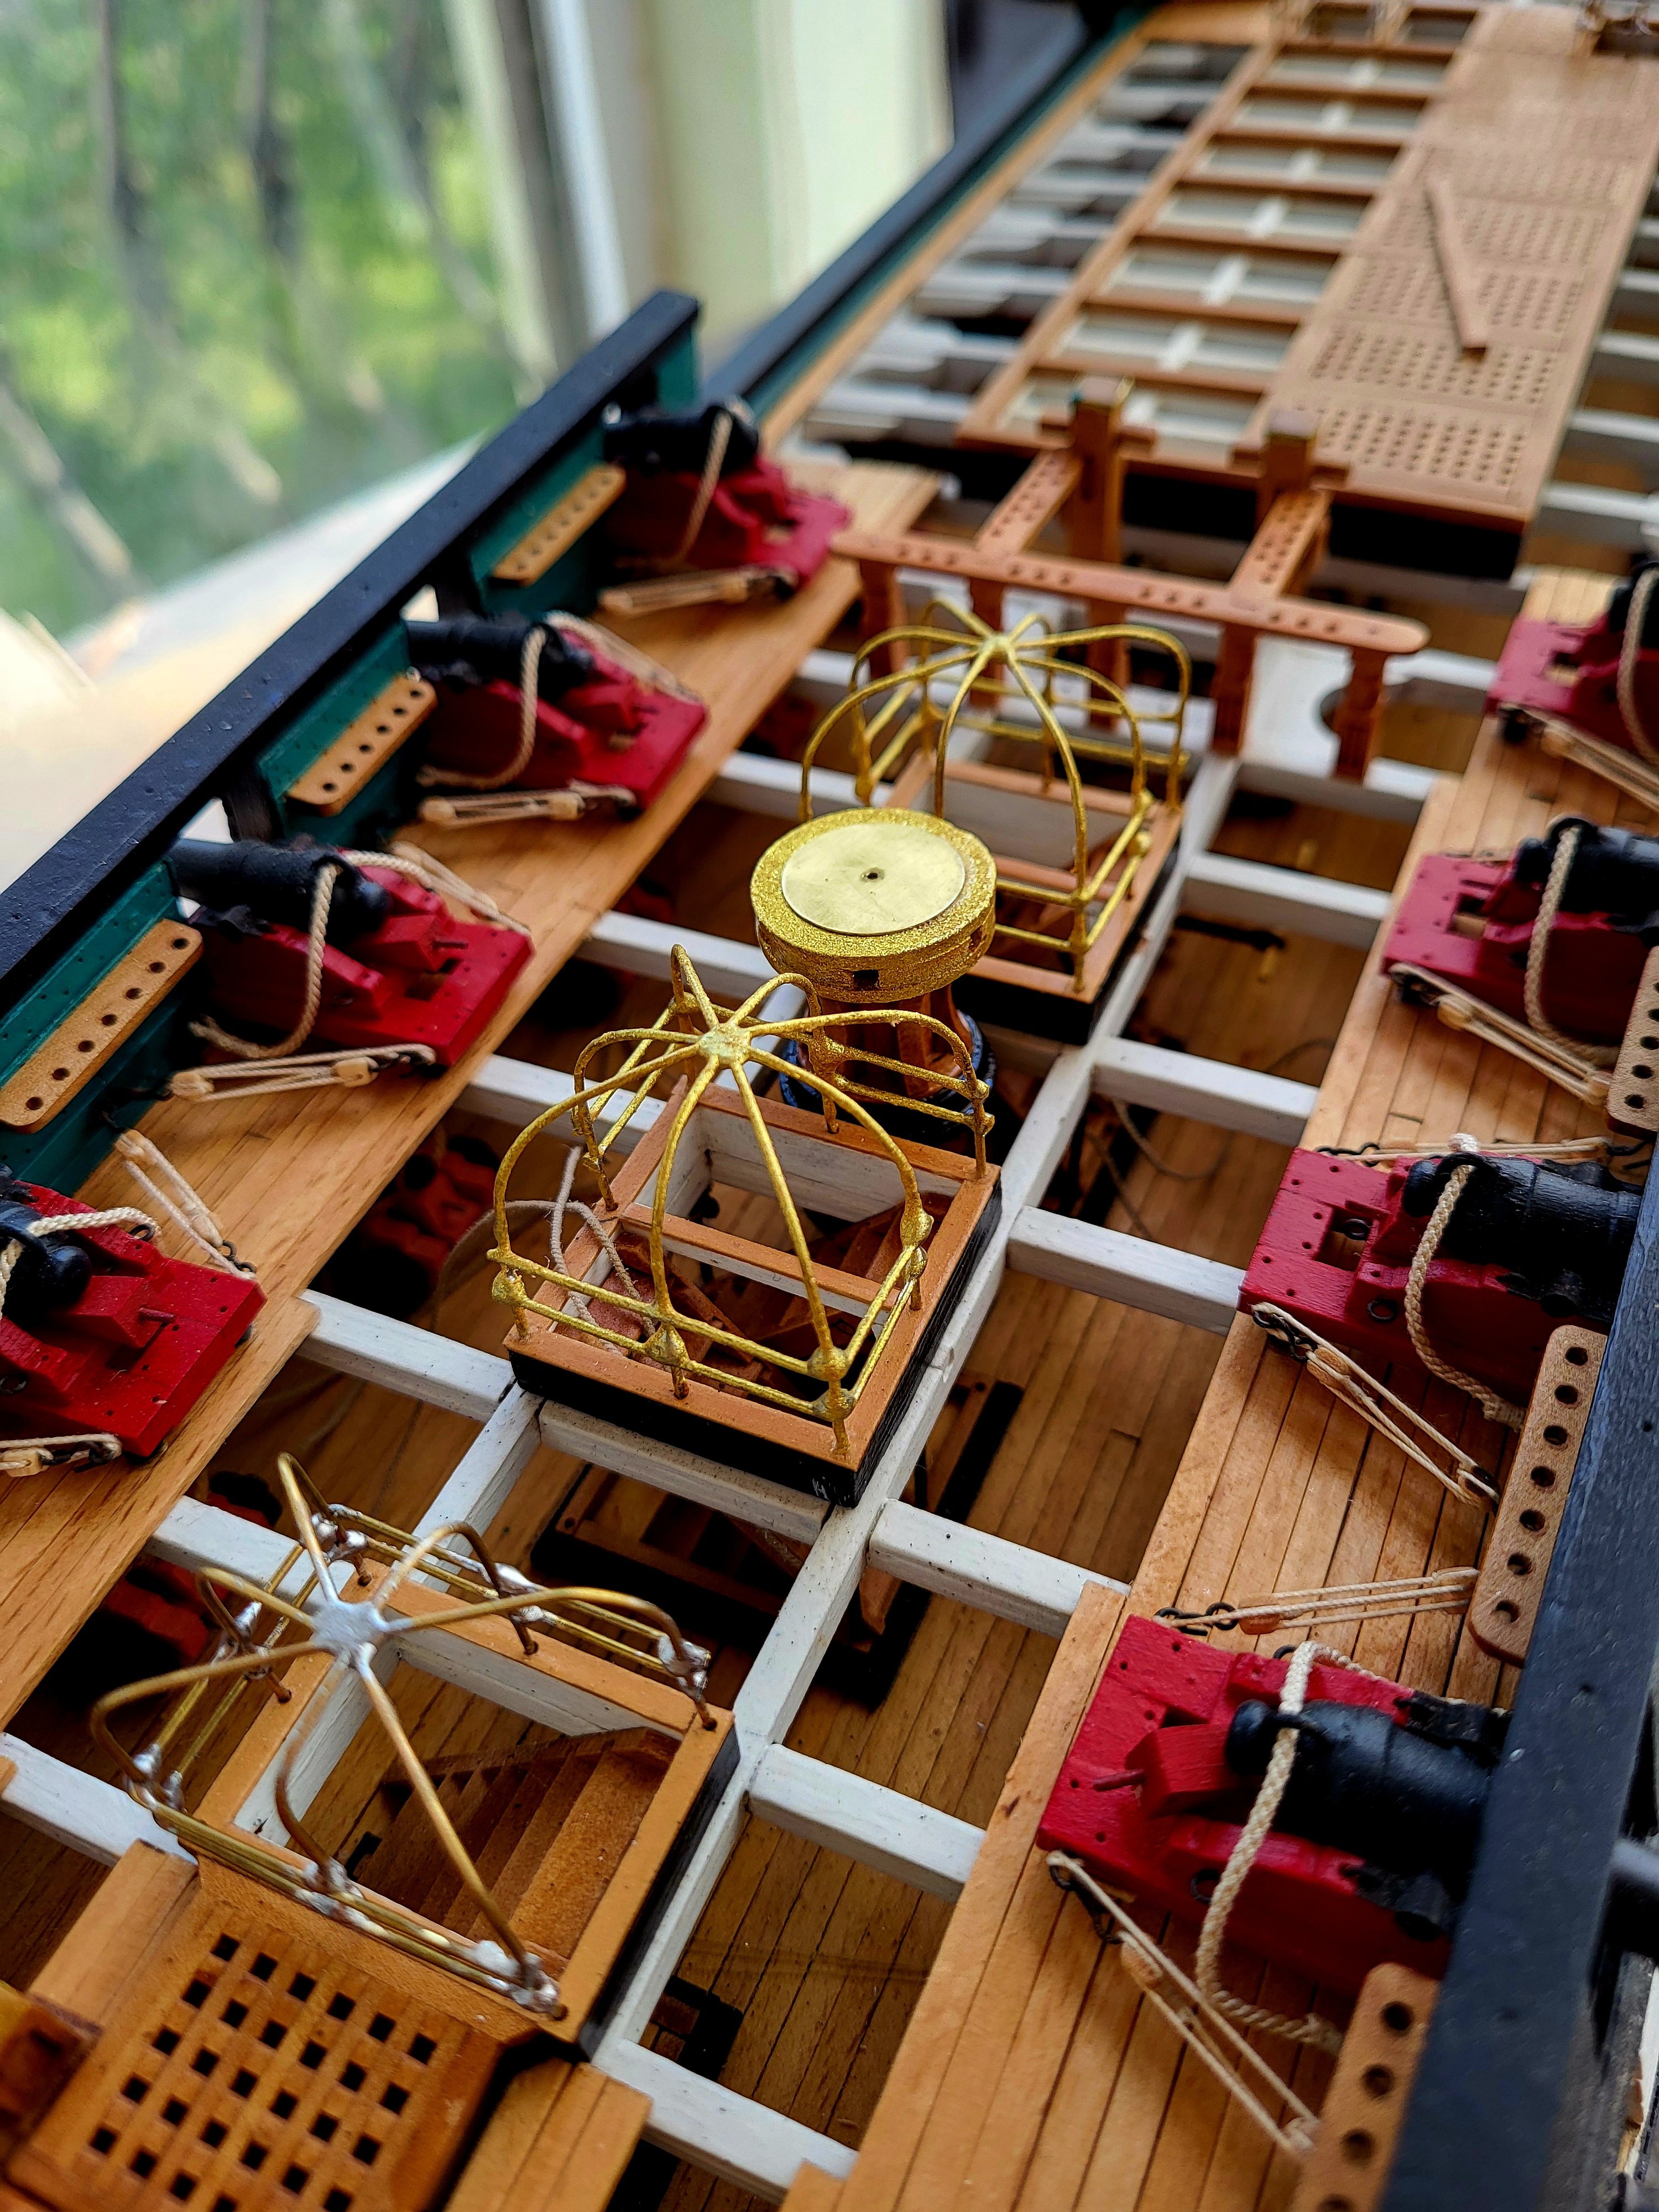
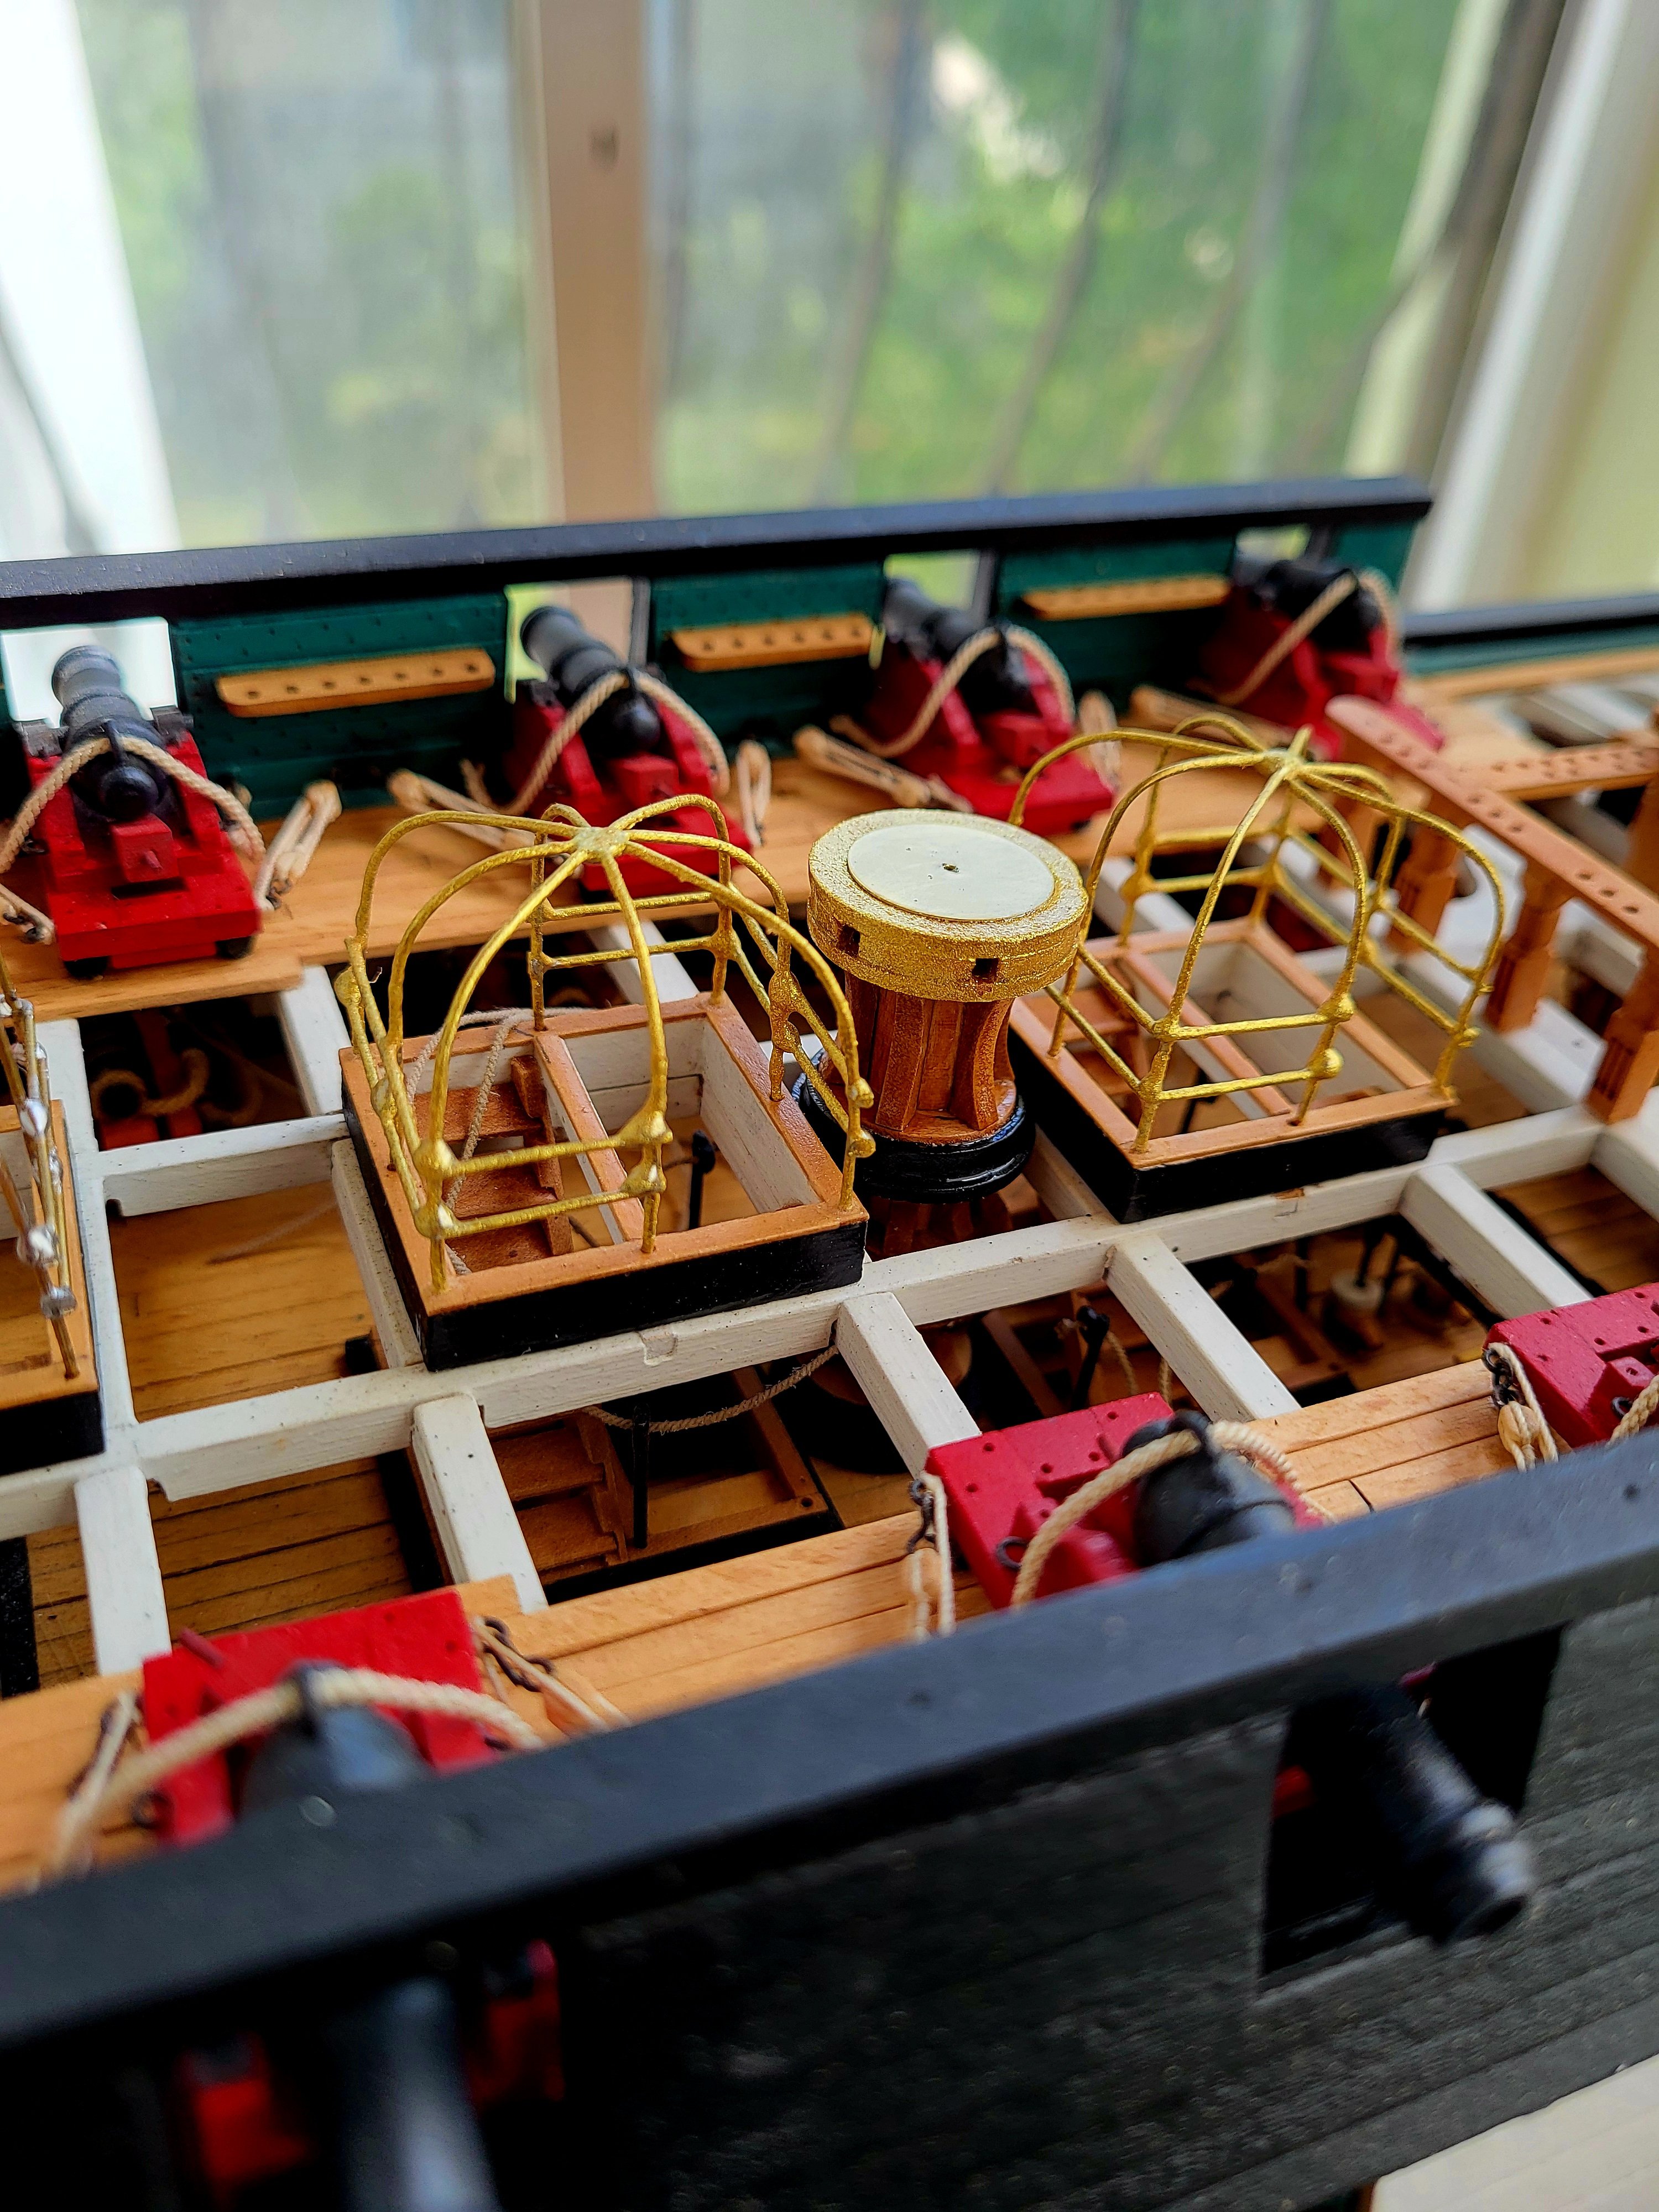
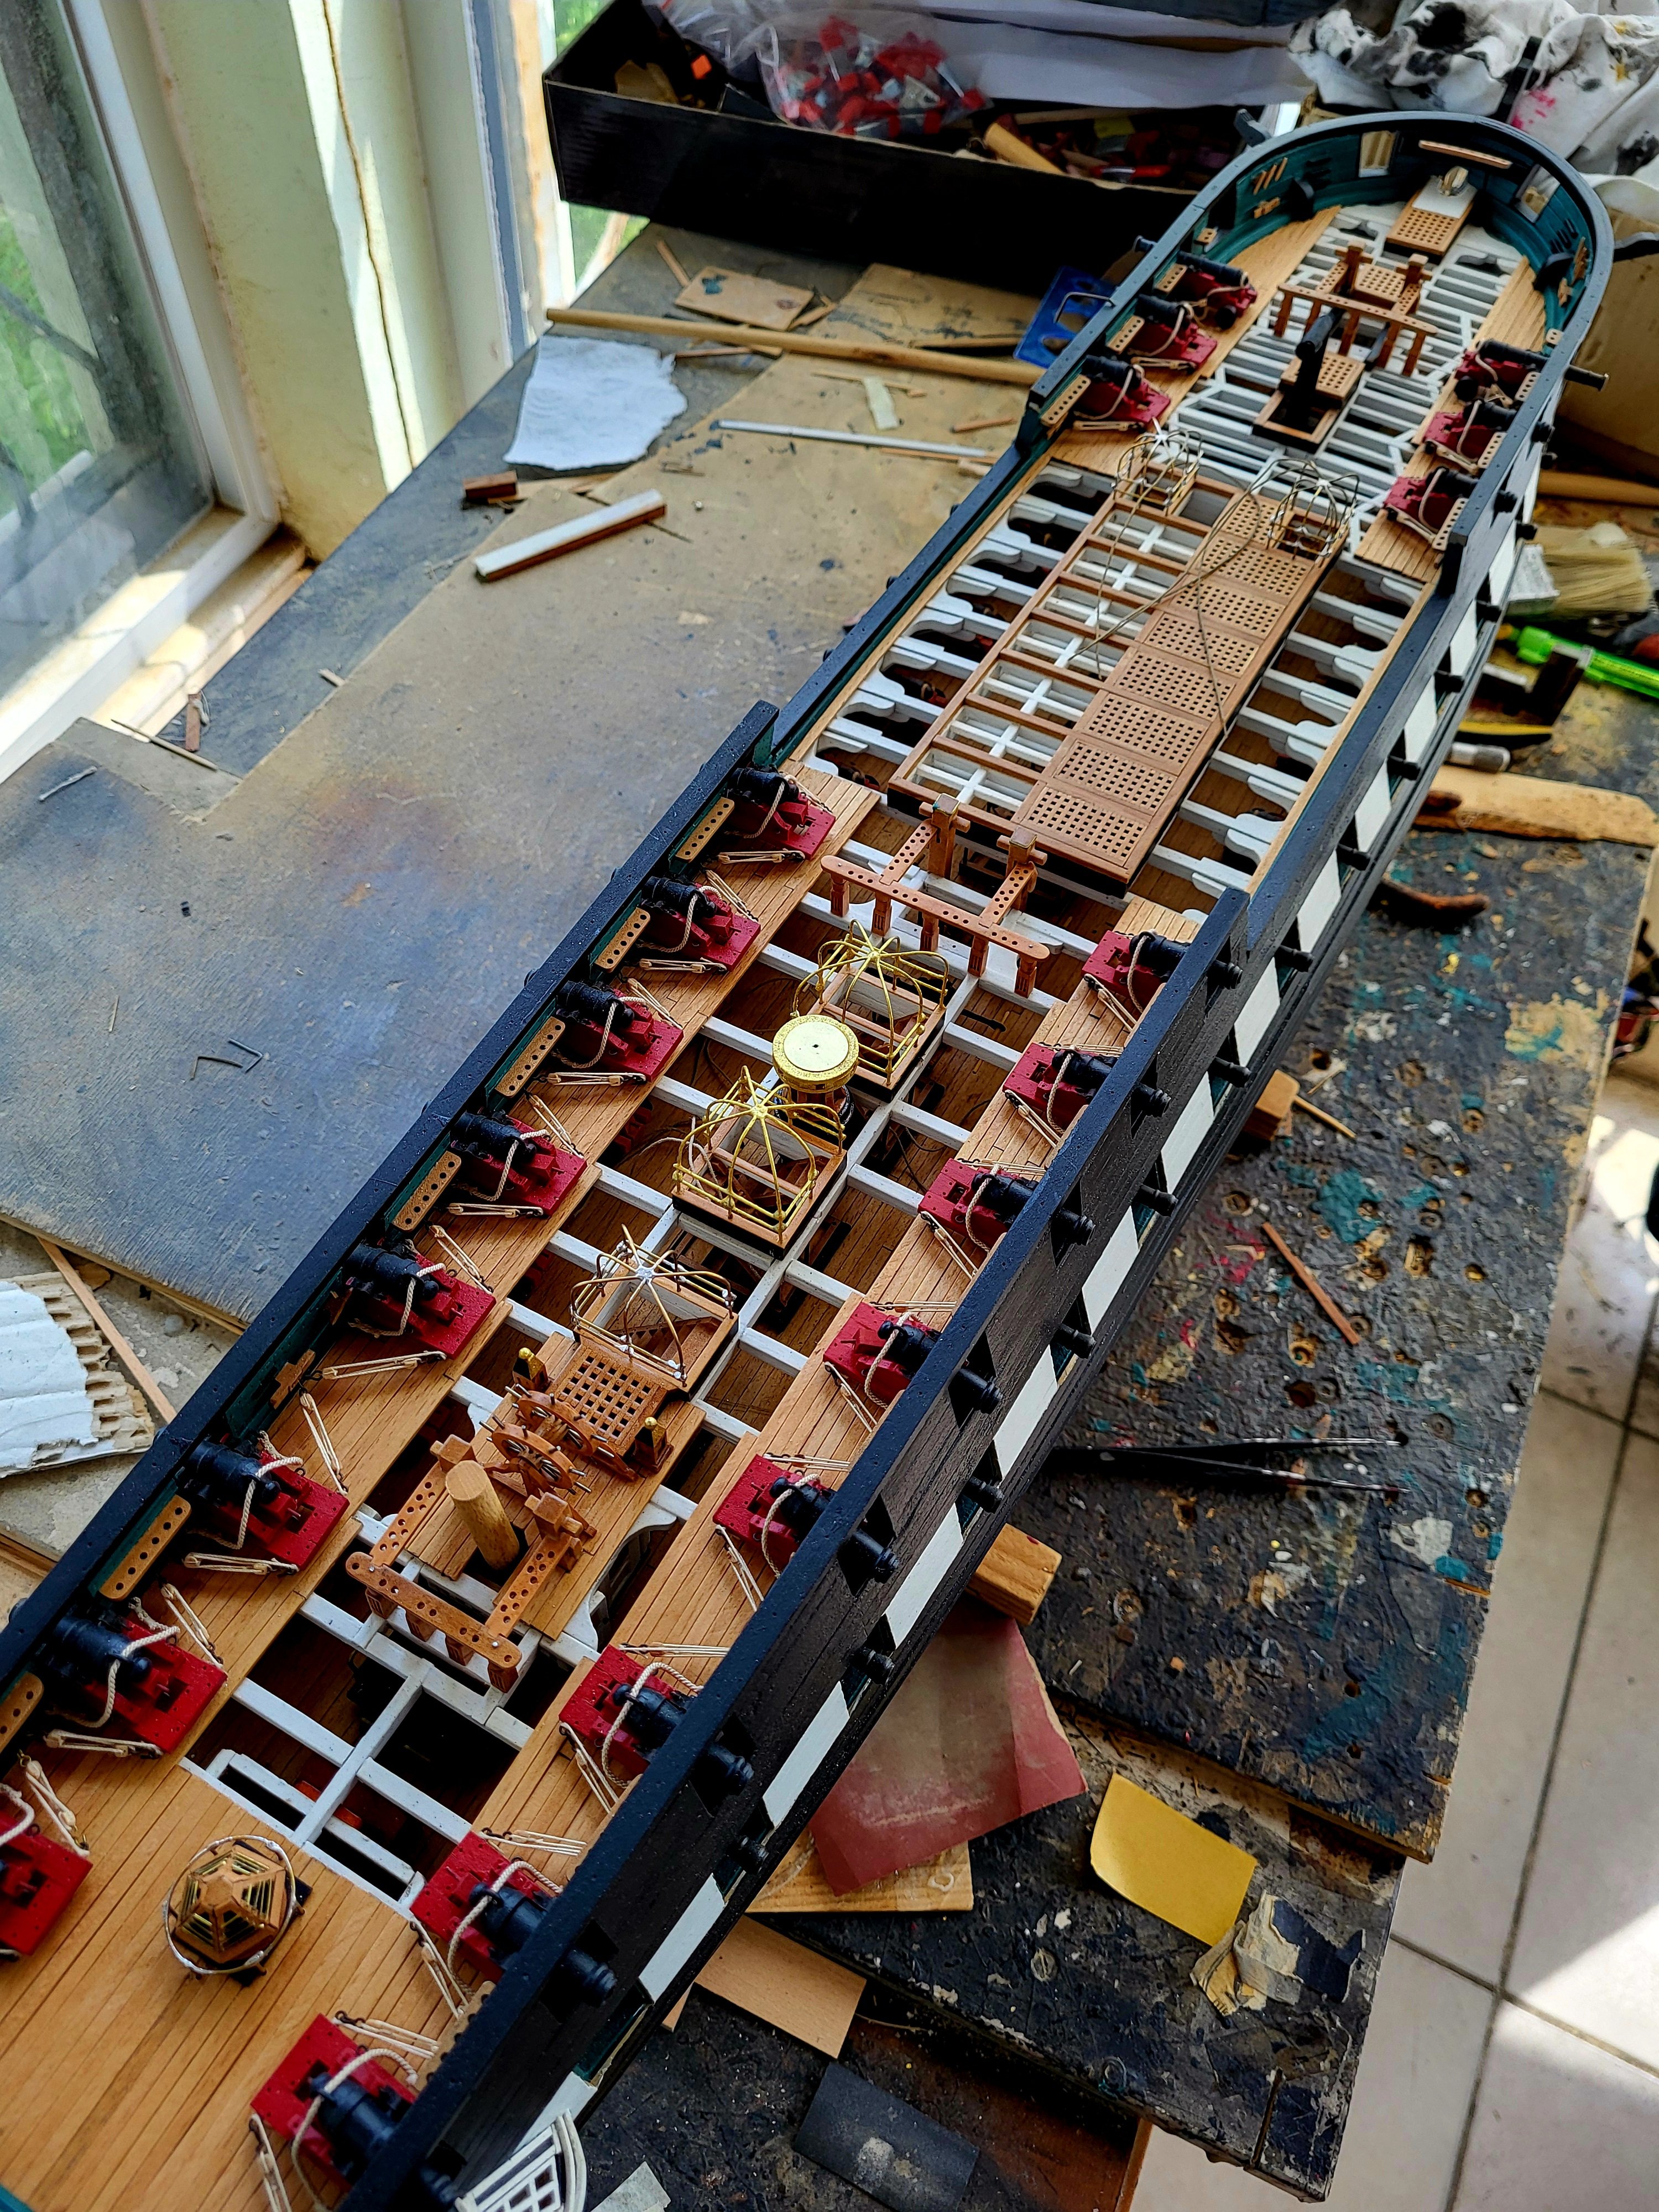
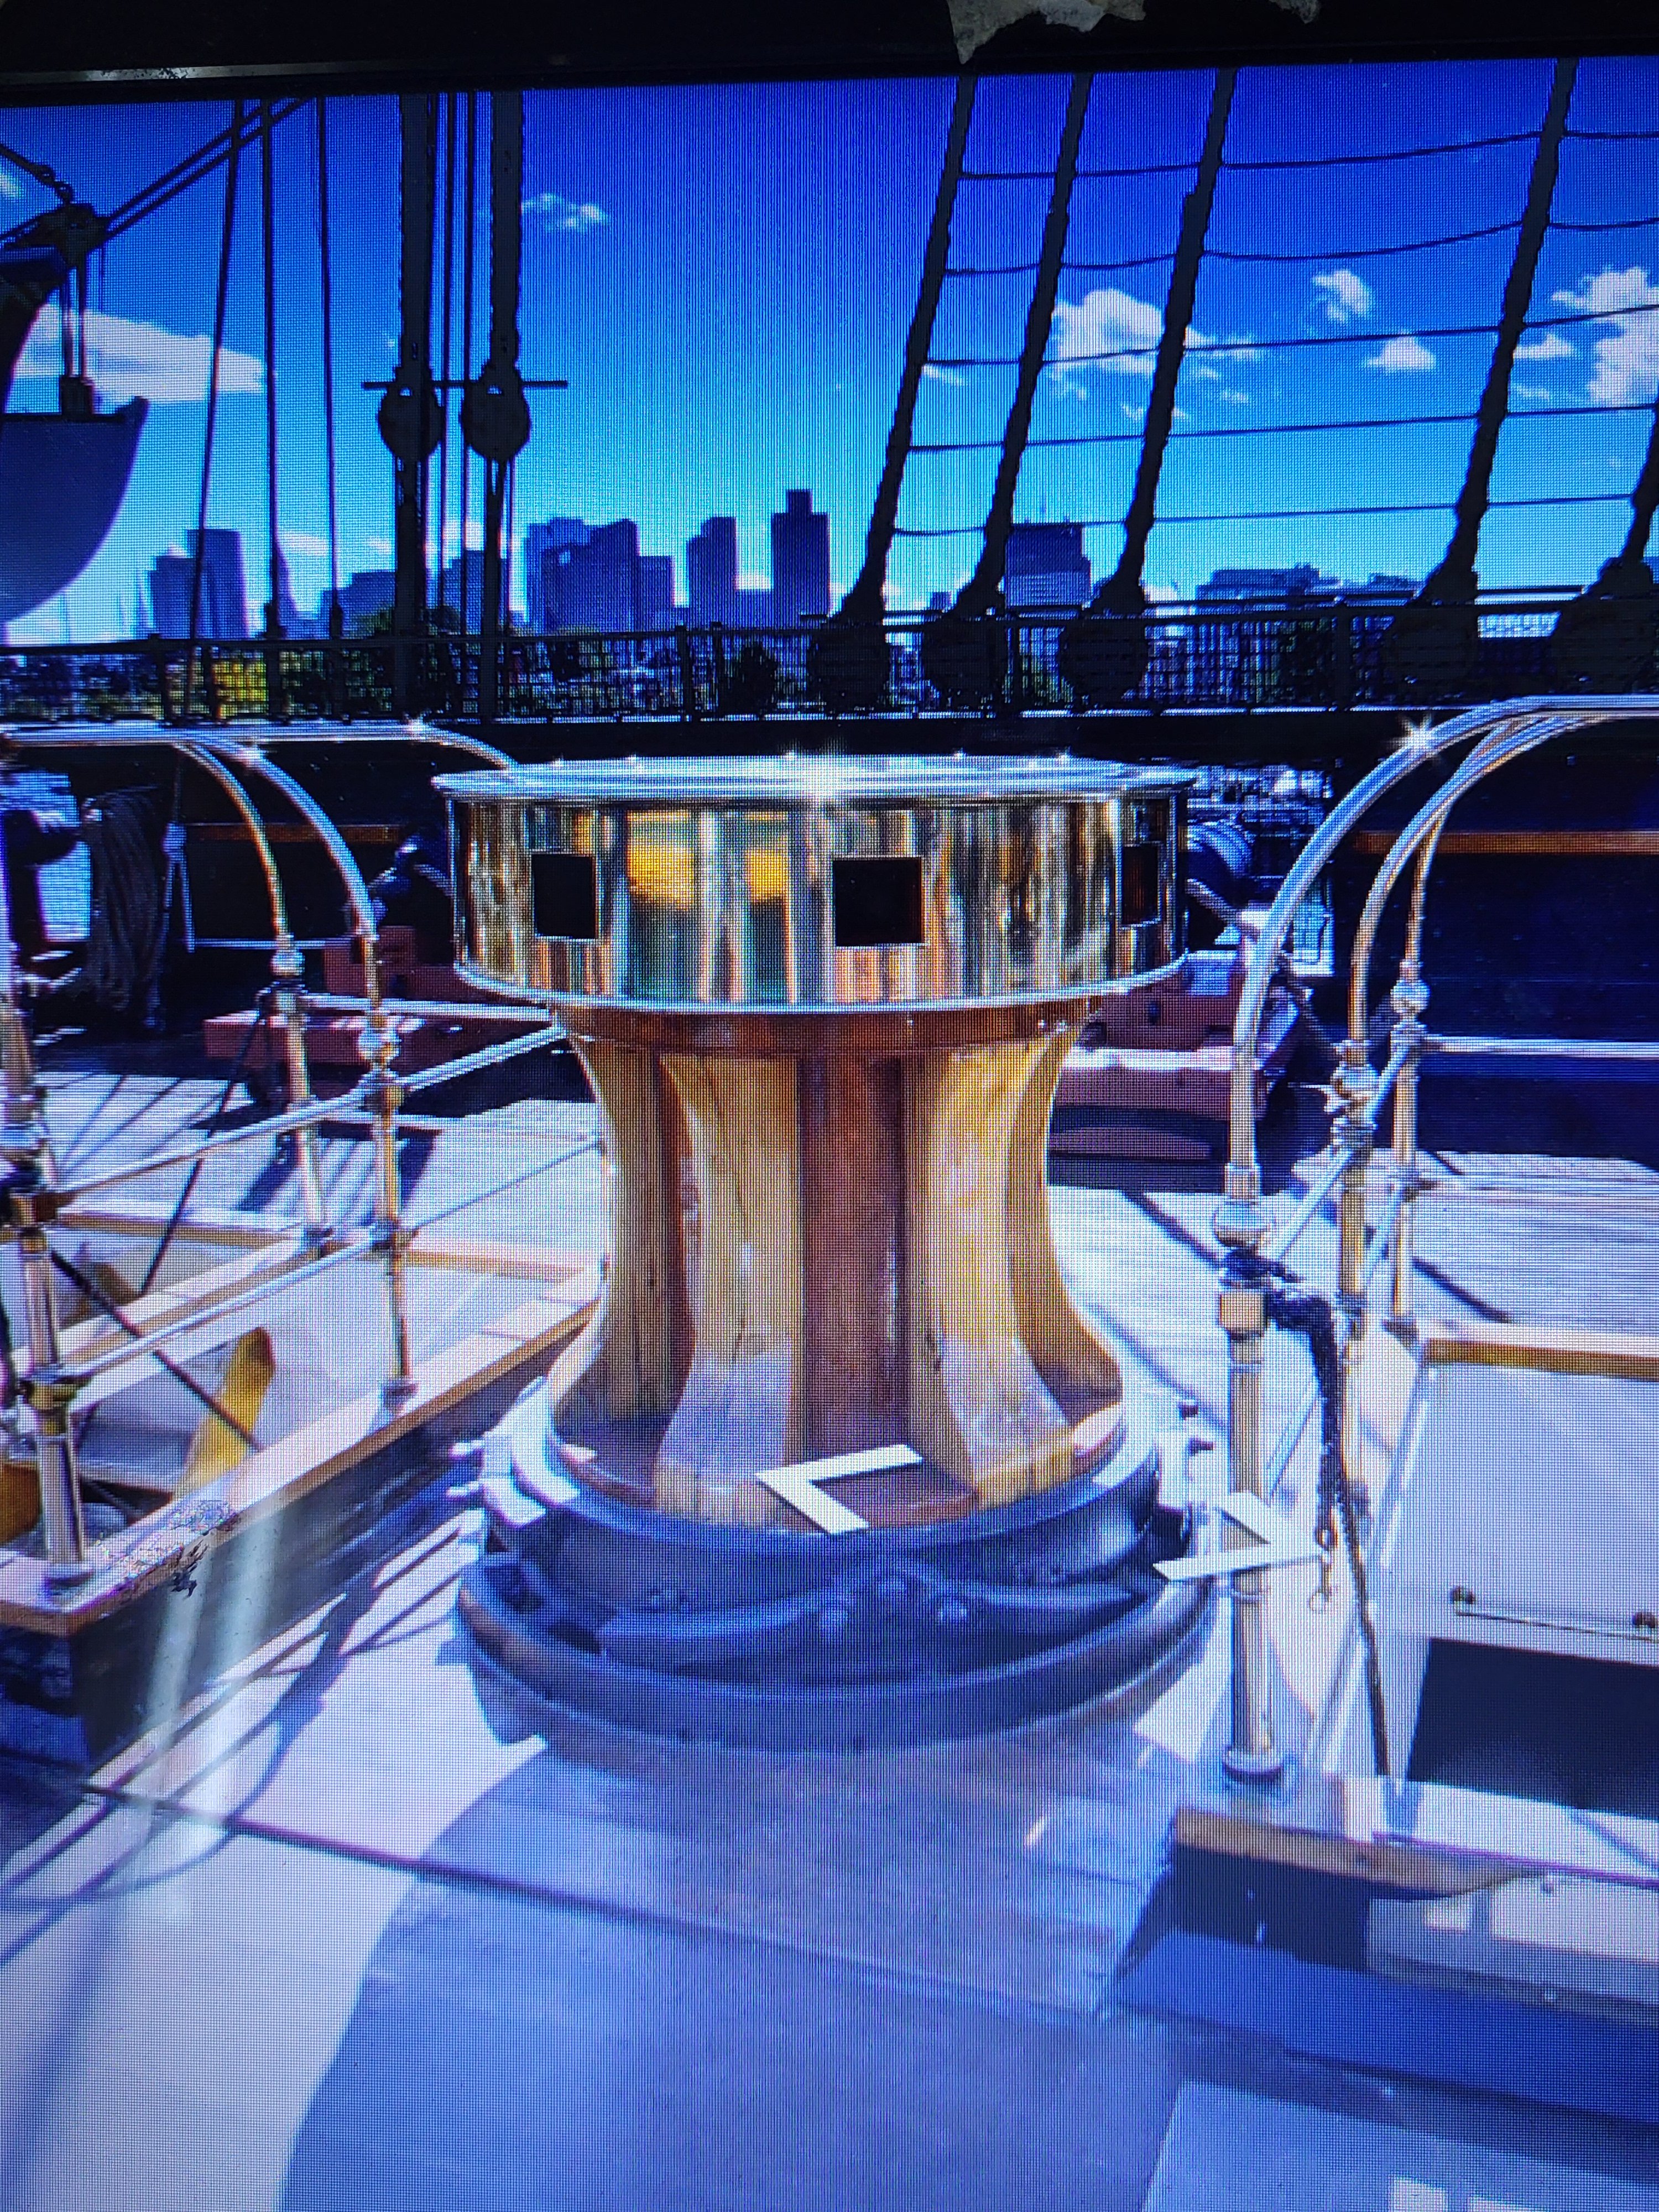
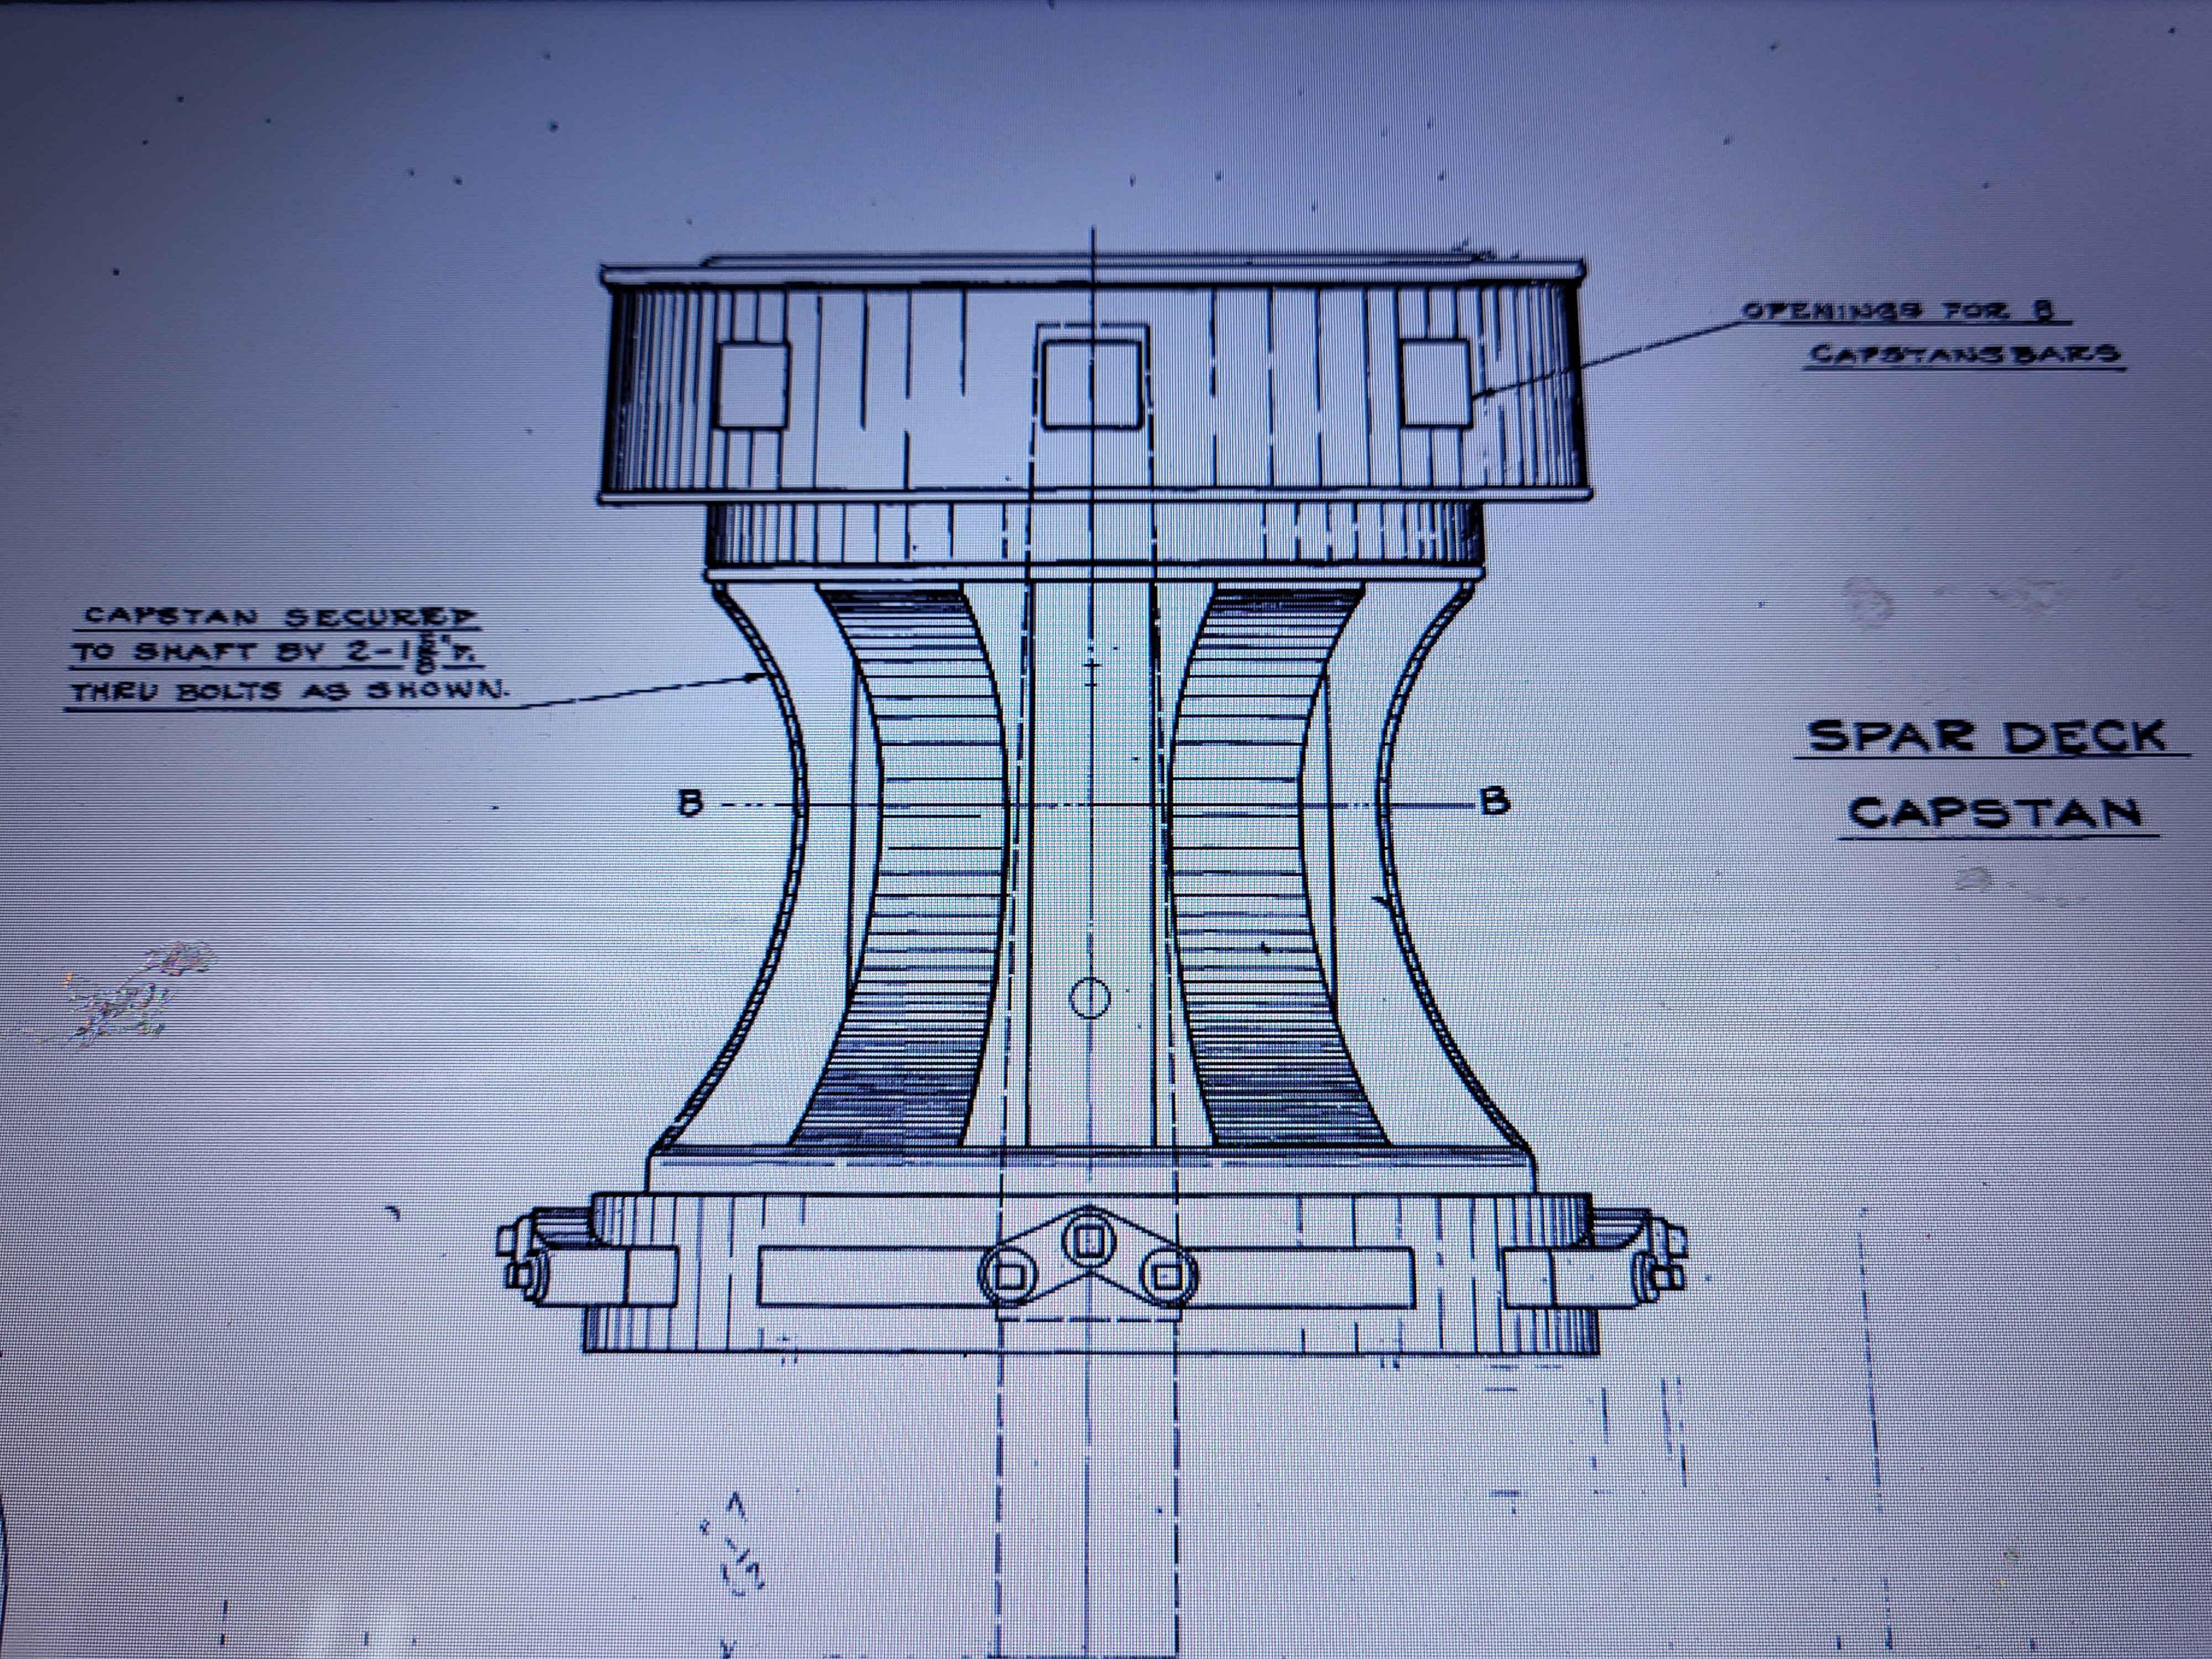
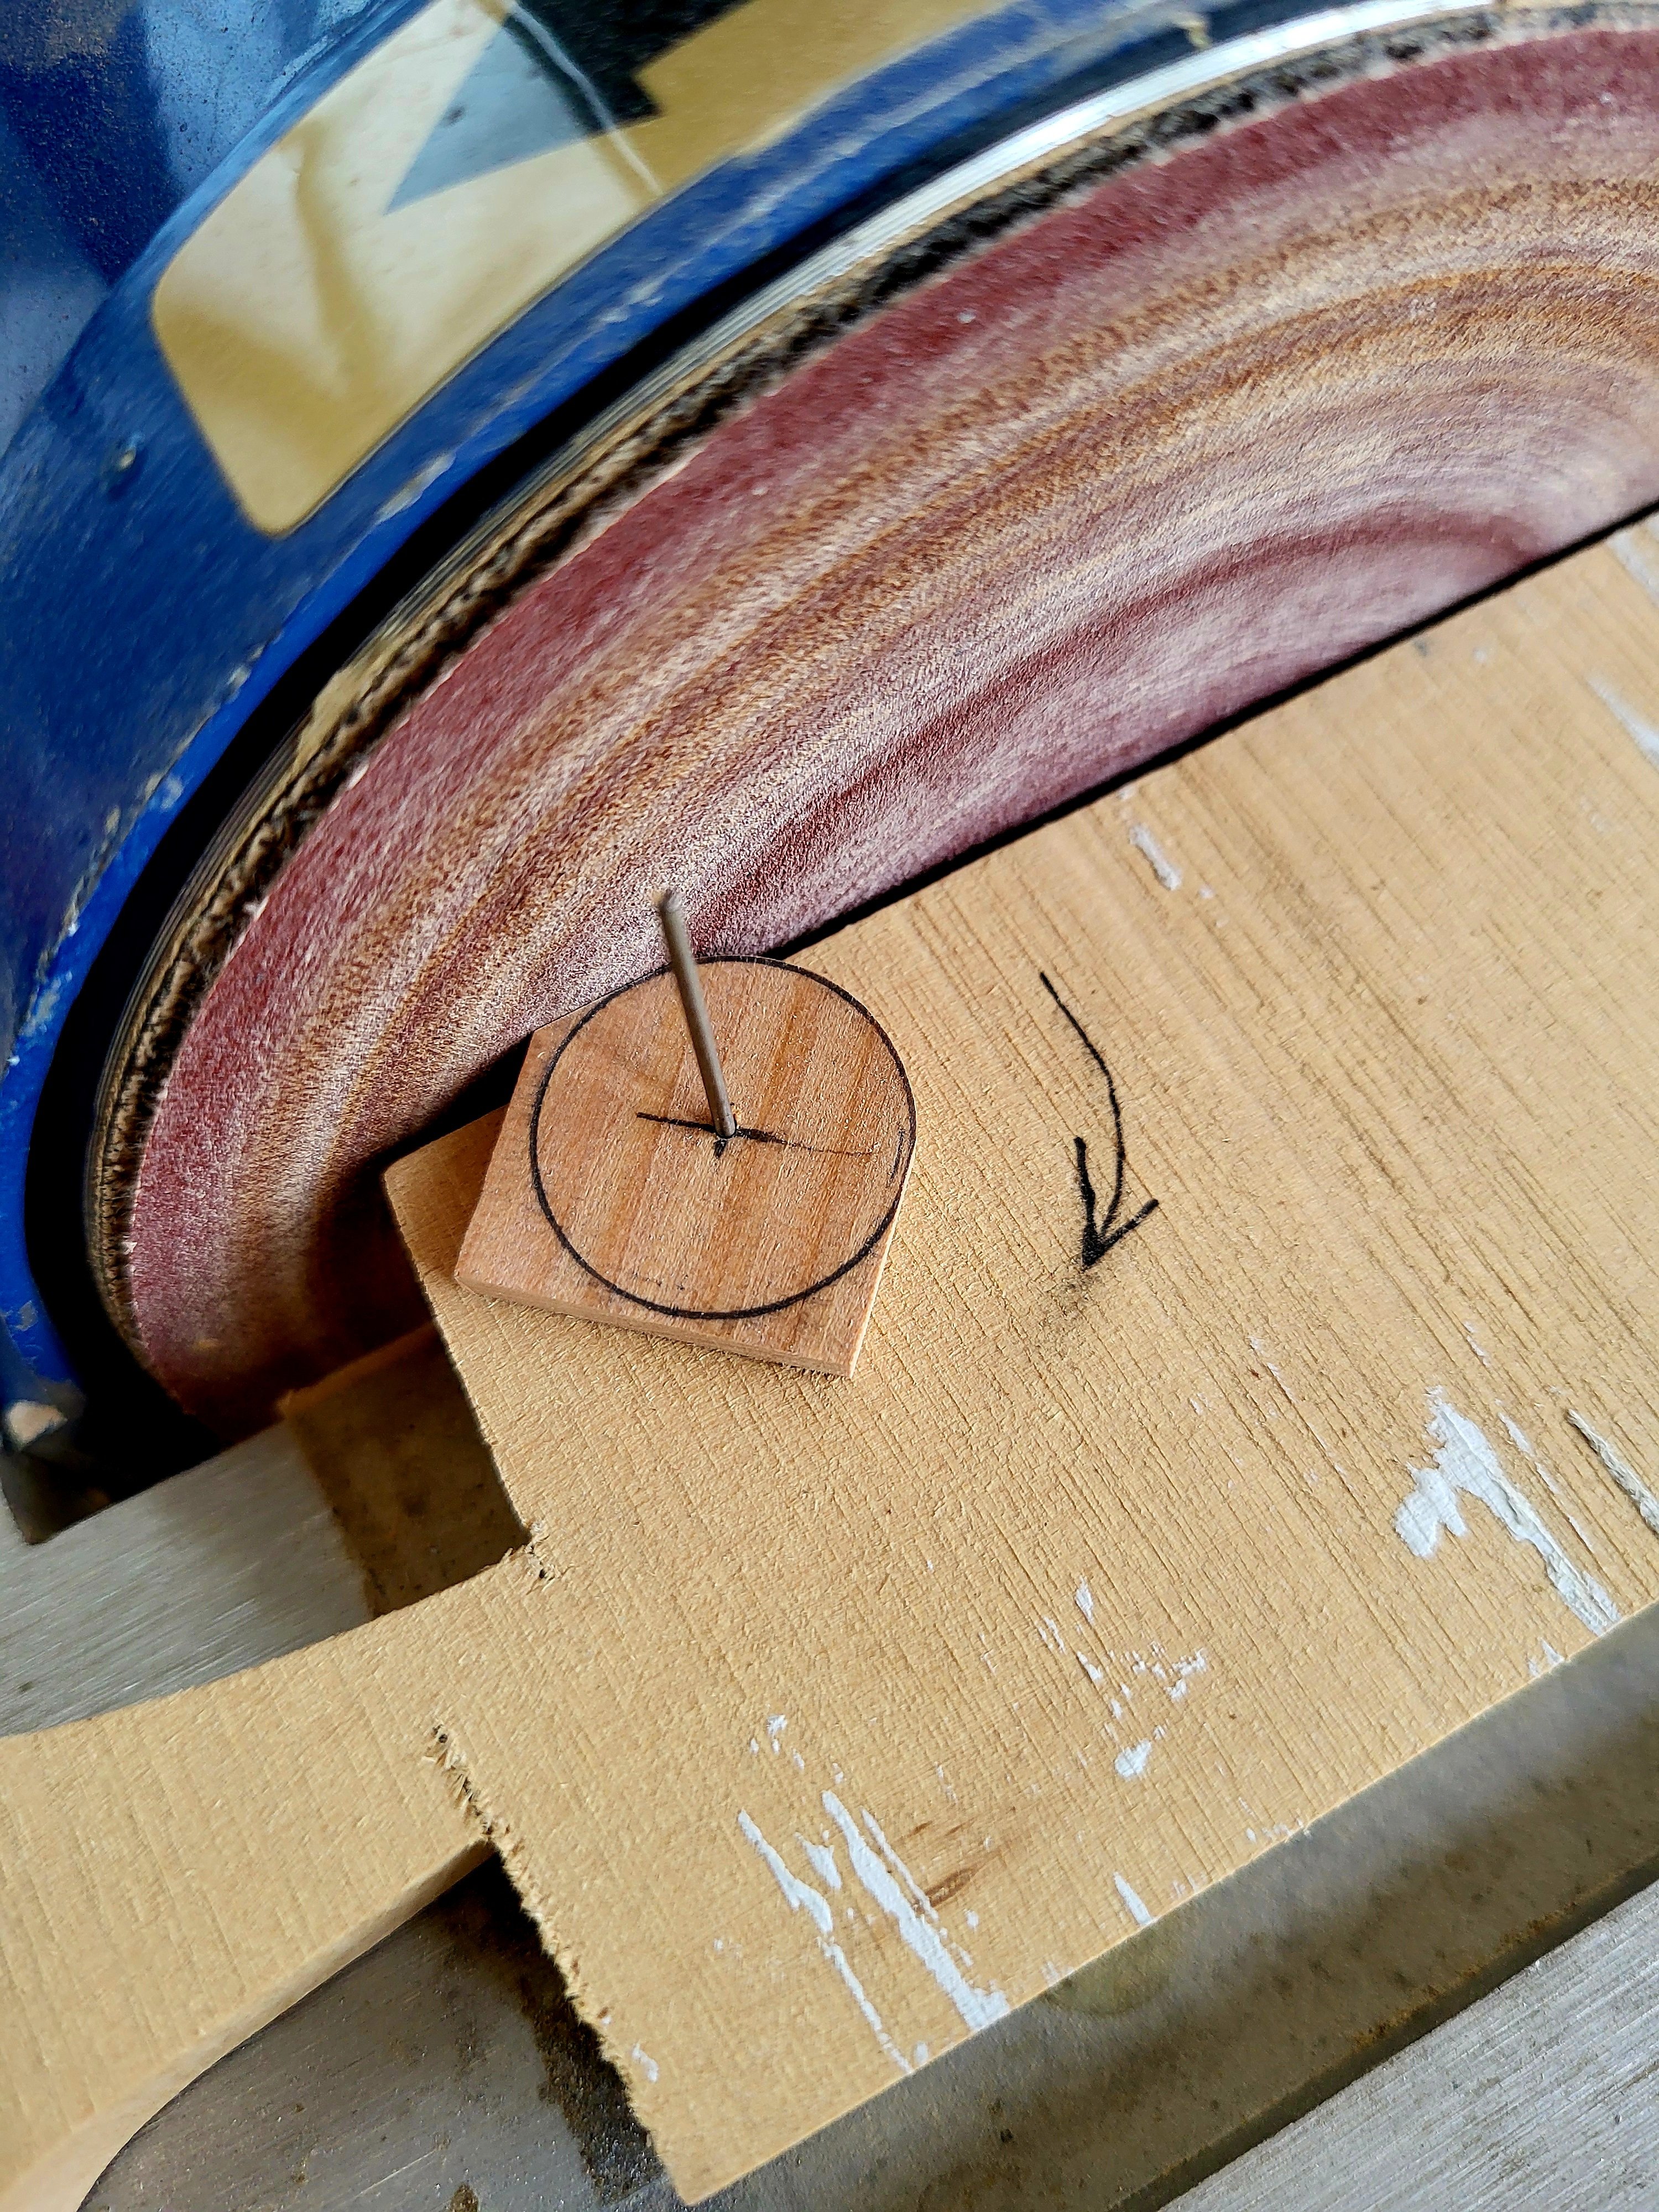
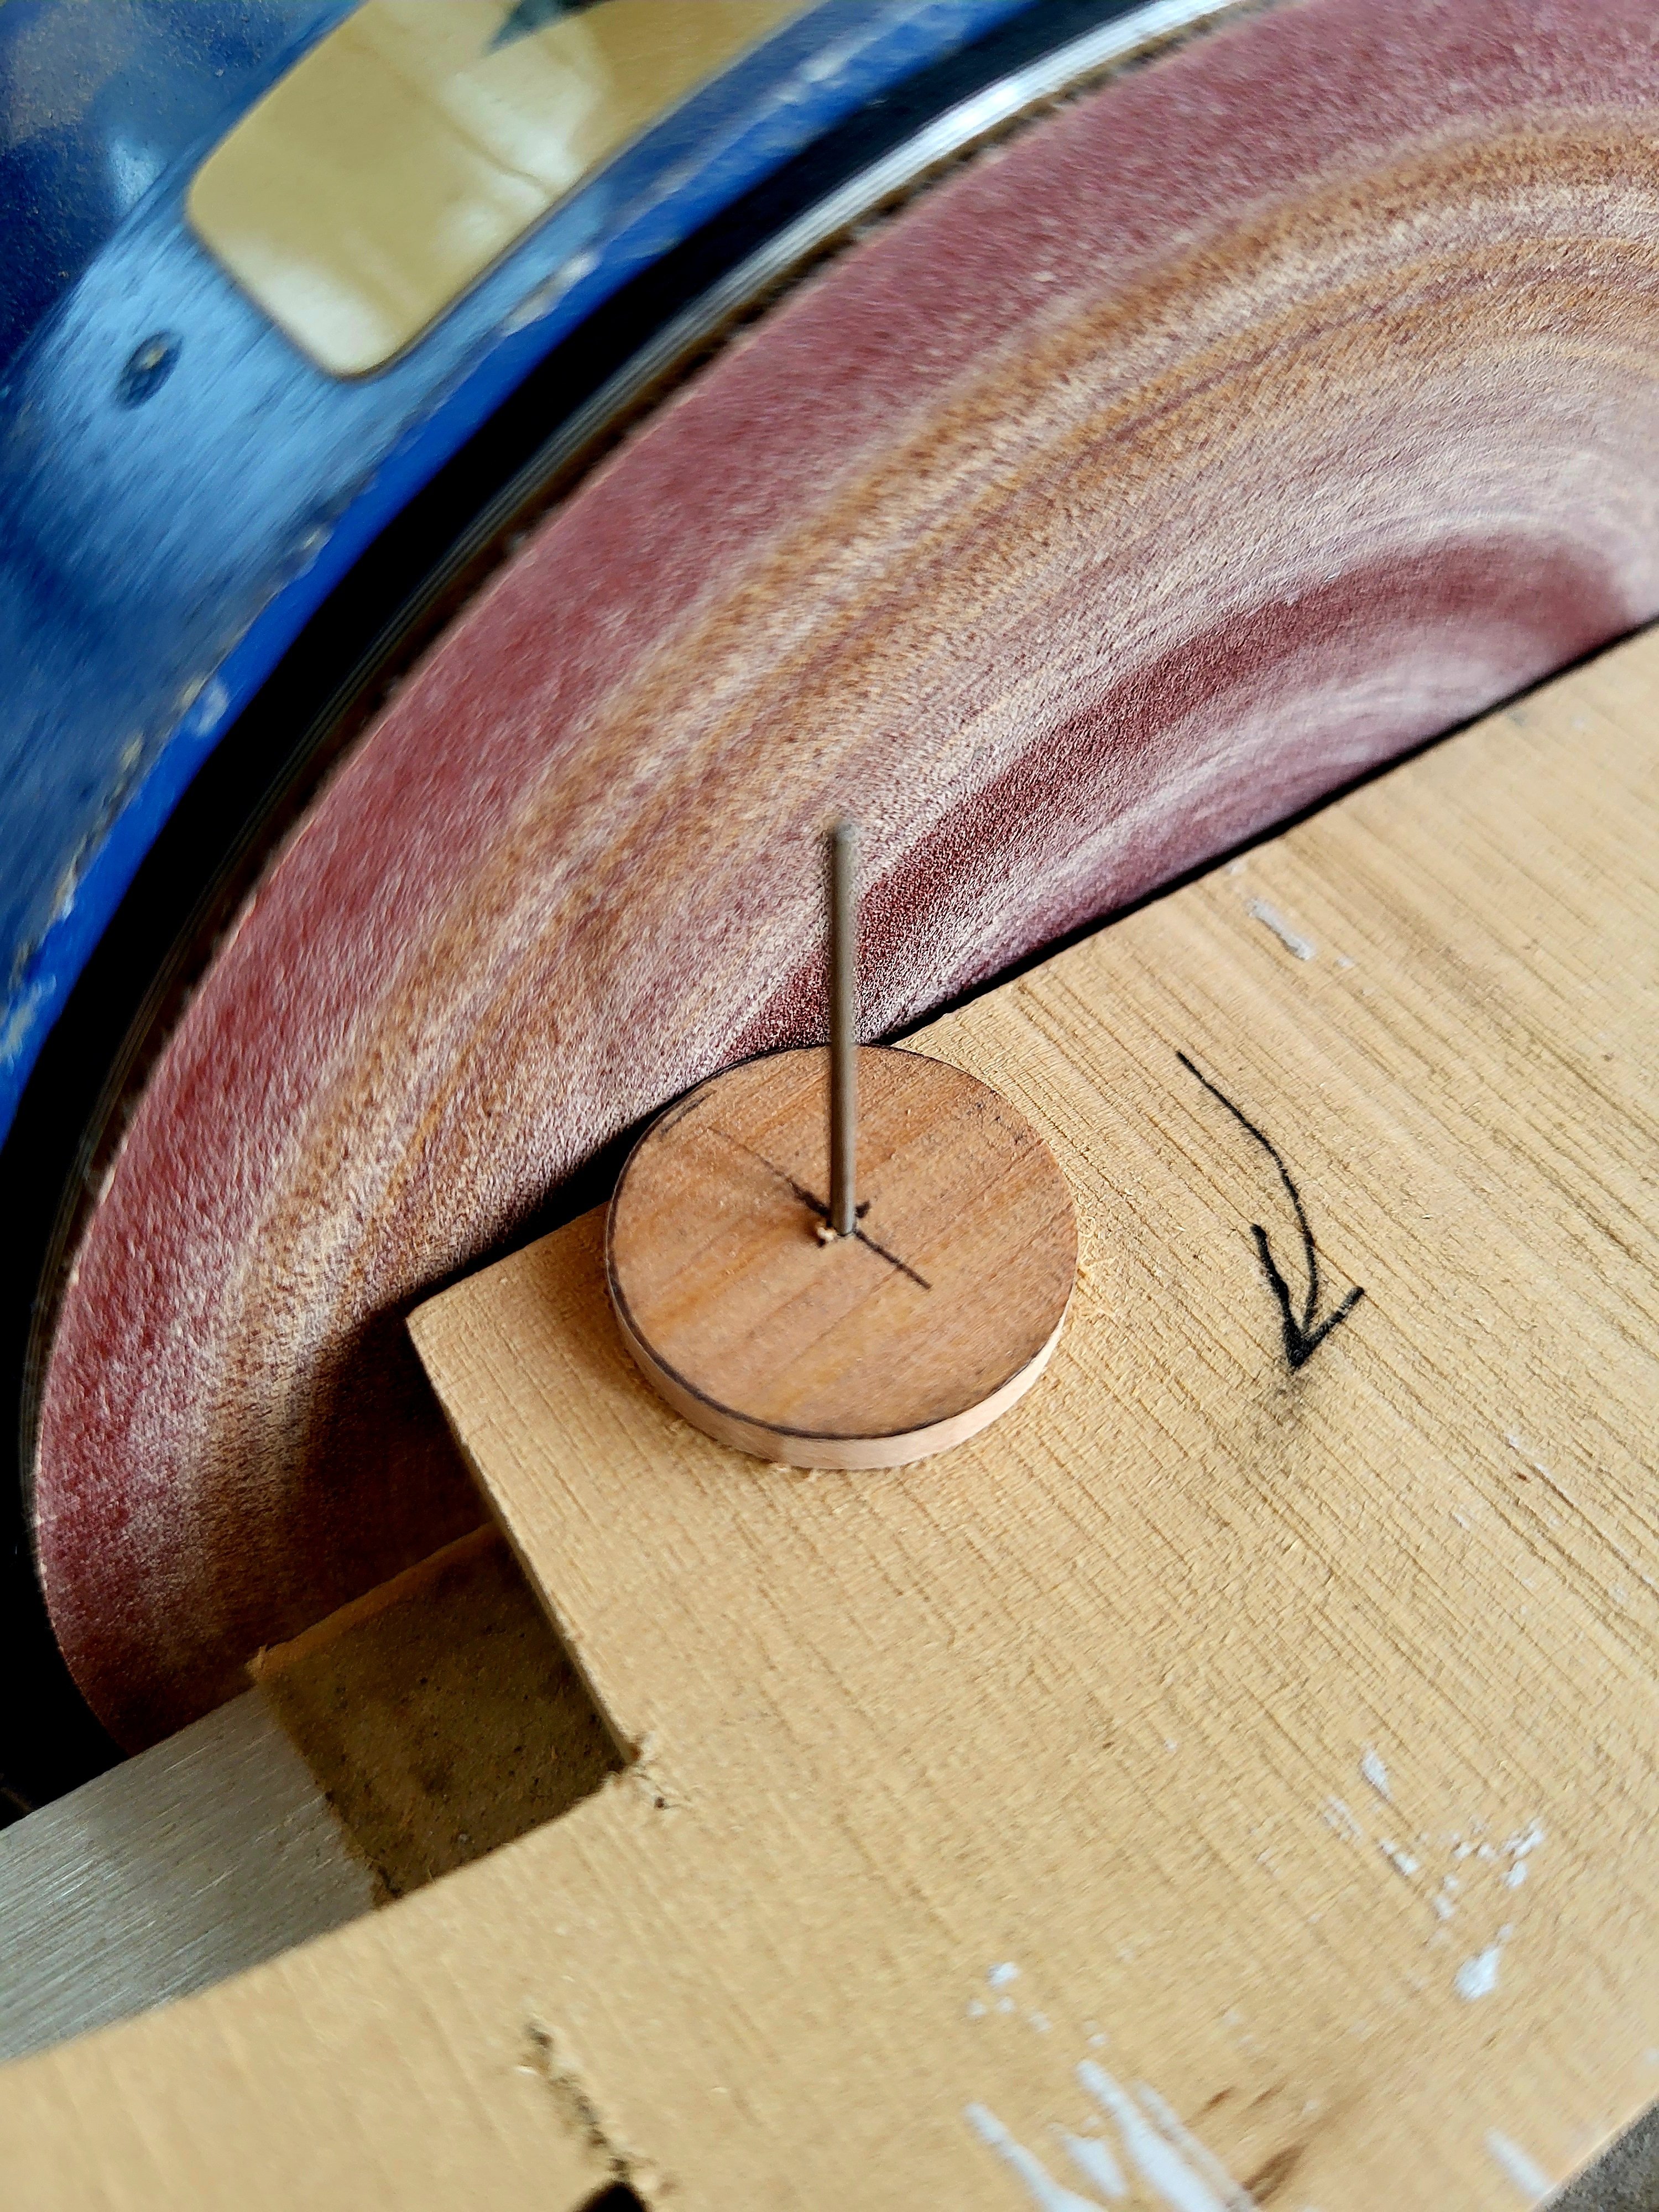
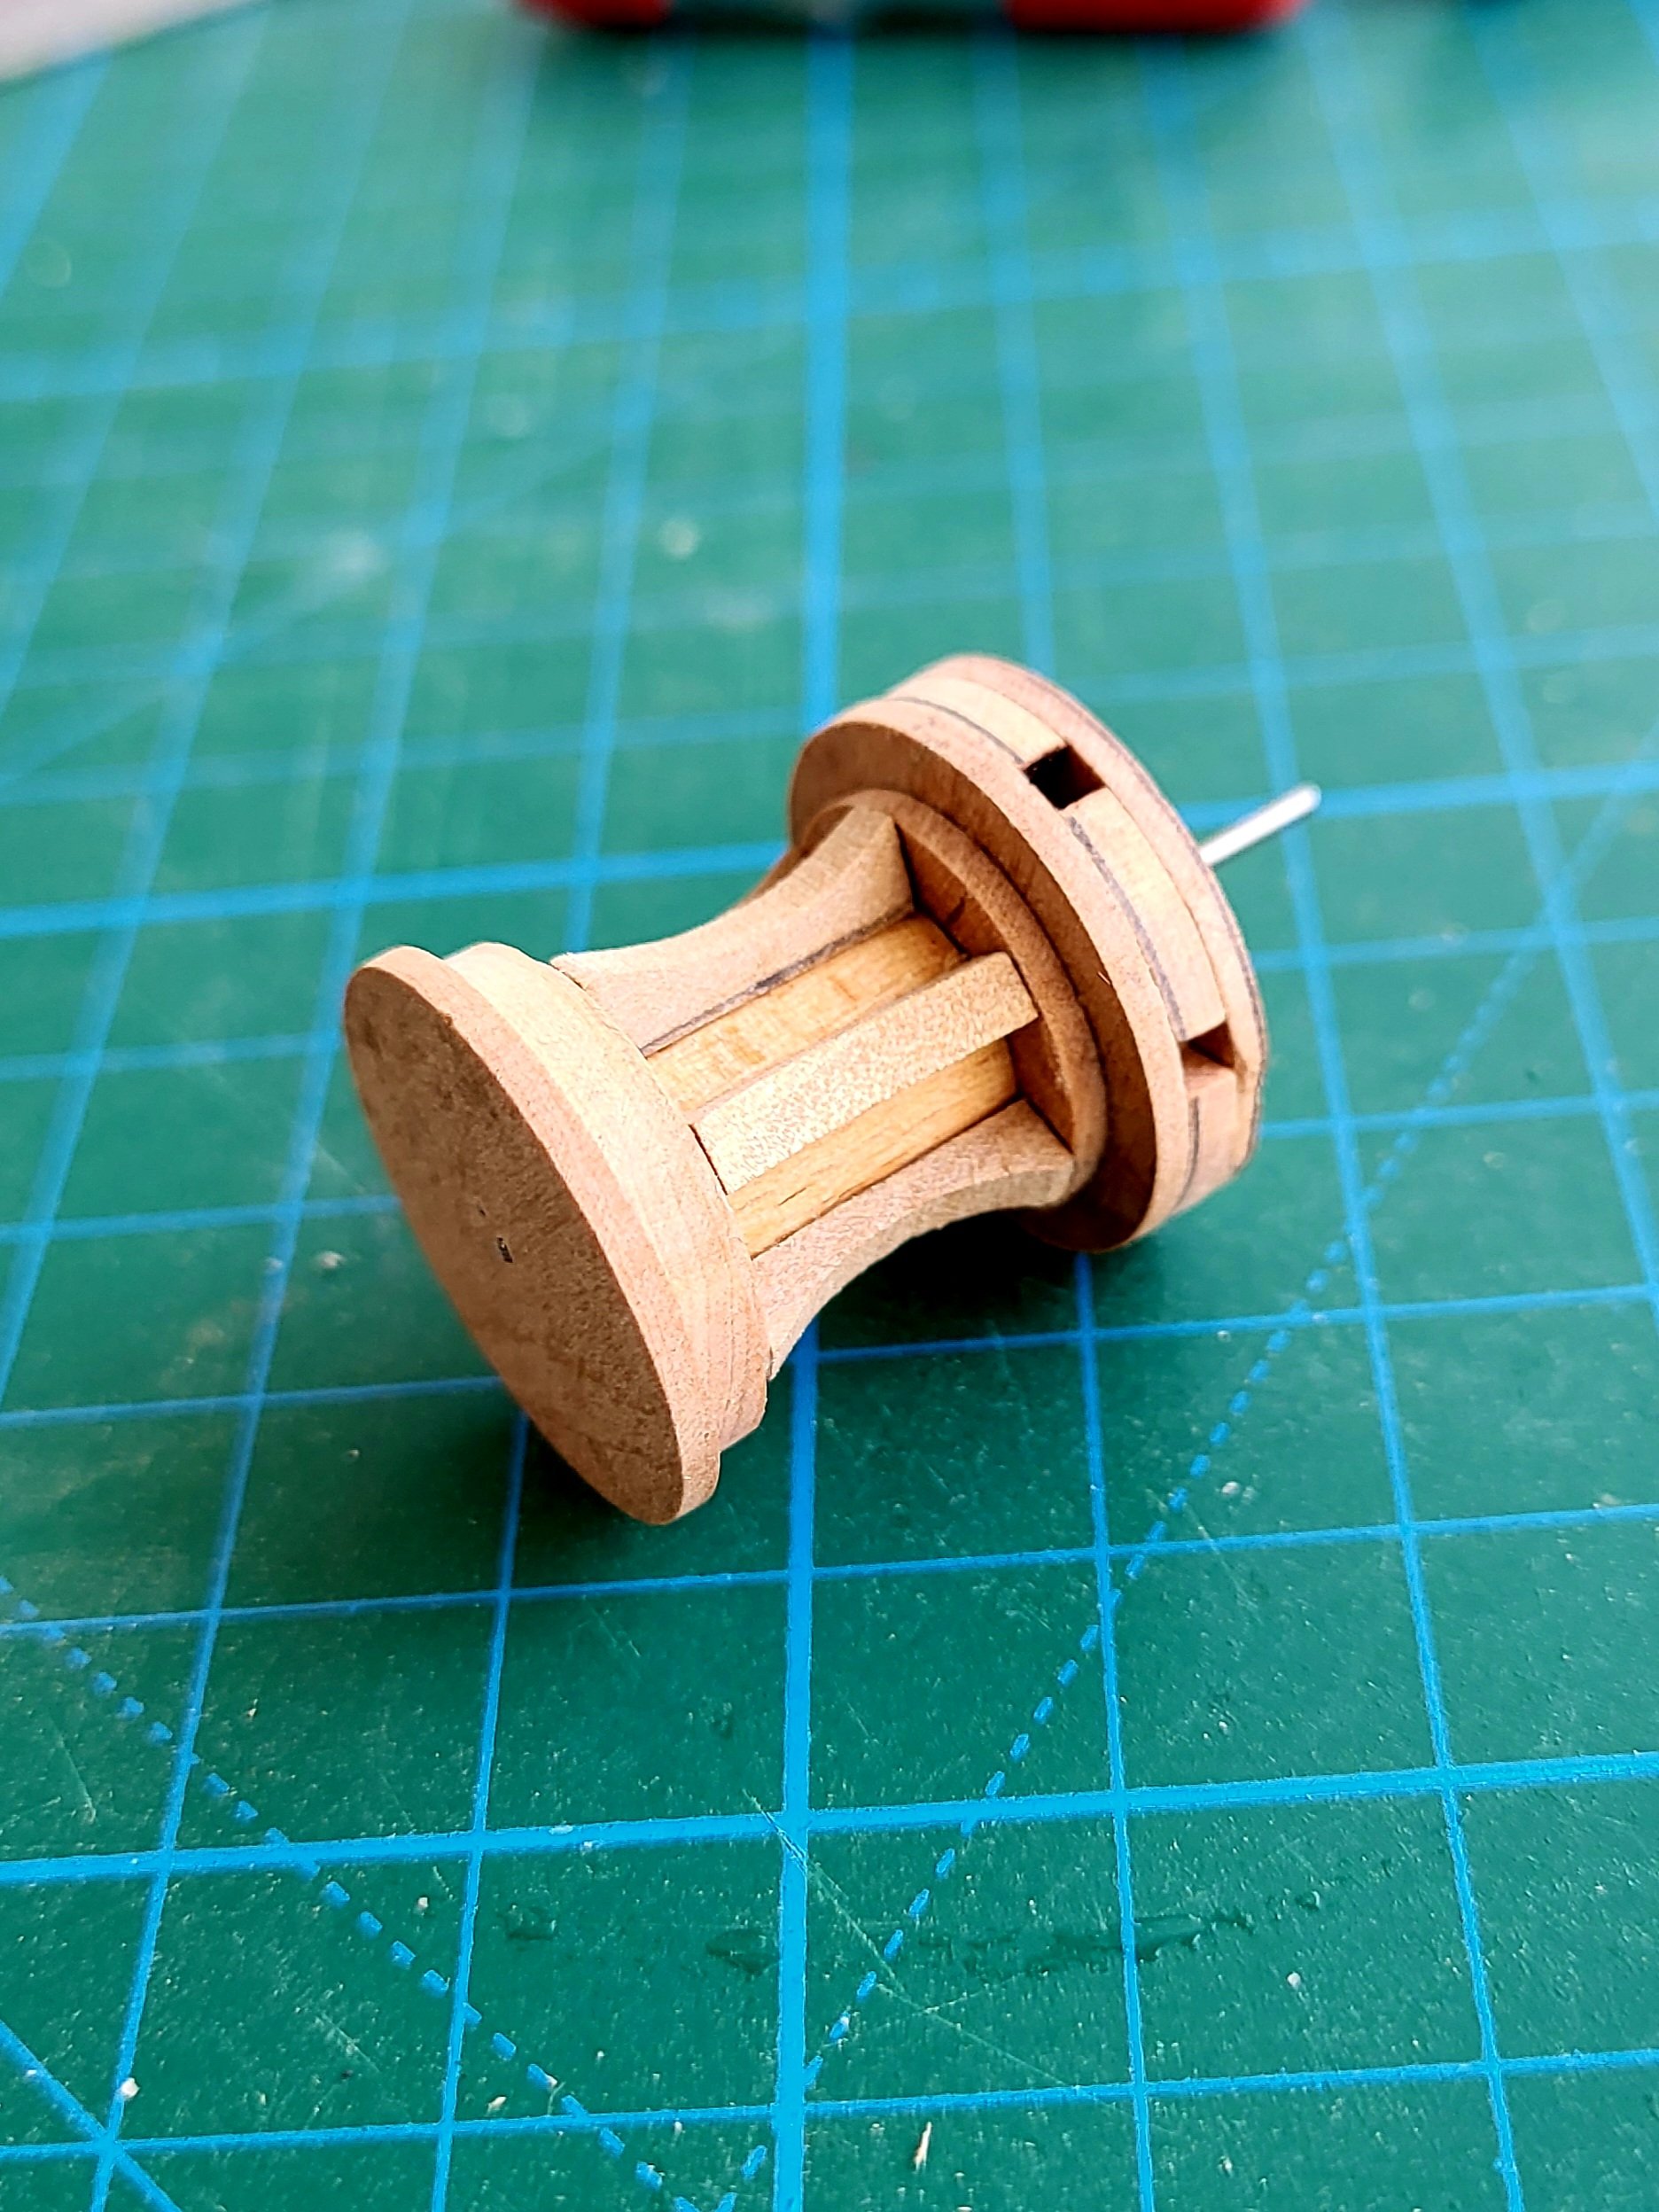
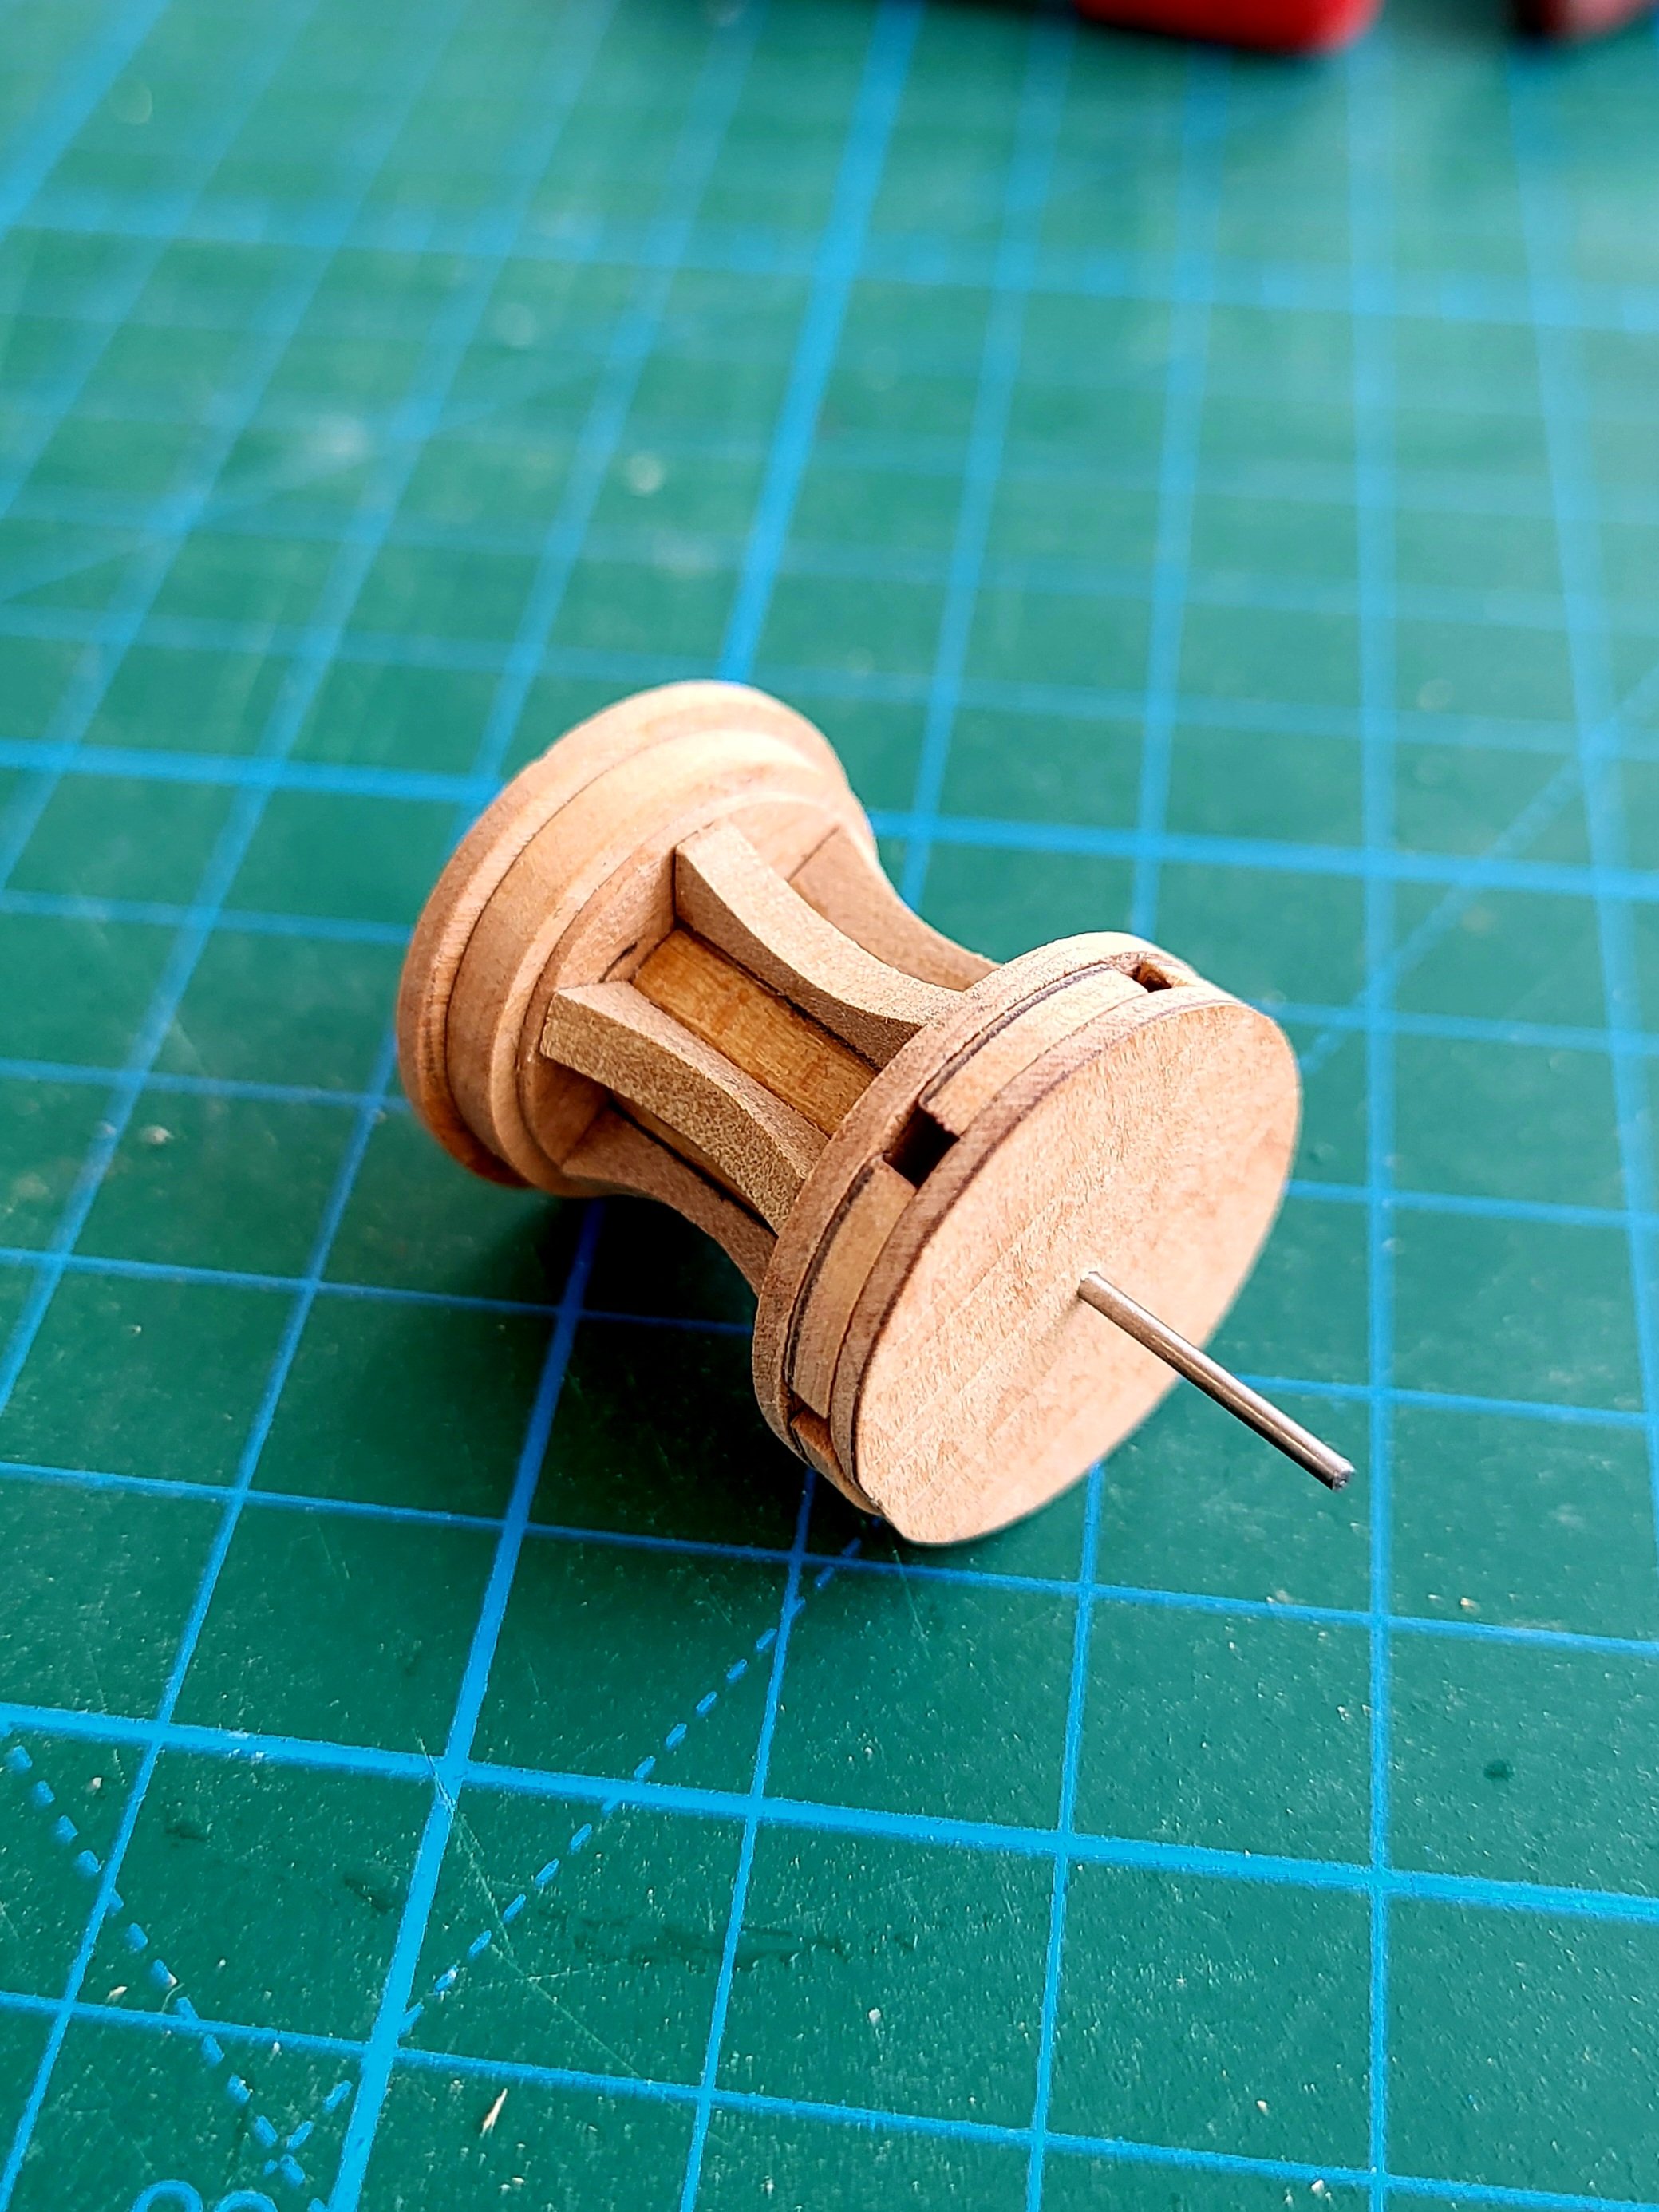
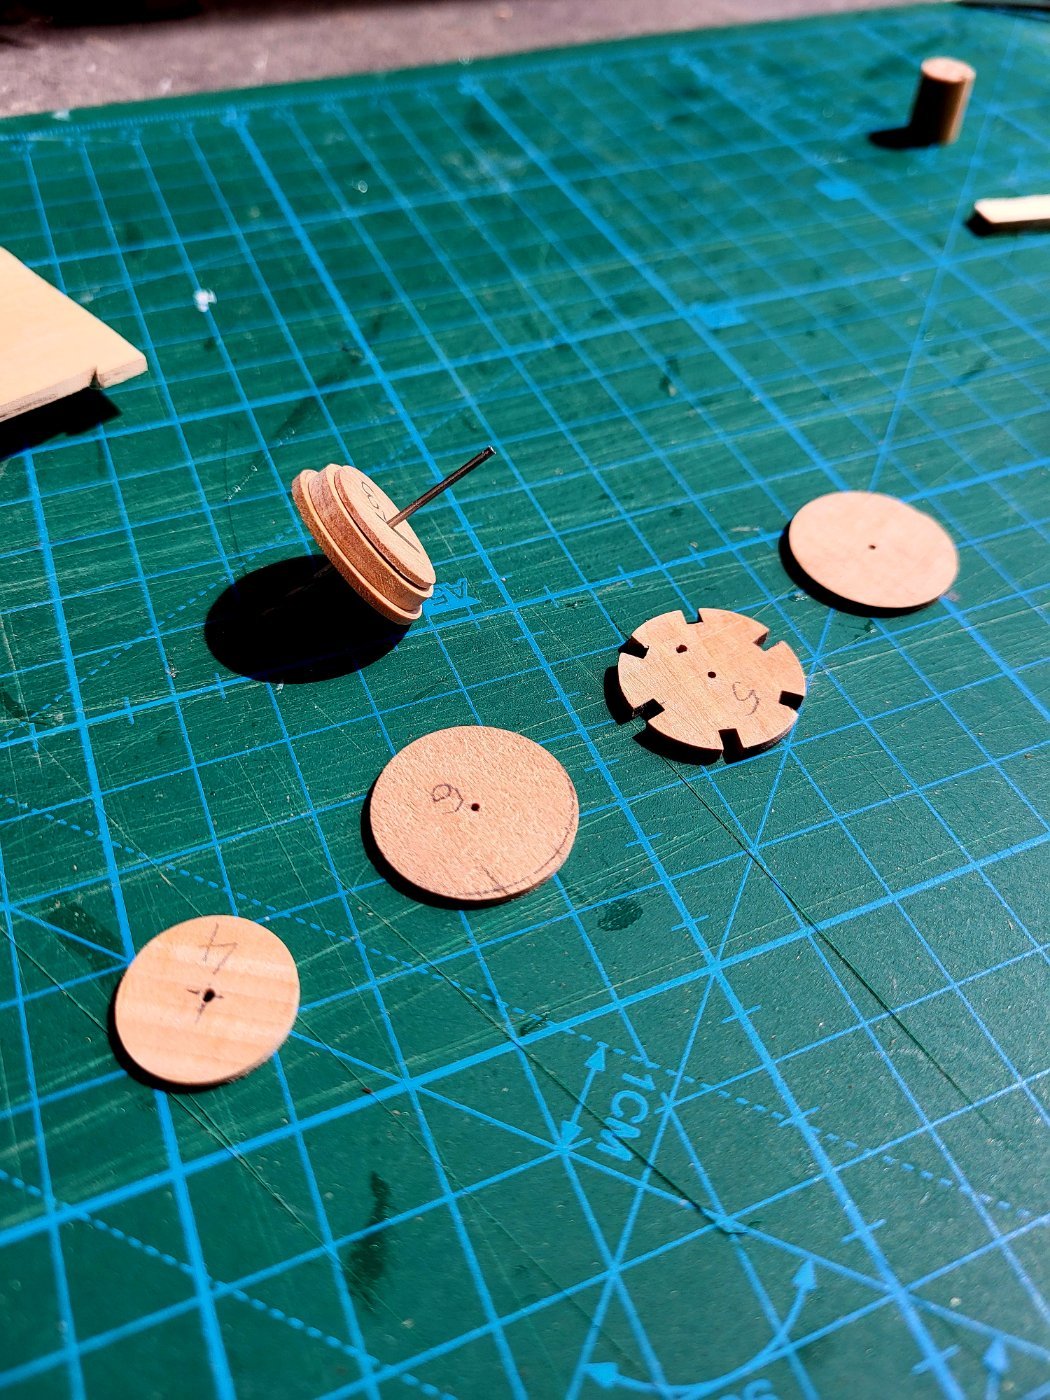
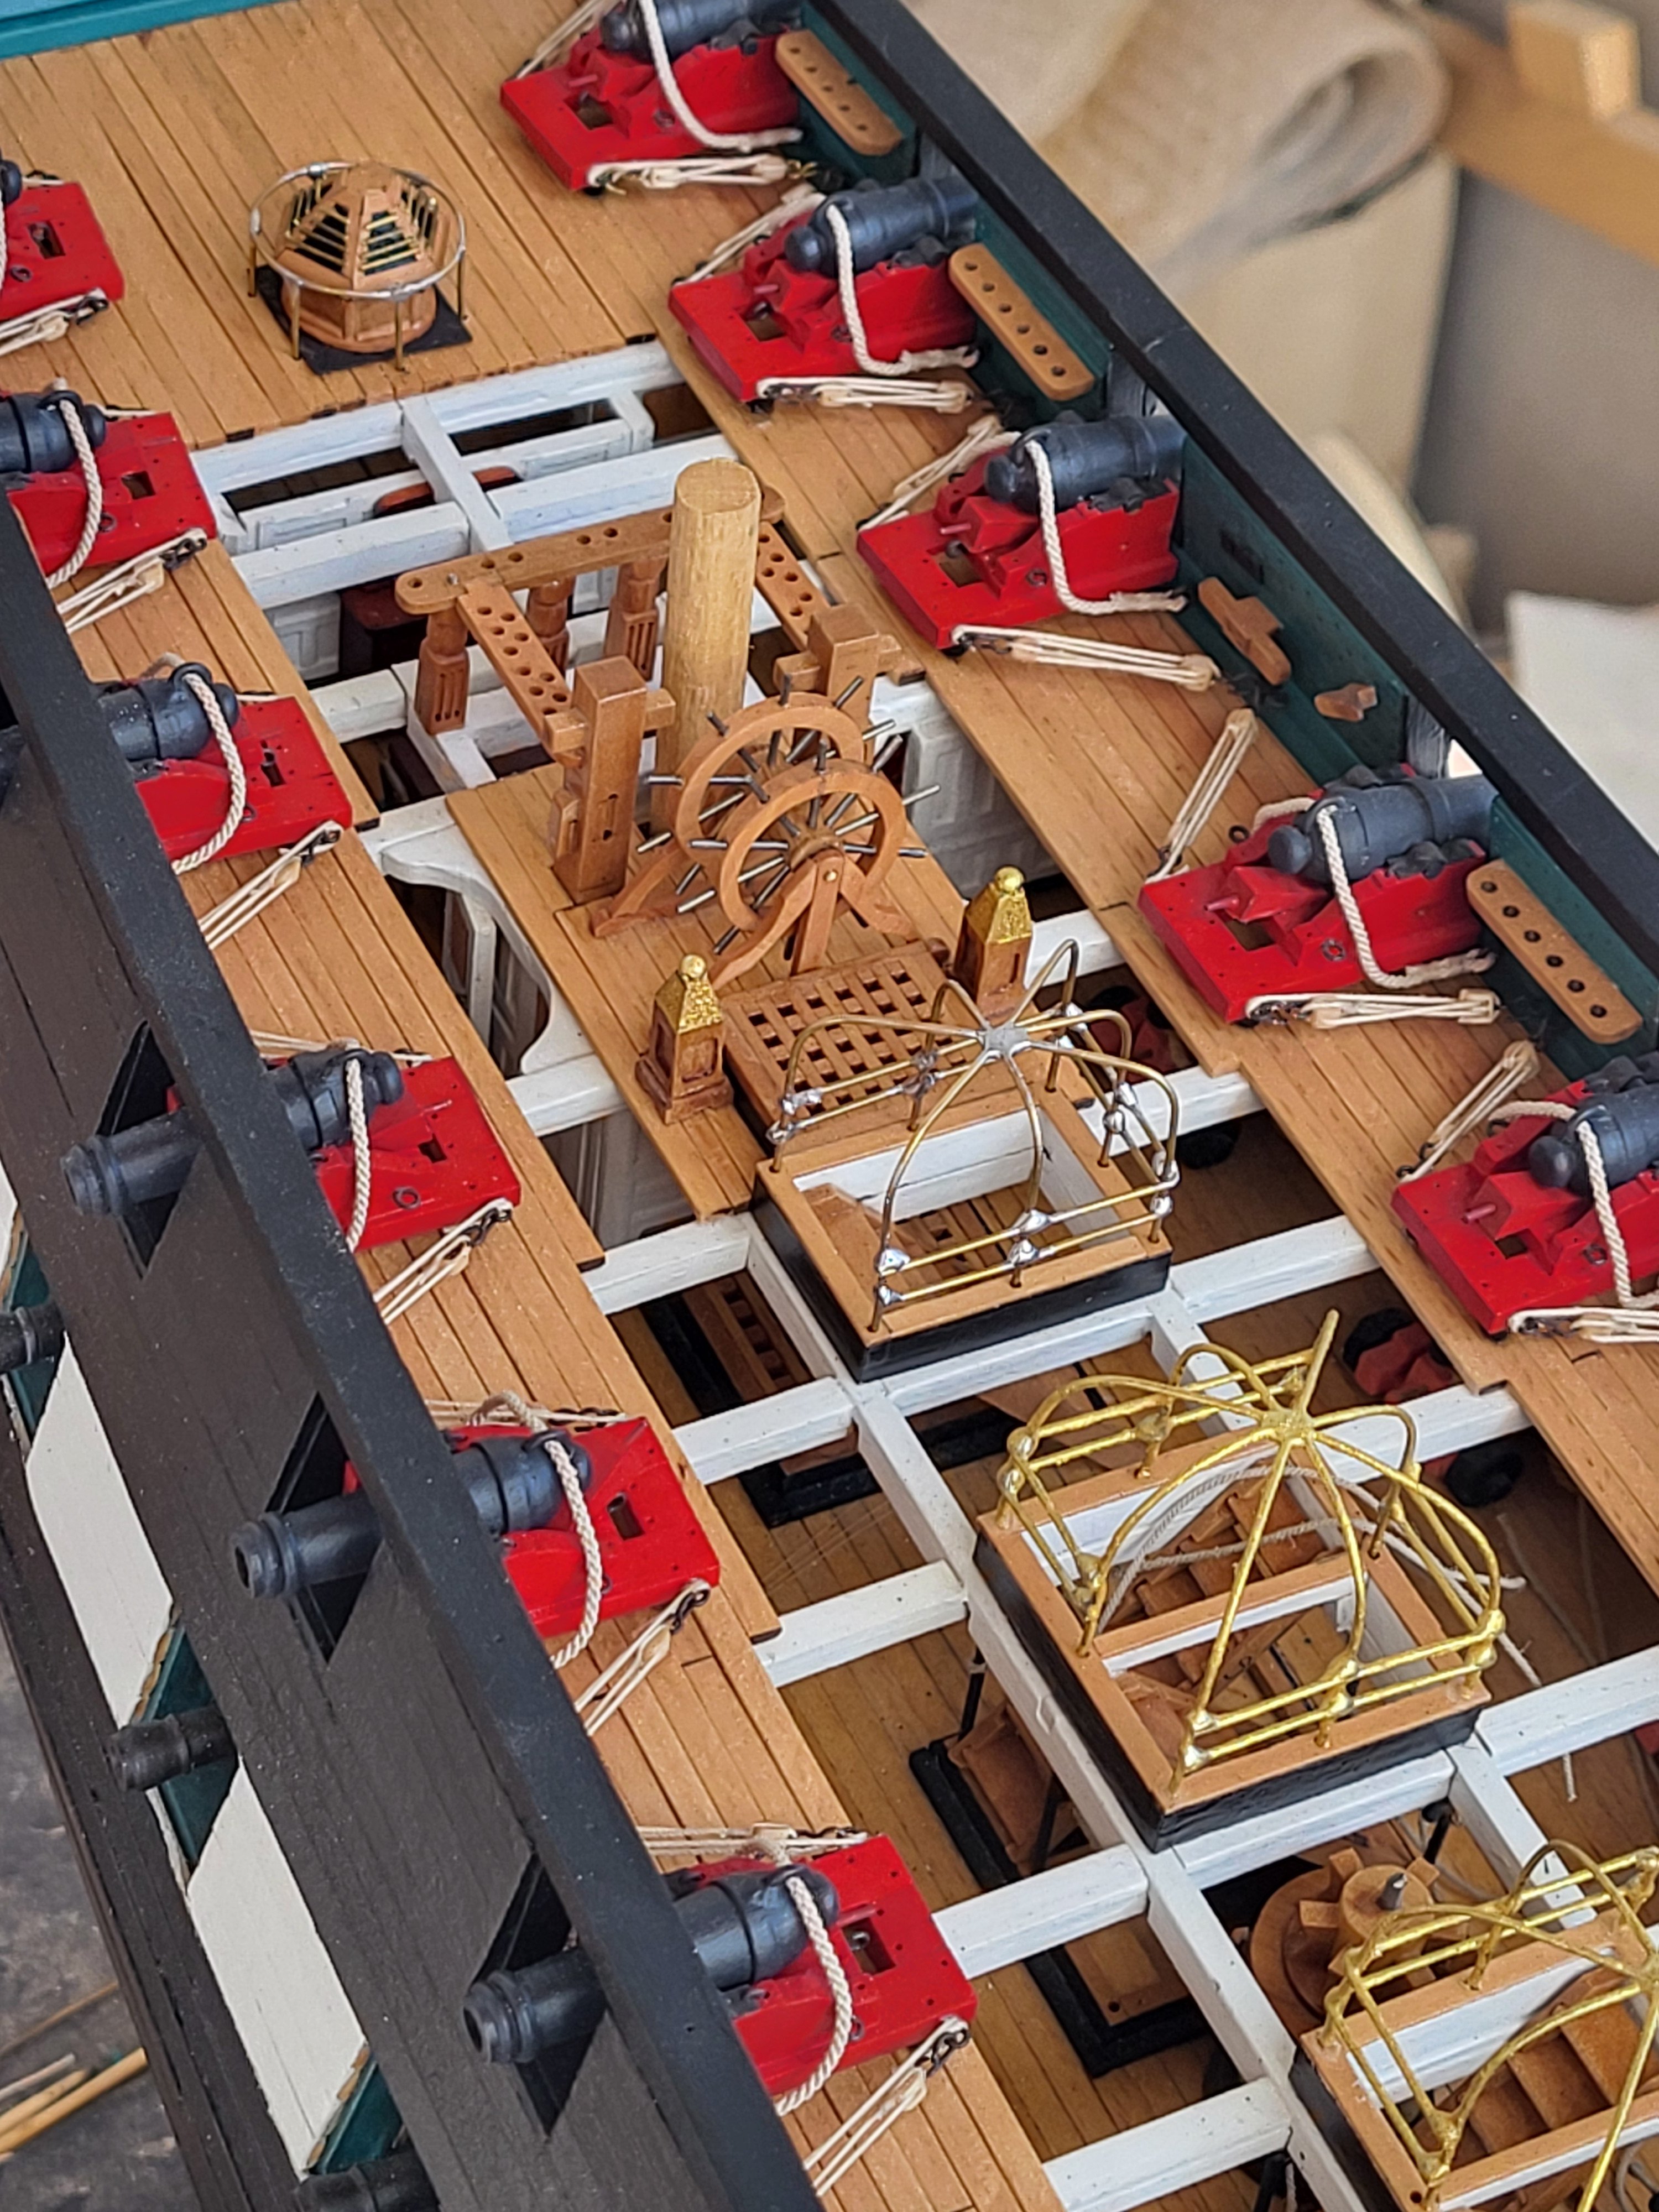
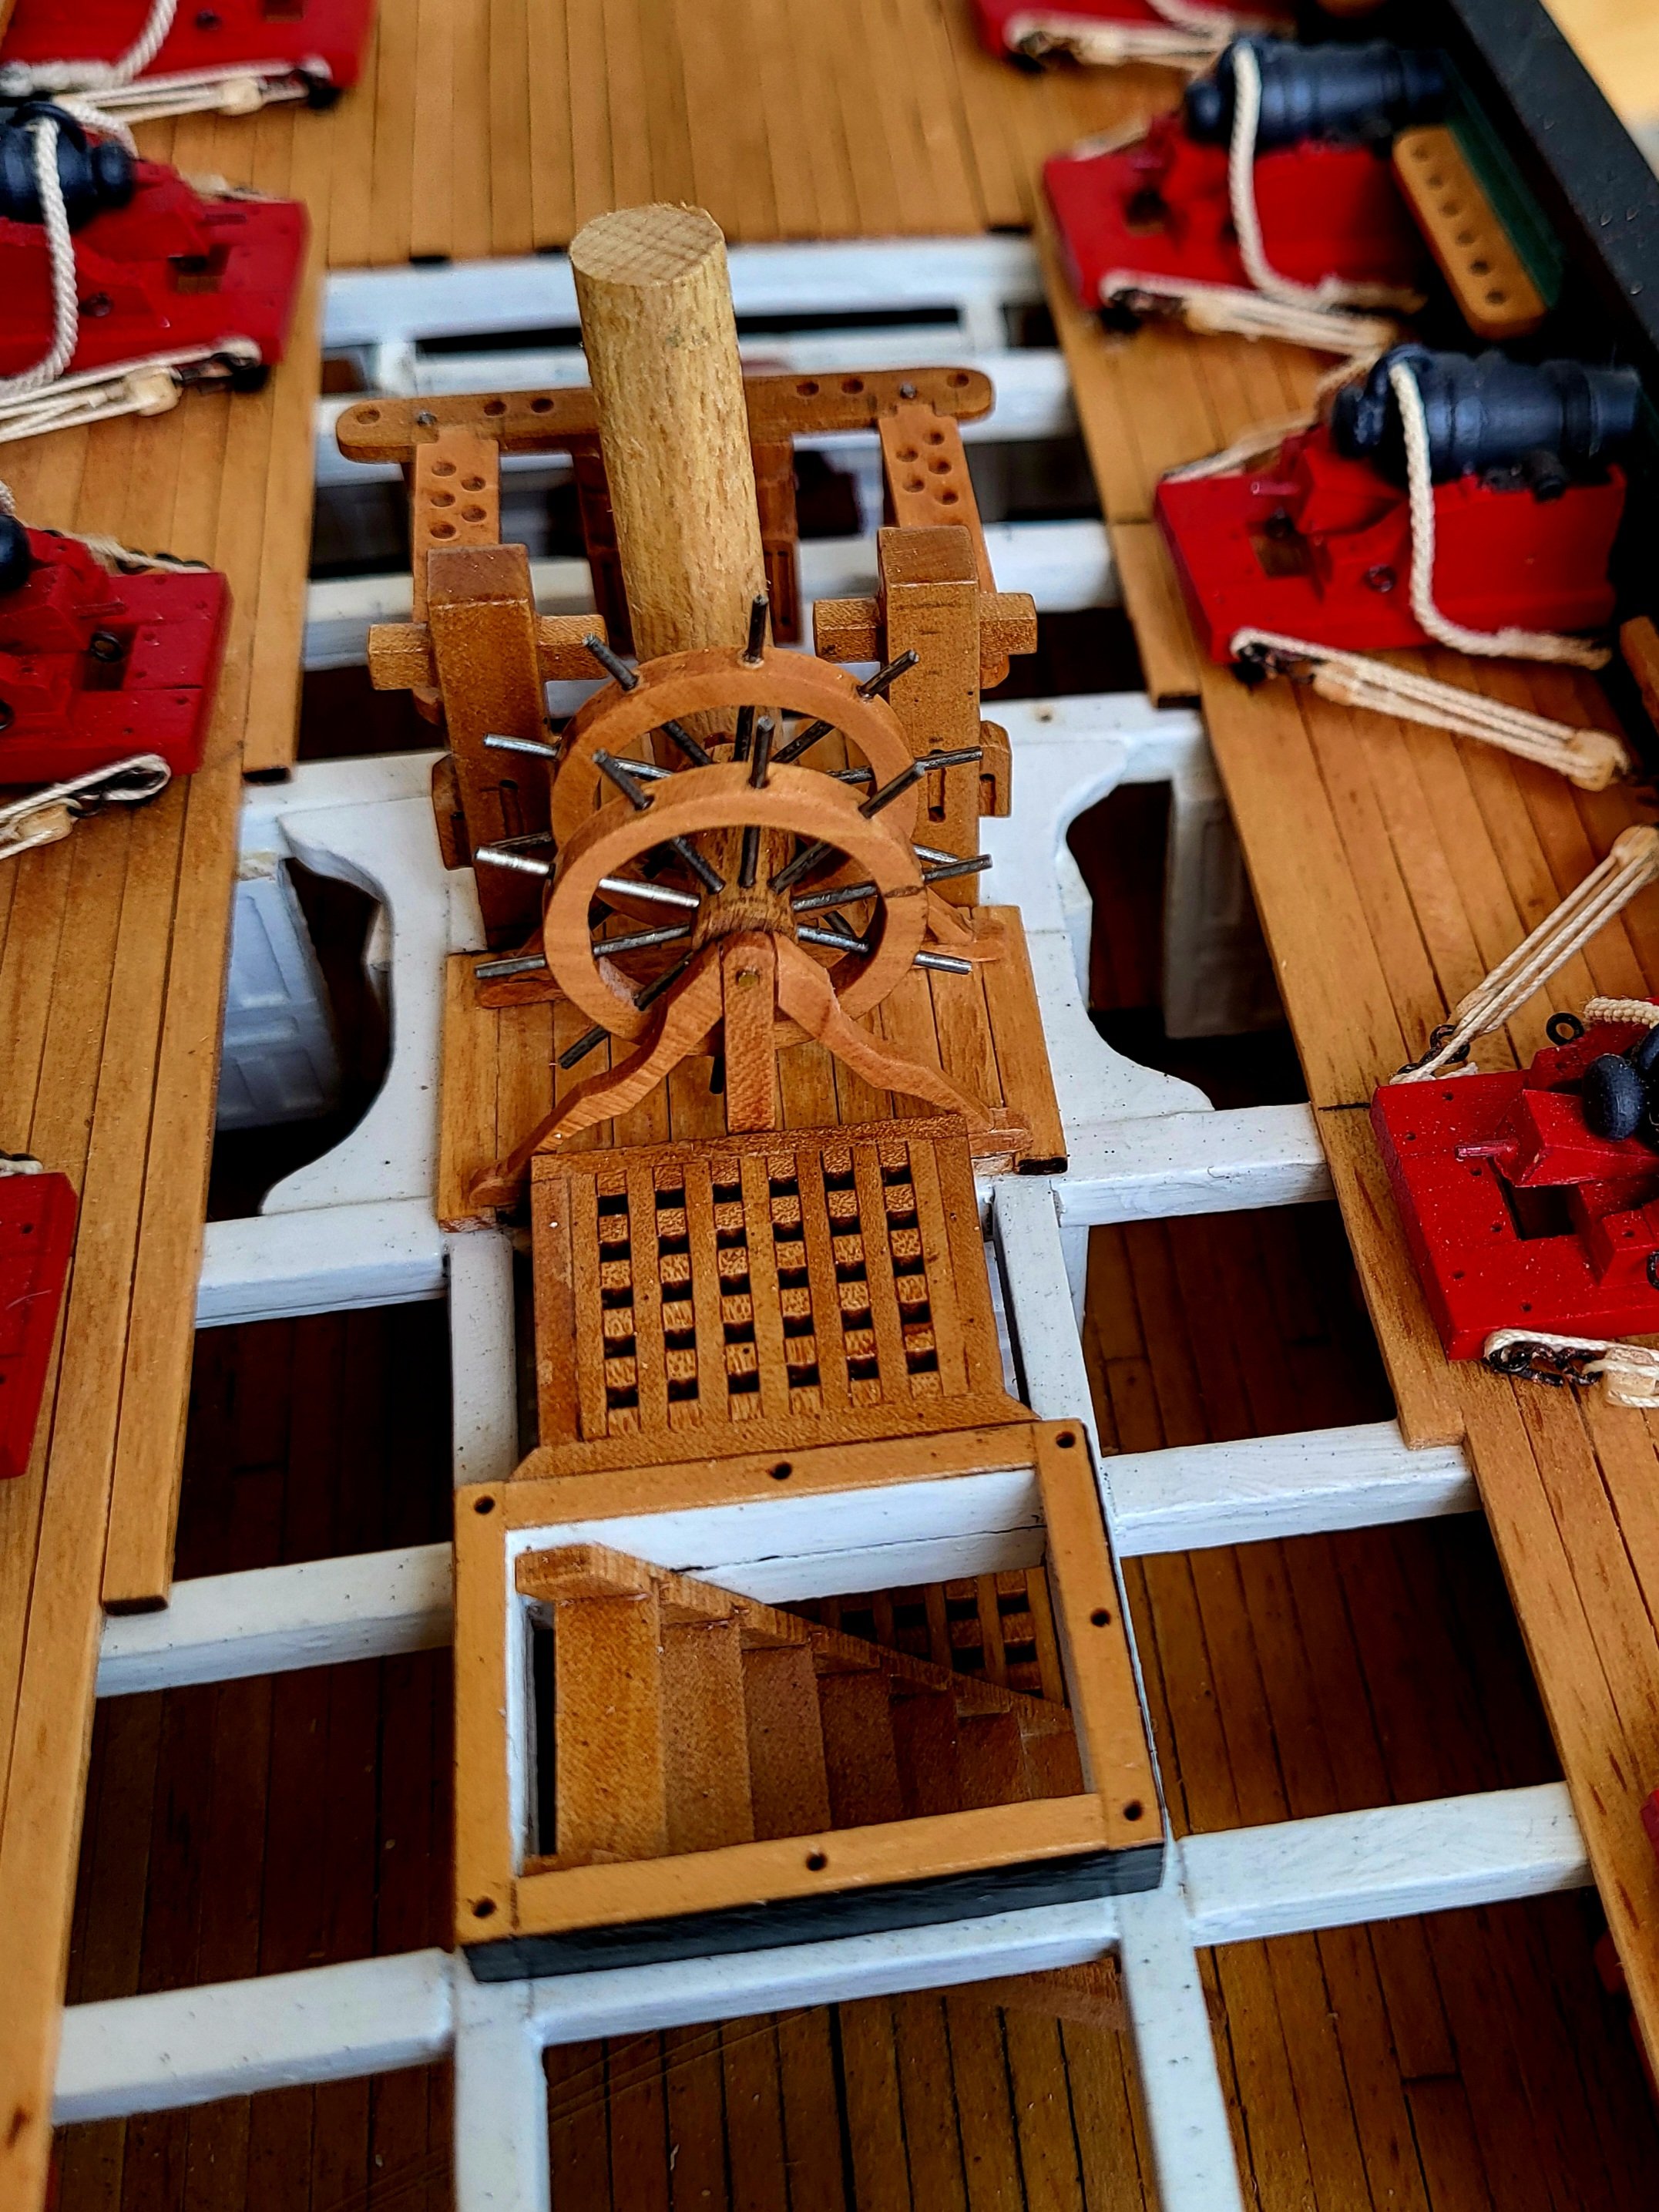
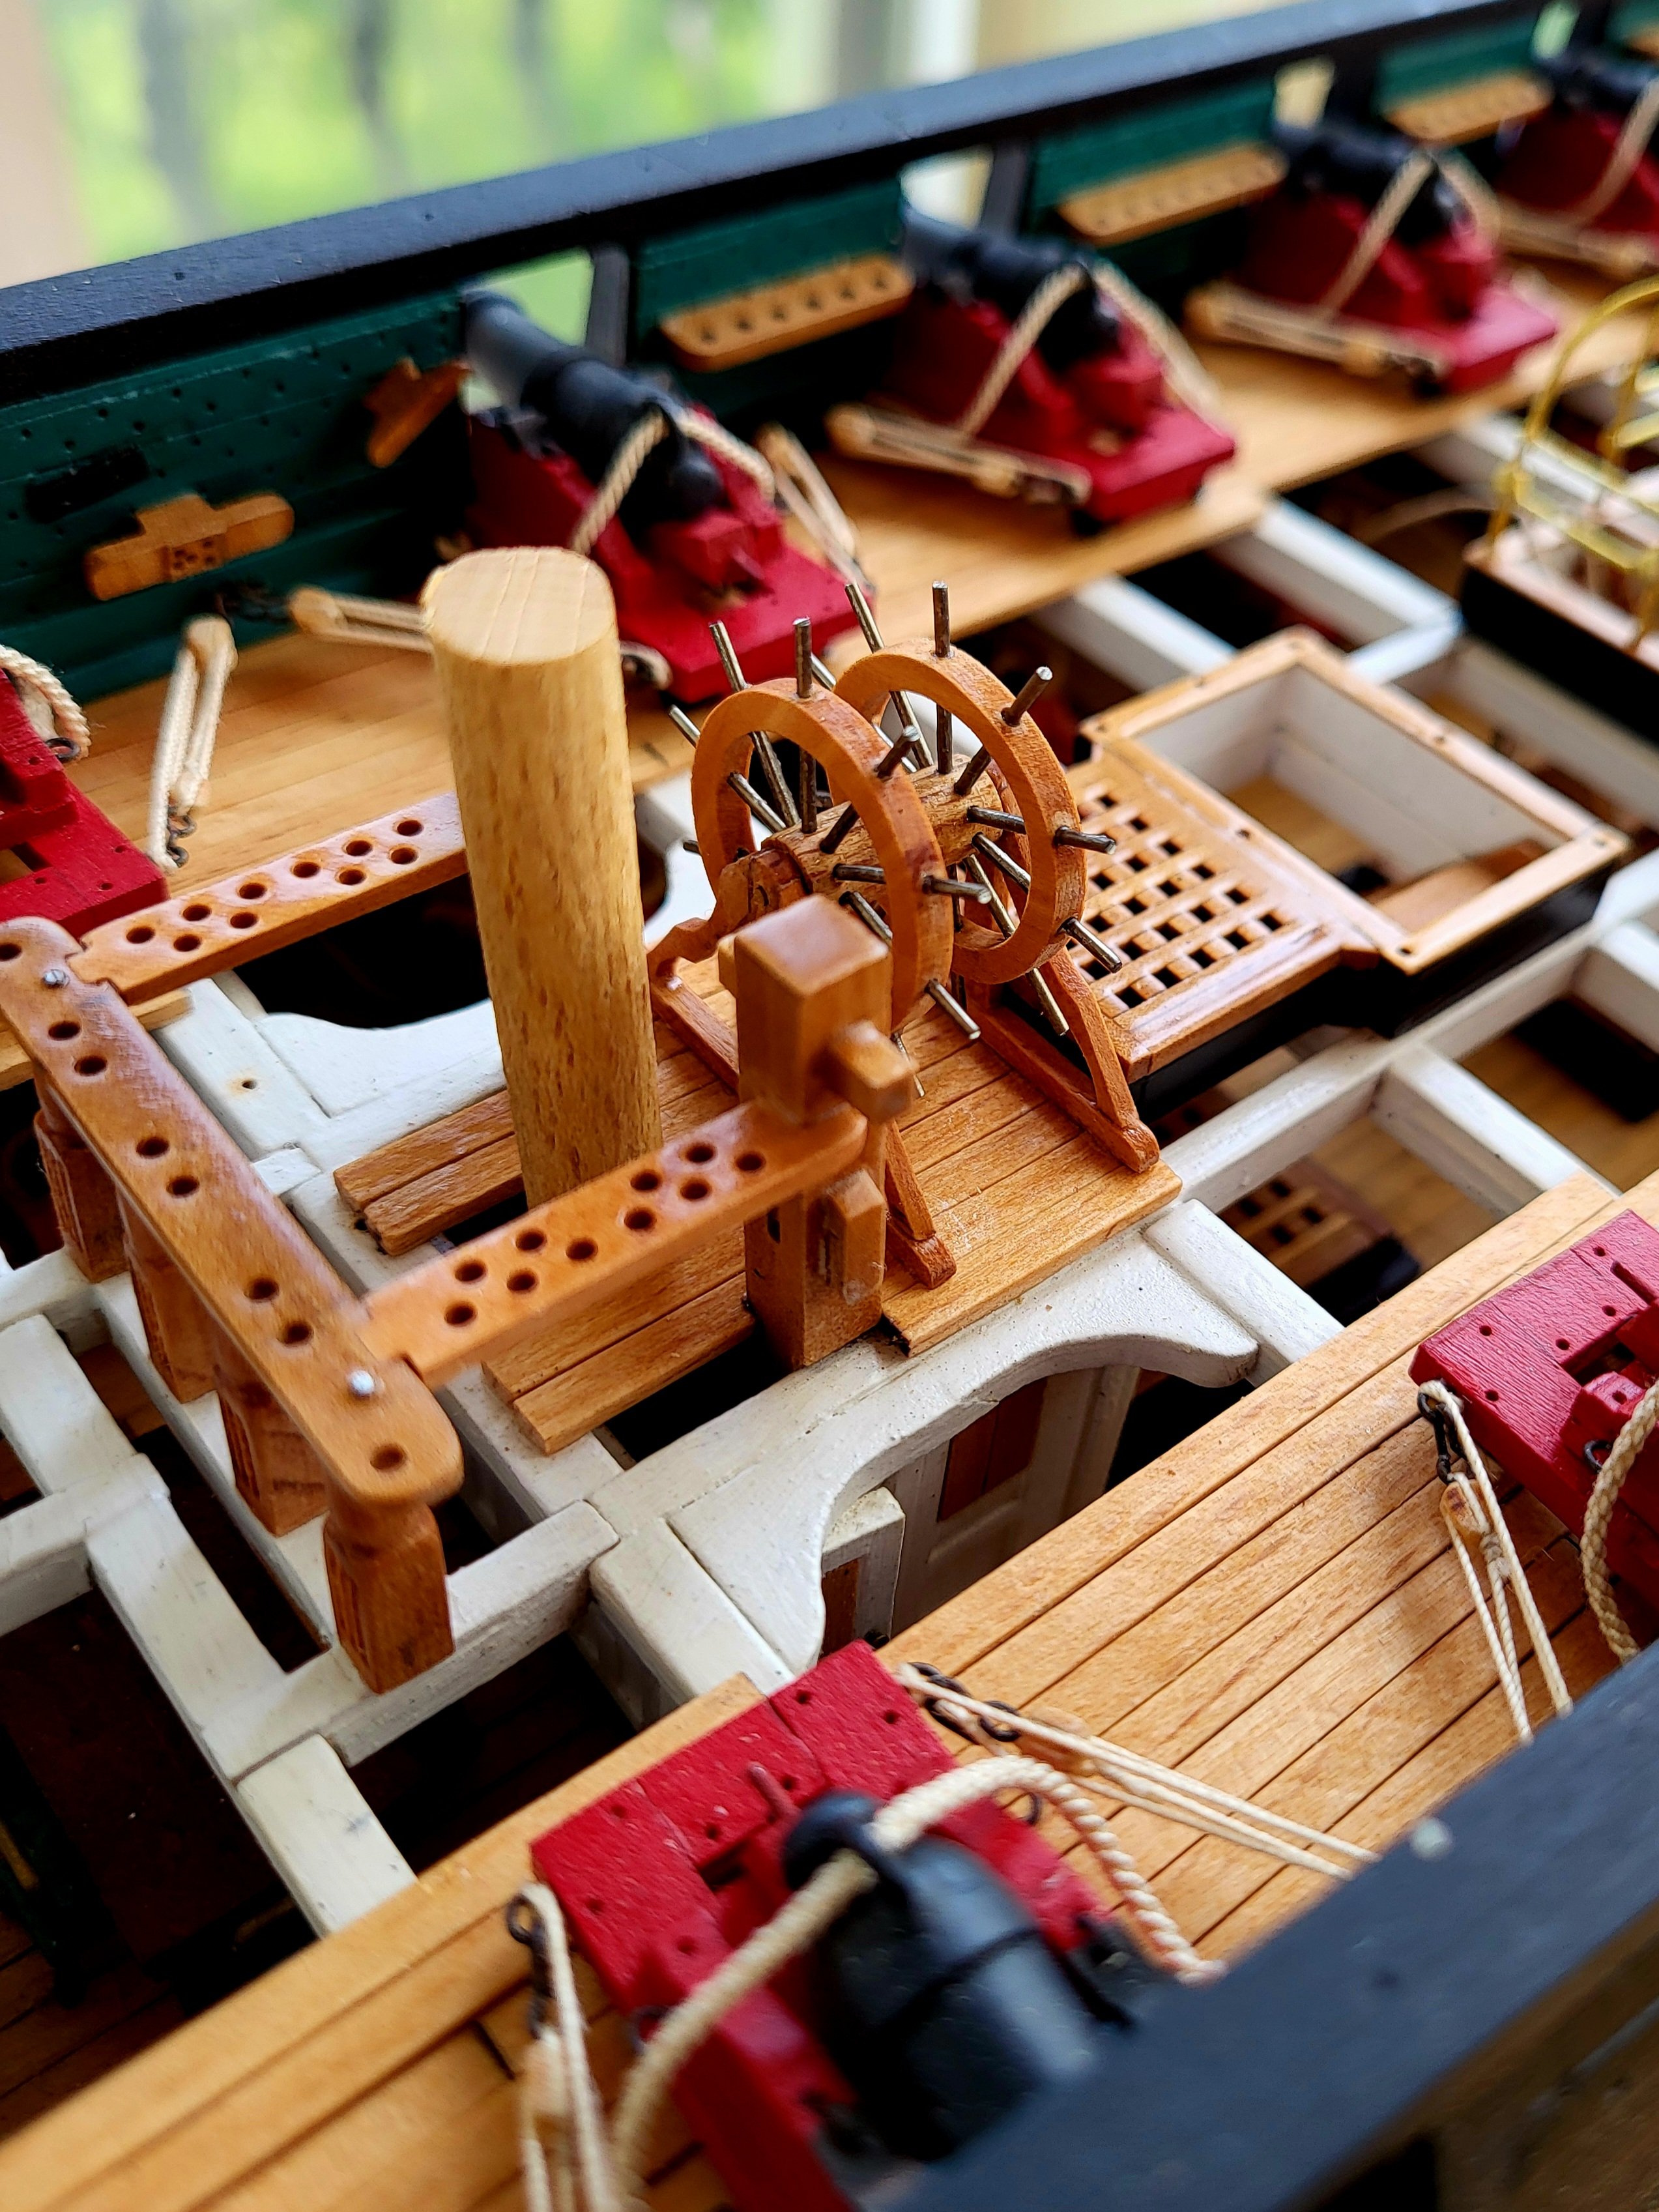
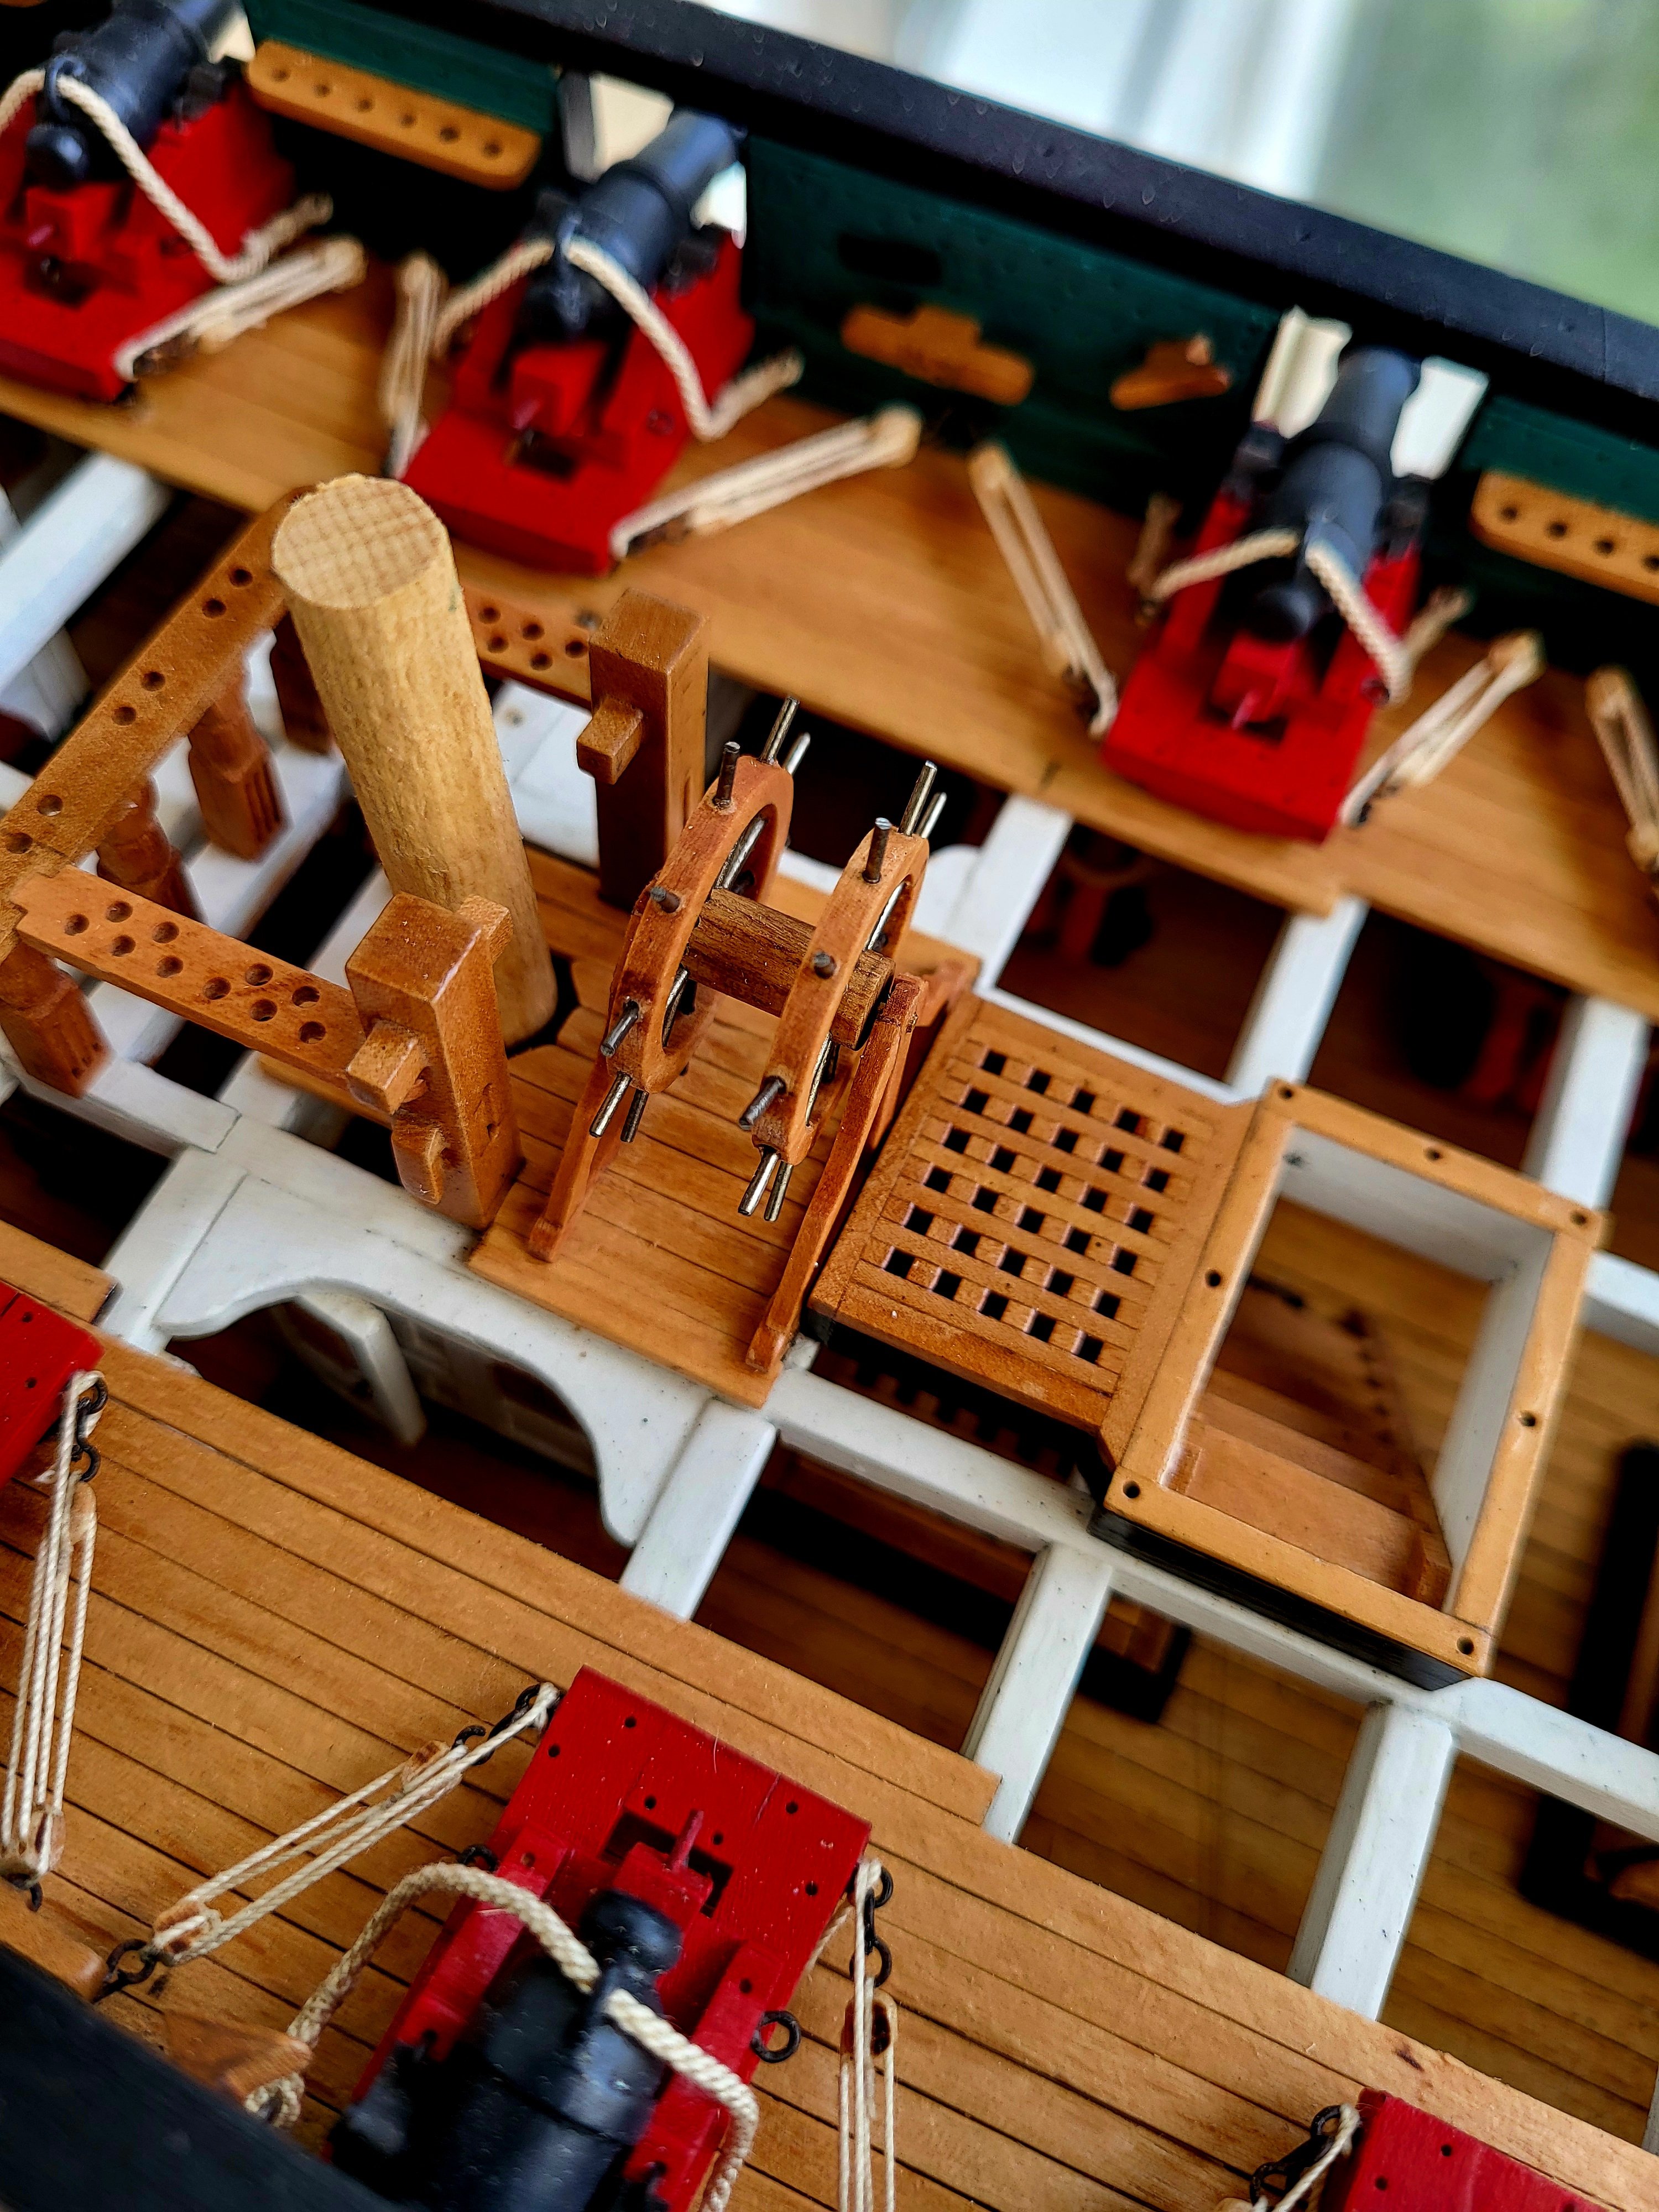
I am working on the spar deck capstan. I am using the jig in the photo to make the round pieces. The capstan will be installed in place after painting.


- woodartist, Unegawahya, Stevenleehills and 9 others
-
 9
9
-
 3
3
-
If I understand correctly you are planning on not adding breeching ropes. I think it would look better if you added breeching ropes instead of the second tackles.
- Geoff Matson and GGibson
-
2
-
4 hours ago, JSGerson said:
The second canopy frame is completed in one month, half the time it took me for the first one. This is one of the pairs of hatchways at the ship’s wheel. The other one is closed and therefore has no frame. The last two are on the main hatchway. They are a bit smaller and have only seven stanchions each.
That canopy frame looks nice Jon. Well done. It's a good idea to leave one of the companionways closed. I might steal that idea from you
")
-
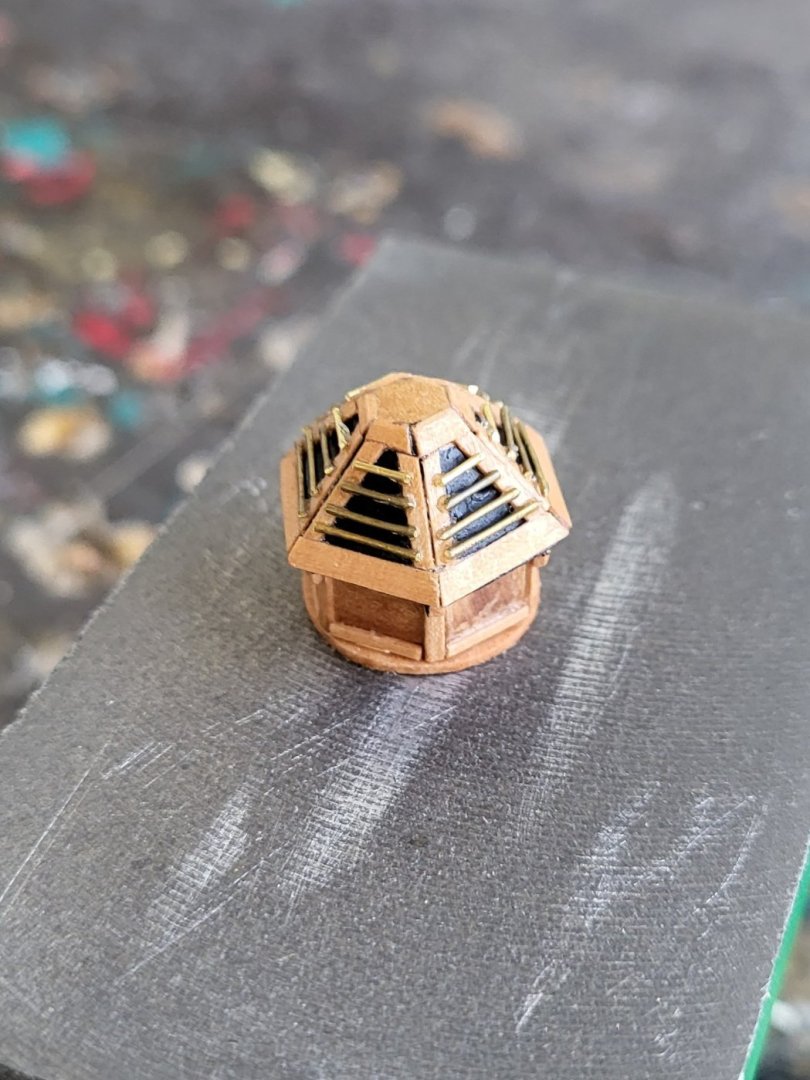
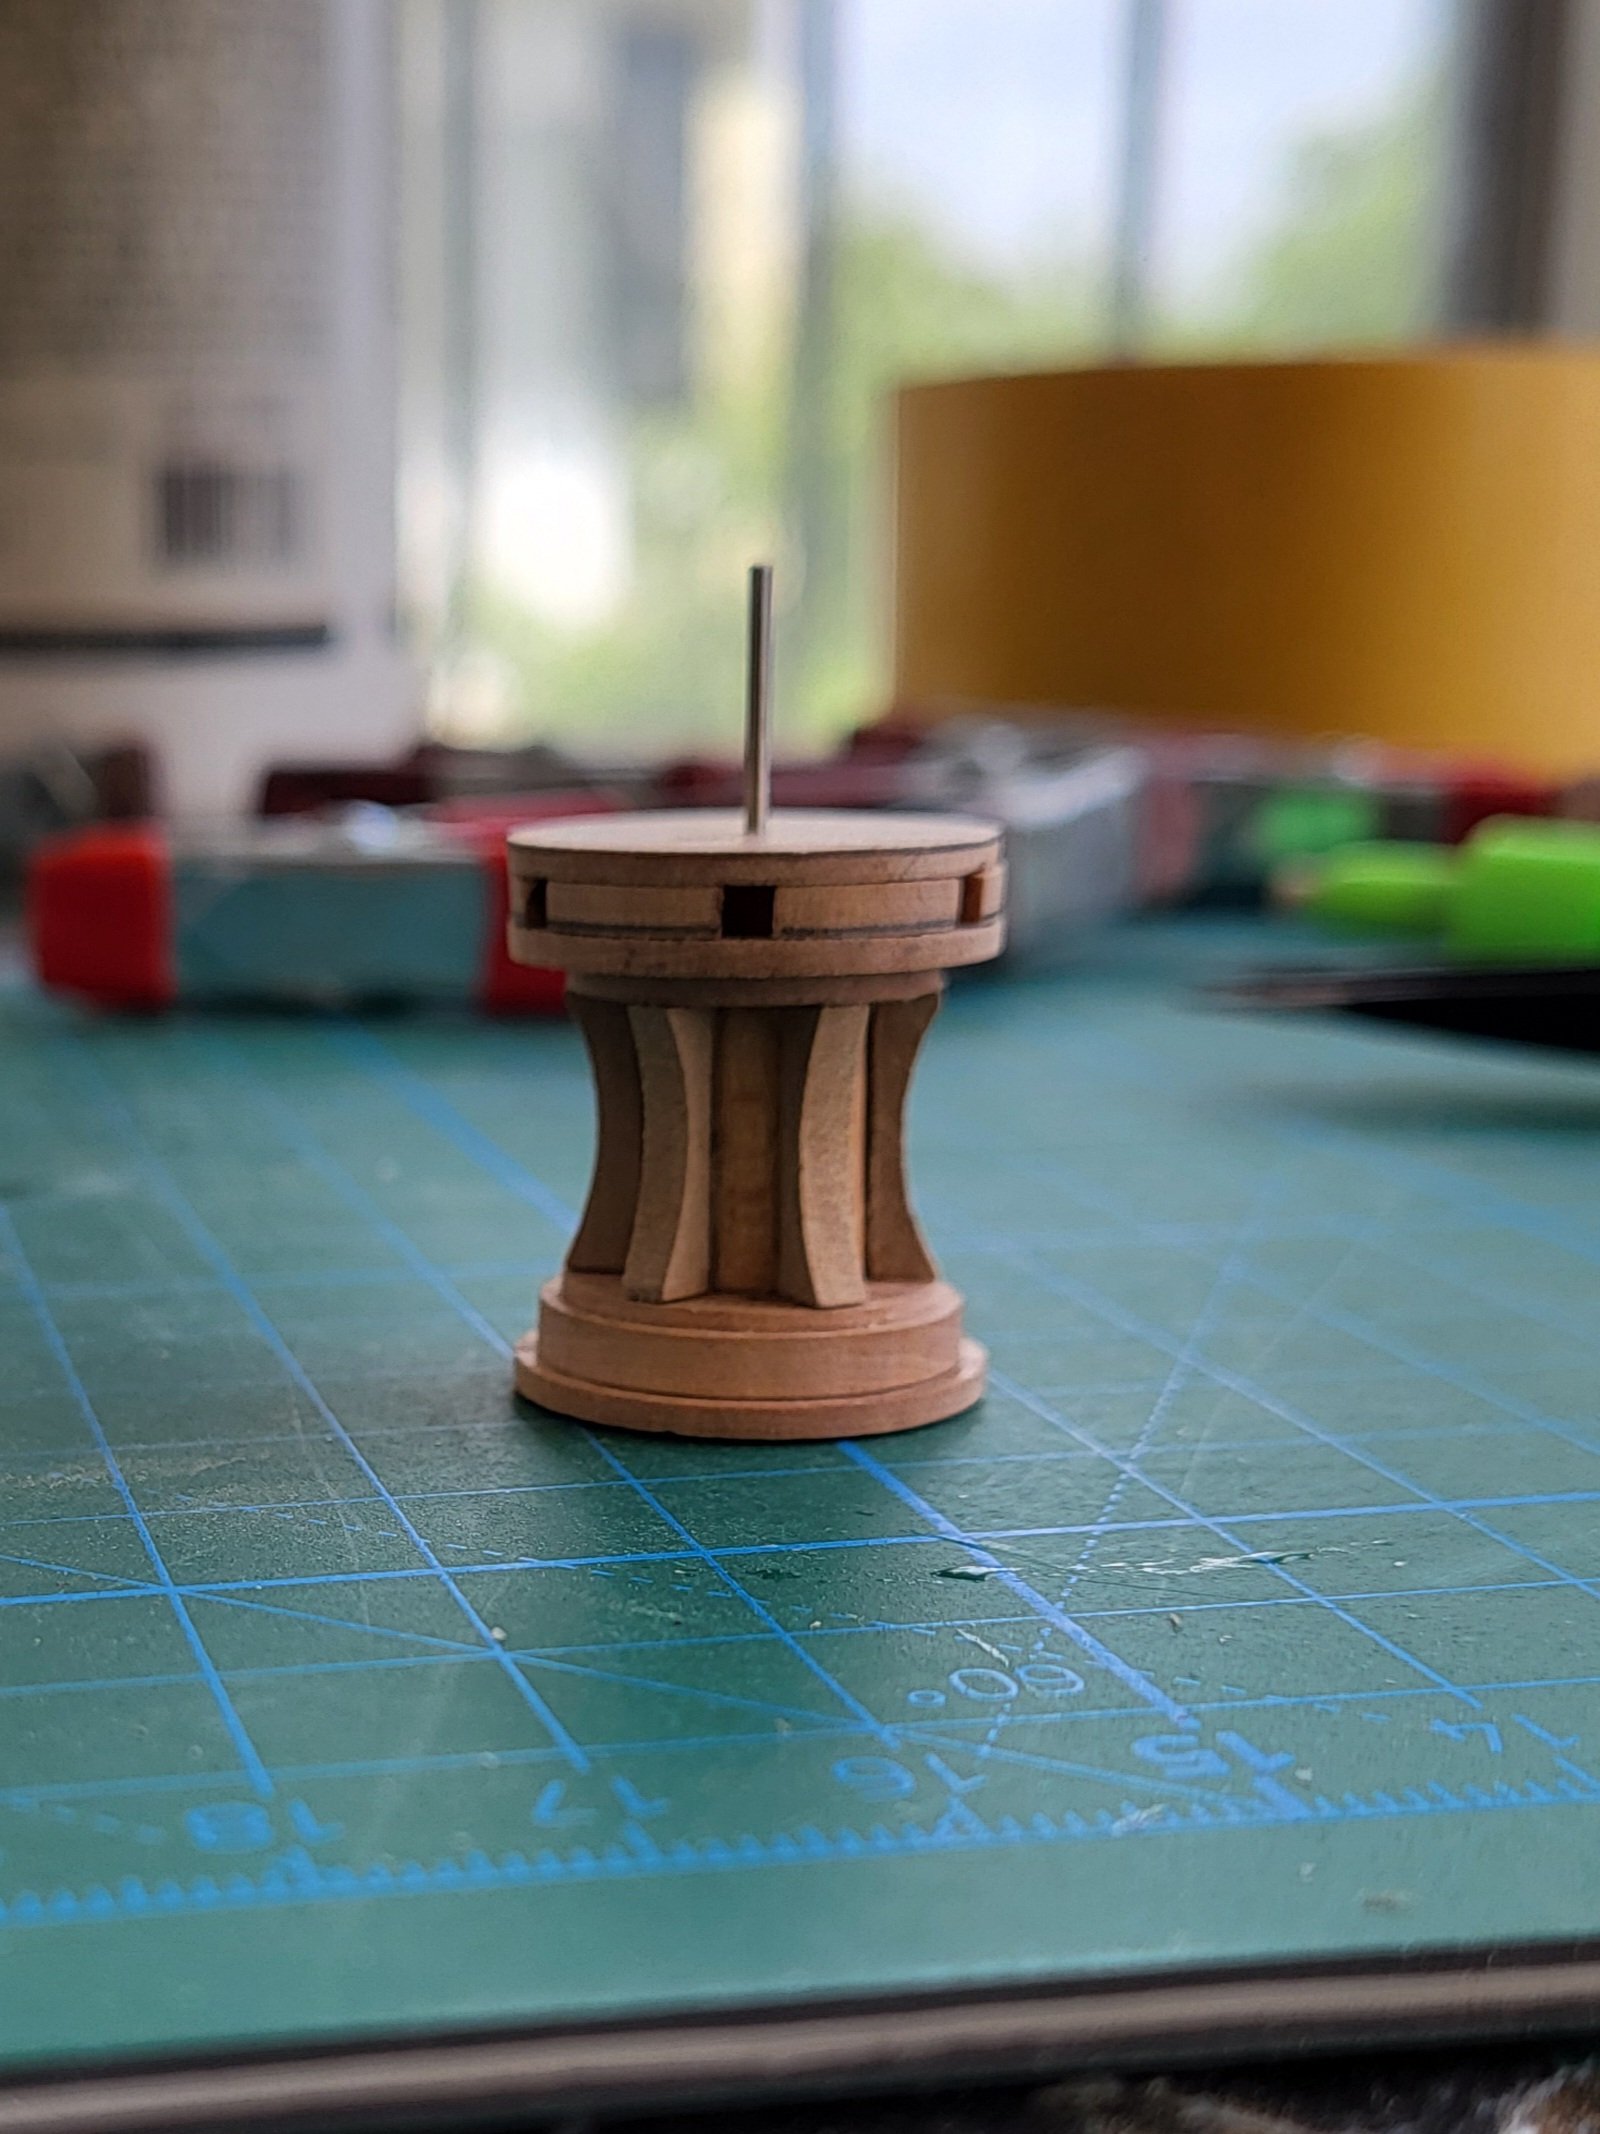
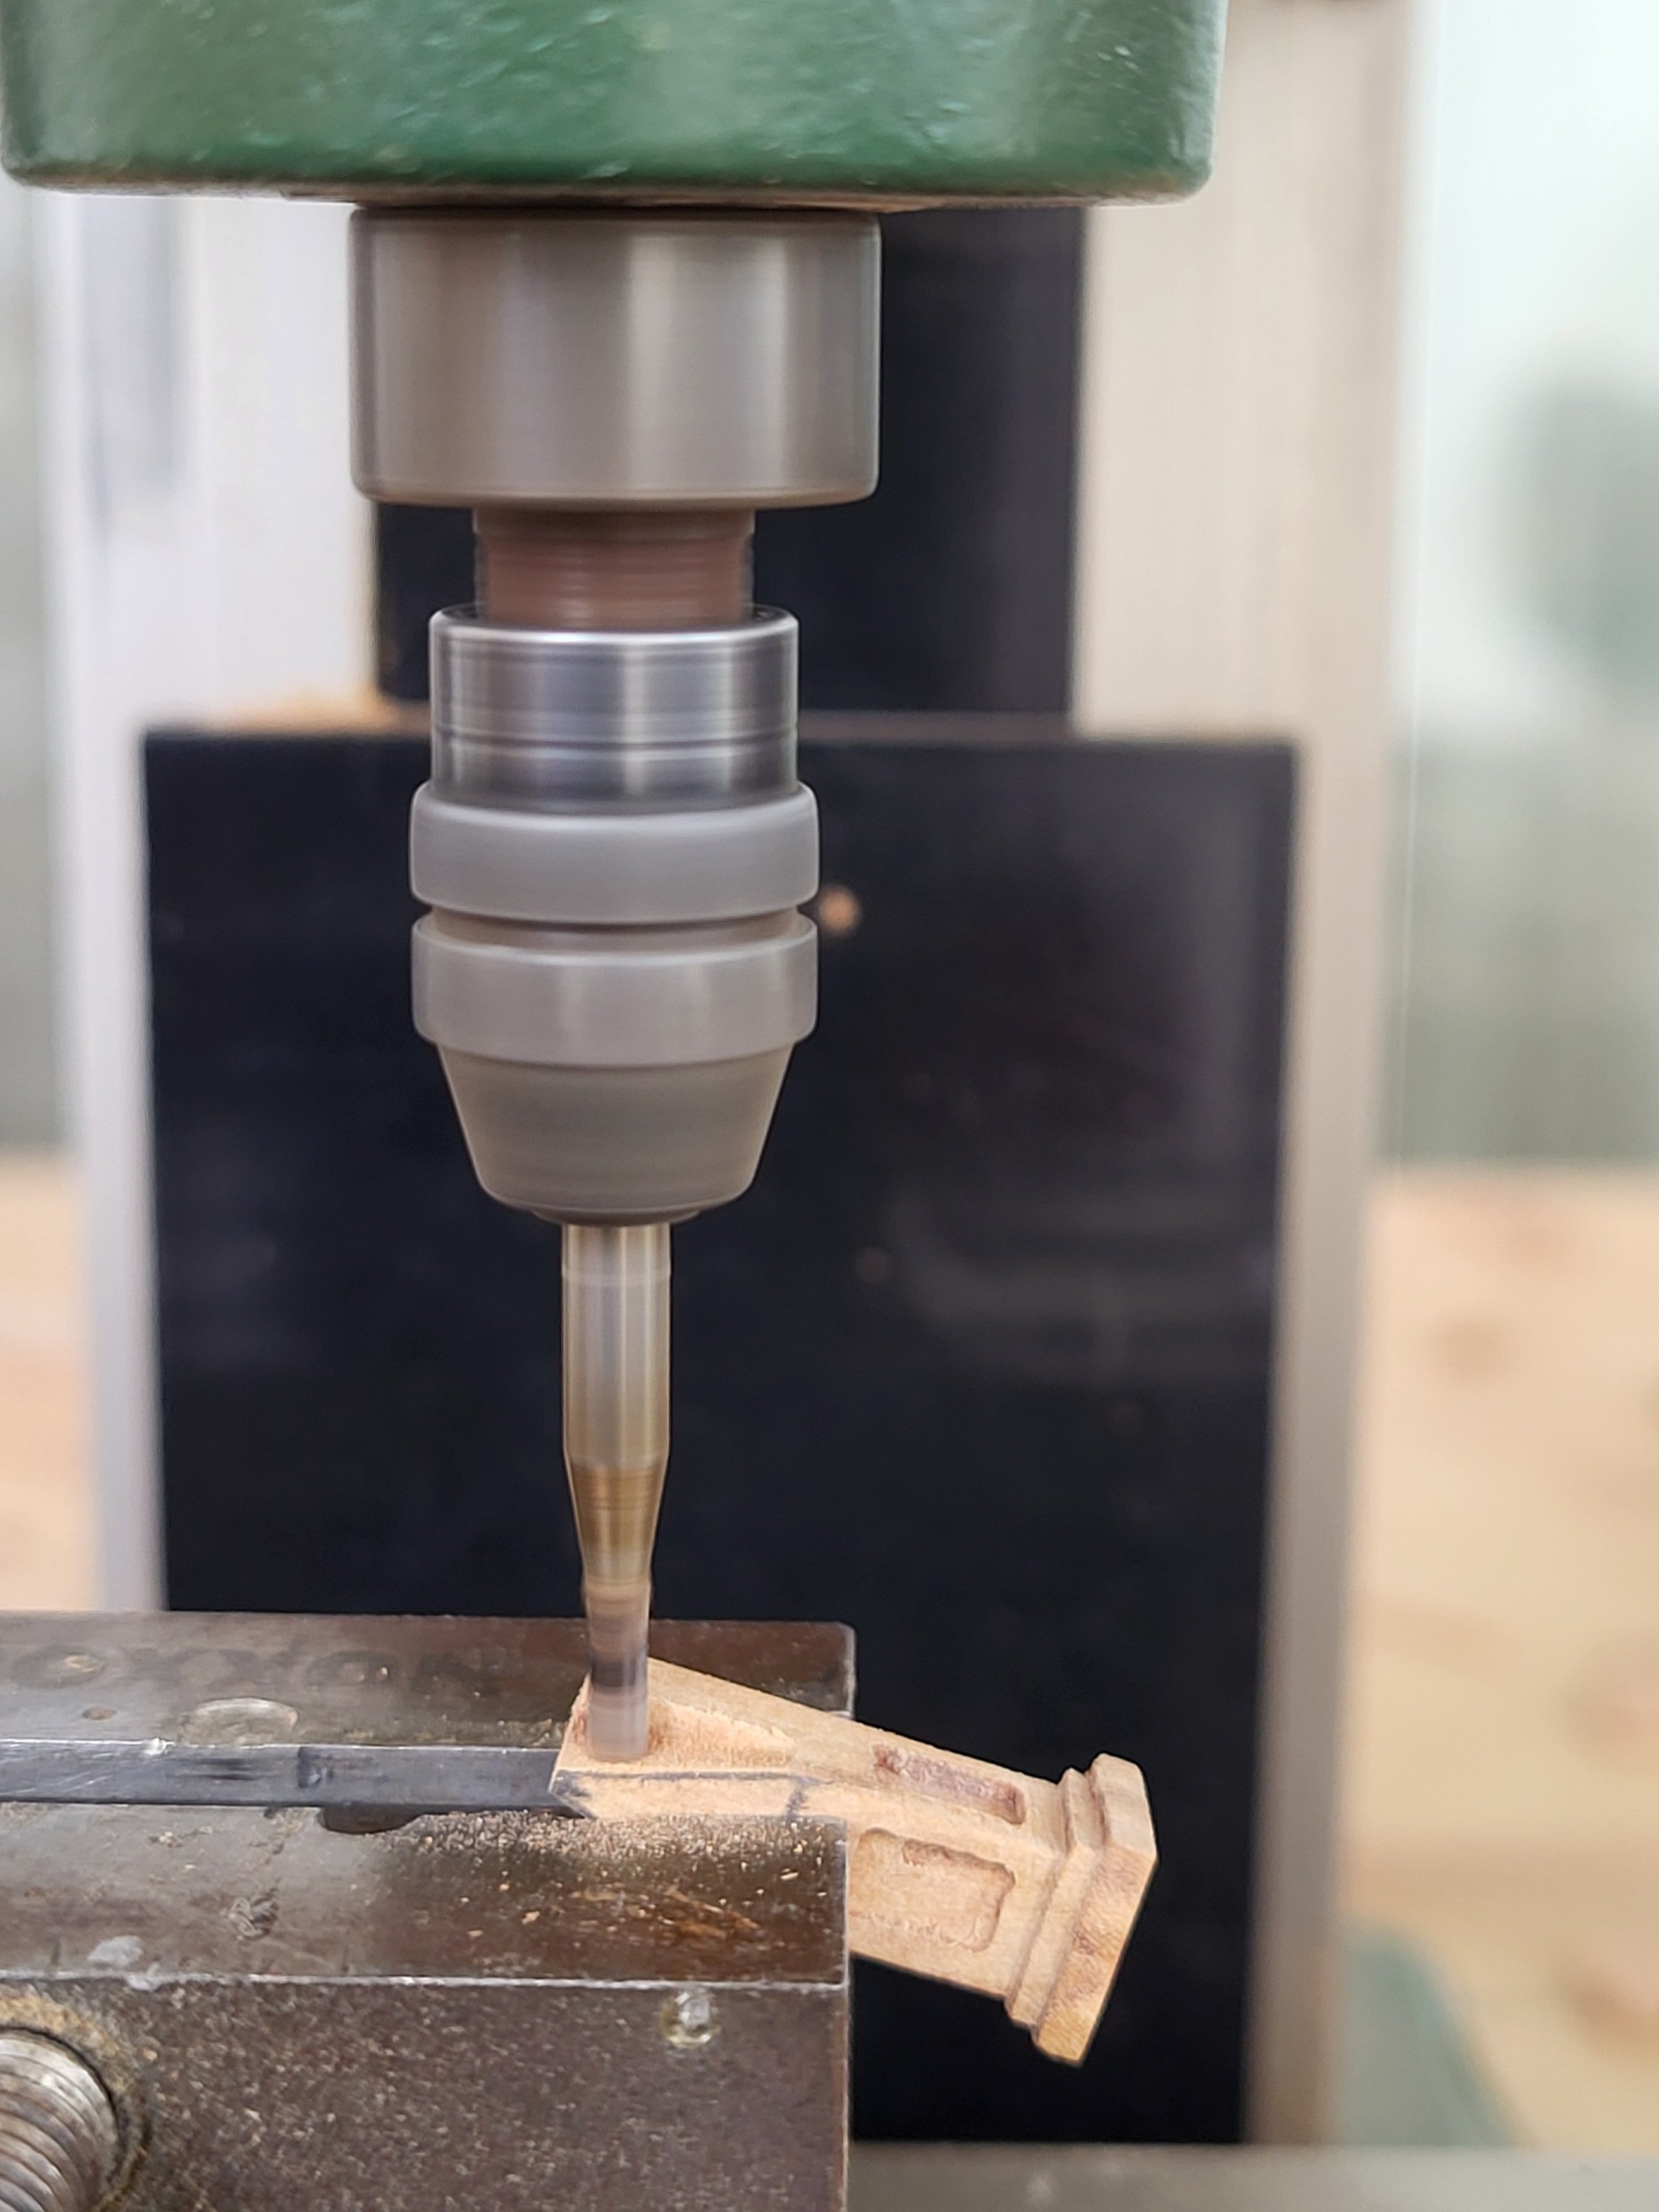
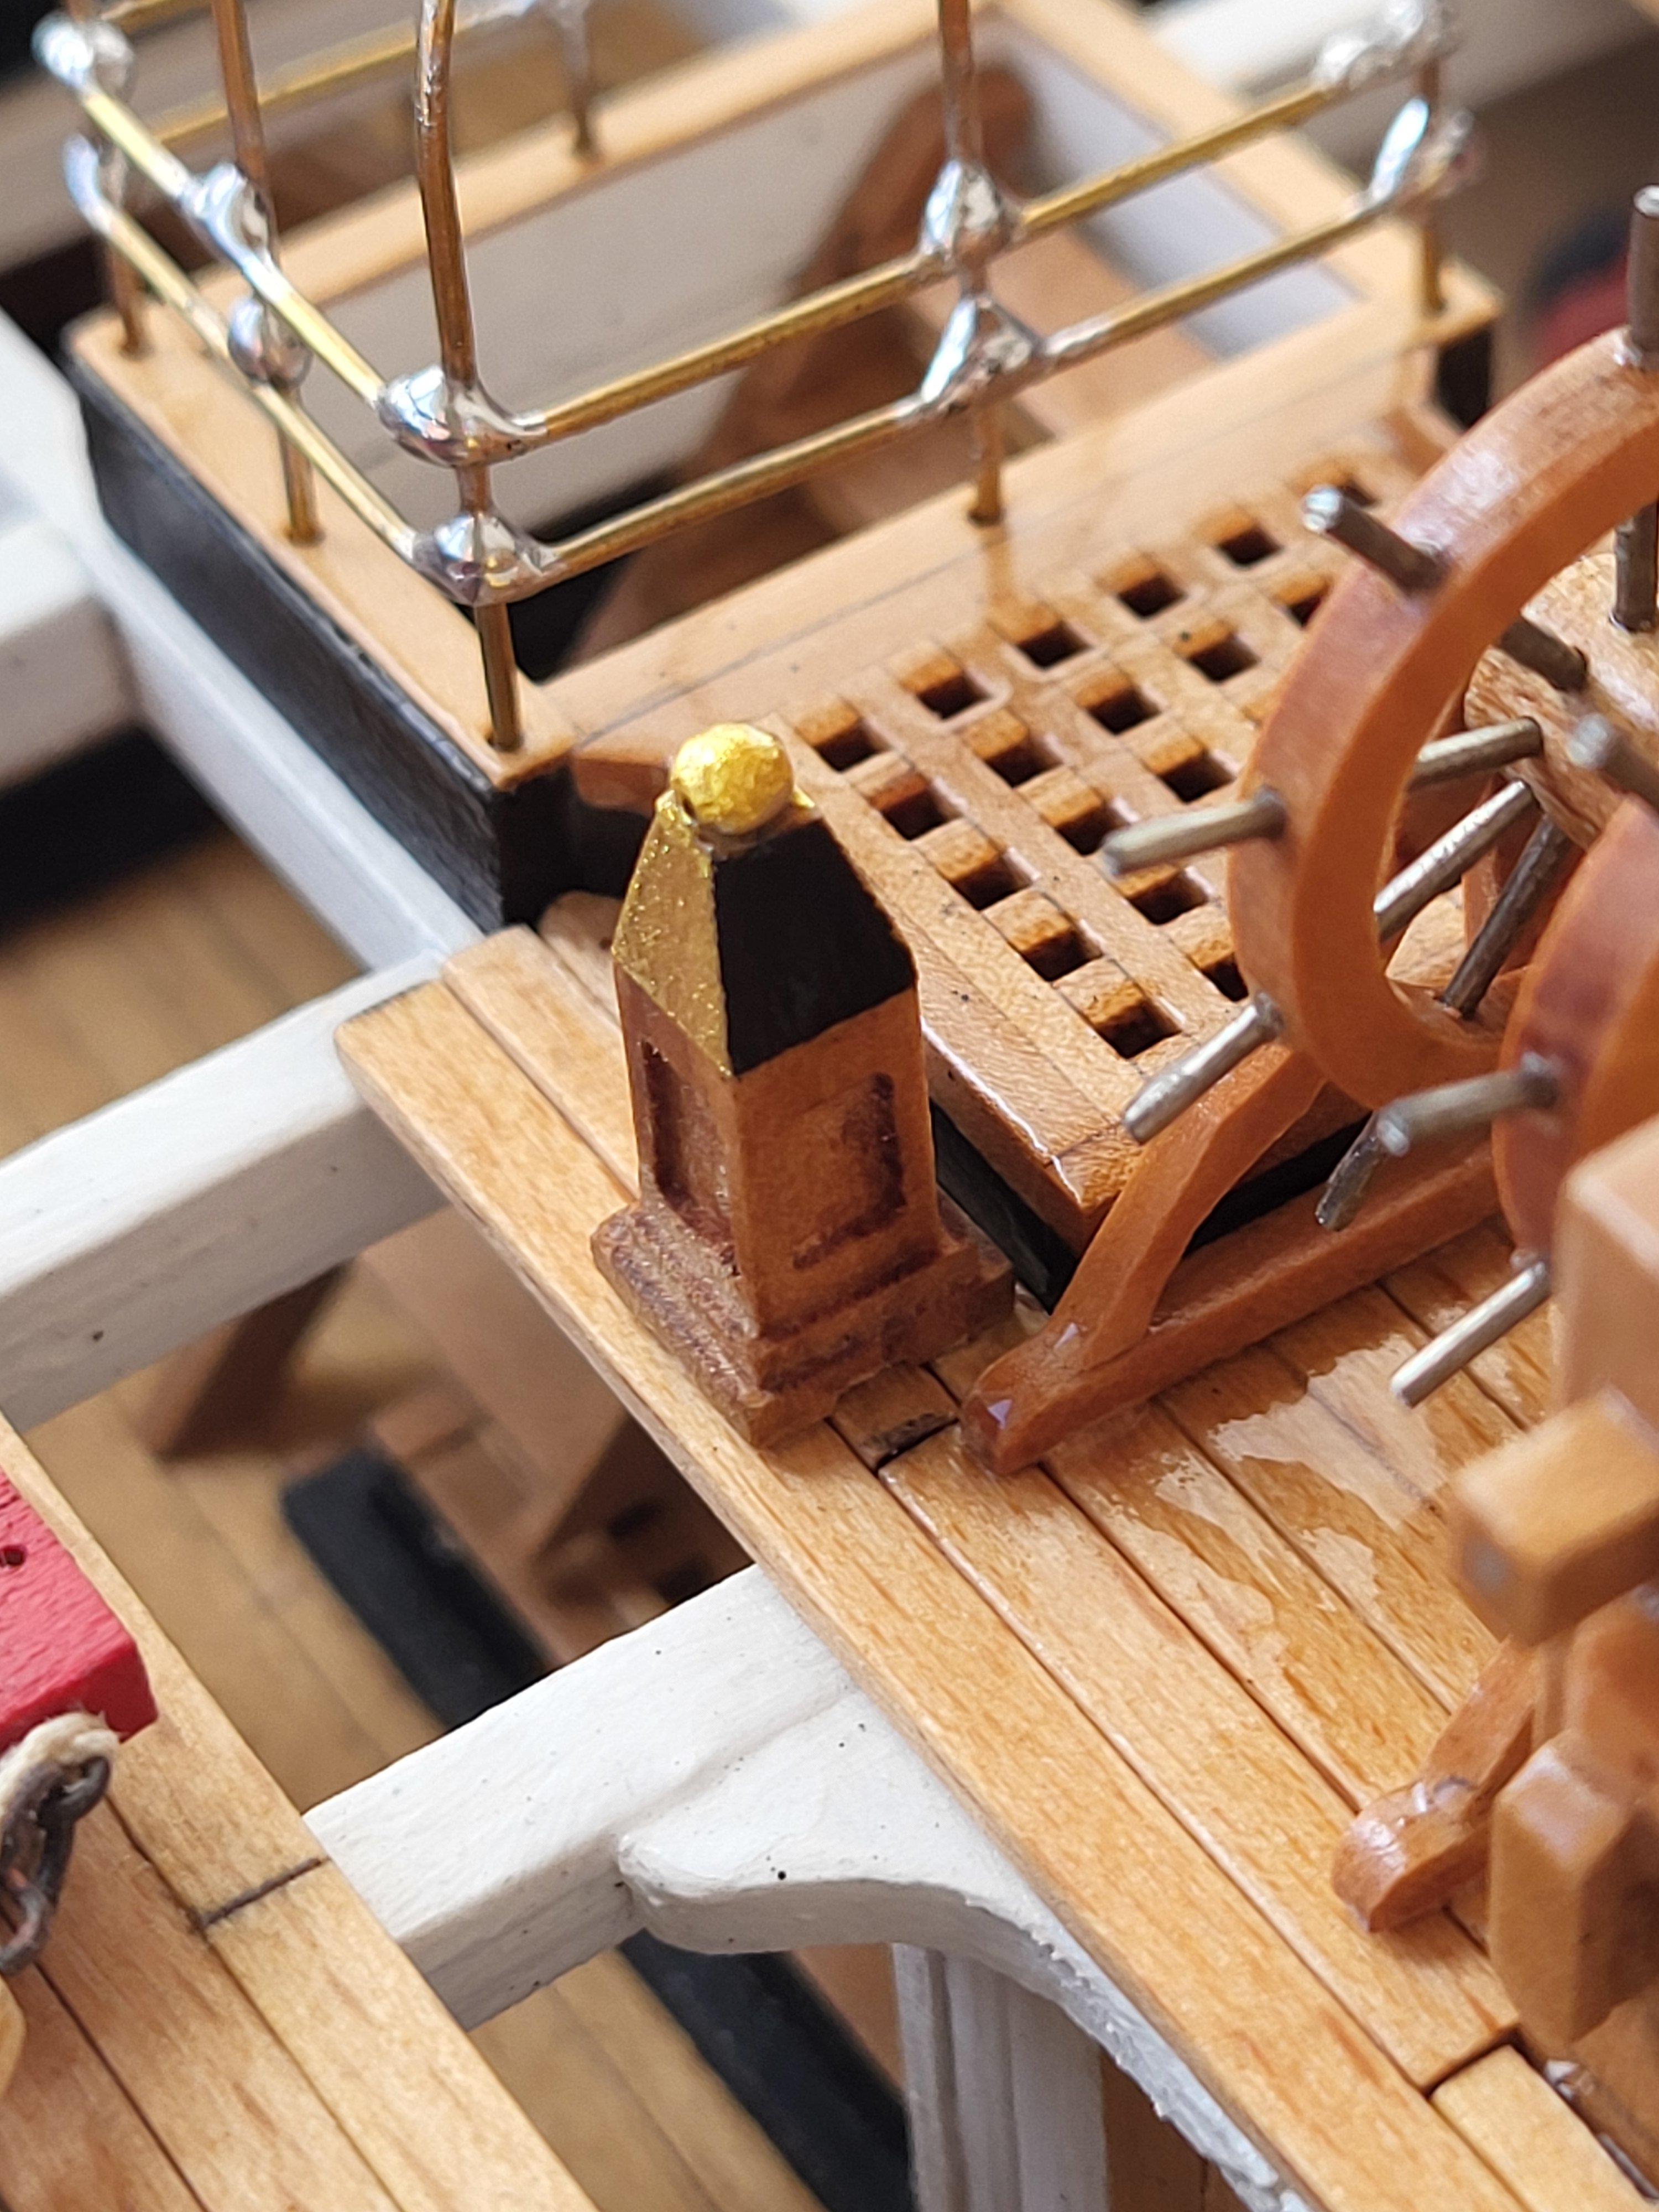
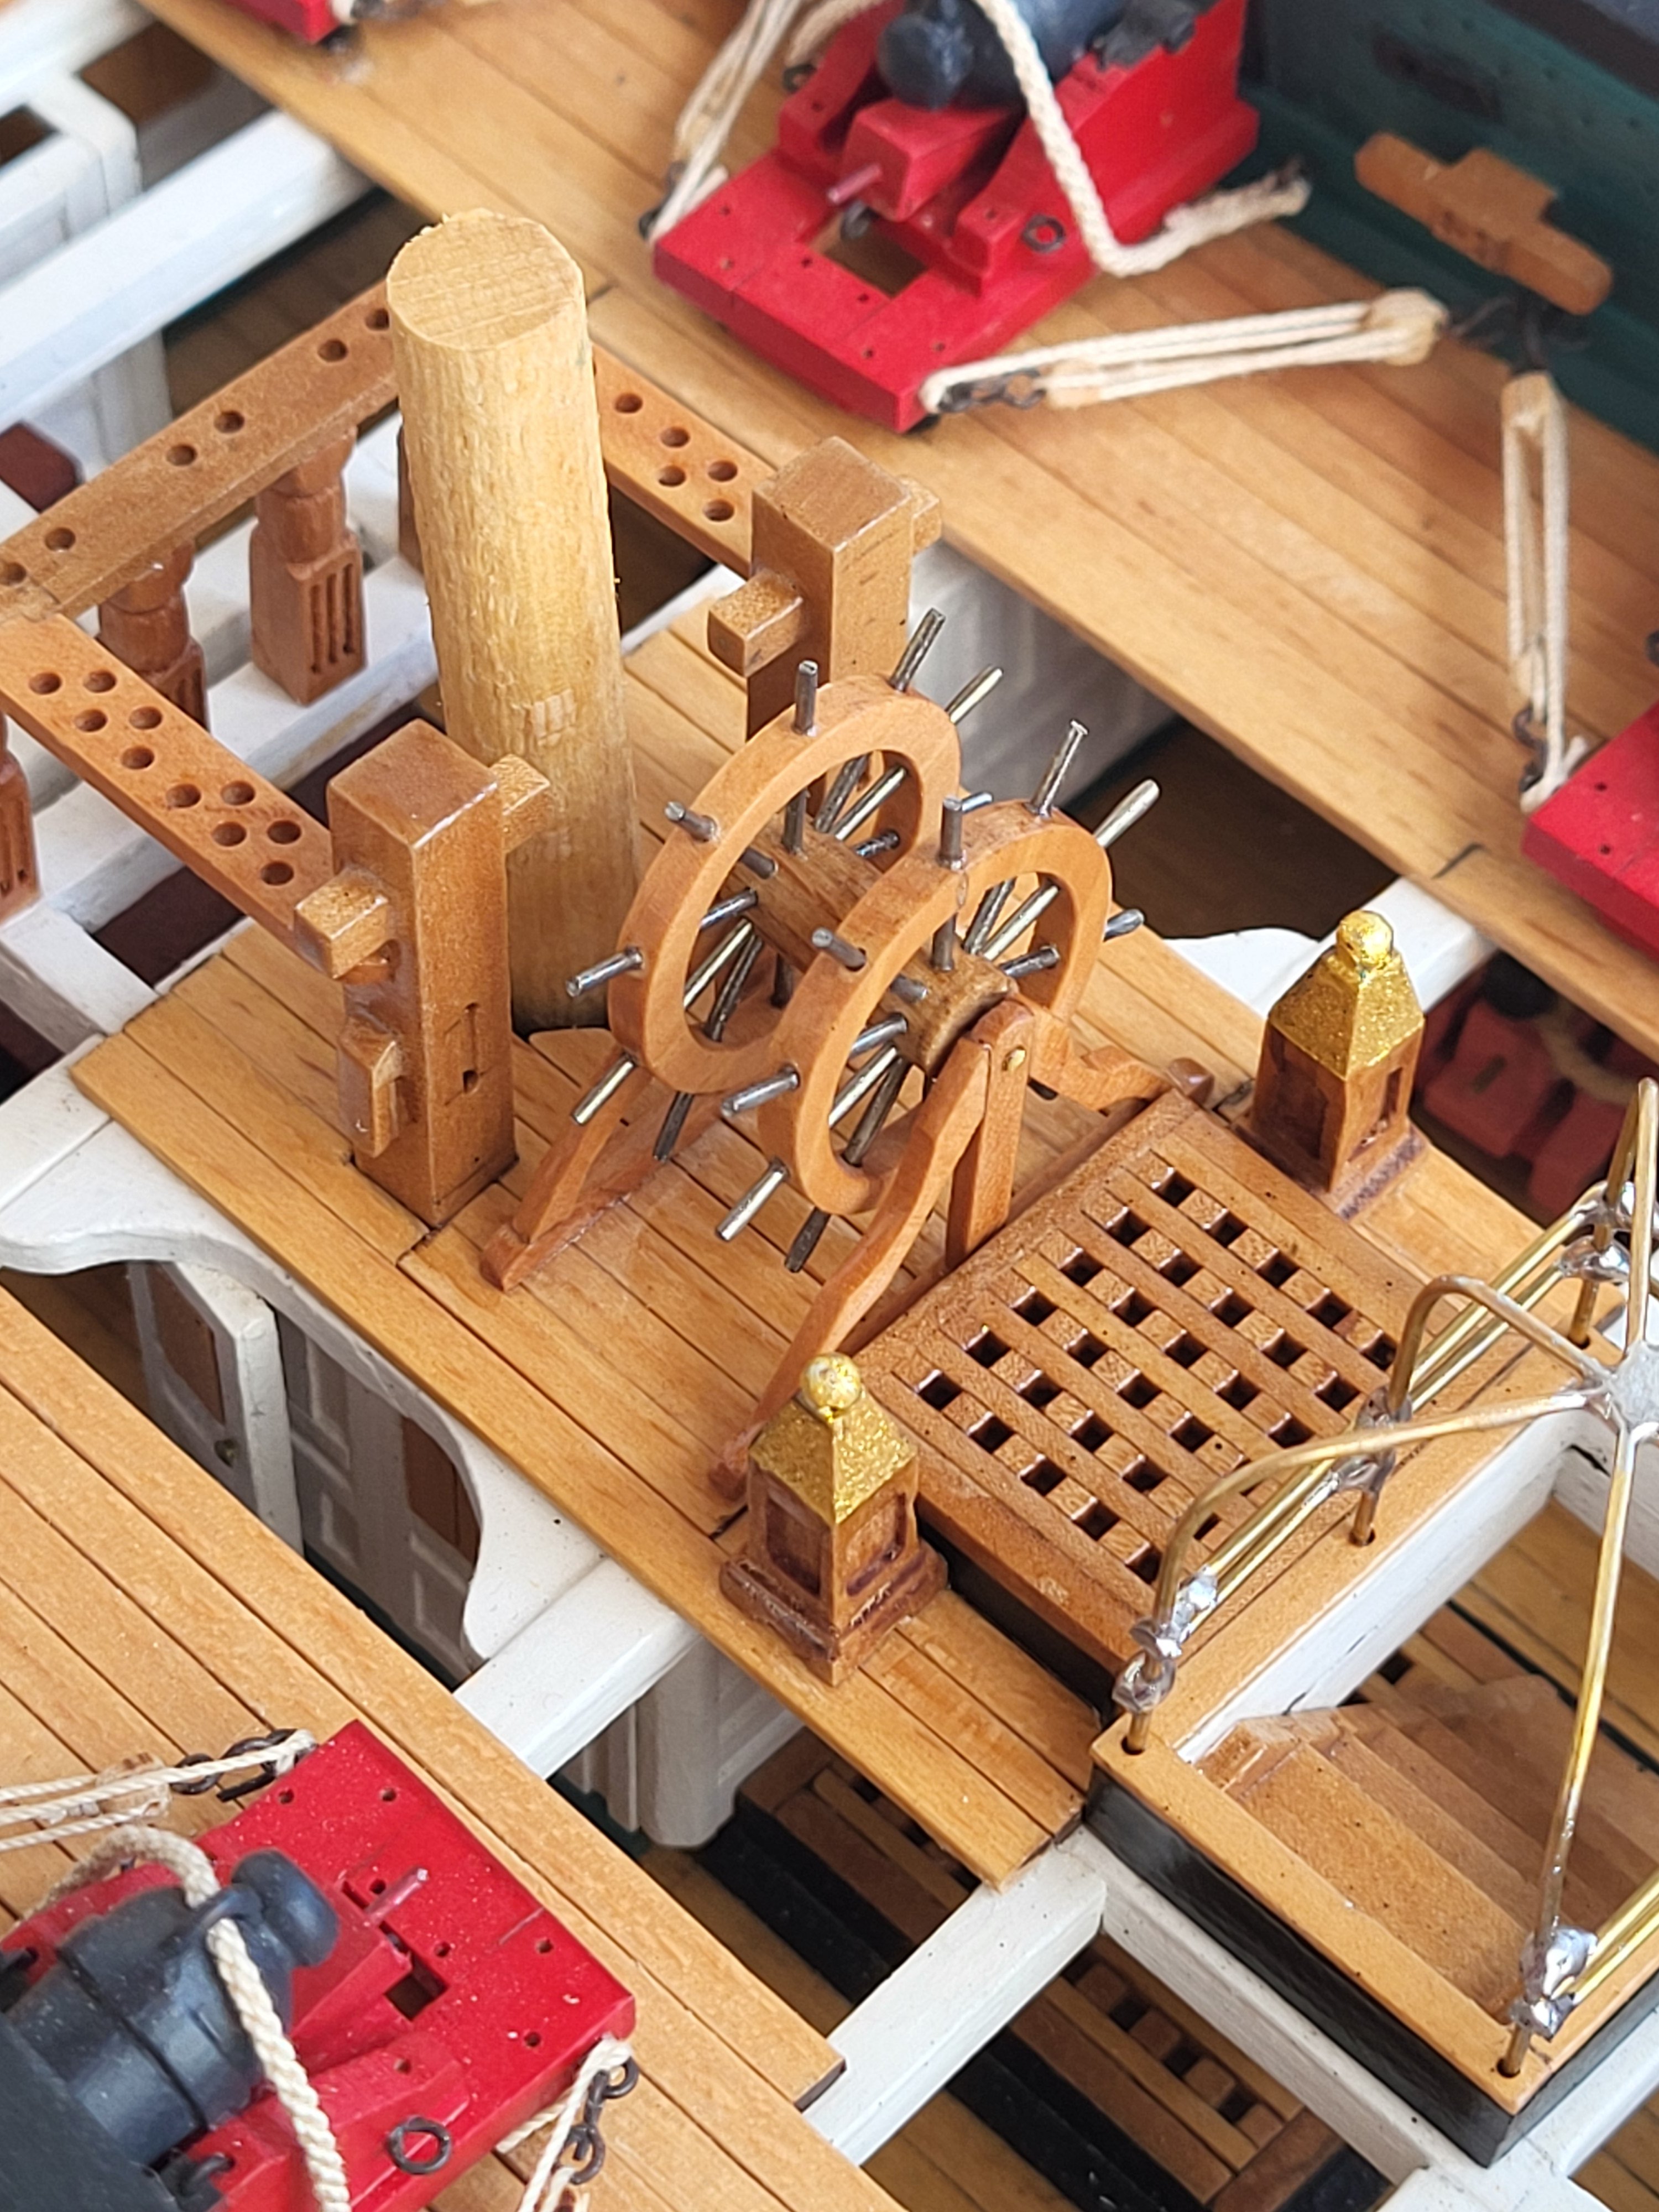
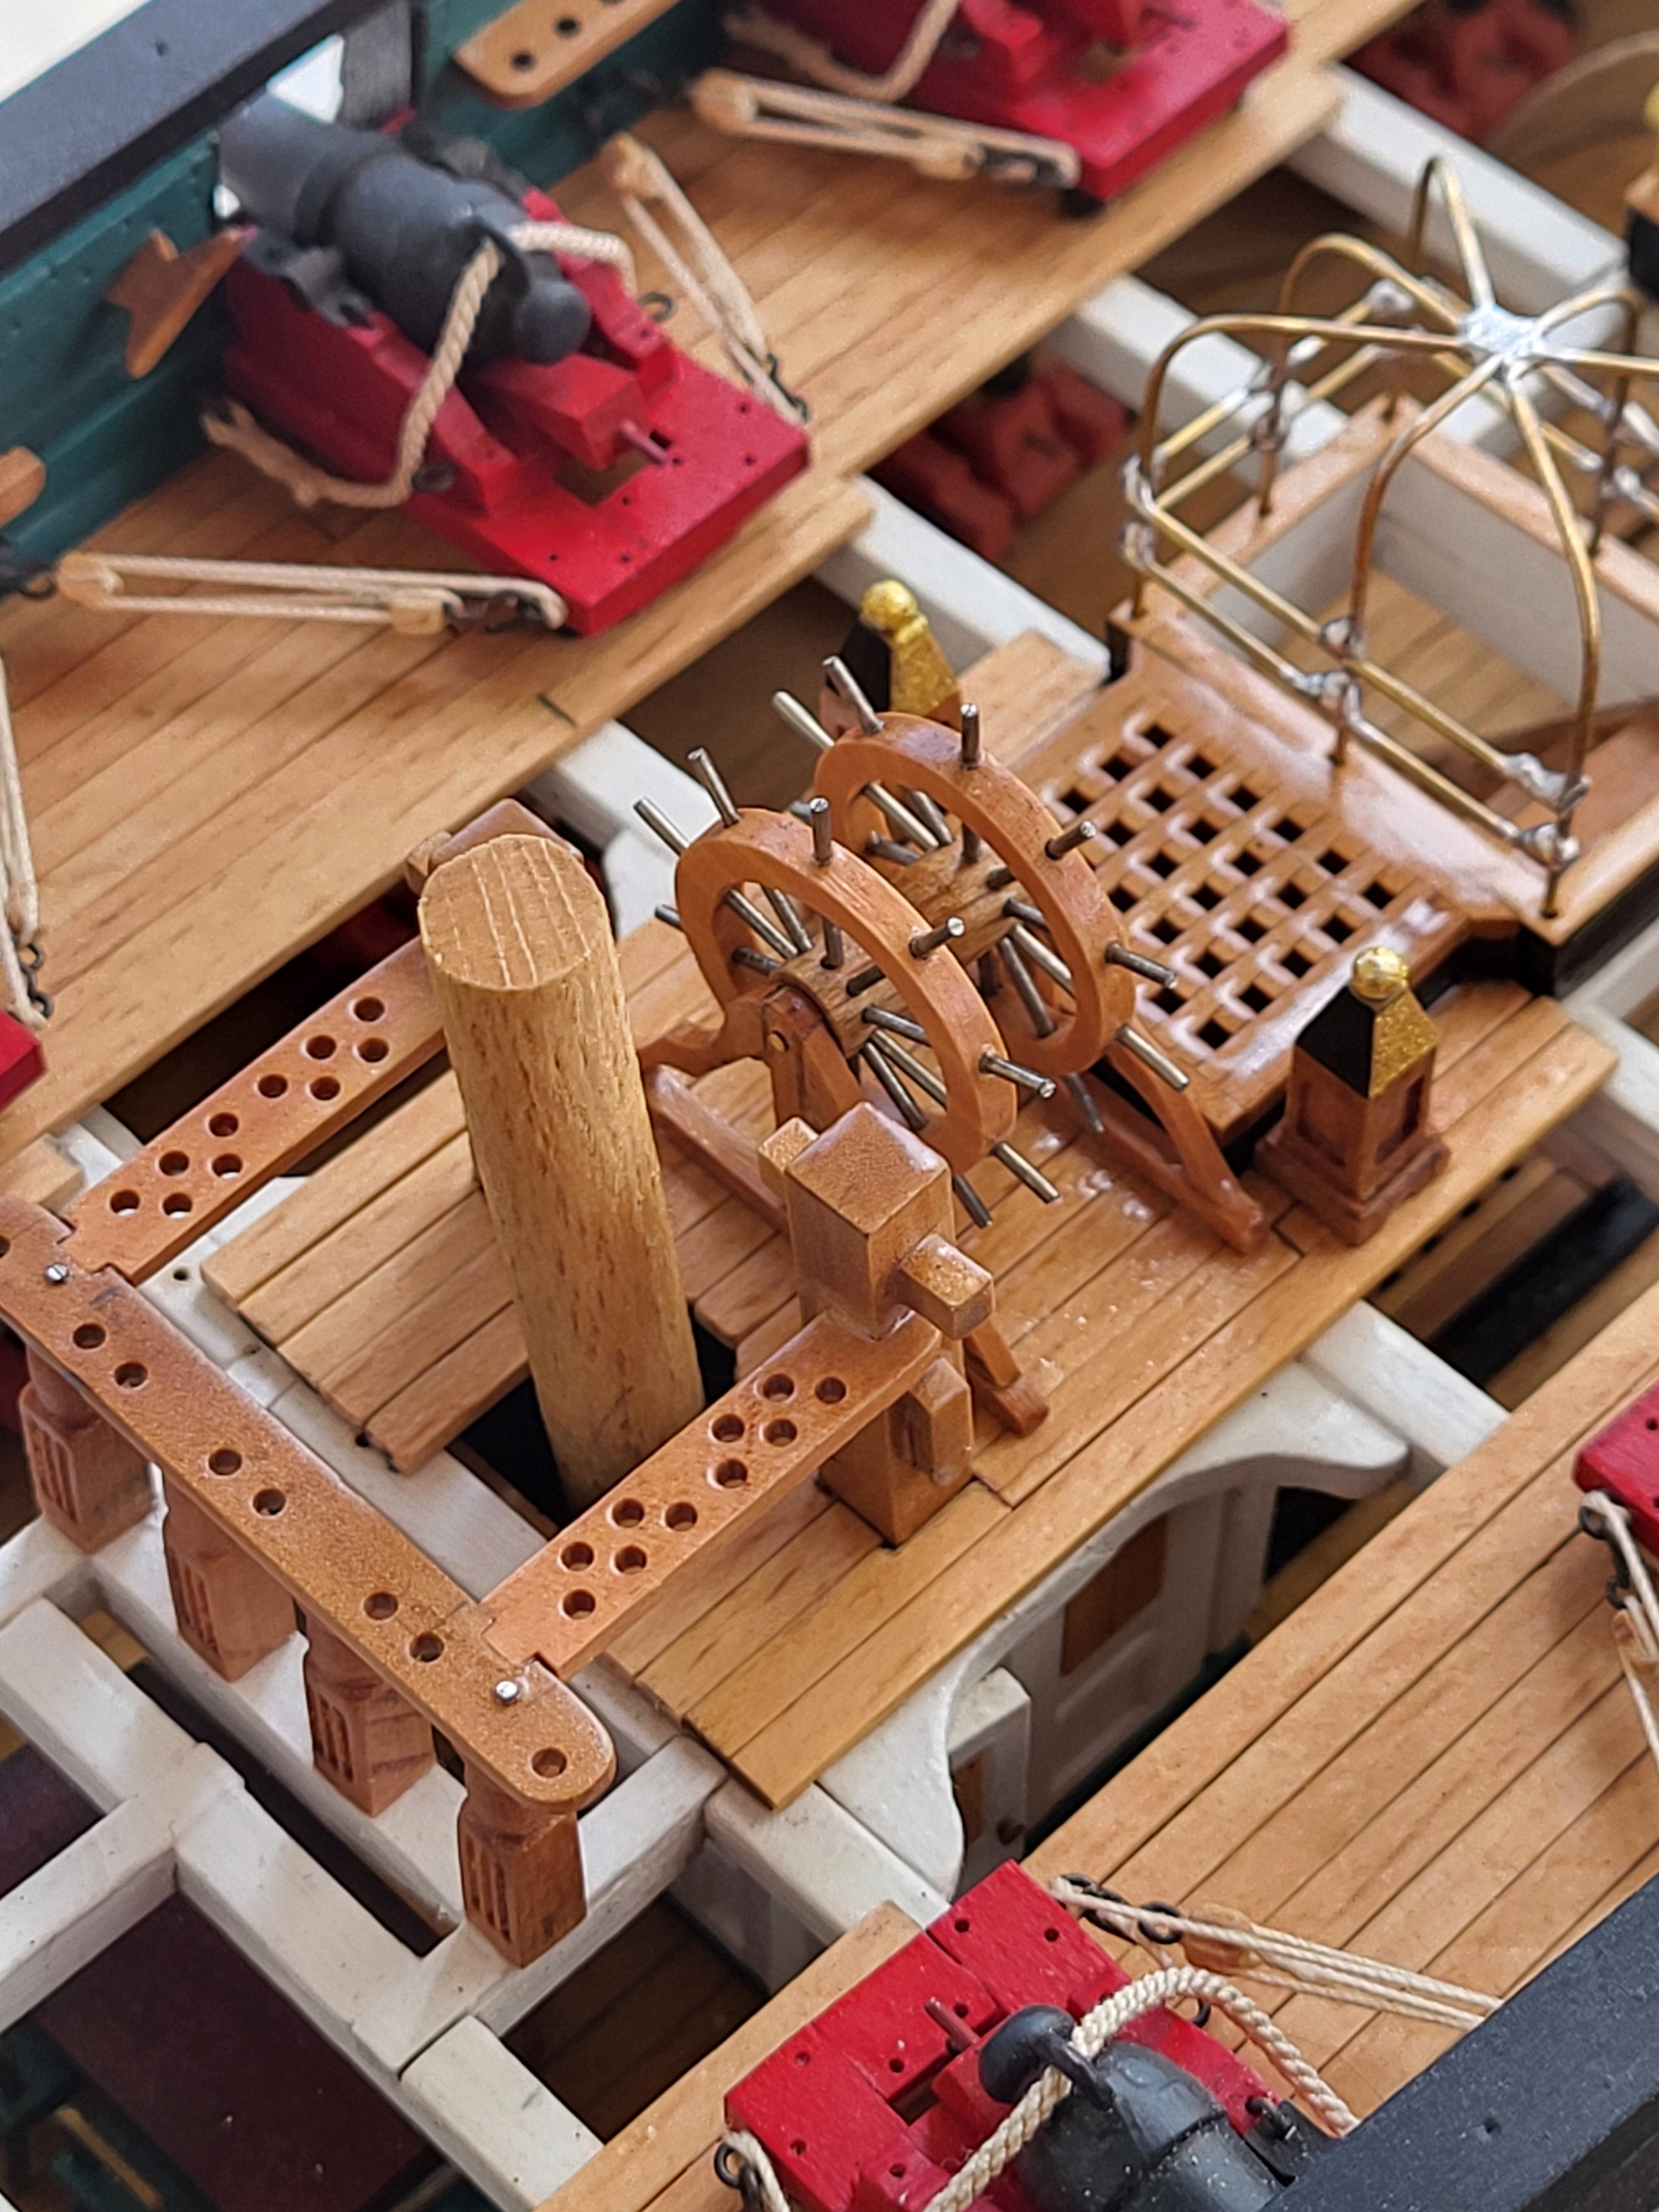
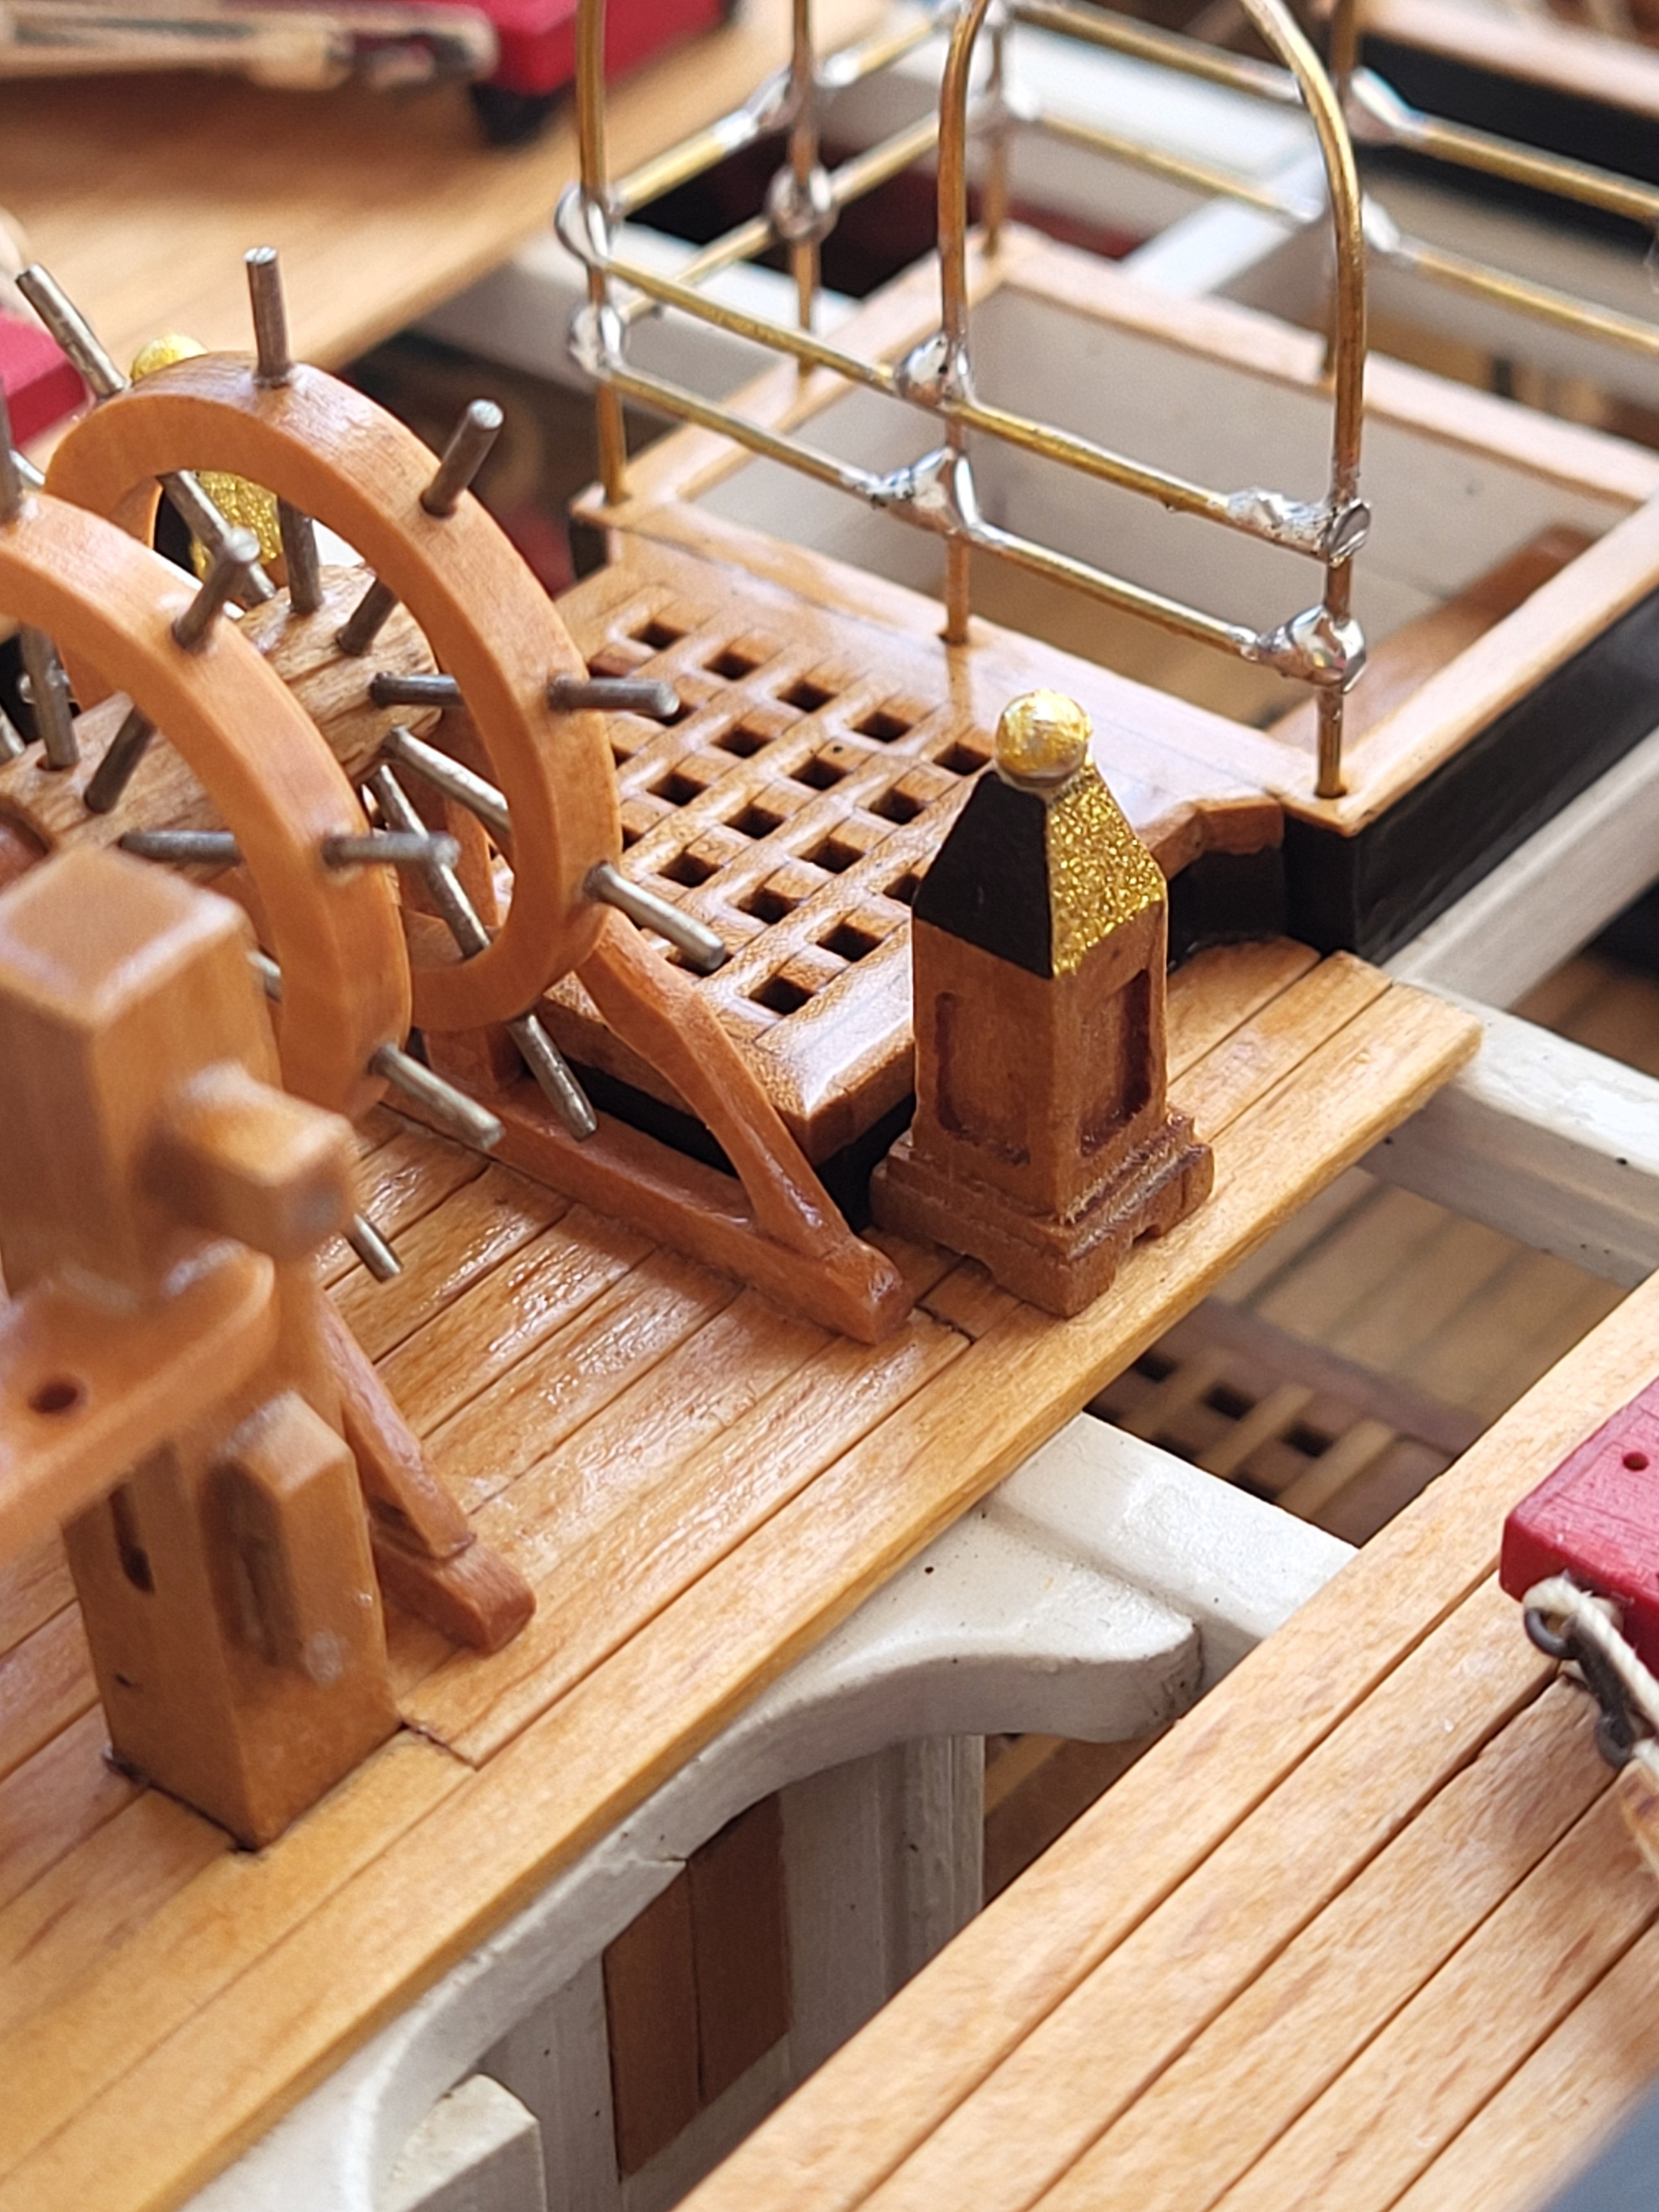
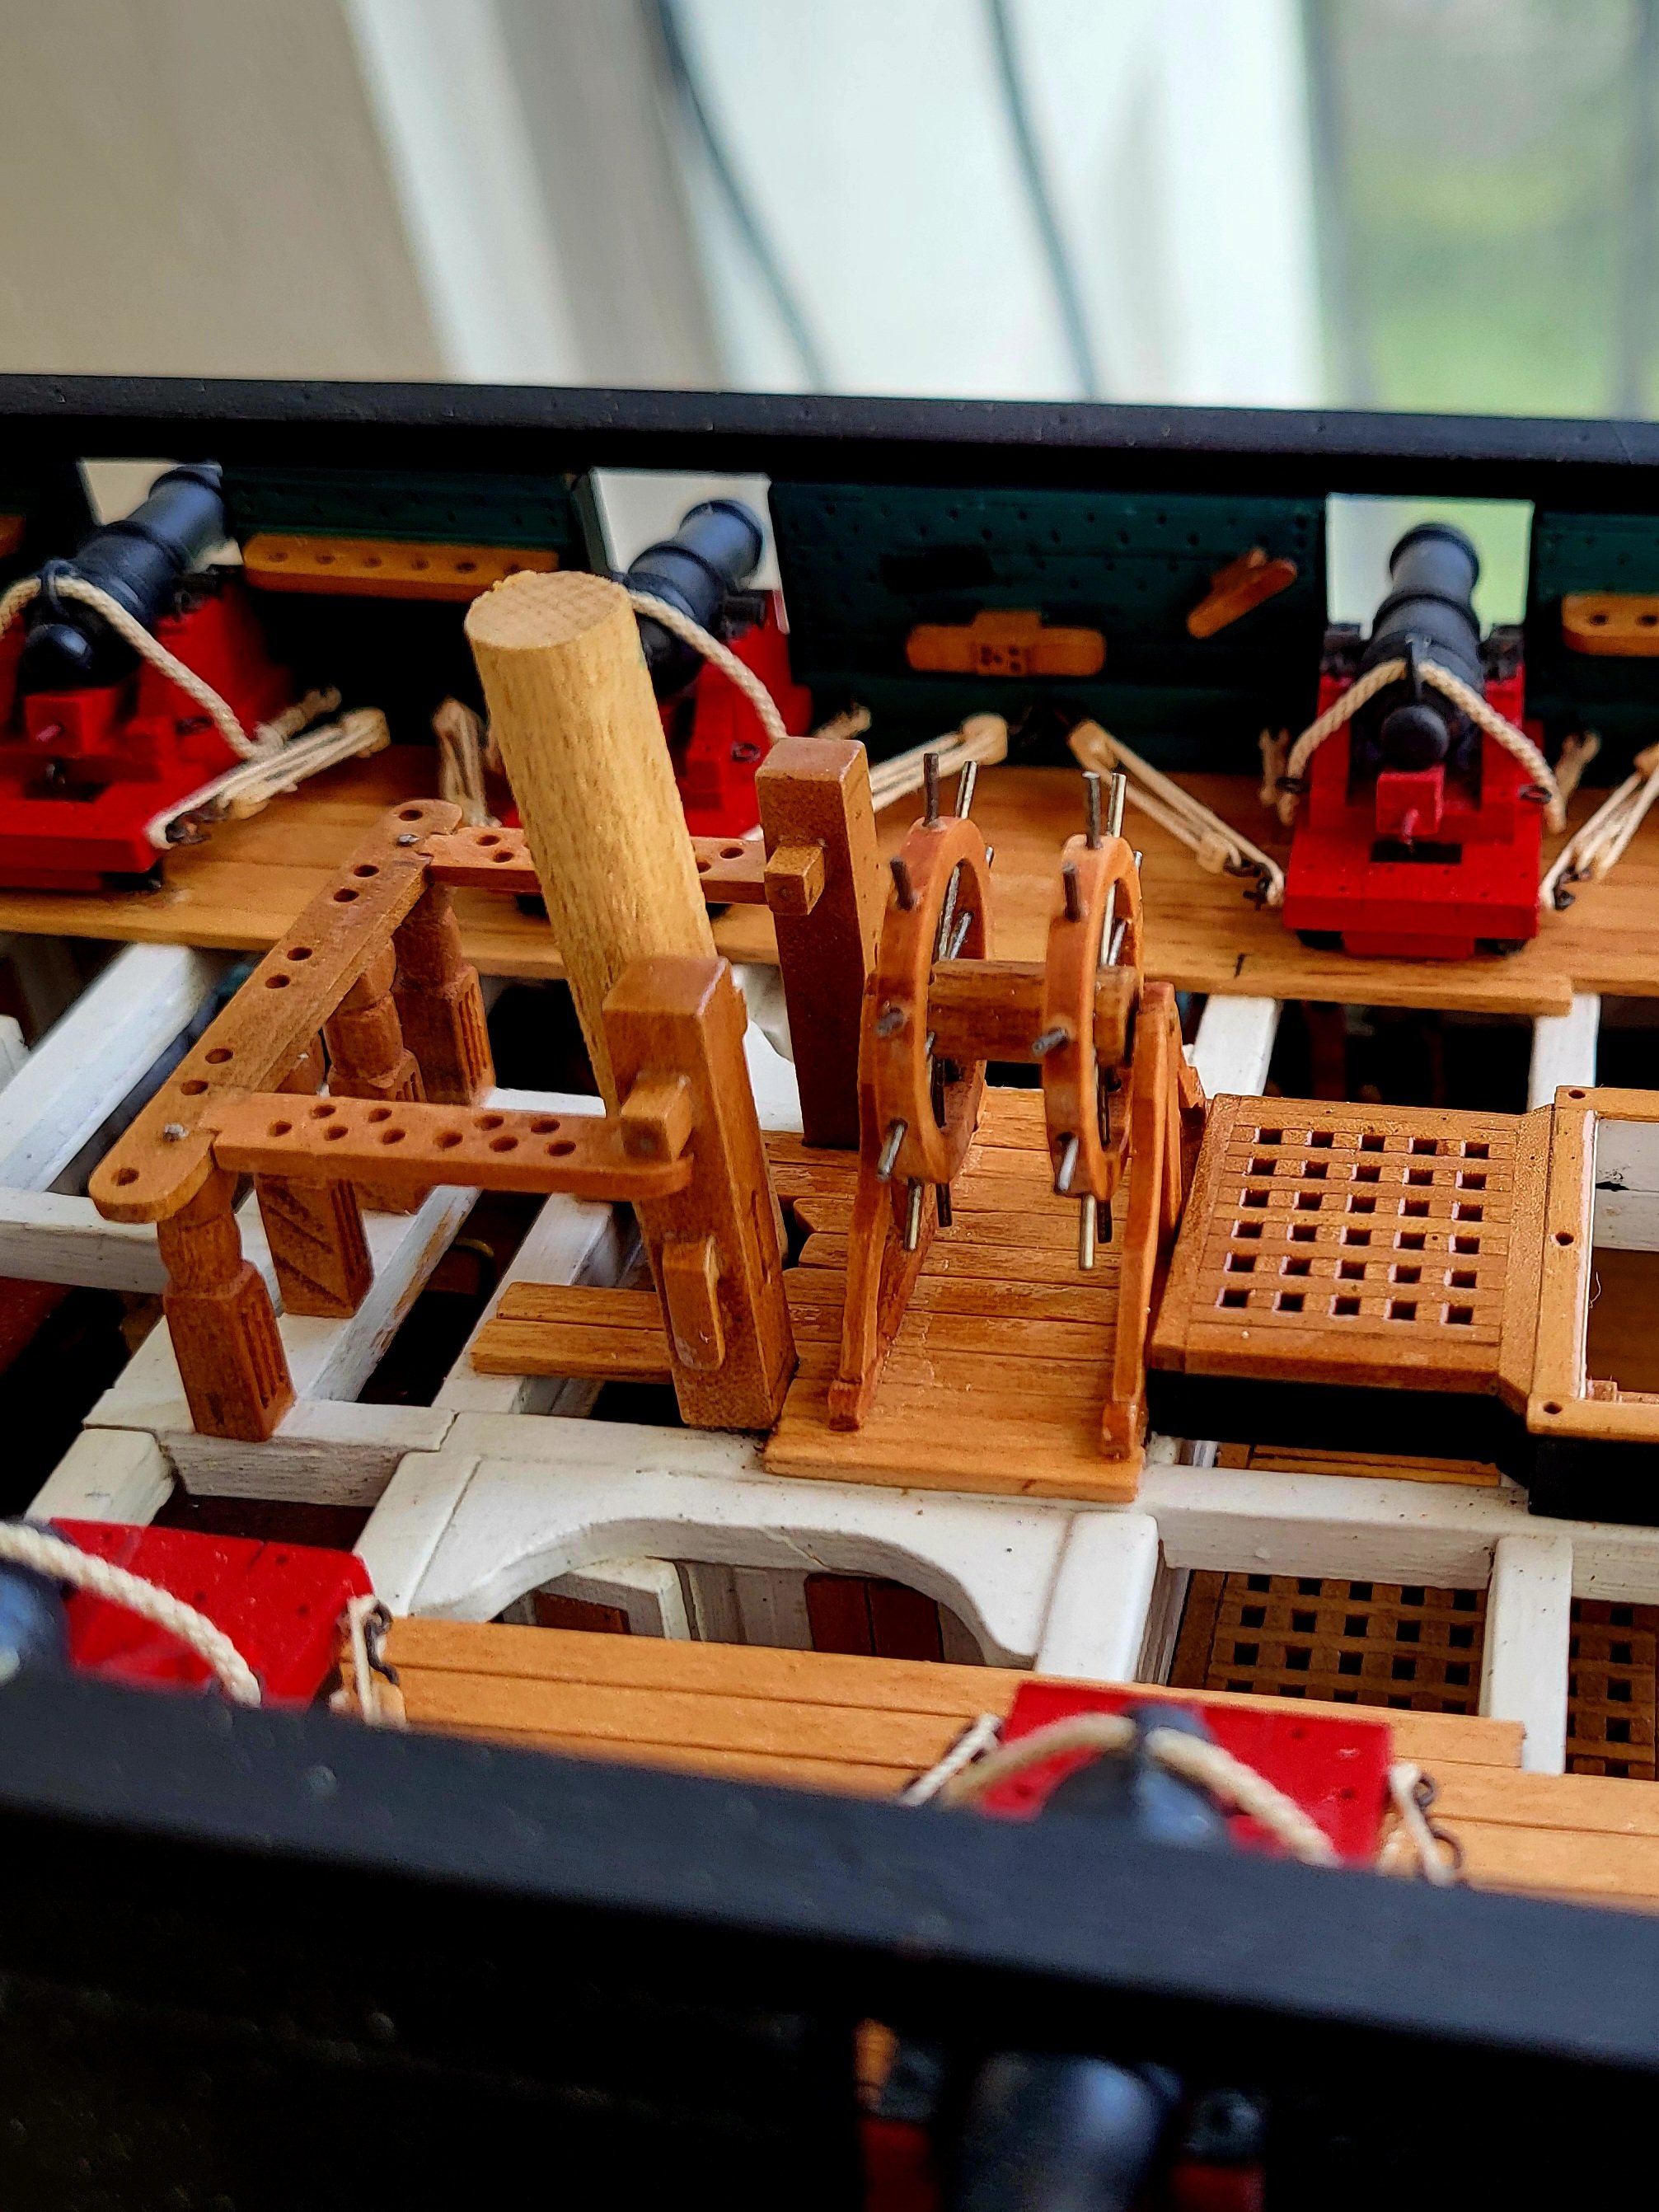
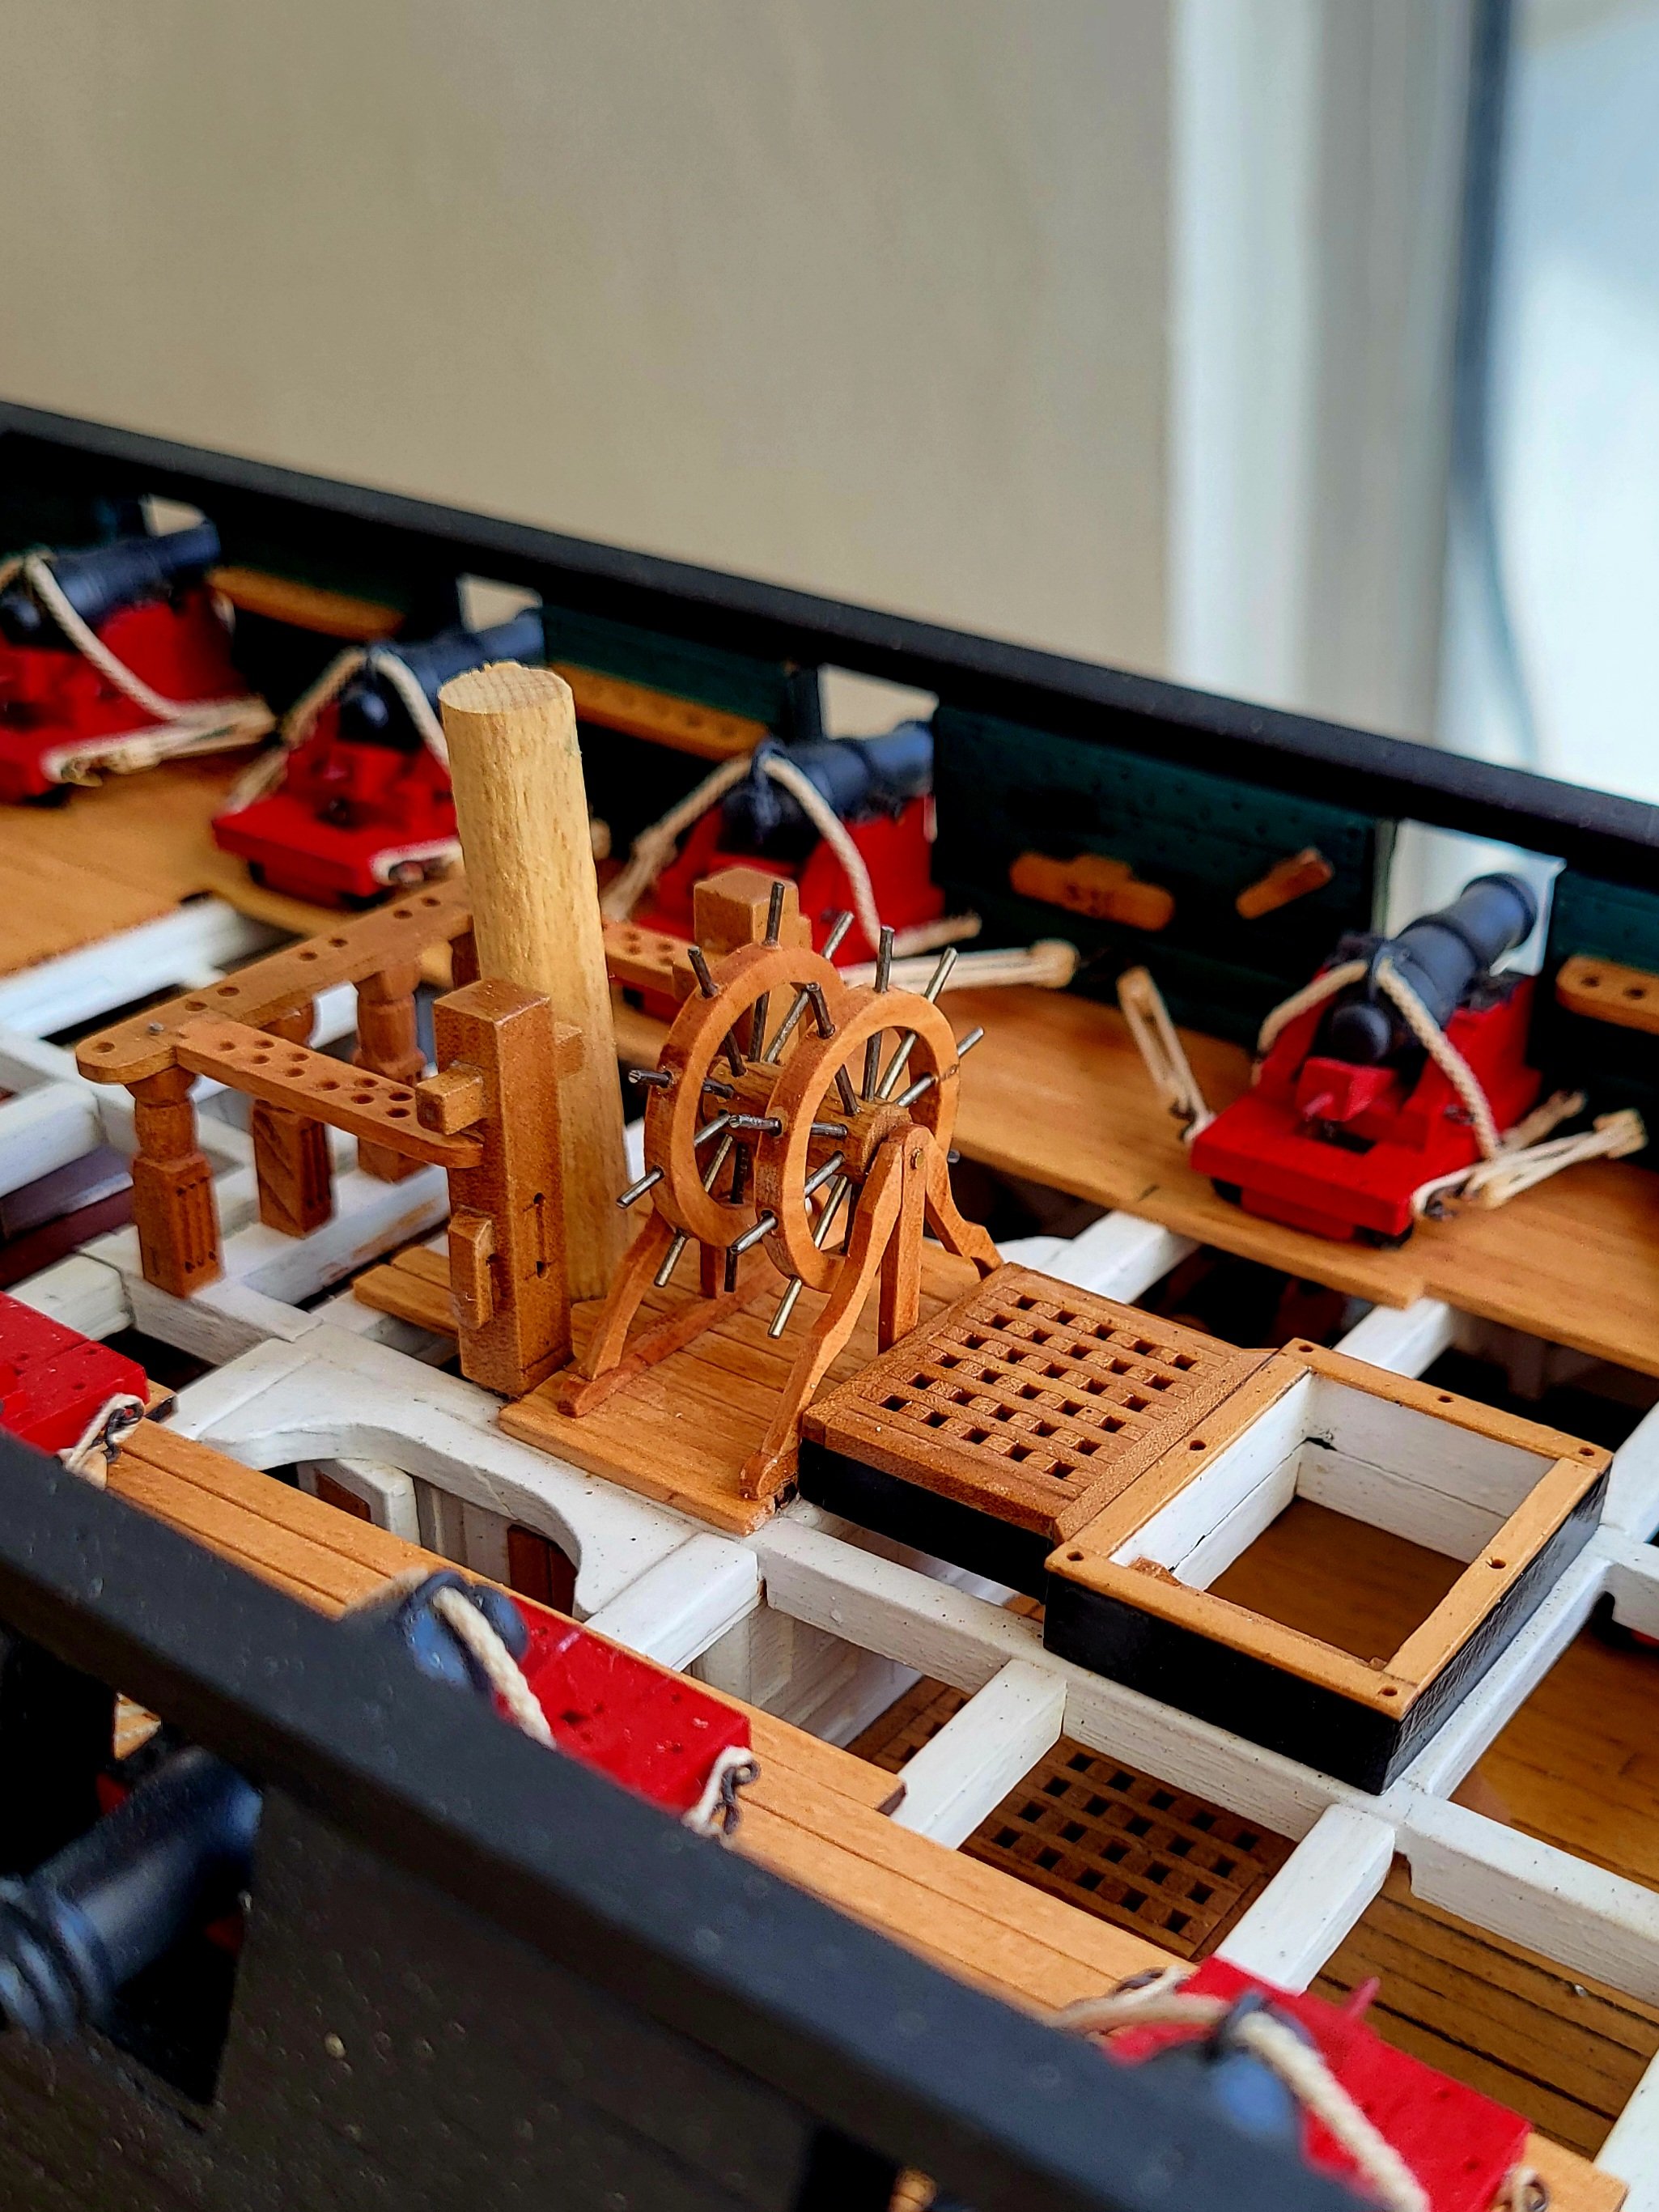
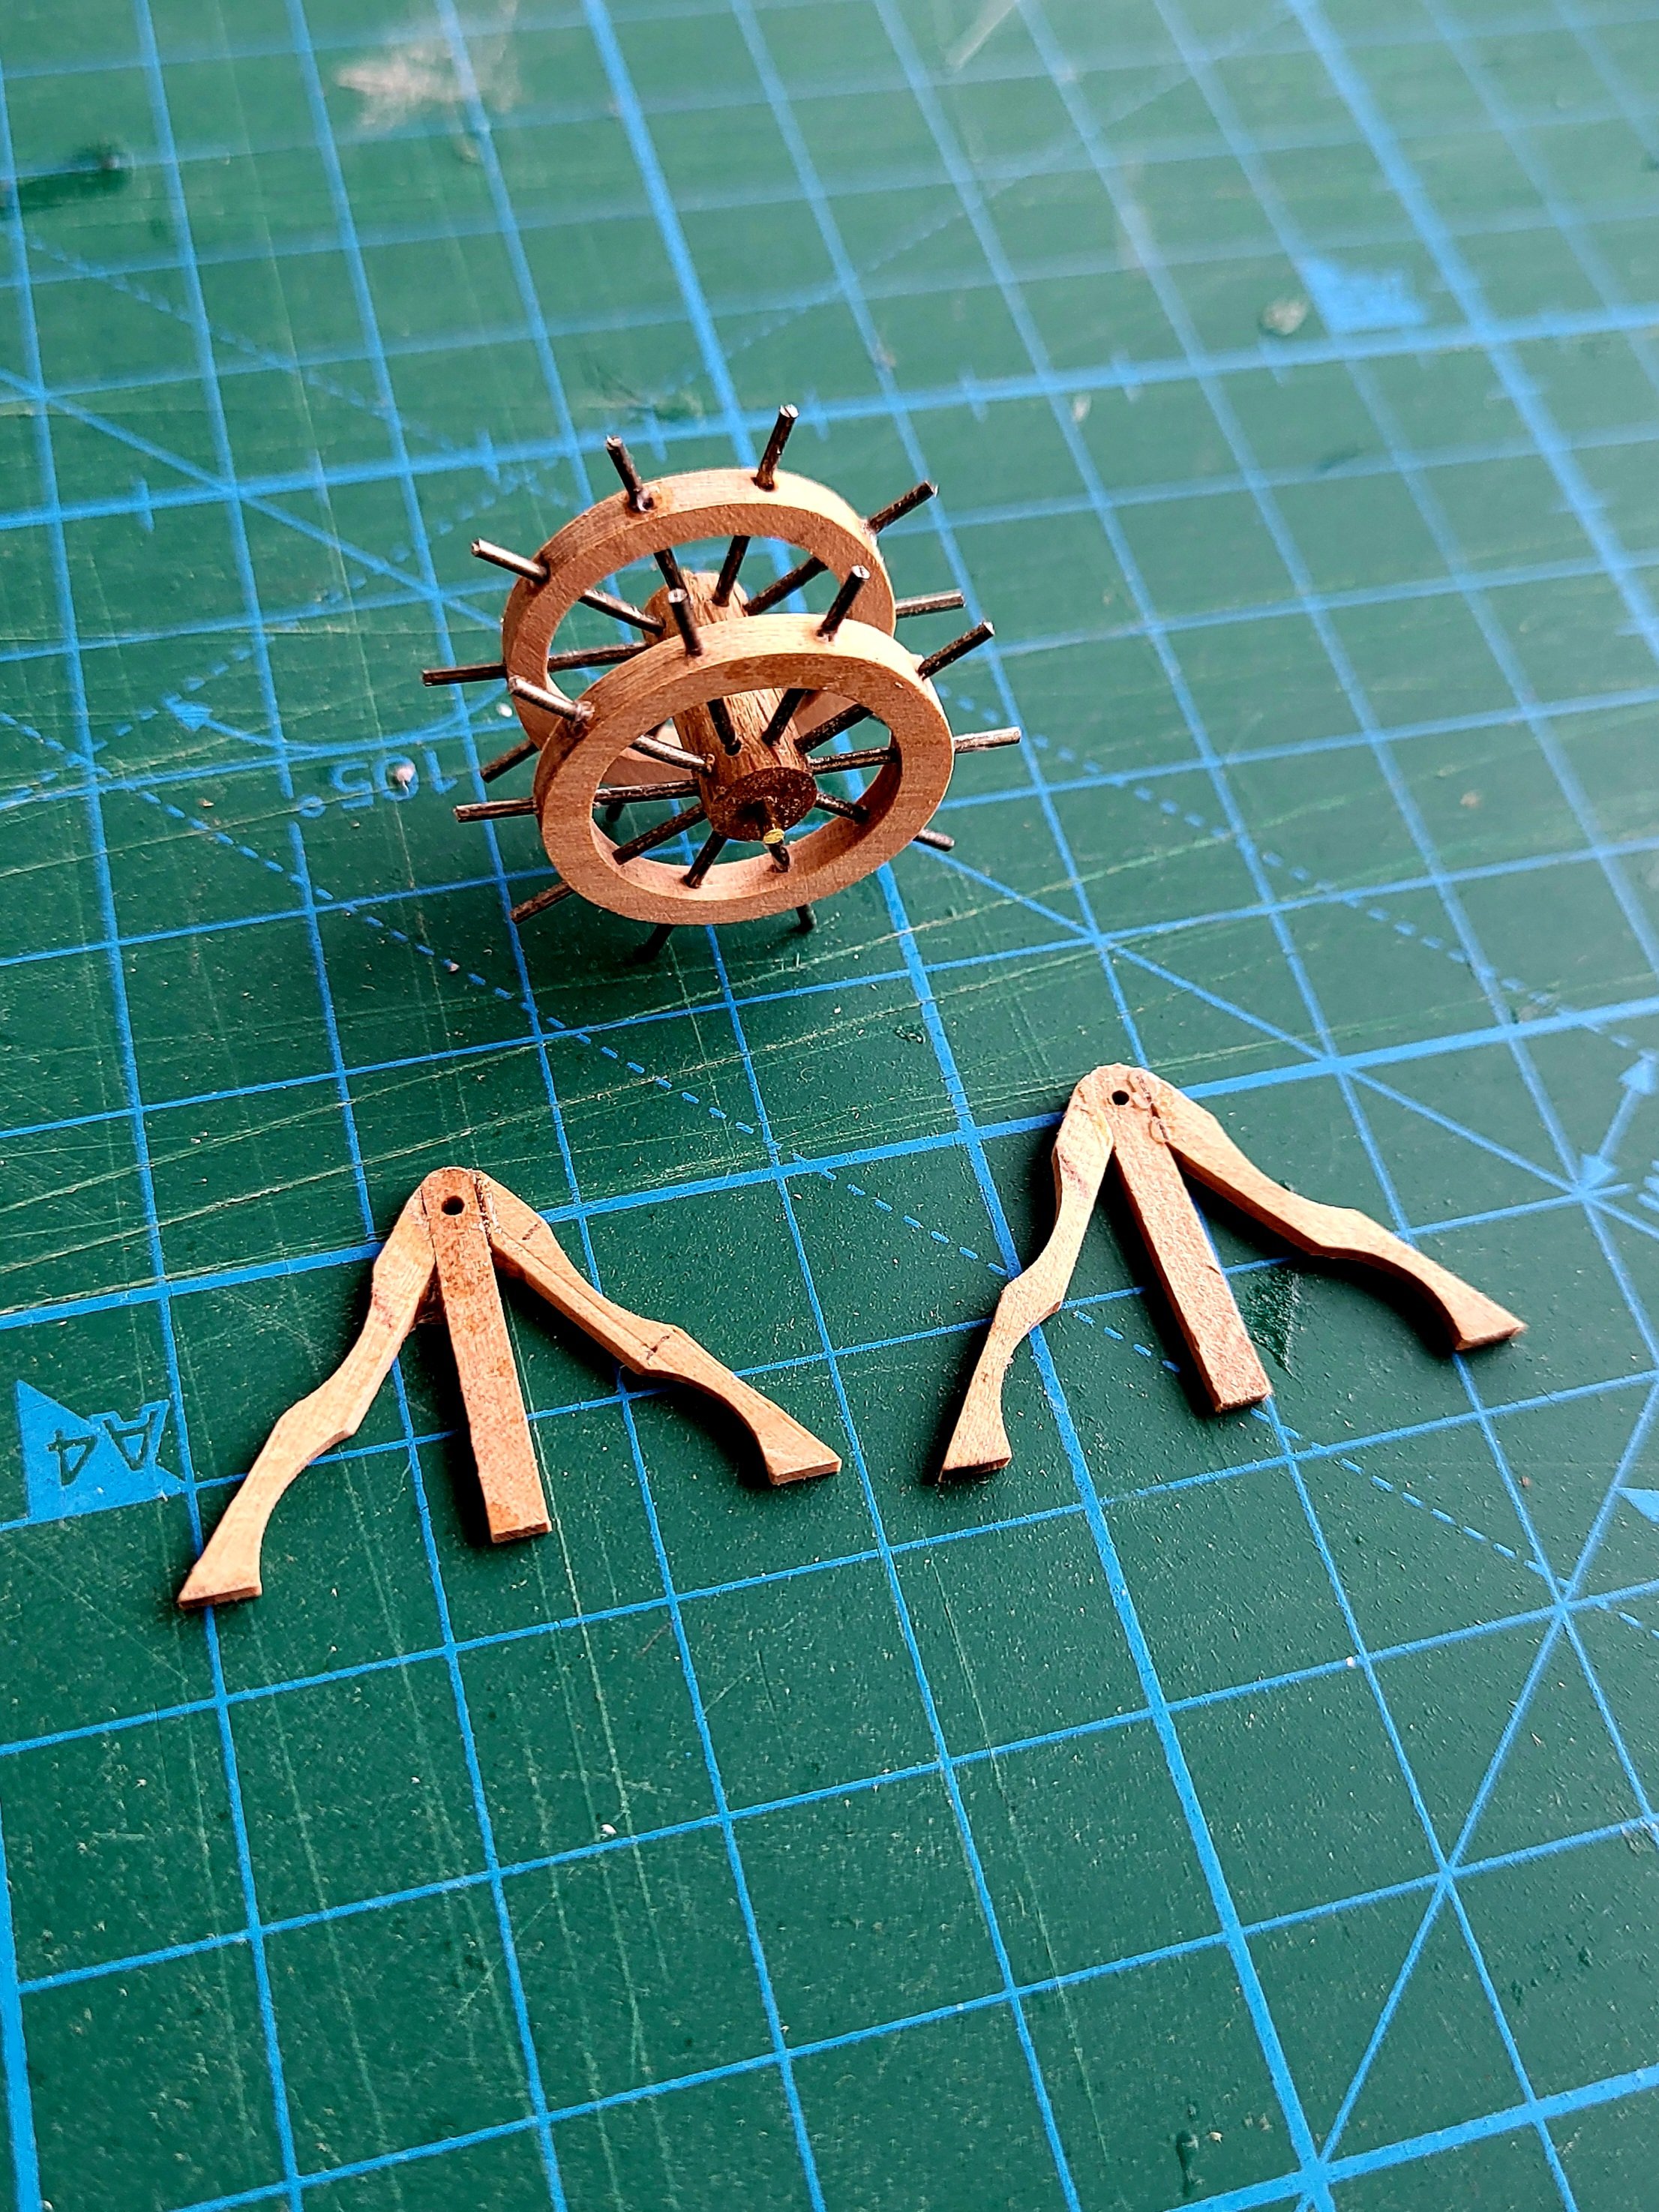
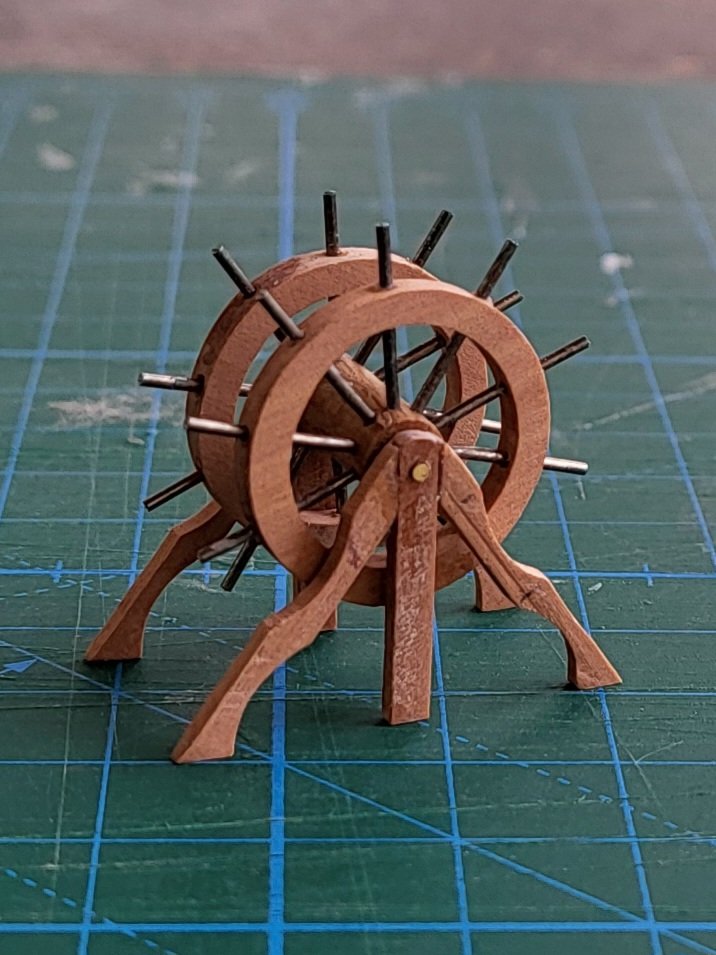
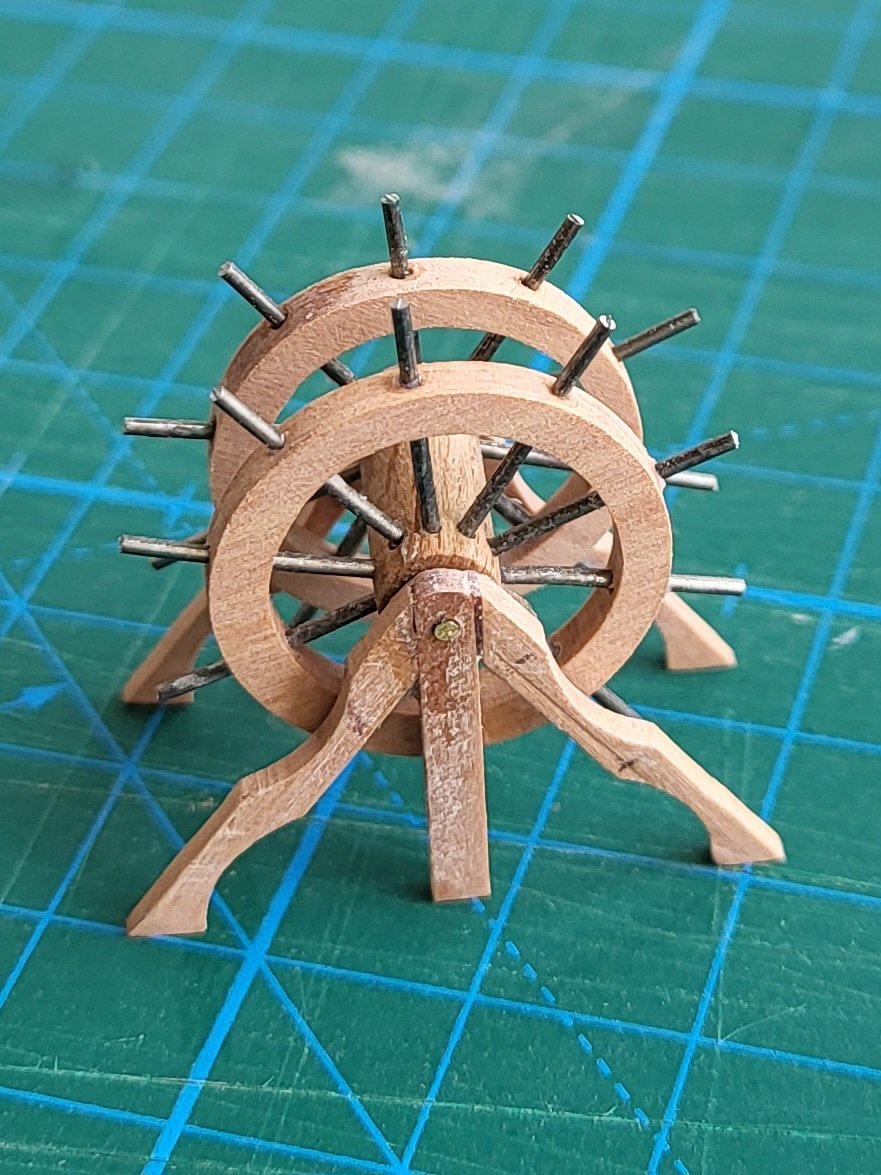
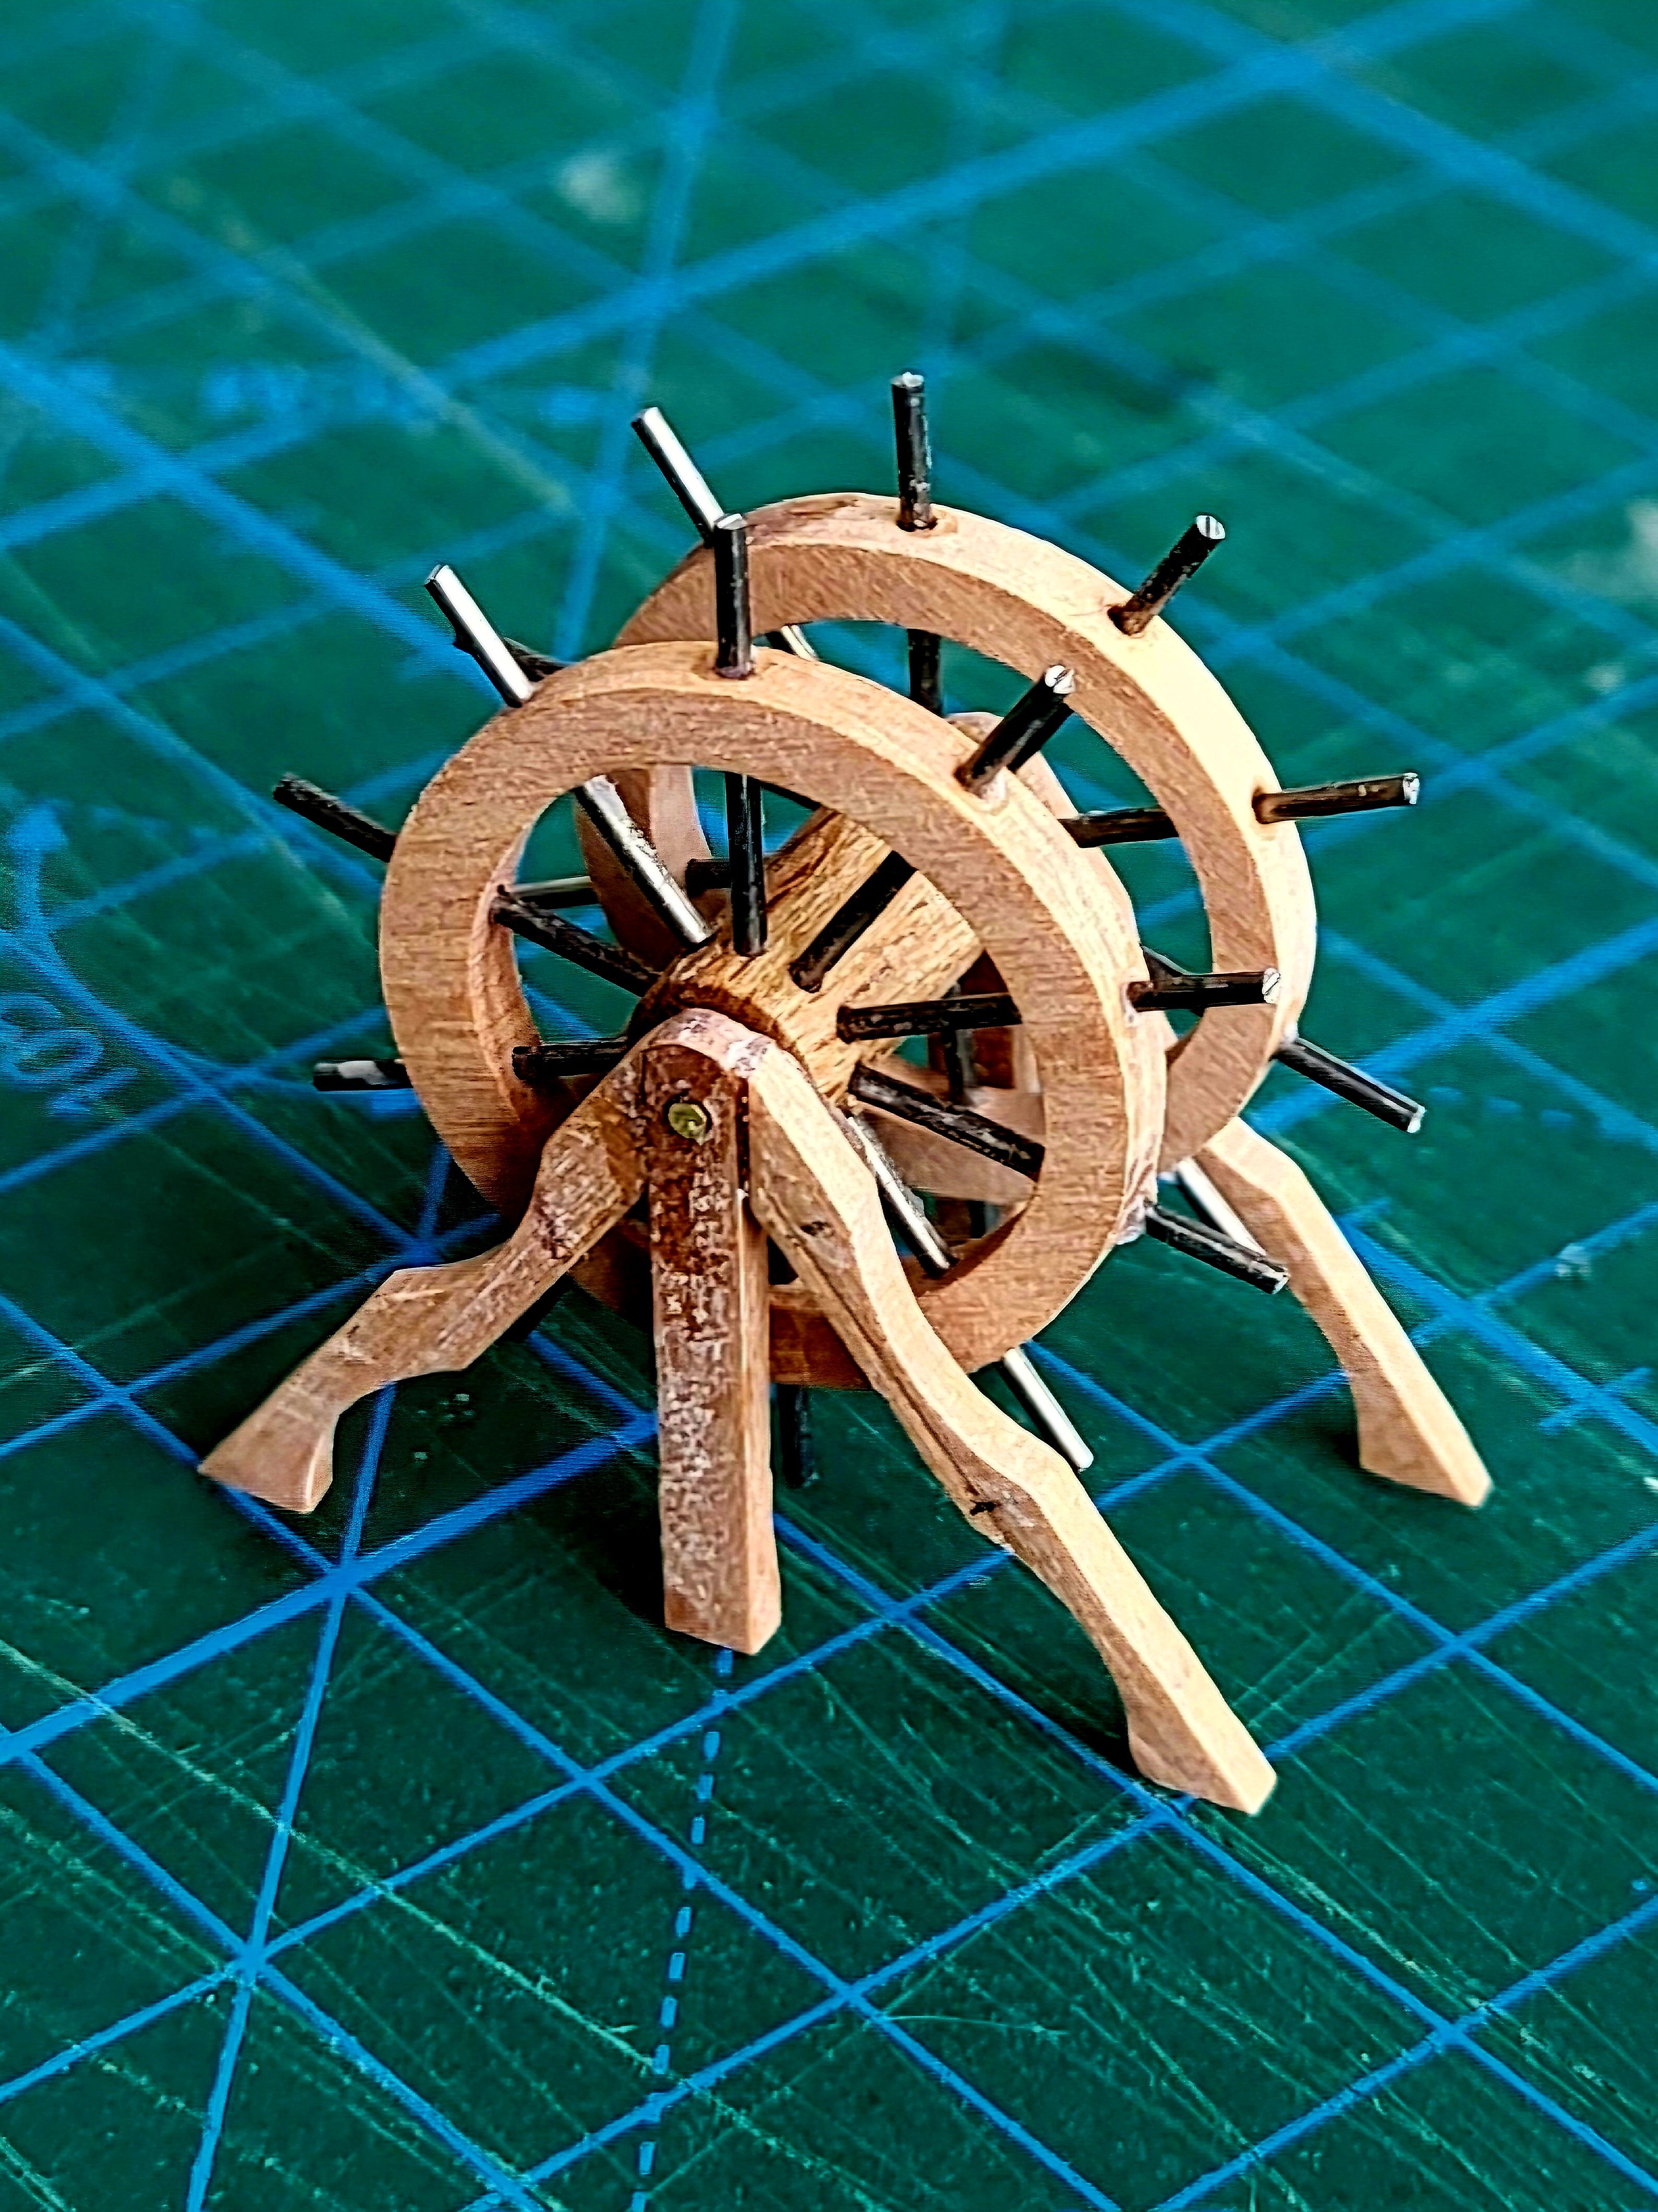
Believe it or not, I bought this dividing attachment two years ago and used it for the first time when I was building this wheel. I don't know when I'll use it again. You'll probably need this tool once or twice during a model ship build, but if you have it, it's a lifesaver and you'll get great results. I agree with Jon, he's in no rush to finish his model, and there's no point in investing in an expensive tool that he might need every 10-15 years!

As for milling, a real milling machine is a must, especially if you're building a model from scratch or tackling a kit bashing. Its signature can be found on every square inch of my Constitution.
- Stevenleehills and GGibson
-
2
-
1 hour ago, GGibson said:
Great work on the binnacles, Mustafa! Showing me all sorts of ways to use that mill! 👍🏆
I find it interesting that Model Shipways' USS Constitution Instruction Manual discusses the binnacle on page 23 and I'm assuming addresses it in the plans (although mt plans are still neatly folded in the Model Shipways book on the shelf), yet the binnacle is not on display in the online USSC Virtual Tour (actually you don't see the ship's wheel either, so maybe both were under repair when the virtual tour video was created) and you don't see the binnacle placed in the Spar Deck General Arrangement plans on the museum's Modeler Resources page. 🤷♀️
Love seeing all your spar deck details, Mustafa!
Thanks Greg. Life is pretty easy with that mill.
-
4 hours ago, JSGerson said:
That is, if I ever finish these #$%^& canopy frames.🤬
So I made the right decision not to try to make the canopies your way.
-
-
3 minutes ago, JSGerson said:
Wow!
I just edited my answer, if you read it again it might make sense.
-
11 hours ago, JSGerson said:
Out of curiosity, how did you set up your soldering jig for the skylight railing?
Jon
I didn't use a special jig for this. I just fixed the rail onto a flat surface with tape and soldered the stancions to it while holding them with my hand. By the way, I use soldering paste for soldering, so my hand is free and I can hold the stanchion with my hand.
- GGibson, Stevenleehills and PaddyO
-
2
-
1
-
Thank you Jon.
For the aft skylight, I cut the base plate from 0.3 mm brass sheet and blackened it. I made the railing of the skylight from 0.7 mm brass wire, but I couldn't clean up the excess solder using my old files. So, I ordered a new set of files. I'll work on that later. Nothing is glued in place yet.

-
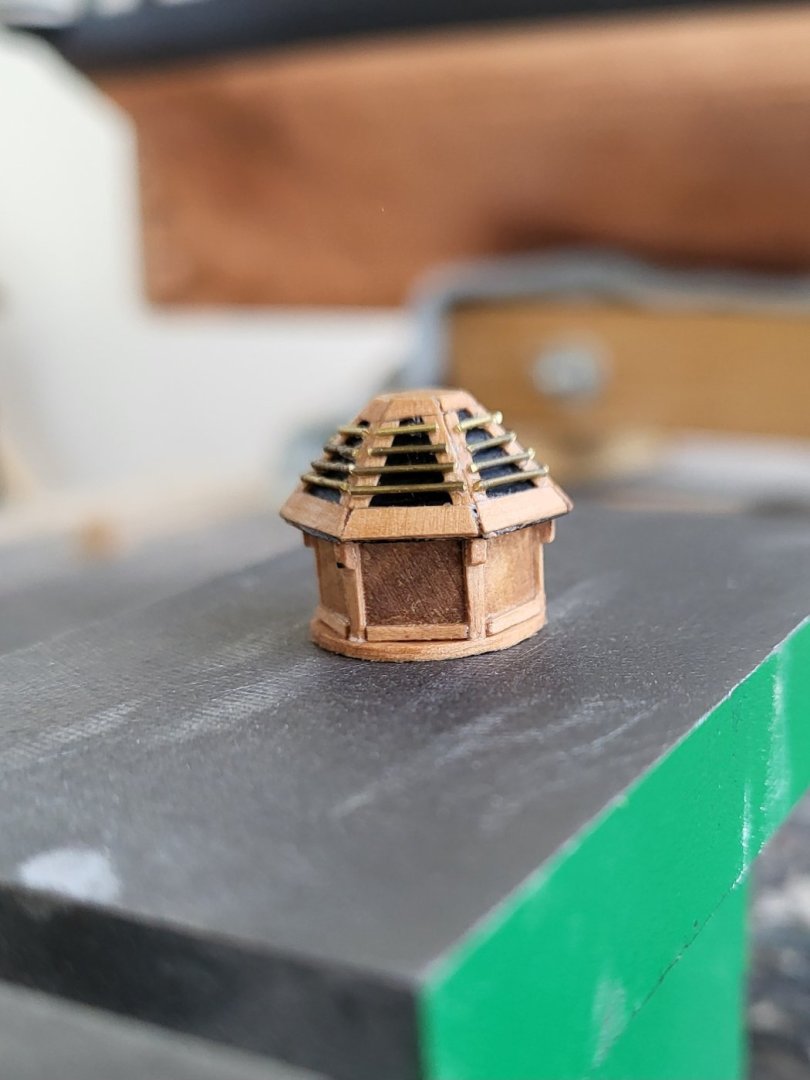
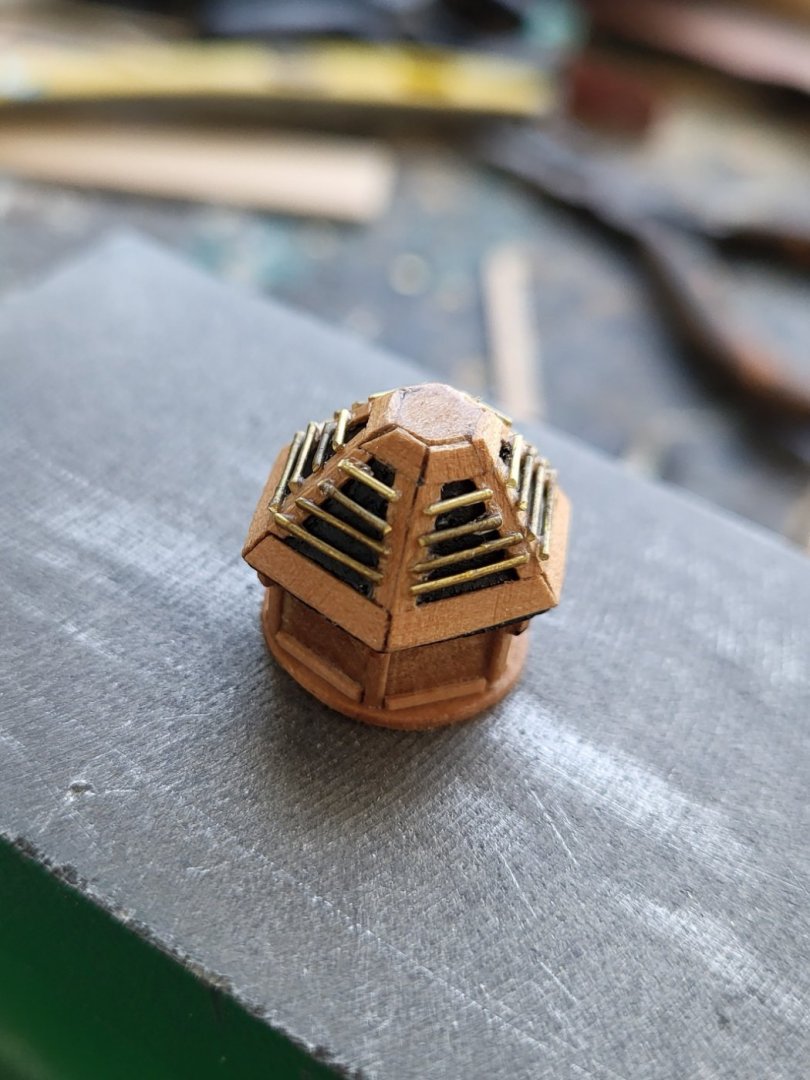
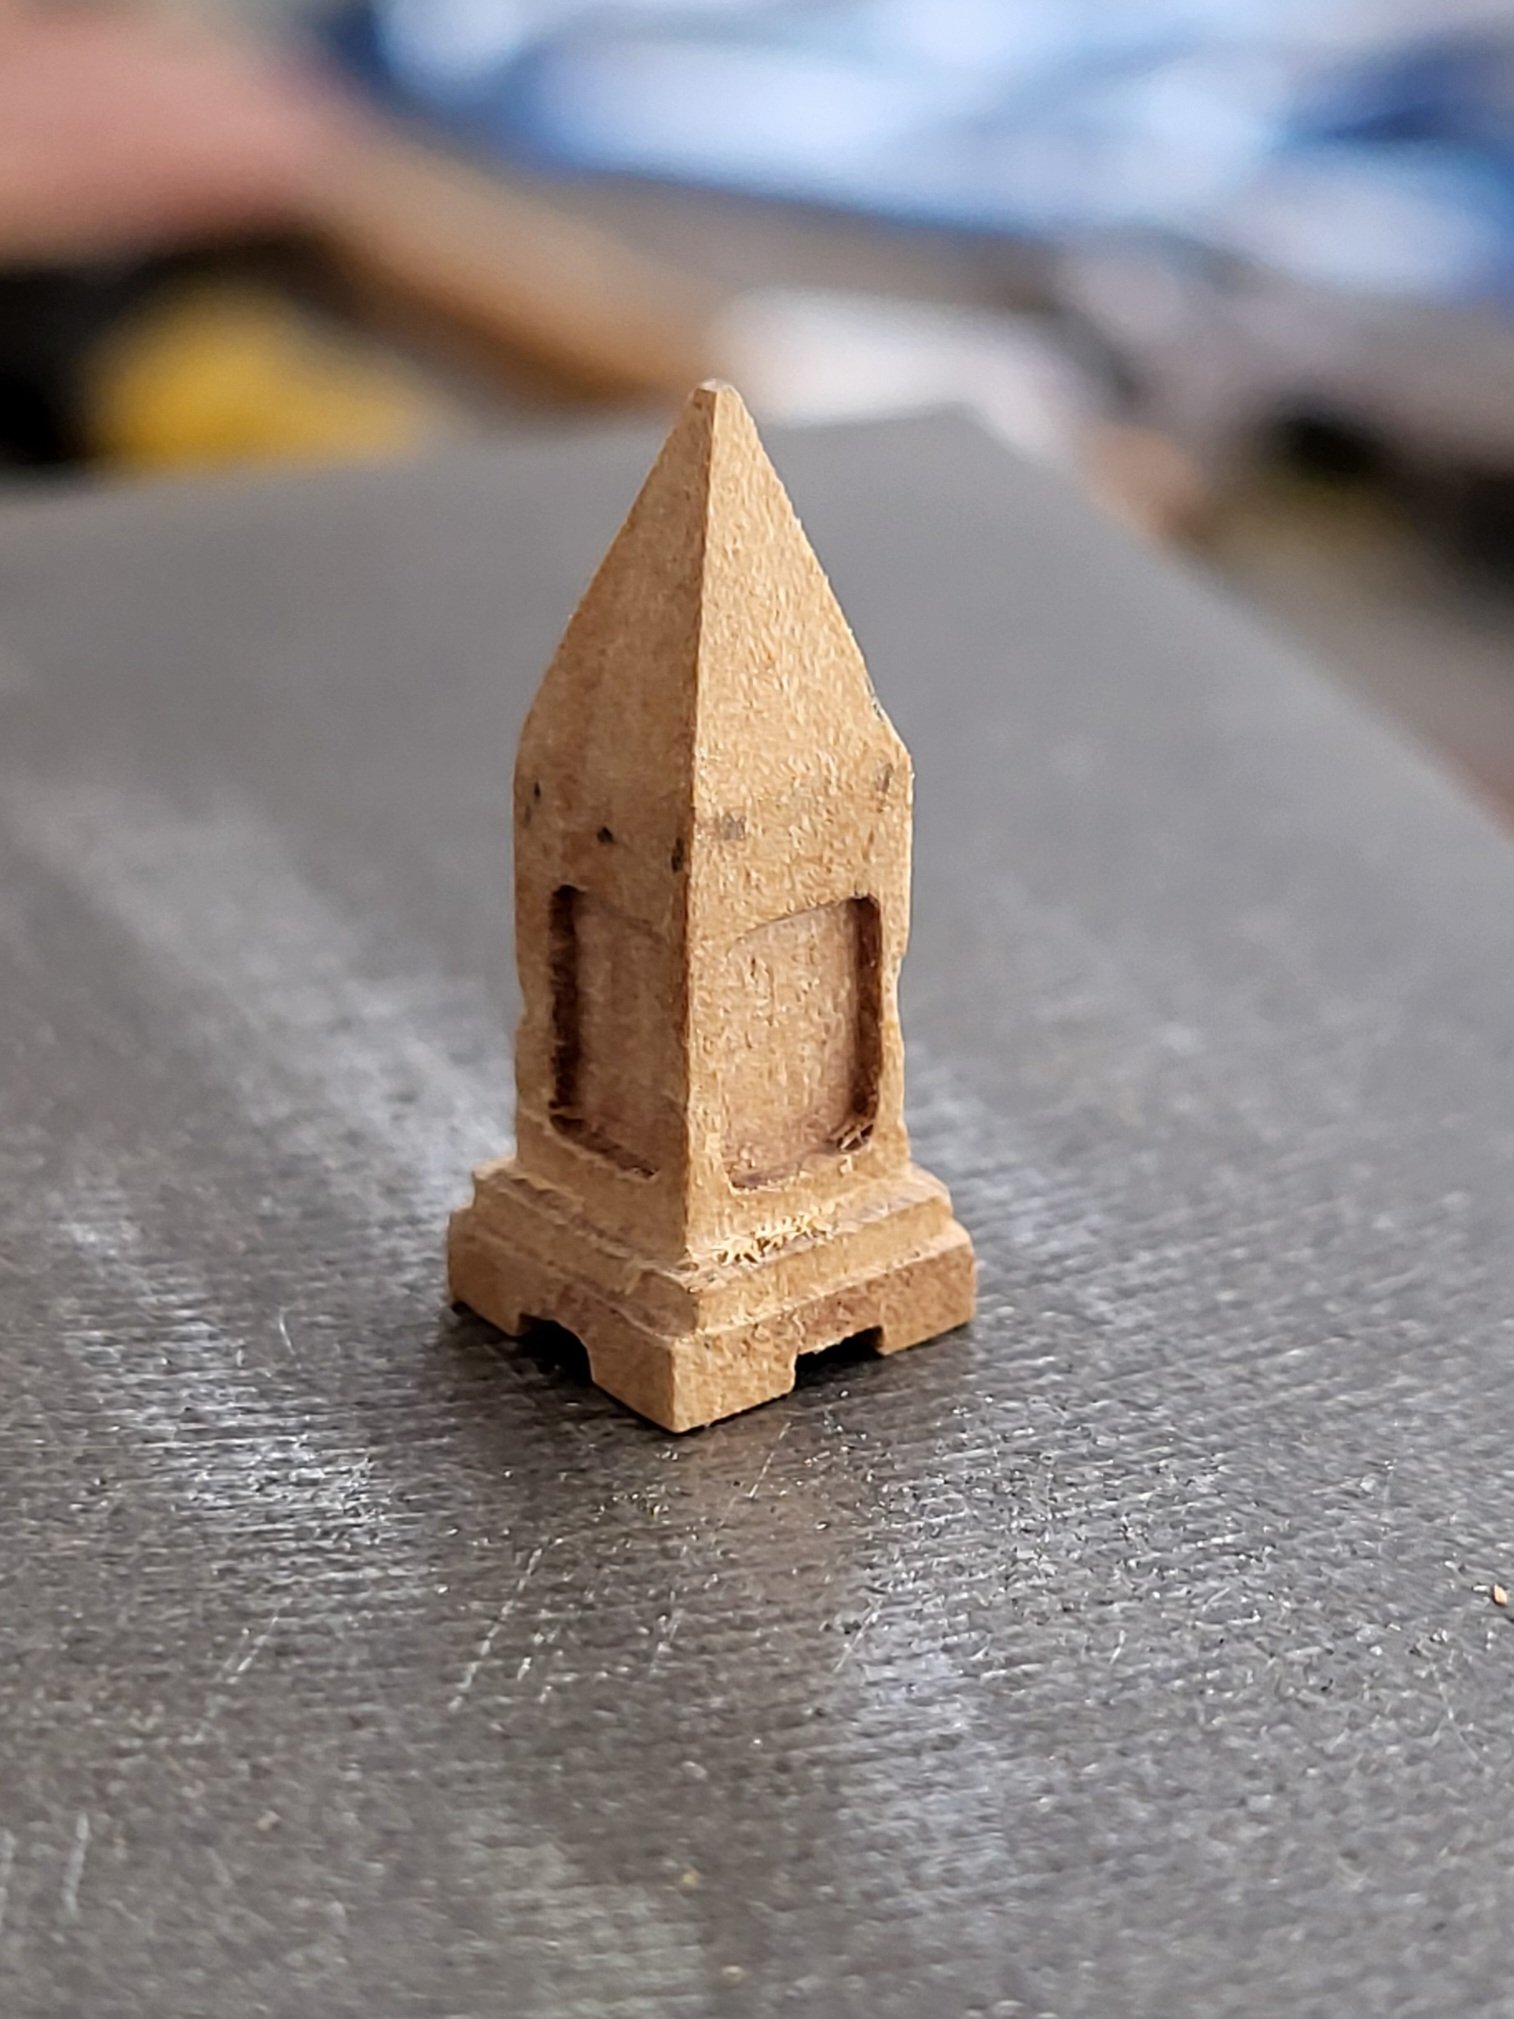
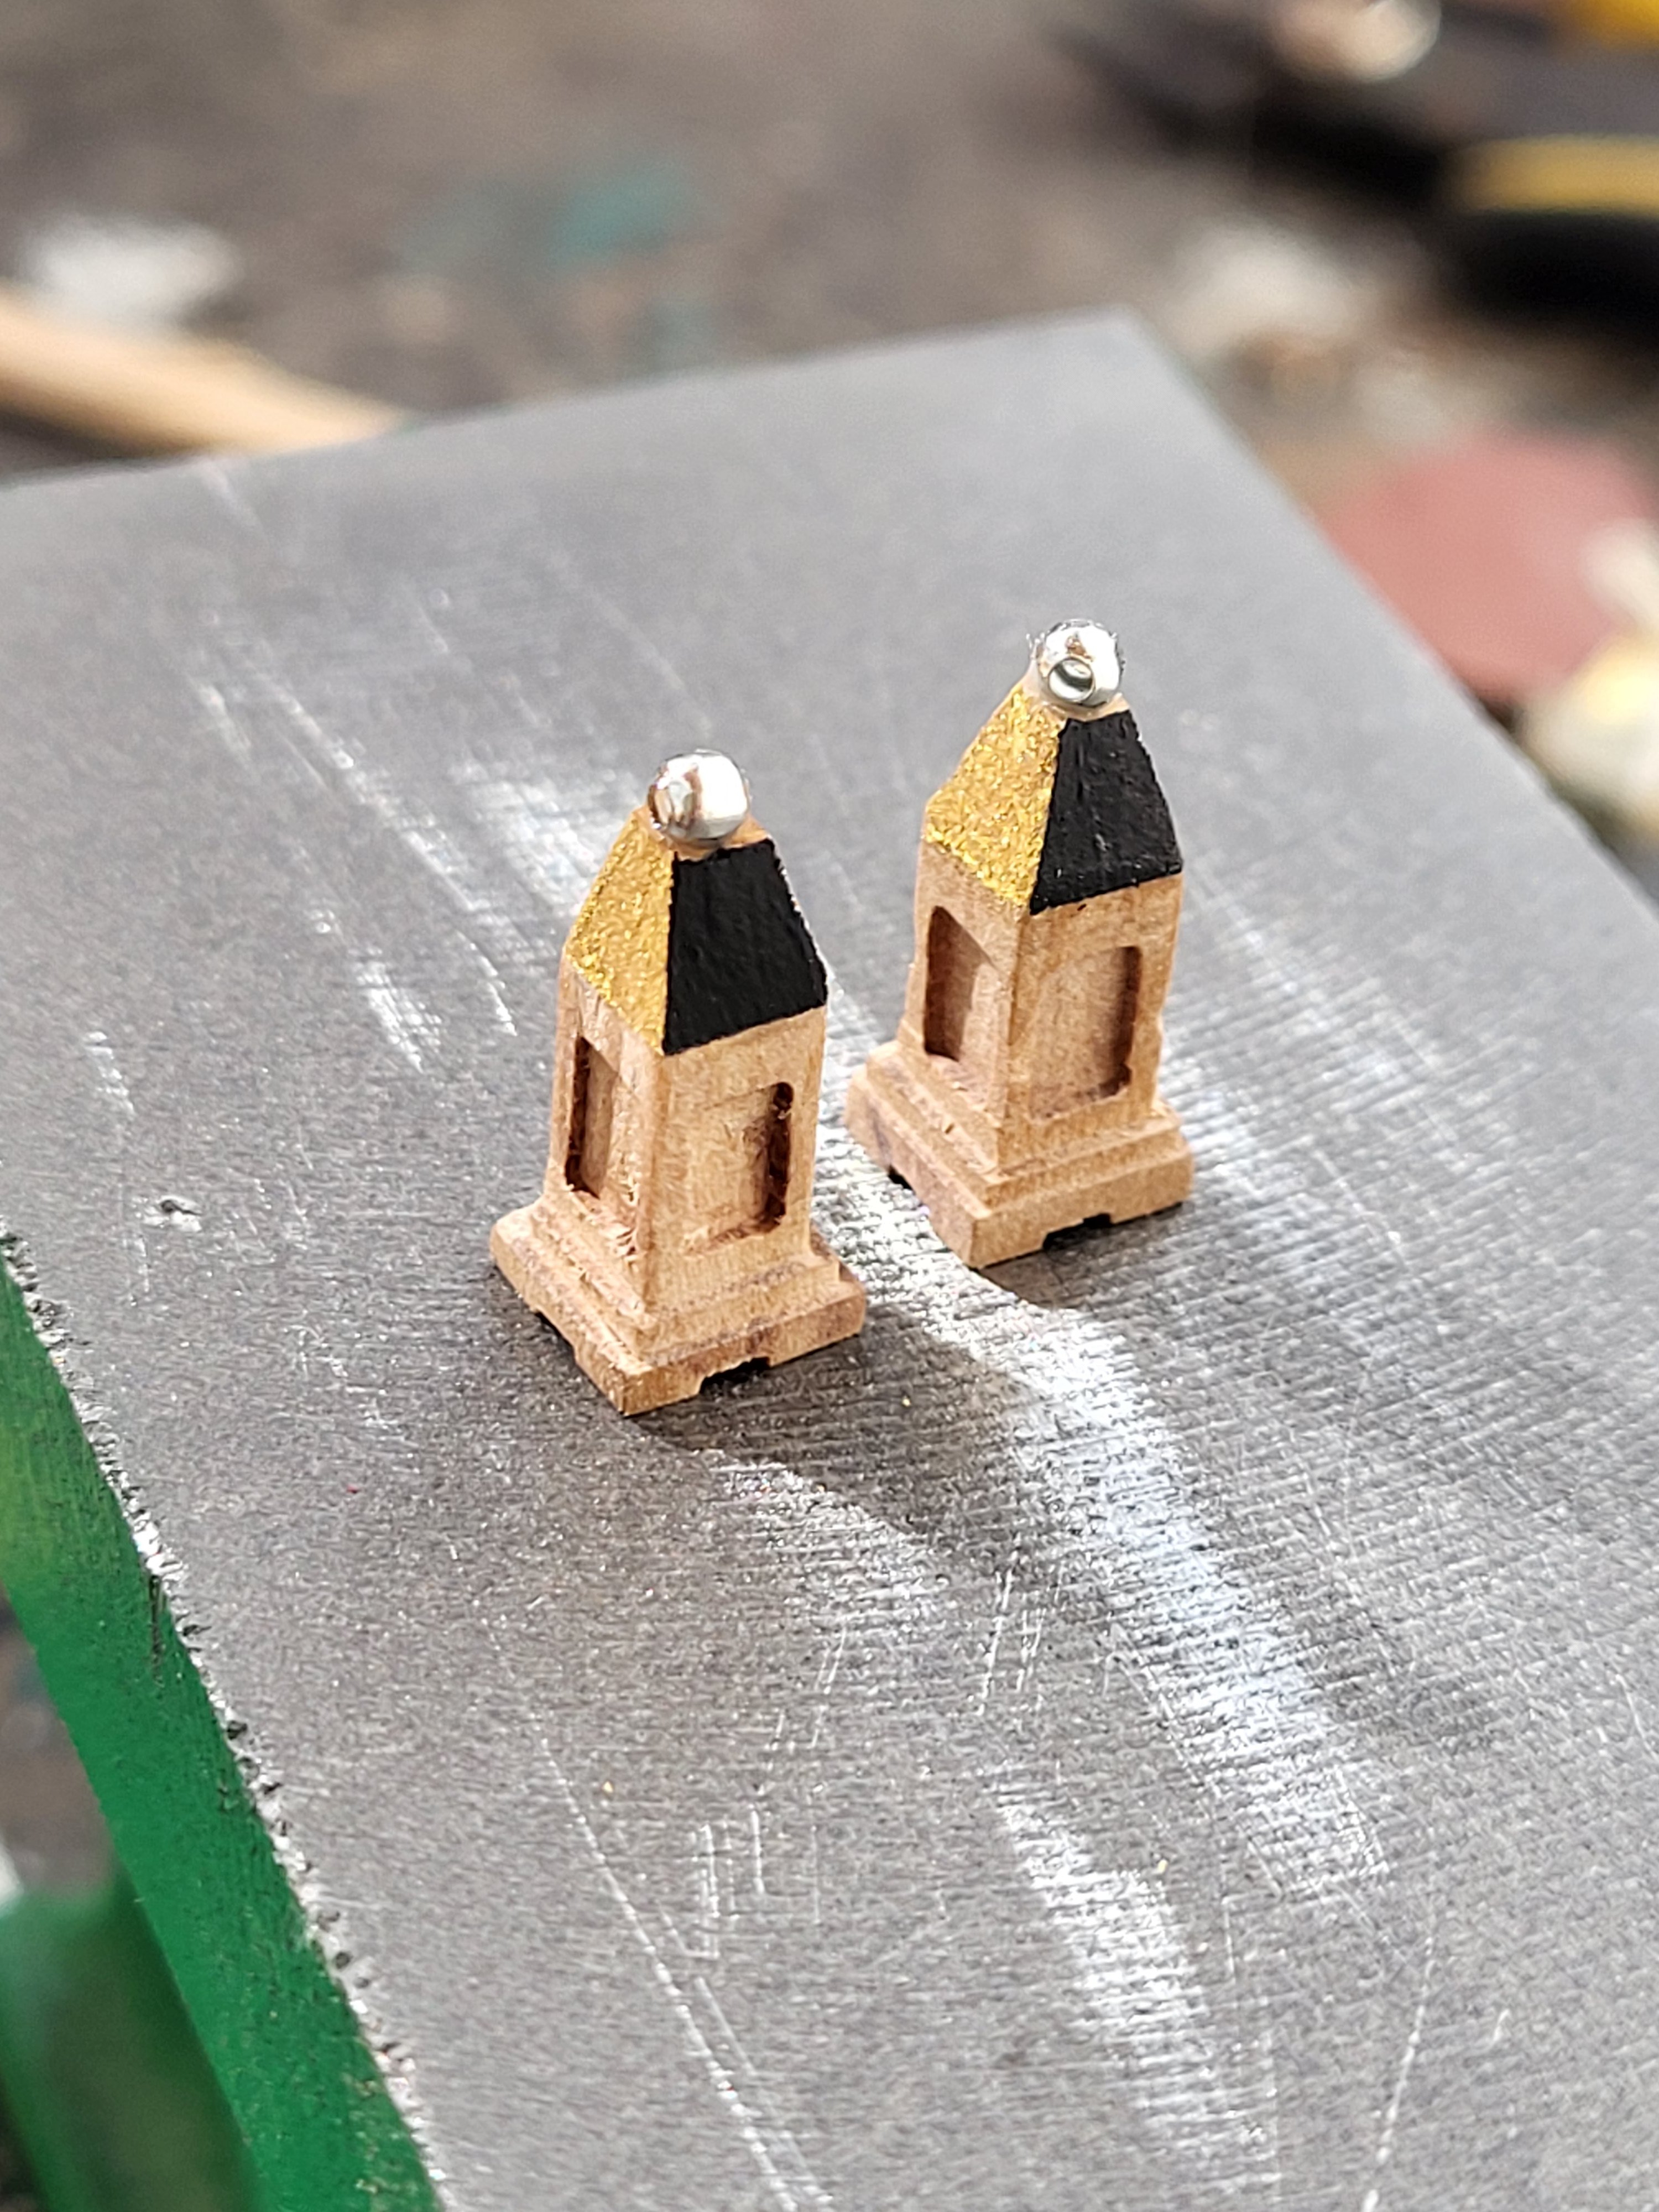
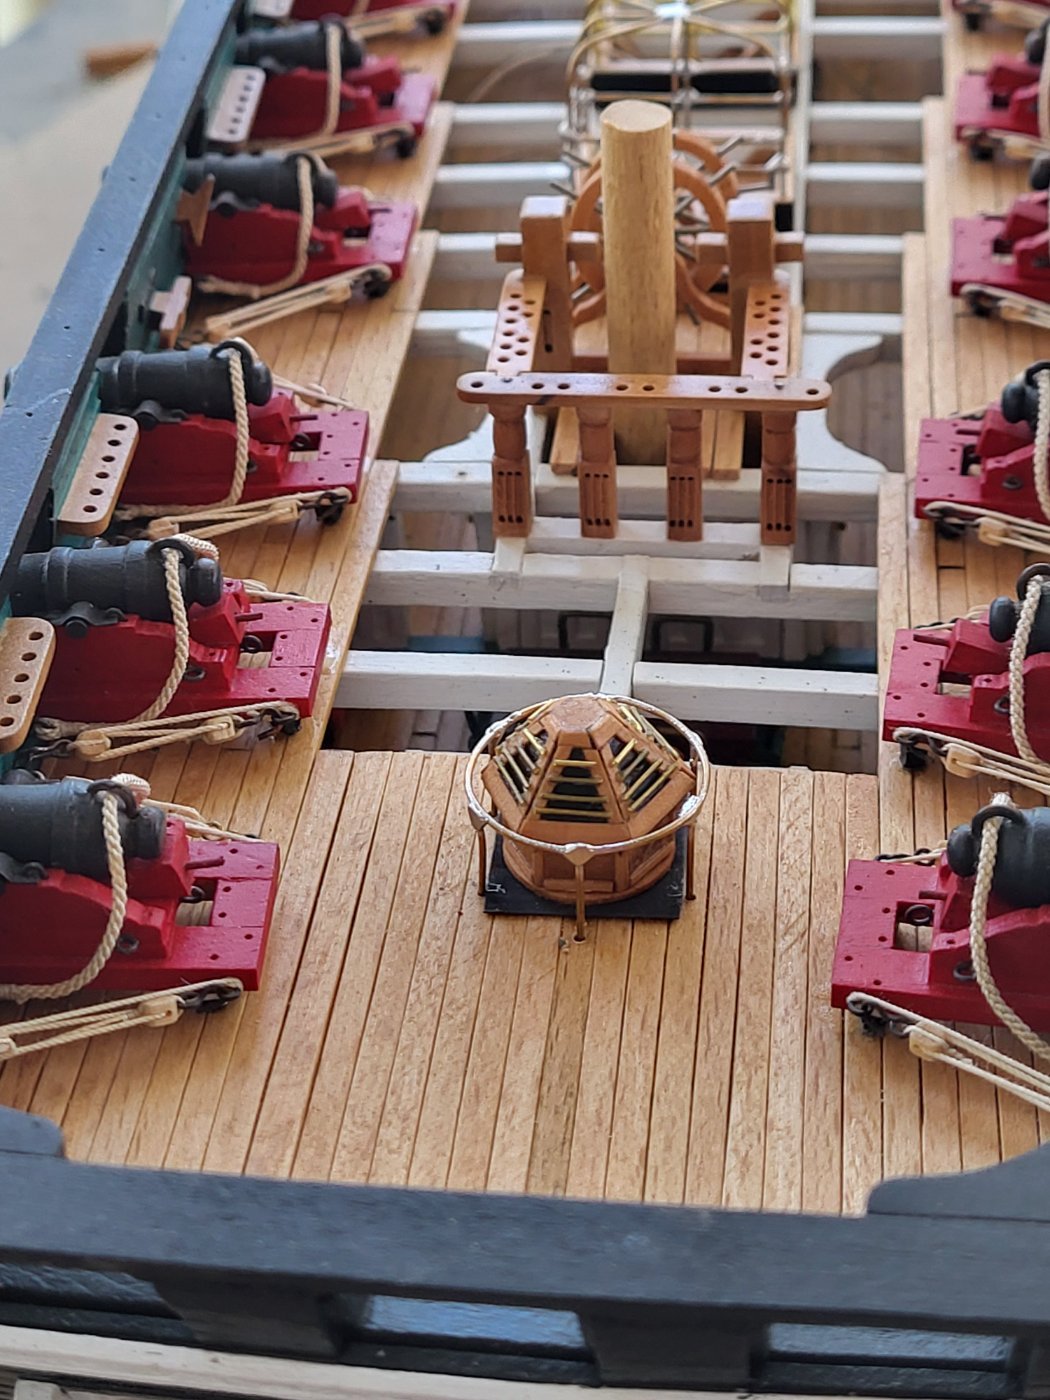
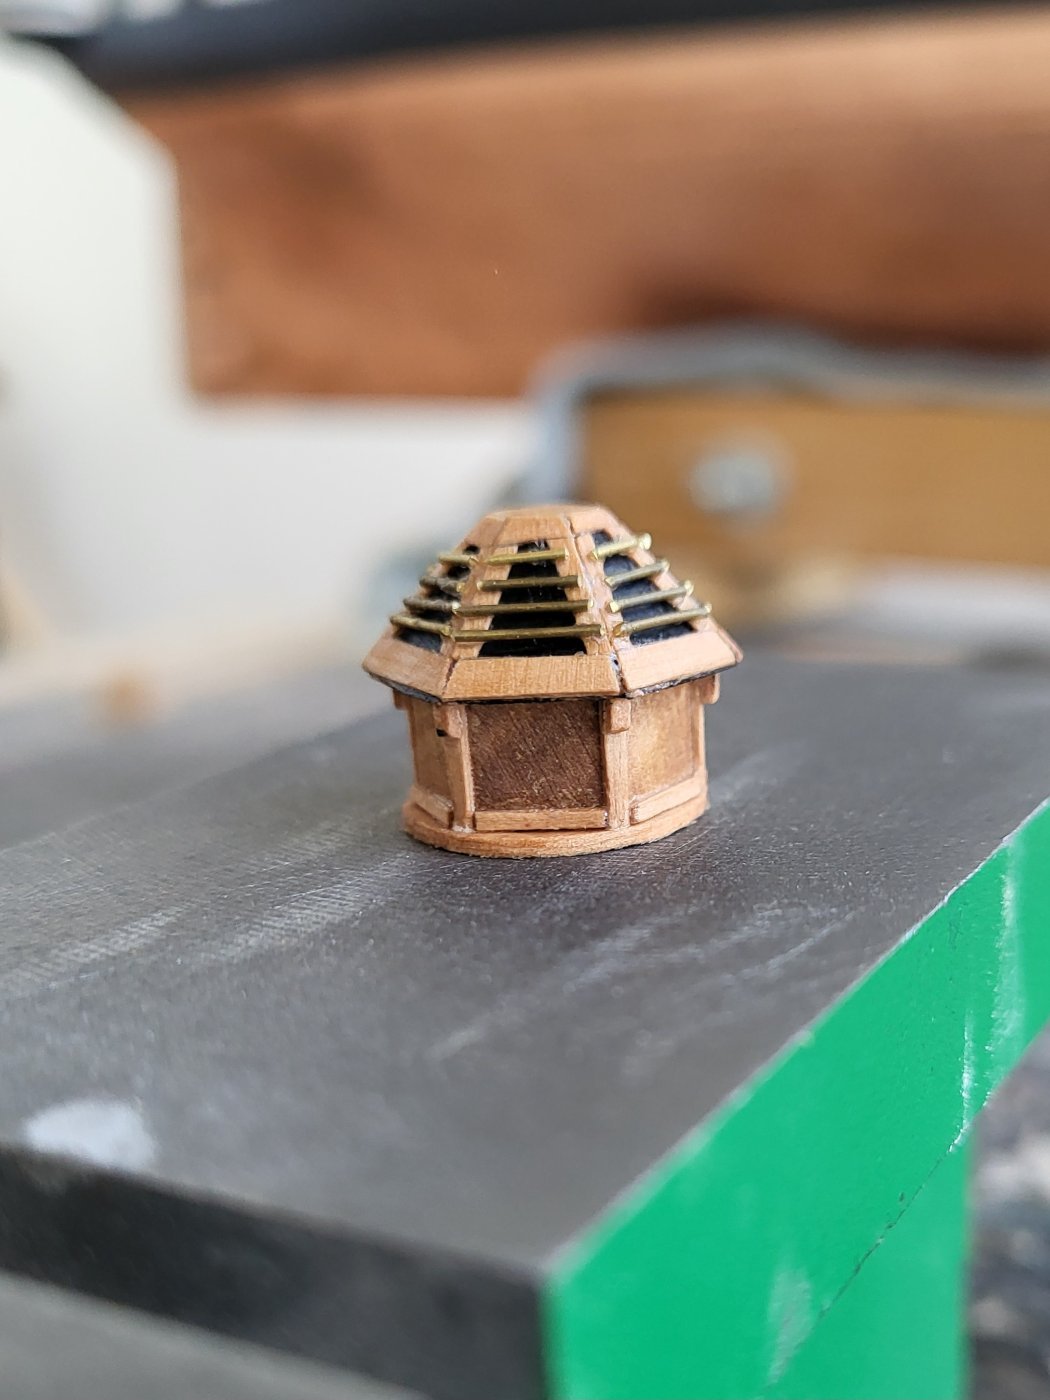
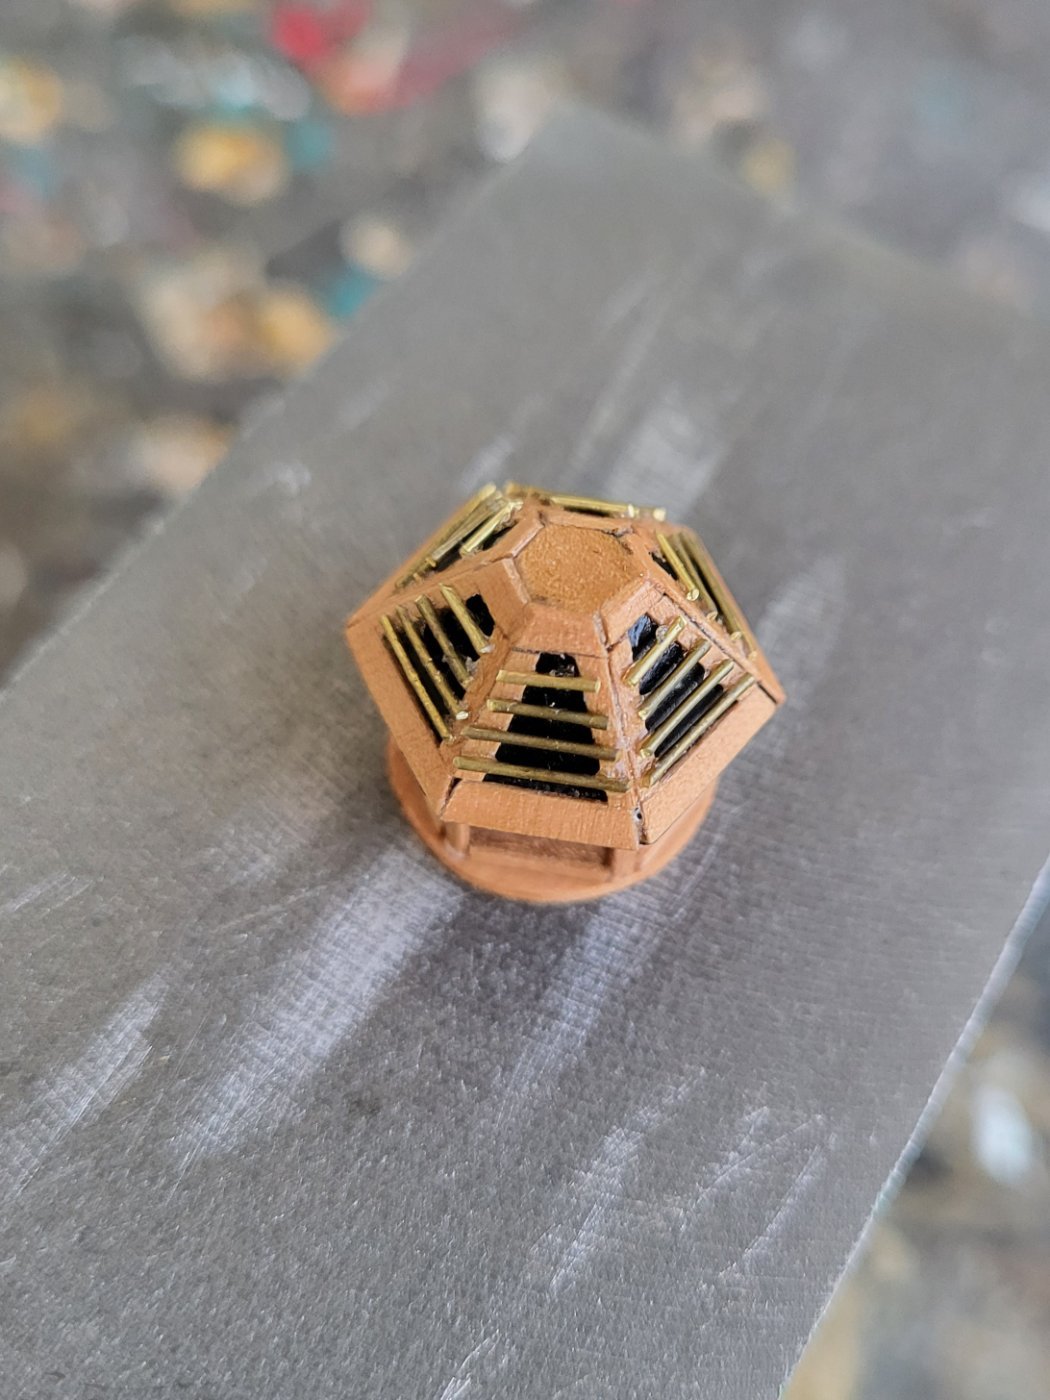
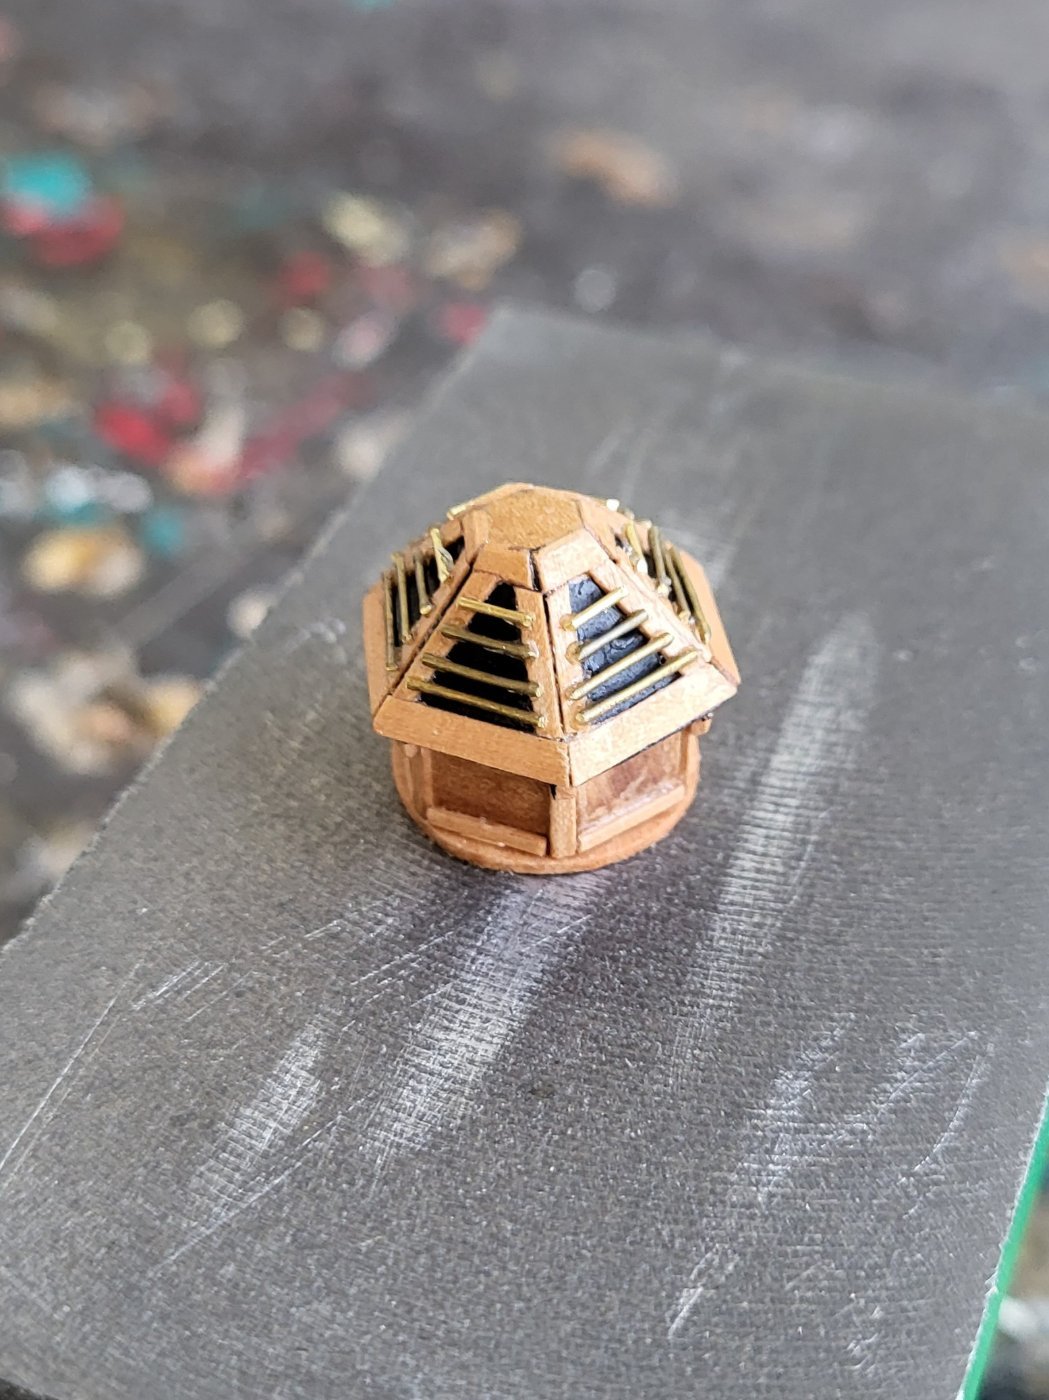
I am working on captain's skylight. I prepared a hexagonal prism and a hexagonal-based conical prism from pear wood, adding details cut from 0.5 mm pear strips. I used black paint to represent the windows and made the window bars out of 0.5 mm brass wire. Finally, I finished it with a matte varnish."

-
1 hour ago, GGibson said:
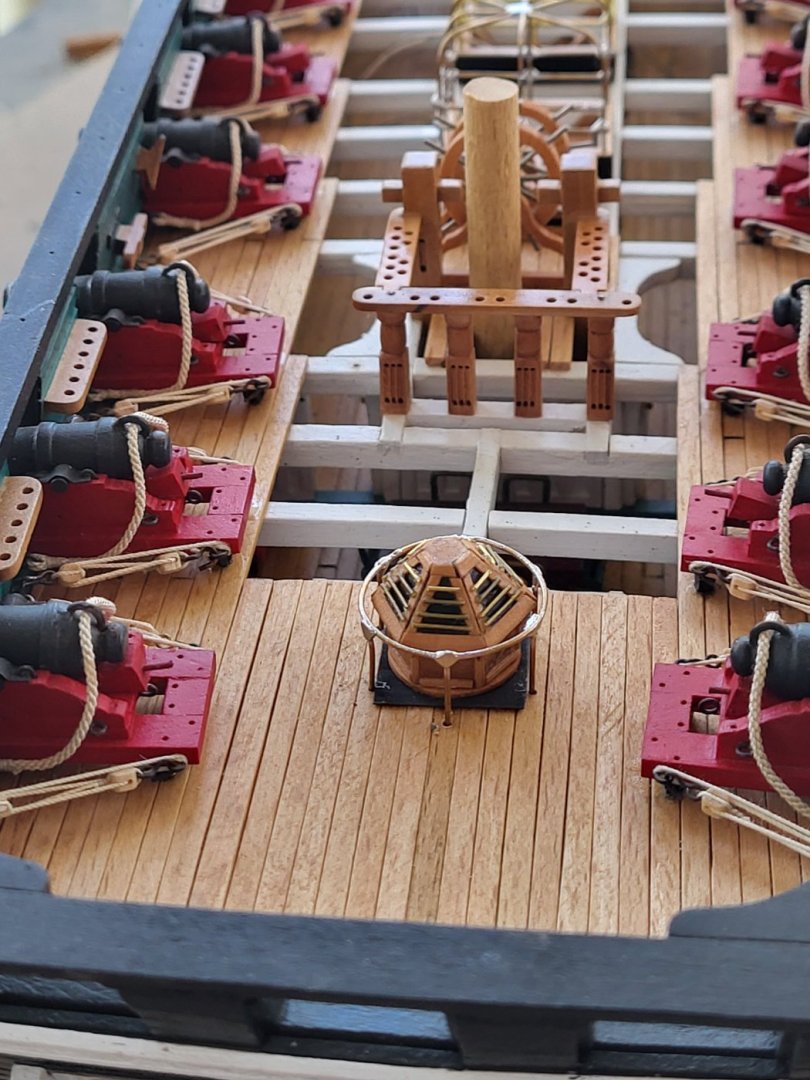
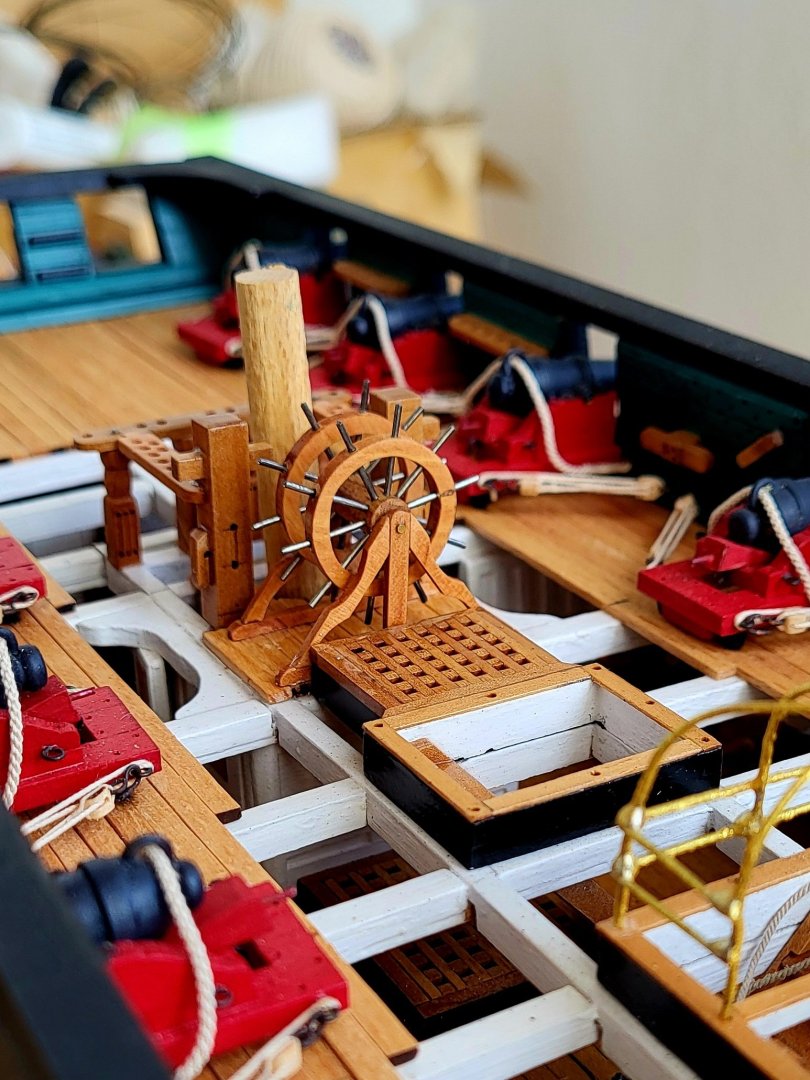
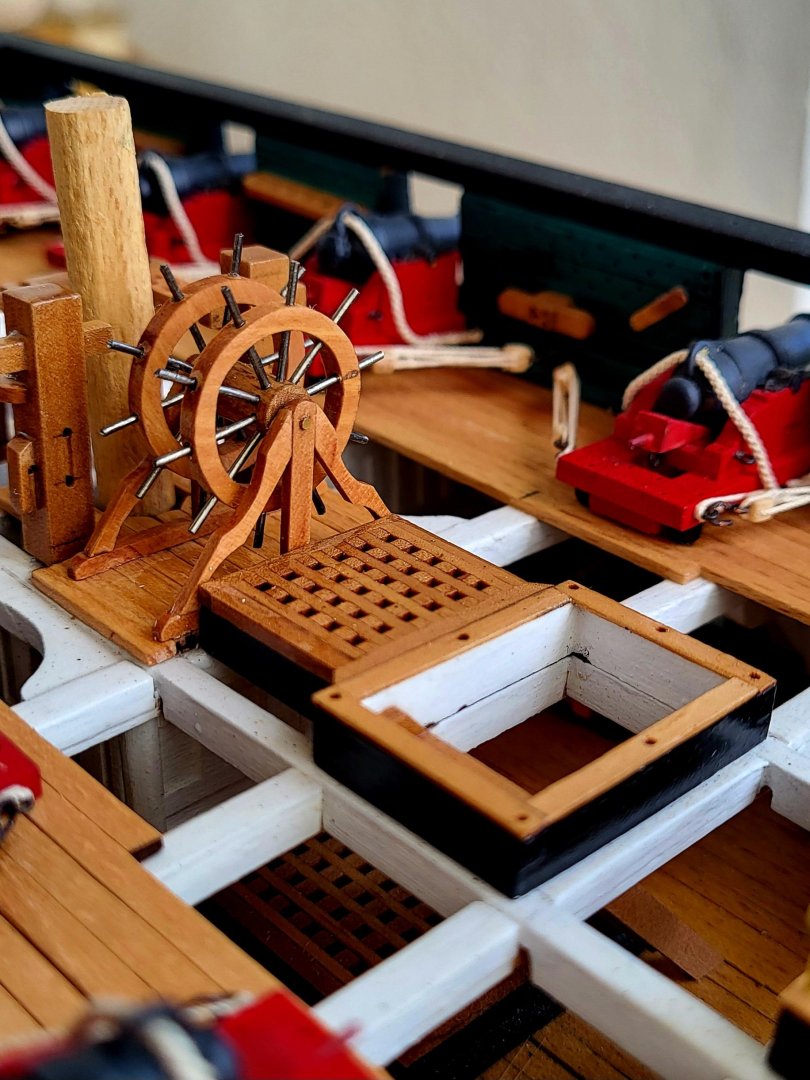
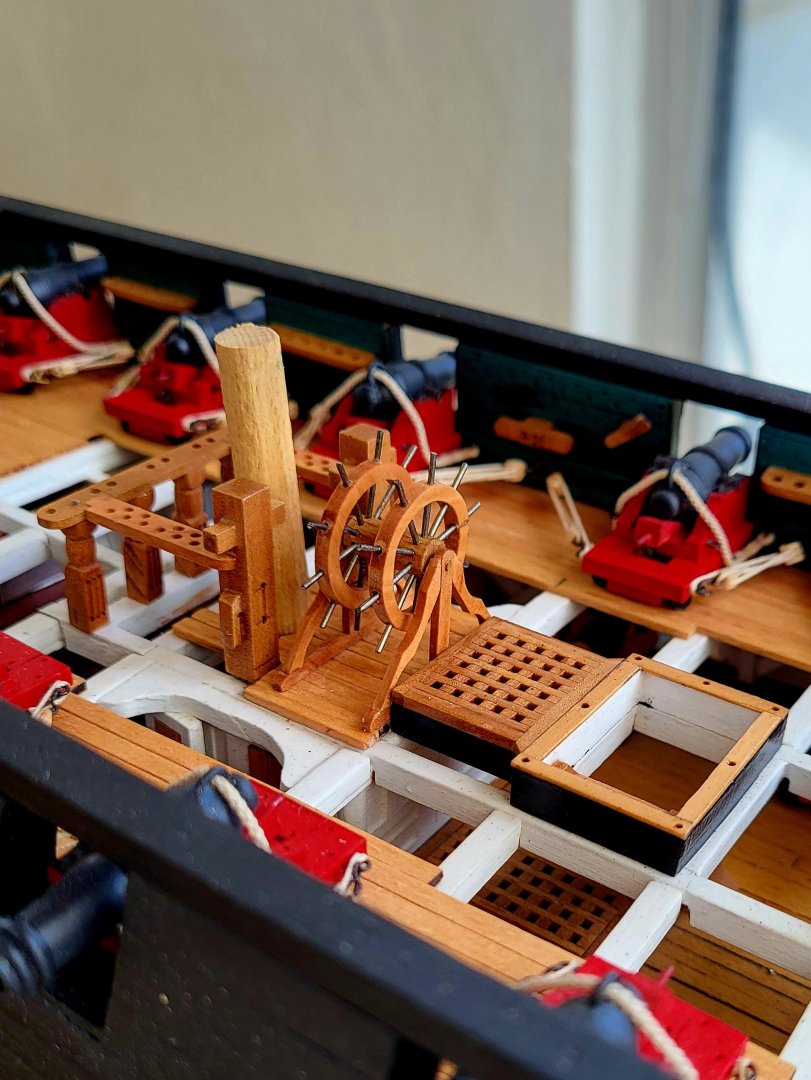
I'm assuming you placed some type of "dummy" support beam between the fife rail and where the ship's wheel sits, somewhat like where I drew the red line in your picture below?
Never hesitate to ask anything Greg. I'm here to answer questions.
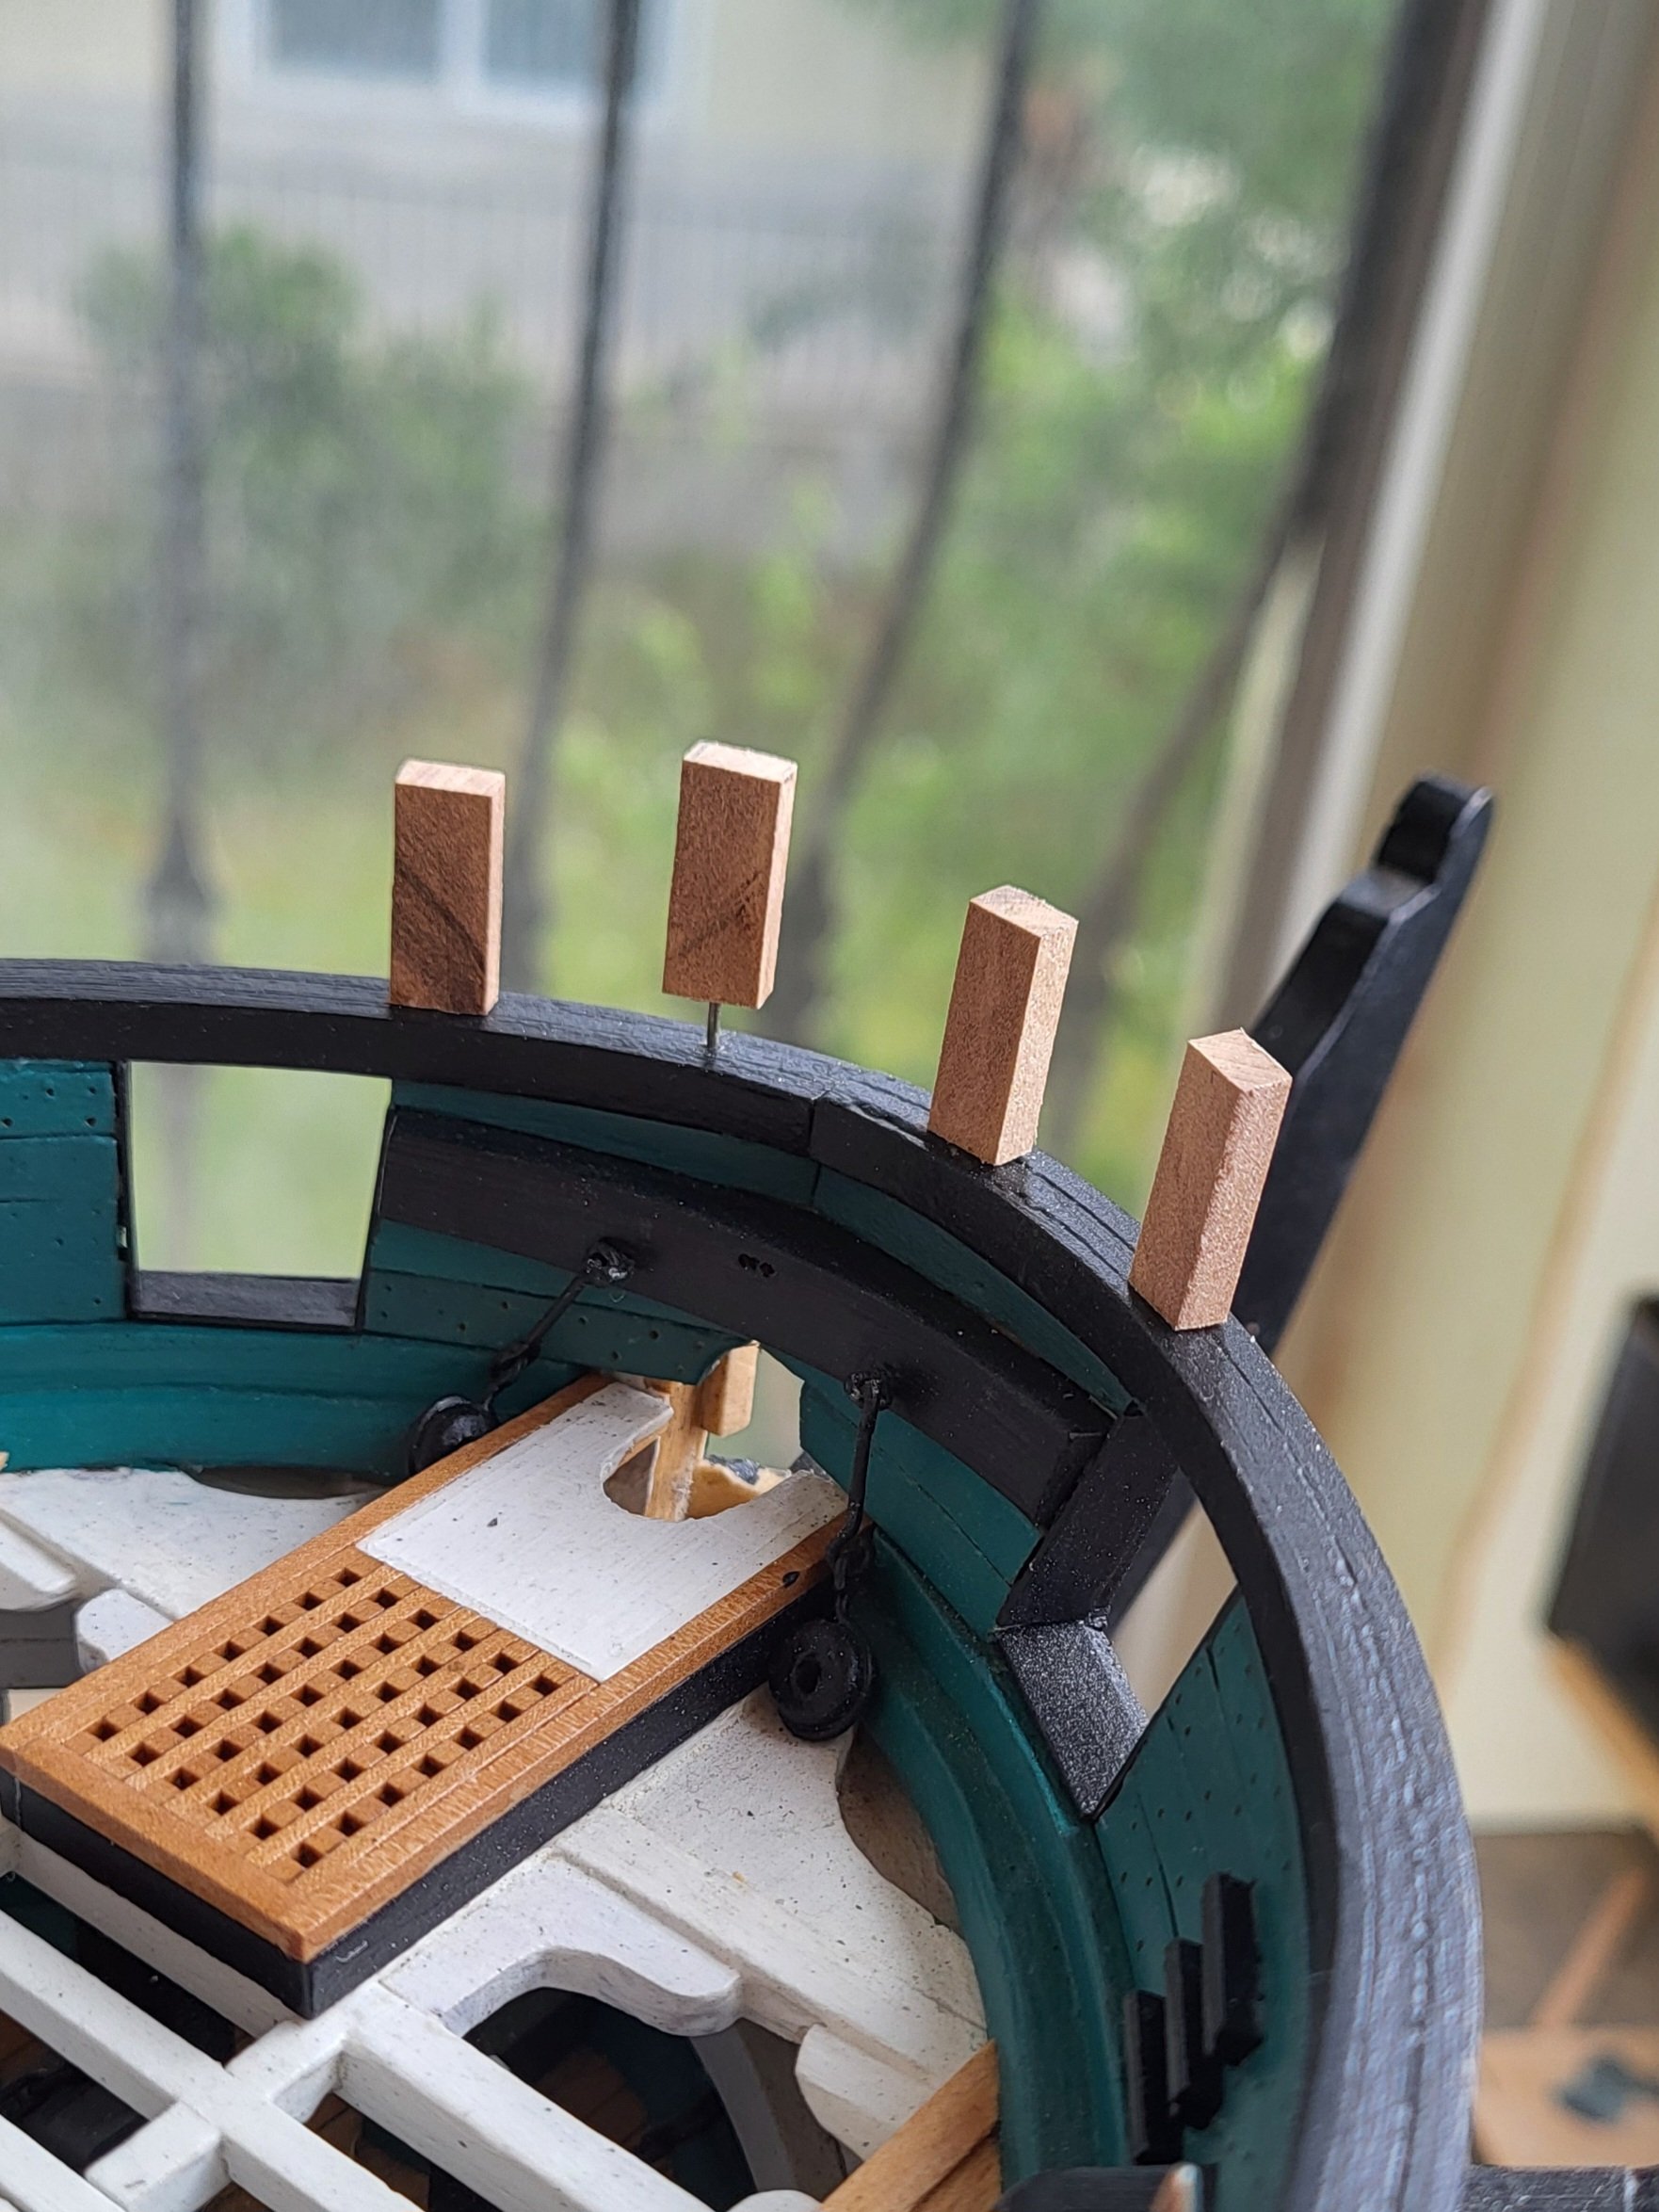
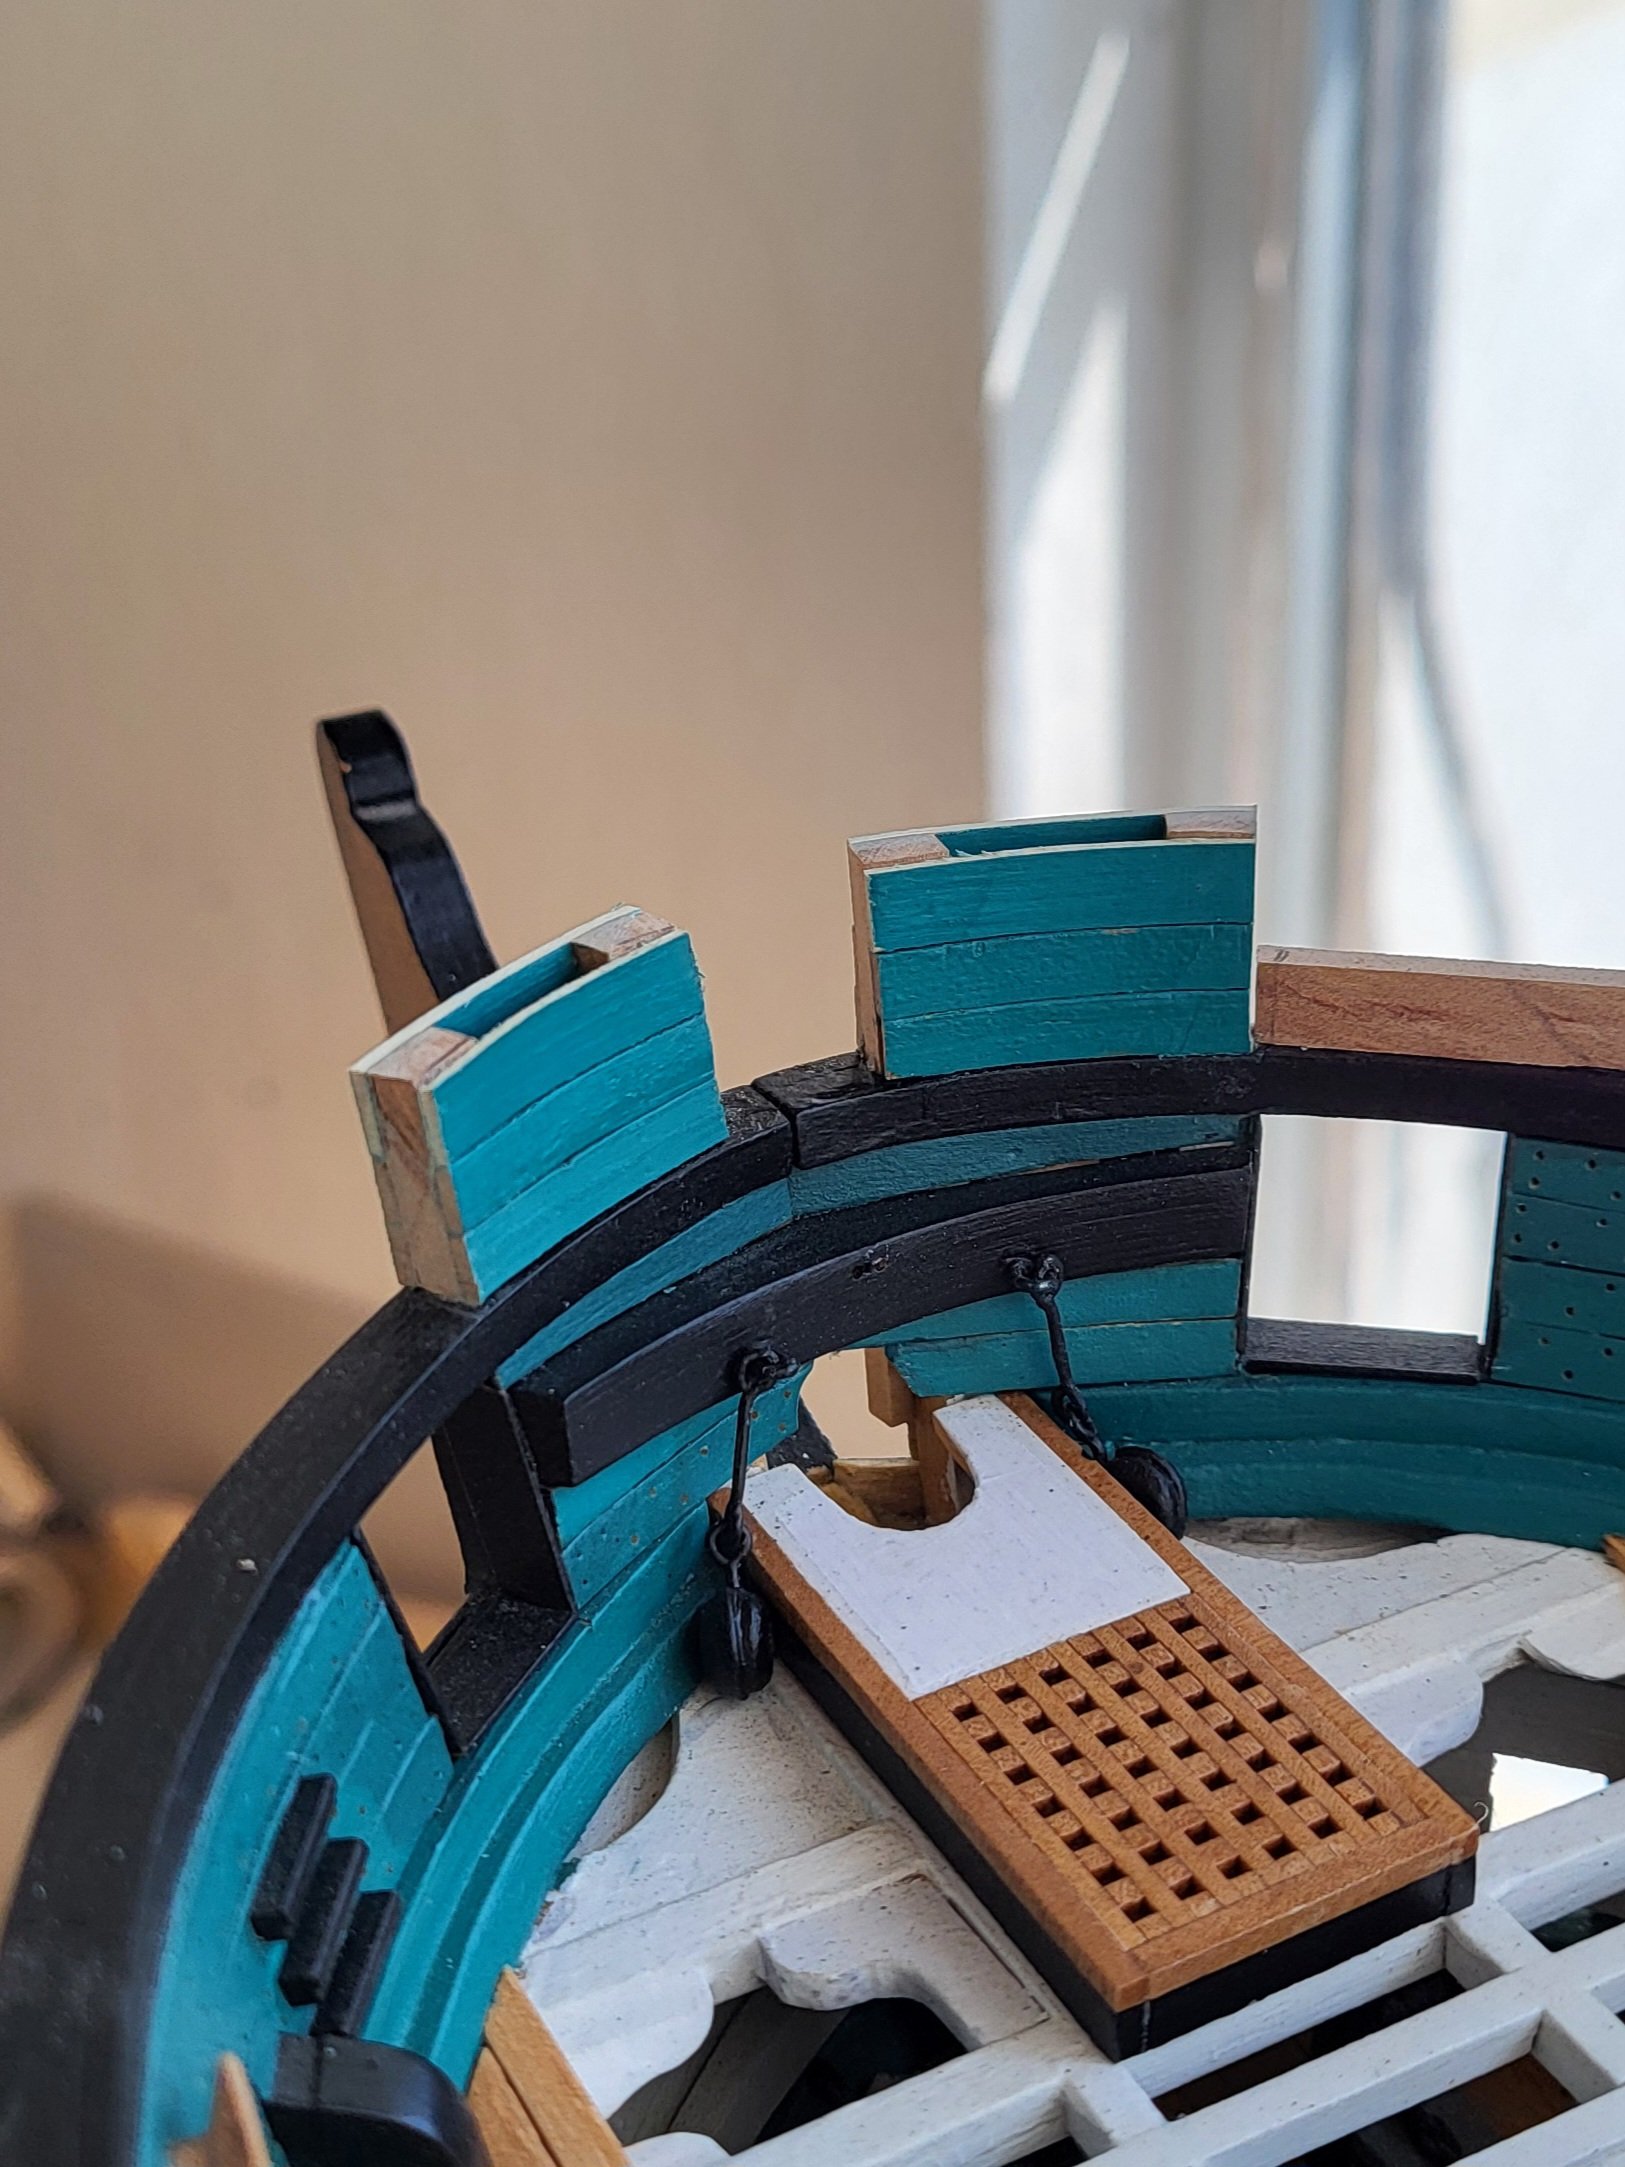
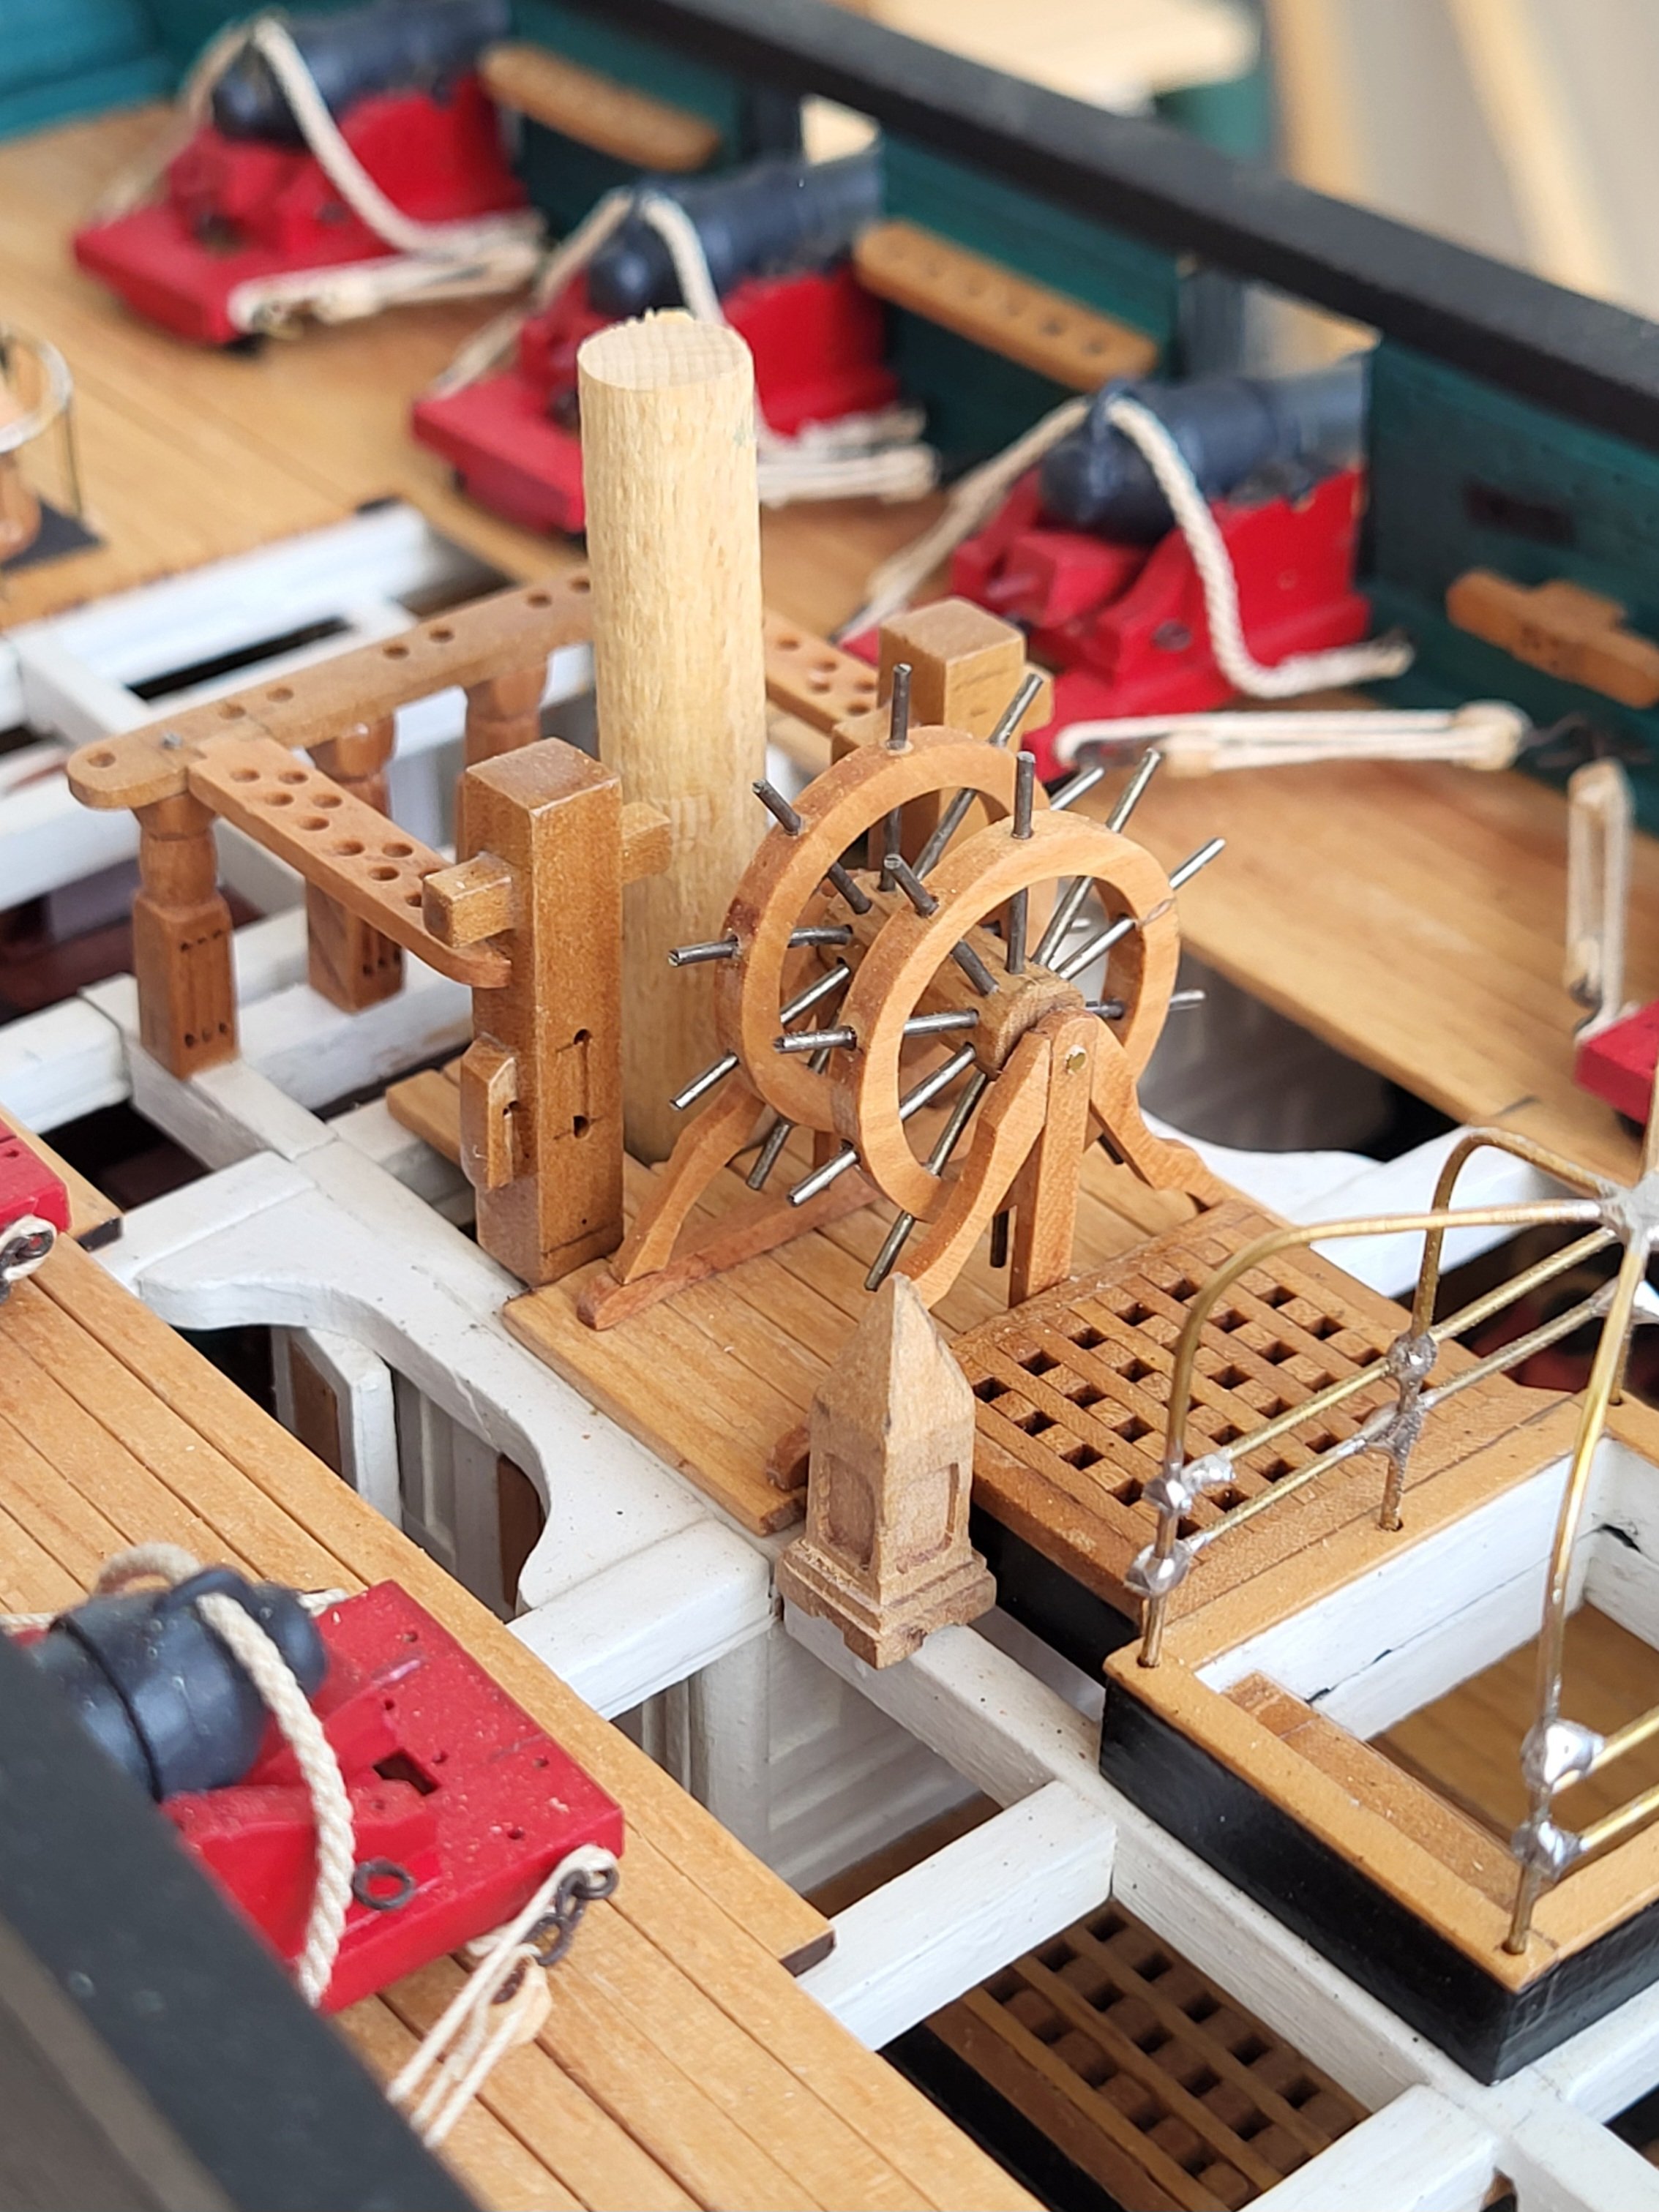
Yes, I did exactly as you said and added a beam there. There are a lot of auxiliary beams on the original ship that I didn't add to my model anyway. And yes, I'll plank the aft side of the mizzen mast later.
-
10 hours ago, GGibson said:
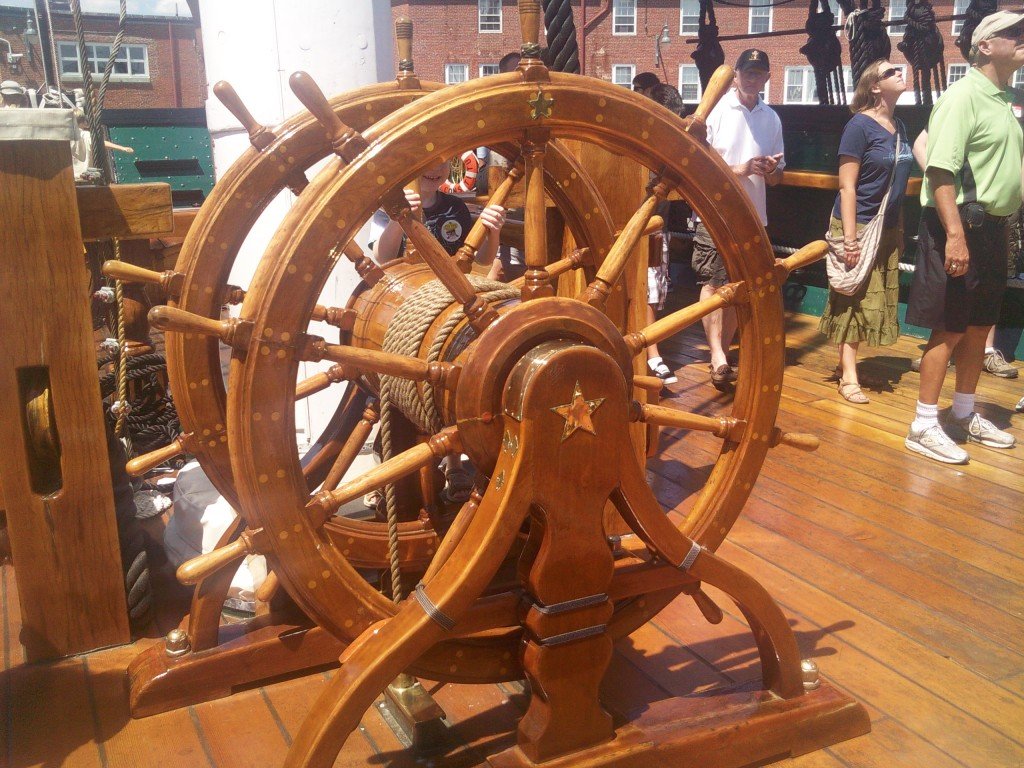
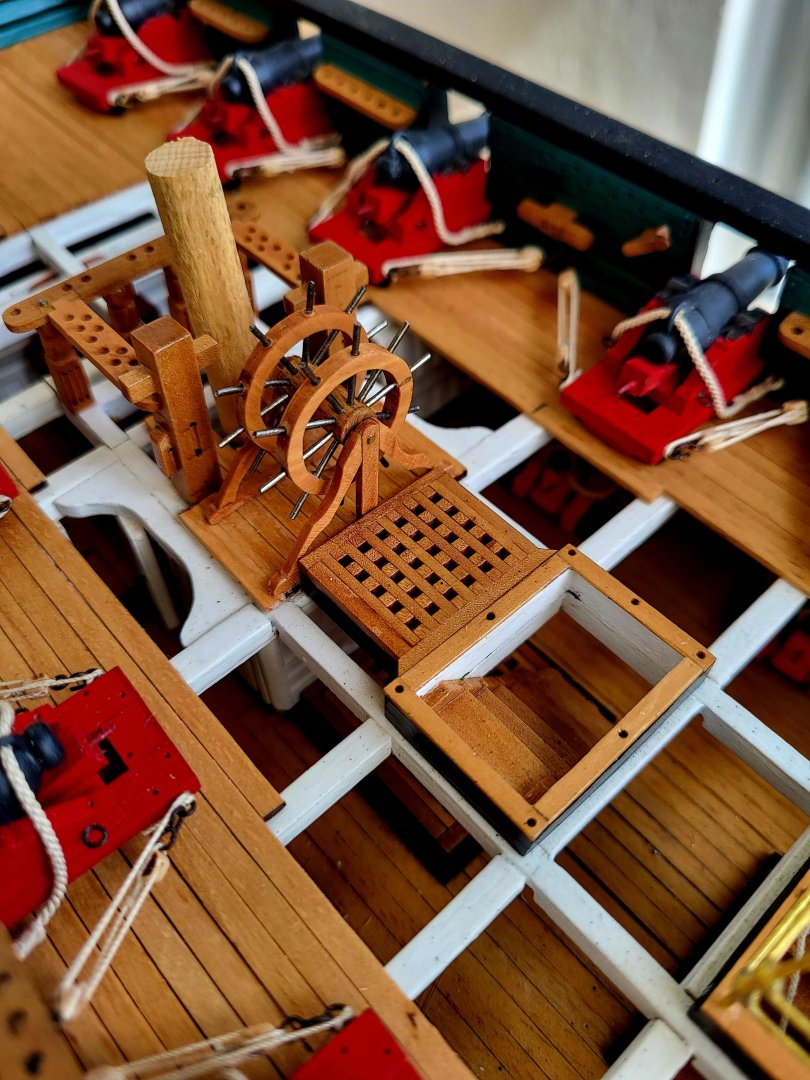
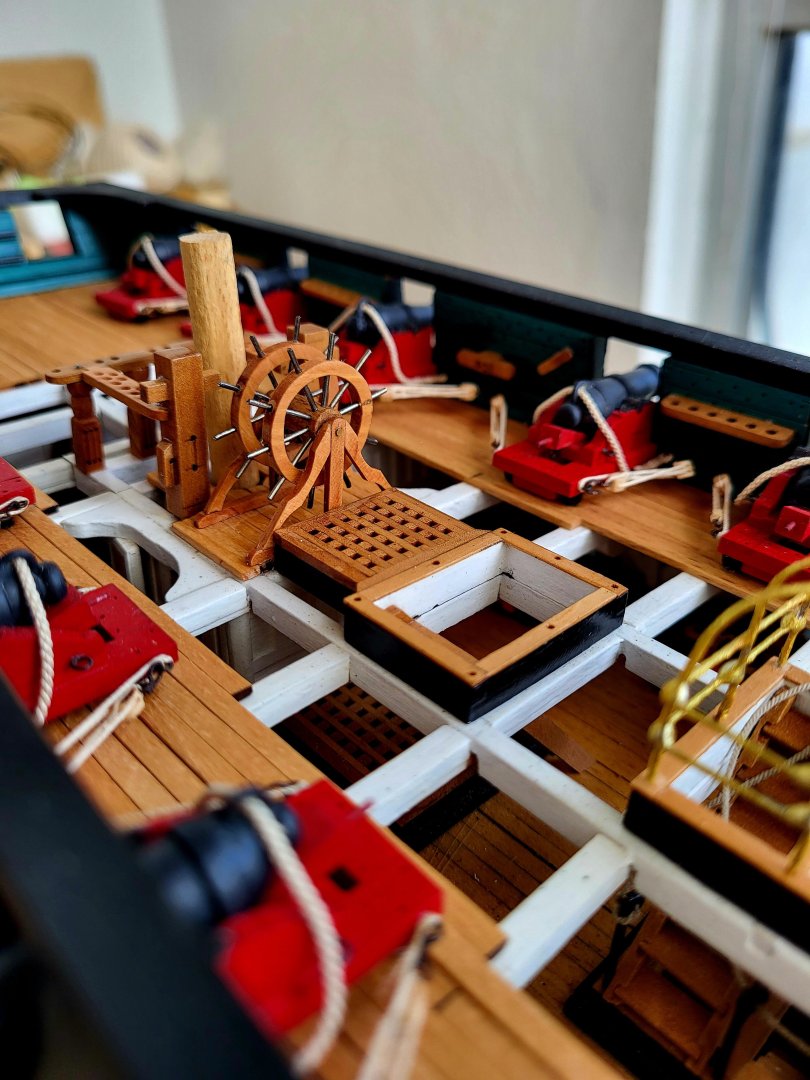
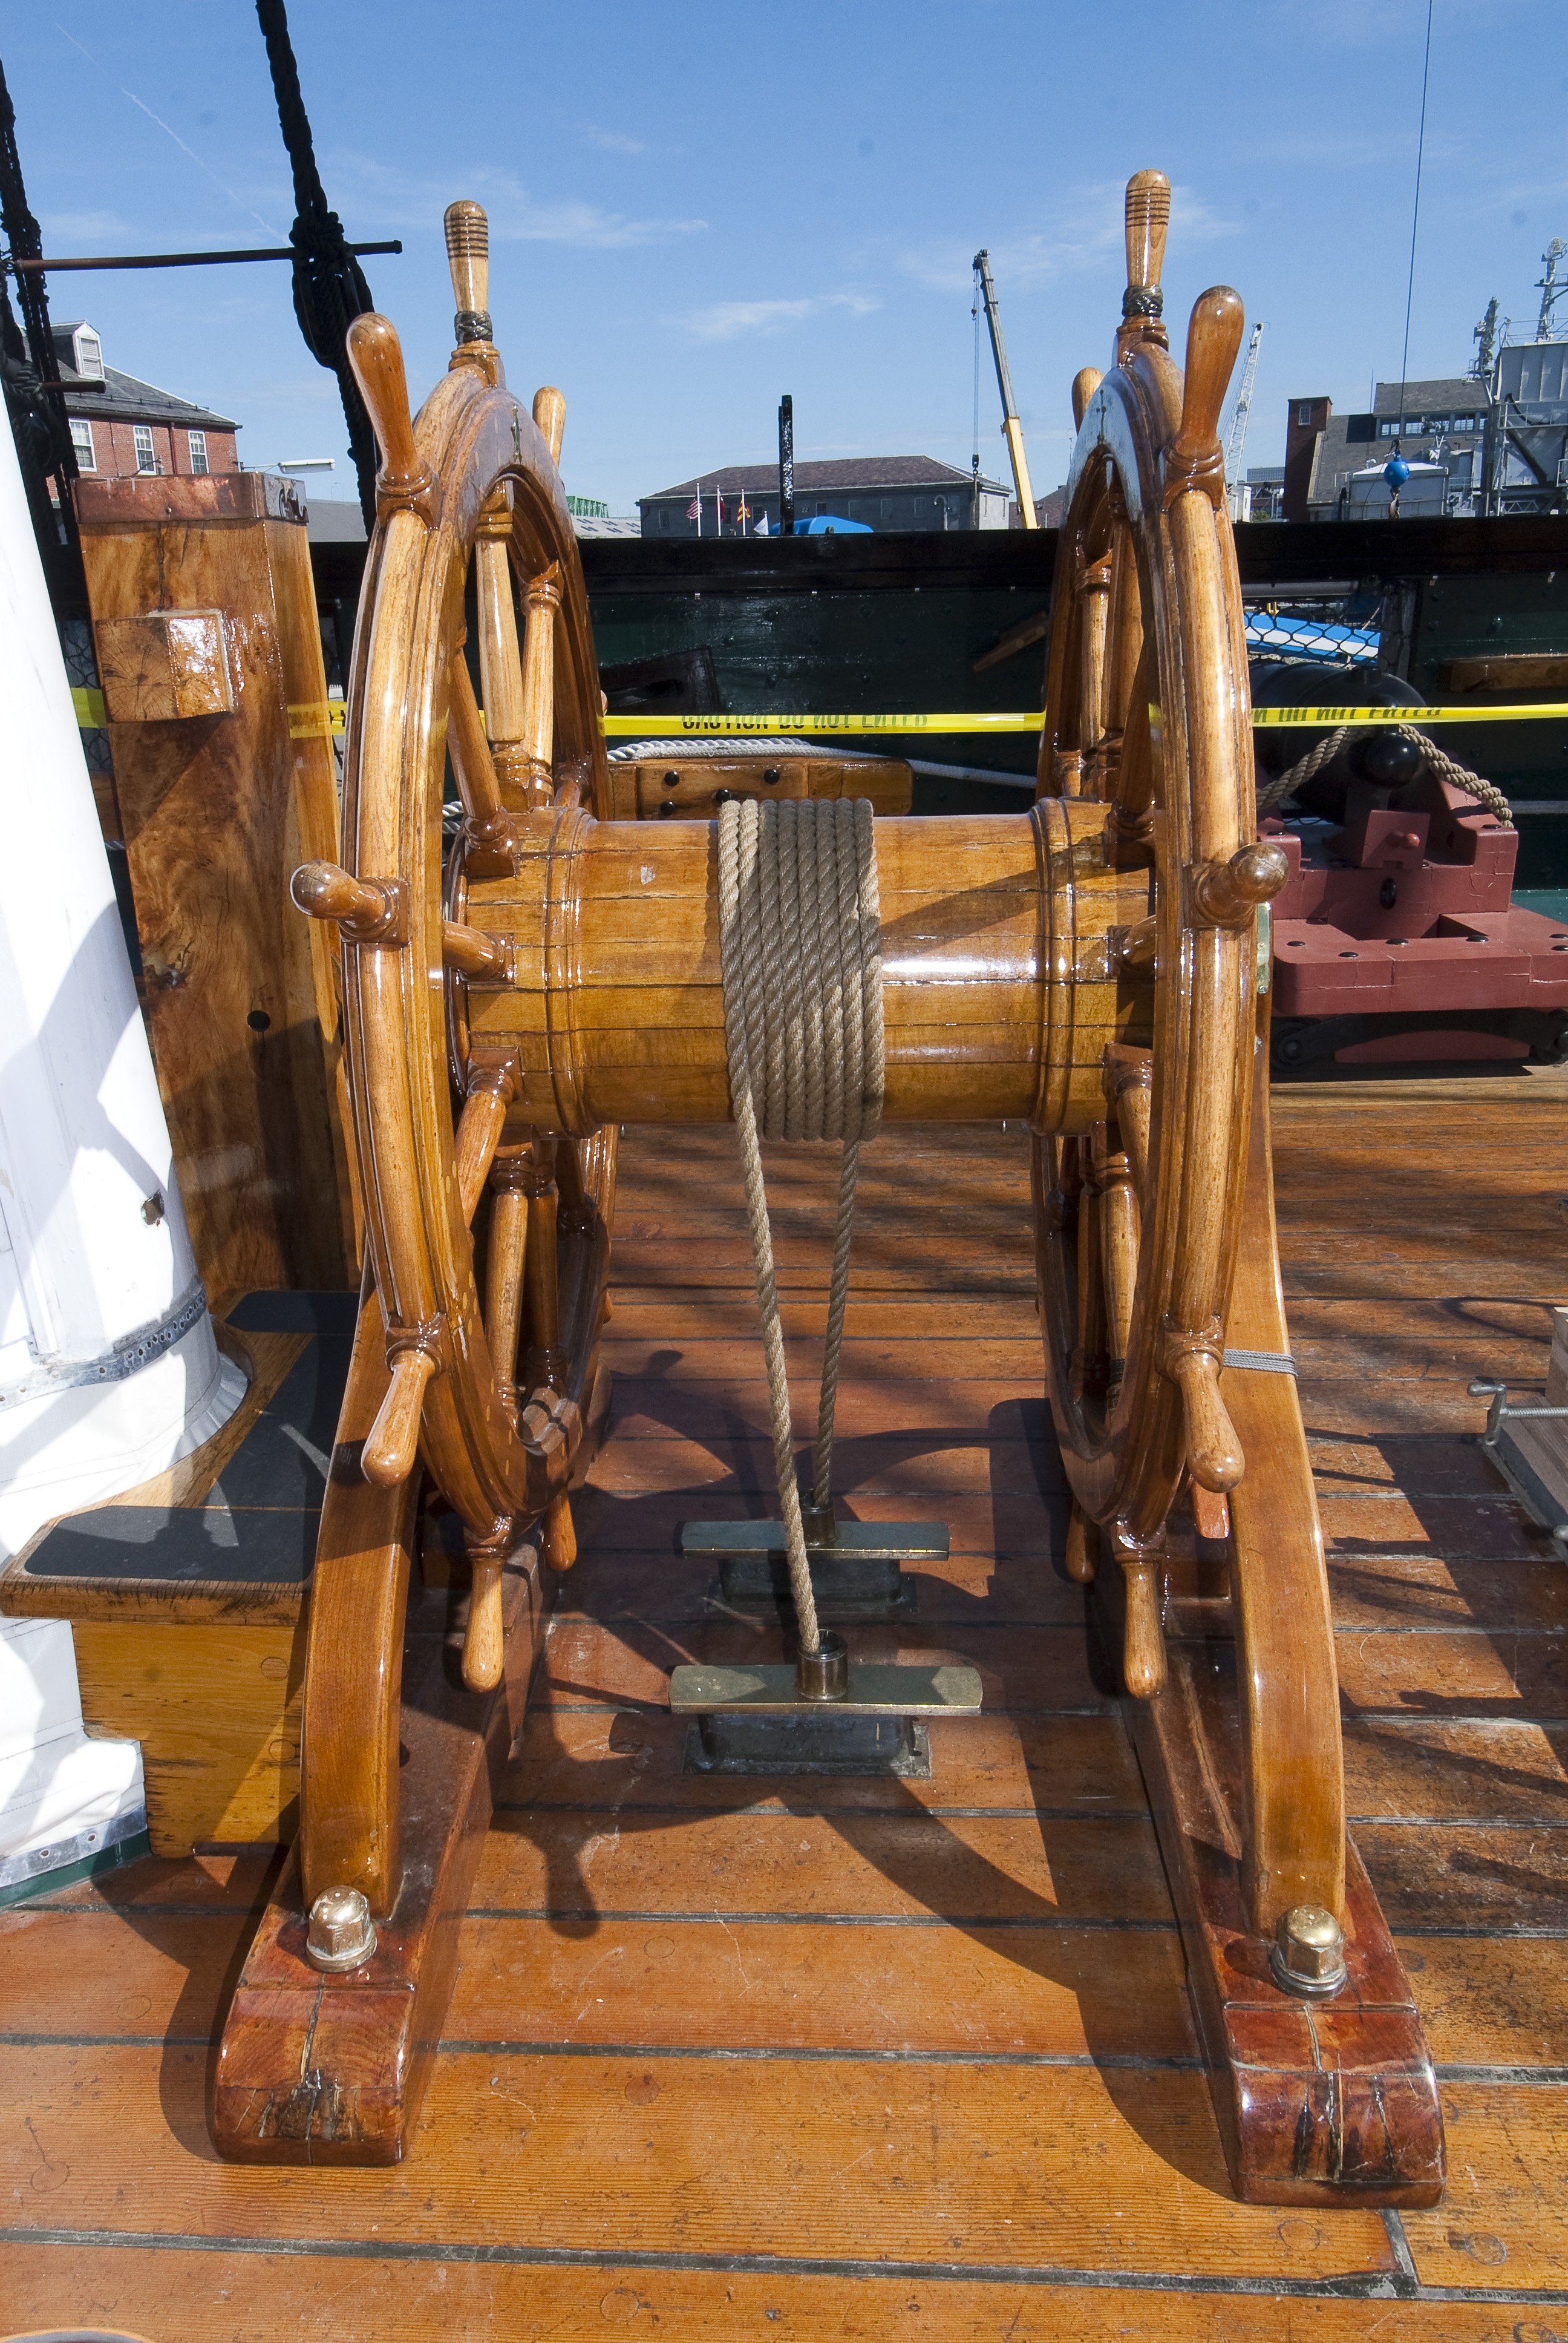
OK, so this was very interesting to me. My apologies, Mustafa, for taking up this space in your build log. Your ship's wheel looks awesome in its place on the deck! Great pictures, Jon. So, I wondered where do those ropes wrapped around the drum go after they go through the spar deck?!? Should we be able to see them somewhere on the gun deck, then?
Well, I did my own research (I've learned so much from you guys!), and found the plans on the USS Constitution Museum website related to the steering. I saved these files as pdf's, and can't figure out how to show them as a picture here, but hopefully the pdf will open up ok. It appears the cables go through the gun deck and then travel along the ceiling of the berth deck where they attach to the tiller and the rudder. Very interesting! It appears that on the gun deck, they are going through some sort of conduit located in the Commodore's pantry (circled in red on the PDF), which is why we don't see it on the Museum's virtual tour website. Jon may have been able to get in that area during his actual visit to the ship.
Anyways, I thought that was interesting, and thanks to Jon for pointing out the cable on the ship's wheel drum. Again, this all looks fantastic on your Constitution, Mustafa!
Steering_Cables.pdf 357.97 kB · 3 downloads
Thanks Greg. I was wondering where these ropes go and wanted to do a virtual tour to see them, but as you said, they go through the pantry.
-
14 hours ago, JSGerson said:
I assume that at some point you will wrap rope around the steering drum. That means the rope needs to pass through the deck. I didn't see any provisions for that. Should you rig the ship's wheel, here are some photos to help you do that.

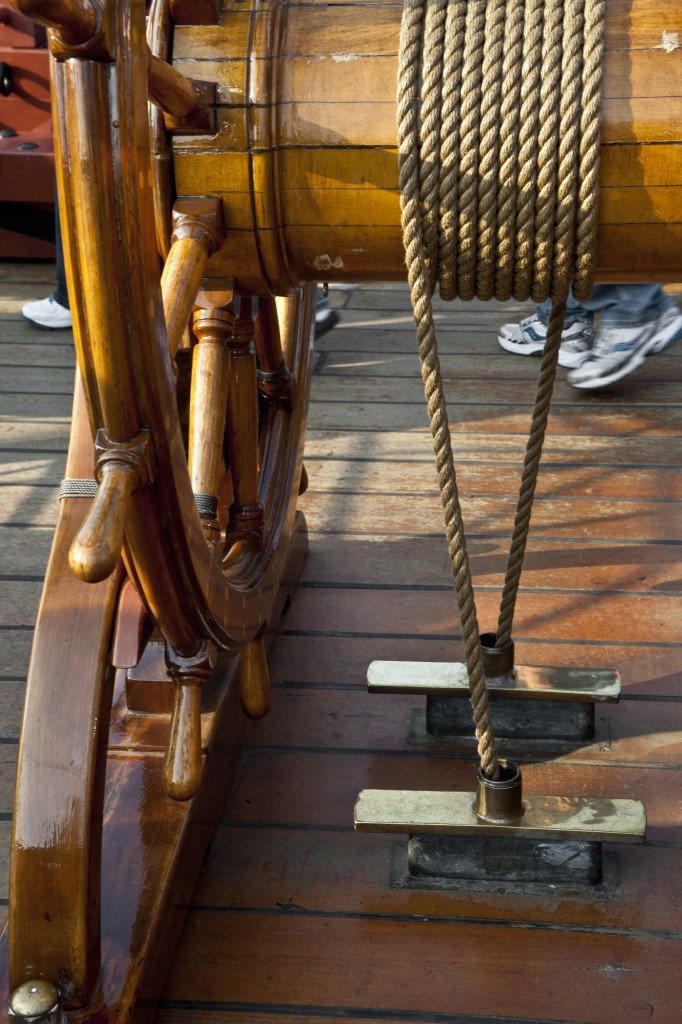
Thank you so much for the pictures Jon.
-
3 hours ago, woodartist said:
I absolutely love the precision of all that you do
Thank you so much.
-
I made the deck planking for where the ship's wheel would sit and mounted it in place.


- PaddyO, Maxthebuilder, KARAVOKIRIS and 4 others
-
7
-
3 hours ago, JSGerson said:
Coming along very nicely
Jon
Thank you Jon.
-
-
2 hours ago, GGibson said:
Absolutely excellent work, Mustafa! You really do make it look simple. Getting those drill holes spaced such that each of the rods fit perfectly. Impressive, sir! And, yes, the proper tools certainly help!
I have the dividing attachment, as well, for my drill press and mill but have not used it yet. Dividing Attachment for MF 70 – PROXXON Inc Nice to see how it can be used for making these measured cuts.
Thanks Greg. We have a saying; "The tool works but the hand boasts". Proper tools really make my life a lot easier.
- GGibson and Stevenleehills
-
2
-
3 hours ago, JSGerson said:
Nicely done, you make it seem so simple. Of course, it helps to have the proper tools, like a drill press sitting over a lathe. The metal rods work nicely too. They won’t snap and break at the merest glance. If you had absolutely no choice but to use wood, I would have recommended bamboo pulled through a drawplate. The bamboo fibers give added strength. That’s how I made my treenails for my Rattlesnake. Although that process is tedious and a pain, it works.
Jon
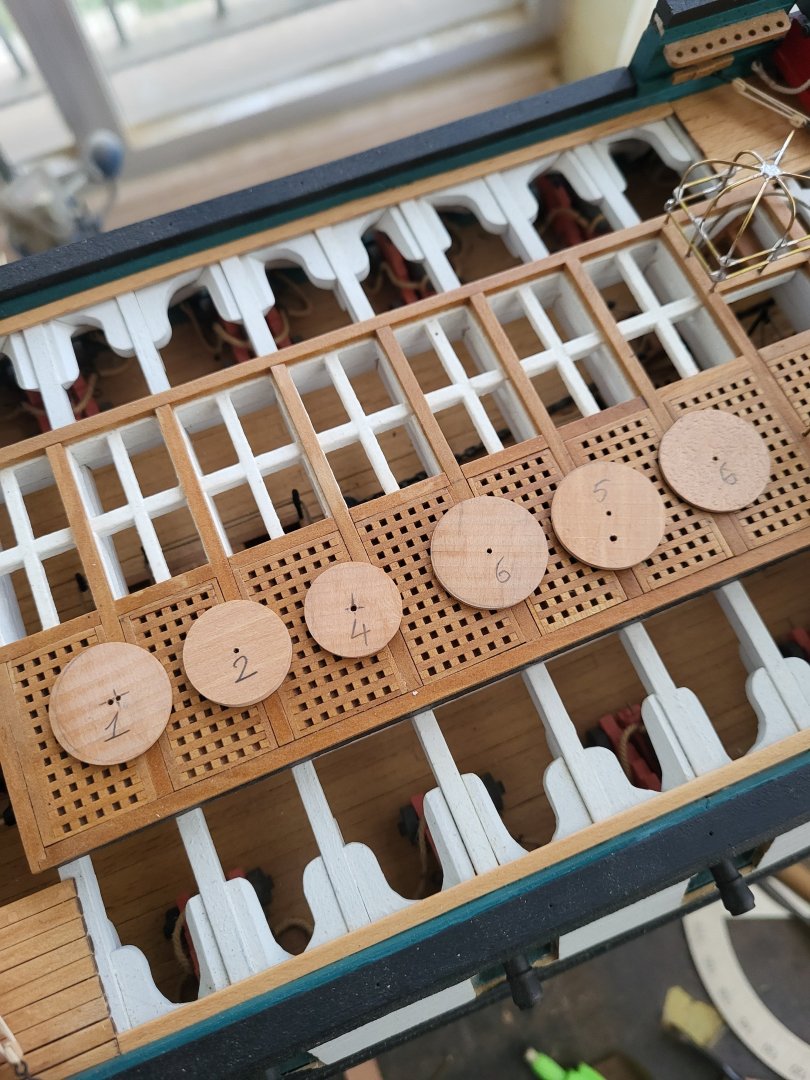
Thanks Jon. I tried to make the spokes out of wood but they were really thin and broke during the turning process. It turned out I needed a drawplate but for now I'll have to make do with metal spokes.


USS Constitution by mtbediz - 1:76
in - Build logs for subjects built 1751 - 1800
Posted
I know Jon has something to say about this, because he has explained it somewhere before. He will respond when he sees your post.