drobinson02199
-
Posts
919 -
Joined
-
Last visited
Content Type
Profiles
Forums
Gallery
Events
Everything posted by drobinson02199
-
 Bob: I'm glad you'll be following this -- and I hope I build her in a way that honors your USCG memories. I'm going to build it as a static model. Regards, David
- 46 replies
-
- 4
-

-
- Fast Response Cutter
- Dumas
- (and 2 more)
-
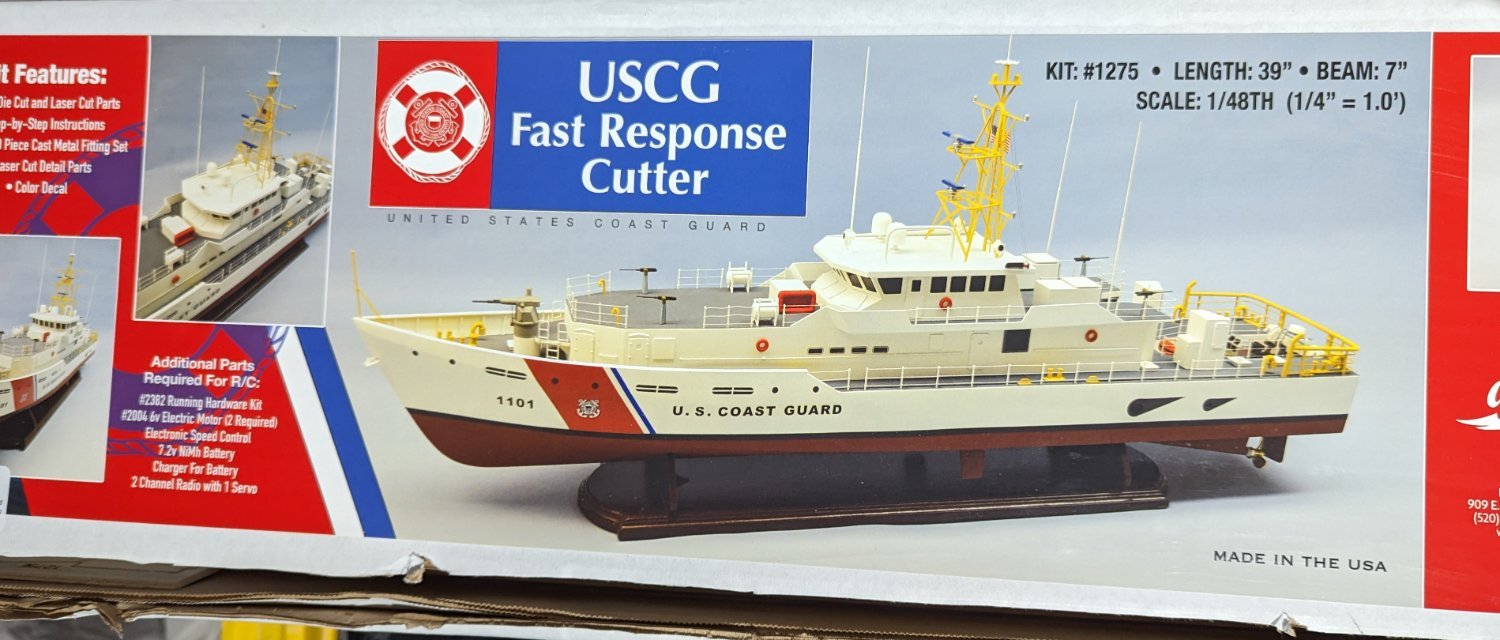
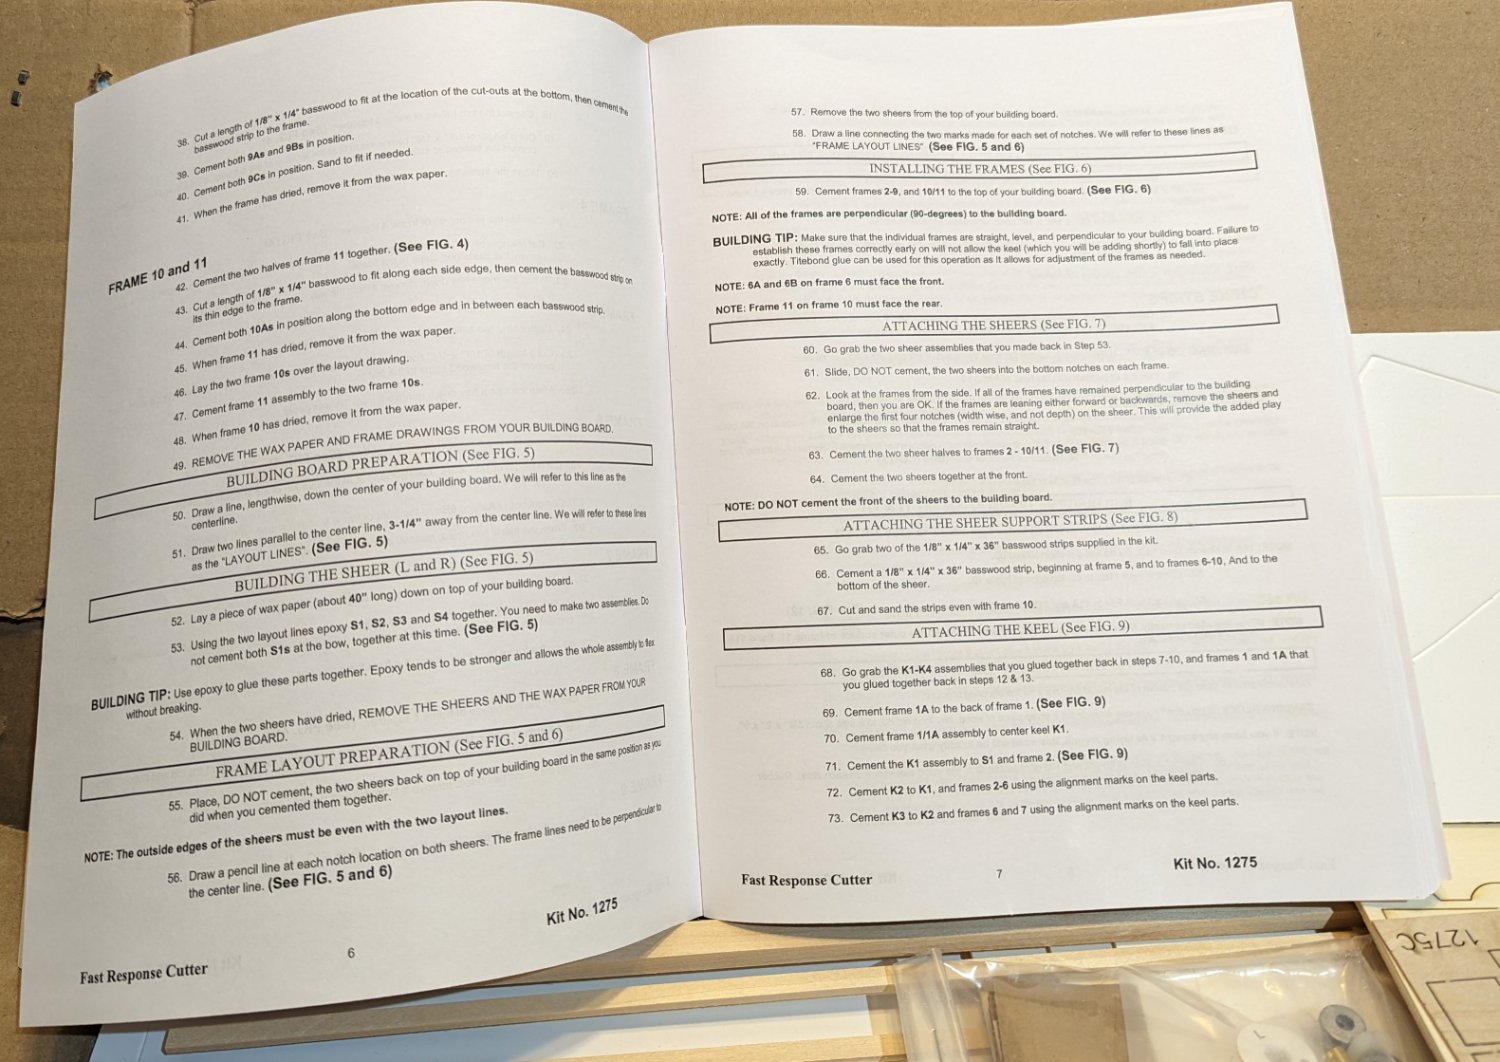
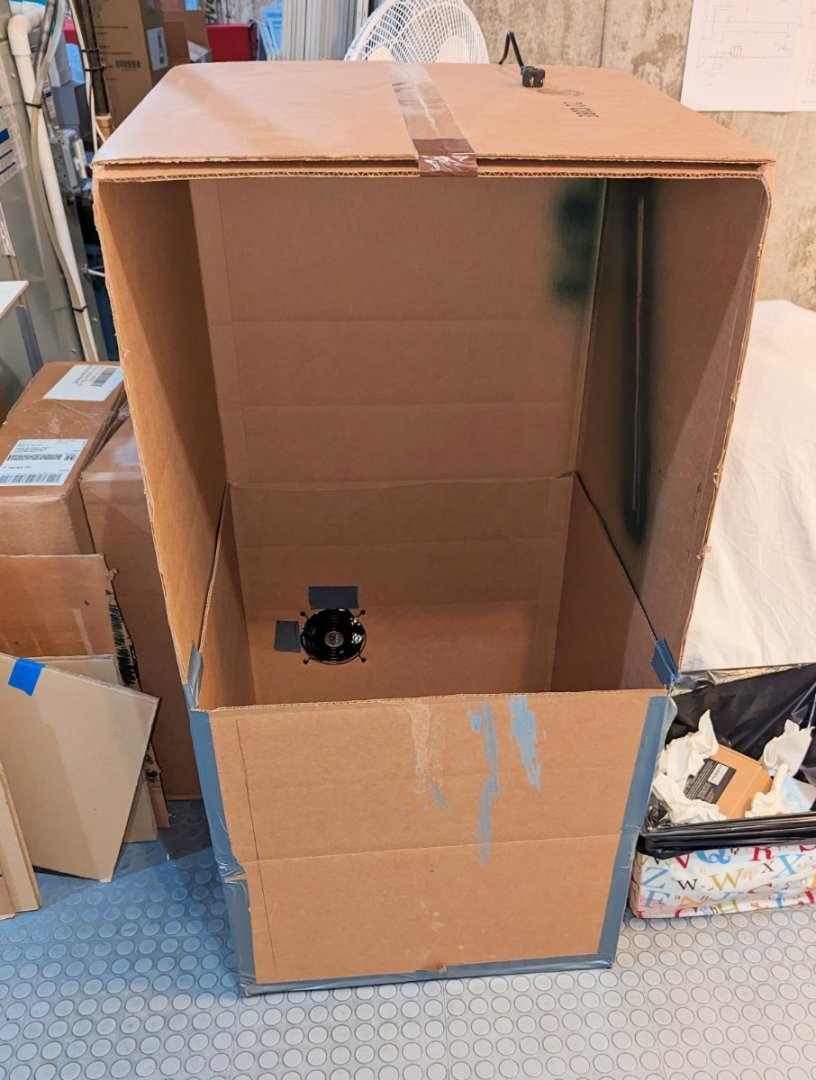
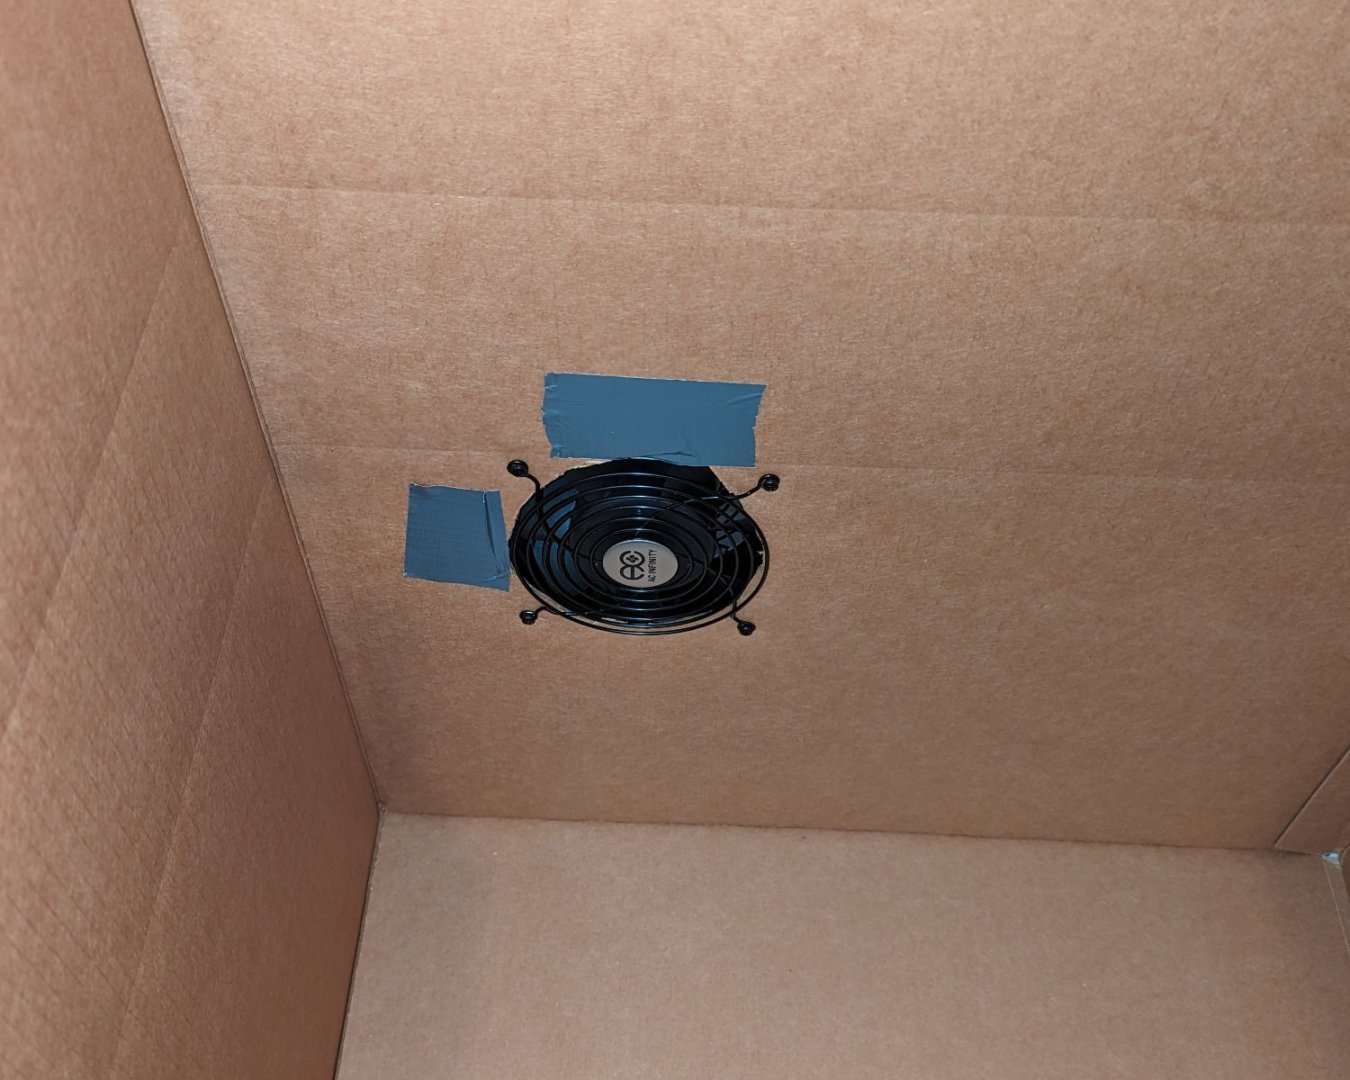
After finishing my 2+ year HMS Victory project, I had planned to take some time off from modeling and pick up again when I returned from a vacation trip in mid-September. But I find myself getting antsy for a project, so here goes . . . I picked this model because I wanted something simpler after the complexity of Victory -- and something without ratlines! This is a Dumas model, and based on a couple of other Dumas kits I've built, it will require something of a mental shift from the construction of European kits: First and foremost, everything is in inches! The hull is expanded PVC over a wood frame Dumas uses styrene strips for some finish items where other kits would use wood I've included some "what's in the box" pictures. You can see one of the PVC sheets. Also some pictures of the manual and accompanying drawings. Dumas has really excellent detailed instructions with step-by-step drawings. Finally, looking at this kit and also looking forward in the instructions for the Amati Bismarck, which will be my next model after this, I've realized that I'm going to have to do some spray painting. I have developed an aversion to spraying because it's too cold here in the winter to do it someplace like the garage, and the "backspray" mist gets all over everything in my workshop. So I built the "spray booth" shown here (it's on its side in the pictures), with a small fan installed in the rear. I've tested it, and if you put a piece of tissue over the fan, it acts as a filter and the fan draws out the spray mist. We'll see how it works in practice. Now on to the kit. For anyone who follows, hope you enjoy this one. Regards, David


- 46 replies
-
- 8
-
-
- Fast Response Cutter
- Dumas
- (and 2 more)
-
Thanks for the good words, Bob.
-
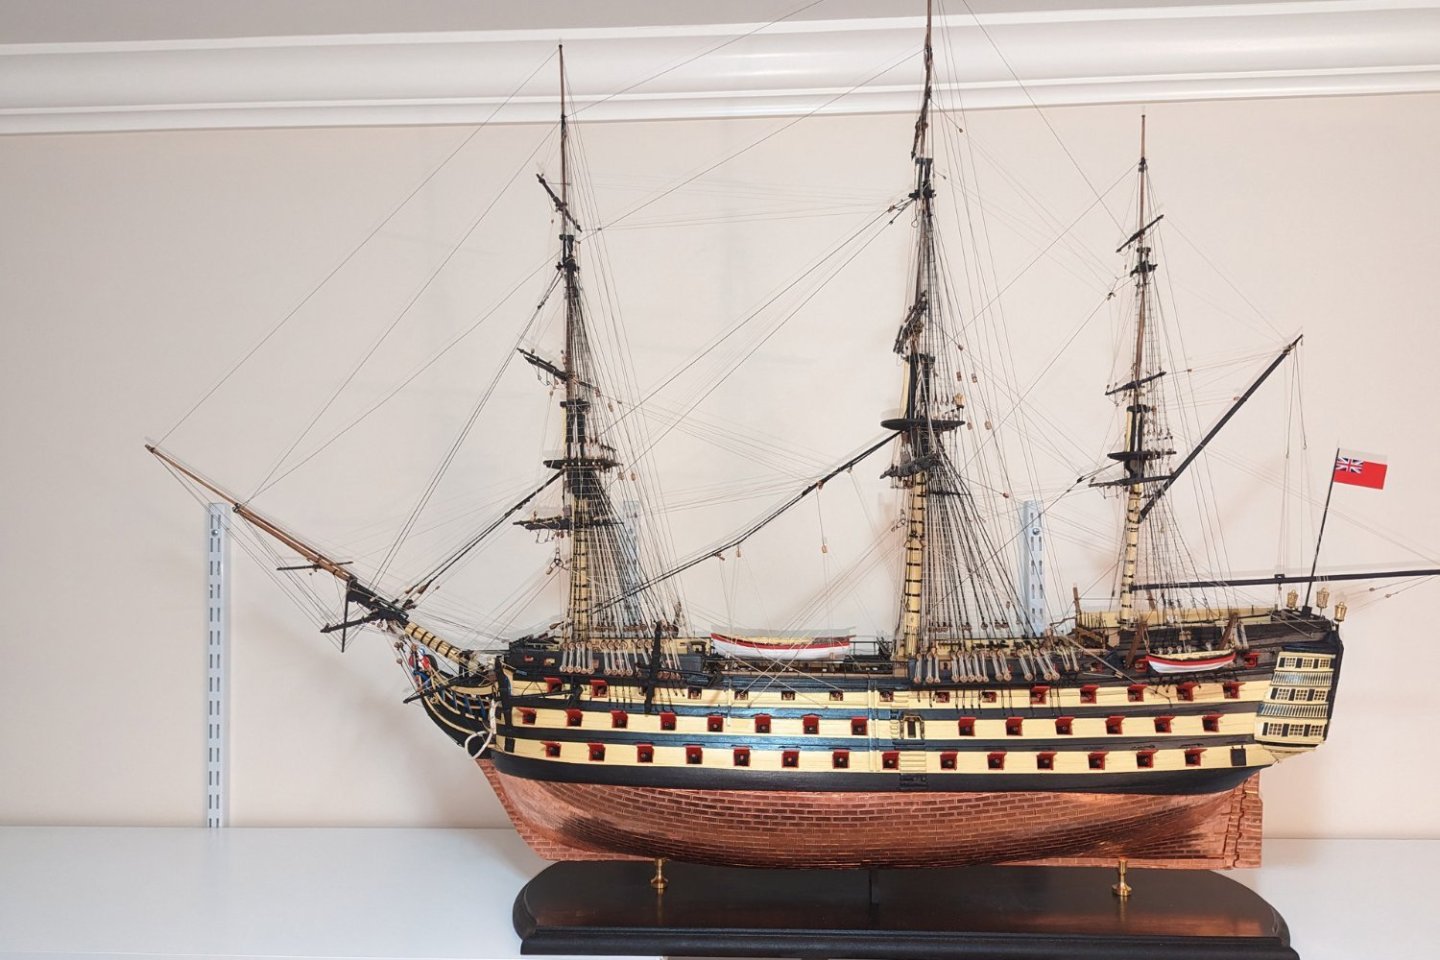
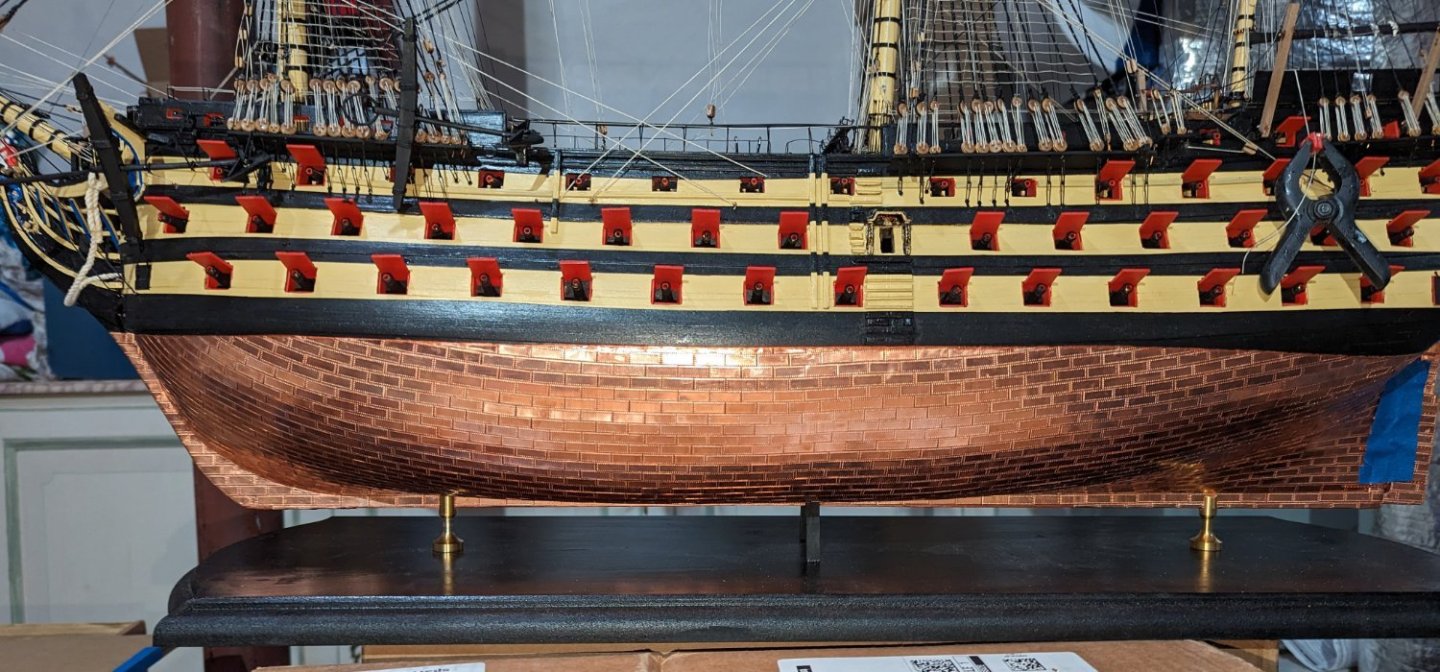
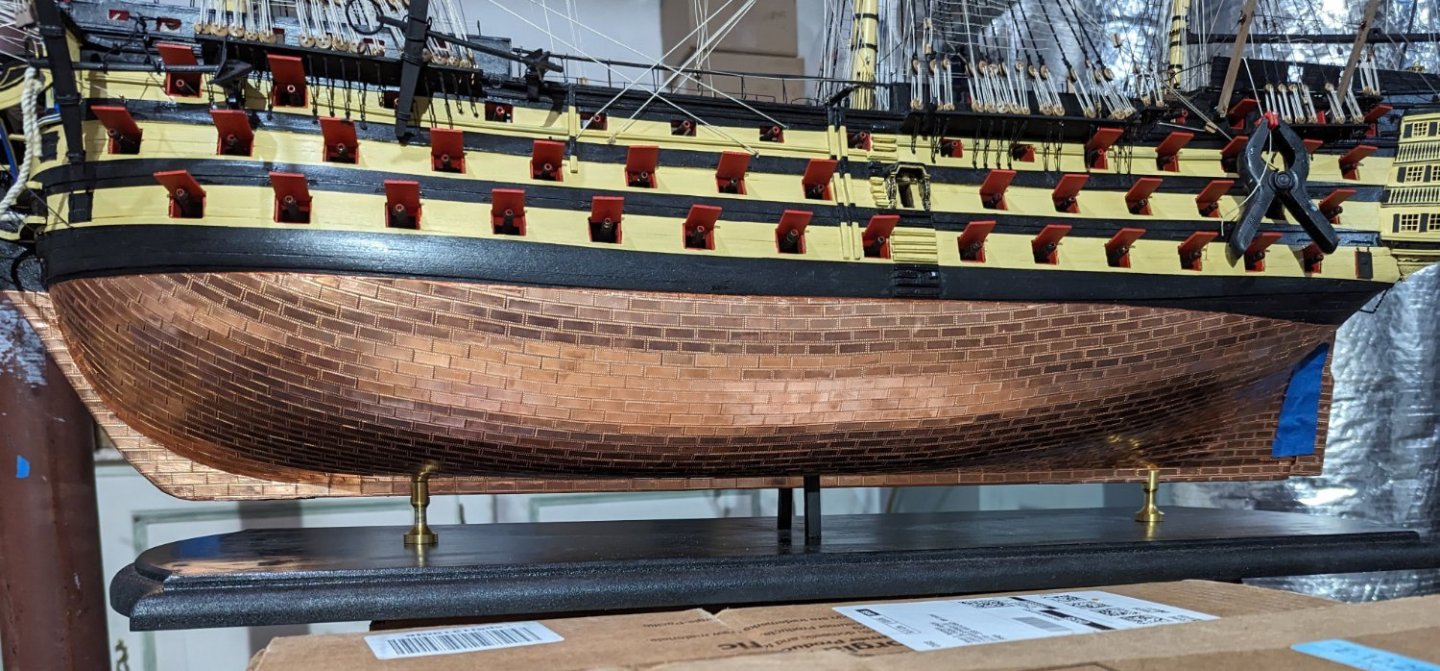
FINISHED! My 2 year one month build is finally done. The last step was building the cutter and mounting it on the rear quarter davits. Pictures of that here, plus one full view of the ship. A set of completion pictures with different views of the model is posted in the gallery of kit-built models. Thanks to all of you who came along for the ride -- I appreciated the support. Regards, David
- 218 replies
-
- 13
-
-

-
- Victory
- Caldercraft
- (and 1 more)
-
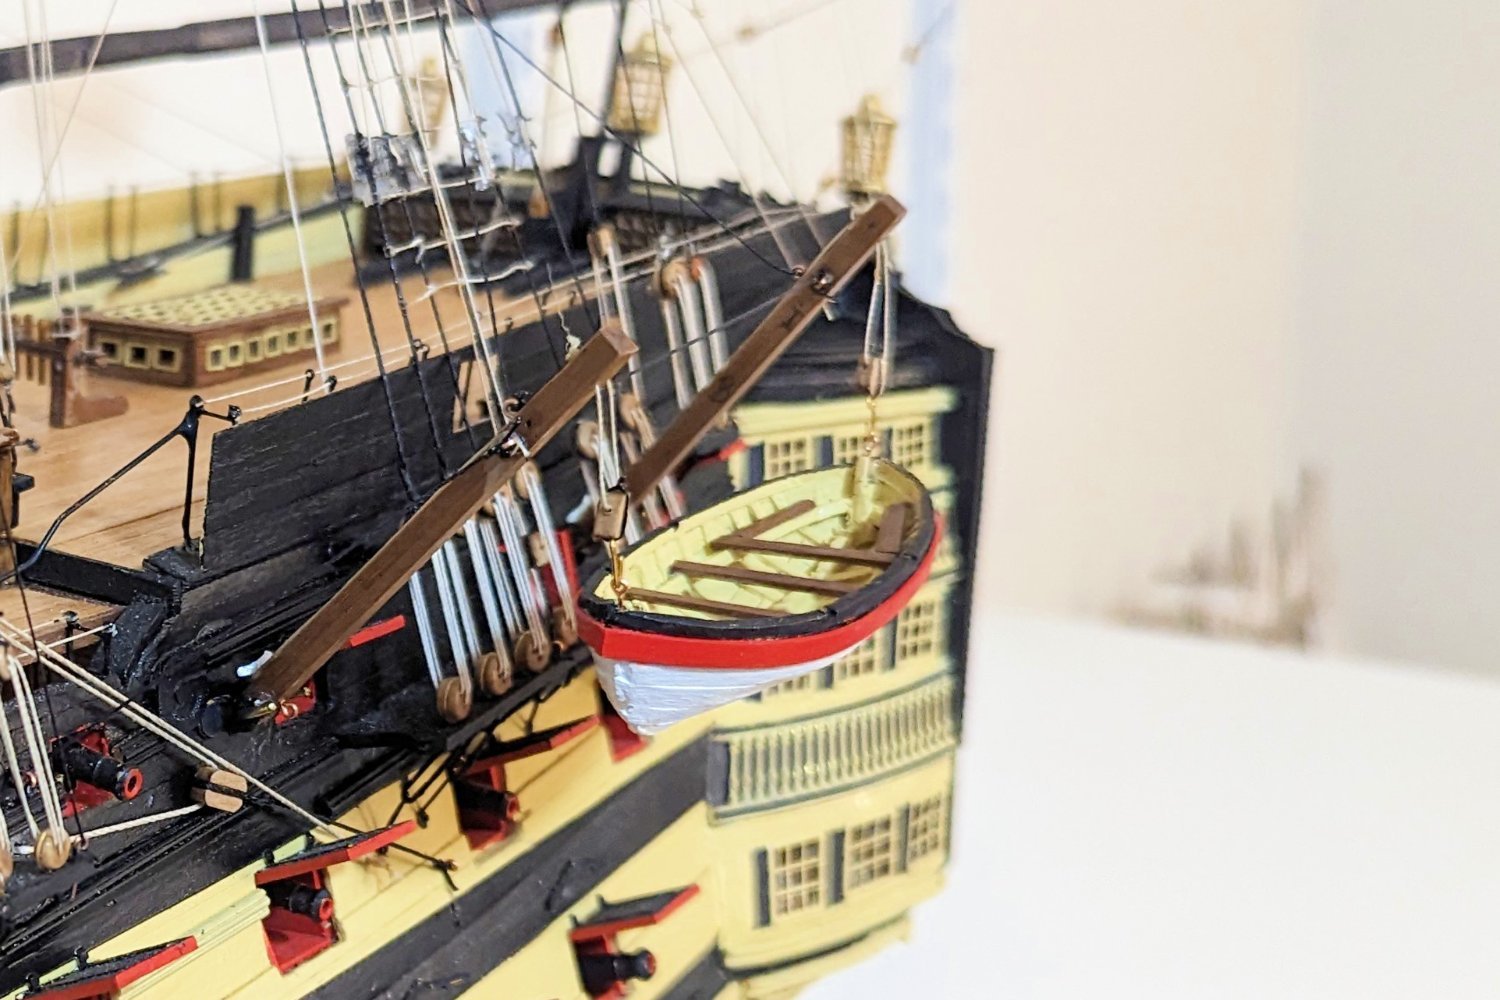
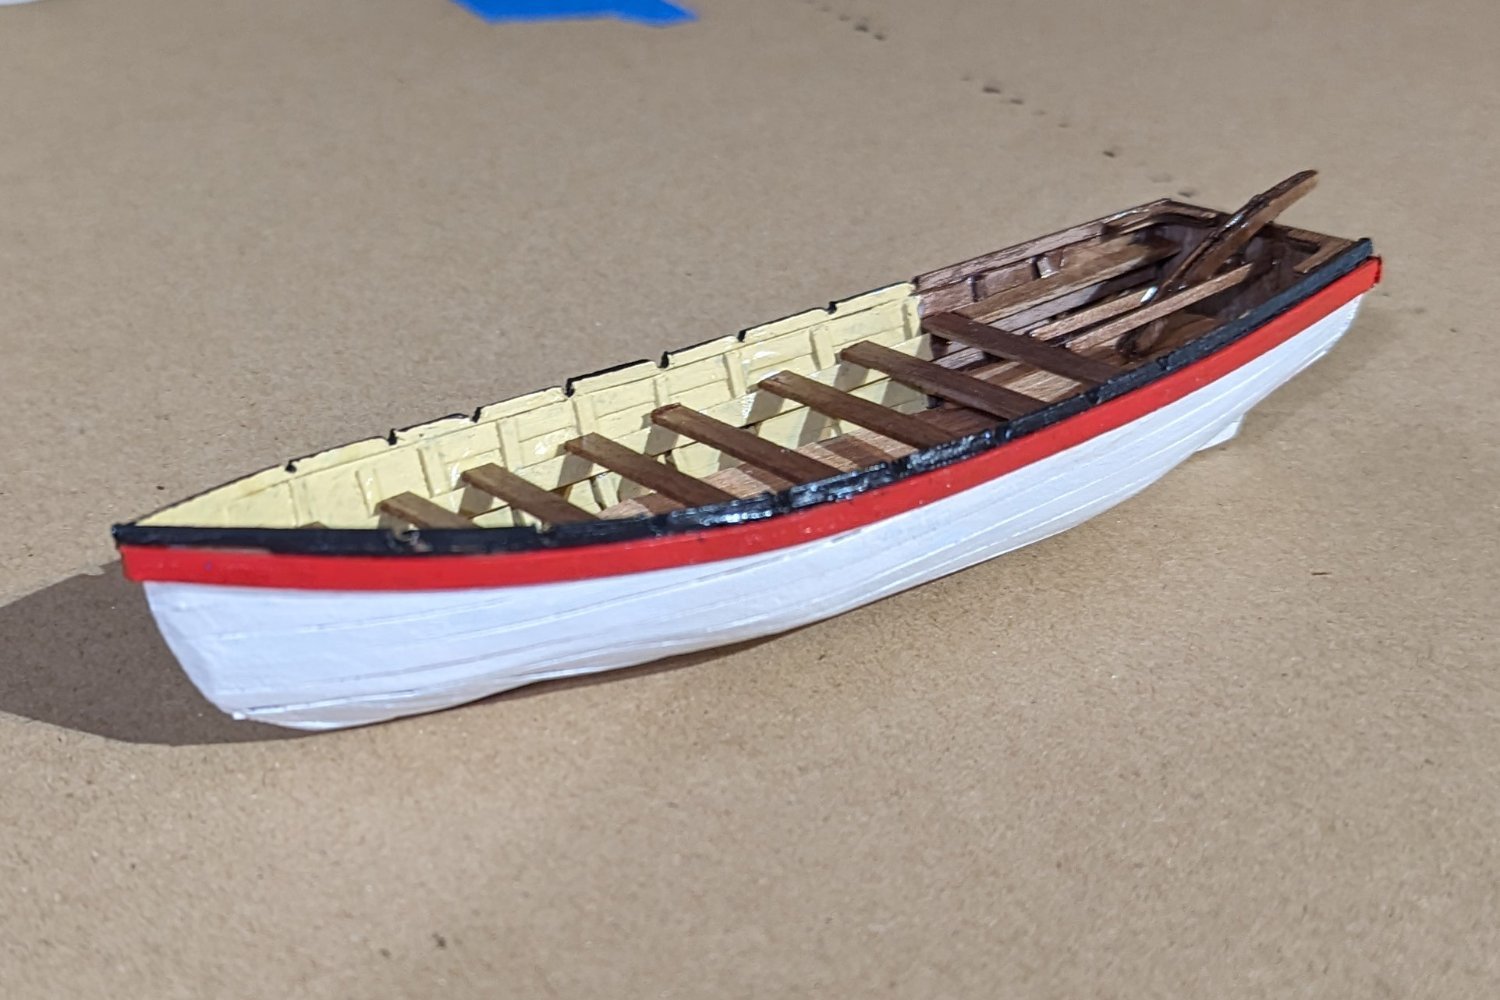
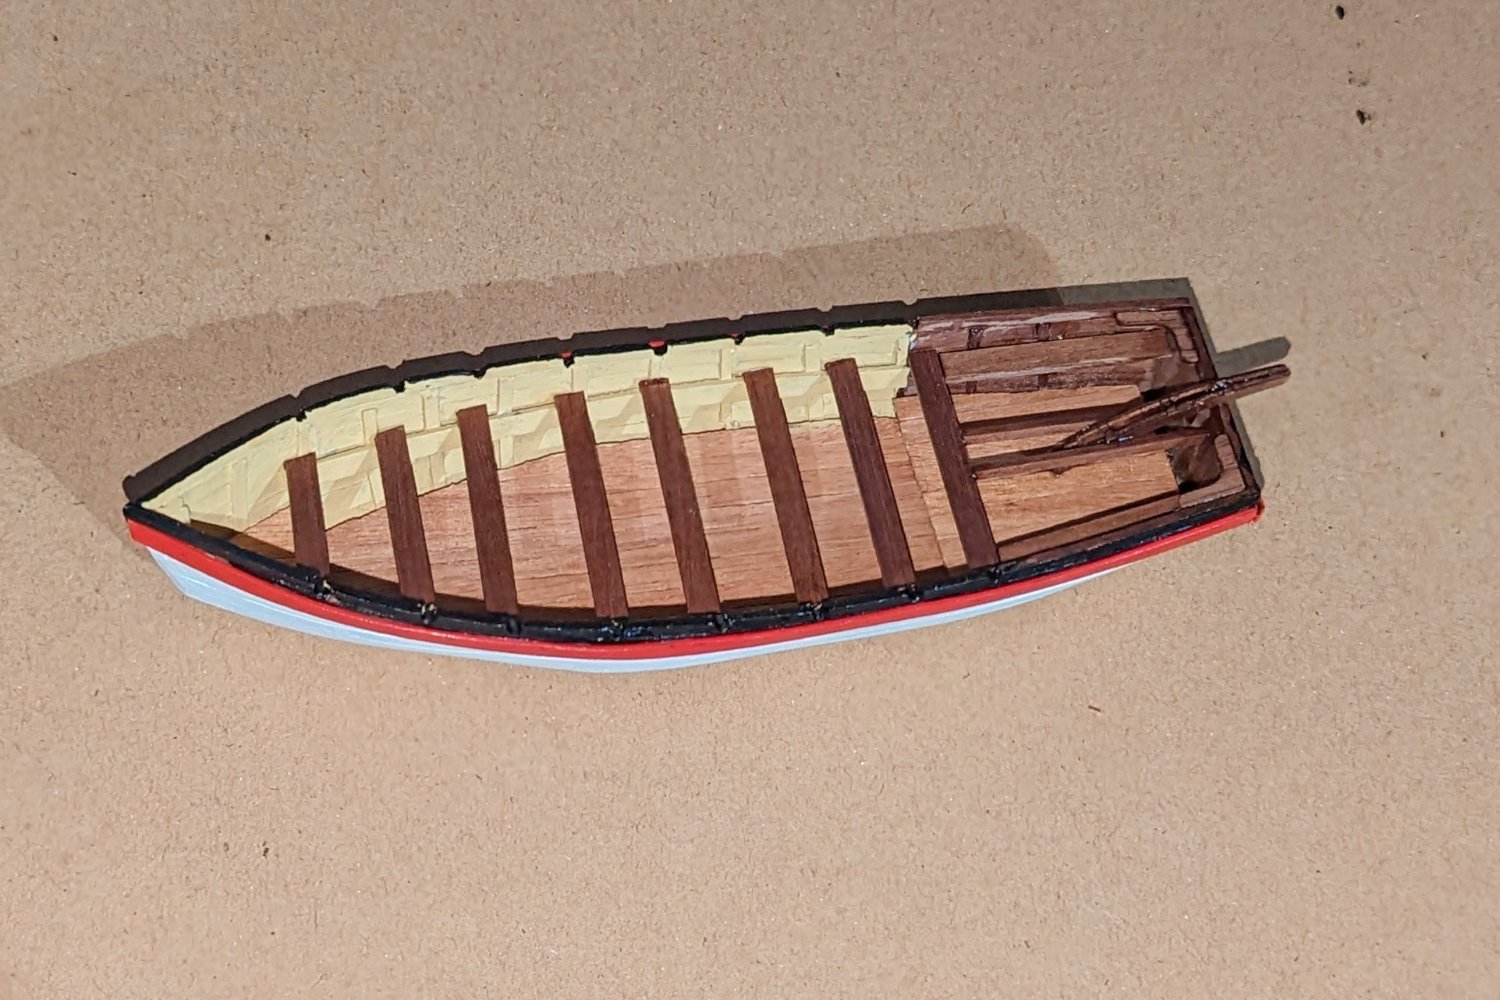
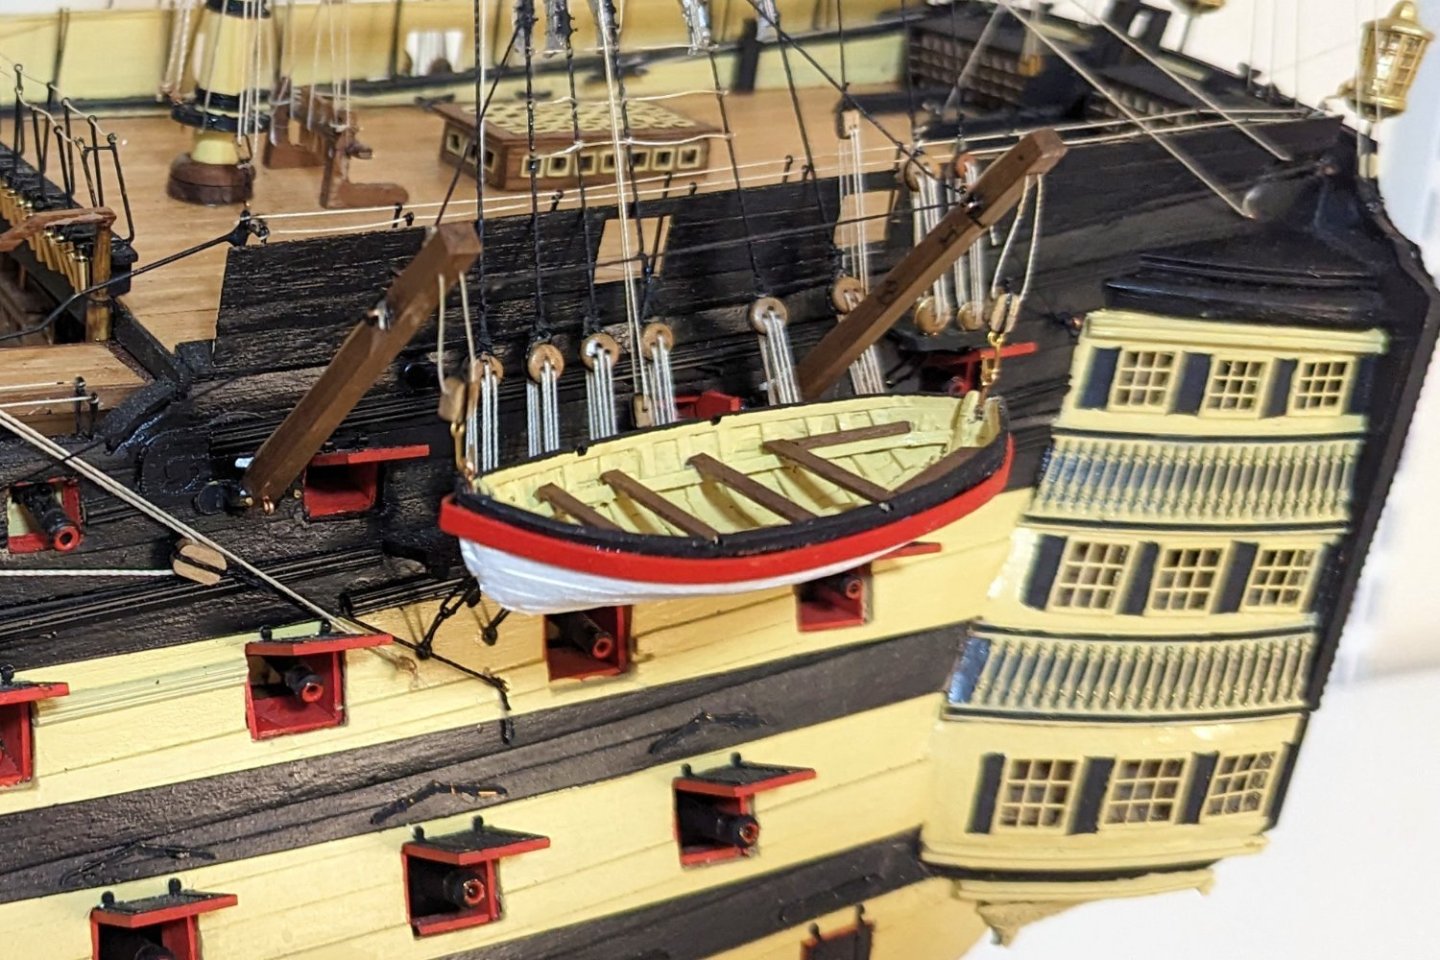
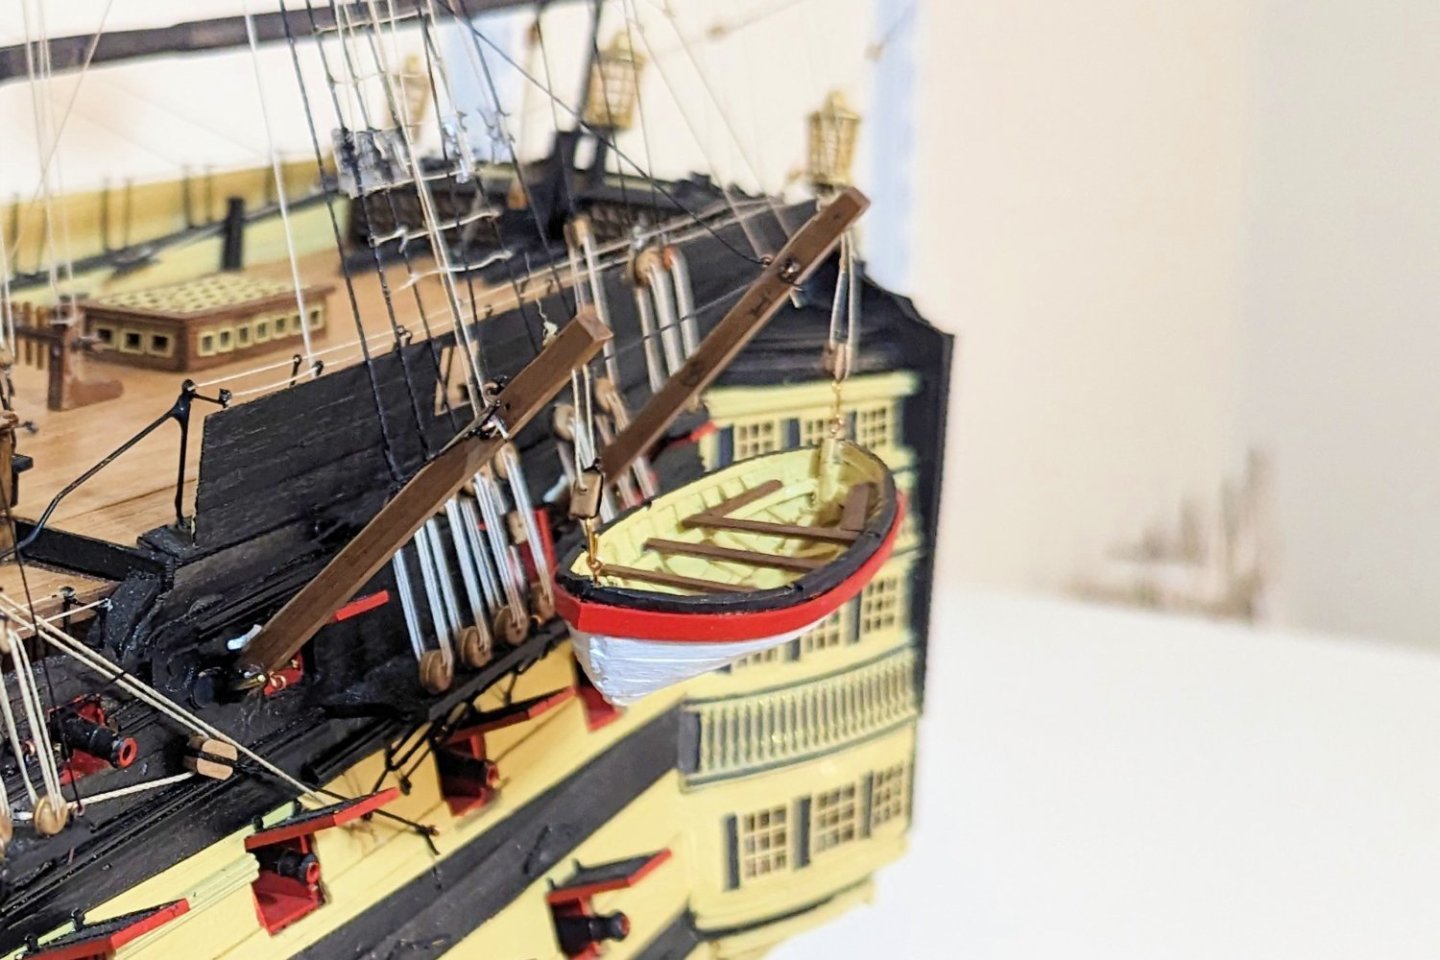
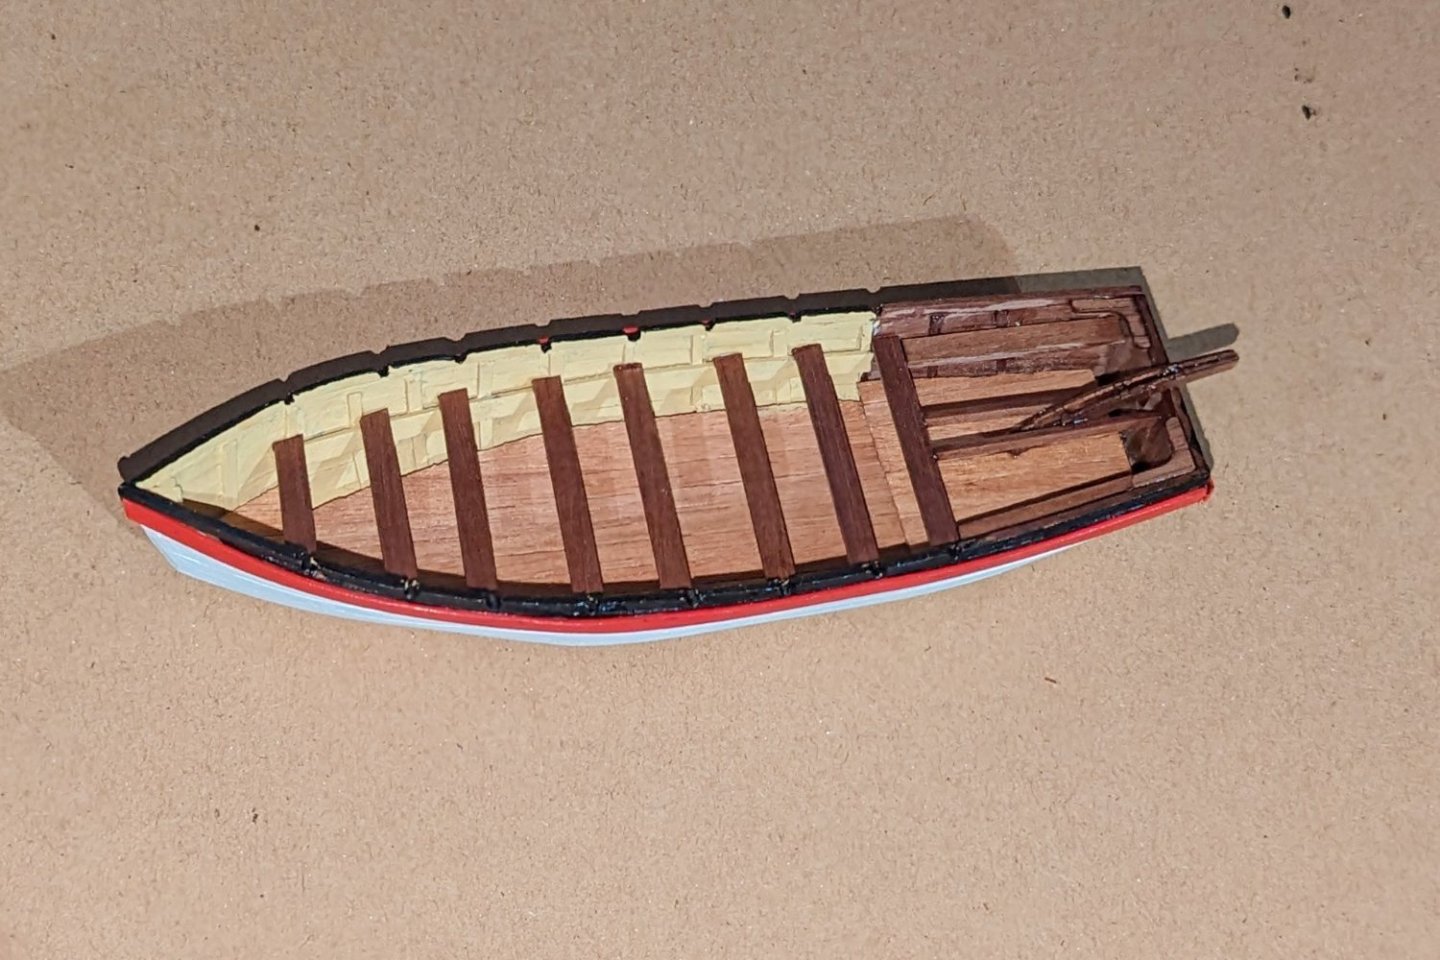
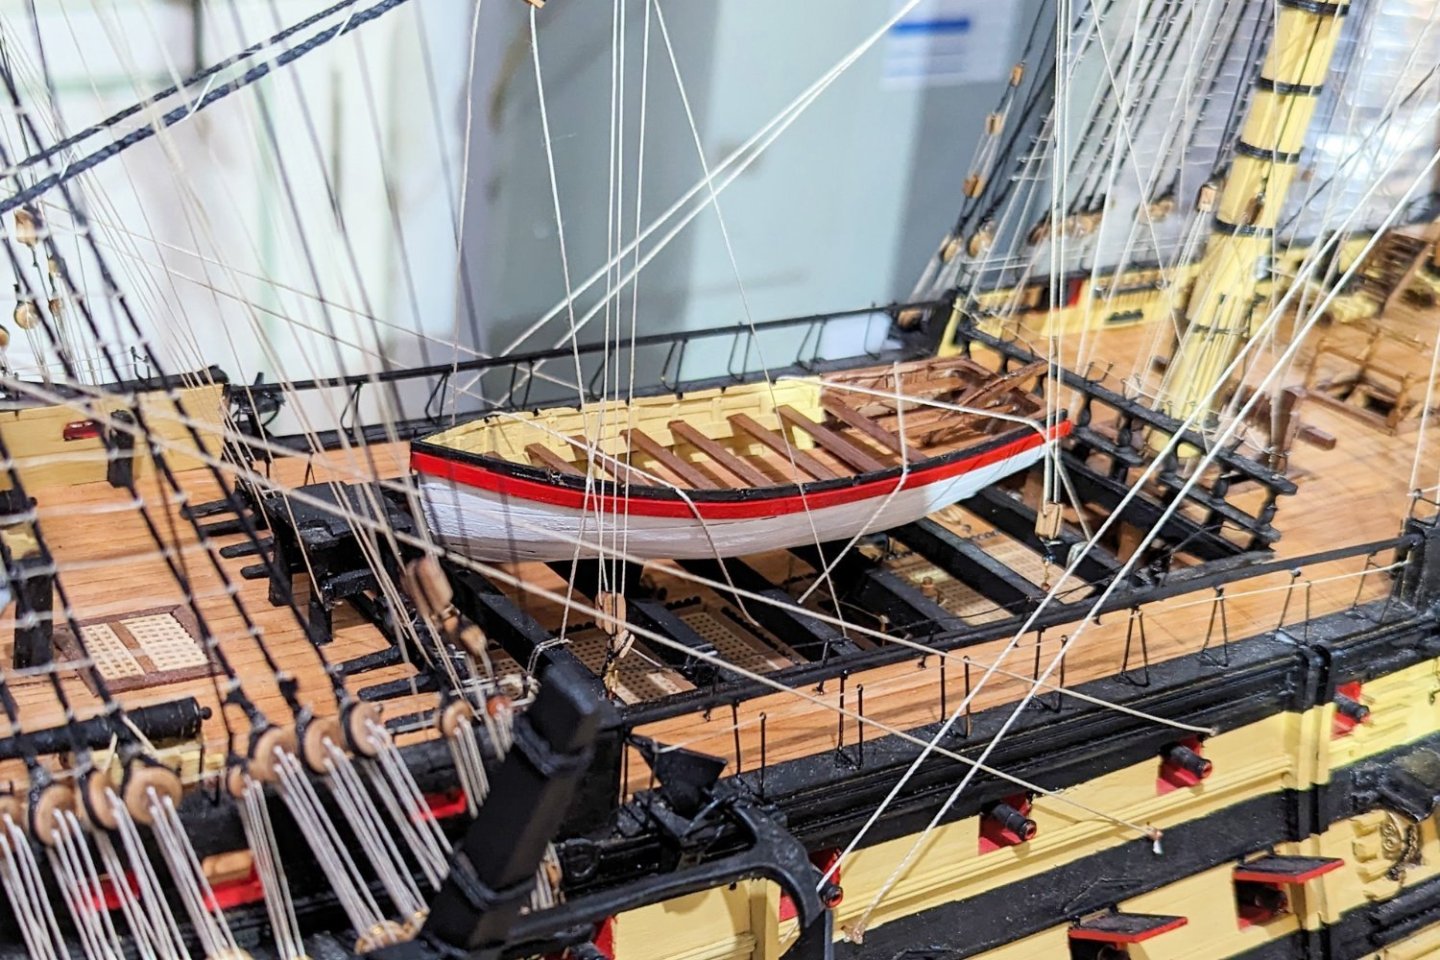
I have built the largest of the four small boats that come with the kit -- the launch. Took me about a week. The boat is double-planked, and even though it's small, the planks are small too so it takes some time. I took a few liberties vs. the instructions: I used 1 x 4 maple for the flooring vs. the .5 x 3 walnut that was called for. My original reason was a concern about having enough .05 x 3 strips to do all four boats, but as time passed that became moot (see below). Actually, I kind of like the contrast. I bypassed the winch, which in the pictures of the boat makes it look kind of messy to my eye, so I just left it off. I'm all for visual appeal vs. historical accuracy. The instructions call for the gunwale to be yellow, but I used red to give some "snap" to the look of the launch. I left out the oars, which didn't paint well, and the rudder piece, which is supposed to be stored in the boat when not in use -- and I just didn't want to junk it up. Pulling back to the boats overall -- I have decided to just build one more, the cutter. It's a perfect size to fit on the rear davits, and I want to hang a boat off those davits on the "display" side. In addition, if you build the launch, barge and pinnace, when you mount them on the skid beams side by side, you obscure all the nice detail below. I kind of like the look of just one boat on the skid beams, so I mounted the launch, finished positioning the hoists, and that's what you see here. Regards, David

- 218 replies
-
- 4
-
-
- Victory
- Caldercraft
- (and 1 more)
-
Thanks, Zappto
-
Thanks, Bob
-
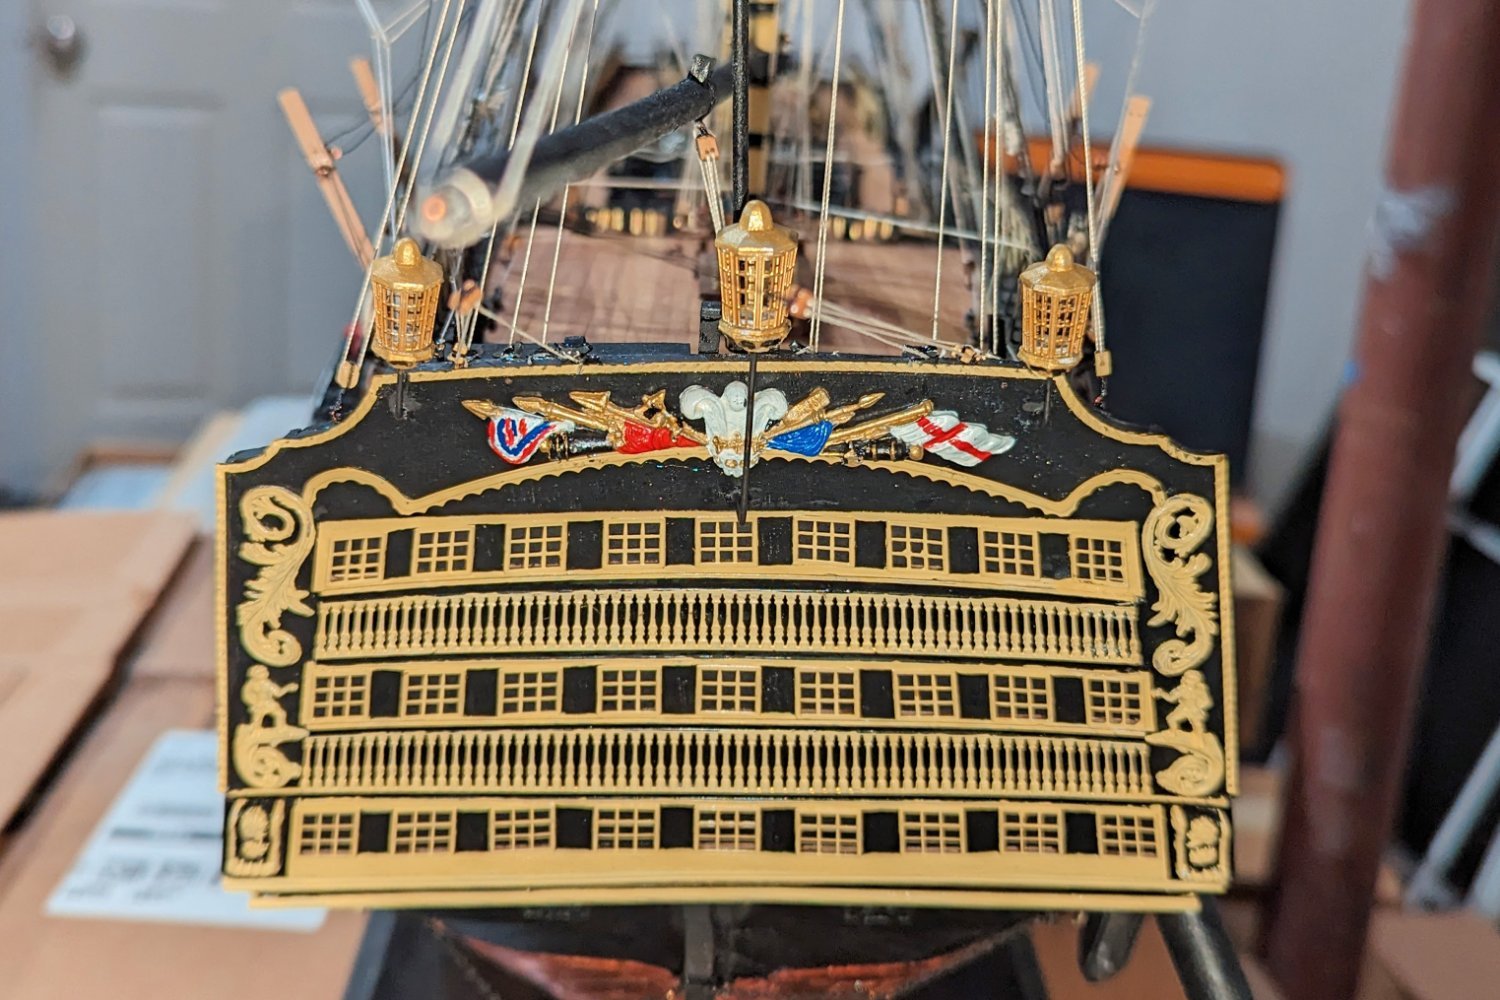
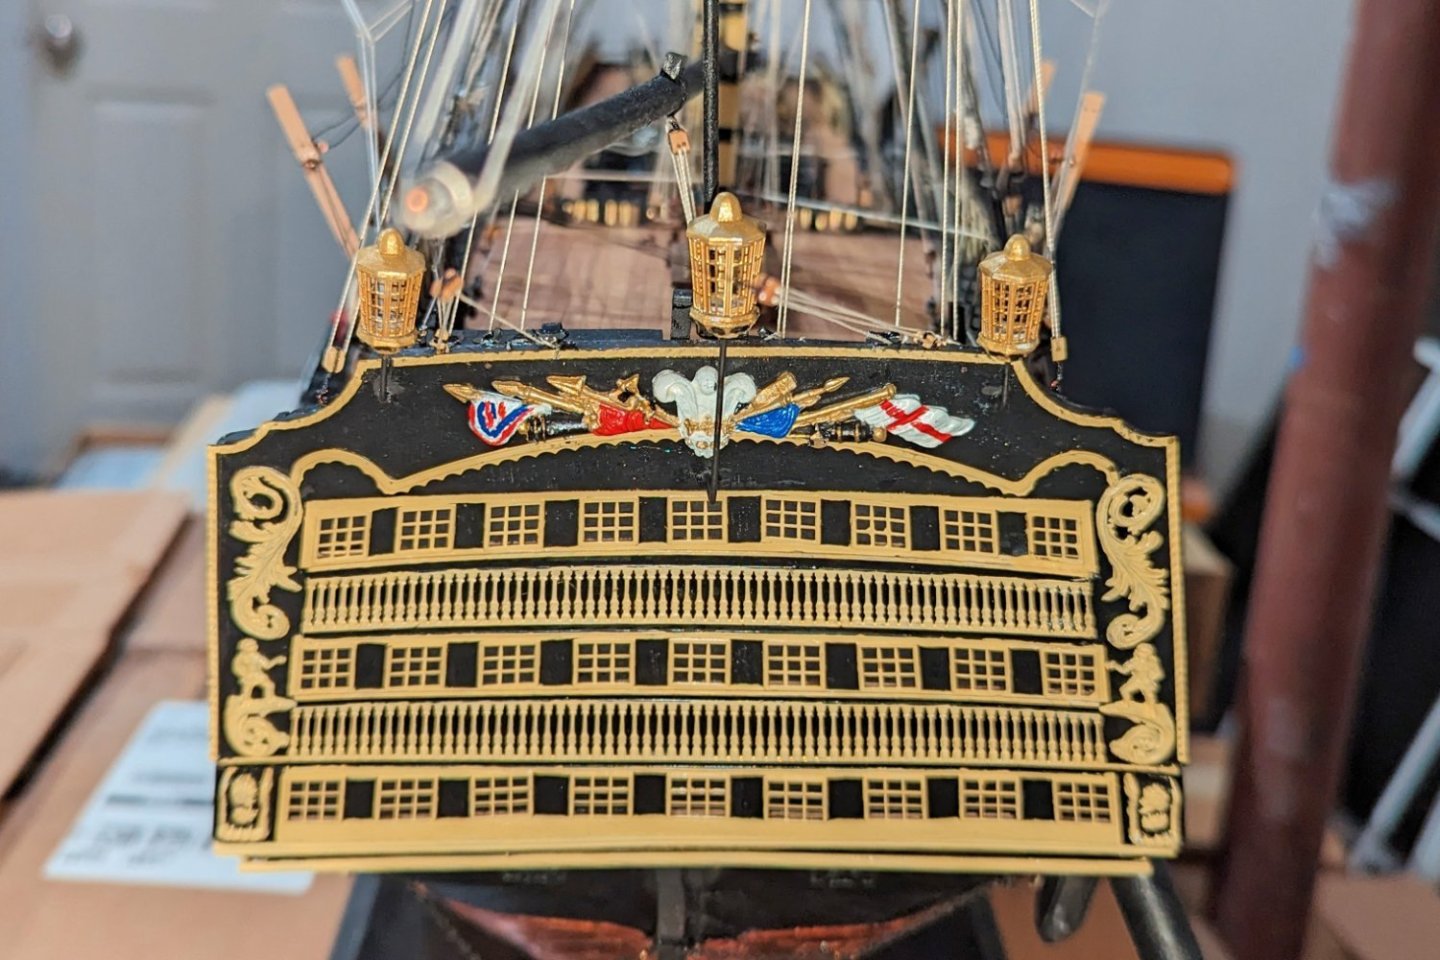
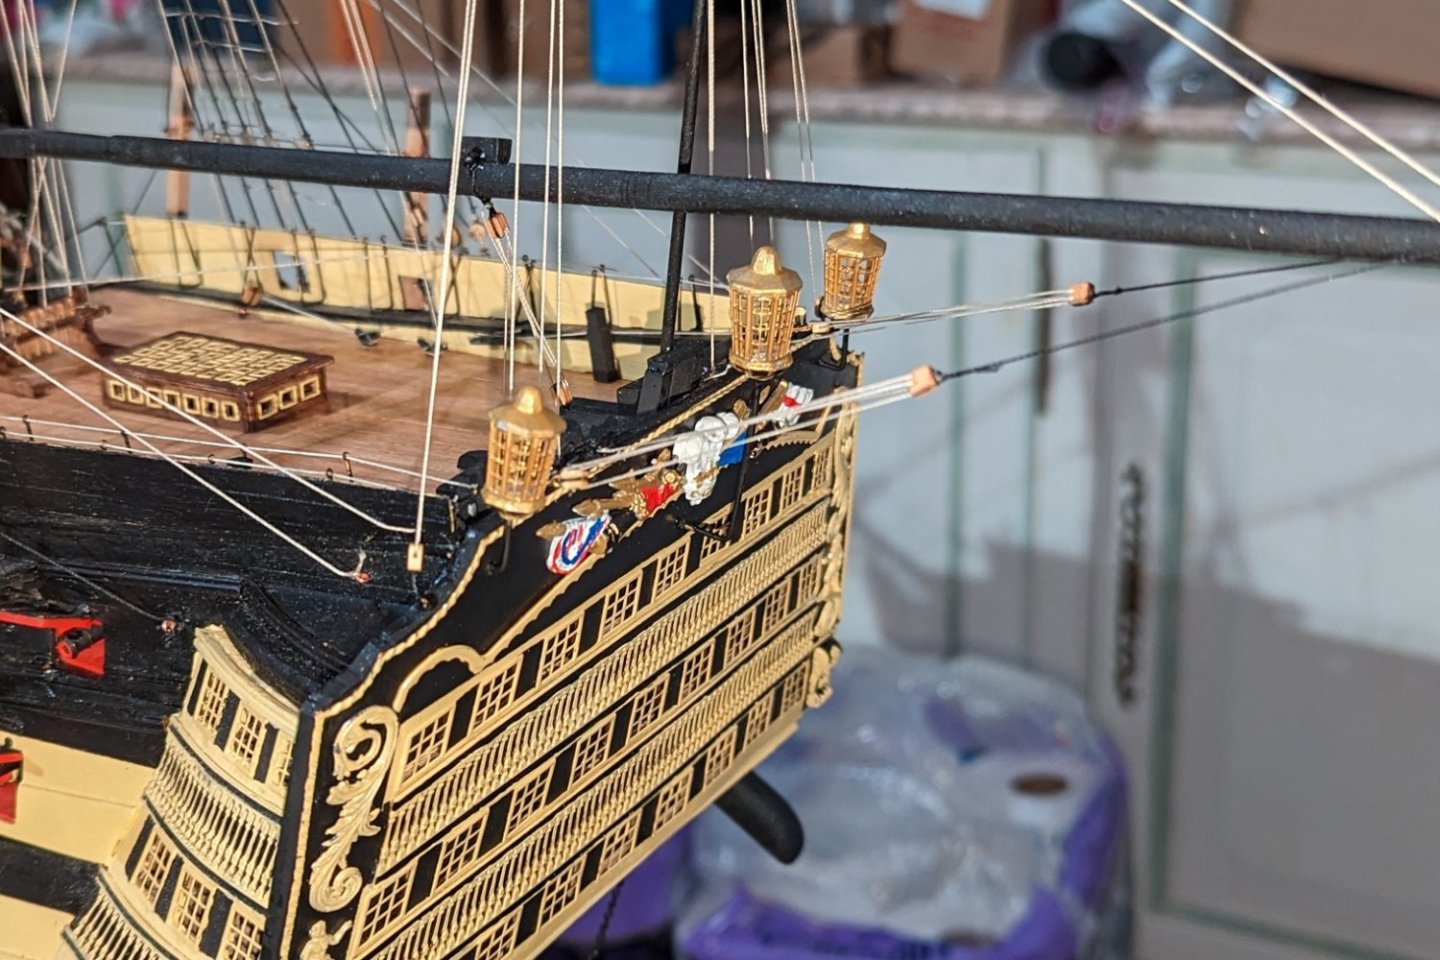
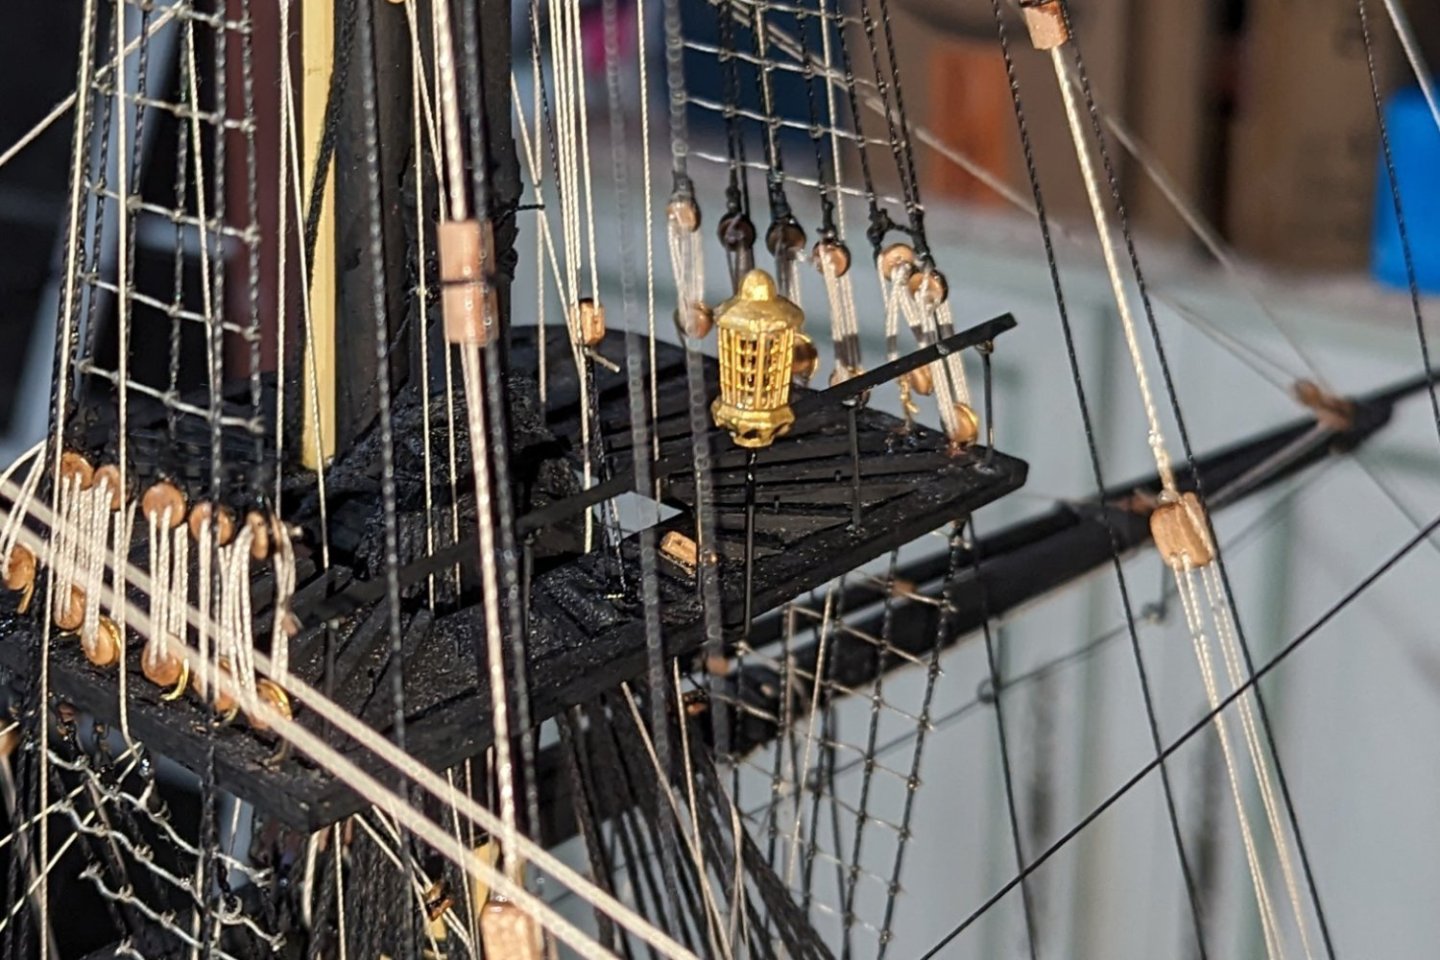
Something of a milestone here. I haven't finished the project yet, but I have finished all of the work on the ship itself (except for adjusting the davits). What remains is building the four small boats. I started this ship in June, 2021 -- so at 2 years one month (and not yet quite finished) this is my longest build. Pictures below show the stern and main mast lanterns. I also got the ship off of the temporary cradle and onto brass mounting columns. But it's a really HEAVY ship, and had too much lateral sway, so I added two small wood columns under the hull and now it's solid as a rock. A couple of pictures below showing that. Regards, David
- 218 replies
-
- 13
-
-
-
- Victory
- Caldercraft
- (and 1 more)
-
No, I looked all over. And even weirder now that I see your totally logical two sheets of four. Regards, David
- 218 replies
-
- 1
-

-
- Victory
- Caldercraft
- (and 1 more)
-
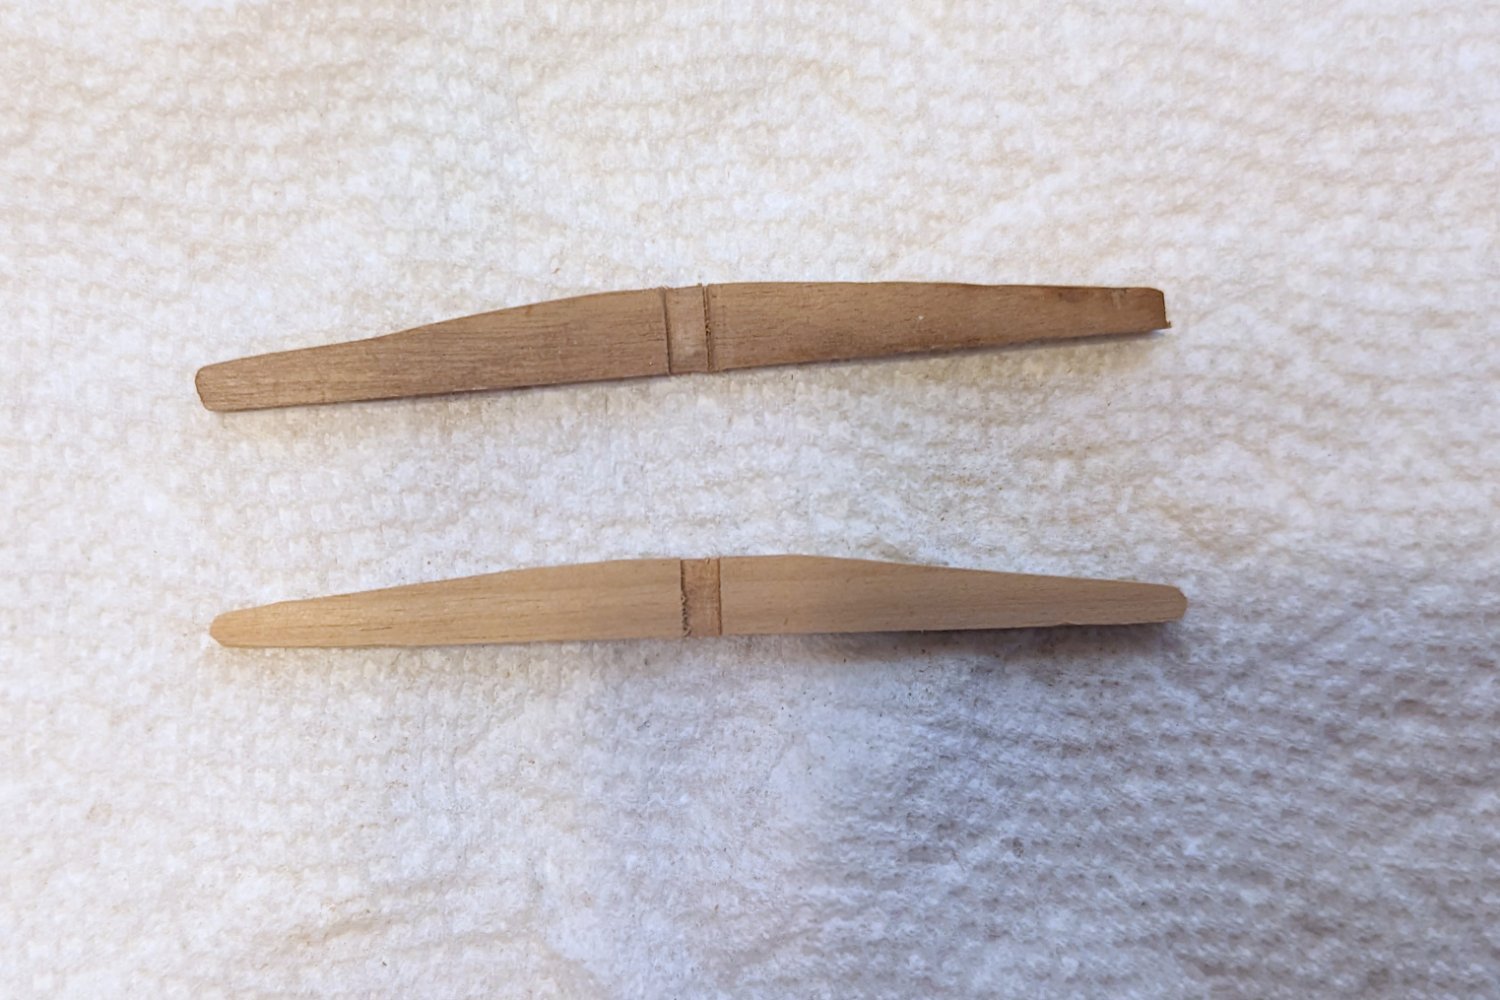
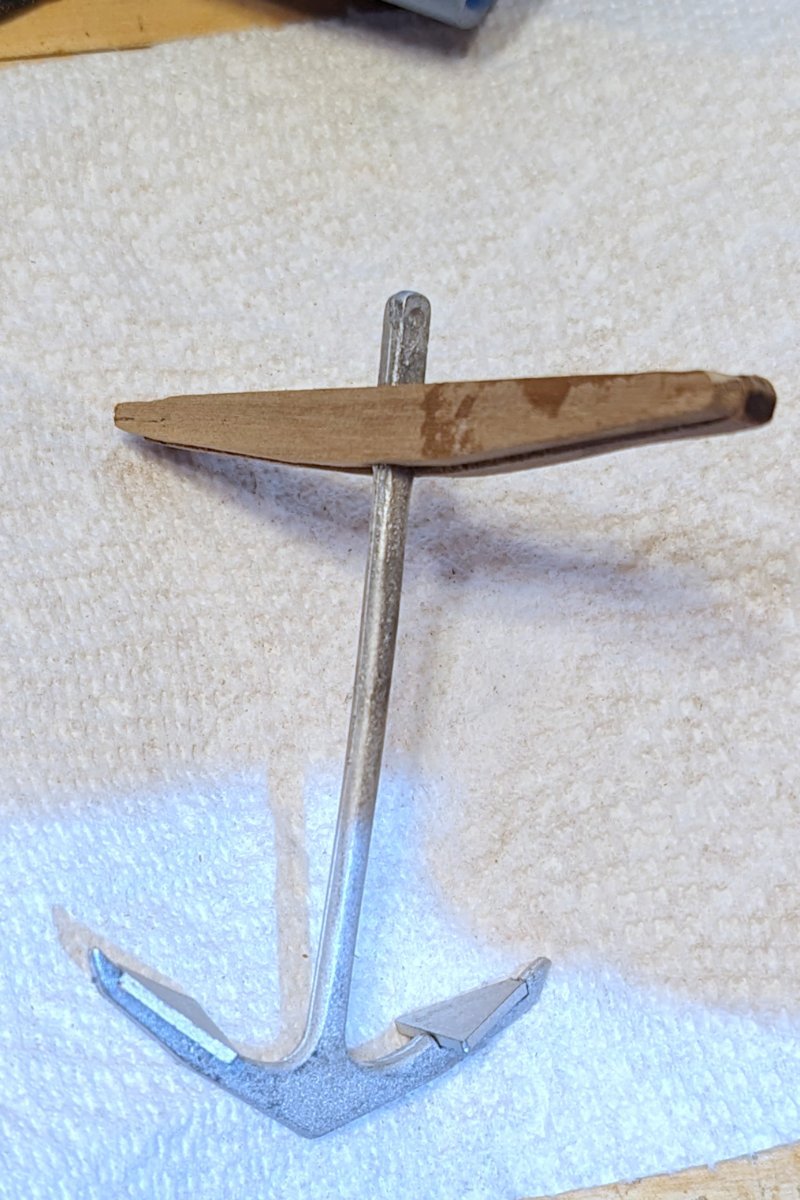
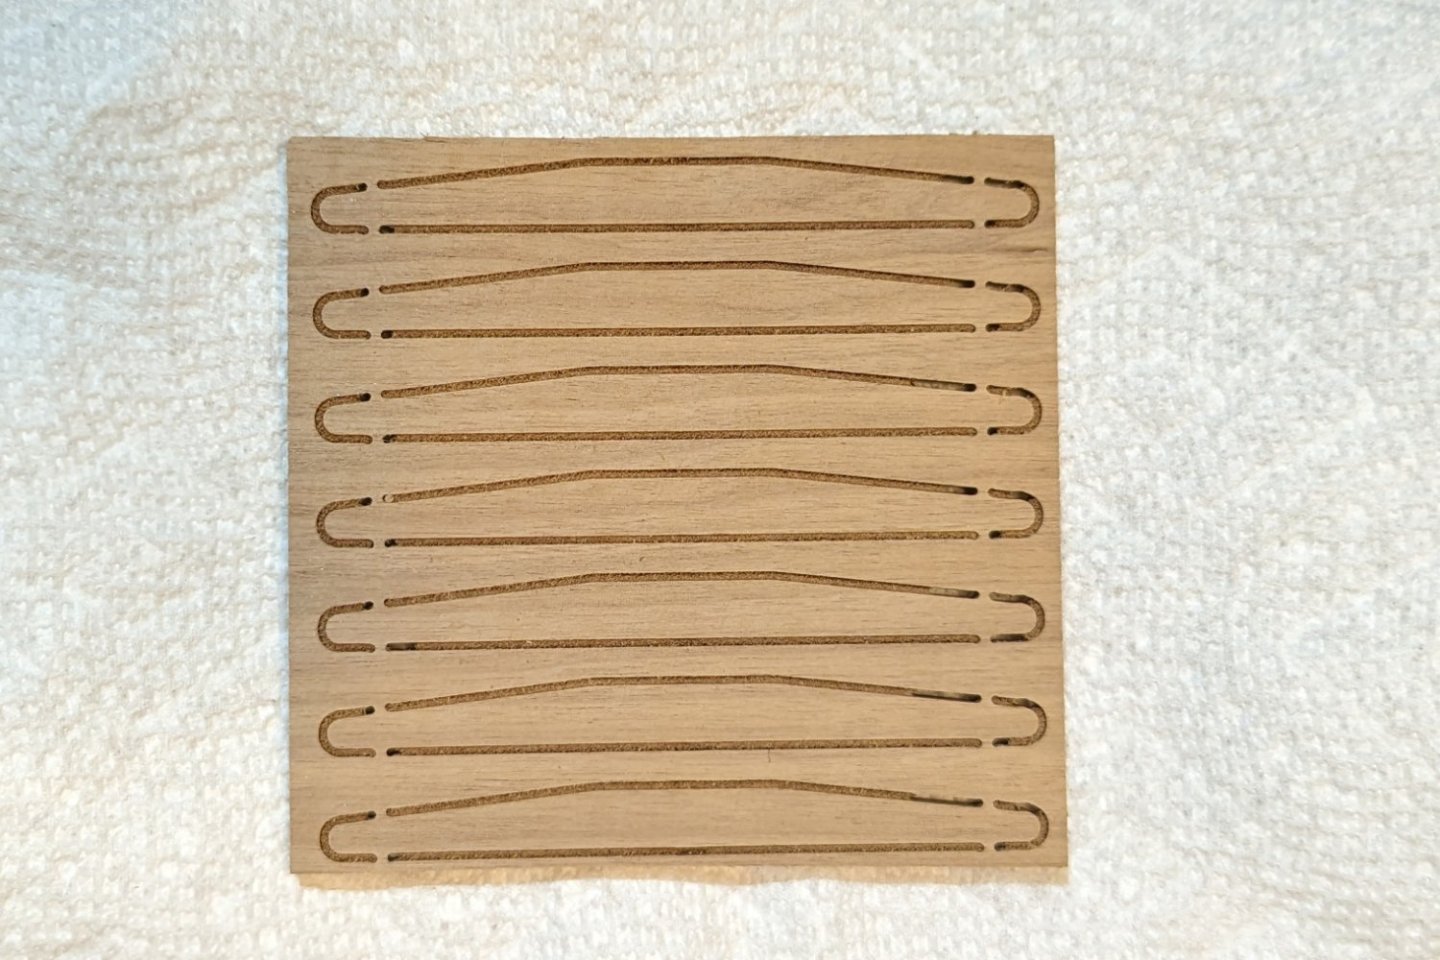
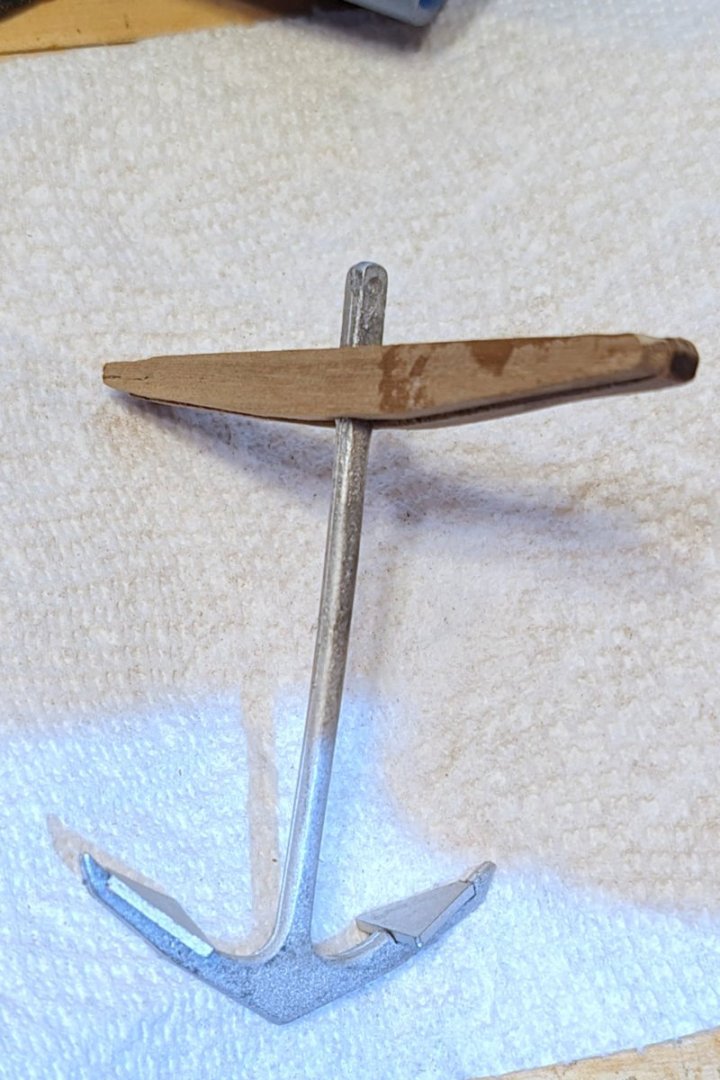
Something odd in my kit. When I went to get the anchor stocks -- 8 needed -- there were only 7 in the wood sheet. There isn't an eighth anywhere. The parts book says 8. But curiously, there is no drawing of that wood sheet in the book. If you look below, you will see a finished sheet with even sides and only 7 stock halves. Really, really odd. So I had to make one, which I did out of a scrap piece of the 5mm walnut sheet, sanded down to 4mm thick and then shaped. I have since sanded the mounted stocks you see below, and now have painted them black (no picture here of that), and you can't tell which one has the handmade stock. So all's well that ends well -- but really odd with that finished sheet and missing one stock. Regards, David

- 218 replies
-
- 5
-
-
- Victory
- Caldercraft
- (and 1 more)
-
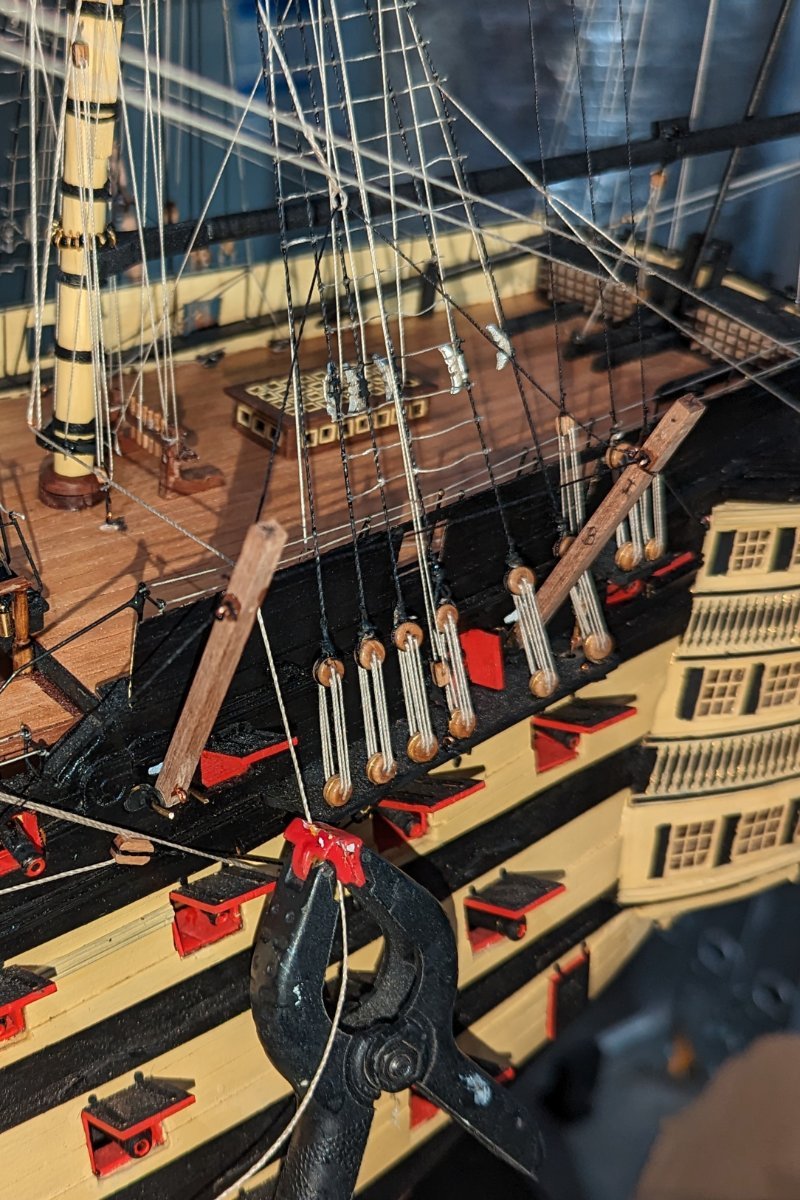
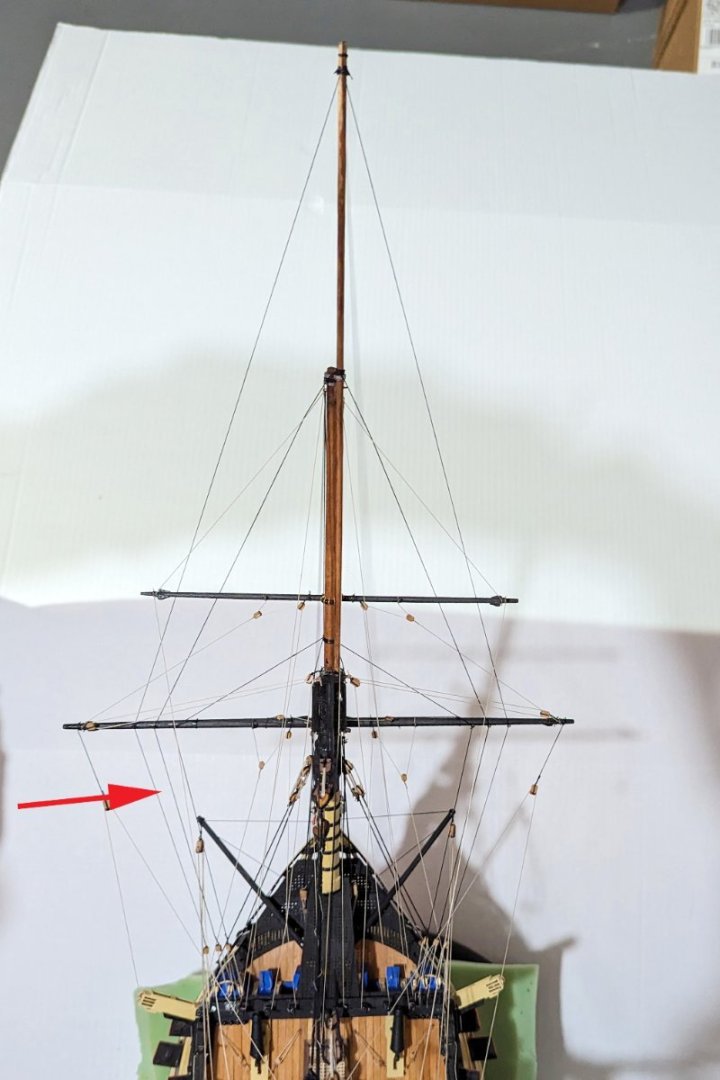
Finished rigging the bowsprit guy lines. The red arrow shows them running up in parallel from the beakhead to the spritsail yard, and then diverging to different points on the sprit. The manual wants you to use a single thread for both sides of the black line, which requires you to seize a block into the attached line near the beakhead, and which would make precise alignment difficult (or impossible for me). So I started at the beakhead end with one line per side, got the blocks lined up (with a slight slant to the stern to match the direction of the guys), and then attached them to the appropriate points on the sprit. Not sure why the manual doesn't do it that way. OK, getting close now. What's left for the main ship is the anchors and the lanterns. Then I will build the small boats. Regards, David
- 218 replies
-
- 5
-
-
- Victory
- Caldercraft
- (and 1 more)
-
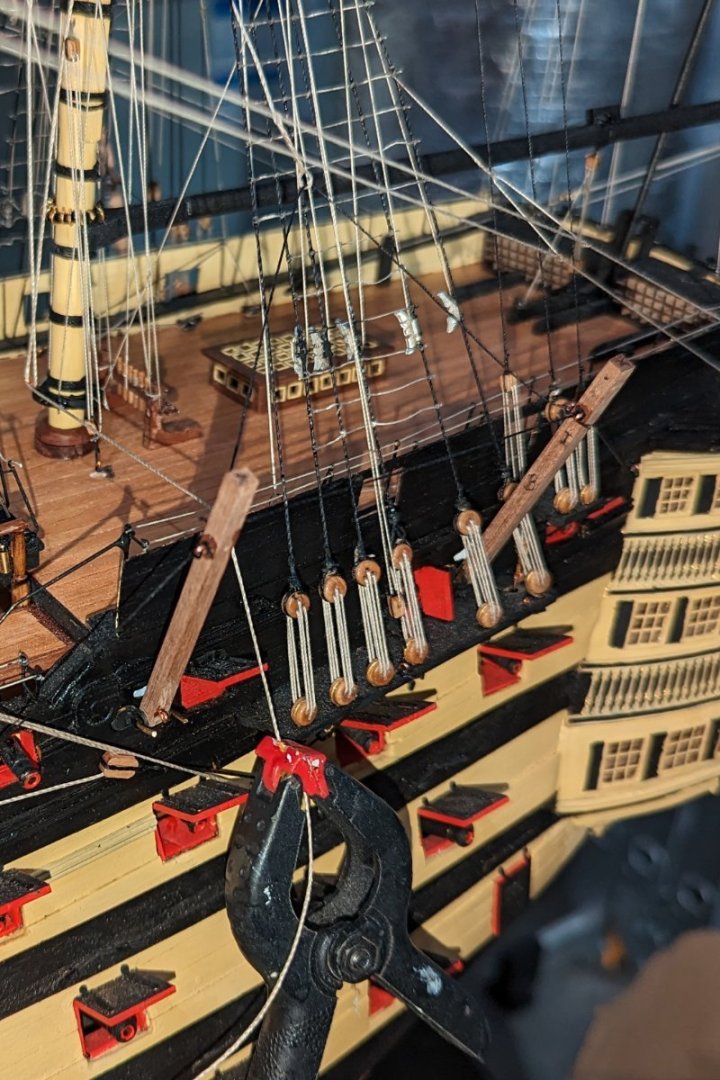
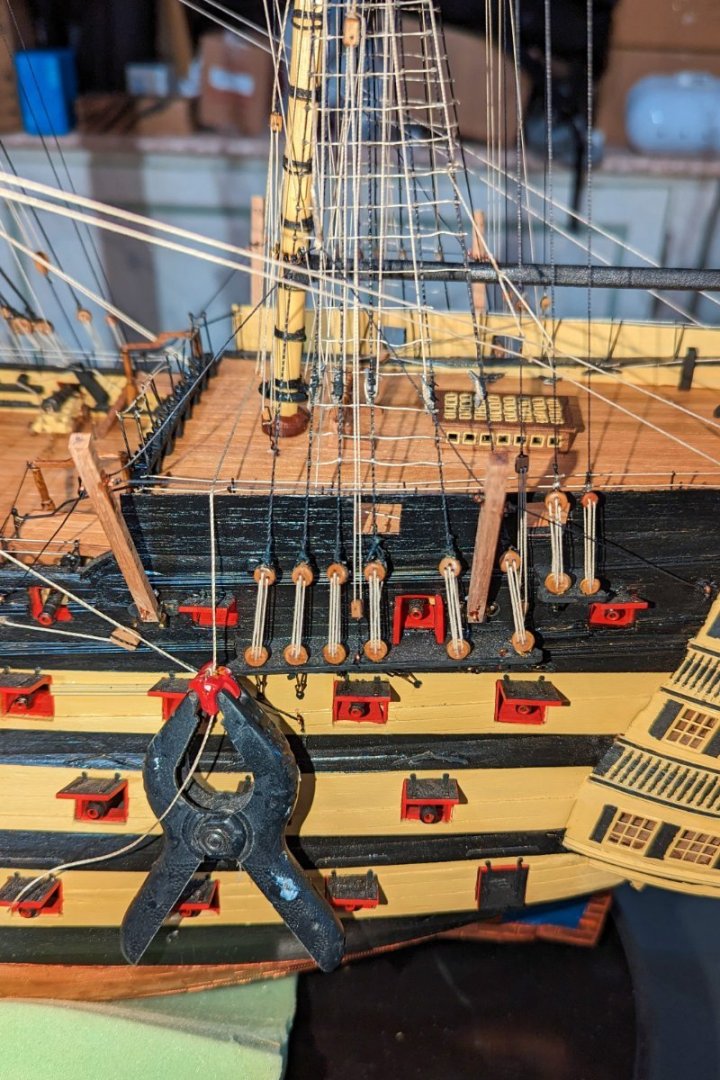
Quarter davits done. A few comments on these: I have not yet fixed the running end of the lifts, and that's because I won't know how far out I want them to swing until I build the boats and decide which ones I want to hang on the davits. The plastic clip you see provides some mild tension on the lift for now. I left them natural walnut (vs. painting black) to provide some interest and make them more visible. They have not been varnished yet, because when I do that I will probably cause the hinges to seize, so again I need to wait until I have the angle set and the boats hung. So they look a little rough right now. There will be block & tackle for the boats -- I'll add that when I hang them. Regards, David
- 218 replies
-
- 7
-
-
- Victory
- Caldercraft
- (and 1 more)
-
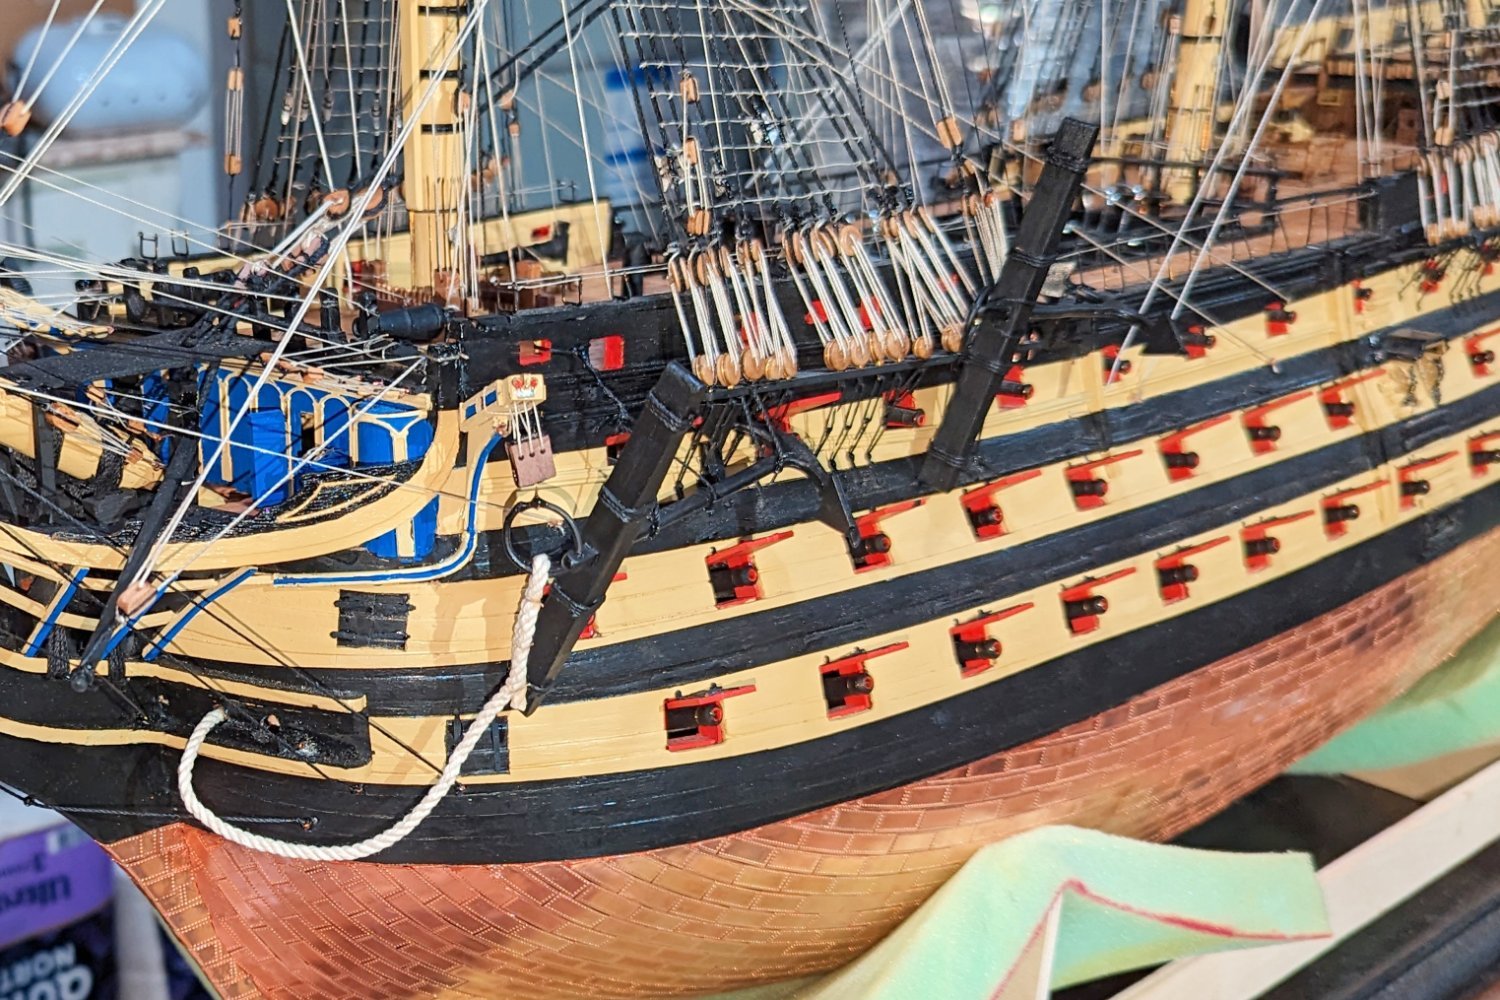
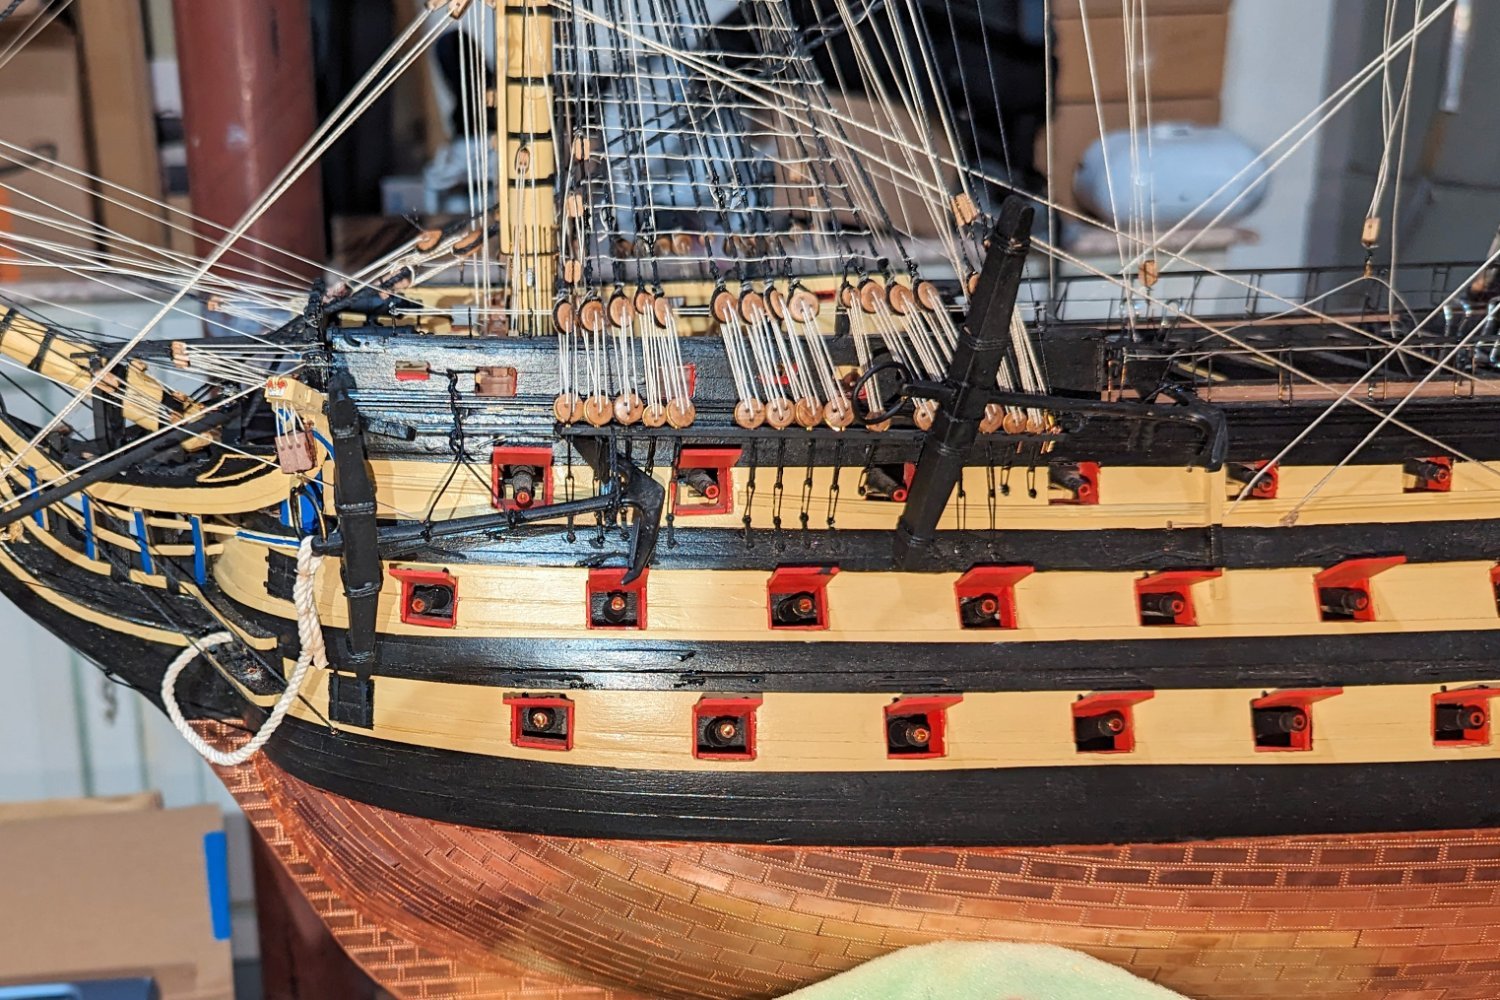
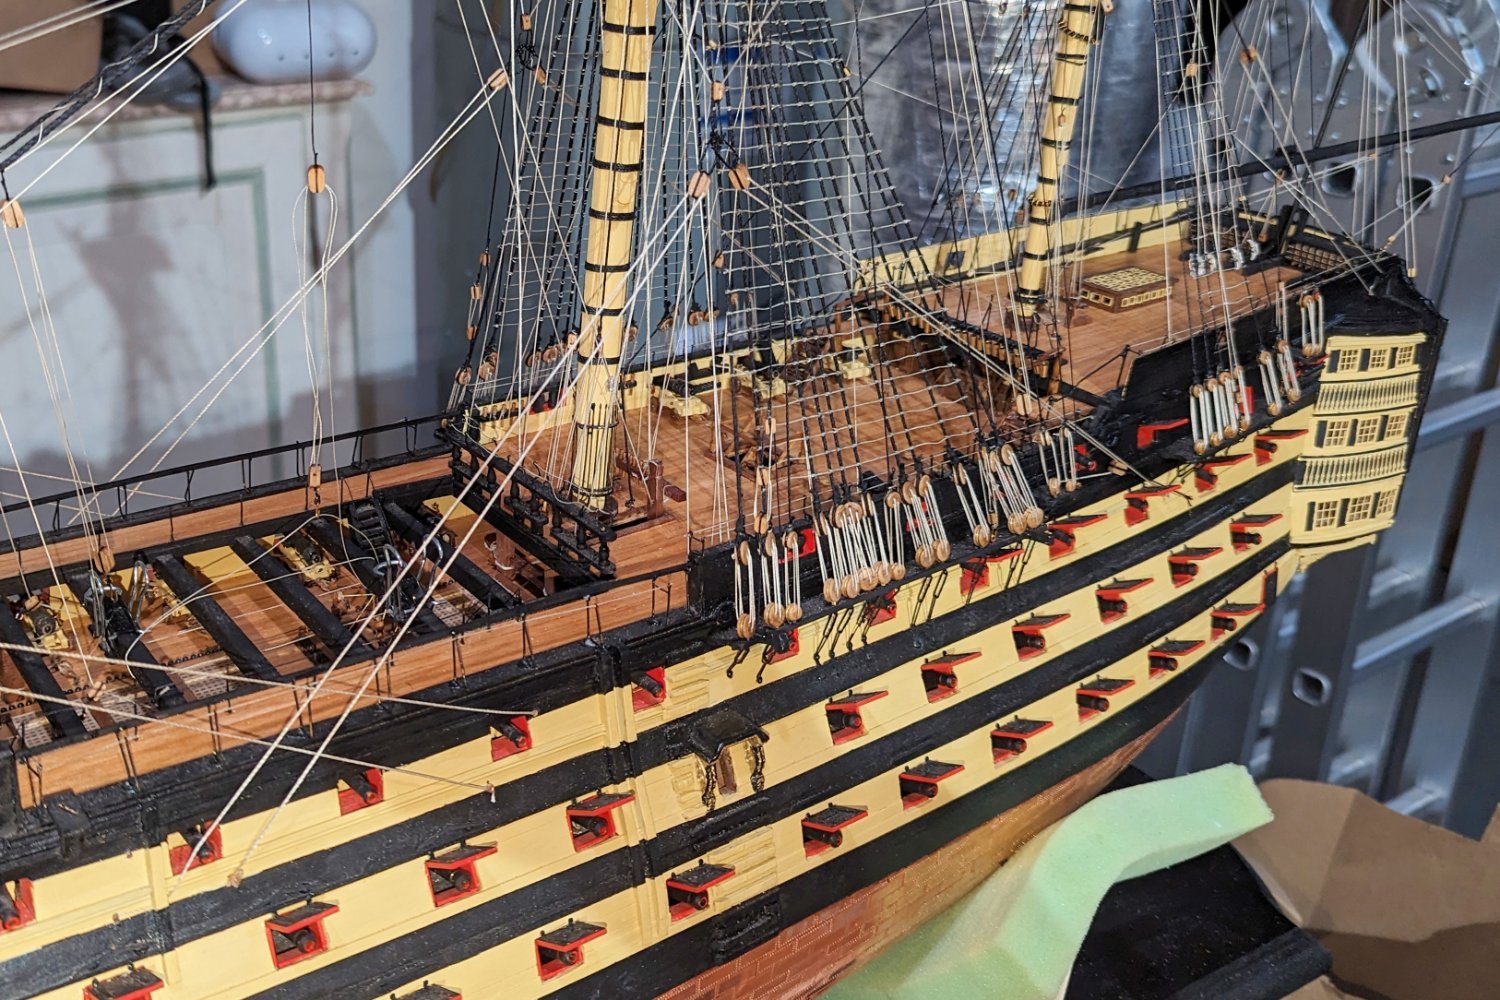
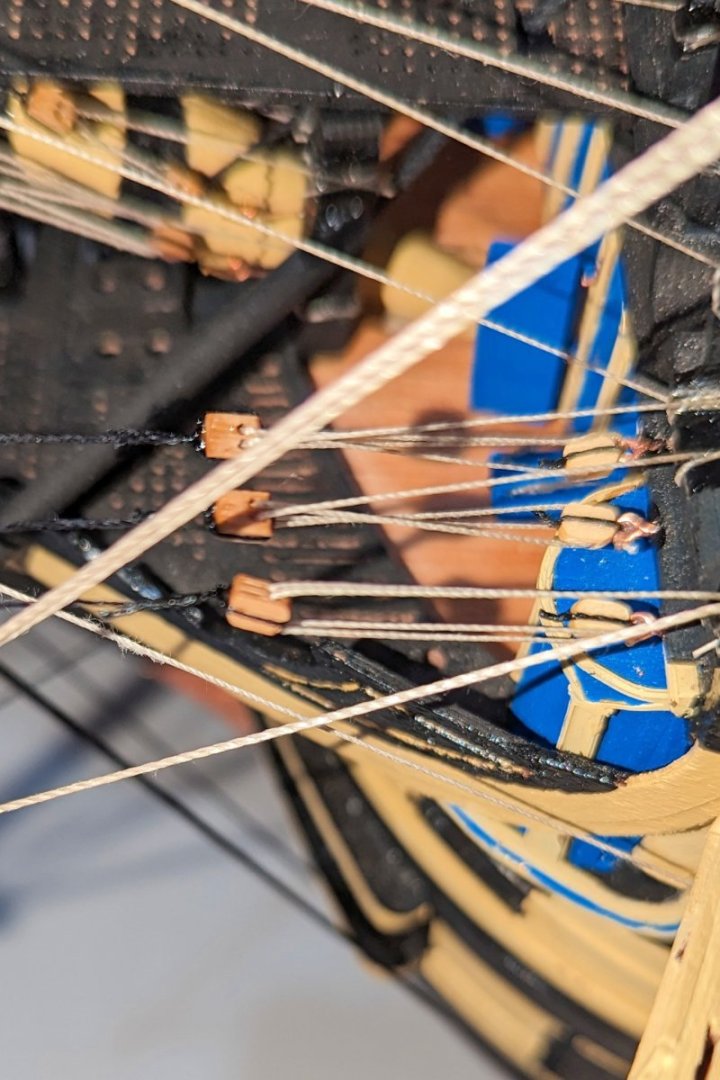
Fore and main cluelines, tacks and sheets done. Some of these go through holes in the hull and are anchored below the skids. It's super difficult to do that last, when you are trying to tension the lines. So I started there, got them anchored, and then rigged back to the eyebolts on the exterior of the hull -- and it's easy to tension there. Three points of tension have to be balanced at the same time. Regards, David
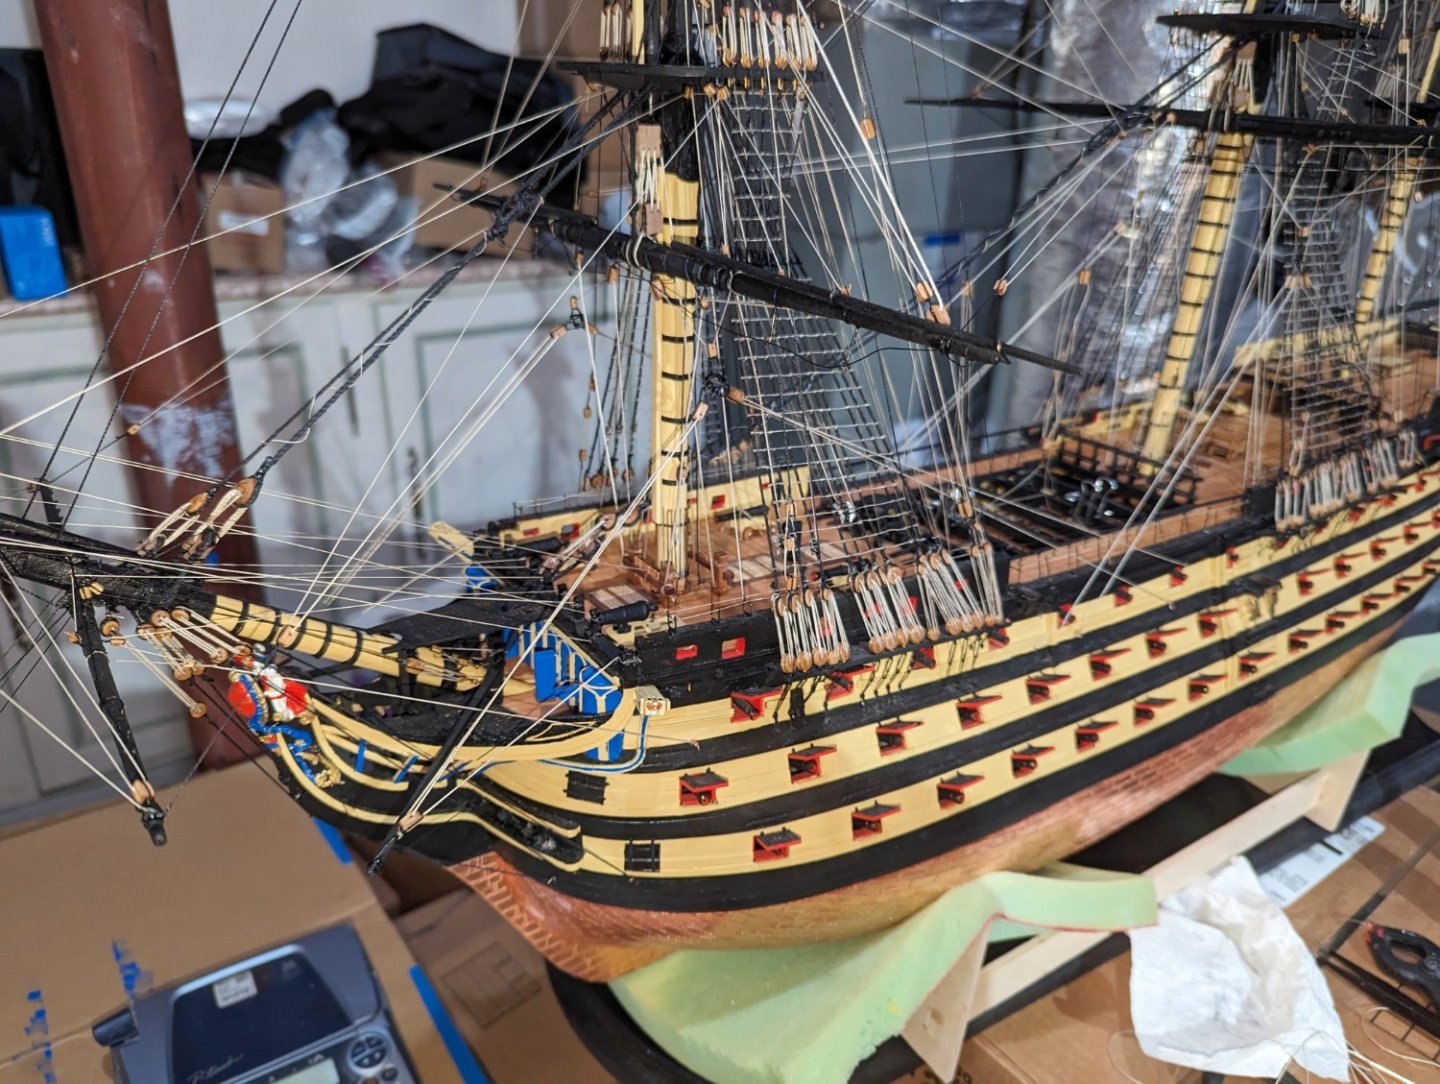

- 218 replies
-
- 9
-
-
-
- Victory
- Caldercraft
- (and 1 more)
-
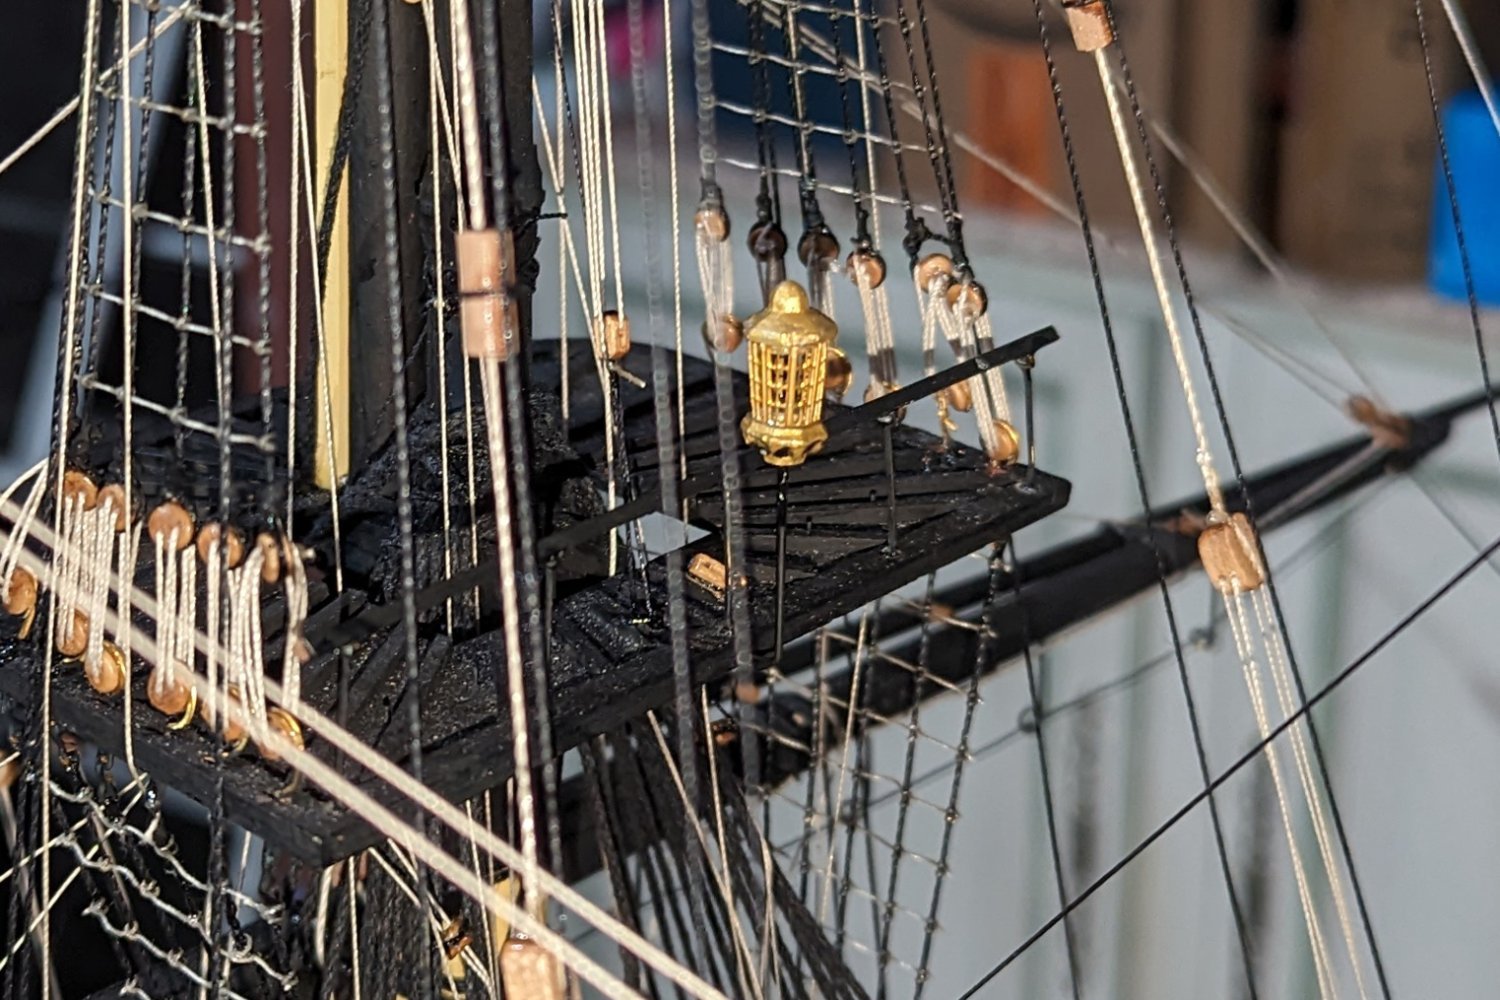
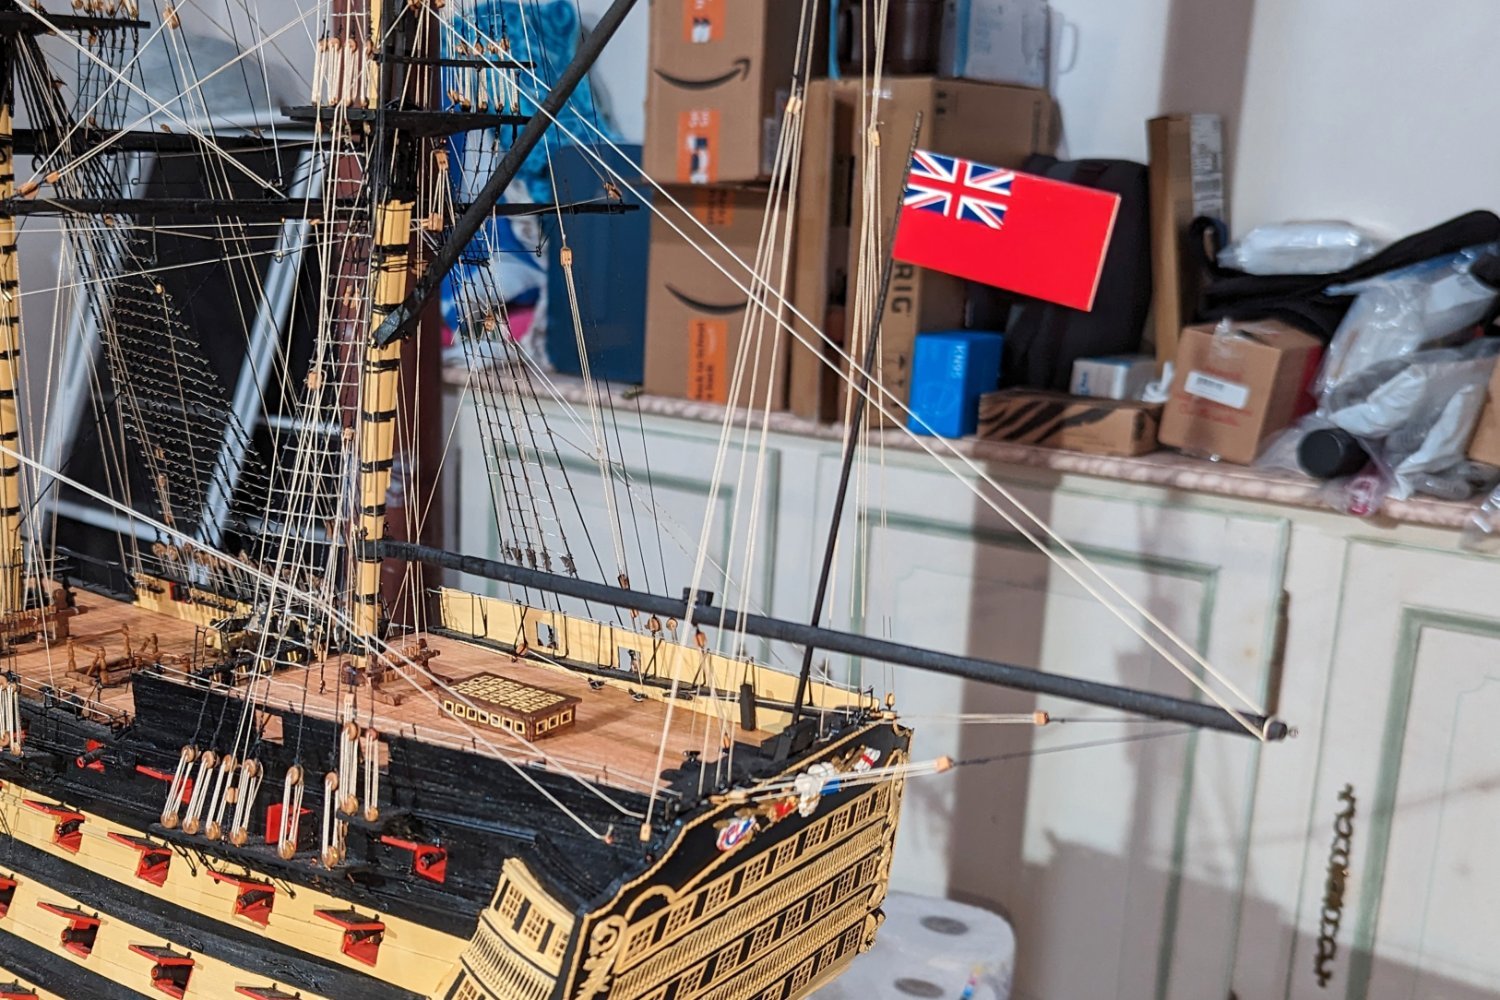
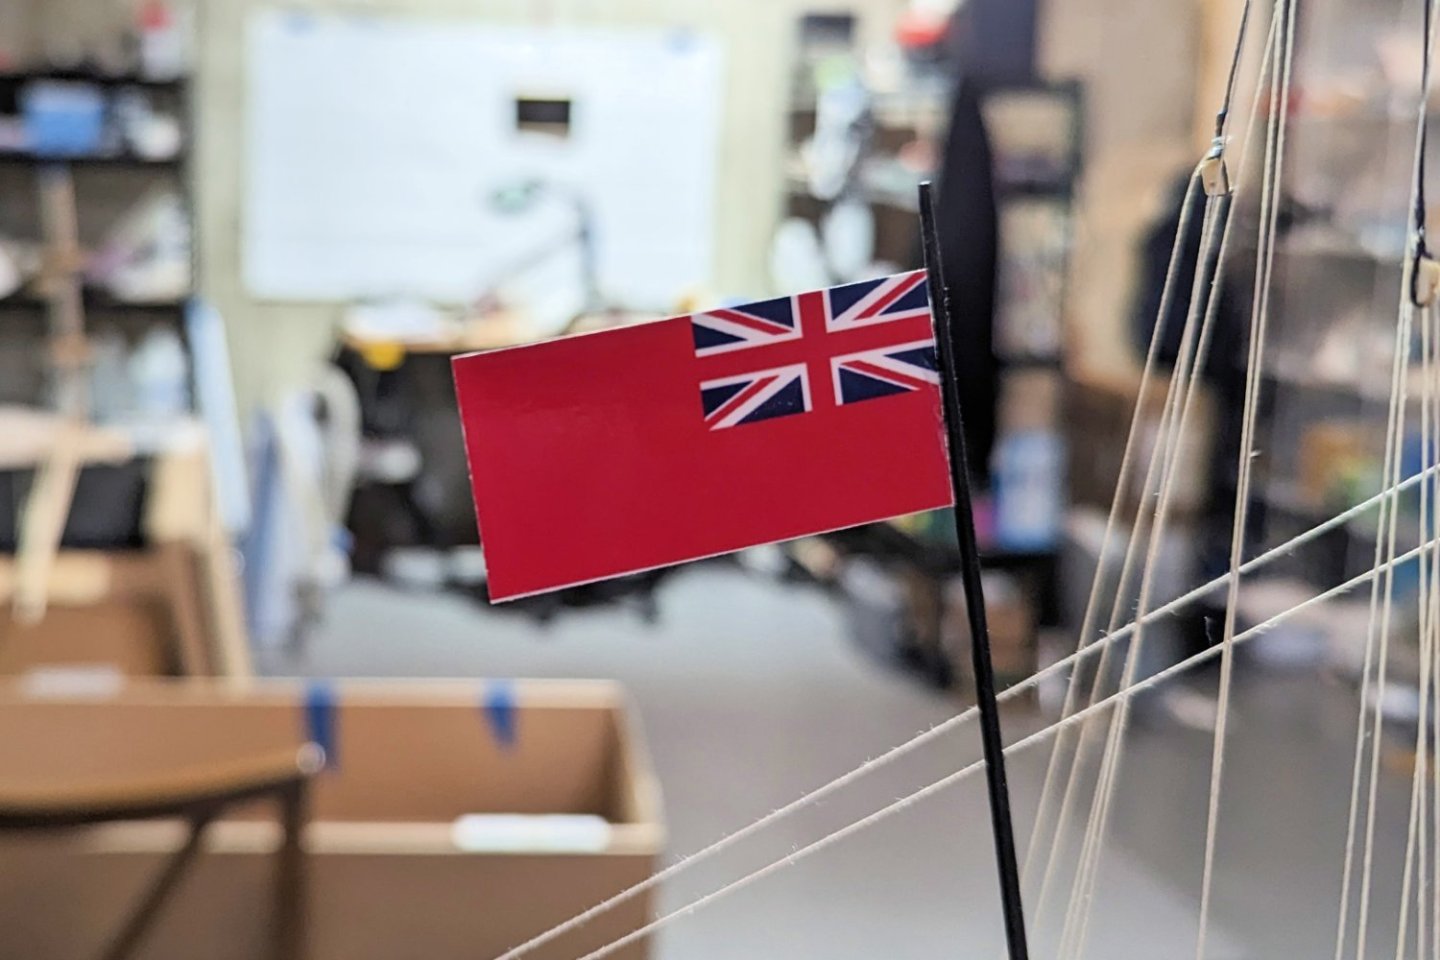
Driver boom built, mounted and rigged. Also the jackstaff for the ensign. Regarding the ensign: there are no flags supplied with this model, and I thought a small ensign would be a nice addition. So I researched British ensigns of that period, and found a good picture that I could download. I then used Photoshop to resize it, and also to do a "flip horizontal" on the image so that the backside would come out properly. Looks nice on the model. You may notice that the lanterns aren't on. I held off on that to avoid pranging them, but now that the boom sort of "protects" that area, I can add them at any time. Regards, David


- 218 replies
-
- 6
-
-
- Victory
- Caldercraft
- (and 1 more)
-
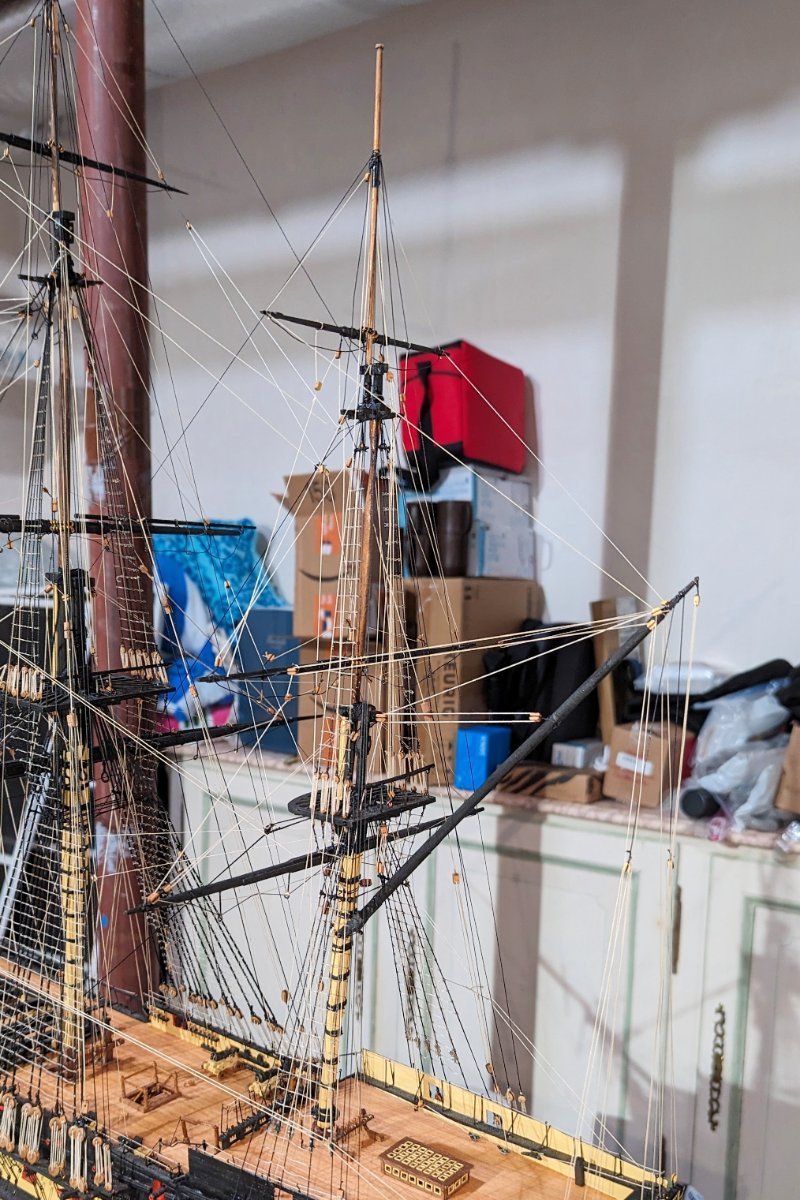
Finished building, mounting and rigging the Driver Gaff. One of these pics shows the gaff better, and the other one shows the rigging bettter. One comment: the instructions say to rig both the mizzen top yard and the mizzen topgallant yard braces before rigging the vang. I did the top yard brace because the angles put some downward pull on the gaff, but the topgallant brace would pull up. So after the top yard brace I rigged the vang, which puts nice downward pull on the gaff and also helps to align it side to side. Then the topgallant brace and I could put some tension on it because the vang anchored the gaff down. Just a small note for those who might be building a step or two behind me. Regards, David

- 218 replies
-
- 7
-
-
-
- Victory
- Caldercraft
- (and 1 more)
-
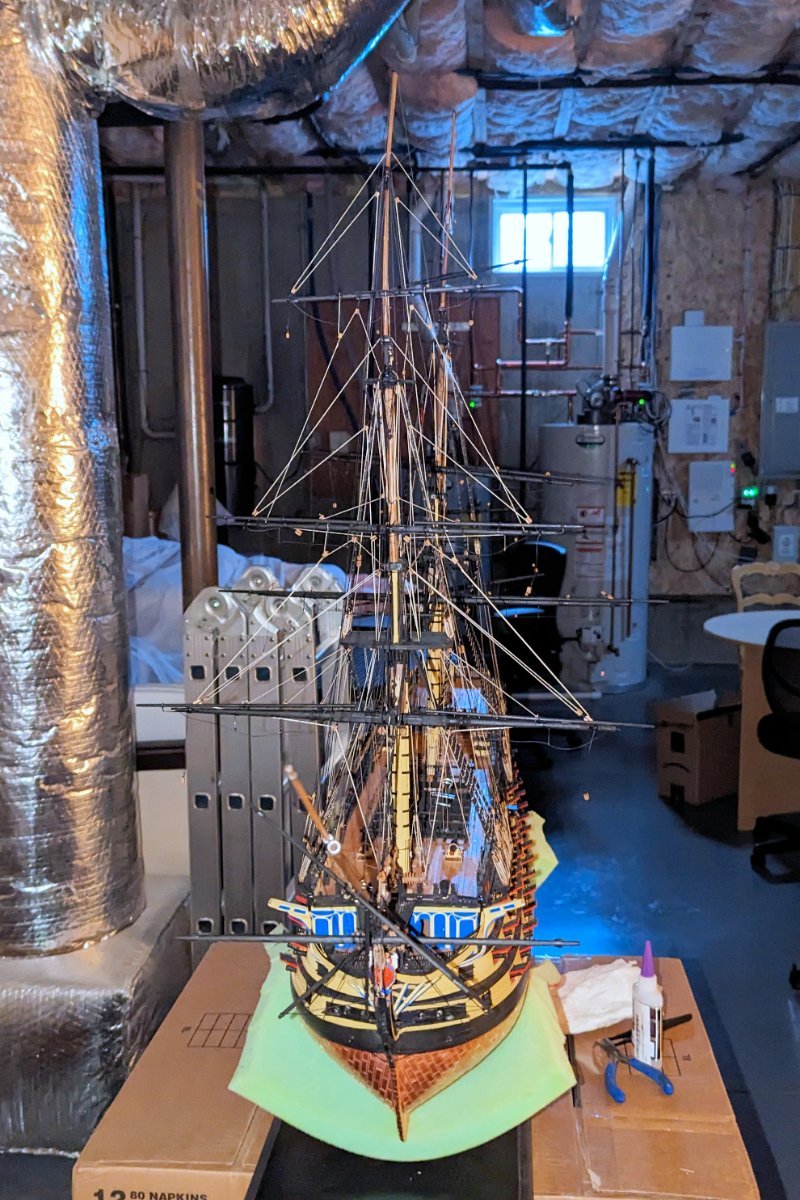
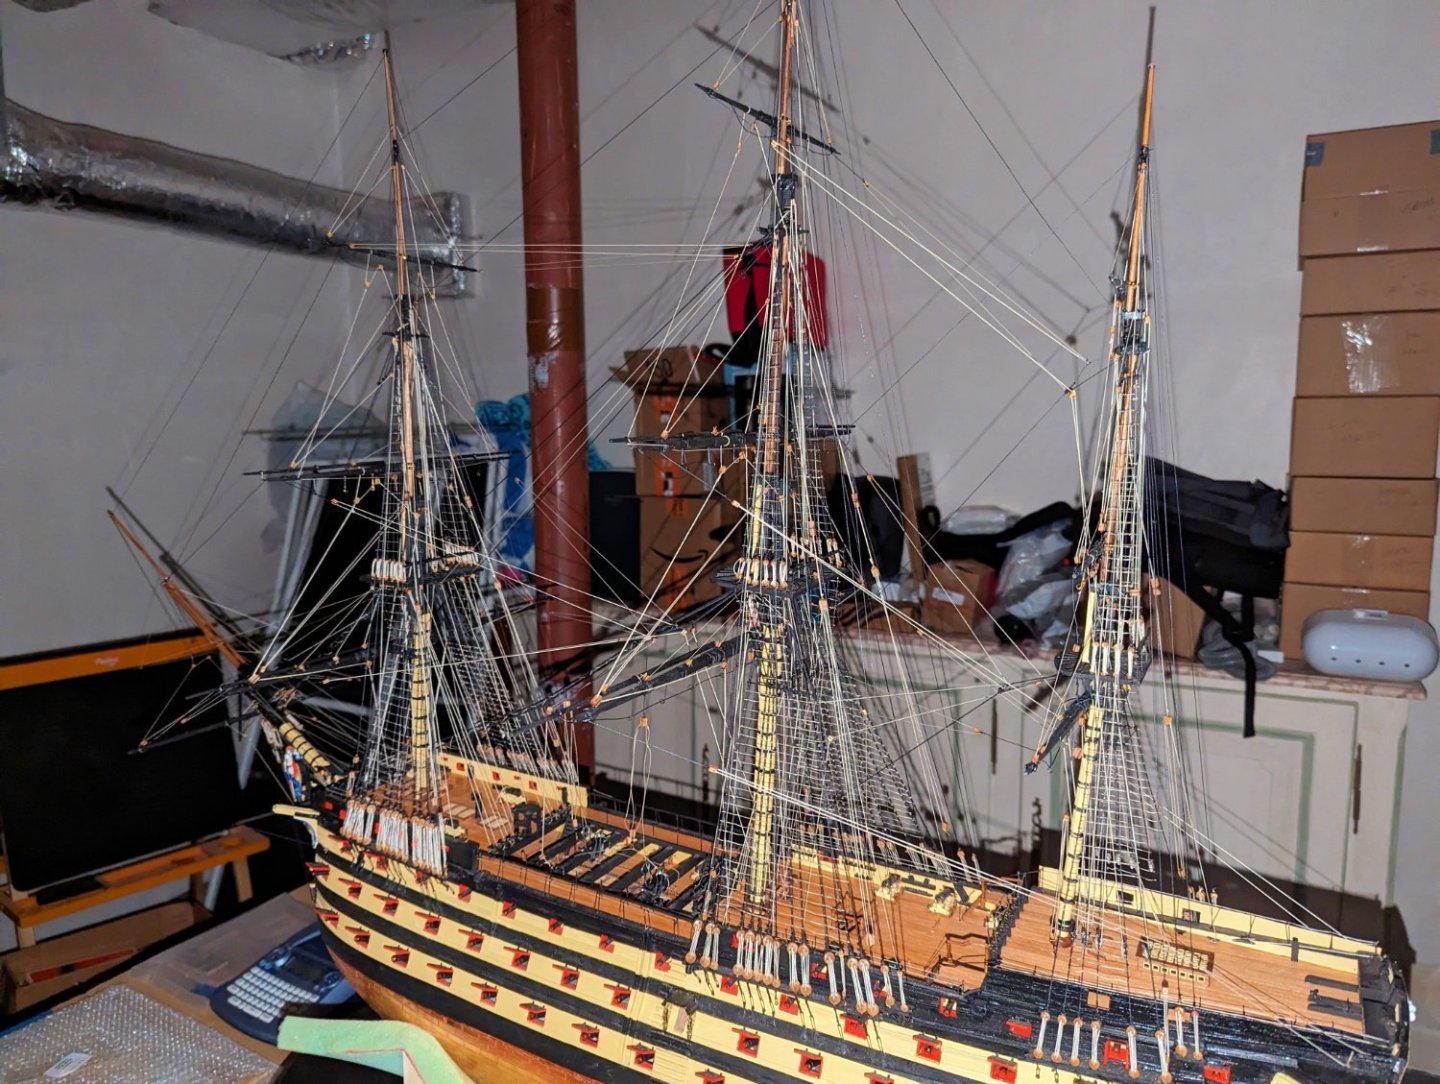
Braces now done. Next step is the boom and gaff, which look semi-complex to build and to rig. Regards, David
- 218 replies
-
- 8
-
-
-
- Victory
- Caldercraft
- (and 1 more)
-
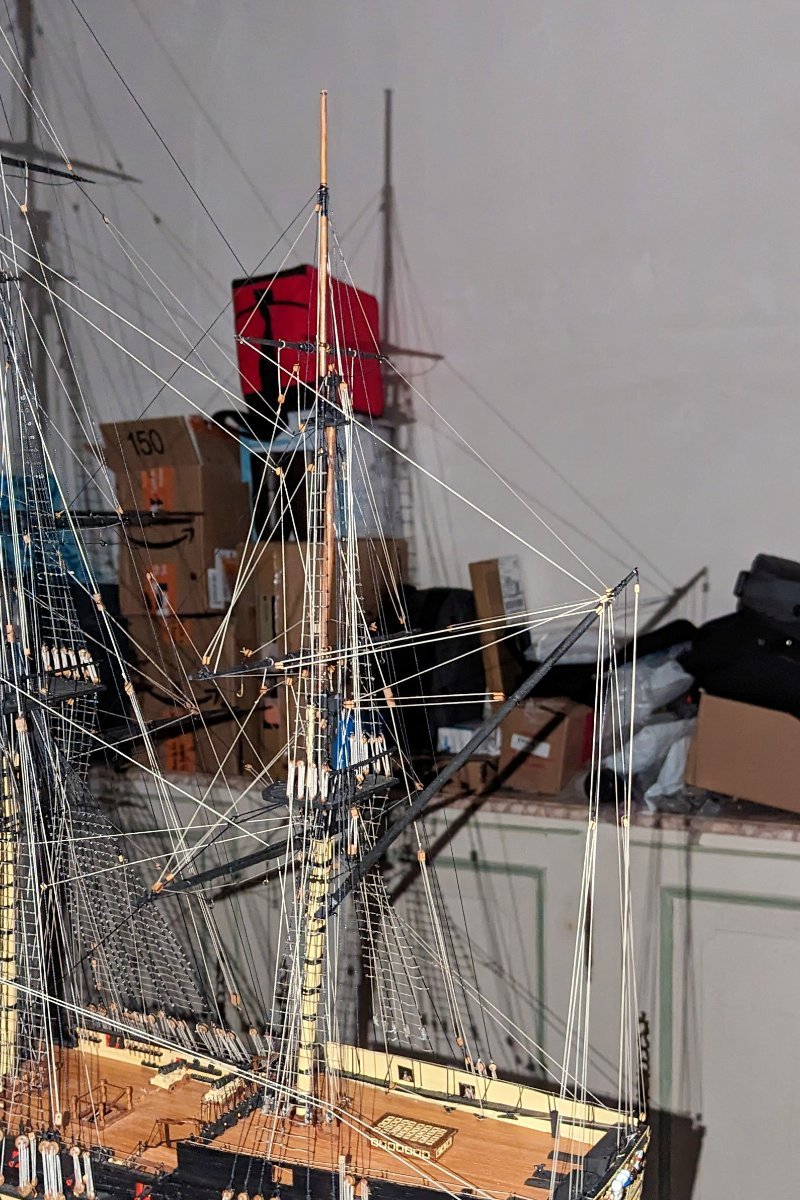
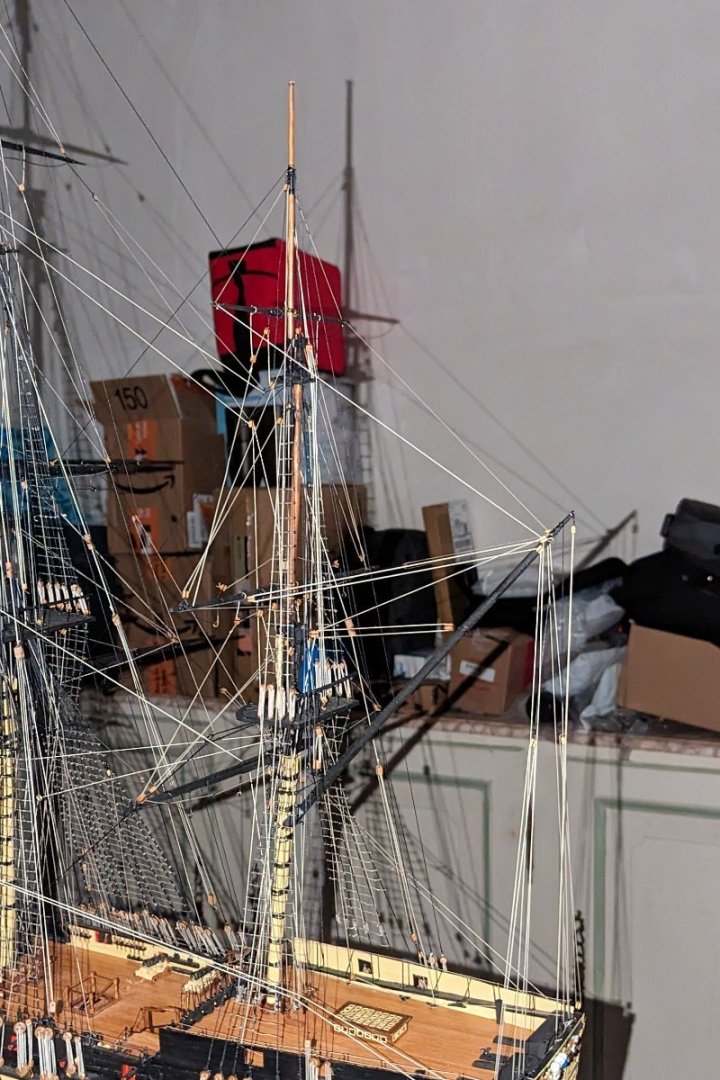
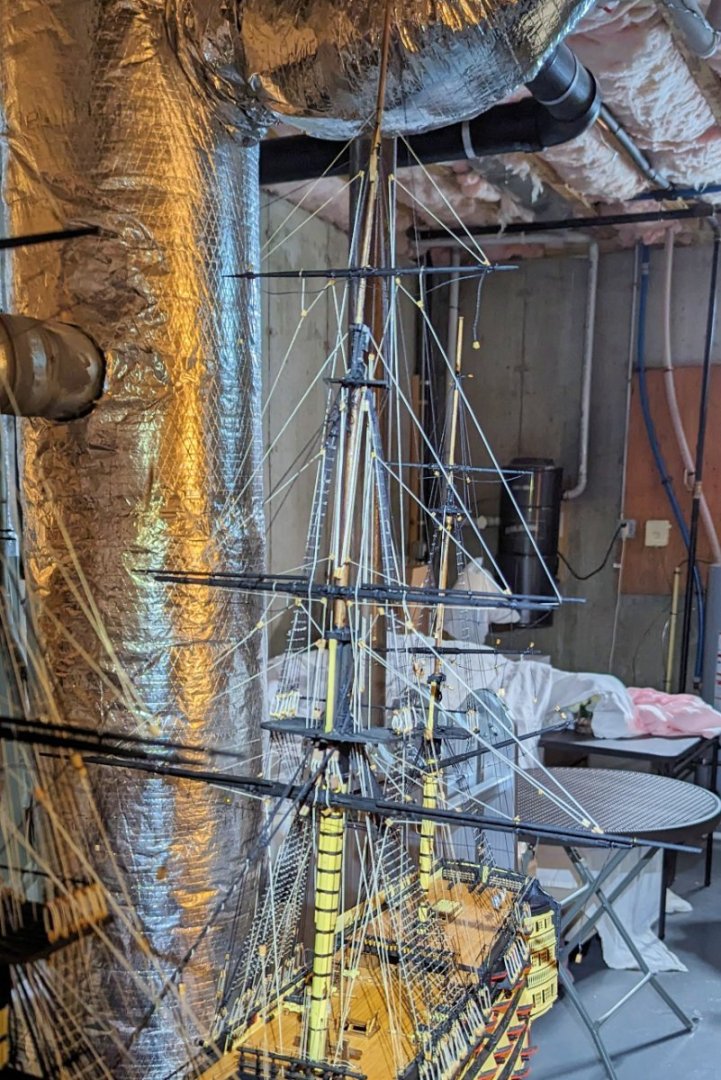
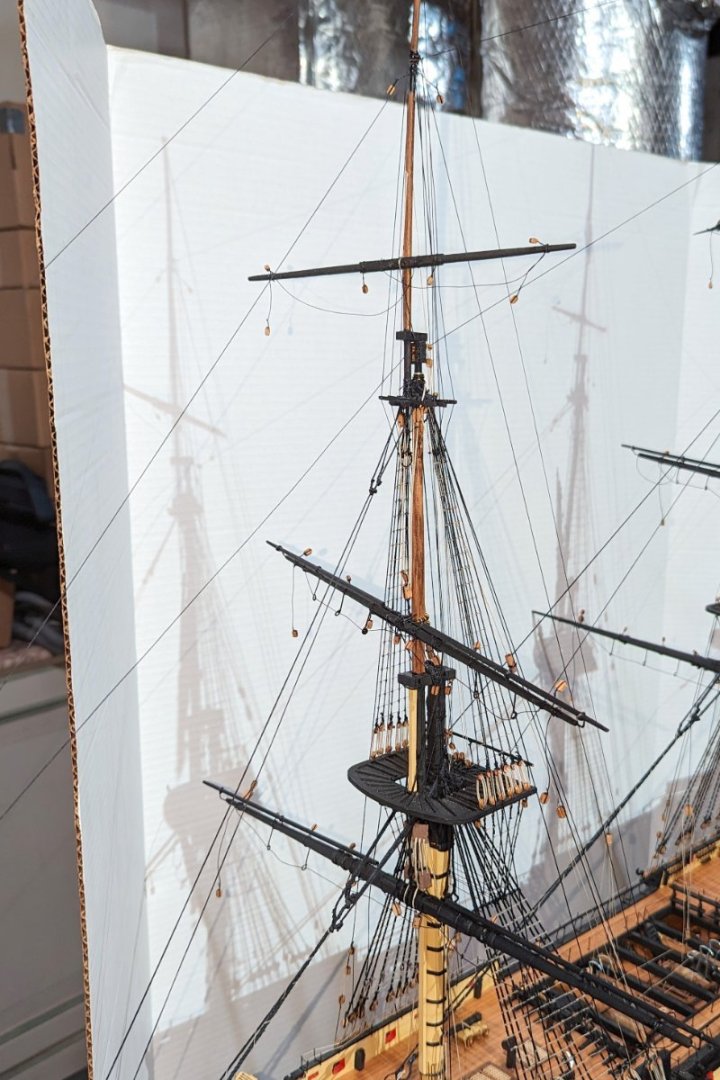
A note on the rather odd backgrounds you may notice in my more recent pictures. When I started building the yards, I needed to clear my workbench, so I moved the ship on top of some large boxes that contain case lots of household supplies -- something we started doing during Covid and have kept up. What I found was that I could get to both sides of the ship easily without having to rotate it all the time. The hull is just below chest level, so the masts and yards are at a perfect height when I'm standing up. So I bought a headlamp (mentioned earlier) to provide a good worklight in that area, and that's where I've been mounting yards and doing rigging. Works pretty well -- but it's why you see those odd "basement" backgrounds. Regards, David
- 218 replies
-
- 3
-
-
- Victory
- Caldercraft
- (and 1 more)
-
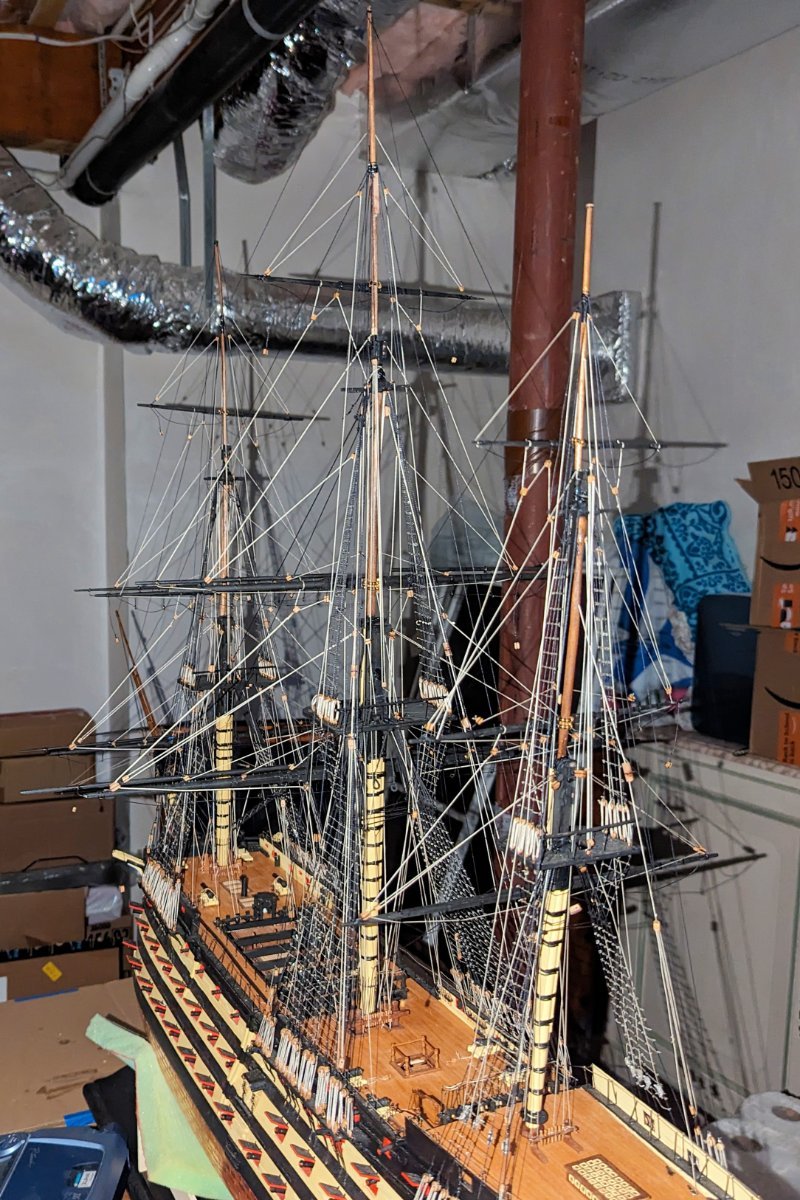
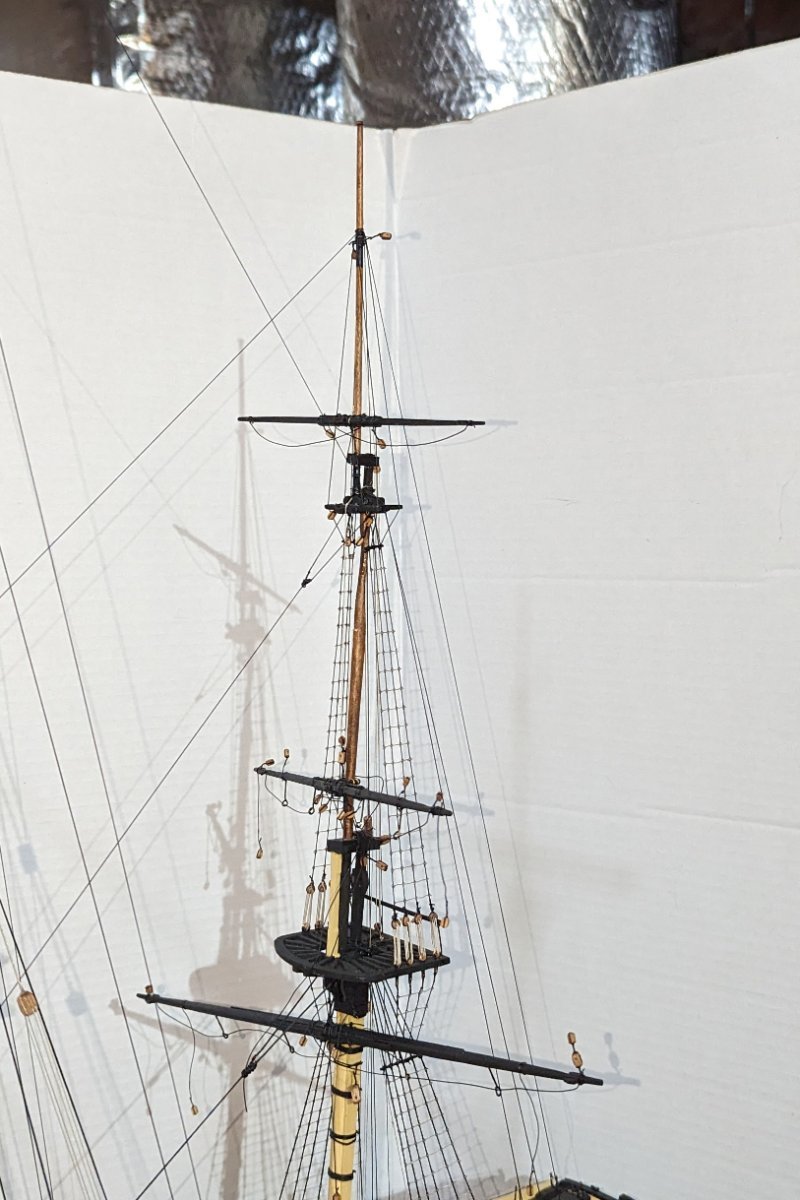
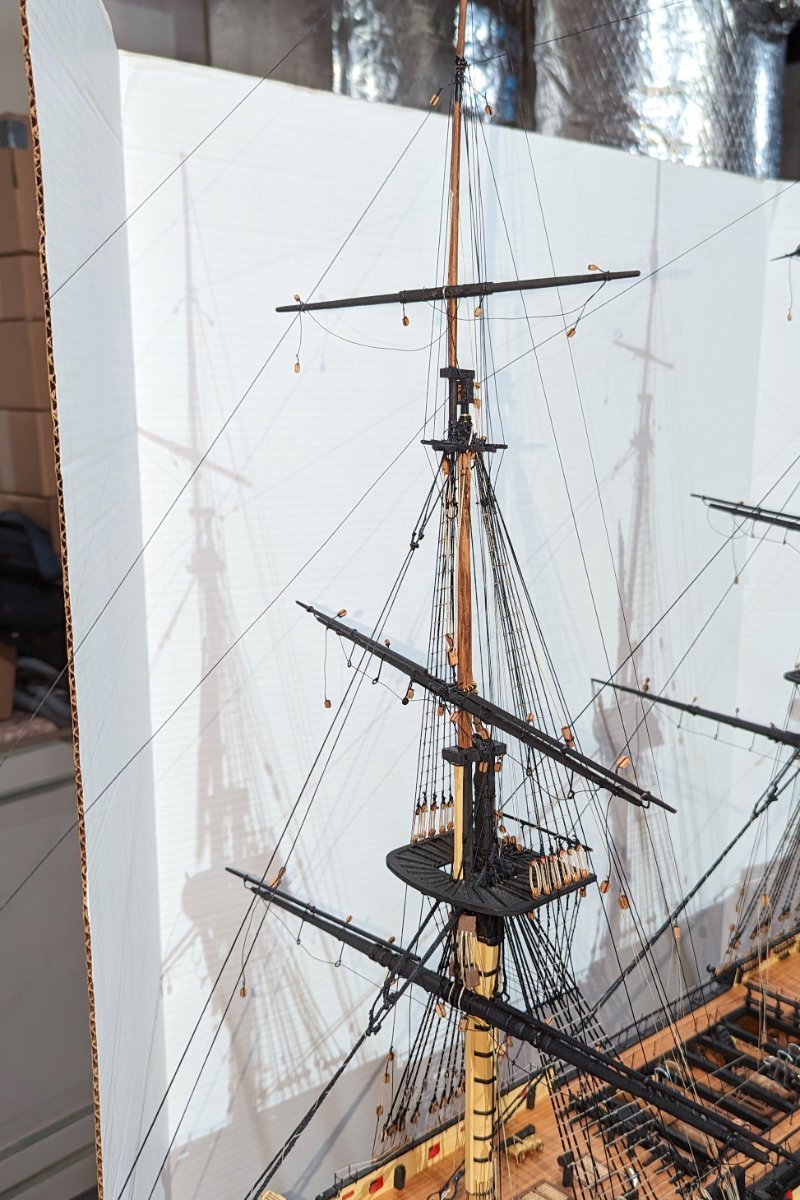
The lifts, sheets, buntlines and cluelines are now done on all 3 masts and the bowsprit. Pictures attached. Next step is braces. It moves along more quickly once you get to the "real" rigging stage. Regards, David
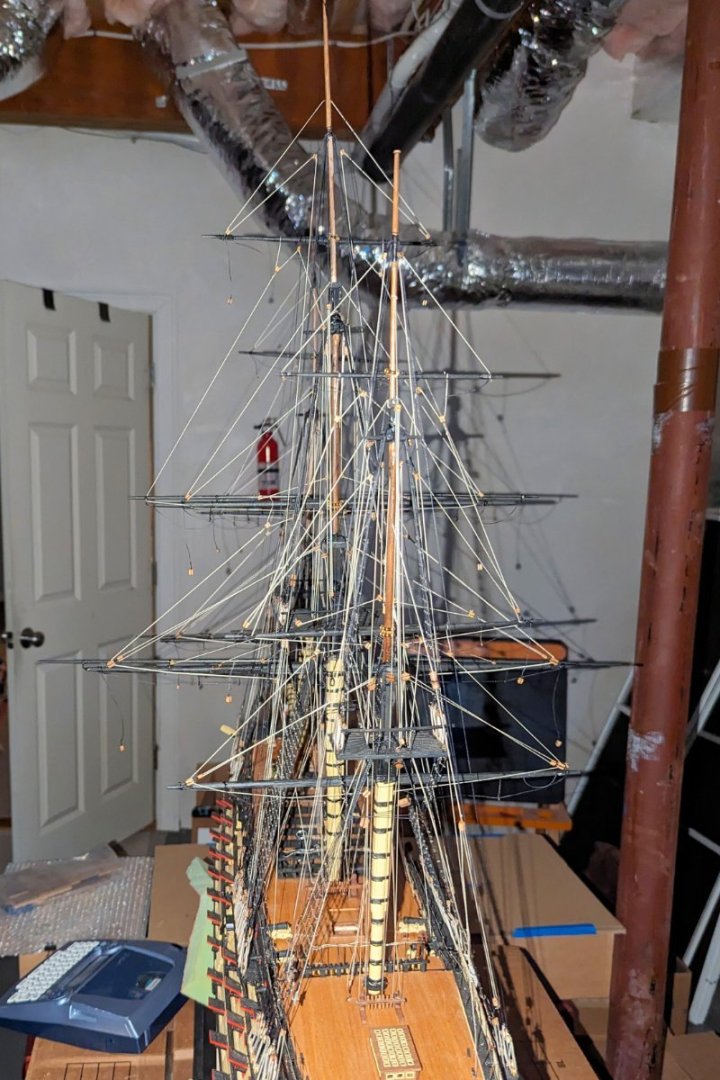

- 218 replies
-
- 9
-
-
- Victory
- Caldercraft
- (and 1 more)
-
Main mast yard lifts, sheets, buntlines and clewlines done. Regards, David
- 218 replies
-
- 7
-
-
- Victory
- Caldercraft
- (and 1 more)
-
Finished the foremast yard lifts and sheets (plus "bunt" and "clew" lines, whatever those are). I used flash in the dark with no white background so the rigging would show up. Regards, David

- 218 replies
-
- 4
-
-
-
- Victory
- Caldercraft
- (and 1 more)
-
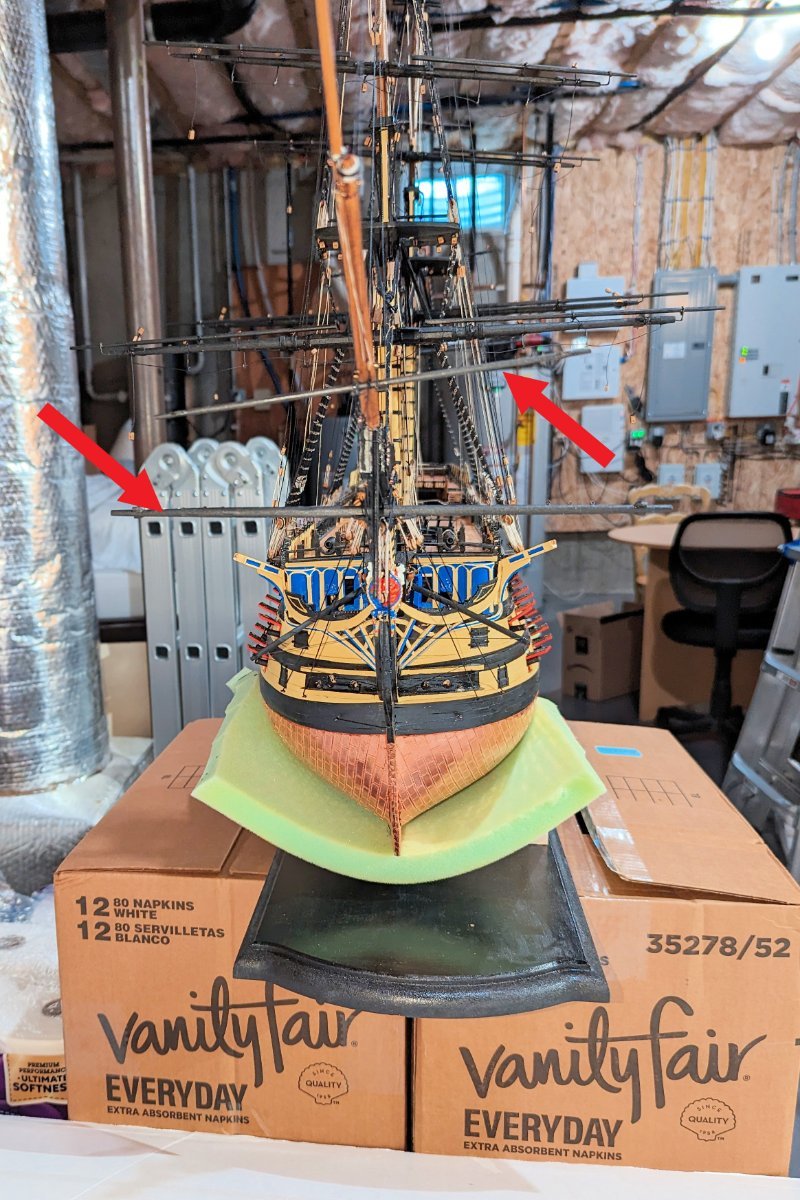
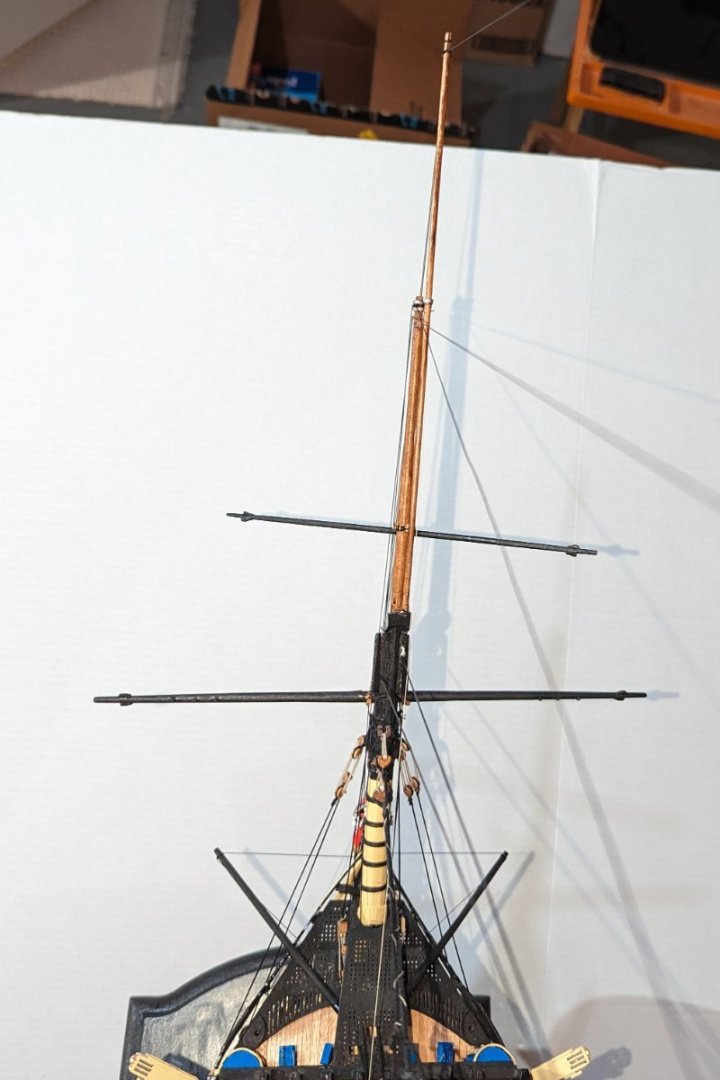
Bowsprit yards done and mounted. Pictures show bow-on view with some arrows added so the yards are more identifiable, and a top-down view. Now the real rigging can start! Regards, David

- 218 replies
-
- 6
-
-
- Victory
- Caldercraft
- (and 1 more)
-
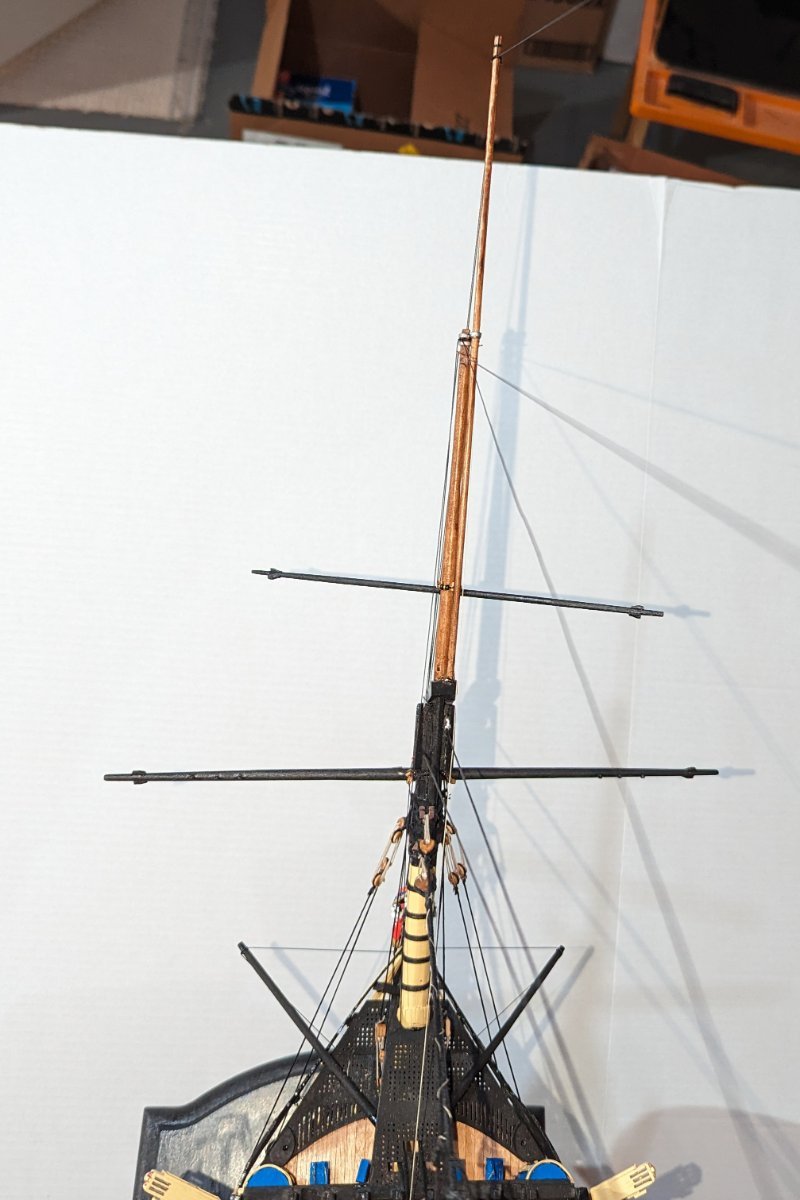
Mizzen yards done and mounted. Now just the bowsprit yards left. Regards, David

- 218 replies
-
- 7
-
-
-
- Victory
- Caldercraft
- (and 1 more)
-
Fore topgallant yard up. So now on to the mizzen yards, which are simpler to build than the fore and main yards. Regards, David
- 218 replies
-
- 10
-
-
-
- Victory
- Caldercraft
- (and 1 more)