HOLIDAY DONATION DRIVE - SUPPORT MSW - DO YOUR PART TO KEEP THIS GREAT FORUM GOING! (Only 66 donations so far out of 49,000 members - Can we at least get100? C'mon guys!)
×


rwiederrich
-
Posts
5,518 -
Joined
-
Last visited
Content Type
Profiles
Forums
Gallery
Events
Everything posted by rwiederrich
-
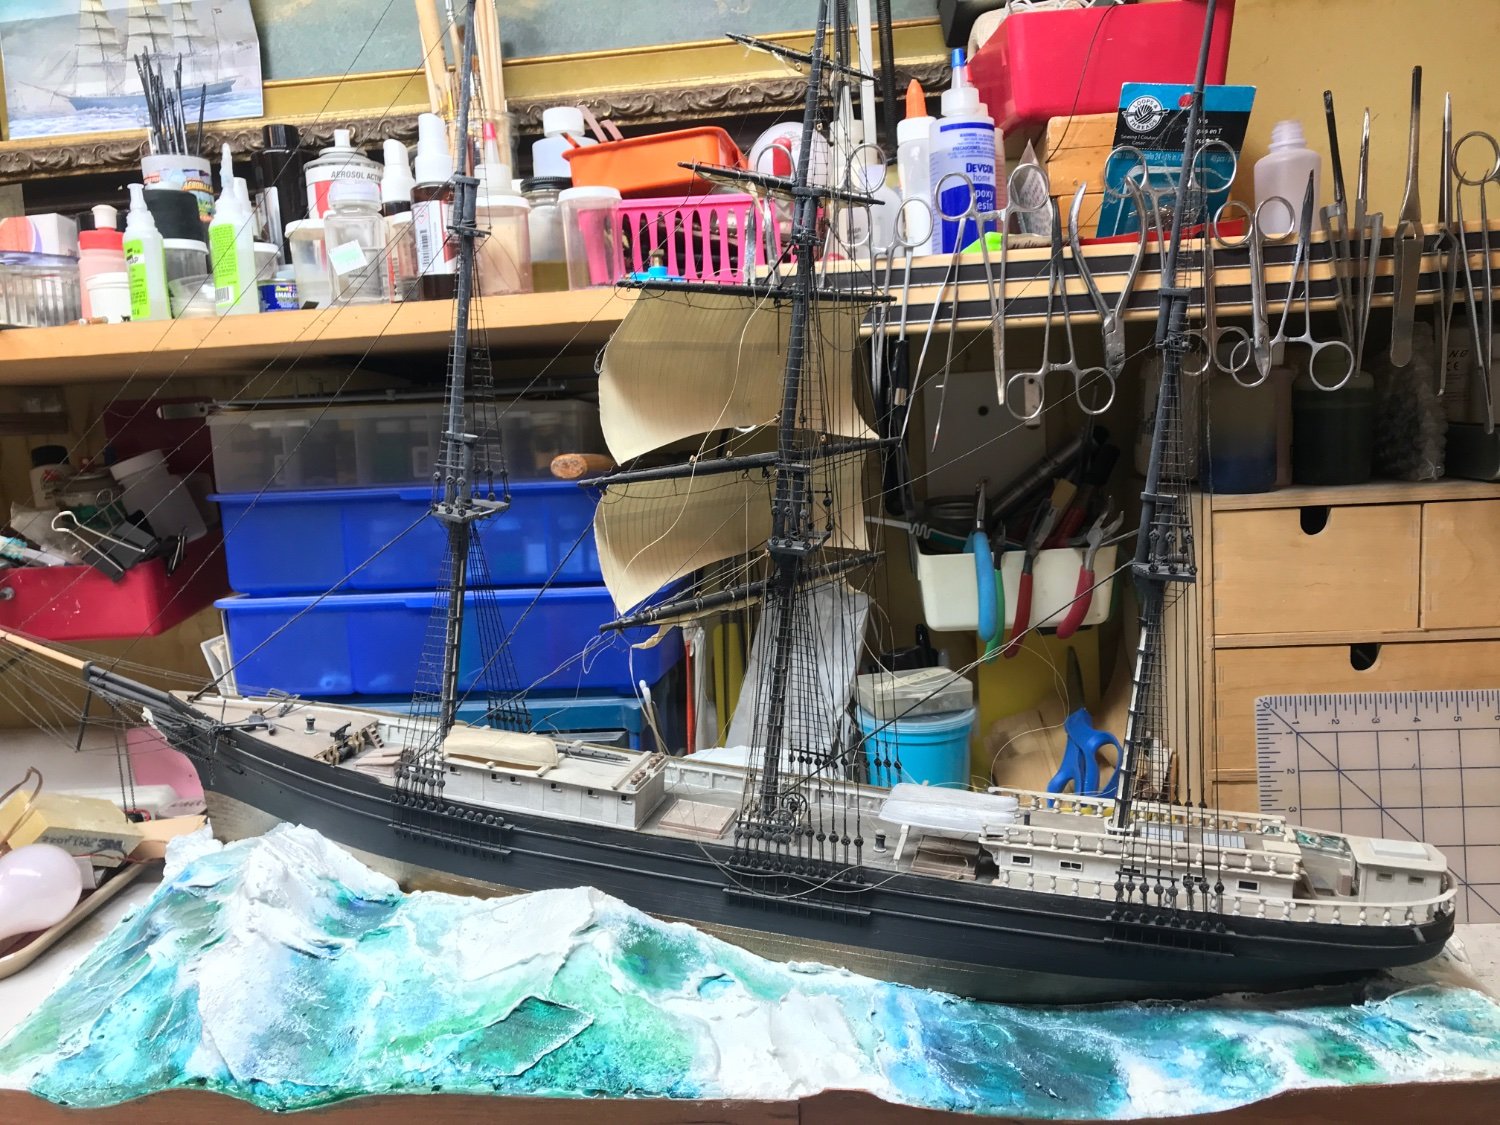
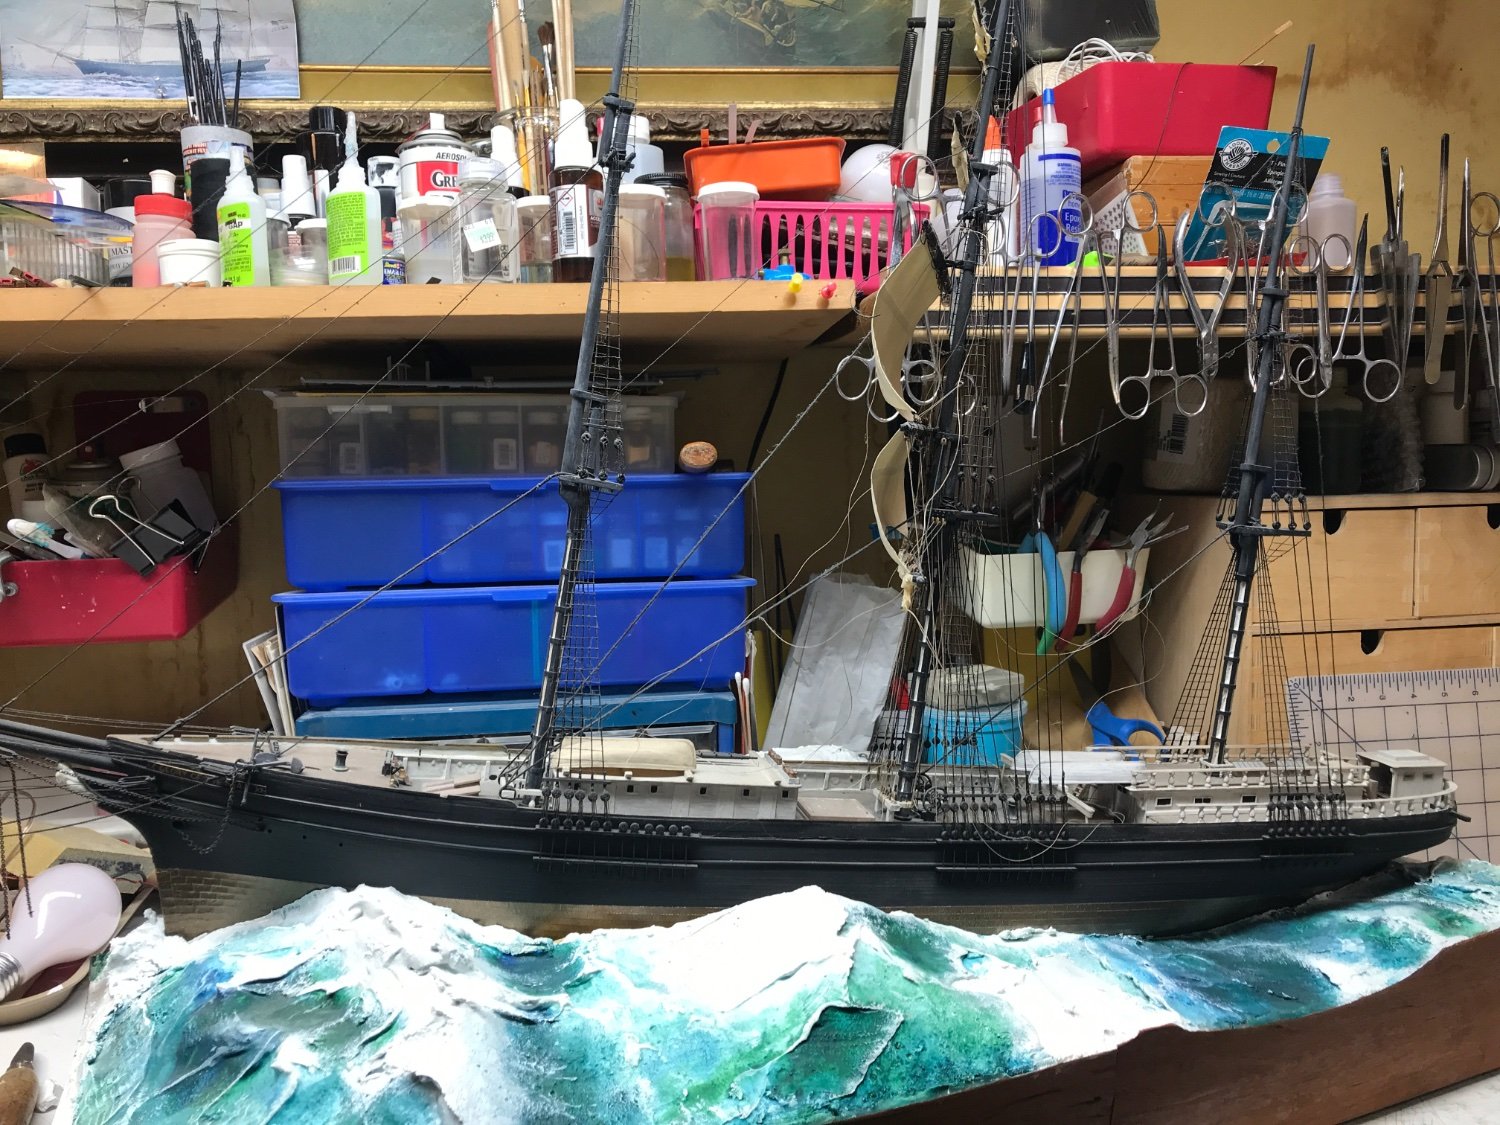
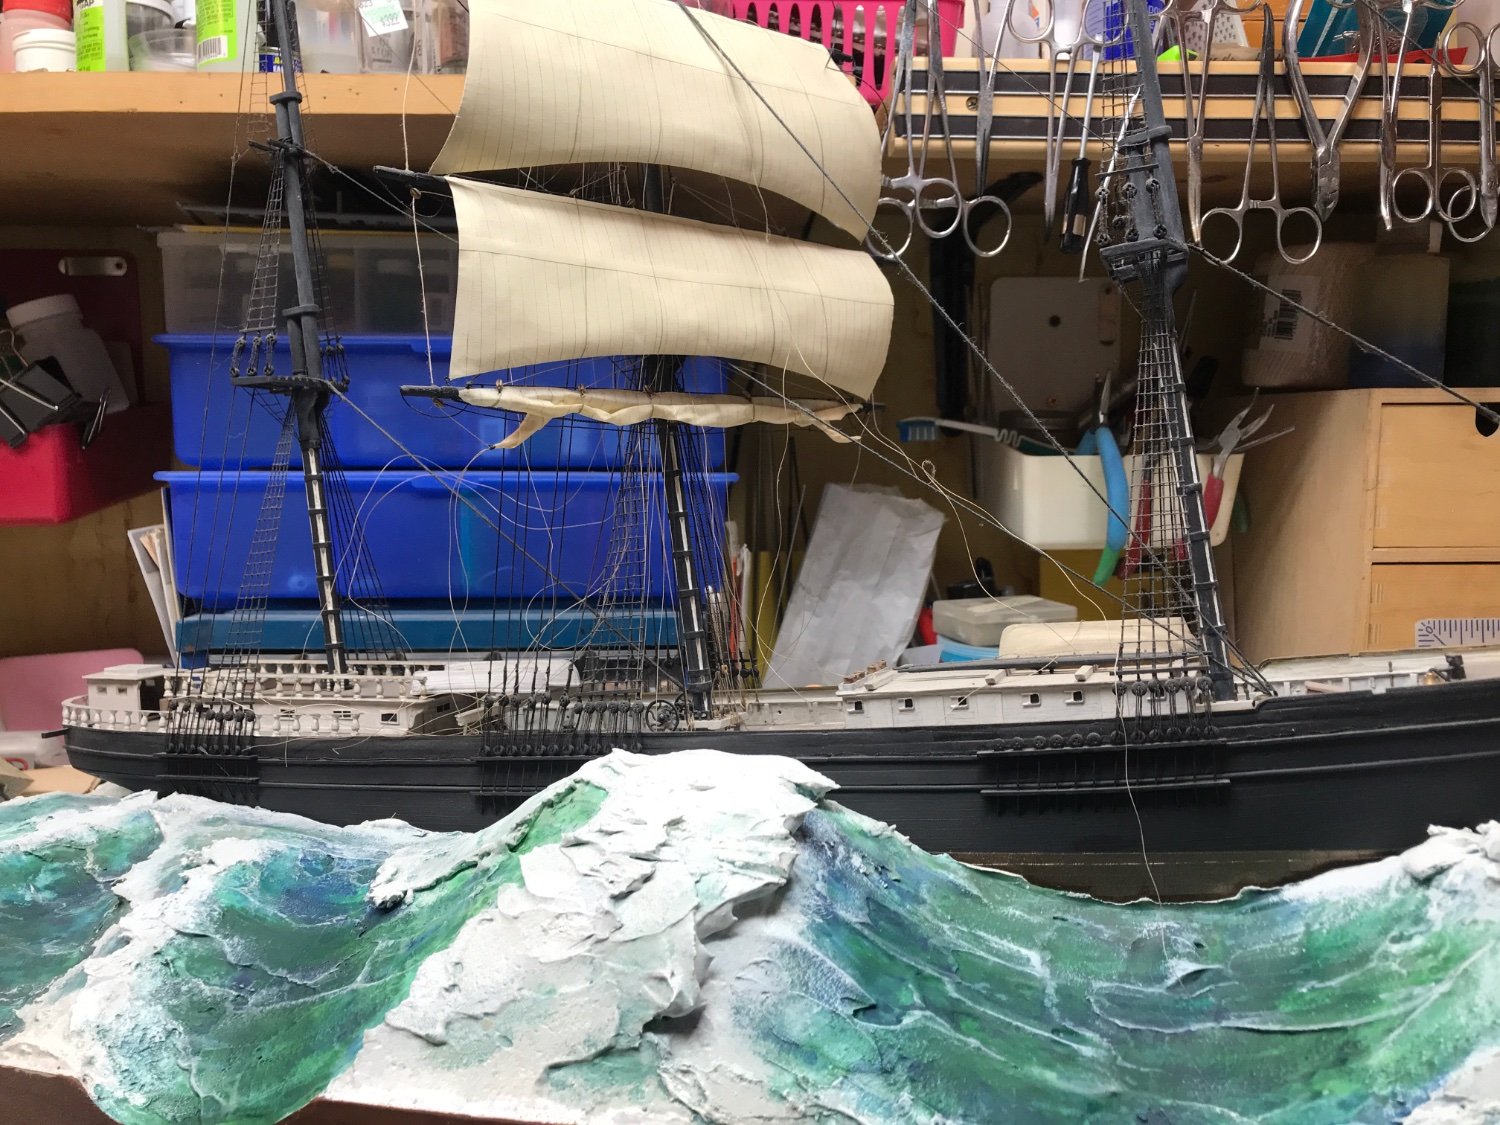
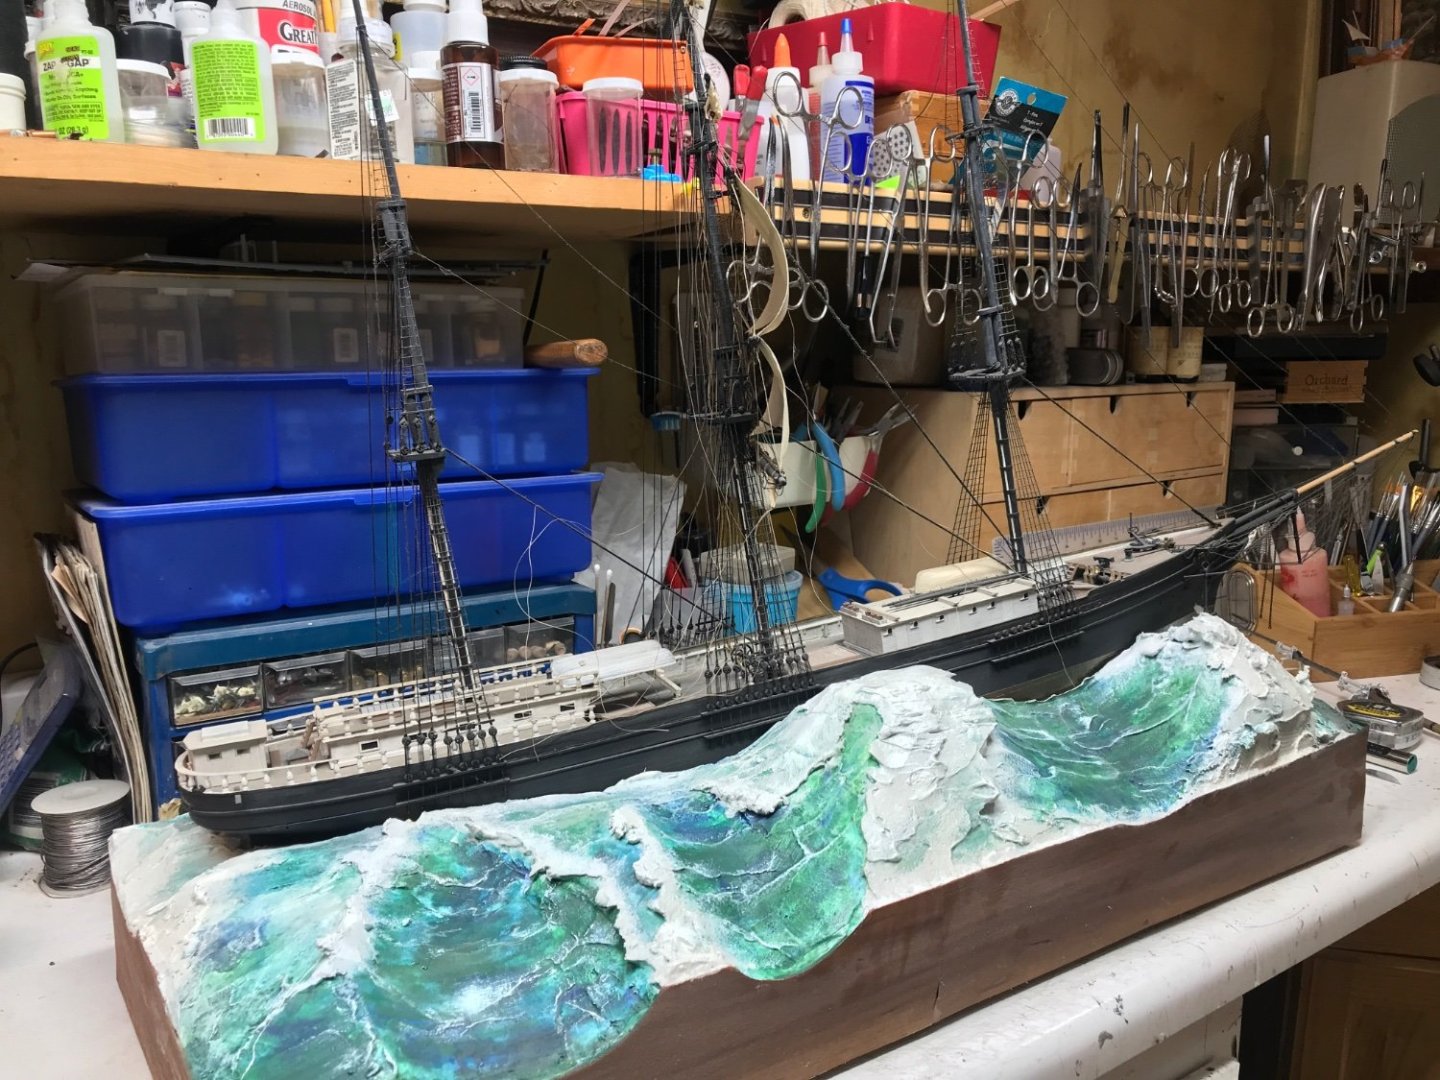
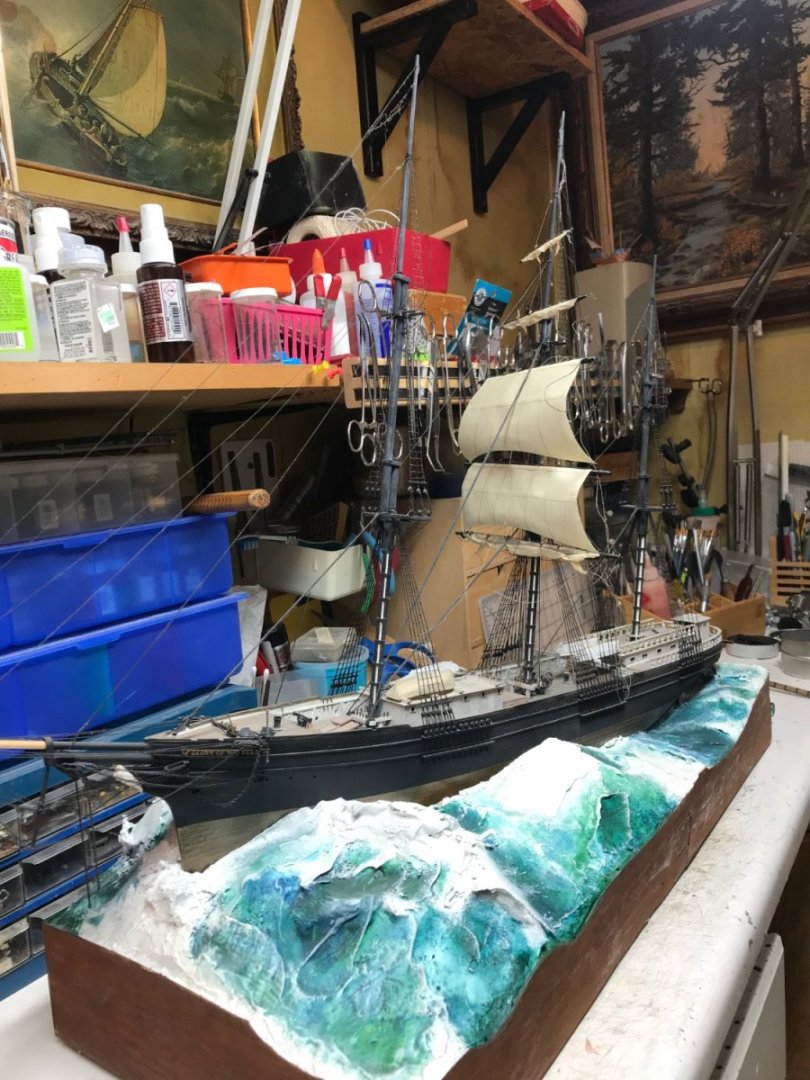
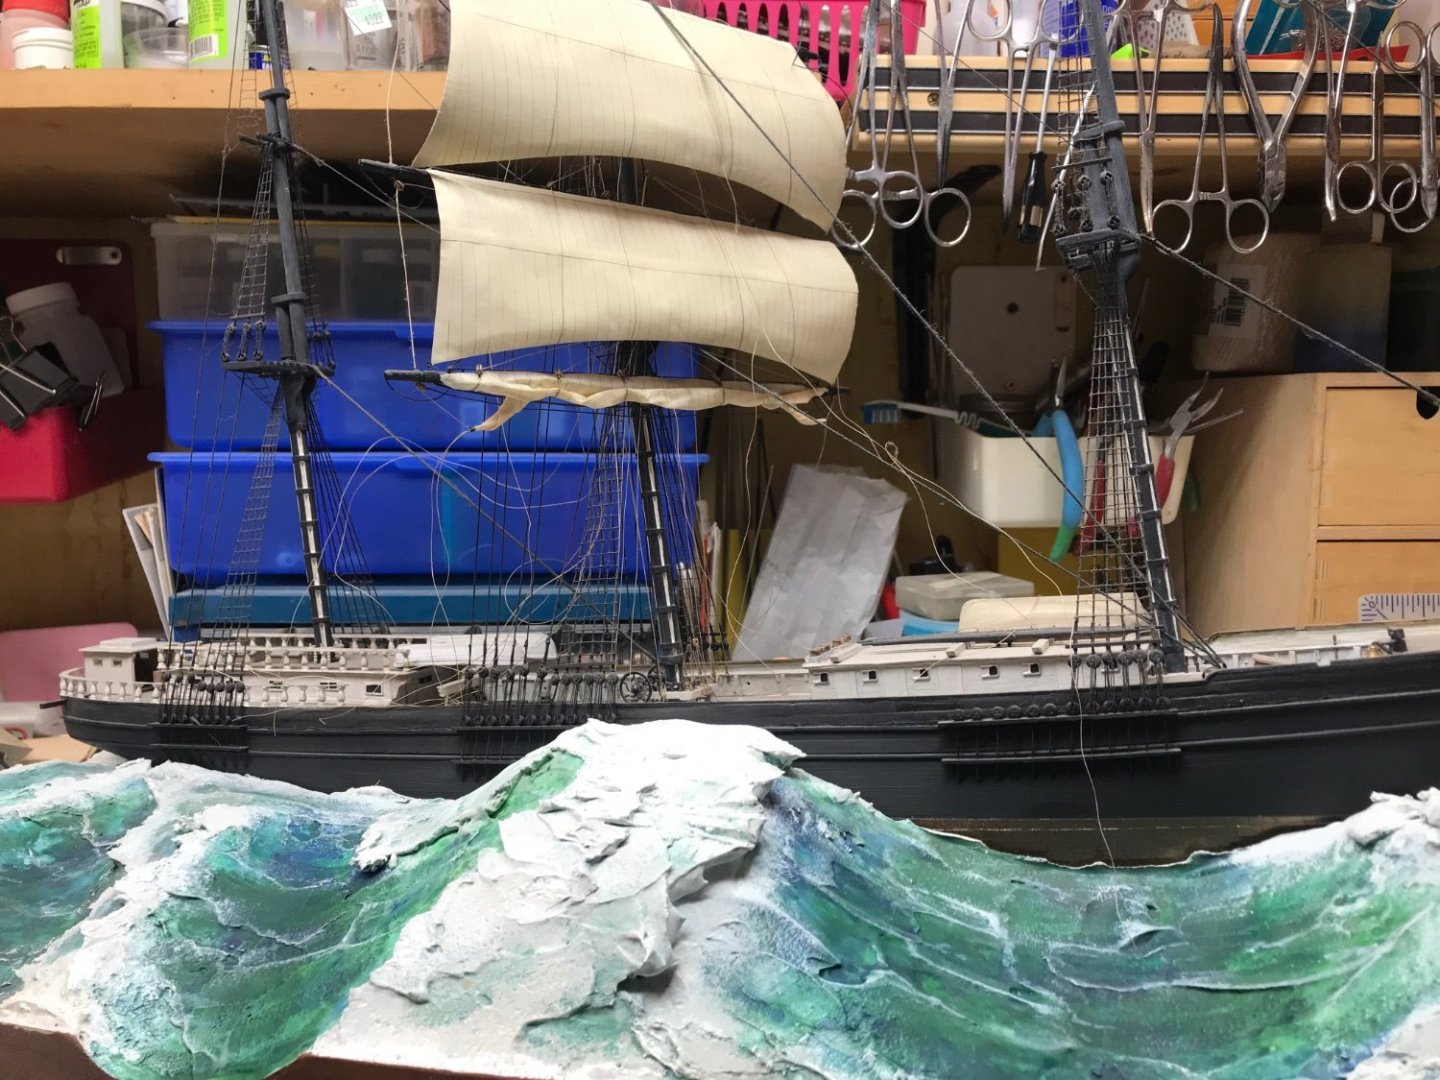
We’ll now that GloryOf the seas is now complete I am ready to start a new on the Donald McKay. Here is my old glory of the seas mounted in the Donald McKay waterbase I am going to convert this model into the Donald McKay. First I had to make some home modifications corrections in the base to accept the glory of the seas hull. Typically the hulls were very similar above the waterline but below the waterline , quite different. I am not worried because that is completely covered by the water base. The conversation will be an extensive one, since the McKay had. Flush weather deck forward(forecastle) …..atop the main deck house and a gangway that ran down port center to the flush weather deck of the poop. All of this will need to be build and added. But first a great deal of demolition will need to take place on the old Glory of the Seas decks This model will be more to the scale of 1/128. Not sure exactly …..at the time of this writing. Here are a few starter pic to let you know what I’m starting out with Rob


-
This is the main reason why the Forbes design and subsequently, the Howes design came into being. Being the easiest of the two designs...Howes, became the norm. Still....I think the model makers, made a slight mistake when they chose the iron truss for the single topsail. It is appropriate for the main course....because it is slung away from the mast...but the topsail as well as every other yard used a wooden parrel or mast boot...where the chain hoist was affixed. Placing it close to the mast and causing less stress and friction as it travel up/down the mast. Agreed...the double chain tackle for the hoist seamed necessary....but it became a far less cumbersome design when double topsails were introduced and a double block purchase and deck winches were introduced as well. Rob
- 602 replies
-
- 1
-

-
- Flying Fish
- Model Shipways
- (and 2 more)
-
Super work George. She looks clean and well done. From your close-up angle...it is clearly visible and understood why McKay transitioned to the Howes double topsail design...over this single topsail design. One major drawback to this design is the pinching that was very evident within the parrel band. When the gin block is mounted on the top of the yard and the lift is activated...it unduly pinches the parrel band against the topsail mast...when attempting to raise the yard . Personally, I think the a truss is less effective then a wooden parrel..where the gin block could be mounted further back to the mast, allowing a more vertical lift angle....permitting an easier, friction free lift. This is one advantage(Of many), why the Howes and Forbes double topsail design was adopted in the early 1850's. I'm sad to hear you will be taking a break on her build....but I am enjoying it so...I guess I'll have to muddle along till a new entry is made. Again....super job. Rob
- 602 replies
-
- 2
-
-
- Flying Fish
- Model Shipways
- (and 2 more)
-
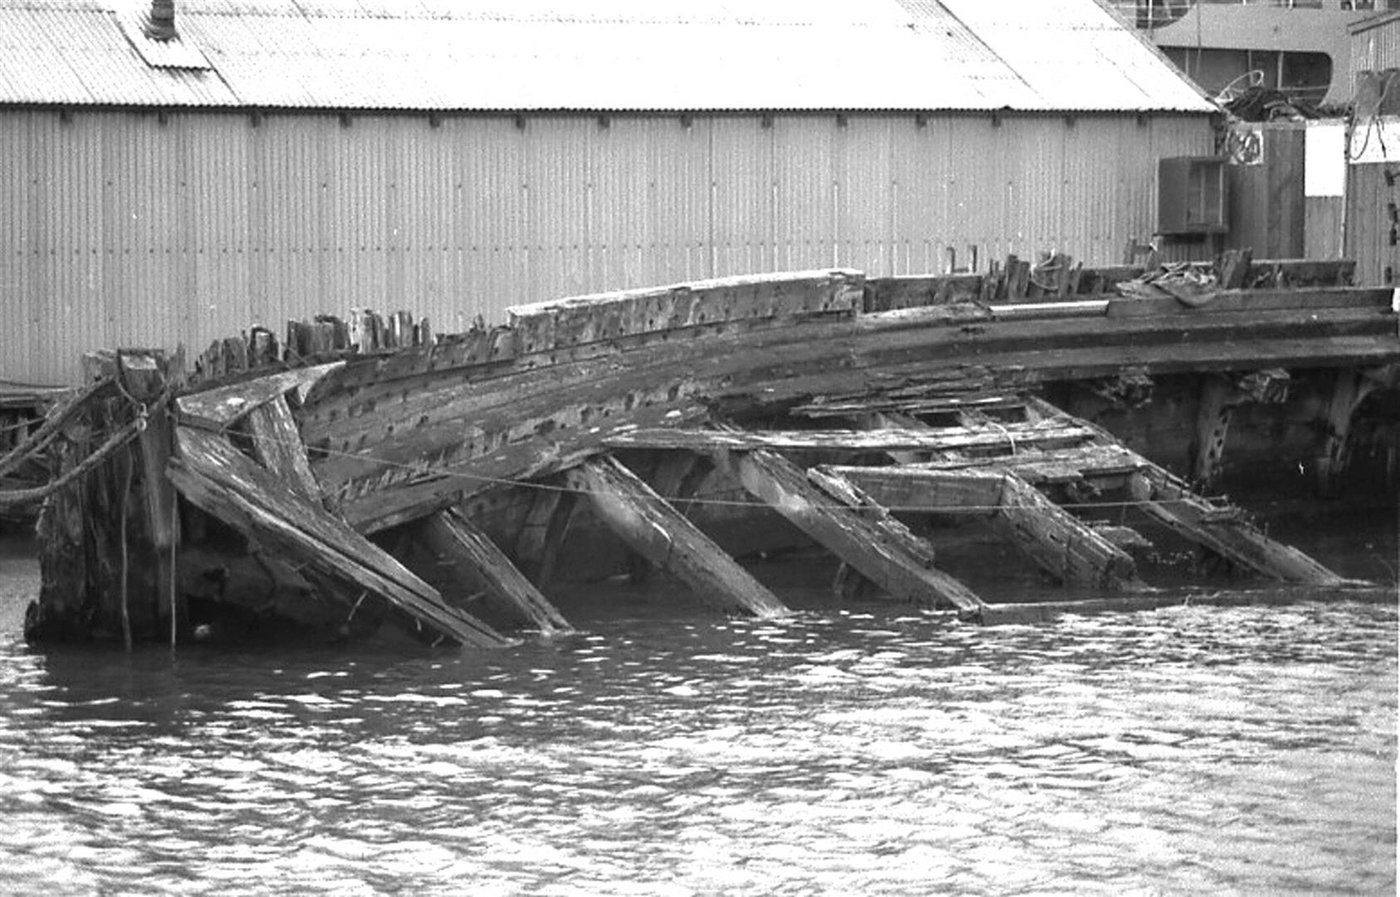
Beautiful. I have a good picture of a model of her being built....I'll find it. I have read and own the Book about her. Good read. I had a friend who actually visited her in the Falkland's before parts of her bow were excavated. Here is a picture of her wreck. Rob
-
Rick...what ship is that, you posted a couple of pics with your own? You're doing a fantastic job. Rob
-
Modeling Ships is sucha wonderful hobby...... You can take it as far as your heart desires...or as far as your skill permits. If the prototype has had longevity...then surely, you will be allowed the freedom to model the *Period* you so choose.....and still be accurate. Where as, if the vessel lived an unchanged or short life...you have only one chance to get it right. Anything else is just wrong. Personally, my own travels have lead me down the road of modeling vessels that are not regularly modeled. It releases me from the scrutinous eye of the *comparer*. However....this approach, requires the utmost in diligent research. You have gained a plethora of knowledge and understanding....where clippers are concerned.....I suspect what you bring to your next build will greatly enhance that outcome. Great job...and I'll continue to monitor with eagerness. Rob
-
George. I hope this observation hasn't caused undue repairs. Worse thing is, you leave it and as mentioned earlier it might just *blend* in with the sheet and bunt lines. I have been doing research on McKay vessels for over 40 years and most notable on Glory of the Seas....so even the most minor of details I try not to over look...though it happens. You have done very well on this build and she is looking magnificent. I'm glad you went the extra mile to work out the *Missing* Naval Hoods...the manufacture failed to include in the kit. Rob
-
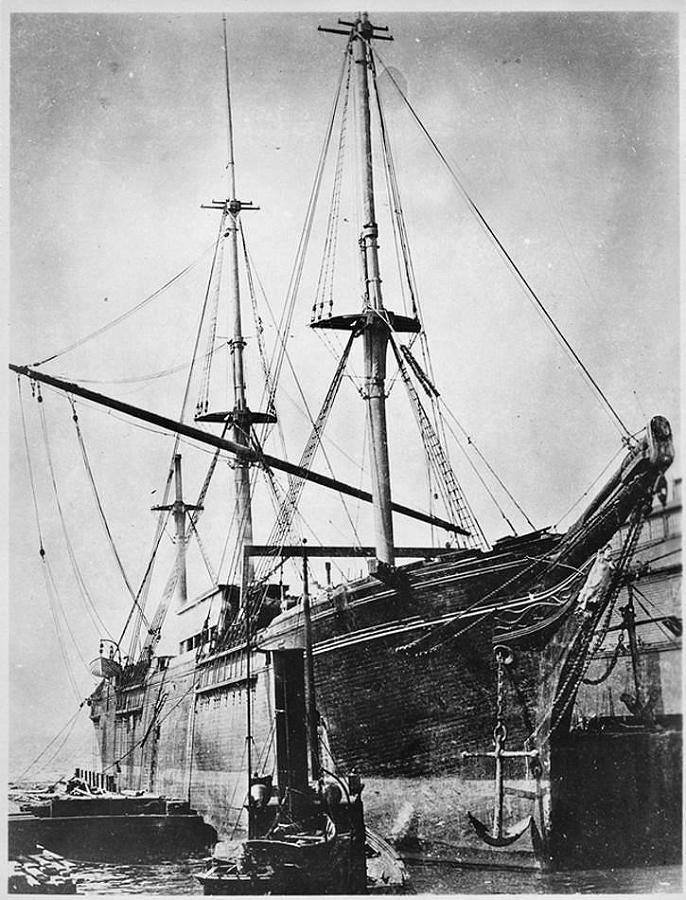
The reason I brought up the whole thing is that McKay used the same rigger for nearly all of his ships and and due to mast location, rake and the angle of the stays insertion to the mast.....it simply *Looked* as if your forestay was too low and in interference with the yard. Again, Many clippers rigged their forestay over the top. British clipper's....such as the Thermopylae and Cutty Sark rigged their forestays above the top. I can name a dozen clippers rigged in like fashion. Namely my own recent clipper, Glory of the Seas was rigged this way. Sometimes painting will not reflect every detail as it was....(especially with the rigging...because it changed so often). Flying Fish was built 18 years earlier then Glory of the Seas...and it is quite possible her forestay was rigged under the tops in her lubbers hole....but given the fact your stay appears it will impede the yard, and supposing this is a relatively accurate production model of the *Fish*....... and knowing McKay's habits. I came to an educated conclusion and made the suggestion. Here are some examples...
.jpg.a637739f340a0eaa0ac73e45e324da7d.jpg)
-
Looking great George....but I see a slight issue with your forestay. Donald McKay used the same rigger for many of his clippers(he even did the designs himself). The issue is the placement of the forestay on the fore mast. With its insertion point being below the tops...it will drastically interfere with the for main lards motion around its truss. McKay....and others....would bring that forestay up on top of the tops....reason being, is the distance from the stays deck mounting on the forecastle to the foremast top is considerably shorter then the main mast stay...from its origin on the foremast fife rail and up to its insertion just below the main mast tops. This shorter distance causes the stay to be too low and the yard will either rub against it, or its chain sling can come in contact with it....creating a big problem. Most modelers follow the kits rigging plan....however, design and physics, just doesn't permit it. Other then this issue...your efforts are wonderful. Rob
-
Yeah...you worked up from driver to loader then, if you were good, to gunner. I was a gunner on a command tank and half the time I was the commander, cuz the officer was off tank. Served in Wildflecken.
-
That is not hung as the example you made or the one in the B/W images. Seams simply hung from a line that cane raised or lowered. Interesting. Rob
-
Indeed, I saw that metal eye……..and probably it was for a down haul…….but I was making my reference from the block…….by looking at your modeled representation, it appears there are several lines coming from the block or some other origin. Not just the two guide ropes. Your pint in a valid one……..a foul at the halyard, would require intervention with some form of a downhaul. Rob
-
Keith.....Upon reading my response....I didn't mean to say, *Cept for*..to imply any error on your part....but that if you used a single line from deck level up to the single block, supporting the lamp and back down through the block to the lamp saddle/chair. You could eliminate that second downhaul line. The halyard line could be placed just aft of the lamp elevation axis....keeping it far away from the hot lamp chimney. That is what I meant. Rob
-
It appears to be a simple mechanism. Two guide ropes and a single halyard. From the images of the actual lamp...there are no downhauls....just a halyard to raise the lamp. The weight of the lamp will easily bring it back down the guide ropes. And since the halyard is inserted back behind the lamp chimney to the metal *saddle*or chair.....the halyard rope will not be in danger of heating. Your model is well executed....cept for the downhaul(which could be problematic if damaged by the chimney heat. My 5 cents. Great detail to your model...by the way. Rob
-
Newly discovered info is exciting for sure......remembering that many Naval customs did not find their way into civilian practice....or vise-versa. I just wanted you to feel comfortable with the slight diversion....though it did pertain to your subject....originally. Like many sub-subjects.....group think, can sometimes run amok from the original posters log direction. Sall-good, it appears, since old nautical oil lamps are, sometimes the only artifact we can acquire for our personal collections that fit in our limited display space. Rob
-
Indeed I see it and am surprised at myself that I hadn't realized this from the beginning, by not looking closer. Aging a lamp can be aided by realizing this particular fact...that thin plates of curved *interior* glass would have been the preferred method and not, as in later designs that used more expensive colored Fresnel lenses. Even more modern lamps used clear Fresnel lenses and colored electric bulbs. Thanks for the clarification. And I'm sorry we have pushed the envelope on the subject in Keith's log. Rob
-
One interesting note. I have several lights as well and the starboard Fresnel lens is red and the port lens is blue. 🤔 That is because the oil and wick used burned bright yellow...thus against the blue lens it shown green. The starboard still shown red. Bob...in your one image with the light open, is appears the lens is red....but no other image shows a lamp with a red lens. Rob
-
Yep…… looking closely you can see the technique here….. in each belay pin. pretty nifty. The only issue I see is that the pin could be pushed off axis slightly. But once the rope coil is applied it is all good. Rob

-
Just something I noticed..... You apparently ran the lines down through the belay pin hole...then pressed in your belay pin to hold the line in place. After secured...you then added your rope coils. Interesting method....I never thought of doing that....I just belayed using the protypical way myself. Your final look is very nicely done and clean....with appropriate addressed rope coils to boot. Good job for sure. Rob
-
Sorry to hear. But it is your build and you are the Master of its direction. I can understand the trepidation you may be feeling...as you are learning and developing your skills......all on the same model. This can be positively looked at as a Test bed model....one where you learn technique.....hone your skills and develop new and better ways to create a model you are satisfied with. Don't look at it as a failure....because you have not failed....you have learned. And surely do not worry about any of us....we are merely observers as you travel this road on your modeling adventure. I'm looking forward to your next log. Rob
- 248 replies
-
- 2
-
-
- Cutty Sark
- Revell
- (and 2 more)
-
Just joining now. you've make exceptional expeditious progress....from research to her current state. Wonderful job indeed. Rob
-
Many good points are brought up...and some good ideas too. Natural fibers are easiest to work with and as mentioned have less of a stringent memory. Gluing gives ample time to make any corrections, and or adjustments to the final look of the coil, while in place. Best part about the entire process...of adding rope coils...is the plethora of methods that can be employed. Pick the best method for your skill set/what you are comfortable with and gitt-er done. Good luck, in whatever method and or approach you choose. I've used my method for about 50 years...after much experimentation. I find it to be the fastest and easiest...not to mention cleanest when finished. Rob