rwiederrich
-
Posts
5,520 -
Joined
-
Last visited
Content Type
Profiles
Forums
Gallery
Events
Everything posted by rwiederrich
-
True indeed Pat. When there are so many eyes watching and scrutinizing your next move....it could make one *jumpy* and a bit *offended*. Vlad is taking it all in stride. When as much study and evaluation that has gone into our rediscovering of Glory of the Seas, you'd begin to think everyone is an expert in some way. Not forgetting, that photographs do not lie, we need to balance accuracy with ability and allow for some license on the part of the builder. This isn't a community build....it is an individuals interpretation for the most part. Consisting of so many parts, it is easy to forget where everything goes exactly. Hopefully extreme errors can be remodeled, while minor (truly insignificant) errors can be left to themselves. My forecastle deck remodel is a perfect example of a needed correction. Vlad is doing a super job. Rob
-
I recognize I made that chain guy error. After I made the discovery , I had progressed too far along to comfortably redo it all. Like the previous mistake of not taking into account the carriage house taper……. I again opted to excuse myself from the terror of remaking it. I believe such errors are in keeping with a growing knowledge of her members, after the fact of construction. I can only imagine how Mike Mjelde feels after published so many errors in his books and now through a more thorough re-engineering of Glory’s members, discovers his errors were more impressionable and of a reconstruction oversight then any act of laziness. Vlad….. you’re doing magnificent. I hate to point out issues like the chain on Glory’s deck……..forgive me if I appear hypocritical. Rob
-
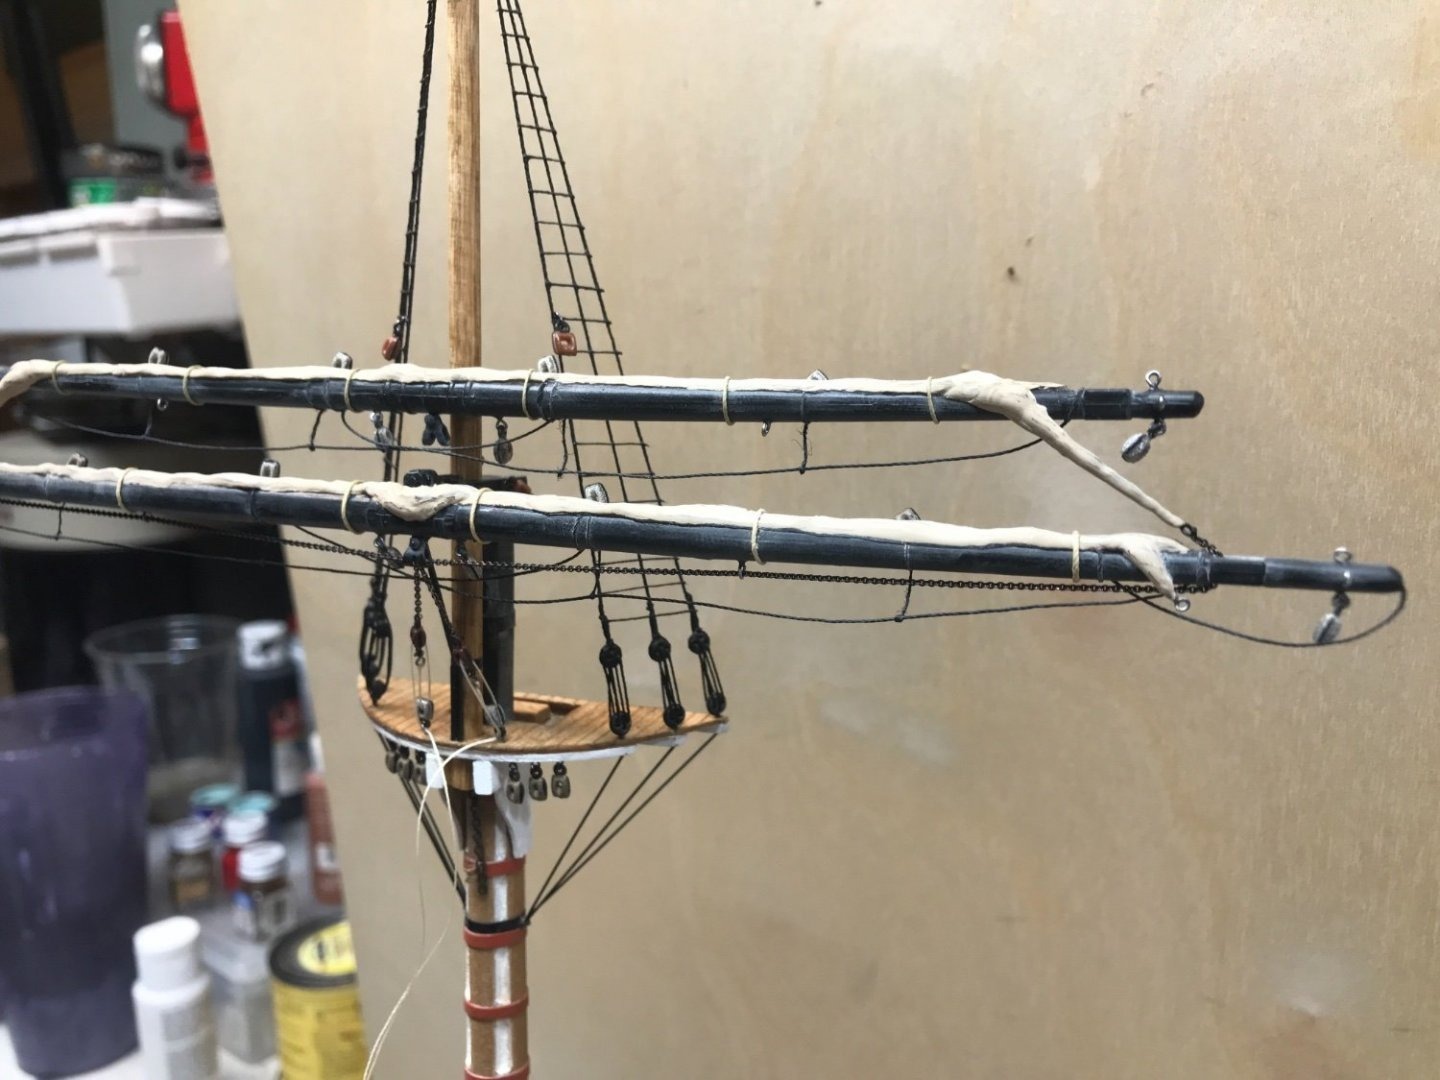
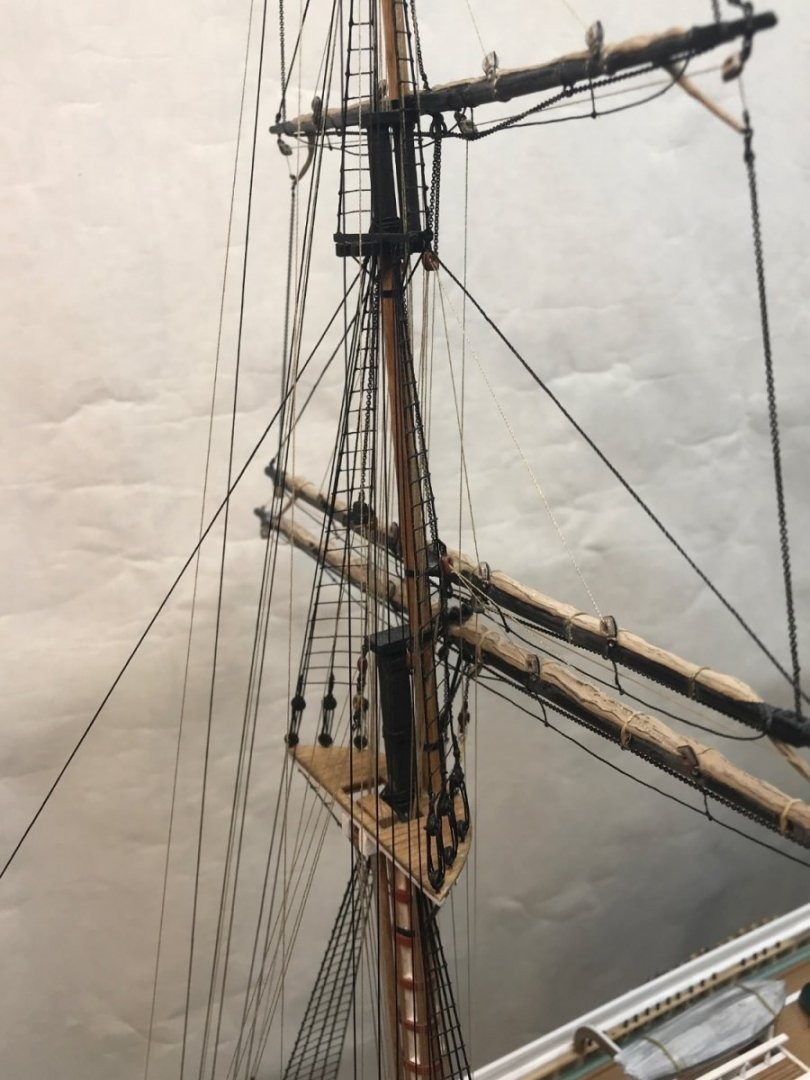
Rich....on more modern ships the chain ran within a chain channel. There is no evidence to indicate that the anchor chain ran across the for deck from the forecastle windless to entry points just in front of the main cabin down into the chain lockers on Glory...this is why I didn't model it that way myself. Mileage may very for other builders. CS is a good example....but she also had a winch in front of her for mast which hoist the chain aft from the windless and down into the old. Glory did not have sucha winch to aid in this process. So to suggest the chain simply ran across the deck into these ports of their own accord and then down, into the lockers is a great stretch. Rob
-
Vlad...what is your source that you're using for the head gear layout you've employed? The martingale chain guys origins don't appear to be correct. I know you are rigging Glory according to her original layout, but her head gear didn't change, cept for the addition of the bowsprit cross yard. Rob
-
Beautiful large scale work. She looks amazing. Rob
-
No problem at all. I've been building clippers for over 48 years now and I've developed an *eye* for dimensions and I can usually spot an error very quickly. Diameter and circumference are significantly different. An easy mistake to make. Trying to be true to Glory's rigging layout at any particular period of her career can be challenging....since receiving her new for and mizzen lower masts(Single sticks), she also received rigging upgrades for them as well. Hemp was her original material...but soon changed when her additional backstays were added and her spreaders where removed. She got the normal *upgrades*, one would expect with time and improvements. Keep moving forward. With this latest image I posted you can clearly see the 3 drain ports for the internal(2nd deck) pumps. 6 in all. Ro
-
Sometimes things don’t scale very well. That is why you need to reference images often to correct for these issues. Rob
-
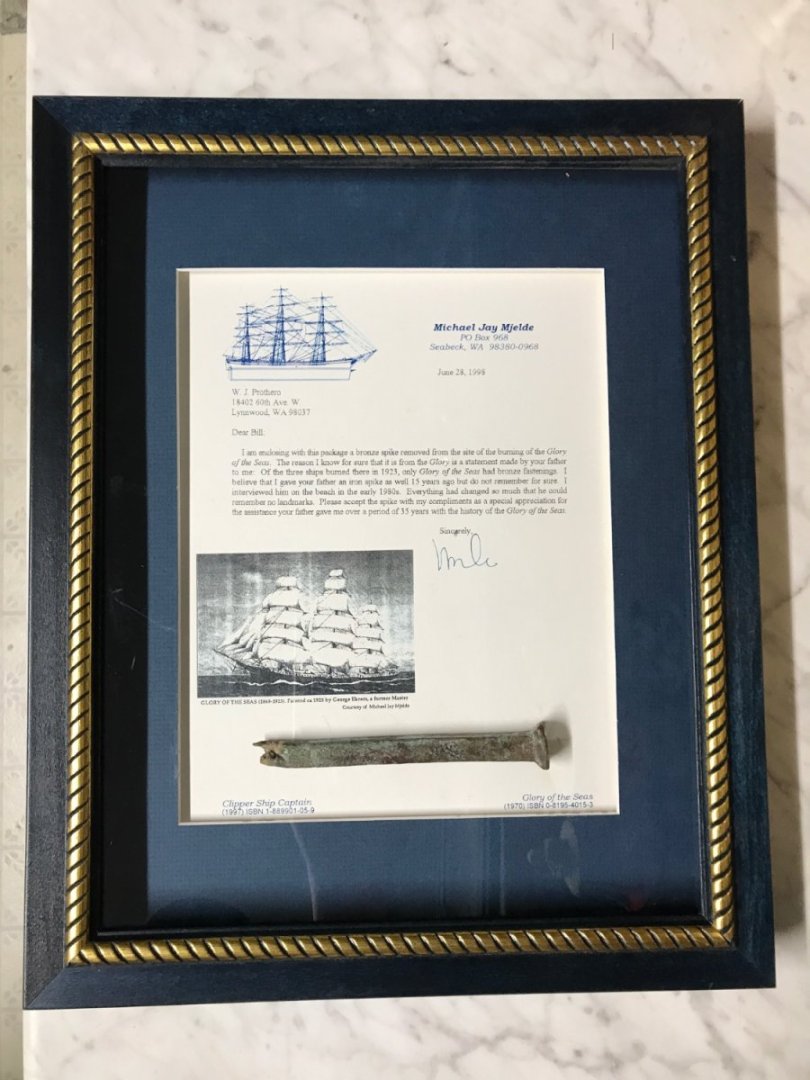
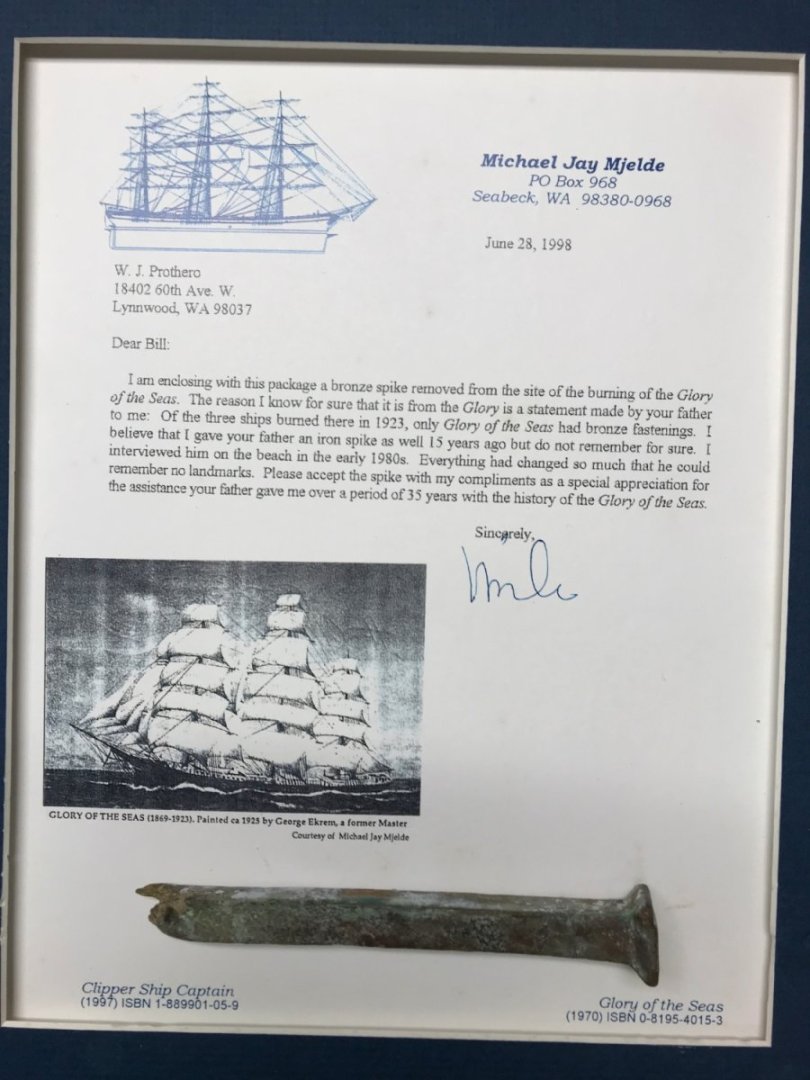
Here is an image after I completed the shadow box. Reflections are off the glass. Blue on blue with gold rope trim. Rob
- 3,560 replies
-
- 6
-

-
- clipper
- hull model
- (and 2 more)
-
Here is a better image. I’m going out to build the shadow box frame. Rob
- 3,560 replies
-
- 1
-
-
- clipper
- hull model
- (and 2 more)
-
I got it today. I’ll take pics of it tomorrow. I’m gonna make a new shadow box for it, so it will be displayed correctly. I was prepared to spend what ever it took………I’m glad we were spared *war*……😂. It will go well with my other artifacts. Rob
- 3,560 replies
-
- 1
-
-
- clipper
- hull model
- (and 2 more)
-
Vlad, Glory's Shrouds/Backstays and Stays were all probably steel wire rope...so I'd use very dark or black rope. Her deadeye lanyards as well as her ratlines were oiled or tared to protect them from the weather. White ratlines and lanyards was not a prototype practice, However, some later clippers and large iron ocean carriers painted their lower shrouds white...to protect the steel cable.

-
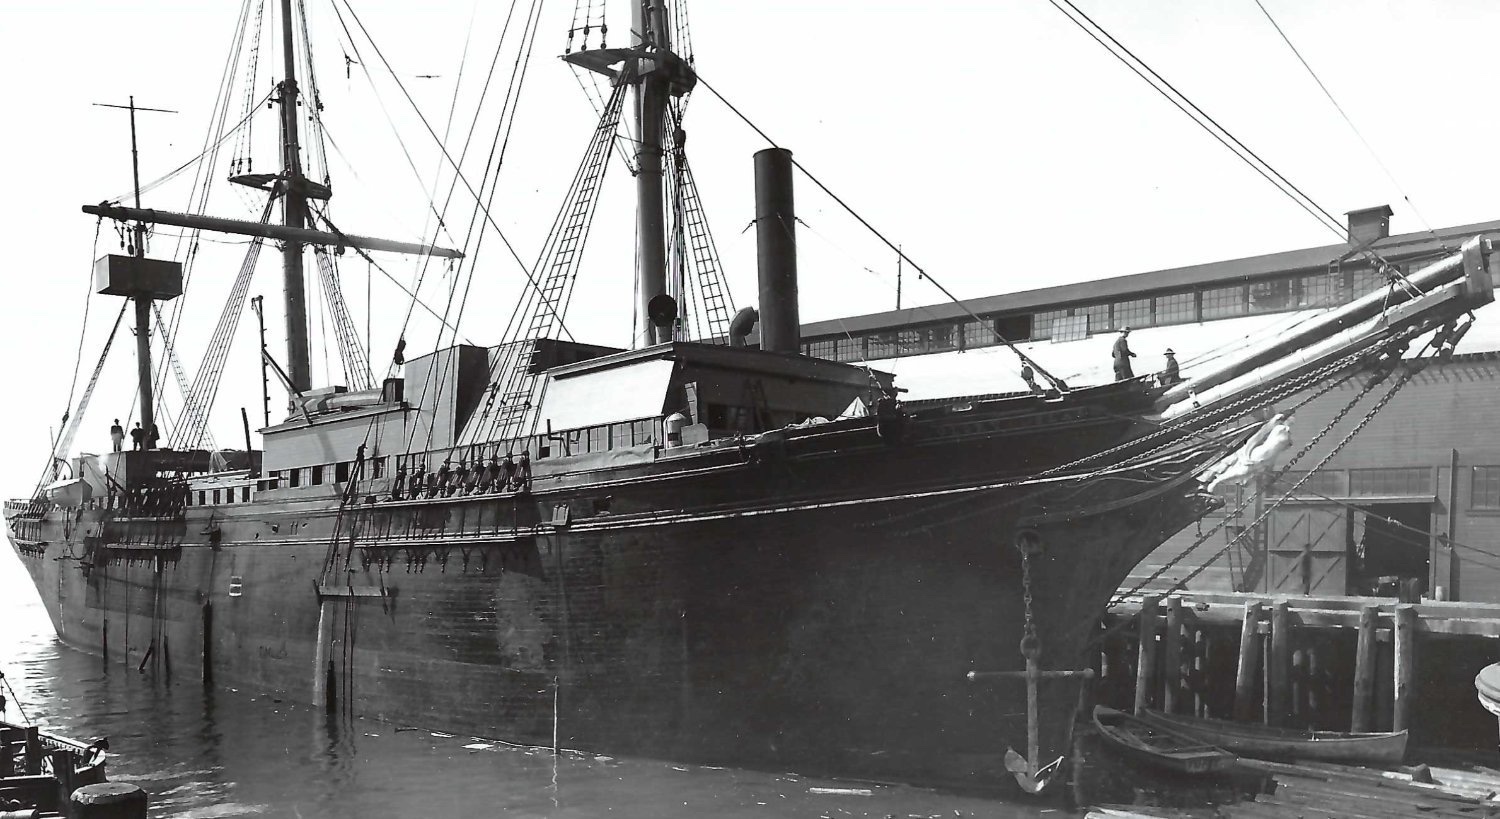
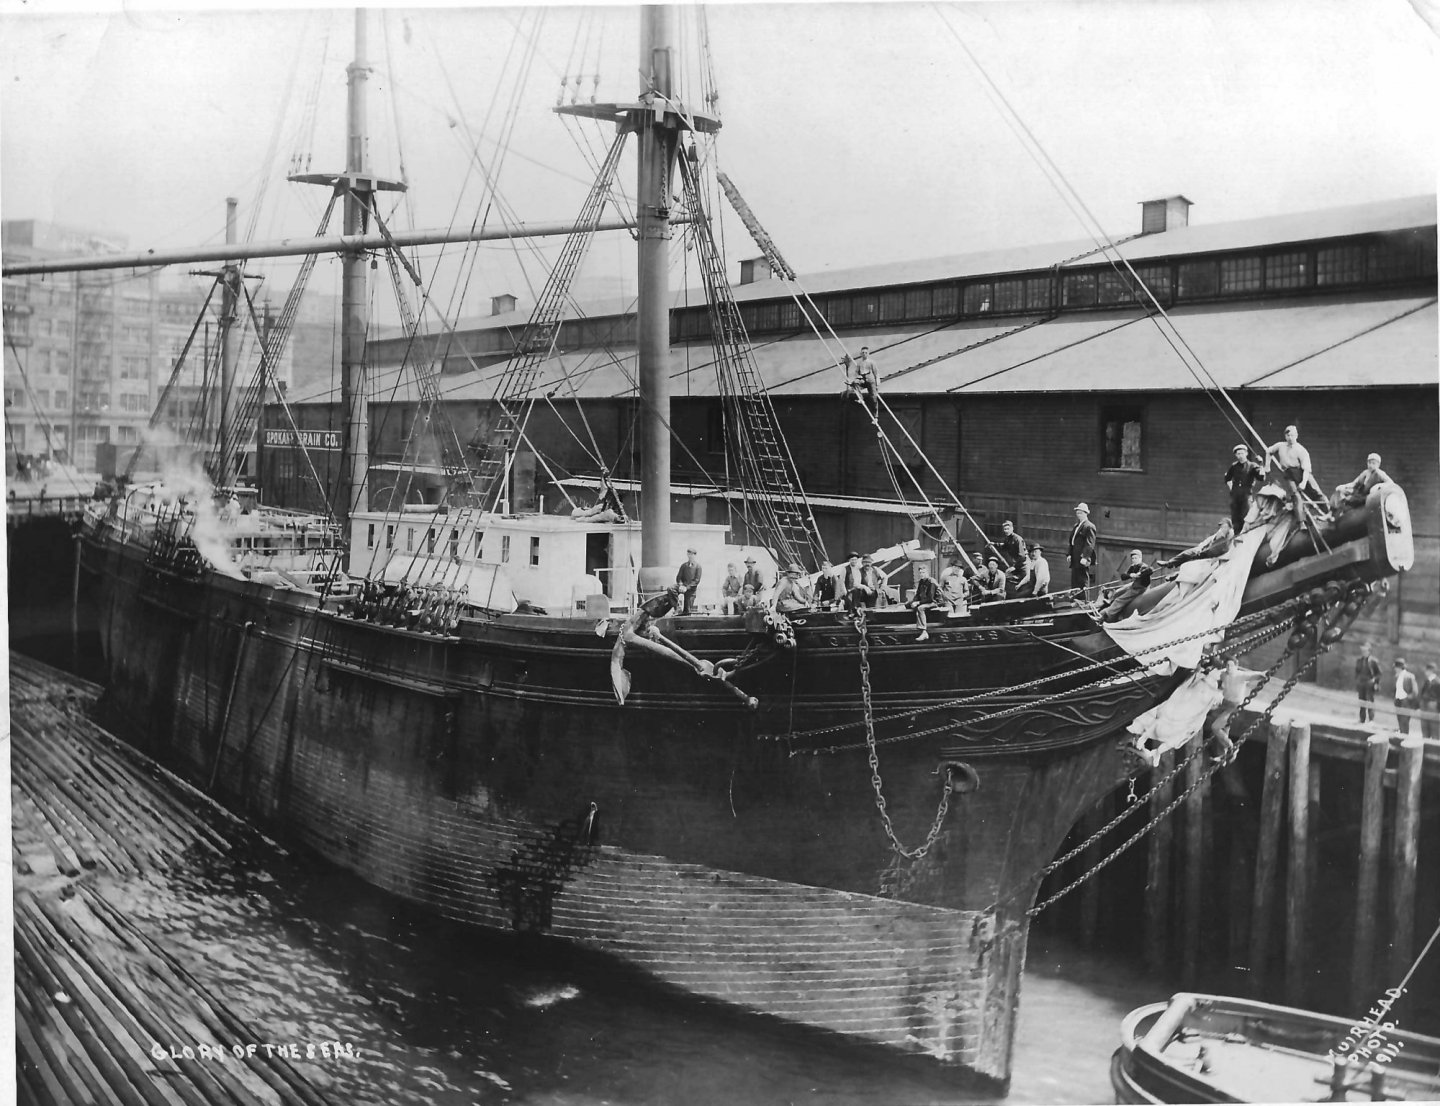
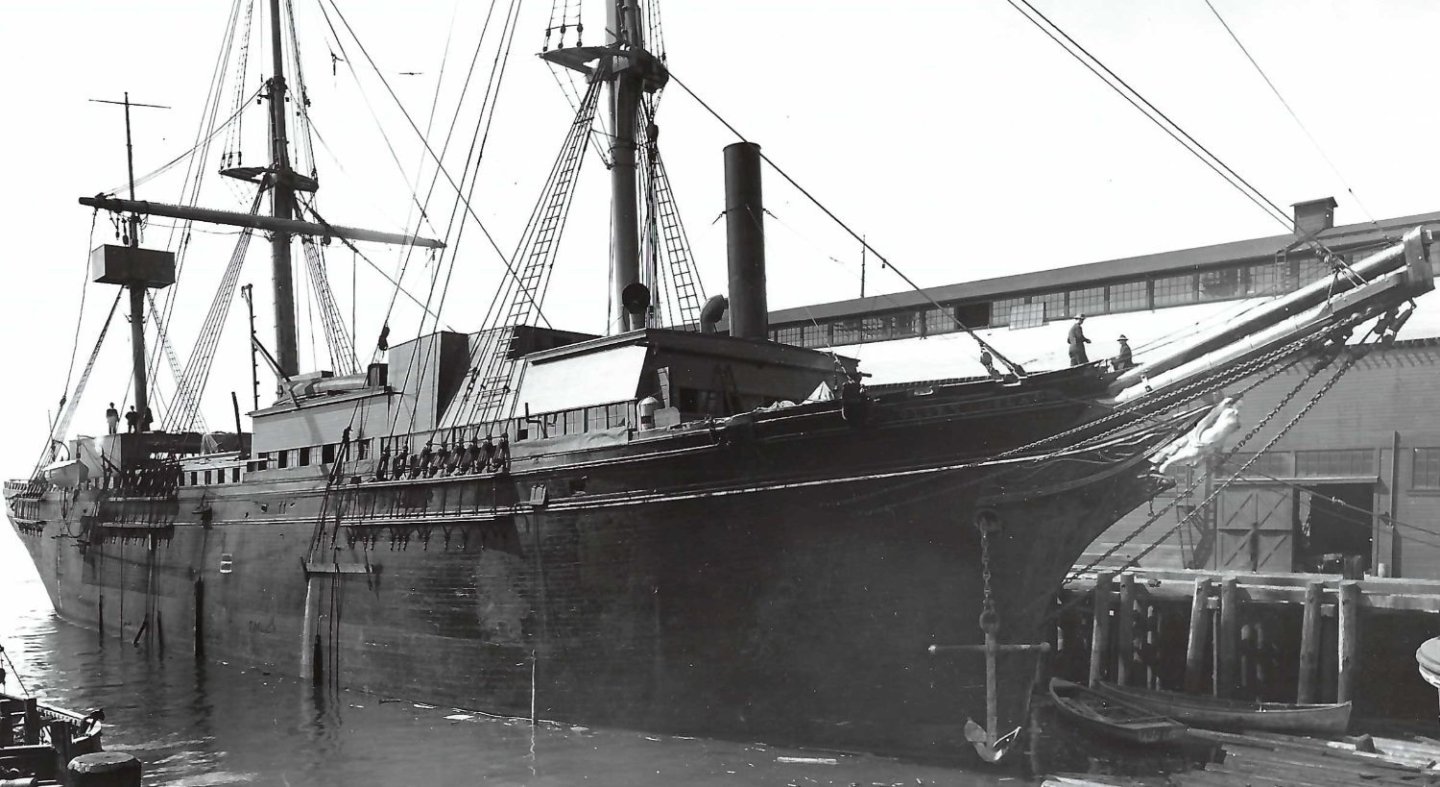
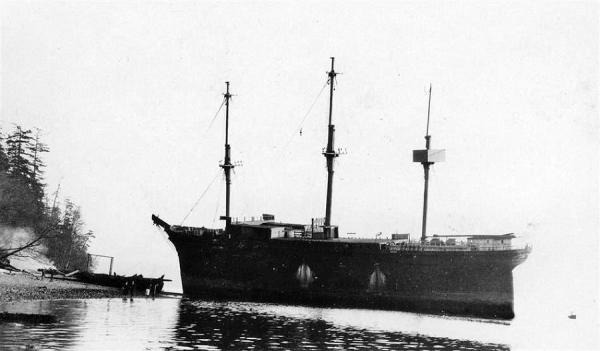
Yes...Vlad..6 pumps within the hold. These pumps removed water and debris and expelled it out hull drain ports that were found along her second deck level. Look closely and you will see the exit ports on these images and the staining caused by the expelled fish fluids(Top picture), and water in the bottom picture. The only pump on deck was the large flywheel bilge pump. Rob

-
Vlad, you ump construction is wonderful. However, I’ve found no evidence of the 6 smaller single pump type were on Glory of the Seas. No photographic evidence shows them. I’m assuming you are using artistic license here. Rob
-
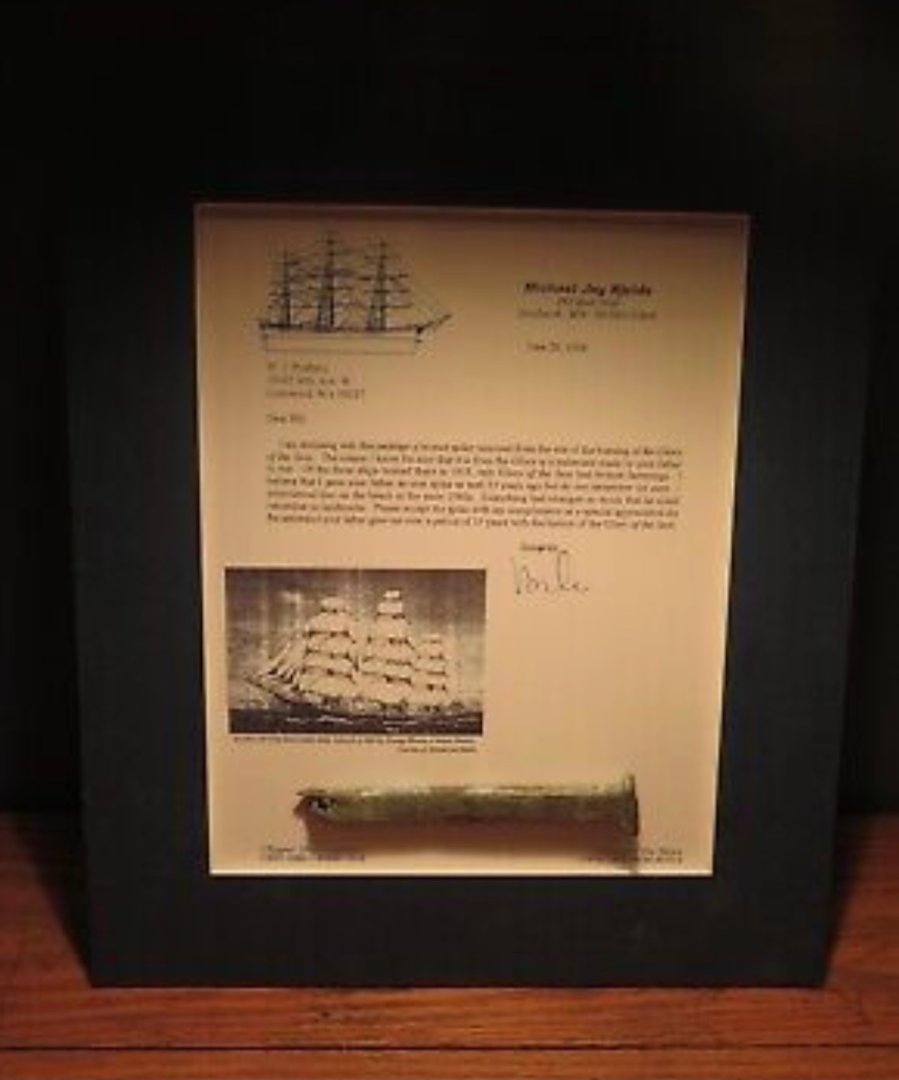
Just to let my friends know, I bought this artifact and it’s description originally written for and sent to the son of one of the men involved in the burning of Glory of the Seas. It was a gift from Mike. He (Joe), since passed and his estate put it up for auction. I got it. What a thrill. I will place it in a new shadow box and put it in my collection. Rob
- 3,560 replies
-
- 3
-
-
- clipper
- hull model
- (and 2 more)
-
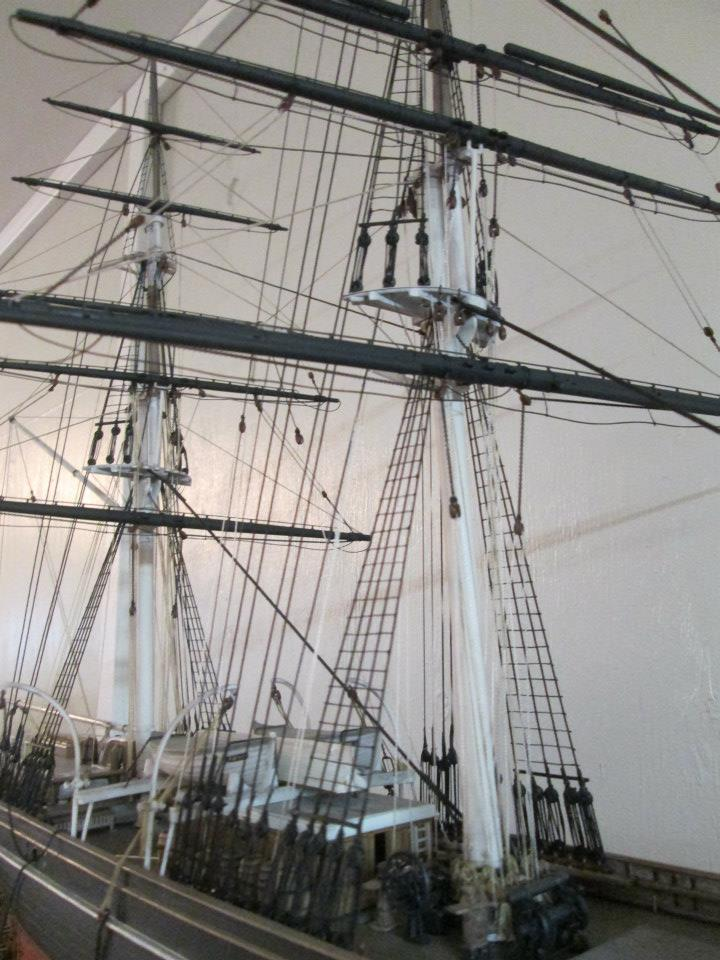
Johnny. In its premium(Later) form, the howes design evolved into a self reefing topsail and other designs namely from Colling & Pinkney and Cunningham's self reefing topsails.. Cranes were for lower topsail yards that were mounted on the mast cap and they then had another *crane* iron bar supporting them from either a band on the topmast doubling or from a foot on the tops. Basically the upper and lower topsails were laced together and were both rolled onto the upper topsaIL yard as it was lowered down to were the lower topsail yard would have been placed. I recommend you aquire a copy of Underhill's book *Masting and Rigging the clipper and Ocean Carrier*. It will answer all your rigging questions for sure. Rob
- 3,560 replies
-
- 1
-

-
- clipper
- hull model
- (and 2 more)
-
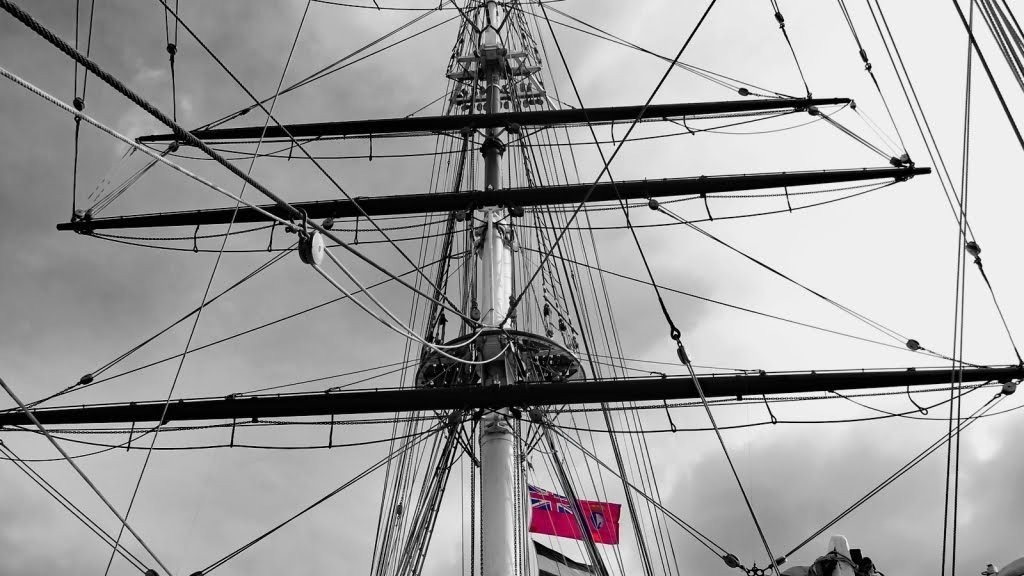
Kevin. It is prudent to more then vaguely familiarize yourself with CS structures. The Howes design lower topsail yard is no movable(It does not have a tie or chain lift....so its weight needs to be supported with a *crane*. My Glory of the Seas was built the same year as CS and it had a crane as well...though it was slightly different....it rested on an iron pedestal affixed to the topgallant mast doubling. This is the best pic I have. Rob
- 444 replies
-
- 3
-
-
- Cutty Sark
- Revell
- (and 2 more)
-
I have a better quality version that you can magnify. Rob

- 444 replies
-
- 1
-
-
- Cutty Sark
- Revell
- (and 2 more)
-
You are correct Bruma. Here is an image of KS yards. Rob
-
Another fine addition Nils. Question: Do you use plaxi or acrylic for your cases...or are they glass? Rob
-
Nicely done Nils. Smart little pilot schooner. Completed in your typical clean, concise manner. Very well done. Congrats on another fine addition to your collection. Rob
- 180 replies
-
- 1
-
-
- pilot boat
- Elbe 5
- (and 3 more)
-
No.....your reasons are your reasons. I fully understand. The grain in the original deck was out of scale because of the oak.....but it didn't look bad. I do follow your goal to demonstrate proper joinery...especially in your scale. I'm still waiting to see how you include the addition of a waterway in your new construction. The new deck is nearly at the level of the covering board. The new deck is going to look wonderful, I'm sure. Rob
-
First of all...thanks to everyone who commented and congratulated me on Glory's completion. A most heart felt...thanks. Rich.....Talking to Mike, he suggested contacting the Bainbridge Island Historical Society...claiming Glory did indeed share some history with Kitsap County. I hope I enticed him to throw some of his own Authorship weight behind the venture and do some investigating himself. Most of these local nautical historical societies have, either previously corroborated with him, and or, provided him with information. His name among certain circles, I am sure, can at least, give us the traction needed to find a suitable and respectable museum partnership. Rob
- 3,560 replies
-
- 1
-
-
- clipper
- hull model
- (and 2 more)
-
Good job Vlad. Im interested in how you will properly align both sides when they join in the middle And what becomes of your waterway as you cover her up with new decking? Are you replacing the deck because the old one is out of scale? Rob