HOLIDAY DONATION DRIVE - SUPPORT MSW - DO YOUR PART TO KEEP THIS GREAT FORUM GOING! (Only 69 donations so far out of 49,000 members - Can we at least get 100? C'mon guys!)
×


lb0190
-
Posts
686 -
Joined
-
Last visited
Content Type
Profiles
Forums
Gallery
Events
Everything posted by lb0190
-
 Hi Scott, Thanks for looking in and for taking time to post. I seemed to have missed your post - sorry about that. Yes, this method has worked out much better than I could have hoped for. One thing I forgot to mention is, I place the end boards such that the wood grain is running vertical. This allows me to easily cut the majority of excess wood that sticks out with a sharp blade, leaving very little to sand.
 -
Thank you Sjors! I'm glad I'm finished with planking large areas. It can get boring very quickly. I'm getting close to where I need to figure out the sequence for painting the hull. I'm considering painting the light green boot topping line first, overspraying a bit, then mask it off with a single thin width tape and use that tape as a means to further mask off for the the colors above and below the line. I hope doing it this way will give me a well defined stripe. I just need to finish up working the hull details before painting. I've been quietly following your build (and others) when time permits. Your San Ildefonso looks amazing my friend.
-
Hi Augie - Thanks and welcome back from your trip. I wonder sometimes if I provide too much minor detail such as the above, but hopefully someone will benefit, including me if another builder responds with another method easier or better. Your Confederacy build is very impressive!
-
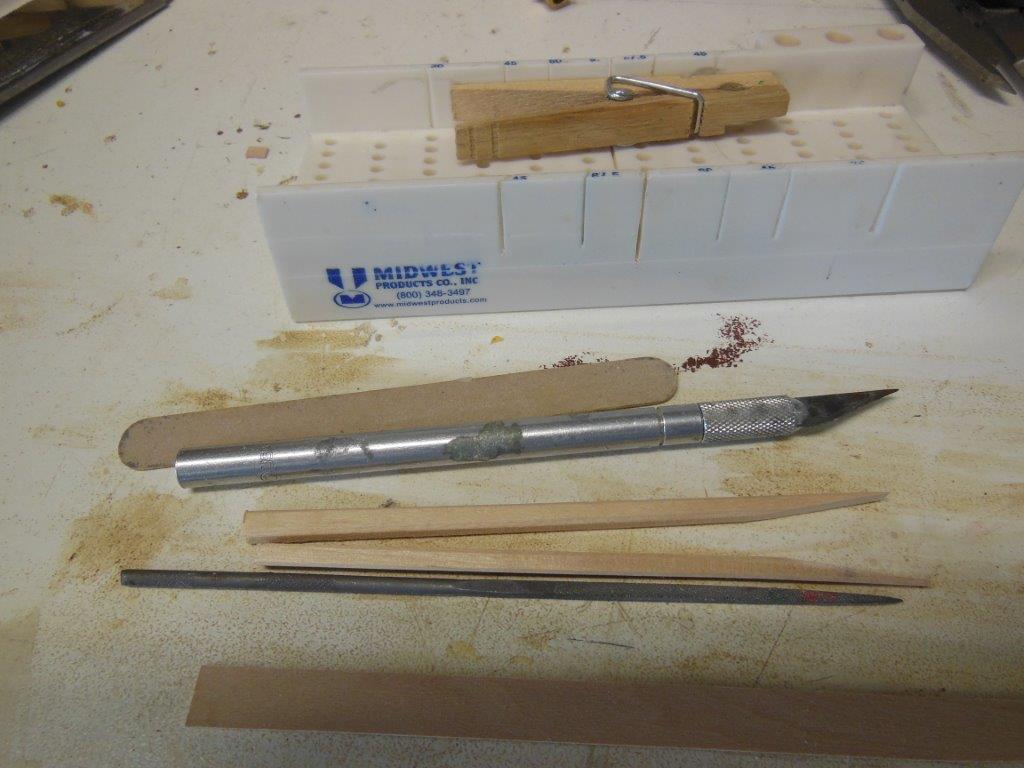
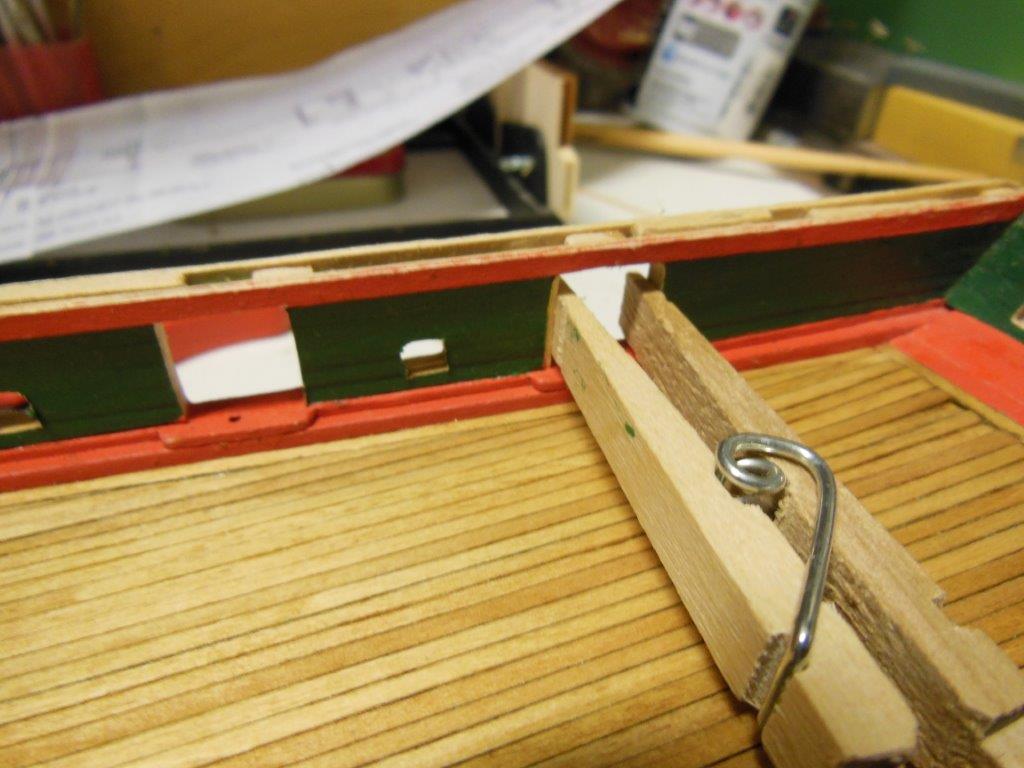
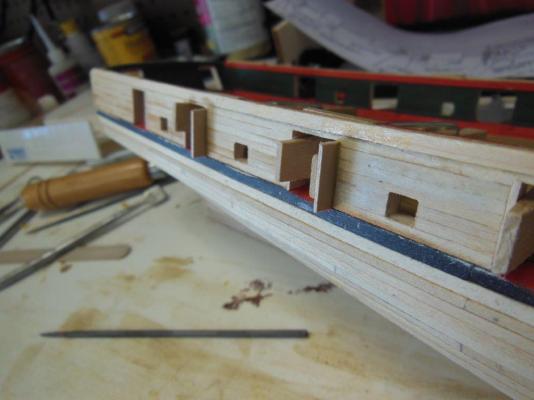
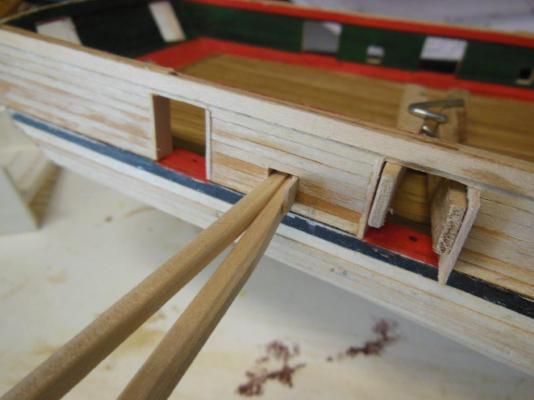
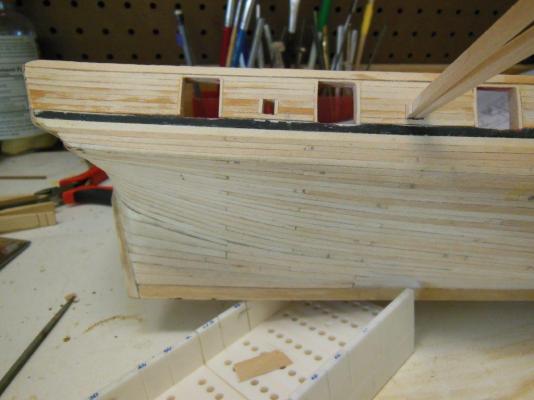
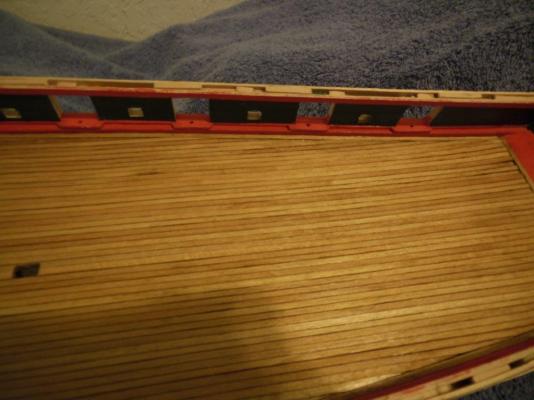
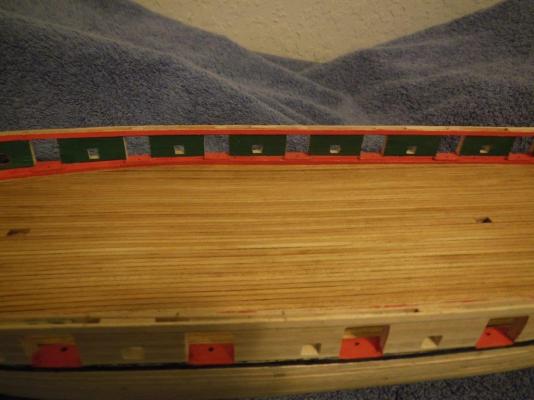
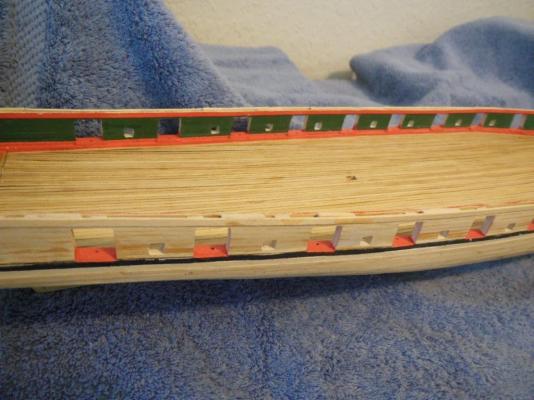
I have a small update, regarding what I'm working on and my approach to what I thought would be a very difficult if not impossible task, due to the size. I've postponed framing in the gun and sweep ports for a while and even thought about skipping that detail, but seeing how much it dressed up the ship I started working this item yesterday. The first photo shows what tools and wood i'm using. clothes pin Dental tools chop sticks sanded into wedges emery-board 1/32" x 3/8" wood As the photos show, once the side planks are cut to size I use white glue and wedges to hold the plank in place as the glue dries. Once it dries I cut the excess wood away and then sand it down flush. Finishing all twenty two gun ports and eighteen sweep ports will take a while at my present pace, but time is what I have


-
Good morning Scott - thank you, It's been a fun and challenging build.
-
Hi Mark, Your welcome. I'm anxious to follow your build log. Sorry there is not much text with my build log but it was lost when MSW had a server issue. Luckily I saved all of my photos on my desktop, making it pretty easy to recover my build log other than being able to show all of the great help from more experienced builders. The hull was really iron (my error saying steel) and the Washburn started out as a single stack until refitted with new boilers and two stacks in 1921. I believe she was demo'ed in 1949. If look on-line at Amazon books and search for Cornell Steamboat Company you will find a book about Cornell. Amazom lets you search in the book on-line and it lists all of their tugs and some specifications. It's worth reading...
-
Hi Edwin, thanks. I have had numerous visitors at home, ask about the rope fenders, many seemed shocked to hear there were tugboats before tires were available to use as fenders. IMO some of the rope fenders were woven works of art. I'm doing ok, thanks for inquiring. The past year has been a bit rough for my health and other family members, but it's improving everyday. Take care my friend!
-
Brian, thank you for looking in and for the compliment. IMO, getting one under your belt (completed first build) has many benefits from learning new skills and confidence building. Learning/improving some basic skills from an easier build pays off many times when you move on to a much harder kit. Best of luck with your Niagara.
-
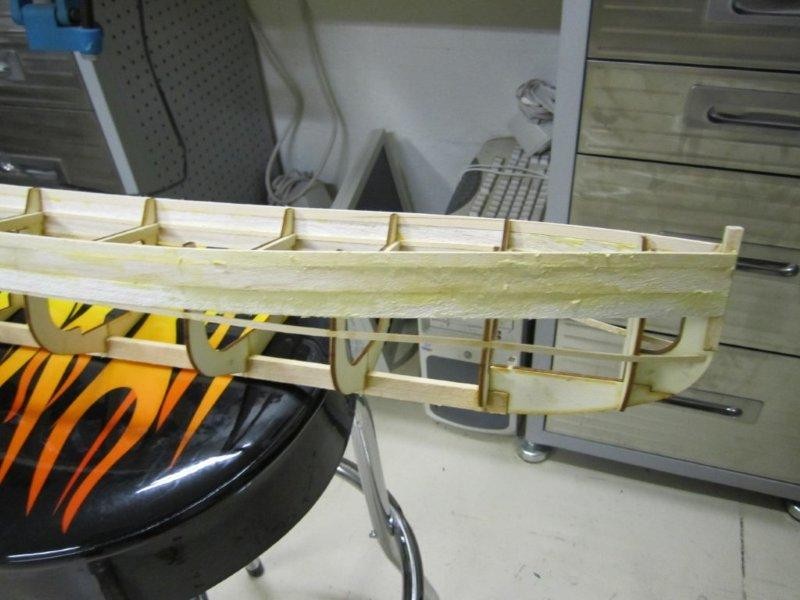
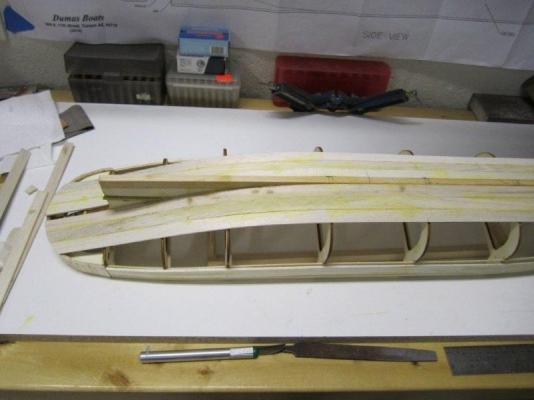
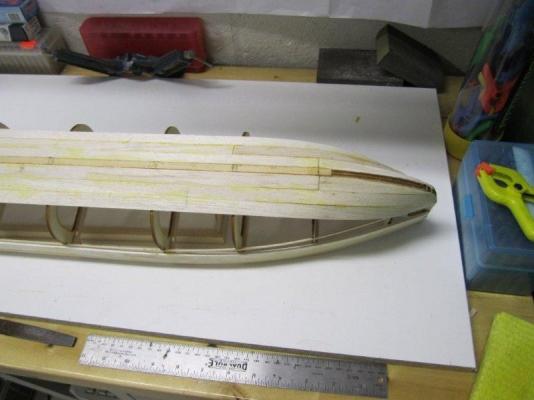
Hi Mark, I hope your enjoying the Washburn build. It's a great kit and helped me as a beginner to learn about the basics of building wood model ships. I do not know if it would have ever made it to completion without the help and encouragement of the MSW community. In regard to your build here are my suggestions and input. 1) I did not find a build log. Having a build log is important. It allows other to follow and learn from your build, plus it also allows others to better help you and even spot potential issues before you may see them. 2) The planks on the Washburn are thick - yes 1/8" allows for a lot of sanding, which I also had to to do. I used Balsa Light filler at seams where needed (mixed with a little water to make a paste). I attached a few photos that may not have been published in my build log that shows this (yellow substance is where I applied Balsa Light filler). The last photo is before sanding off the excess filler. Clinkers can be fixed with sanding and some filler. 3) The Washburn had a steel hull which I simulated with a fiberglass coating and can also be simulated with an epoxy coating. I'm assuming your doing one or the other which provides lots of opportunity for correcting the hull lines. Since (assuming) the hull will be coated or covered do not worry too much on how the planks go on. Simply cover the frames, and sand, use filler as needed - the planks will all be covered and out of sight. 4) Coating the entire inside surface of the planks with epoxy not only helped make it waterproof, it really increased the strength of the hull and stiffened the planks. I suggest you do this before sanding very much. I used z-poxy finishing resin on all the above - it sands and brushes on very easy and nice (Amazon purchase). 5) Start a log, post some pictures so we can see where your at and get a better idea of the problems your concerned with. You will get a lot of excellent advice and support for the entire build... I hope this helps...

-
Hi Nils, Thanks for looking in and for the compliments. It was a fun and challenging build. I thought it was perfect kit for a first build, very challenging but forgiving.....
-
Good moring Mark. I just seen your post. I'll take a look at your thread and get back with you before the day is out. We'll figure out how to resolve your concerns.
-
Hi Steve, Thanks for the compliment and for taking time to visit. I lived in Ca. (Lancaster) for eleven years, working at Mojave Airport and Edwards AFB furing my flight test years. I thought the nibbing strake looked a bit too difficult for me, especially at this scale. I hope to give it try on my next build and will choose the kit carefully in regard to scale, to make sure the planks are larger than what I'm currently working with.
-
Good morning Russ, Popeye, & Augie, Thanks everyone for the input. Since I have WOP, I think I'll do a sample test to make sure the outcome looks OK to me, if it does not appeal to me I'll look into using lacquer. I'm pretty rough on the model when working on it and the finish would hopefully prevent me from scratching the deck. I'll plan on pinning deck structures - thanks again!!! After applying the finish, I'll move on to applying the exterior details to the hull take I believe should be mounted before painting, ie fashion piece, bow plank doubler, Hawse pipe holes, stern mooring chocks, etc..
-
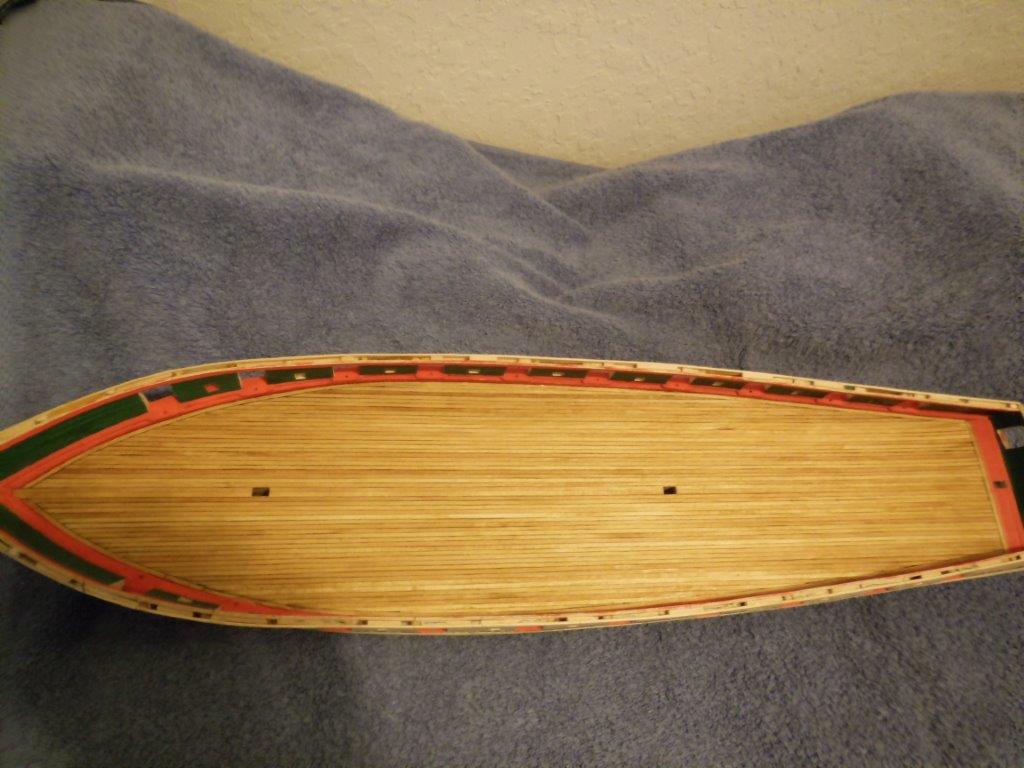
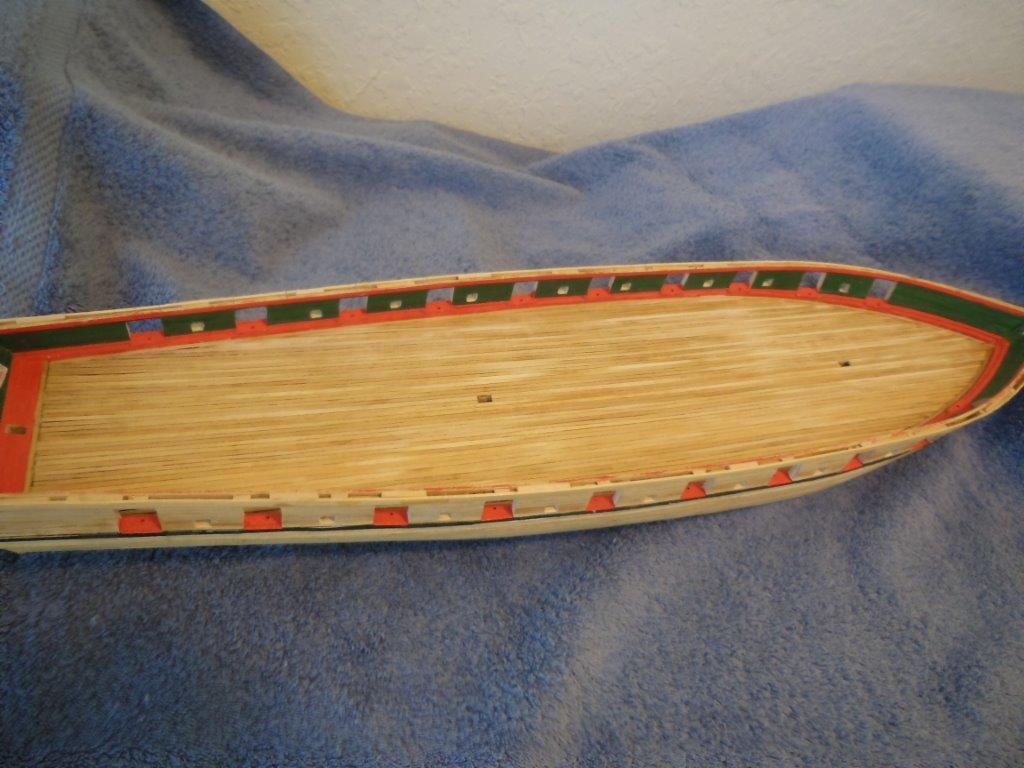
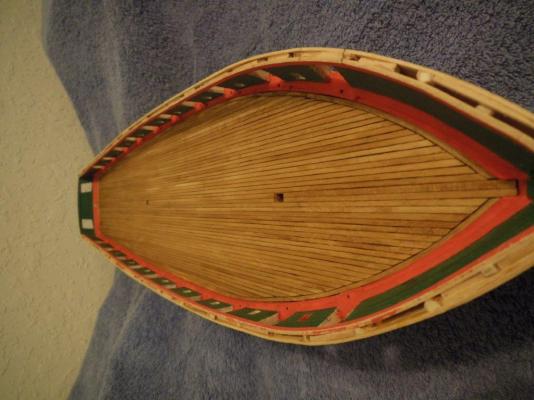
Here ya go... one completed deck. The room was a little dark and I did not use the camera flash due to my usually getting too much reflection, resulting in slightly dark photos and the deck stain is not quite as dark as it appears. Even though I used a pre-stain, I still ended up with some light and dark planks but I convinced myself that is closer to reality than a very consistent color. I sanded with 220 grit paper glued to a piece of wood, a fine Emory board glued to a piece of wood, plus I used an electric mini sander in places where needed (THANKS Augie for pointing out this wonderful little tool!) and finished up with 0000 steel wool. Overall I'm satisfied with the final outcome. I have a question for you modelers who been down this road before. Should I coat the deck at this time with wipe on poly to help protect it (that's my current train of thought)? I'm open to ideas. I also have the Model Expo Clear Satin Coat and plan on using Dull Coat afterwards to remove and residual shine. What is your favorite way to protect the deck finish? Since the deck is basically complete, I'm doing my normal second guessing myself for not leaving openings for the deck furniture. Current plans will be make one item to see how it looks attached to the top of the deck. If I do not like the appearance, I'll bevel the bottom edge inward and scribe the outline and remove deck material so it's slightly recessed (the thought of doing this curls my toes.


-
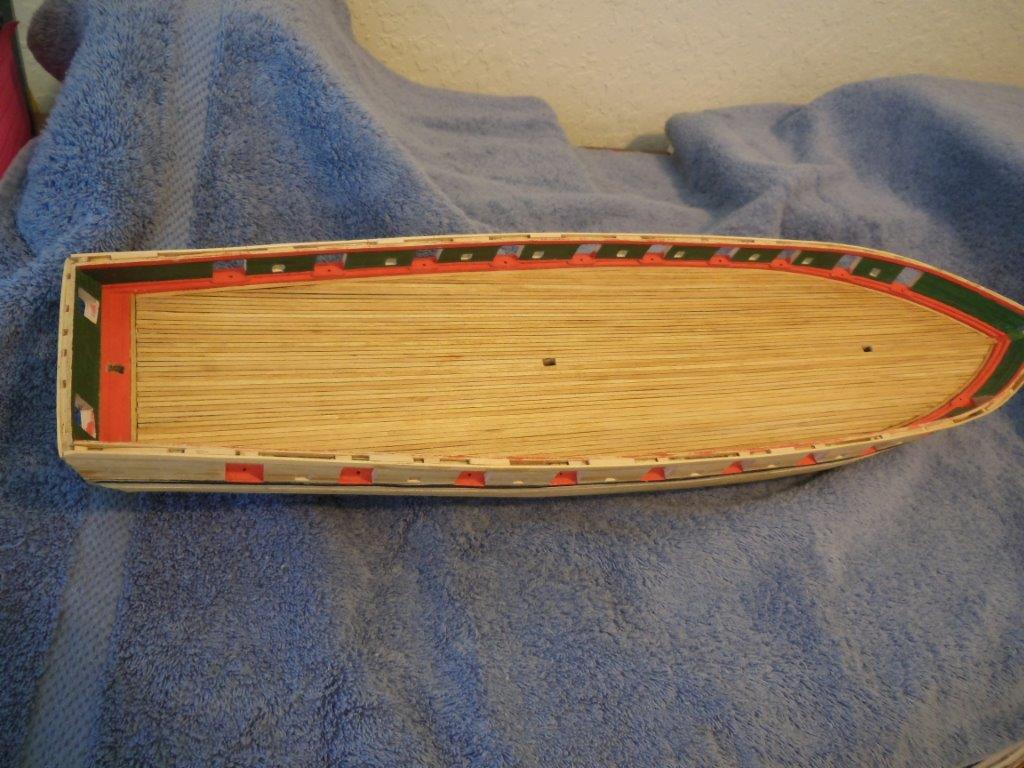
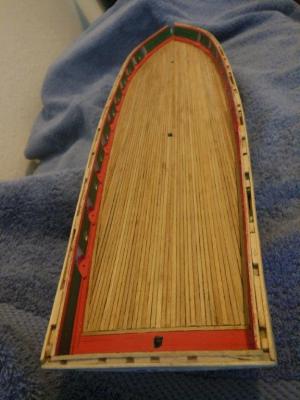
Good morning Alistair, Thank you. Since my post yesterday I sanded and scraped the deck to where I'm satisfied with the how it looks. Now all I need to do is reapply the pre-stain and restain with my 50% diluted Golden Oak - hopefully I'll get a fairly even color. The photo was taken after sanding and scraping.

-
Thank you Dale and Popeye. Yes, it's that plank and a few more. I started light sanding using an Emory board glued to wood. So far the sanding has helped and all I need to do is not sand too much.
-
Hi Russ and Sjors, Thanks for looking in and for your input as well as the compliments. I understand what your saying and agree it's very easy to get caught up in looking for results that are beyond reasonable. I'll do a little sanding and try not not to overdue it. Most of what I do not like is in isolated areas.
-
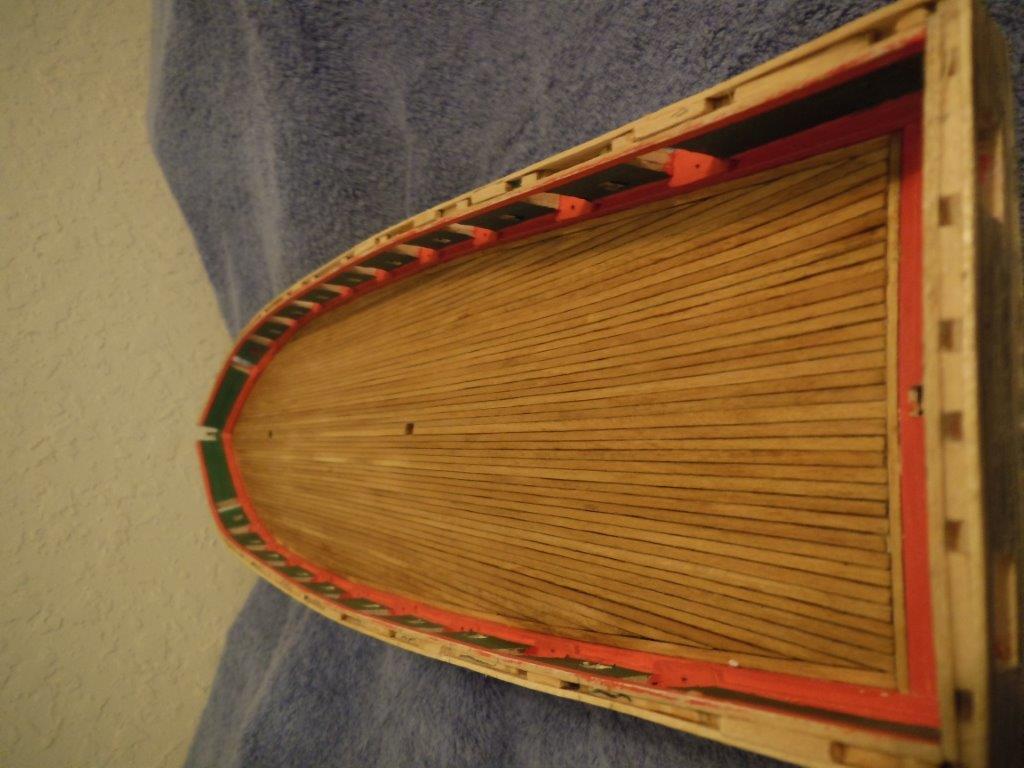
I've finally completed installation of my deck planks, which now require sanding and re staining. If you look closely you will see some plank seams appear darker than others. This darkness is due to the plank being slightly higher than the plank it's mated to, showing more pencil marked edge than intended. Sanding should eliminate that issue but I am a bit concerned about being able to sand the deck evenly. As I mentioned in an earlier post, I decided to install full deck length planks and not to install the nibbing plank. I realize this is definitely non-scale but I believe this keeps the build well within my skill-set and due to the size of the ship keeps what will be a busy deck, more appealing to me. Home life has been very busy and hectic, keeping out of the shop (as well as MSW), but laying 2-3 planks at a time has finally resulted in my laying the last plank this morning. I hope all my friends on MSW are doing well and in good health!

-
Mark, I found the link: http://www.frayedknotarts.com/grudinskas.html. It's a very nice tutorial called: Making a bow fender for a tugboat by Cap't Ben Grudinskas I hope this helps. Edit: I forgot to mention I used tea to slightly dye the fenders.
-
Hi Mark, Thanks for looking in and for the compliments. I'll try to answer your questions in the order you asked. The beard (I call it by that name also) I believe it's also called a fender. I do not think the Washburn had one in real life but I like how it looks. I found a link where someone was building beards for restored tugs and he posted a number of photos showing how he made them. I simply scaled the process down to fit my model. I'll look for the link and post it as soon as I locate it. I constructed the build for RC but did not have have any intention on anything other than static display. I thought, maybe one day I would give it away or sale it to someone interested in RC boating so it's ready to add the RC hardware. The upper deck lifts off (snug fit) and has a water barrier to help prevent flooding the hull. The hull interior has plenty of room for the components and ballast. I used to fly RC but never took up boating RC.
-
Hi Ken, I'm using the alternate method of attaching them on the top of the deck, by adjusting the overall height. If I do not like the results I'll cut the deck planks and attach to the sub-structure.
-
Brian, Sorry I did not answer your questions regarding battens, but I suspect you rec'ed a lot of good advice. I also did not like the approach of pinning battens in place. I used the battens to find my belt lines and then traced the batten edge on each bulkhead with a pencil. Once my belt was defined, I found the widest spot and measured the width to determine the number of planks needed. I then measured the distance at each bulkhead, divided the measurement by the number of planks to determine the needed plank width at each bulkhead. If you look back on pg 14 of my build log you will see an example of the spreadsheet I came up with.
-
Hi Bob, thank you for your concern and friendship, life can be tough at times but friends certainly help with the recovery. Today I started back on laying deck planks. Once I have a few of the starboard planks in place I'll cut open the mast mount holes.
-
Thank you gentlemen, I'll wait.
-
Thanks Alistair. We returned home Saturday and today I installed the last port side deck plank - I'm 50% complete. I now have to decide if I scrape or sand the deck before or after I install the starboard side deck planks. Any advice from the more experienced builders out there???