HOLIDAY DONATION DRIVE - SUPPORT MSW - DO YOUR PART TO KEEP THIS GREAT FORUM GOING! (Only 72 donations so far out of 49,000 members - Can we at least get 100? C'mon guys!)
×


lb0190
-
Posts
686 -
Joined
-
Last visited
Content Type
Profiles
Forums
Gallery
Events
Everything posted by lb0190
-
 HI Sjors, thanks for the help. The metal is a white metal casting that's pretty rough. The sanding cleans it up a bit knocking off flashing and mold split lines plus it leaves a little bite for the paint to stick. I need to buy a wood colored paint to airbrush on, I'll look for the Tamiya primer while I'm there. I have a primer I have used before but it goes on so heavy it hides details. I suspect the Tamiya primer is thin enough not to hide details - thanks again. I'll let you know how it works out.
 -
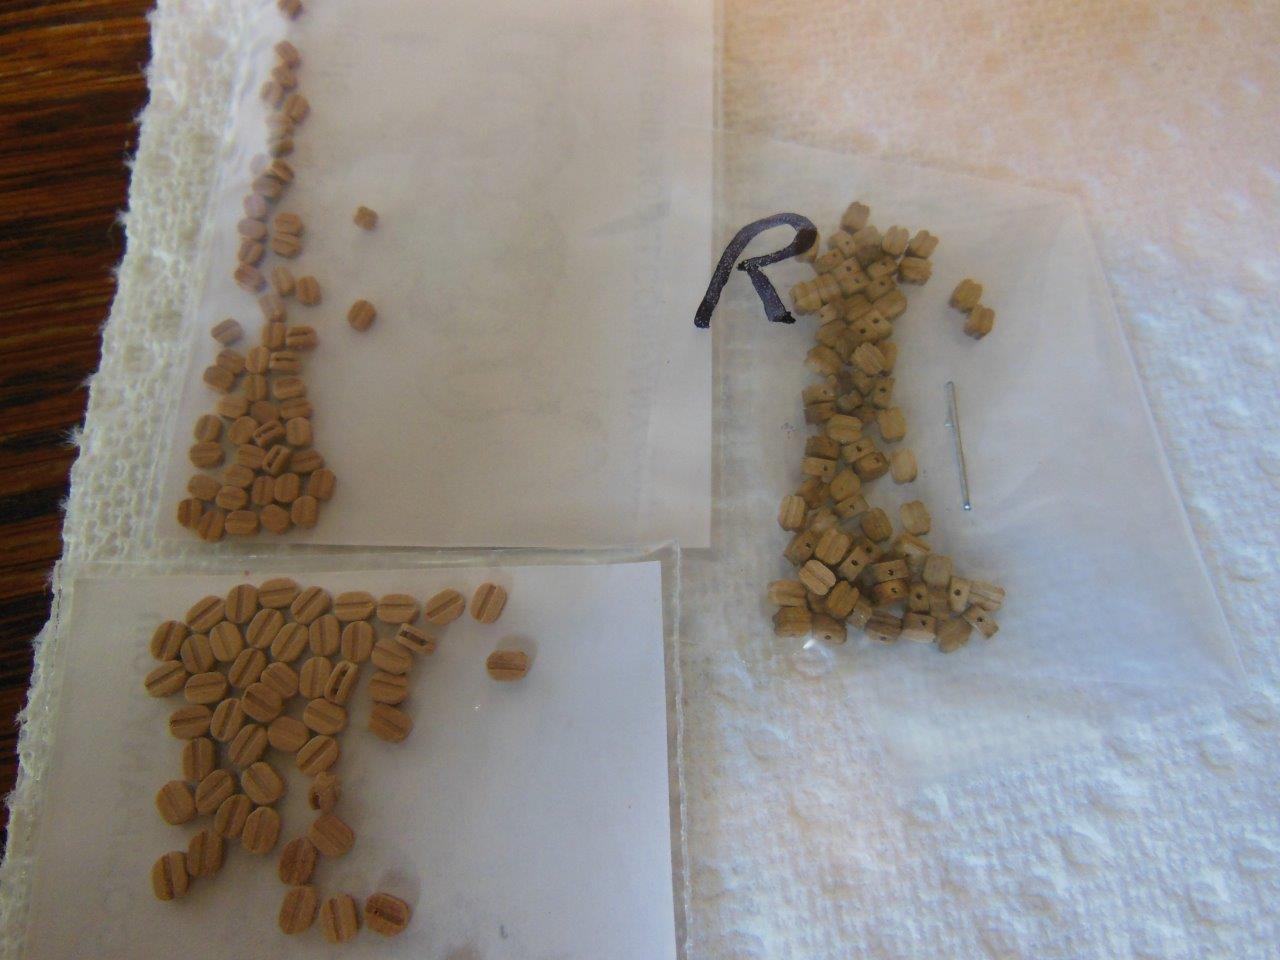
Hi Sjors, I agree it looks much better black than than the bright brass. I used Blacken-It which worked pretty good (so far). I just finished sanding all of my cast metal cleats. I think I'm going crossed eyed due to how many there were. Now it's time to try the blacken-it on the cleats, but I'll ck the plans first in case they suggest a color. Edit The plans say the cleats should be bright - natural wood color. I tried to blacken a couple of them but it did not take color very well so it looks like I will paint them.
-
Thanks for looking in John and for the compliments. I agree, black looks much better than the bright brass. I really disliked the idea of painting all of those pins...
-
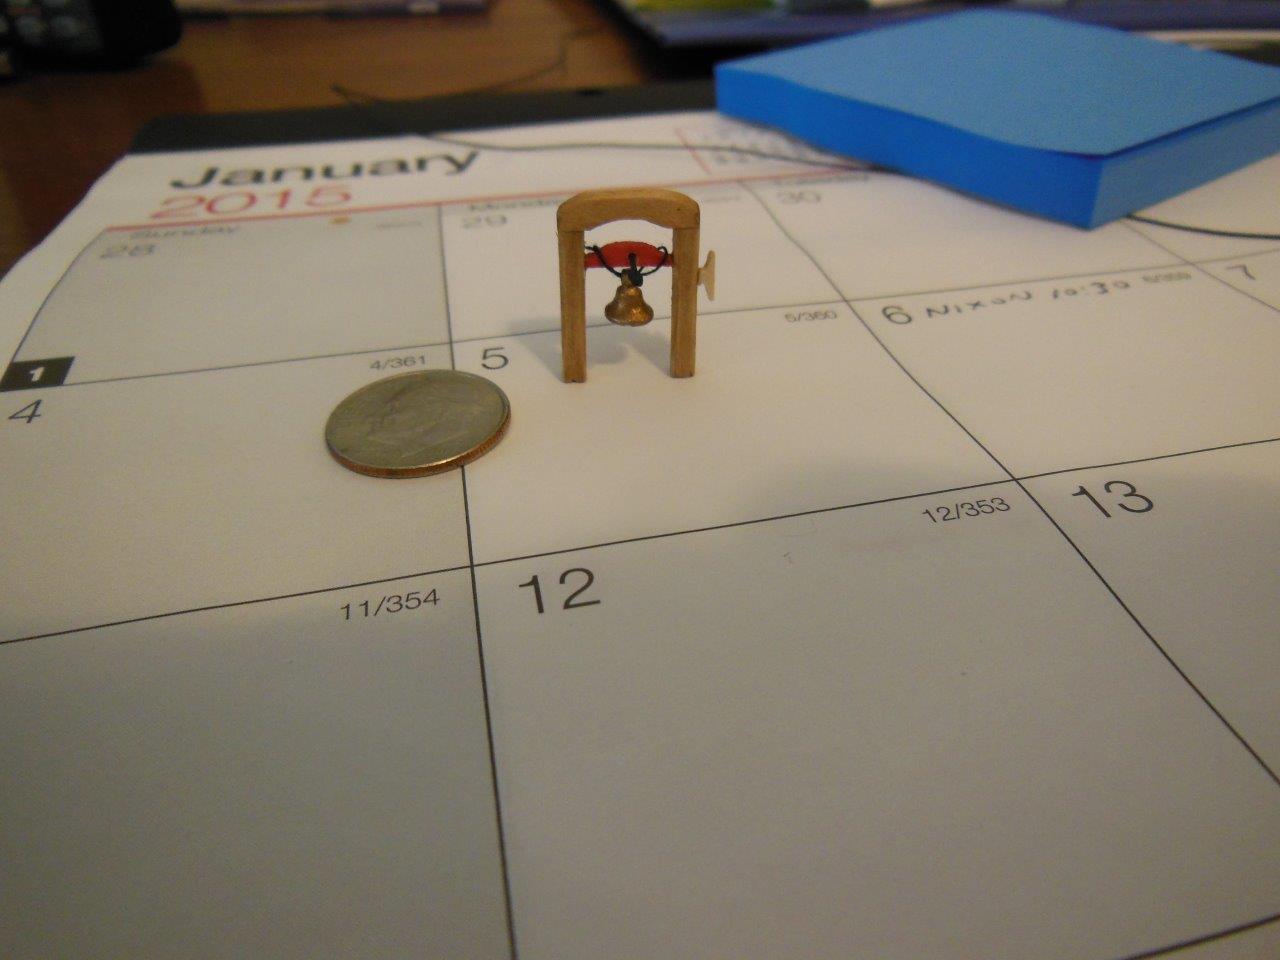
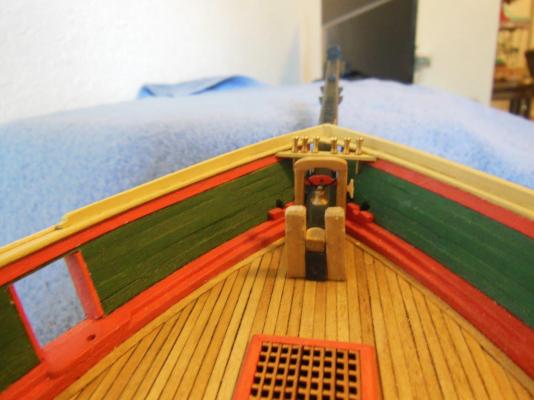
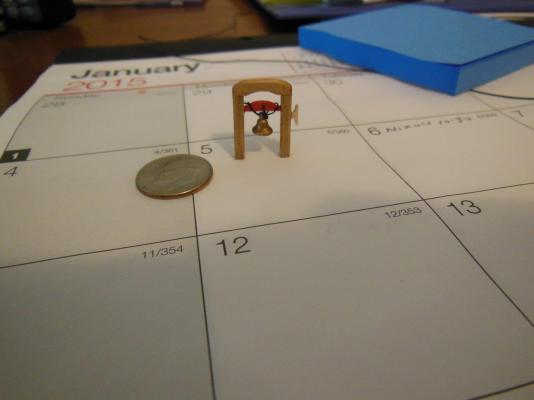
Augie, Patrick & Steve, Thanks for the compliments and for your opinions. I was leaning toward blacking the pins with paint being my 2nd option, so here are the blacken-it results and the Captain approves! Thanks for the help! Digital cameras are amazing. The handle sticking out from the ship's bell is 0.015" (0.38mm) diameter.
-
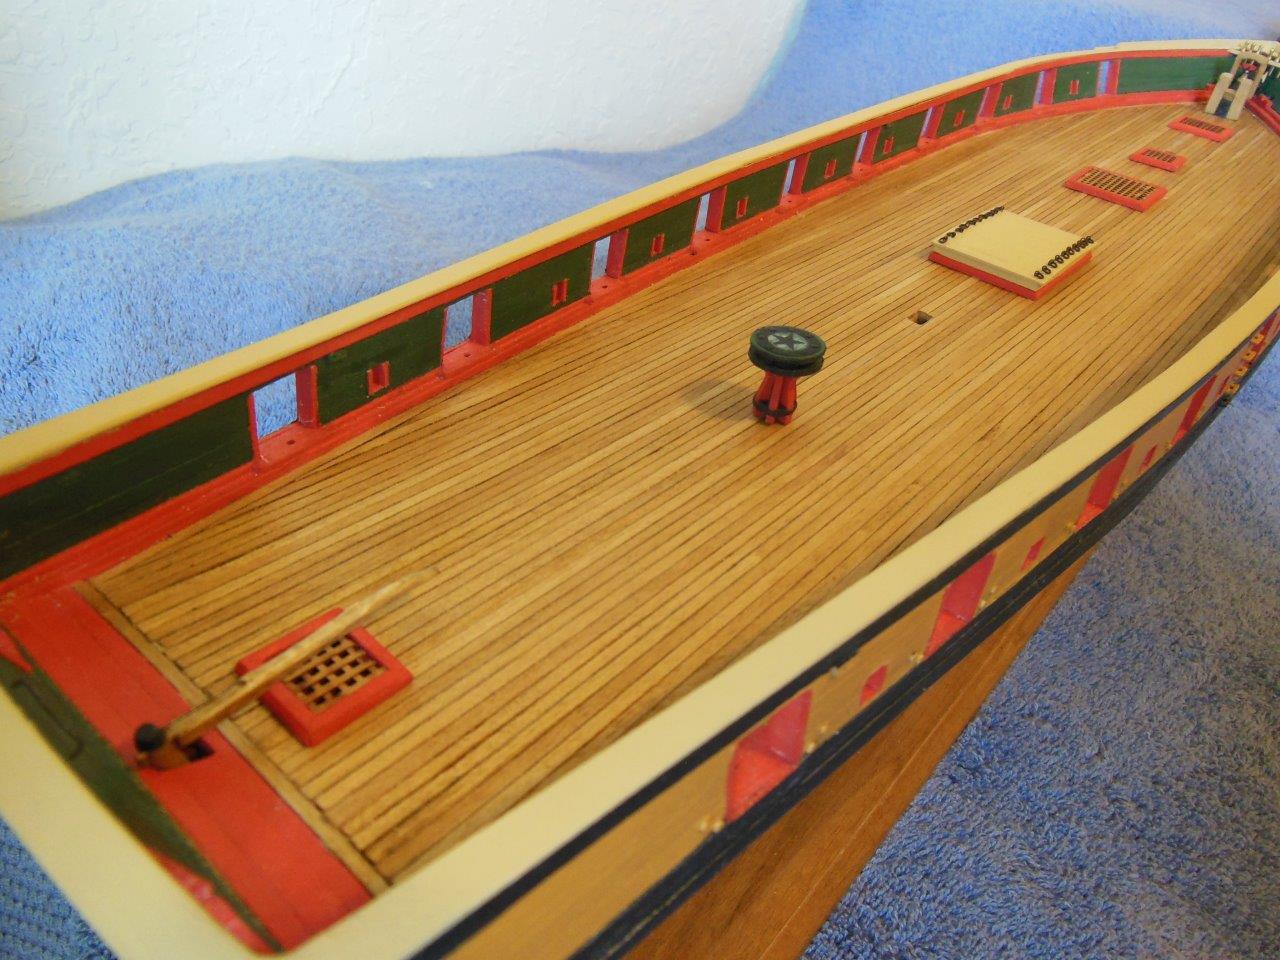
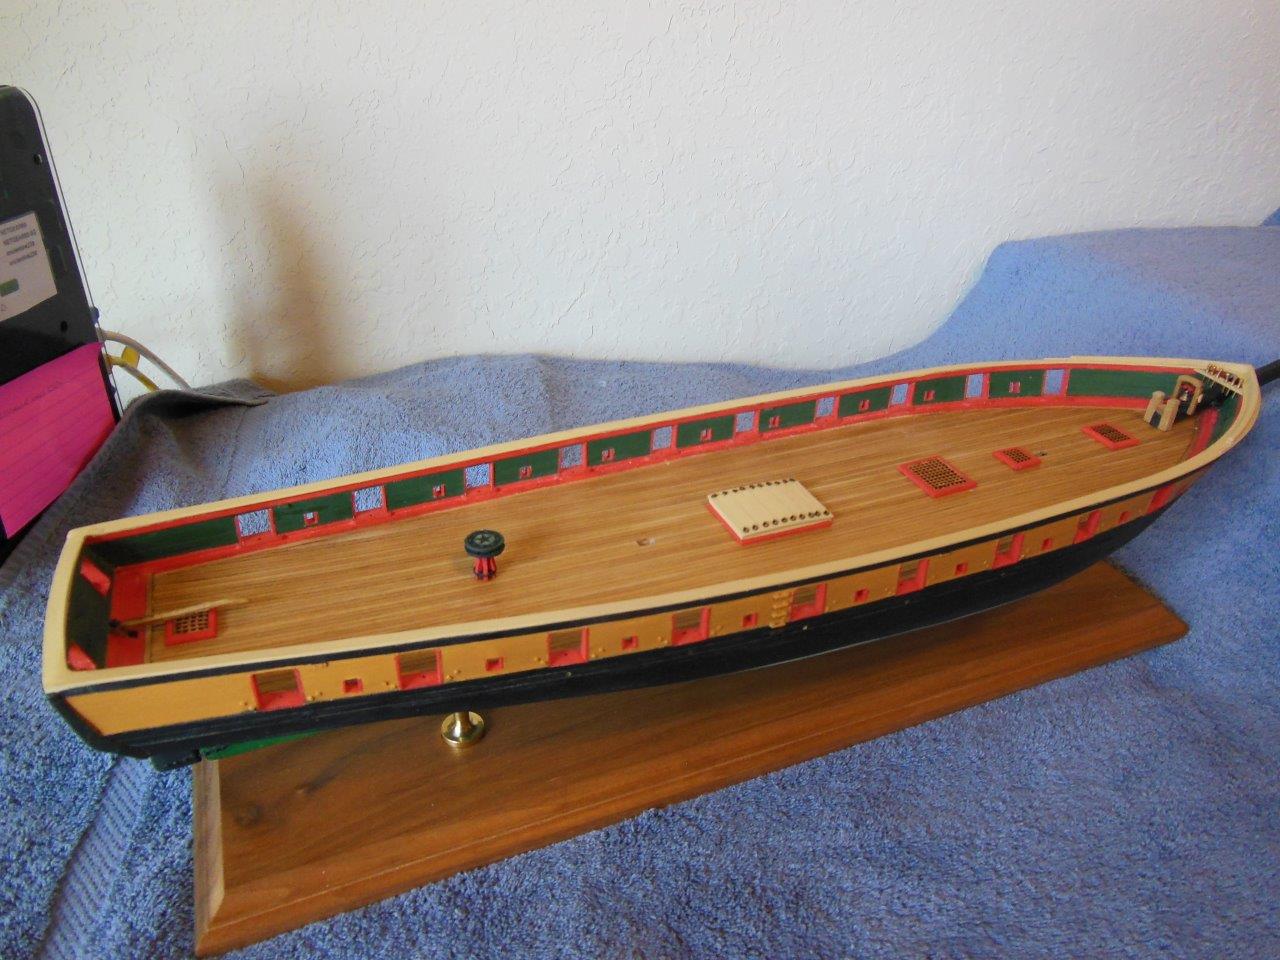
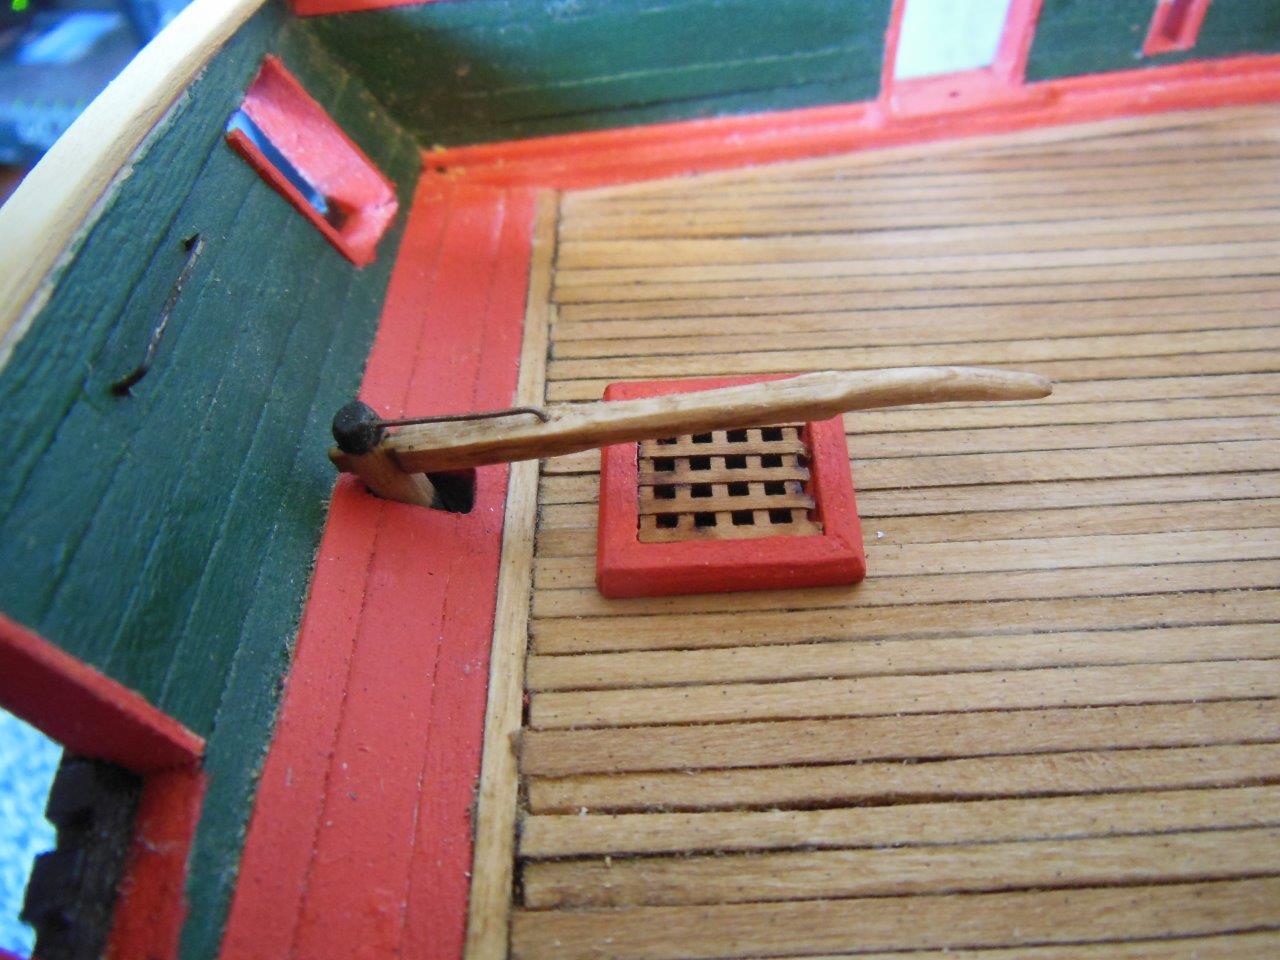
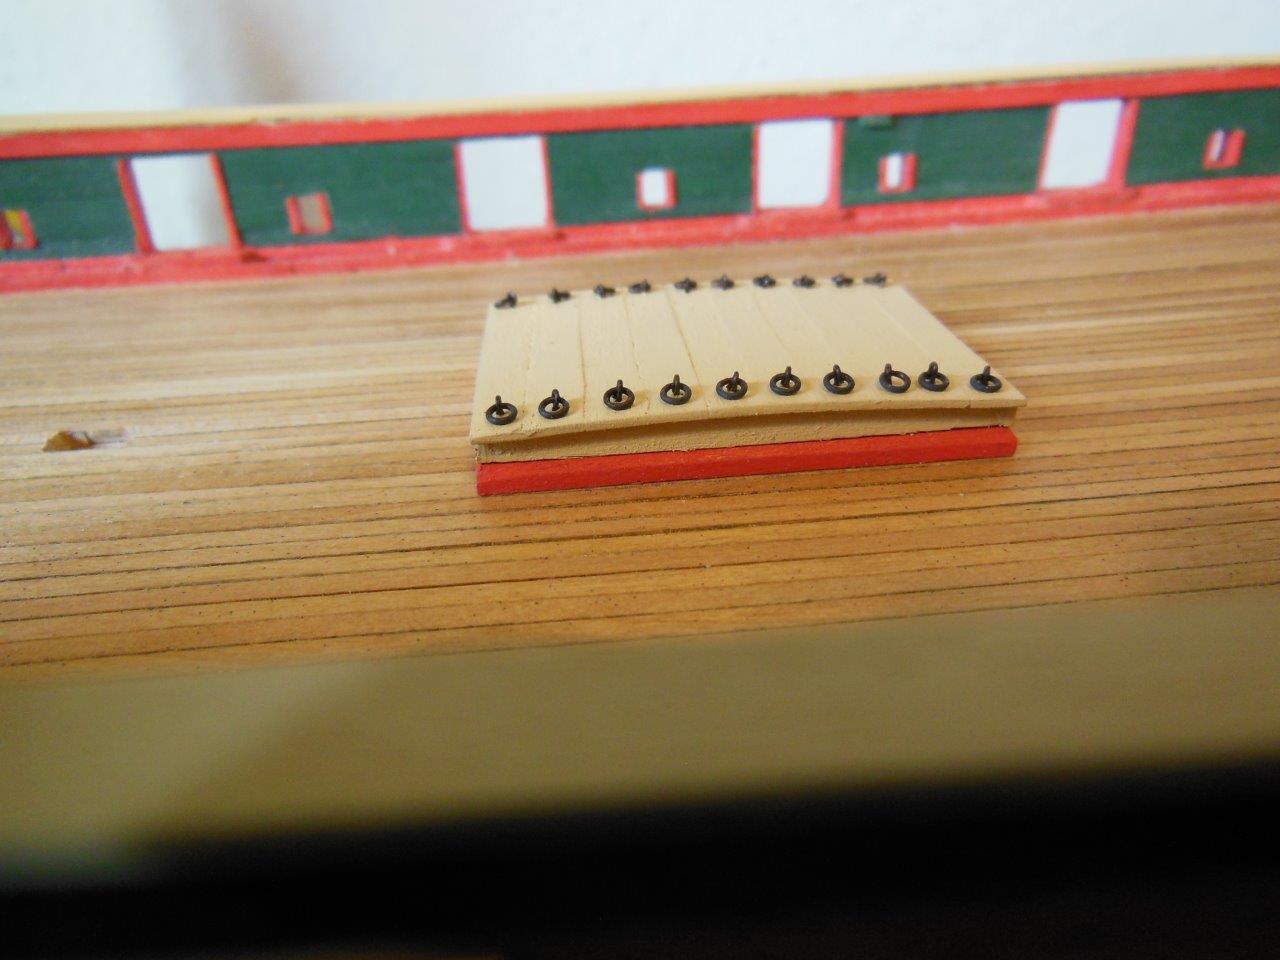
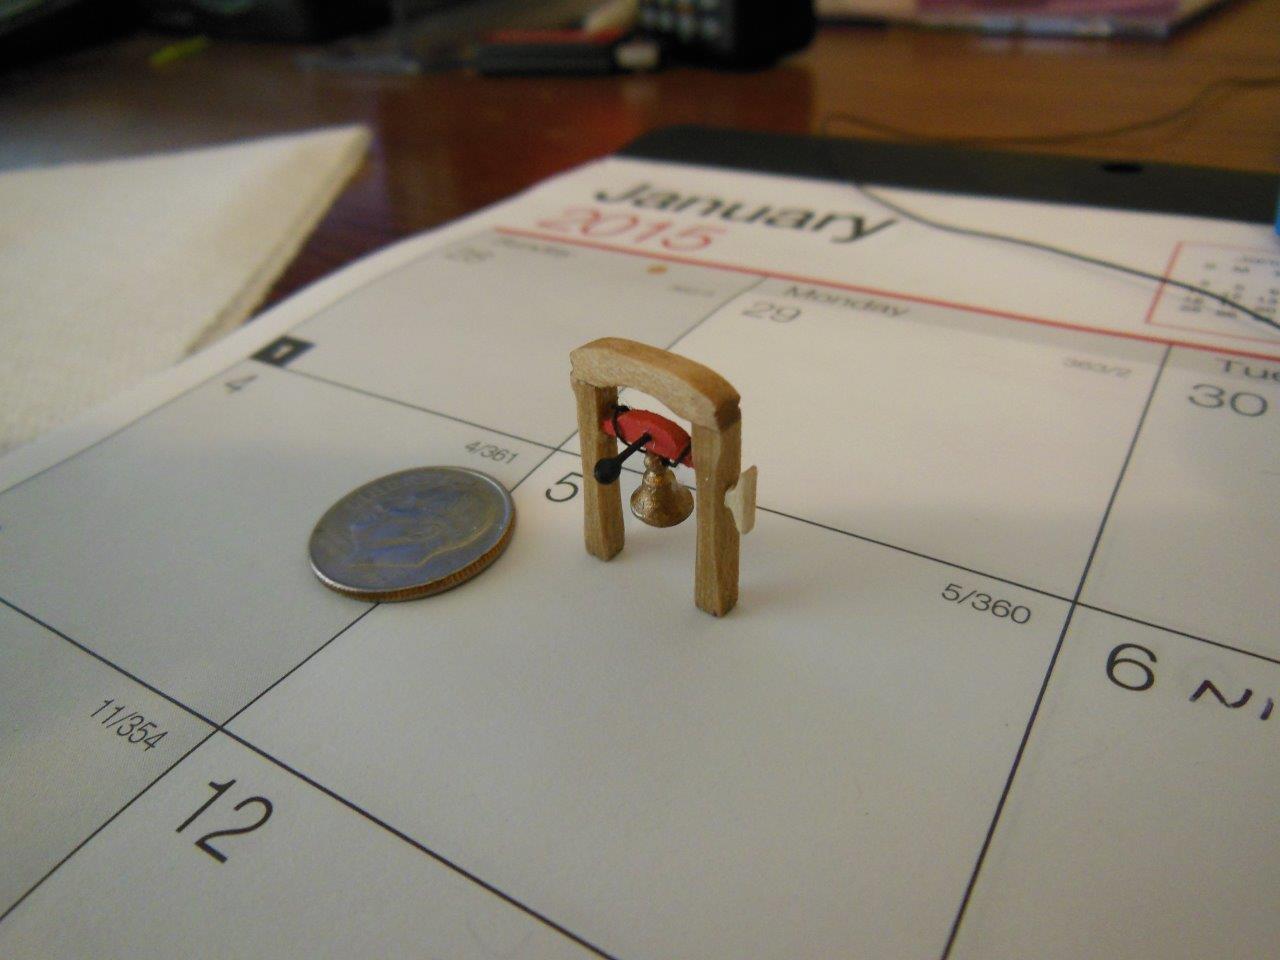
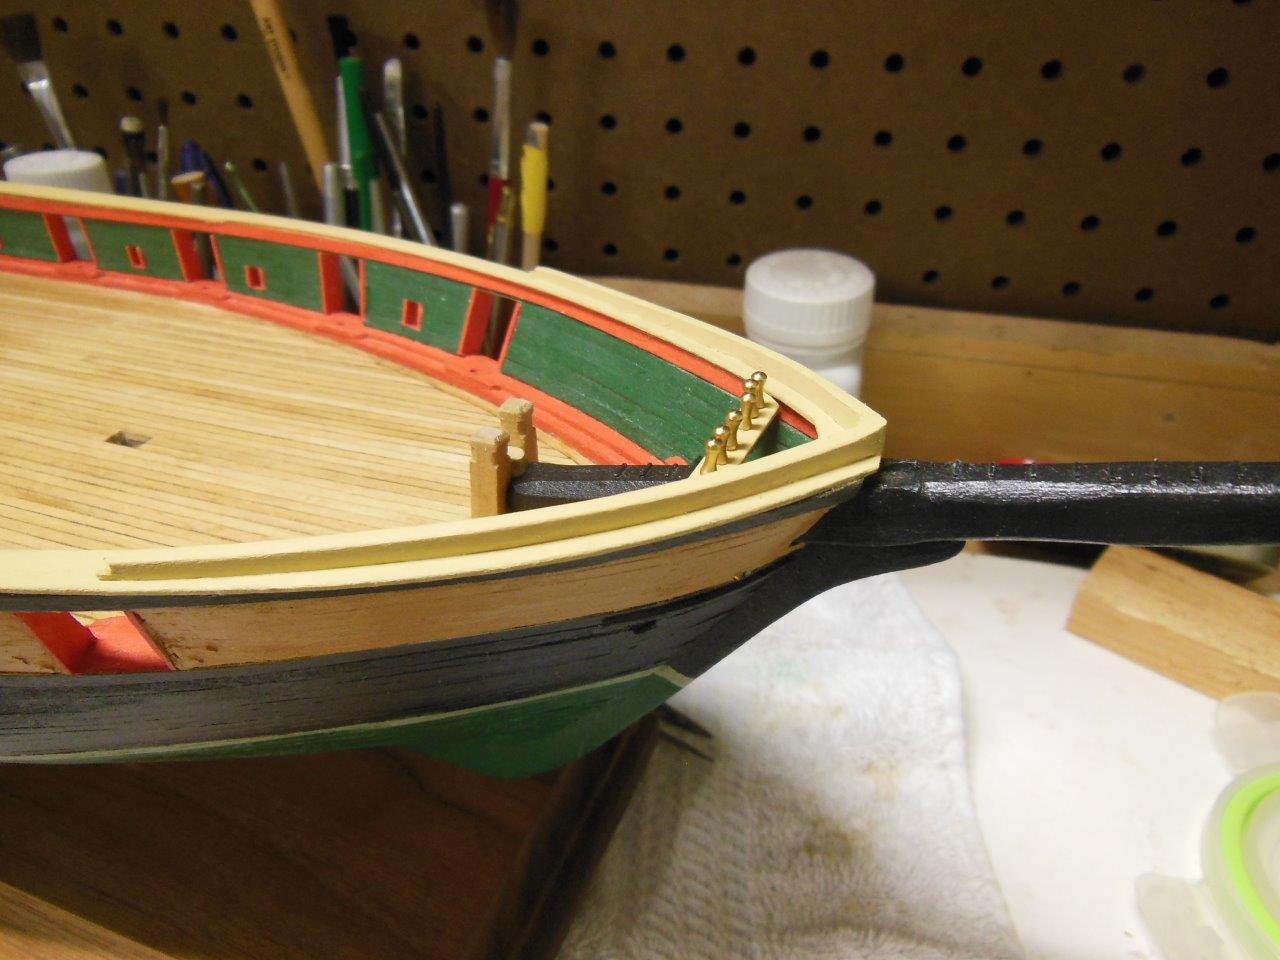
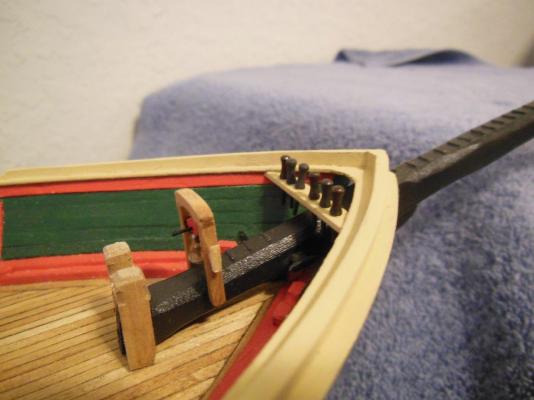
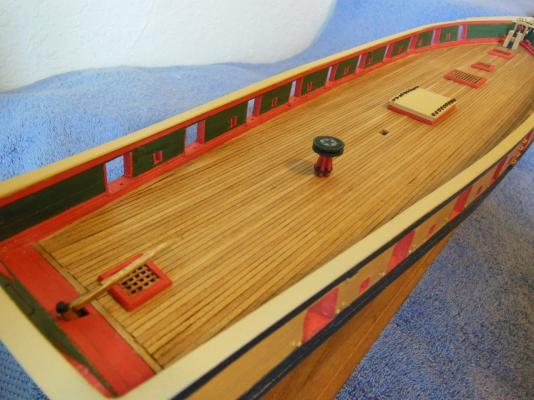
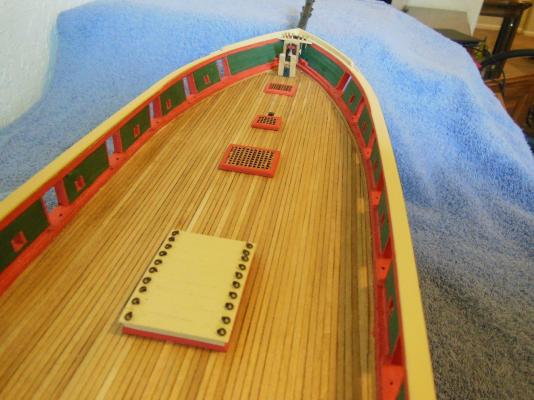
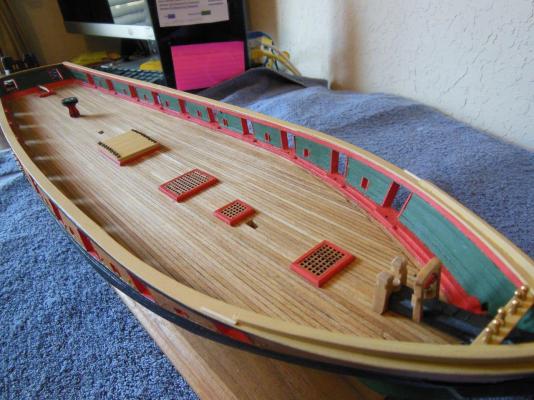
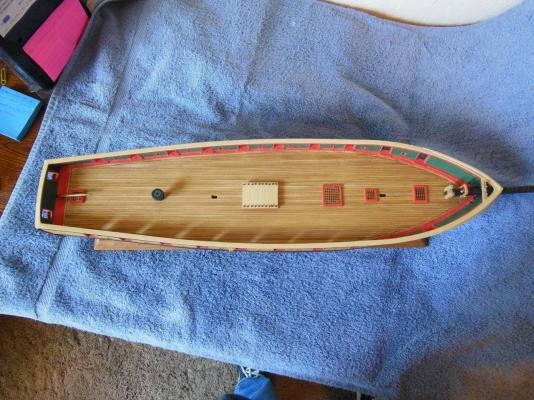
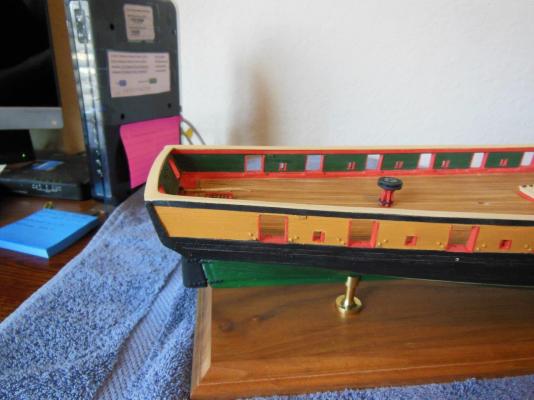
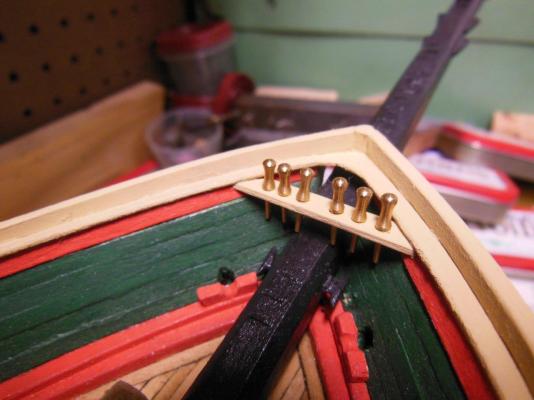
I've completed a few items and thought it was enough for a few photos. I mounted the ships bell but not before changing the OEM rope for Chuck's rope. It now hangs more natural. I also changed the bell handle due to the first handle having a knob that was too big and out of scale. I finished the remaining hatches and mounted them in place. I used grating for all but the center hatch which shows cover boards. Flush mounting the hatches was a decision I will not repeat on any future builds, due to it not looking as natural as it could. I also mounted the two anchor chaffs but still nee to paint them. The capstan is finally mounted to the deck and I installed the spanker sheet horse just below the stern cap-rail. I have a question regarding the belaying pins. Your opinion on how to address the color would be appreciated. The OEM parts are brass which looks nice but I suspect not realistic. Do you think I should leave them alone, paint them a wood color, blacken them or ....???? Next is adding the attachments to the bulwarks followed by the deck structures. Sorry about the dust, nicks etc.. Every time I look the build over (especially with that darn macro setting) I see things that need fixed. I'm trying to hold of as much as possible so I do the repairs as few times as possible


-
Patrick, What type of saw do you rip planks with and if you had the opportunity to select the type saw again would you pick a different type? Somewhere in the future I can see myself cutting my own planks and have read some people use a band saw and others a table saw. I would appreciate your thoughts on this. I do not currently have a power saw for ship building, leaning toward a table saw since it seems so versatile. I thought a decent saw and planer would round out my needs when I'm ready to jump to that level of building.
-
John, she is an impressive build. I can hardly wait to see my ship grow vertically.
- 2,250 replies
-
- 1
-

-
- model shipways
- Charles W Morgan
- (and 1 more)
-
That looks better for all samples. I still lean slightly for the third photo of the maple, but depending on which one contrasts better with the rest of the ship would sway me to a final decision. How do you like that for a non- answer
-
Subtle. Hi Patrick, I love the look of holly, but based on your photos, the third photo of maple had a more subtle look which appealed to me the most. I also agree with Mobbsie that the opinion of the ship's Captain carries the highest opinion.
-
Hi Jerry, Welcome aboard. I'm anxious to see photos of your ship. To find Syren all you need to do is click the "Forums" link at the top of the page, then look on the right edge over half way down. If you cannot find it there, here is the url: http://www.syrenshipmodelcompany.com I hope to have an update on my progress next week.
-
Hi Tim, Thanks for stopping by and for the compliment. Yes the Syren products are very nice and even though the prices are friendly they sure do add up if you replace everything supplied with the kit. I'll buy in stages so the cost is spread out over time.
-
It's like most places in respect that it depends on what part of the state you want to live and how close to a big city (ugggg). Big cities such as Miami are pricey, but sometimes where you work limits your location choices. I looked near Ocala for a family member a year or two ago and 3BR rental homes started @$900/month. The further south or closer to the ocean/gulf the more expensive, but in reality your never far from either even if your located in midstate like us. If you want to look around ck out ads in http://ocala4sale.com/ Note that at the top of the page you will find links for the same type xyz4sale at numerous locations around the State. GOOD LUCK!!
-
Bob, I'm sorry to hear your bad news. I hope your move will bring you good fortune and a better place to live. Florida has no state income tax and the weather is pretty nice, in case your open to considering the southeast.
-
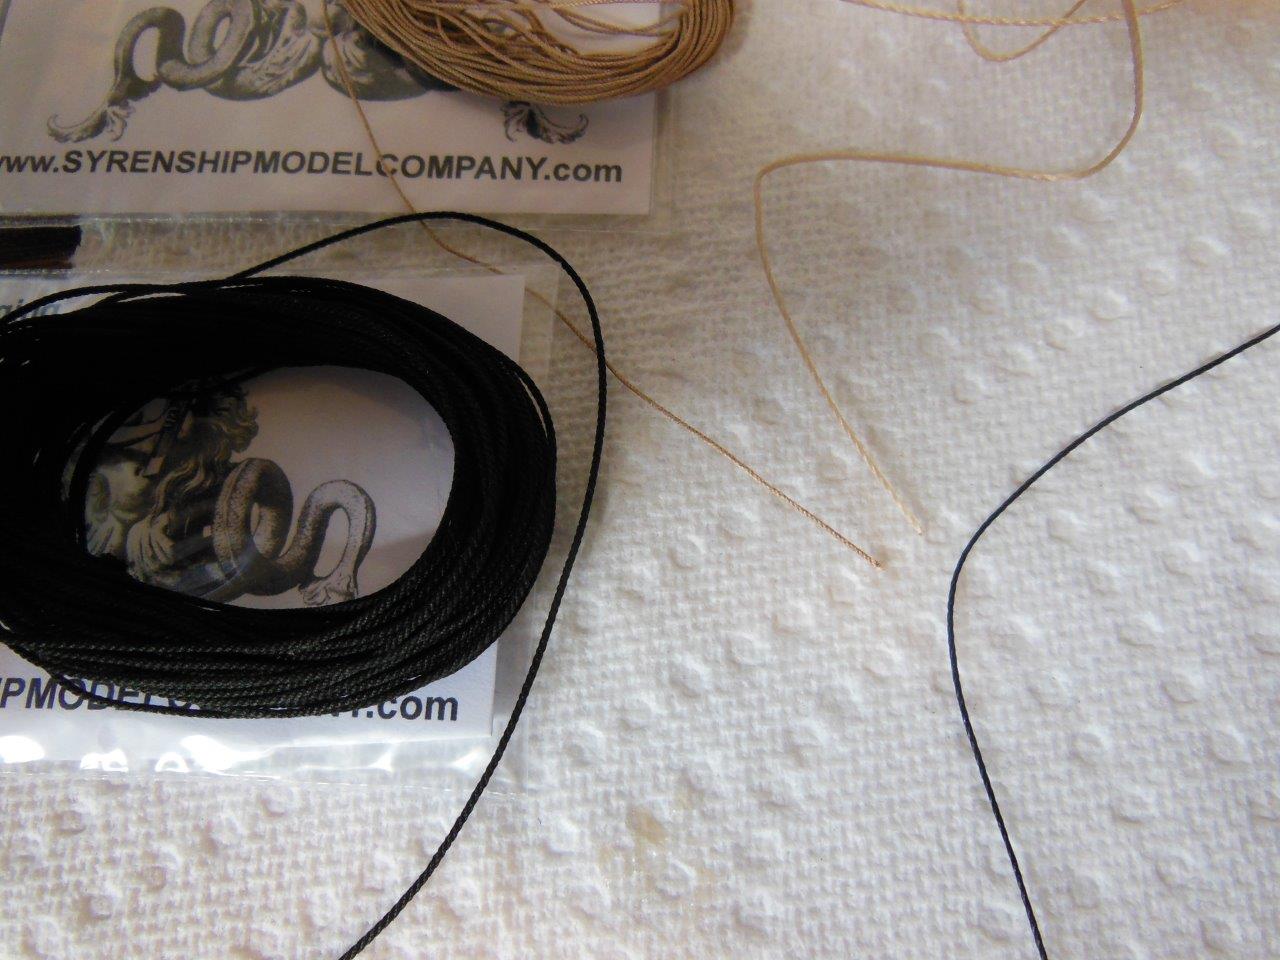
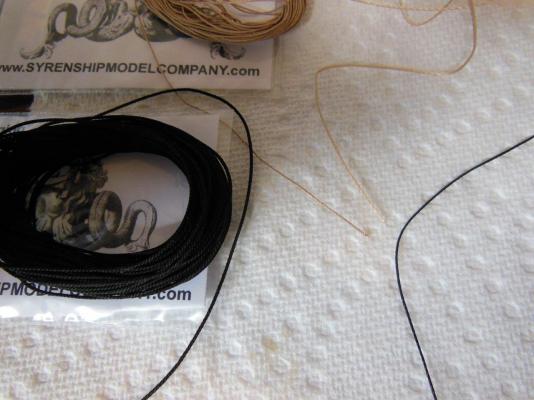
Good morning John, Yes, she is a good looking ship! I hope my finished product does her justice. I think you would enjoy the build. I'm back form my trip and was happy to see my first order from Chuck's Syren Co has arrived and based on my experience and what I see, it will not be my last order. I'll share this experience in case it's beneficial to others. On line ordering was simple to follow with no issues. I ordered on Thur Jan 15 and on the same day rec'ed three emails. One was a receipt from paypal, the second was was a confirmation letter and thank you from Chuck with the third being item shipped. Very impressive! The items arrived the following Monday after I left for my trip up north. Arrival in four days is outstanding in my book. I had a couple of minutes this morning to confirm contents matched my order and I took a couple of photos to compare Syren parts vs OEM from my Niagara kit. In my opinion based on my initial look, the Syren blocks and rope are hands down much better than what was supplied with the kit. I would not hesitate to use the kit supplied items if I had to, but I had options and liked what I purchased. The OEM blocks supplied for the carronades looked a bit rough and too big for me and I did not want to sand them down to try and get a smaller size. I ordered the smallest pear blocks Chuck offered and they will do the job nicely. I used the OEM rope for my ships bell but it does not hang right (I will replace) and I could see I would be fighting that issue on all of the rigging. Chucks rope looks like it will hang more natural and it just plain looks right to me. Below are a few pictures, on the left side of the photos are Syren products with OEM on the right. Hopefully resolution is good enough for you to see and appreciate the difference.

-
Good (cold) Morning Brian, THANK YOU. For the picture. That is an awesome view of her. Seeing the ship in person is in my to-do list. I can hardly wait to get home to warmer weather... I've turned into a wimp since moving to Florida.
-
Thanks Steve! Yes it is a fun build and very challenging for me. I'm picking up new skills and learning a lot. Im thankful for the advice and shared experience from everyone on MSW.
-
Good moring Patrick. Thank you. I'm going to search for some manufactured cleats that look decent and are the right size. The thought of making them does not appeal to me and more importantly I cannot imagine my making them all a consistent size. If I find a source, I'll post the vendor info. The voice in my head is saying I'll be making them and counting cleats in my head as I sleep.
-
Thank you Popeye.
-
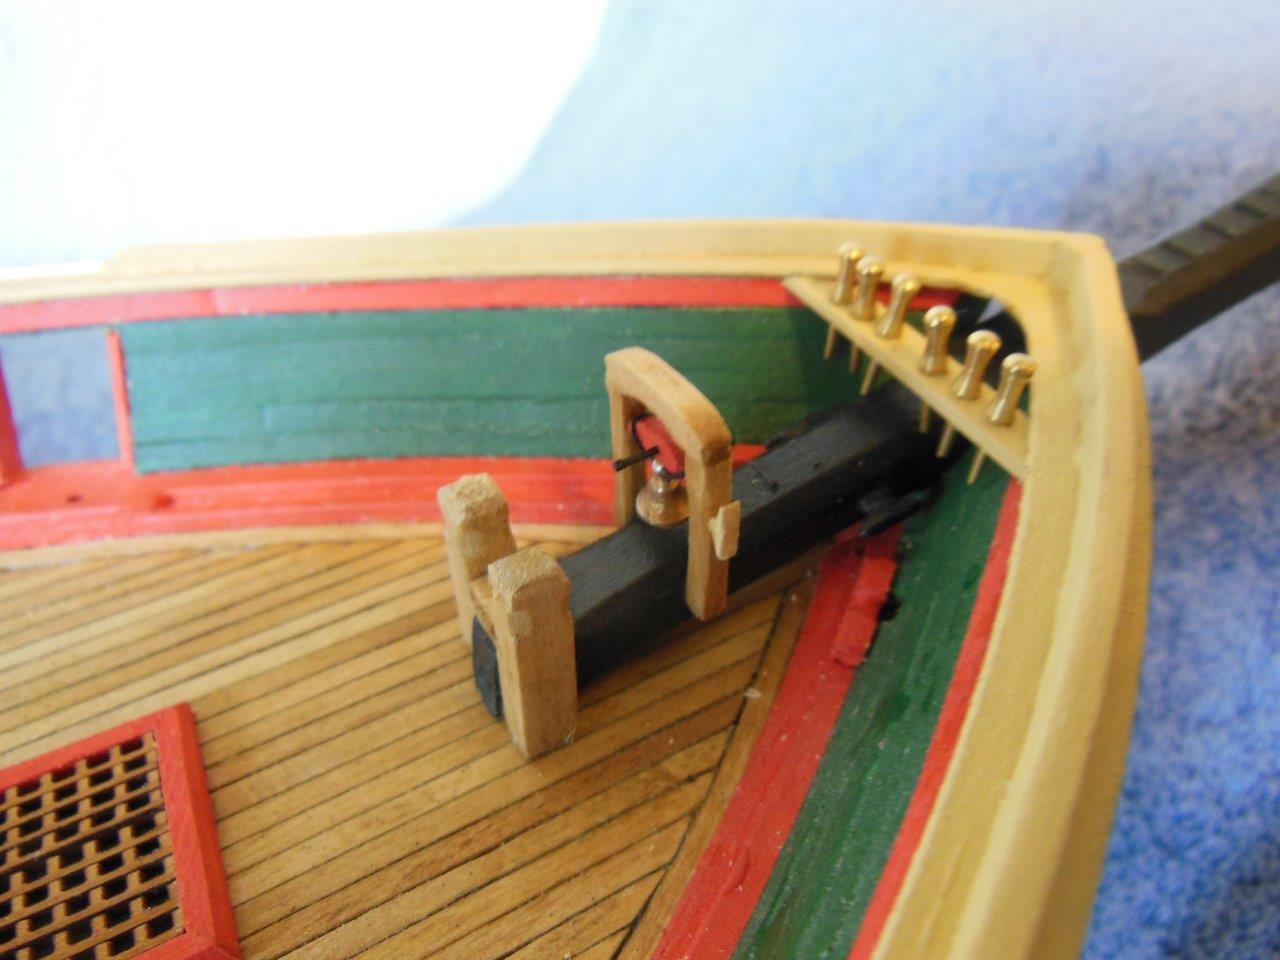
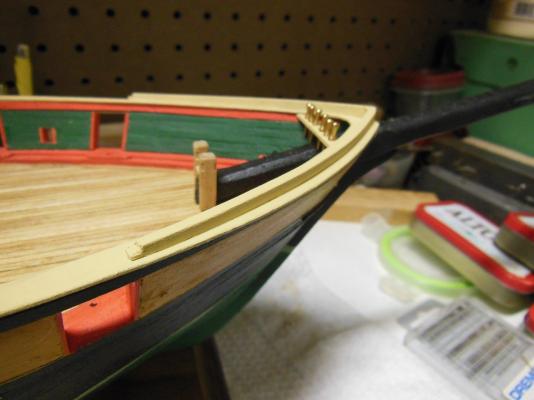
I have a small update to present prior to my trip. I managed to install the chock rail and the bow pin rail. The pins are nor glued in yet so they are sitting a little crooked in the photos. I also made the bell housing and hung the bell with some black thread. I'm not completely satisfied with how the thread looks but I'll look at it again once I return from my trip and mount it then if I decide to keep it as is. The plans calls for a cleat on the starboard side of the bell housing, but the kit supplied cleat looks way too big so I cut one out of wood.


-
John, She's looking good - very impressive! At what point do you plan on mounting her.
- 2,250 replies
-
- 1
-
-
- model shipways
- Charles W Morgan
- (and 1 more)
-
Hi Carl & Frank, Thanks for the condolences and for looking in on my build. Looks like I'm heading north this Tuesday. I'm pretty happy with how the build is going so far, especially considering it's my second build. I'm really looking fwd to trying a build with some nicer wood, maybe a leap to the dark side - I kinda have my eye on Chuck's English Cutter Cheerful
-
Thank you Patrick. If you can influence the big guy into a few days of warm weather and sunshine it would be appreciated.
-
Thank you gentlemen.
-
Hi Popeye, Thanks for looking in, for the compliment and for asking about my uncle. Yes, I'm finally at the part where it's starting to look like a real ship. My uncle passed away today which means I'll be heading up to Ohio this weekend. He was 90 years old and has had a rough time over the past few months.