HOLIDAY DONATION DRIVE - SUPPORT MSW - DO YOUR PART TO KEEP THIS GREAT FORUM GOING! (Only 72 donations so far out of 49,000 members - Can we at least get 100? C'mon guys!)
×


lb0190
-
Posts
686 -
Joined
-
Last visited
Content Type
Profiles
Forums
Gallery
Events
Everything posted by lb0190
-
 Hi Augie, Your ship is looking impressive (as we all expect ) and I'm very envious of your planking skills!
 -
Hi Frank, Merry Christmas to you and yours and I hope you (all) have a great 2014!!! Of course the same goes the the rest of my friends on MSW! I hope to provide an update in a few days. I targeted end of year to complete the hull planking, but it looks like I'll be doing good to complete the port side. Once the port side is done, I'll post a few photos and show where I had challenges and how they were resolved. I suspect the starboard side will go much quicker
-
Hello to all my friends on MSW. I'm alive and well - thank you for the concern. The past month or so has encompassed a little bit of traveling, family visits and friends stopping by, keeping me busy and away from the shop. I sneak in a quick peek at MSW send a few Likes when I can and try to get an hour or so in the shop from time to time but it's been hard to do. I hope over the next few days or so I can pick up progress on my ship and spend more time on line with my friends on MSW. Merry Christmas, Happy Hanukkah and good health to all of you.
-
She looks awesome Augie. I may have to switch from PVA to CA for planking based how well you like using it. Take care and let's put this month behind us.
- 2,191 replies
-
- 1
-

-
- confederacy
- Model Shipways
- (and 1 more)
-
Hi John, The detail in your ship is amazing and I've enjoyed following your build. It's almost a universal given for me, no matter what build I look at, regardless if it's related to my build, I always learn something.
- 2,250 replies
-
- 2
-
-
- model shipways
- Charles W Morgan
- (and 1 more)
-
Hi Popeye, Thanks for the help and for looking in. We just recently returned from our son's home with one grandchild in tow. I've had just enough time in the shop this evening to finish my first attempt at the garboard plank, starting near the point you and Chuck referenced. I believe I'll make this a single plank and cut in simulated butts later so the step pattern is correct. I feel pretty confident on closing up the hull with the suggestions everyone provided. Chuck's estimate was right on in regard to the number of remaining planks.
-
Hi Chuck, Thank you! Your input helps a great deal. For some reason, the garboard is a more signifcant challenge for me, but the marked photo really helps. Augie sent me a pdf that shows how you planked the Syren - so much help form so many people, it's what makes MSW so special. I'll remake the garboard and get it in place then follow your suggestion on how to install the remaining planks. Due to everyone's help, the remaining hull planking does not sound as daunting. Hi Sjors, As I mentioned above, the garboard is a real challenge for me and from where I'm at now I believe installation would have been easier if I installed it much earlier, simply due having more room to work with at the bow. For me, the shape will probably be trial and error until it looks right.
-
Thanks Popeye. The term joggers is new to me but now that you bring it up I recall seeing a diagram on this approach. This should help me for me issue at the bow. Thanks everyone. Between remaking the garboard and using stealers and joggers I should be able to resolve the issue. This is going to take some time
-
Thanks Augie, that's the path I'll take!
-
Thanks Alistair & Ken. I'll get started on the garboard next. Now that you mention it, I do recall reading the garboard shouldnot rise up the stem.
-
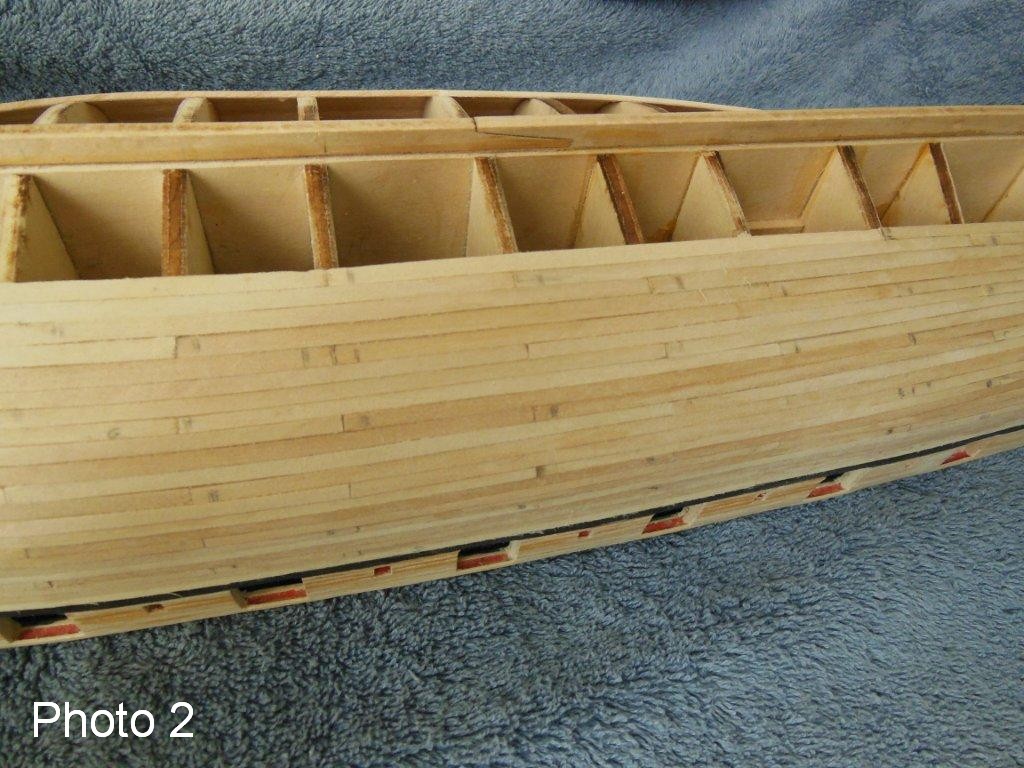
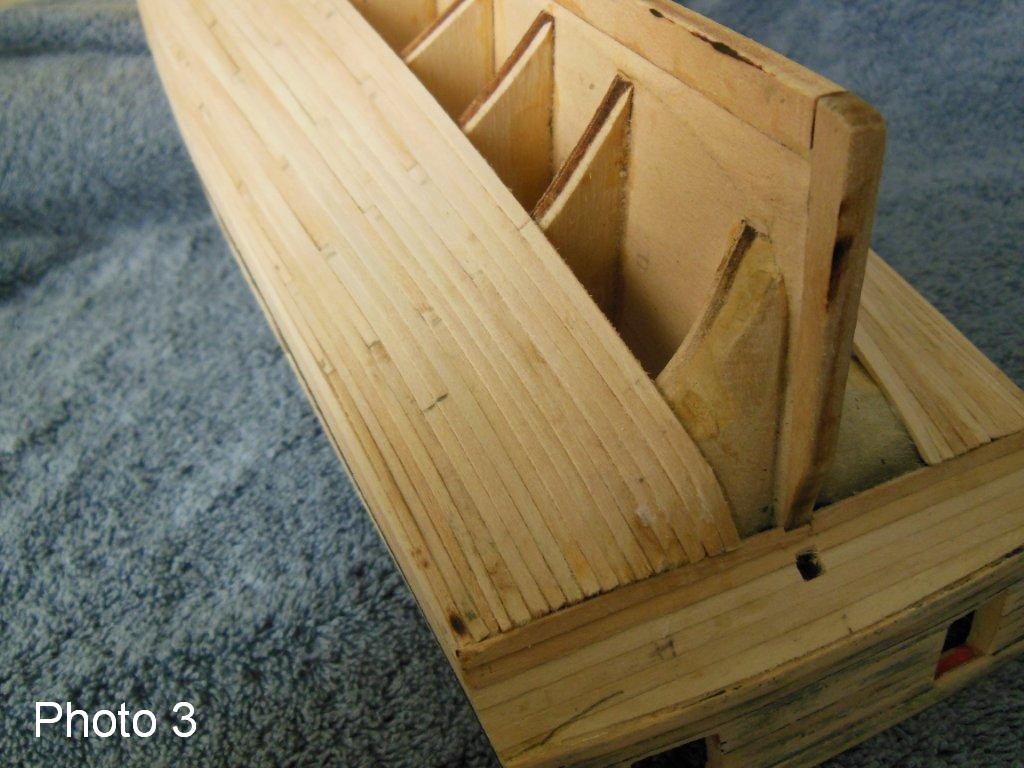
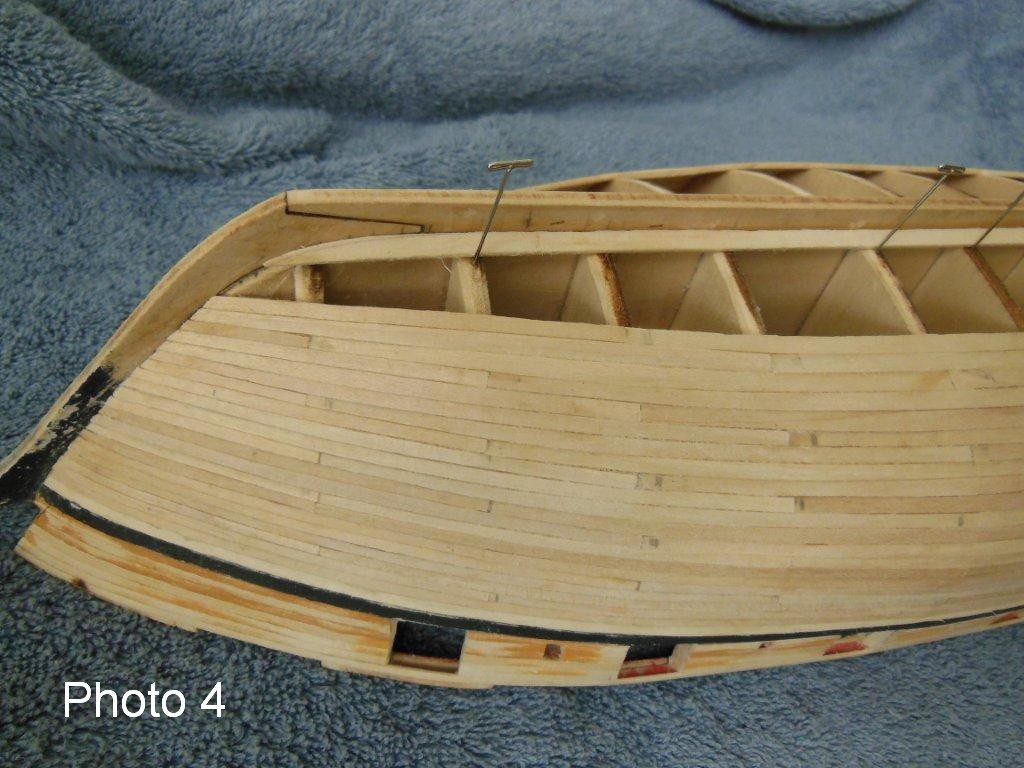
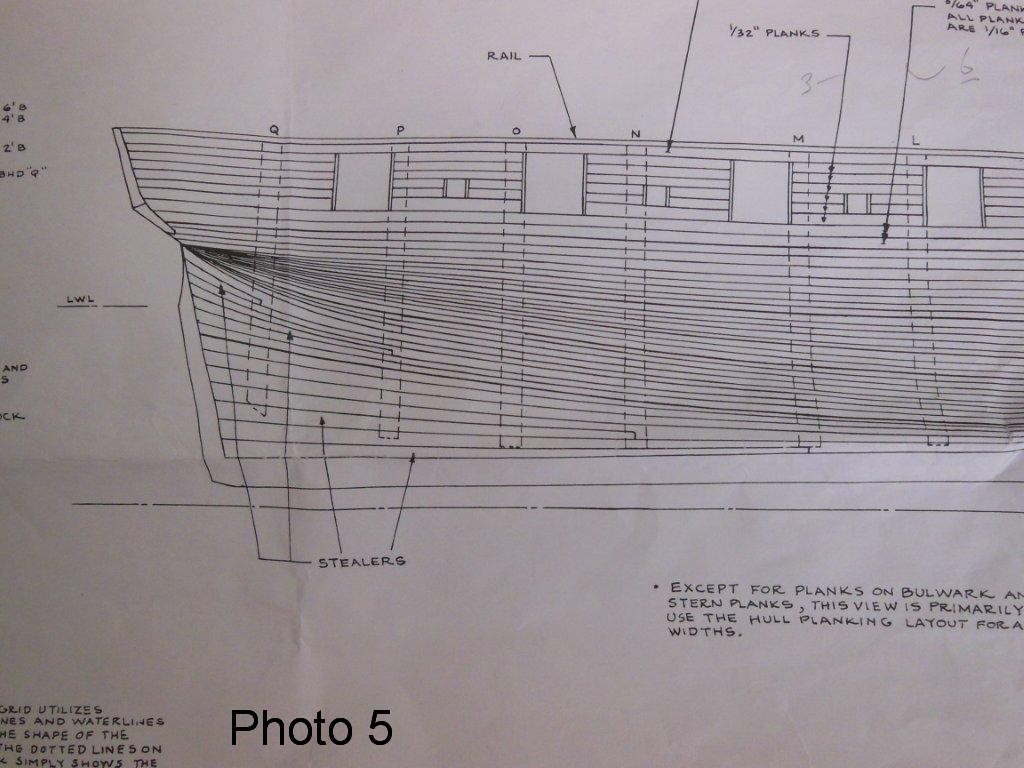
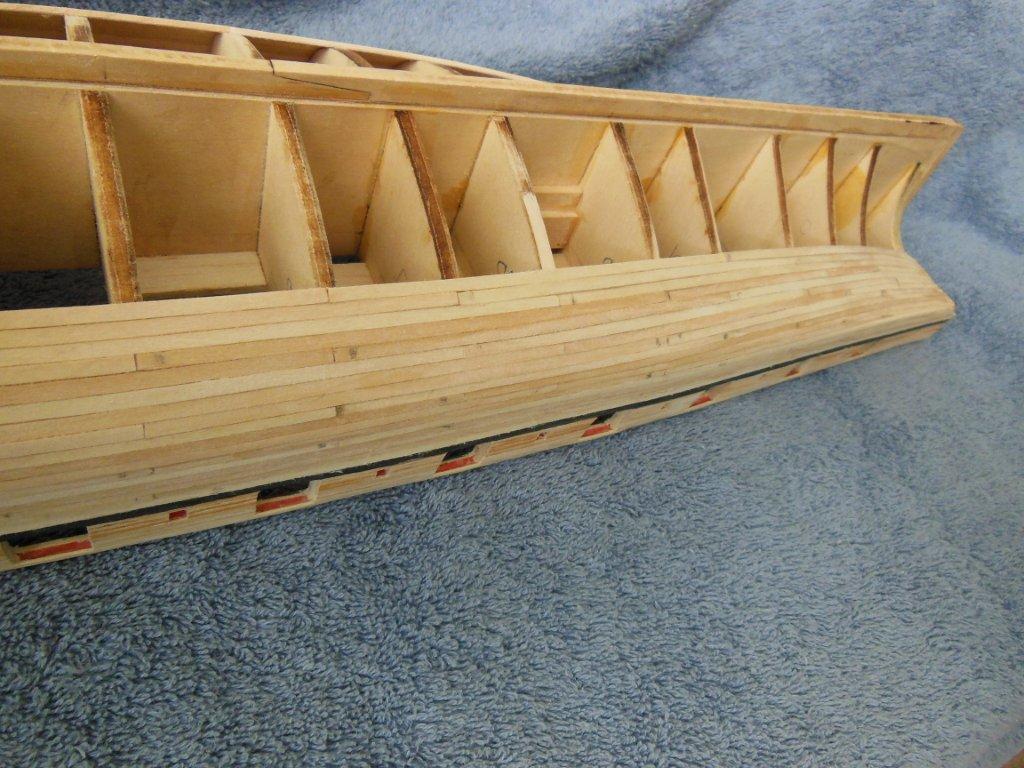
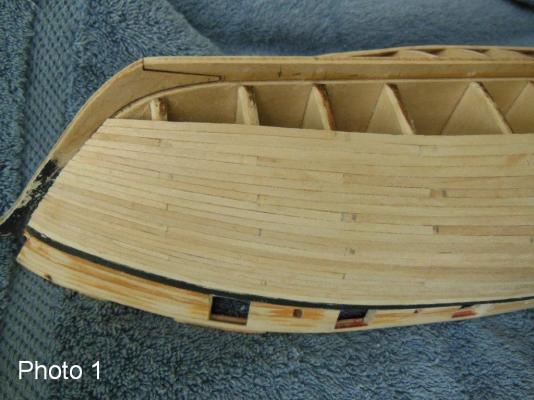
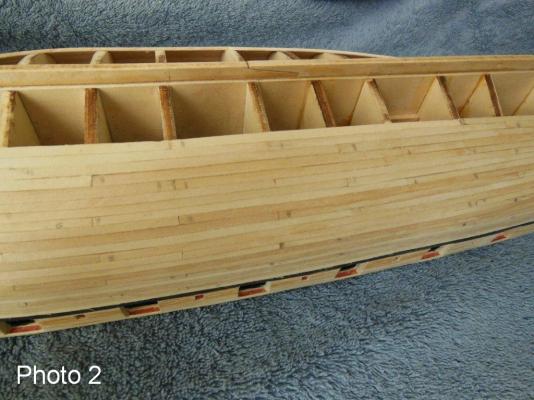
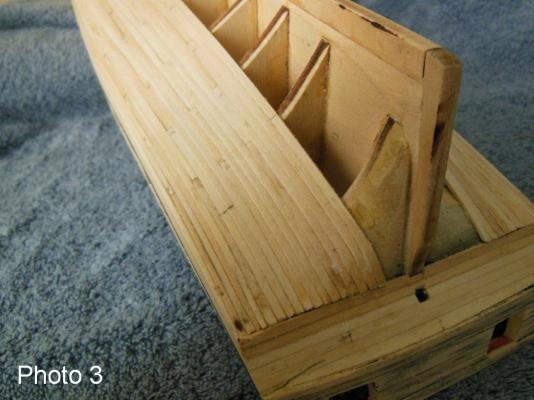
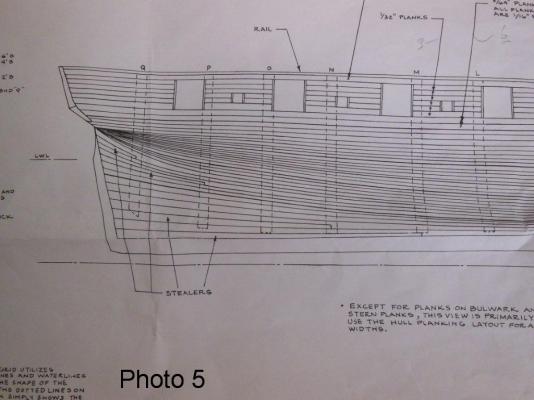
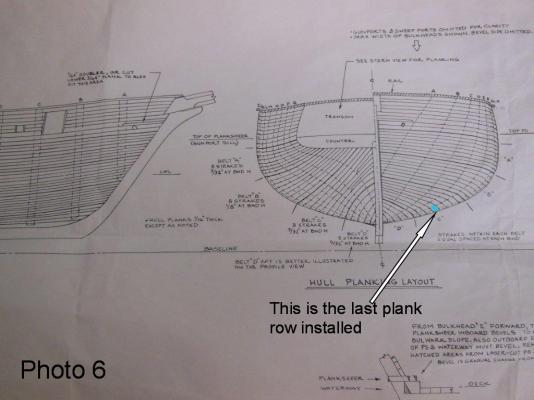
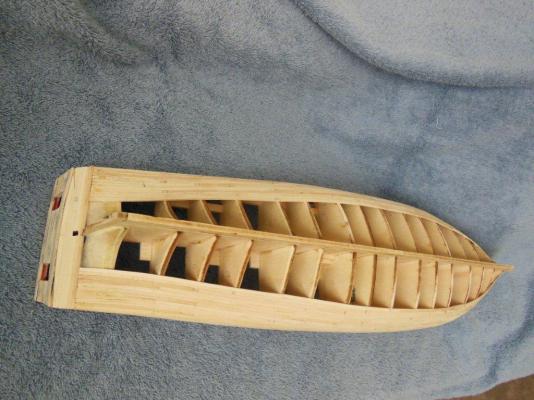
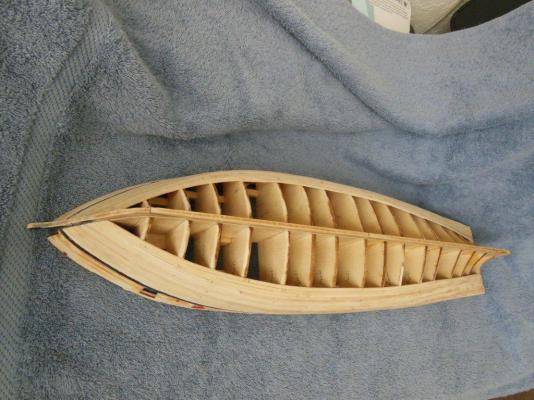
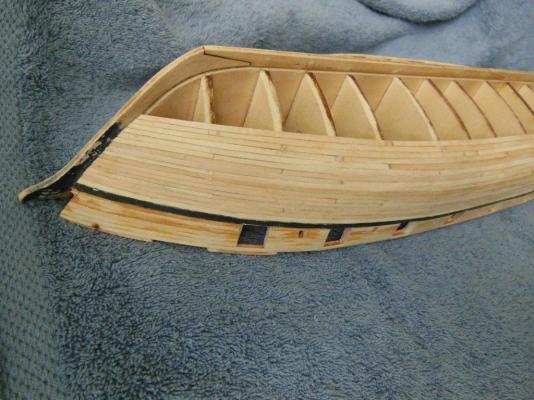
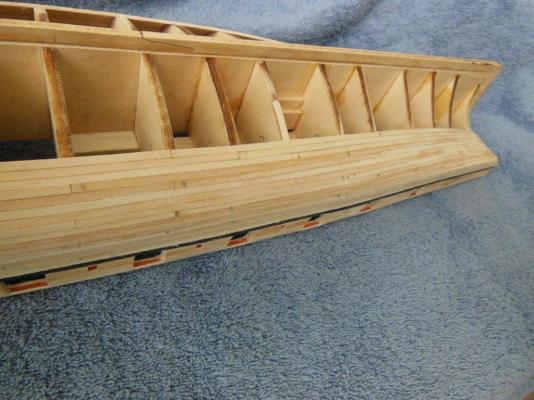
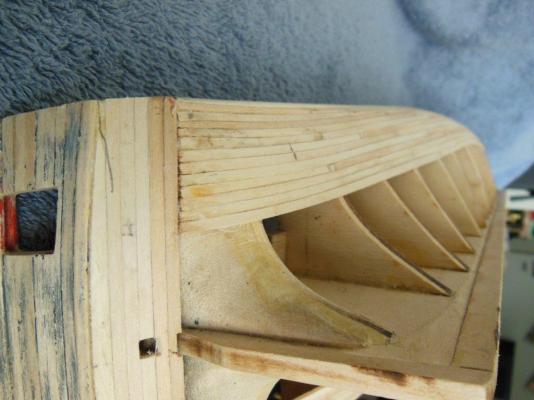
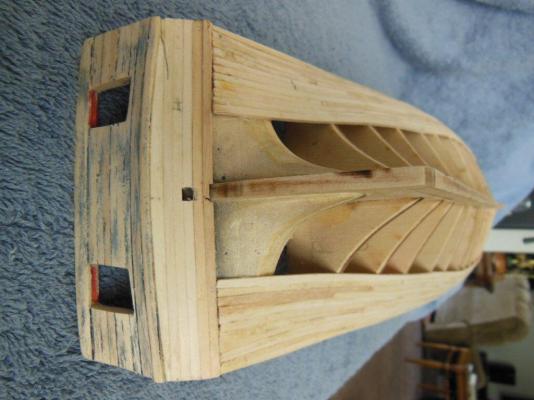
Thank you Joe & Popeye.. Here is where I'm currently at: Hi Everyone, I'm in need of your advice, ideas thoughts – whatever you feel like providing in regard to my current issue (which of course may only be in my head). Photos 1,2 & 3 show where I'm at on the starboard side hull planking. The last row (lowest plank) is plank 5 of 8 for belt C which should include 2 stealers, not yet instlled. Belt D per the plans has 5 rows (includes garboard) which shows 2 more stealers on the drawing. Once I completed row 5 for belt C I see what may be a problem. If you look at the bow area photo, the remaining open space is closing rapidly. The stern photo still shows plenty of space. Photo 4 shows my garboard plank laying loosely in place at the bow, untrimmed in length and width. To my amateur eyes it looks like I getting into trouble that the stealers as defined on the drawing will not resolve (photo 5 & 6). Before I install another plank I would appreciate any thoughts, suggestions or ideas you may have. My initial thoughts are to; install the garboard plank before there is not enough room to do so then build up the stern planing area with the stealers then start installing planks moving in the forward direction, recognizing I may be able to resolve any issue forward with additional stealers. To be blunt, I do not know if that plan makes any sense. I'm not against ripping any planks off or cutting in some stealers now, I'm just not sure what is the best next step BTW, I have not started belt C on the port side thinking it has enough planks in place to prevent twisting, as I finish the starboard side first – make sense??? Edit: almost forgot, Yes I'm back posting and plan on complying with the request to limit social comments on the build log. I apologize if my posts caused you or anyone else (including Ghuck and his staff)any issues.

-
Thanks for the details Bob. This part looks difficulttome, I'll use your process.
-
I agree with Rich! Taping on the drawing to assist with the shape looks like it will work well. Thanks for sharing the idea, I'll try this approach. Edit: did you glue on the top sheet, cut the side profile then added the side sheet?
-
Good morning Bob, Your Niagara is looking good!
-
Popeye, You are certainly right about narrow planks being easier to install. The first thing I noticed when mounting a wider plank last night and this morning is that they do not conform to the hull curvature as easy as the more narrow planks. I have to soak them a little longer to help negate that change.
-
Niagara by Catch22 - Model Shipways
lb0190 replied to Catch22's topic in - Kit build logs for subjects built from 1801 - 1850
Hi Gleason, THANKS for the photo!!! -
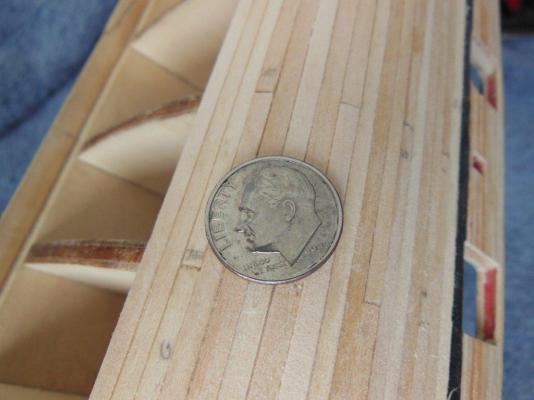
Something I've meant to do before now but kept forgetting, was show the planking size with a reference item. When I purchased this ship, I did not realize how small the width of the planks would be (bearing in mind this is my second purchase). Since it's a 1/64 scale, the full scale planks would be in the 8” to 10” width if I calculated this correctly.
-
Today, I completed the starboard side belt B planking. I believe I'm officially 50% complete on planking the hull based on the ship having four belts. While I was waiting for my replacement plank bender to arrive, I thought I would work on something else, which I thought would be the bowsprit. I pulled out the wood and drawing stared at it for a while and promptly place it back in the box. what a complex piece of wood. I'll hold off on tackling that job for a while – yes, it completely intimidated me for the time being so I went back to planking without the tool. Now I need to plan out belt C by measuring the width of eight planks on the plans and see how it compares to the hull. It looks like I will use 5/32" boards for this belt and maybe a stealer or two according to the plans.
-
When I run into a question regarding plank width and I cannot find the size specified anywhere, I measure the width on the drawing and use the measured width. The drawings are 1 to 1 so this should provide a reasonable answer. I hope this helps...
-
She's looking good Tony and the shop, unlike mine is neat and organized!
-
Great progress Augie, word of advice - do not use course grit paper for the belt sander... :D
- 2,191 replies
-
- 2
-
-
- confederacy
- Model Shipways
- (and 1 more)
-
Good morning Joseph, Your painting turned out great! I do not understand the use of card stock. Are you leaving a gap between the deck planks?
-
Now that is a good list! I'll use everyone before this build is complete. Wait a minute, I already used them several times. . .
-
Hi Bob, I have the same issue but in my opinion much more noticeable than what you pointed out. Once I seen my problem, going backwards was more painful to me than trying to make it look like it belonged that way. As Captain of this ship I'm good with it being this way on my second ship build! I figured the vast majority of people who look at my ship will never know and I simply chalked it up as a lesson learned. Your ship is coming along very nice and my advice is, ask the Captain what he wants to do about it – it's his ship! :)
-
Hi Joseph, Thanks for the compliments and the advice. My low planks stand out to me like a busted thumb and I have been waffling on what to do about it. I'll take your advice and wait before doing any real sanding and hope they will sand out. Even though they are not dented low, I wonder if they would steam out??? I may give that a try as soon as I get my planking iron in operation again. I'm anxious to see your painted hull. Question for my fellow builders (which of course includes the lady builders ) I thought I would start working on the bowsprit and scanned a copy of the drawing, so I could cut and paste the outline on the wood, but it did not scan one to one. I have an Epson 2480 photo scanner and expected it be off a little, but the overall length was 1/4" longer than the original. Any ideas or suggestions would be appreciated. I asked for help sooner than needed. I originally used the scanner s/w to make a copy of the print. After thinking about it, I loaded my photo editing s/w and selected an option called....... drum roll....... ORIGINAL SIZE. :P