HOLIDAY DONATION DRIVE - SUPPORT MSW - DO YOUR PART TO KEEP THIS GREAT FORUM GOING! (Only 72 donations so far out of 49,000 members - Can we at least get 100? C'mon guys!)
×


lb0190
-
Posts
686 -
Joined
-
Last visited
Content Type
Profiles
Forums
Gallery
Events
Everything posted by lb0190
-
 Thanks Augie., believe it or not your input does help. I'll go around in circles over the decision until I'm more dizzy than normal. My gut suspicion is wop is more durable.
 -
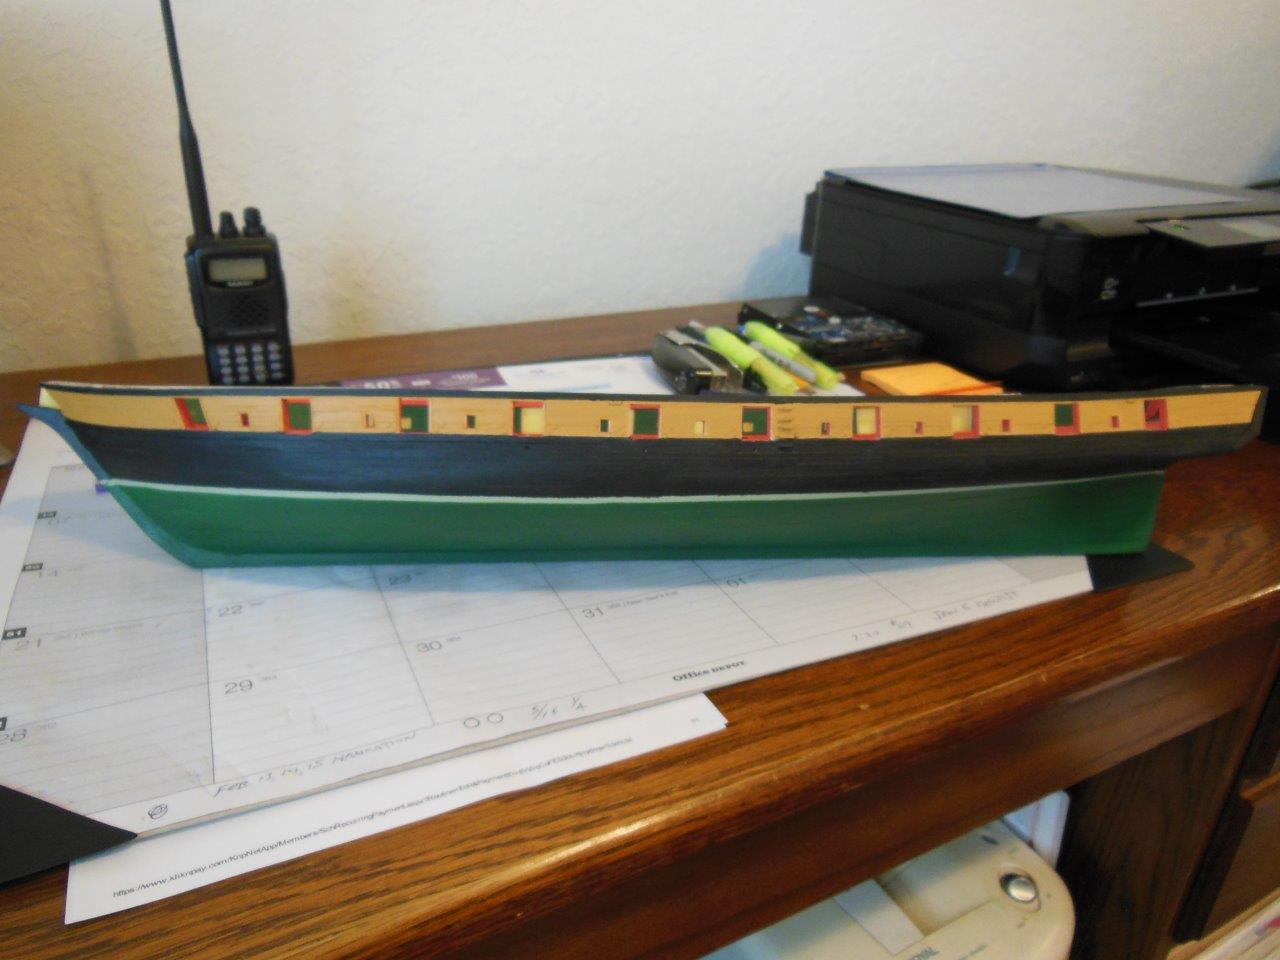
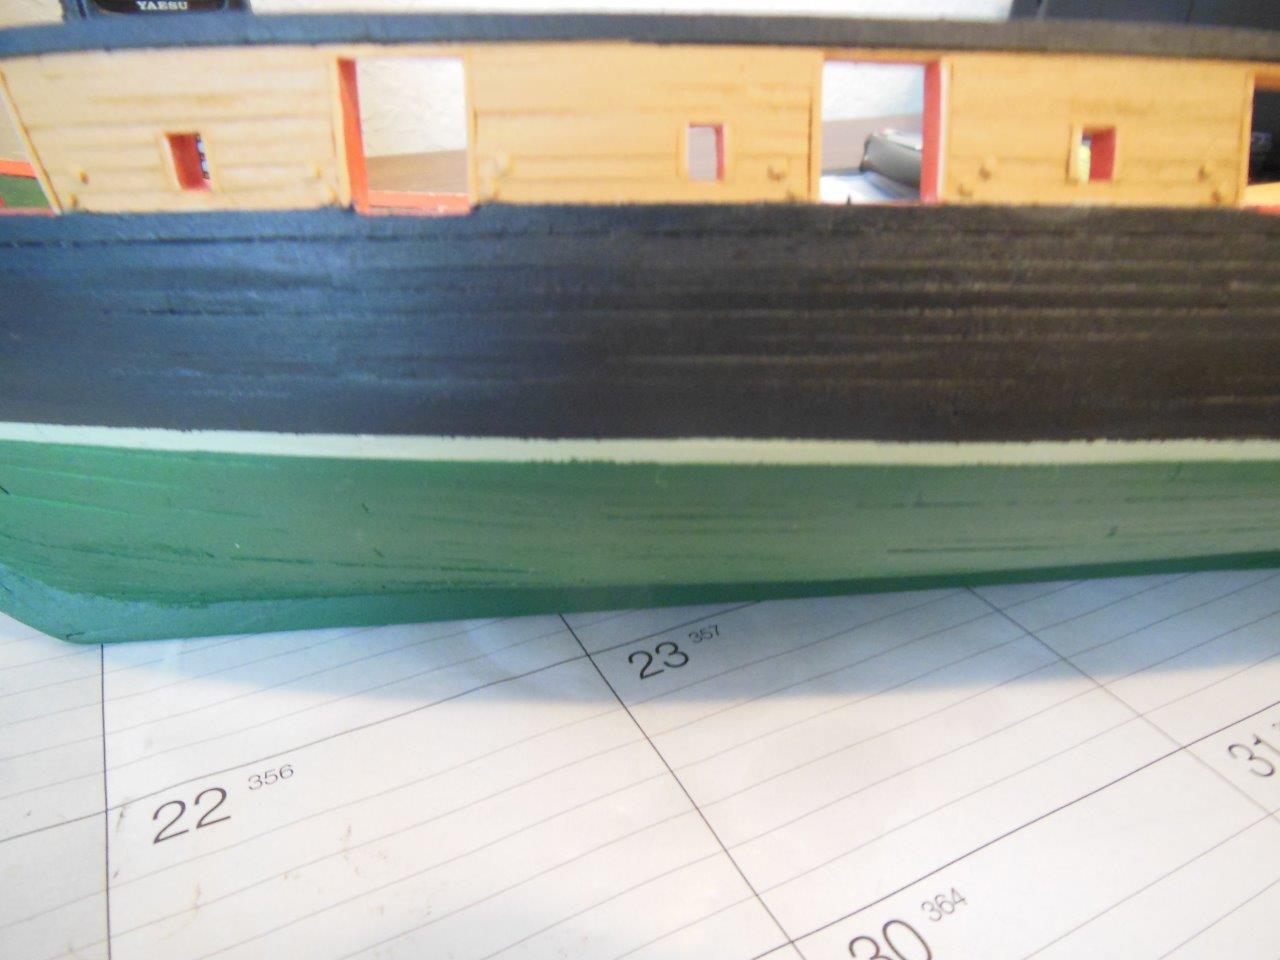
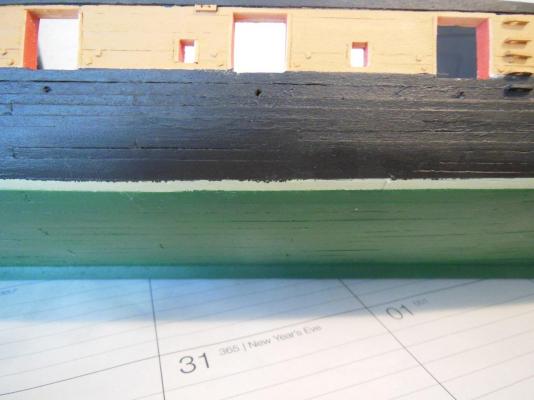
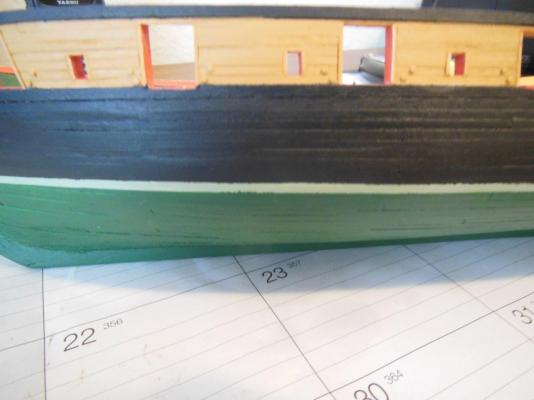
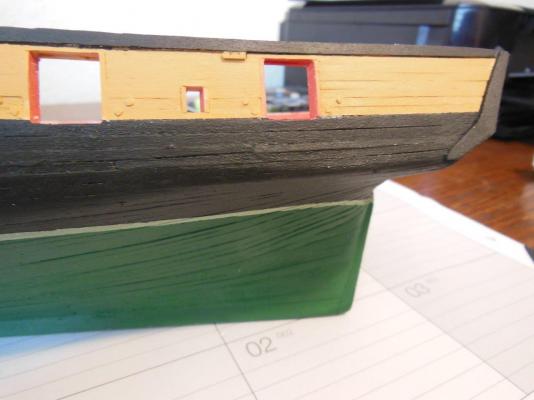
Hi Brian, Welcome aboard and thanks for looking in. Thank you for the advice, others have mentioned the same process or something very similar which I'll use the next time. I believe the tape selection was my biggest issue. I've cleaned up the majority of the bad areas but not in the way I planned. Before taping off the bad areas and repainting I thought I should remove some paint so it does not look too thick at the repaired locations. I sharpened my no.11 blade and gently scrapped at the offending color thinking I would end up exposing the wood, but that was not the case. The dark paint peeled off of my water line very clean, leaving the light green color in tact with a decent edge. I have one side complete and a lot done on the other side with very few areas needing touch up paint. What an unexpected surprise. Once that issue is resolved and the port end boards are painted red (75% complete) I'll apply a clear finish to help protect the paint. I'm debating between using Model Expo's water based clear satin finish and wipe on poly. Since I'm using water based paints I'm a bit nervous about using wop. Sample boards of both products look good but I'm leaning toward the Model a Expo since it's also water based. Any thoughts or suggestions on this would be appreciated. I've started shaping the bow sprite which is a nice change of pace when I get bored with the painting. Making this part was a little intimidating due the the complex shapes but once started, it was an interesting and fun pice to work on.
-
Sjors, now that is a SHIP! Very impressive. Merry Christmas and a safe and healthy new year.
- 1,616 replies
-
- 2
-

-
- caldercraft
- agamemnon
- (and 1 more)
-
Good morning John, Your making great progress and the build looks right on target.
-
Thanks Sjors, Popeye & Augie!
-
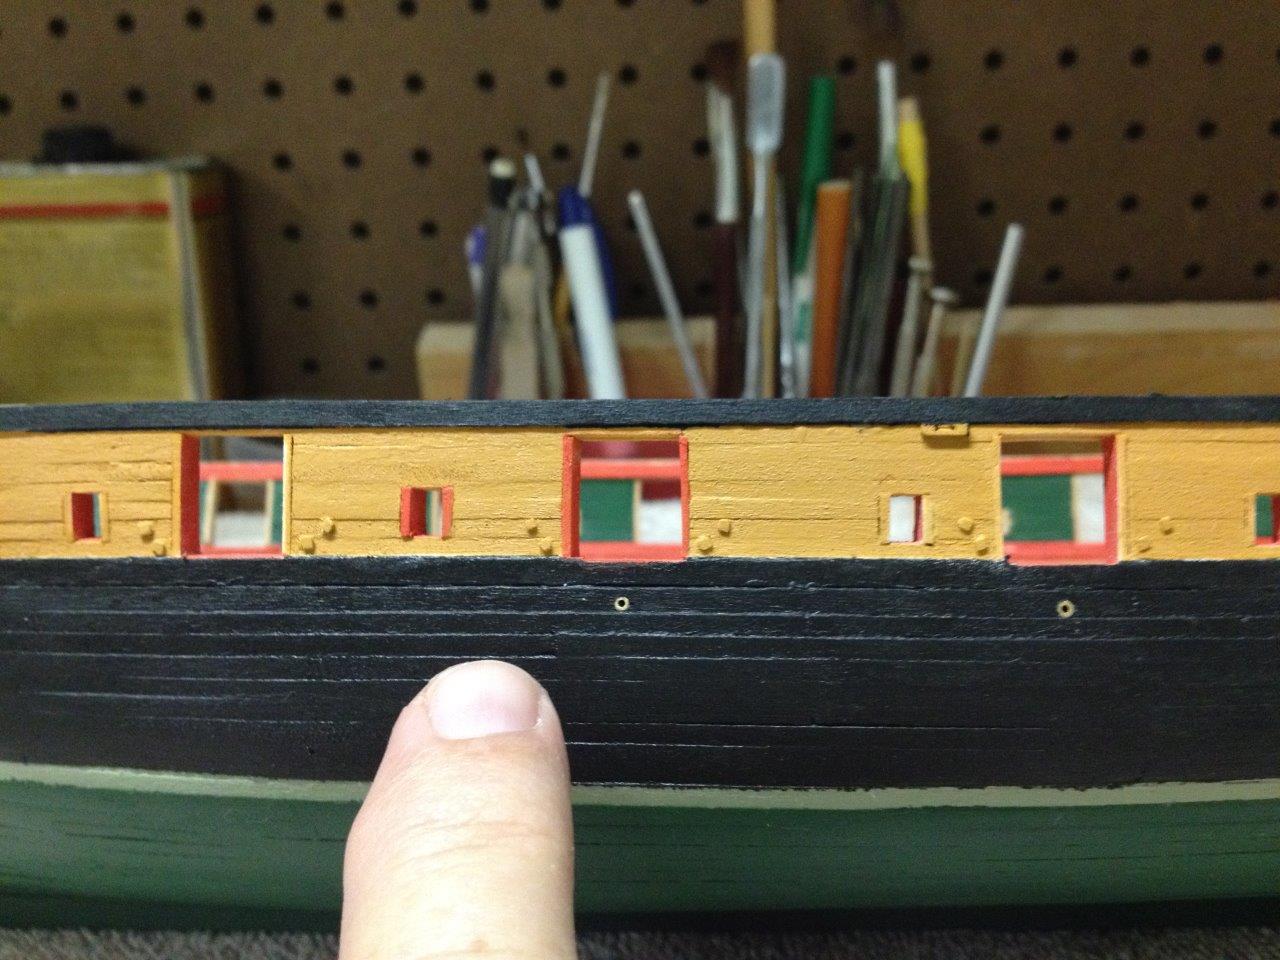
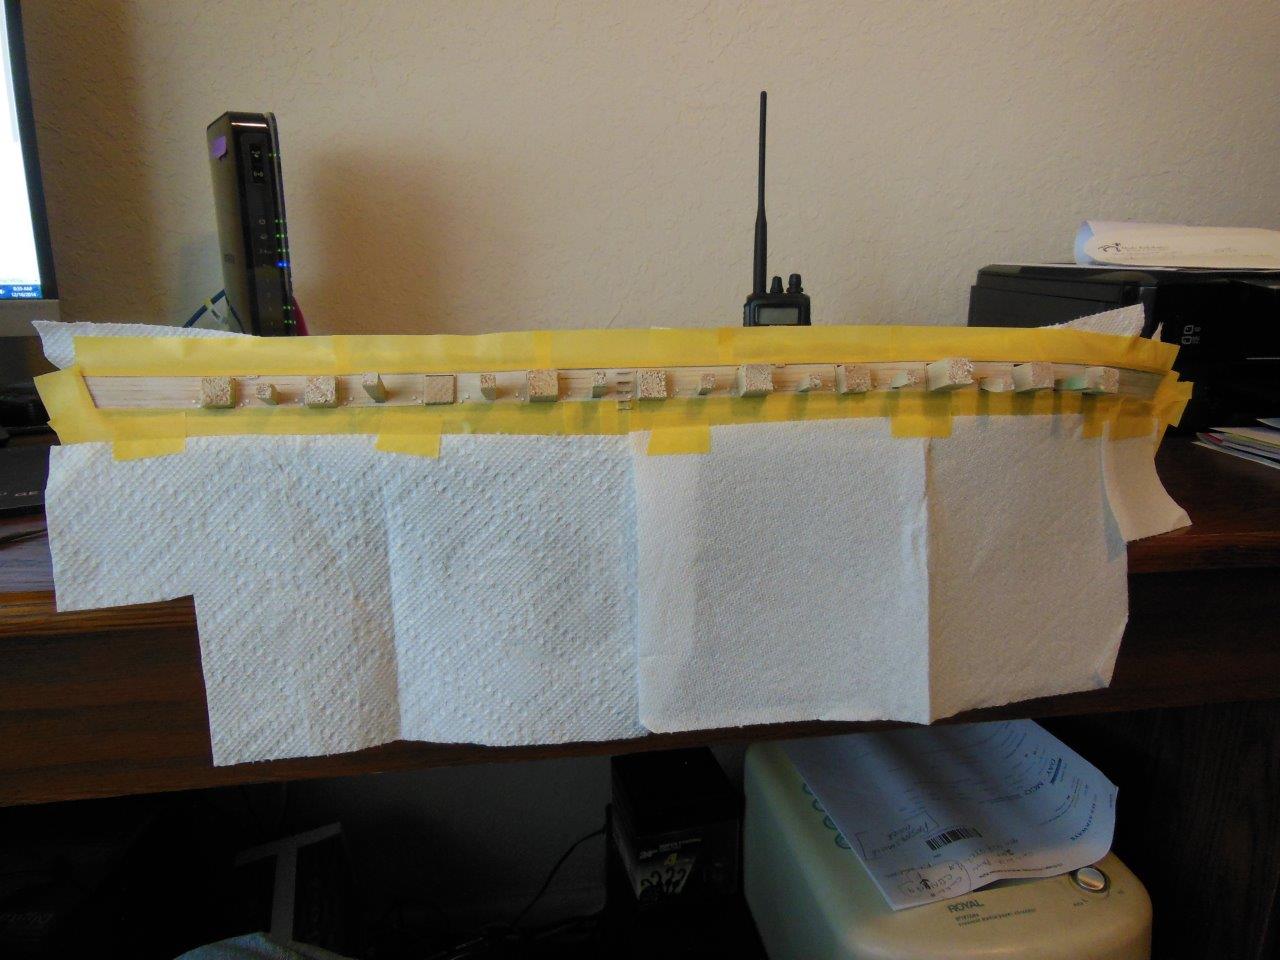
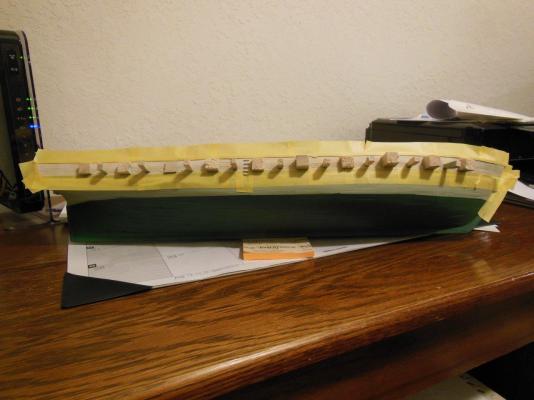
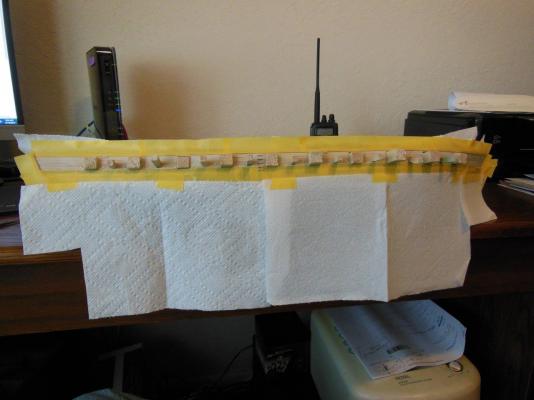
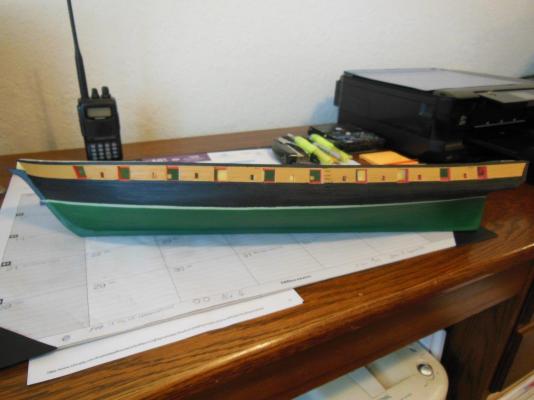
Since there's conversation going on regarding Tamiya tape, I thought a photo showing how well it worked may be worthwhile (waterline stills needs repaired in this area). As you can see, I painted the end boards for one gun port and one sweep port with decent results. I also added brass drain lines below five gunports. I do not believe this was in the plans and probably not historically correct, but the Captain said put them in. A big finger is always good for size reference...

-
Hi Patrick, I'm sold on sticking with Tamiya (sorry I could not stop myself) . So far it's working very well for painting the gunport endboards and for cleaning up the waterline. BEER and POPCORN, I'll be there...
-
Hi Patrick, I finally made time to look at your log and what an impressive build. It looks very challenging but your making great progress. Now if Sjors will share the popcorn I'll sit in and watch your Connie come to life.
-
Thank you Sjors, I will take your advice and I wish my build looked as good as yours!
-
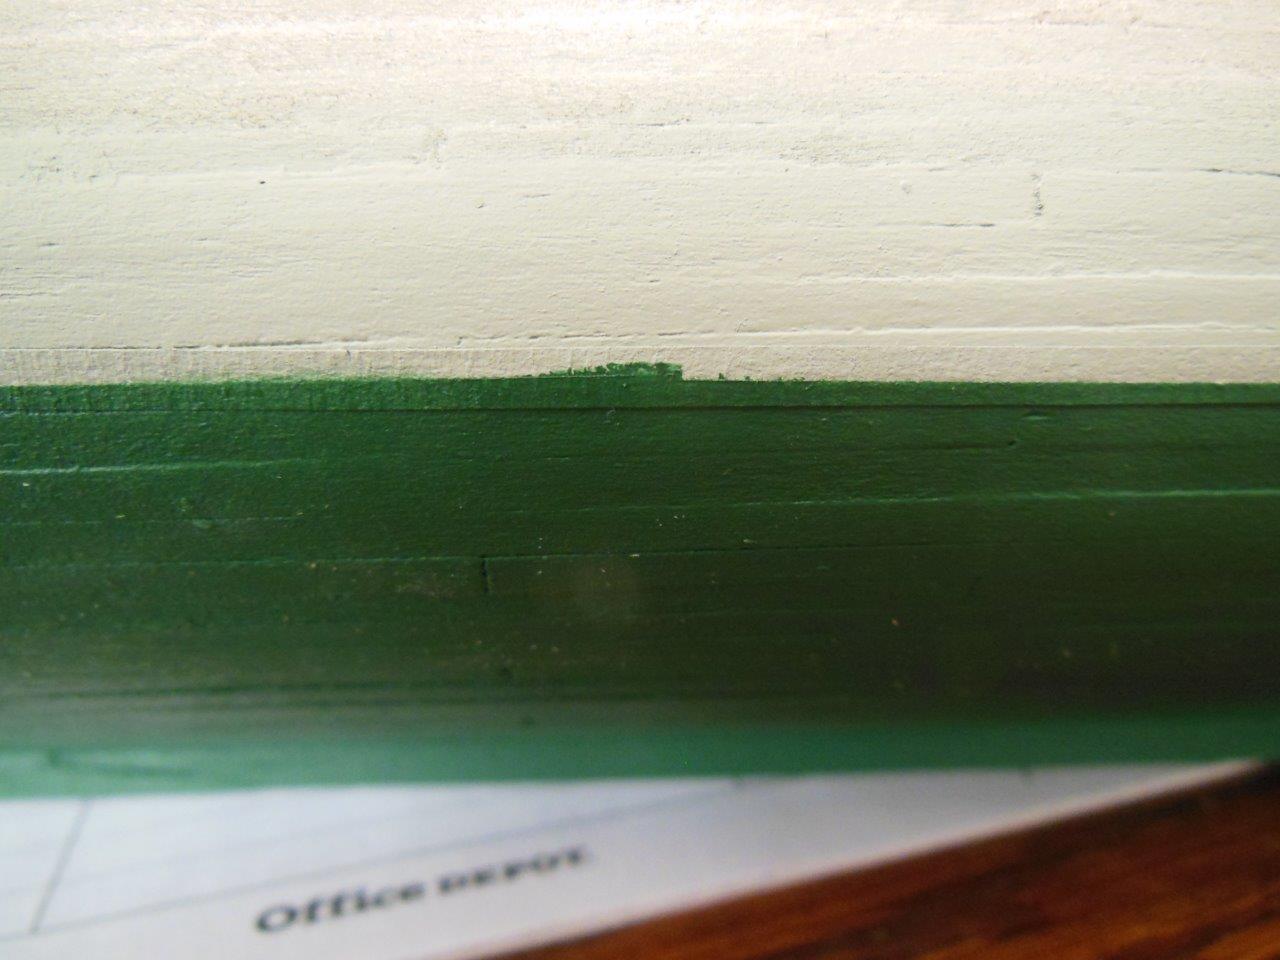
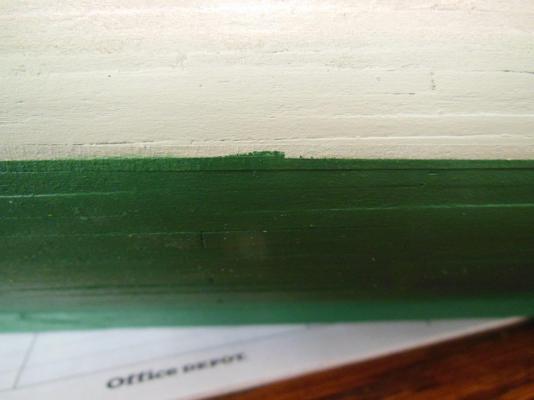
Hi Patrick, I'm used several brands of tape - probably a mistake... The thin tape I used to define the water line was purchased at the local hobby store, initially purchased to simulated metal bands on my Washburn tug. I do not recall the brand but it does appear to have a wax surface. I recall I had to sand the top surface and prime it before paint would adhere. This is the tape that seeped even though I rolled the edges and over-sprayed the tape once it was in place. I also used a yellow Tamiya tape in some areas which worked fine plus a blue painters tape to cover large areas which worked fine. Since my posting I corrected some of the seepage by re-taping the water line, carefully scraping off a lot of the black paint on top of the light green line and repainting the light green. I used the Tamiya tape for this step without issue. Based on this recovery step I believe other than a few hours of work, I can get the waterline fixed to my satisfaction. Lesson learned no. 3,466 for this build...
-
I managed to get some painting completed since my last post. The bad news is my painting ability has not improved. I have a lot of touch up work to do where the tape bled as well as a few misses, plus I need to paint the gun/sweep port end boards red. I'm really getting to dislike the macro lens on my camera, it shows way too many faults. Maybe I can find a camera with a fault filter... I'll post the clean up photos once I spend a few days working on the above issues. If you look close you can see the narrow tape thats on top of the light green paint, hopefully protecting the waterline stripe as I paint above and below the line. Tape... More Tape Results Some issues to dress up I'll re-tape to try and get a better edge...

-
Mark, I used Testor lacquer paints for most of the model other than the rust colored hull which was a lacquer primer spray paint by Krylon. I have since changed to water based acrylics. Whatever you use for paints, sealers etc, the best thing you can do is make up a test piece for ease of mind. I also sprayed the entire model down with a Testors Dull Coat. It took away the shine and did a great job making the decal edges disappear.
-
Mark, I did use the suggested nitrate on my Washburn. You may want to test it on scrap wood if your not sure it's compatible with the type paint, stains or surface you want to use it on.
-
Good moring Mark, I would not seal the false deck. I suggest you plank the deck then seal it after your done with sanding. I do not recall what I sealed my deck with but I'll do a little research to see if figure it out, but I may have used the nitrate as suggested. Your build is coming along very well, something to be very proud of!
-
Hi Chuck, The ship looks like a great future build for many of us and as usual your work is an inspiration. I regard to the size, would you mind posting a picture or two with something next to the ship for reference, such as your hand, a tool or whatever floats your boat... Sorry I could not help myself.
- 1,051 replies
-
- 1
-
-
- cheerful
- Syren Ship Model Company
- (and 1 more)
-
John, Your work looks very good. Congratulations on a great start.
-
Hi Adam, Thank you for the compliment and your opinion on Chuck's lines and hooks. I think I will give them a try.
-
Dale, That looks like a good Idea. I'll try it when I get to that point - Thanks
-
Hi JCT & Patrick, Thanks for looking in and for the advice as well as support. I would not have thought of over spraying the masking tape - THANKS. I'm also ready to see some color on that dull looking and scarred hull. I hope I can lay thin enough coat(s) to where the plank seams are still visible. Patrick, your Niagara along with others, is an inspiration for me as I slowly build. If the original builders were as slow as I am, they would have had her ready in time for Desert Storm.
-
Dale, your doing an outstanding job on your Niagara!
-
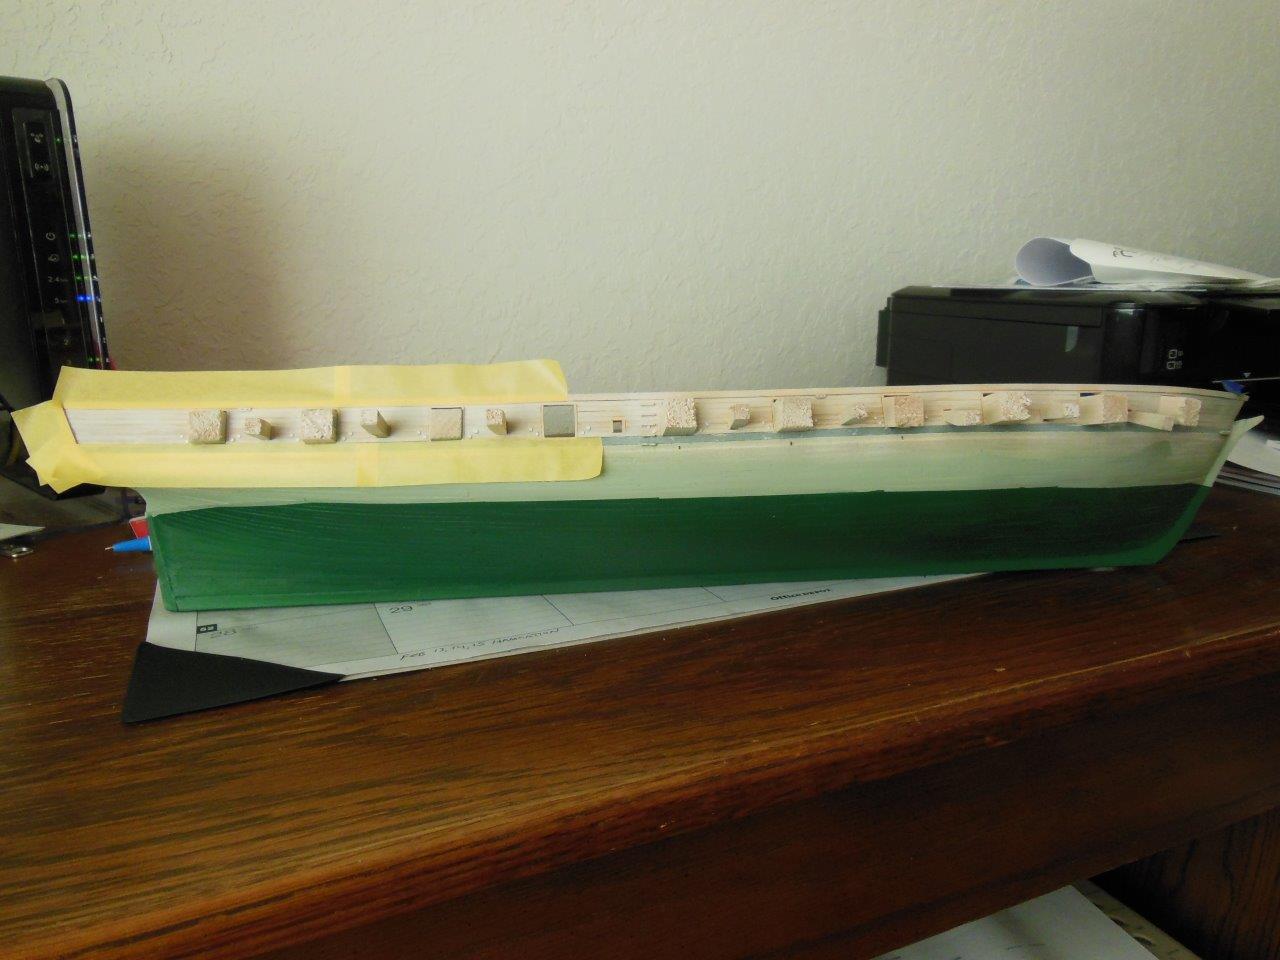
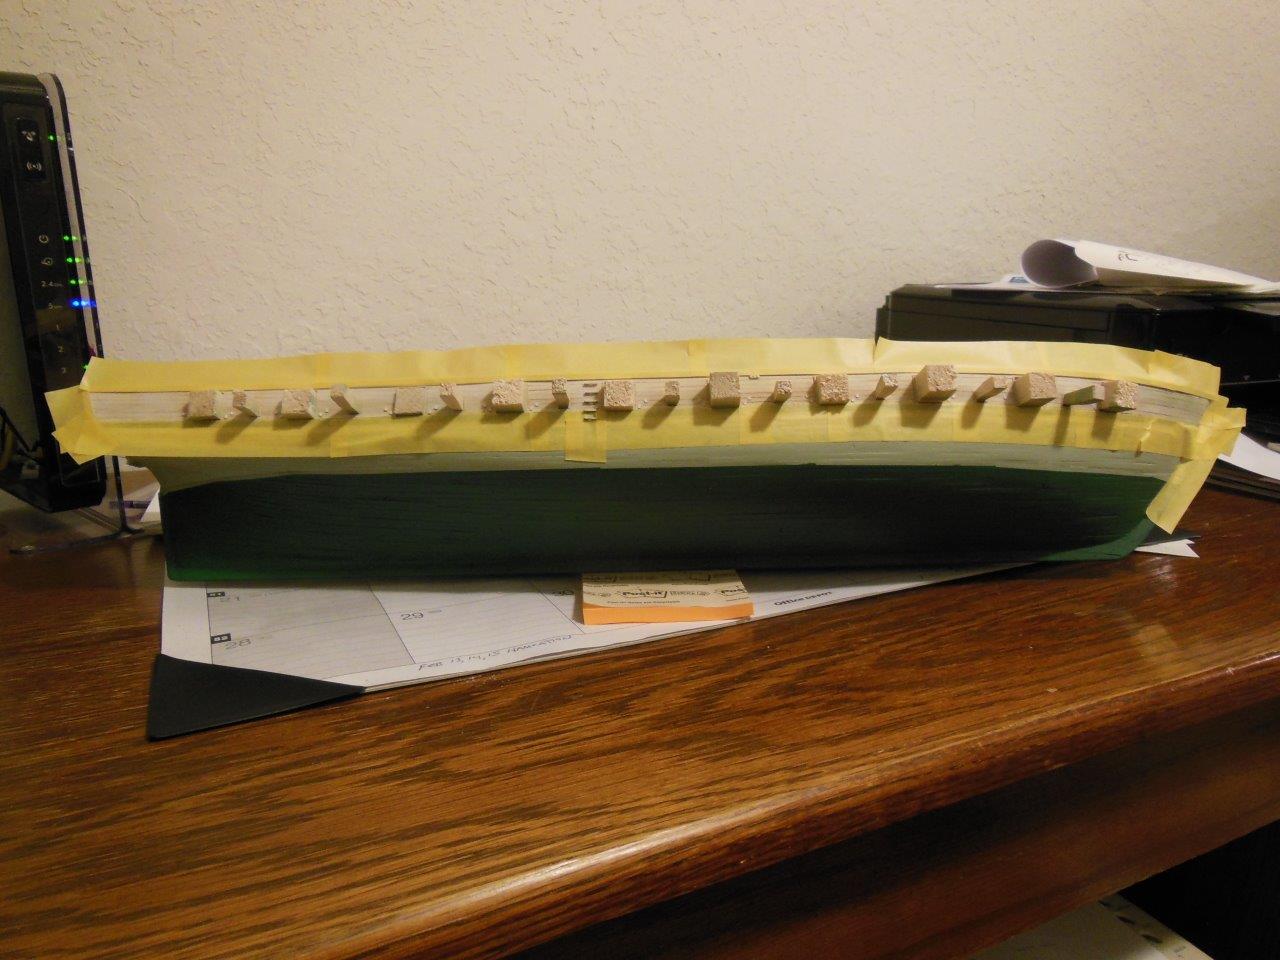
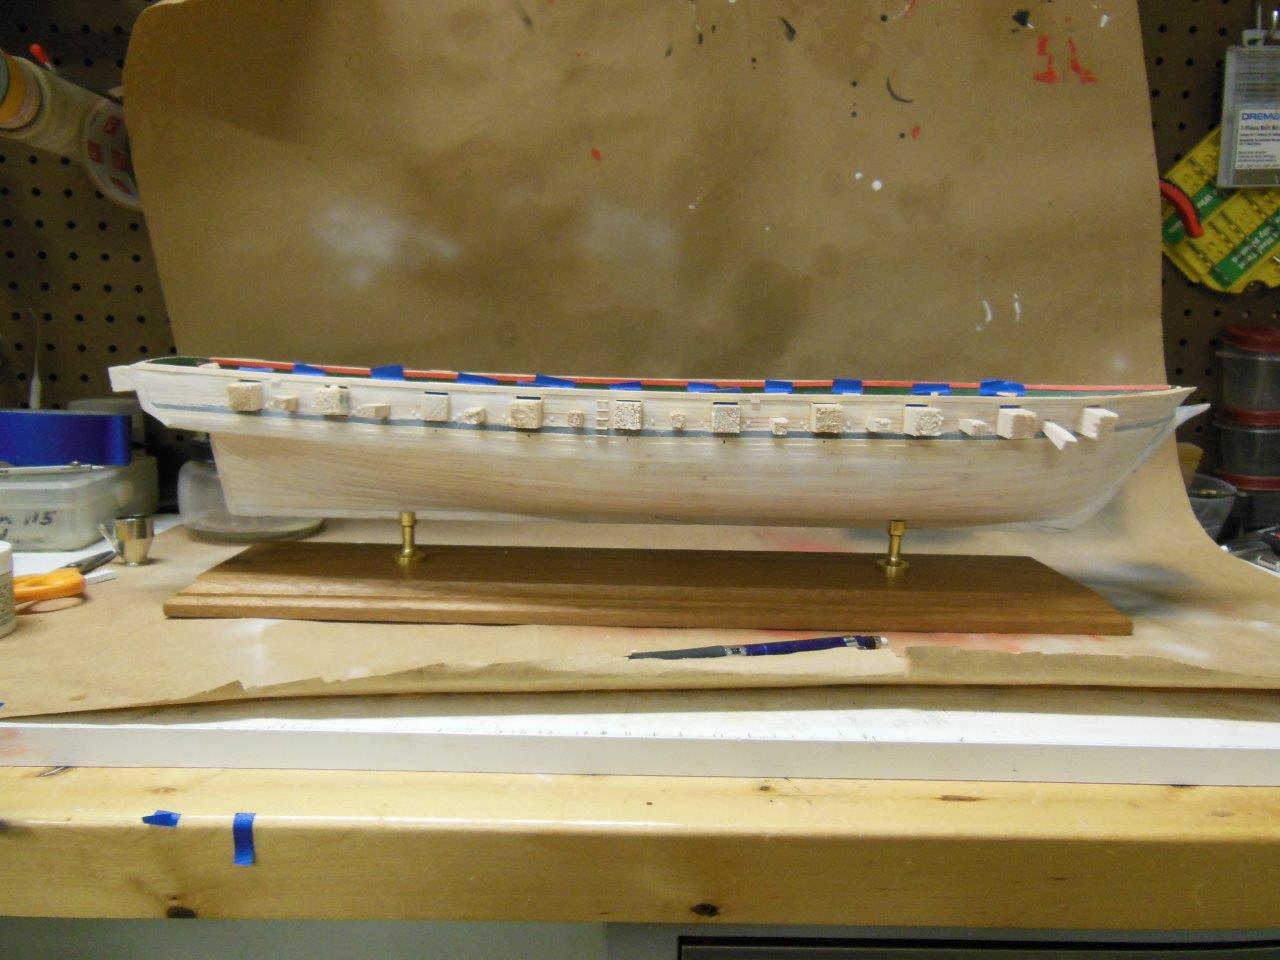
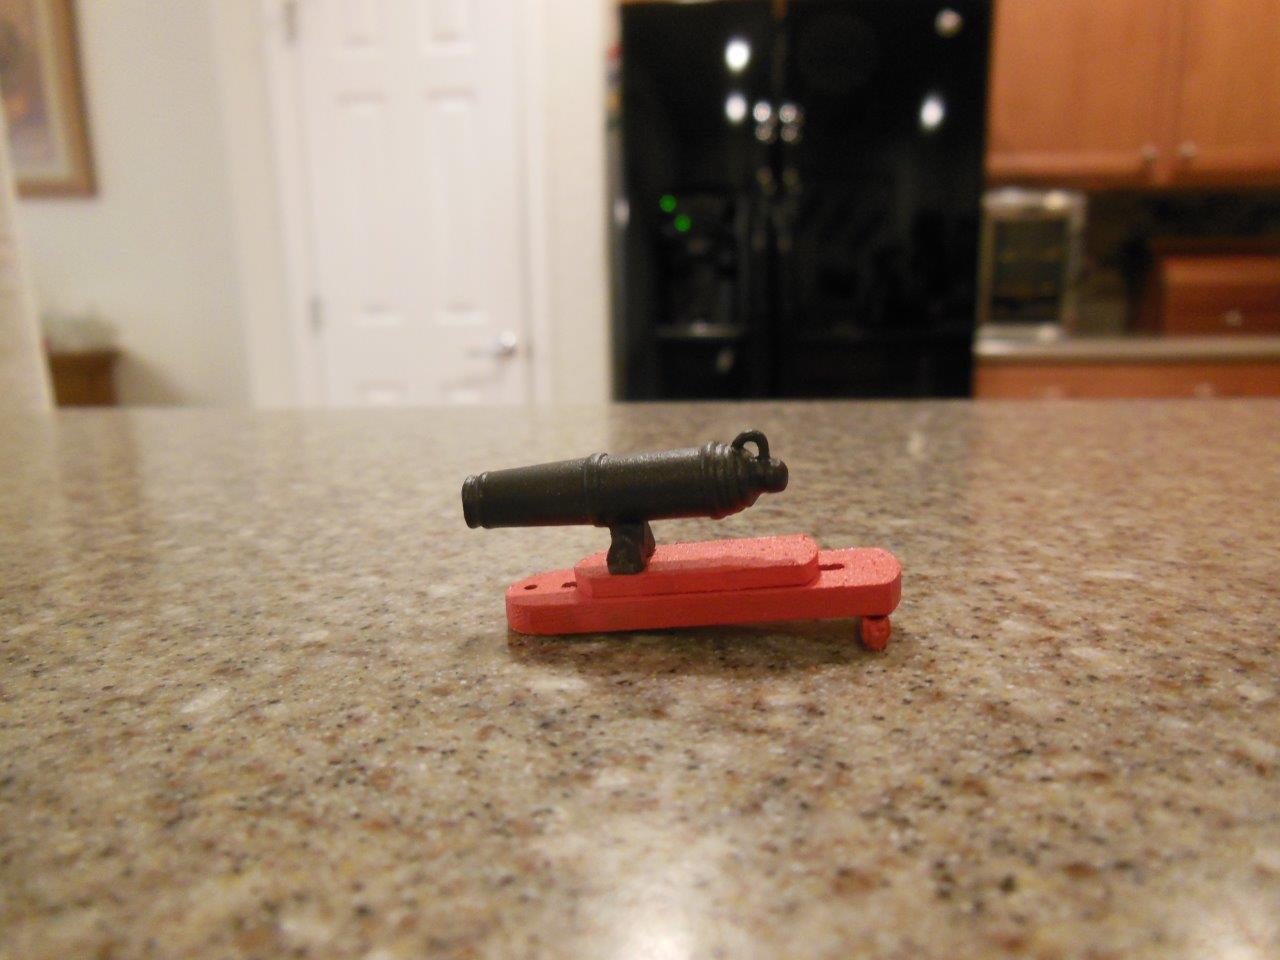
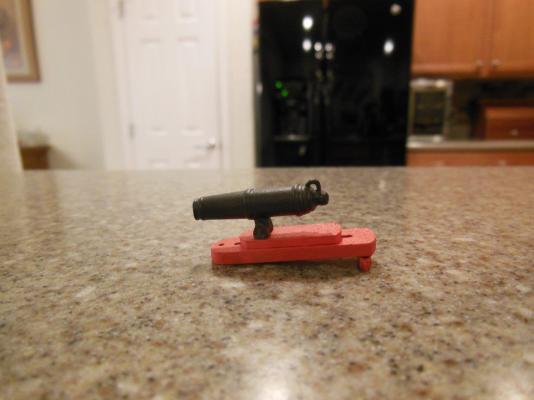
I did enough carronade work to verify the gun-port opening height is tall enough. I just need to be careful in how I glue the guns to the slide so the barrels do not point upward too much. My missing carronade also arrived from Model Expo - once again very quick customer service. I drilled the mount holes and did a trial mount and it looks like I need to countersink the mount screws a little deeper in the mount board so they get more bite into the center keel. It also looks like bow sits a bit low by @1/8" or a little more, requiring me to raise the fwd mount post with a brass spacer or countersink the aft mount more, maybe both. I made some wood plugs for the gunport and sweep ports so I can airbrush the hull exterior. The thought of taping up 42 openings just sounded like a painful process - I hope the plugs work OK. I considered placing a wrap of tape around the plugs to prevent bleed through but I'll play that by ear and see how it goes. First coat I applied was a very thin coat of primer. Once it sits overnight I'll give it a lite sanding with steel wool and then mark the waterline. My paint scheme plan is below. Let me know if it sounds like I'm heading in the wrong direction. In order to get a nice waterline stripe I thought, lets airbrush that color first, making sure the painted surface is lightly wider than needed. Once that is dry, I will apply paint tape that's the correct width of the water line and apply more tape on top of it to block off the colors above and below the waterline when needed. Once the colors above and below are on I'll pull the tape and hopefully have a nice sharp waterline stripe. Do you see any potential issues doing it this way?

-
That sounds like an excellent plan Augie. I need to replace the above photo. It looks low res and I cannot rotate the sideways shot.
-
The cannon work is interesting and tedious. I'm debating on buying some of Chuck's rope, hooks and block to dress them up a bit. The blocks that came with the kit look pretty rough and his hooks would look much better than anything I could make. I still need to paint the carronade wheels black and add the metal work.Sorry about the sideways photo - first time I used the iPad to Take and add photos. Photo replaced using conventional digital camera
-
Thanks Mark. Something I forgot to mention was regarding your deck. At the time I installed my Washburn deck, I was not aware of marking the edge of the deck planks with a pencil to simulate the caulking. The deck planks fit together so well, its difficult to see the plank edges. I wish I could make that change now. Having the caulk lines (IMO) is a nice detail that's easy to do and looks very good. If your considering adding that detail and need some advice, I and many others can help.
-
Good morning Mark, Your hull looks great! As a suggestion, I would epoxy coat the hull interior before doing the exterior. This will stiffen it up and provide more strength before you start working the fiberglass.