HOLIDAY DONATION DRIVE - SUPPORT MSW - DO YOUR PART TO KEEP THIS GREAT FORUM GOING! (Only 20 donations so far - C'mon guys!)
×


jfhealey
-
Posts
361 -
Joined
-
Last visited
Content Type
Profiles
Forums
Gallery
Events
Everything posted by jfhealey
-
In the picture at post 29 above I transposed B and C. Sorry. Thank you nzreg and JpR62 for your likes.
-
In the picture above A is 2mm and B is 13mm.
-
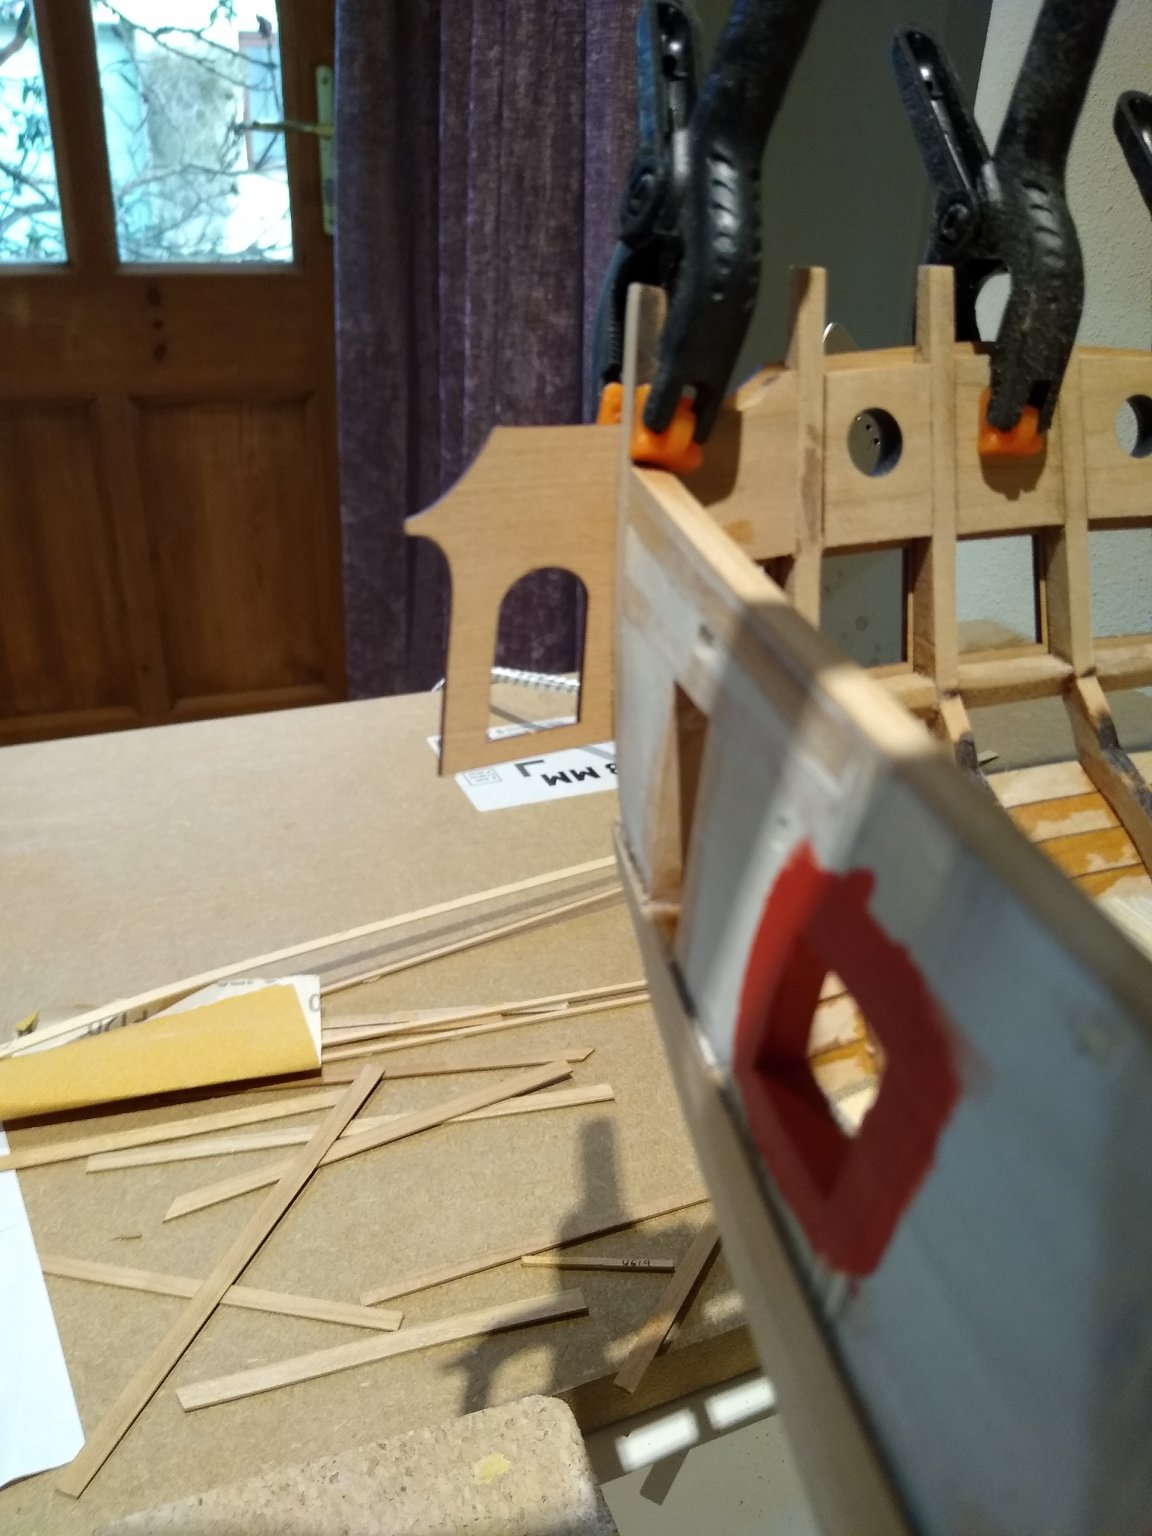
Should I cut out the window frames and re-install 3mm or so higher up? That would push the transom piece up by the same amount which looks to be desirable comparing this picture with your photos in the instructions. The top of the blank window, as far as I can make out from your pictures is a clear plank or so higher than the top of the doorway to the quarter gallery. Mine as you can see is about two thirds of a plank's width. Pushing the window frames up would fix that, but am I, I wonder making another problem. All of this comes, I'm sure, from multiple little inaccuracies throughout.
.thumb.JPG.772f55cae0e68f21713c621f4cce5d88.JPG)
-
I wonder if I have a problem here. Chuck, can you help? The plans show the deflection from a straight line between A and B is, at C, 2.5mm. I must have over vigourously sanded and mine came to 9mm. Taking the hance pieces as a datum point and assuming I needed to use a plank of constant width as distinct from a tapered one I built up the sheer with limewood strips. So far so good. But am I now too high at the junction with the stern frames. I have not yet got the hang of posting photos in the order I want them but here goes. I wonder if I've put the window frames in too low. I set the widow sills level with the transition from straight to curved on the stern frame - at the outside. I've lost the photo just at the minute - but this picture shows the result from the inside.
_LI.thumb.jpg.7040bcb38ff1419609c619d685214df6.jpg)
.thumb.JPG.66e8388a4d41ce3d701f72775b442ef6.JPG)
_LI.thumb.jpg.aa38a062080bc43e238b43ea69ddd9ad.jpg)
-
I do not have a Jim Byrne's table saw (perhaps for Chuck's next project!) so I used commercially available cherry necessarily, on our side of the pond, in millimetres. I should have taken more care - a lack of experience showing - selecting widths. As it was I planked in 6mm all the way up until the last two where I had to use 8mm. I'm hoping the error will be hidden behind the fancy mouldings and friezes - or perhaps they will make the error more obvious. We will see. I'm pleased with the run of the planks and I have no dips and hollows or corrugations but the edge to edge fit is not great. Chuck's laser cut drop planks went in with no more adjustment than sanding down from imperial to metric.
.thumb.JPG.6dd194c6e0424fc06a3ad4af33450e79.JPG)
-
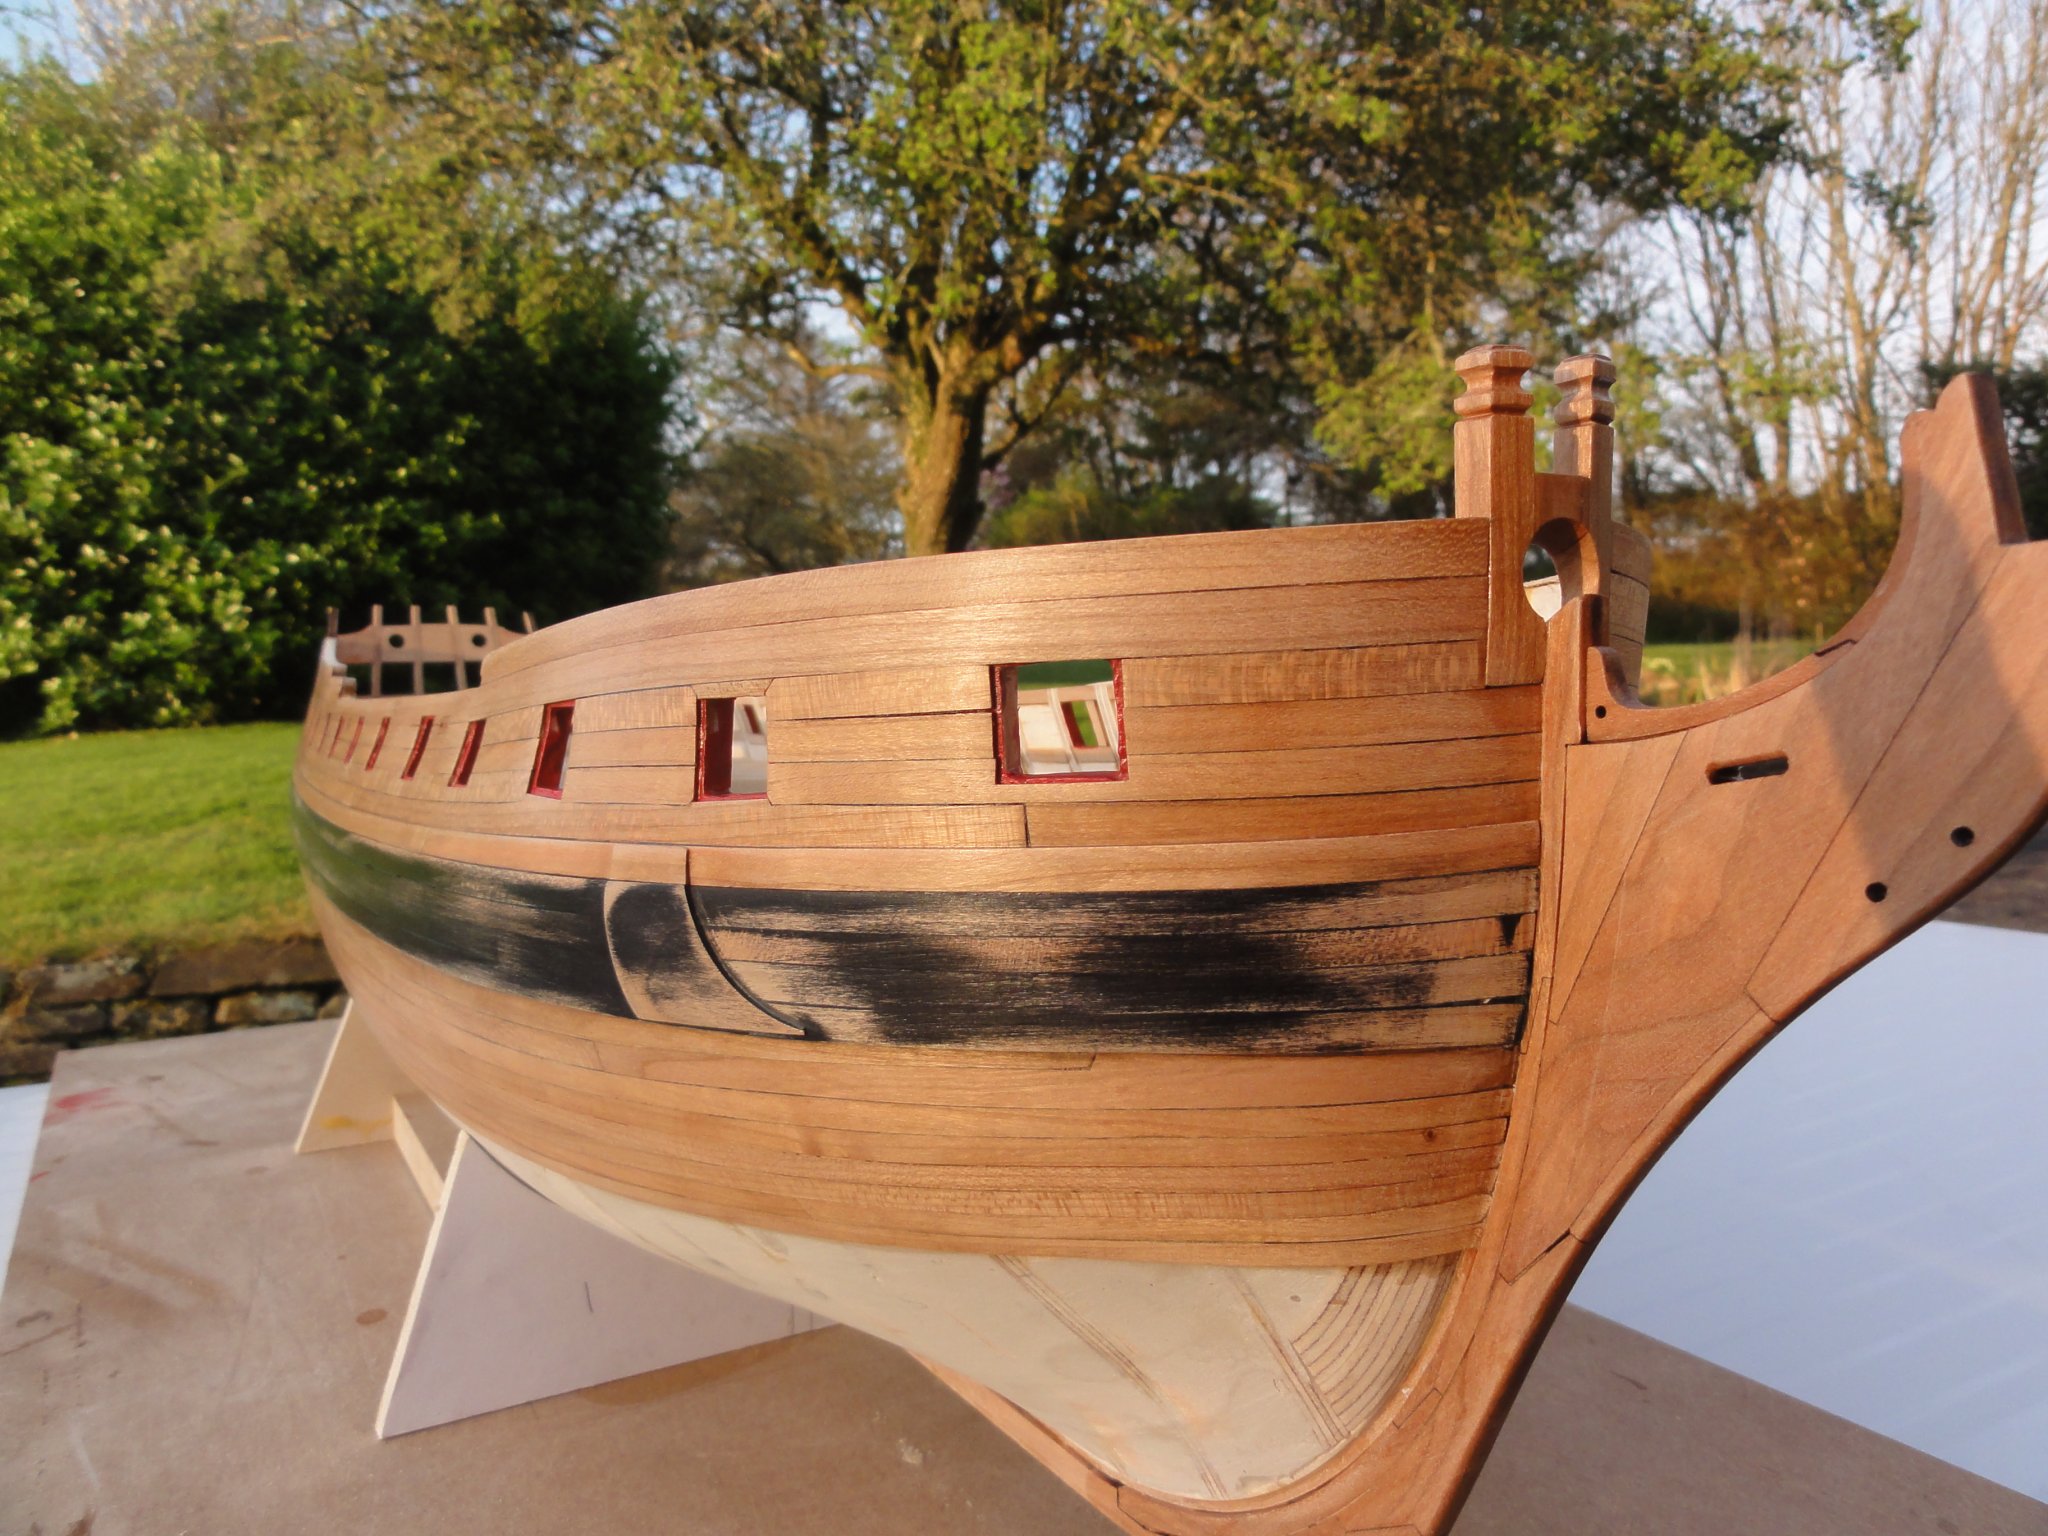
We've had the most wonderful early summer weather here in Cornwall for the past 10 days or so and the forecast is set fair. Cornwall is a holiday destination and the roads and beaches are usually packed over Easter. Instead all is quiet - and the sky over my home, usually criss-crossed with jet airliner vapour trails, is unbroken blue. Stay safe everyone. I've planked one side to the bottom of the first belt (and given it two coats of sanding sealer) and the other to two strakes below the wales.
.thumb.JPG.6f9b91f4f4d3db96a2609cdaee405c43.JPG)
.thumb.JPG.9ff95110663ea55acbc6a4218e3cc53c.JPG)

.thumb.JPG.9c5a6b09ec87780c7dc39db214c790ed.JPG)
-
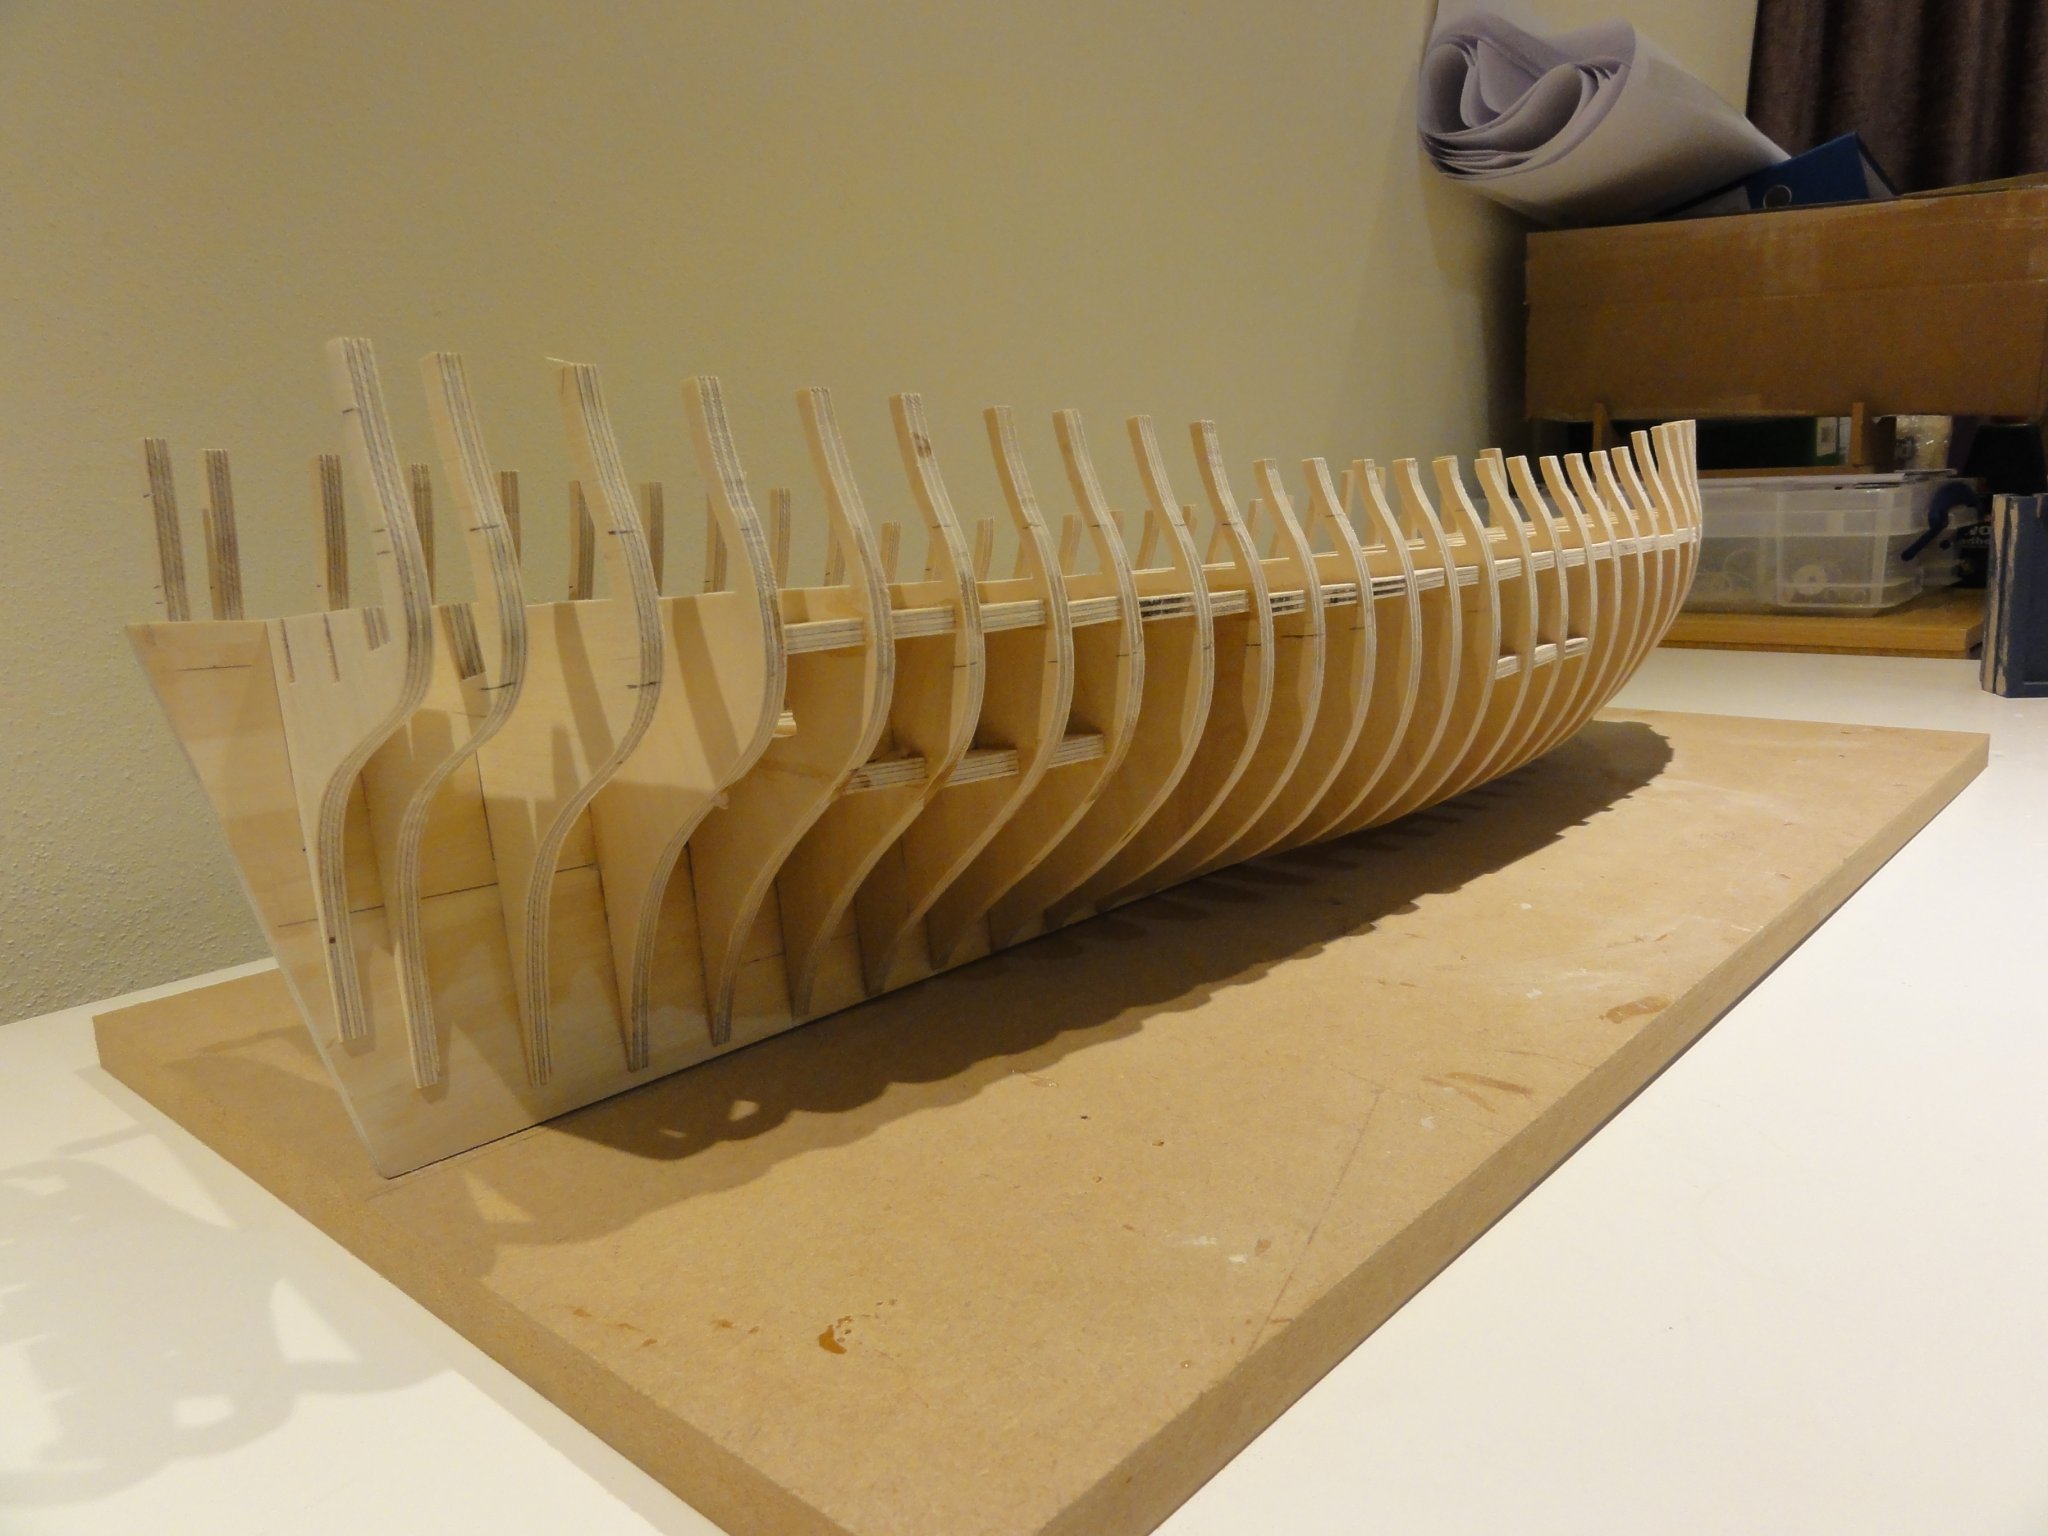
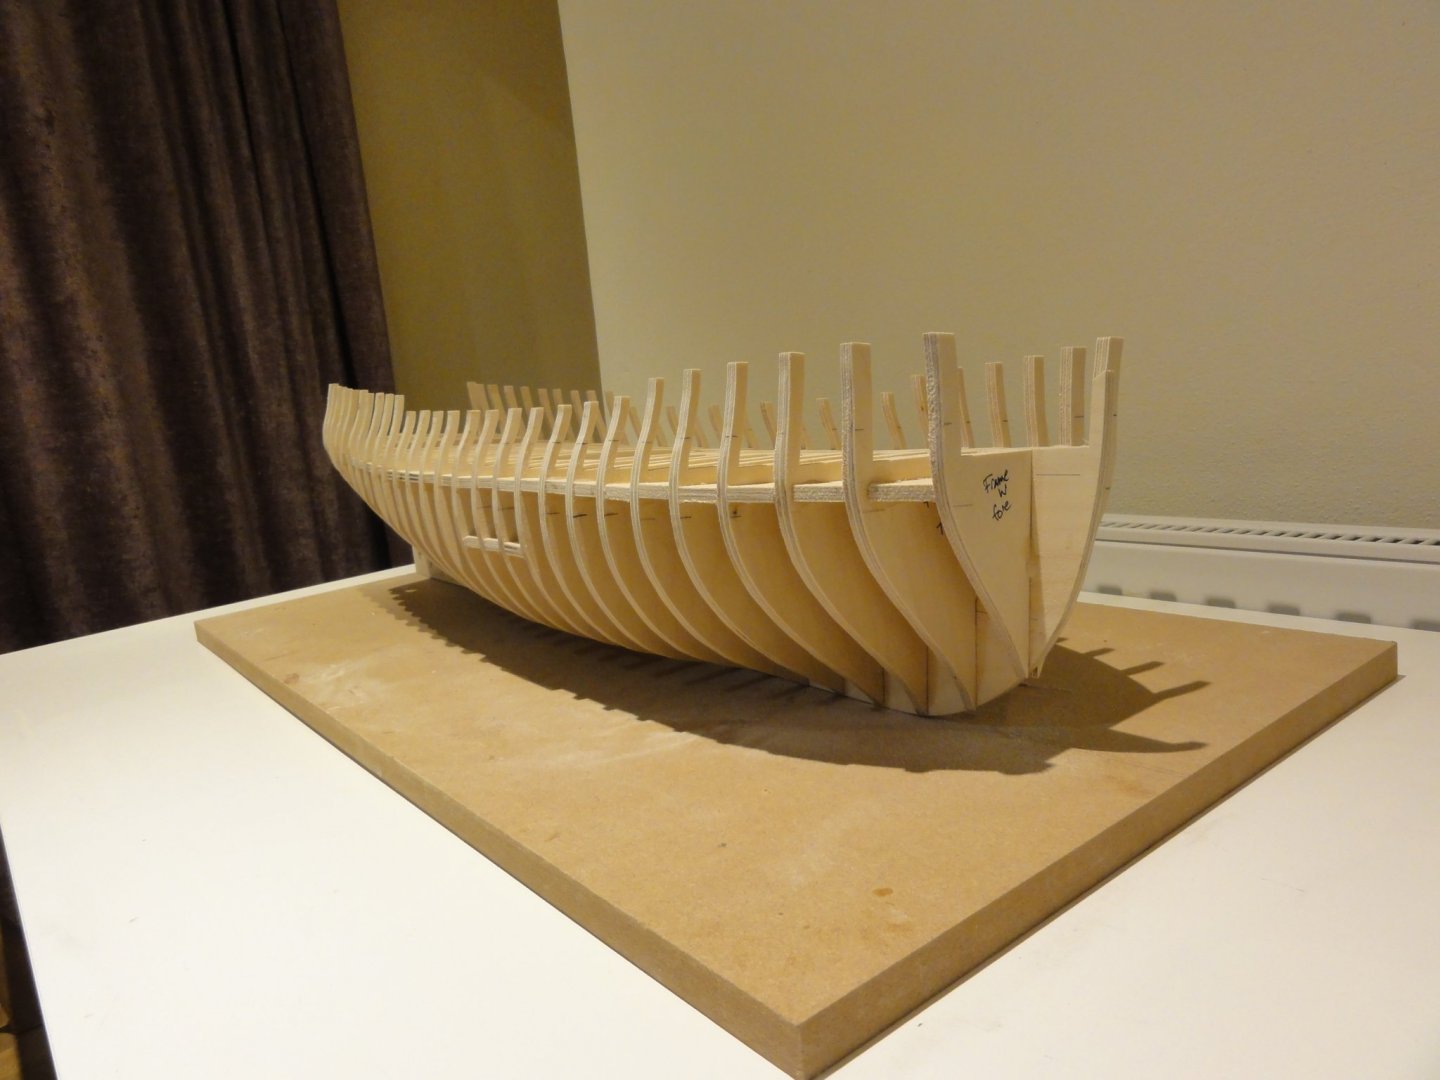
Good morning Mark. I cut my own frames with a scroll saw - which was a new tool for me. I found out two things. First a little bit of "out" when cutting the slots in the bulkheads ( I stayed off the line and then filed to fit the bulkhead former for a snug fit but may have filed more off one side than the other) means a big out at the top of frames. Take care there. Secondly take care to be really precise with frame 29 and the slots for the stern frames. Again a little bit of out at the slot end means a big out at the top. I spent a lot of time fiddling about doing my best to get things something like right. Otherwise good luck! Fred Healey
-
Thank you Chuck
-
I went a bit over the top with balsa wood and body filler. I have no confidence in my ability to single plank this ship however. It wasn't much work nor any great cost and it does give me a sporting chance of a half decent outcome. I actually intended only to fill a few bulkheads at the bow but got carried away. I've been spooked by Matthias' problem with the quarter gallery. Matthias/Chuck: I have a 4mm space between the false window and the hull. It's a consistent 4mm form top to bottom (it does not appear so in the photo) and is the same on both sides. Is that enough or should I sand away a little more? Thank you in anticipation of your reply. Fred
-
You and Scrubby J win the most interesting workplace prize by a country mile in my book. Fred
-
Thank you Chuck. I'm going along slow and steady!
-
I made the bollard posts and was quite pleased until I offered them up and found I had not filed anywhere near enough angle. I think I will cut new blanks on the scroll saw with the bed set to the required angle. I can't get the hang of neatly filing it. Then chapter 1 is about done. Regards to all Fred

-
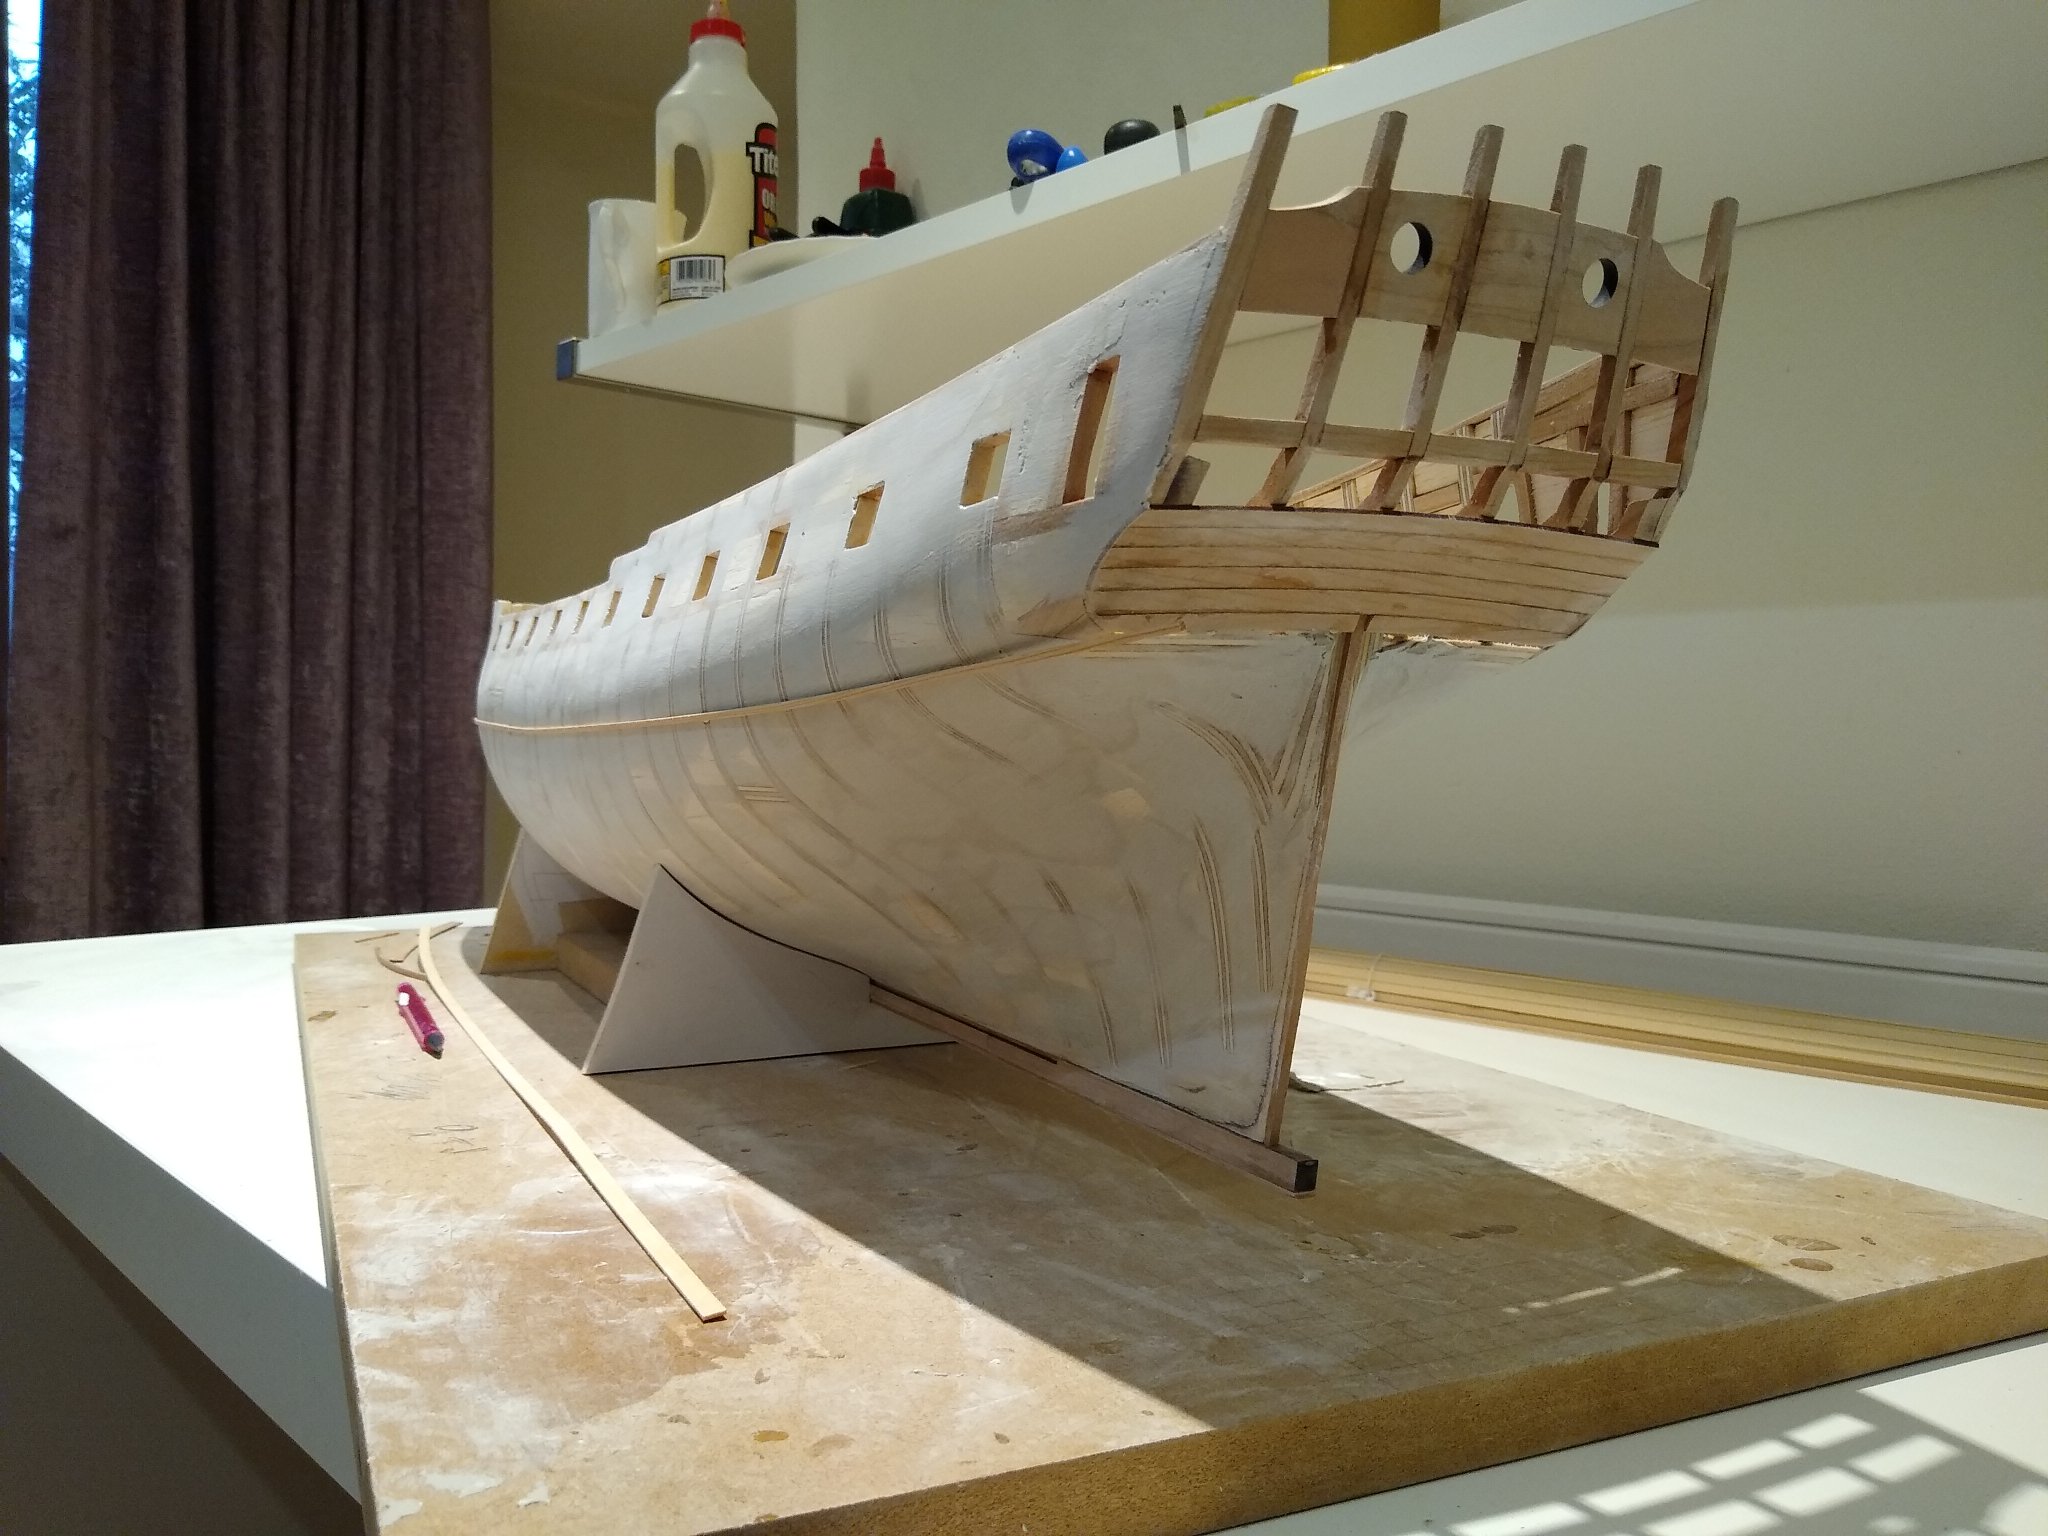
I've put in the additional bits of wood below the counter. I'm happy with the transition from vertical to horizontal where stern post meets counter(having read and re-read stuntflyer mike's log). The outer bottom corner of the counter has a nice definition but not so on the left where I think I over-sanded. My plan is to sand the counter back to the frame on the correct (right hand) side and then trace that over to the left.

-
I think you are very brave Ben. I've got enough on my hands without adding on extras. But its a great idea and I shall watch with great interest. Fred Healey
- 399 replies
-
- 1
-

-
- winchelsea
- Syren Ship Model Company
- (and 1 more)
-
It is a very gentle curve. The cills on mine don't curve quite enough. I don't think it matters. We'll see when I come to put the laser cut parts on (the fit seems good). But it was a silly mistake. I sometimes think I shall make so many mistakes through inexperience that I should buy Chuck's laser cut bulkheads and start a second Winnie running a chapter behind the one I'm presently building. That way I'd hopefully make all the mistakes on the first and have no excuse for going wrong on the second. I shall review at the end of chapter 2! Fred
-
Thank you Chuck. Thank you Mark. I've just been to check.You're right. They are not in a straight line but they do not curve as much as the windows on the laser cut transom piece that covers them and clearly they should. I'm going to have a think about it. I'm not sure it matters. If it does I'll have to get a file out and see what I can do. Good spot and thanks for drawing it to my attention. Fred
-
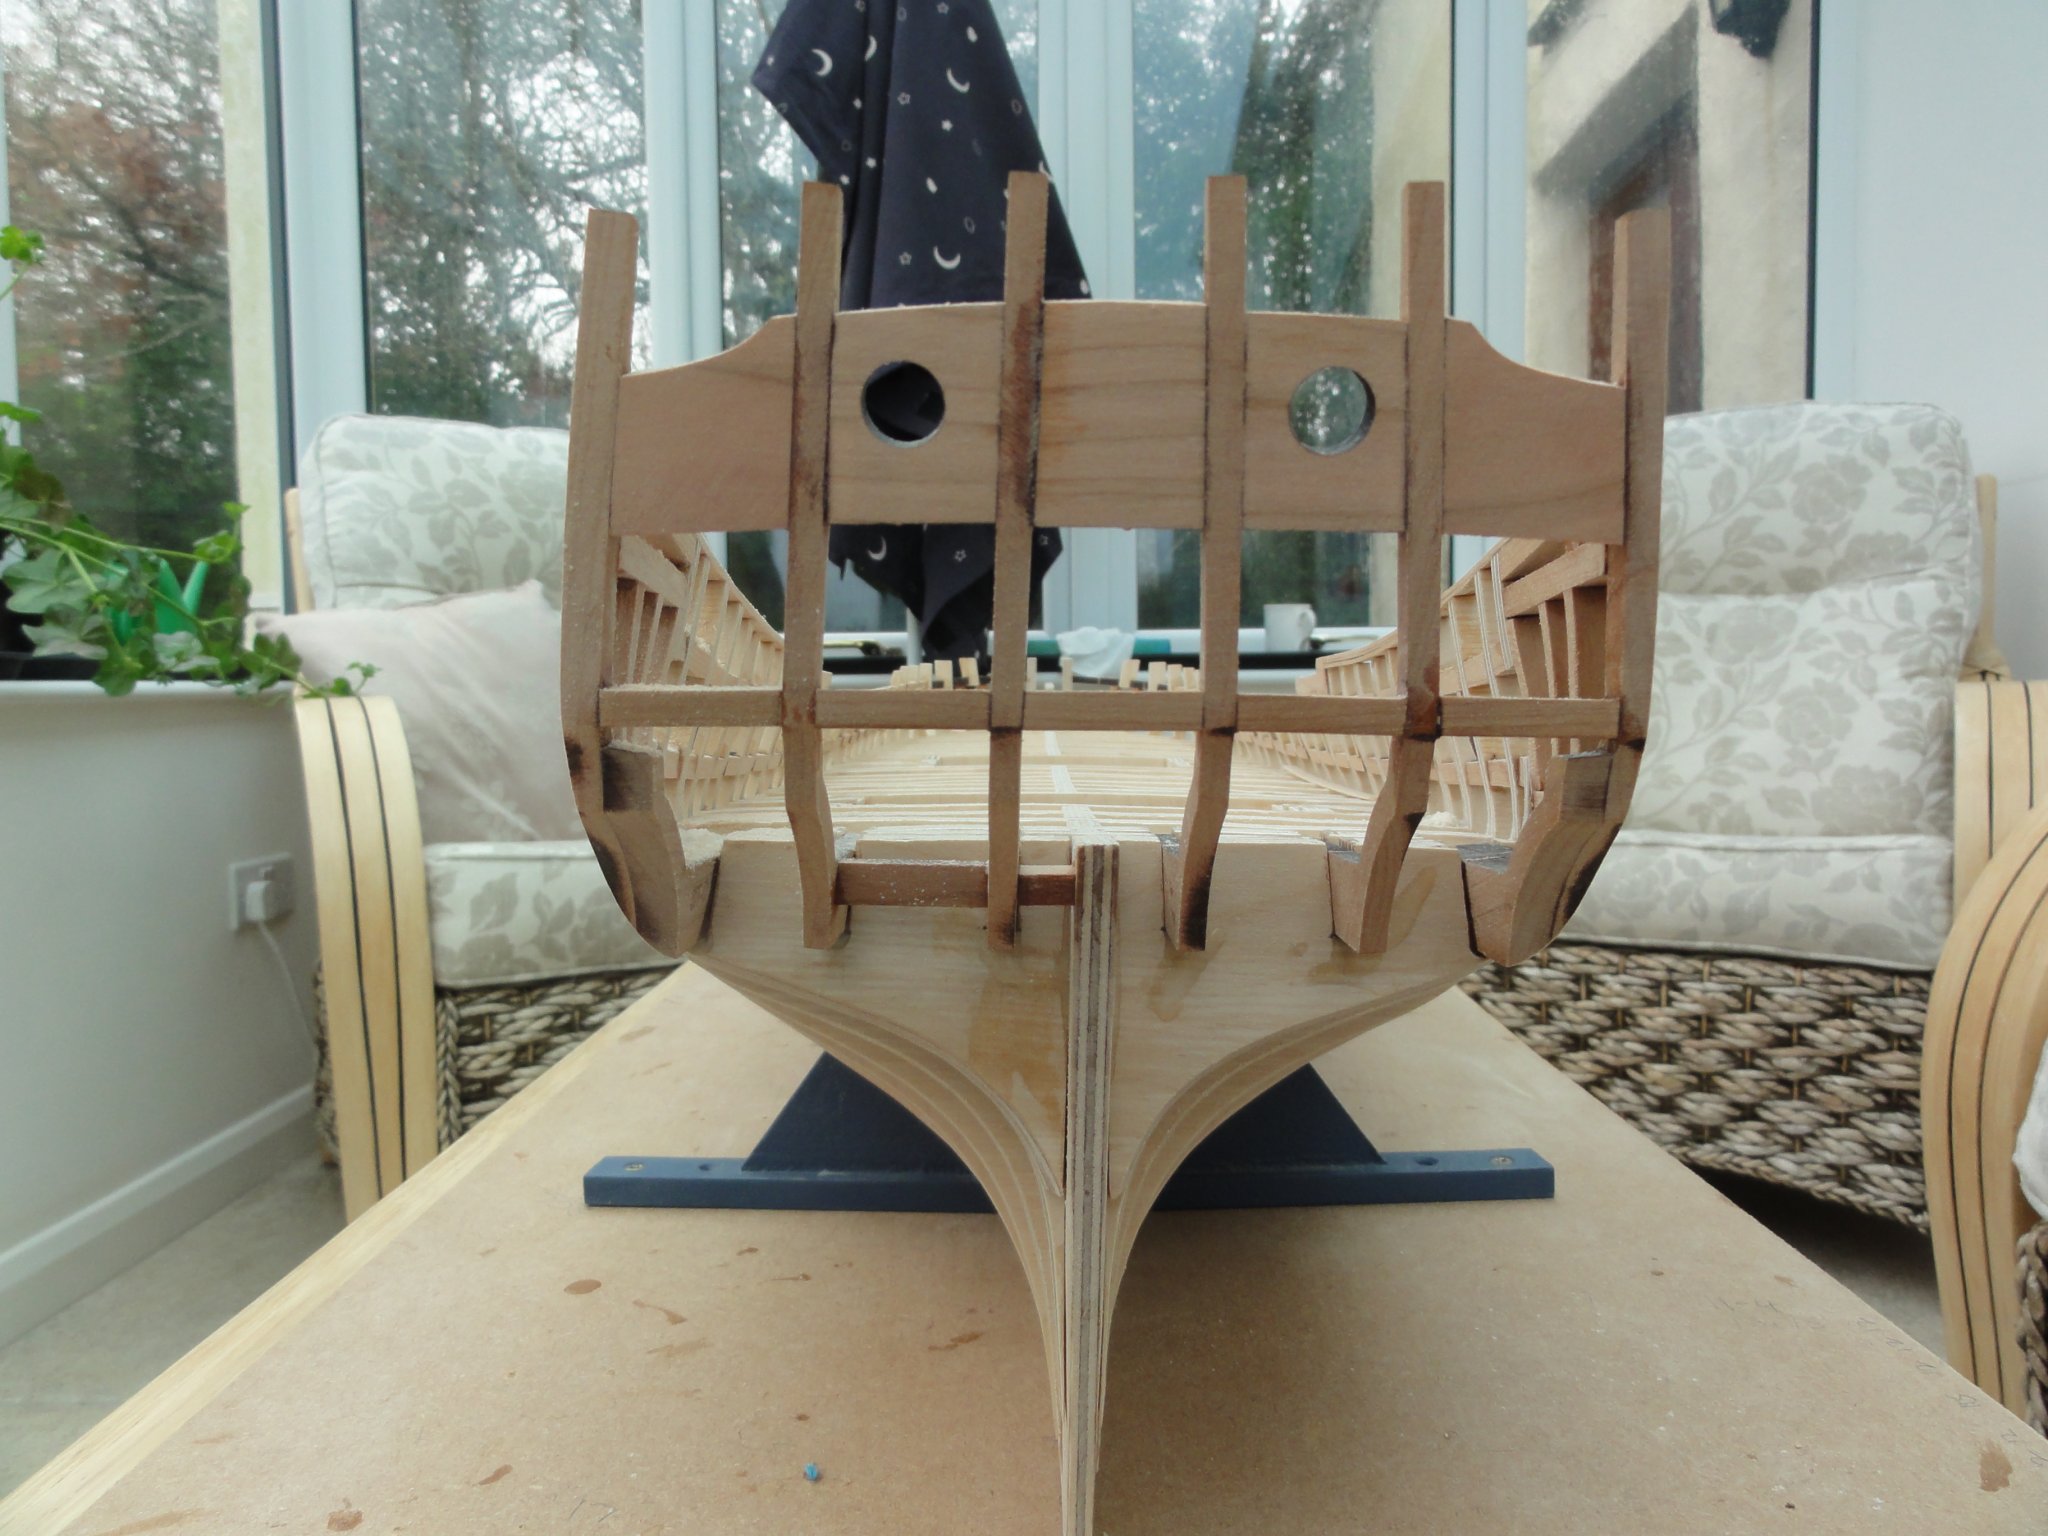
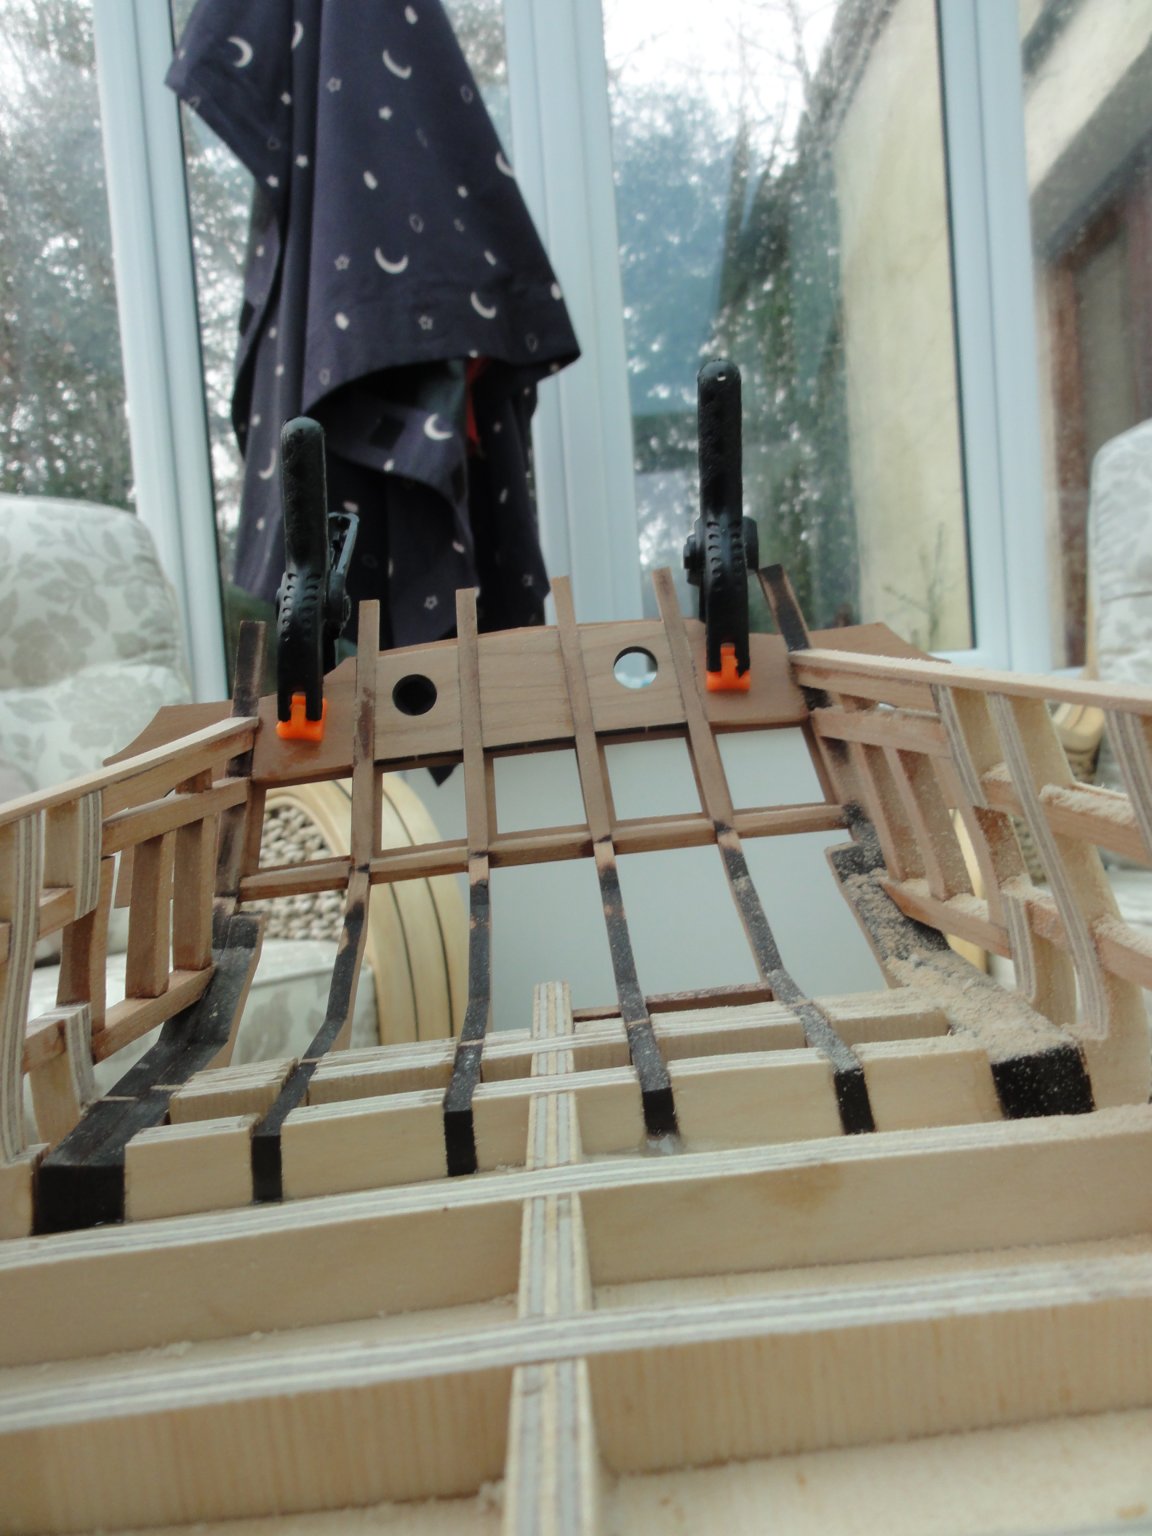
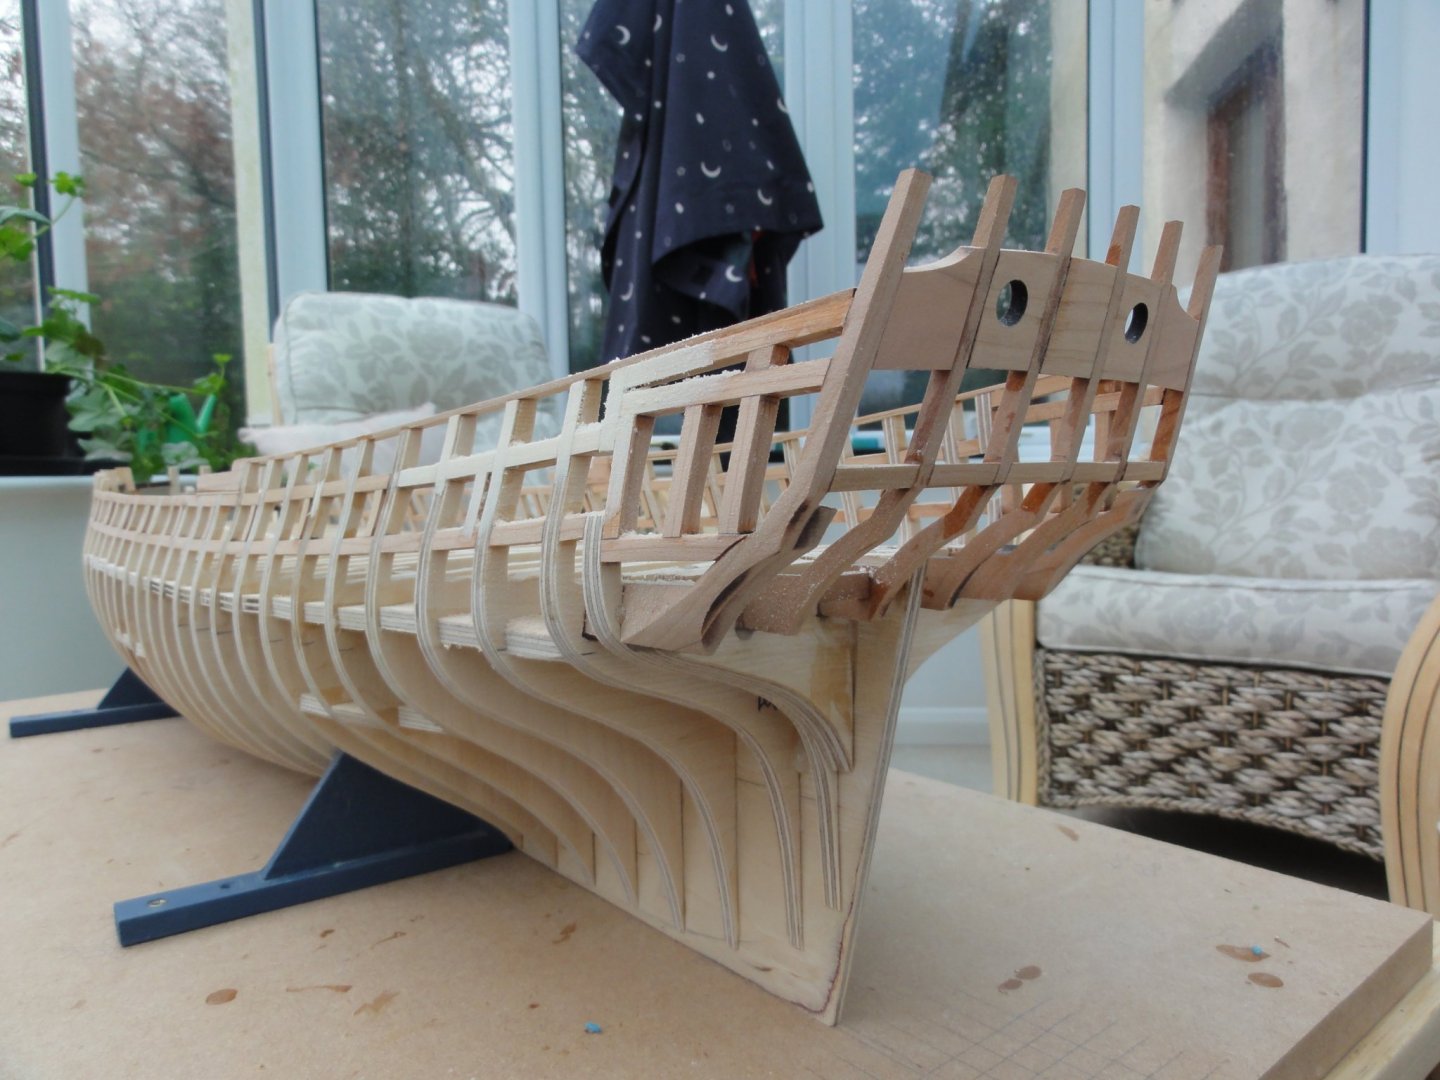
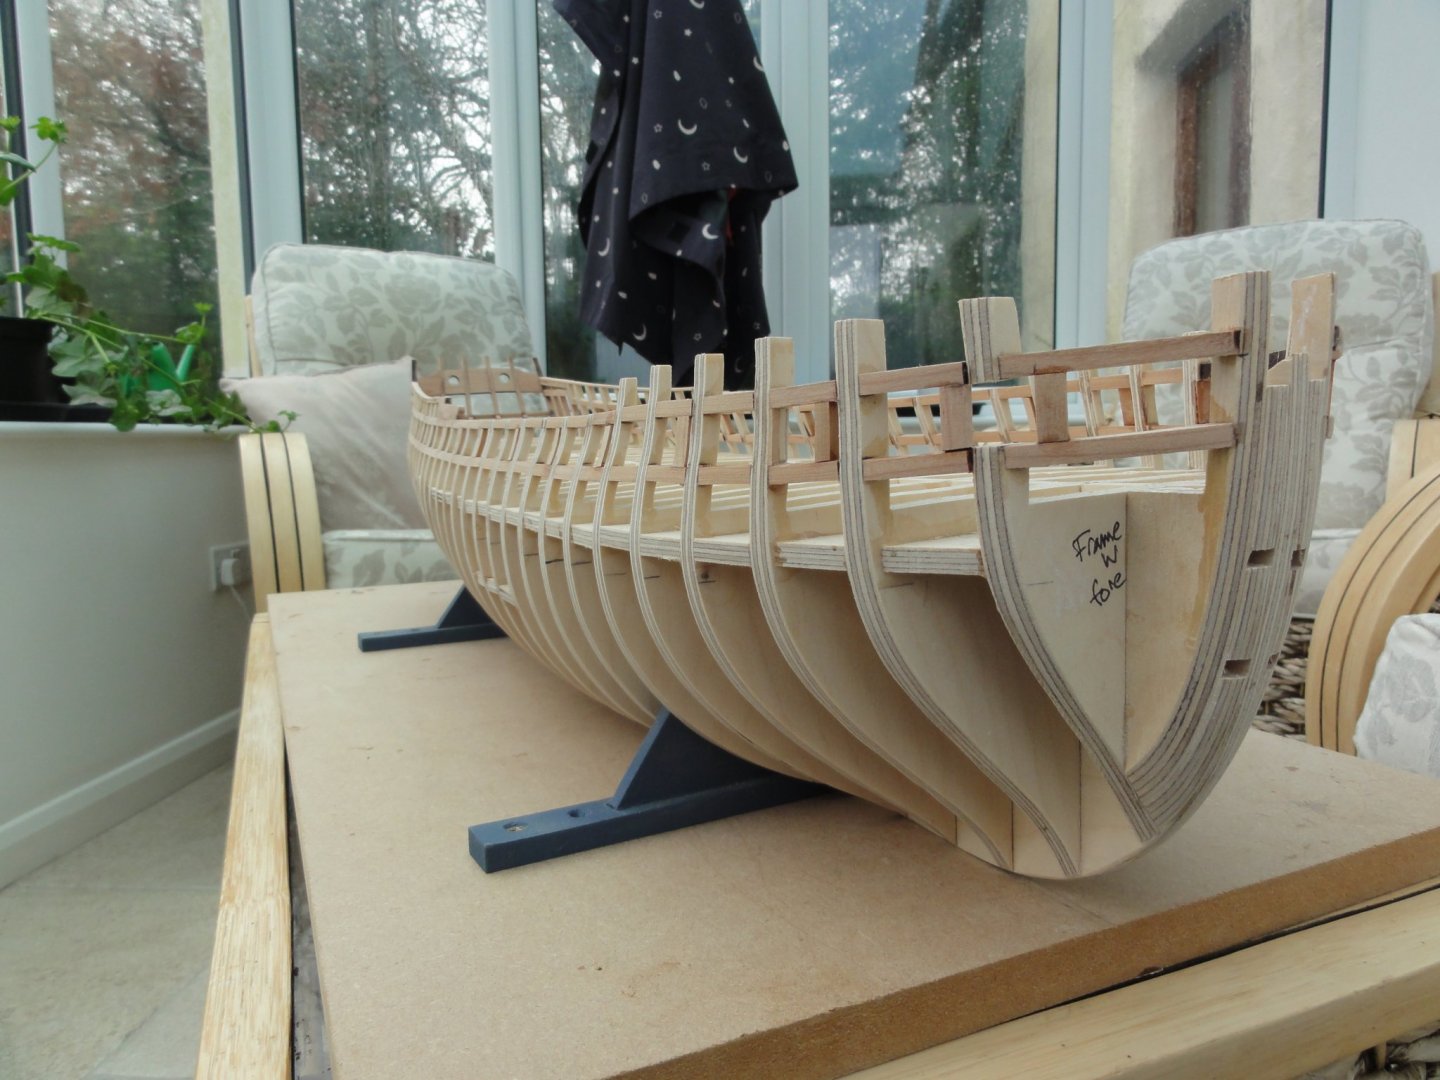
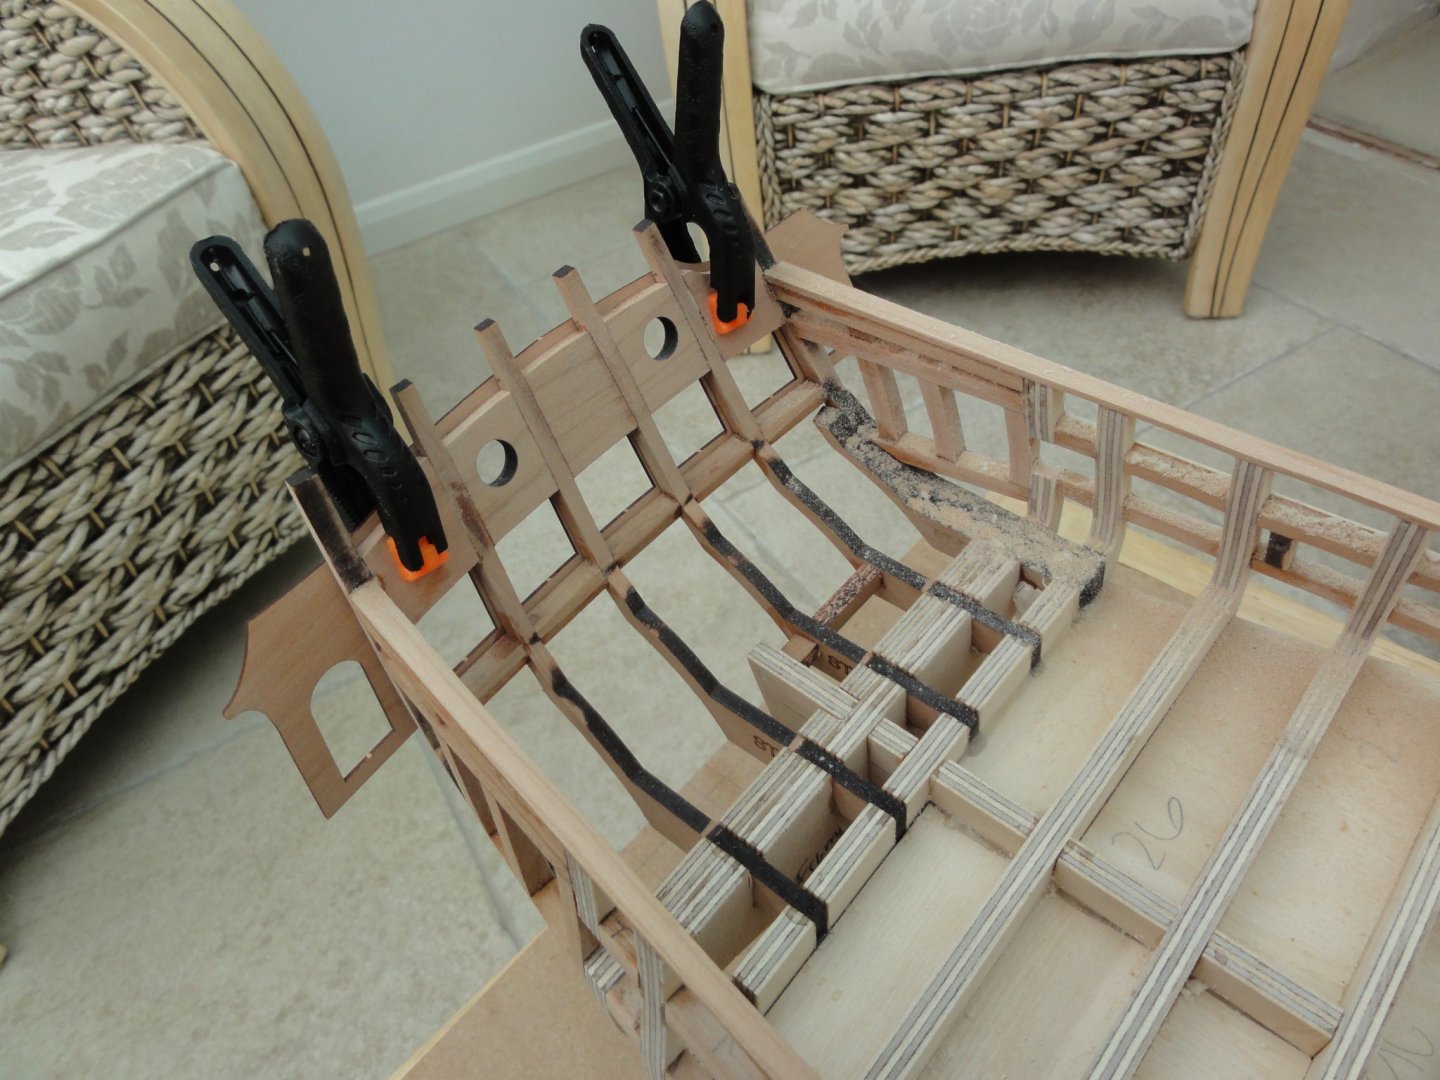
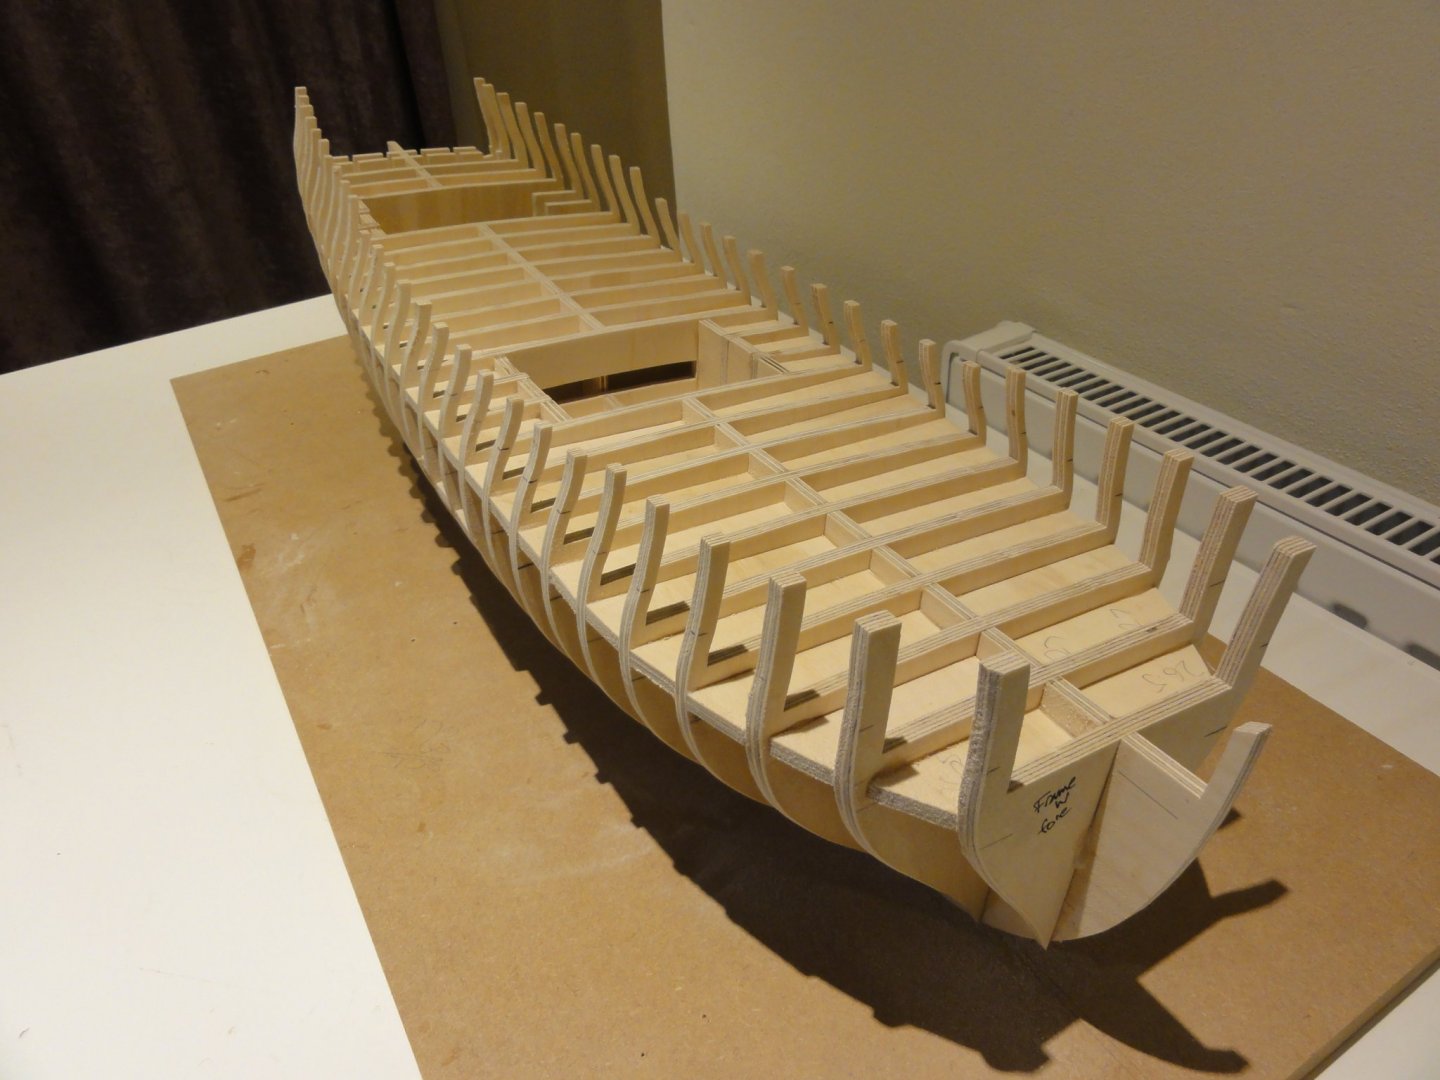
These are all familiar (but not very good - I need to think about my backdrops) pictures. I didn't find the stern frames at all easy. I cut my own bulkheads rather than using the laser cut parts and I found that any slight inaccuracy at the junction of the bulkheads and the bulkhead former produces a big difference at the ends of the frames. But , with slow and steady as my watchwords I filed away and got them I think tolerably well lined up. The stern window guides were essential. The sharp eyed will see I had to push two of the frames over a tiny bit with a brace off the bulkhead former. It all seems OK - the gap around the window aperture is nice and even. I'm not quite sure of the junction between between frames ST C/D and the bottom of the counter/incoming planking. I'm studying all the other build logs. I know I have a couple more bits of wood still to go in. I suspect it becomes clear as you work on it. Faring the outside I thought quite therapeutic. One or two of my bulkhead horns were out - just by a couple of millimetres and only it seems right at the top. I suspect inaccurate filing of the slots in the bulkheads. I will go through and spend as much time as I need making sure everything looks OK before planking otherwise I will, have unwelcome rises and falls. Its blowing a gale and lashing down with rain here in Cornwall (UK) so a good day for some boat building. I'm thoroughly enjoying the project. Thank you Chuck for creating it! Fred


-
I'm intruiged by your work place. Surely you are not making saw dust in that environment! I'm delighted to see someone using filler to get all the contours correct. I wasn't brave enough to admit that's my plan. Good luck with the transom. Fred
-
superb! You must be very proud of your model. I certainly would be. Fred Healey
-
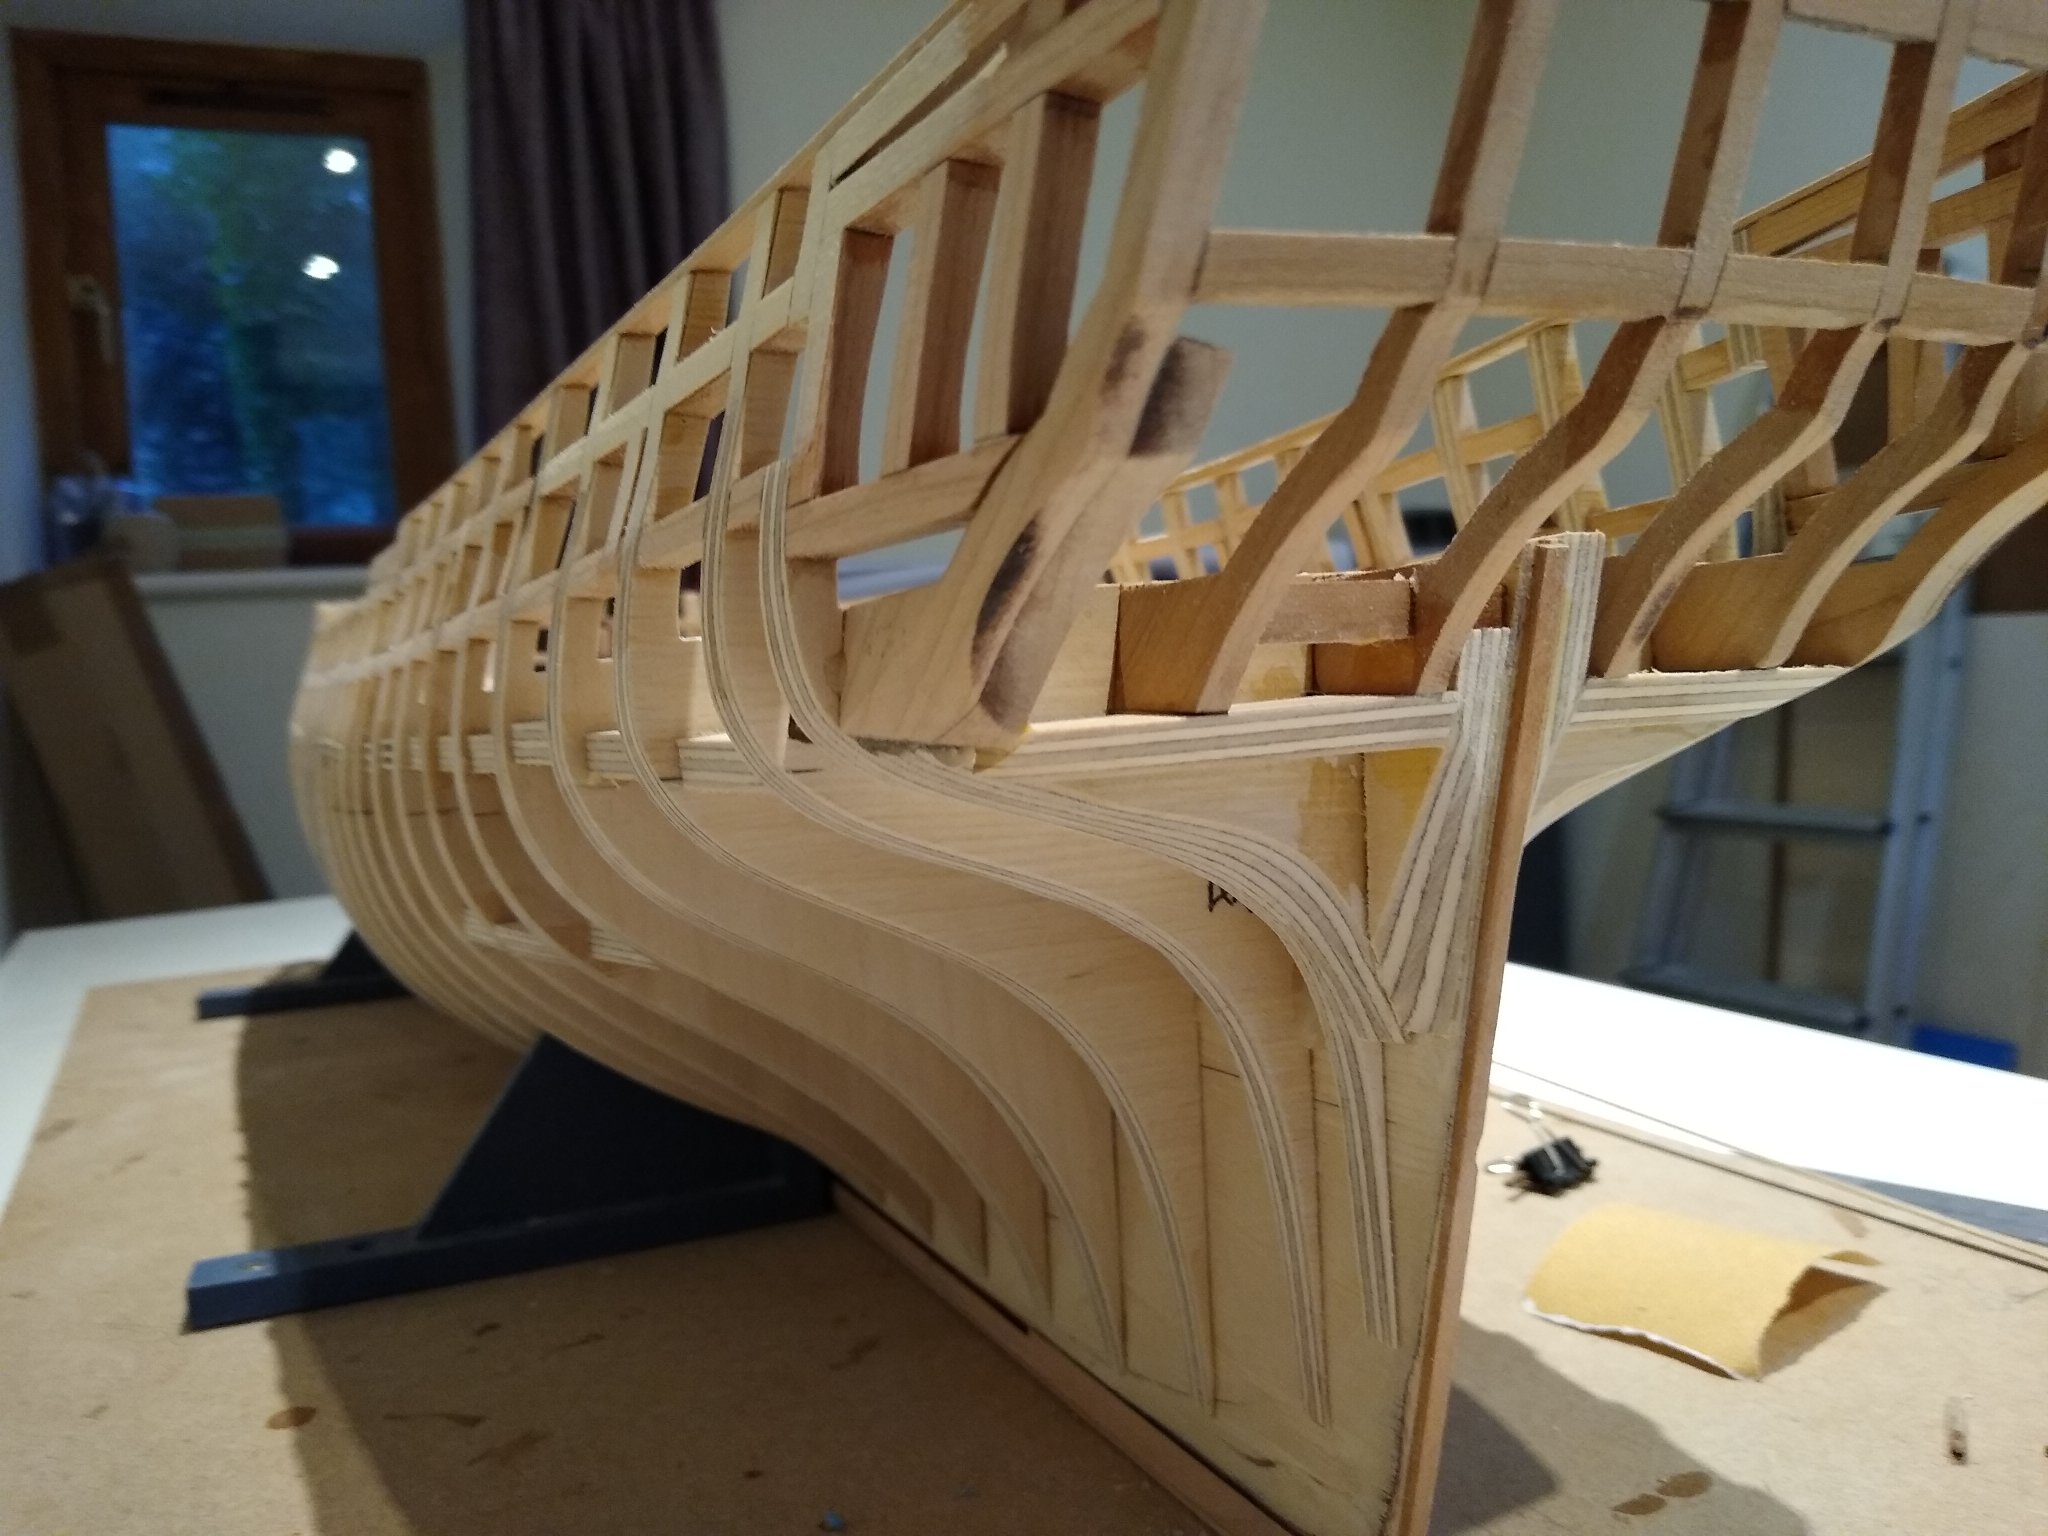
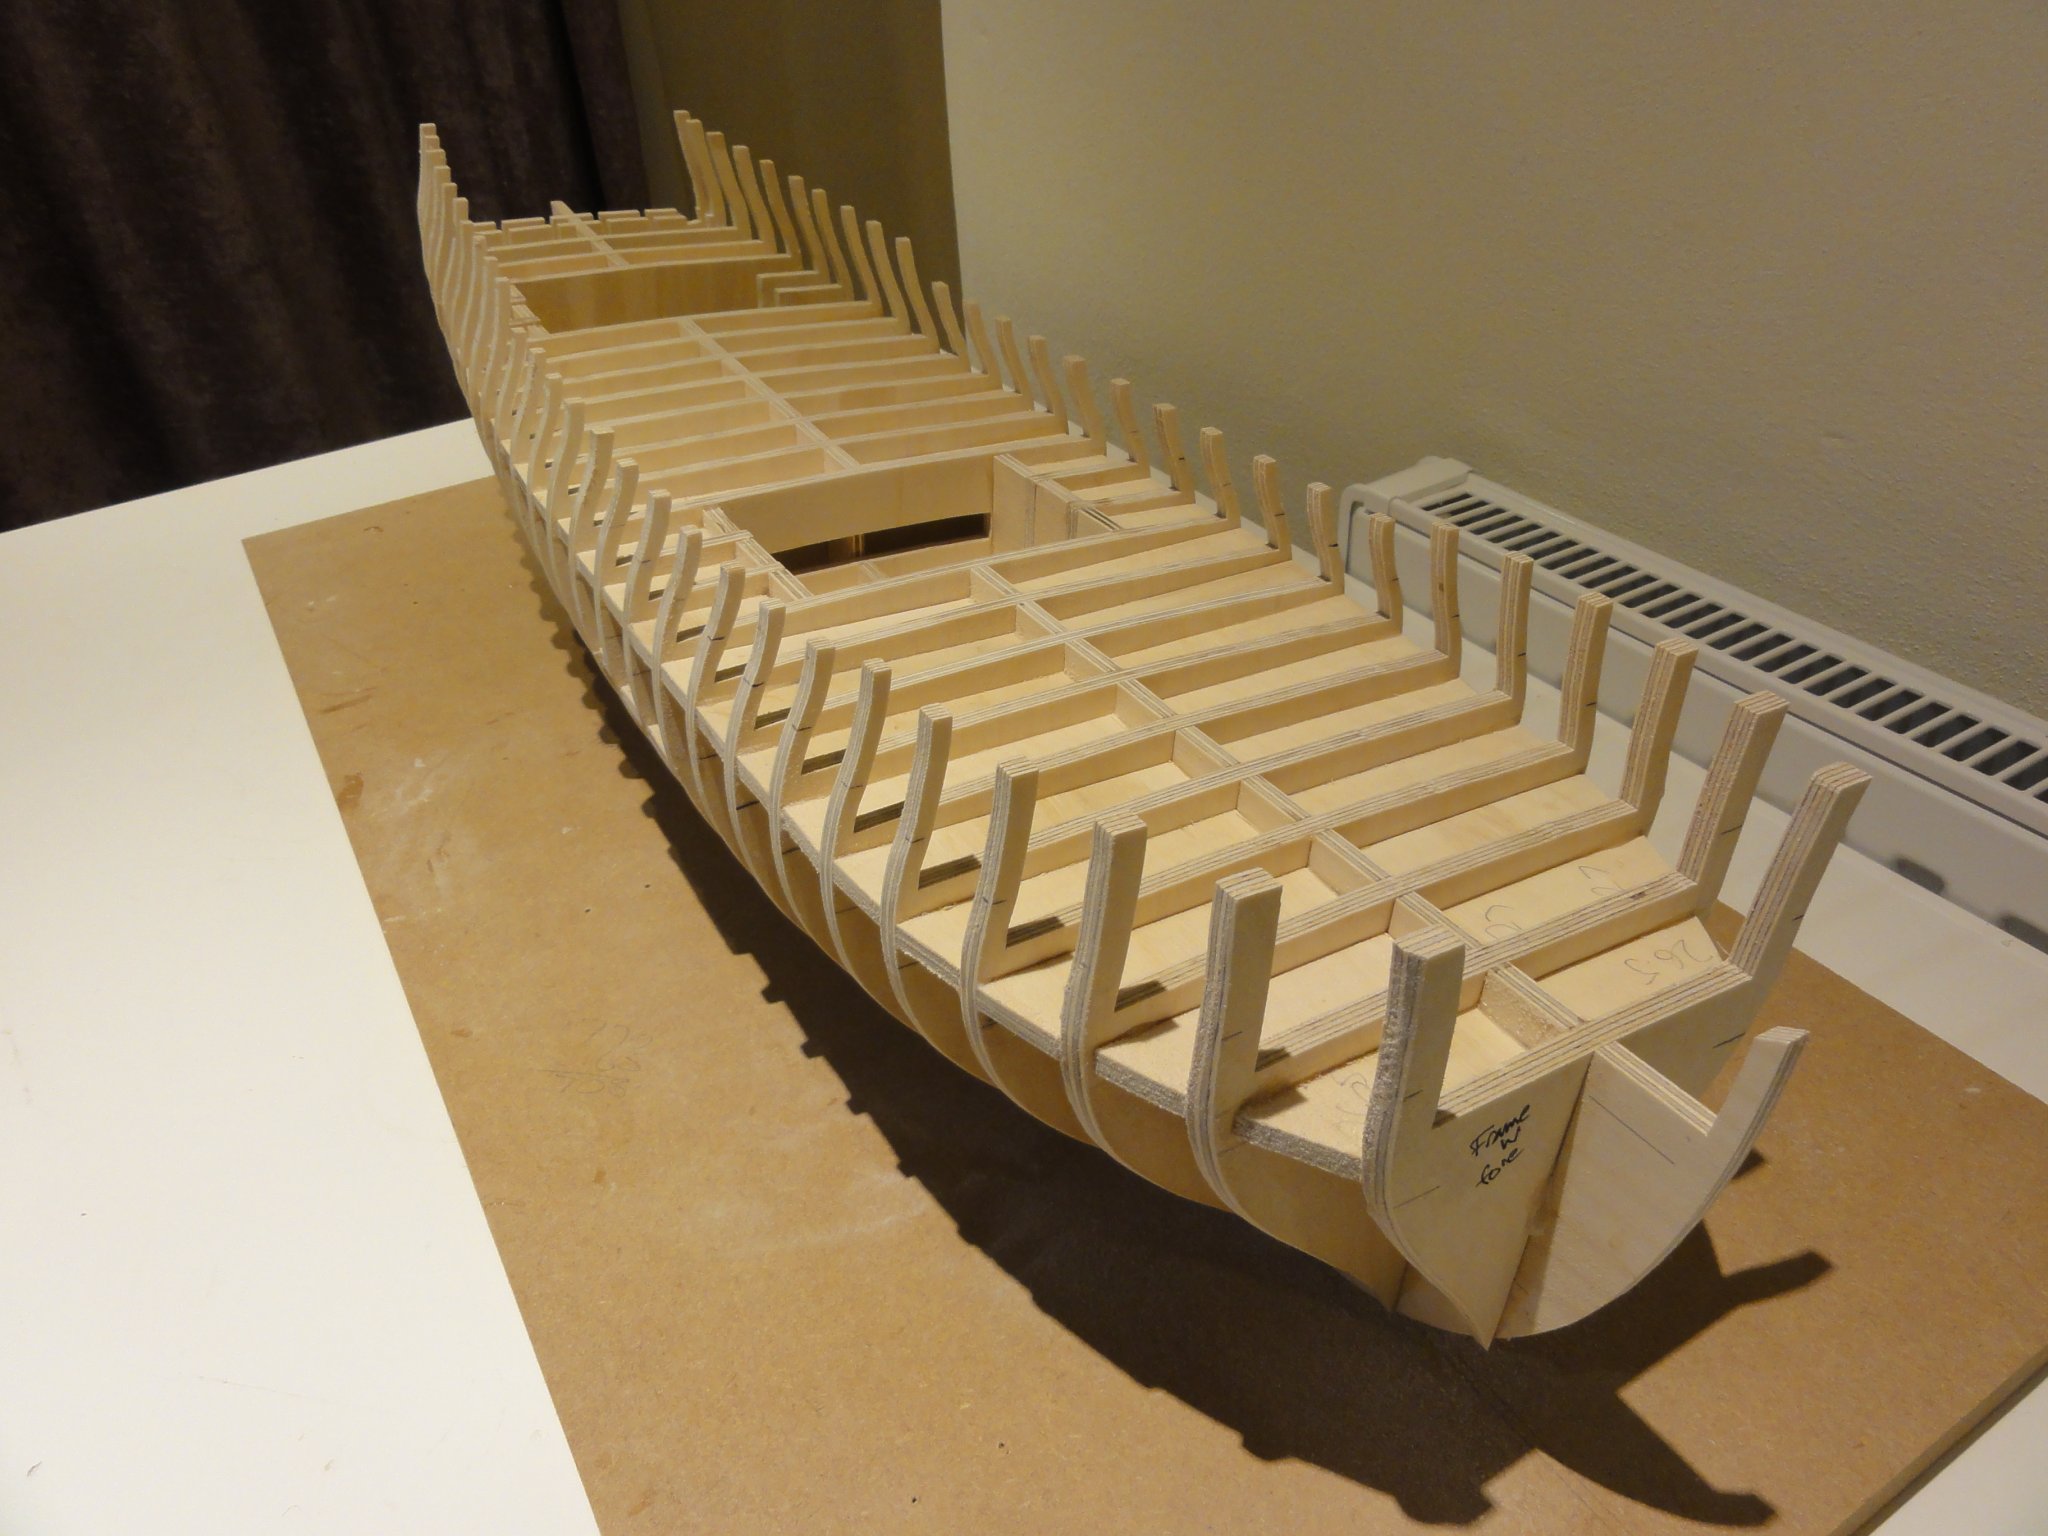
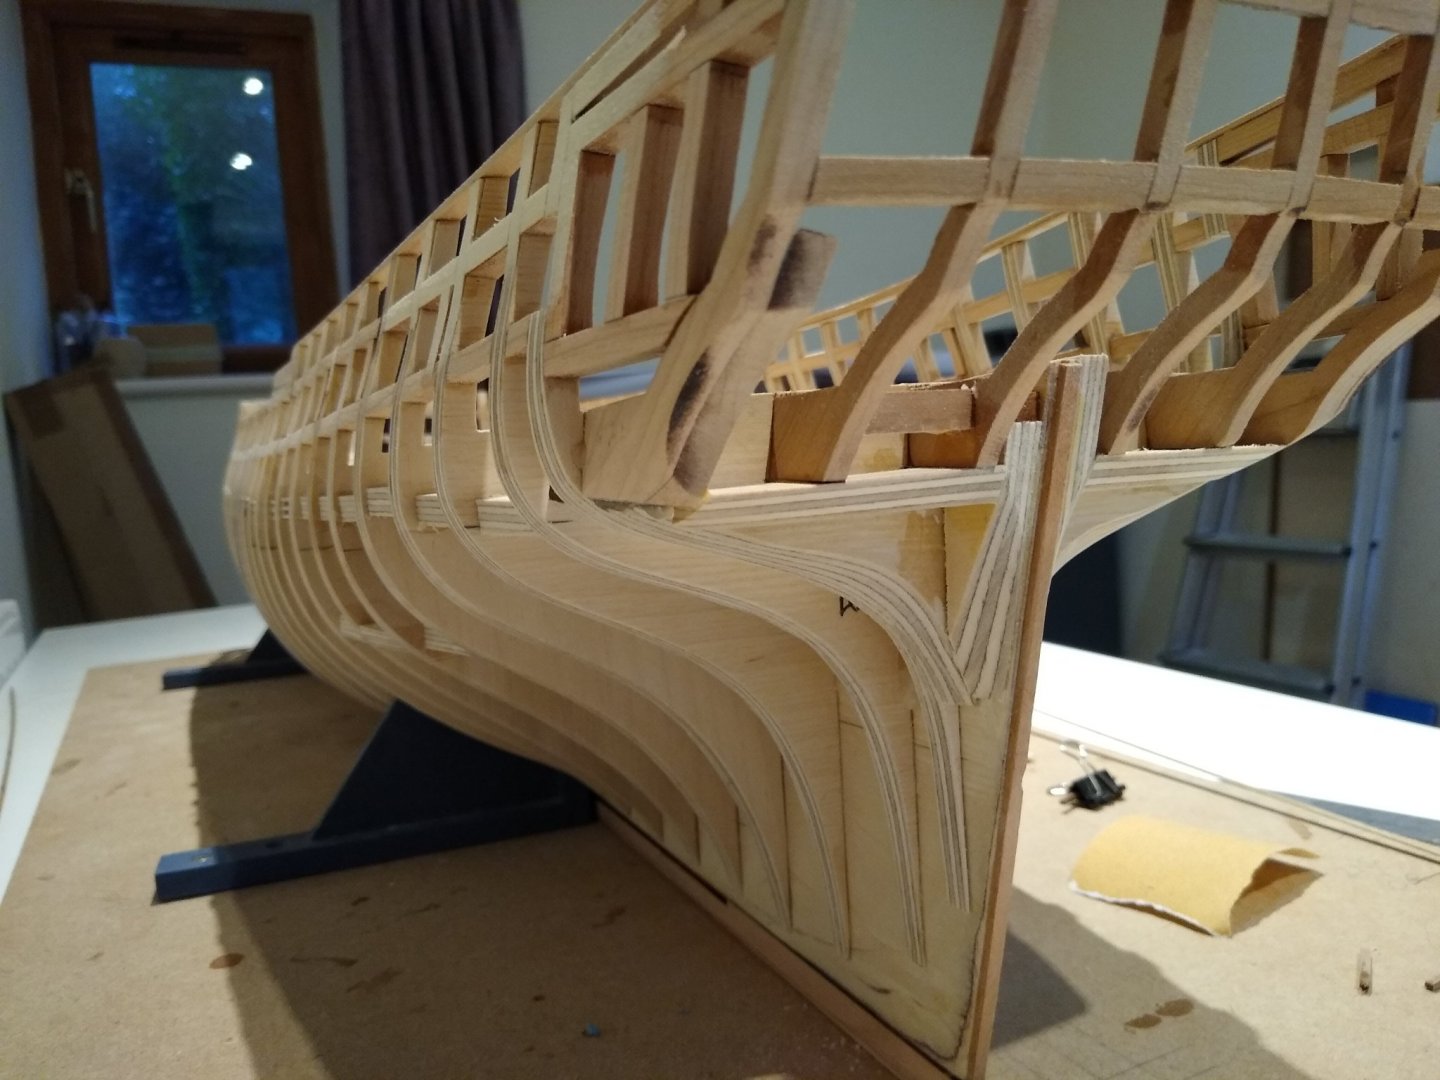
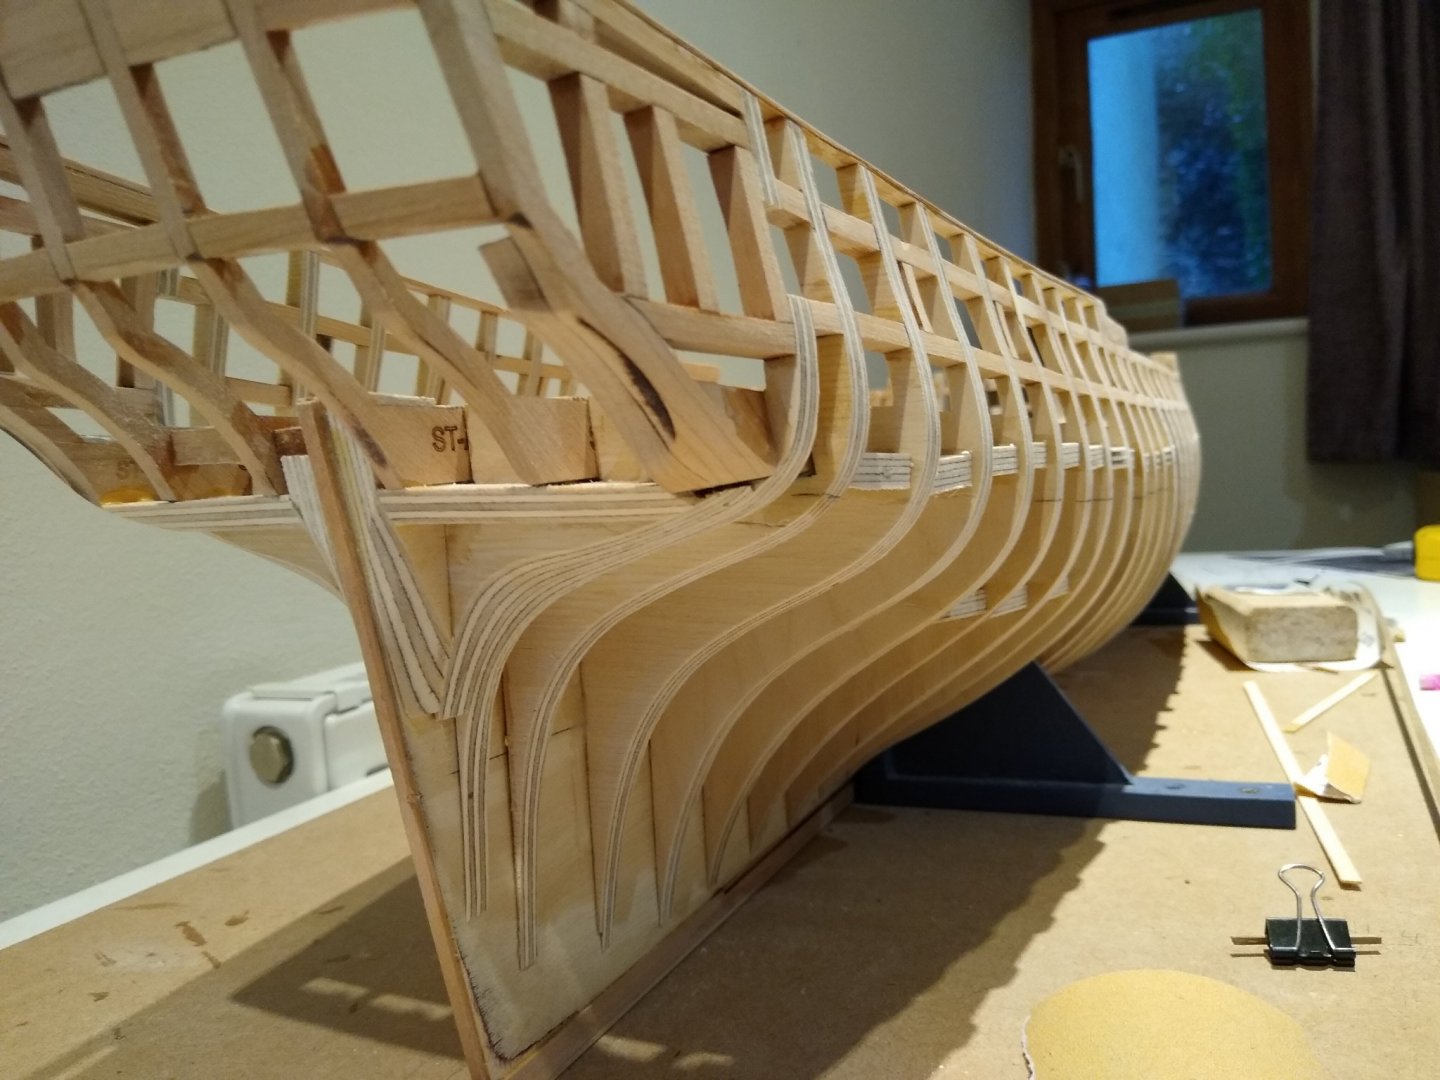
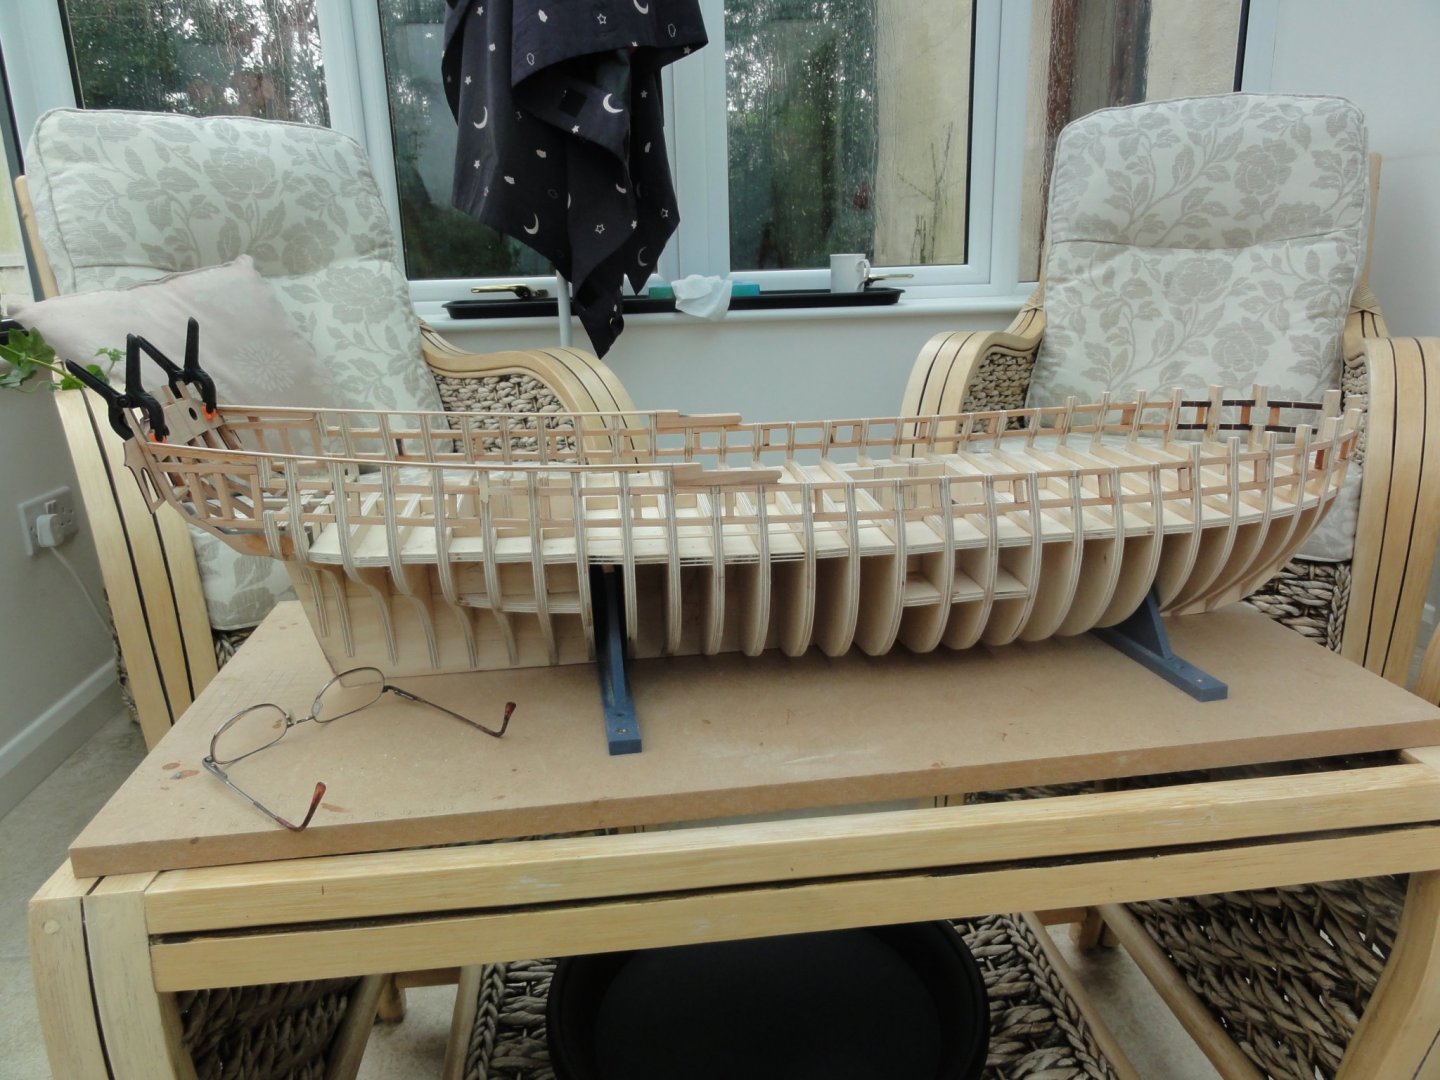
I wish looking back I'd taken a little more trouble lining up the outer edges of my plywood fillets. They look scrappy and though they will all be covered up in due course it irritates me. Oh well -live and learn. The last three frames are not yet glued in. I have not filed the rabbet on the BF yet. That's todays job. Fred
-
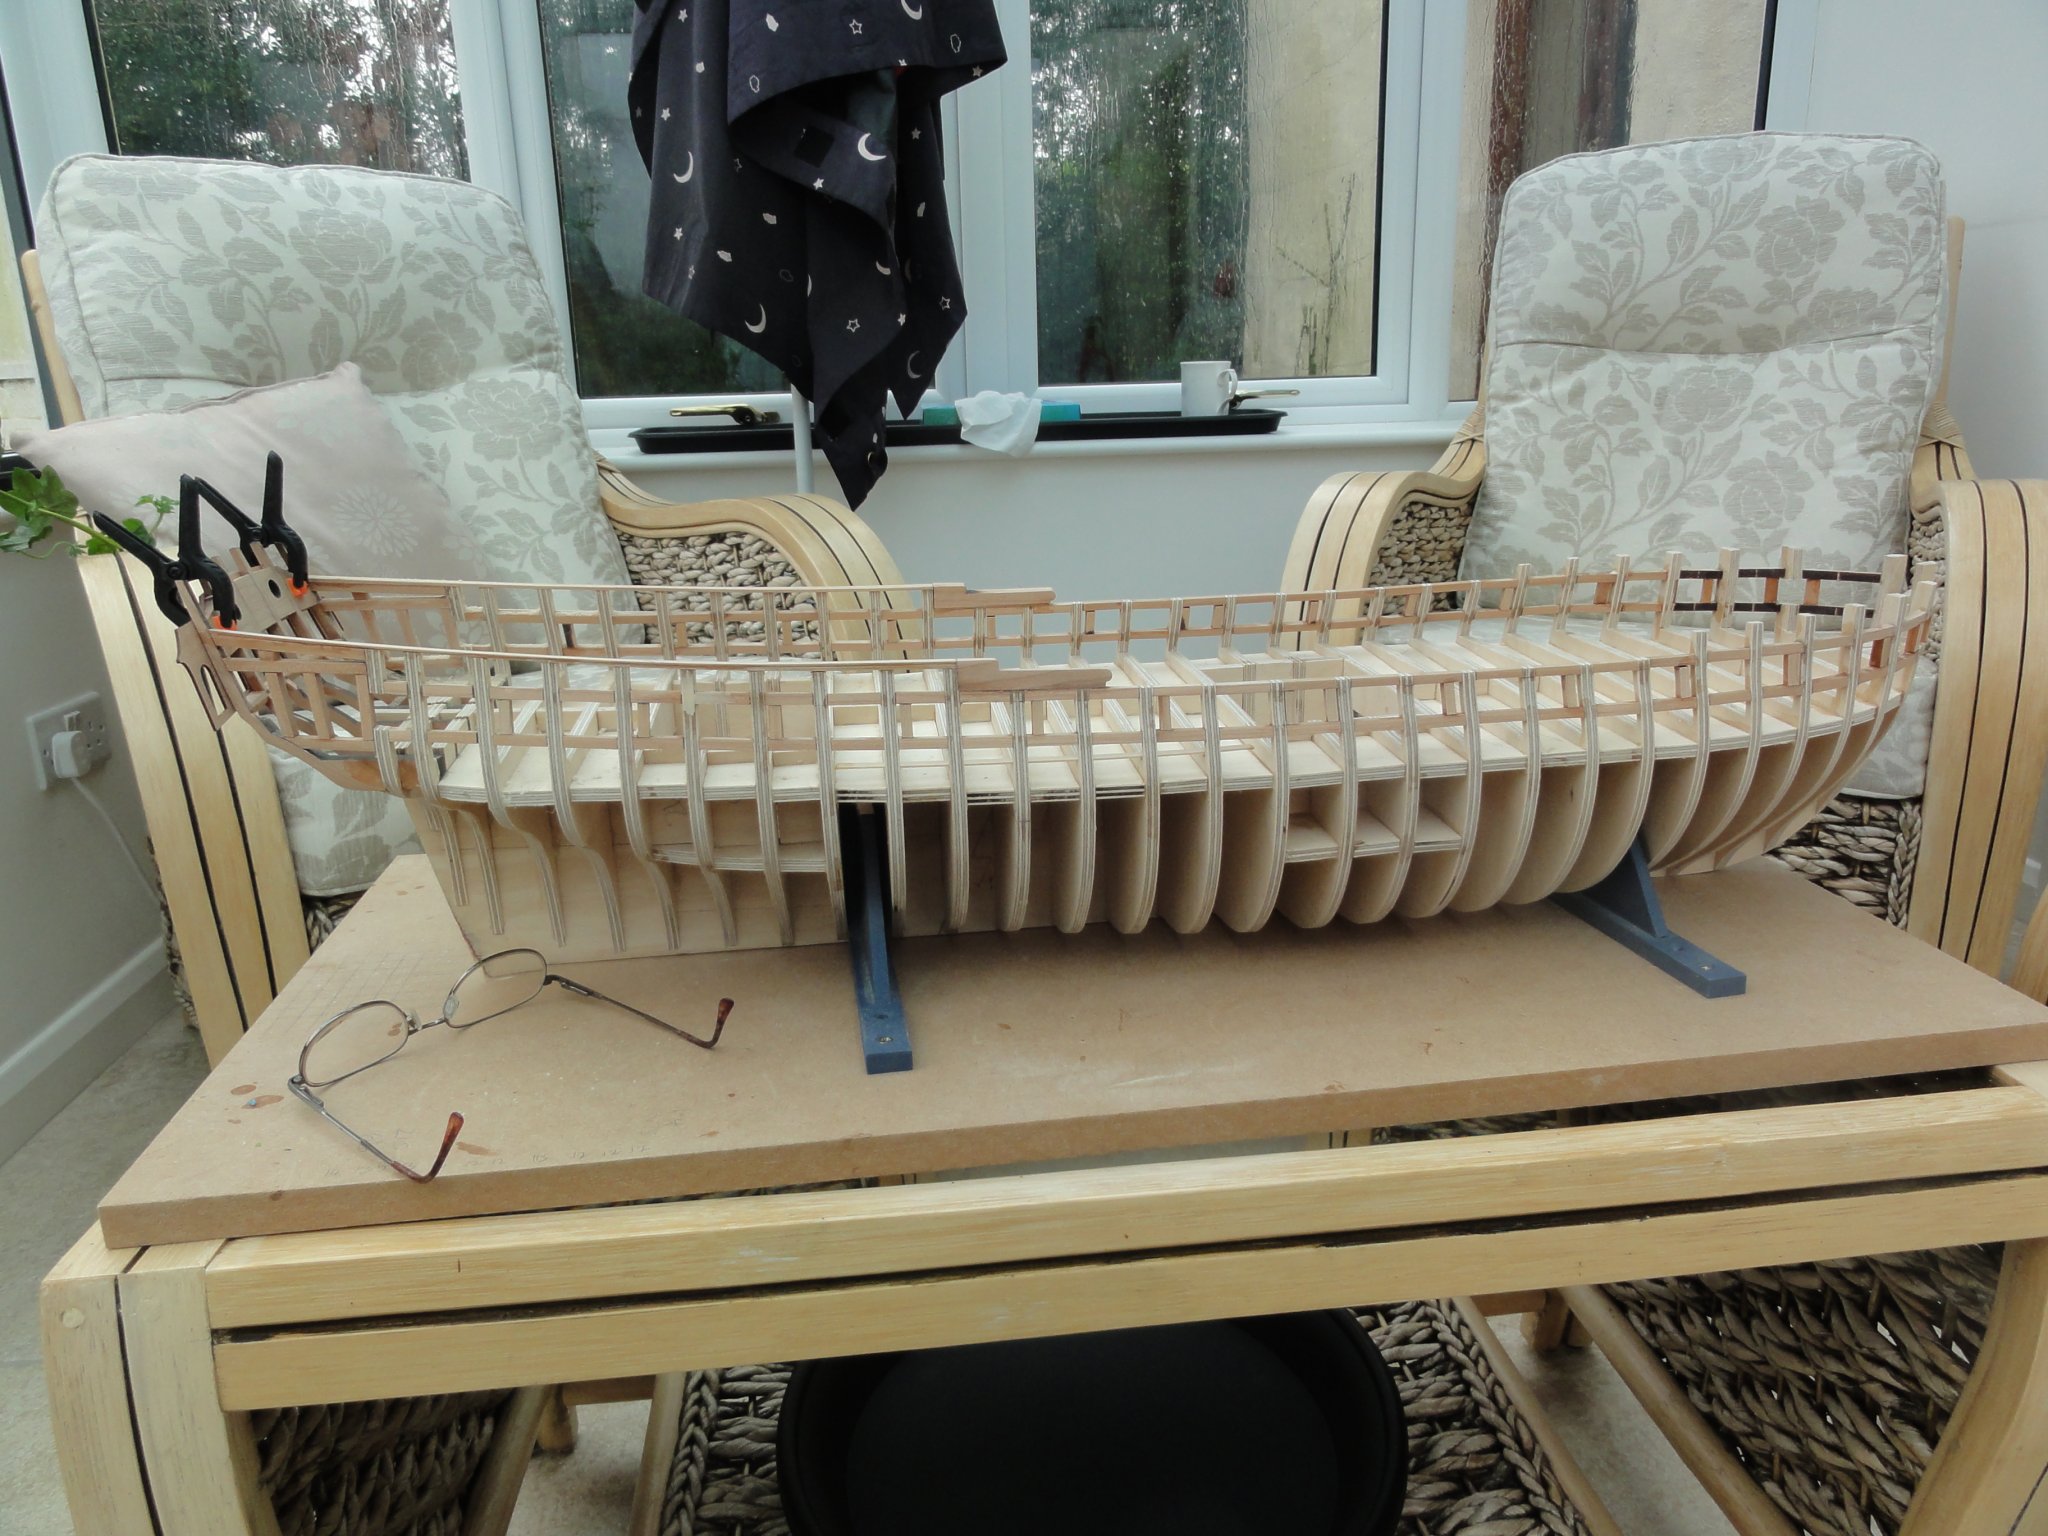
I've gone off piste a bit - in two respects. First I've inserted plywood fillets between the frames. It does make the whole structure absolutely solid. I hope that will make sanding and planking easier. I haven't the confidence to do either out of a building frame. Secondly I've left off the beautiful Syren laser cut prow. I feel certain I would break it or damage it over the course of sanding. I think I can align it correctly when the time comes. I know if it all goes pear shaped I can simply purchase the Syren bulkhead package but I'm happy going along this way for the moment. Fred

-
Thank you Chuck. I've taken great pleasure following everyone's build logs. I'm very conscious that with only two build to my name - Amati's Lady Nelson and AL's Bounty - I'm batting too high up the order for my skill level but nothing ventured nothing gained. I thought very hard before joining the project. The deciding factor - by a country mile - was having Chuck's guidance at every stage. What a way to learn . Fred
-
I'm disappointed to see I'm more than 55,900 views behind that fellow Chuck. Still, he started before me. Fred
_LI.jpg.4a5fc2b9fb8755e2133f80168249745e.jpg)
.JPG.9c6282781bc44c2af4dc4d9c9c2aefe2.JPG)
_LI.jpg.ec2af5db61a971cba813c6fe41a64d49.jpg)
.JPG.a87eb9c1f317d10b96b3af40338e57e8.JPG)
_LI.jpg.fa9136efdda13514f728ba89a927c3af.jpg)
.JPG.8d82686d920916de493f3c5947e933a7.JPG)
.JPG.7d34eababe397c6f565df561a45339ea.JPG)
.JPG.2c5e2e837efea43f131741d503b07dec.JPG)
.JPG.e7182ea232a0e825efde30a05c3ddfbd.JPG)