Trussben
-
Posts
1,935 -
Joined
-
Last visited
6 Followers


About Trussben

Recent Profile Visitors
5,021 profile views


-
 Trumper07 reacted to a post in a topic:
HMS Portland 1770 by Trussben - Portland Scale Ship Co. - 1:48 - 50 gun 4th rate
Trumper07 reacted to a post in a topic:
HMS Portland 1770 by Trussben - Portland Scale Ship Co. - 1:48 - 50 gun 4th rate
-
 Ryland Craze reacted to a post in a topic:
HMS Portland 1770 by scrubbyj427 - 1:48 - 4th rate 50-gun ship
Ryland Craze reacted to a post in a topic:
HMS Portland 1770 by scrubbyj427 - 1:48 - 4th rate 50-gun ship
-
rcweir reacted to a post in a topic:
HMS Portland 1770 by Trussben - Portland Scale Ship Co. - 1:48 - 50 gun 4th rate
-
gjdale reacted to a post in a topic:
HMS Portland 1770 by Trussben - Portland Scale Ship Co. - 1:48 - 50 gun 4th rate
-
Trussben reacted to a post in a topic:
HMS Portland 1770 by scrubbyj427 - 1:48 - 4th rate 50-gun ship
-
davyboy reacted to a post in a topic:
HMS Portland 1770 by Trussben - Portland Scale Ship Co. - 1:48 - 50 gun 4th rate
-
davyboy reacted to a post in a topic:
HMS Portland 1770 by Trussben - Portland Scale Ship Co. - 1:48 - 50 gun 4th rate
-
JpR62 reacted to a post in a topic:
HMS Portland 1770 by Trussben - Portland Scale Ship Co. - 1:48 - 50 gun 4th rate
-
JpR62 reacted to a post in a topic:
HMS Portland 1770 by Trussben - Portland Scale Ship Co. - 1:48 - 50 gun 4th rate
-
Ronald-V reacted to a post in a topic:
HMS Portland 1770 by Trussben - Portland Scale Ship Co. - 1:48 - 50 gun 4th rate
-
Ryland Craze reacted to a post in a topic:
HMS Portland 1770 by Trussben - Portland Scale Ship Co. - 1:48 - 50 gun 4th rate
-
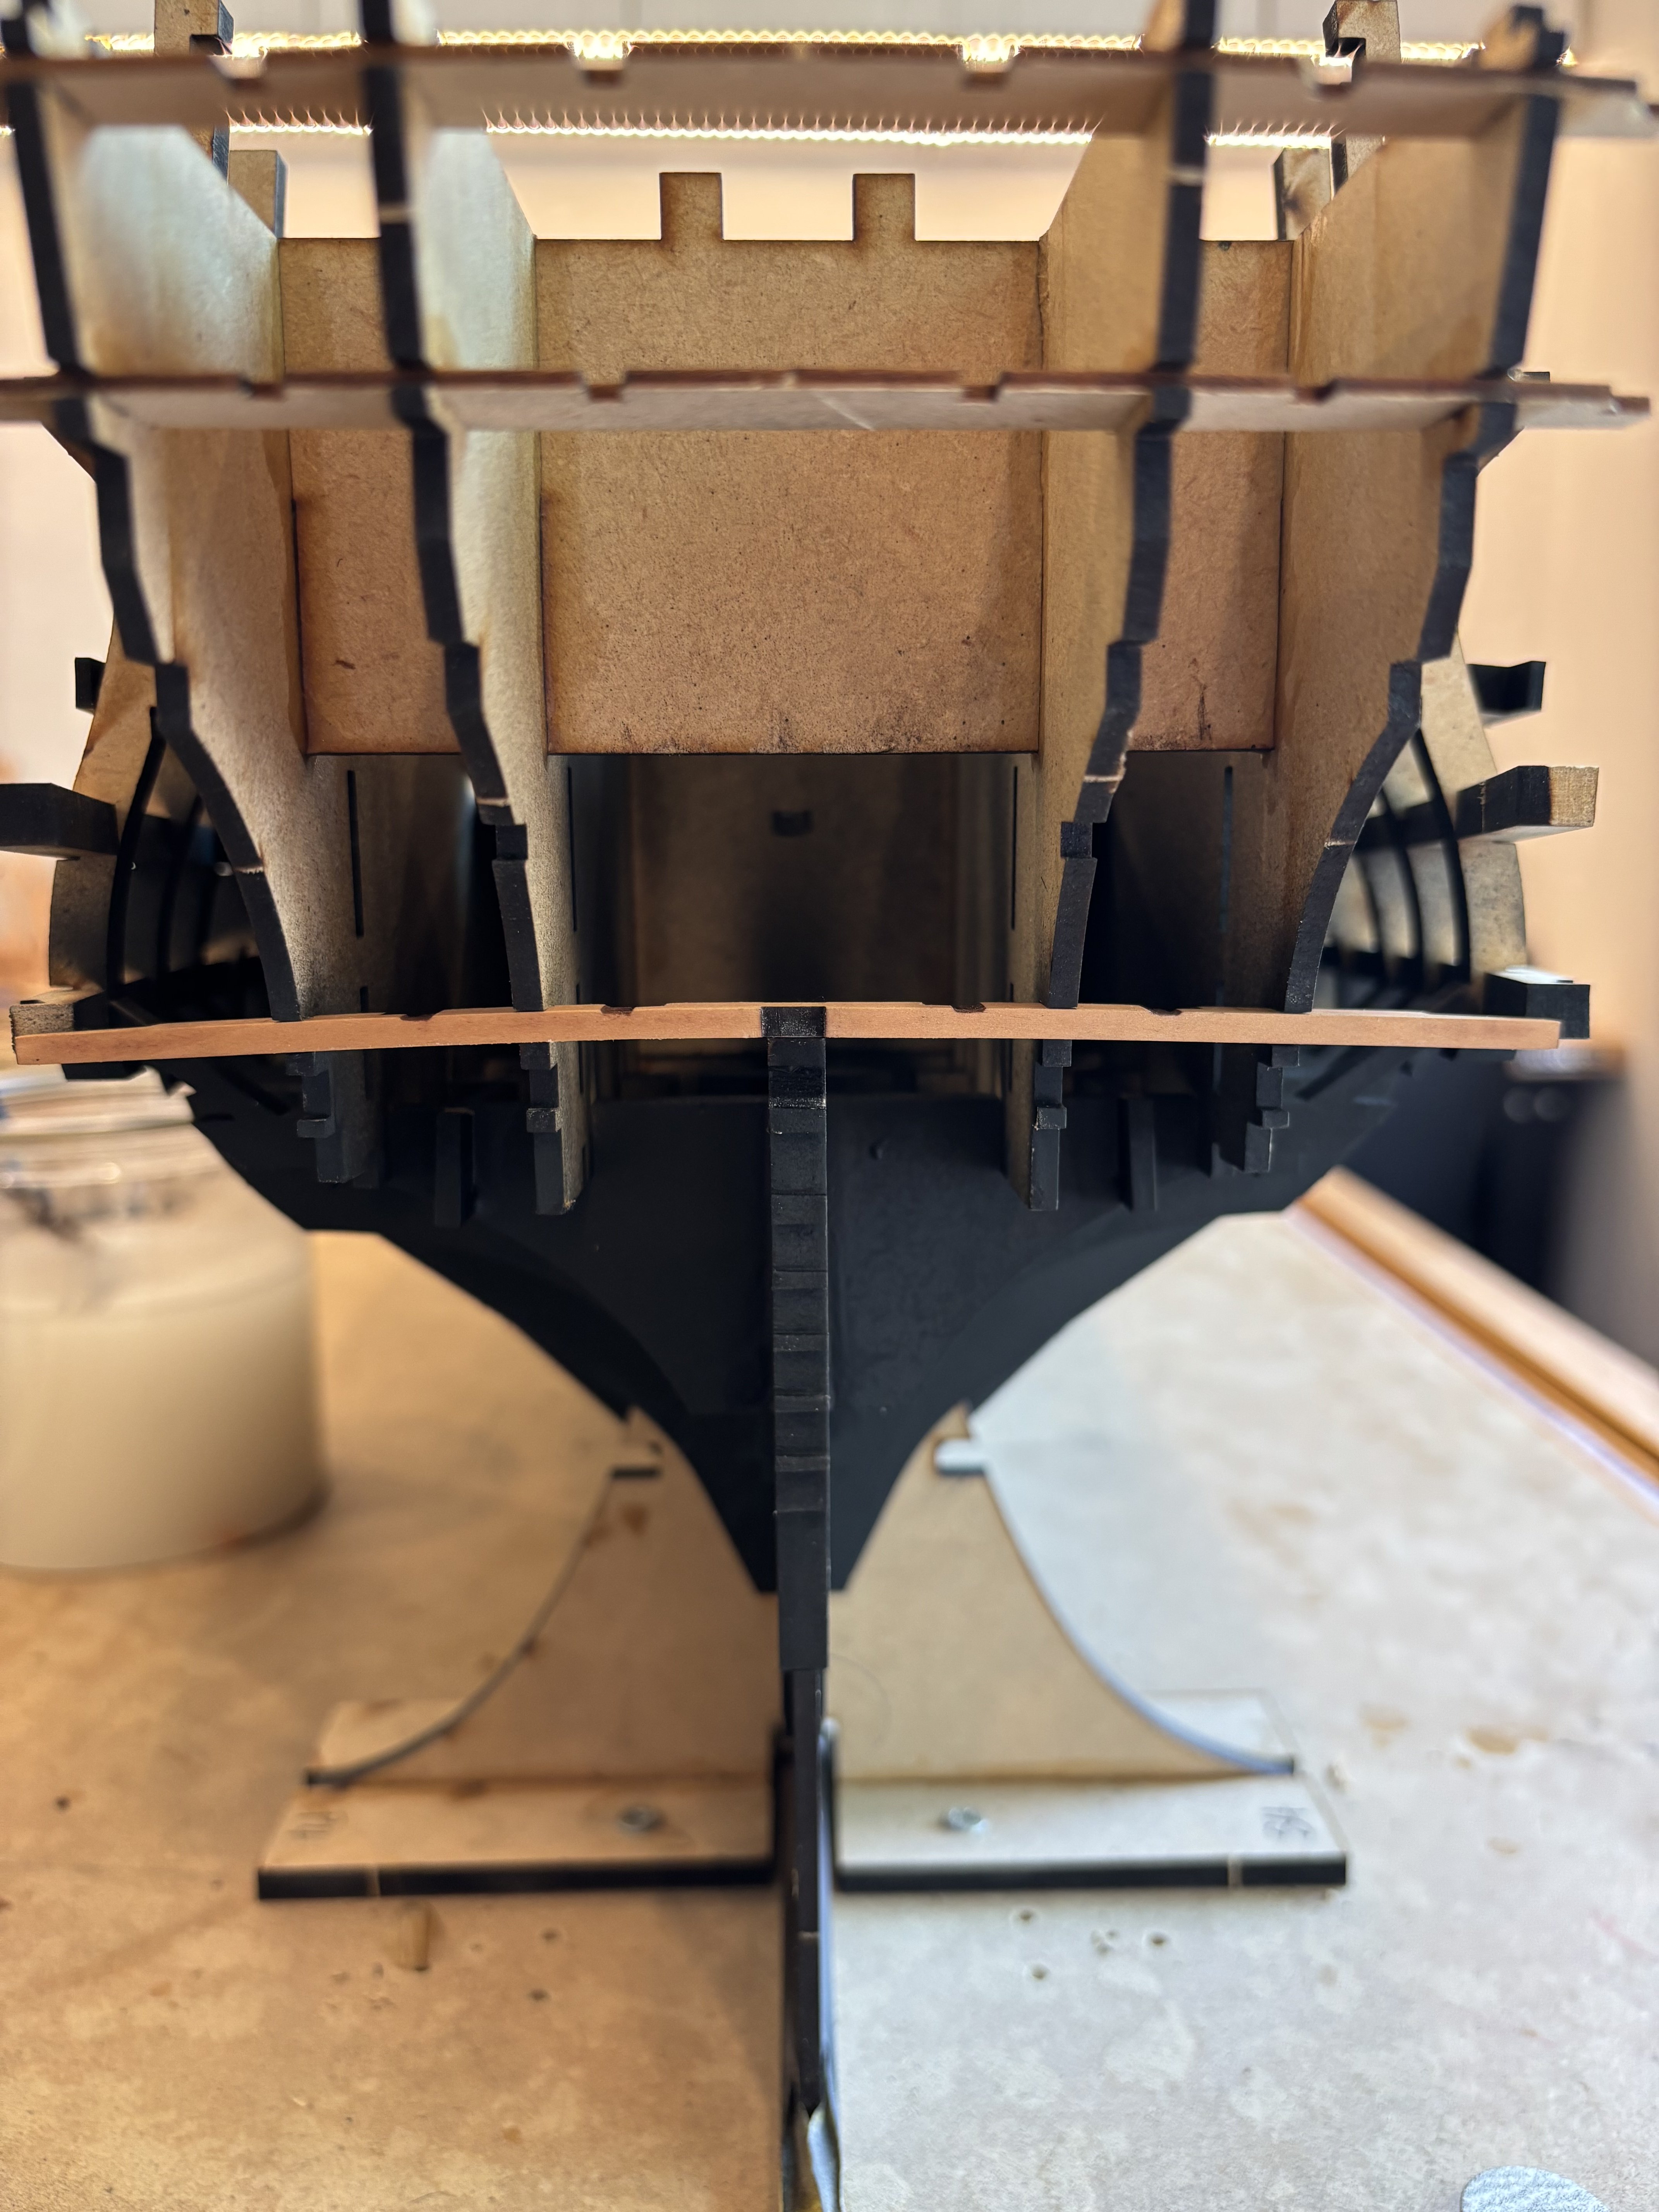
 Aft deadwood piece was cleaned of char and adjusted so it was a nice tight fit in its position, it’s not been glued in as its shape needs to be sanded closer to what it will finally look like.
-
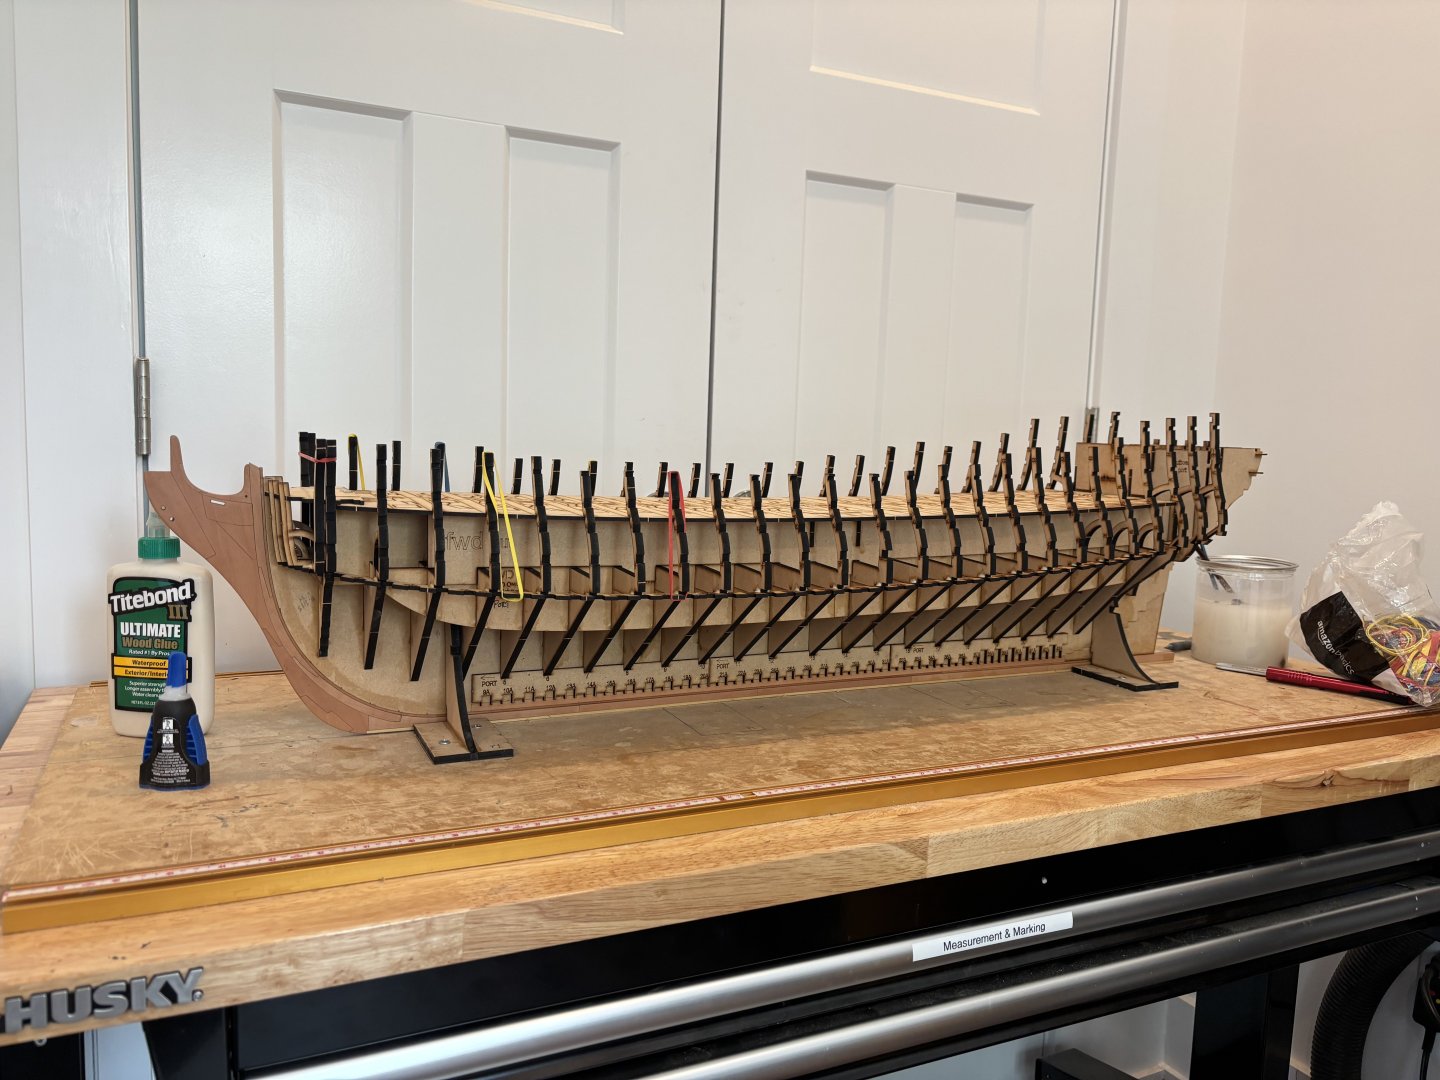
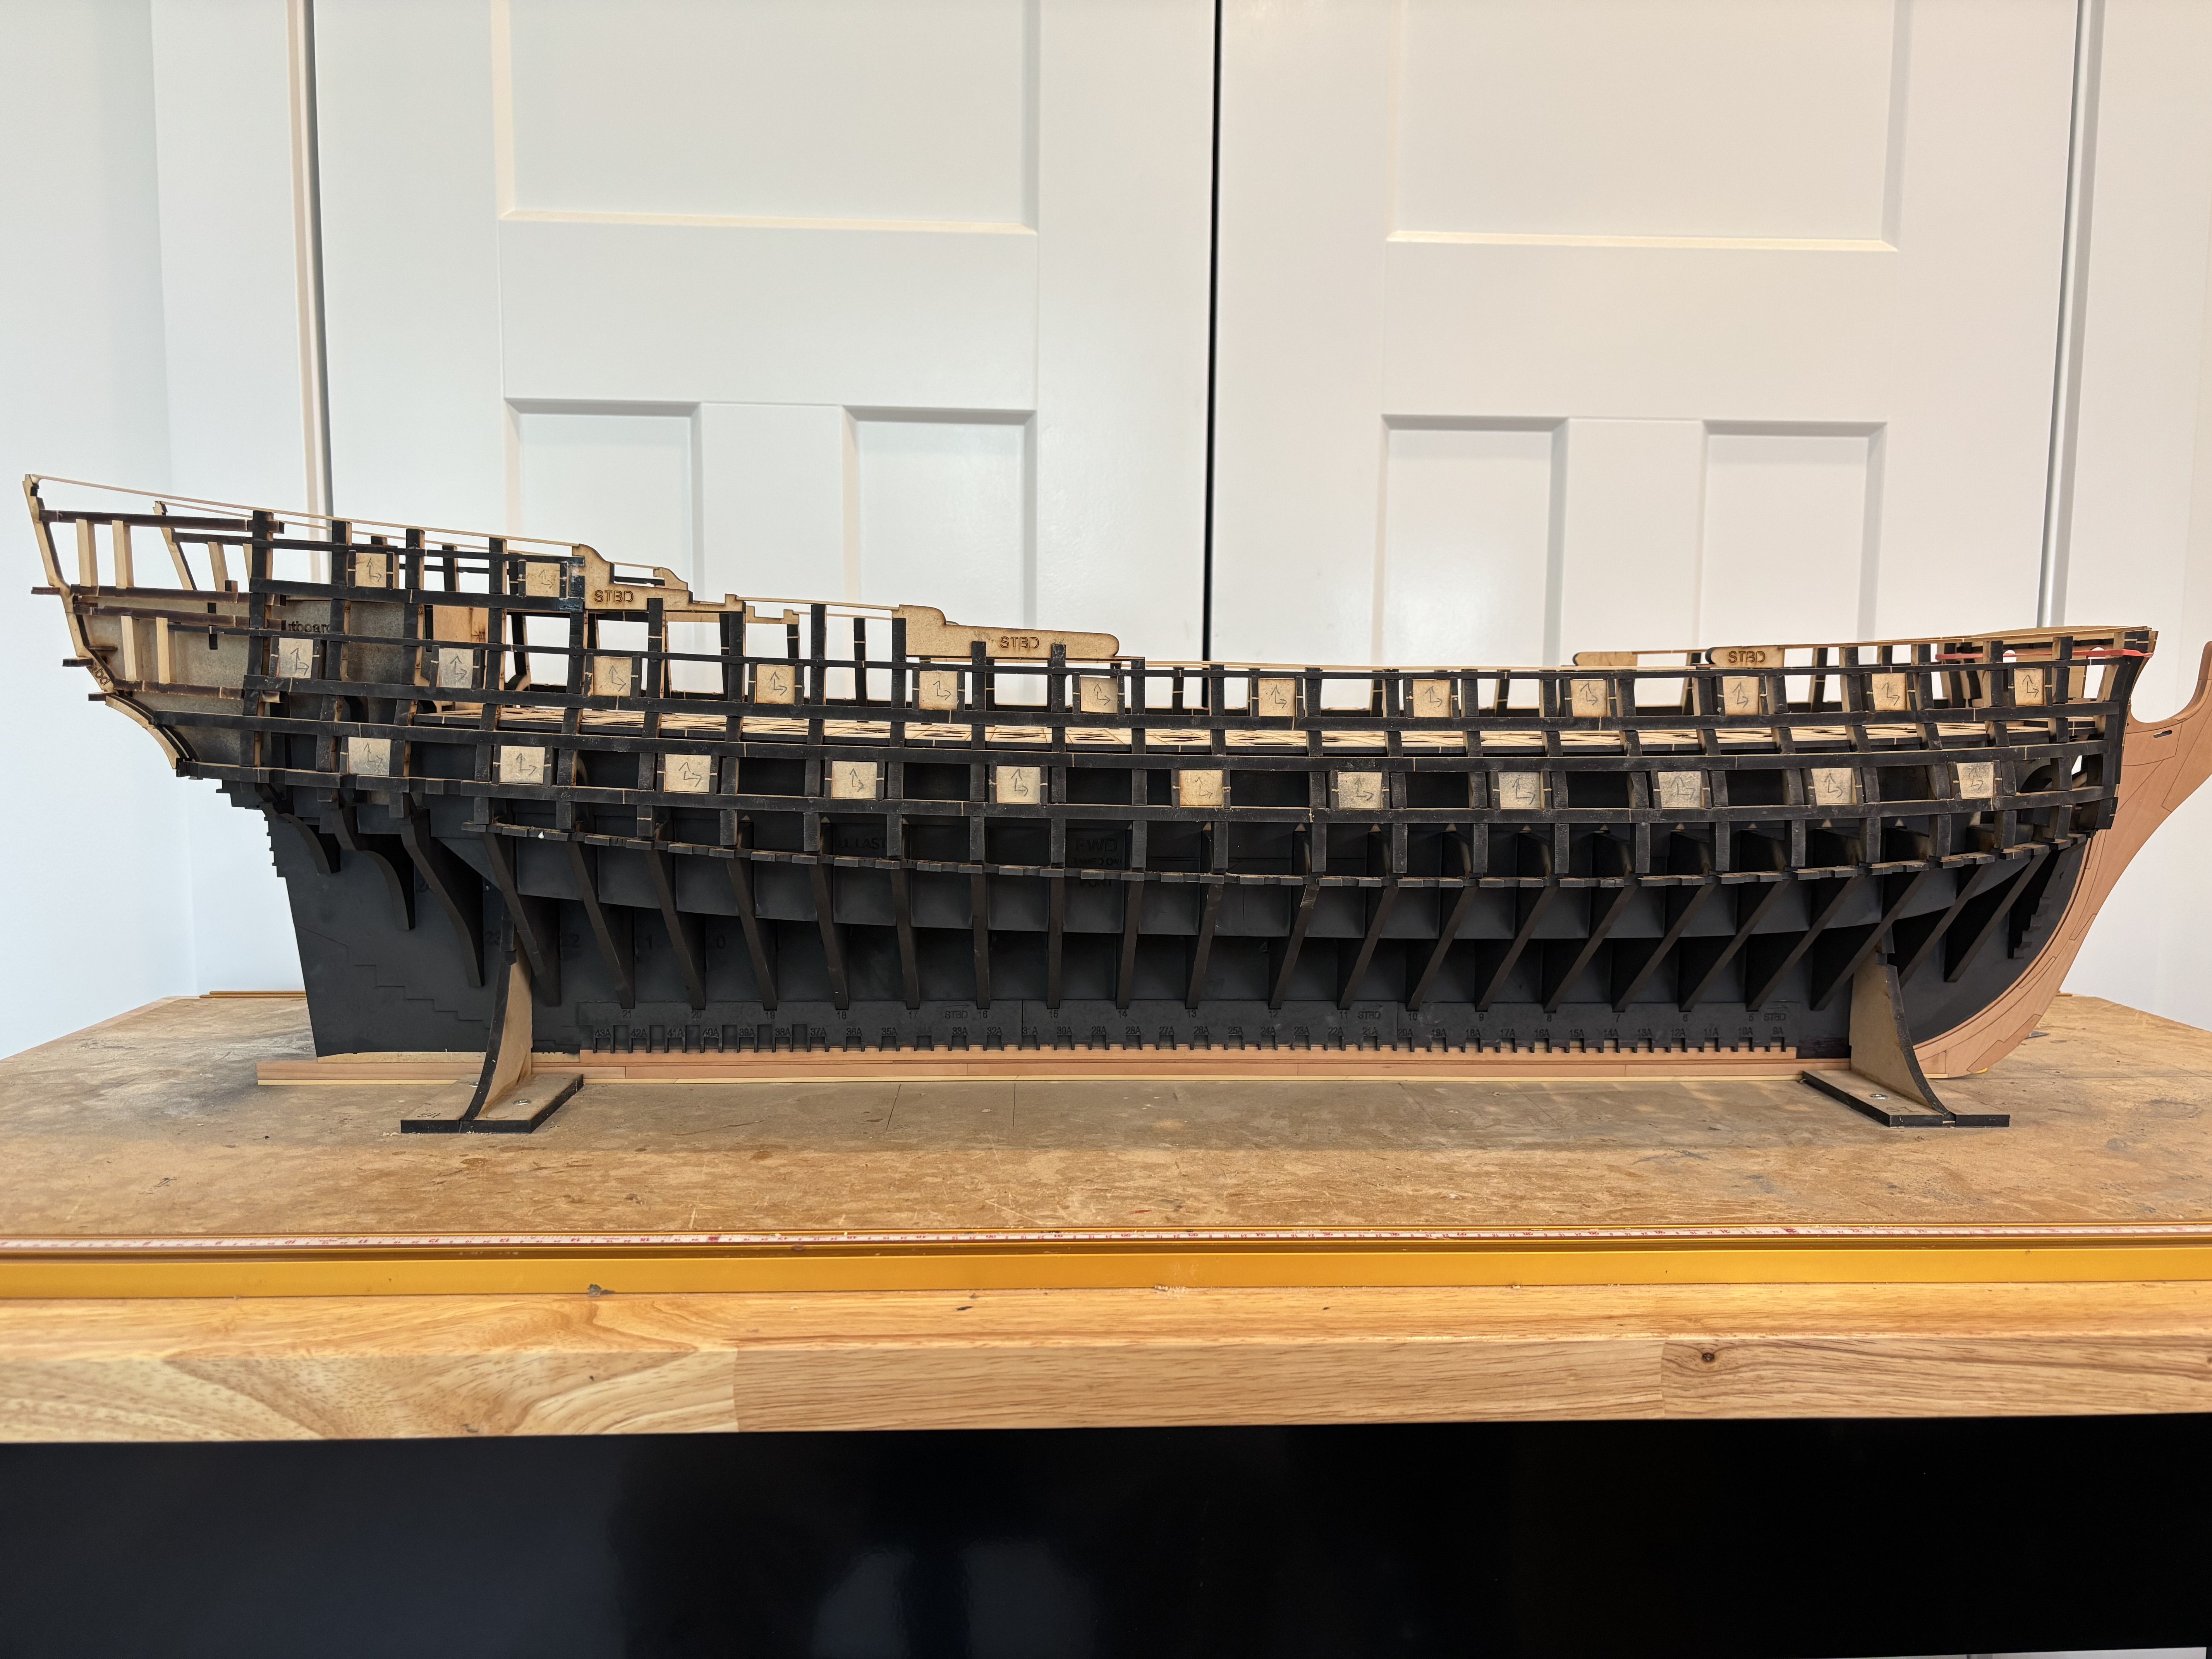
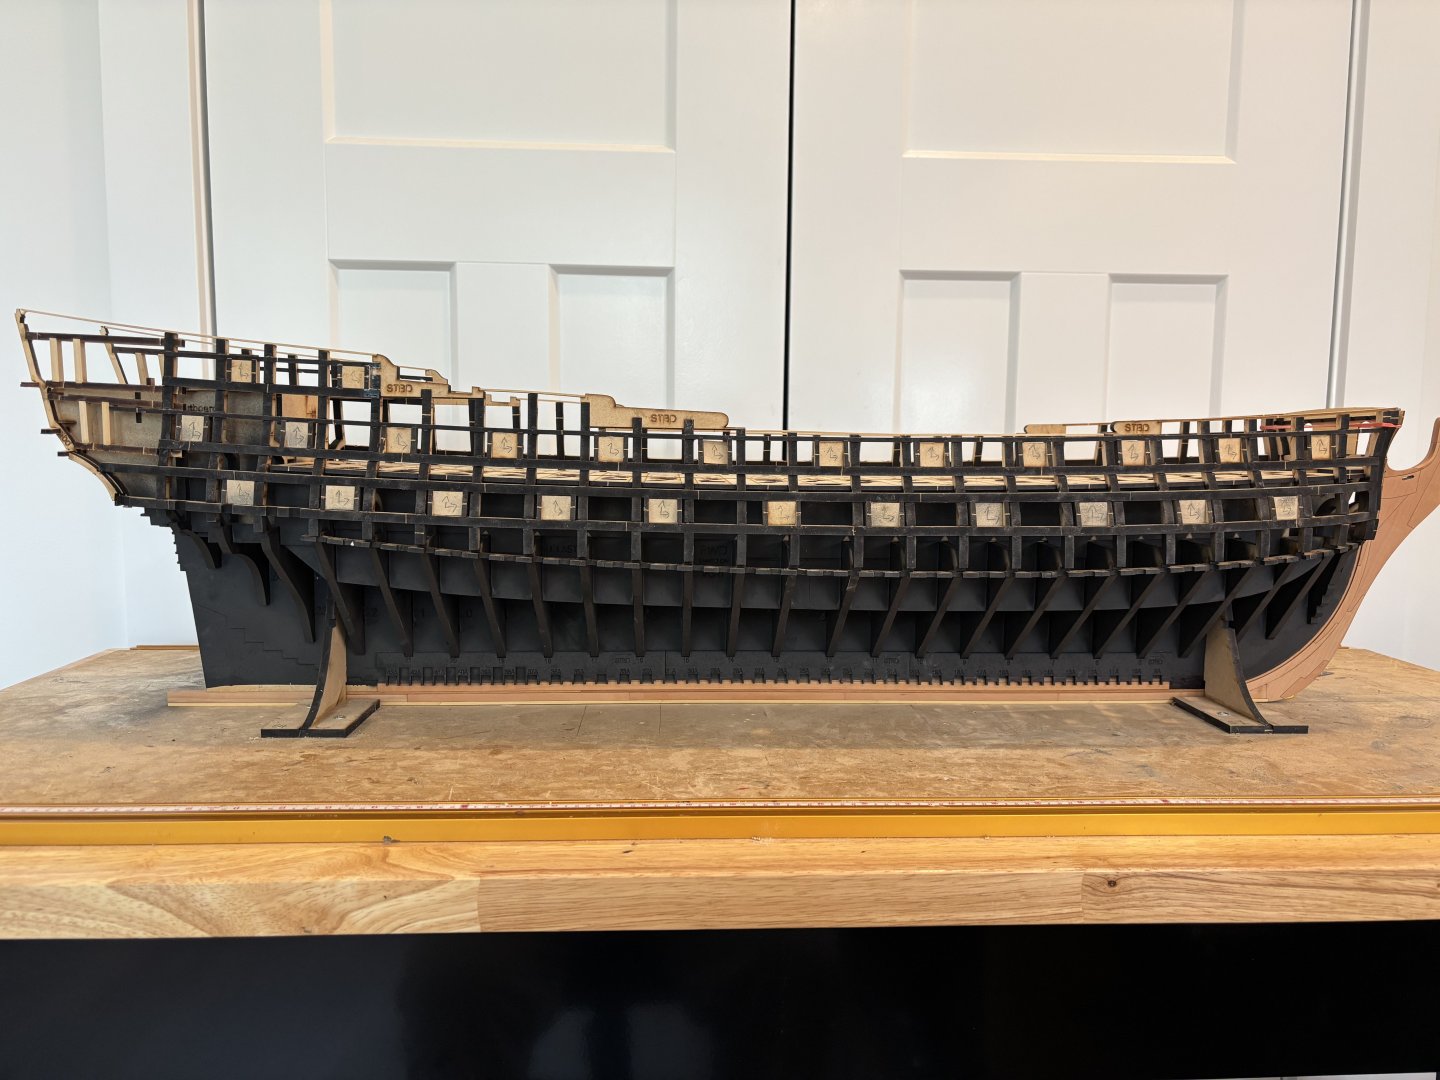
Here are the first few Starboard side frames installed, we will begin to get a proper feel for what the model is going to look like now. The designer has left lots of “meat on the bones” for later fairing of the hull when framing is complete.

-
Trussben reacted to a post in a topic:
Sloop Speedwell 1752 by Chuck - Ketch Rigged Sloop - POF - prototype build
-
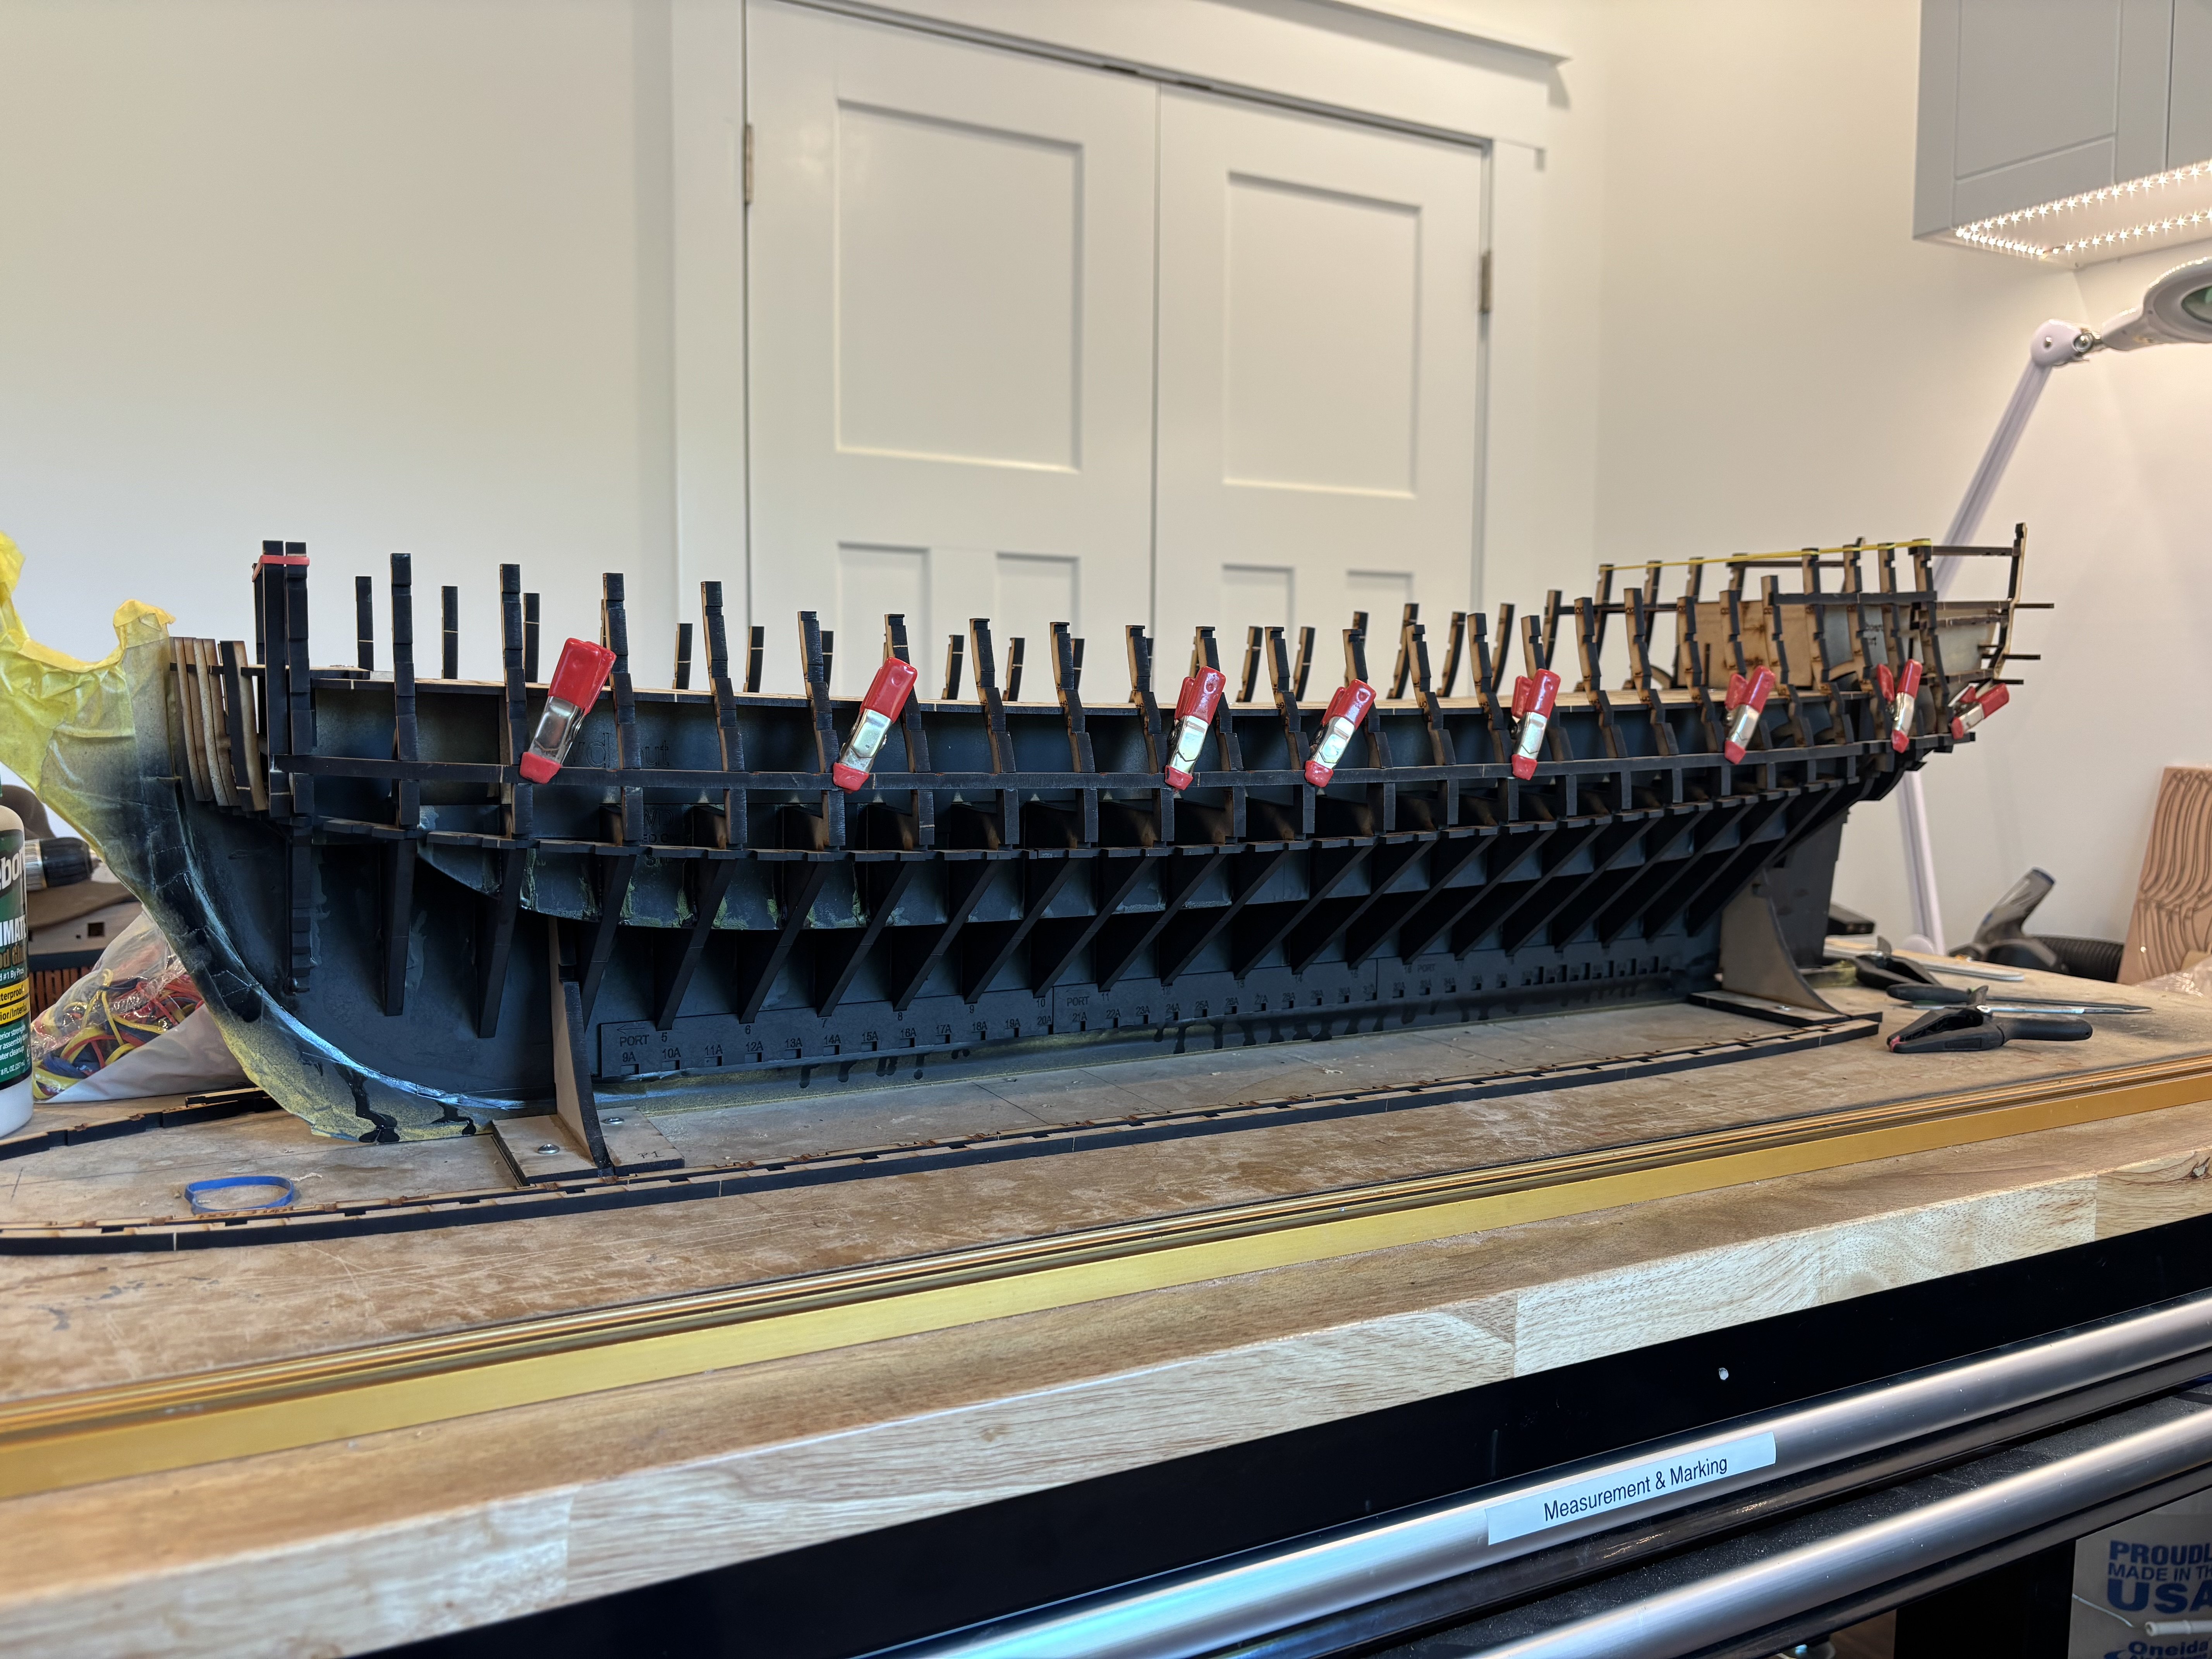
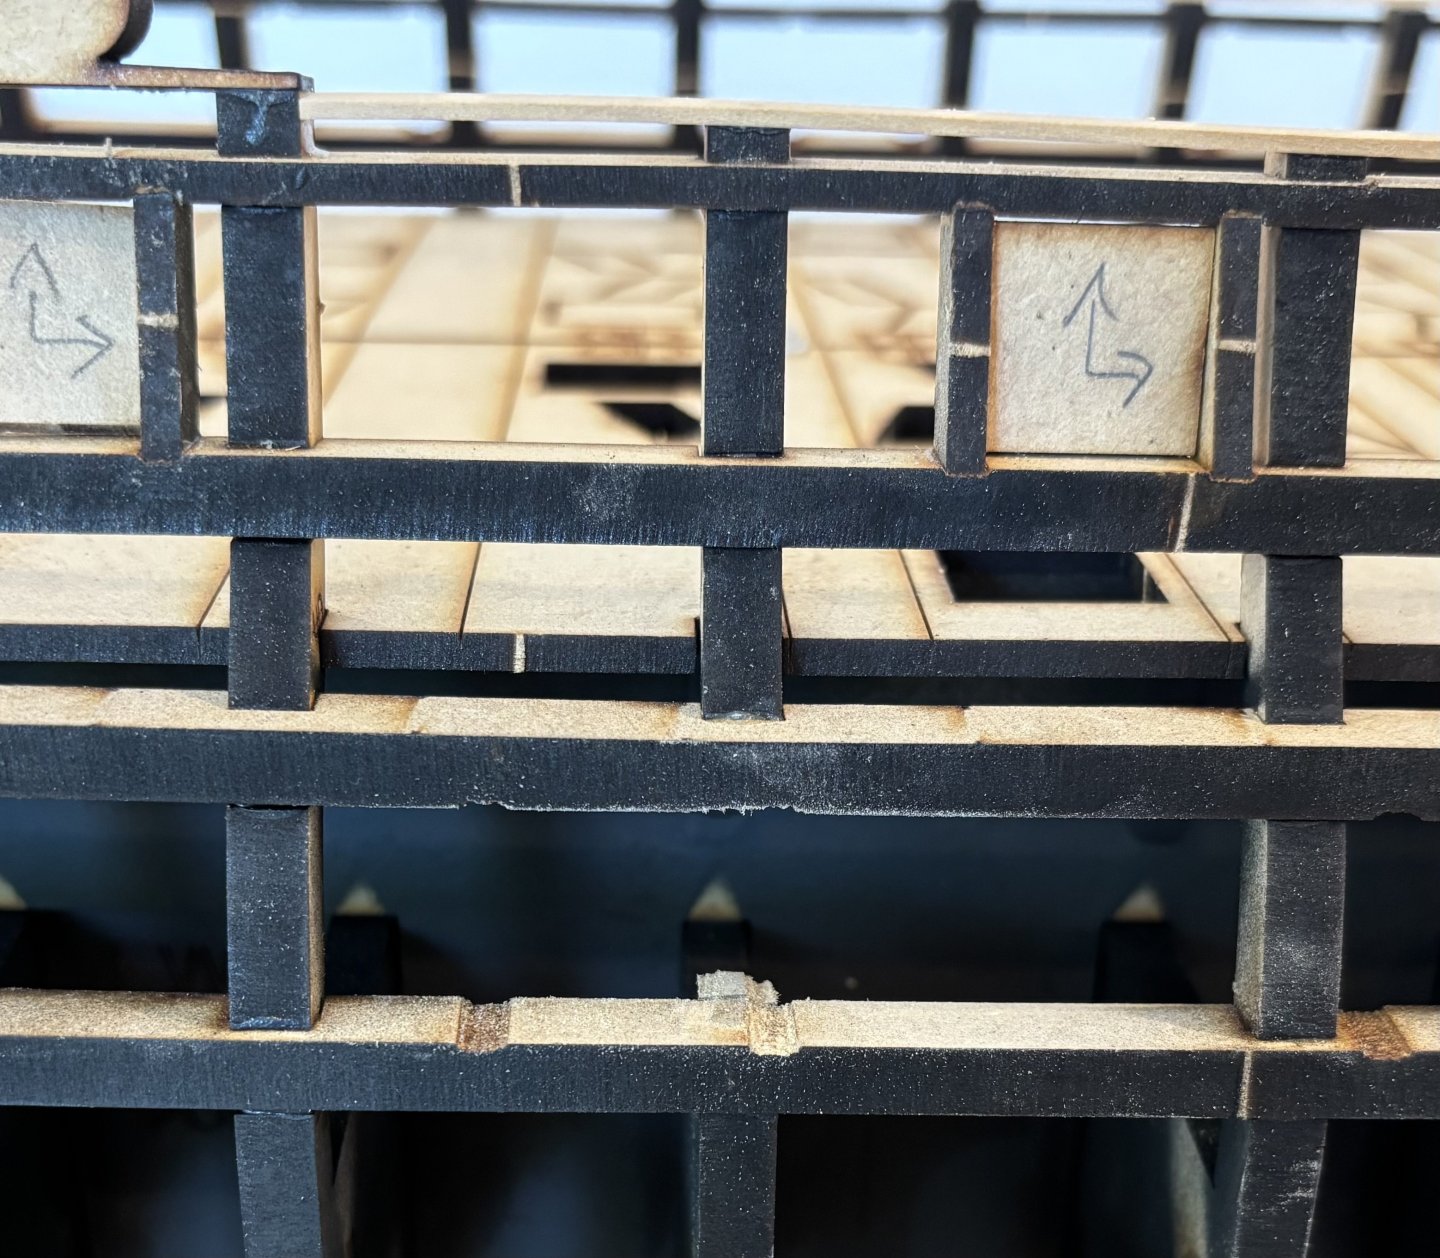
Starboard side gunport framing completed, now to start cleaning the char from the Frame pieces and begin installing them. I intend to frame this side and when done turn her around and frame all the port side.
-
Hance pieces and fairing caps installed and I’ve started framing the starboard side gunports.
-
Trussben reacted to a post in a topic:
HMS Portland 1770 by westwood - Portland Scale Ship Co. - 1:48 - 50 gun 4th rate
-
Trussben reacted to a post in a topic:
HMS Portland 1770 by westwood - Portland Scale Ship Co. - 1:48 - 50 gun 4th rate
-
Trussben reacted to a post in a topic:
HMS Portland 1770 by westwood - Portland Scale Ship Co. - 1:48 - 50 gun 4th rate
-
Looks awesome Chris.
-
Trussben reacted to a post in a topic:
La Renommee 1744 by ChrisLBren - 1/48 - 2025
-
And now beginning to glue all of the longitudinals pieces in place that will help frame all of the gunports.

-
Some more of the stern parts being added to include the aft balcony floor, aft gunport framing and some filler pieces.
-
Trussben reacted to a post in a topic:
HMS Portland 1770 by westwood - Portland Scale Ship Co. - 1:48 - 50 gun 4th rate
-
Trussben reacted to a post in a topic:
HMS Portland 1770 by westwood - Portland Scale Ship Co. - 1:48 - 50 gun 4th rate
-
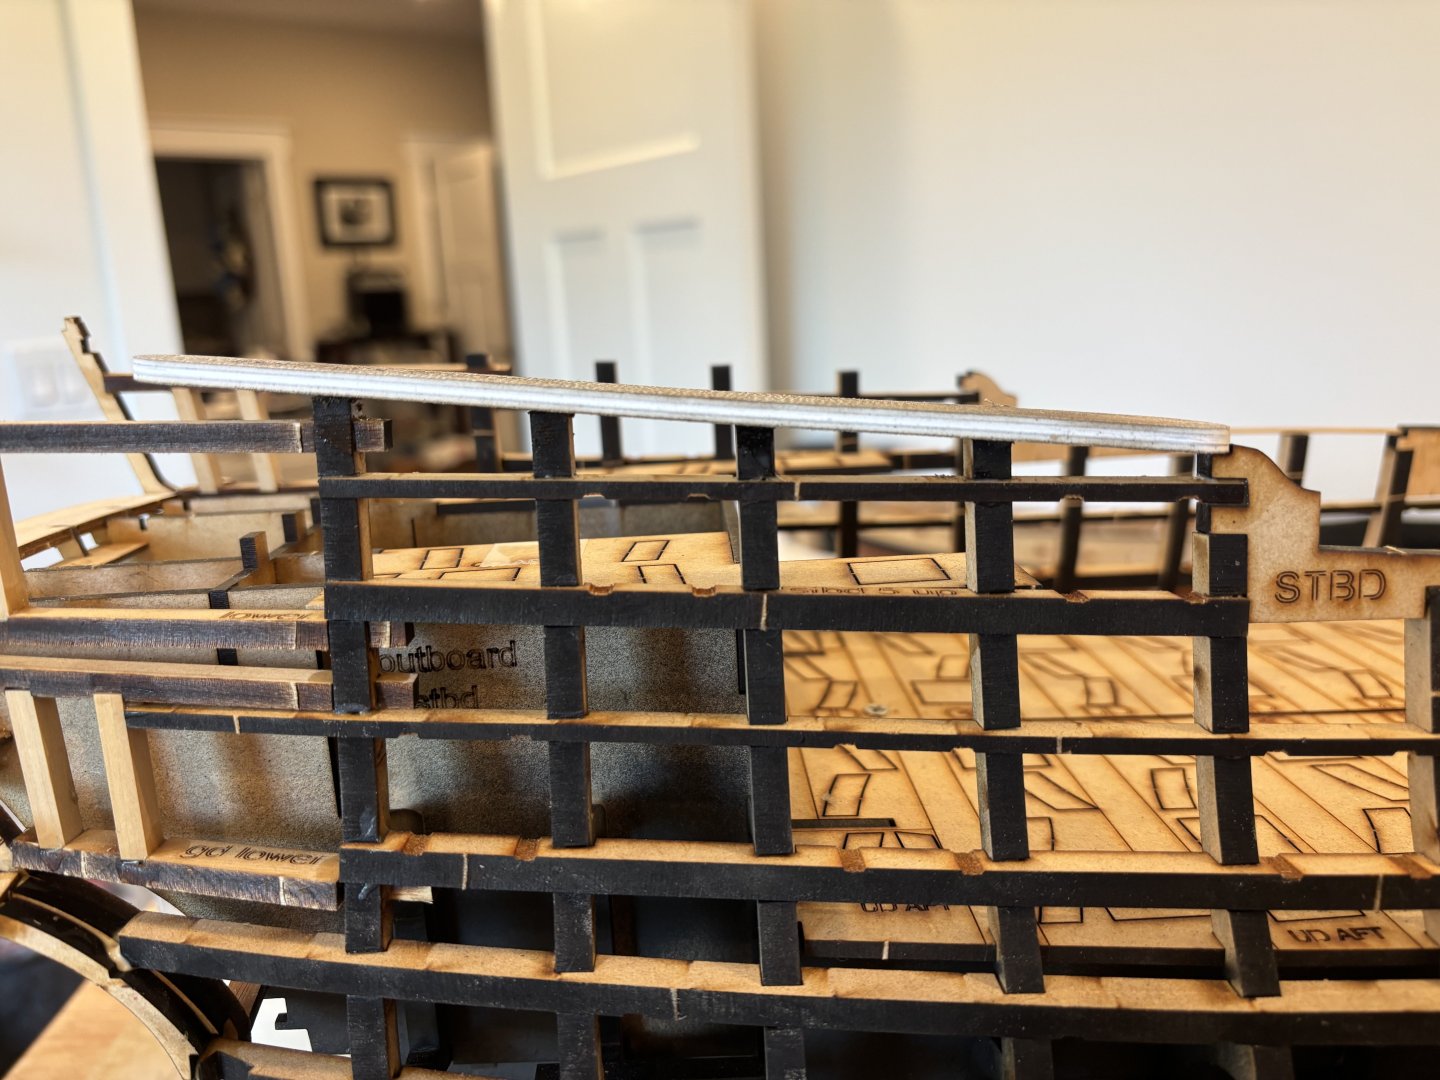
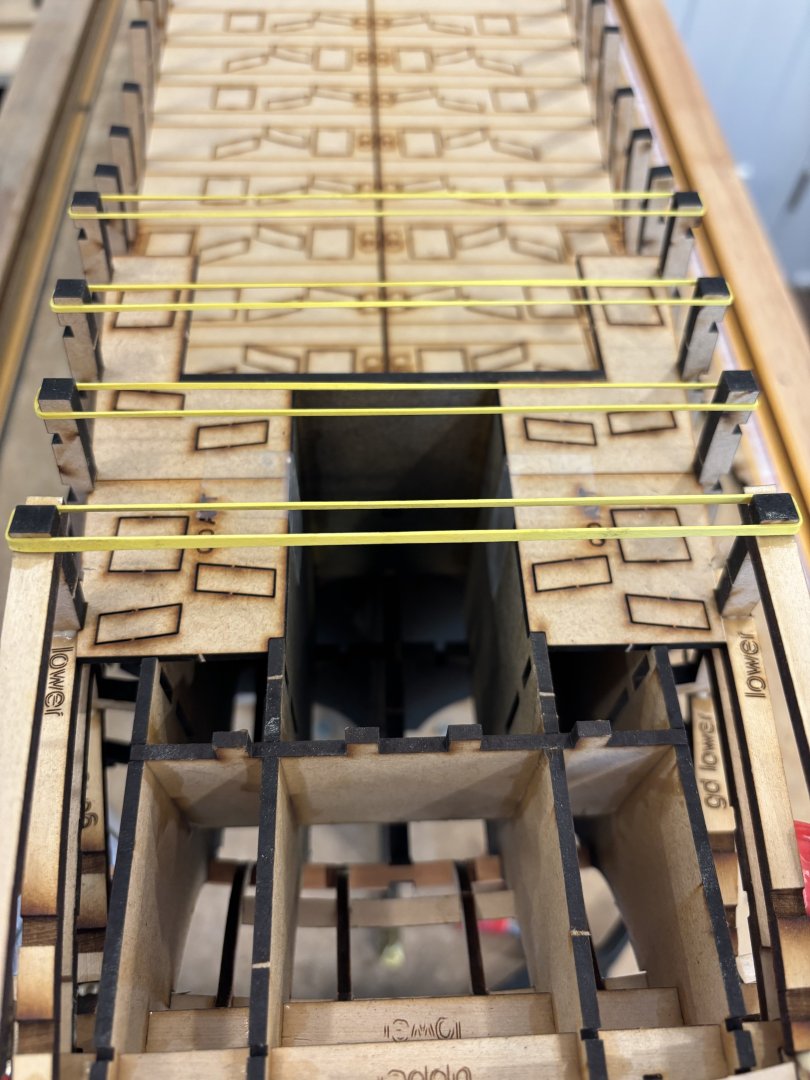
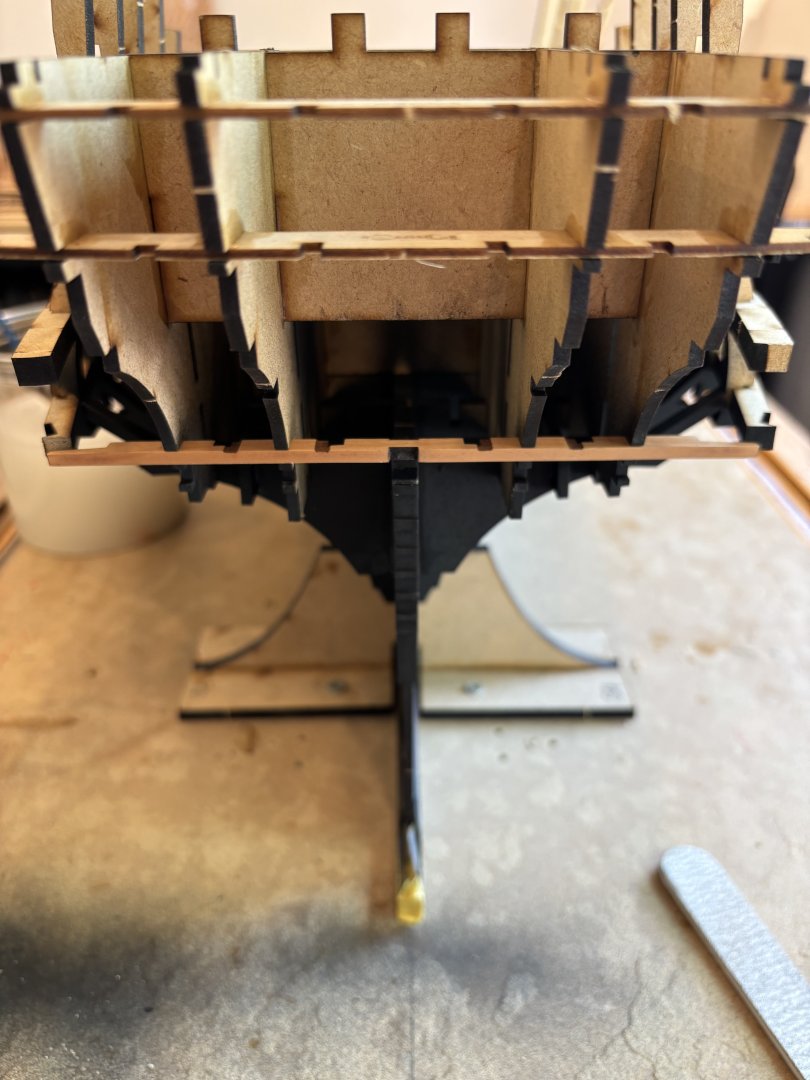
Here are the final jig parts for the moment, these two mdf pieces mount on top of the aft jig assembly and give support to the tallest bulkhead extensions at the level of the Quarterdeck, they also hold the parts for the gunports.
-
Trussben reacted to a post in a topic:
HMS Portland 1770 by Trussben - Portland Scale Ship Co. - 1:48 - 50 gun 4th rate
-
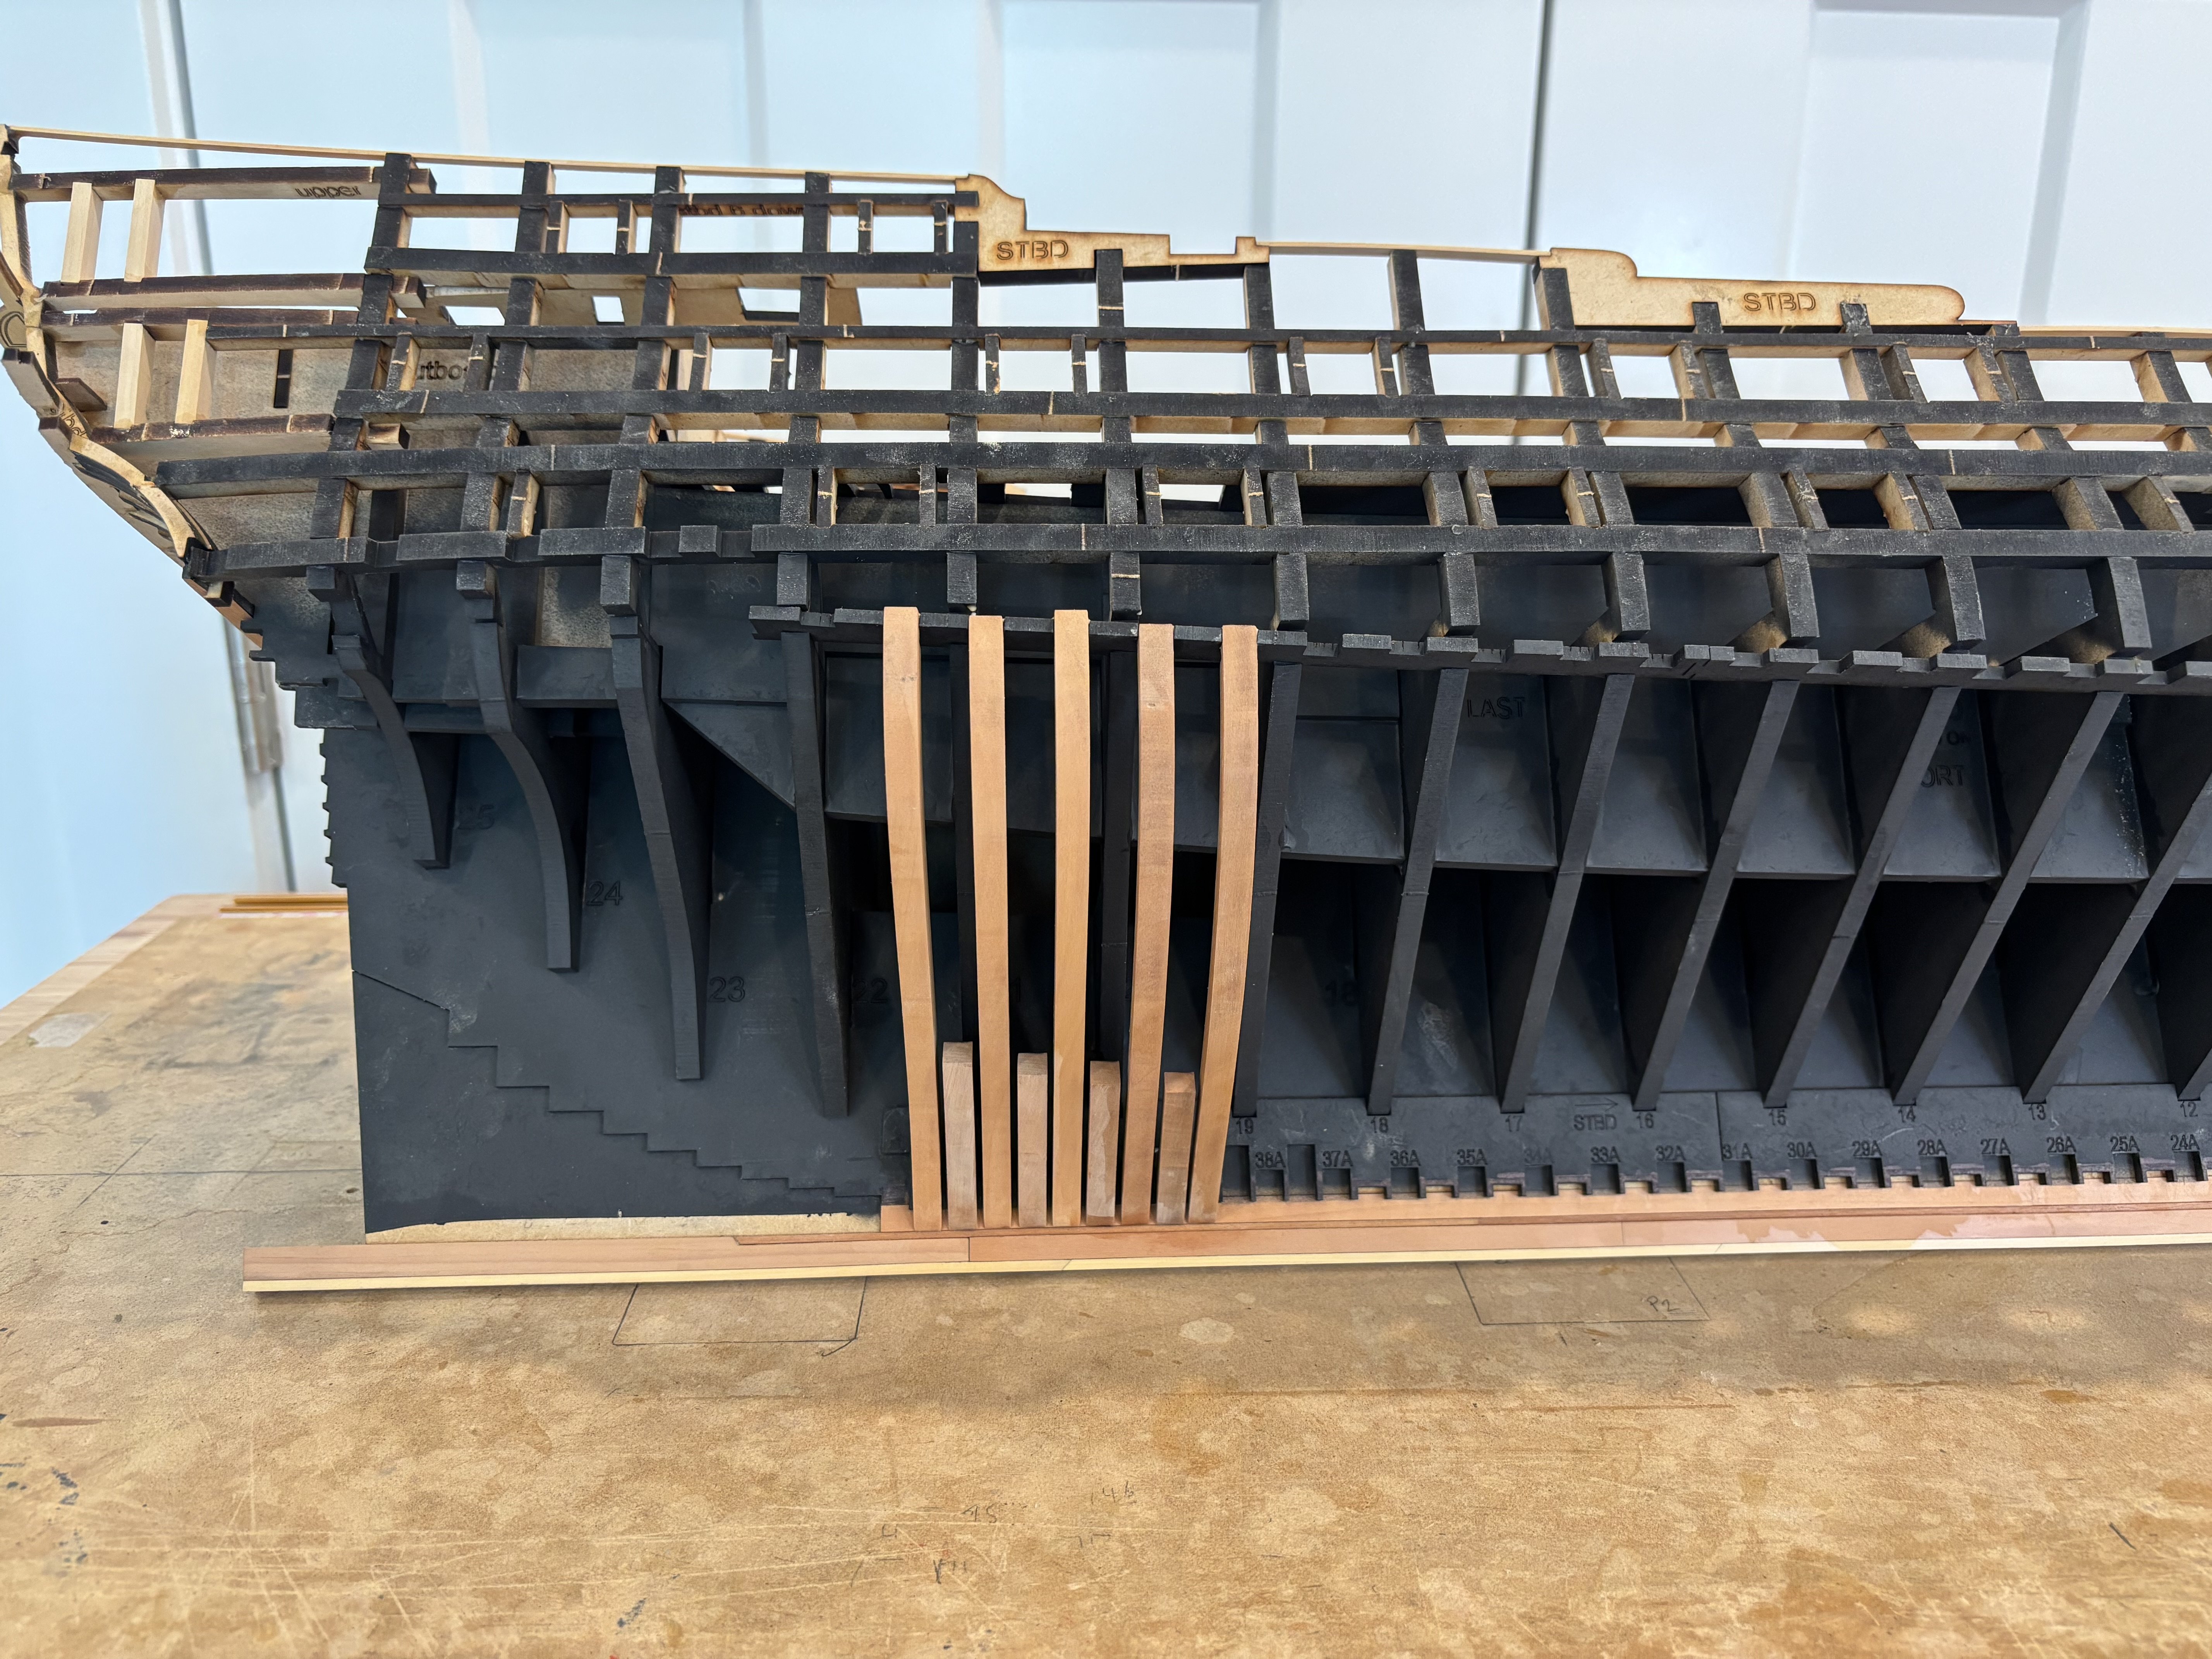
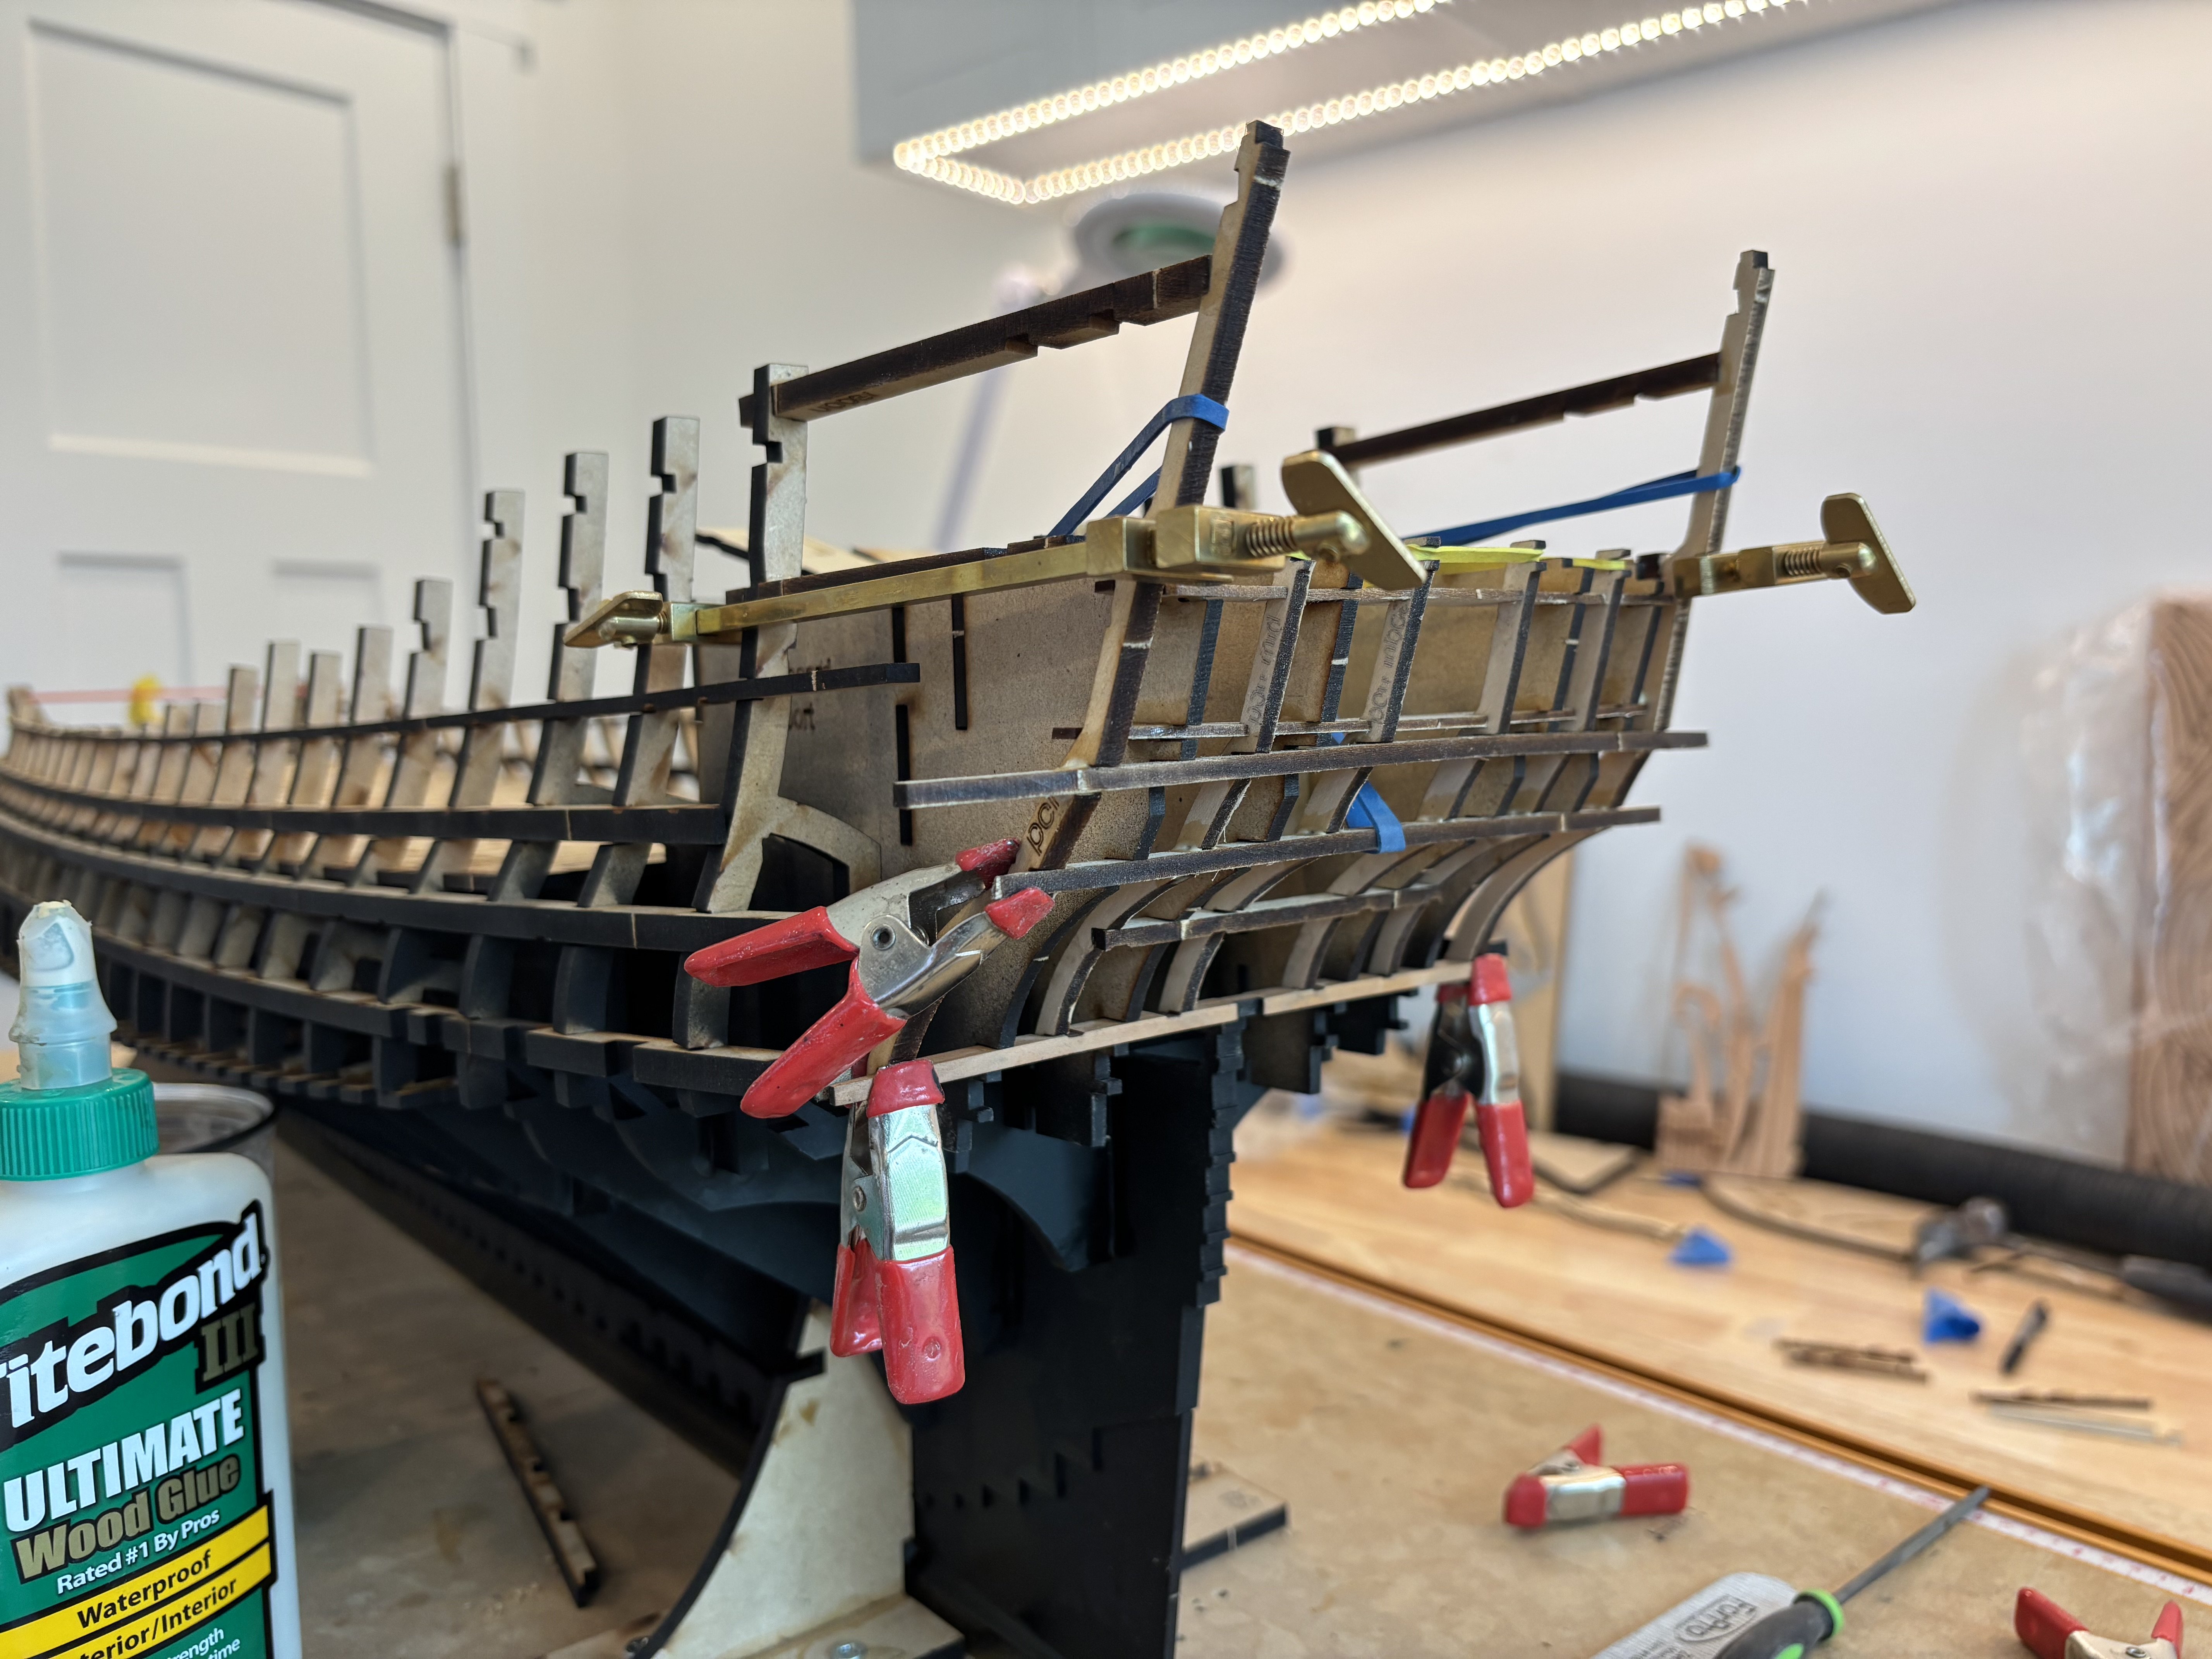
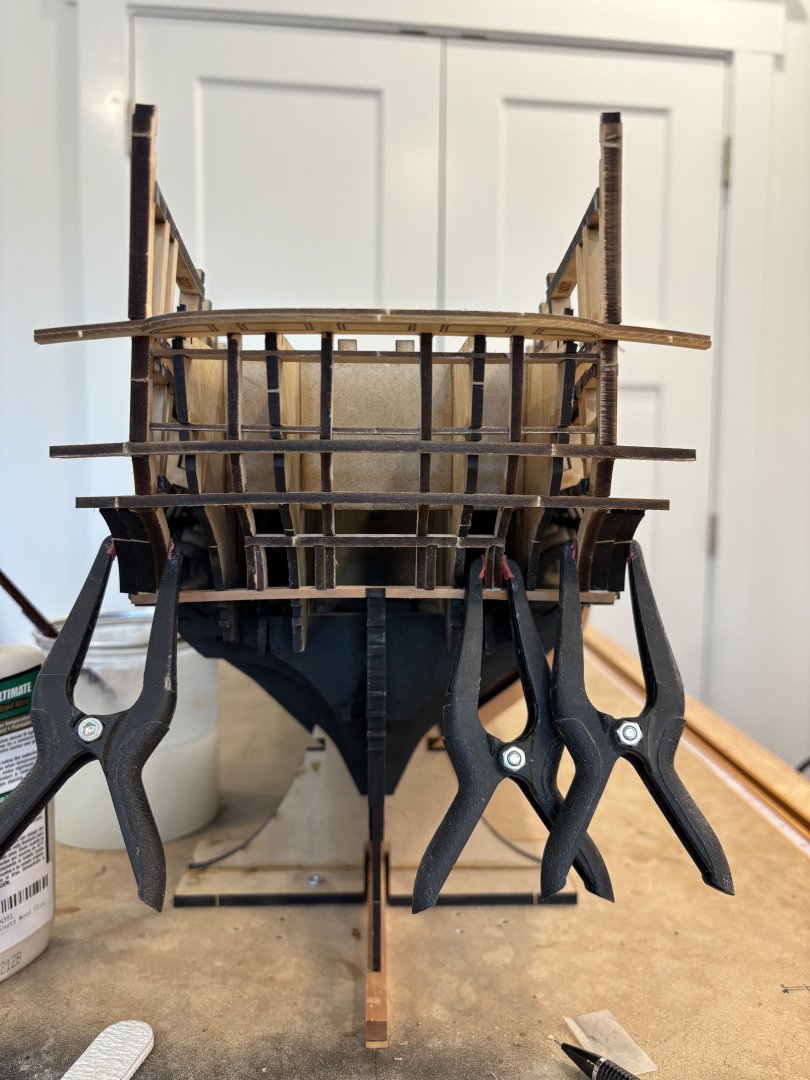
All six counter Timbers installed, the other horizontal ones are for the framing of the aft gunports and the other transoms. The long runners down each side of the ship are not yet glued in place, just there to keep everything in its place until this stern framing is completed.


-
Trussben reacted to a post in a topic:
HMS Portland 1770 by Trussben - Portland Scale Ship Co. - 1:48 - 50 gun 4th rate
-
The beginning of the stern framing starts with the “wing” transom, this part has etched and cut into it the positions for the counter Timbers and the aft gunports. I carefully removed the laser char and then using heat I bent it into shape so that it clicked into the jig slots correctly. It only gets glued to the central former at the moment - NOT to the jig pieces!

-
I guess you could paint each of the parts individually before assembly and achieve the same results, just seems easier this way, at least to me it does.
-
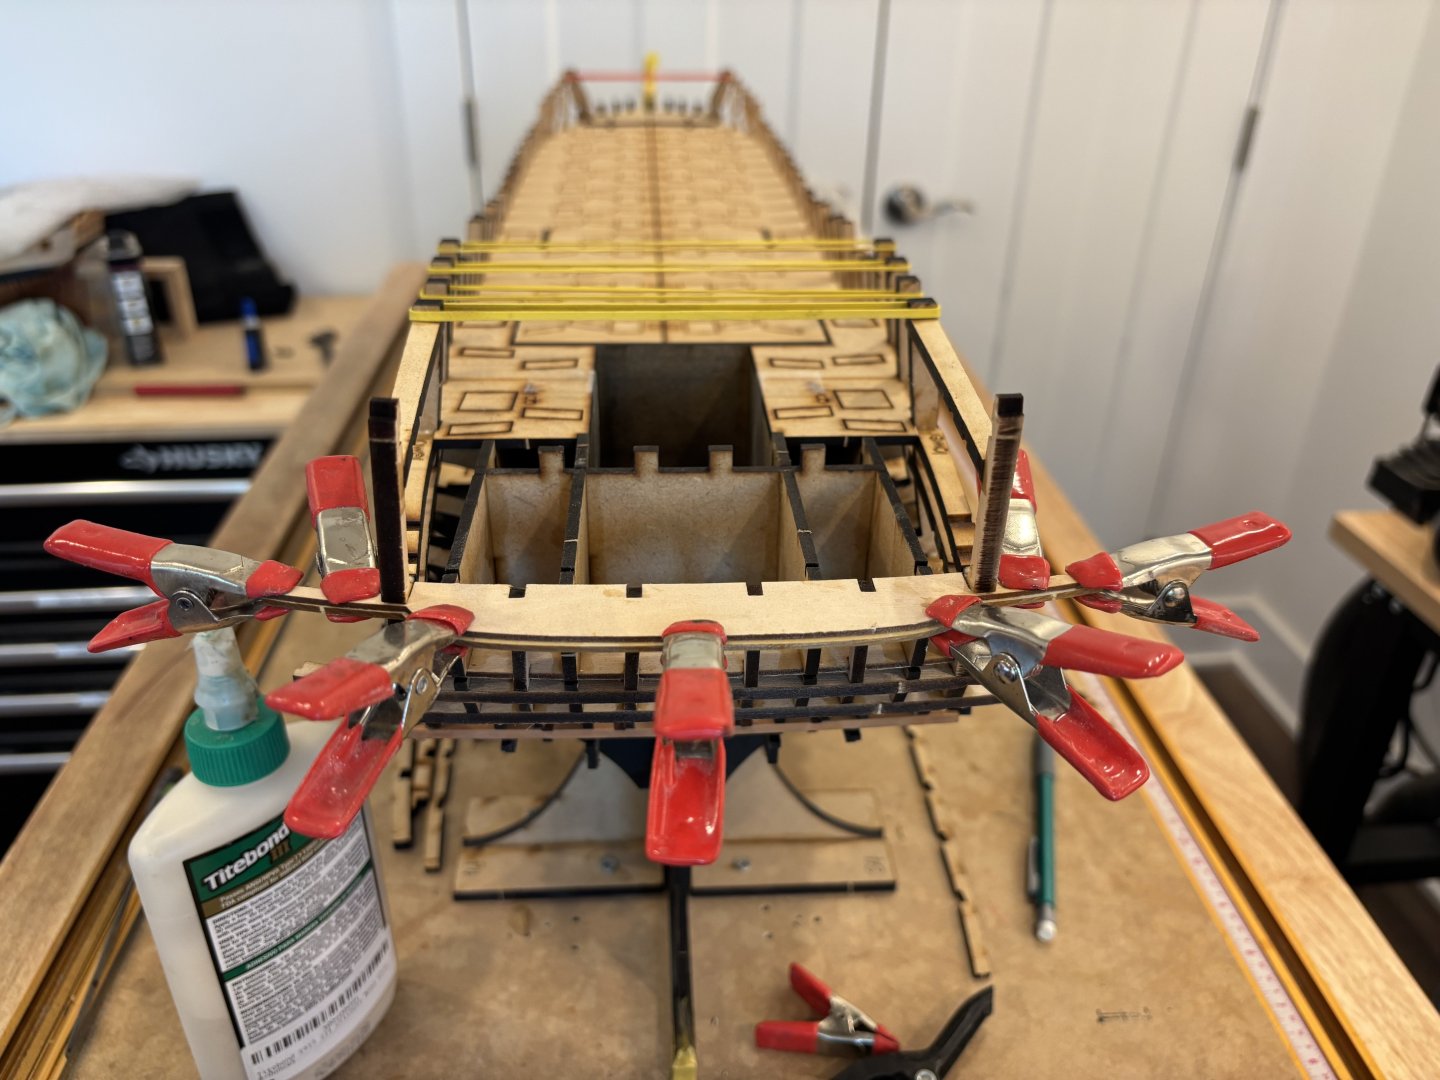
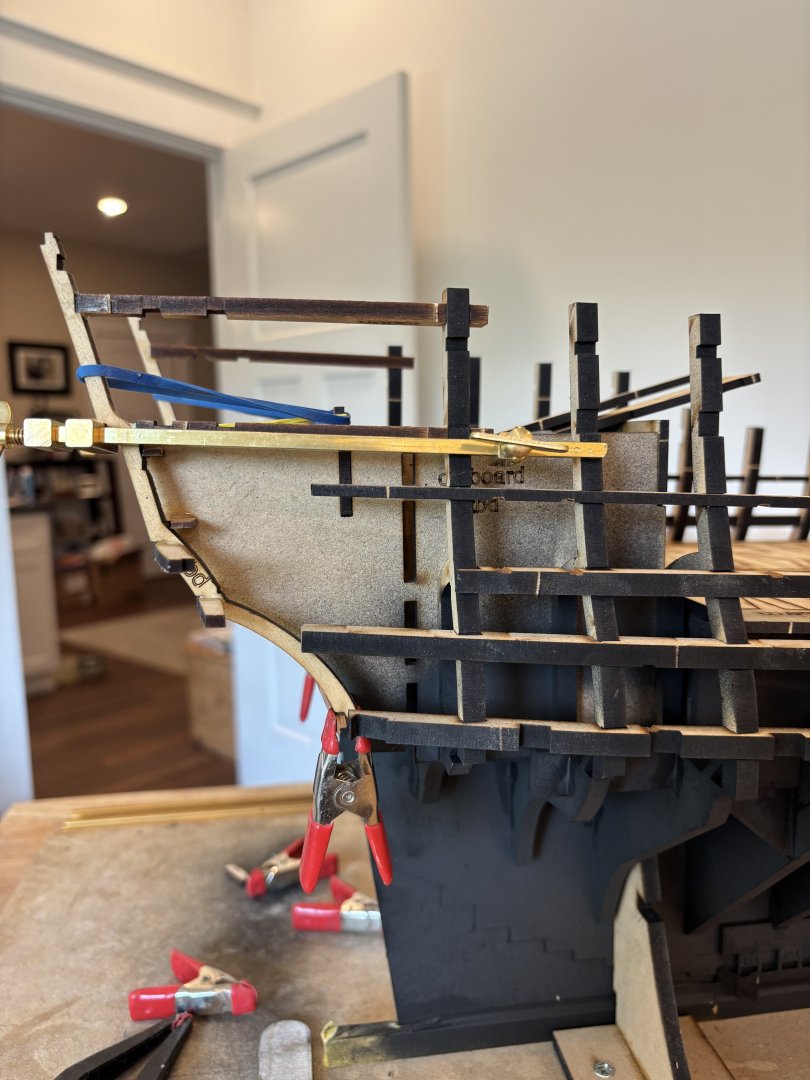
Here are the upper frame locator pieces, two mdf parts on each side that get clipped into the former at the bow and then into grooves on each bulkhead, I used a few rubber bands and some clamps to keep them securely in place while the glue dried. Now that these have been installed I need to start masking off the keel and other parts so I can paint the former and all bulkheads flat matt black below the level of the gundeck so nothing can be seen behind the framing, or at least make it as invisible as possible.