


wtimlen
-
Posts
103 -
Joined
-
Last visited
Content Type
Profiles
Forums
Gallery
Events
Posts posted by wtimlen
-
-
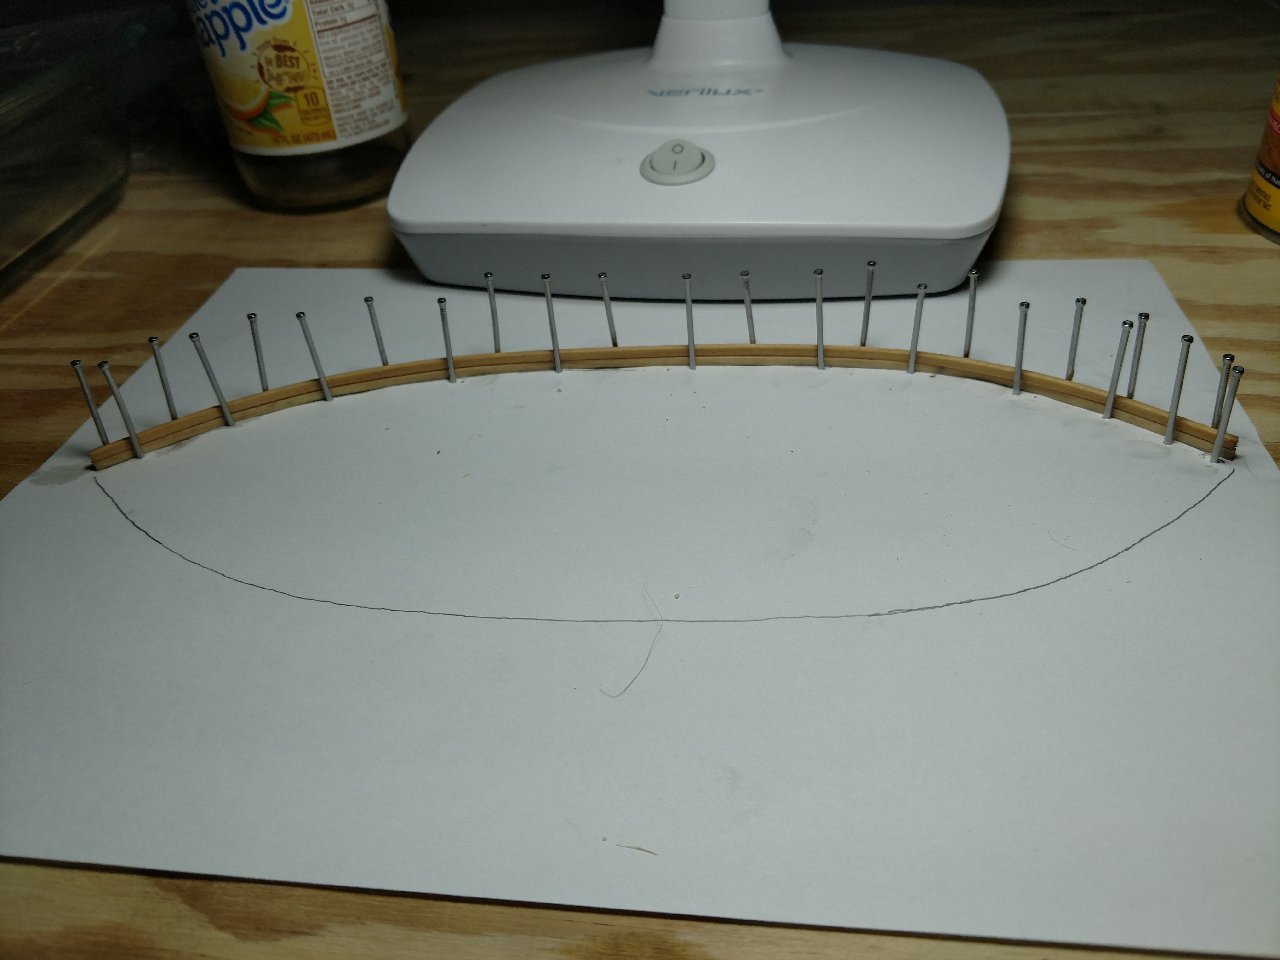
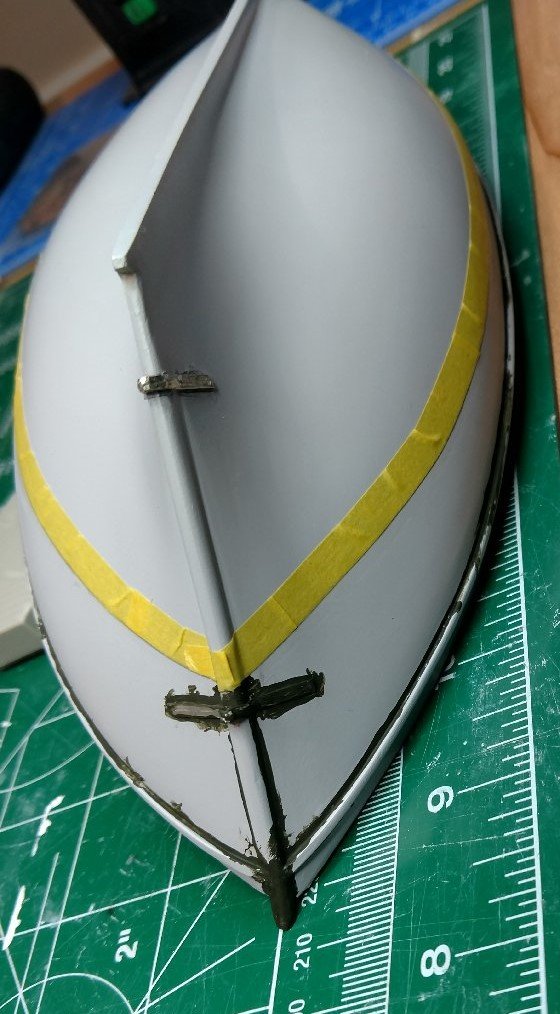
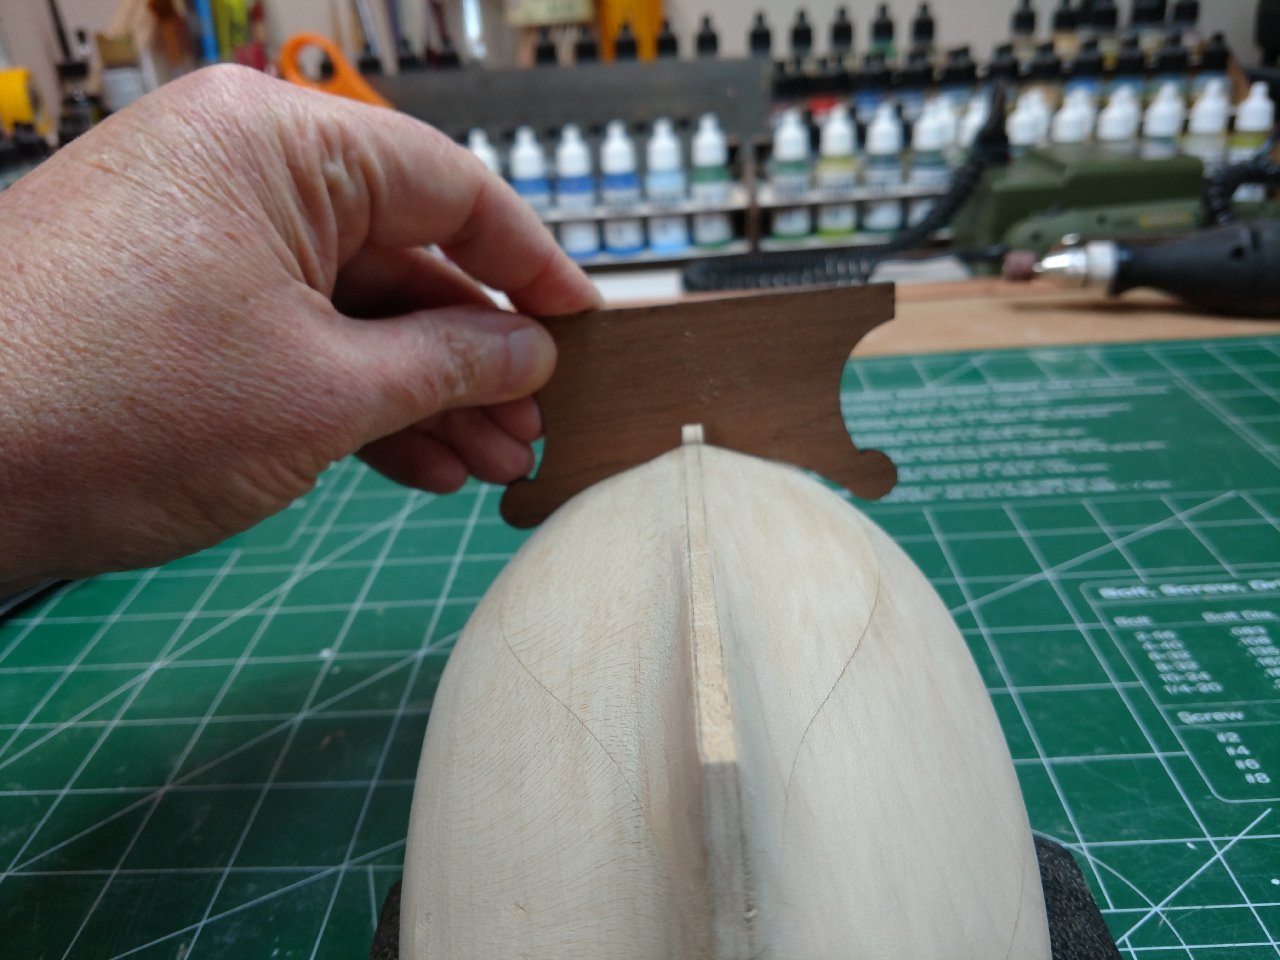
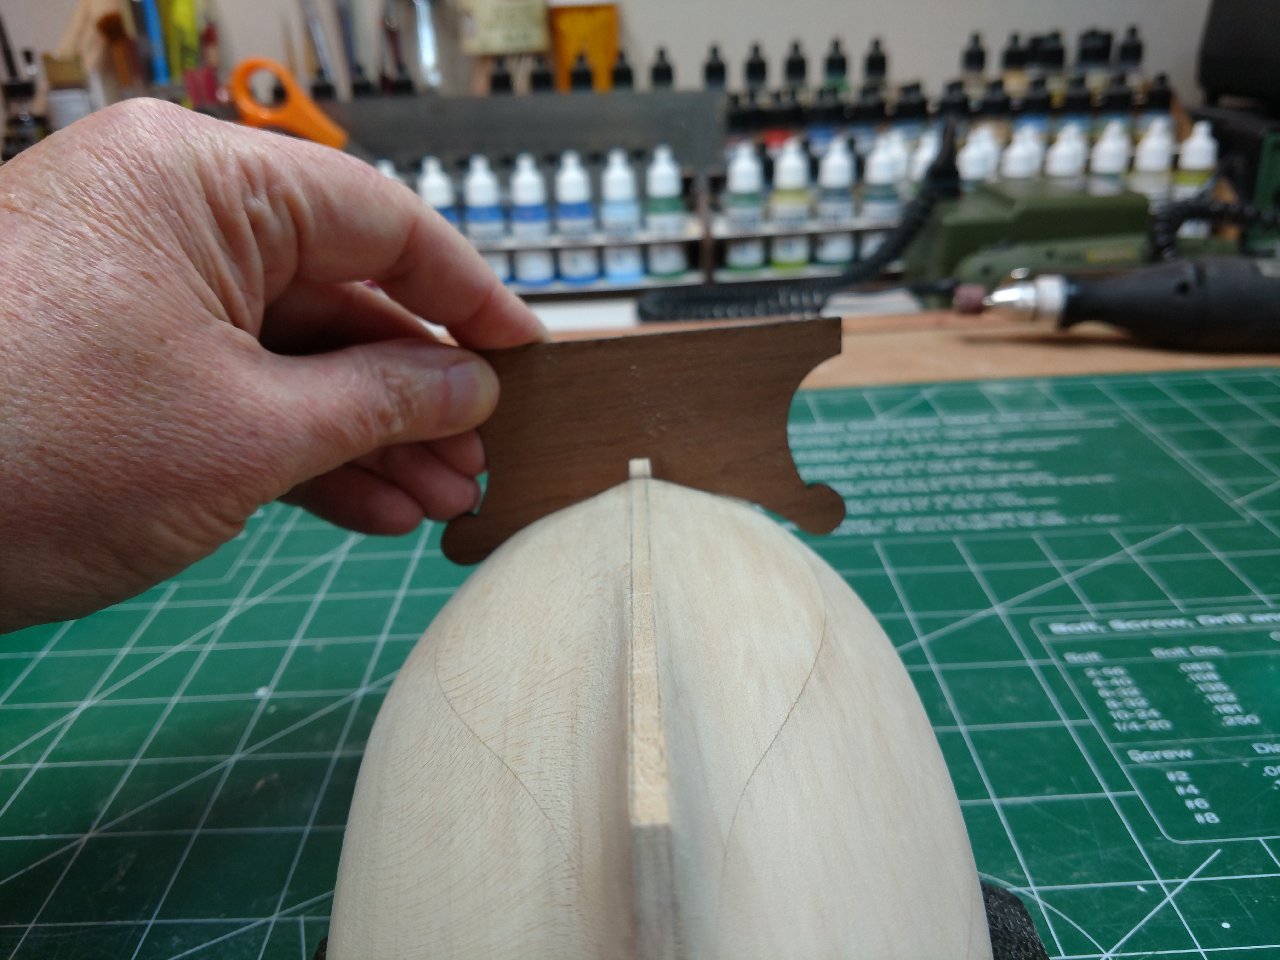
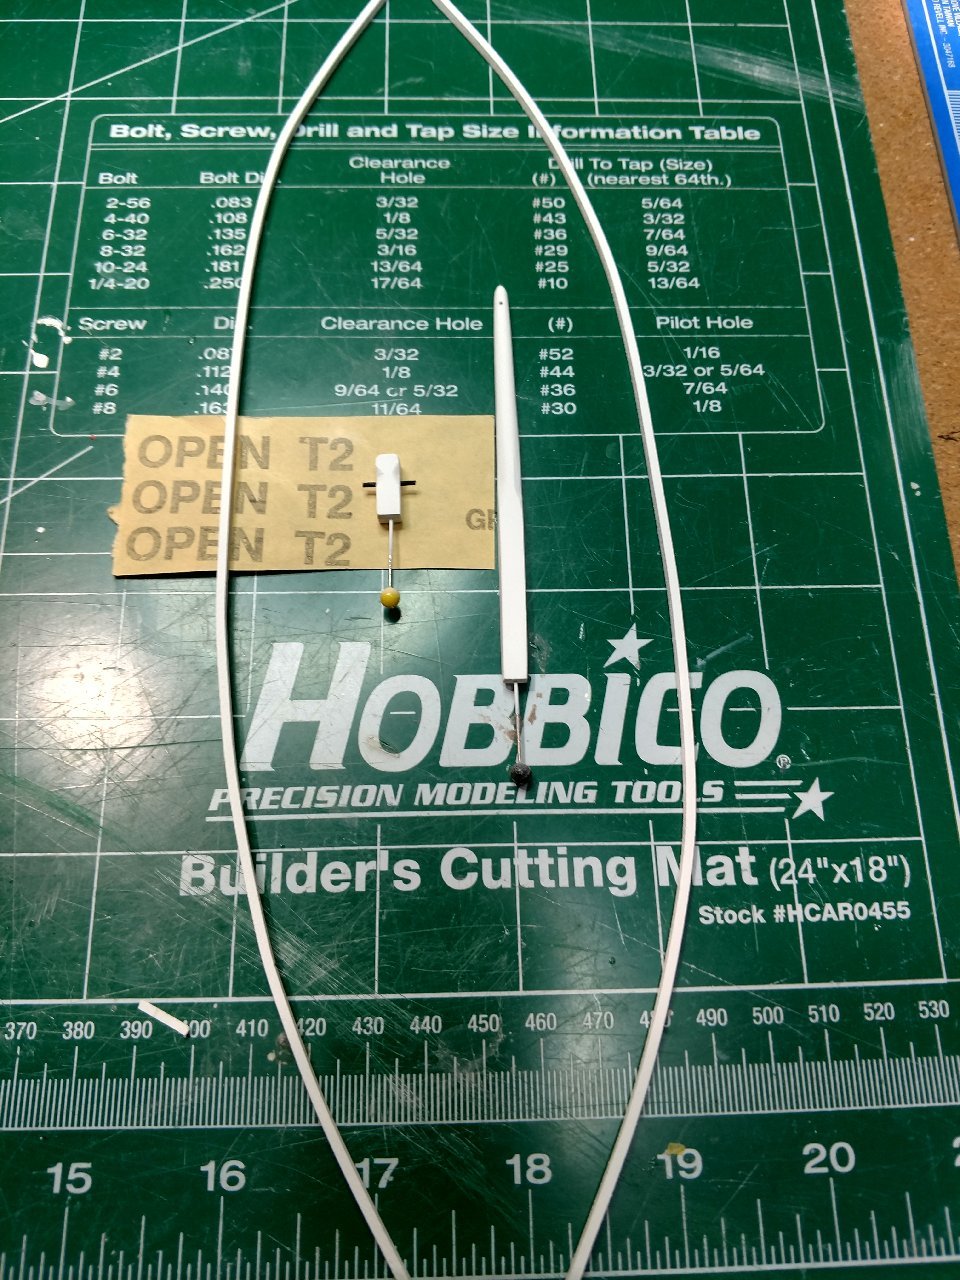
Thank you for kind comment, and following the progress. I am coming up placing the toe rail which has me concerned it is not one of my strong points as a beginner. the wood is bent and painted, curves are not matching up well. Any suggestion would be great.
-
Hello Folks,
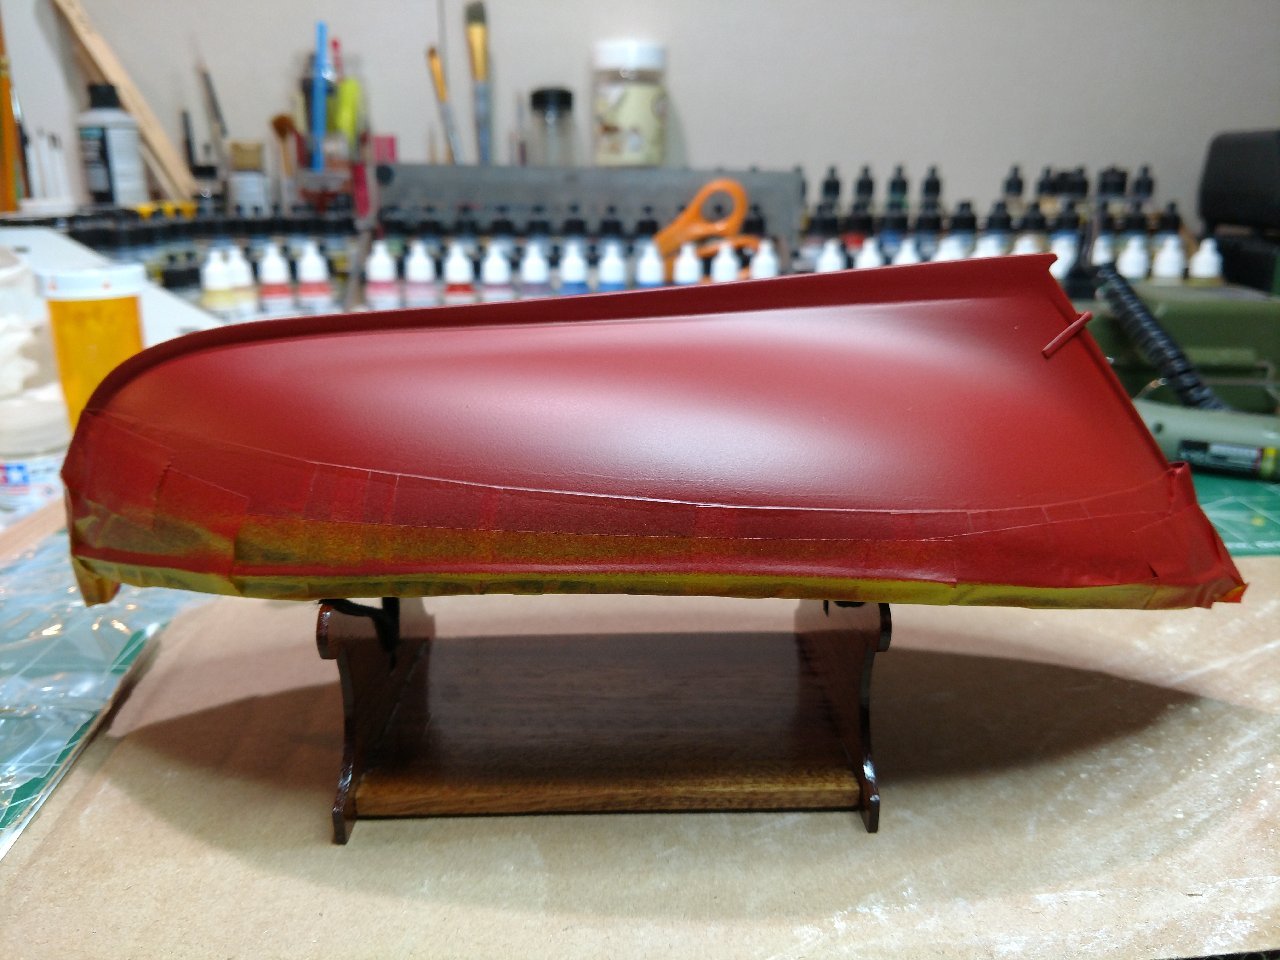
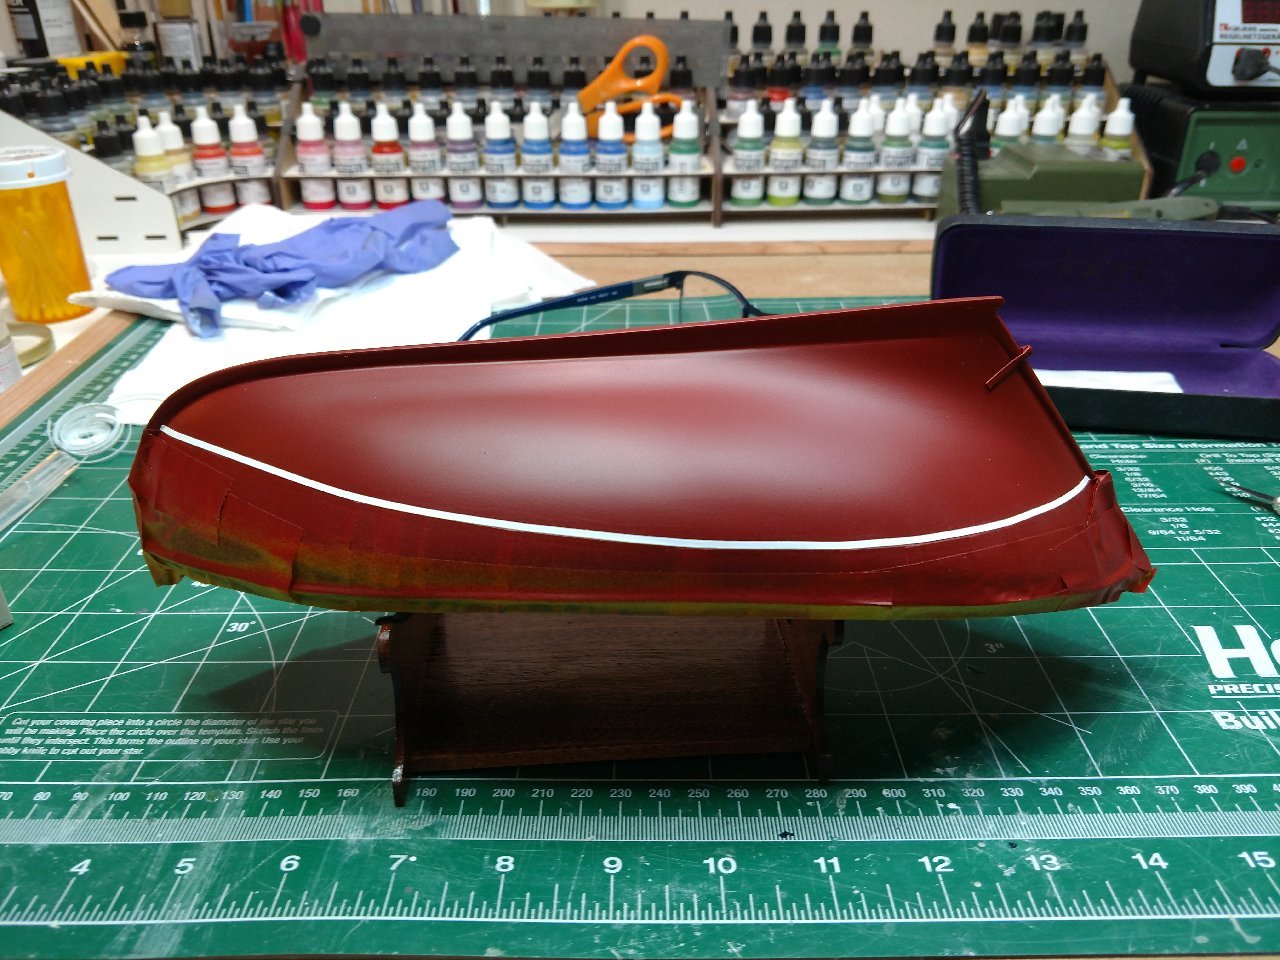
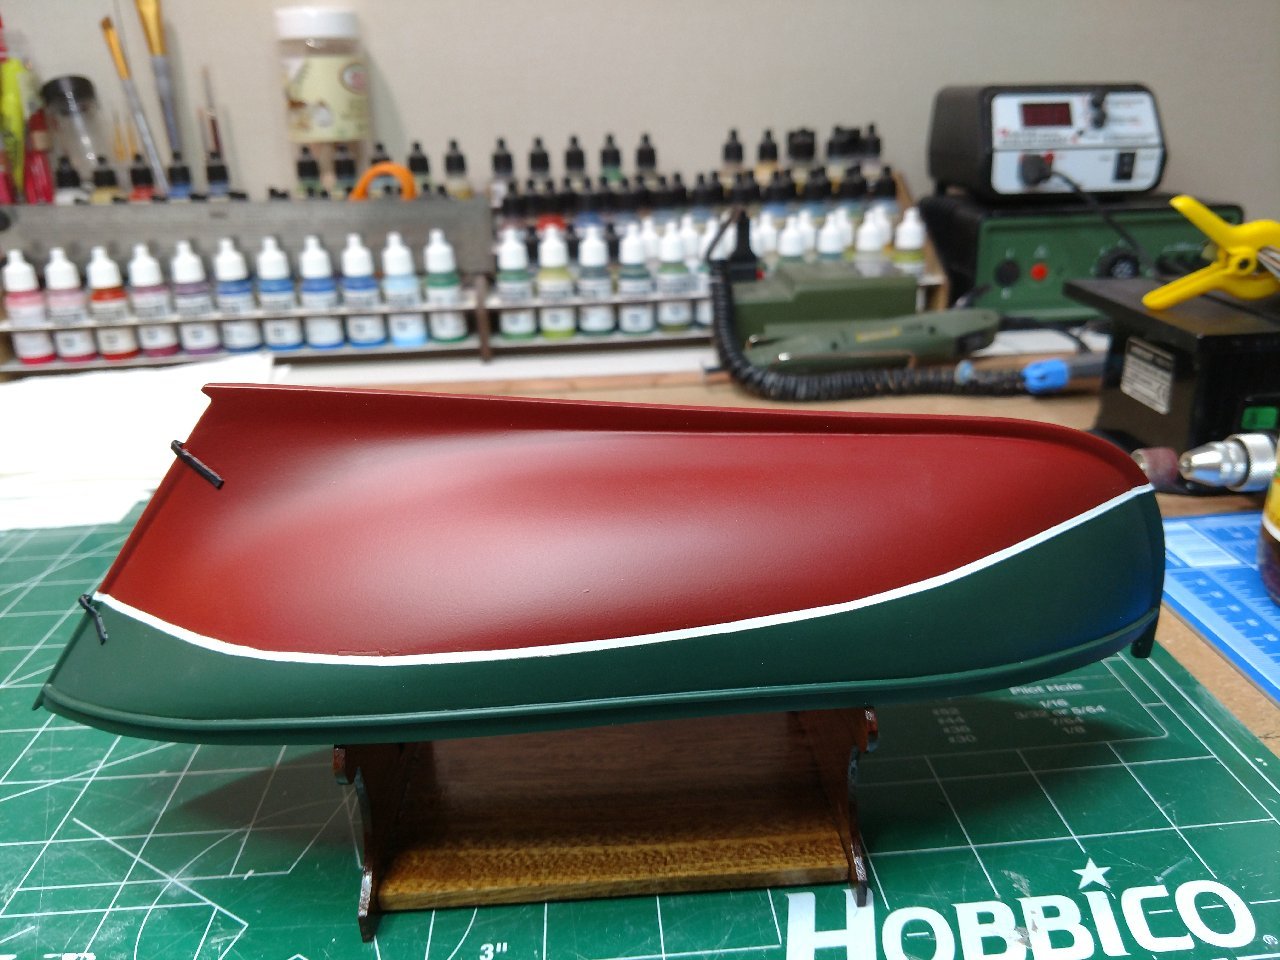
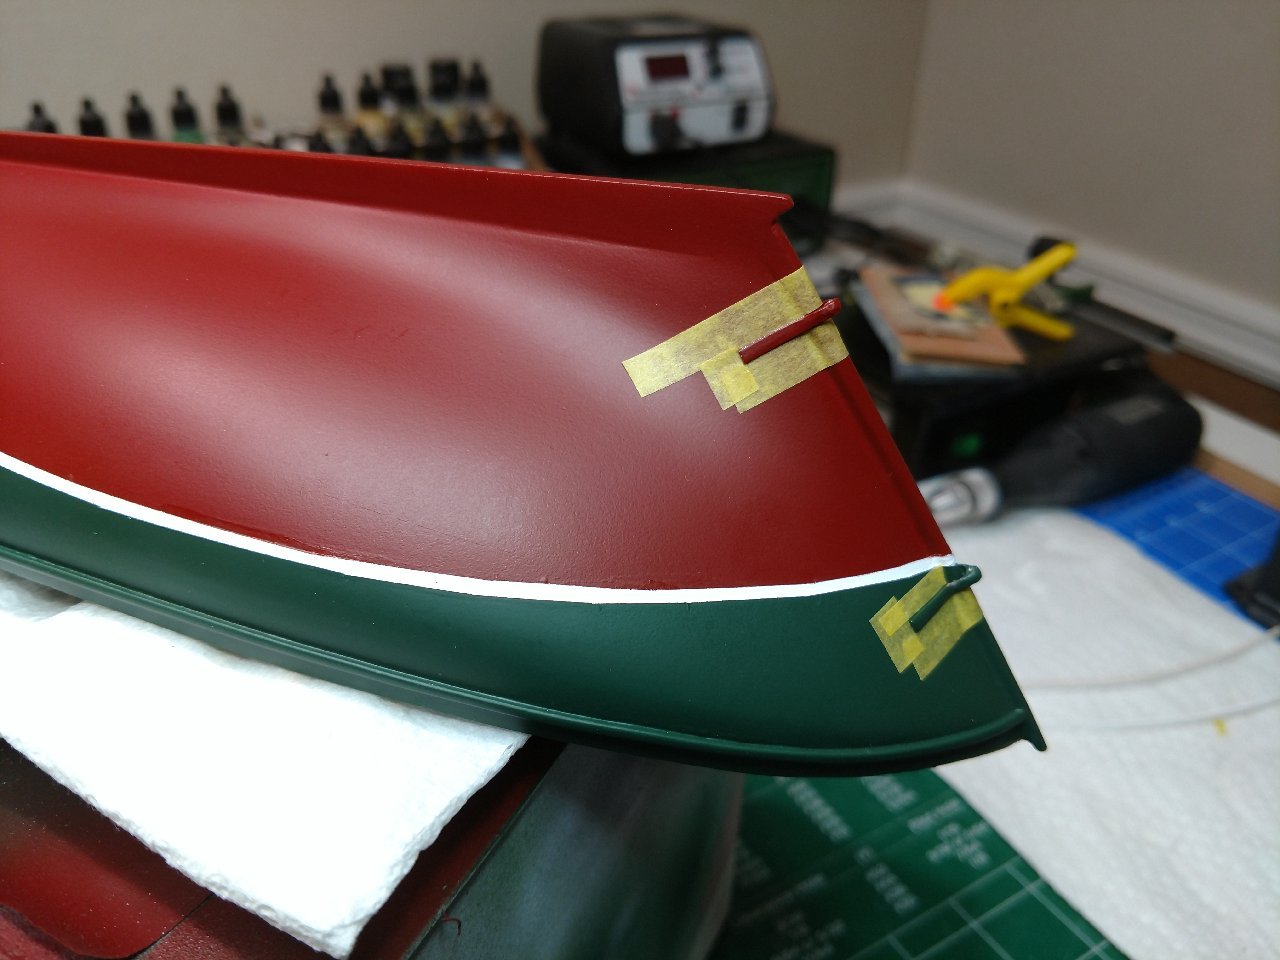
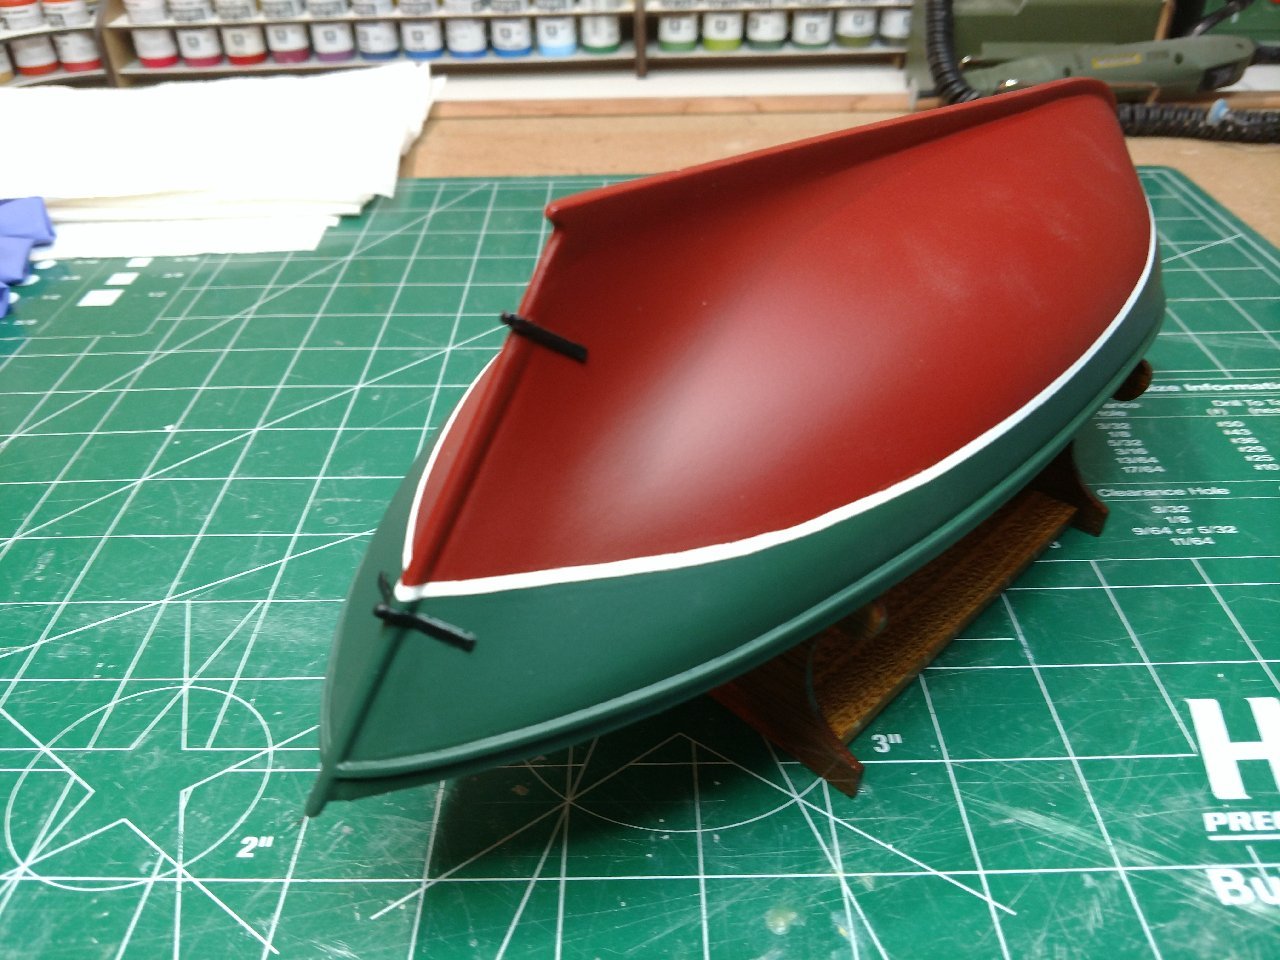
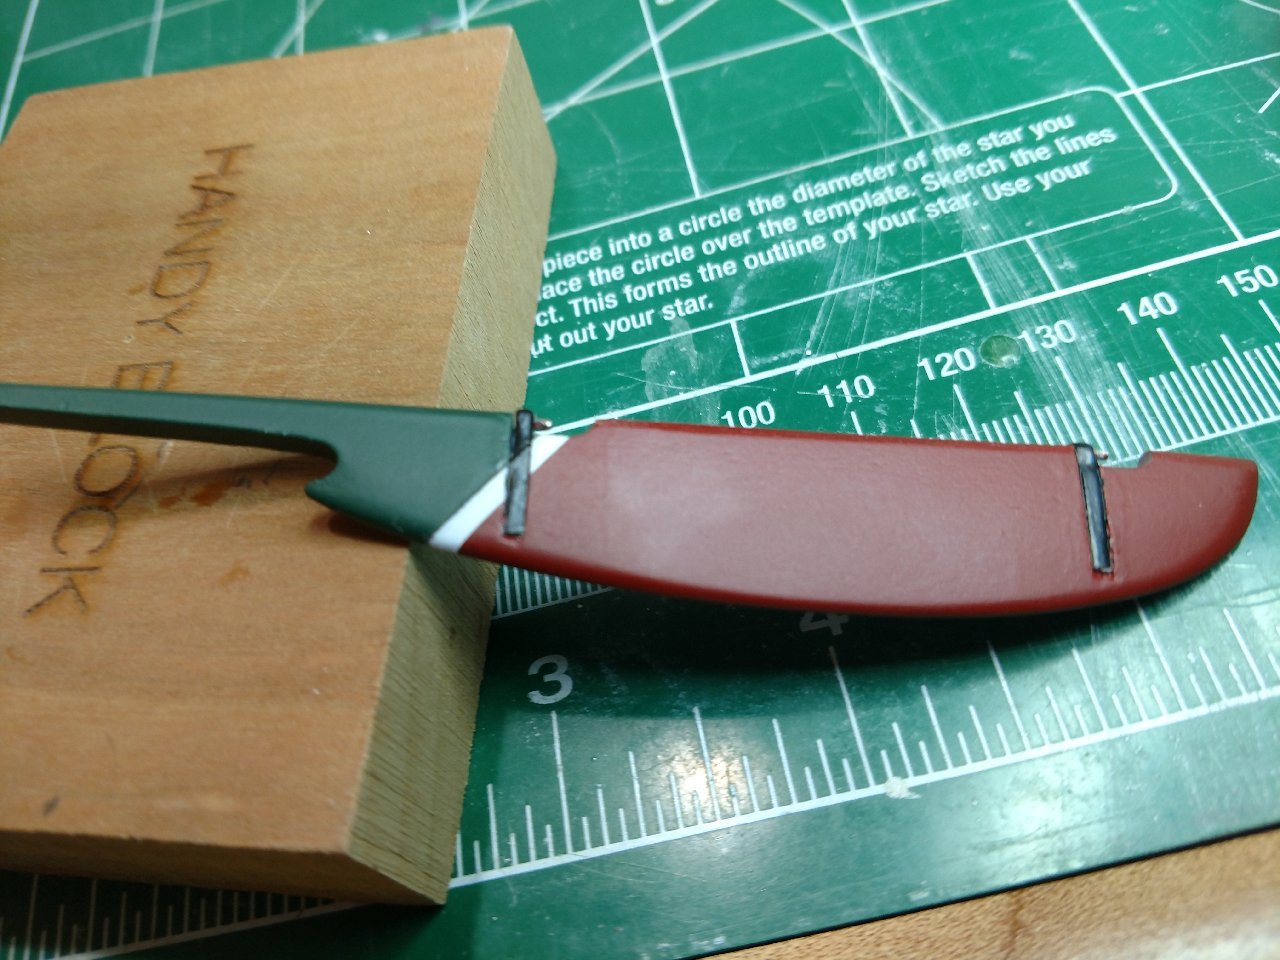
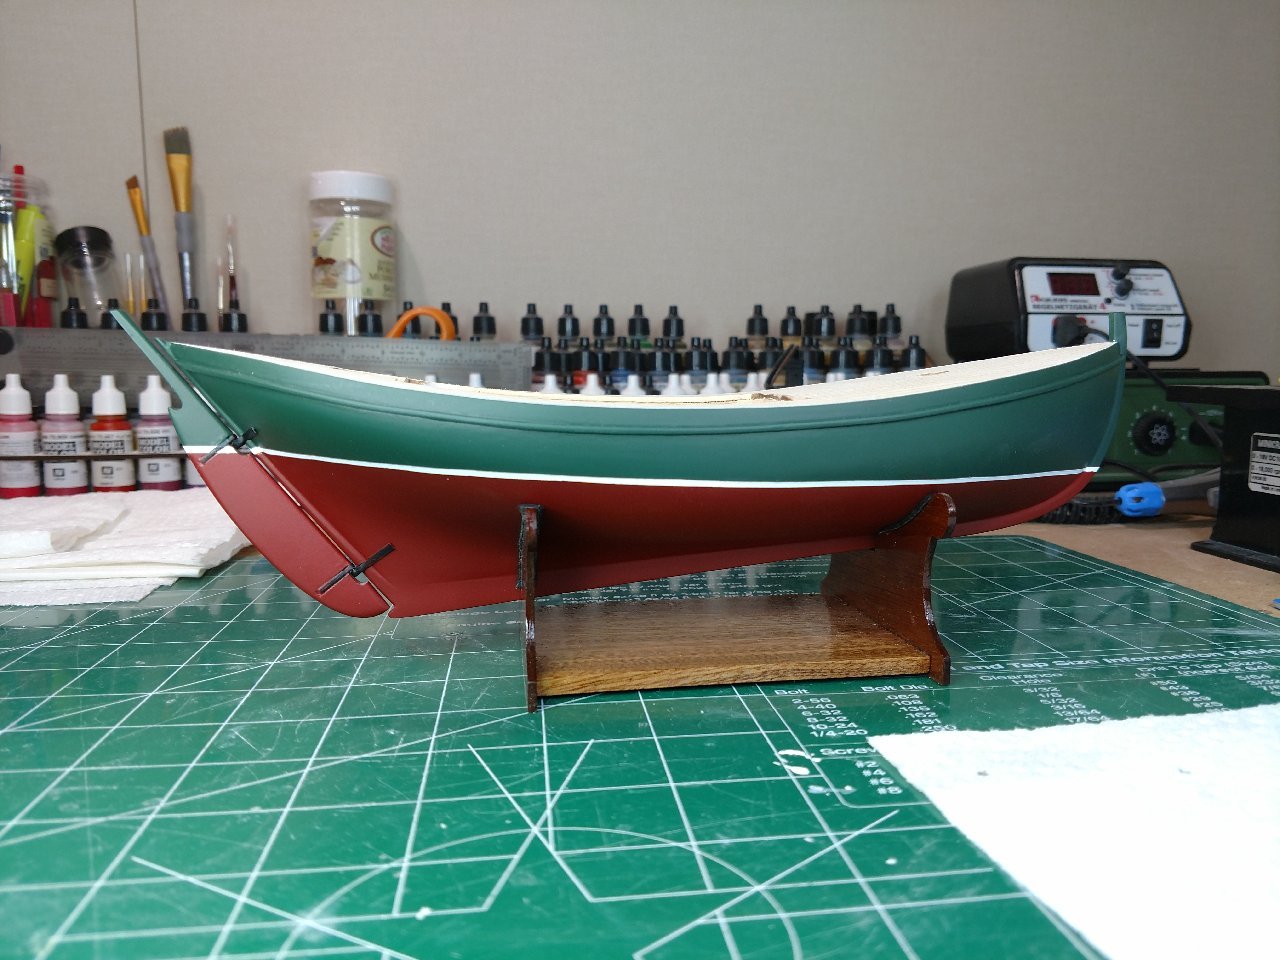
Moving on from my last post, onto painting the hull. The top portion was painted with Krylon "Hunter Green" the bottom Tamiya "Dull Red" and the bootstrap Tamiya "Flat White".
- Top portion completed first, no picture.
- Bottom portion taped off and completed Tamiya "Dark Red".
- Bootstrap: Used the tape supplied by Blue Jacket as a guide and masked top and bottom accordingly. Then applied Tamiya "Flat White" via airbrush.
- Rudder: Followed same process.
- Mortises and Pintles: Masked and painted "Flat Black".
Onto staining the deck Minwax "Golden Pecan" #245.
Good luck, stay safe...
-
Hello Folks,
So I began to do the hull as you can see from my previous post and I realized I made a careless mistake. Unfortunately I used the incorrect wood for the foot rails, I used the wood supplied for the Hold and Cabin molding. I knew something was wrong because the molding I used was too easy to work with and bend. I was not going to use the hull to bend the heated wood because the top portion was just painted. I grabbed some other basswood stock (same size) I had in stock from a Niagara build that went real bad 15 years ago and built a jig and bent the wood. Not thrilled with the results however it will do, I hope. As I see in other logs, there is always something...

-
Hello Folks!
So the build is coming along well, below please see points and pictures that hopefully will help someone out here in NRG world. I am really enjoying this build and learning a lot at the same time. I am experincing starting with a beginner kit goes a long way, I make mistakes however I finding that I can recover from it. This keeps me interested in the hobby. Now for some details:
- The samson post: Complete, however added some detail.
- The bowsprit: Complete, actually followed the manual for a change.
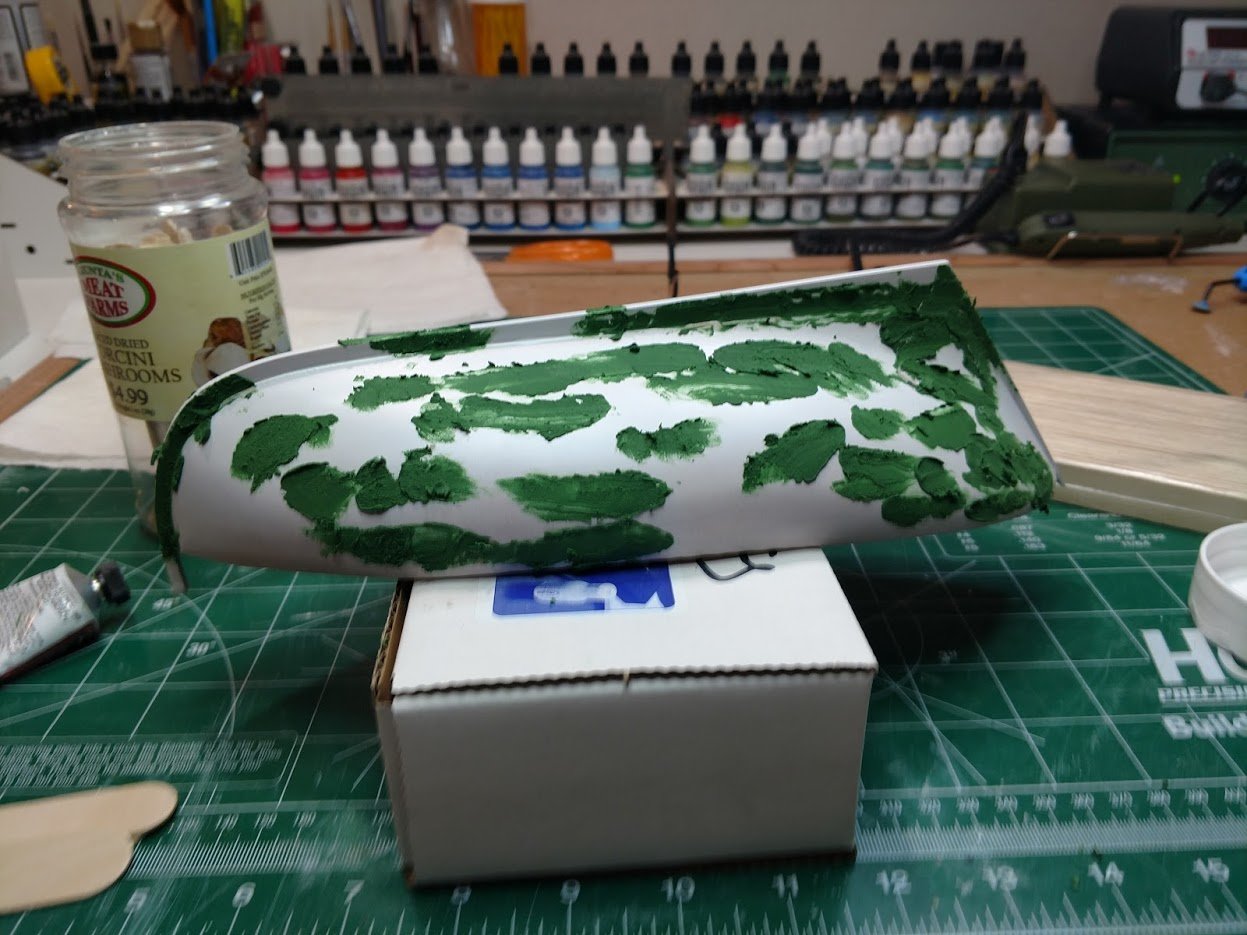
- The hull painting preparation (for only the top portion at this time): Masked waterline, put two coats of Tamiya clear flat over the tape mask to seal the waterline (Thank you Nic @ Blue Jacket). Also hit some of the hard to to get to portions with Tamiya dark green so when I spray paint (same color) I will have all details covered. Learned to do this from Arron Skinner @ Fine Scale (Thank you).
So tomorrow I cover below the waterline with more tape and paper and see how the upper hull comes out.
Best Regards Friends.
.jpg.5b1e9c3c62e5904aef0dc7182eadb3d8.jpg)
.jpg.d4c8ca2d0899e9c74b7838419b585d47.jpg)
- gieb8688, GrandpaPhil and hexnut
-
 3
3
-
Hello Folks,
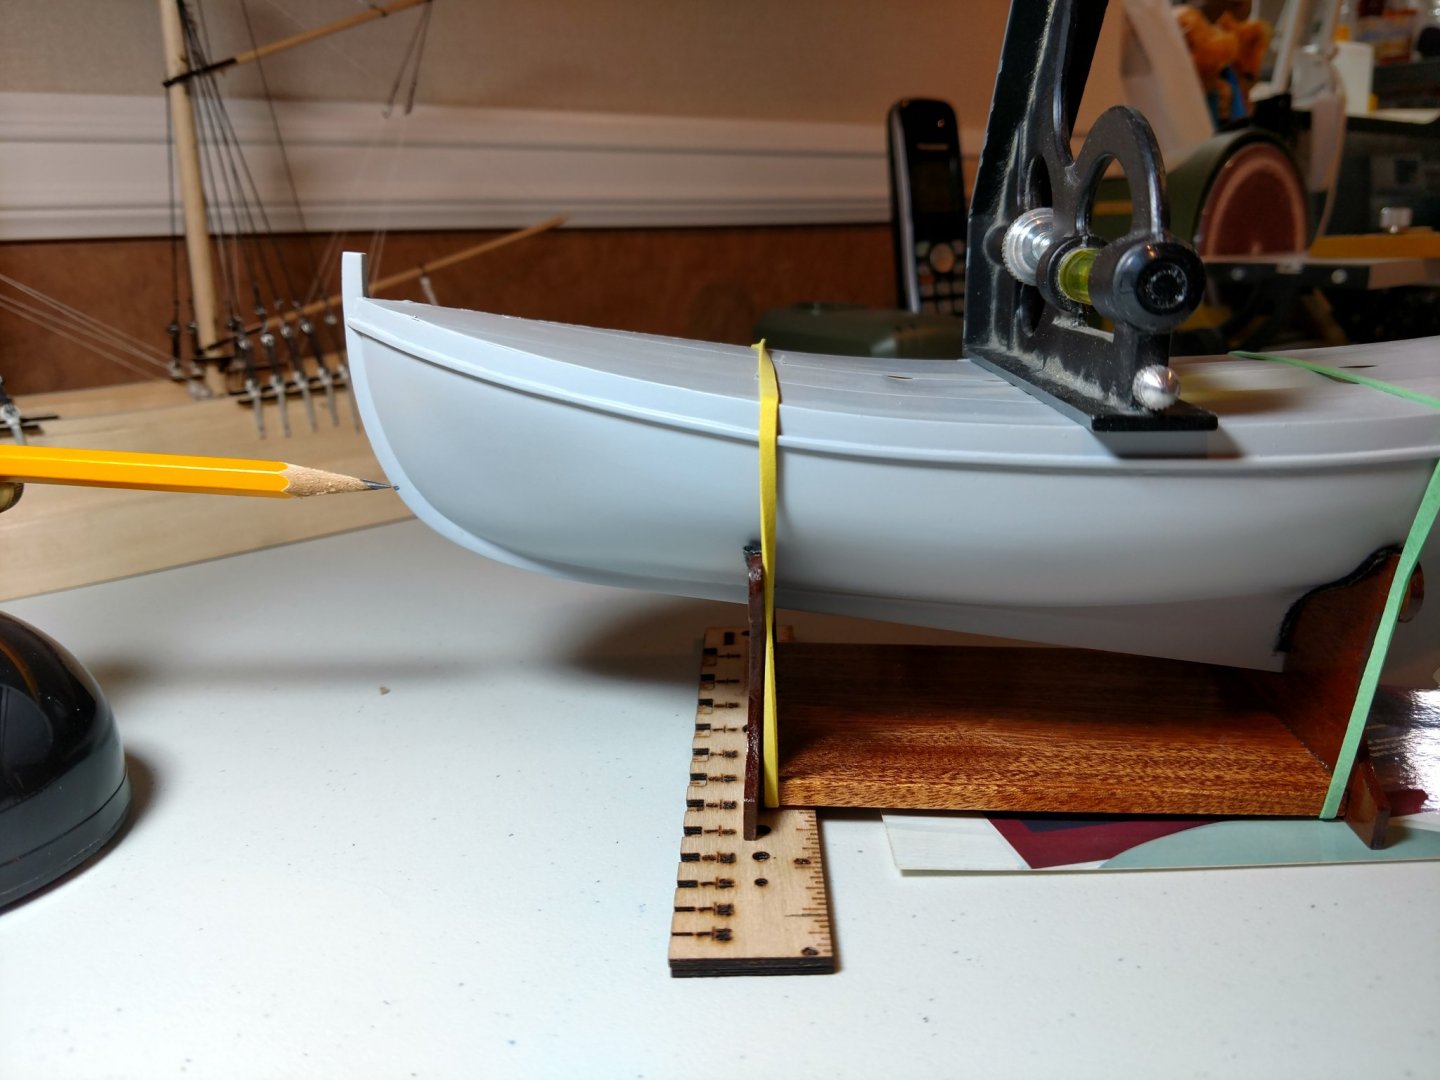
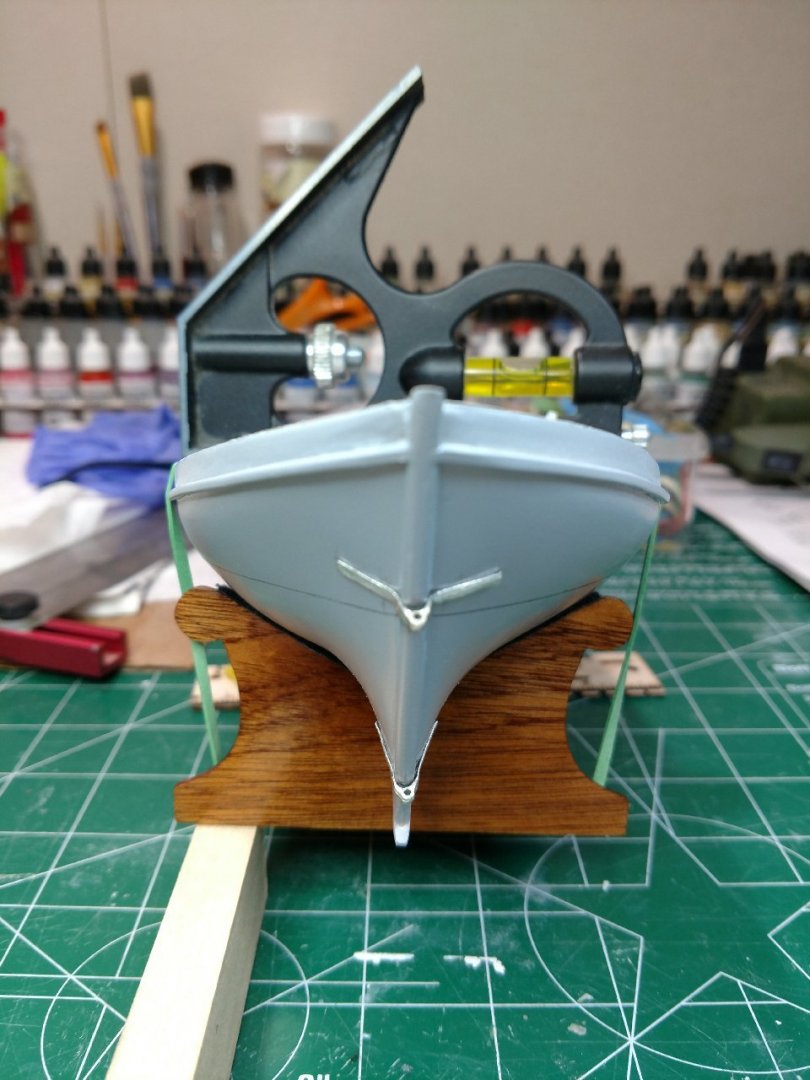
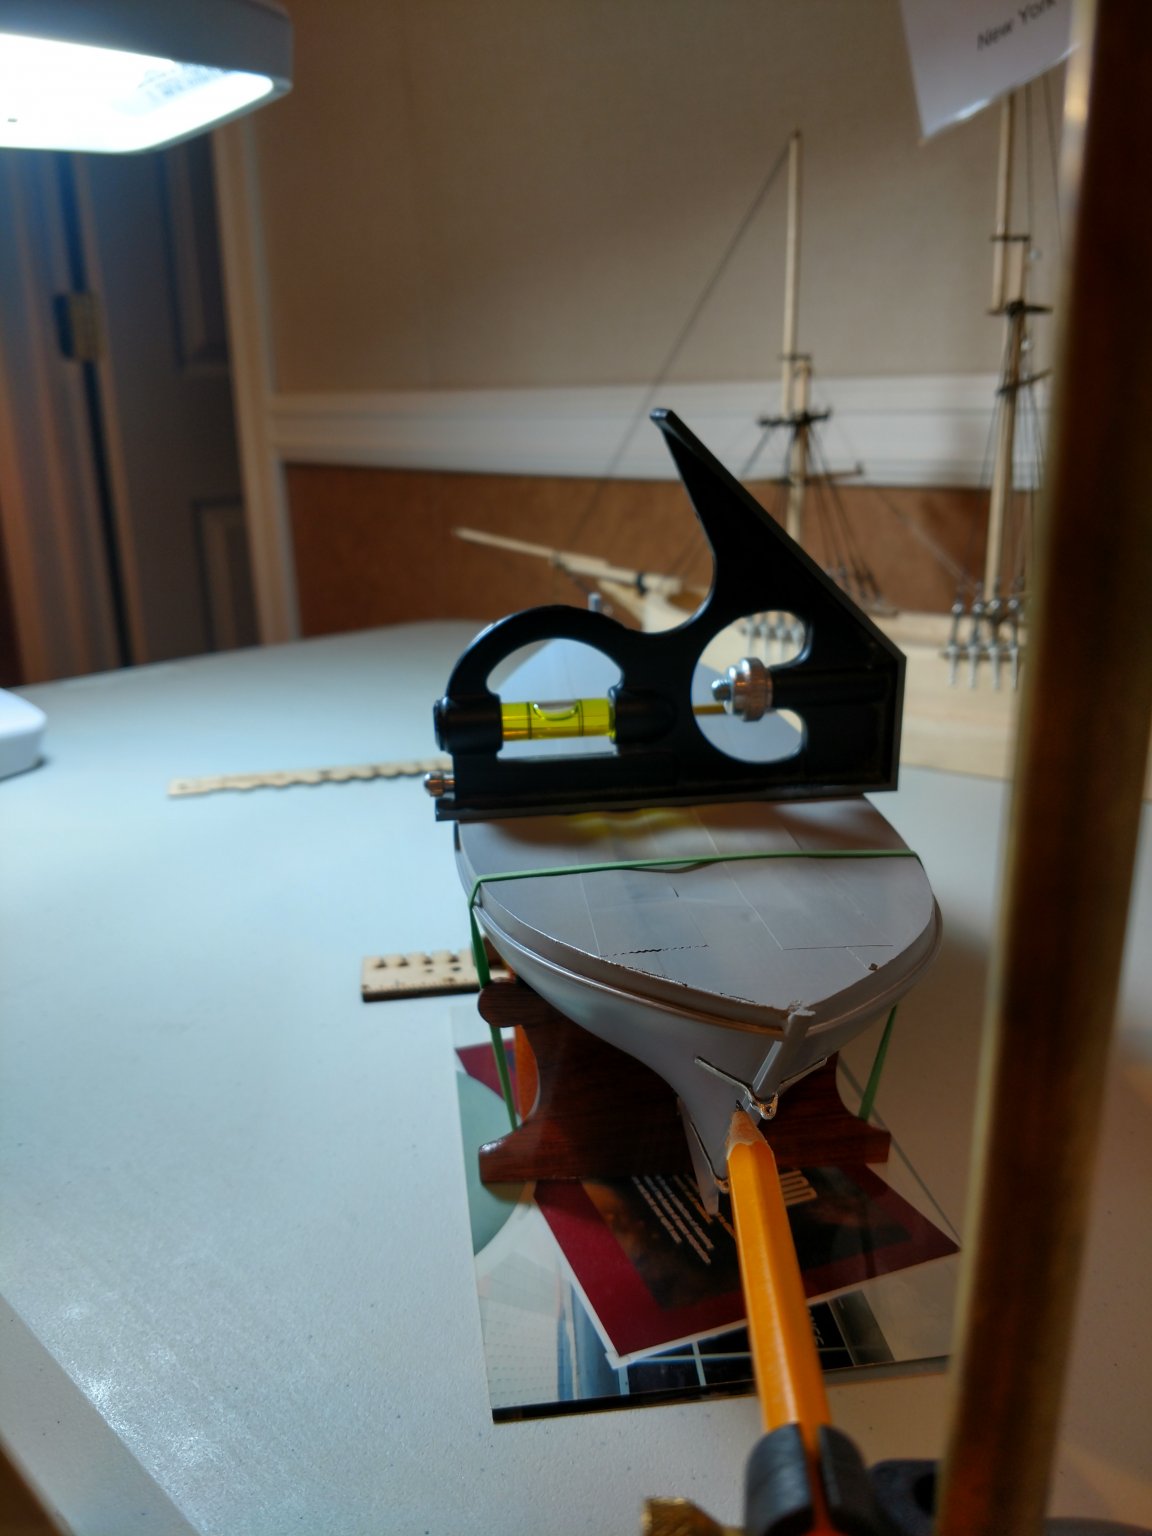
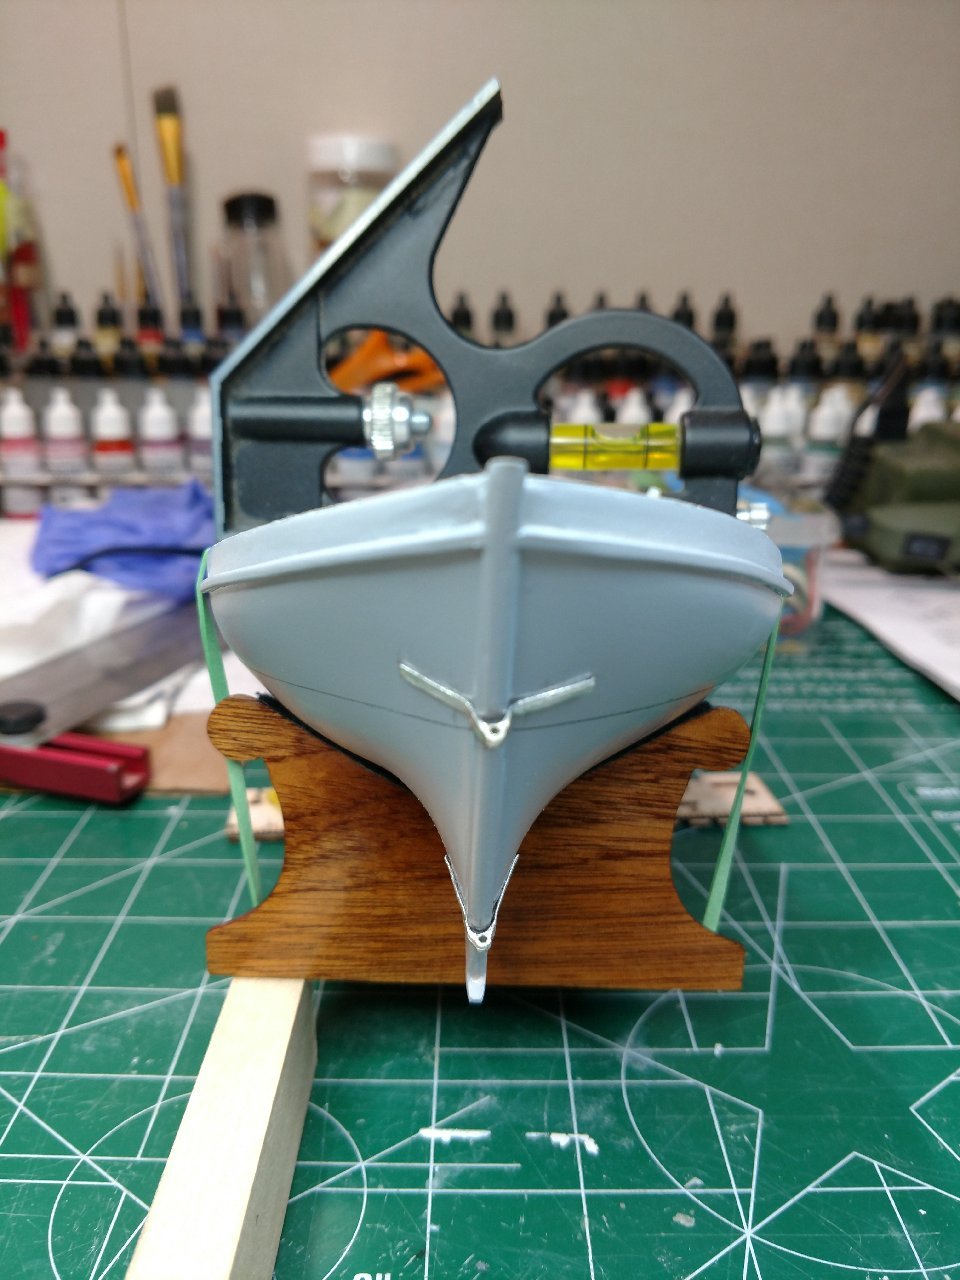
Completed the waterline, once again strayed away from the plans, however wanted to use the level to ensure the waterline was symmetrical. Probably overkill, why not I have the time not being able to work. Also needed to lower the waterline 1/16 of an inch because the template waterline had the marking is directly on the sternpost gudgeon and pintle. Life is tough enough, why deal with that mess (LOL).
Be well folks and thank you.

- hexnut, GrandpaPhil, Voyageur and 2 others
-
5
-
Hello Folks,
Not being allowed to go out has allowed me to move forward on portions of this build far beyond my normal pace.
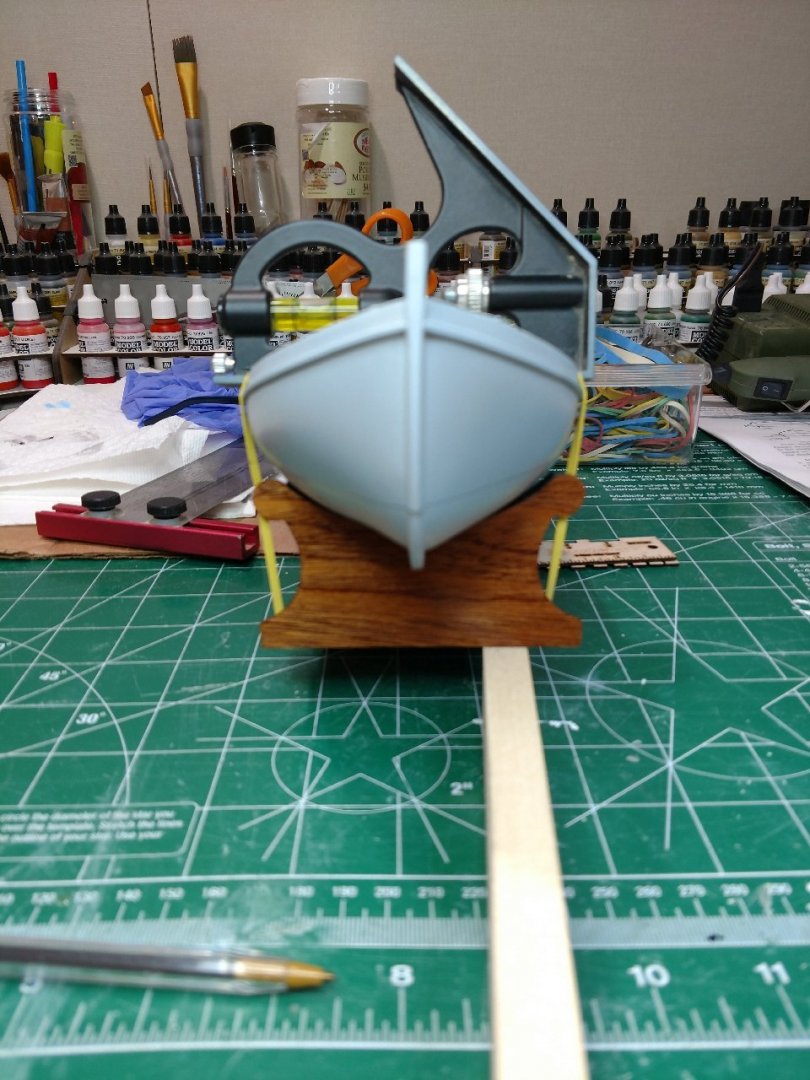
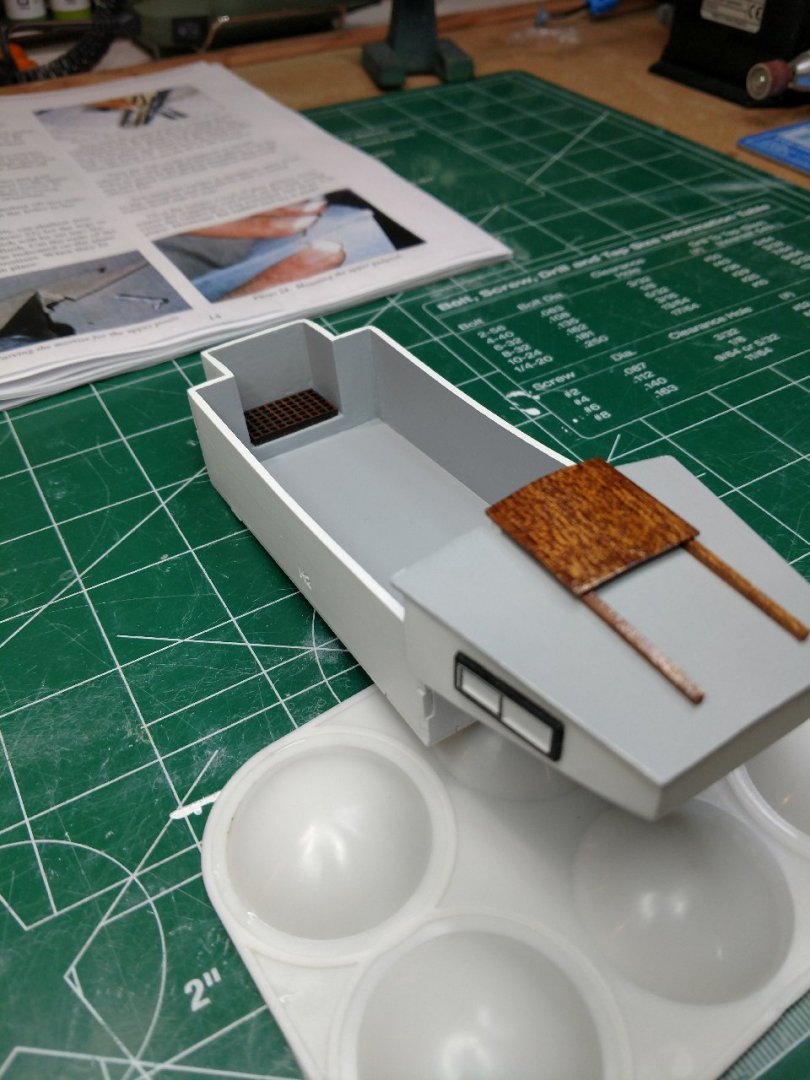
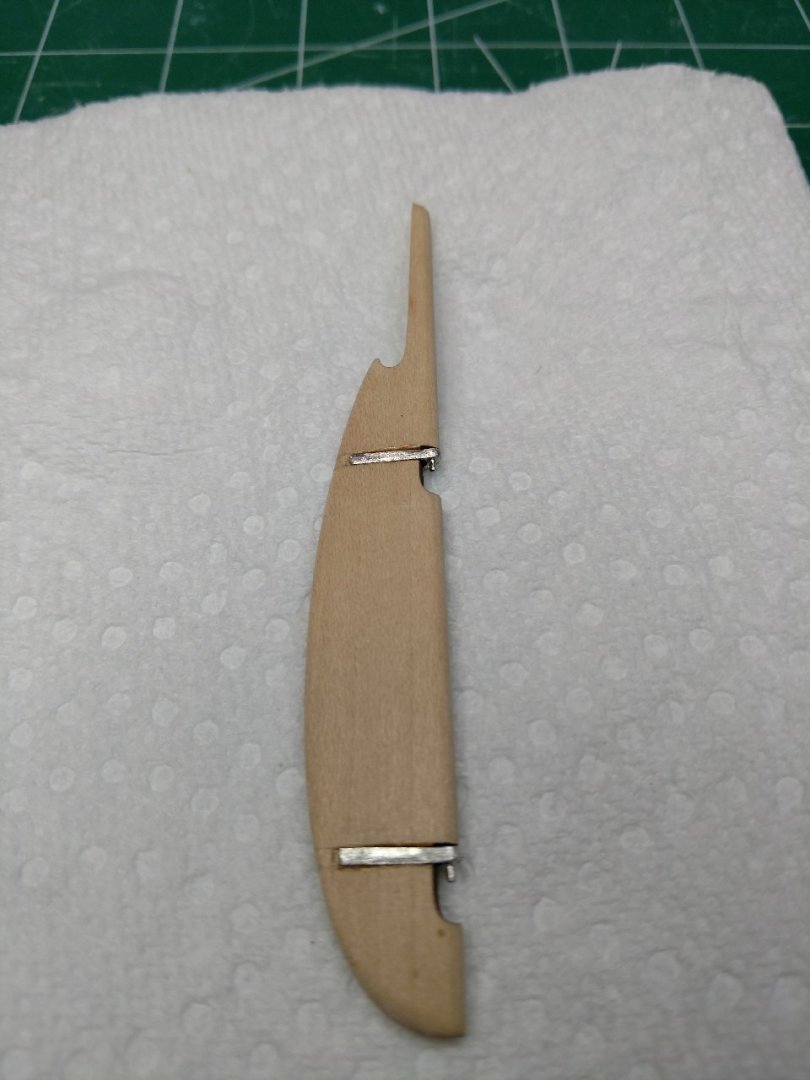
- Fitted the tiller onto the hull. A lot more difficult than I thought, although manageable. It is functional, however not pretty. Hopefully painting the hull (which is next) will hide some mistakes.
Learning a lot through this build to supplement a good foundation to my next build. I hope this helps someone out there.
Peace and be safe.
- GrandpaPhil and hexnut
-
2
-
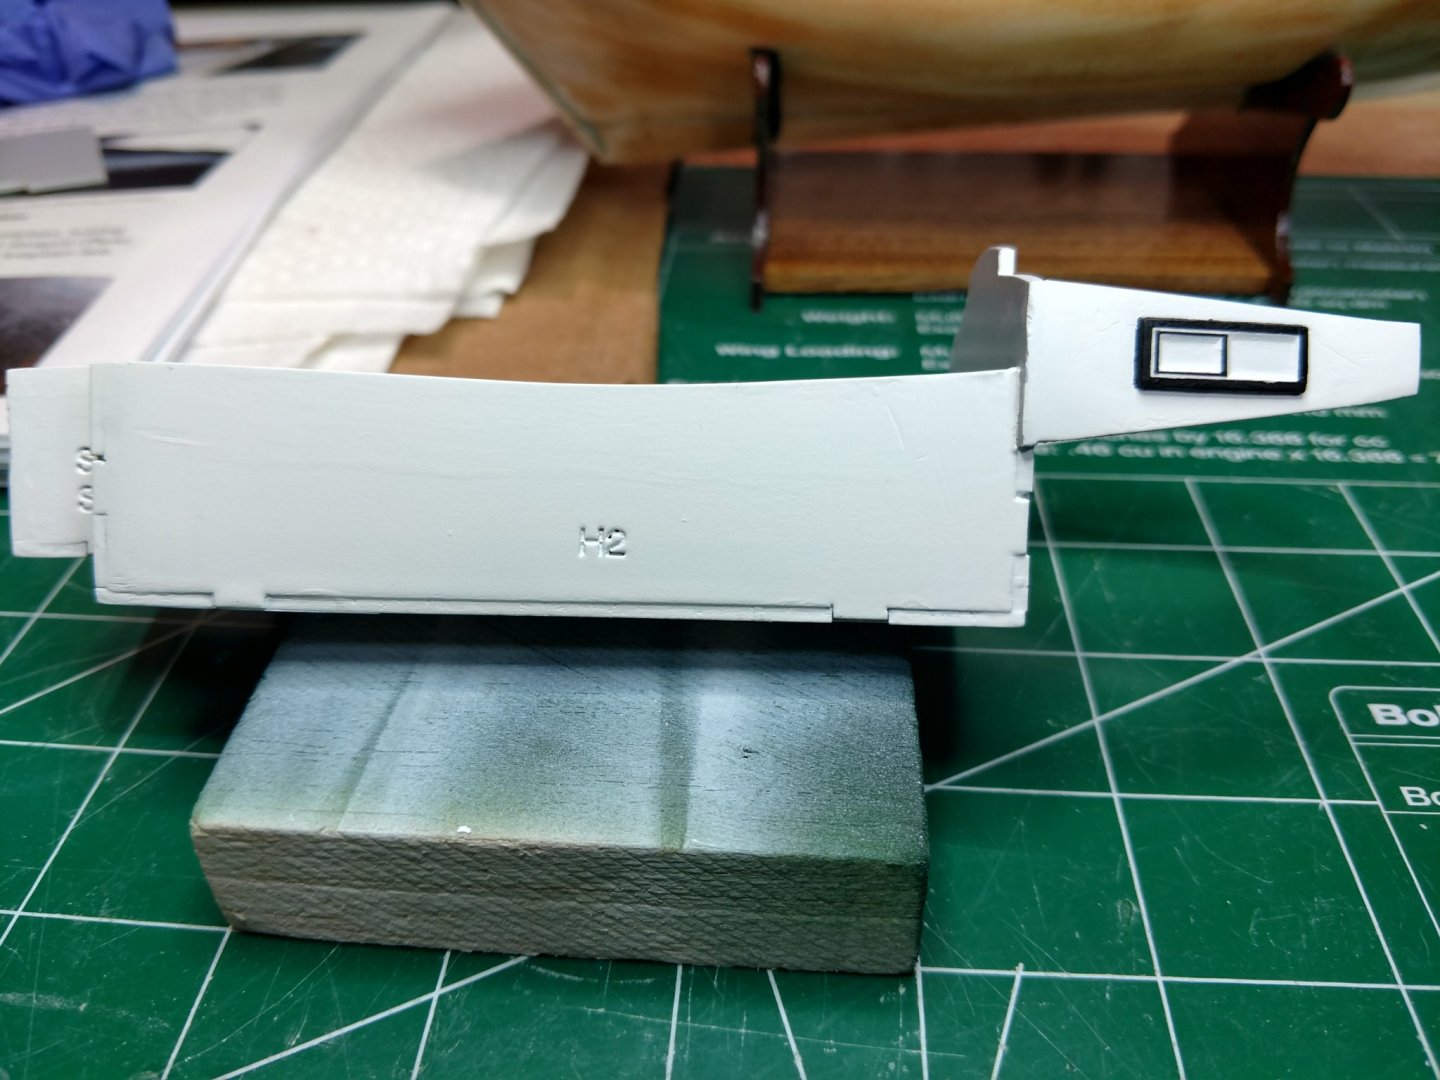
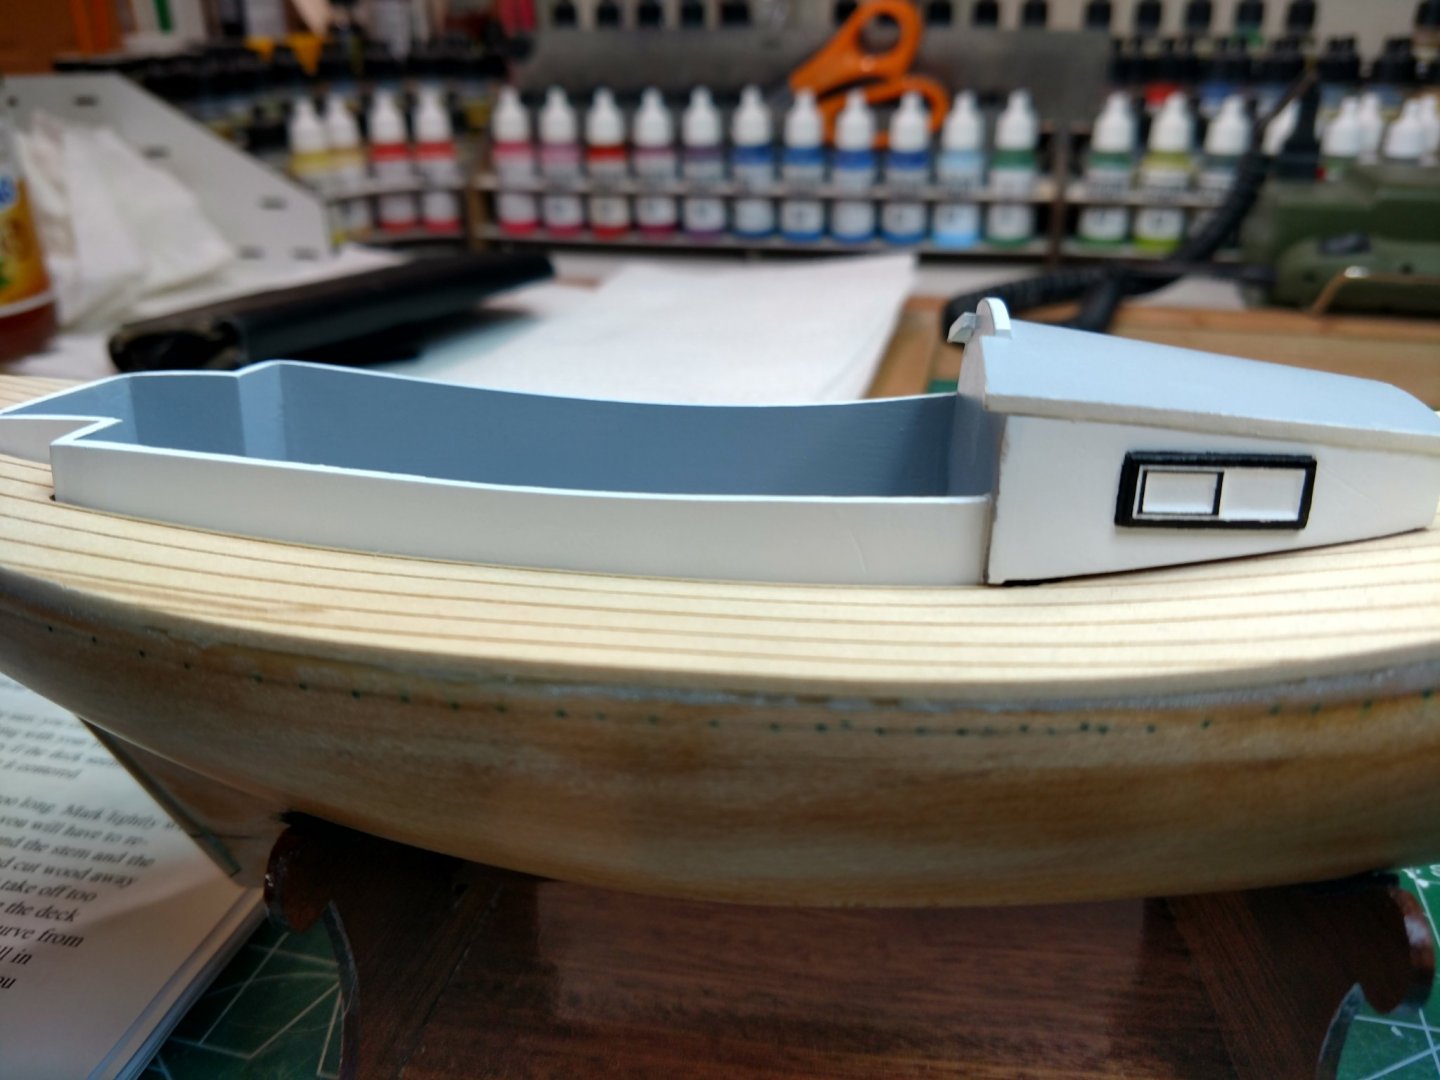
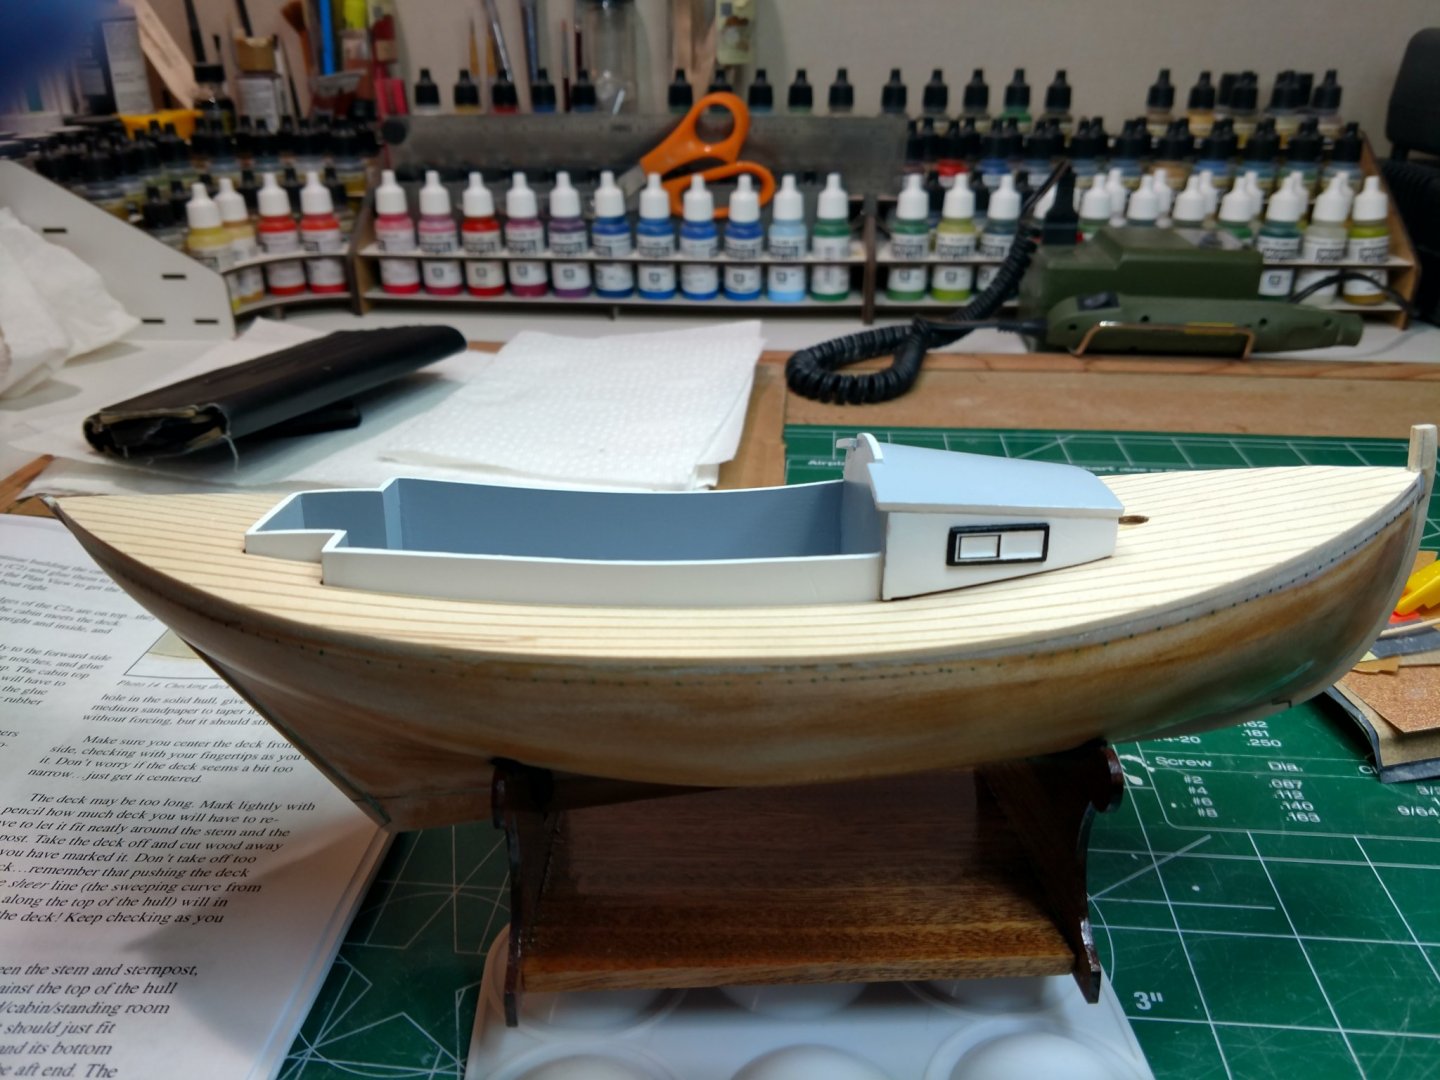
Hello Folks,
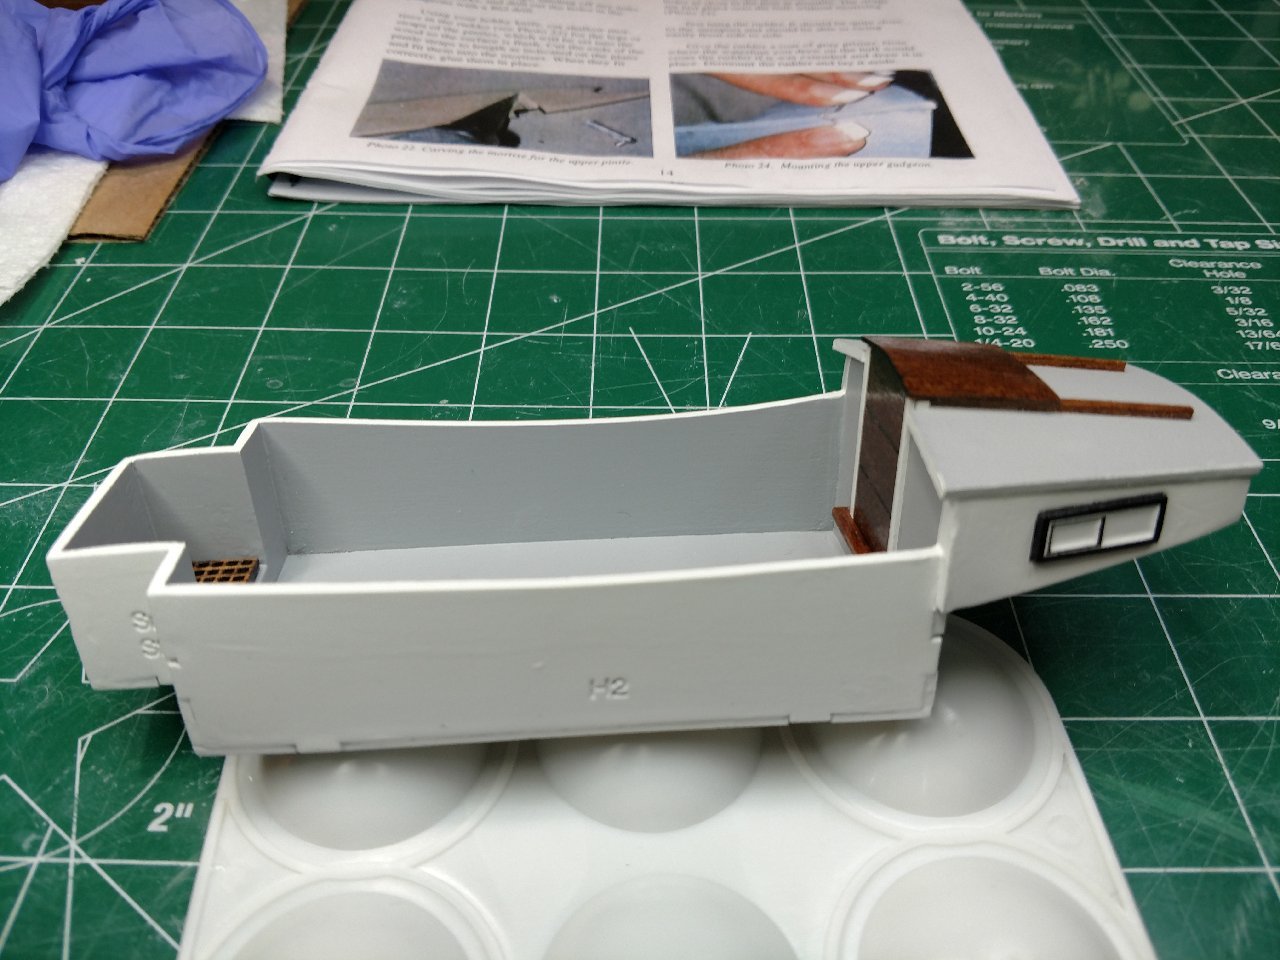
Moving forward with the build, cabin and hold complete. Also began some work on the tiller as well.
- Interesting note though, I messed up on the color of the cabin bulkhead. Accidently painted it gray instead of white, however I rarely go 100% with plans. Looking at it I am pleased for the reason it ads to the detail.
Like previously stated, I will not win any awards for accuracy/authenticity.
Stay safe.
- hexnut, Moab and GrandpaPhil
-
3
-
Thank you, fun build so far. Blue Jacket does a nice job with this kit.
-
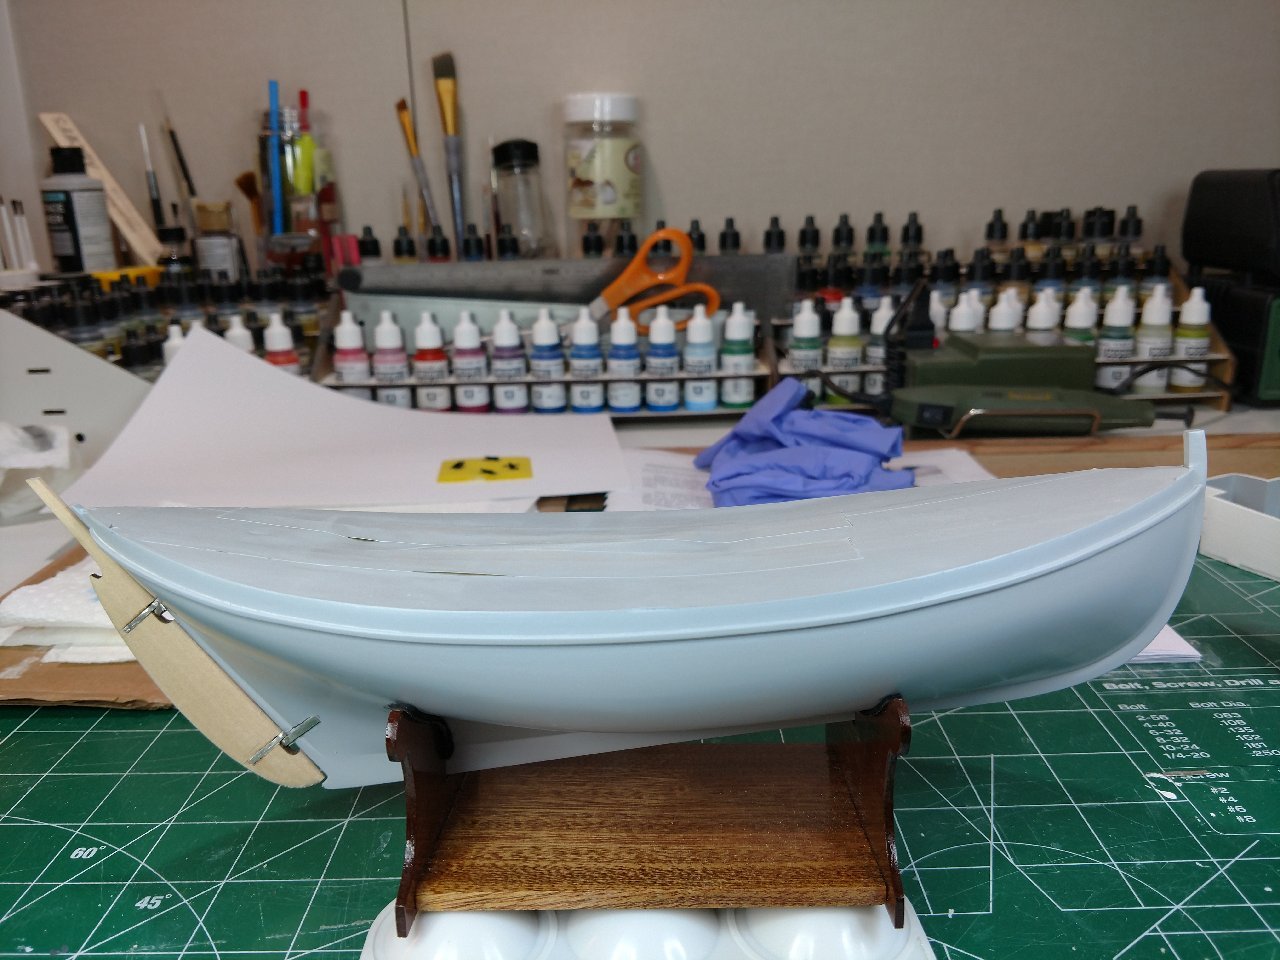
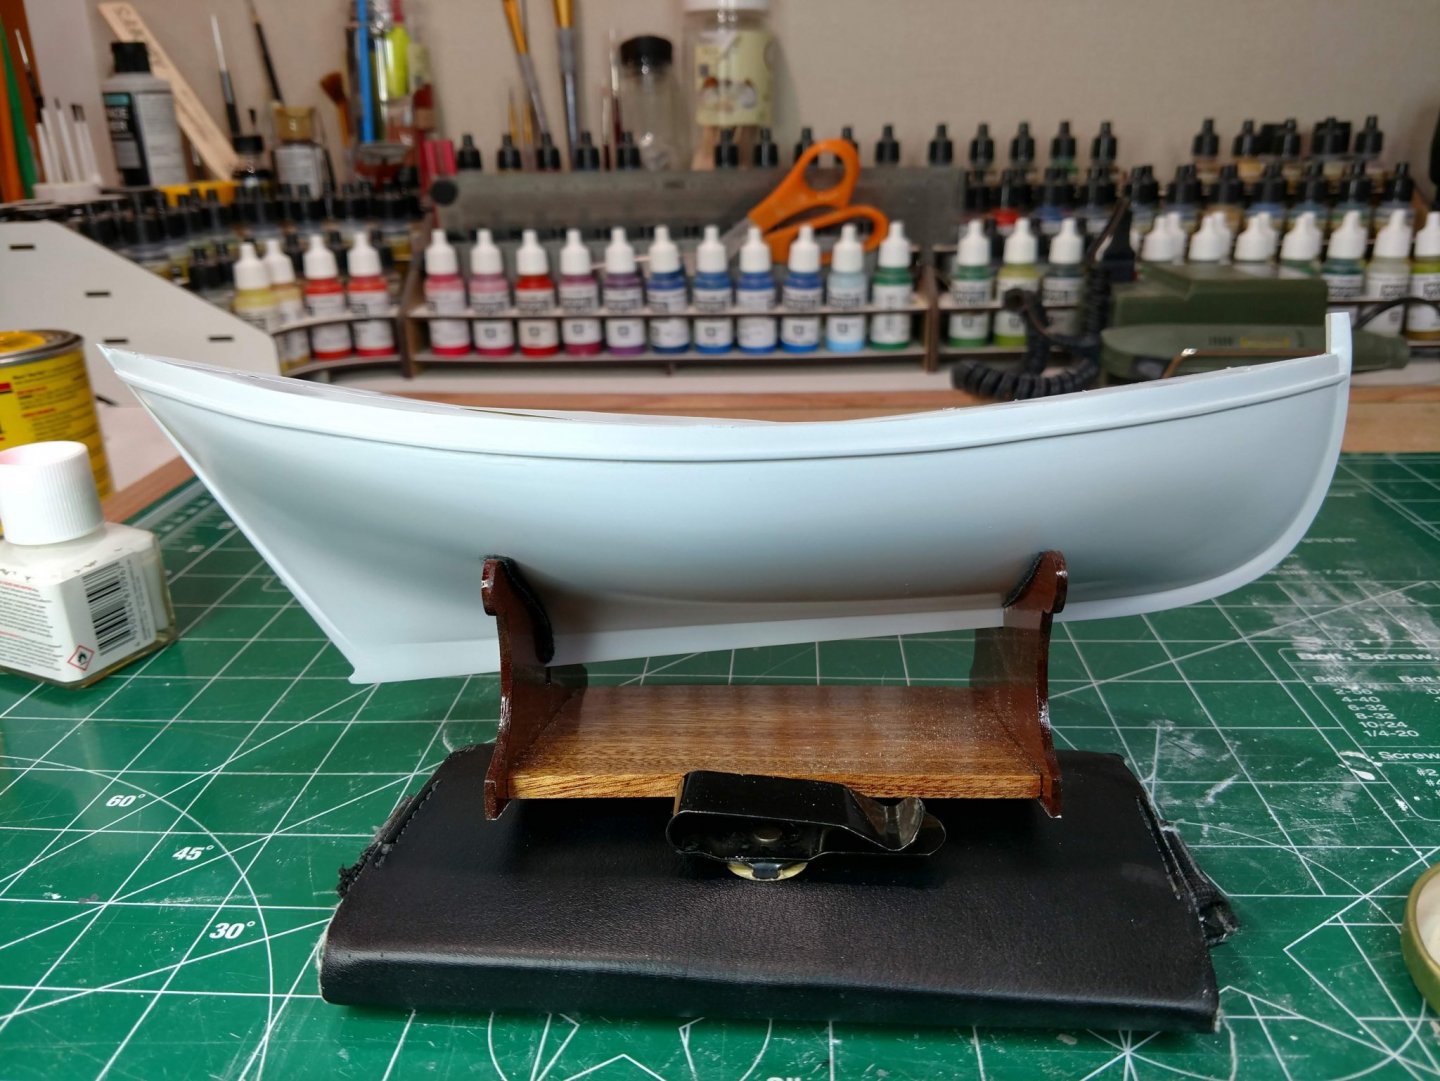
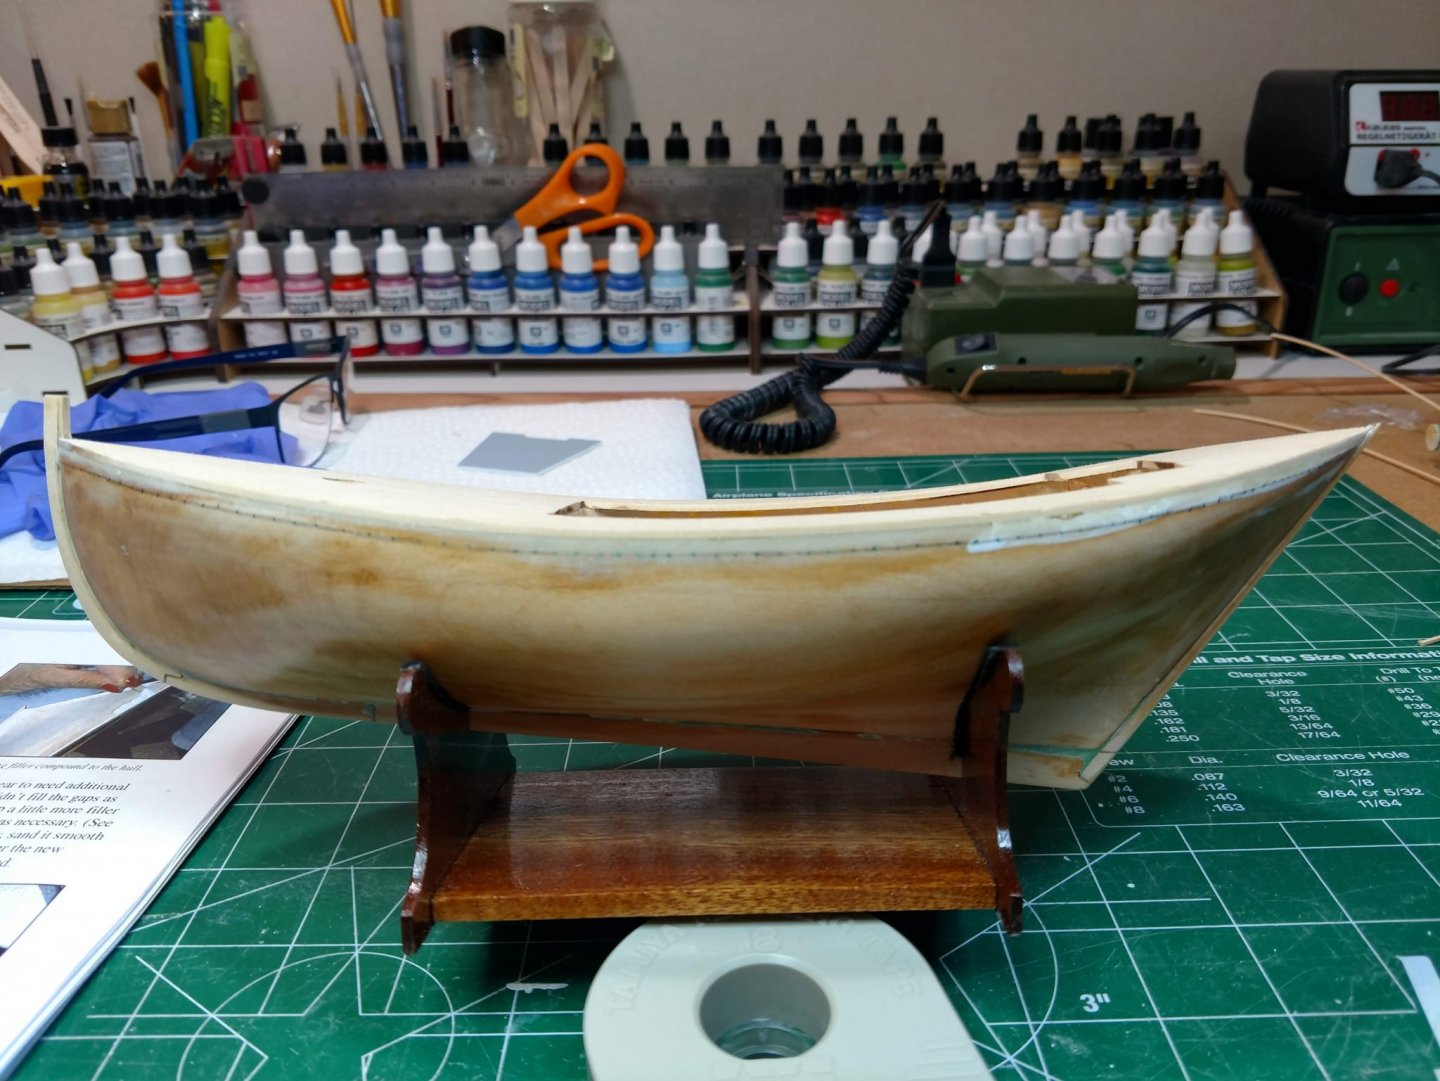
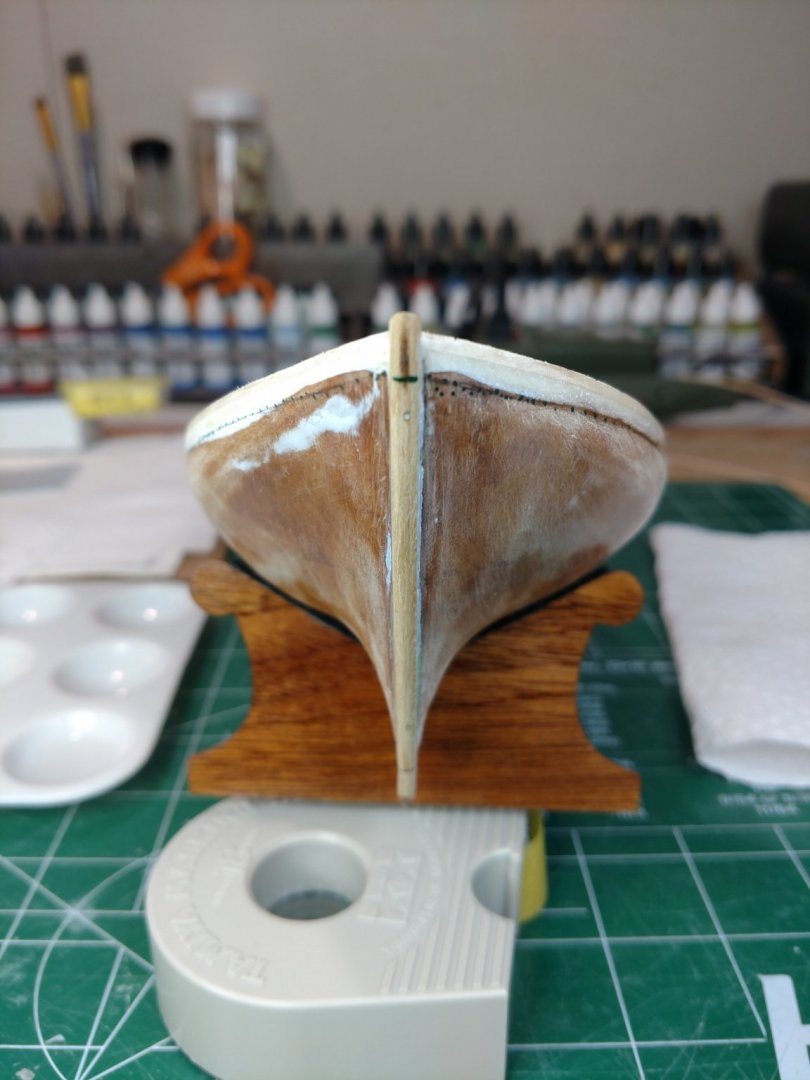
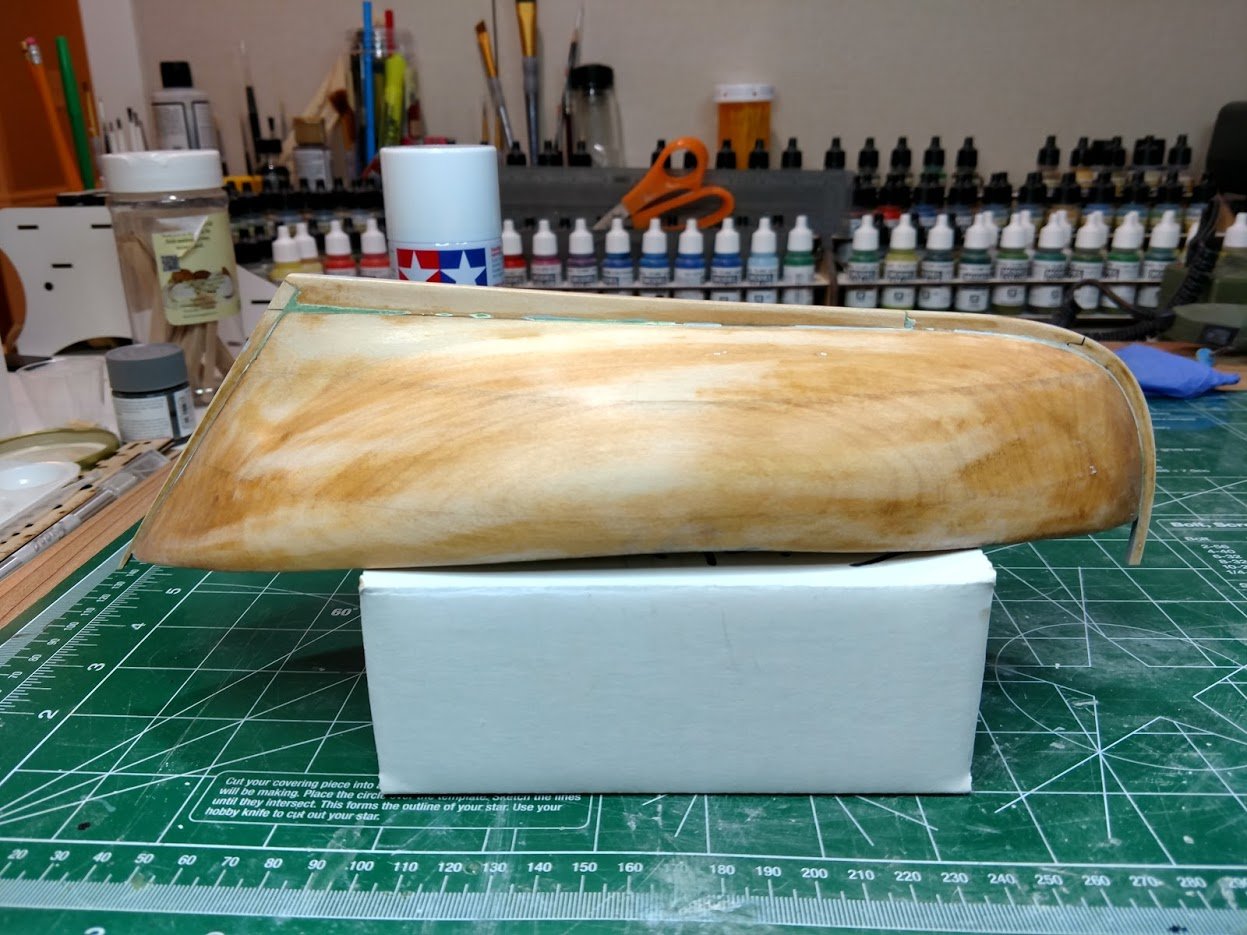
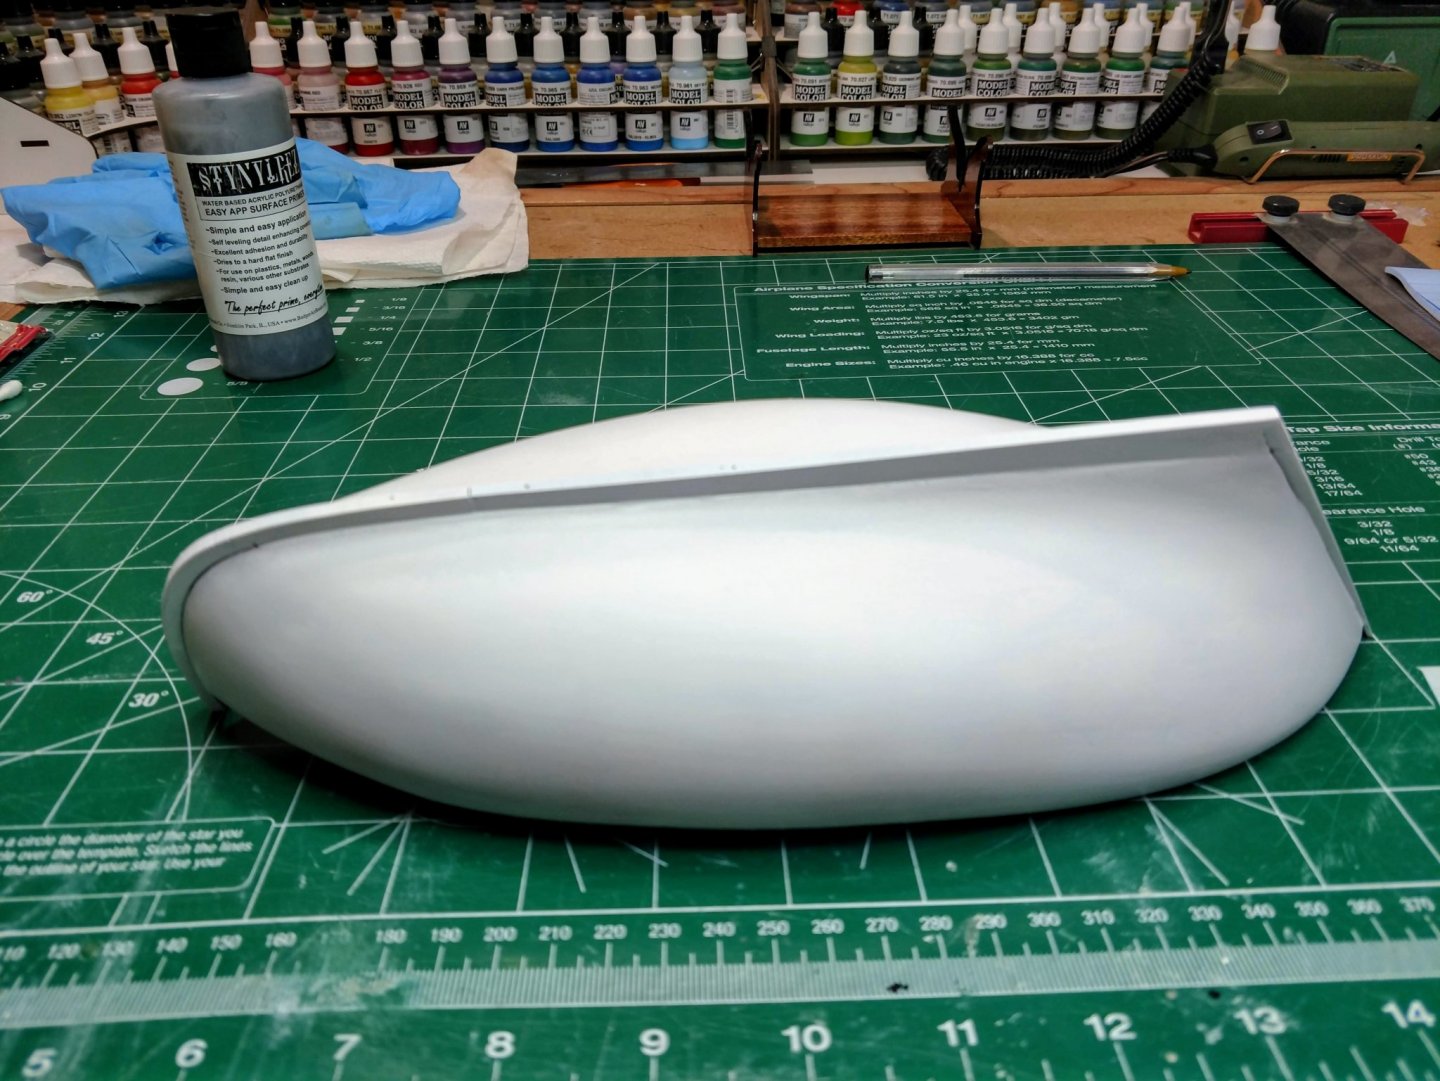
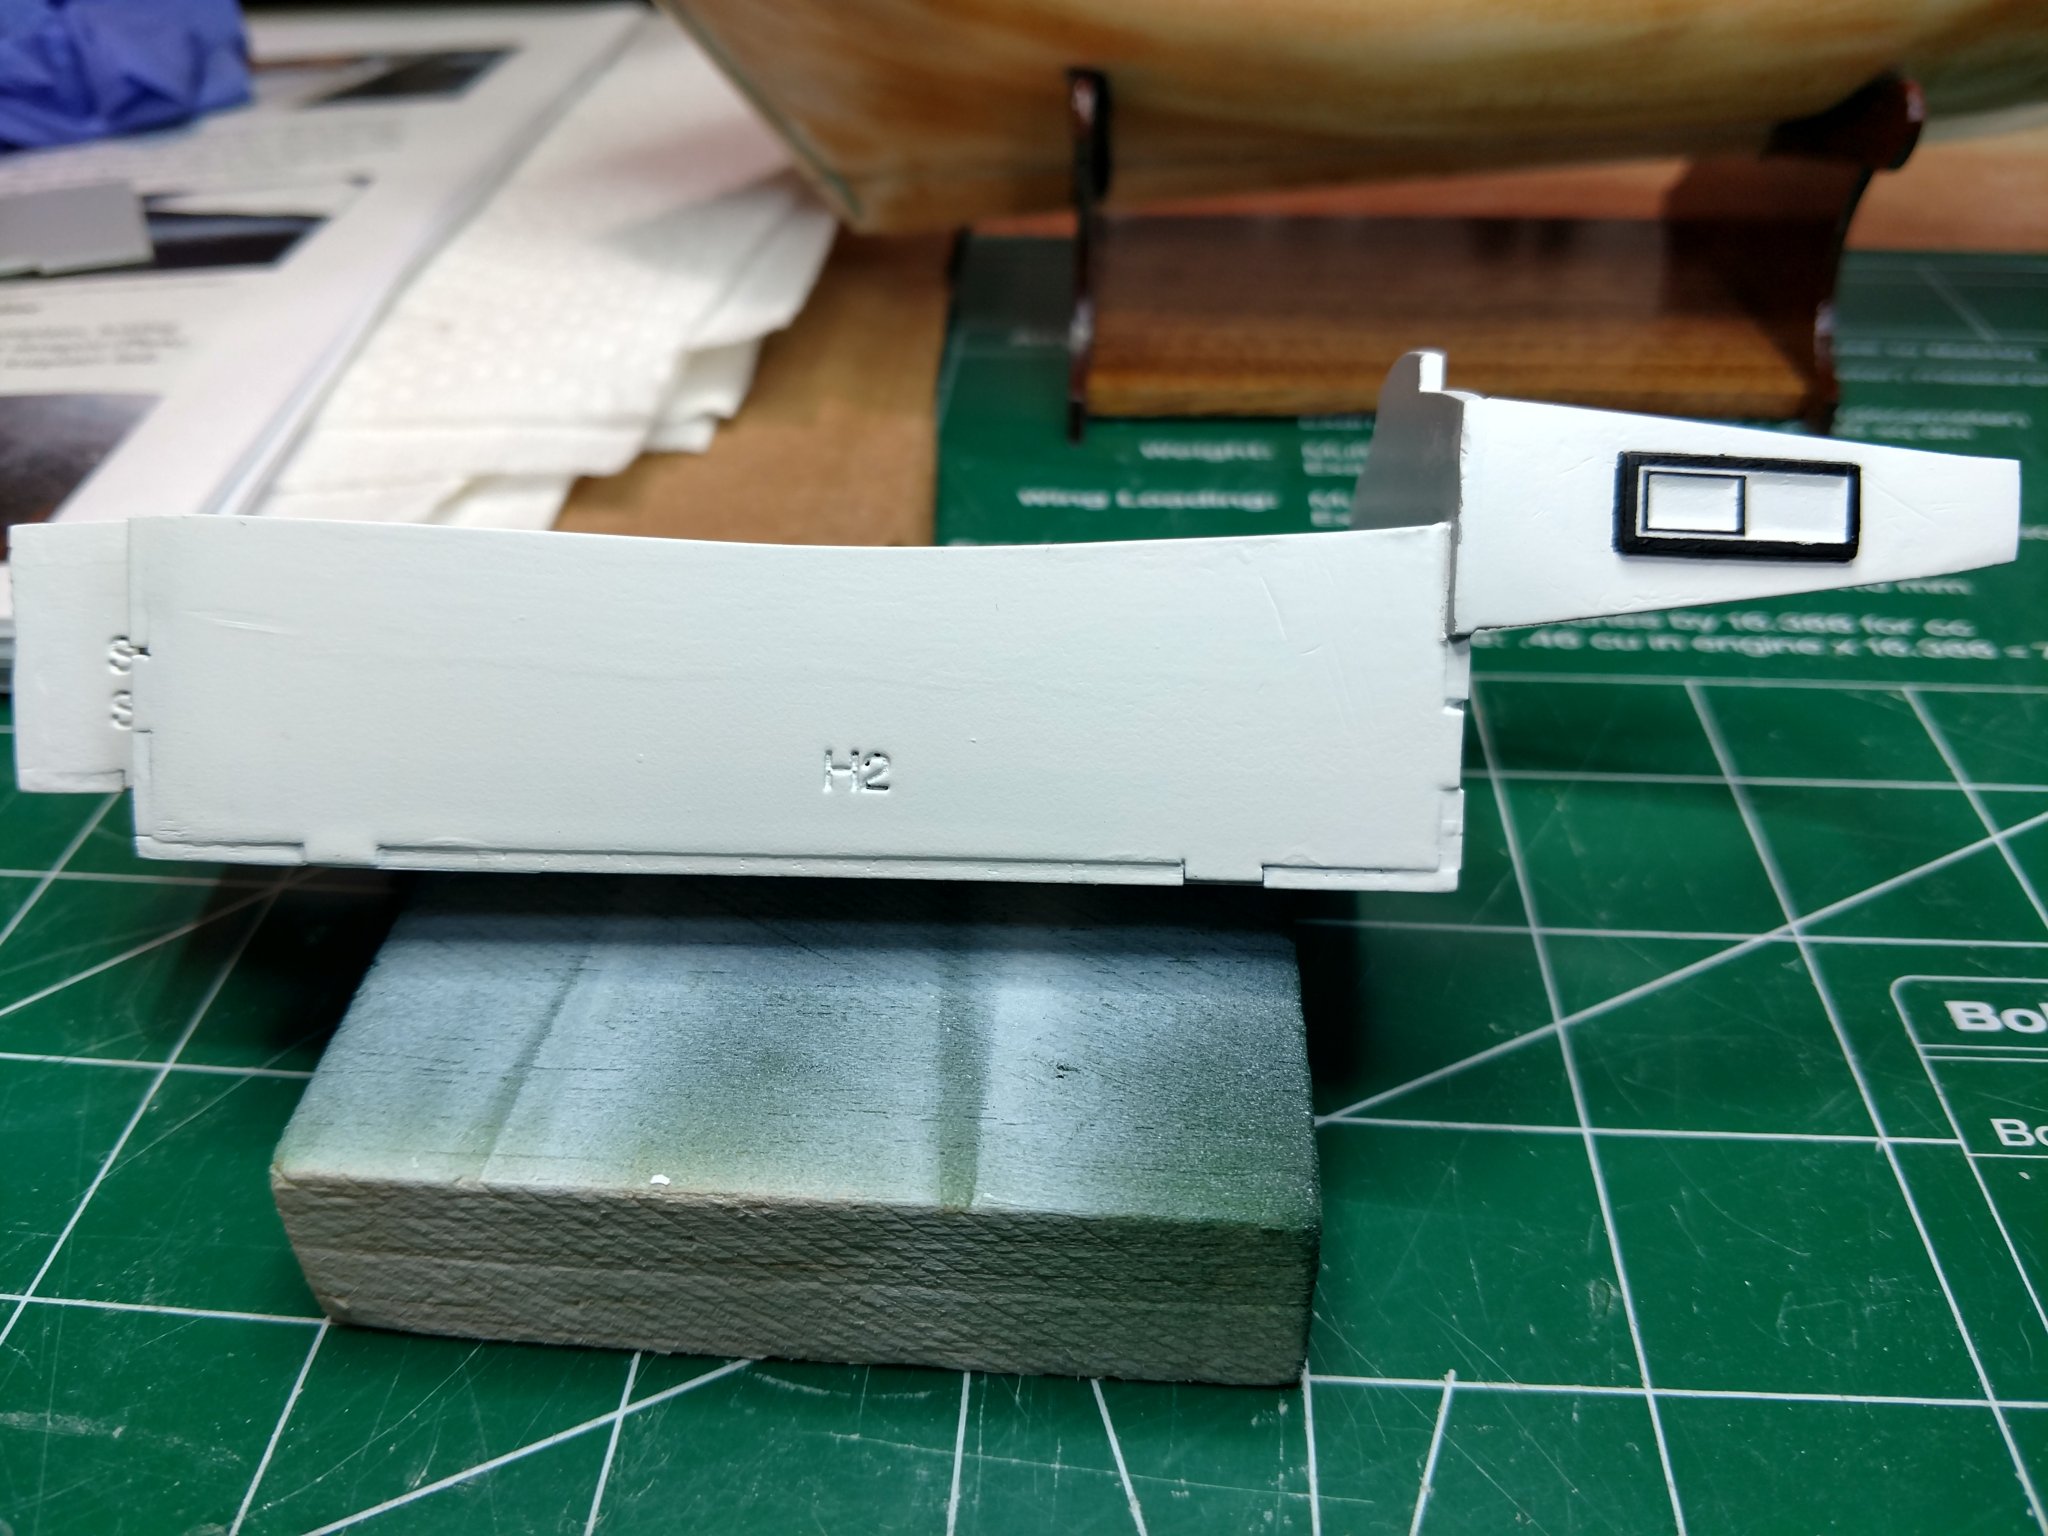
Hello Folks,
Finally the hull is complete:
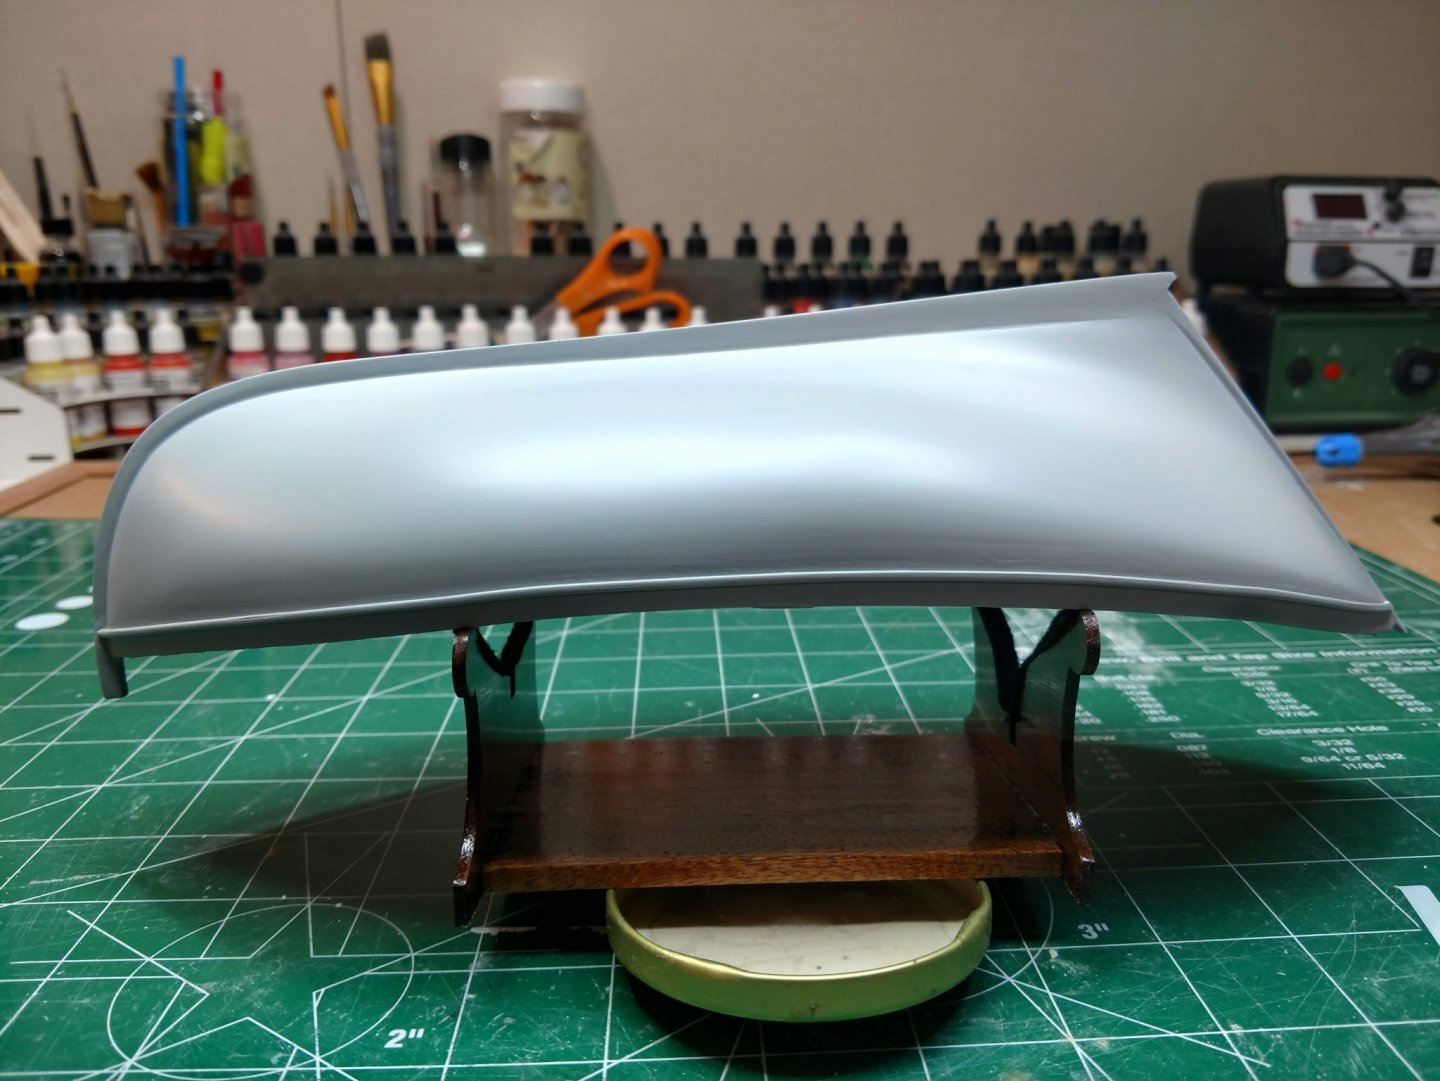
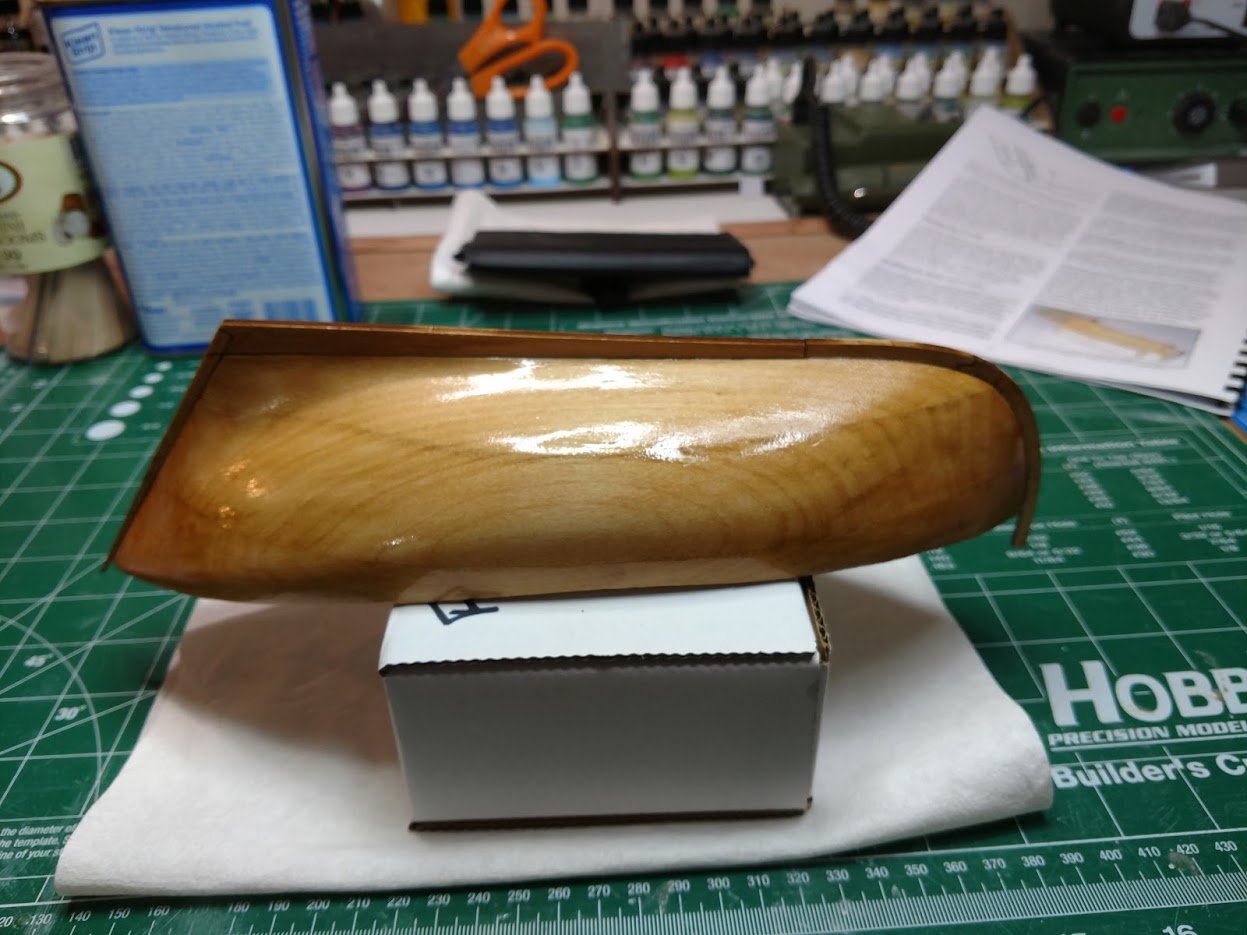
- About 4 weeks of work (embarrassing to say a little). However a great learning experience, pleasing results. Very happy with the lines. Lots of sanding! Very few dents do to hardening the hull with finishing resin.
- I affixed the strake prior to my final priming, used Tamiya white priming for my first two coats, and Tamiya grey for my two final coats.
Next steps:
- Detail the Hold with remaining parts
- Complete the tiller assembly detail w/o fixing it to the hull yet (Paint, Waterline, and Hardware (Hardware will be painted Cannon black to ad detail))
- Identify the waterline
- Paint the Hull.
Until then, be safe folks.
- hexnut, GrandpaPhil and bolin
-
3
-
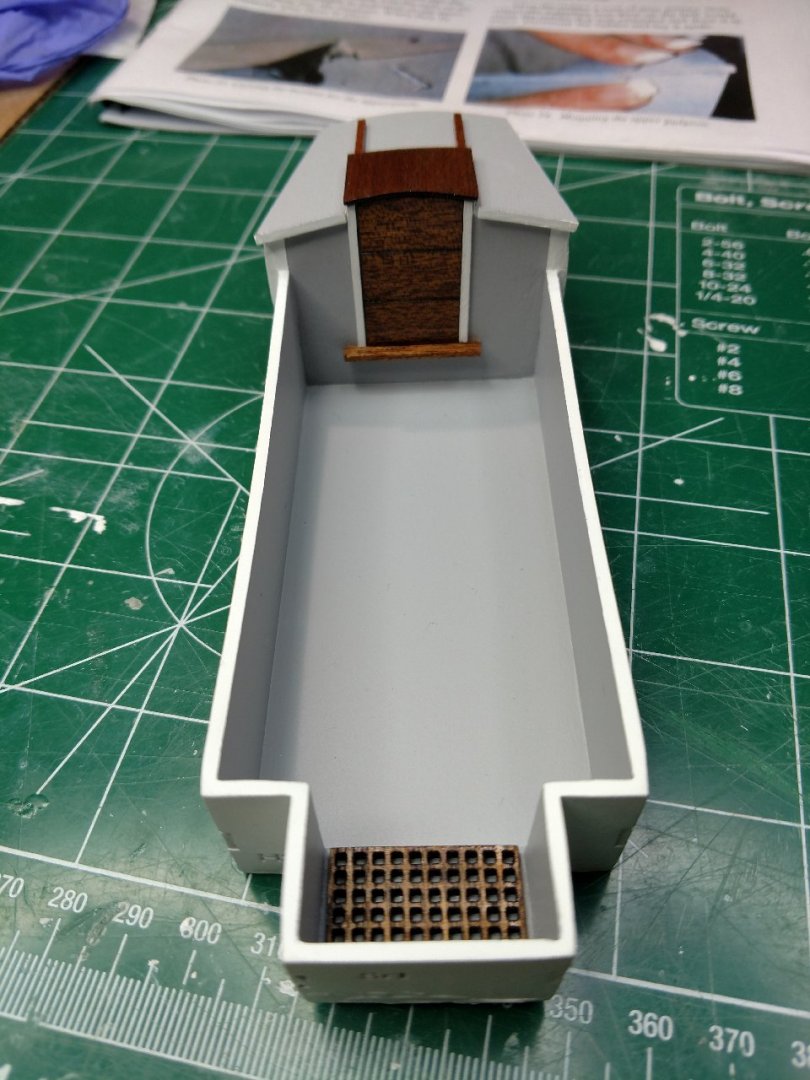
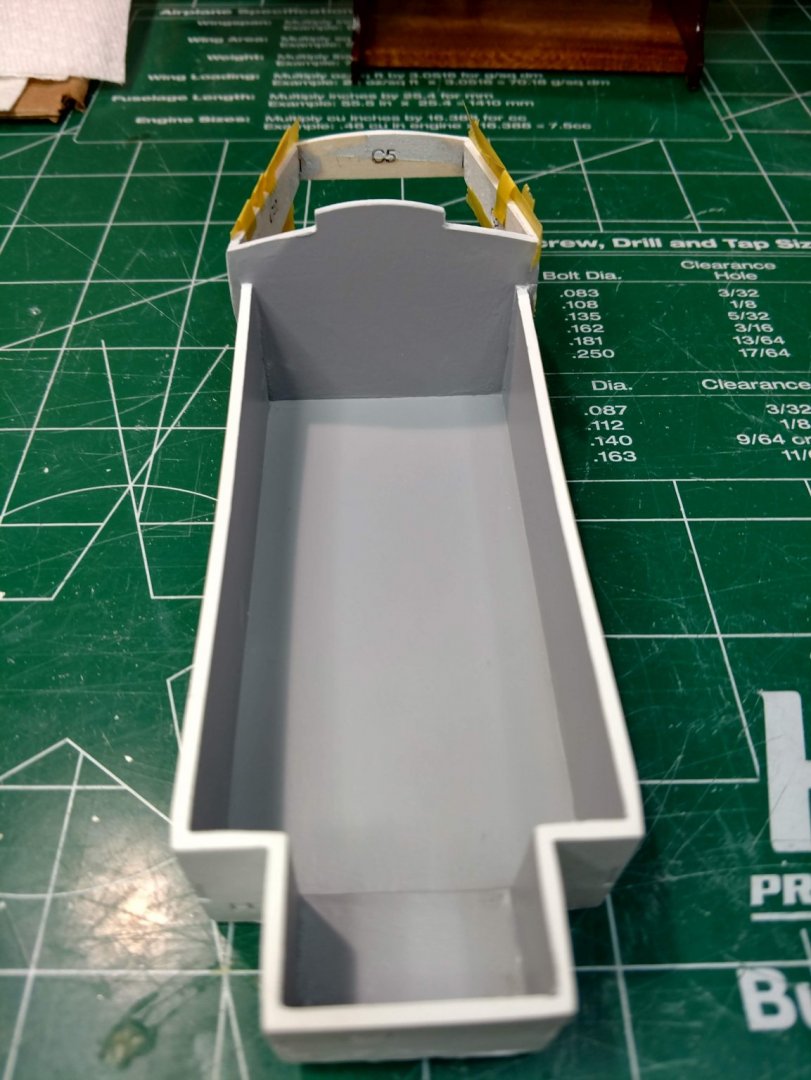
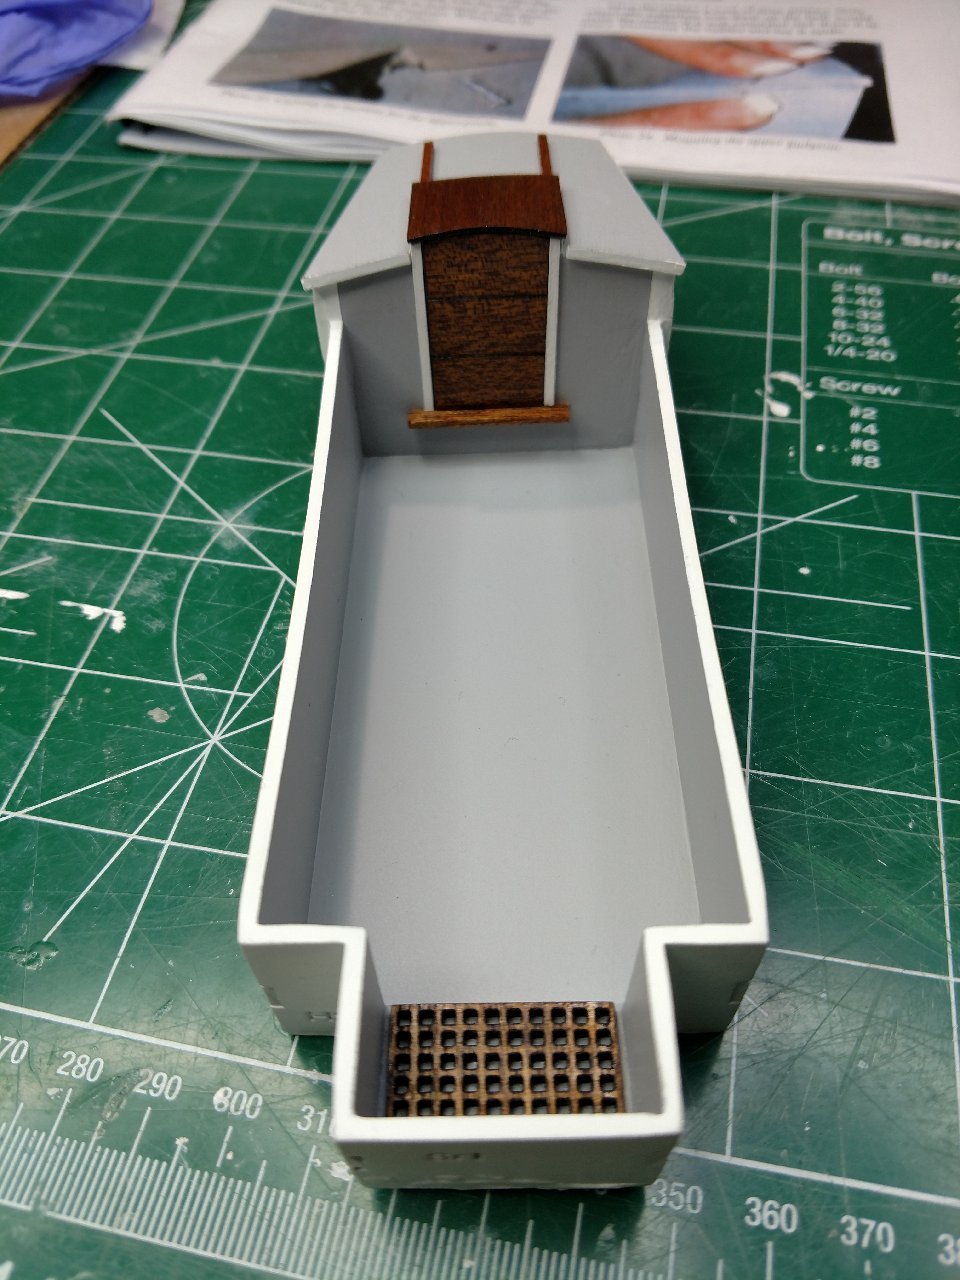
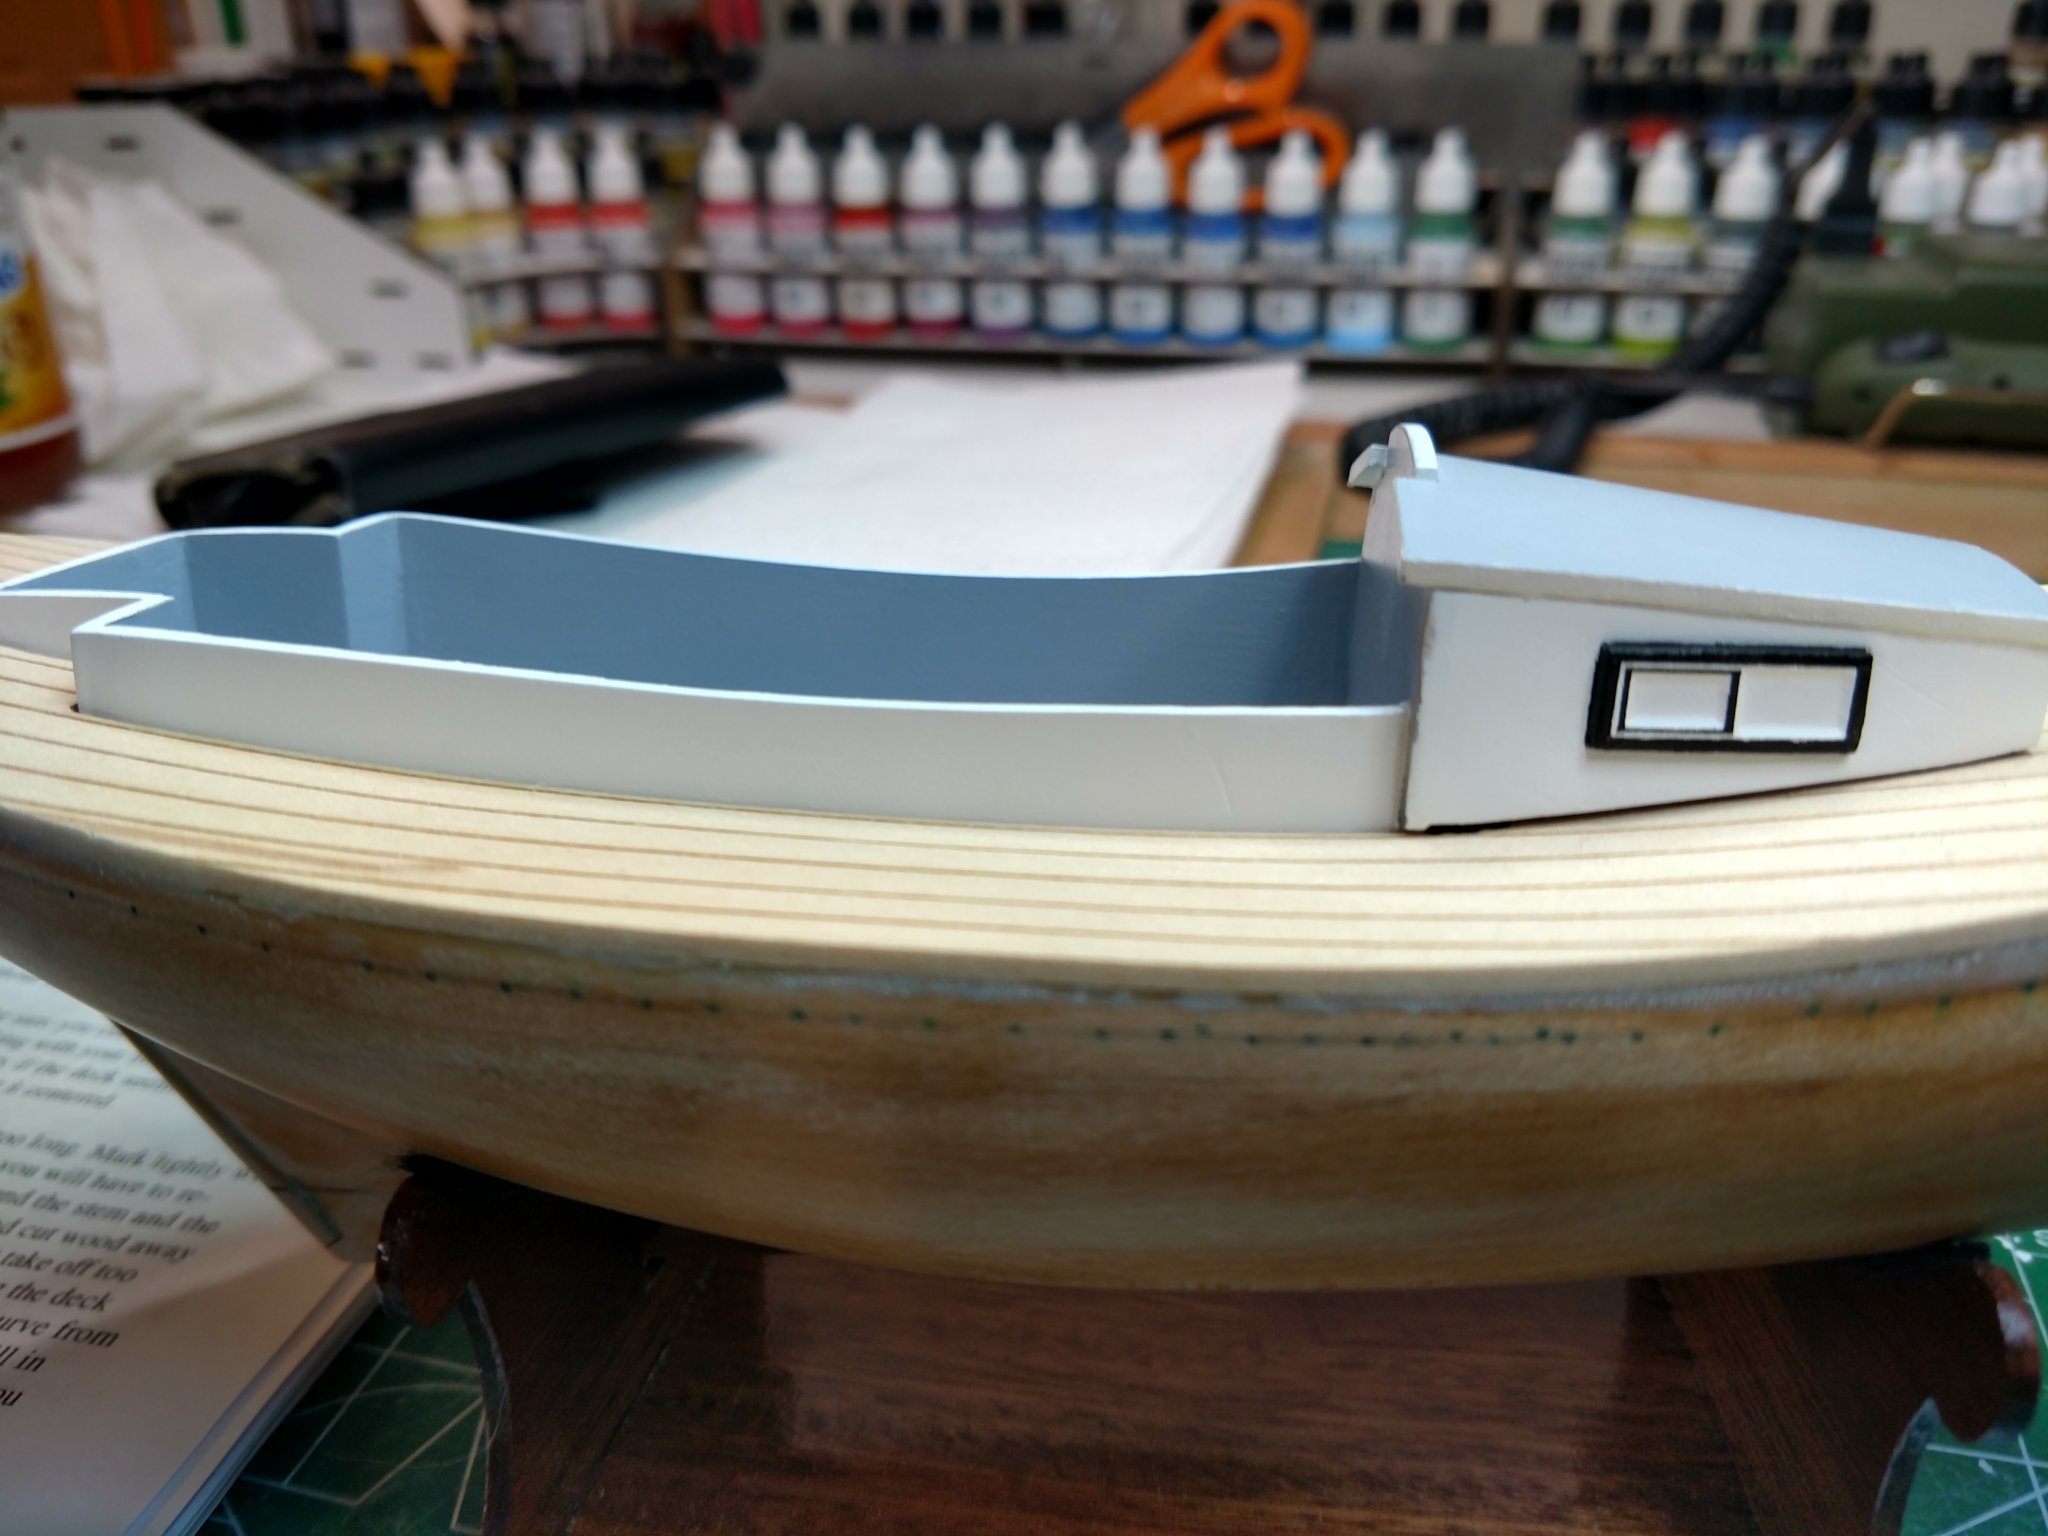
Hello Folks,
The hold is now complete and dry fitted into the hull, pretty satisfied with build so far. I will also spray the entire Hold with Flat Clear to be chip resistant.
Next step add the Strake and then onto one final (I hope) priming. I will be using all Tamiya Acrylics for the hull. Colors will be Gray (primer), hull will be sprayed Dark Green above the waterline, Hull Red below the waterline and Flat White for the water line.
Stay Safe All !
- LEXLOMA, GrandpaPhil and hexnut
-
3
-
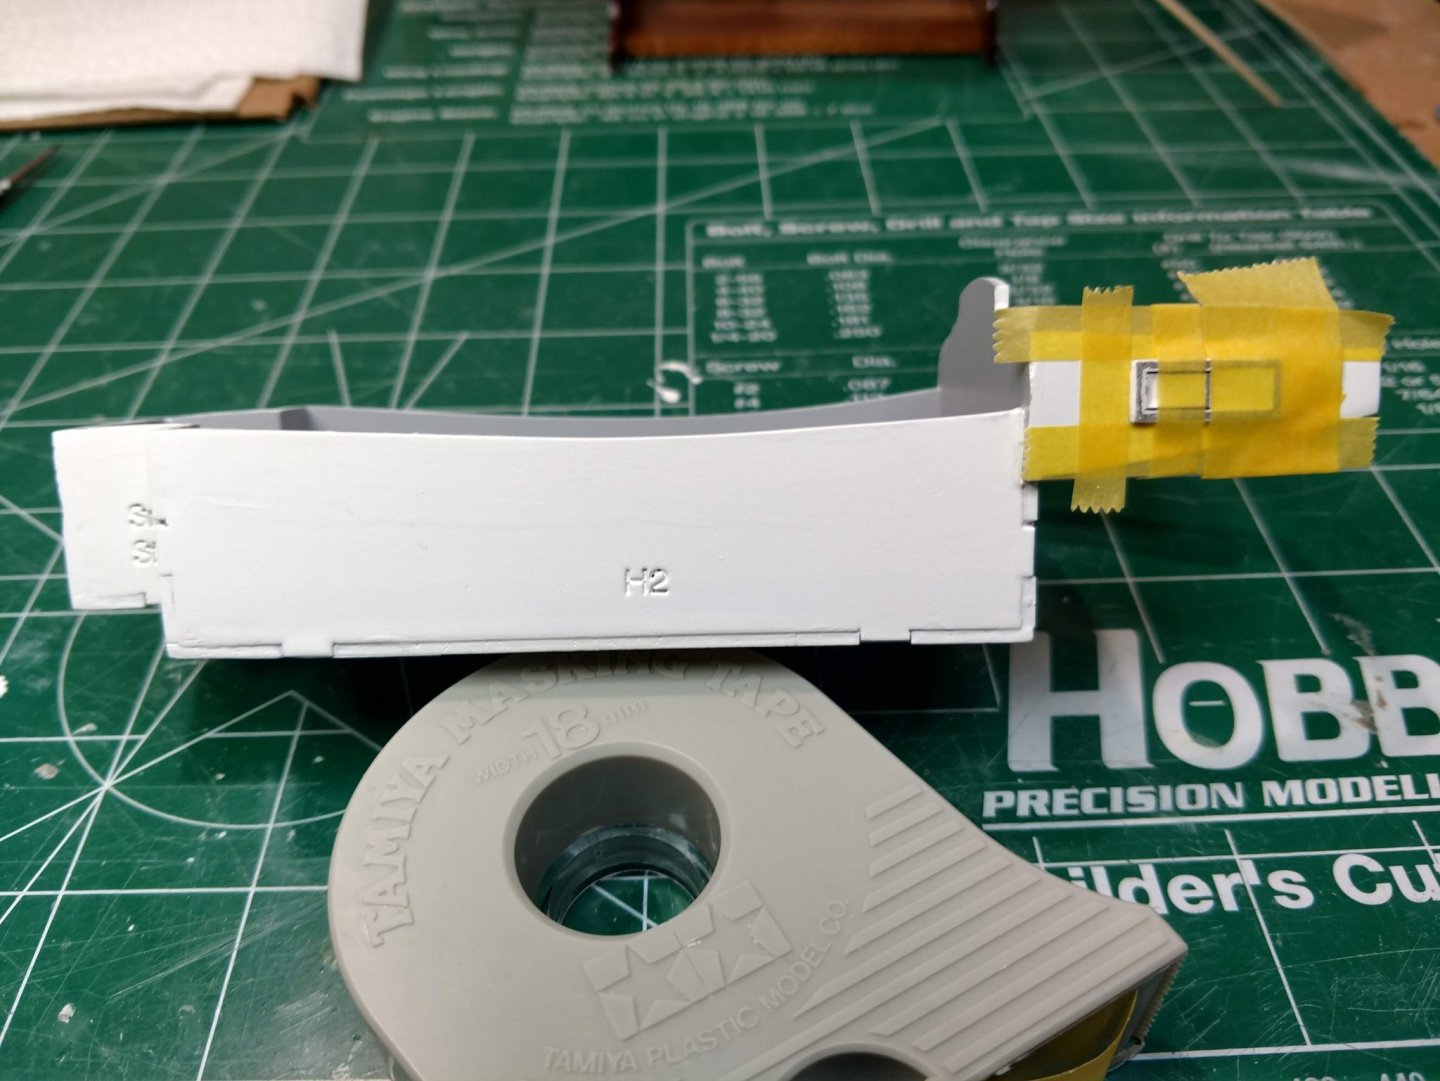
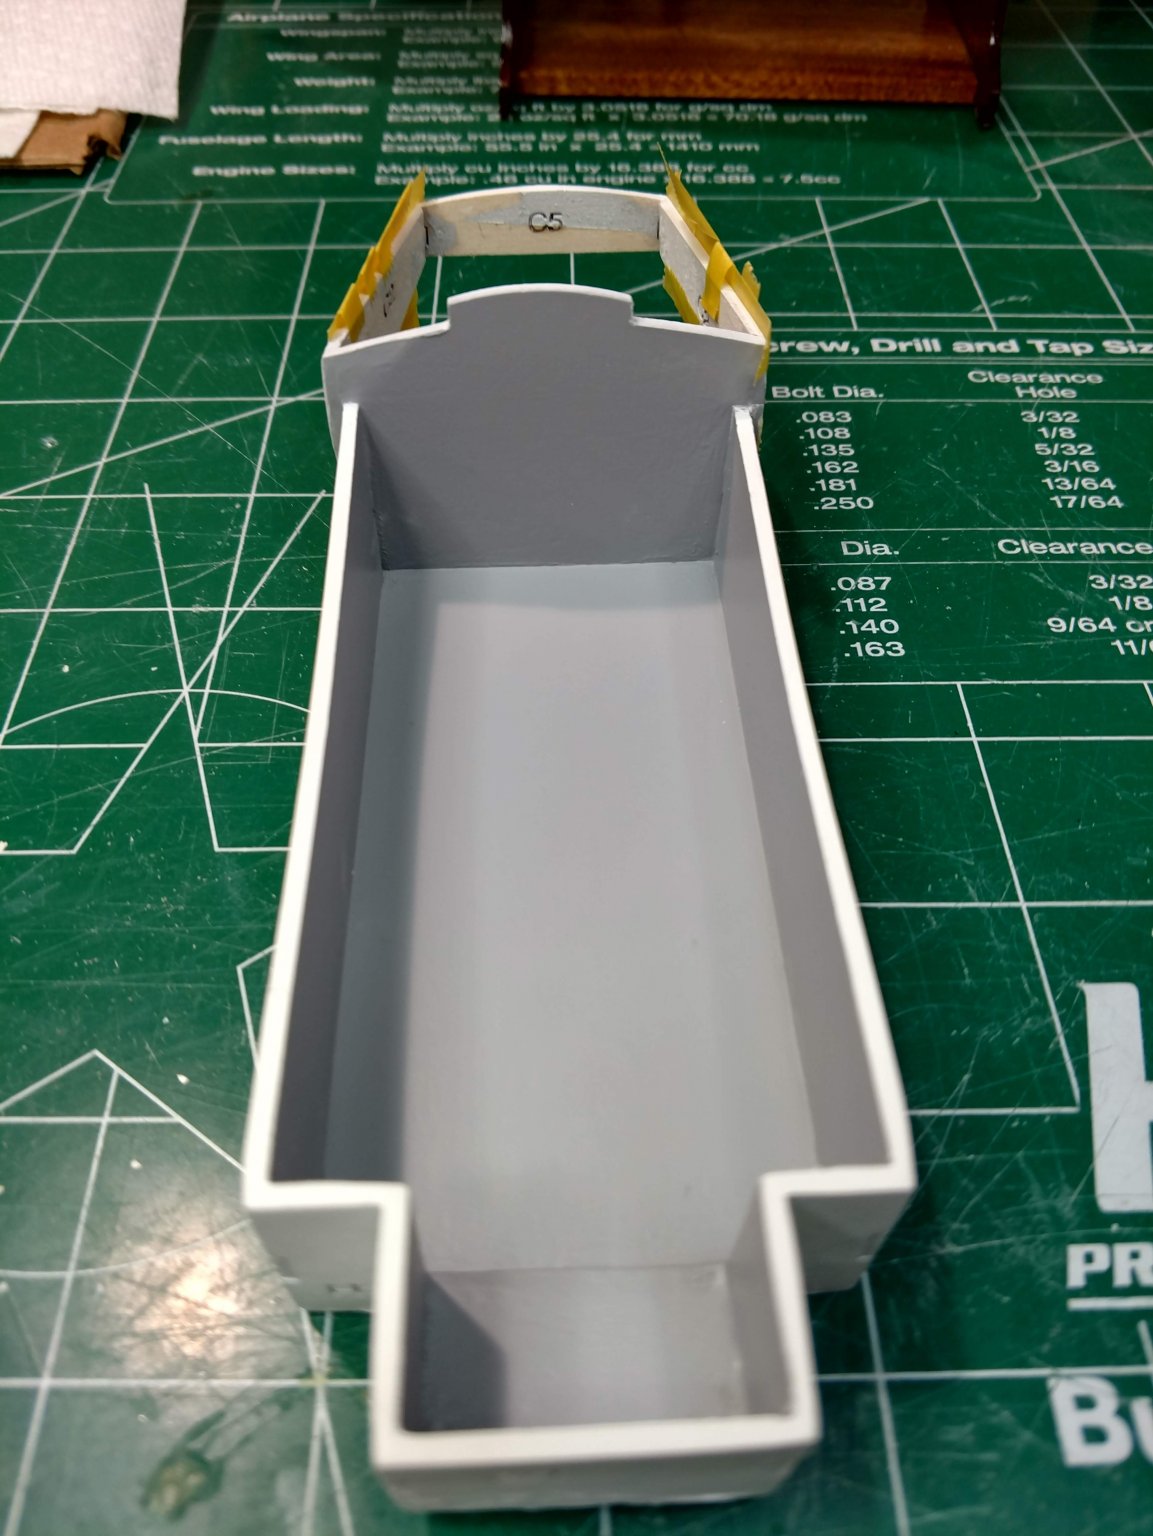
Hello Folks,
Being in New York and having being relegated to working from the house this is a good hobby to be involved with. For those not in the New York area, and listening to all the news and reports it is concerning however the communities are following the rules set forth. Just trying to smart. On the bright side the Yankee Hero is getting a lot of attention and moving along quickly. This is my latest update, mundane however establishing a solid foundation for the build. Now the summary:
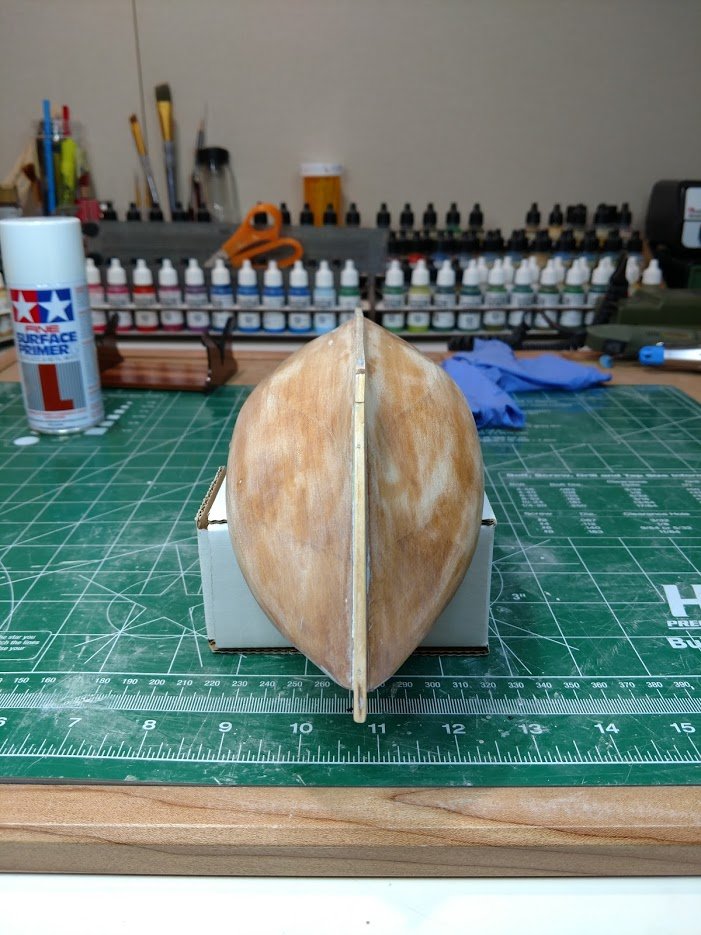
Hull almost ready for priming:
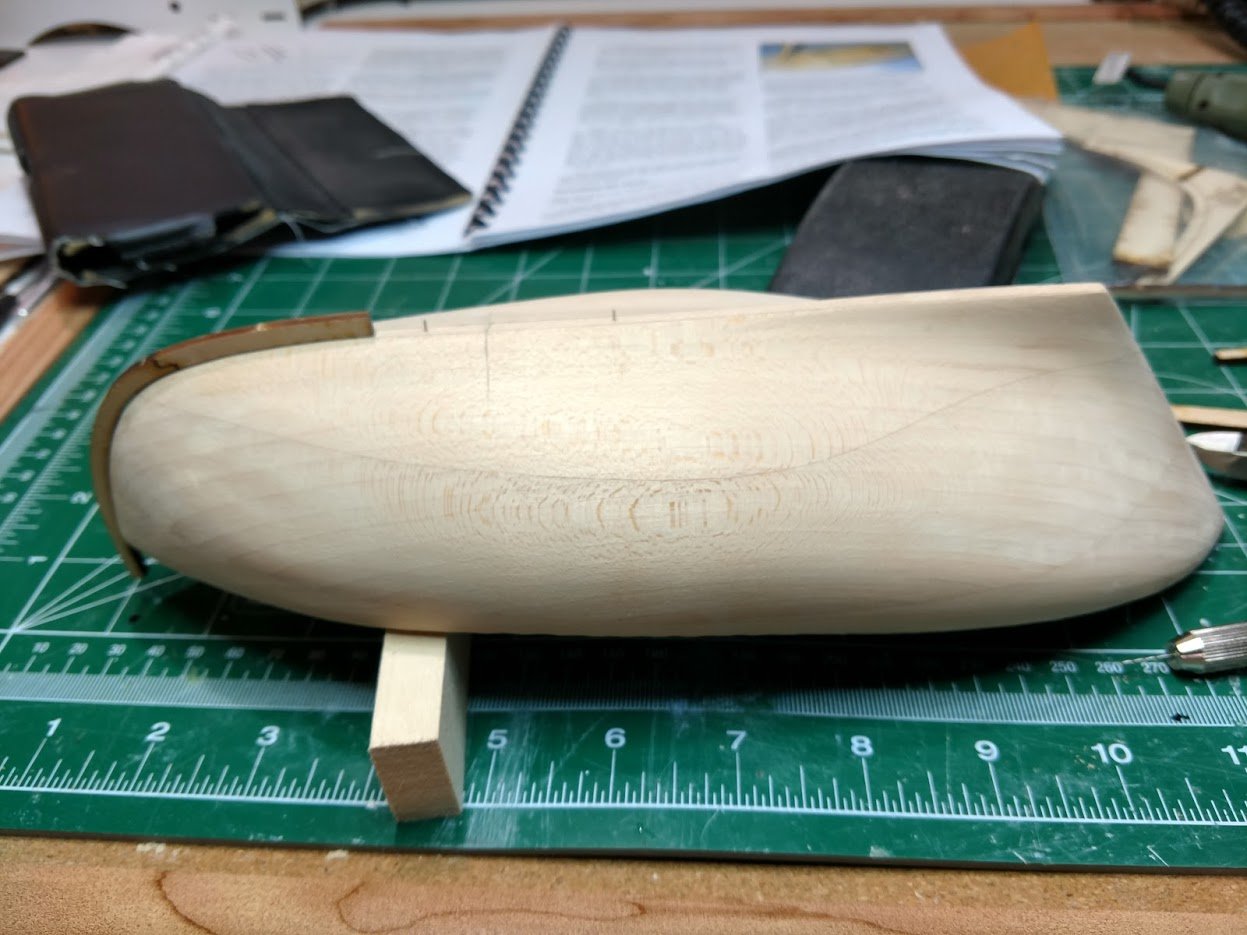
- Deck affixed to hull, putty in place and sanded smooth, green lines represent guidance for Strake to be placed on Hull prior to priming. Very satisfied so far. Hardening the wood with finishing resin was key. NO DENTS!
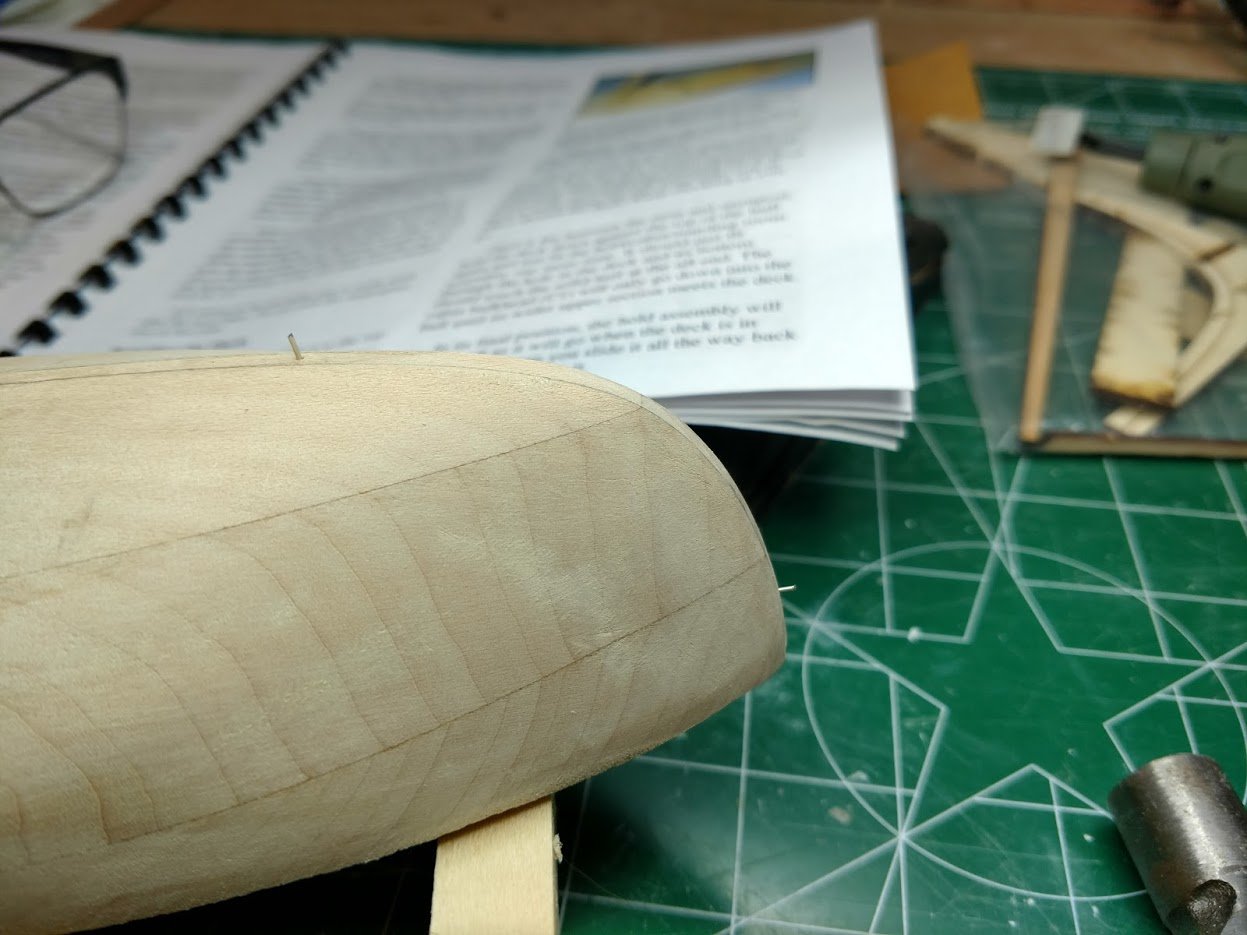
- Sternpost rounded prior to priming.
- Stem beveled as per instructions.
Inside Hold completed and dry fitted already into hull, a process little more tricky than anticipated. Lots of painting, putty and sanding here.
Currently detailing the cabin window still incomplete however, I normally stray on little things like this to bring attention to parts of the boat. All white didn't appeal to me. I will not win any awards for perfect replication.
Stay safe out there friends!

- GrandpaPhil, hexnut and ccoyle
-
3
-
Hello Folks,
More updates:
Placed the deck onto the solid hull, not pretty however effective. Will now assemble the hold and the cabin. I will need to trim down the "Hold" cavity and the deck (oversized), nothing that the dremel can't handle. Next is more filler, sanding for the hull.

- GrandpaPhil and hexnut
-
2
-
Hello Folks,
More updates:
Sanded the hull and re-puttied it twice, happy with it finally.
Also spray painted the inside and outside the hold & cabin. I realize once I assemble the hold and cabin I will need to paint the trim. I try to paint prior to assembly as much as possible.
- LEXLOMA, hexnut and GrandpaPhil
-
3
-
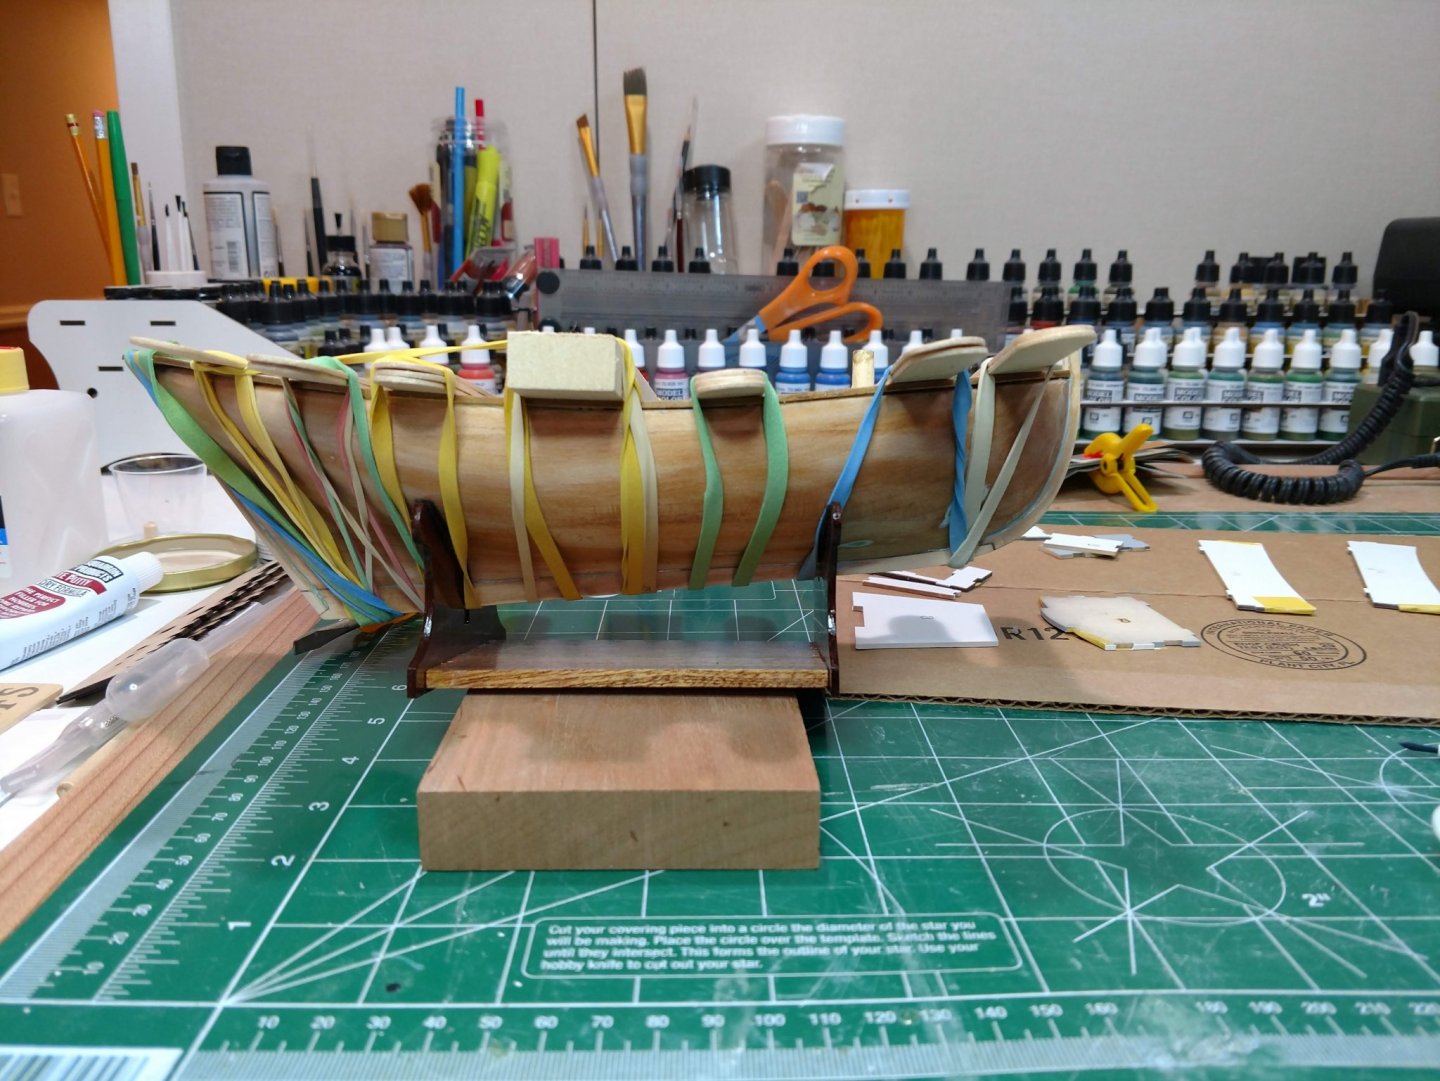
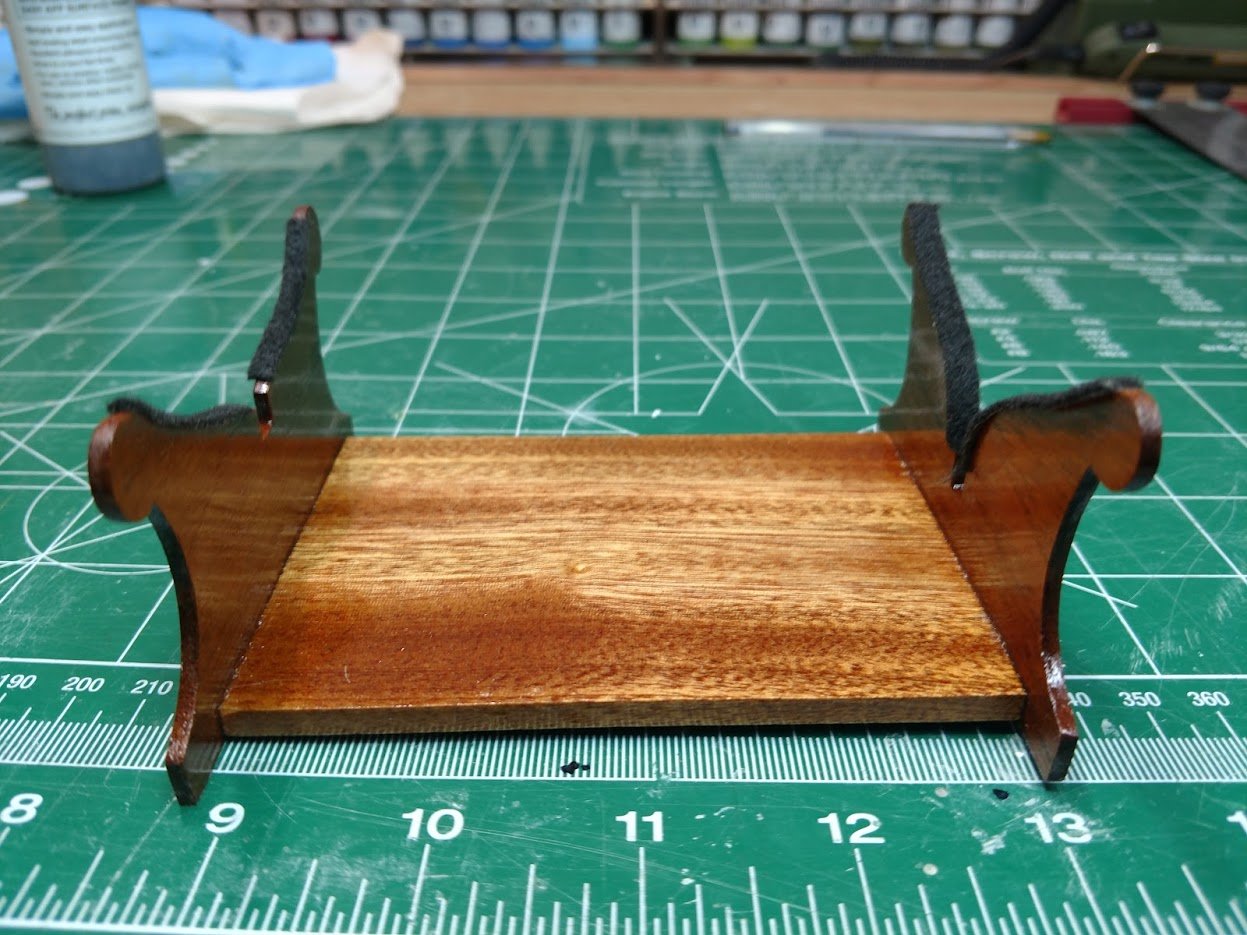
Hello Folks,
Some updates:
- Stand complete, sanded, stained, sanded again, assembled, and finally felt added to protect the hull for further construction.
- Primed the hull with Tamiya Primer (spray, yes I am lazy).
- Then applied Squadron putty.
- Moab, GrandpaPhil and hexnut
-
3
-
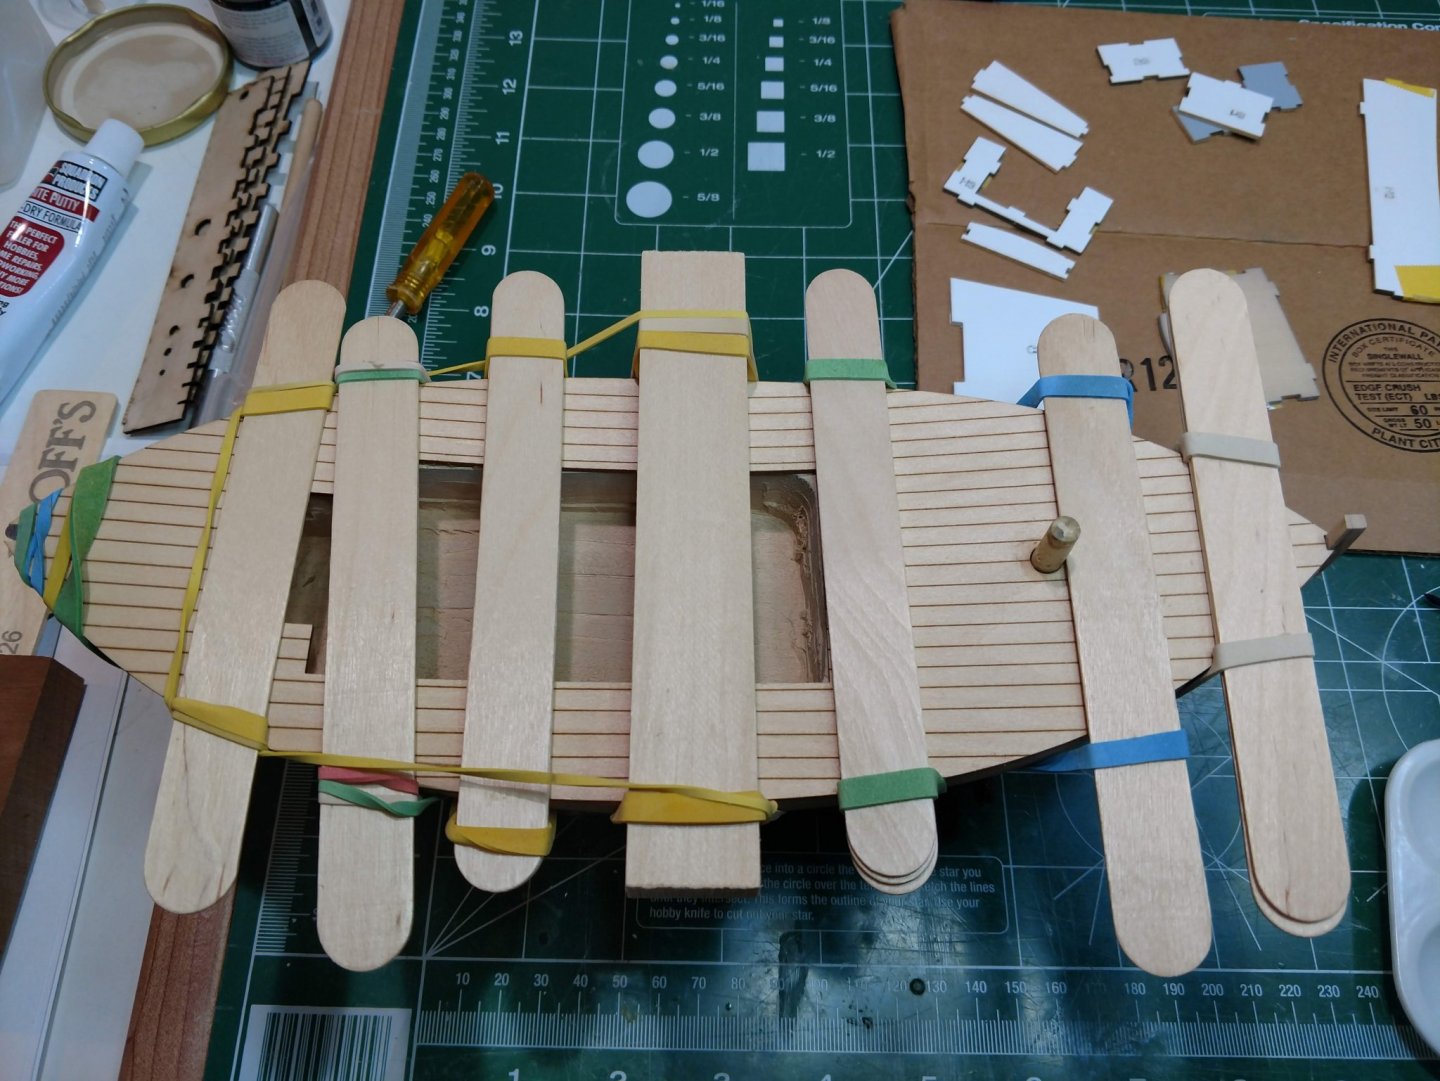
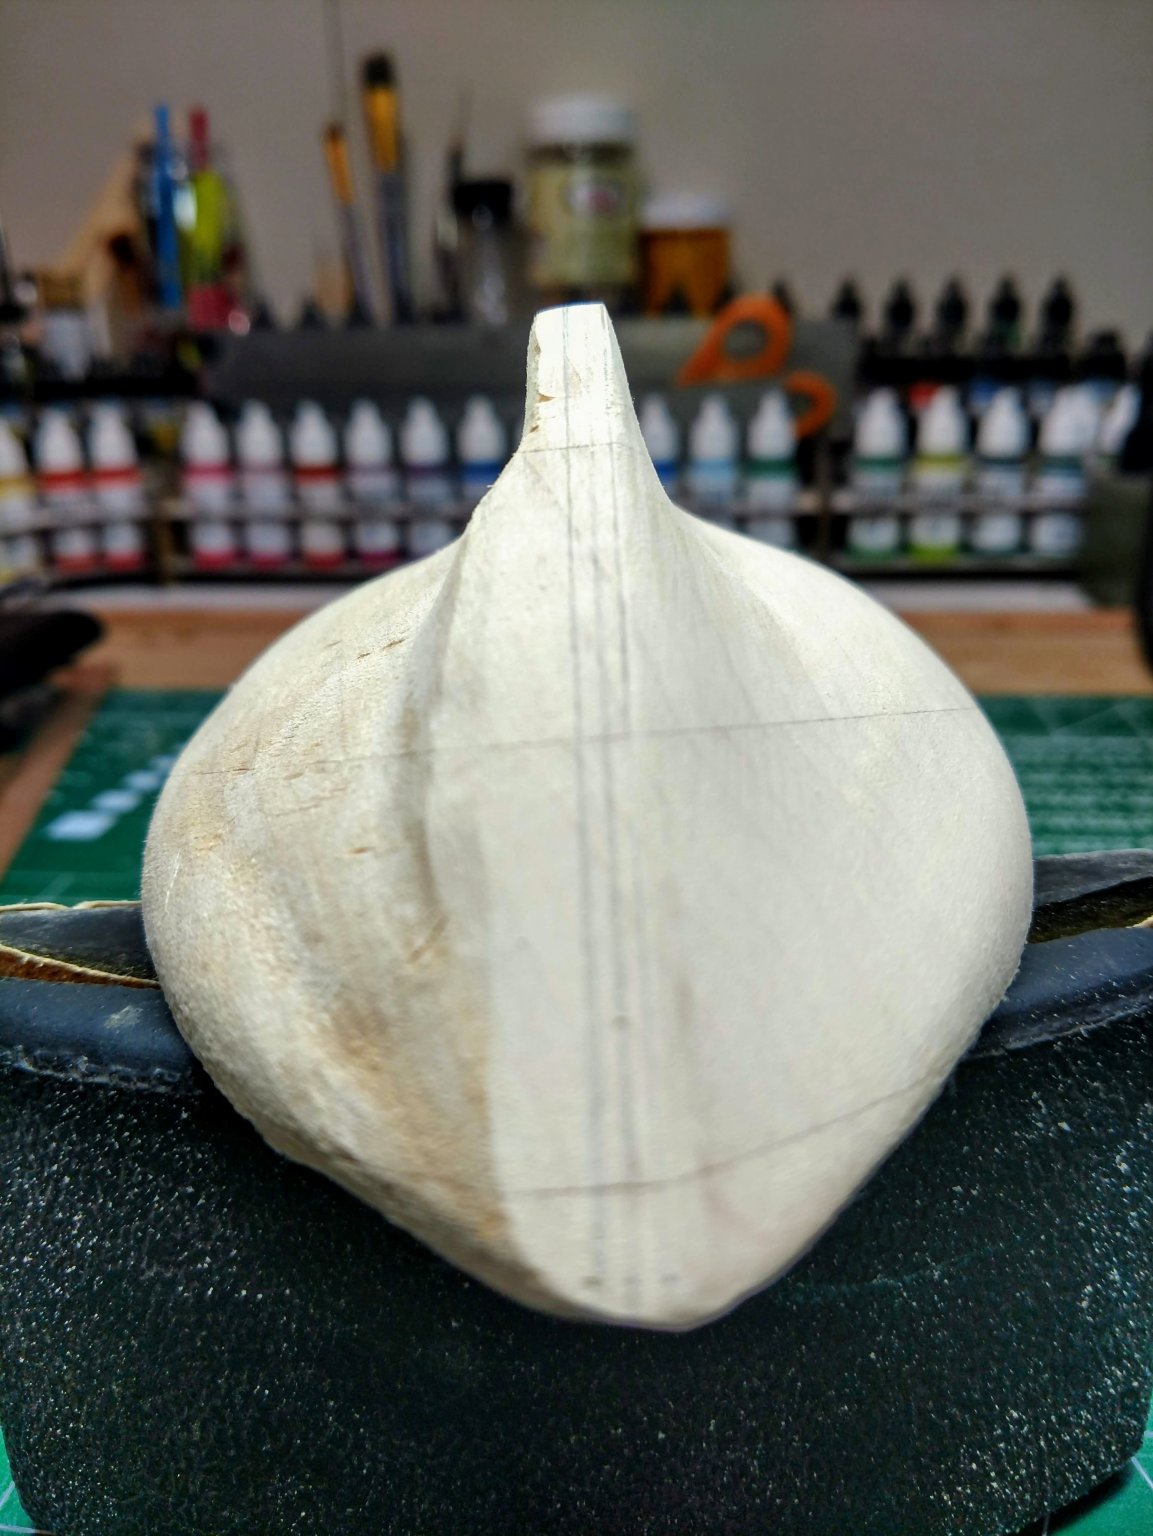
Hello Folks,
So I have made small steps however important ones to create a decent foundation for the remainder of the build
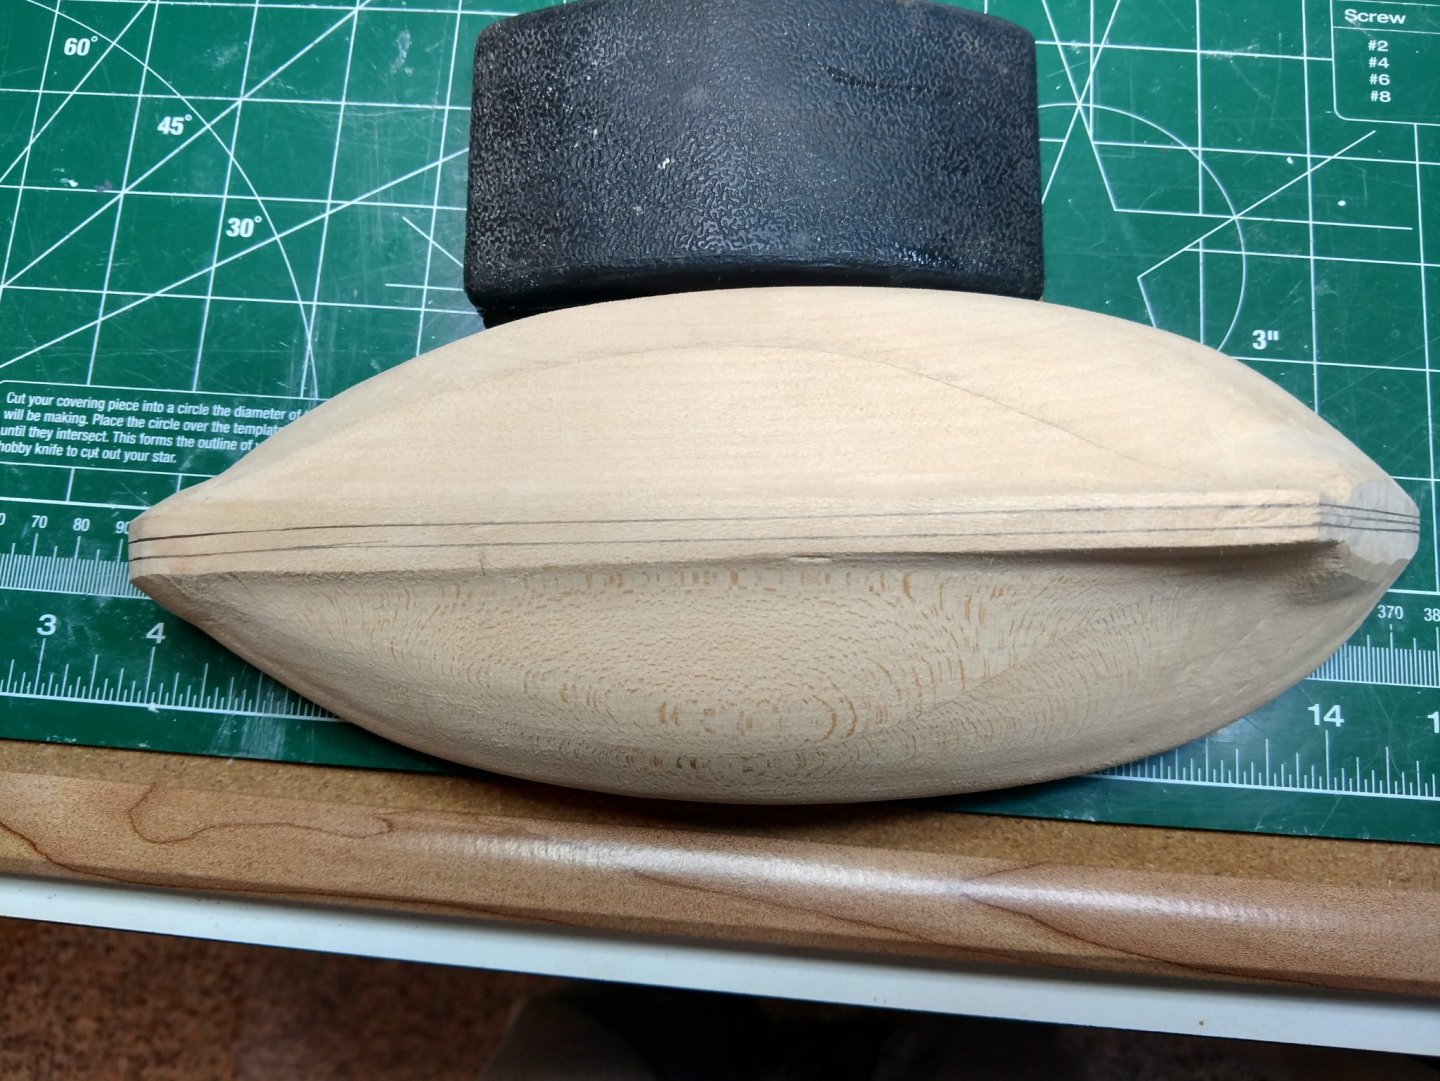
- Picture 1 & 2: Used pins to align and cement the stem, keel and sternpost to the hull. Worked out well.
- Picture 3, 4 & 5: Applied two coats Finishing Resin thinned out with Denatured Alcohol (1/3 equal parts, Resin, Hardener and D. Alcohol).
- I wanted coat #1 to absorb into the hull and harden it the prevent me from creating dents throughout the build.
- The goal of coat #2 was to fill small imperfections from sanding which hopefully works. However, I was pleasantly surprised to see that the capillary action of the thinned resin filled gaps between the stem, keel and sternpost which I hope will lessen the amount of putty work that comes next.
The goal here was a little more work now to lessen work down the line. Putty, primer and painting around the corner.
- LEXLOMA, hexnut and GrandpaPhil
-
3
-
Hello Folks,
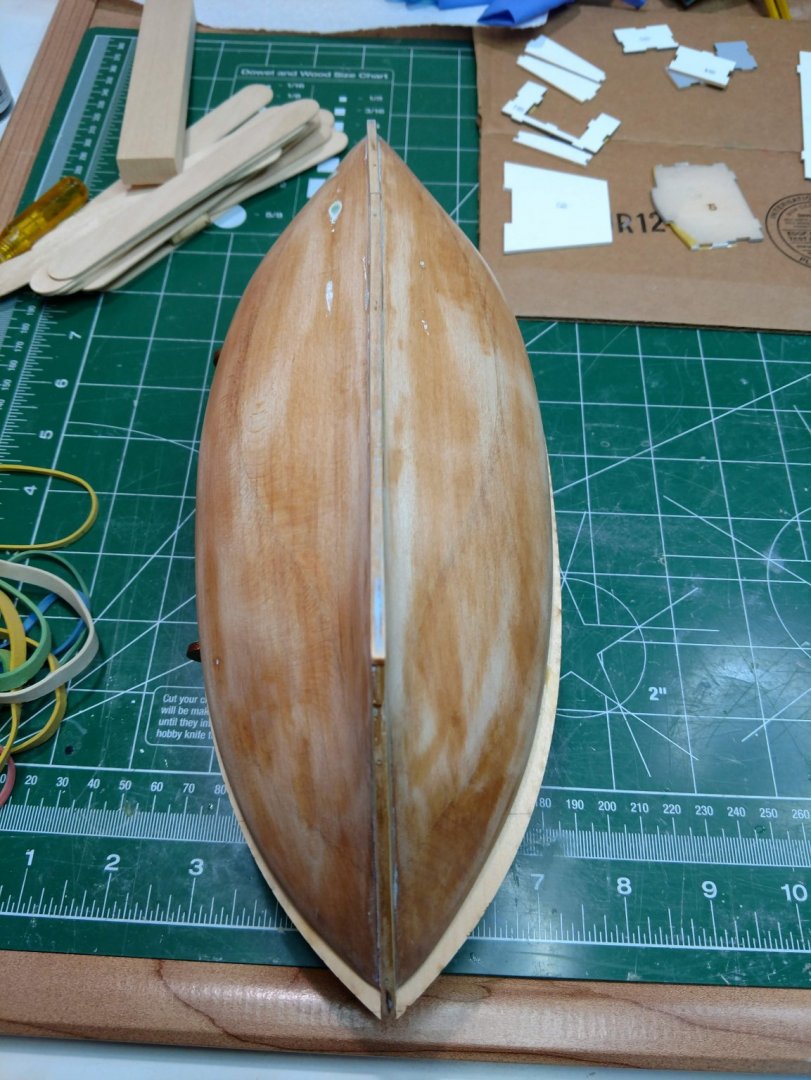
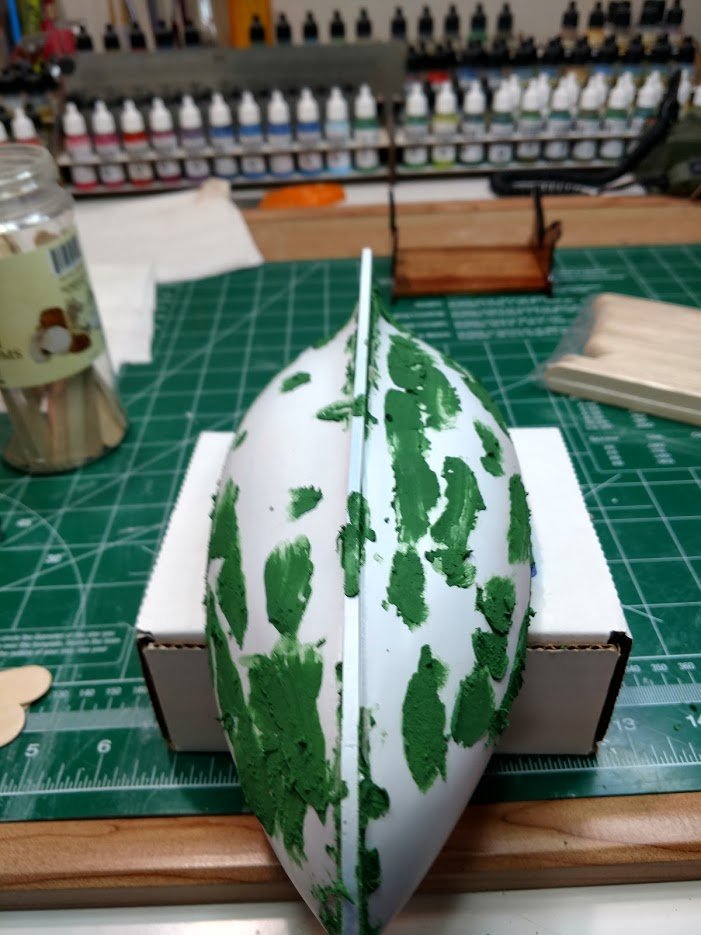
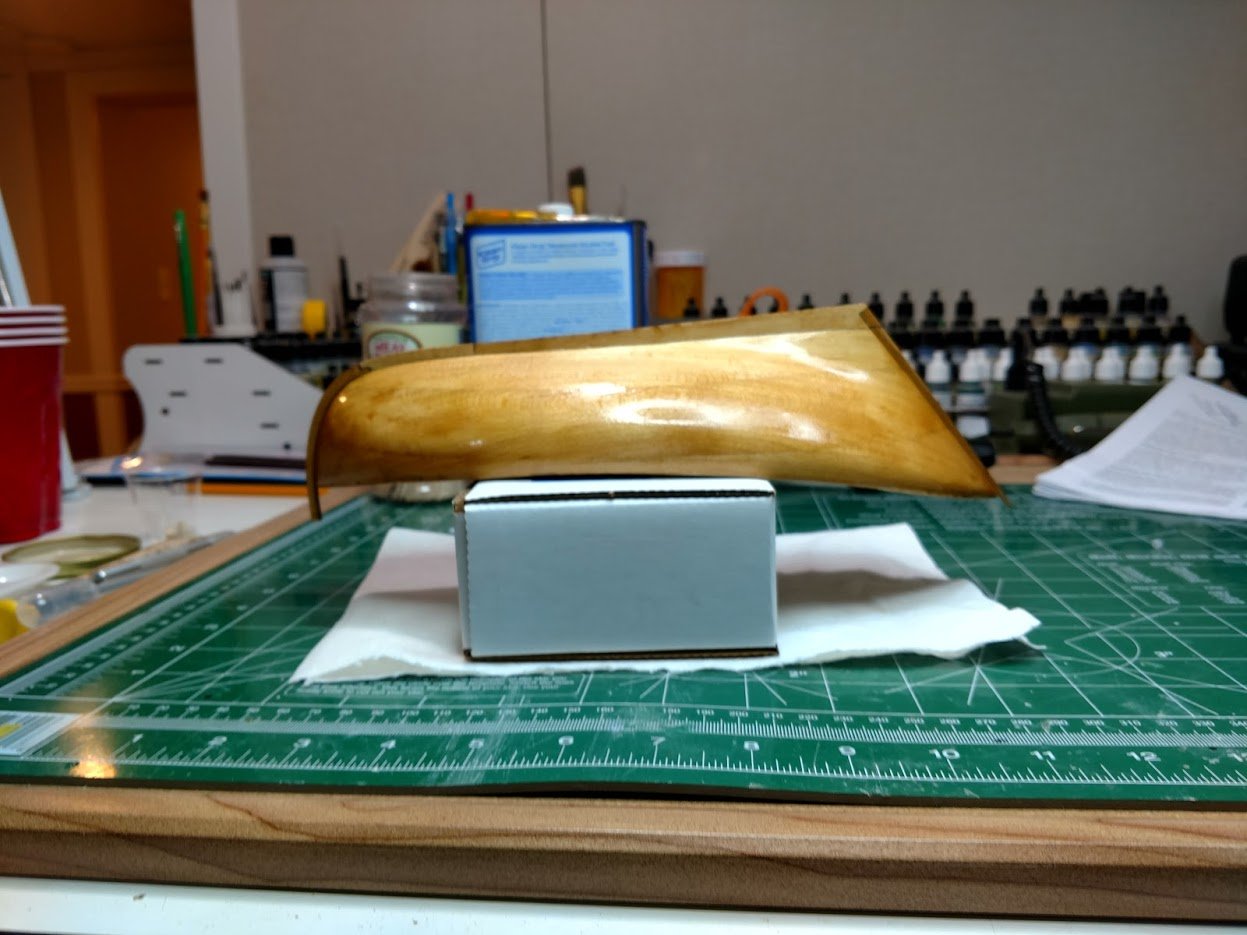
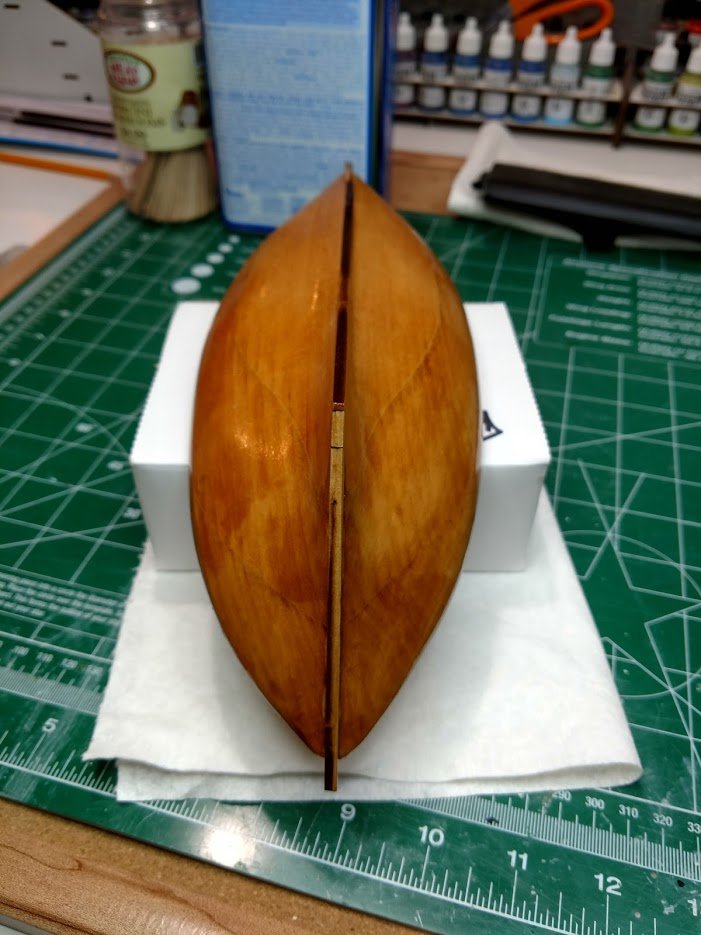
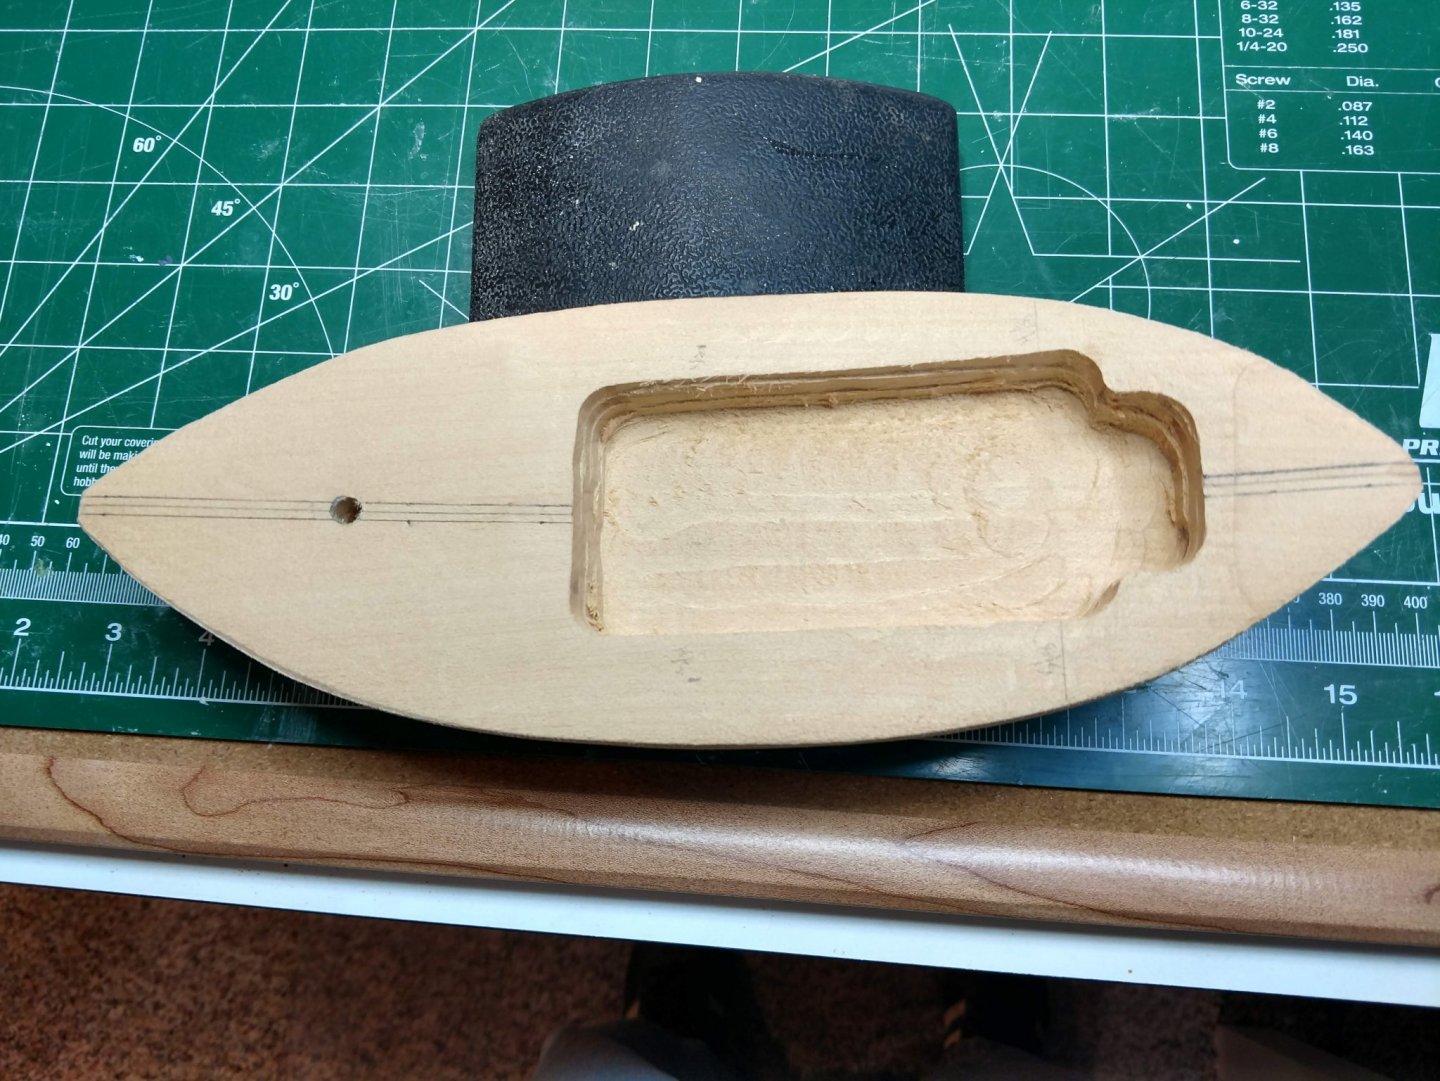
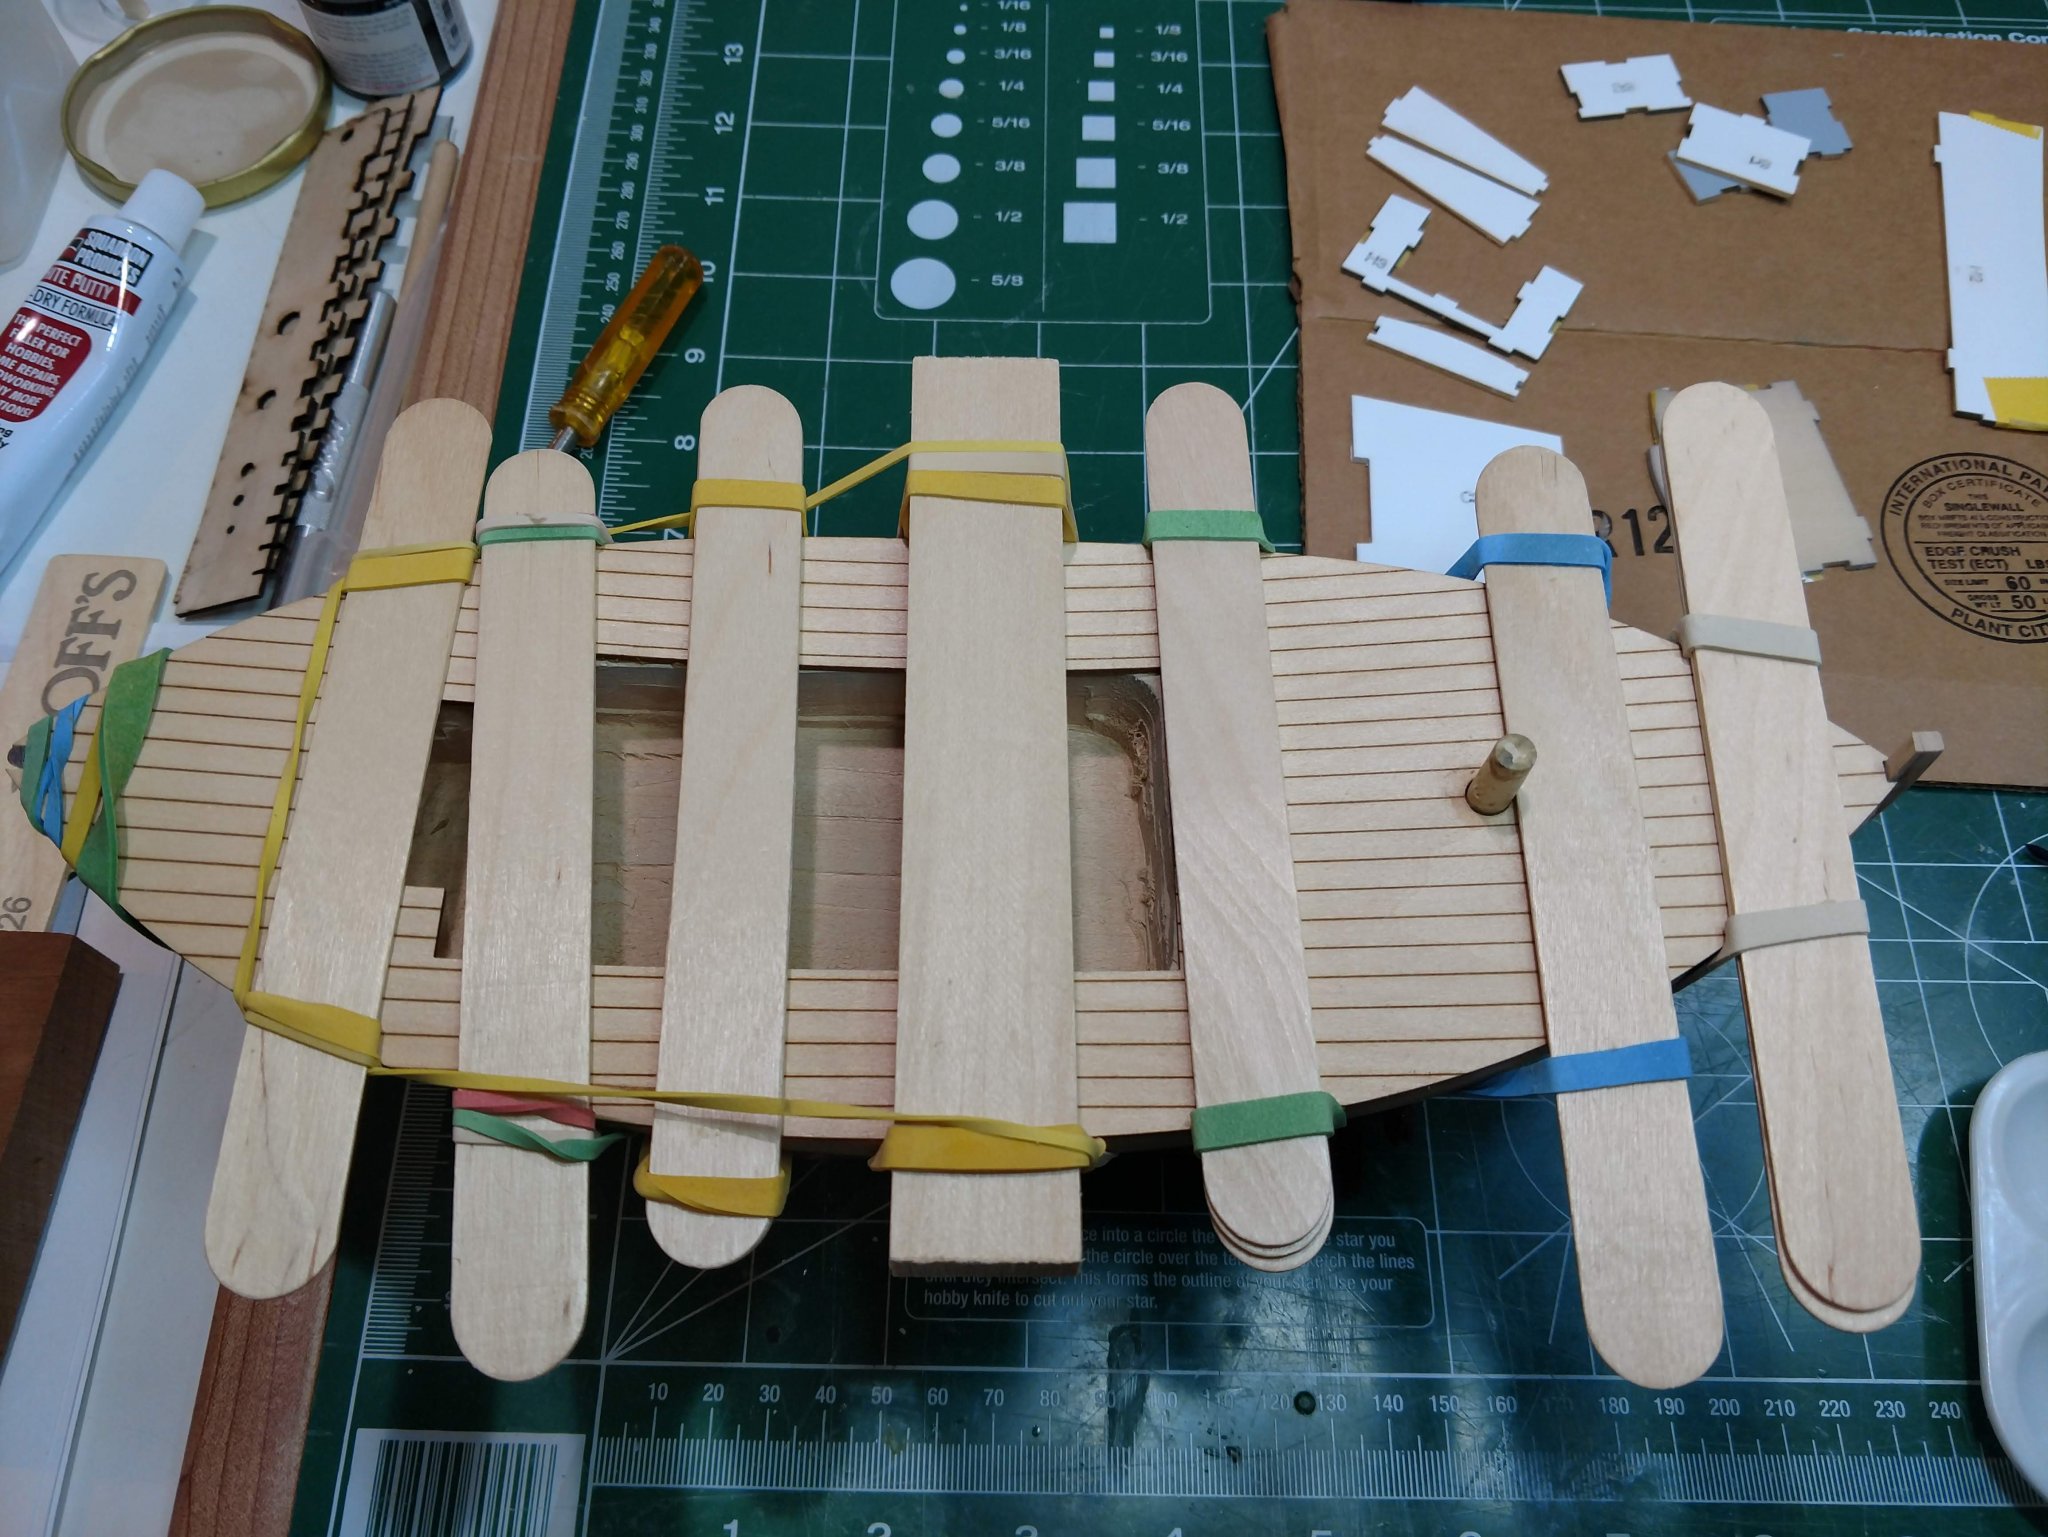
So I find myself without templates to gage the fairness if the hull. So what decided to do is utilize the cradle frames to determine the fairness of the hull from stern to bow. Not perfect, however good enough for me. From the bow moving towards the stern I moved the front cradle from bow to stern just to midpoint, pictures 1-3, then at midpoint I used the stern cradle and moved it towards the stern measured the gaps on both sides to determine the fairness by measuring the gaps as a guide. Not to scientific, however good enough for me.
As noted above in previous entries next steps:
- Place the stem, keel, sternpost assembly on the hull glued (with pins).
- Place 2-3 coats of thinned out finishing resin to fill tiny dents.
- Then prime with white tamiya primer to locate my several gaps.
- Fill my several major gaps with putty after sanding.
- Ahoy mates, want to finish this project prior to my rigging class in Maine taught by Bluejacket shipcrafters.
- hexnut and GrandpaPhil
-
2
-
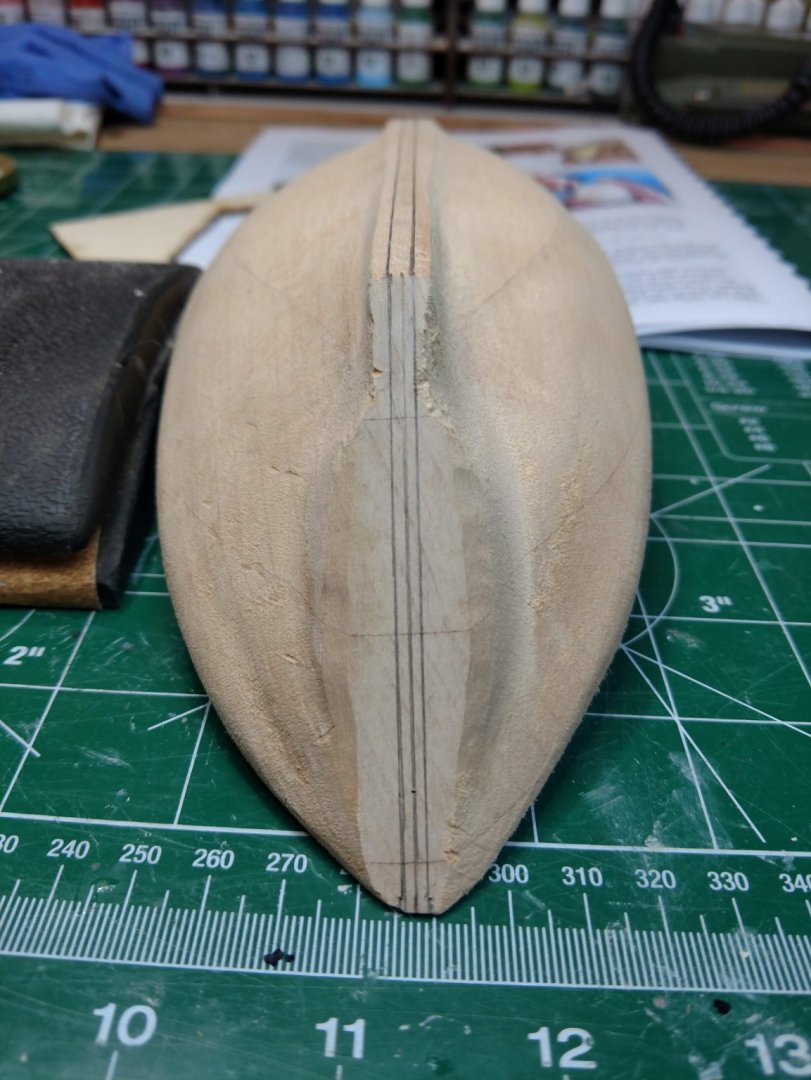
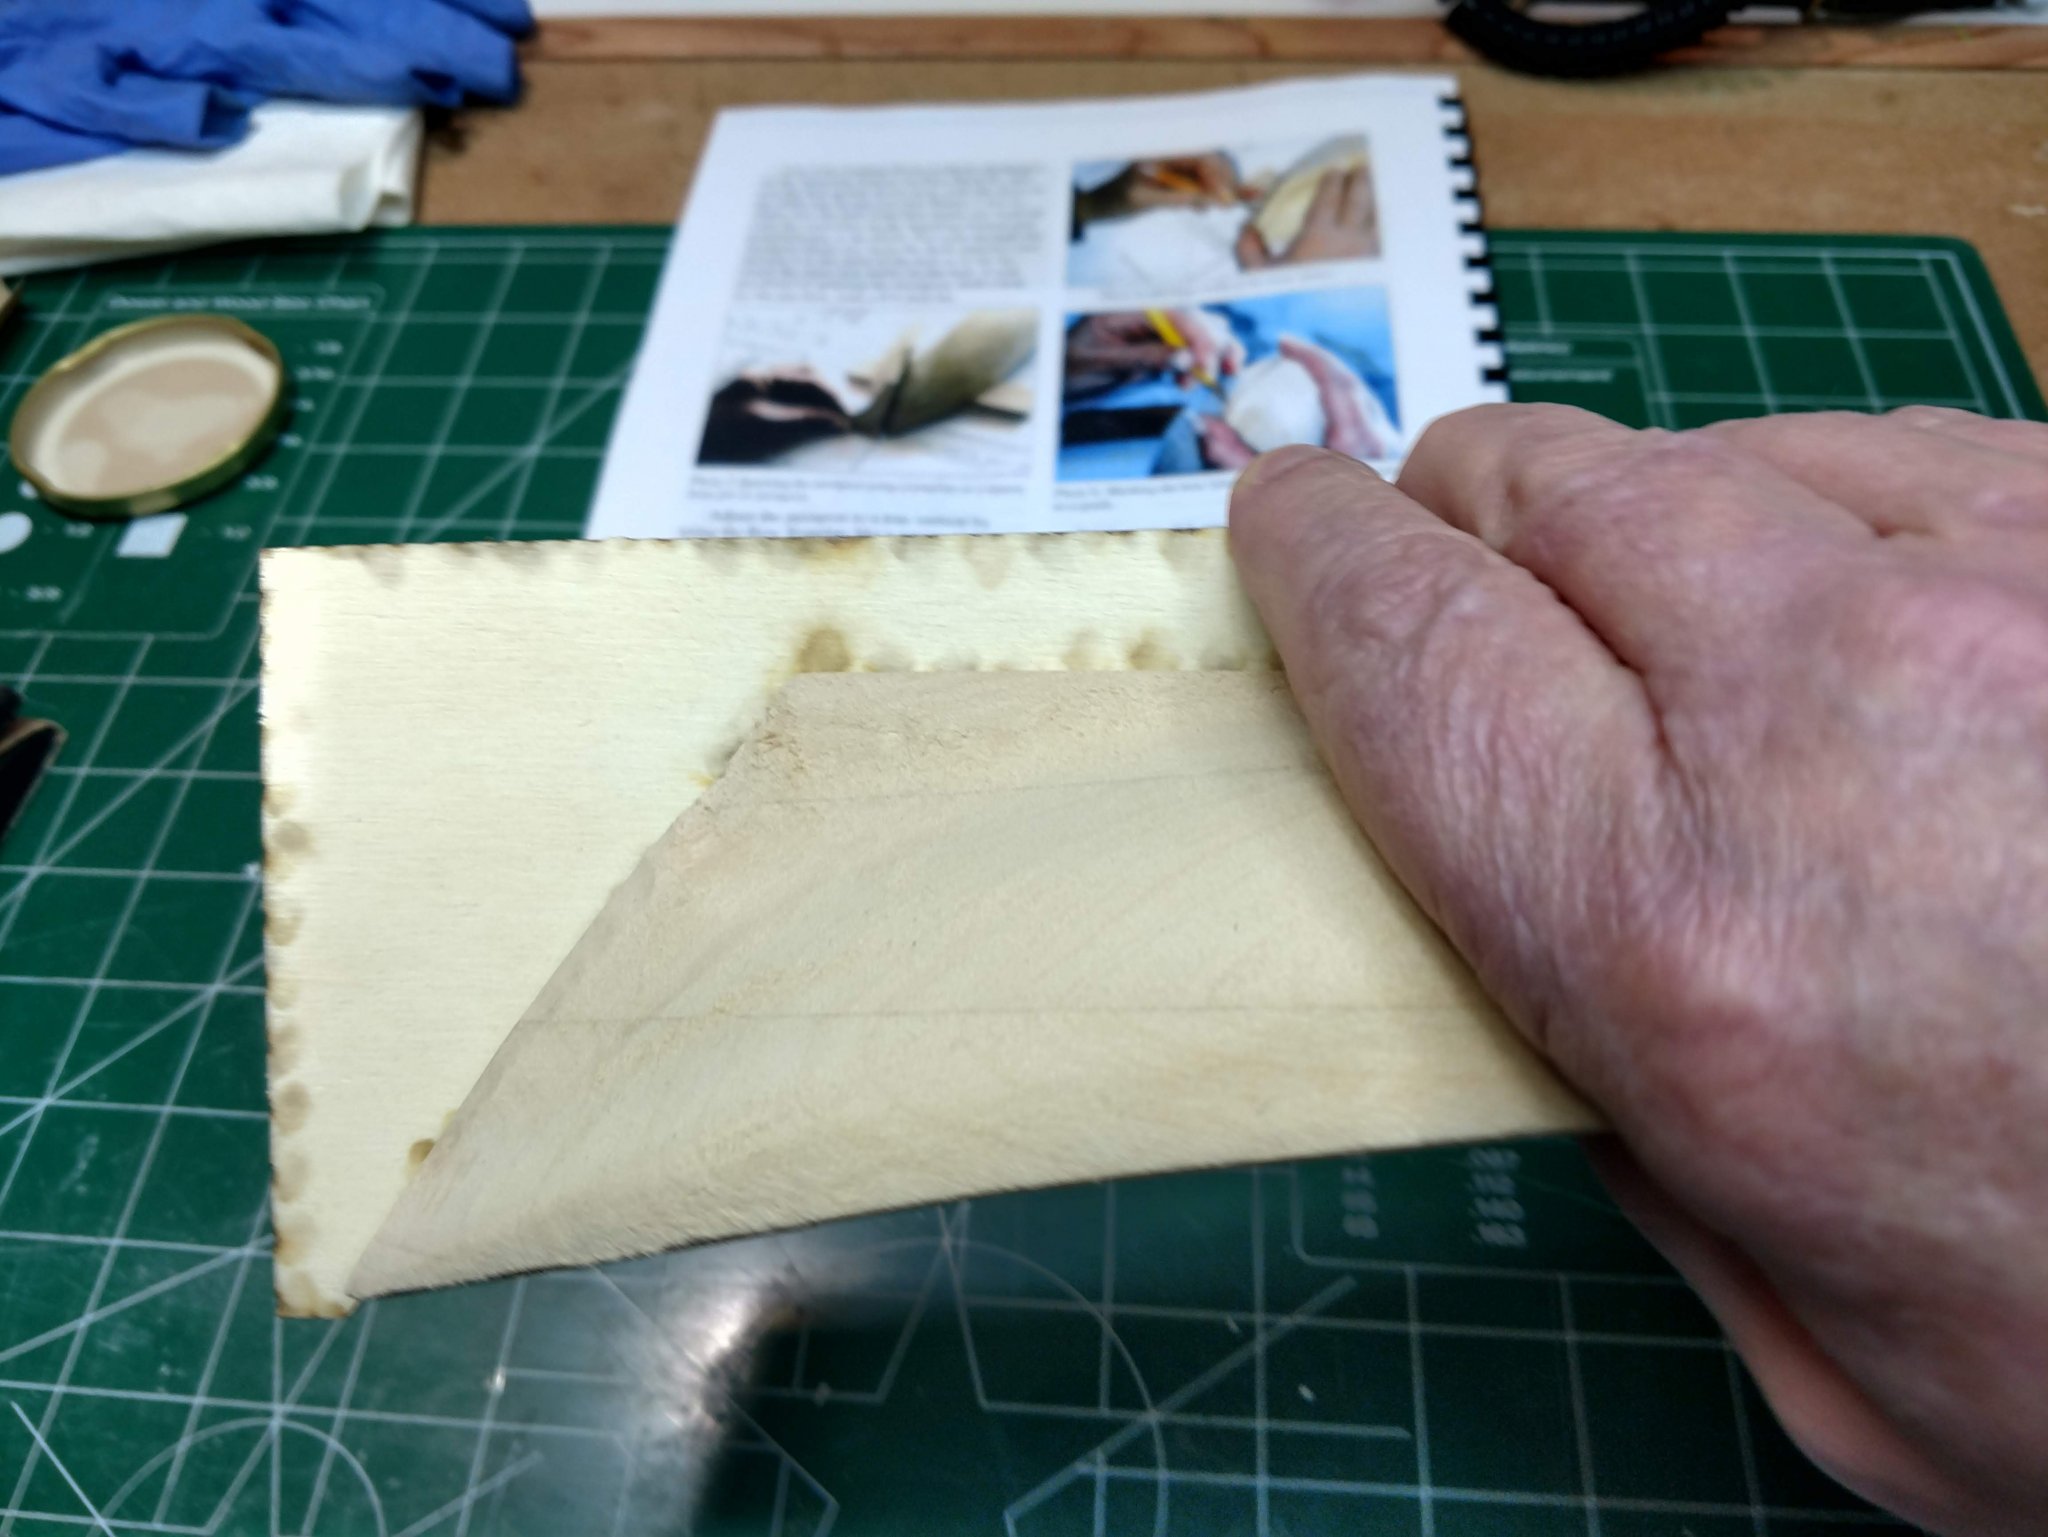
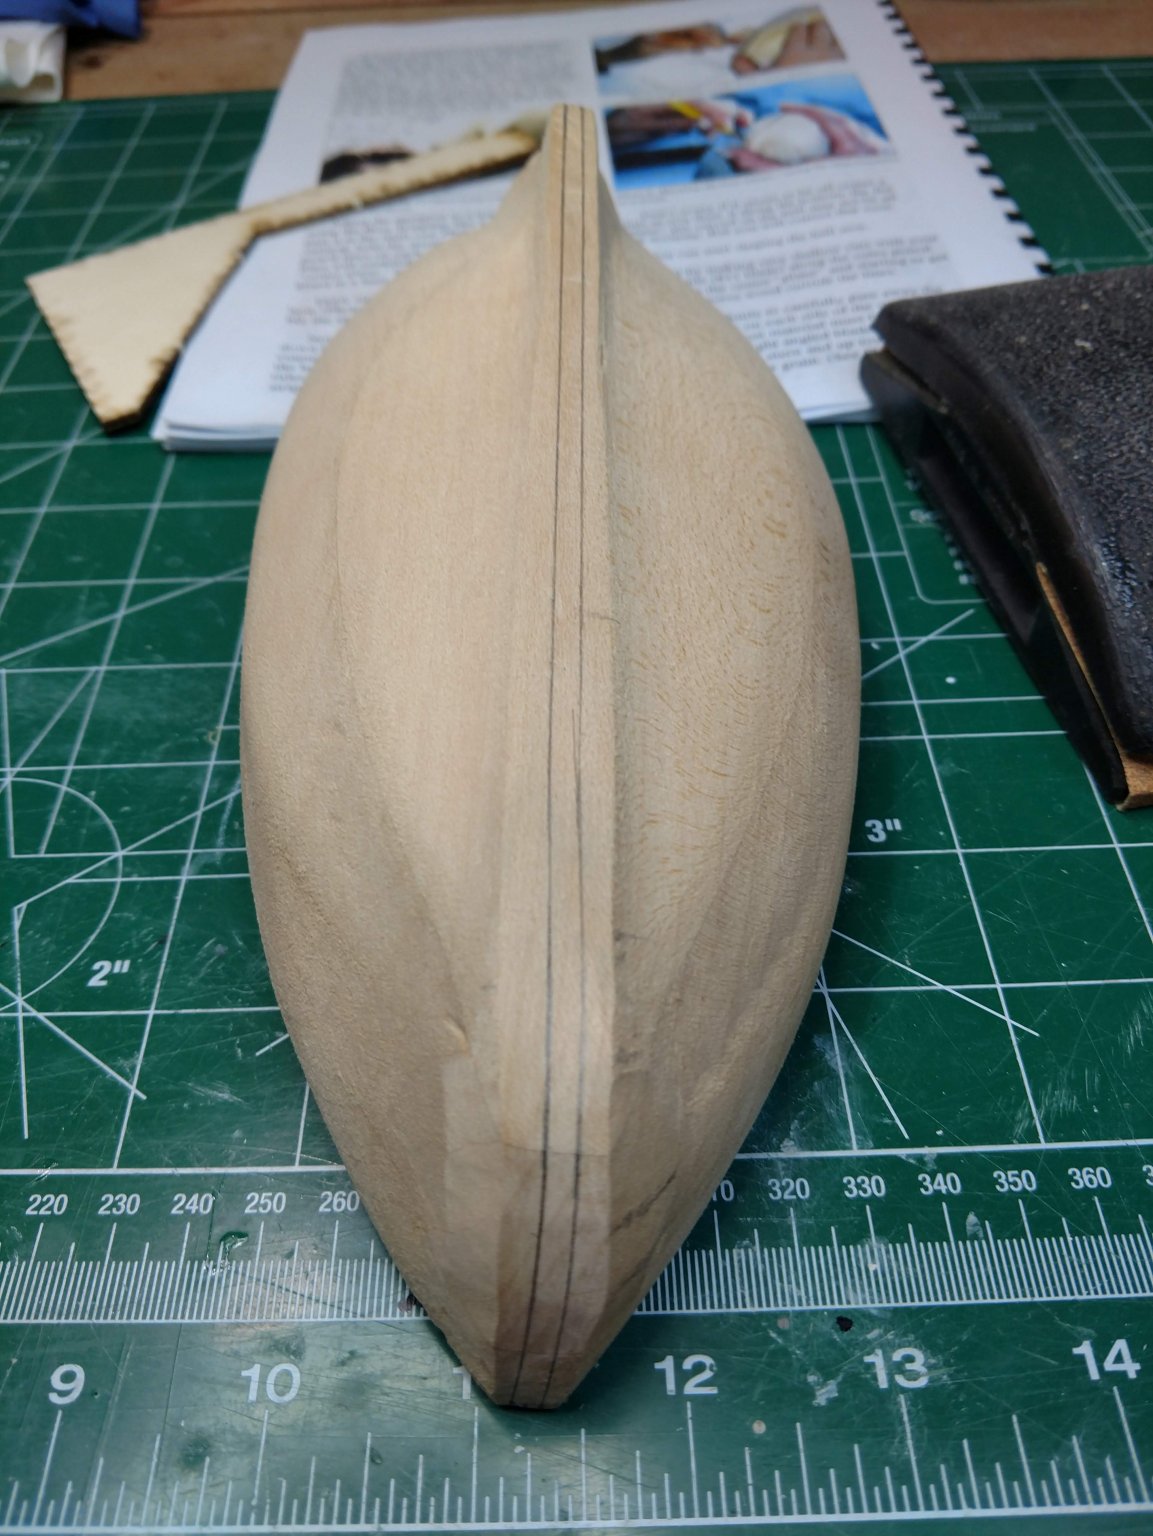
Hello Folks,
Just adding 3 pictures showing one side of the stern almost complete and the other not worked on as of this update, hopefully this helps others even though I am no expert. Once I complete this step I will coat the hull with a few coats of thinned out finishing resin to harden the hull and smooth out some of my dents, and then prime it and then putty major dents prior to painting. A Few additional steps, however tired dealing with my clumsy dents.

- GrandpaPhil and hexnut
-
2
-
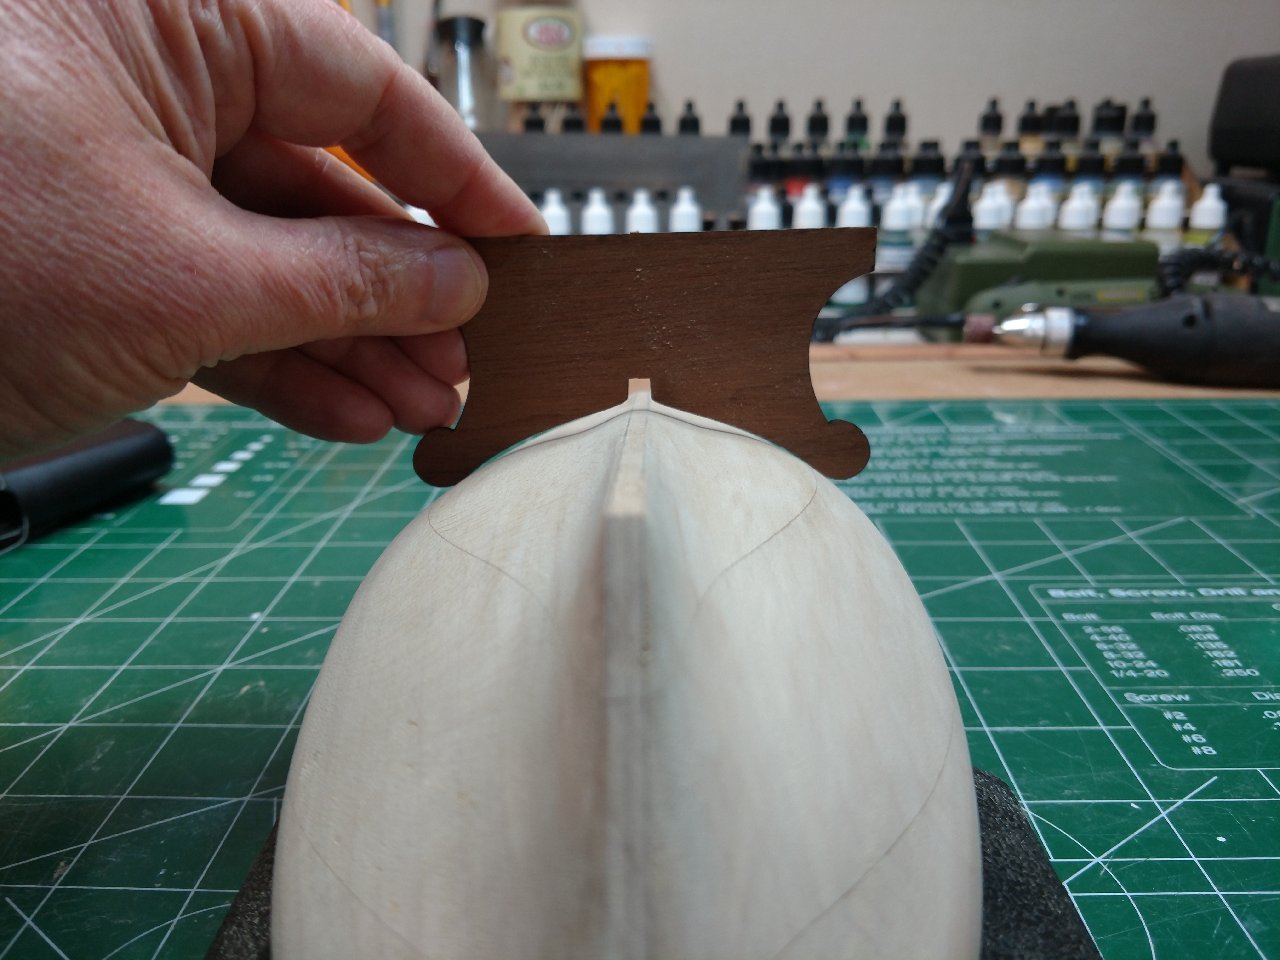
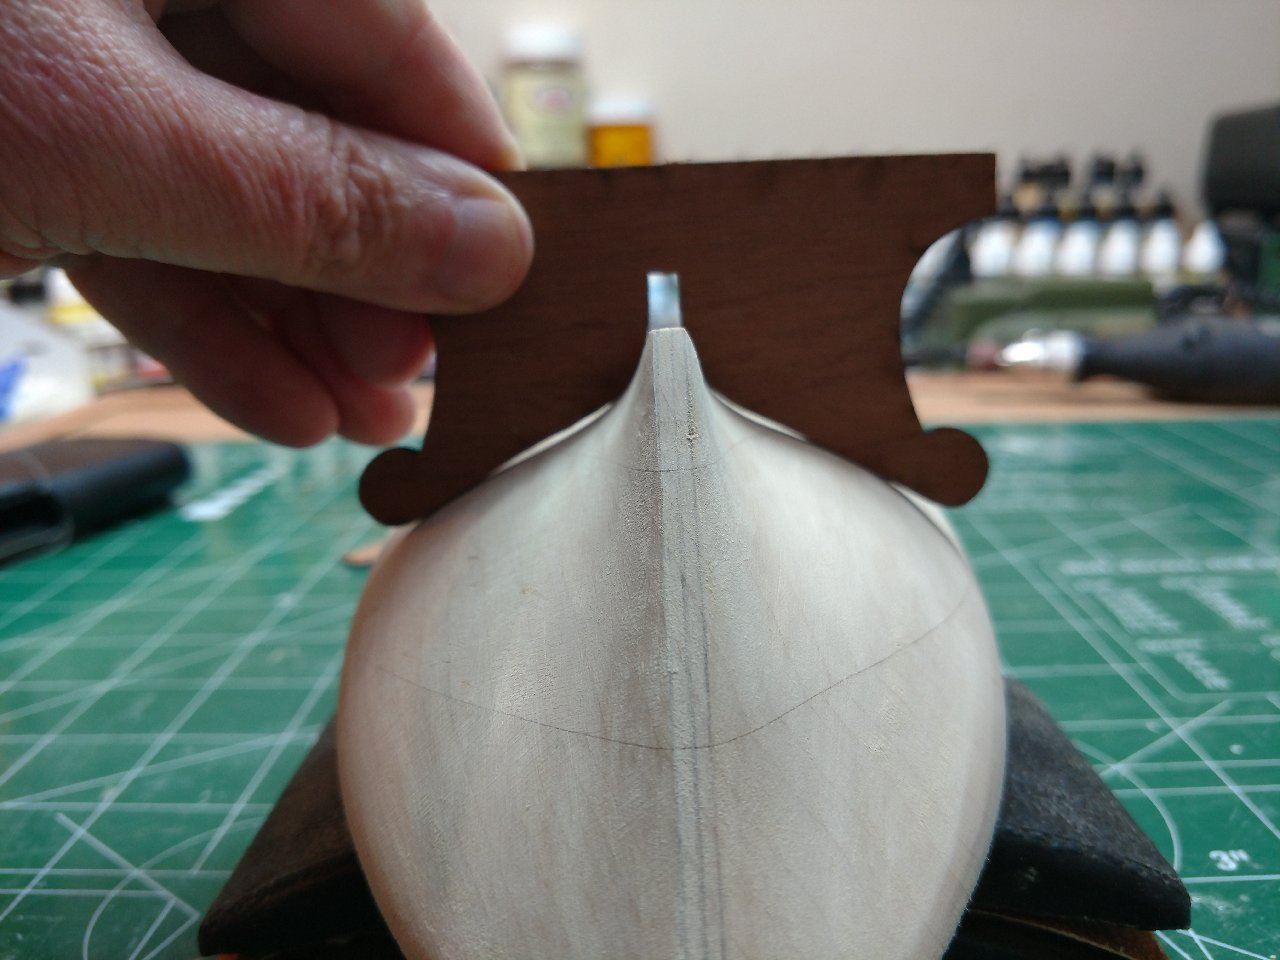
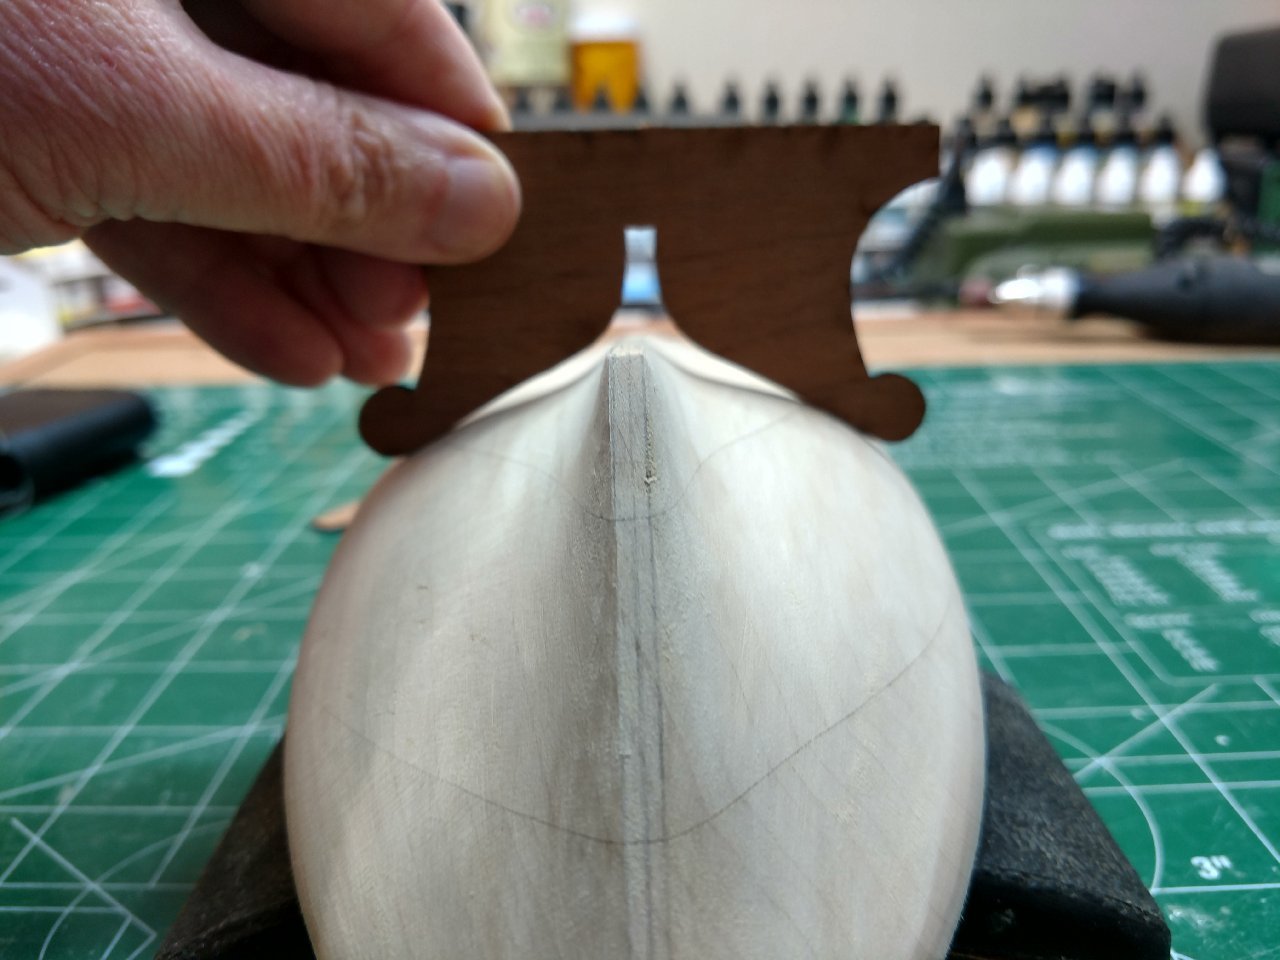
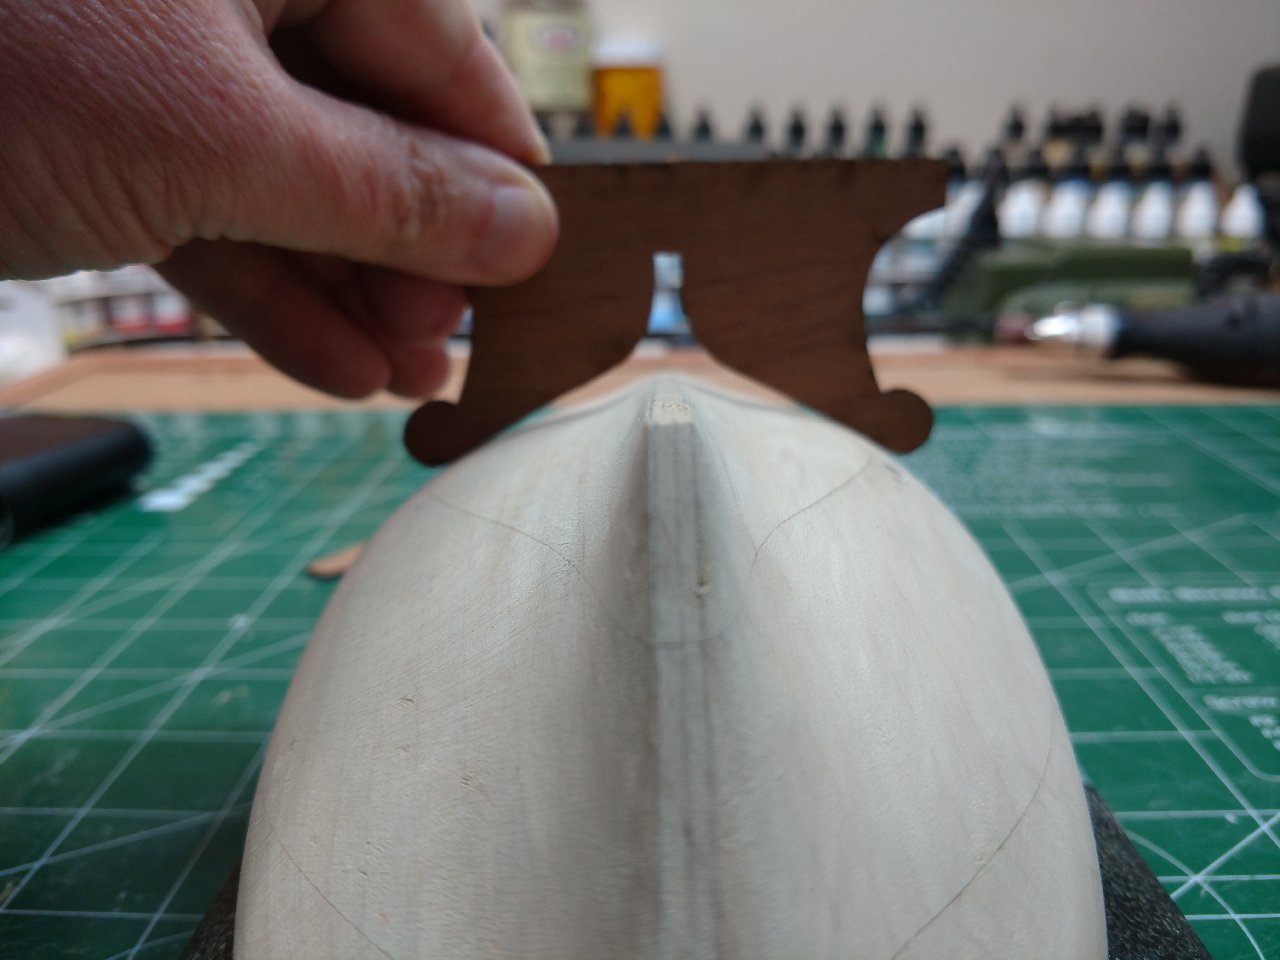
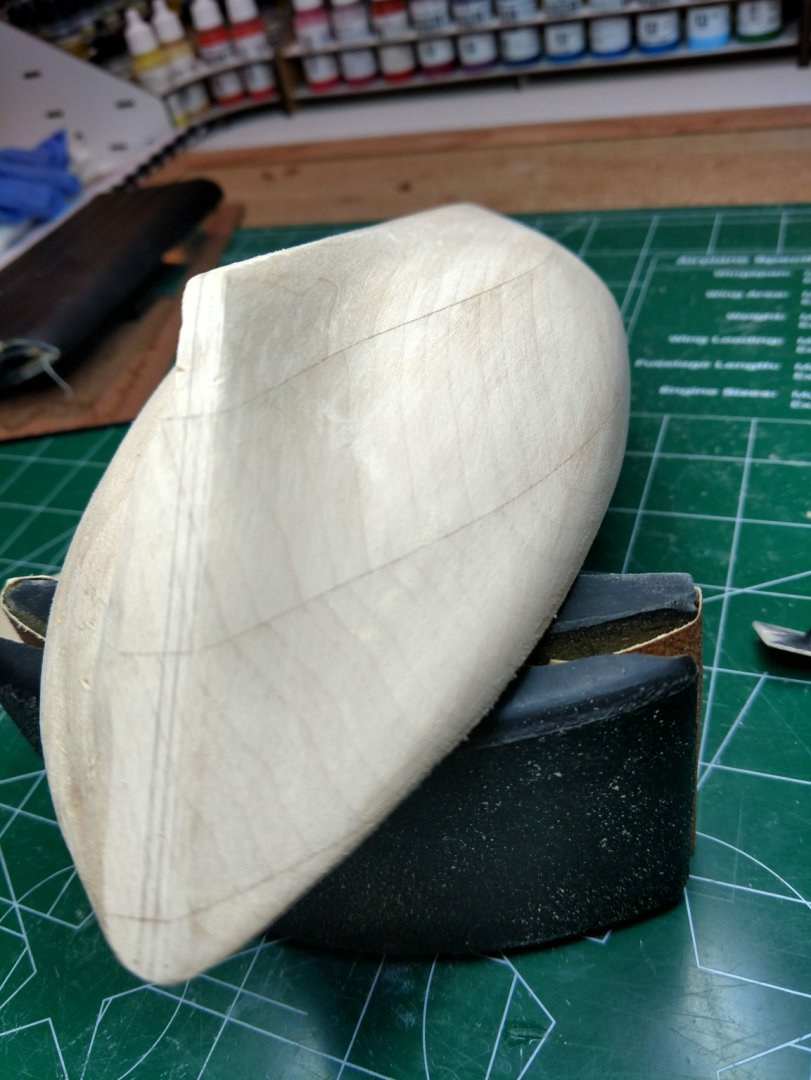
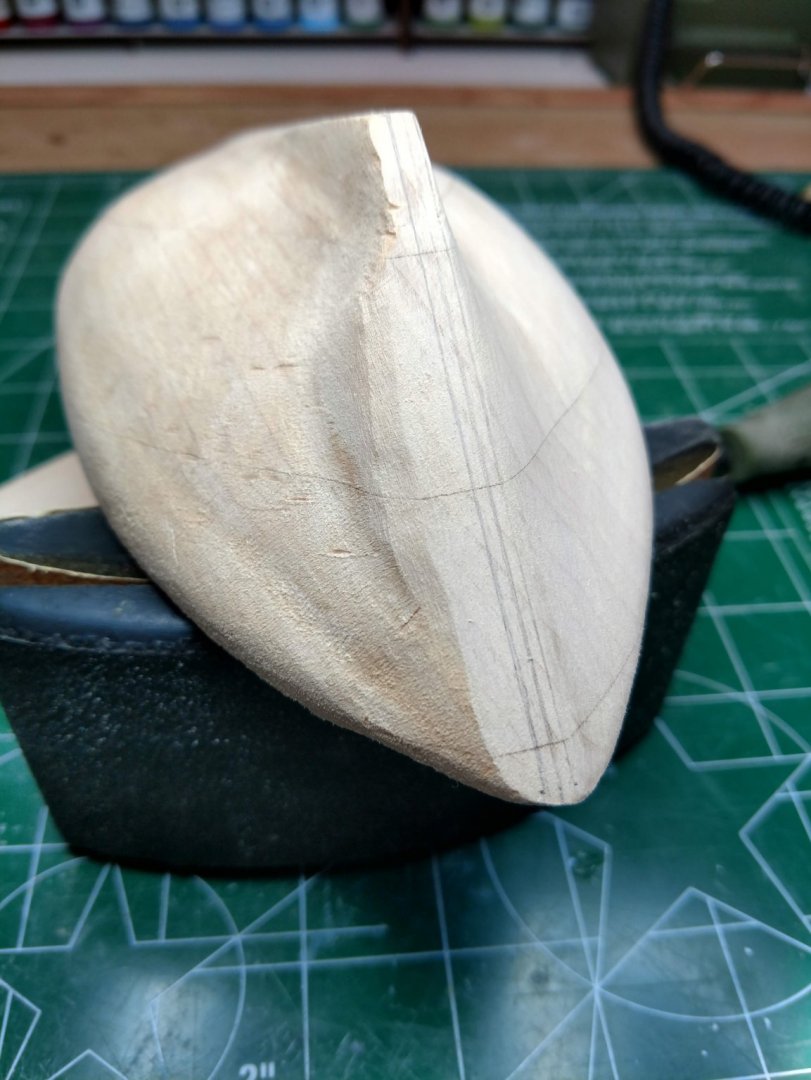
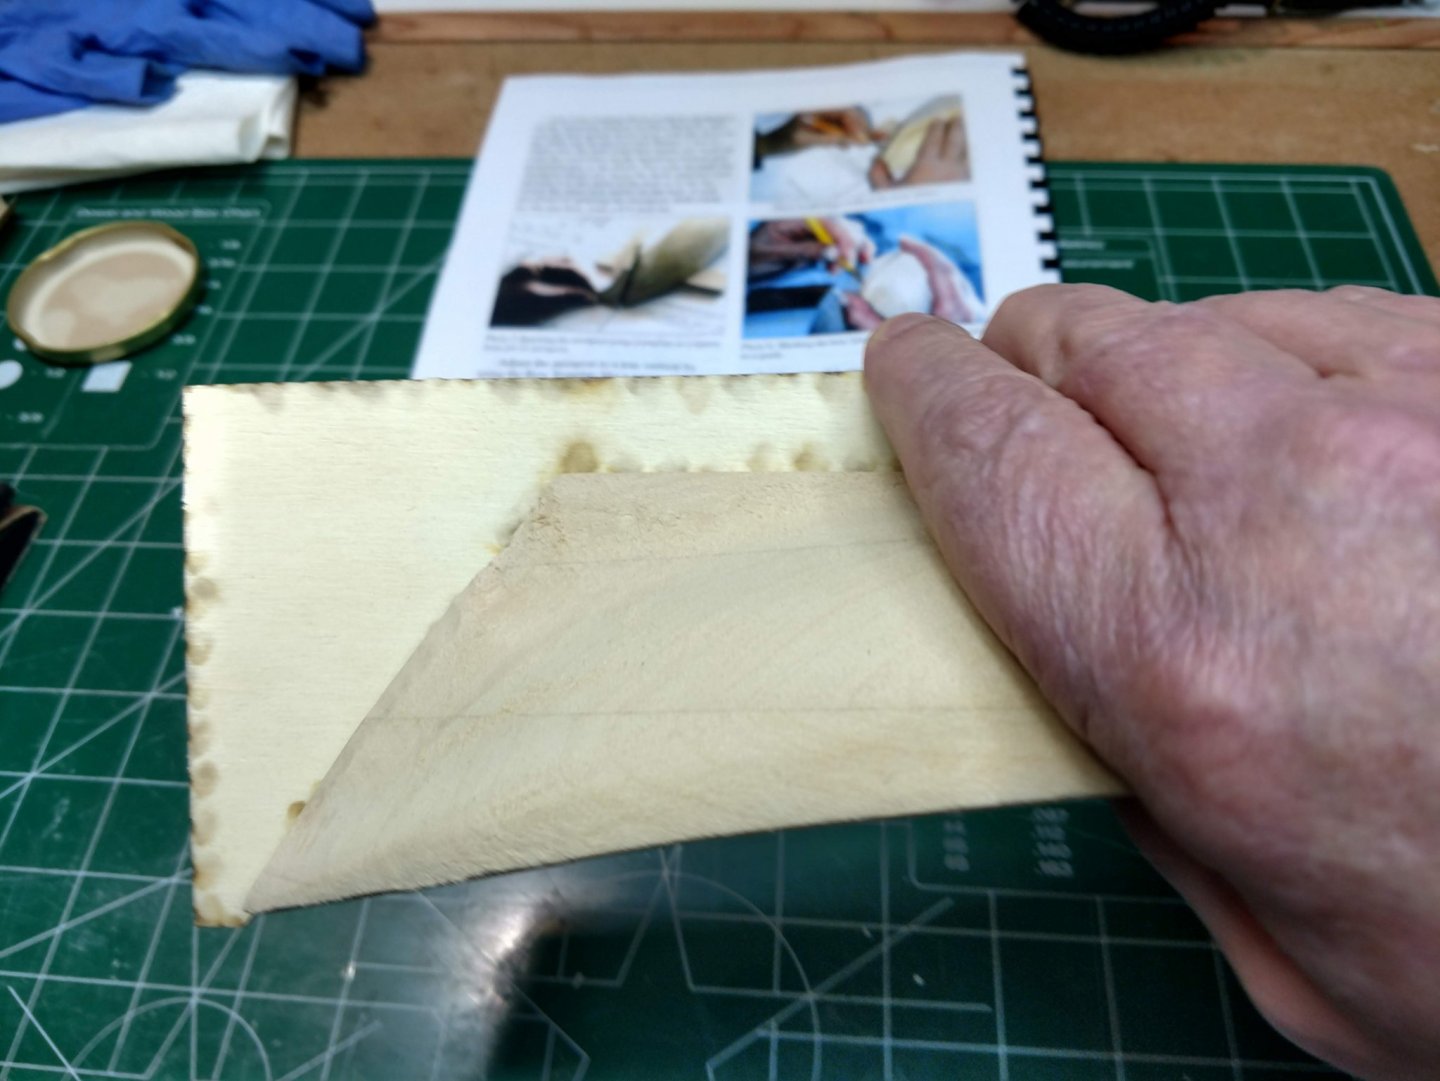
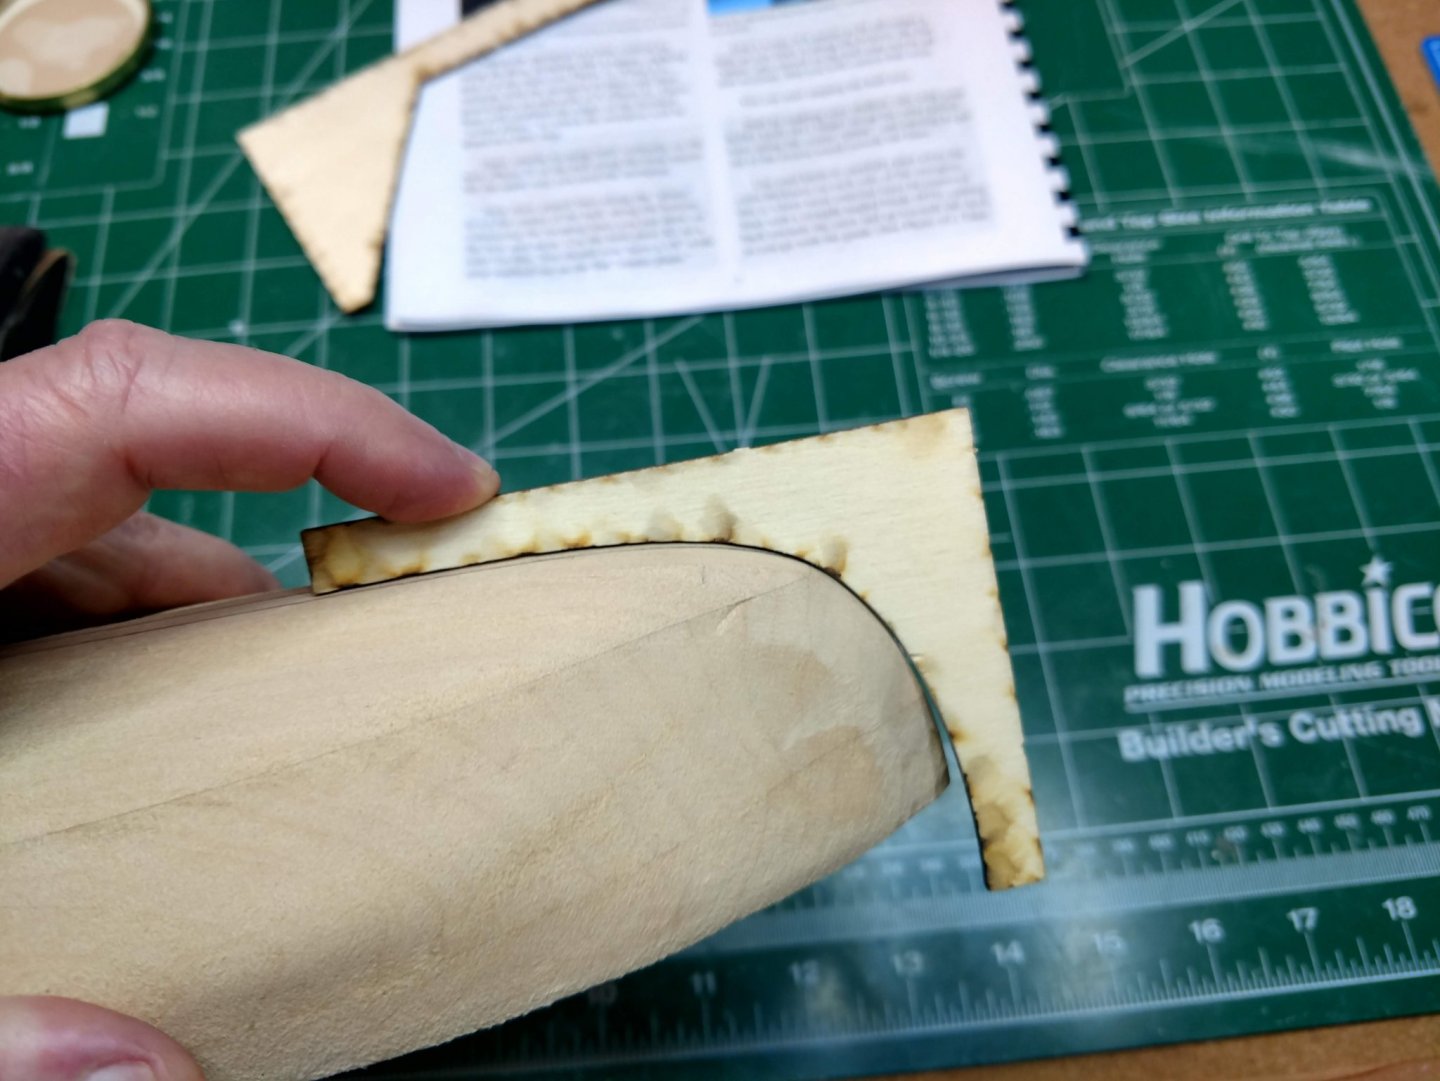
Thank you, here are some more pictures and progress on my build. Few comments:
- Instructions provided are excellent
- Use the templates to shape bow and stern
- Set the center line which was tricky, however stick to the instructions and one will be fine

- GrandpaPhil and hexnut
-
2
-
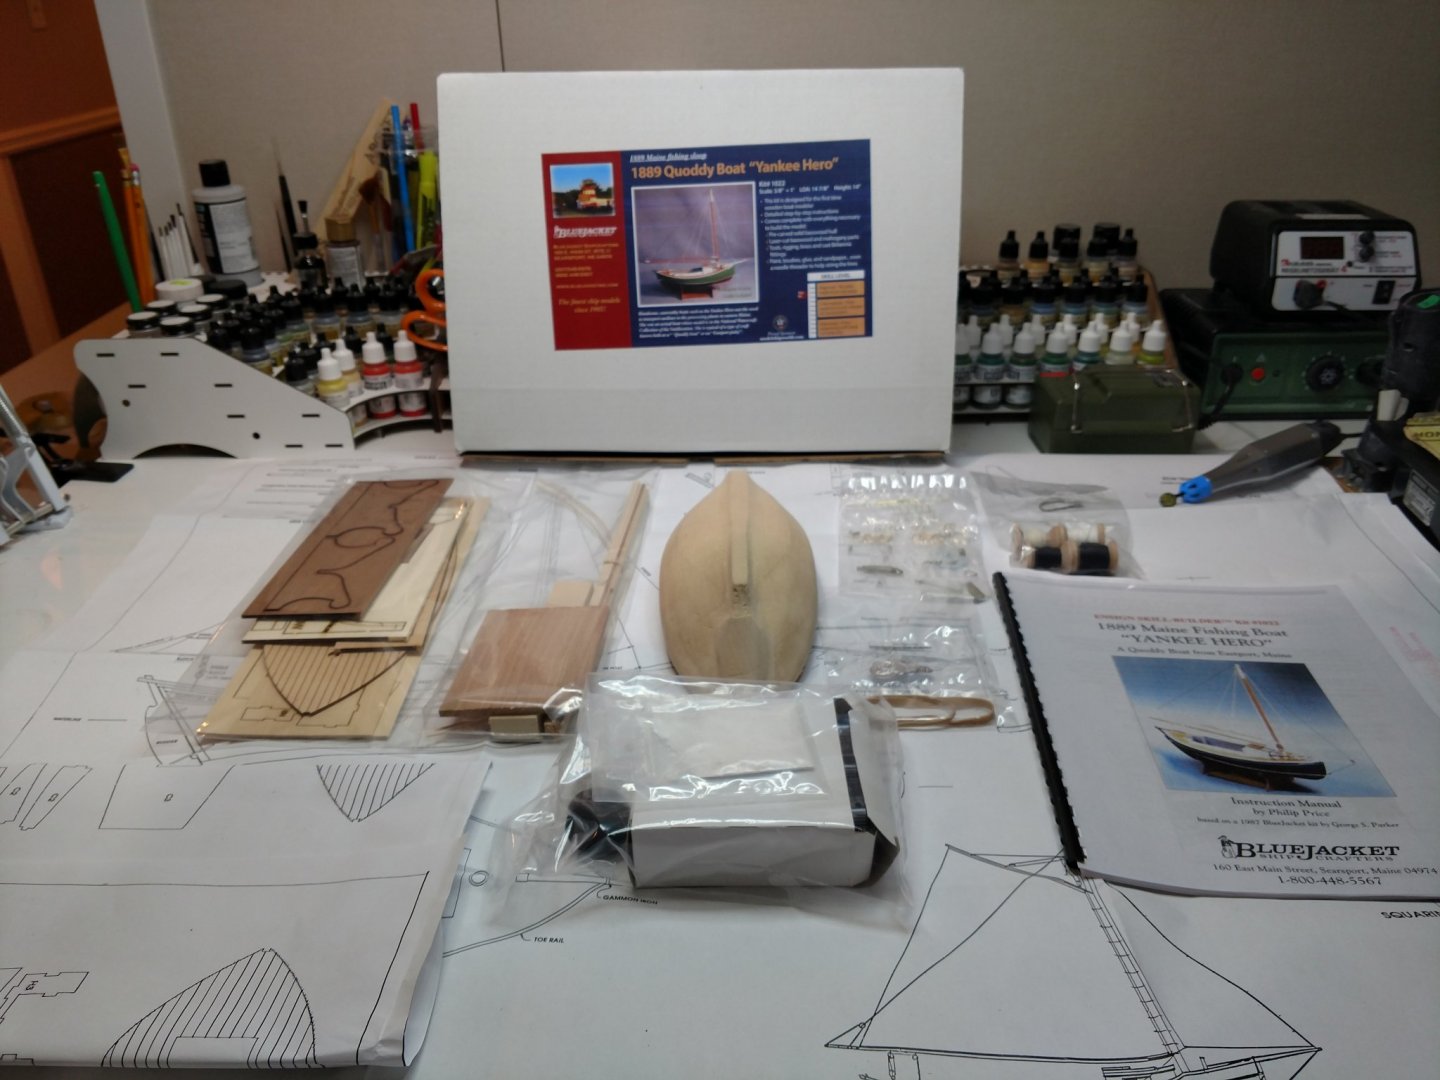
This will be my first solid hull build, and my first Blue Jacket Kit. My last build was a Midwest Boothsbay Lobster boat R/C. Looking forward to the experience of building the kit and posting the build. More posts/pictures to come, this was first just wanted to see if I got right.
- sapperred1, hexnut, GrandpaPhil and 1 other
-
4


Yankee Hero 1899 by wtimlen - FINISHED - BlueJacket Shipcrafters - Scale 3/8
in - Kit build logs for subjects built from 1851 - 1900
Posted
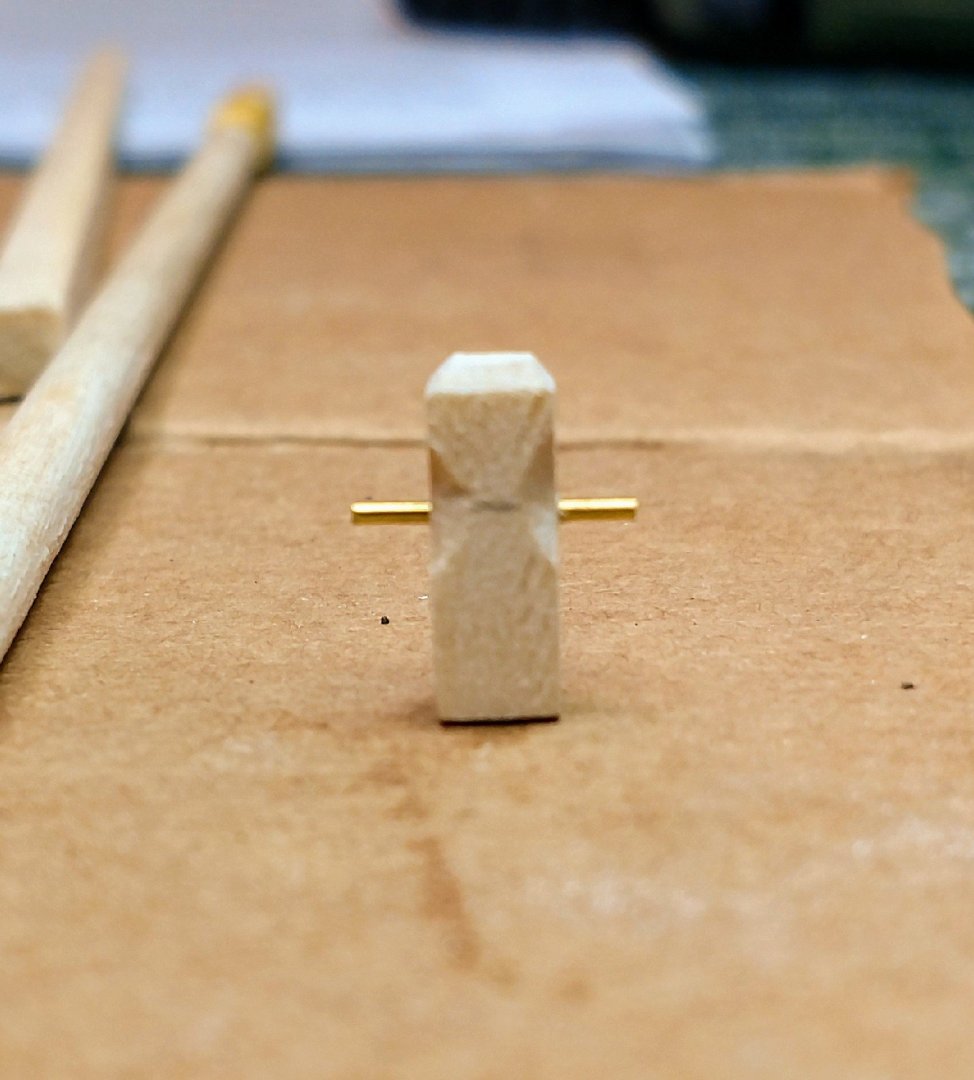
Thank you for the response, now I am preparing for the toerails, even though I have the wood bent it looks to be a some challenging task do to the scale of the model. I have already split two sets of rails, time to hit the drill and brass rods for anchors. #70 drill bit with 1MM anchors. I hope that works.
Once again, thank you.