


wtimlen
-
Posts
103 -
Joined
-
Last visited
Content Type
Profiles
Forums
Gallery
Events
Posts posted by wtimlen
-
-
Hello Folks,
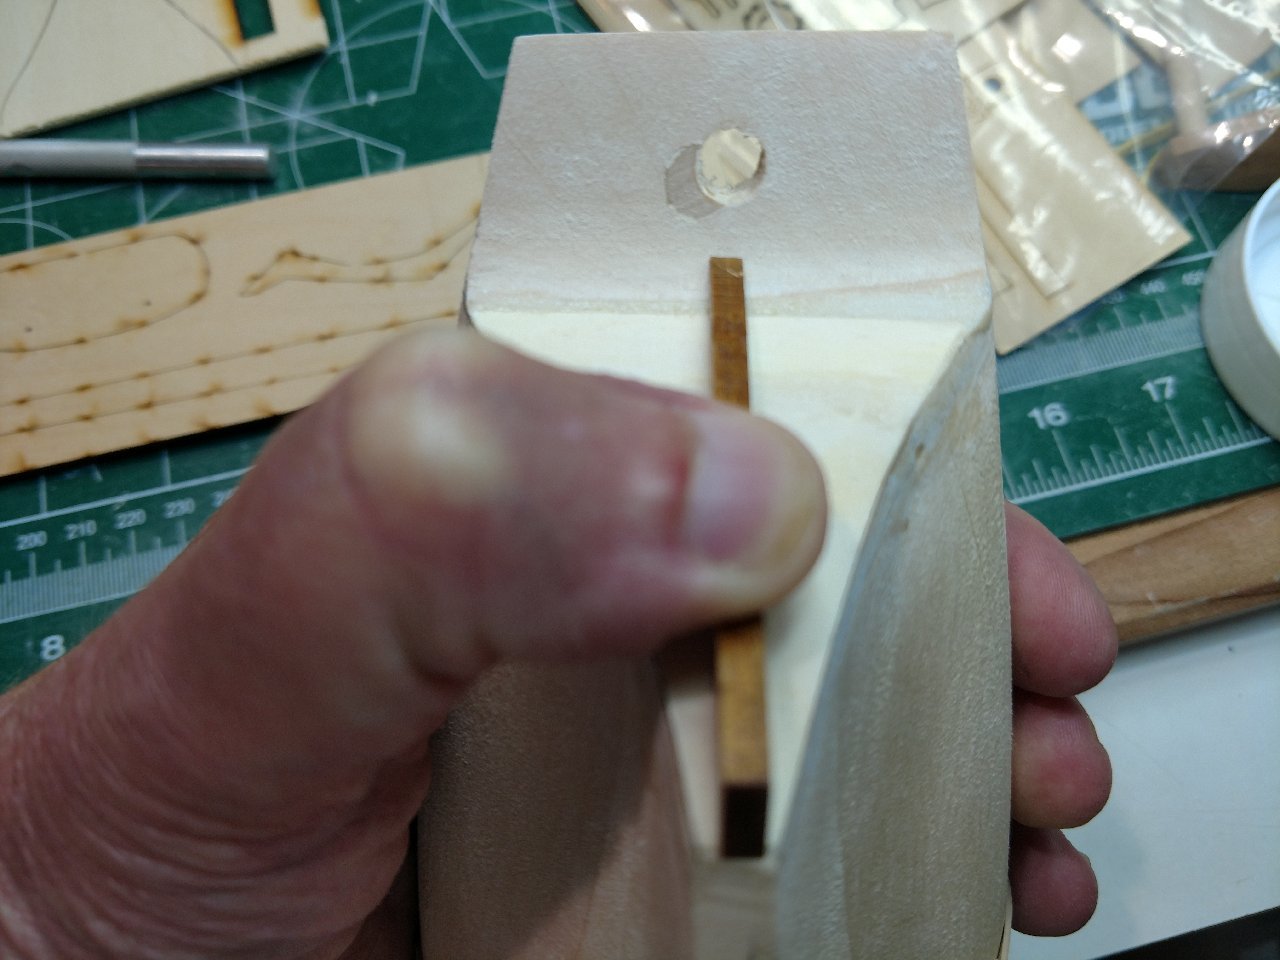
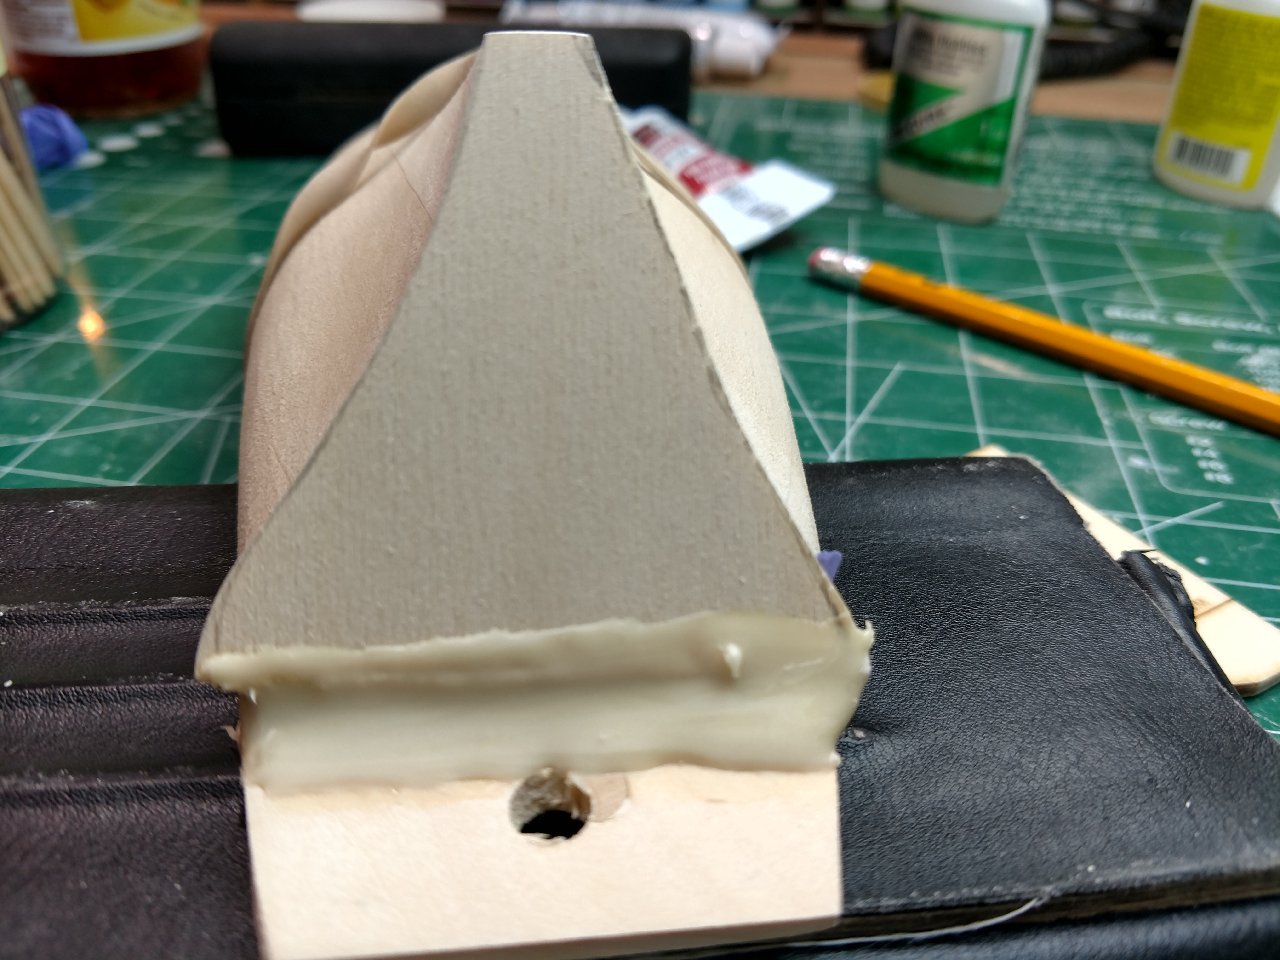
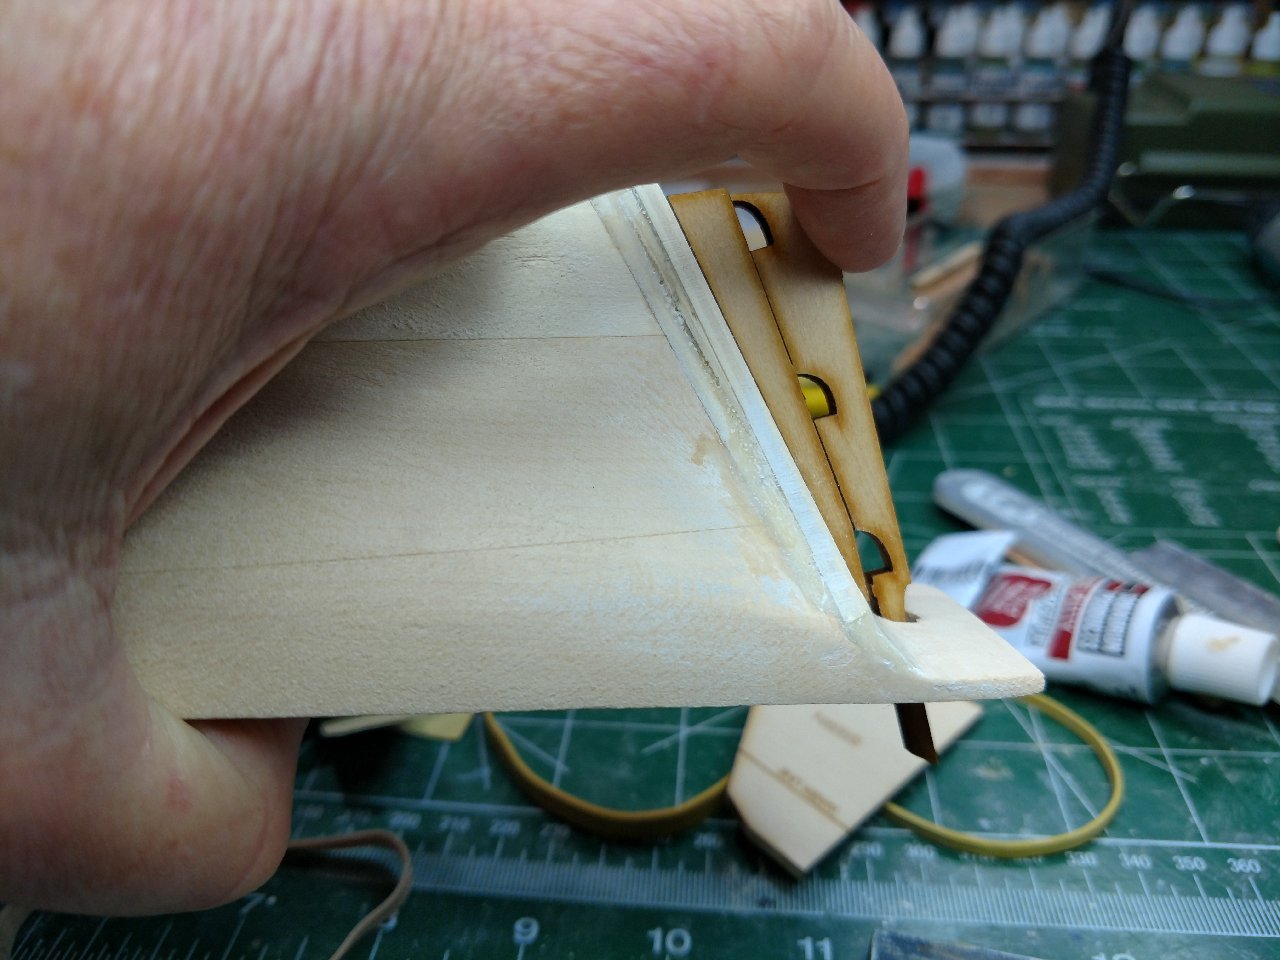
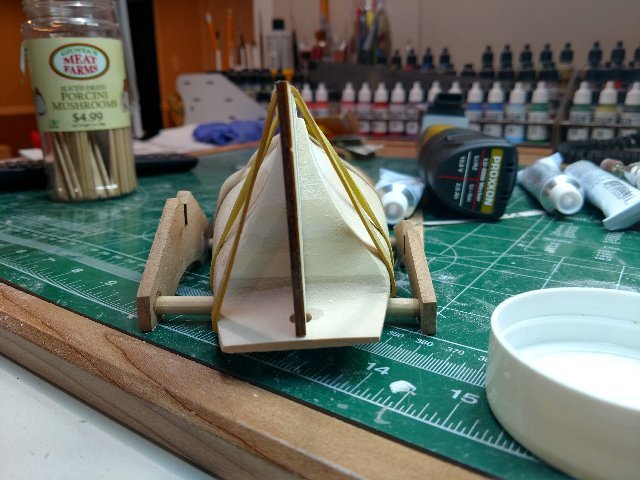
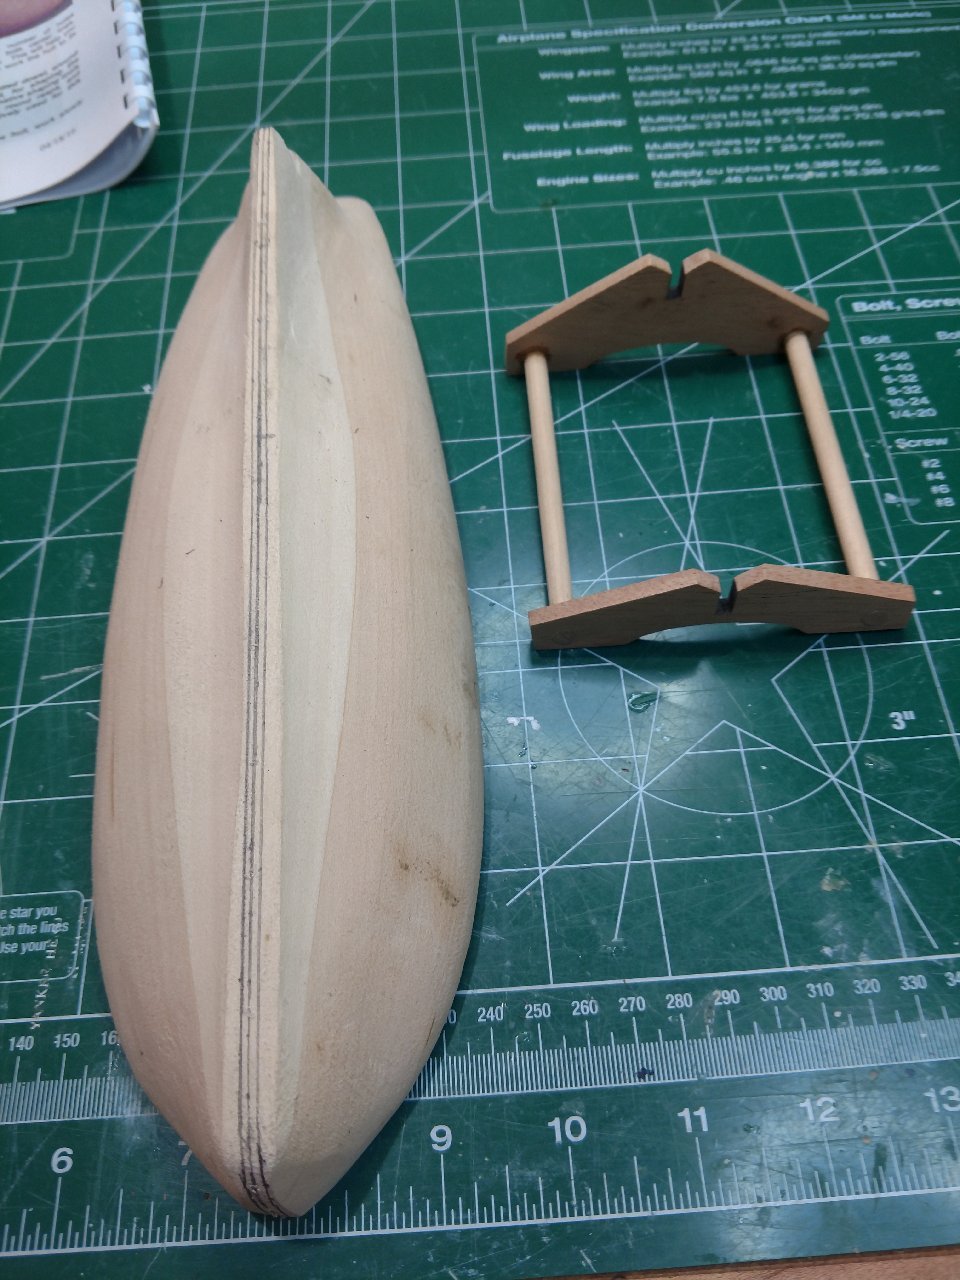
I know it has been a while, however that doesn't mean I haven't been busy. I left off on the stern which presented me with challenges that I overcame (above). A lot of issues resulted in trying new tools and using templates for the first time. The stern survived as seen in my previous post, however the rookie could not survive the mistakes on the bow. Even though I followed the templates for the bow, I butchered the bow by taking a catastrophic amount of wood off the bow. I am still a little perplexed over what happened (See Pictures). My bulkhead templates are true, however when I assembled the false keel I was stunned at what I saw!
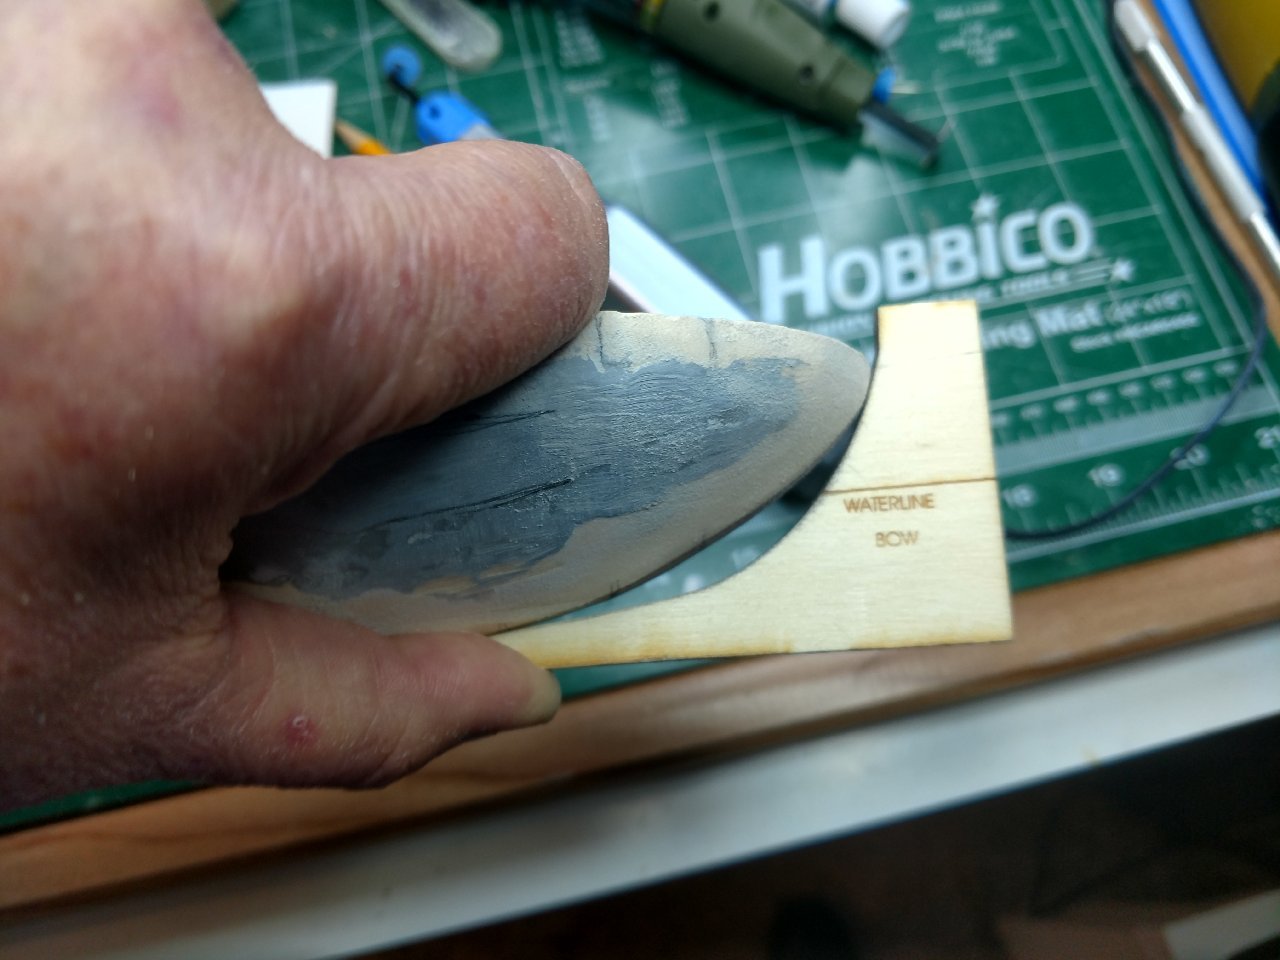
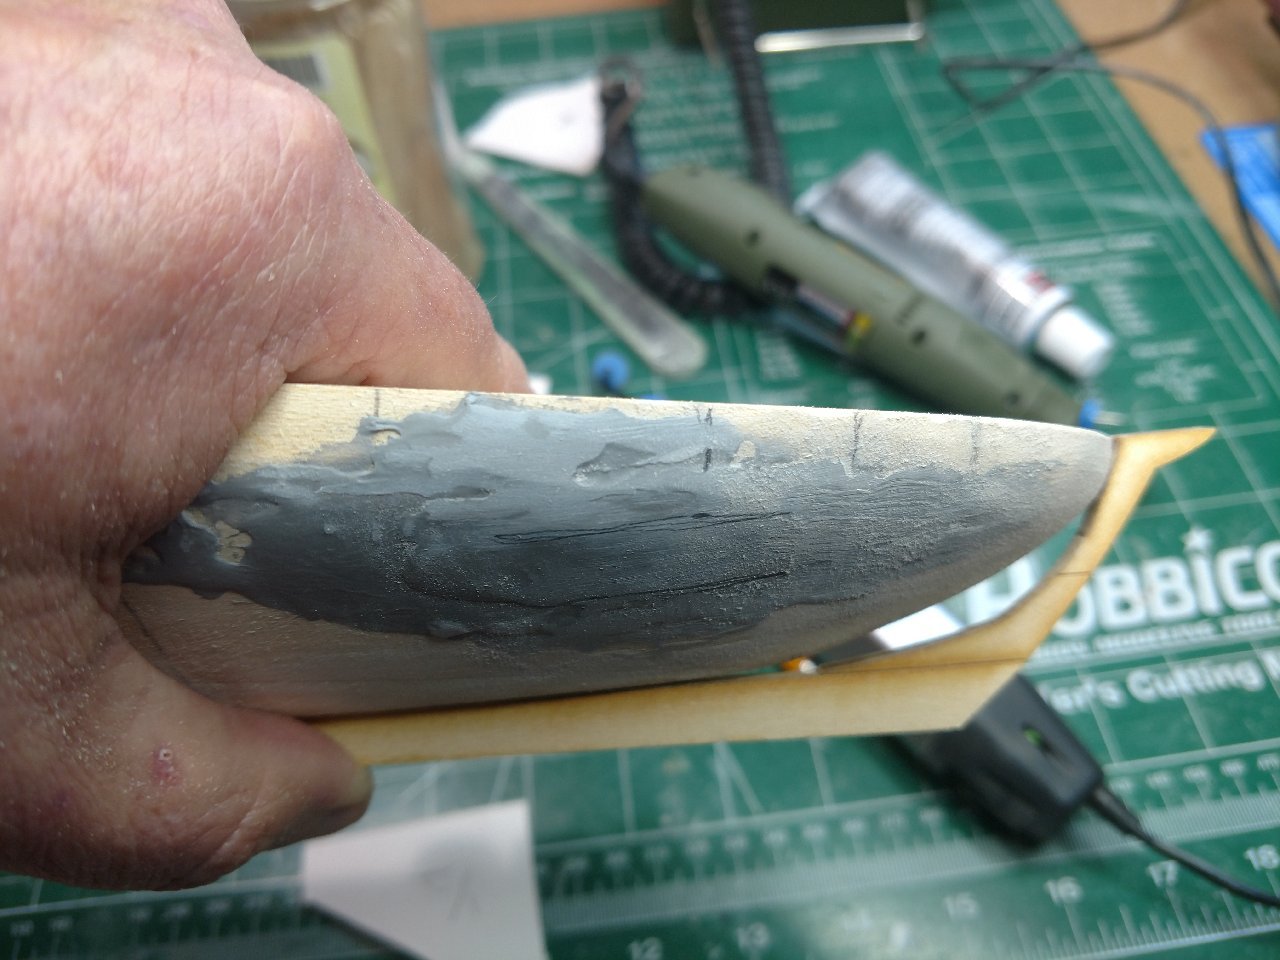
So I spoke with Blue Jacket, I was advised to use the shaping for the bow and stern templates for the shaping of the boat as gospel. Use the bulkhead templates from the keel upward towards the deck (However not all the way up to the deck). So the new hull arrived, and starting again, no quitting here.
Looking forward to beginning my posts once I catch up to where I left off.
Be well everyone and be safe,
Bill T.
-
Hello Folks,
After pondering whether or not to add another piece of basswood to the stern to the RC (Revenue Cutter) I decided to move forward extend the stern to have the rudder whole closer to the stern to be safe. It added about 3 hours of work to the build however thinking about it for 4 nights before sleeping and on my way to work for 4 days (we all do that I believe) it was well worth it.
I am now very pleased versus my prior post with the results (even though my stern looks like counting years on a open tree trunk) three years to be exact if one looks closely at the "after pictures" (LOL). It's part of problem resolution that I imagine we all experience on builds!
Before (& Sleepless):

After: (Now I can sleep)
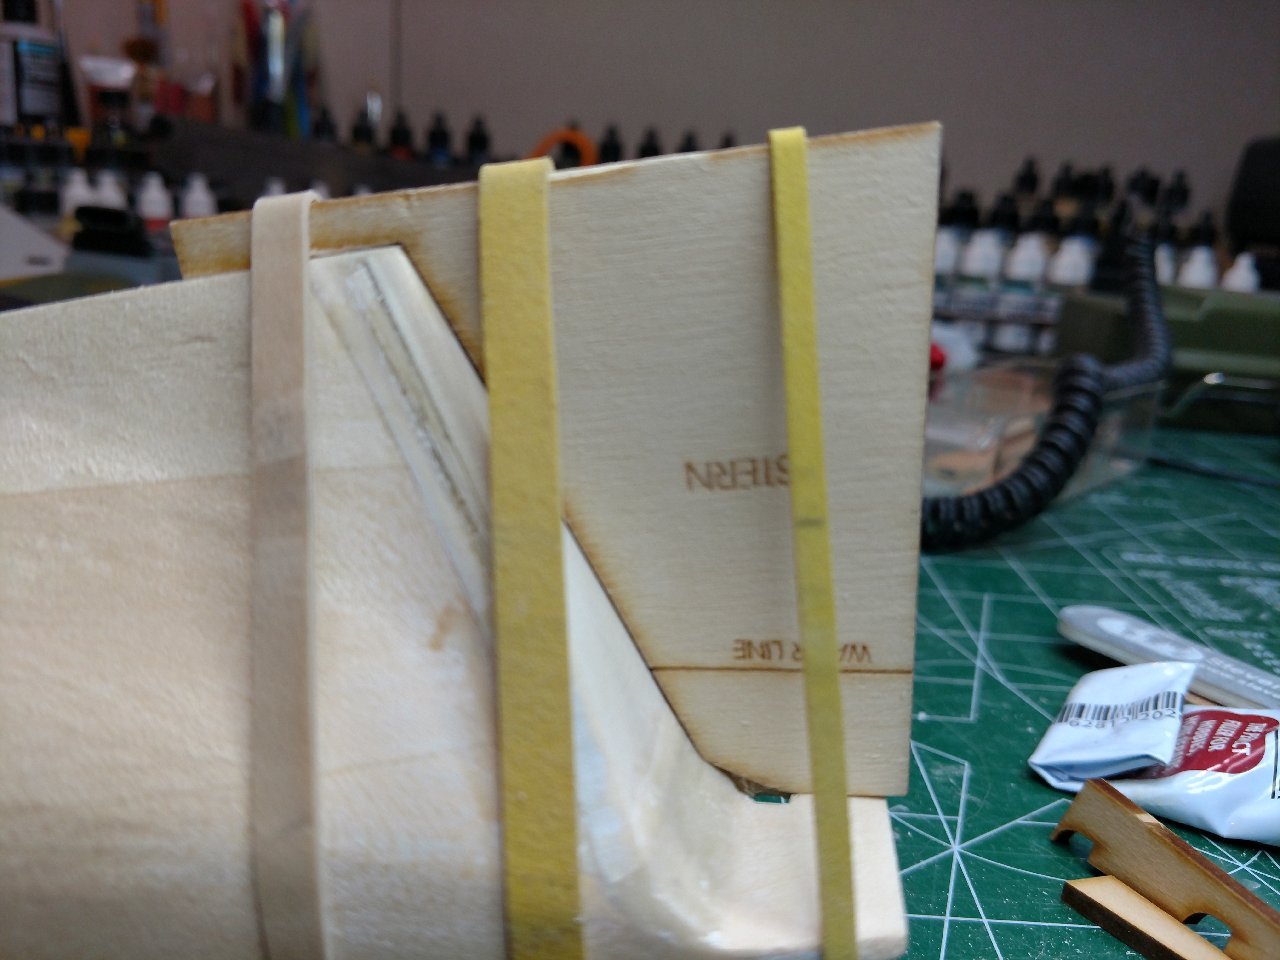
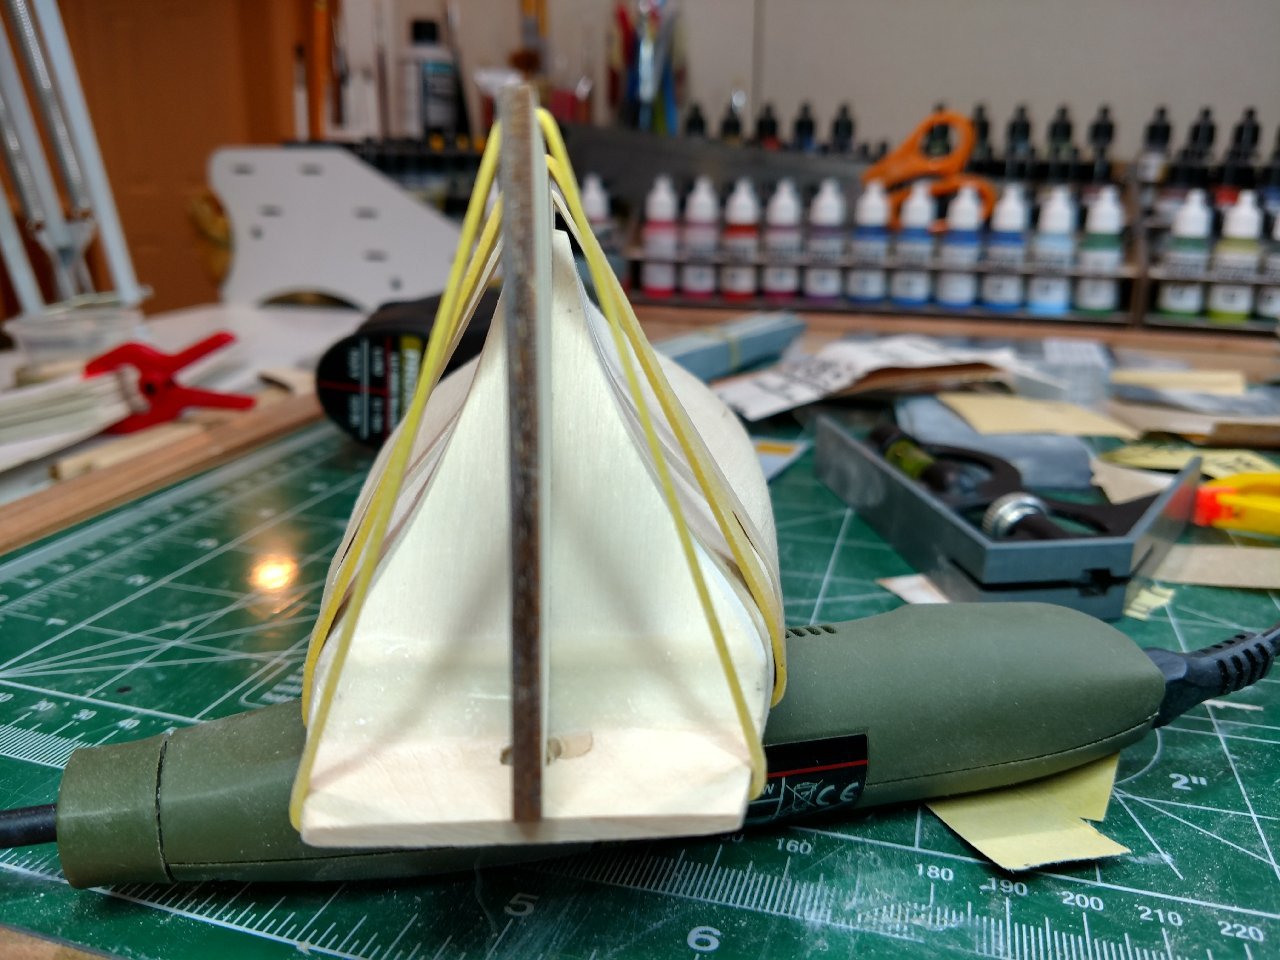
Much better, now on to the bow and move towards the stern. Learned a lot here including never compromise and follow my gut. 😉
-
Welcome to the MSW group,
Being a beginner I have found this format to not only enlightening and fun, however extremely supporting. This is a great group to be associated with, best of luck with your future endeavors on ship building.
- mtaylor and ThirdCoast
-
 2
2
-
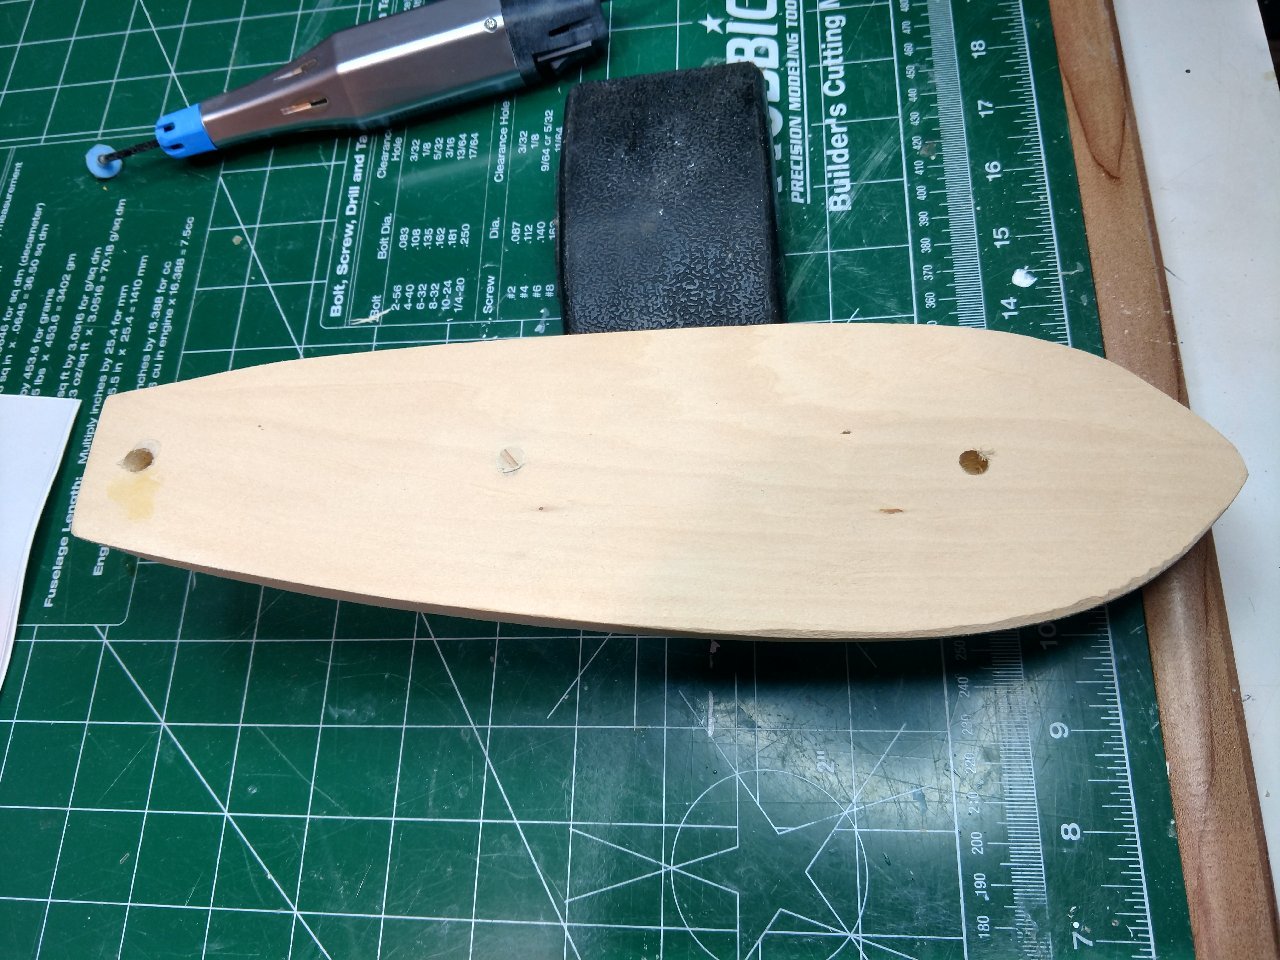
Hello Folks,
It has been a long time since my last post however It is nice to be back on the BJ Revenue Cutter. Still in the beginning steps:
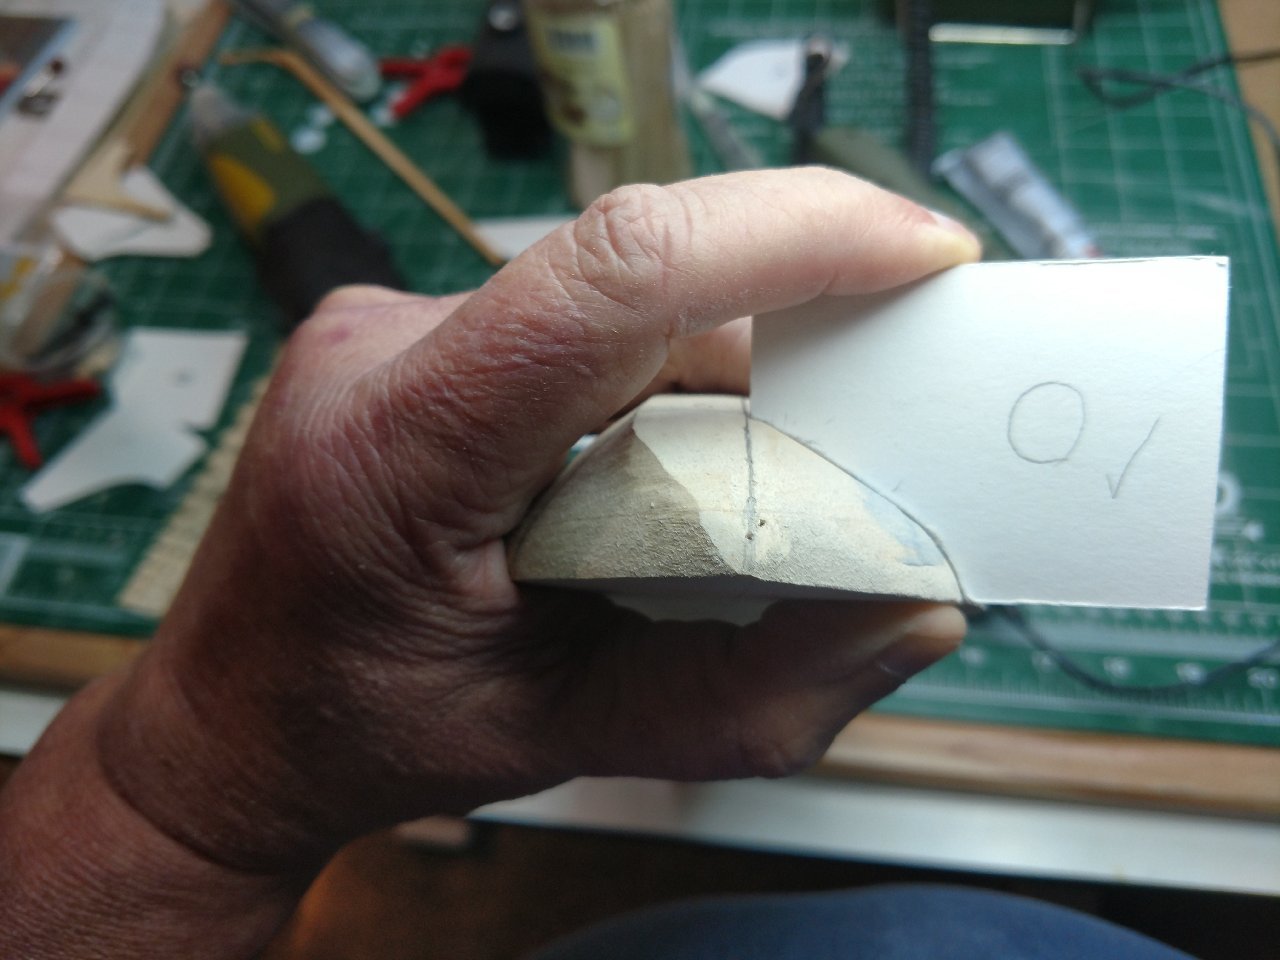
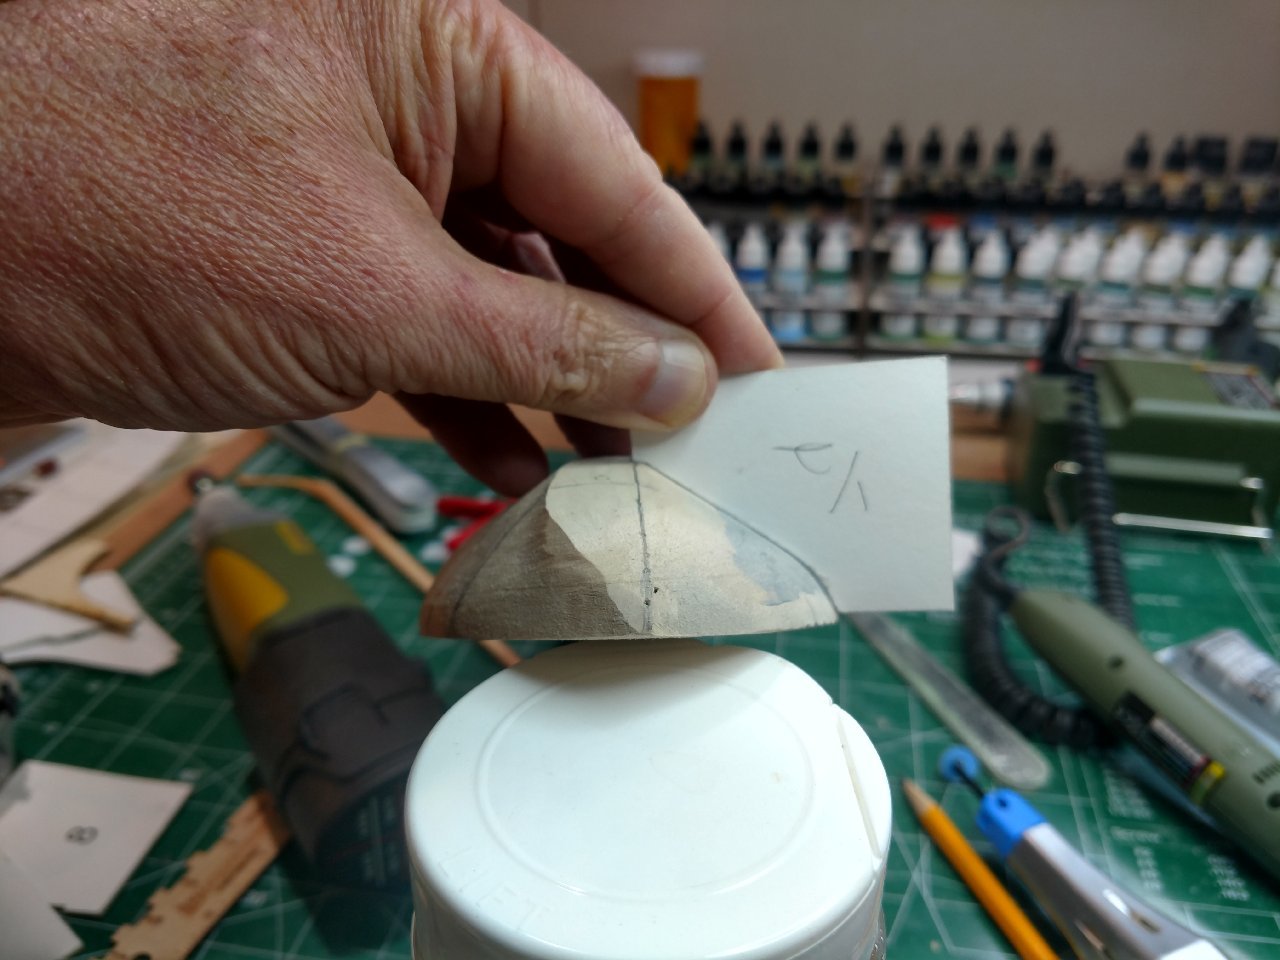
- Shaped the bow using the template supplied by BJ, pretty straight forward. I notice that as I use the templates to shape the forward portion a lot of wood will be coming off. I will trust the templates though.
- The stern was a different story, using new tools has it's ups and downs. As the picture below outlines I took way too much wood off the stern, I just could not get template correct. So I added basswood to the stern and worked slowly using the template, not perfect, however good enough for me.
- I am concerned about the position of stern-post vs the rudder hole, it seems like there is too much distance. Normally this would not concern me, I could always add basswood to the stern to bring the rudder to the correct position. However I plan on copper plating the hull which means I need to be accurate now prior to the process of plating the hull. I will figure something out, probably dry fit the stern post and rudder. I will show my solution if any on my next post.
Take care all!
Bill T.
-
Hello Folks,
Short post for today:
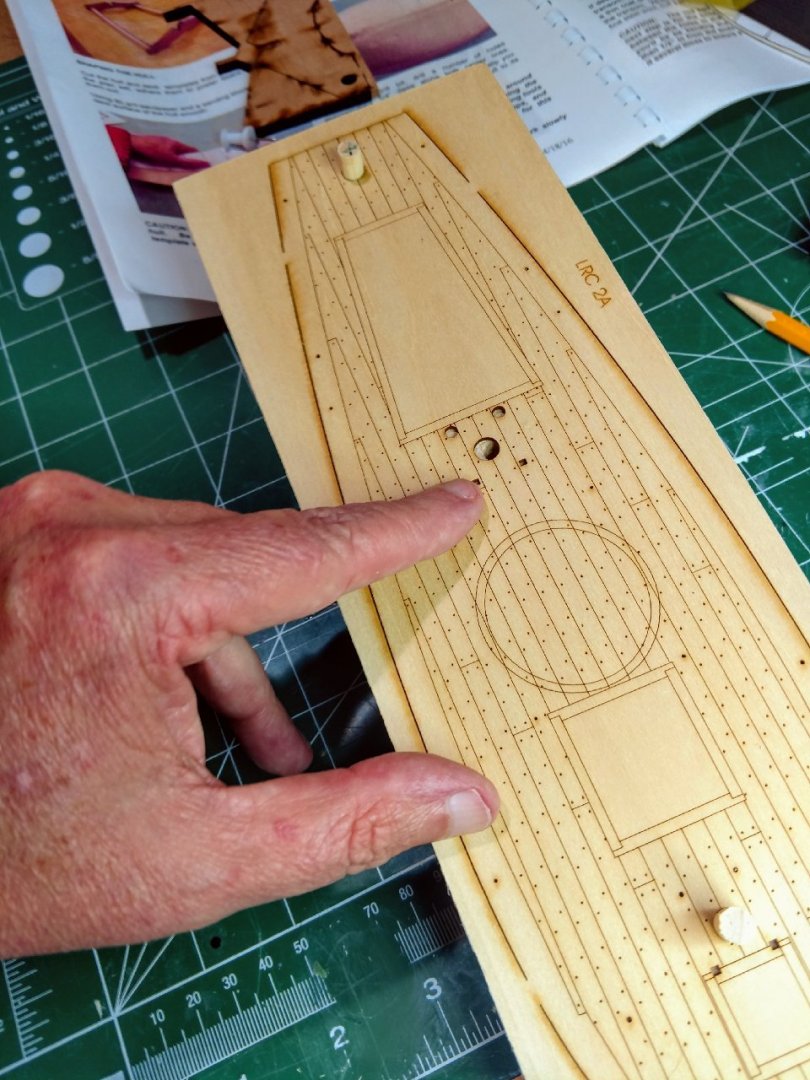
- Finished marking the template lines and the hull outline as per the manual. I noticed I do not have too much room for error on the hull sides. That's why they make putty I guess, that is if I take too much wood off the hull.
- I also completed the stand, not pretty however it is going to need more work because the hull is going to be copper plated. It will make a good working cradle for now.
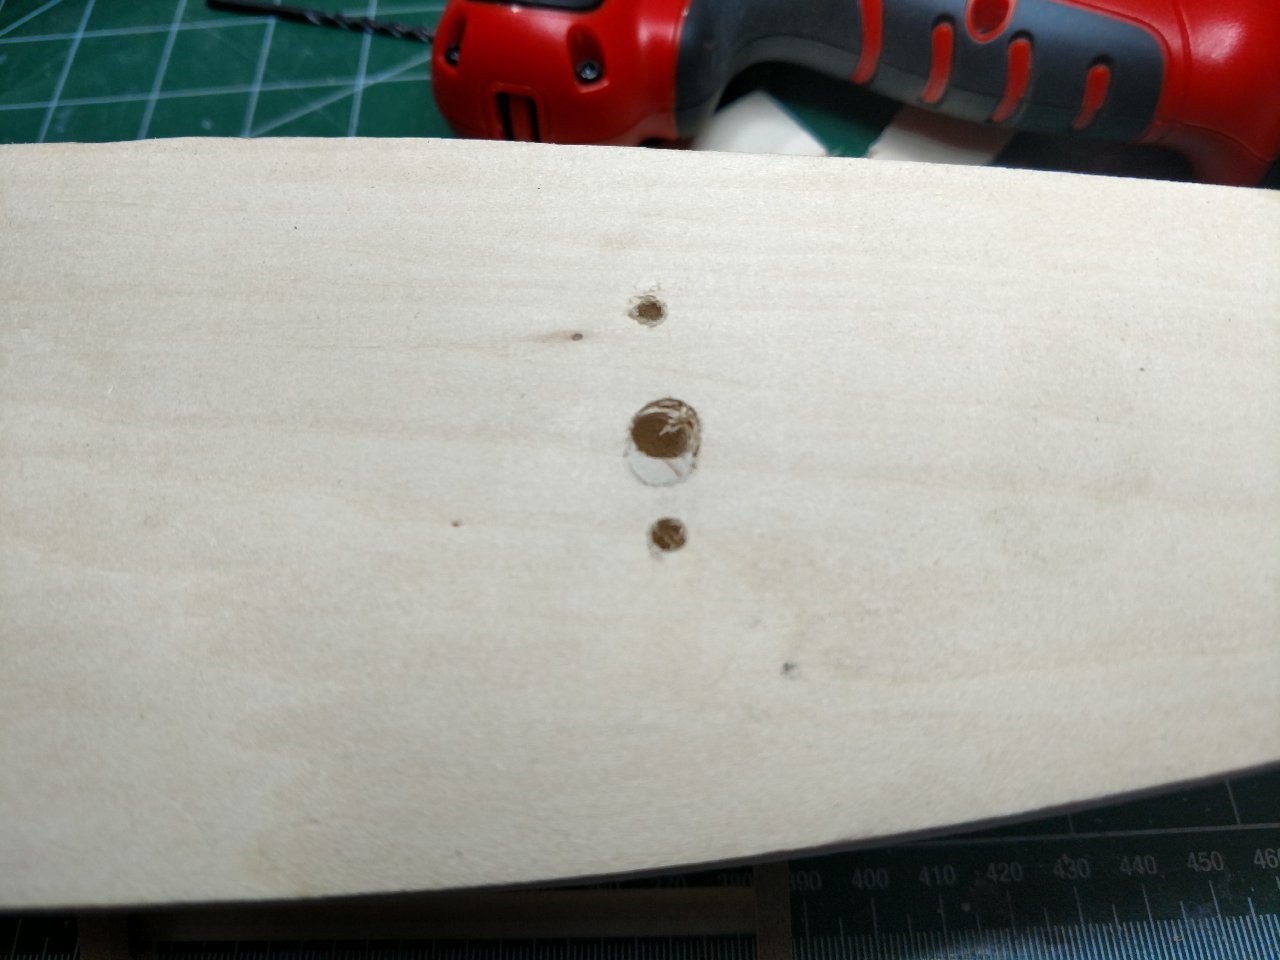
- Once the center-line was located and drawn I used a push pin with string attached and ran it along the keel to locate a fairly accurate line that coincides with the center line on the deck. Drilled the holes as per the manual, could not believe I broke one of my #75 drills. Those break easy!

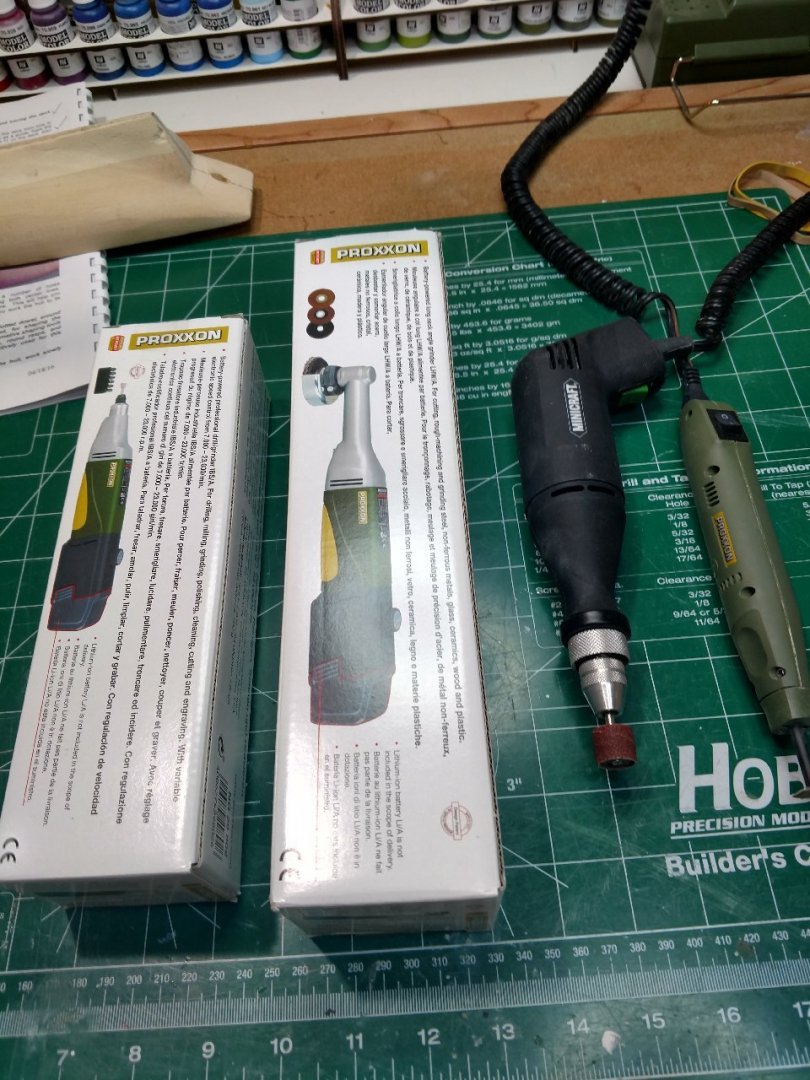
- I just received a mini-grinder from Proxxon, and I have some rotary tools as well to work on the stern.
On to working the hull and making a mess!
Take care all, stay cool and safe,
Bill T.
-
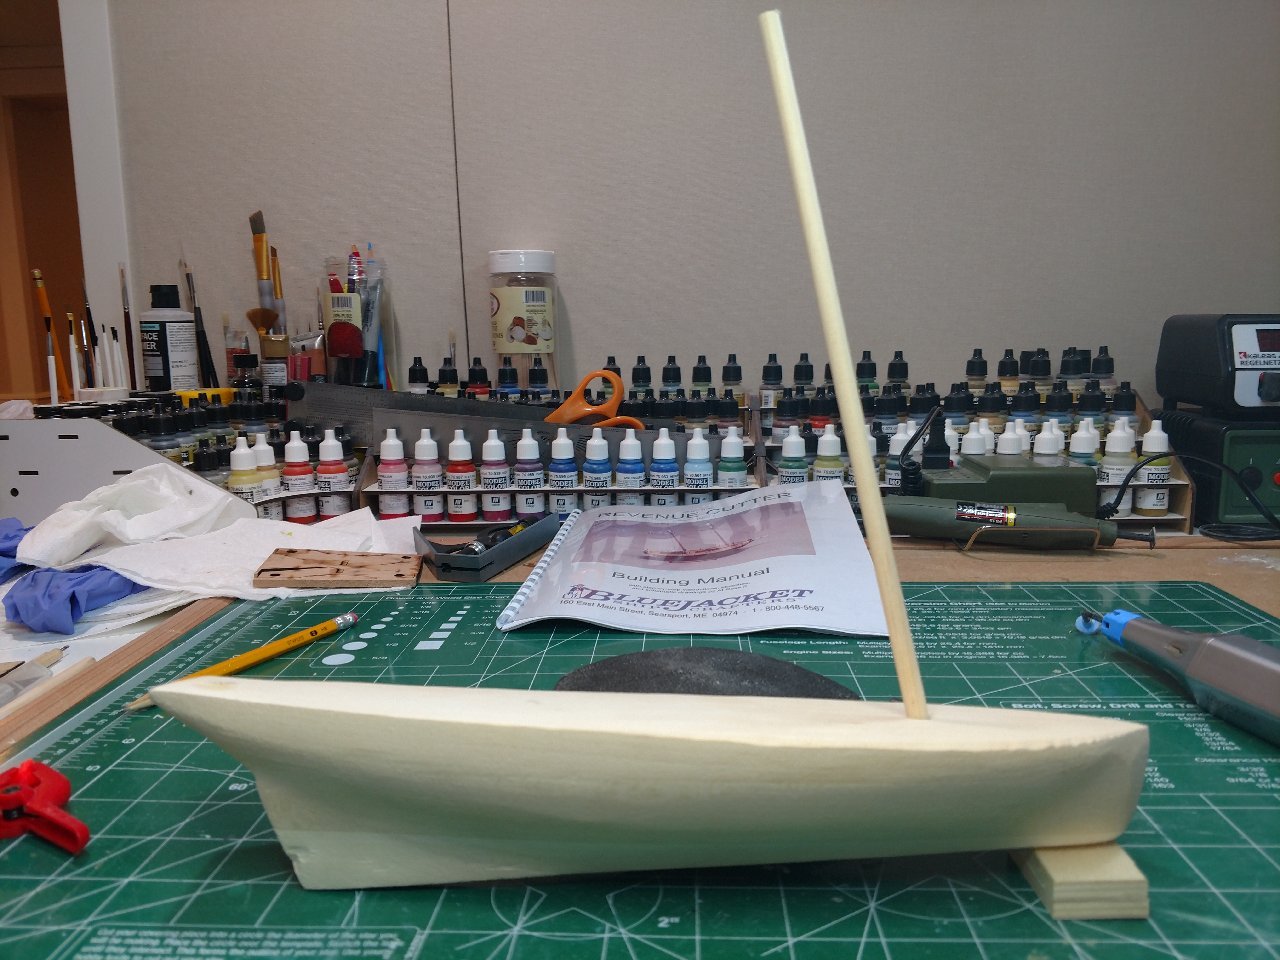
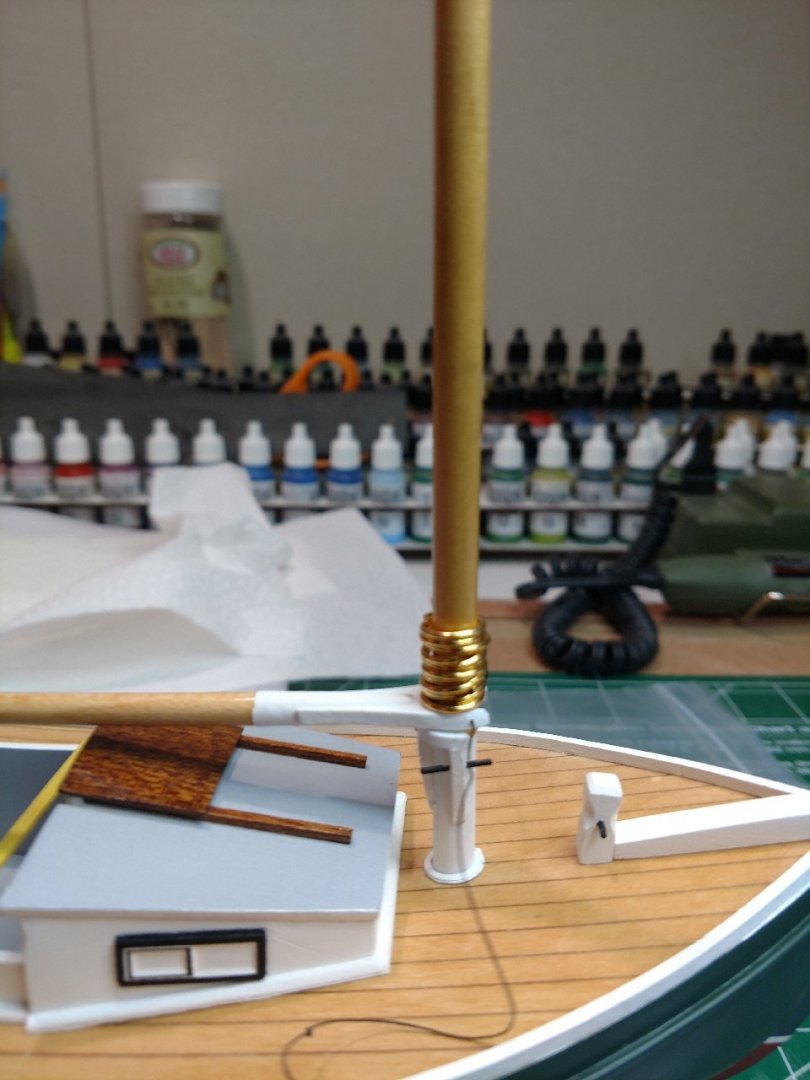
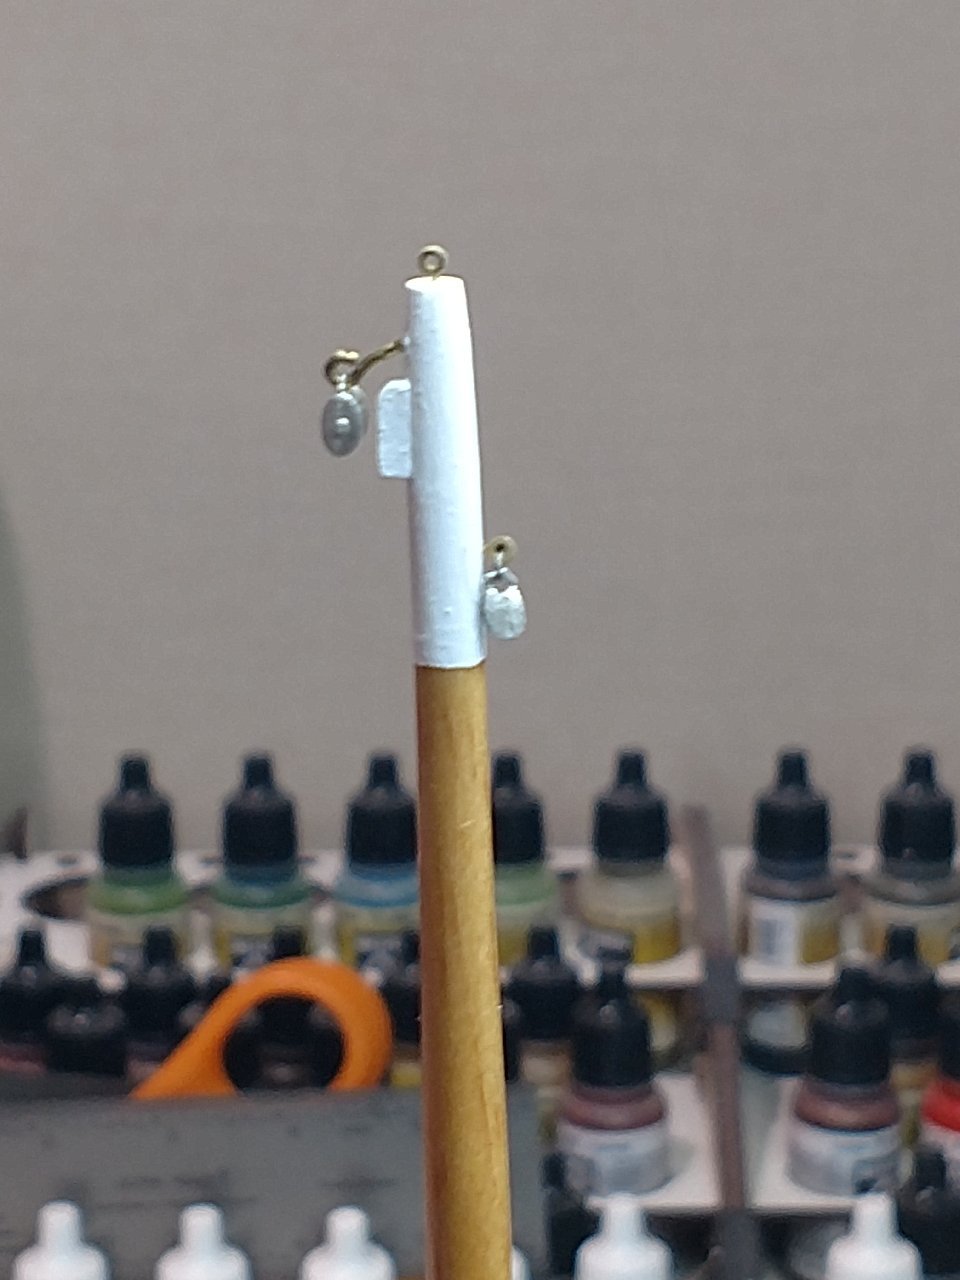
Good Afternoon Folks,
Back in business, feels good!. Left off with having to re-drill misaligned holes in the hull of the kit, covered the original hole with 1/4 in dowel. Needed time to think of how to do this and assimilate the same rake on the foremast with the re-drilled mainmast hole. I am pleased with the result so far, I may be a little off since I do not possess a drill press yet. All this was done free hand (Just ordered a Proxxon Drill Press to save time in the future).
- Step 1: Make a jig (took 3 times to get it right, kept on splitting the jig when drilling the whole for the side screws) to replicate the rake of the foremast to use when drilling the mainmast.
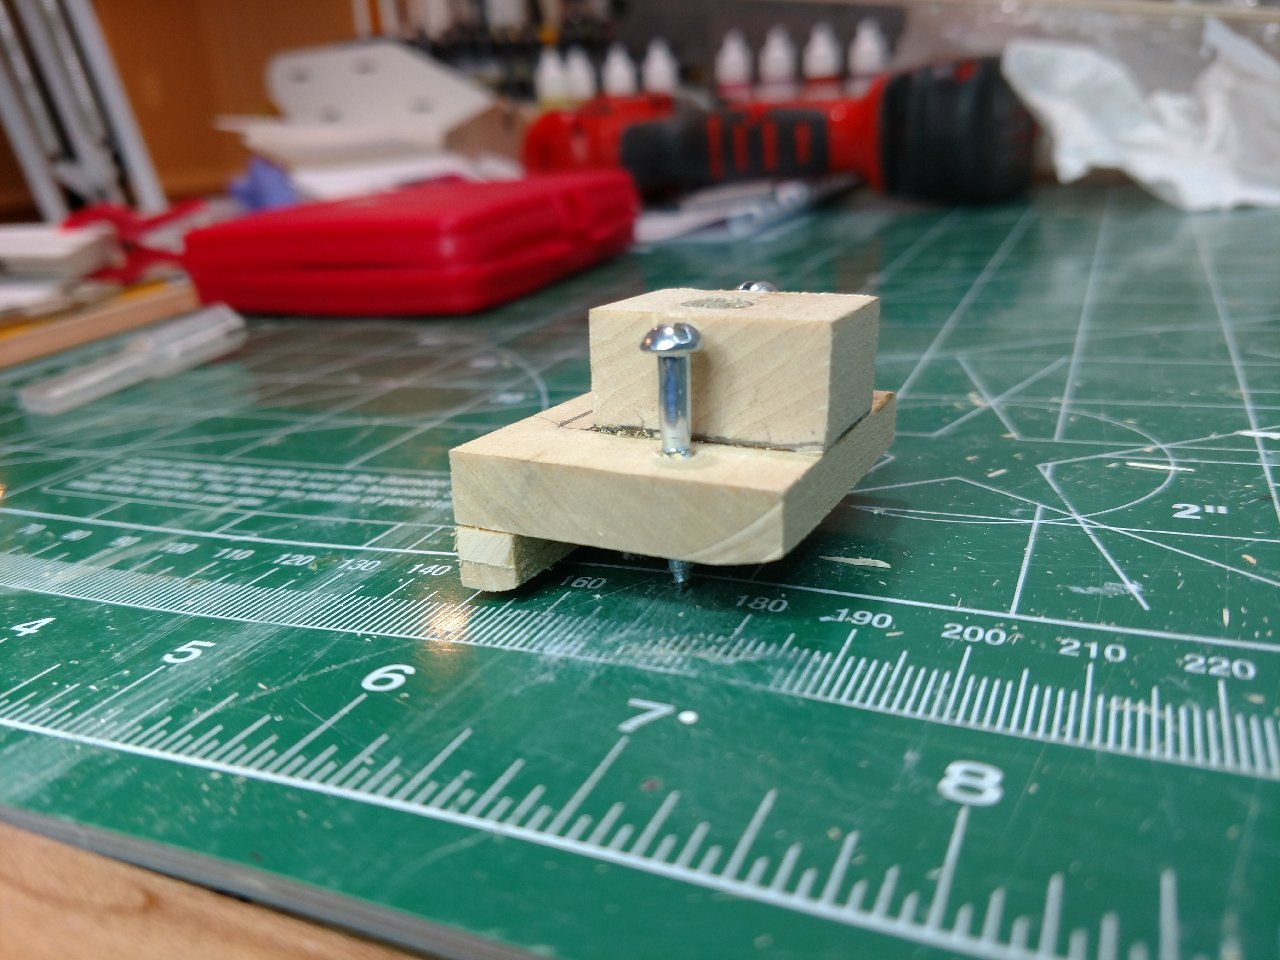
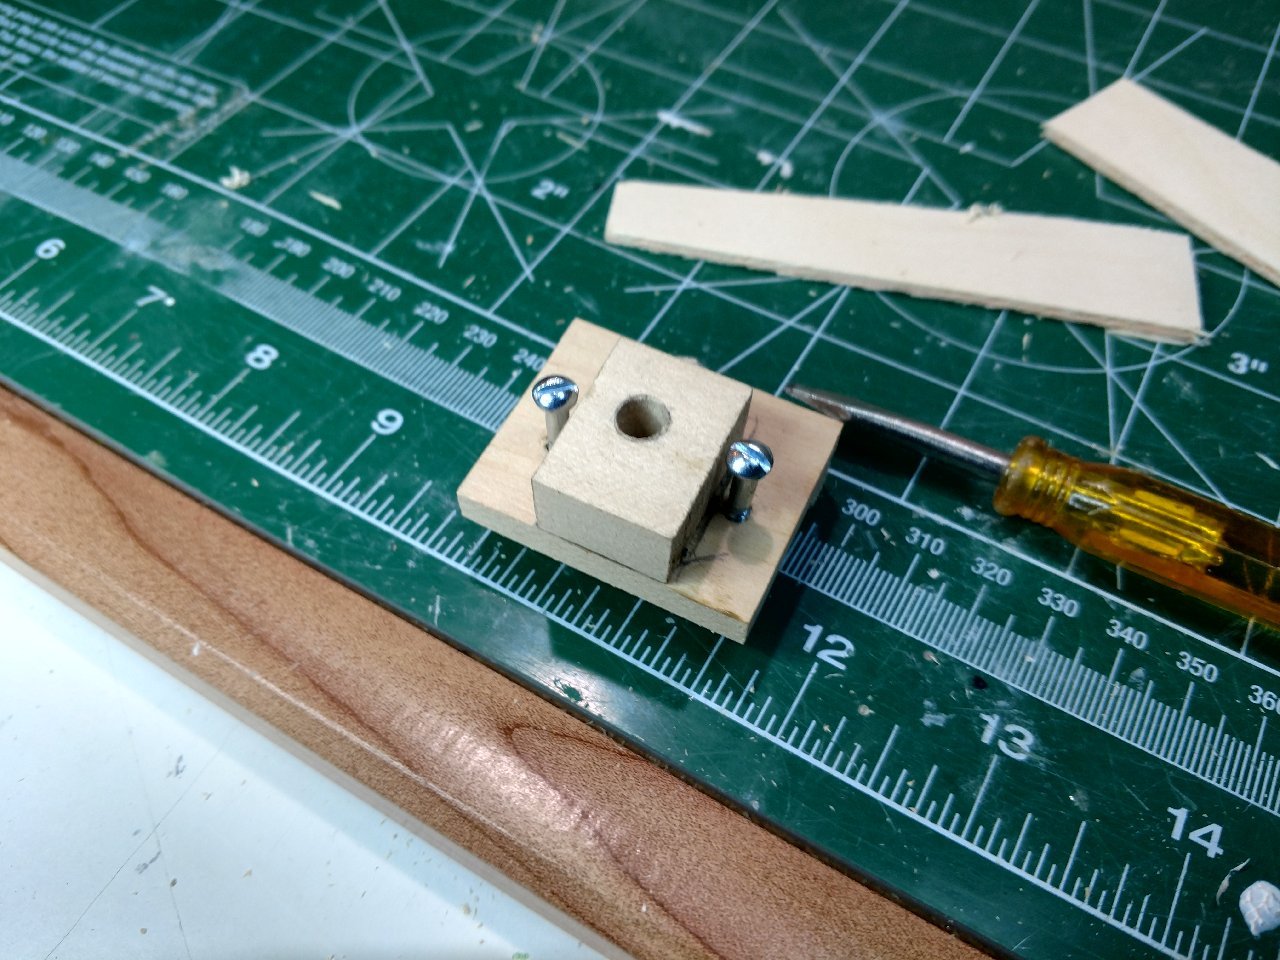
- Step 2: Find the correct location of the mainmast

- Step 3: Affix the jig onto the hull in the proper location.
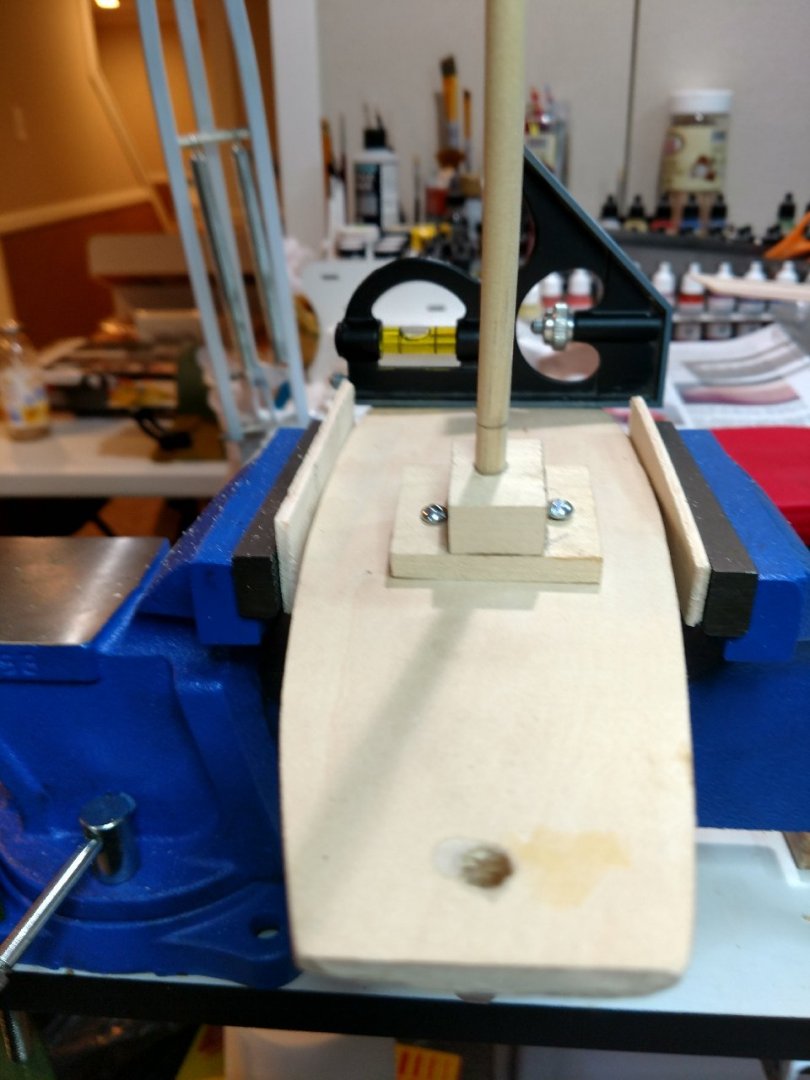
- Step 4: Drill the whole and pray the rake and location match the deck piece.
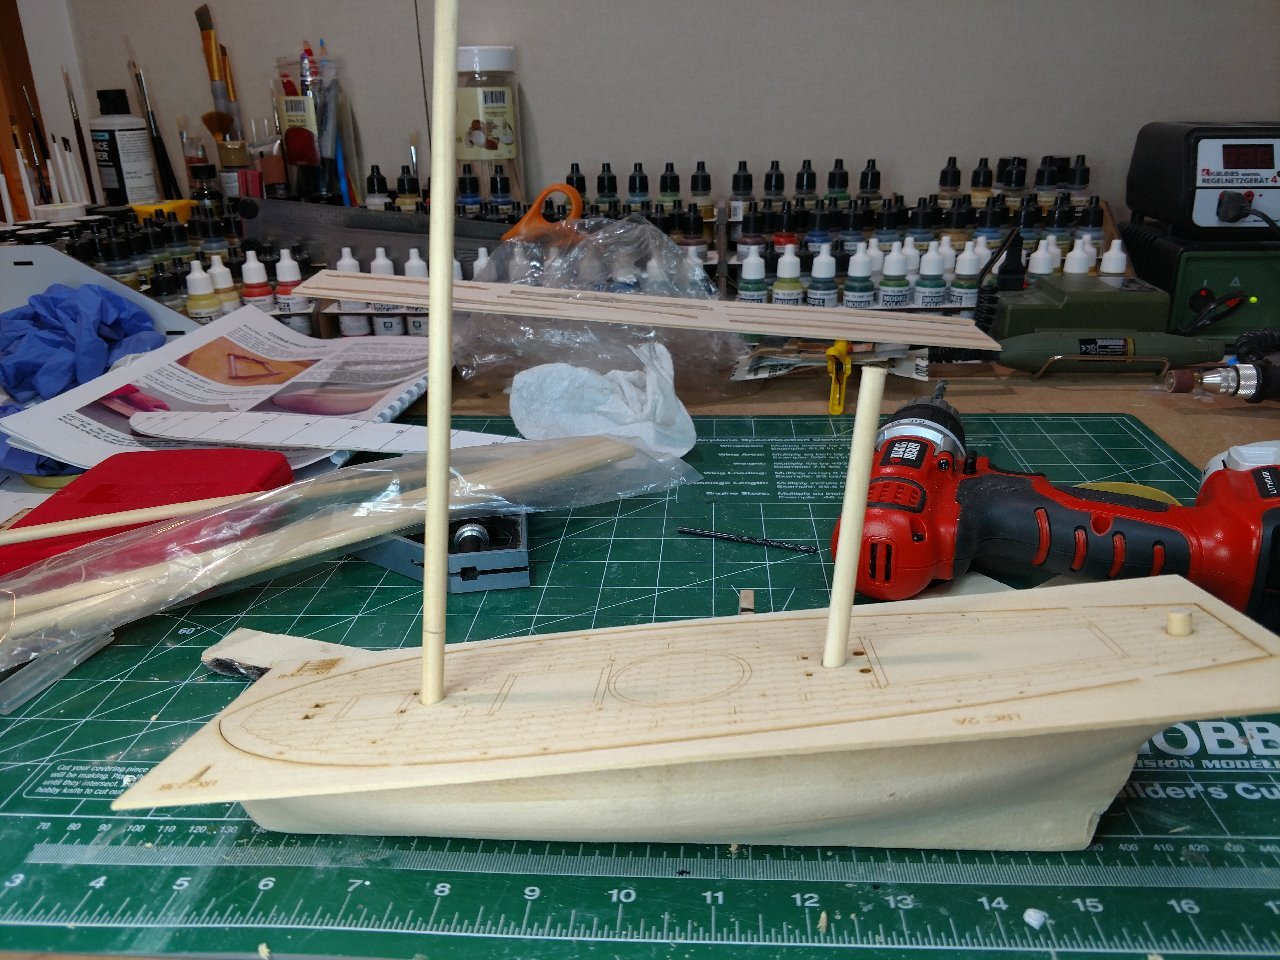
- Step 5: Get back to the business of moving forward on this build!
Have a great weekend folks!
Bill T.
- KurtH, Duanelaker, catopower and 5 others
-
8
-
-
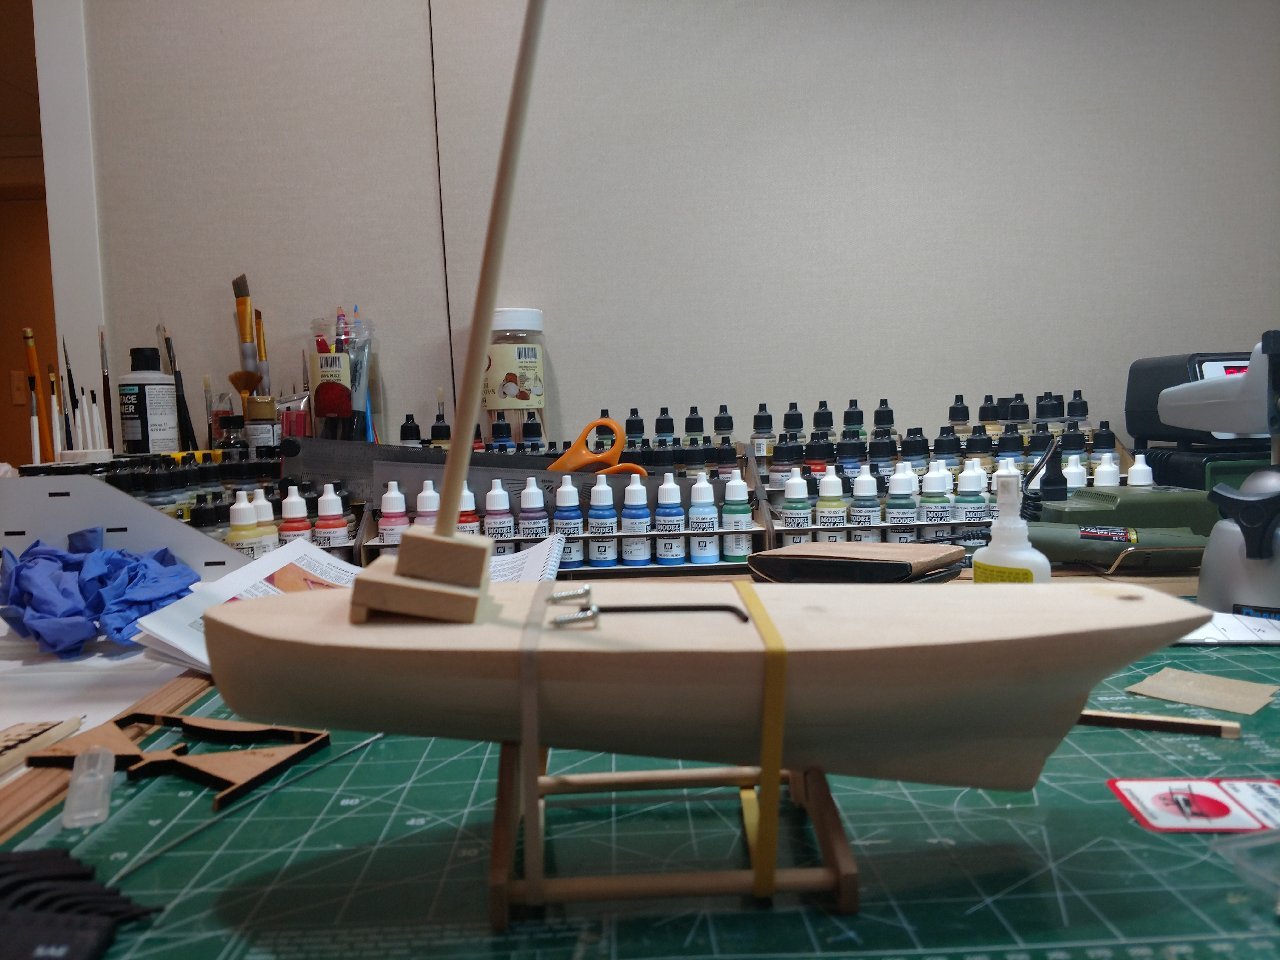
Hello Folks,
I got caught up in life over the past few weeks, this is progress of the kit to date:
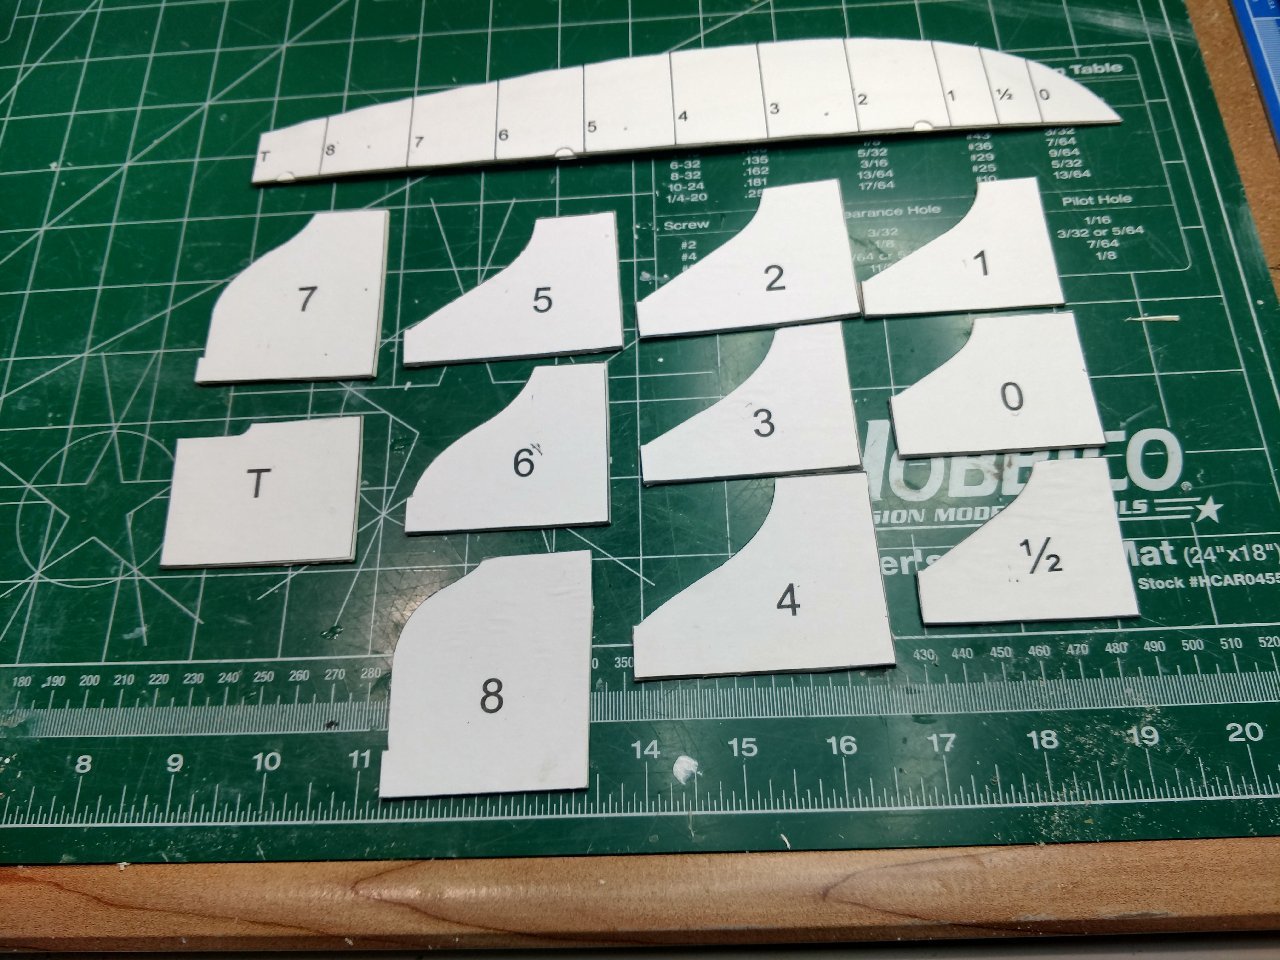
- Templates are complete, used frame matting material versus poster board as per Ryland Craze's recommendation above. Worked great and would recommend matting material over poster board every time. I little tougher to cut through, results well worth it.
- After messing around with the templates I notice that the holes did not line up for the masts and rudder. I double checked the templates I came up with the same result. Finally I broke out the deck part, made some small dowels to secure it, and confirmed there was a problem.

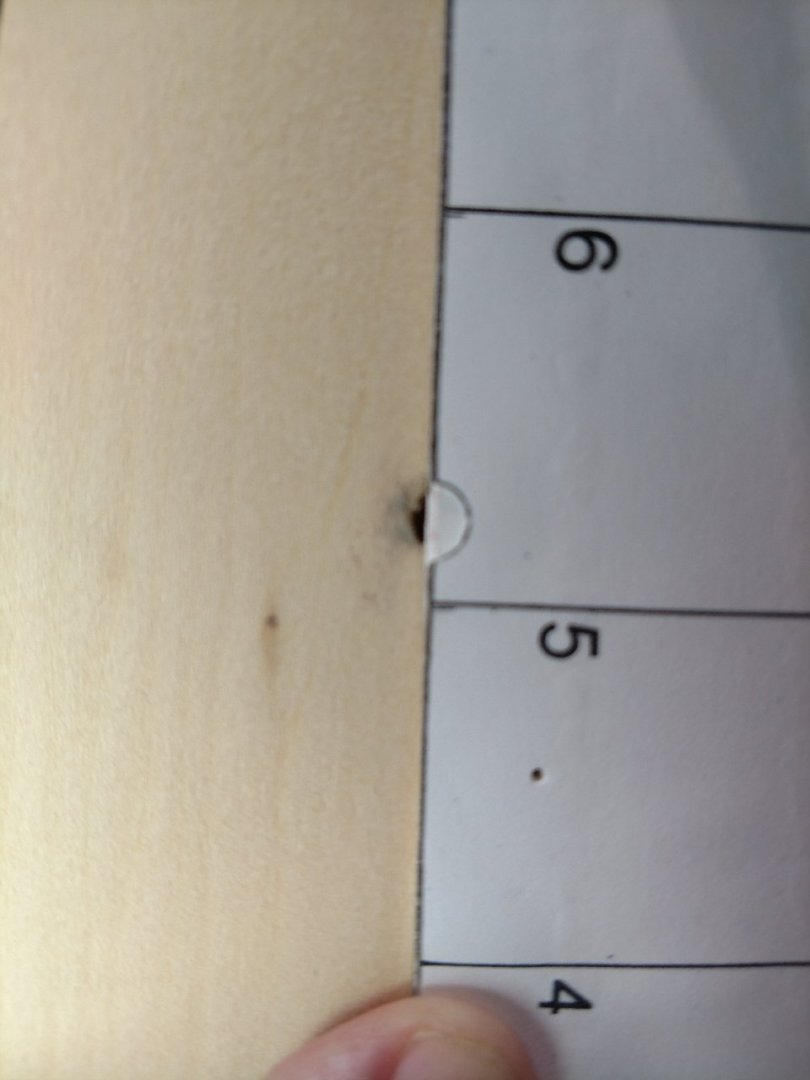
- I got in touch with Blue Jacket (BJ) quickly because I am planning to copper plate the boat vs. copper paint it. I was worried about spending all the time copper plating the hull and then deal with what I thought could be a big problem. They responded quickly as usual recommending to filling the hole and drilling another or drilling a larger whole (the rigging later would prevent a wobbly mast (BTW this problem has already been addressed and corrected by BJ, however my kit is a pre-correction kit).
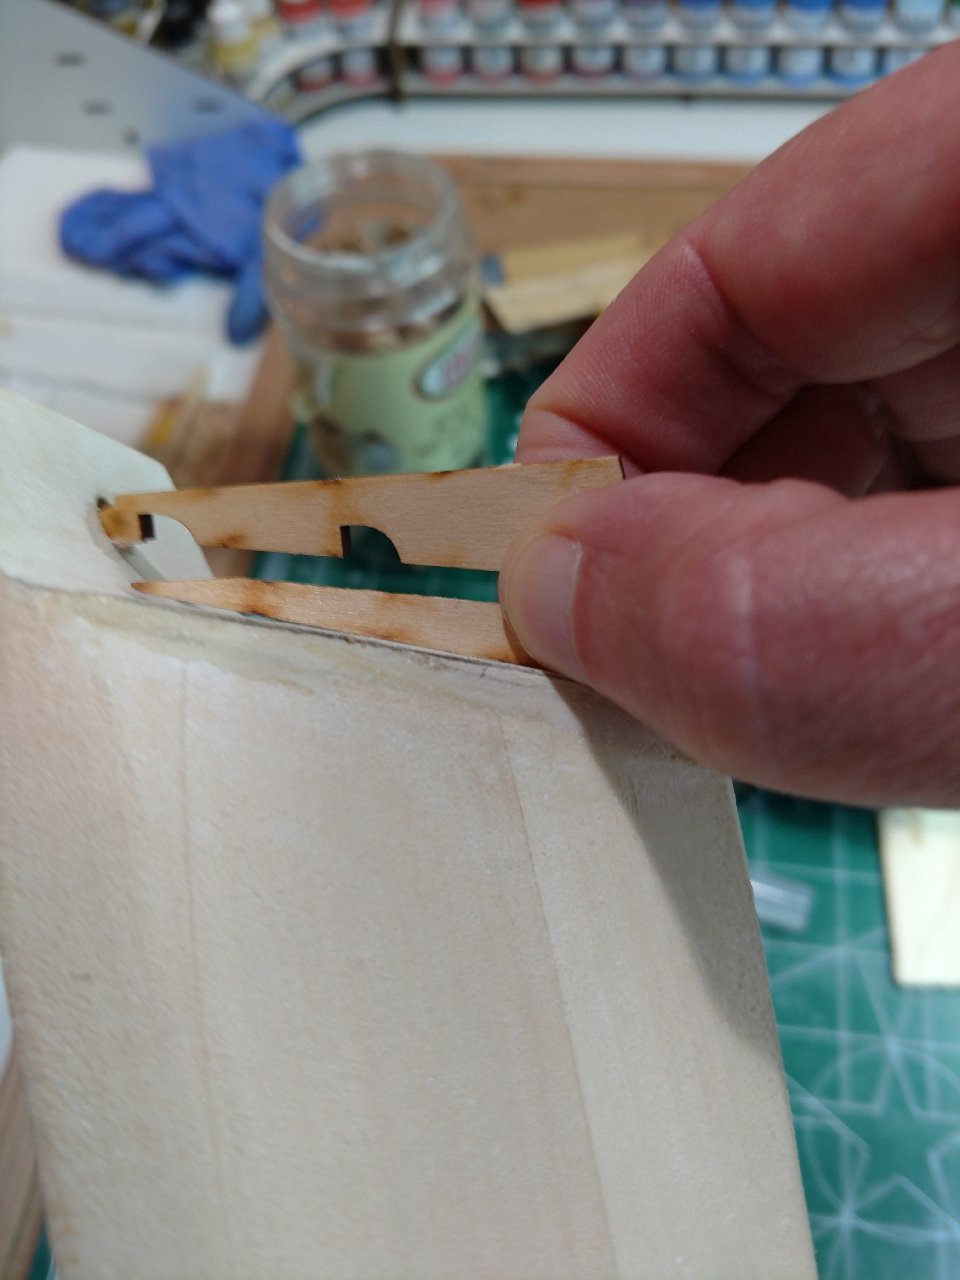
- I decided to fill in the offline mast hole, make some sort of a jig to support drilling a new mast hole that matches the deck part and the angle of the mast. I will use the foremast whole as a guide to have the angle of the new mast hole correct. I believe this will be largest challenge so far. Looking forward to giving it a shot, overcoming obstacles can be rewarding.
I will hopefully have this corrected and move on. (the beginning of my jig is in the bottom right hand corner of the above picture).
Stay safe all!
Bill T.
-
1 hour ago, sjanicki said:
Thank you for the compliments! The plates really make the model so engaging to look at. Do you have a build log? Would love to follow along
Yes I do, Revenue Cutter - wtimlen - Blue Jacket - 1/48. Thanks again for your log and interest.
Bill T.
-
Hello Ryland,
Will do, and thank you for the advice, I can use all I can get.
Bill T.
- sjanicki, Ryland Craze and catopower
-
3
-
Hello,
I saw your great build log of the Revenue Cutter and decided to utilize your technique of completing the kit with copper plates. I recently completed the Yankee Hero and thought the Revenue Cutter was a good progression. Your Revenue Cutter looks amazing to me.
I appreciate having the resource of your log to assist me with challenge of the copper plates, I am lucky!
Be safe and have a great 4th of July weekend,
Bill T.
-
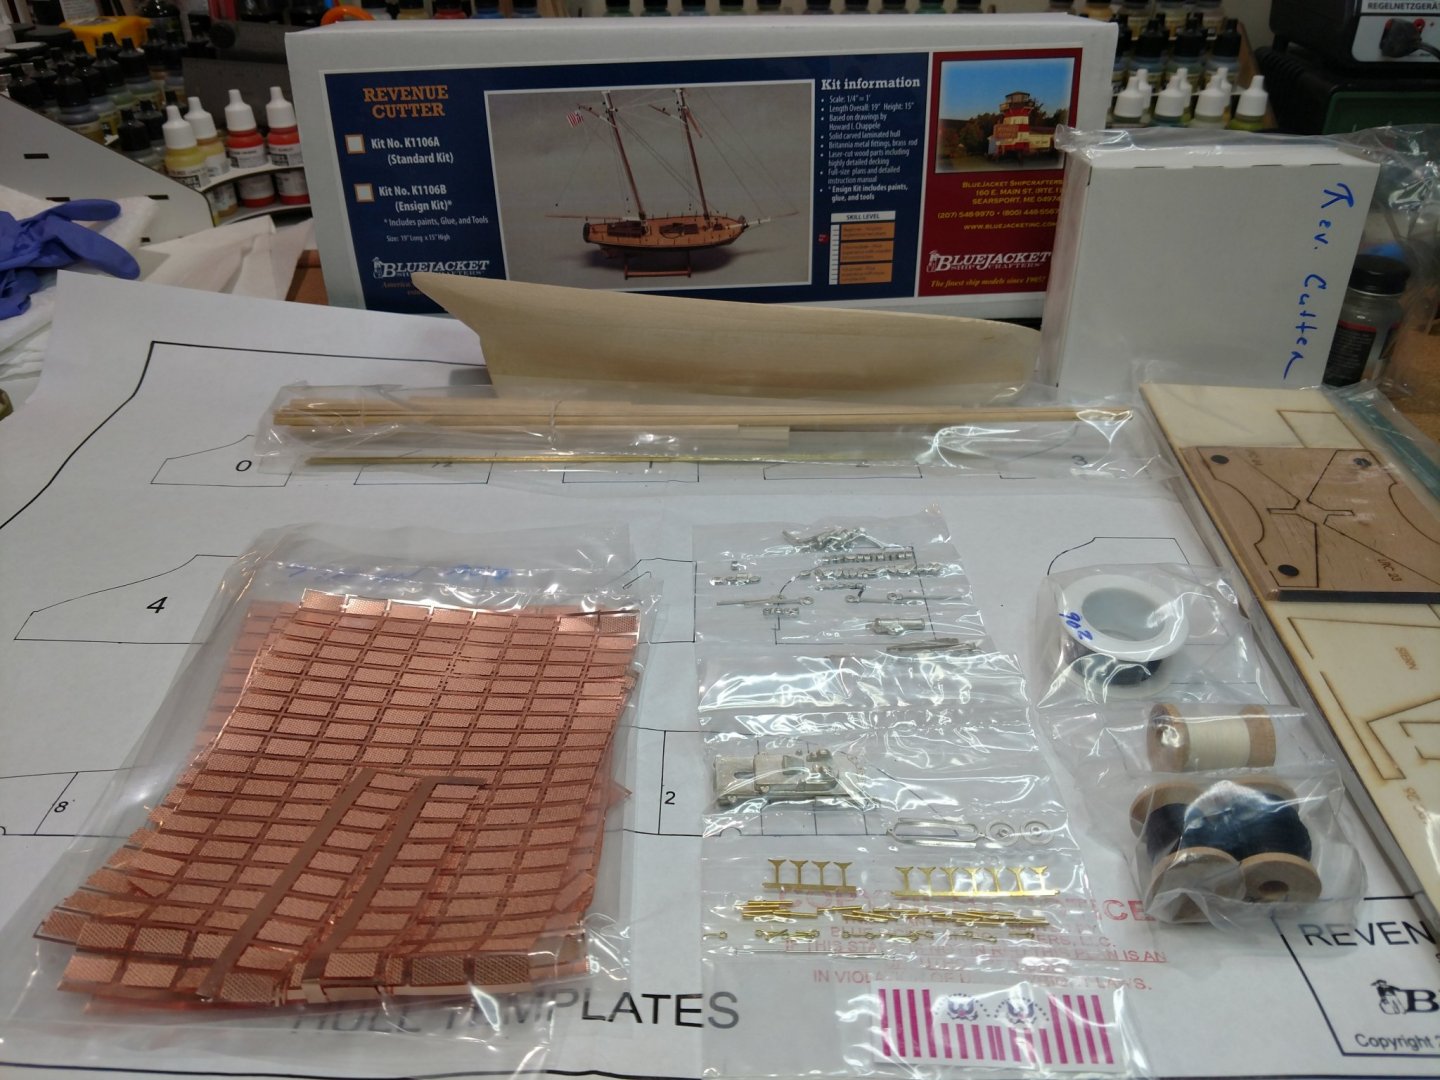
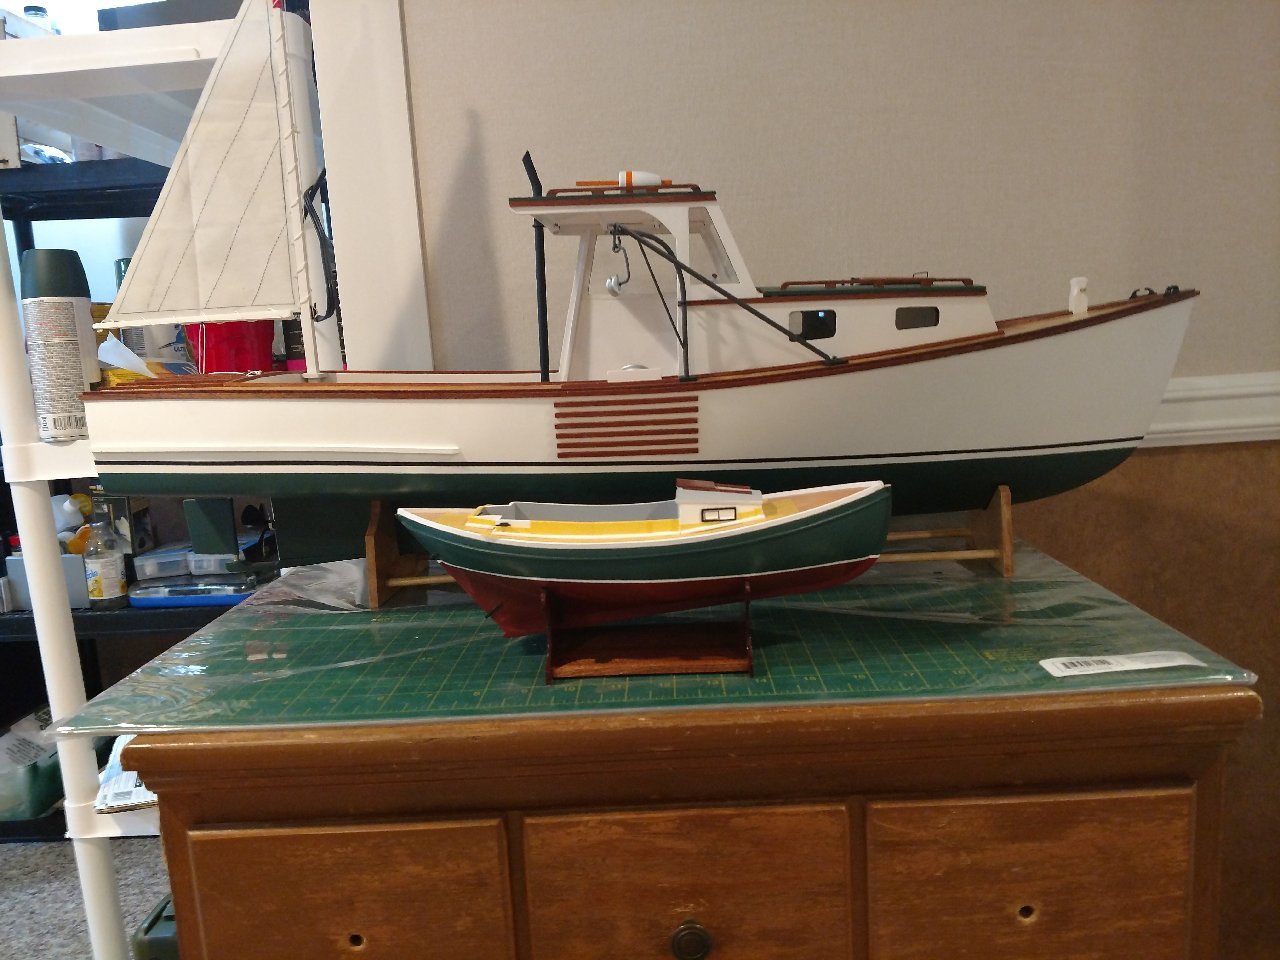
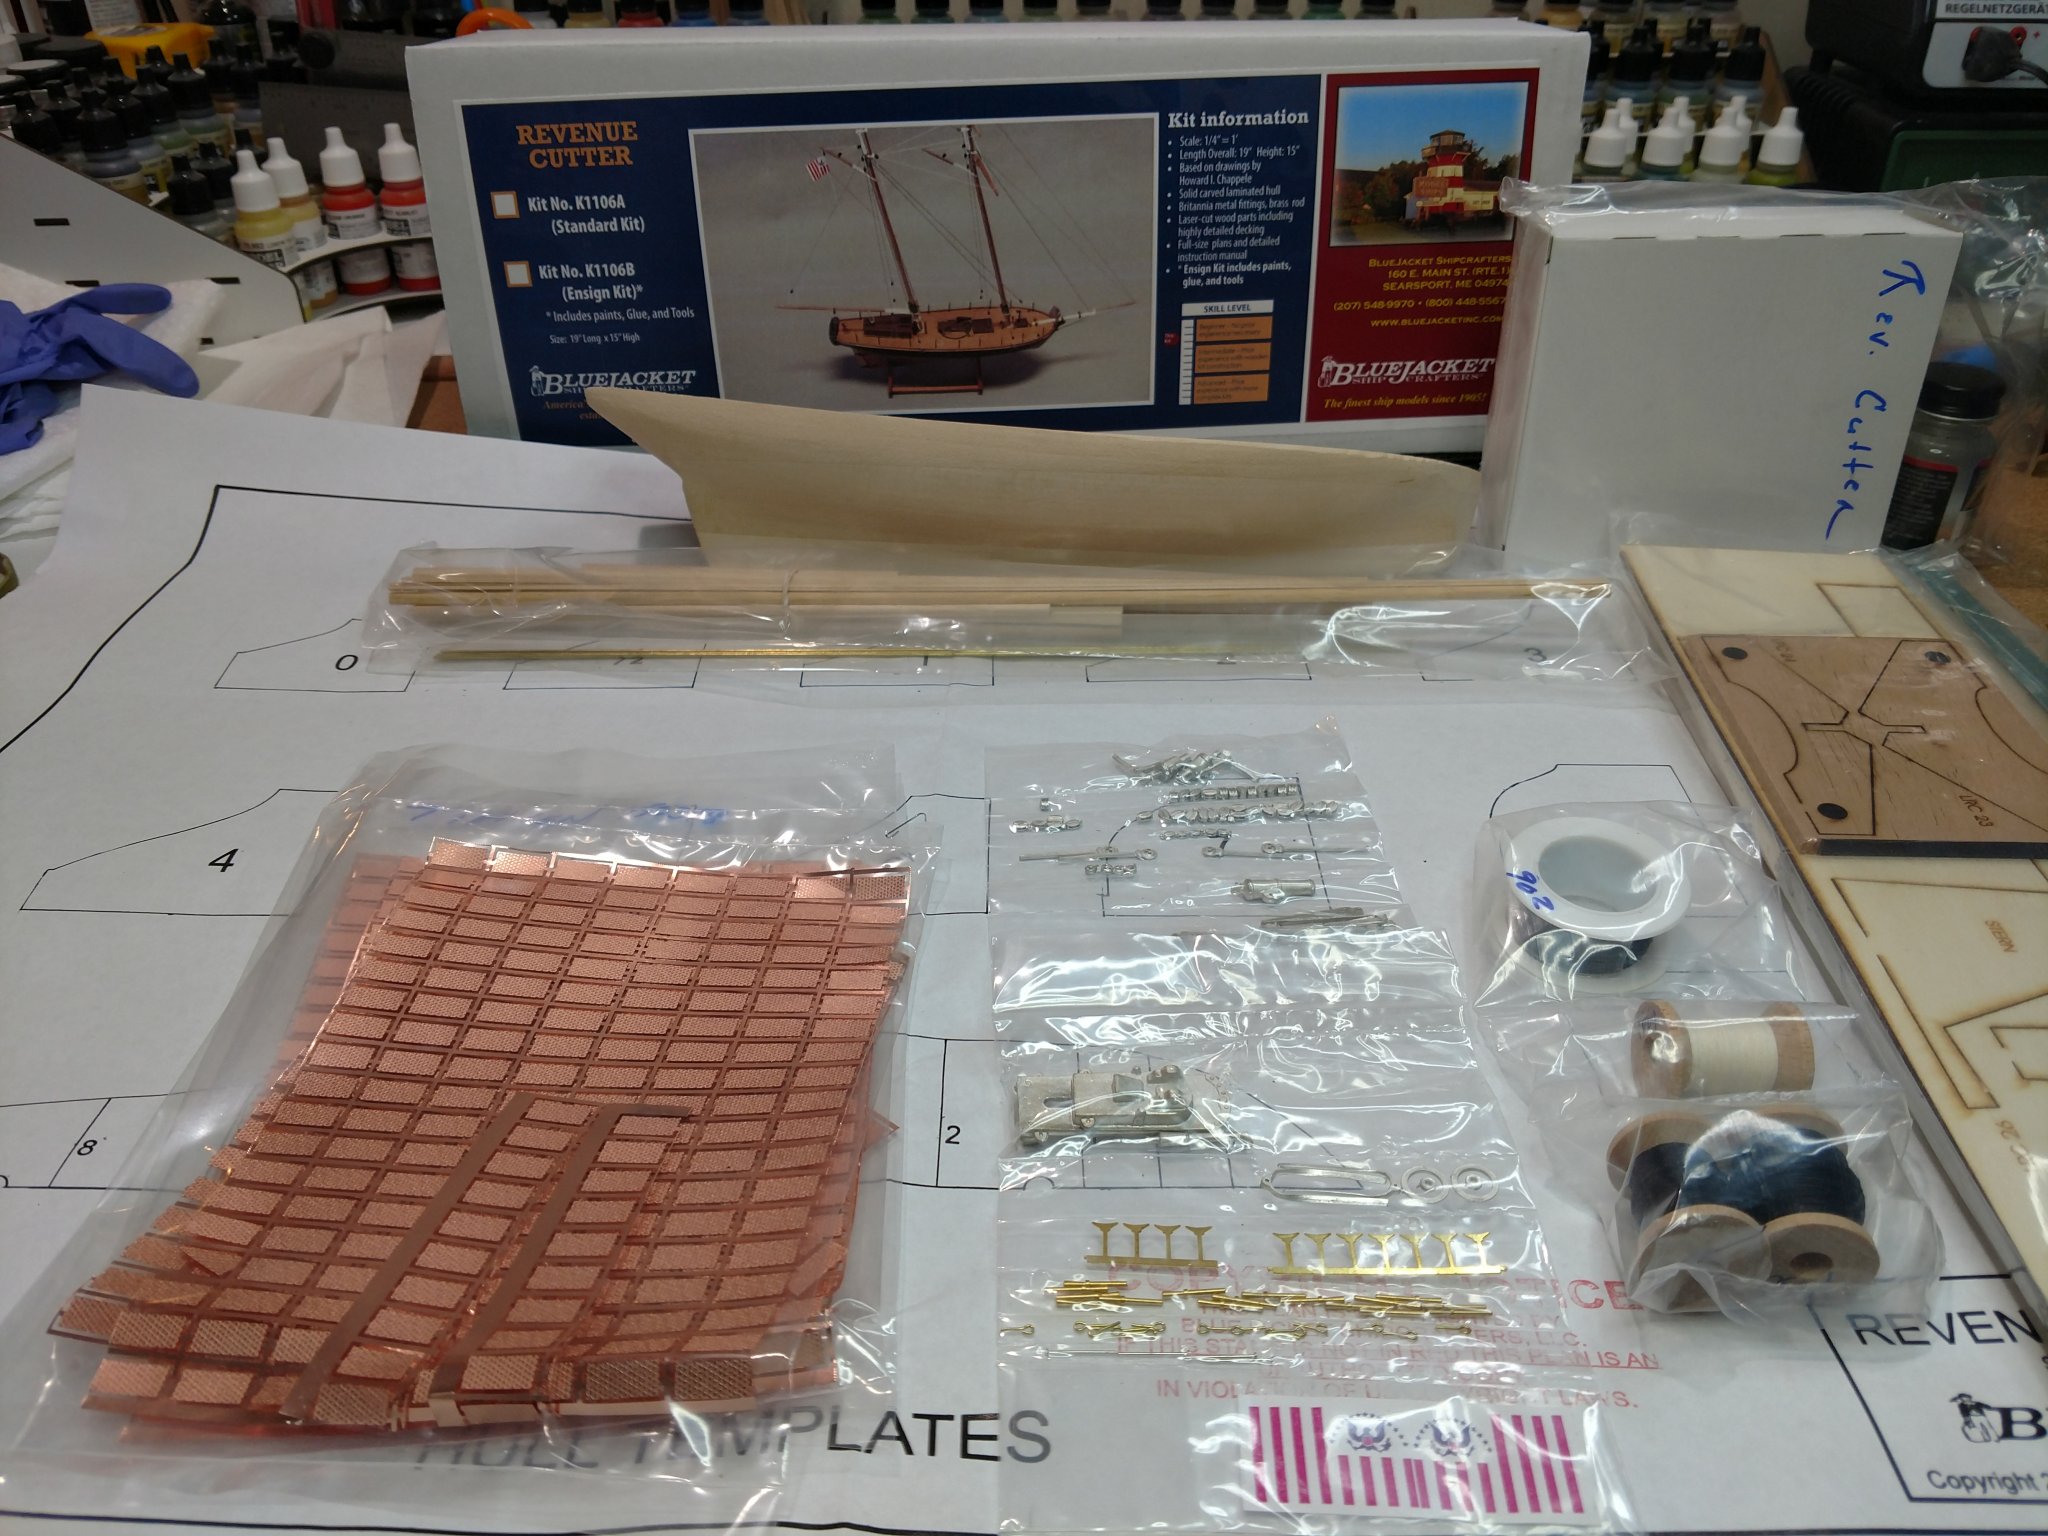
Hello Folks,
I am excited to begin my second build log and Blue Jacket kit on MSW. My first log was the "Yankee Hero" by Blue Jacket and I had a great time with the kit and posting the build. I enjoyed hearing from all the kind and supporting people in MSW. The Revenue Cutter represents what I believe is a reasonable progression from the Yankee Hero. The challenge I anticipate with this build is that I intend and (attempt) to complete this kit utilizing copper plates versus painting copper below the waterline. I was inspired to try this after I saw the Revenue Cutter build log by sjanicki.
Be safe and have great 4th of July holiday weekend,
Bill T.
- bruce d, Duanelaker, Duck-Rabbit and 3 others
-
6
-
-
27 minutes ago, ccoyle said:
Outstanding job! I hope you will consider placing some photos in the gallery.
Cheers!
That is very meaningful to me and THANK YOU. I will be happy to place some pictures in the gallery, just need to look up how to do it correctly. My next build post on NRG will be the Revenue Cutter by Blue Jacket. I think for me that is a good progression.
-
19 minutes ago, MrBlueJacket said:
Bill,
Without a doubt, that is one of the best looking Yankee Heros I've seen. Very clean and crisp!
Thank you for the kind words, and I appreciate your help along the way.
Blue Jacket Revenue Cutter on deck. Excited to start, I will take a week off though!
I will post the Revenue Cutter build on NRG for sure, it is fun hearing from all the kind people out there.
-
Hello Folks,
Finally finished the Yankee Hero from Blue Jacket. This was a lot of fun, both the build itself and posting the build on NRG. I have heard from many kind people from when I began on Jan 31, 2020 through today. Thank you all for all your input throughout!
Five parts of the build I walk away with:
- I started and completed a project that was not beyond my ability, however provided an excellent opportunity to learn without being overly frustrated around every corner of the build.
- Once the basic solid hull is completed/shaped, harden the wood with two coats of finishing resin (and a lot of sanding). This step helped prevent dents throughout the build.
- Apply the toe rails prior to placing the "Cabin & Hold" in the hull.
- Follow a build log if possible to avoid unnecessary mistakes, thank you "Jeffrey" for making the your Yankee Hero build log.
- Blue Jacket makes a great kit and is always there to answer questions, great customer service.
Take care folks, see you on my next build log.
Bill T.


-
Hello Folks,
Haven't posted in a while so I decided to do a short post prior to a successful conclusion to the built kit and build log (I hope).
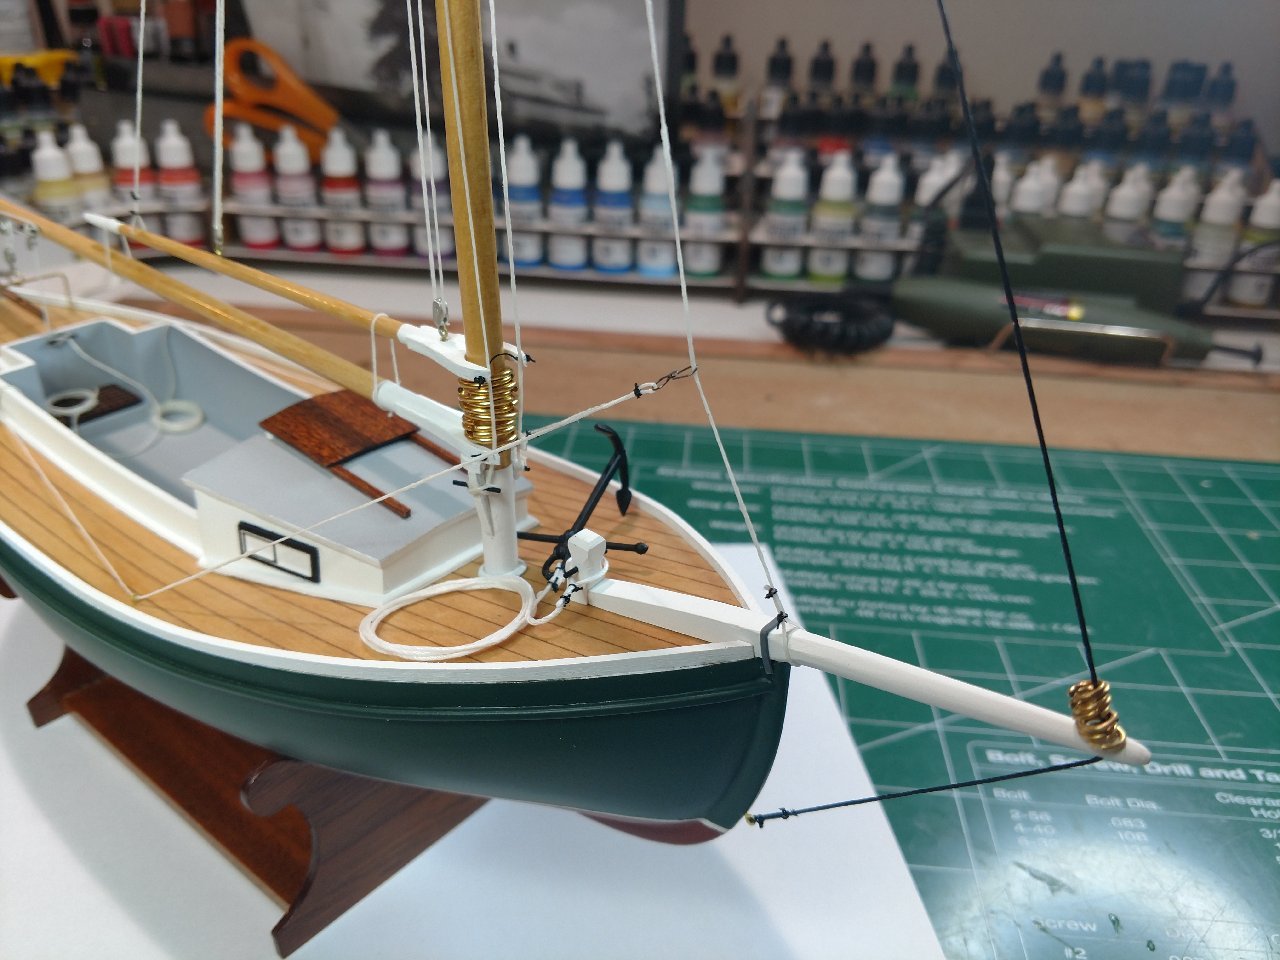
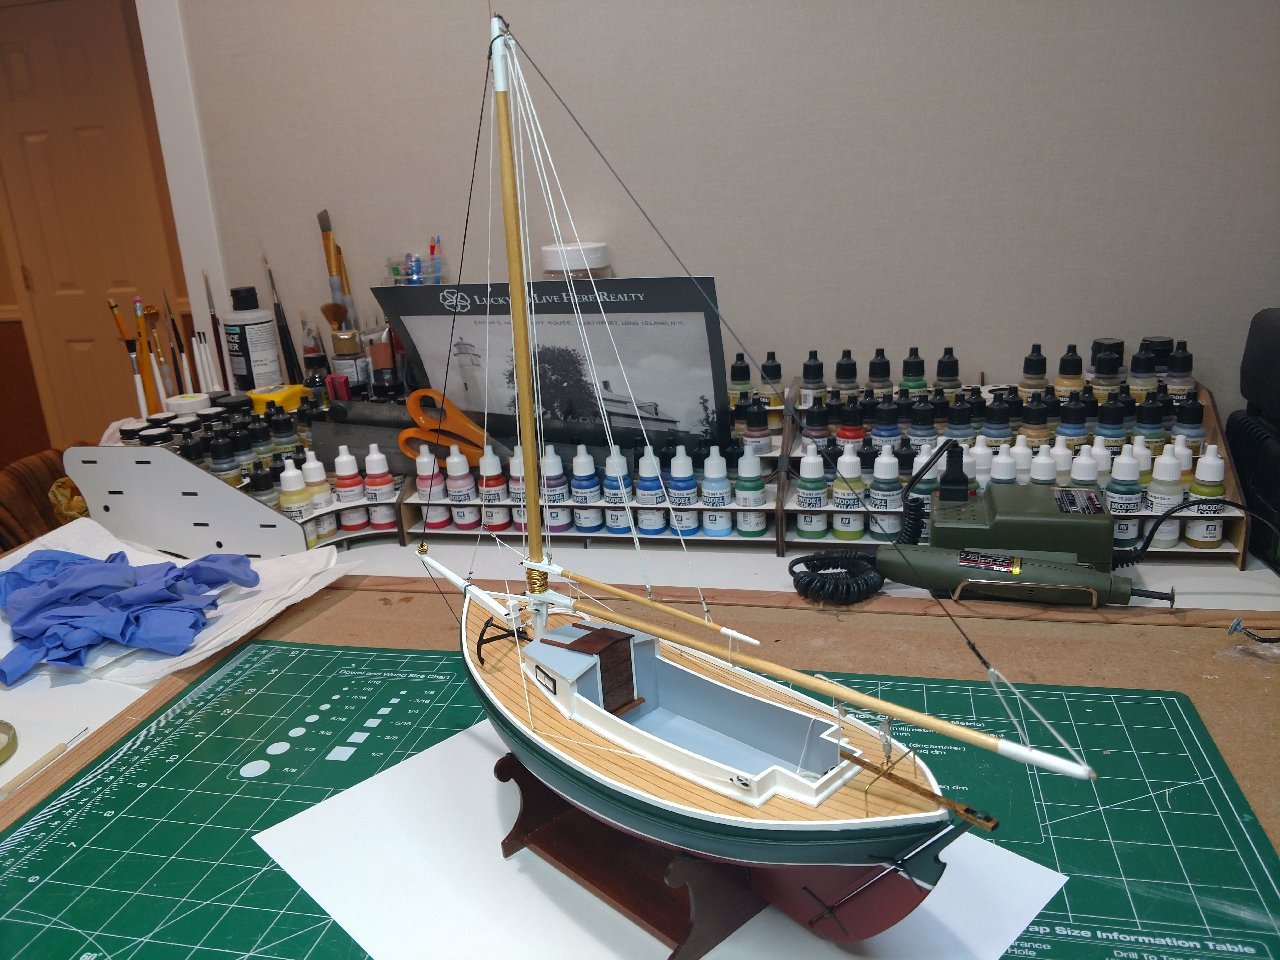
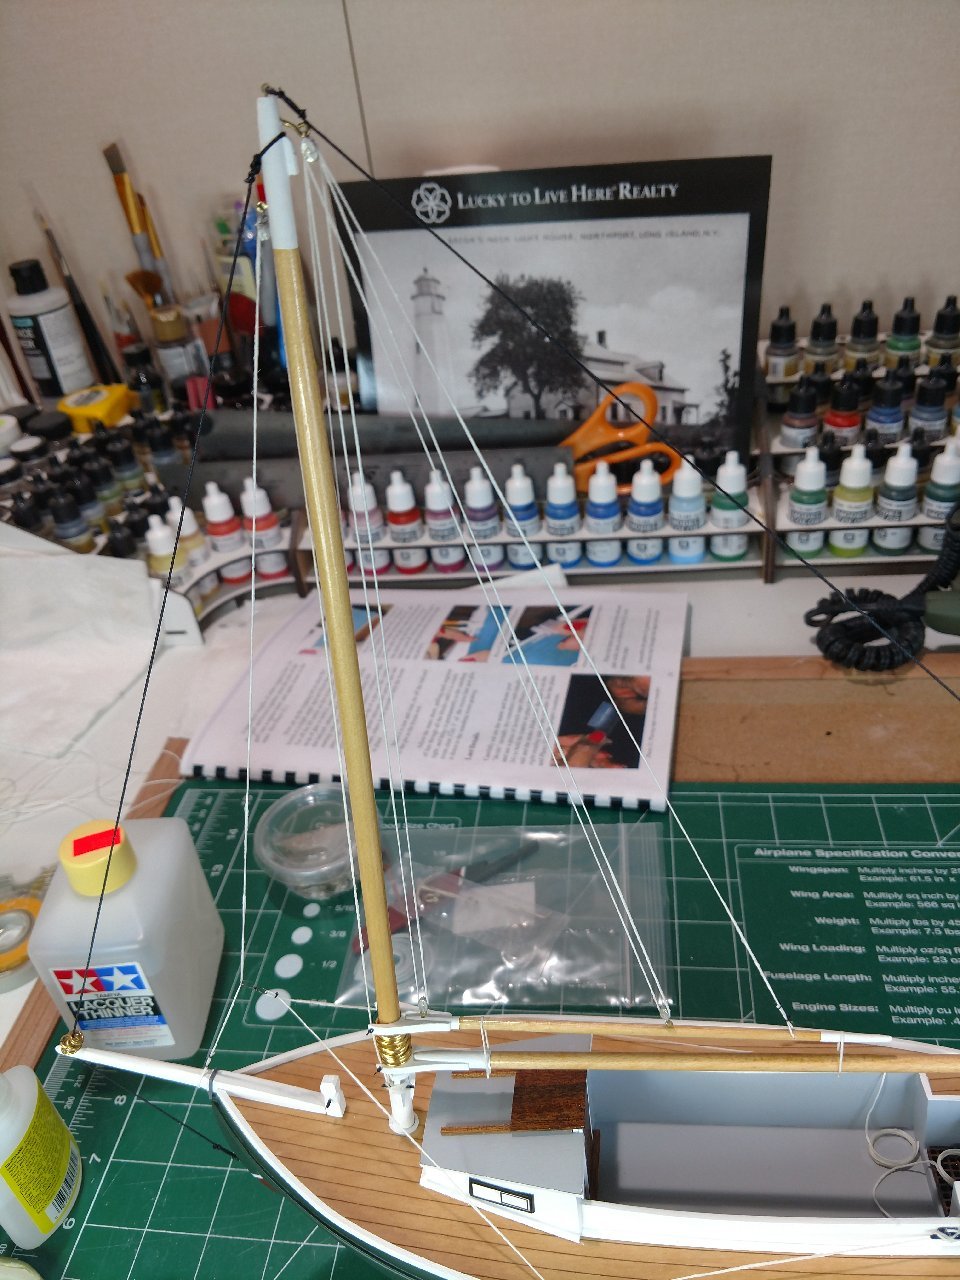
- Set the Gaff up and measured up the rigging length according to the instructions. What a mess, organized chaos though.
- Actually I find myself following the instructions closely at this point. I normally do this because I find getting to the conclusion of a build somewhat stressful (for me). I also find correcting mistakes towards the conclusion of a build are very disappointing and hard to fix.
- Completed the rigging (running and standing), straight forward here, set some additional line coils next to the standing room at the stern for detail purposes.
- Next up is applying the dry decals (I have never applied dry decals, a little concerned here).
- Then I will complete the build with the anchor assembly, anchor rope is already coiled and ready to go. I will use the kit supplied True North Enamel Paint for the anchor because I have read the adhesion is better than my trusted acrylic paints on cast britannia metal fittings.
Nice to post again, stay safe and all the best,
Bill T.


-
Good Afternoon Afternoon Folks,
- Finished the Spar and Gaff, attached the blocks to the eyelets and then affixed them to respective pieces. I thought it would be much easier that way prior to the rigging process.
- Dry fitted the Spar and Gaff to avoid any unforeseen disasters towards the completion.
- Some light at the end of tunnel it feels like (fingers crossed).
- Standing and running rigging next.
- One interesting thing I noticed building this kit to date, I always find myself doing touch ups, question, do we ever actually finish our projects?
Have a great evening, hopefully my next post will reflect completed Yankee Hero.
Bill T.

-
Good Morning Folks,
Onto rigging, and looking forward to it! Happy with the progress so far and thank you everyone for the help and support getting this far. Some notes:
- Using wire to affix the blocks directly to eyebolts, too difficult (for me) to drill holes through the becket (keep on trashing beckets) on the eyebolts. Used an old eyebolt from previous Blue Jacket rigging class (I never discard extras thank god!) on the triple bock on top of main mast.
- Traveler I did not paint, liked the brass. Also used wire here to affix the block to the traveler ring.
- Main mast glued in, used Yellow Elmer's Wood Glue to ensure the mast was set correctly (no quick setting CA glue for me in this step). Painted the brass pins black on Boom Rest/Pinrail assembly to match the Samson Post.
- Lastly affixed Bowsprit and Samson Past.
- Dry fitted the Boom to make sure it was properly set (a little late for that one could say!). It sets fine.
Some way to go, having a great time with the build and processing the build on the NRG site in order to hopefully help someone in the future with the Yankee Hero!
All the best, stay safe and healthy,
Bill T.

- GrandpaPhil, reklein and Tom E
-
3
-
Hello Jeffrey,
Studying your build and a mentor for your wonderful work on the "Hero" since January 2020, question for you. Did you paint your mast hoops or keep them stock brass, I can not tell by the pictures. If brass they look clean. Your post have been a great help and inspiration.
I hope family and you are safe and healthy. Thank you.
Bill T.
-
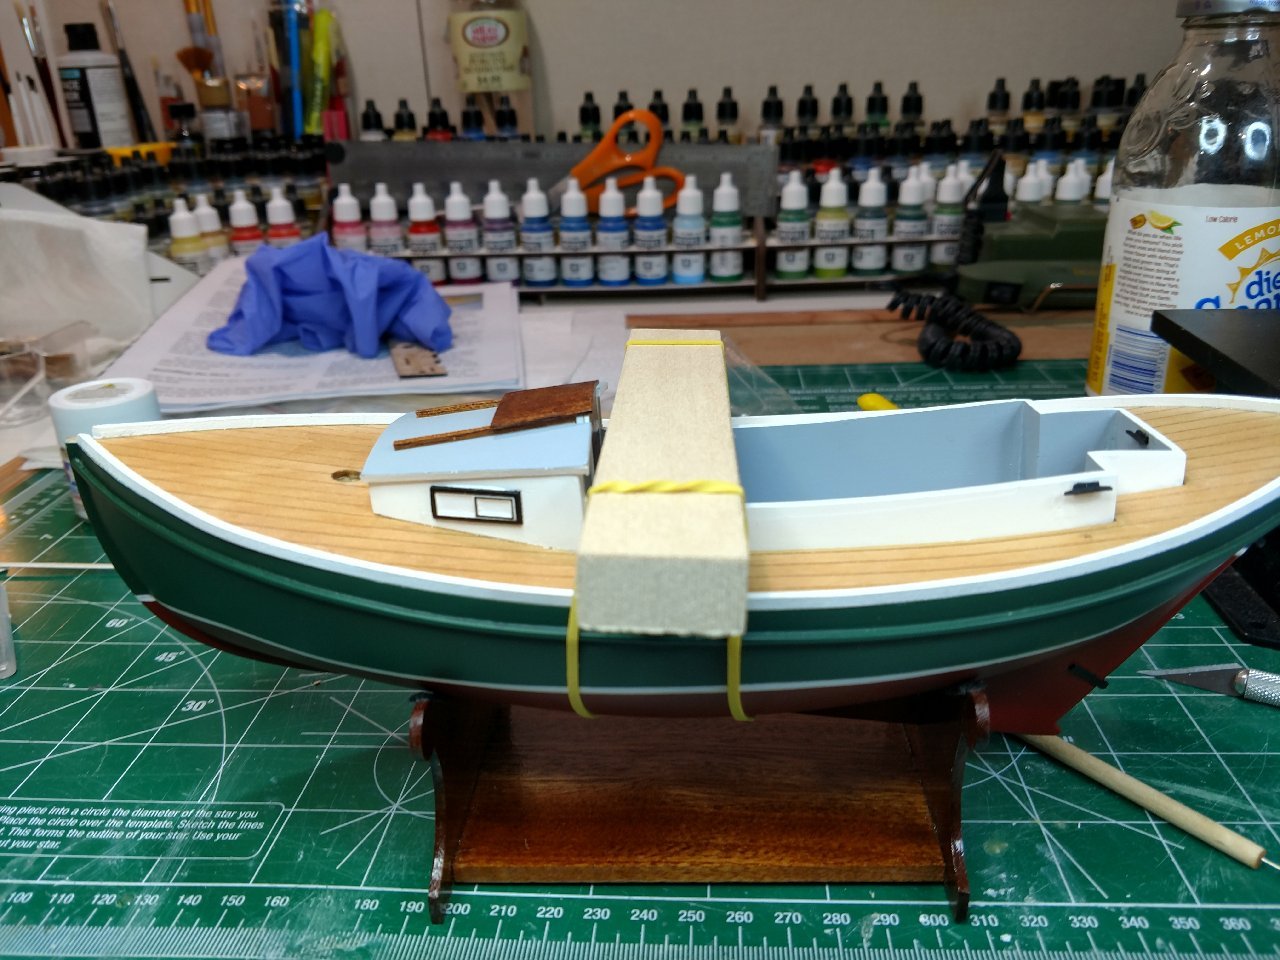
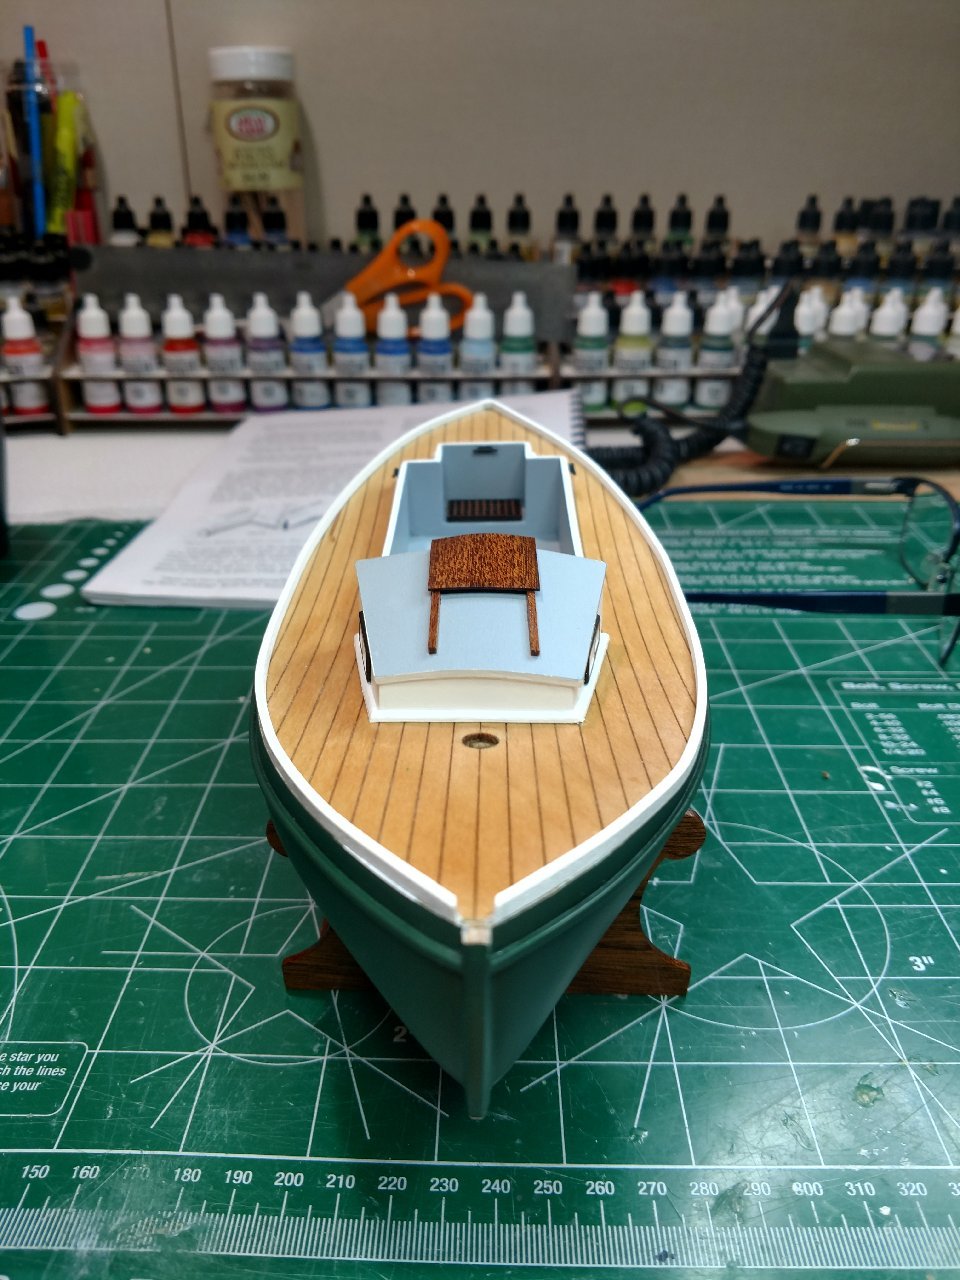
Good Afternoon Folks:
Finally completed the molding that surrounds the Hold and Cabin. A lot of masking, painting, and putty to clean everything up. About 3 days of work which I thought was worth the extra time. Mitre cuts for me are difficult, it was necessary to spend additional time cleaning up the joints, etc...
Bowsprit and Samson Post complete: Will place those last parts on the hull just prior to rigging. Too many accidents with bowsprits, so that part will wait until the last minute!
Working on Mast, Gaff and Spar (some easier parts for me!)
Be safe folks!


-
Good Morning Folks,
So I suppose not all posts are good news, some set setbacks and "solutions". I hope this helps someone out there with this this fine kit. Thank god I started at novice level.
- Prior to setting the hold into the hull, I dry fitted it a 50 times early in the process. Now it was off when at least 10 degrees when I dry fitted it with a level to it after it being perfect in the past???
- I broke the Proxxon belt sander and did not work.
- After testing different methods I came out with a satisfactory solution. I added a block under the "standing room" at stern portion of the boat.
- My hold is not 100% 180 degrees with my level to the hull however not noticeably off, and good enough for me.
See below please.

Next was step was adding the molding to seal the gaps between the hull and hold.
- I quickly realized mitre cuts and I do not get along.
- Not satisfied with my results to this step, so now onto masking time, putty time and re-repainting time.
- I find working with small scales to be challenging (but getting better every step).
- Still optimistically having fun, persevering and posting to someday assisting someone finishing this kit.
Added masking tape, sealed the tape and deck with two coats of Tamiya "Flat Base" (thanks Mr. Bluejacket for the idea that has saved me hours added work). So now a have an artificial tarp begin my putty and painting.

Just an example to my reference of building smaller scale models versus what I am used too.
Be safe everyone, looking forward to my next post with better results (I hope)!
- Moab, gieb8688 and GrandpaPhil
-
3
-
Hello Folks,
Toerails complete, this was the most difficult part of the build to date, tried pins (failed) and brass rods with drilling holes (failed) etc...
- After 2 attempts, I just went old school, soaked and bent wood (boiling water), painted Tamiya "Flat White" airbrush. Then in 1 inch increments with medium CA and my human skin I tacked it down the best I could.
- I needed to ad a small piece the stern to make it work.
I would highly recommend to anyone who is building the Yankee Hero kit to affix the toerails to the hull prior to cementing the Hold/Cabin into the hull.
Now onto growing back finger skin I lost and cementing the Hold/Cabin into the hull and then affixing the molding around it.
Good Luck and be Safe!
-
Hello Jeffrey,
If it was not for your post I would not have experienced my progress to date.
Thank you, regards and safety to all friends and family.
Bill T.


Revenue Cutter by wtimlen - BlueJacket Shipcrafters - 1:48
in - Kit build logs for subjects built from 1801 - 1850
Posted · Edited by wtimlen
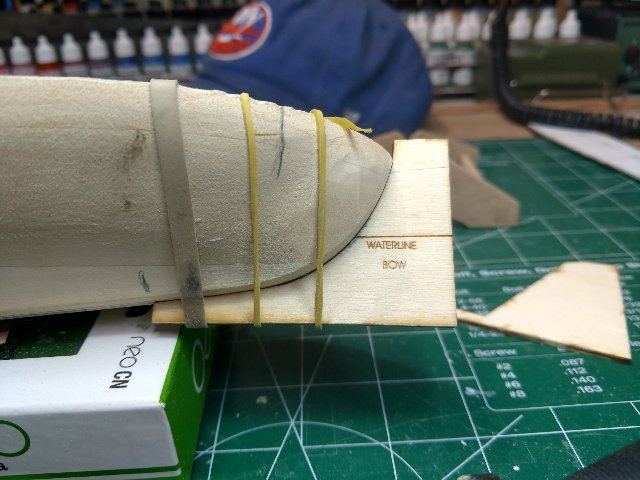
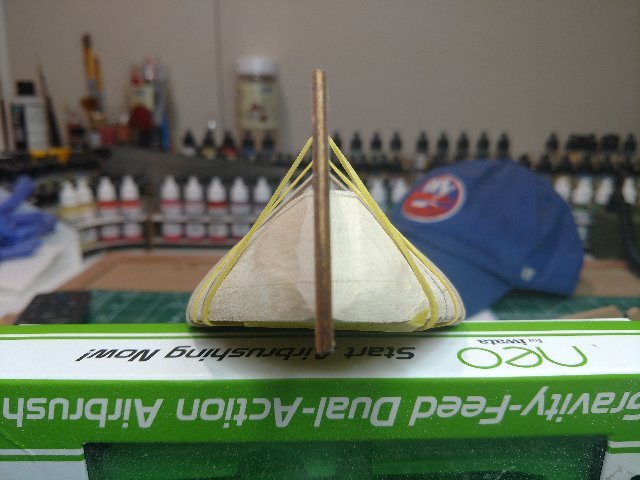
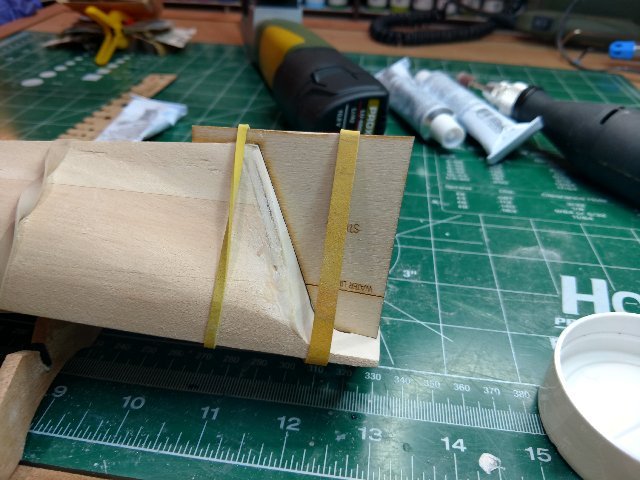
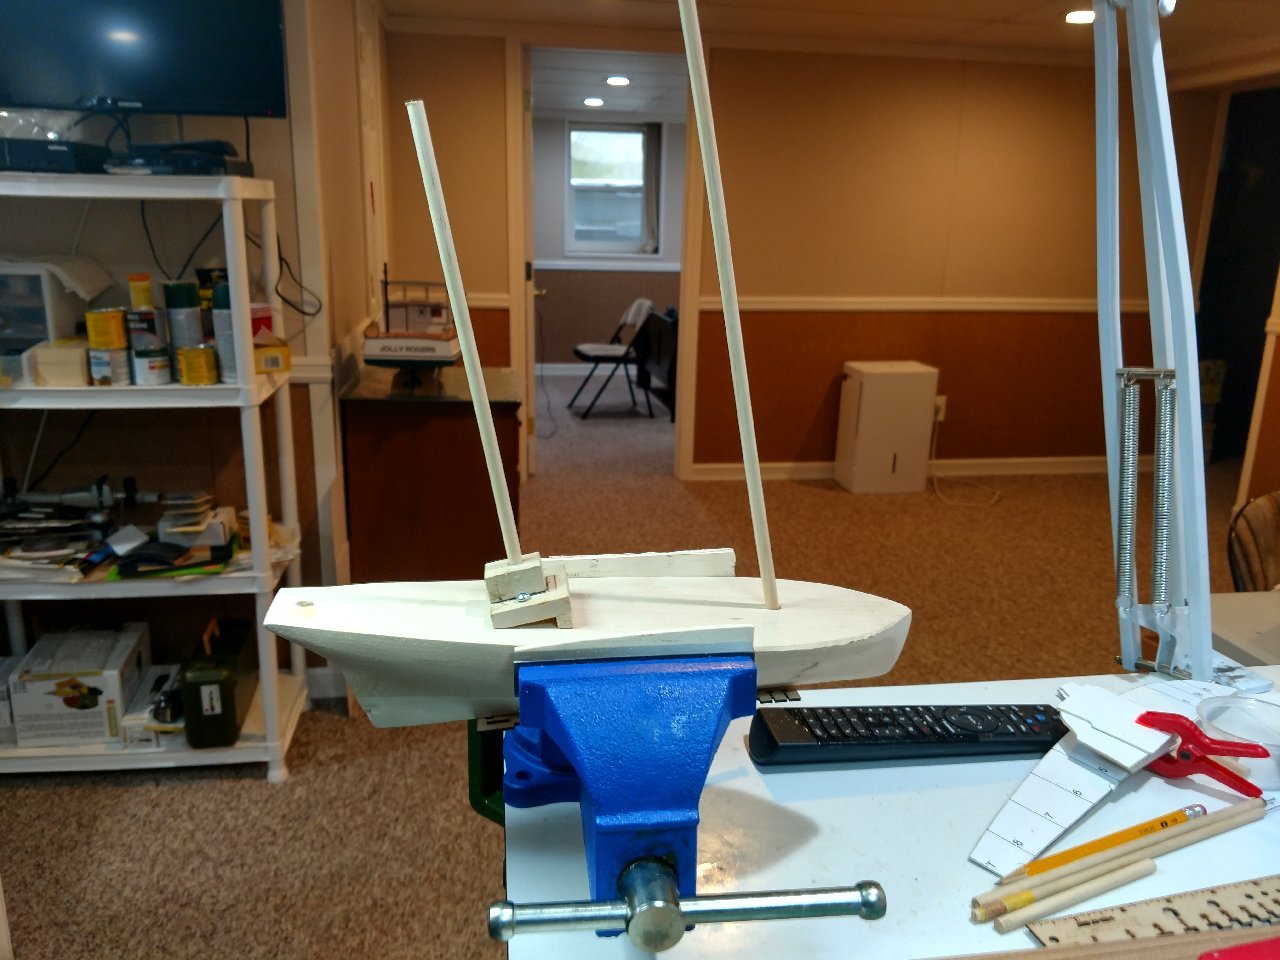
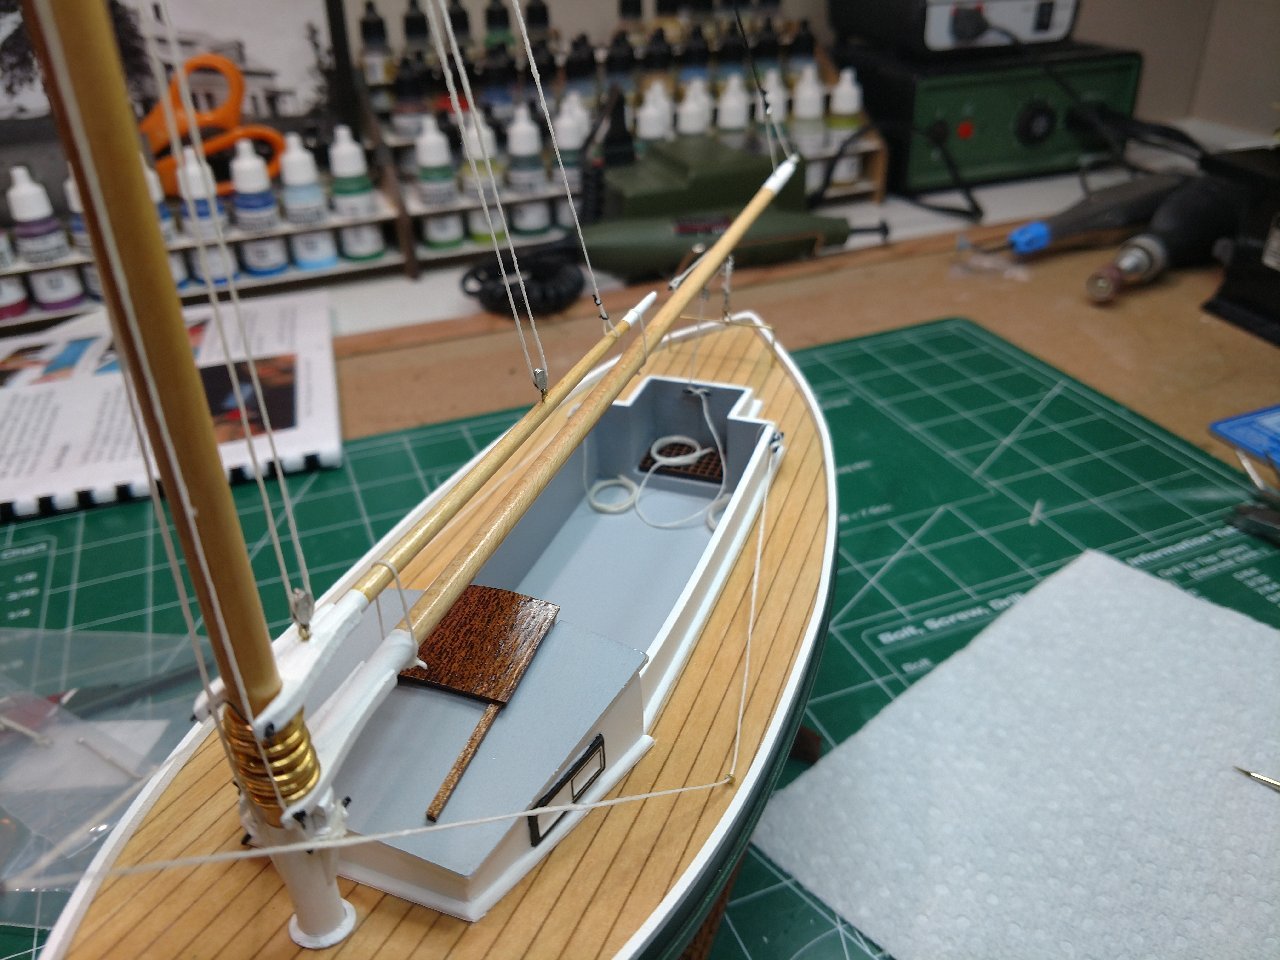
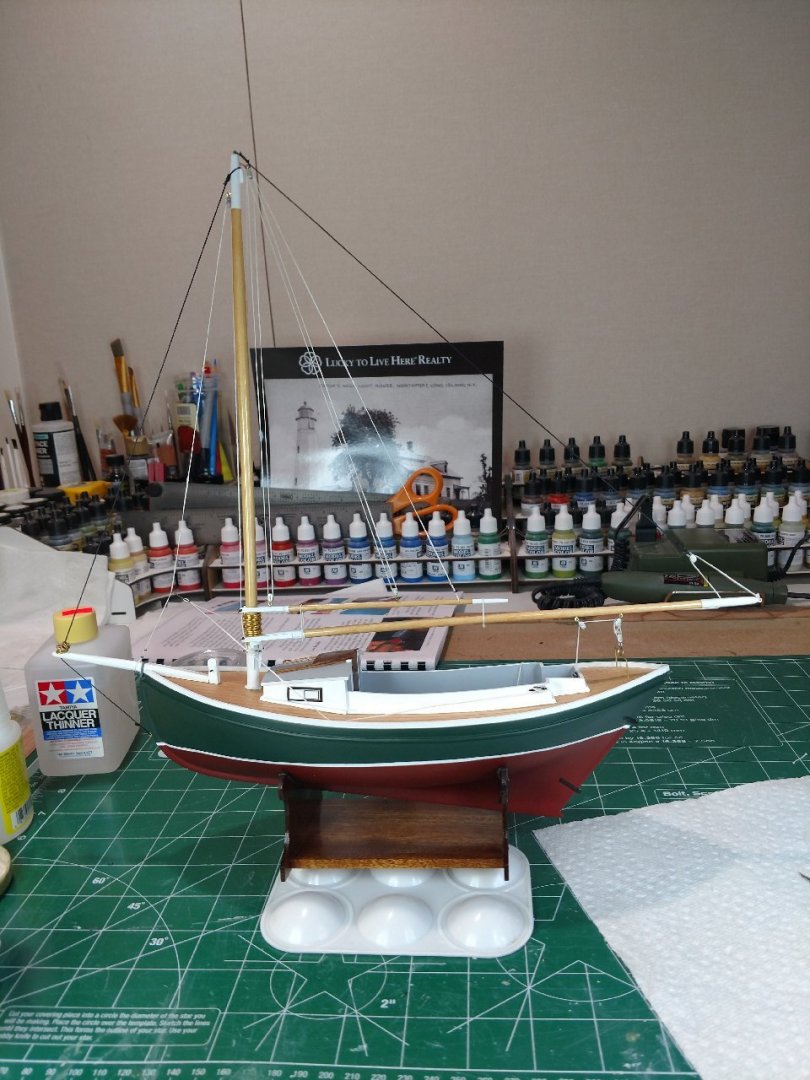
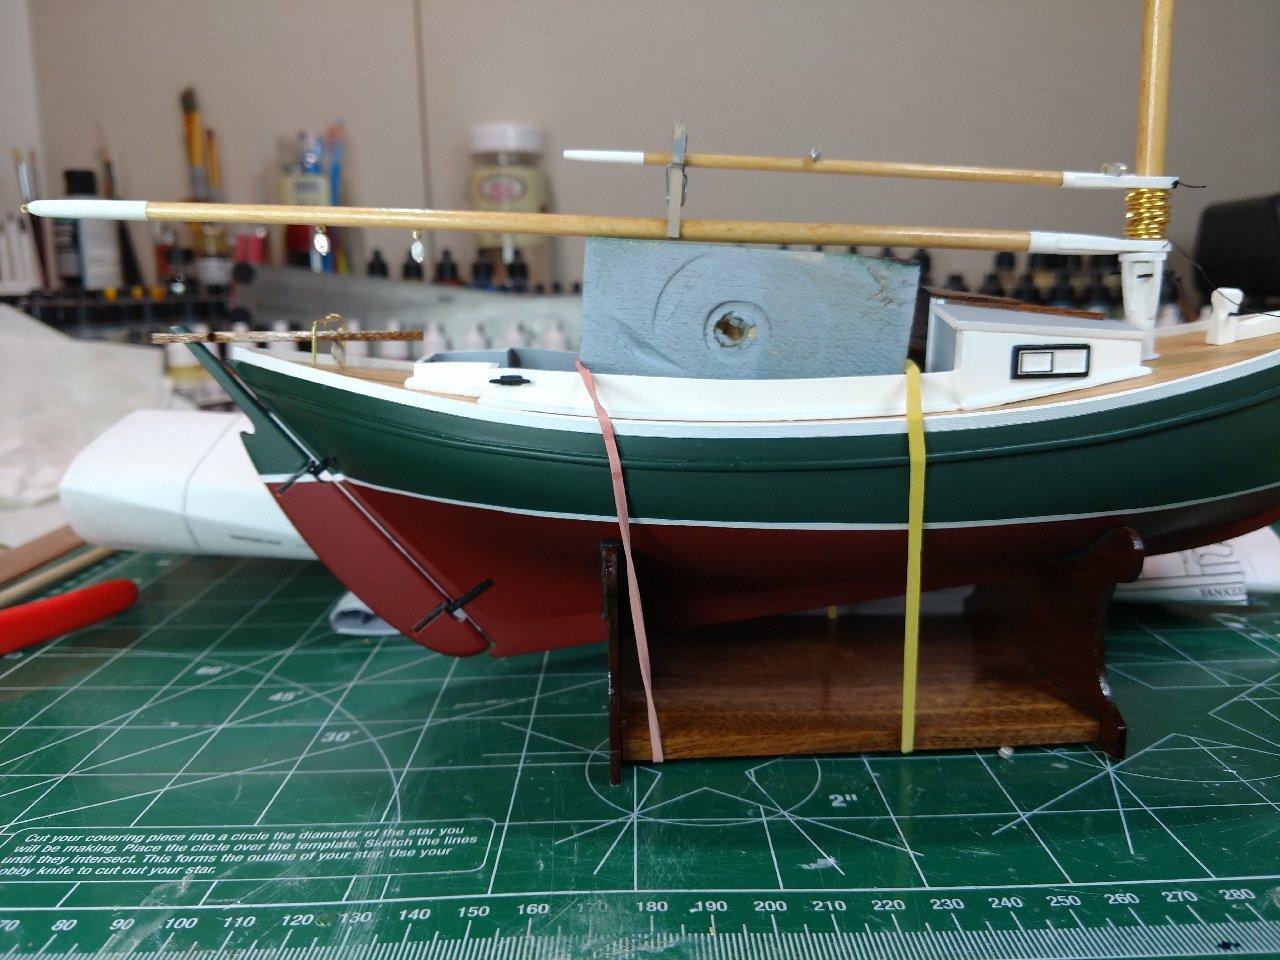
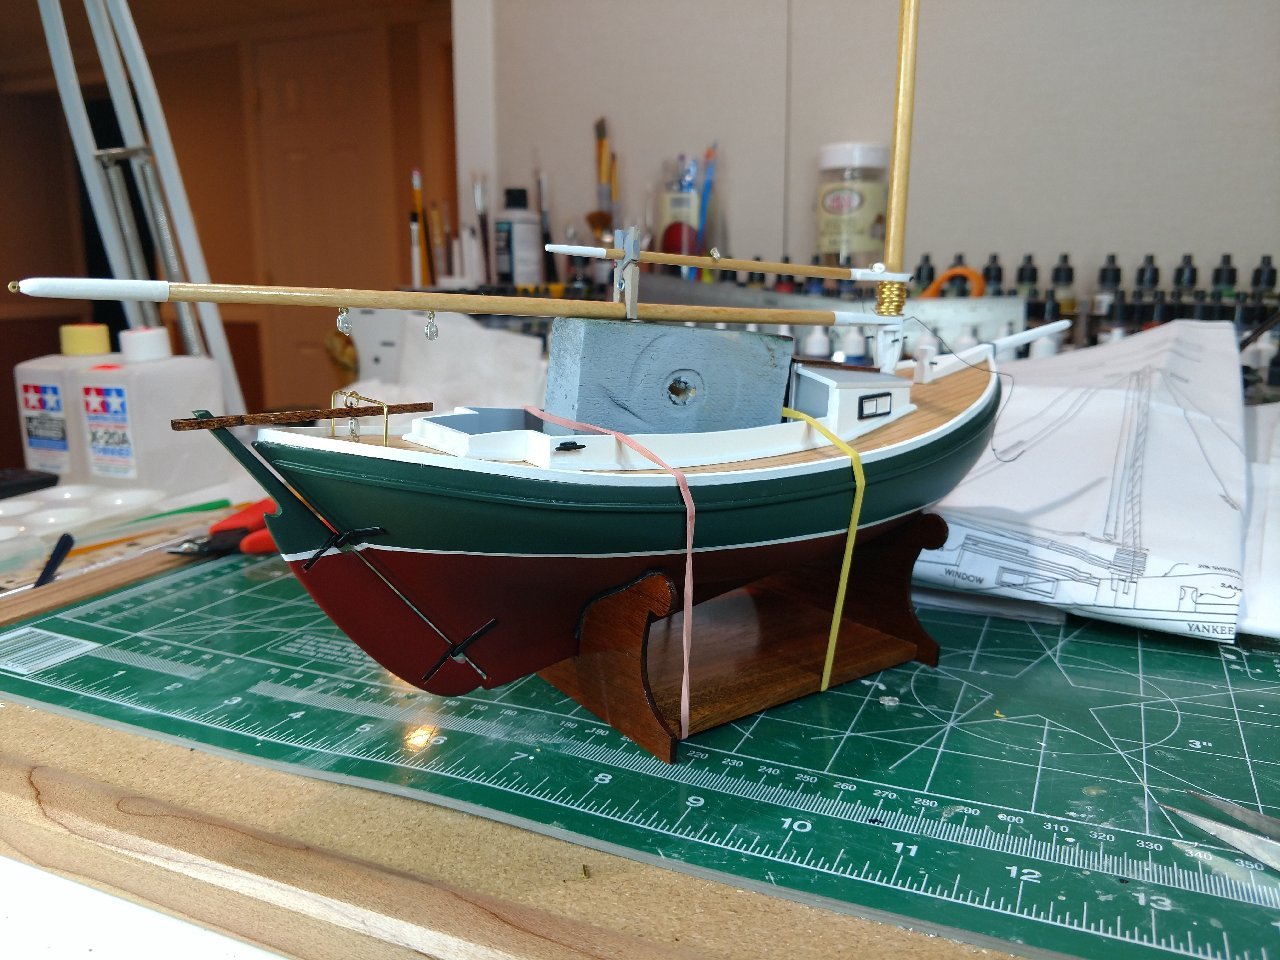
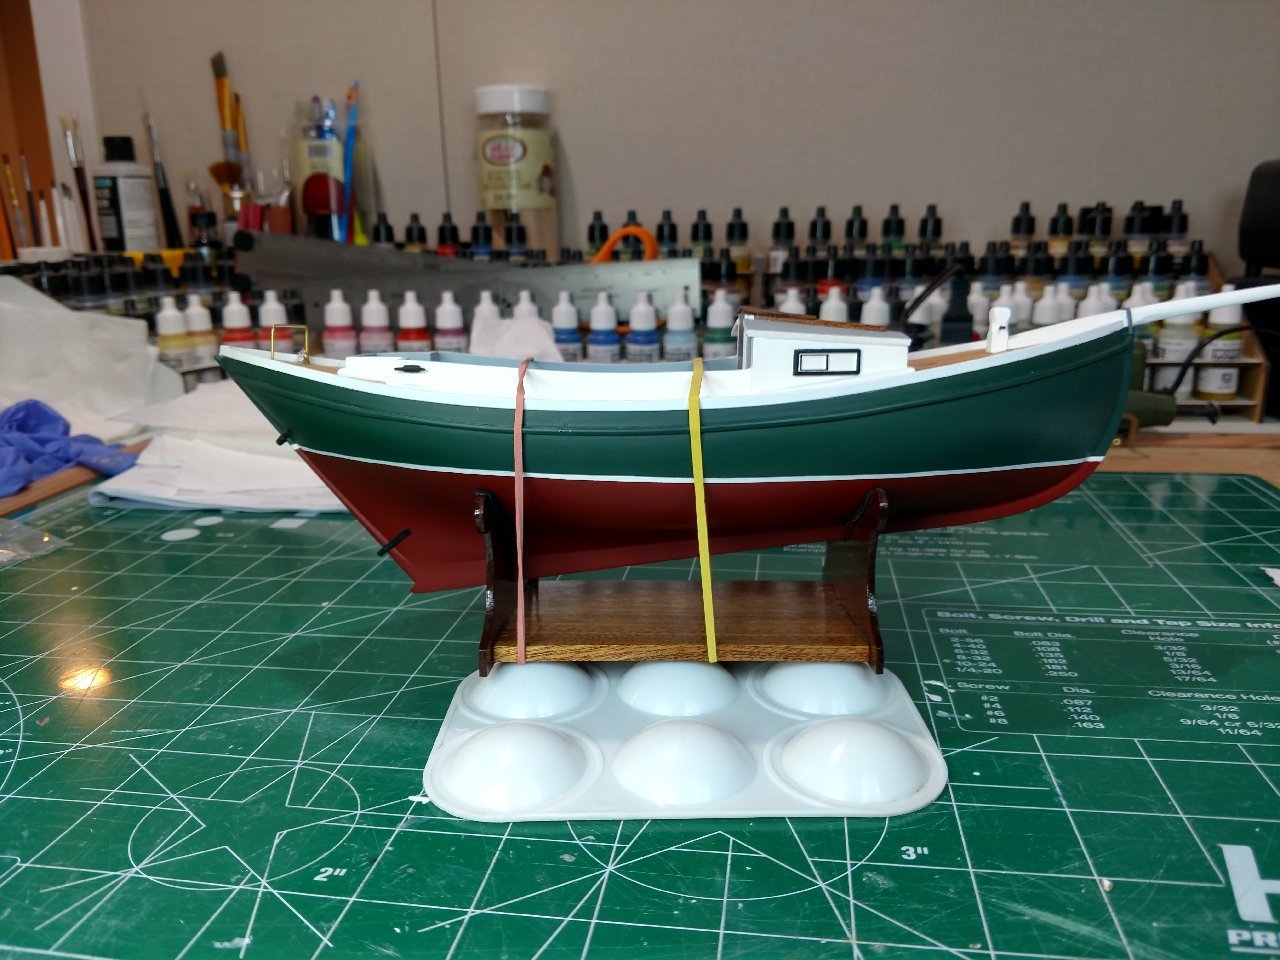
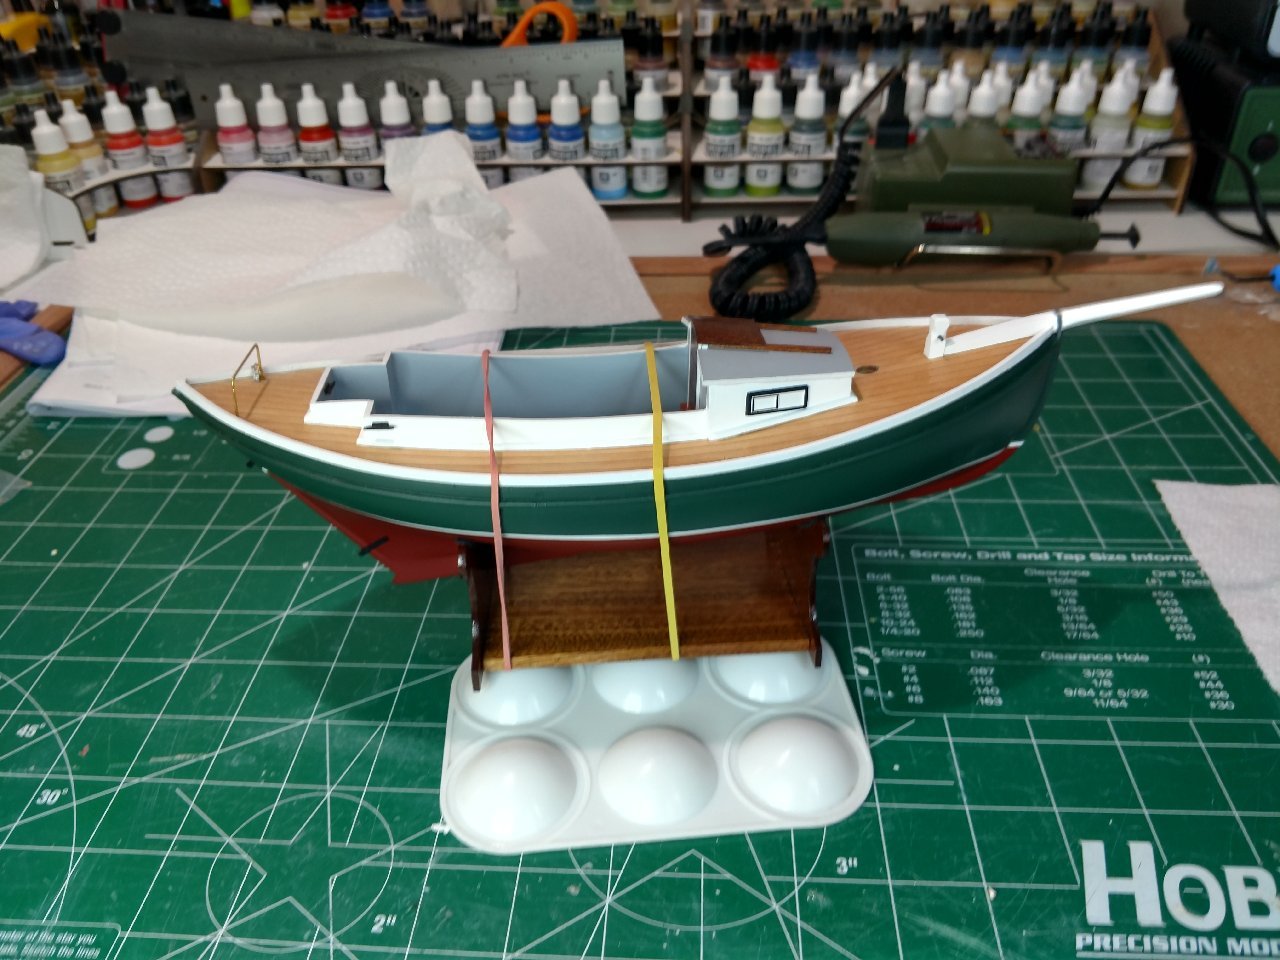
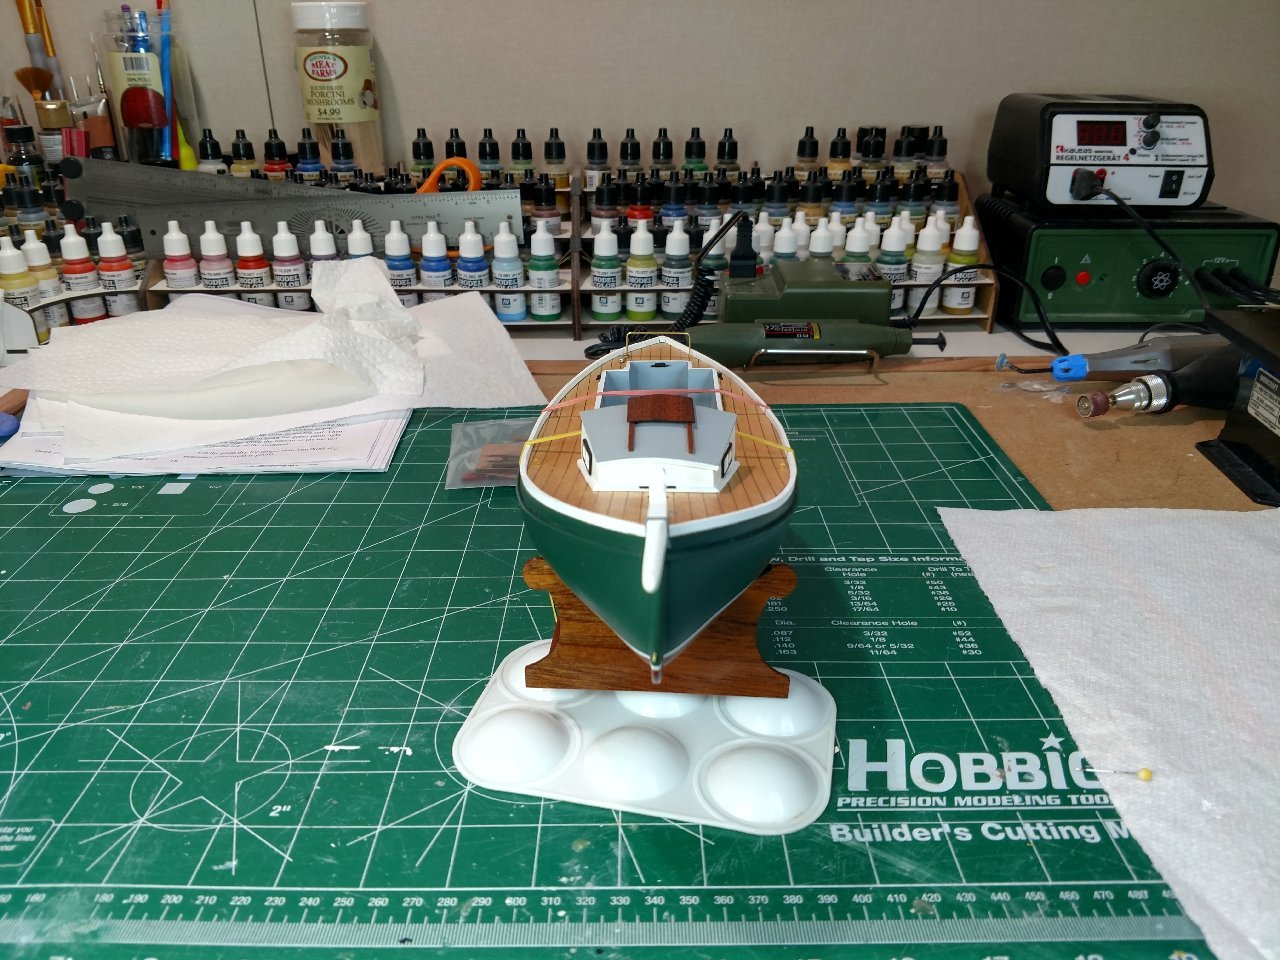
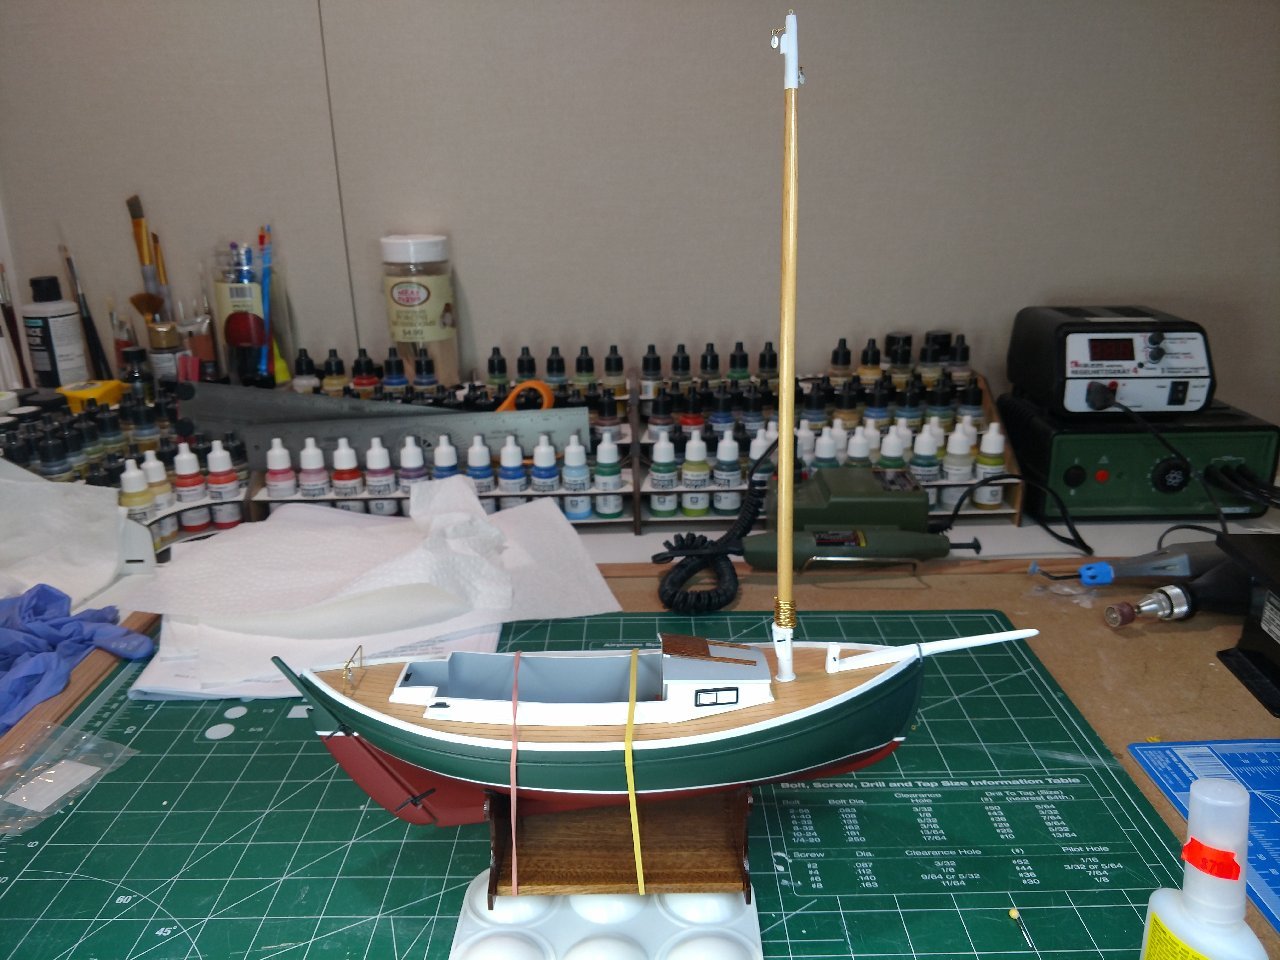
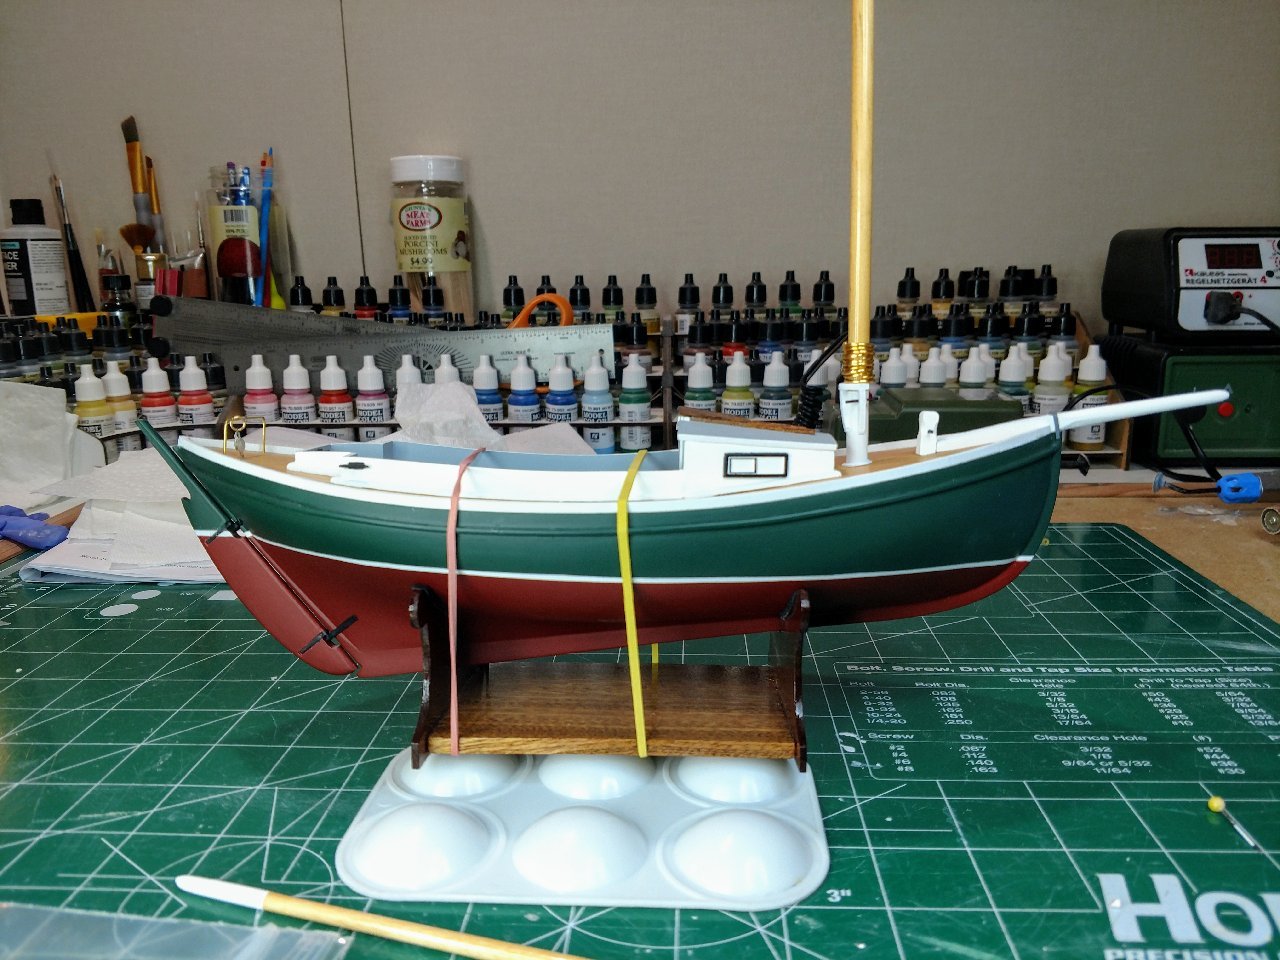
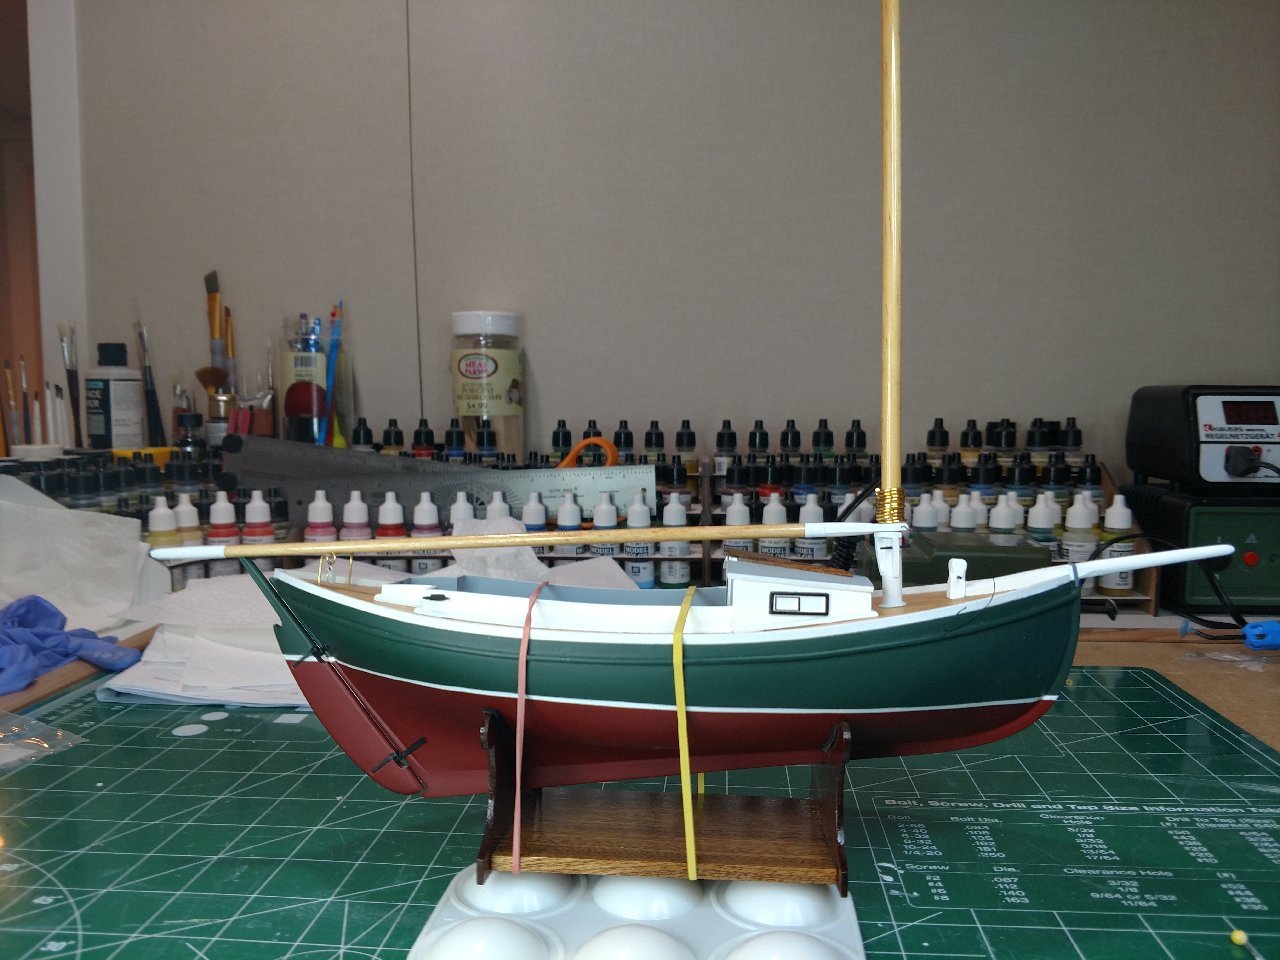
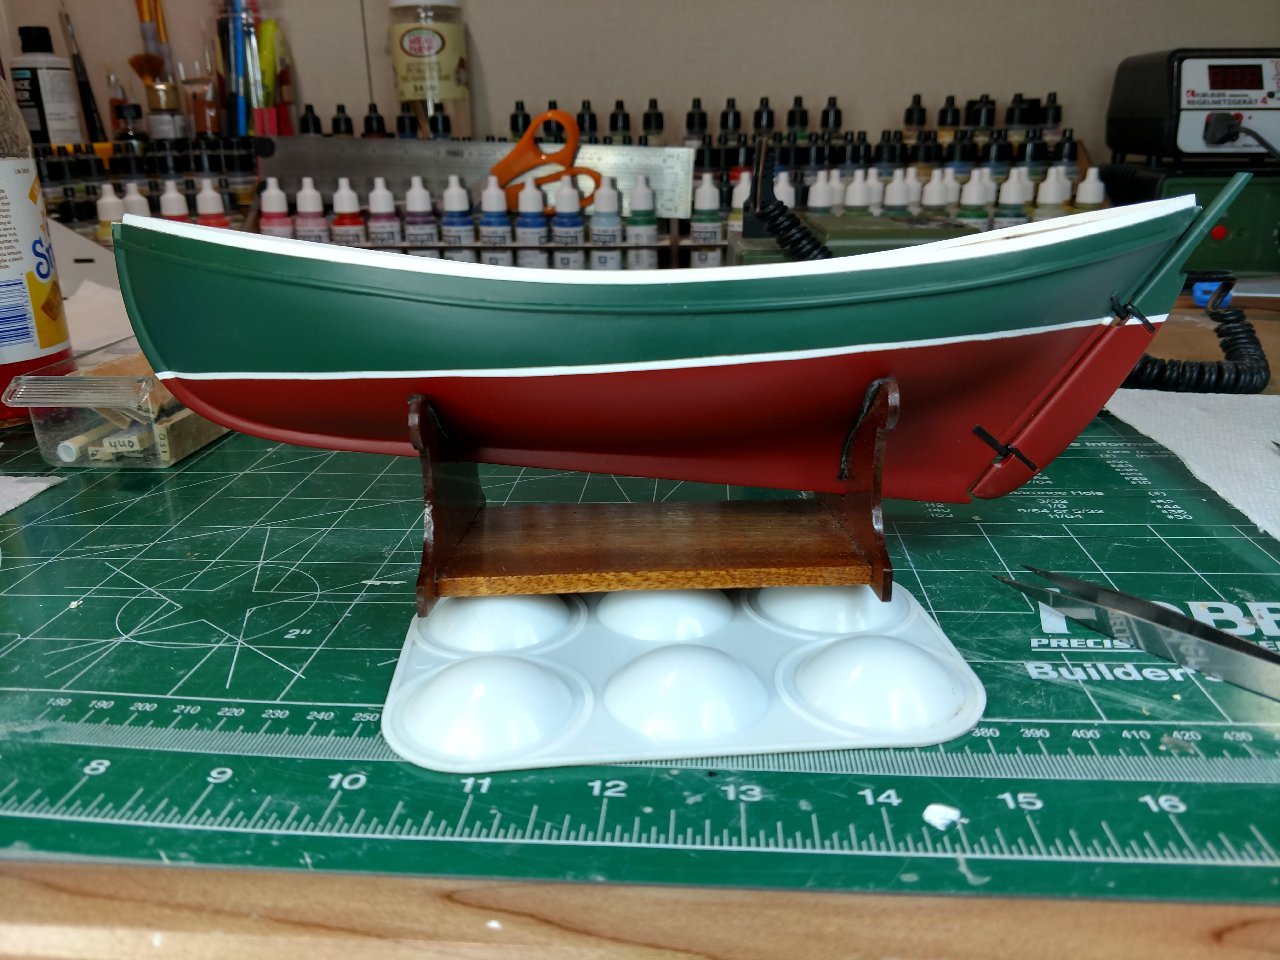
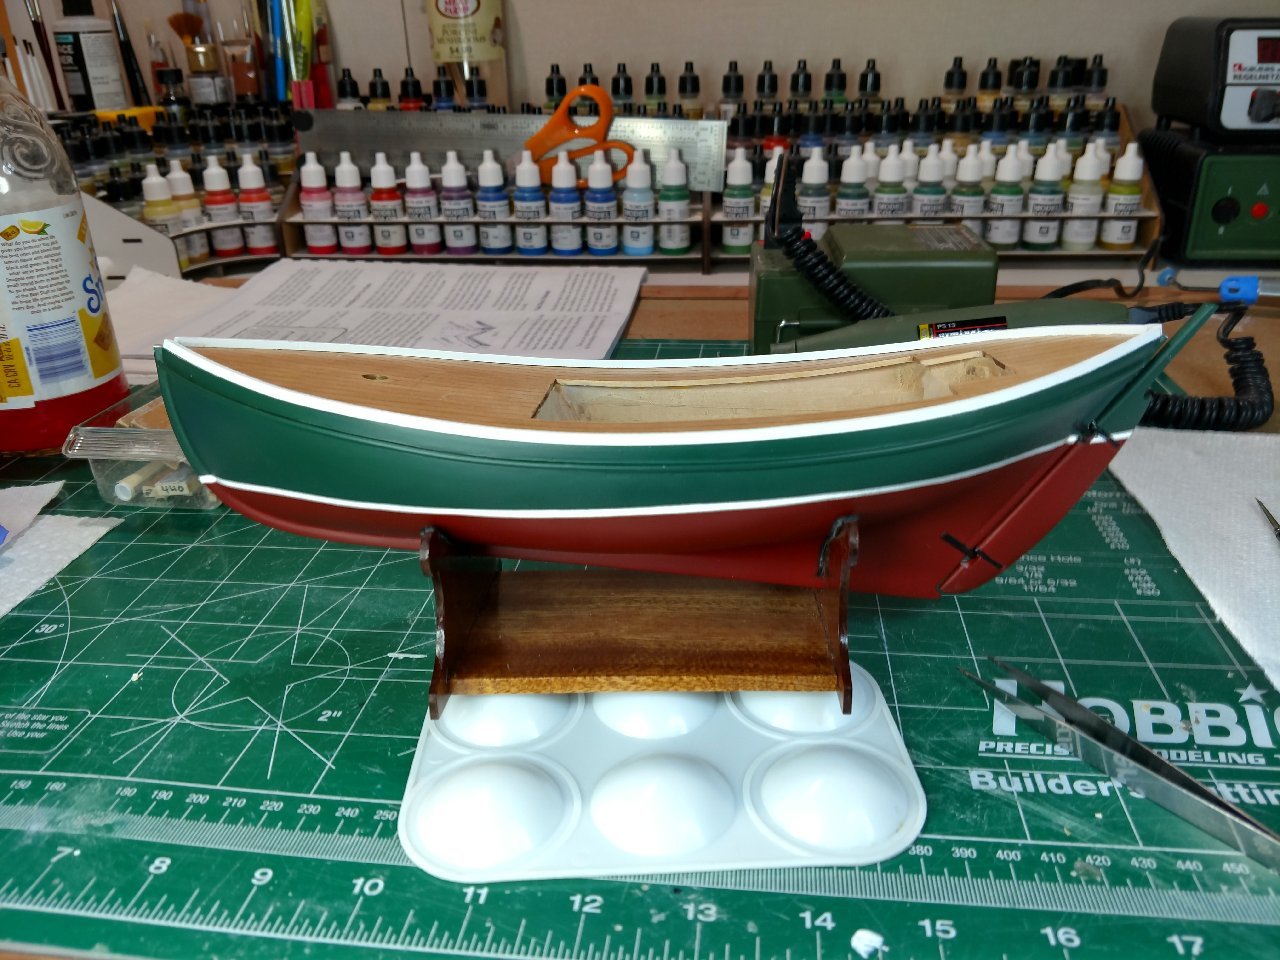
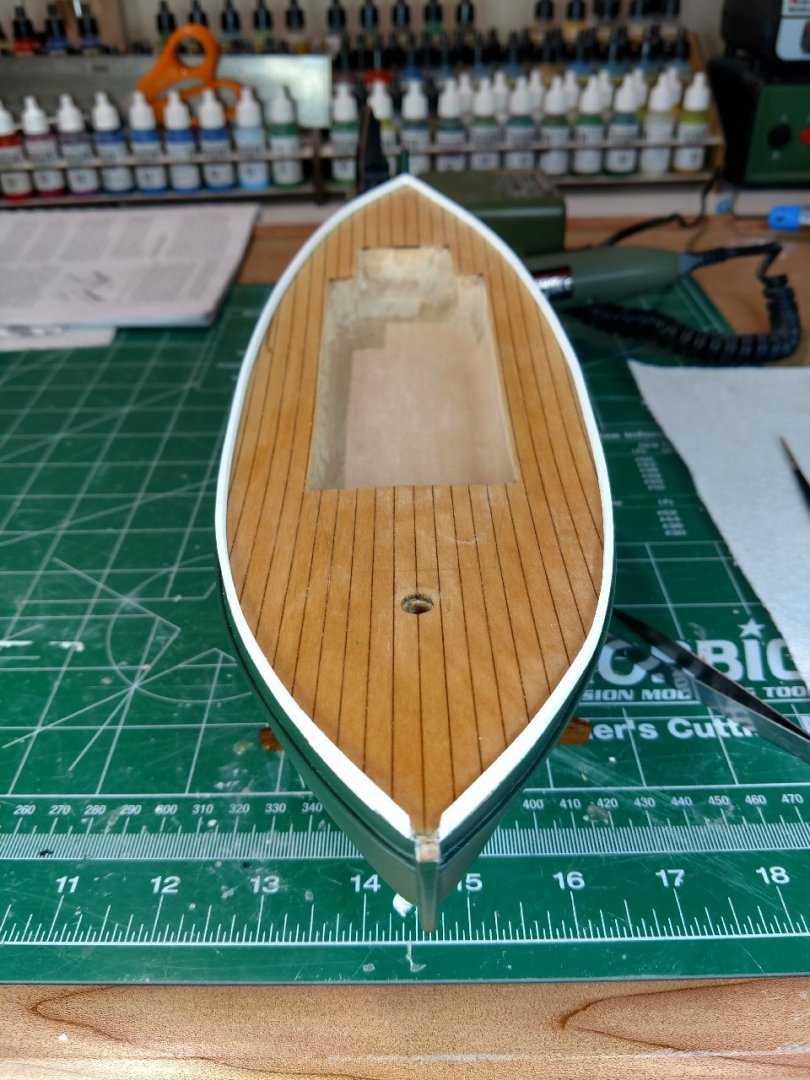
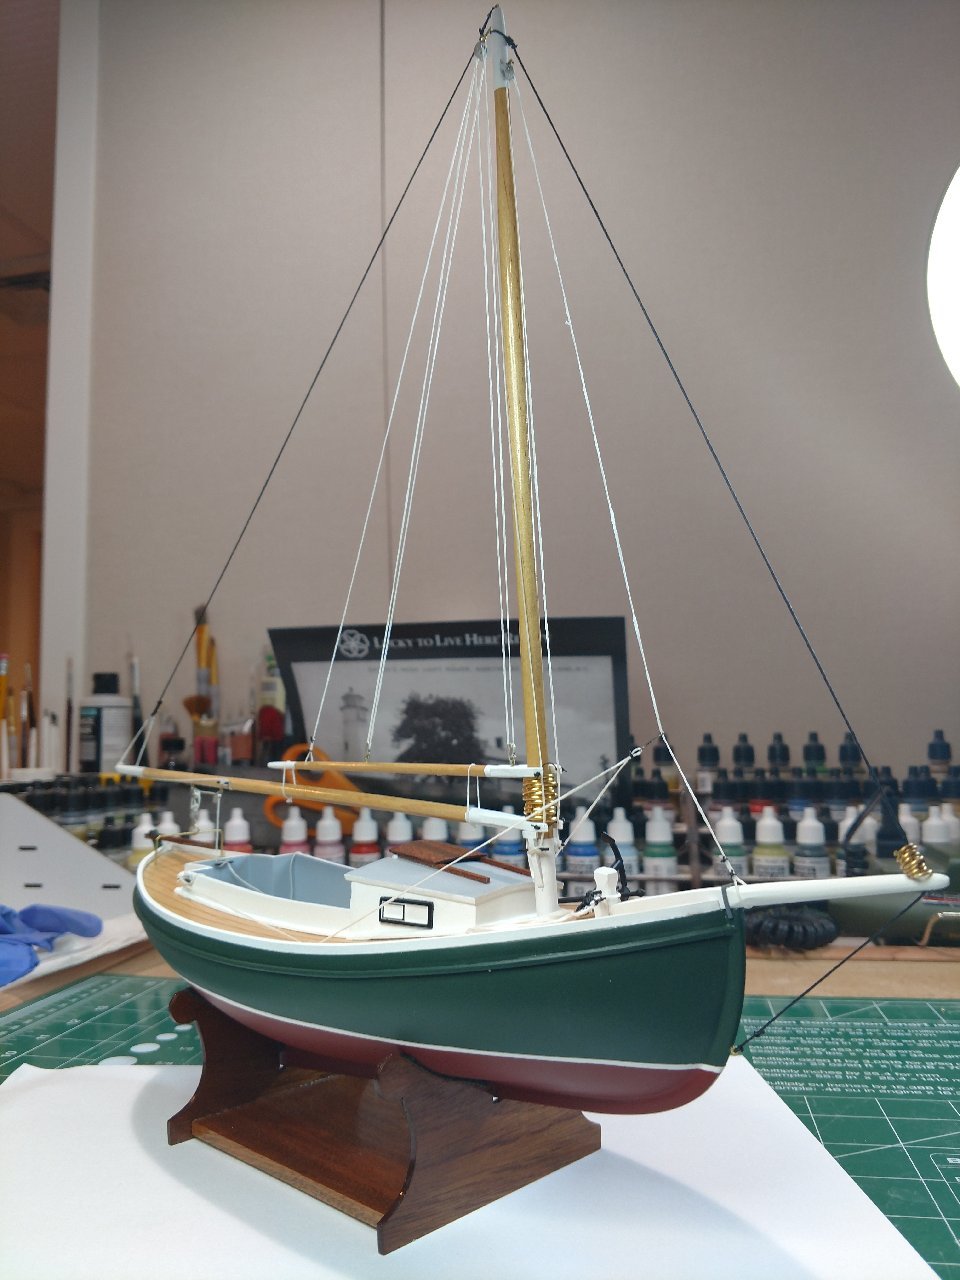
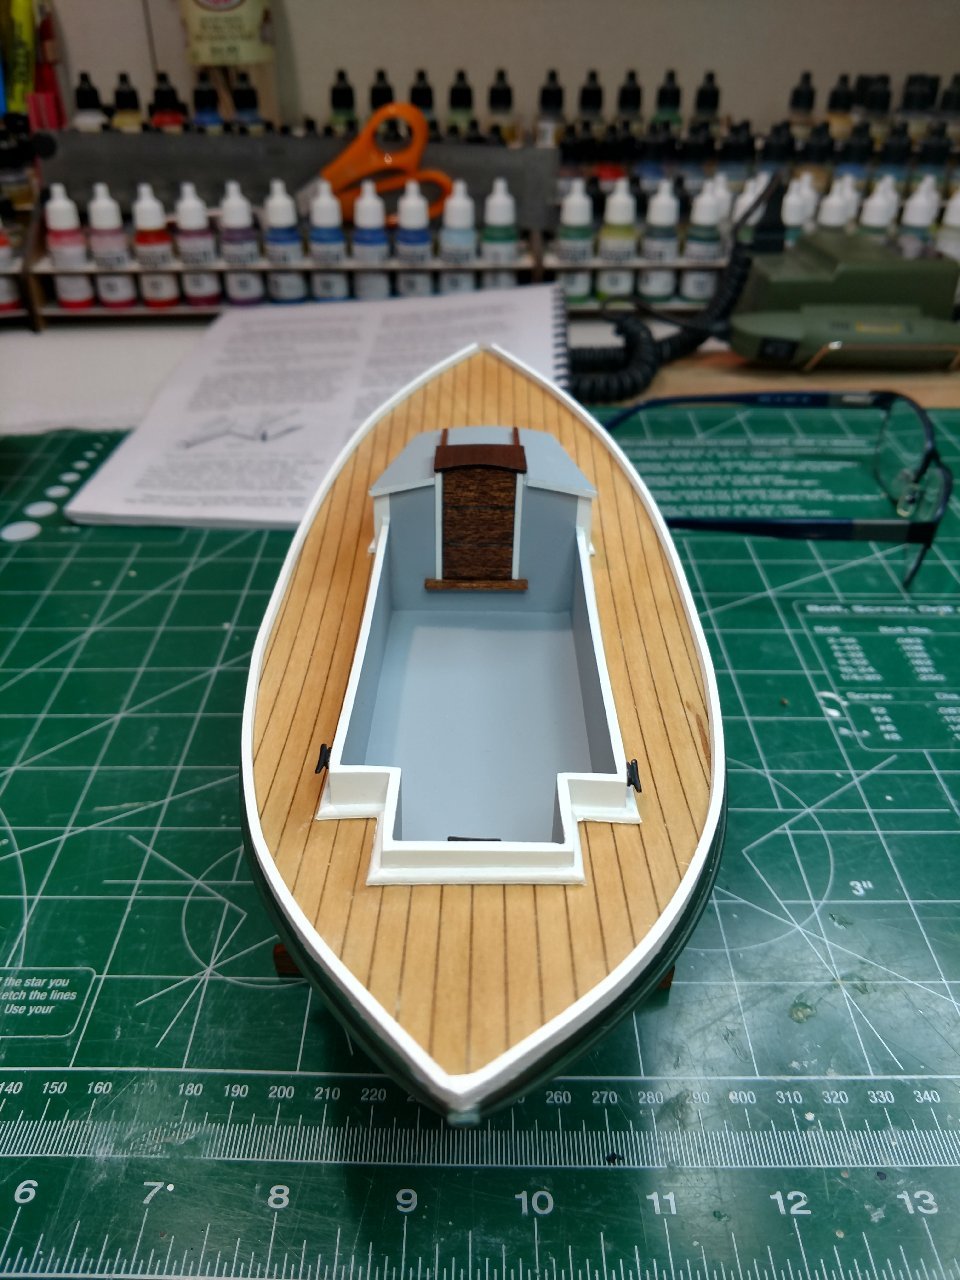
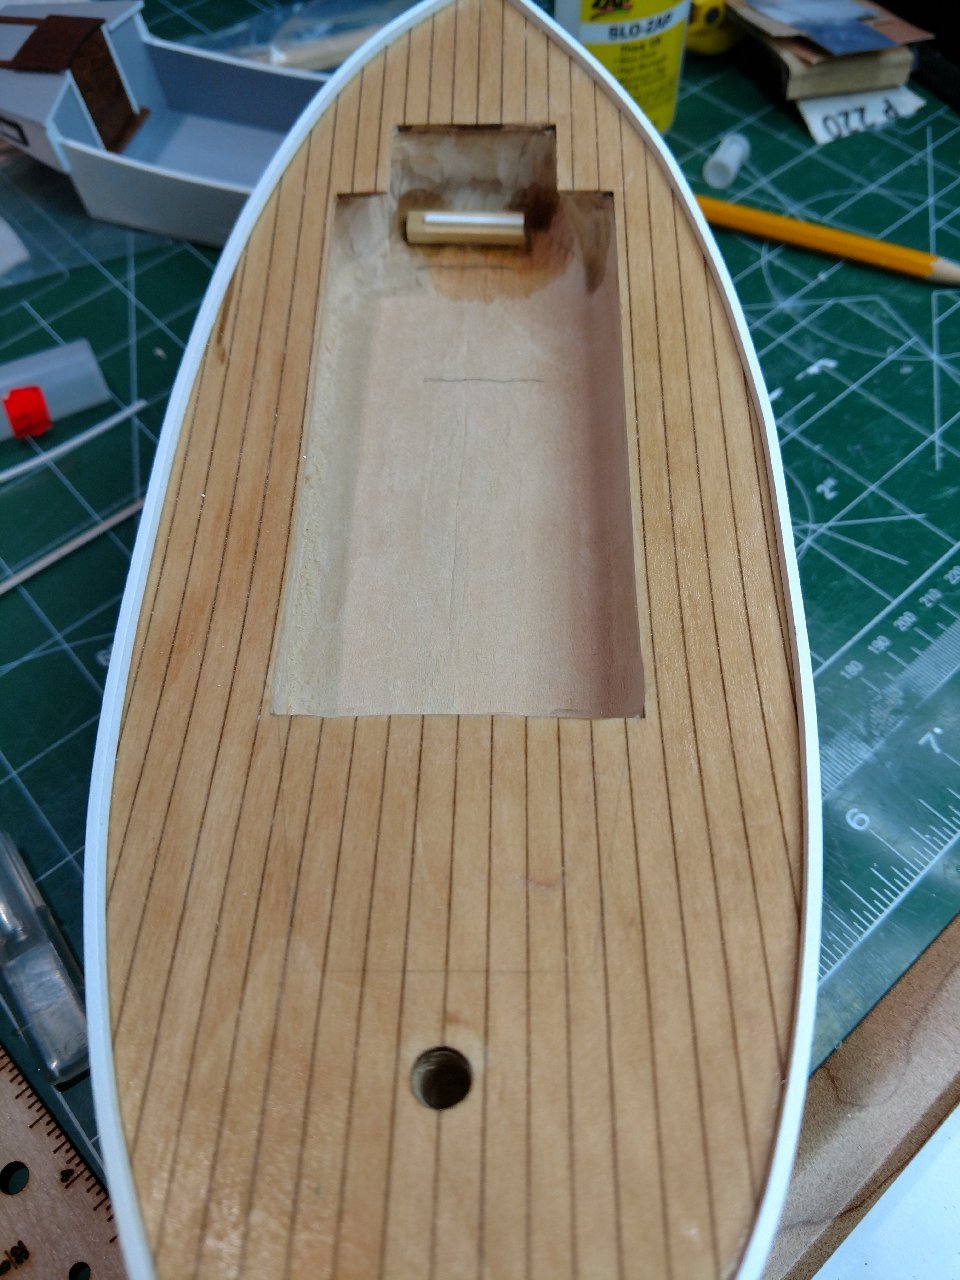
Hello All,
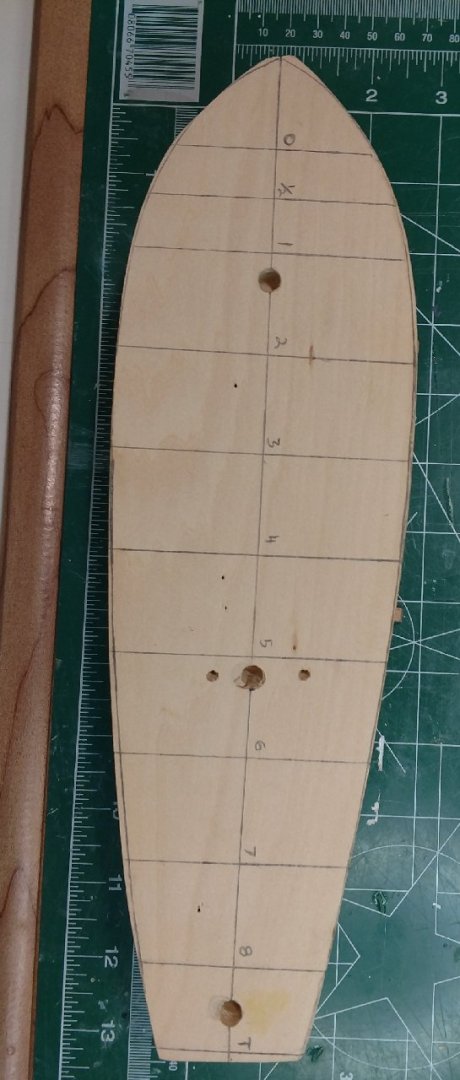
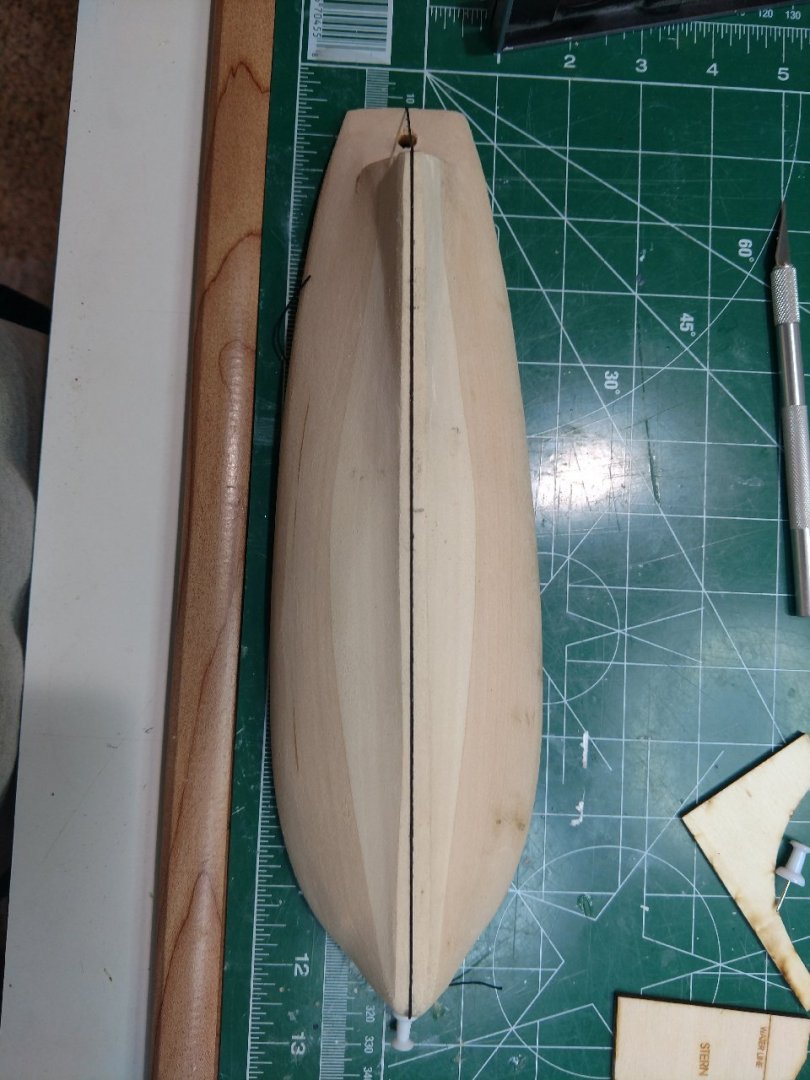
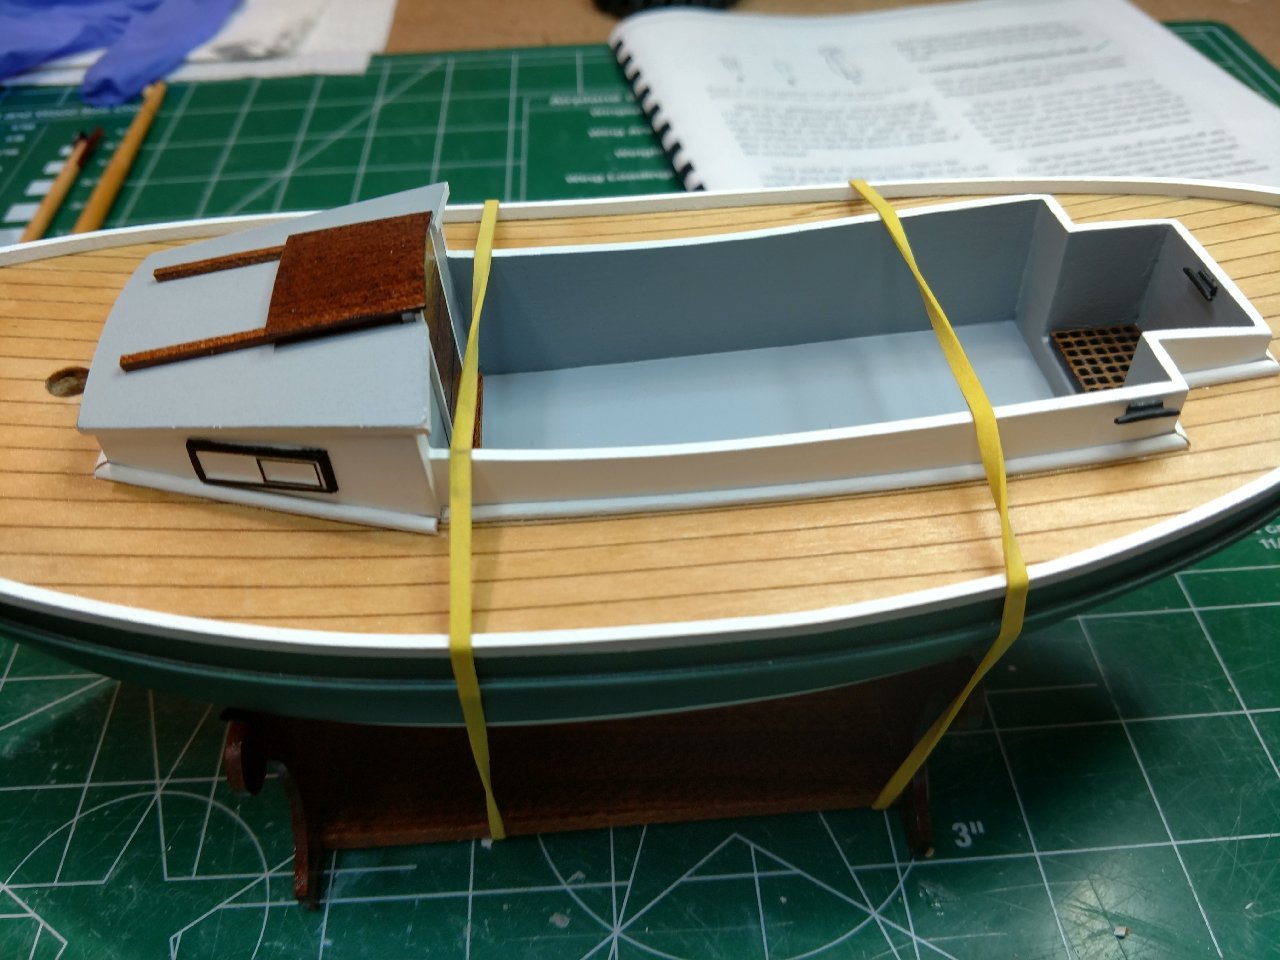
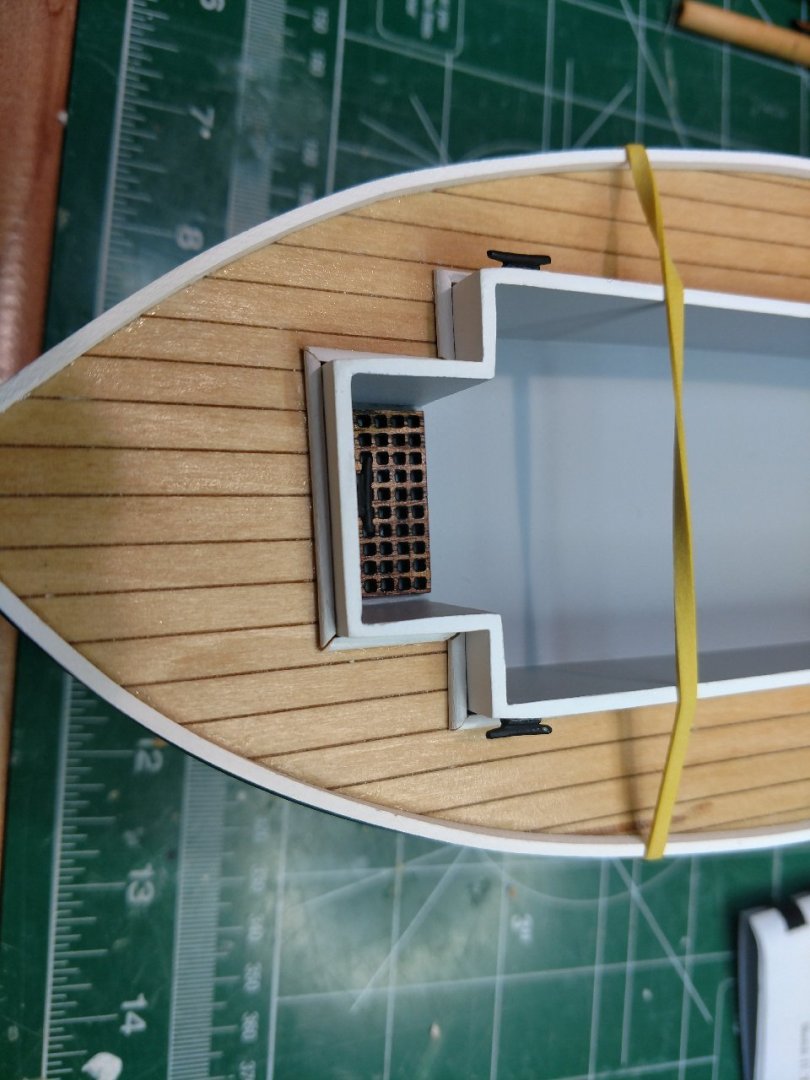
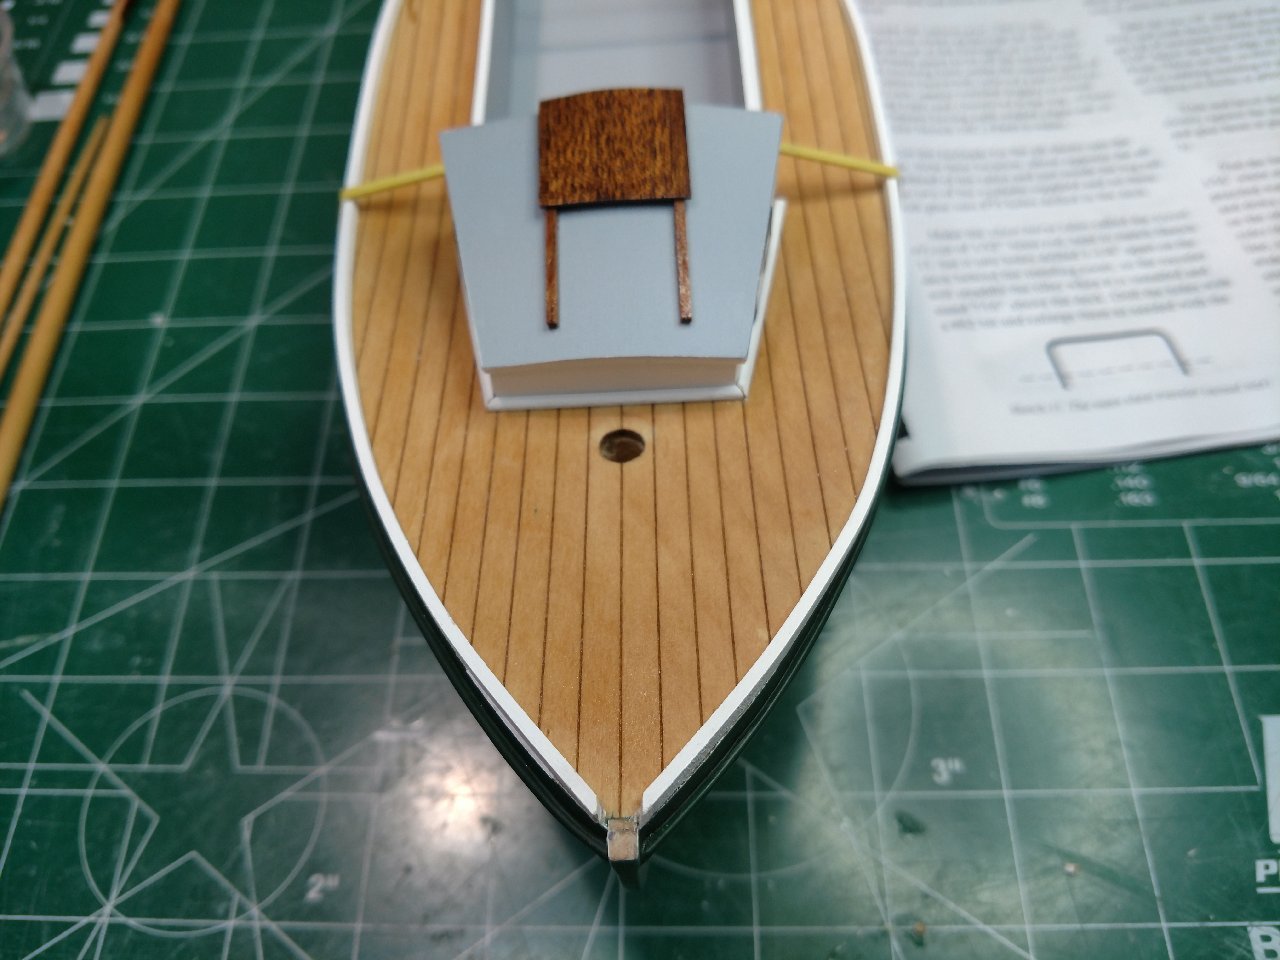
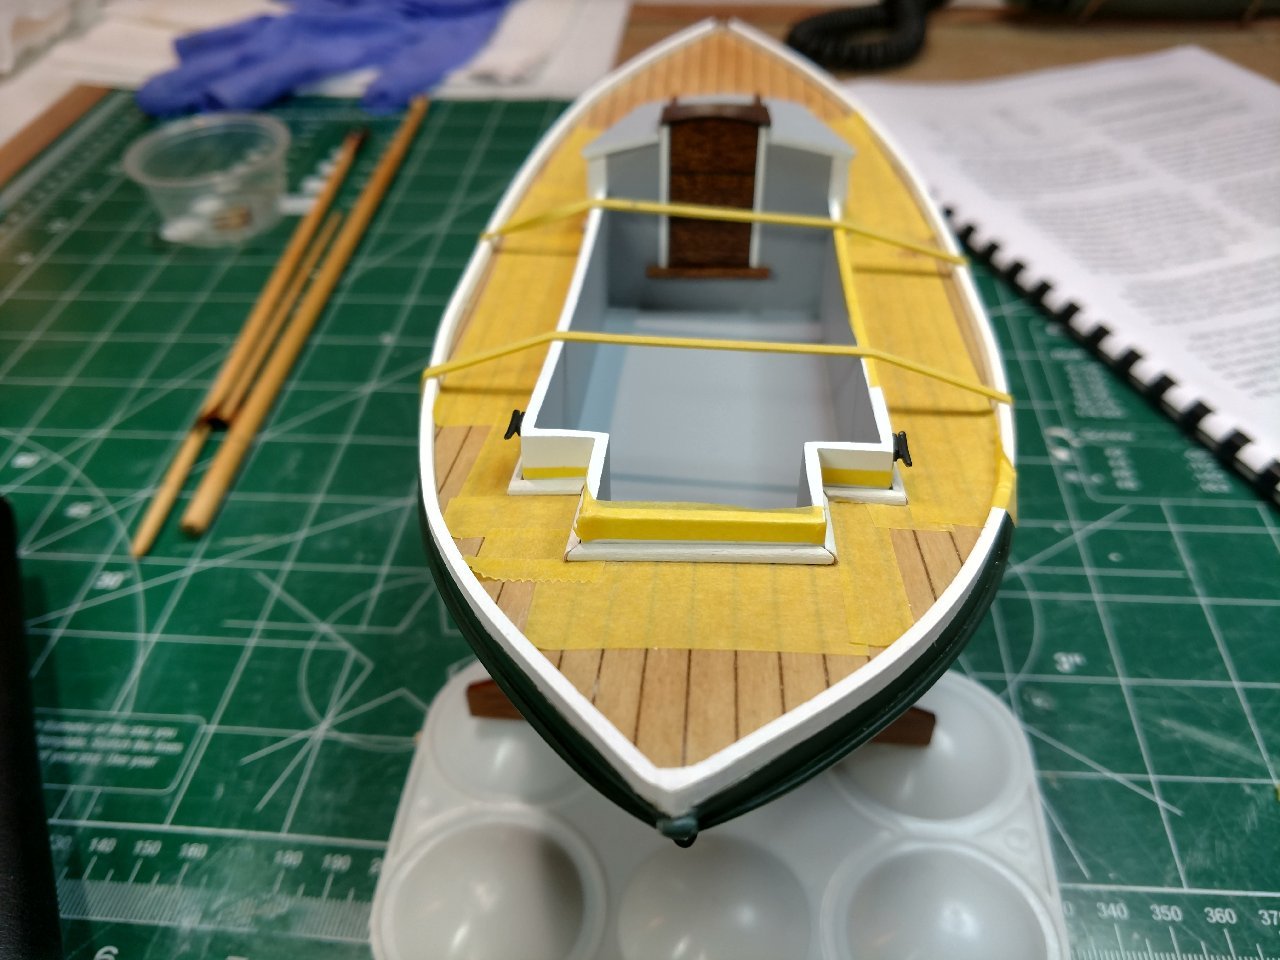
I hope this post finds everyone well. So I finally caught up to where I left off when I received a new hull from Blue Jacket after trashing my original hull. I am very pleased with the result. Some observations:
Next steps:
Below please find some pictures,
Thanks everyone,
Bill T.