HOLIDAY DONATION DRIVE - SUPPORT MSW - DO YOUR PART TO KEEP THIS GREAT FORUM GOING! (Only 20 donations so far - C'mon guys!)
×


mog
-
Posts
196 -
Joined
-
Last visited
Content Type
Profiles
Forums
Gallery
Events
Everything posted by mog
-
Thanks for the replay, great looking wood, love the future being a bit of a woodworker myself self-taught , I do allot of military boxes, collectable framing, , boat cases, I did turn a 3 car garage in a bar room, but mainly smaller type projects. The wood I used on the PT deck was Mahoney, it's still in the unsealed state, so the shade will change slightly. Anyway wishing you and yours a happy Holiday season
Mike
-
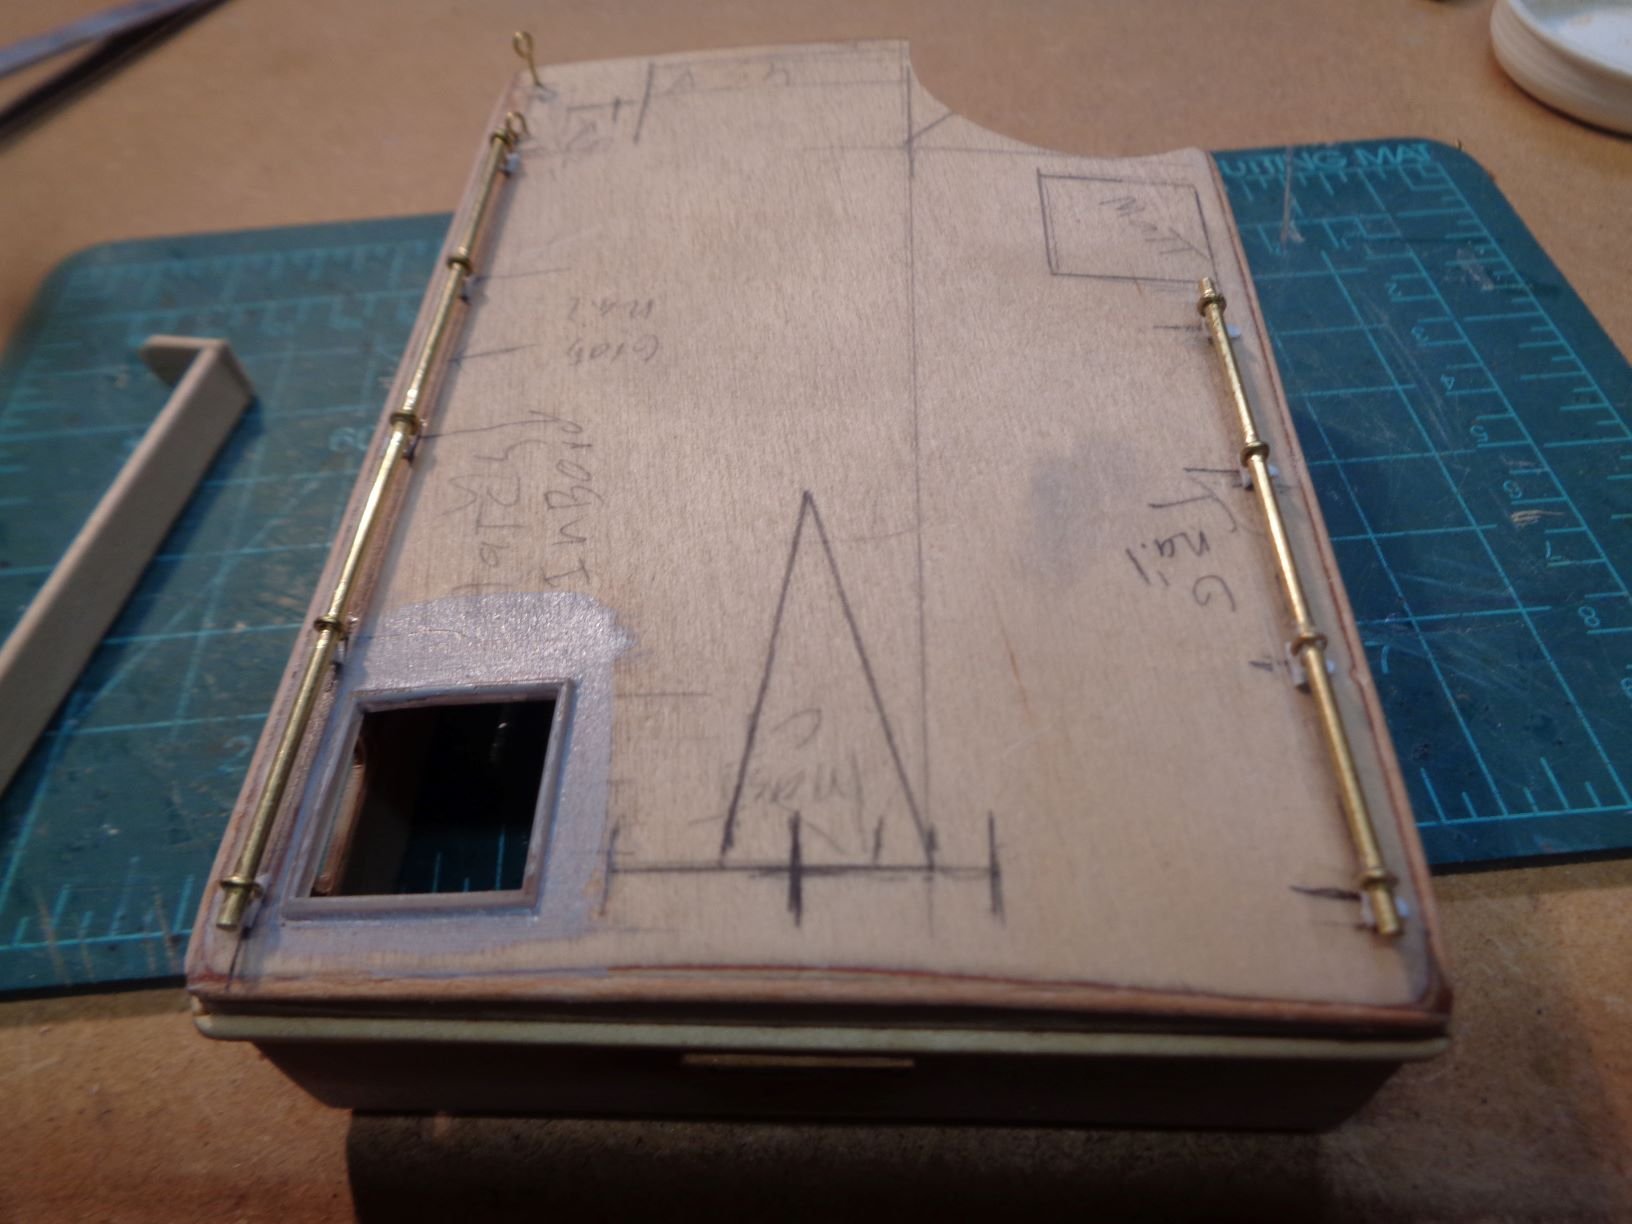
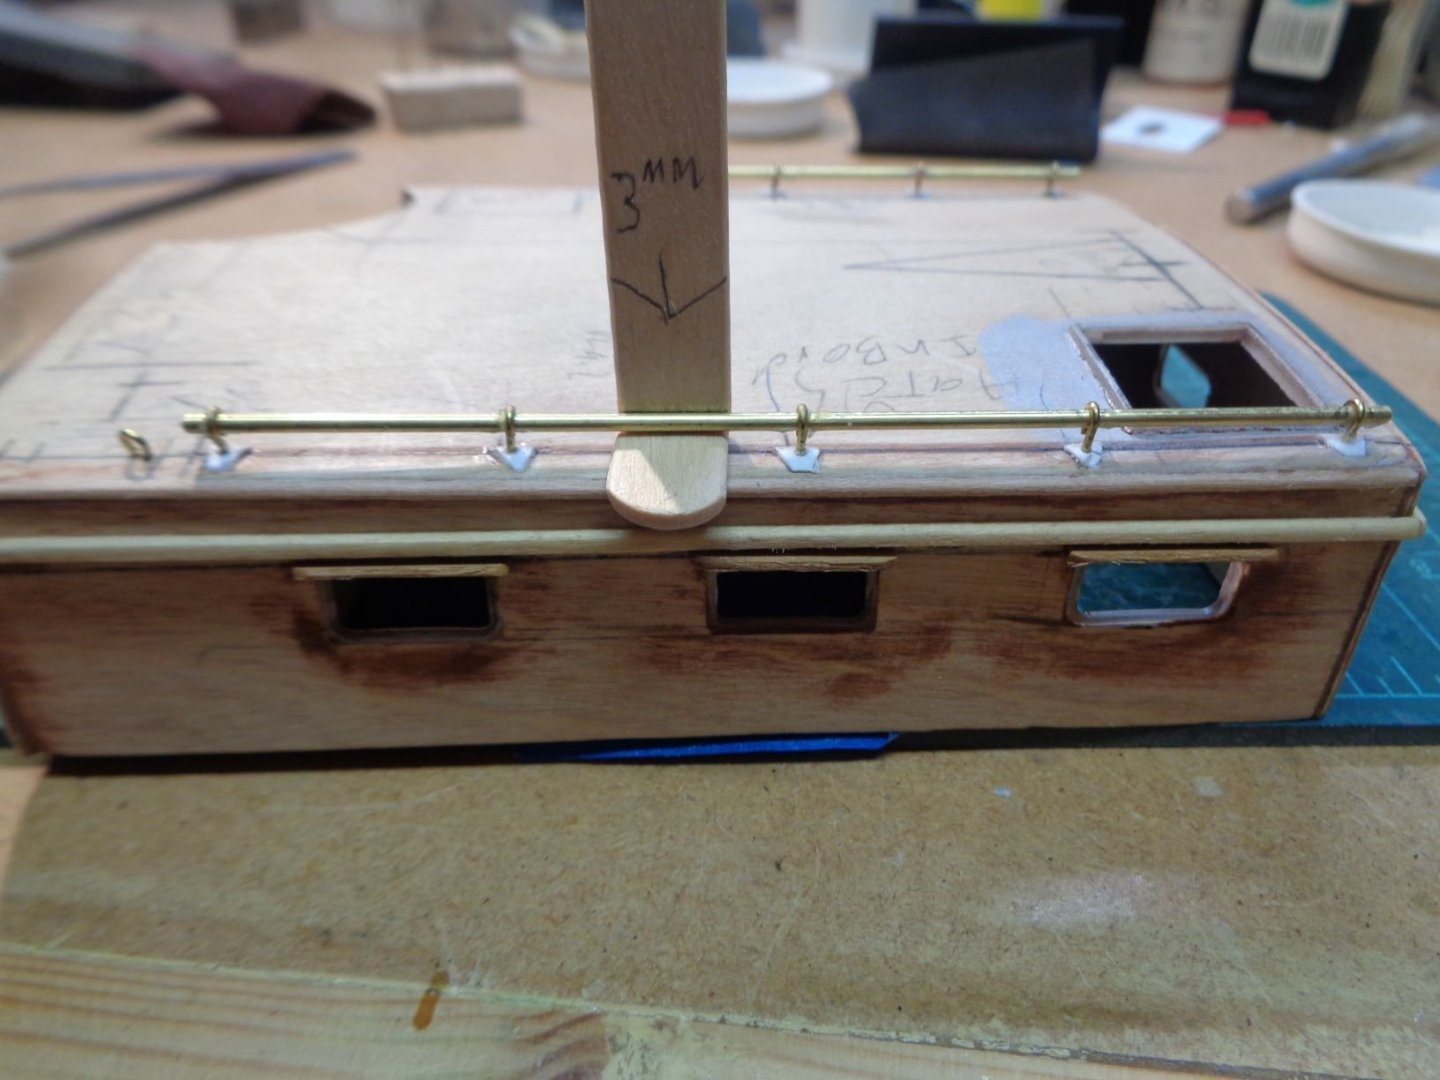
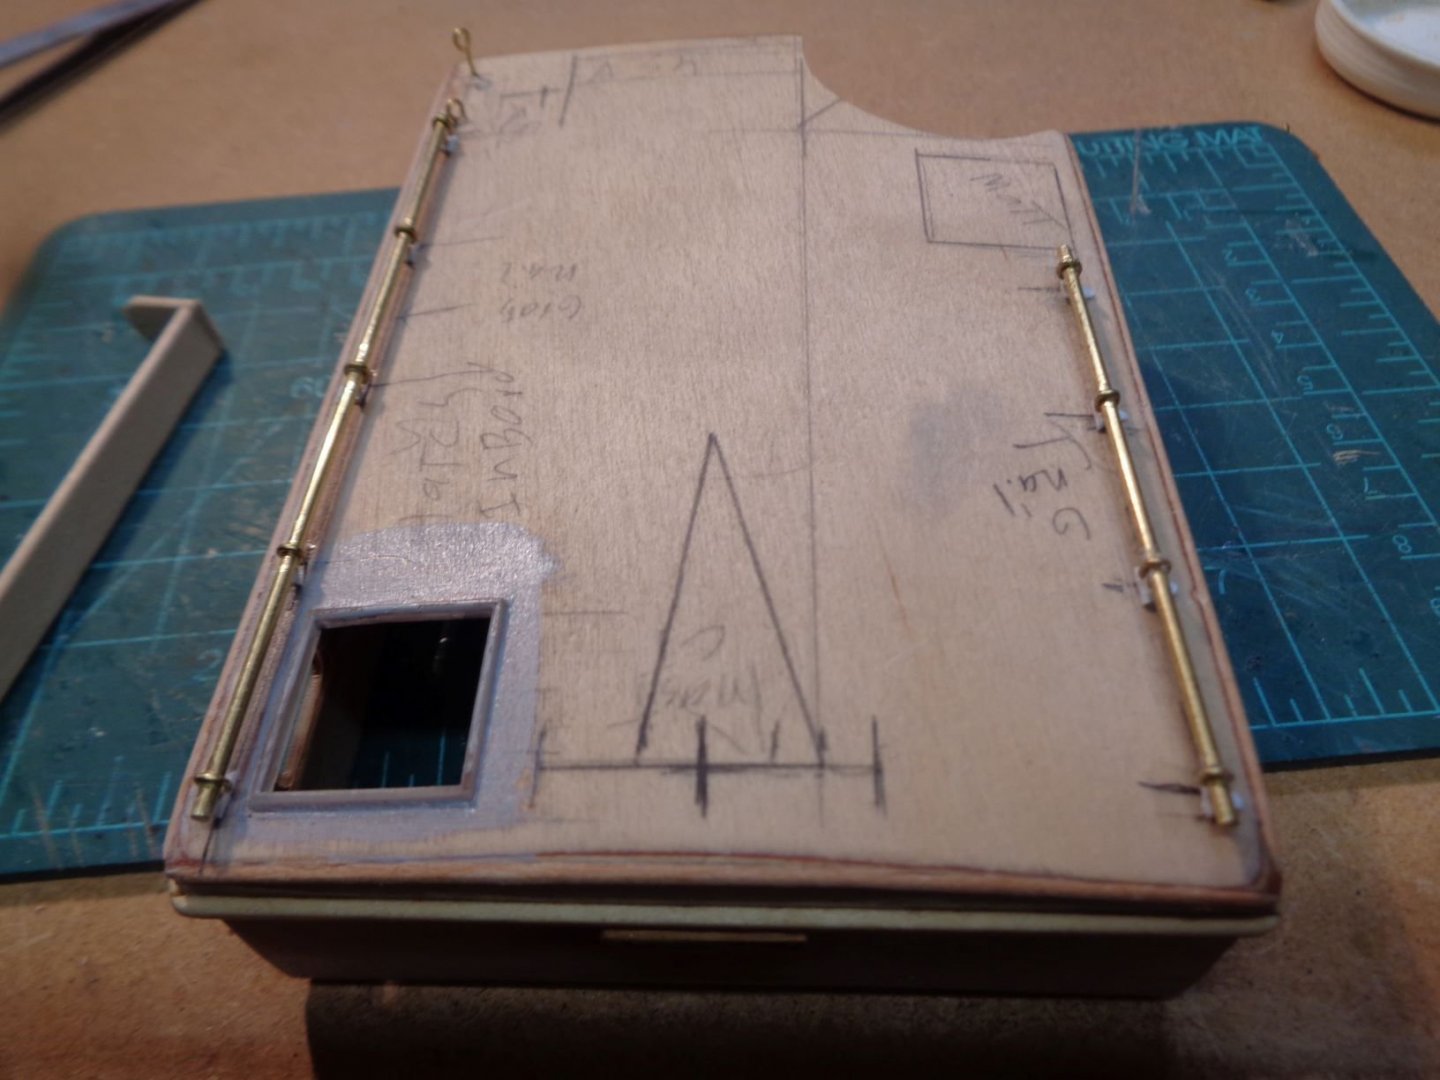
using the day cabin to trial my attempt at making the grad rails in this section they pretty are straight forward, several of the other rails have different end pieces which I have to figure out how to make, all in all I think its a good start, time and practice will tell.
- 195 replies
-
- 10
-

-
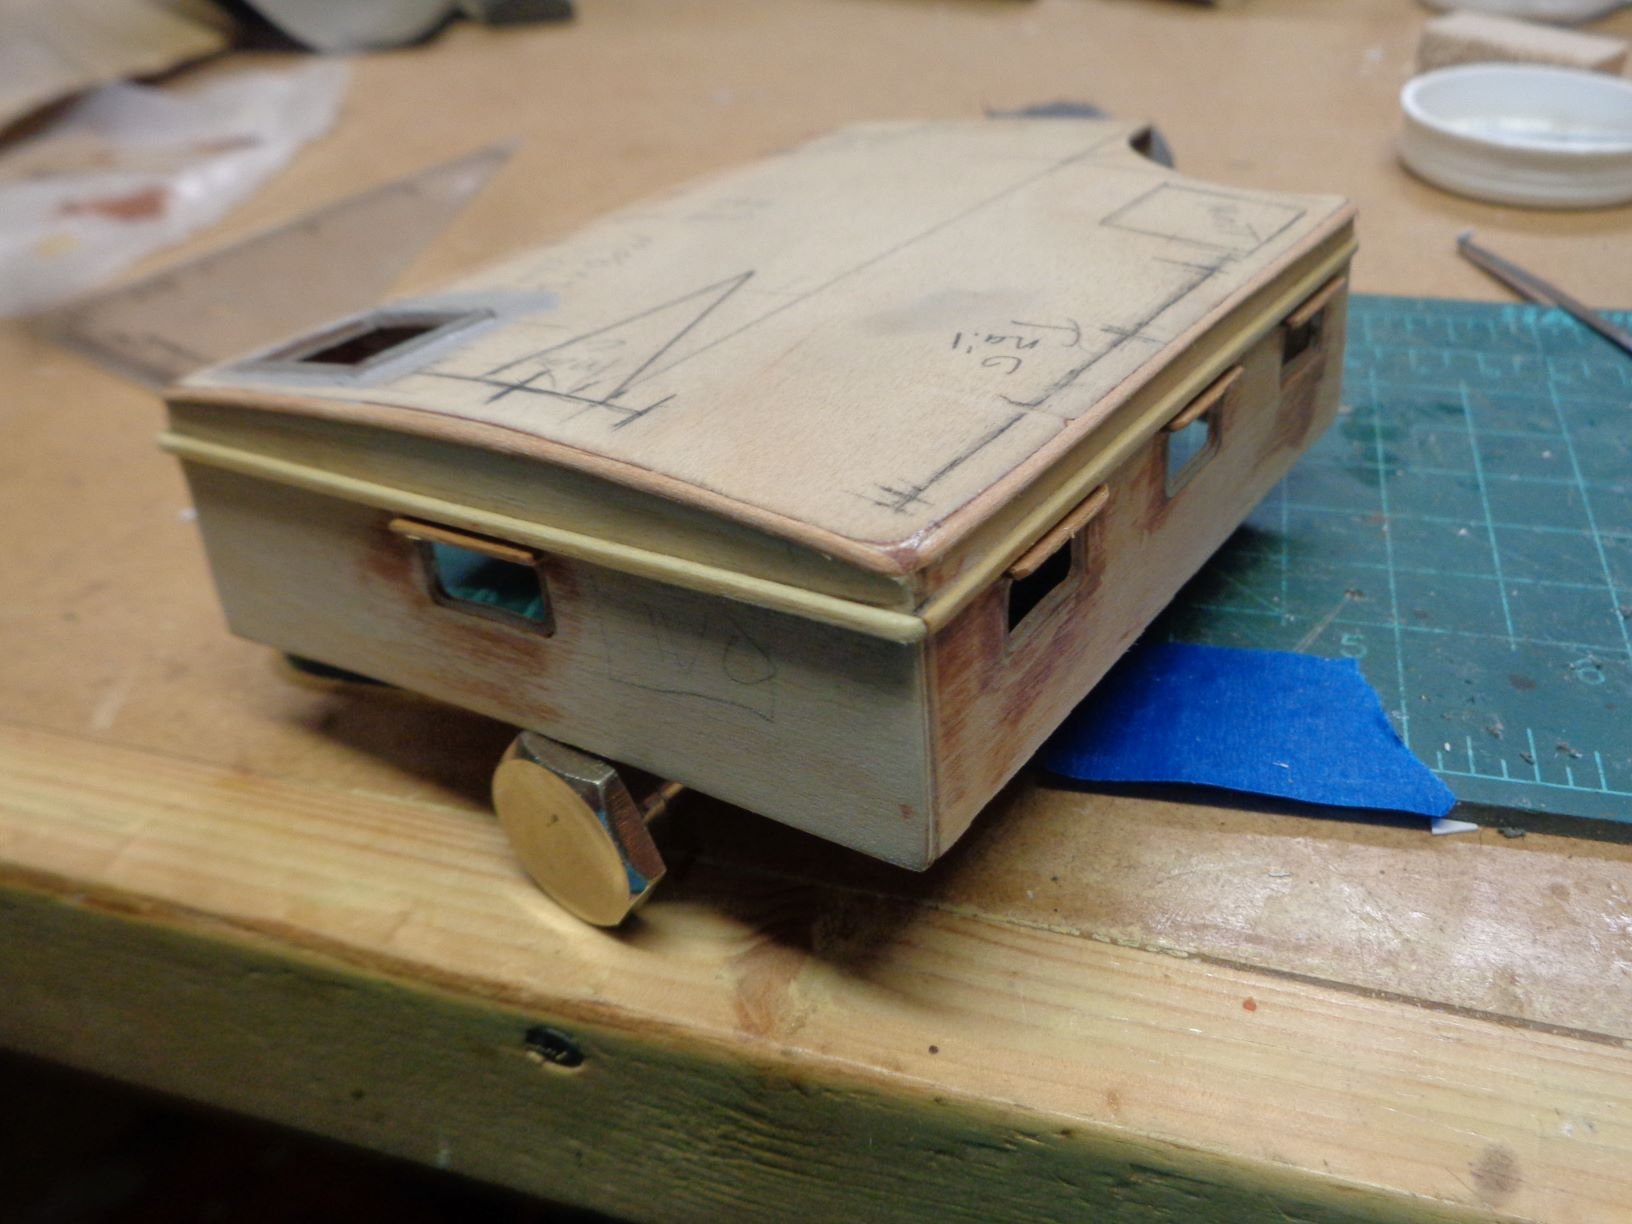
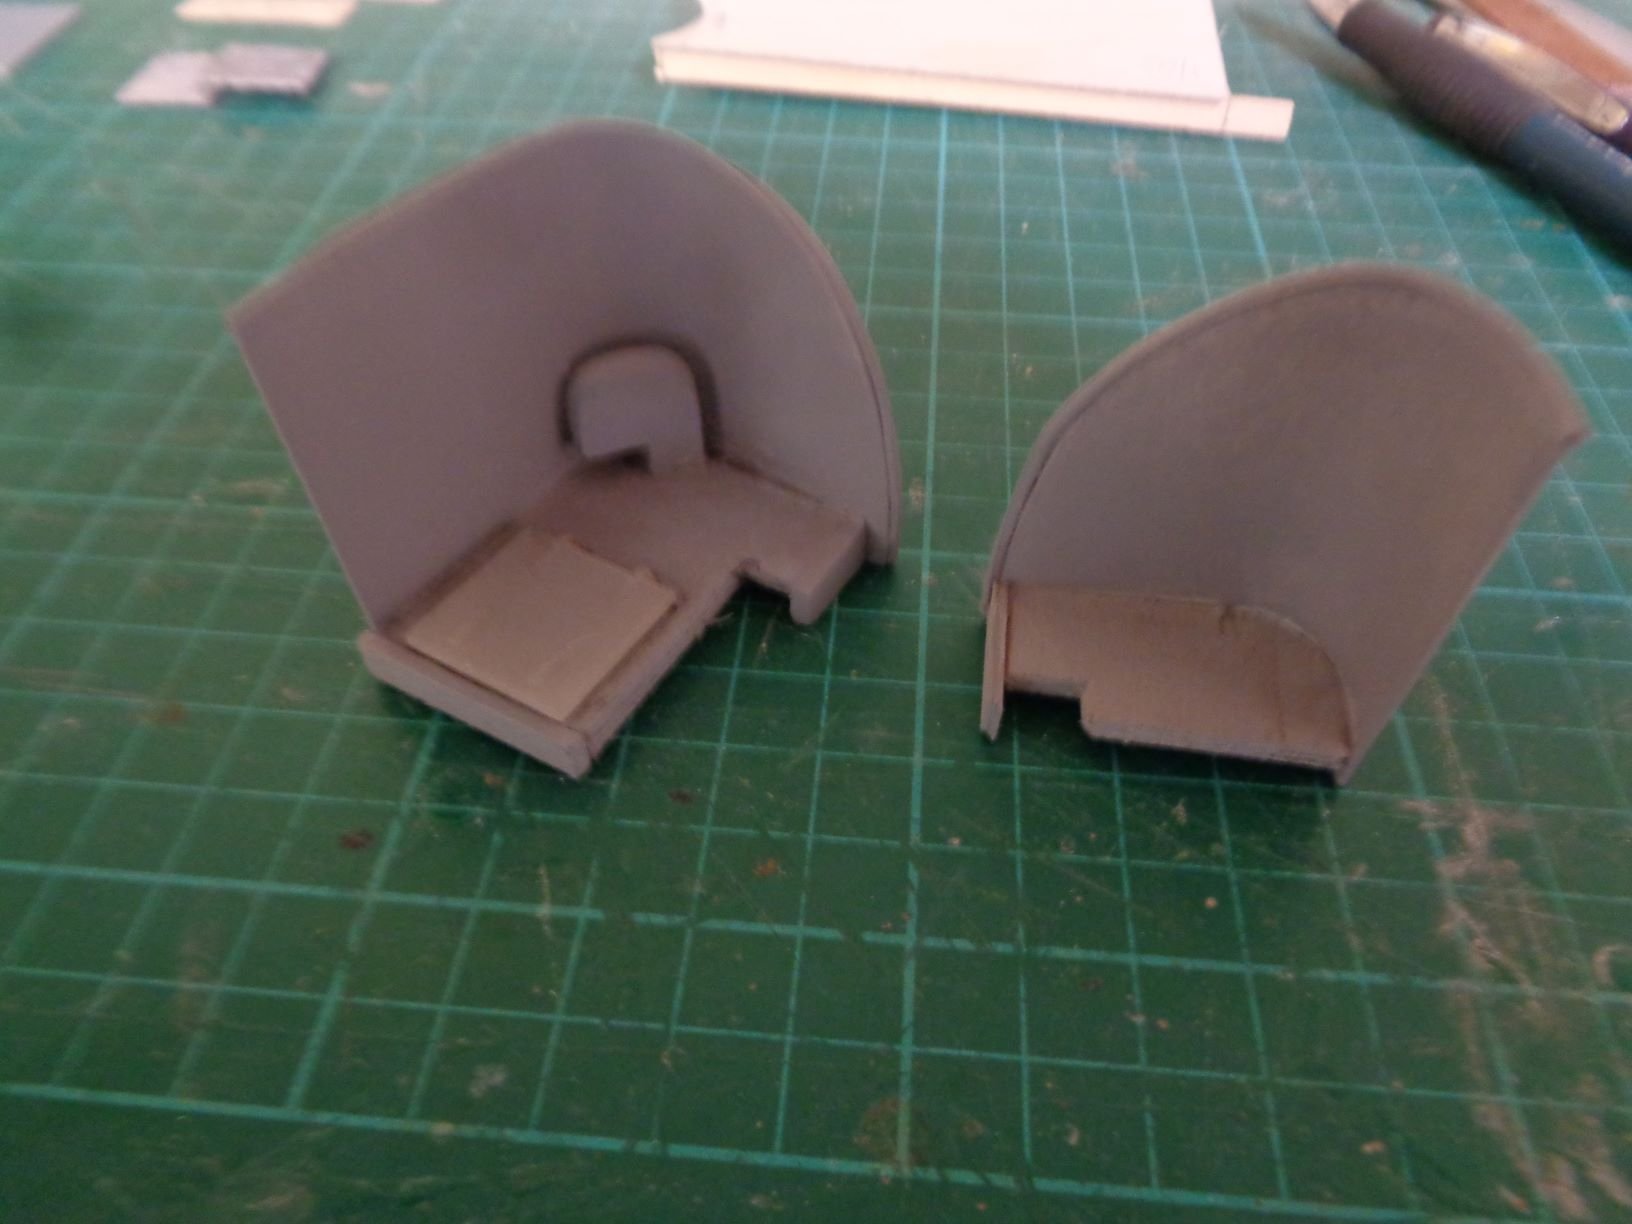
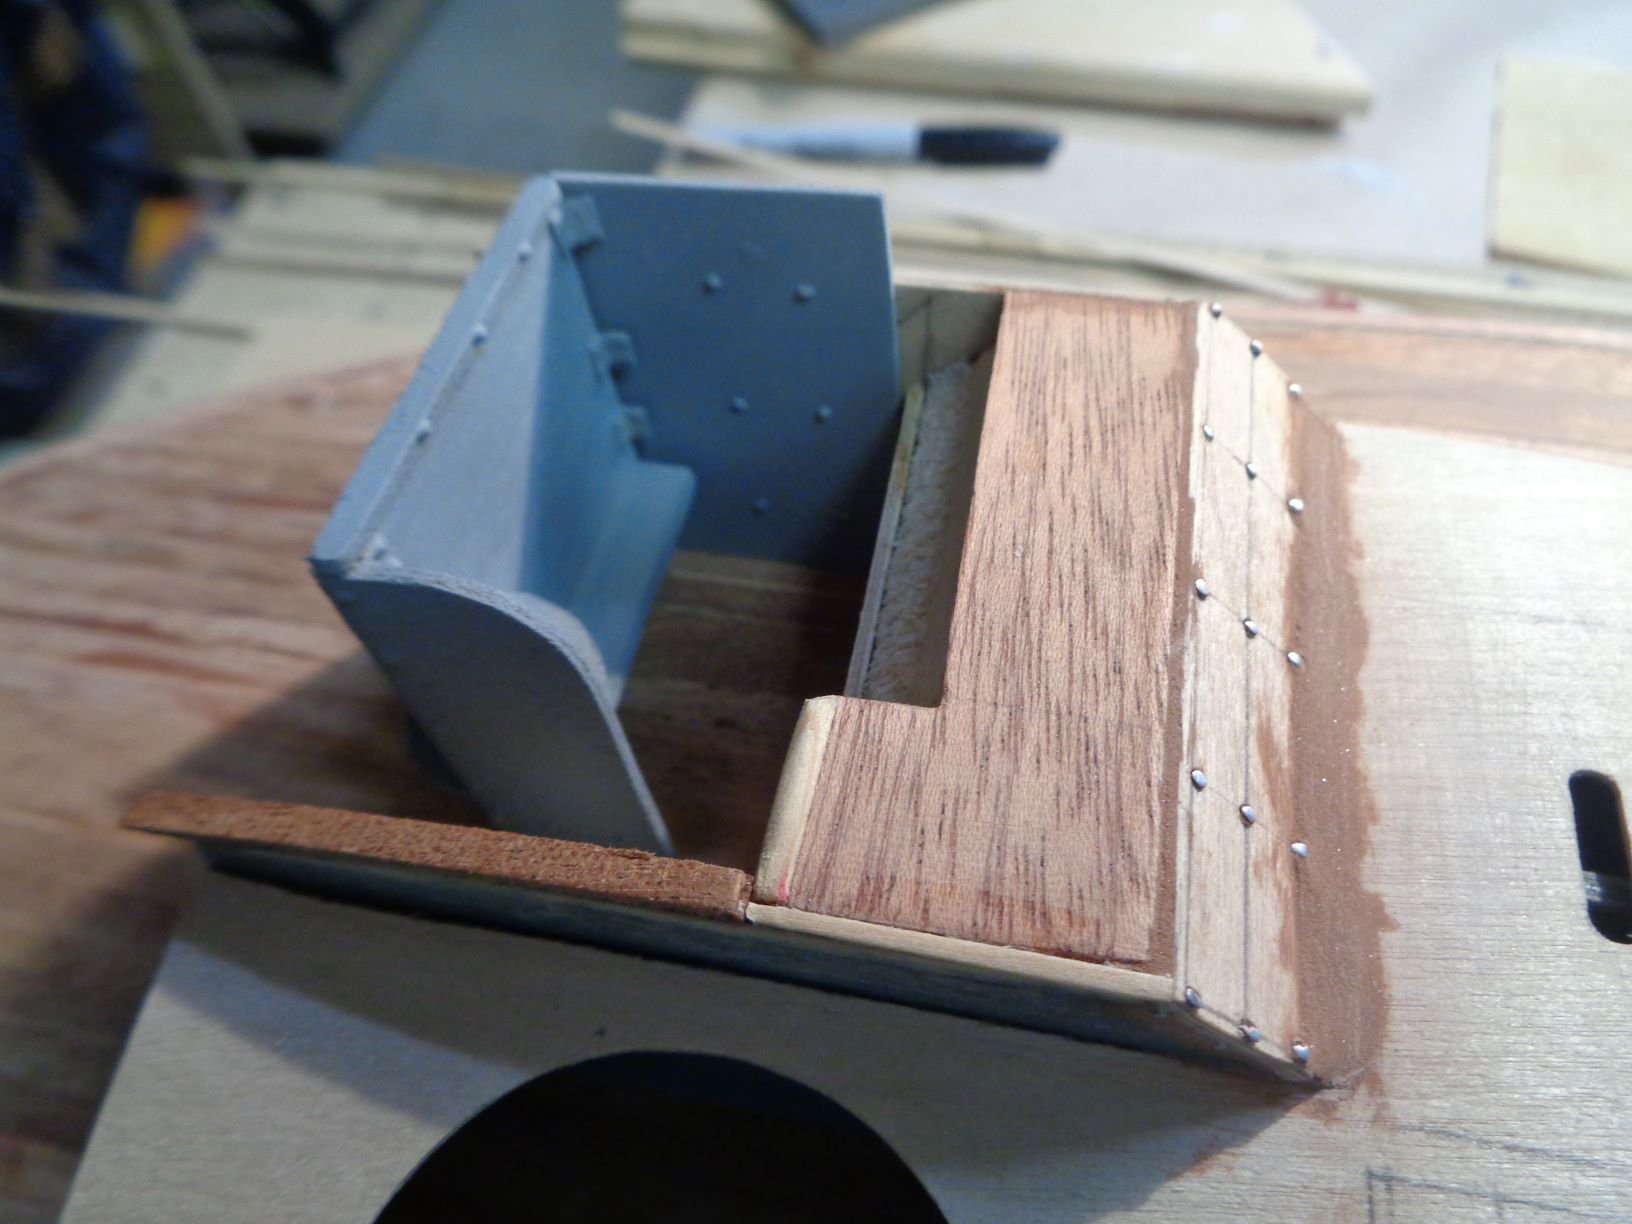
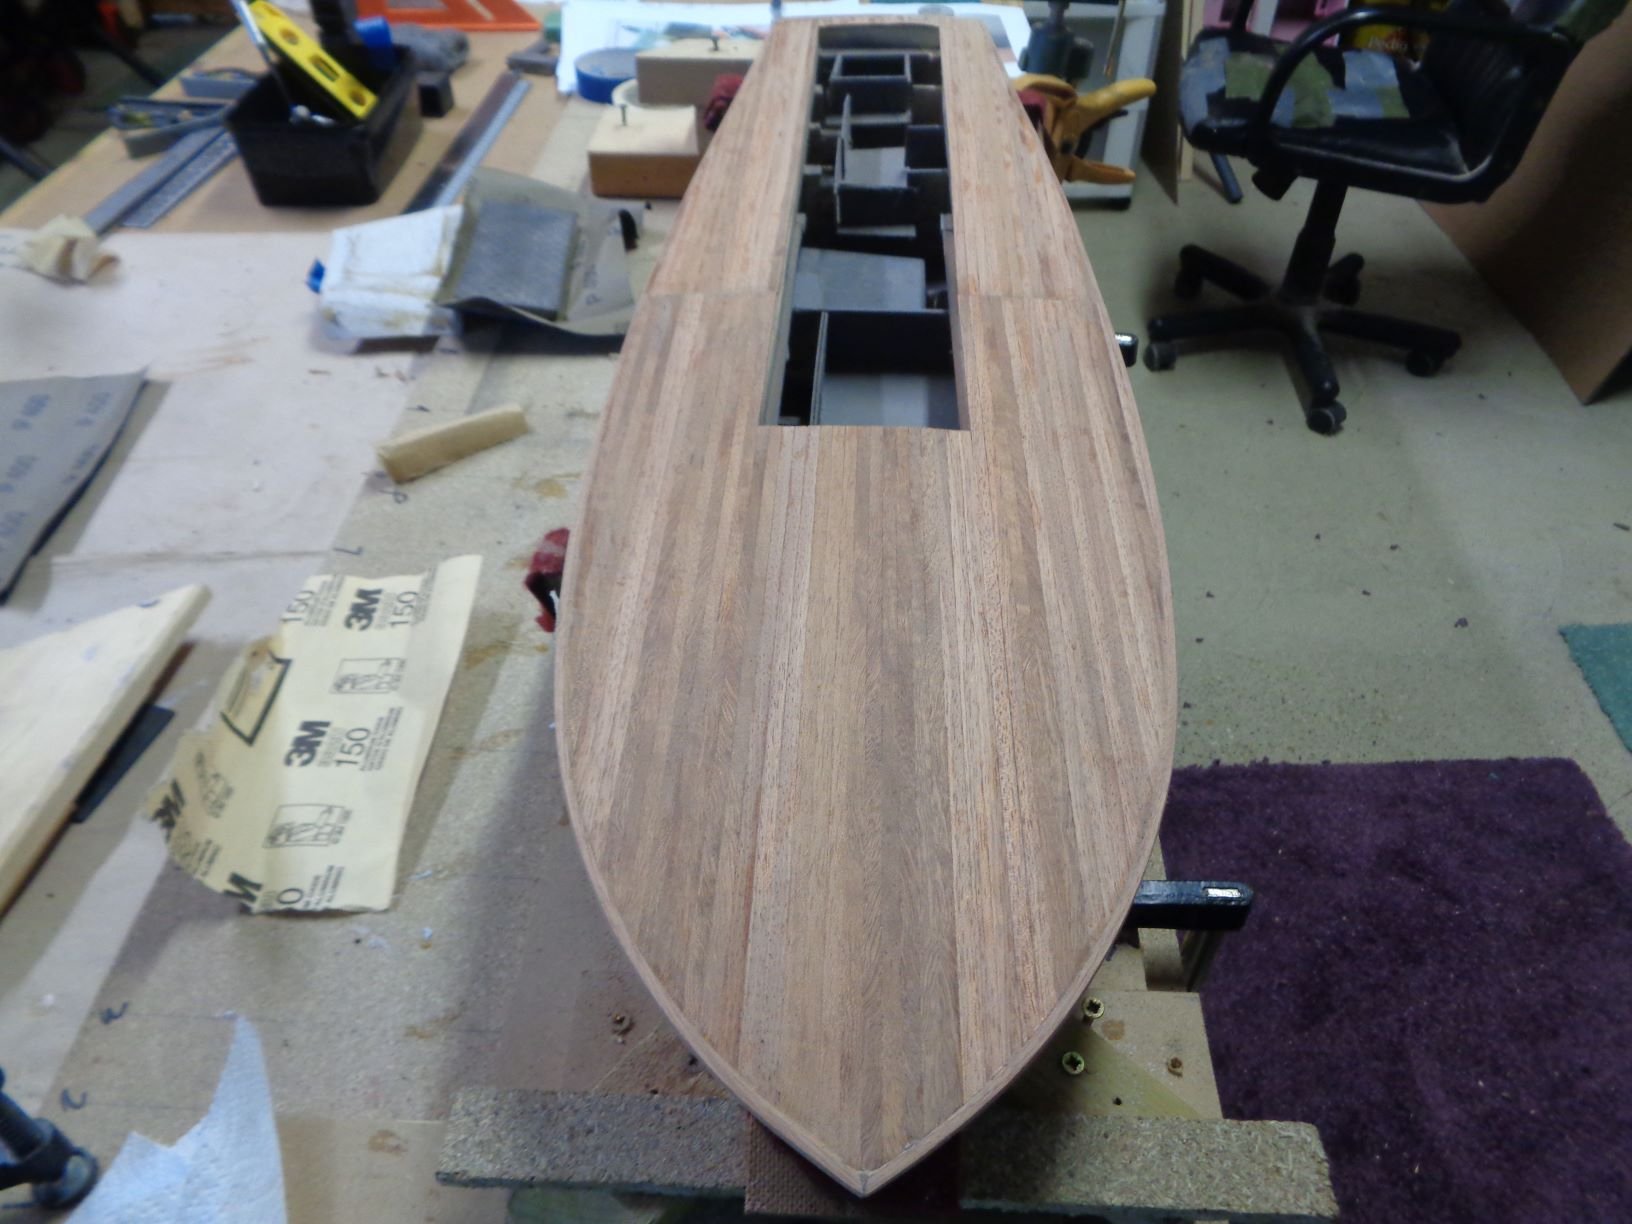
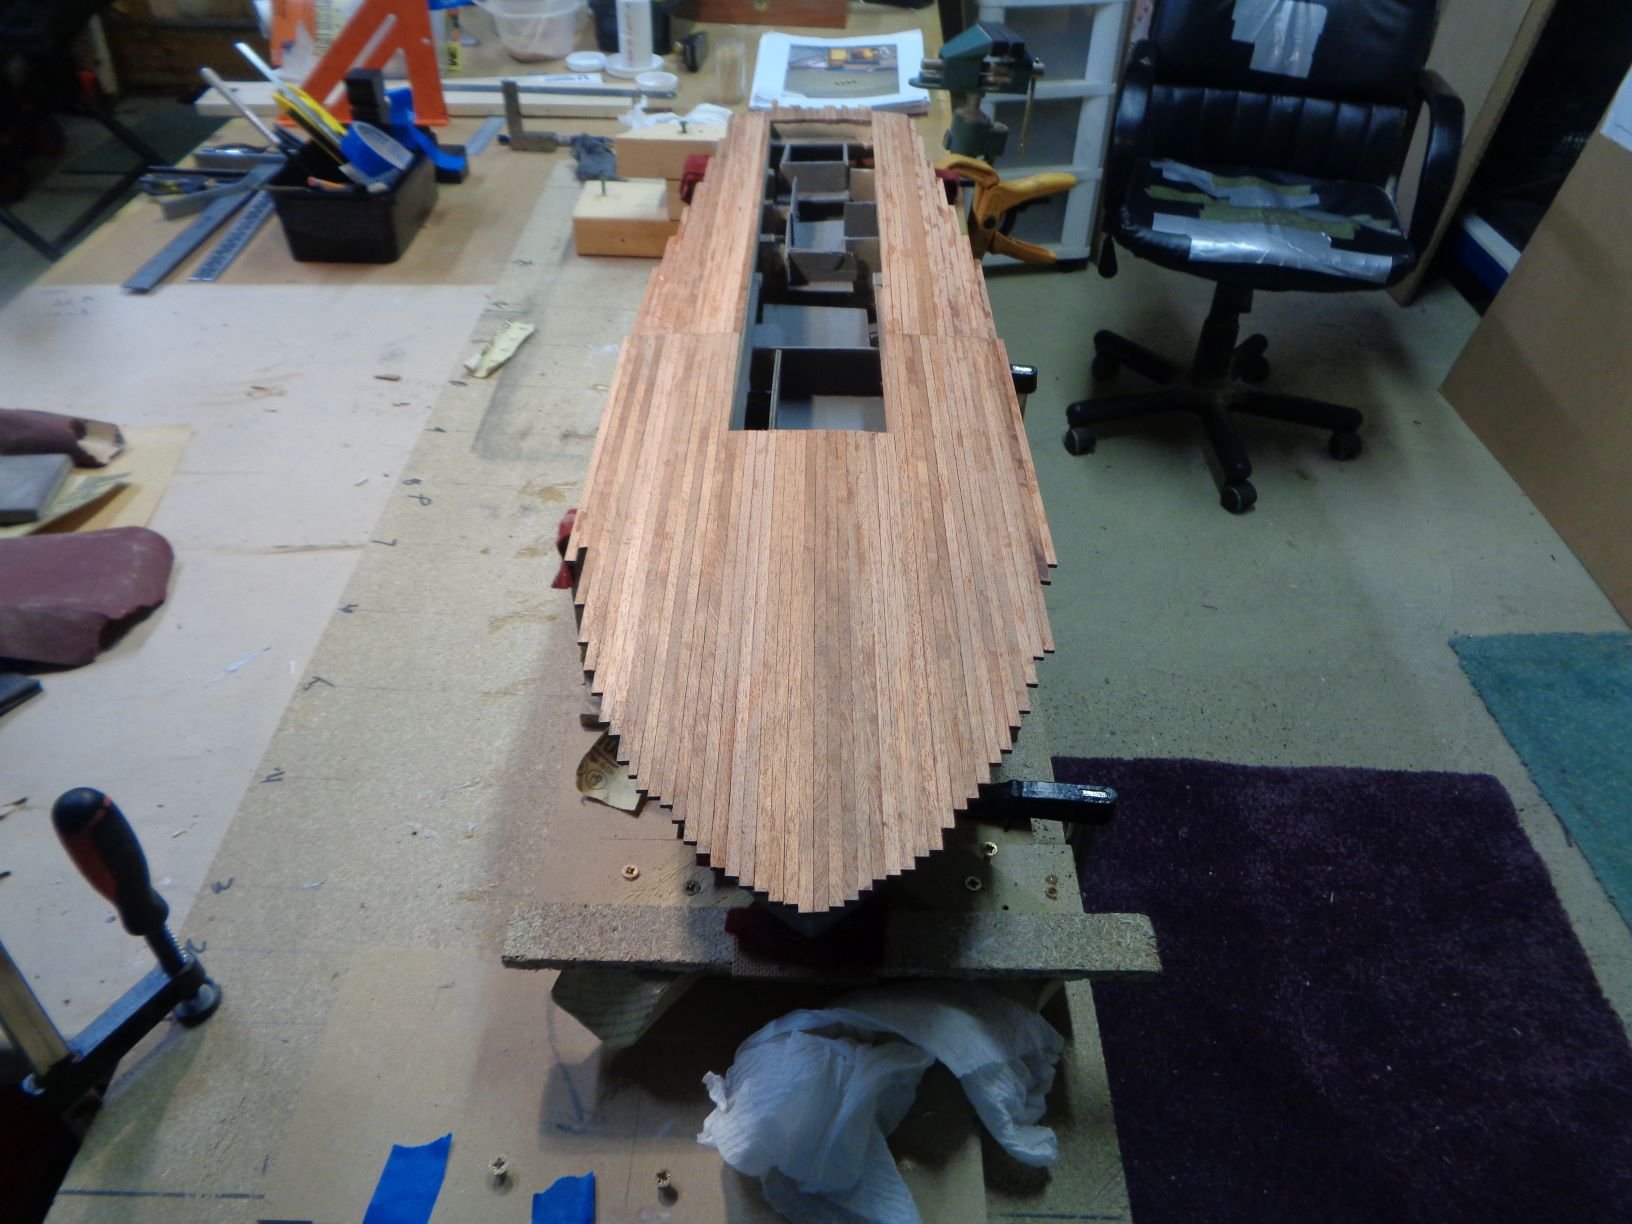
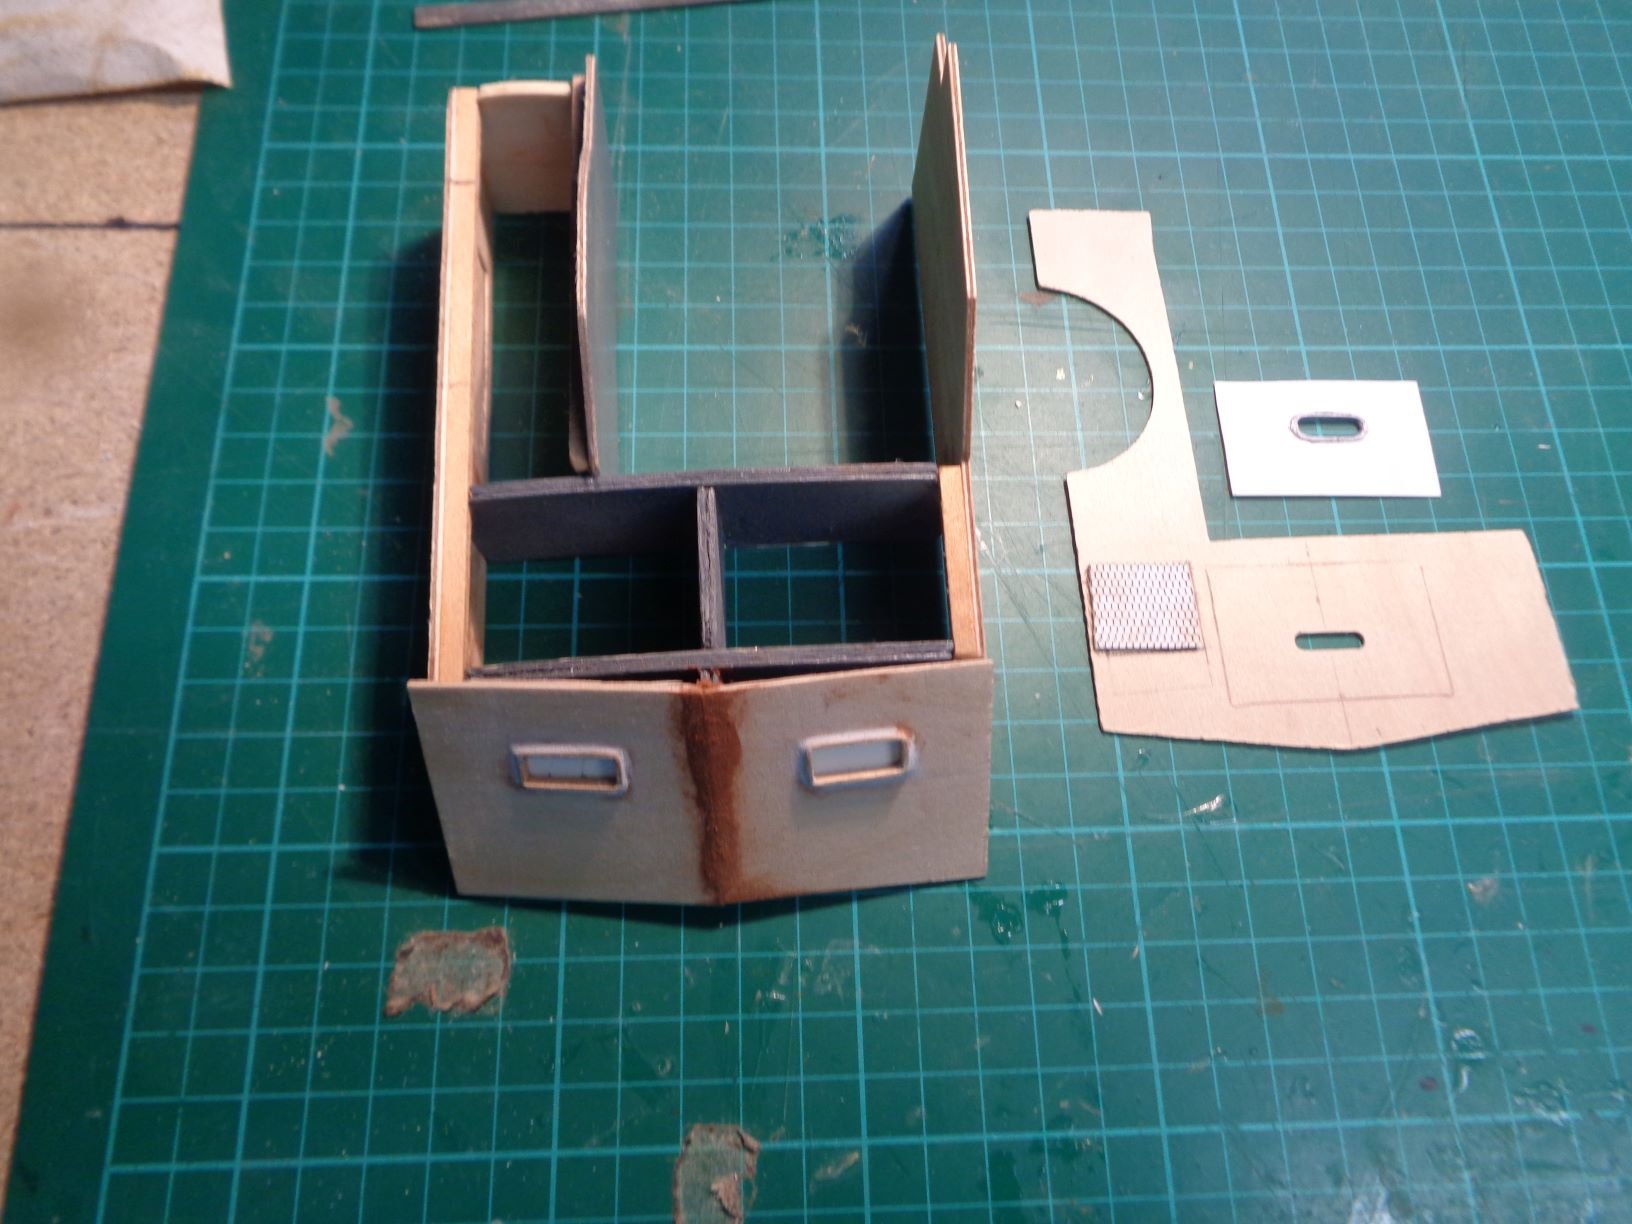
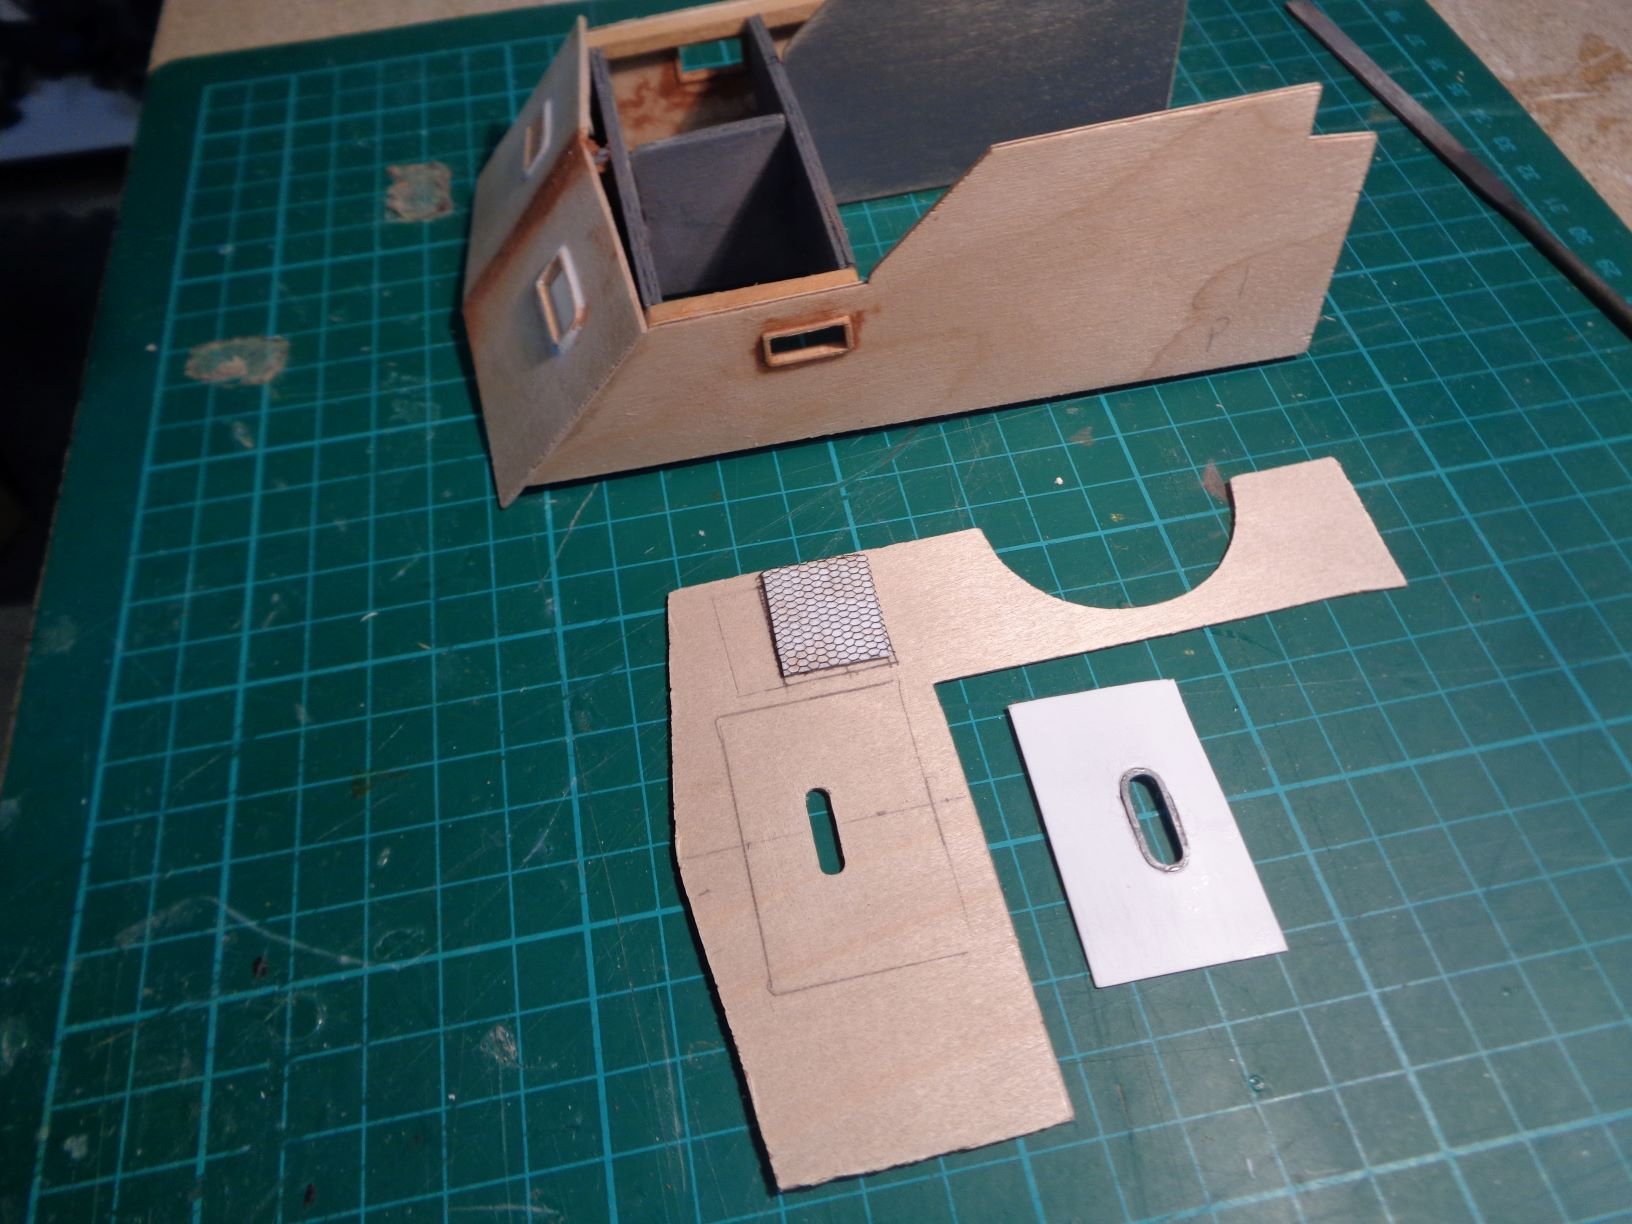
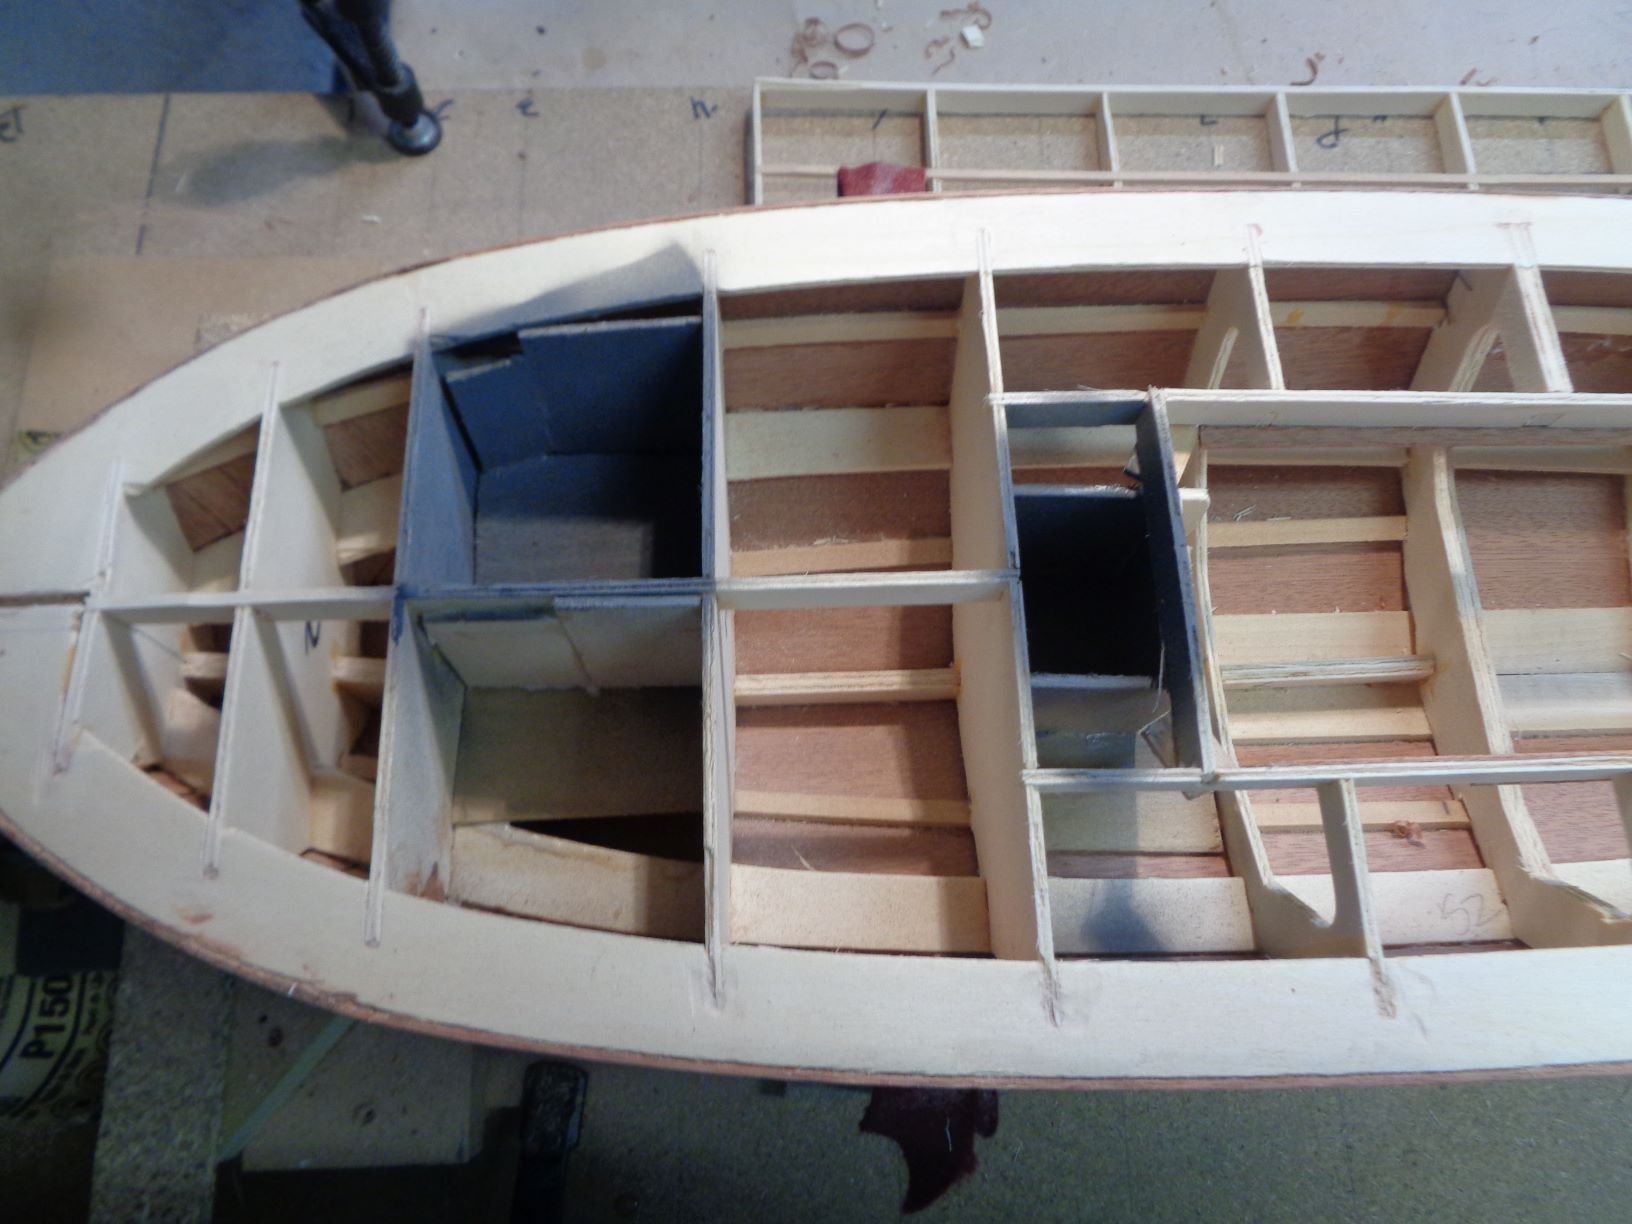
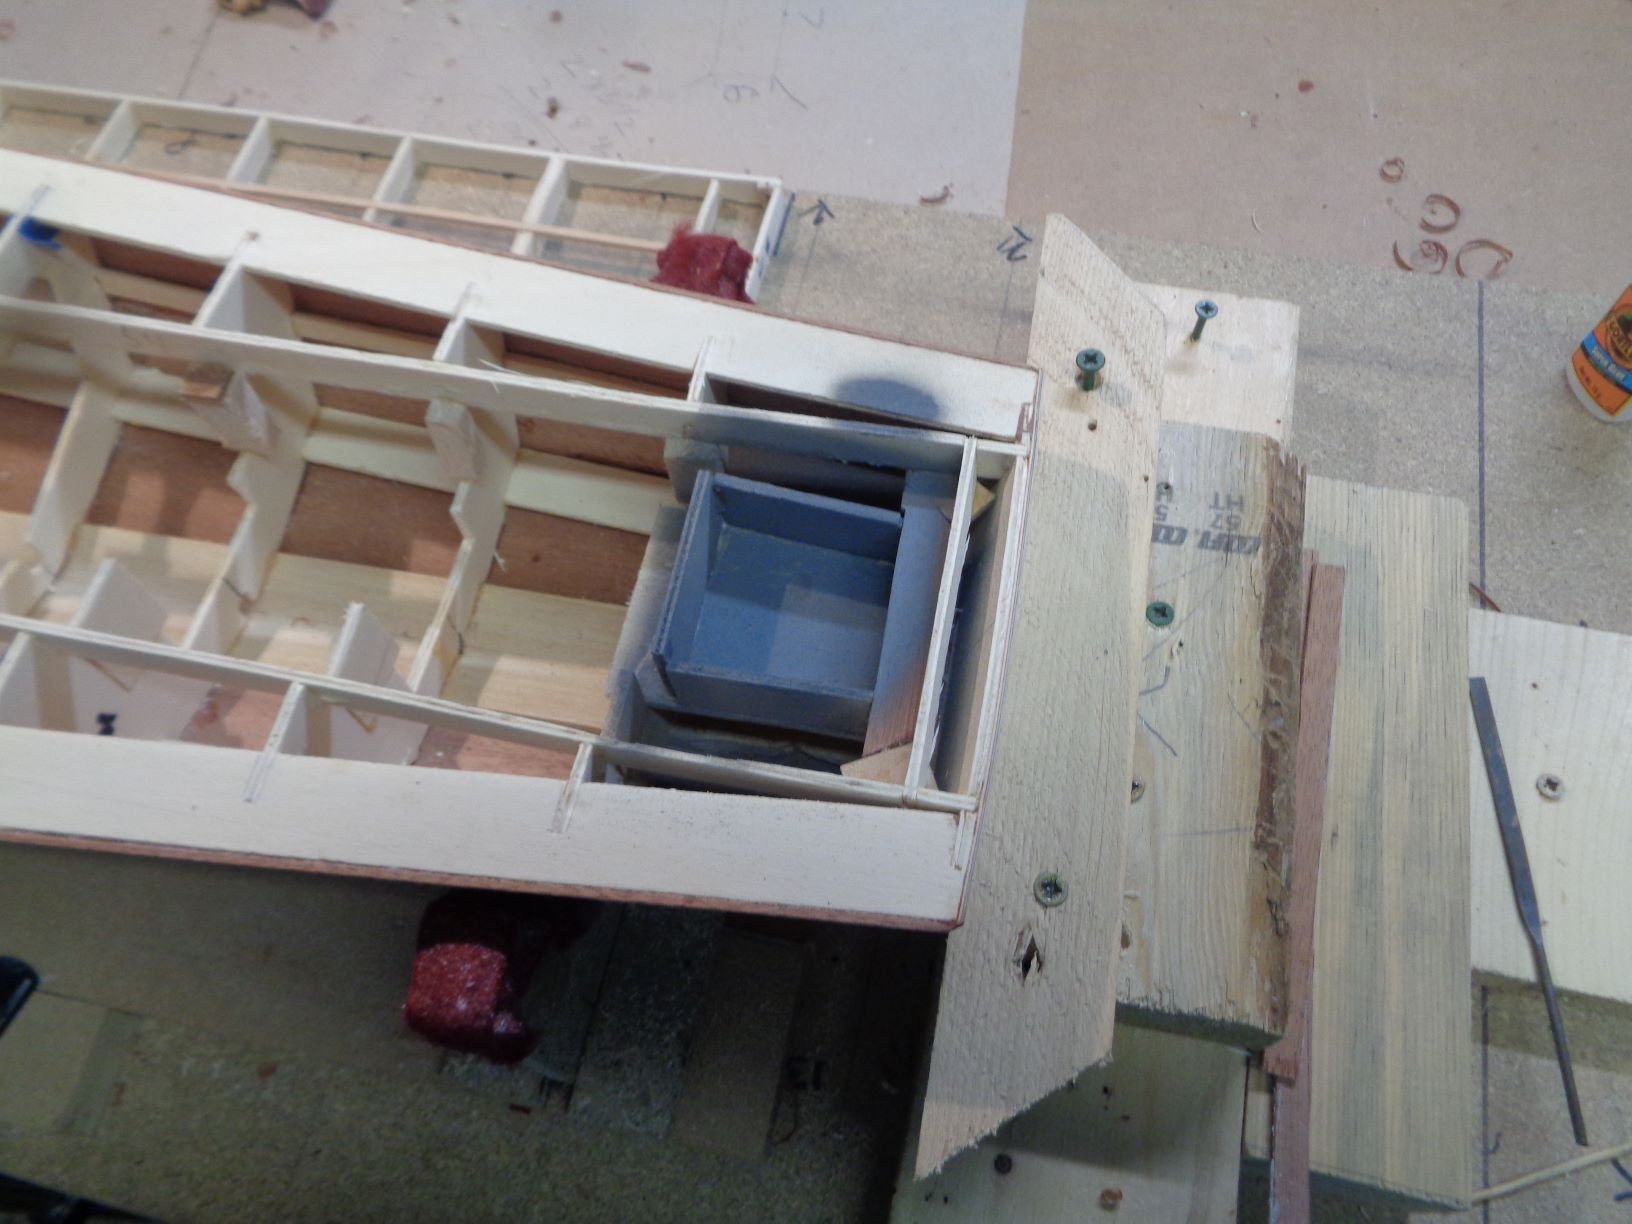
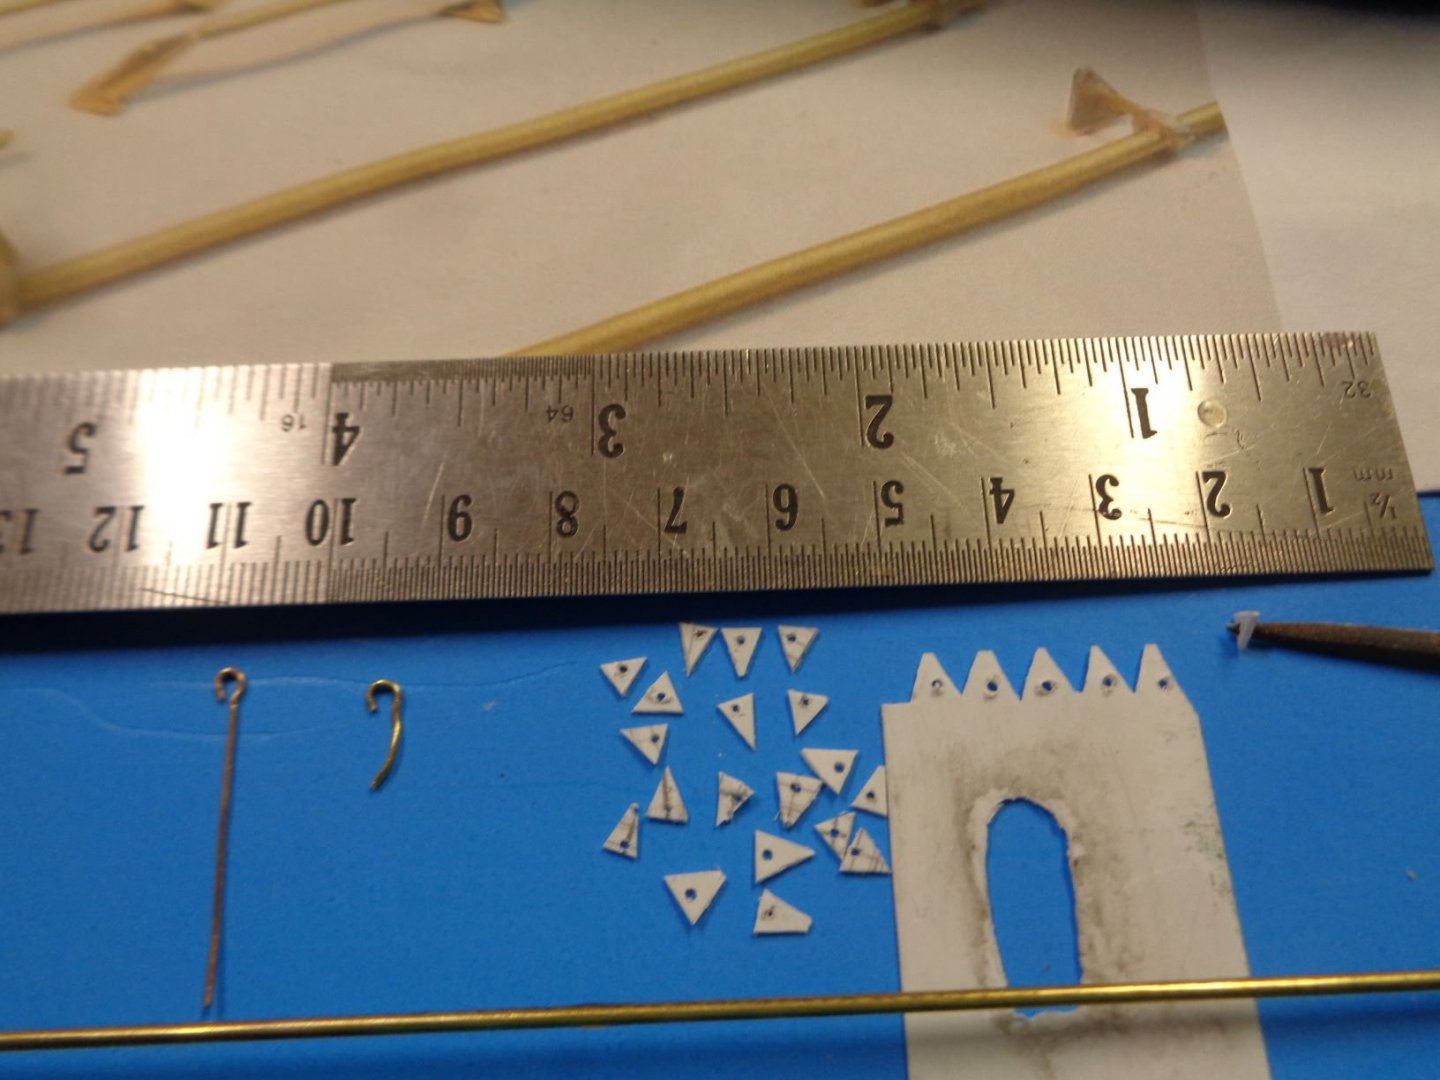
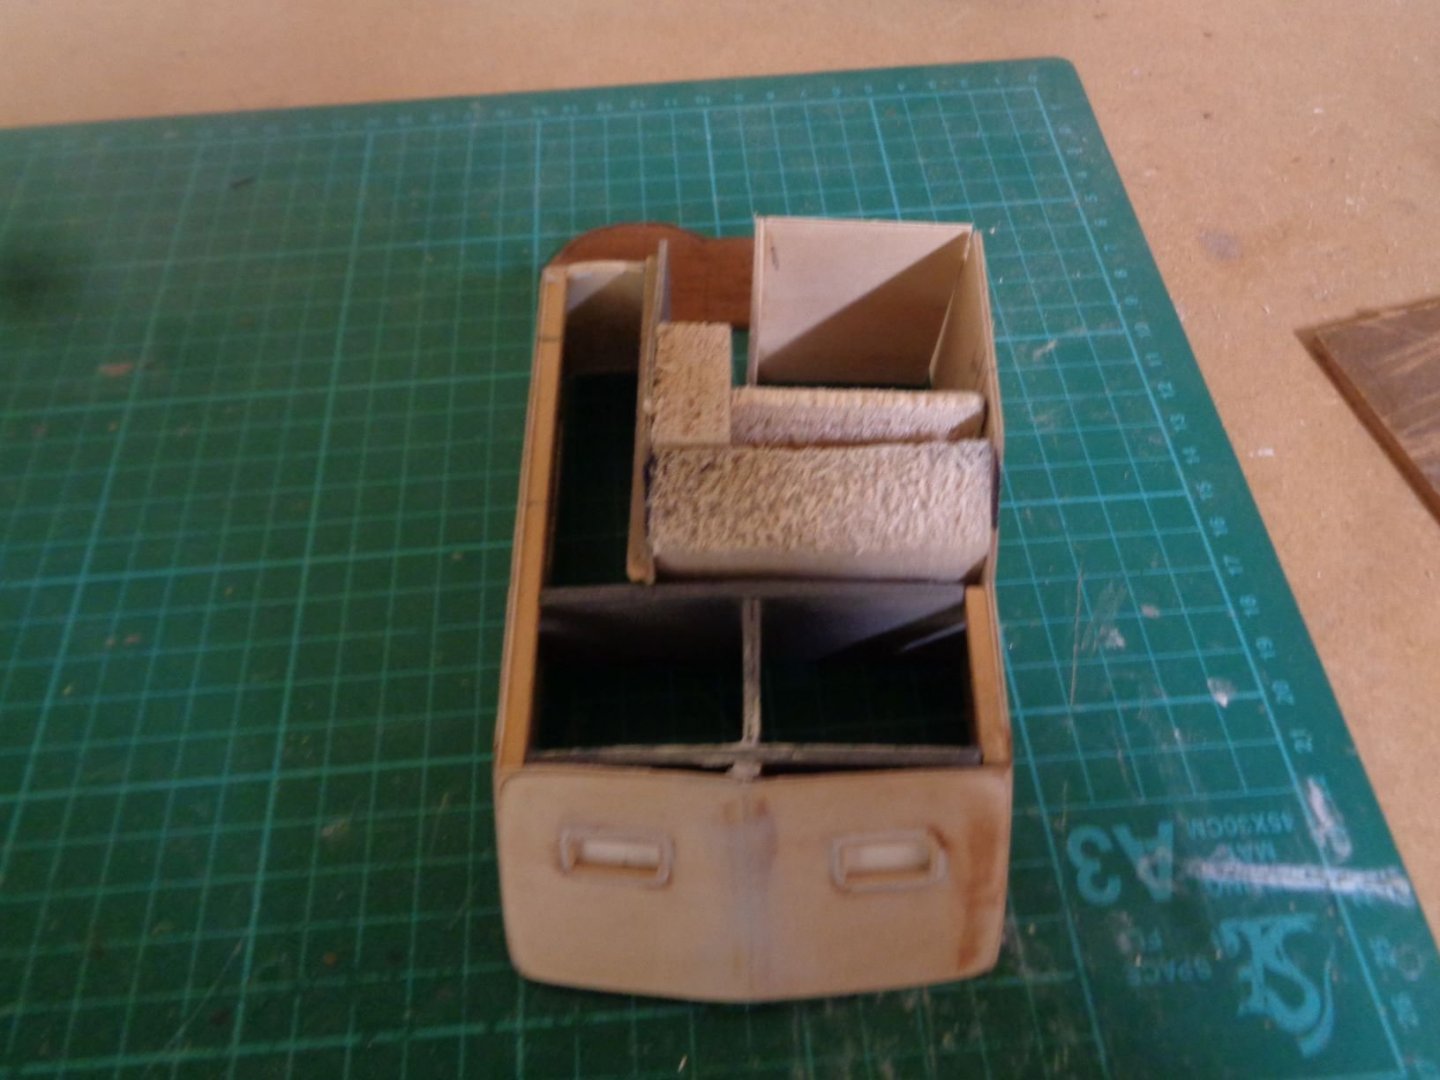
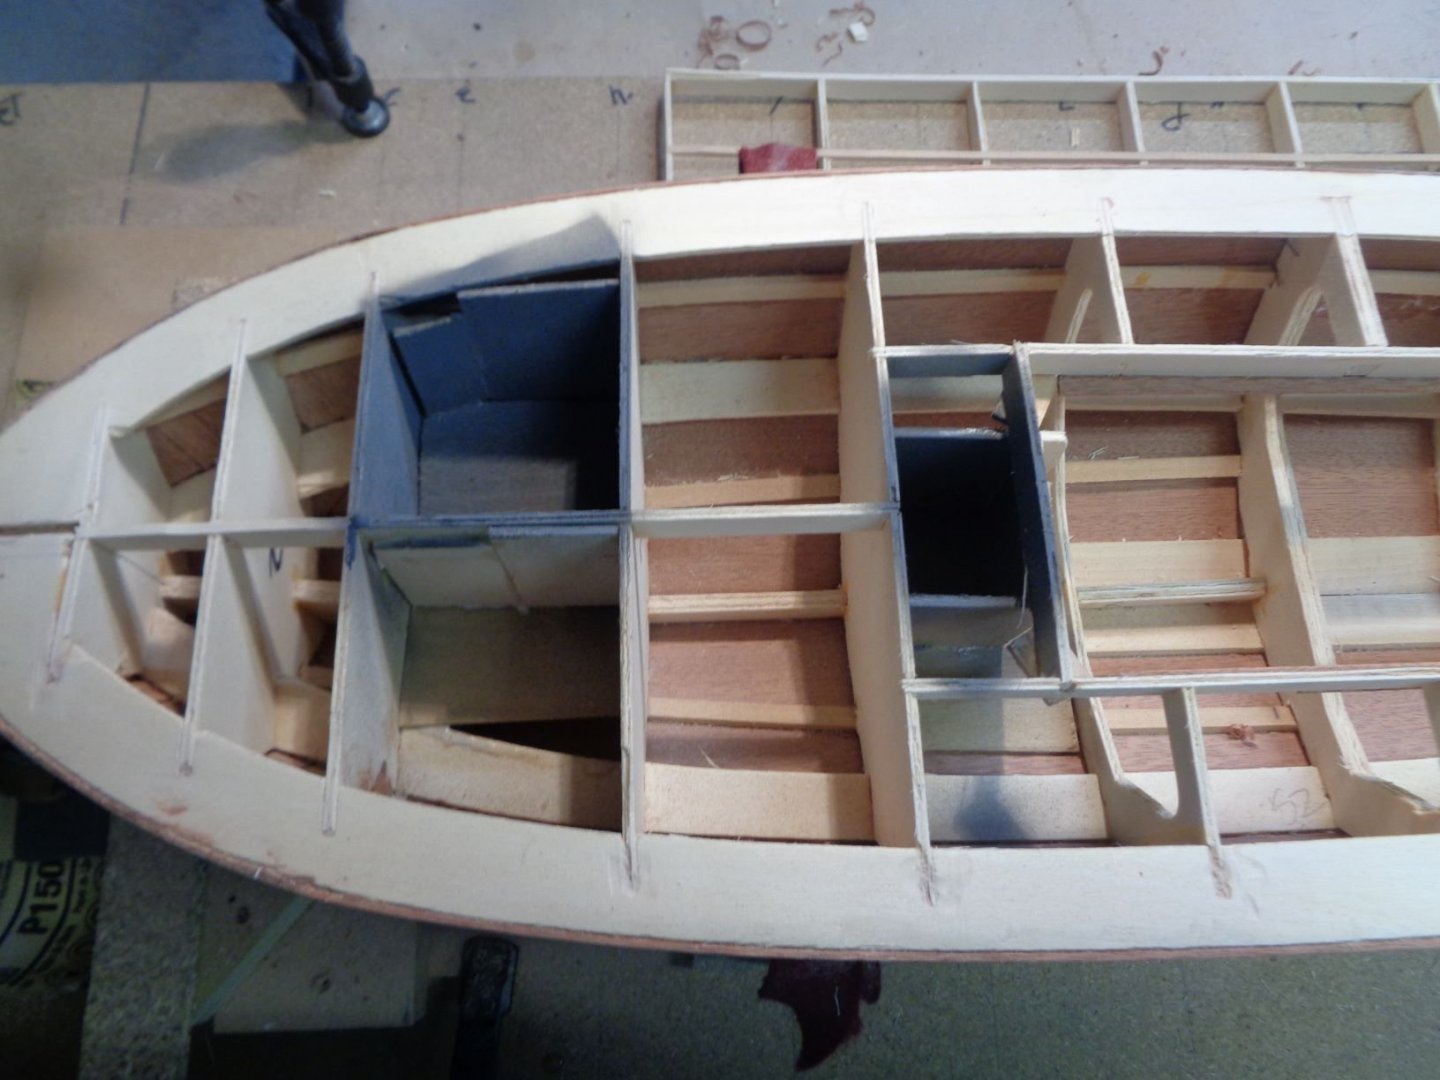
Starting to work on the grad rails 1/16 brass rod, eyebolts and thin plastic, very much trial & error here, rough cut triangle for the stations base, plastic should be easer to shape. cut and bend the eyebolts to hold the rails. anyway this is the plan, as with all plans it sure looks good on paper. put in the starboard 50 Cal ammo locker, Day cabin finished the framing and worked the windows , frames & rain guards. not really following a pattern, detailing as I go along one step at a time.

-
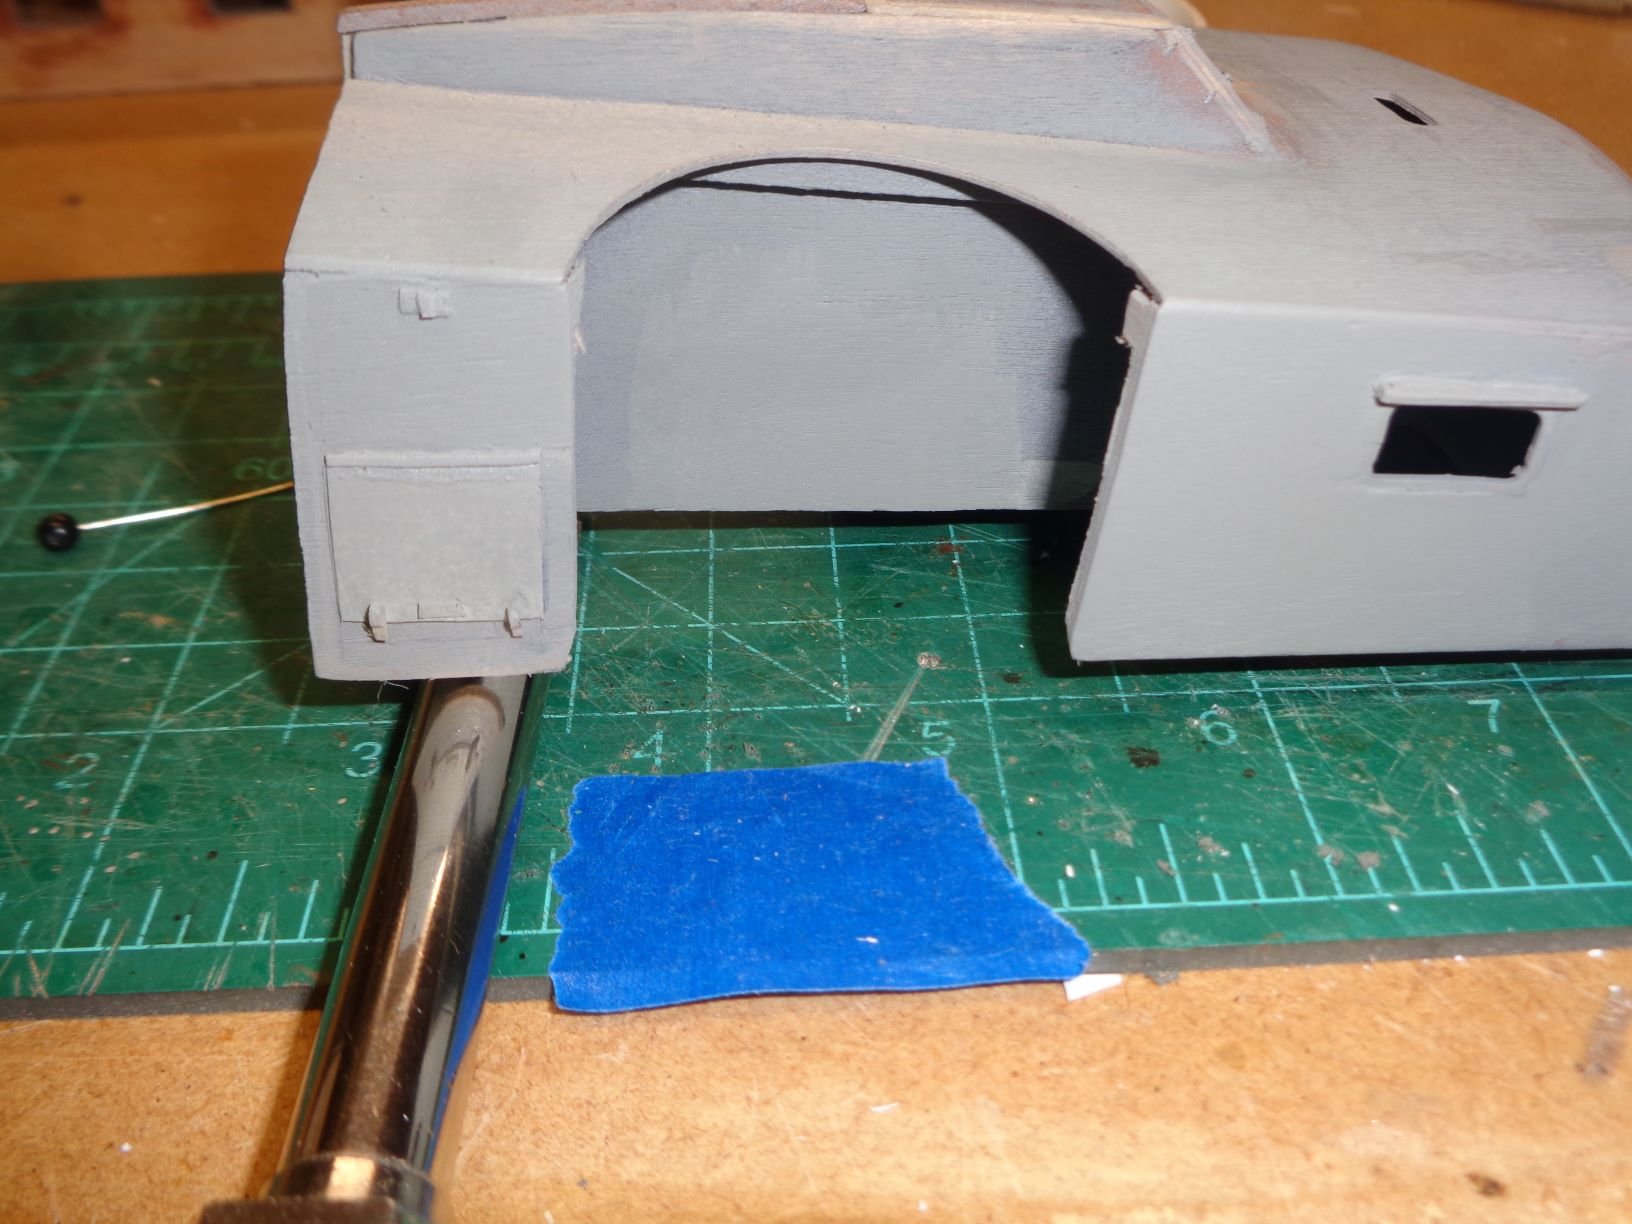
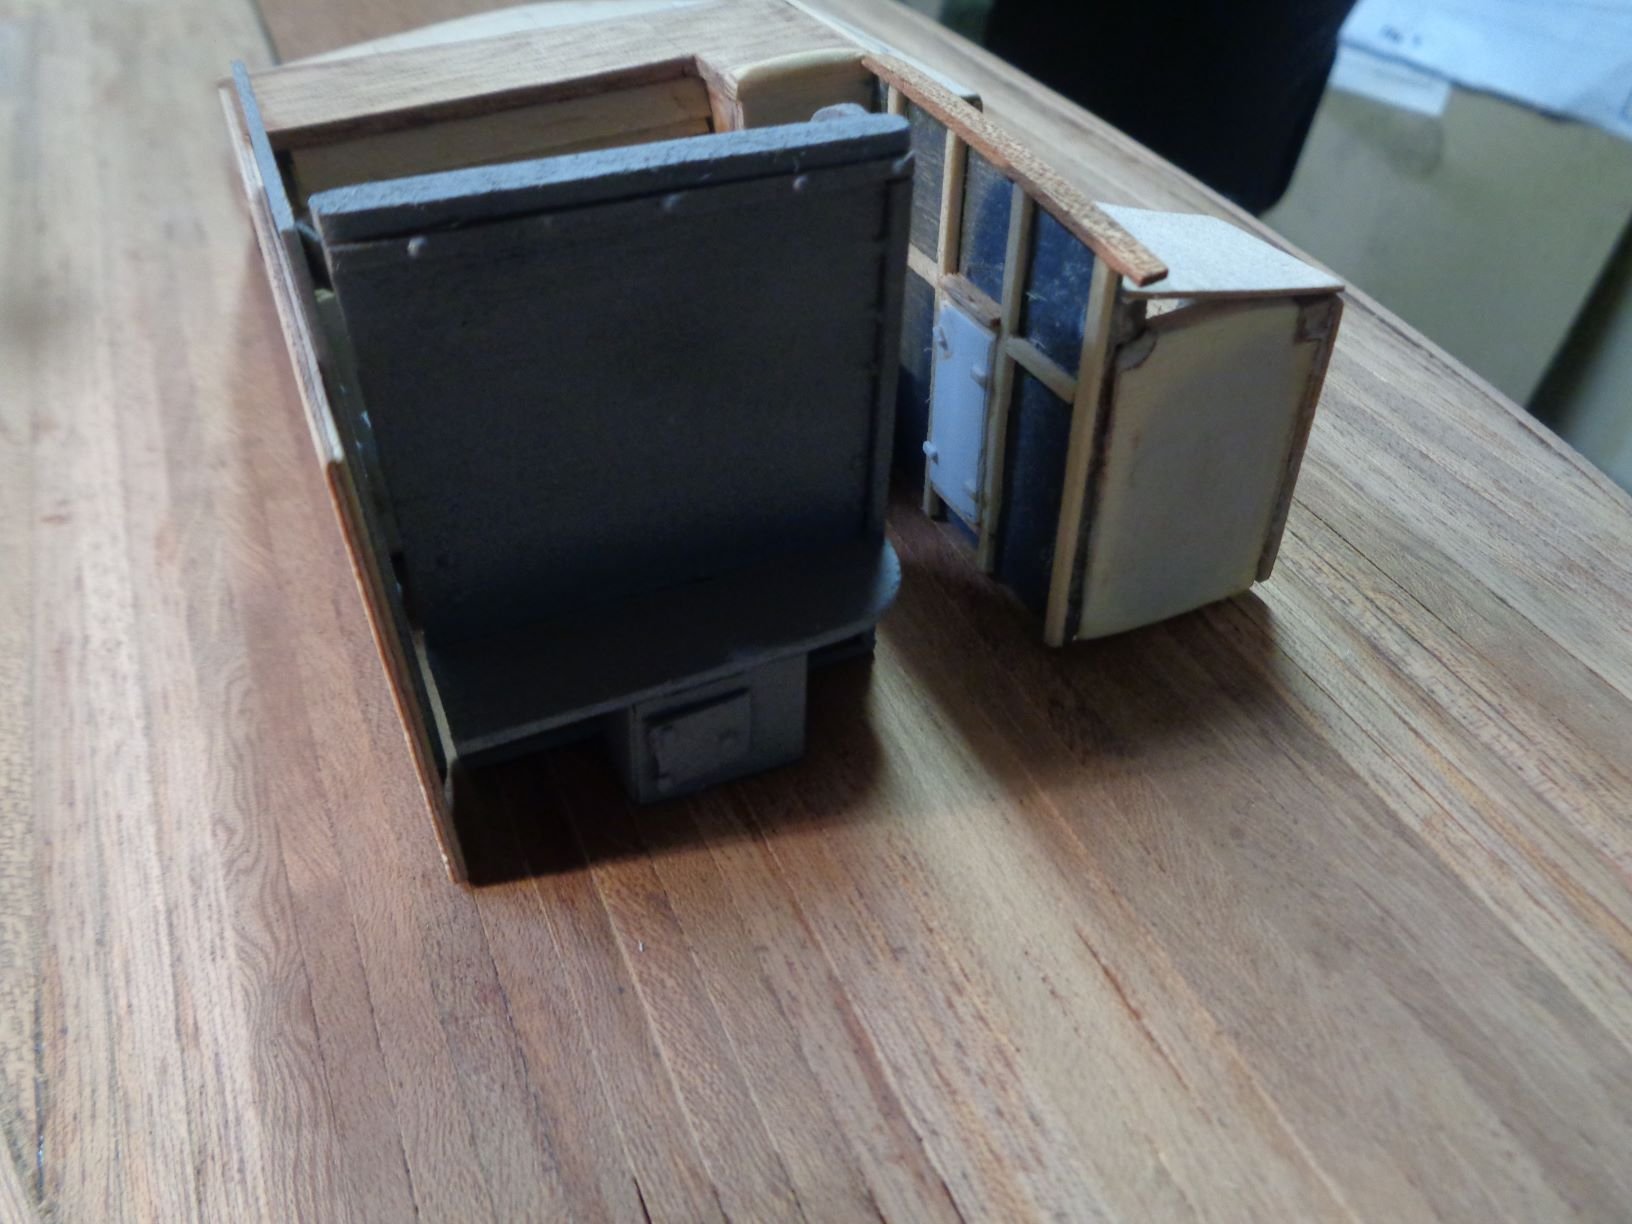
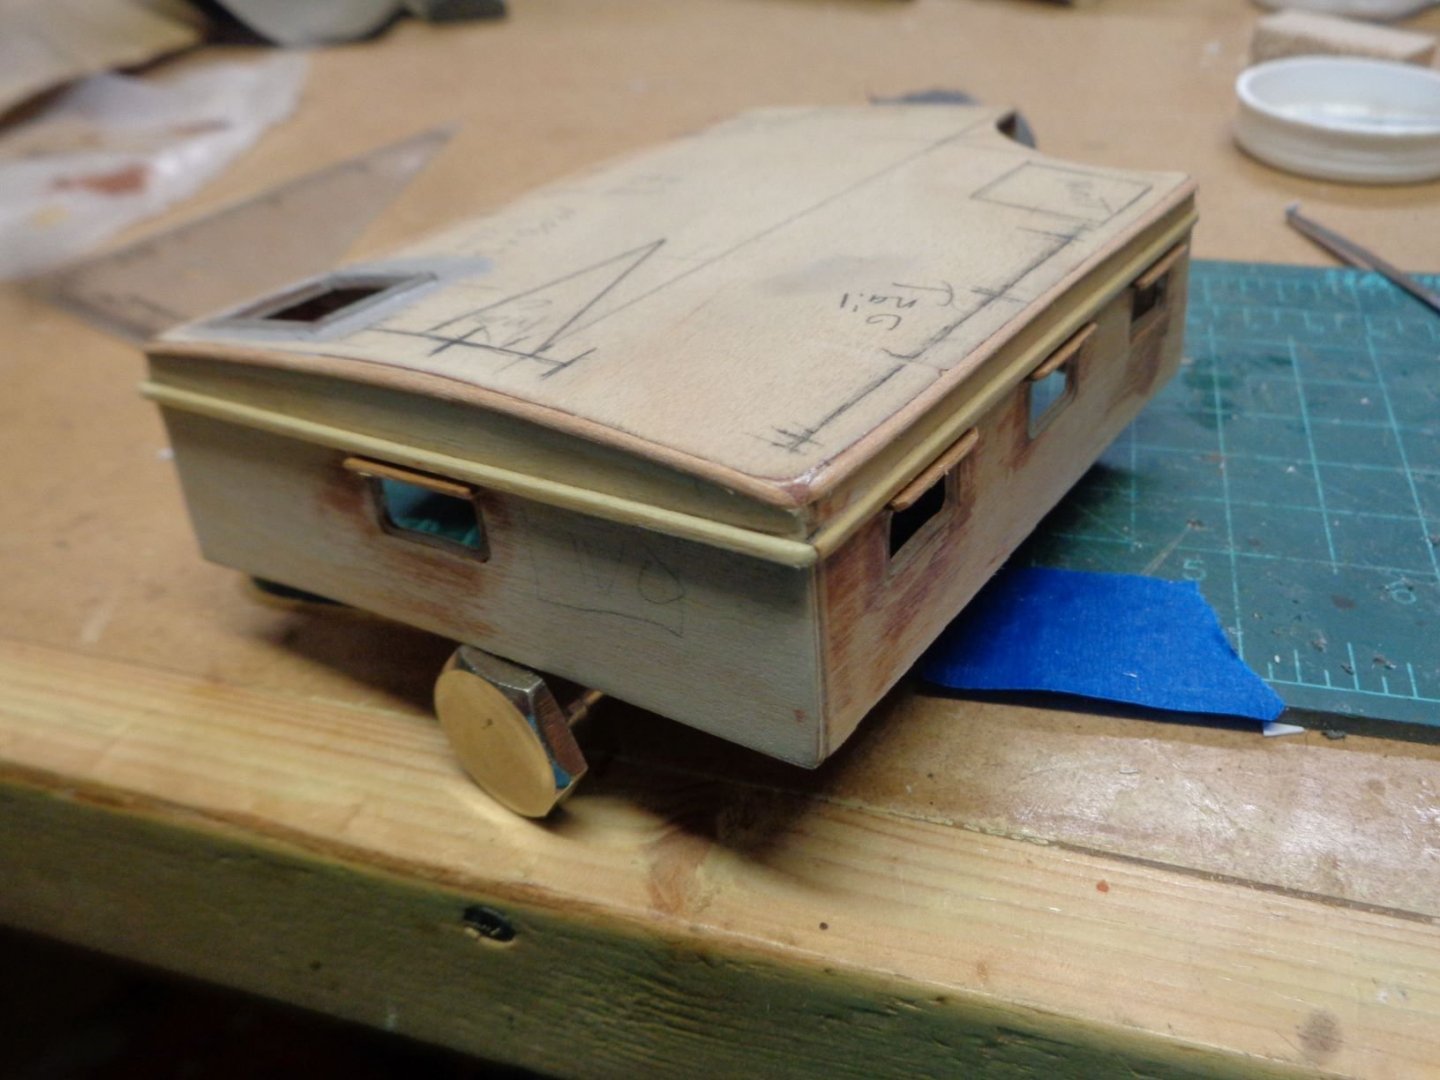
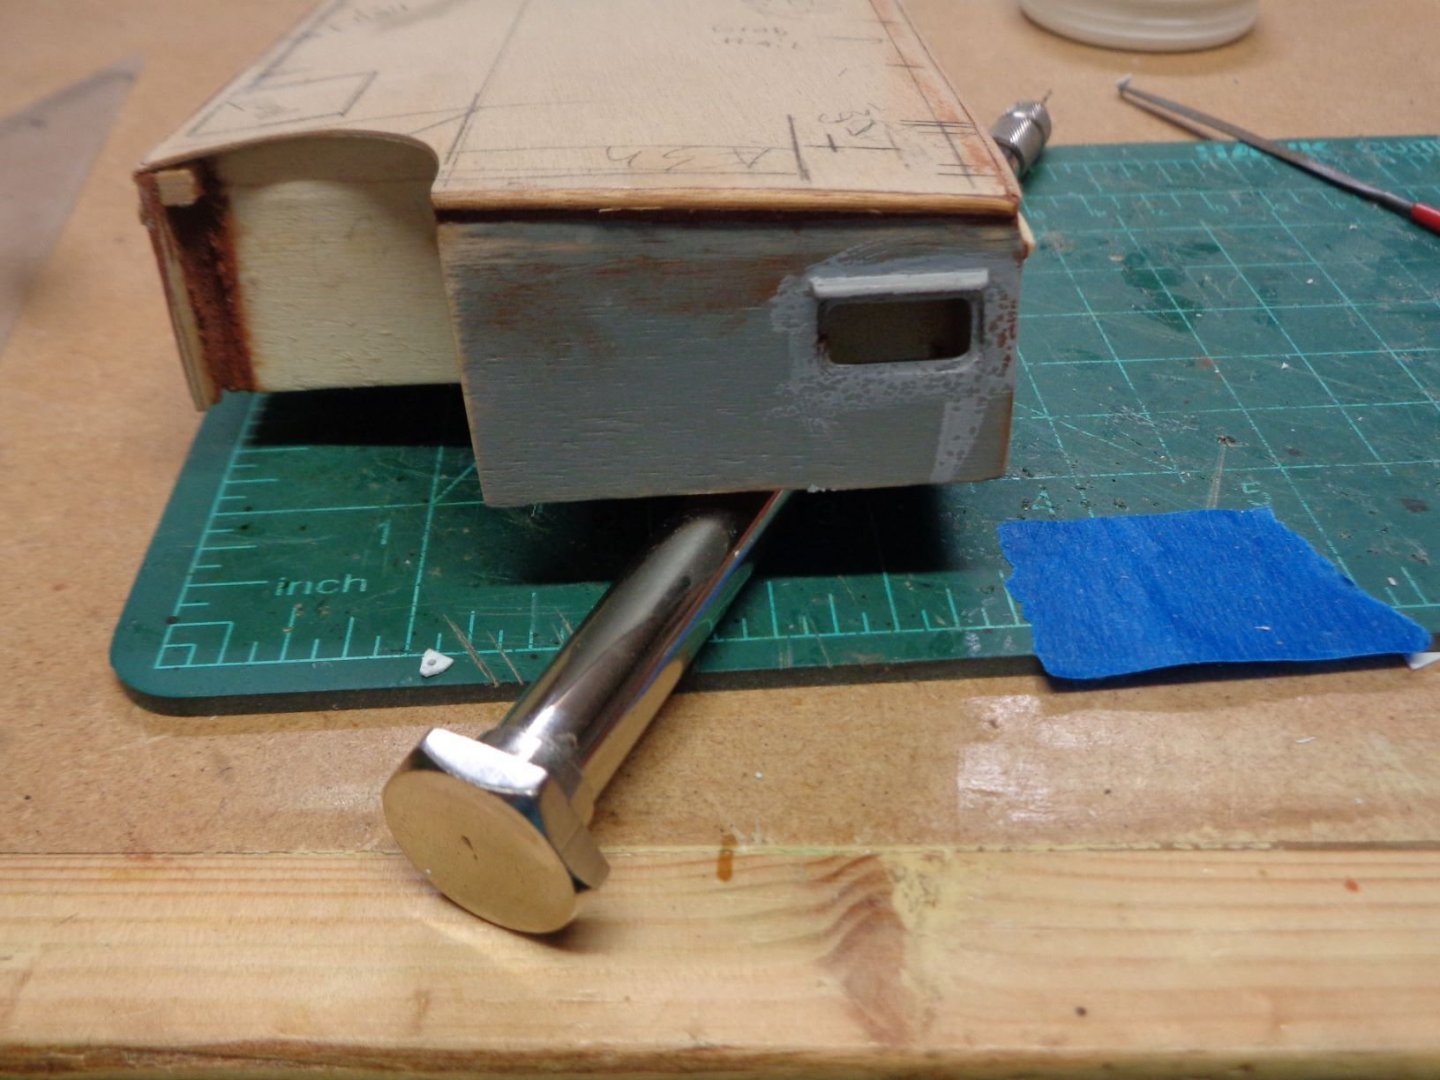
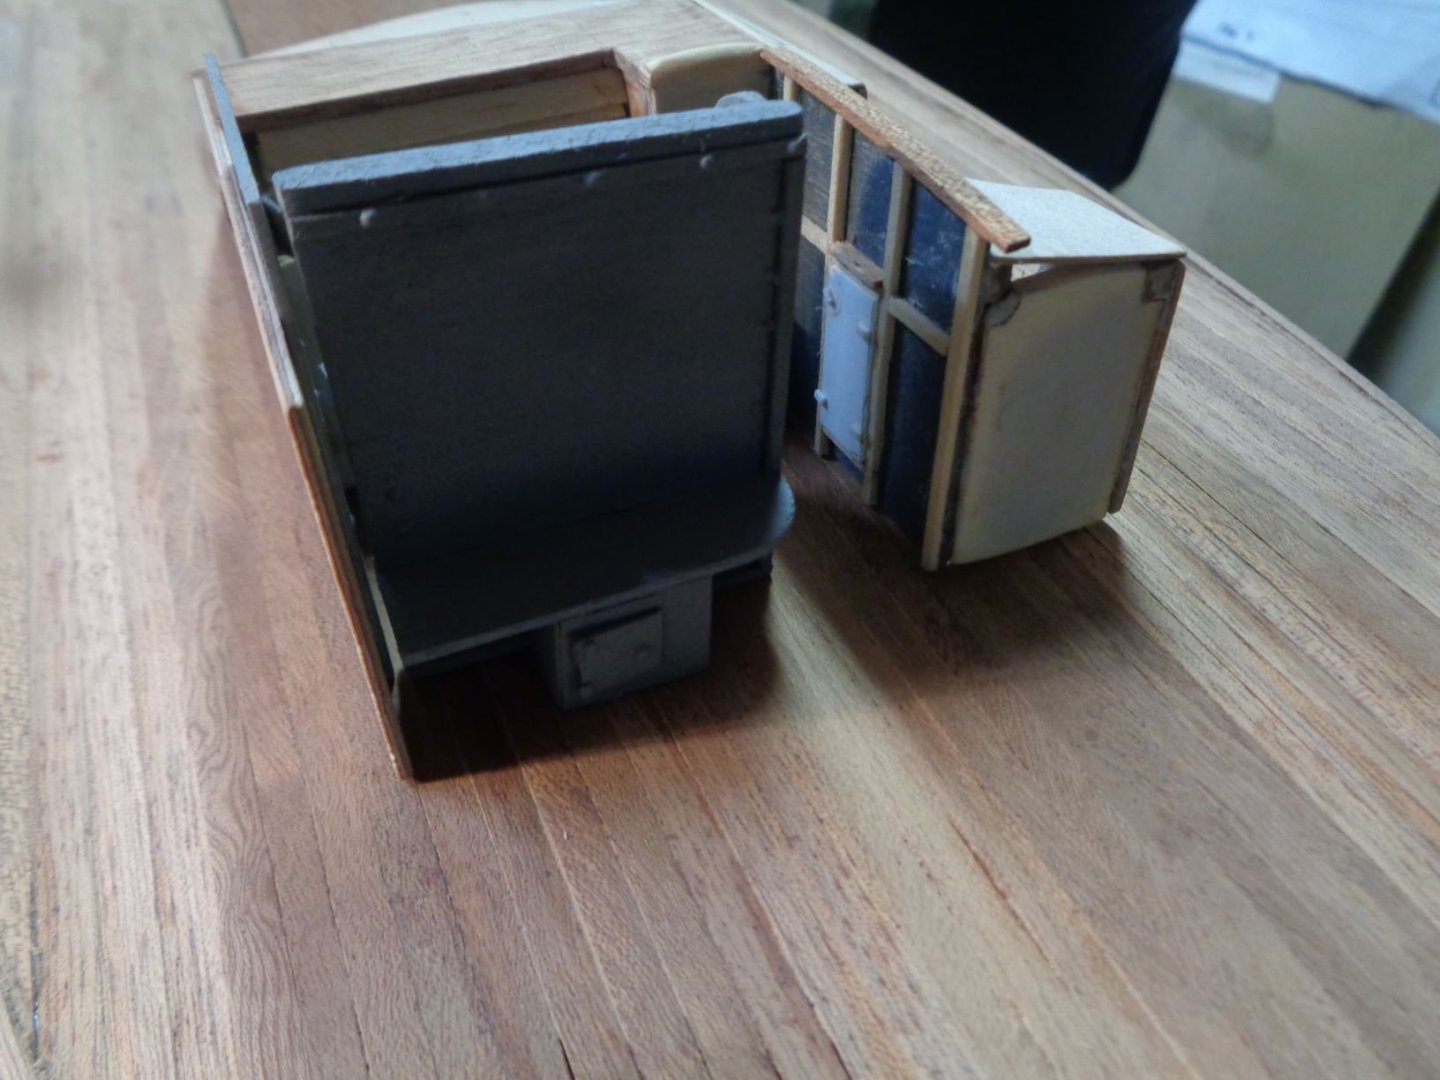
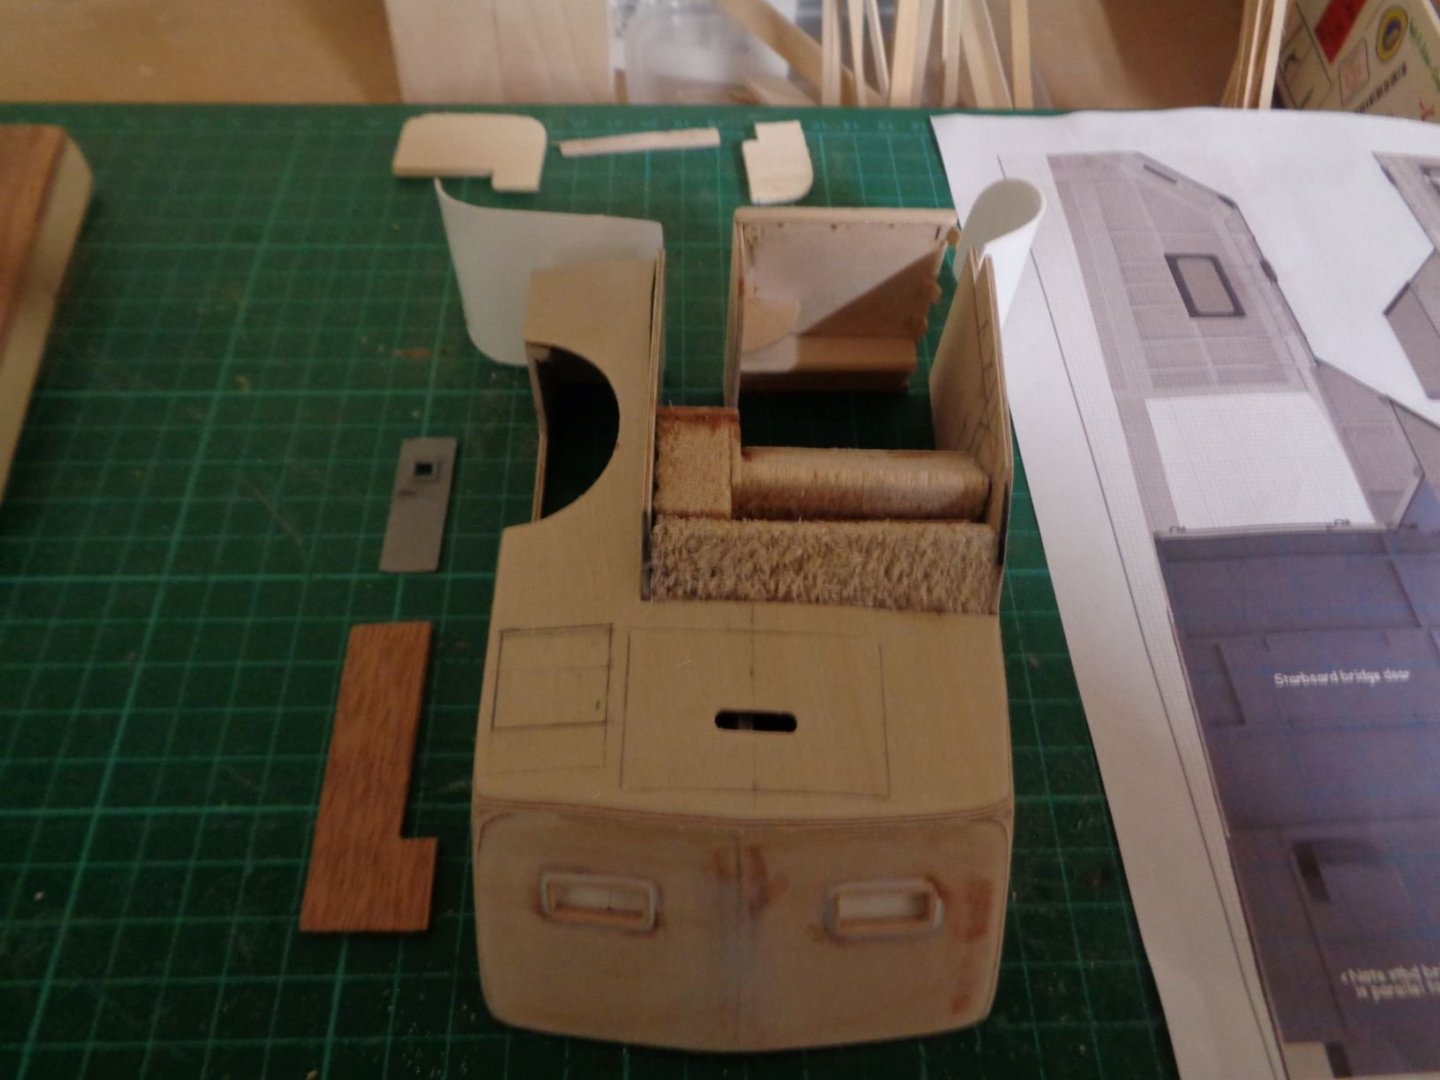
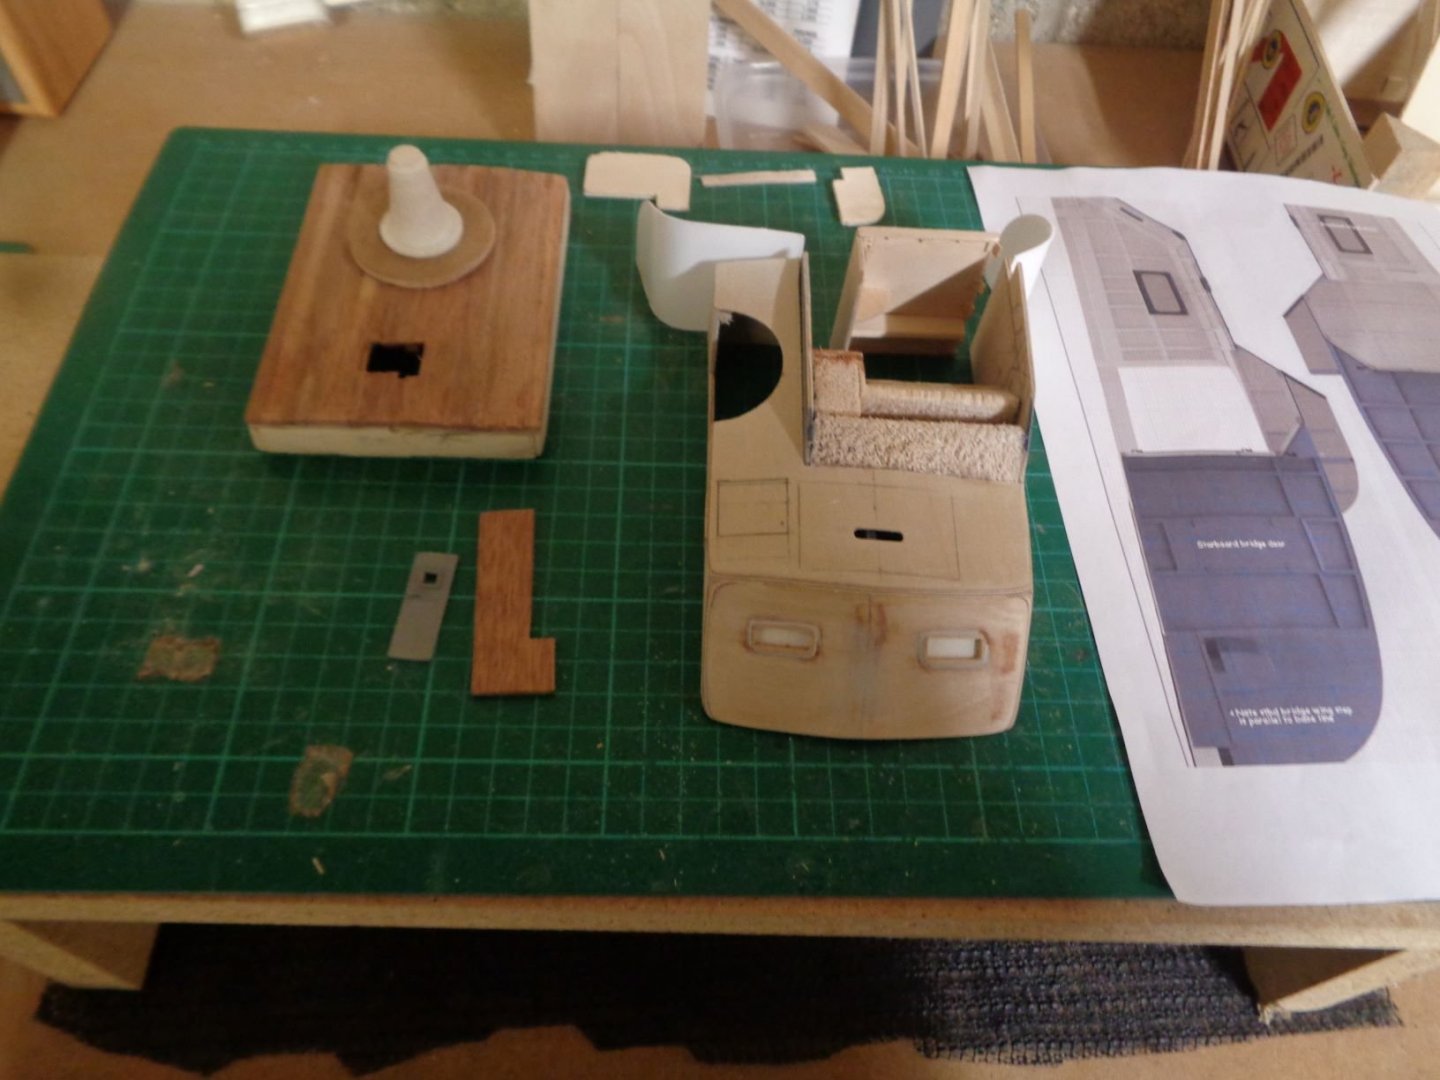
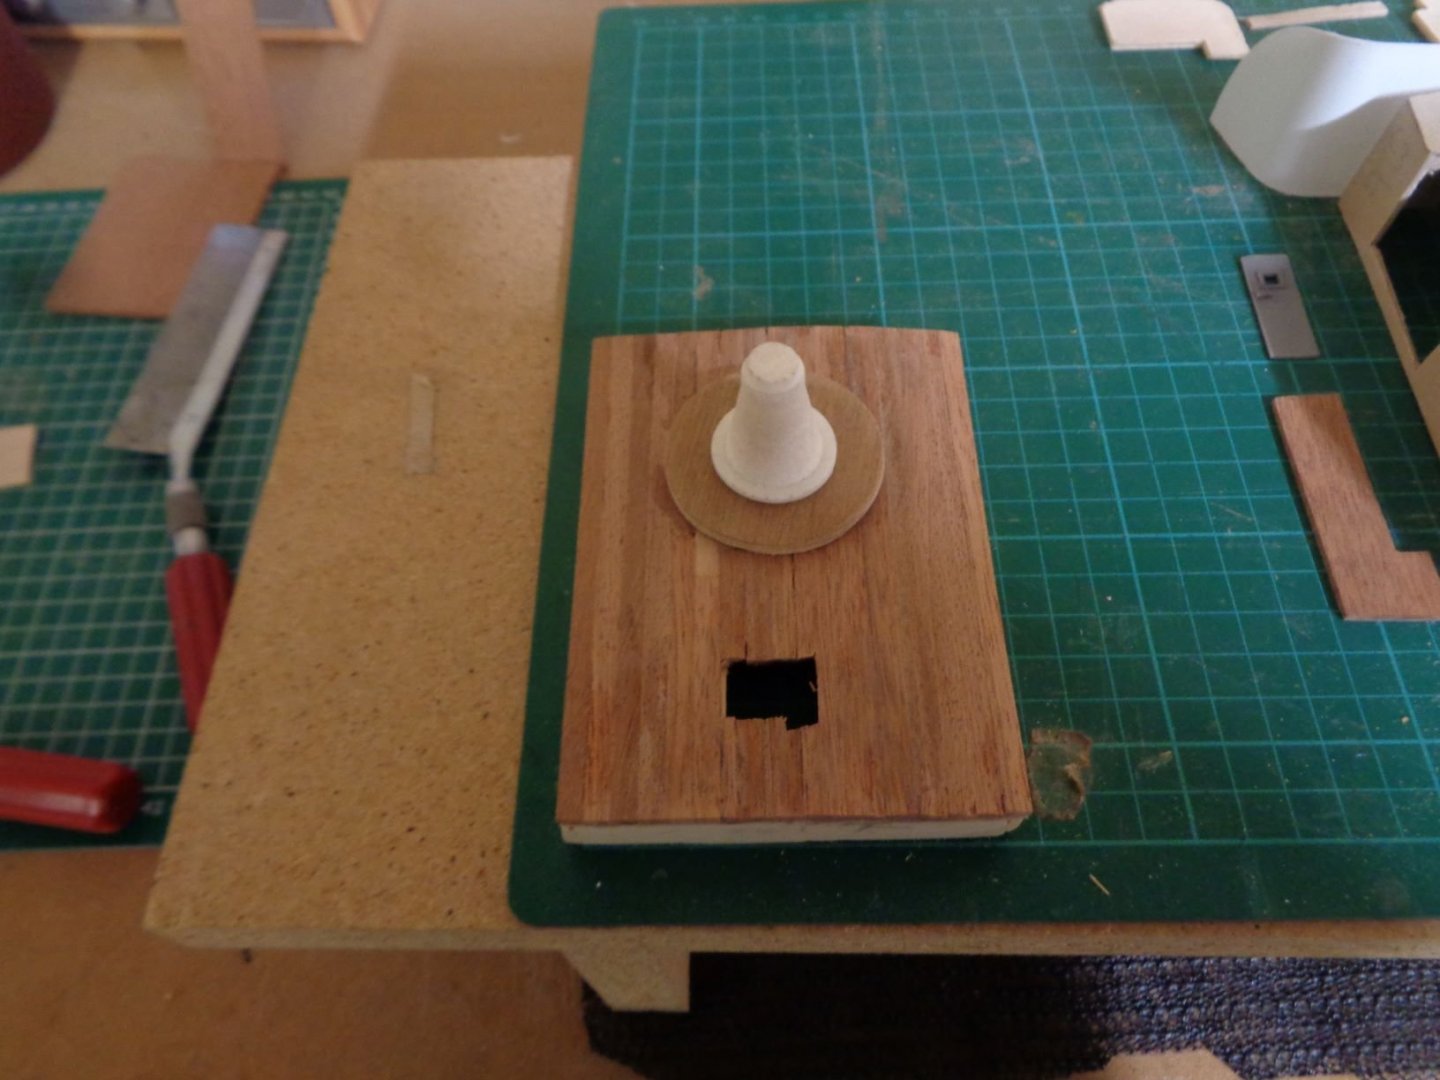
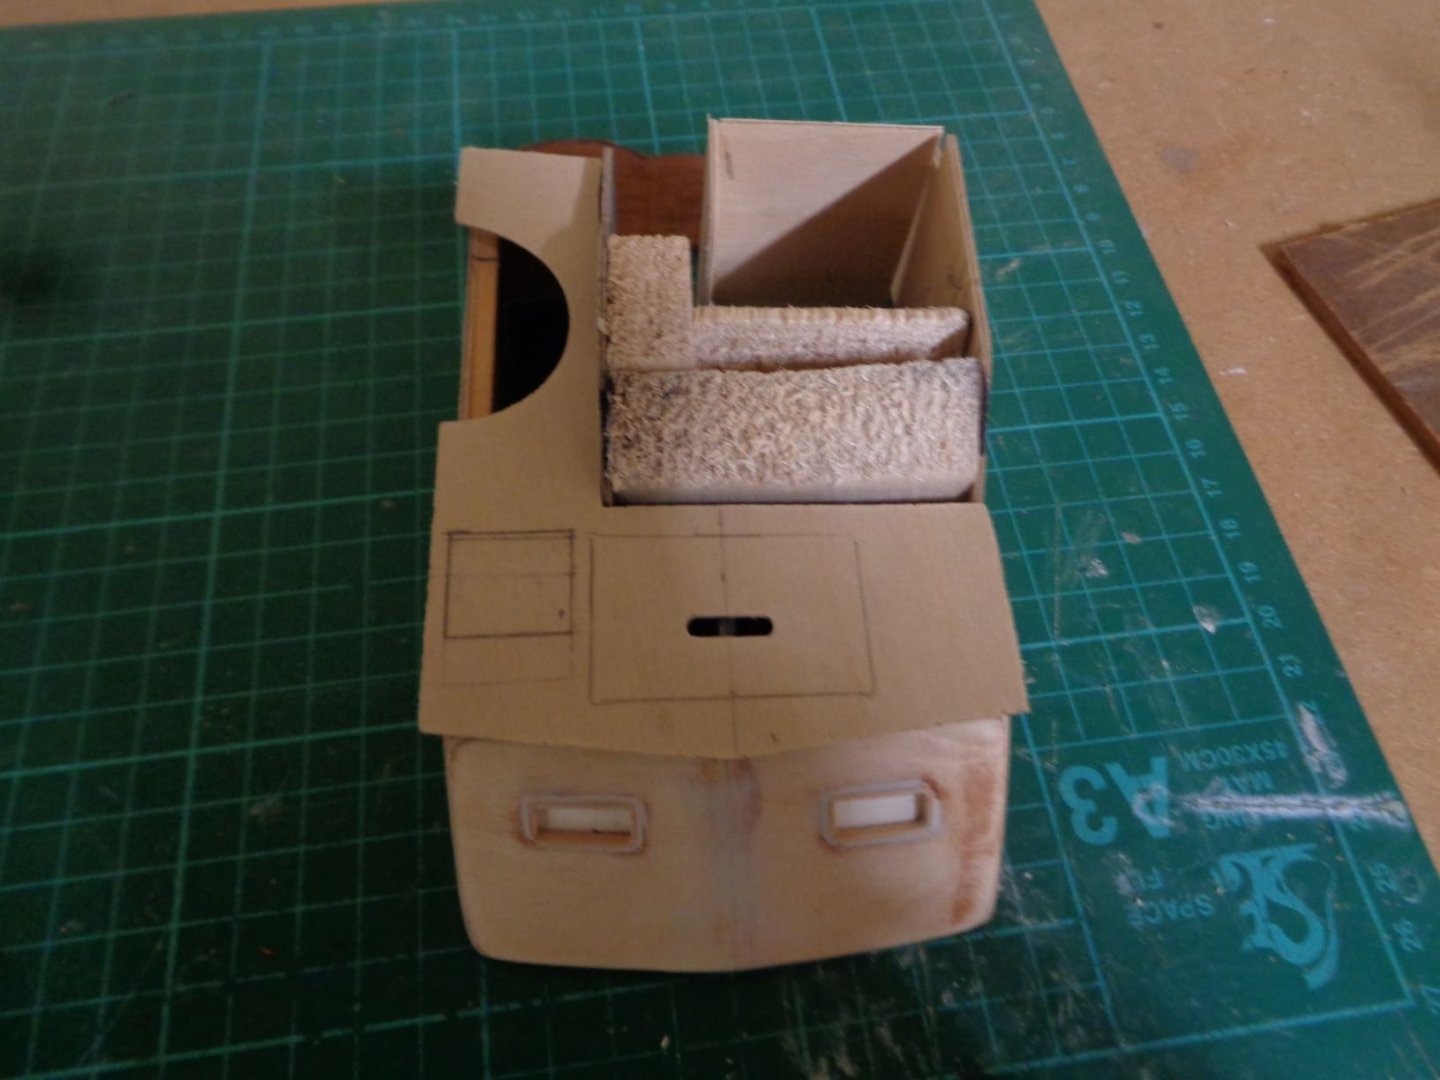
The reworking of the pilot house is on going added some more detail, the parts of the control panel are very fragile so it will be worked on the side. allot more to do here so still not ready to assumable. Started on the day room cabin , cut & shaped the Aft turret area, early days. Solved the problem of the center frame that I needlessly removed, the test fit is looking ok, when it fits right will seal it down. primed the base of the 20mm Oerlikon, to test fit.


-
Have decided to do most of the superstructure work following plans from pt103.com. The Dumas kit is very good, but I wanted more out of the build than just the basic follow the instruction book allowed. I will kit bash, scratch build and try to create as far as my skill level will take me. Reworked the basic shell of the pilothouse to lay the groundwork for putting more detail into it.. I did not like the way the center frame was working out, So it was time for the saw and hope plan. Being new to working with a kit that is mainly for RC , I cutout the center frame following the book, Its good to build the superstructure on it if your planning to remove it to get to the RC stuff, but not so great to build on for static. The small planked bit is the aft 20mm platform area. This section is even with the deck . where the next 2 sections floor base set slightly above the deck, cutting it and reworking was the only way to get it to fit the way I wanted. My thinking is I will be doing allot of hope this works fabricating down the road.
-
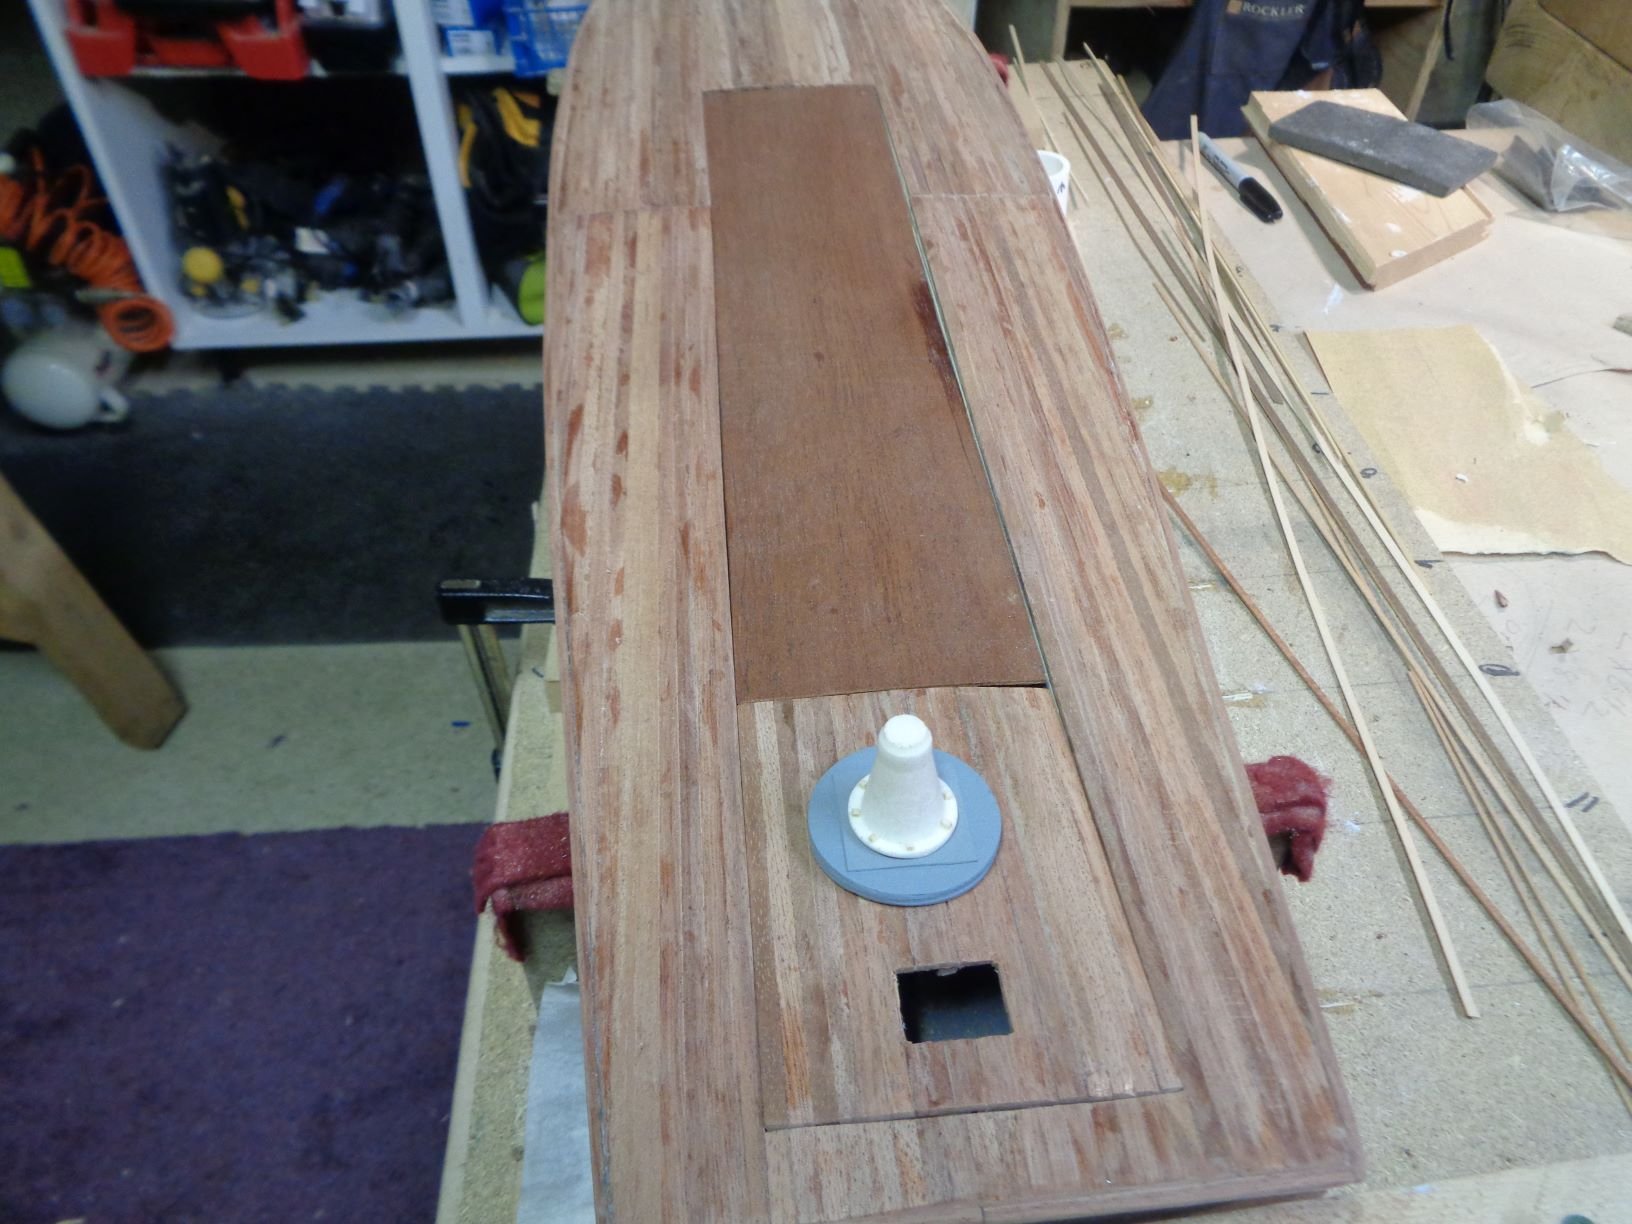
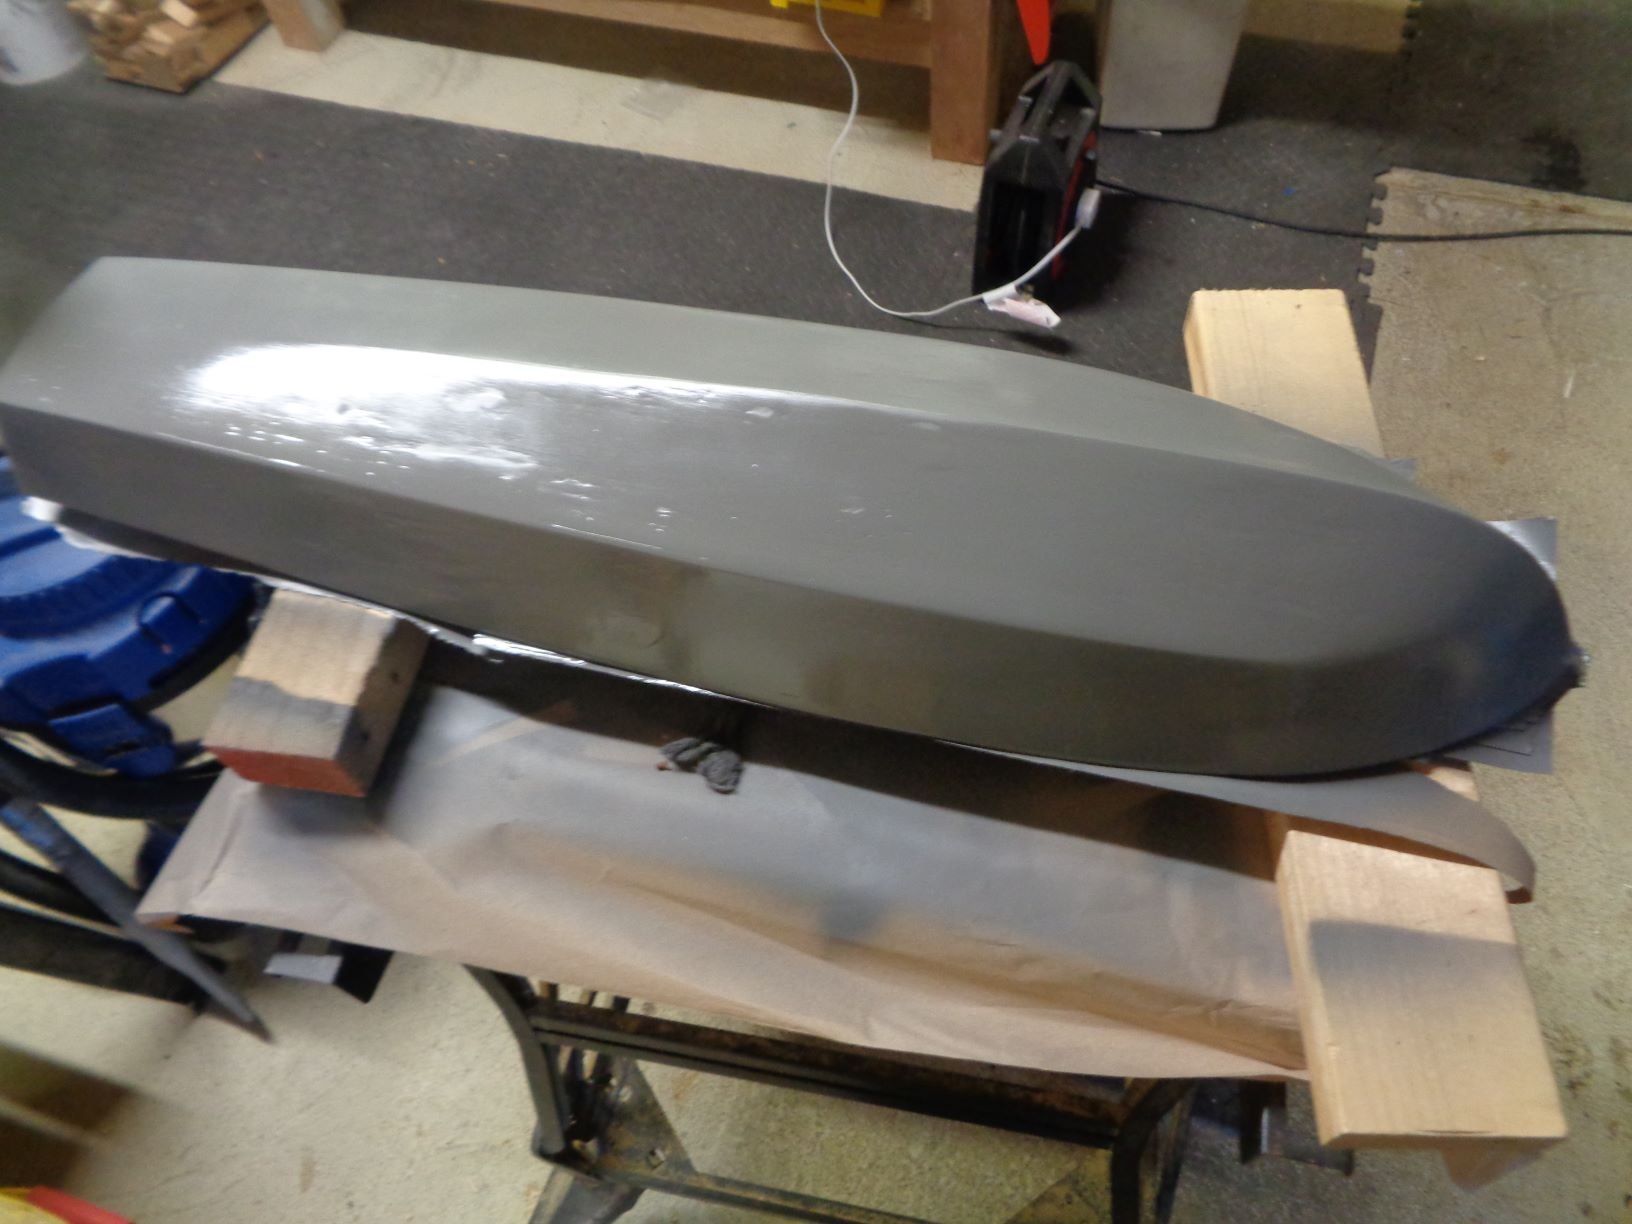
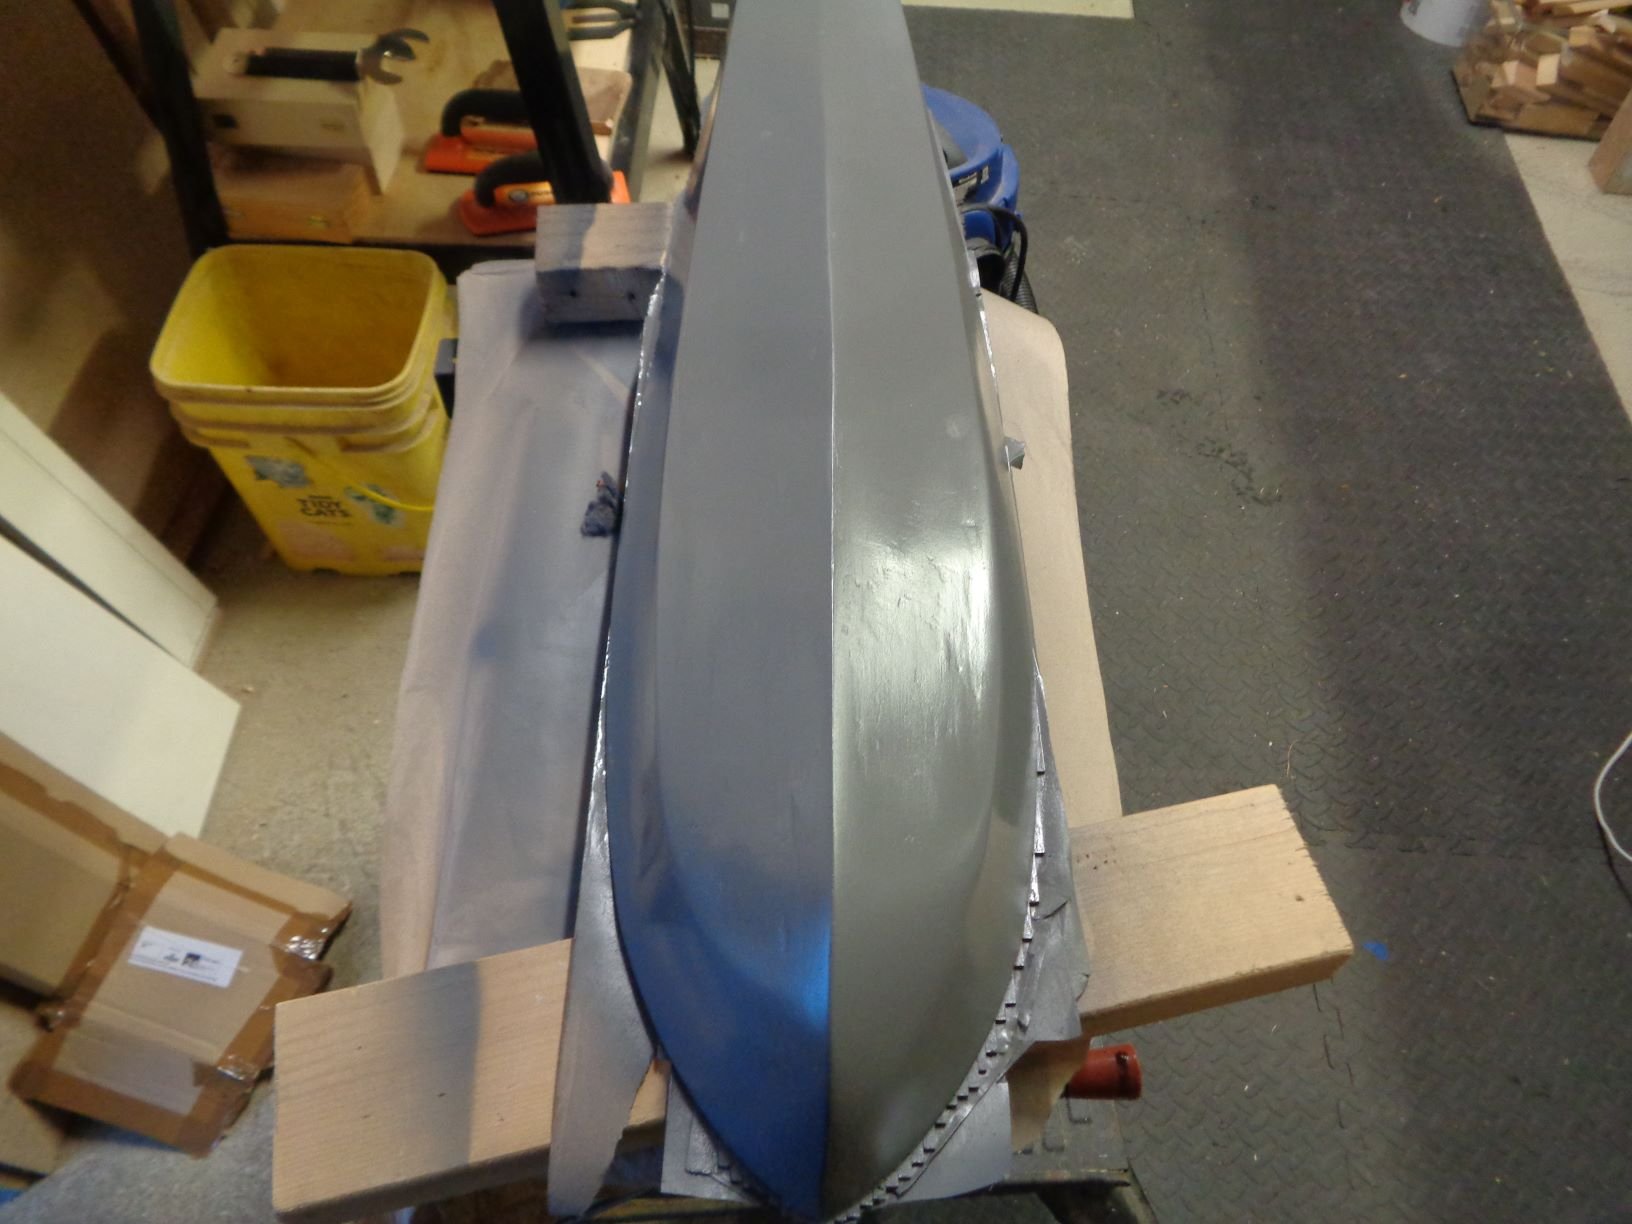
As you know I don't paint my rigged ships. So have made a few 1st time hull painting errors, made life harder for myself,( used allot of sand paper) however learning from it, the primer used is matt, my shop lights make it look more glossy than it is., but it still shines some ?? When its time to apply the finish colors they will be very flat I hope, the Dumas guys suggested dull coat as the last thing will tone it all down. Still working on a final color, I have learned the PTs had many different shades of green, gray and even some type of blue mix. The PT experts at pt103.com tell me this came from the crews voting on the shades along with using what ever they could get there hands on made for many non-reg colour schemes. PT men were well known for there independent ways and scrounging skills. As far as the deck goes, true almost all were painted over, however I do like the look of a natural deck, its always good to add a bit of your self to a build, without taking to much away from the boat.
-
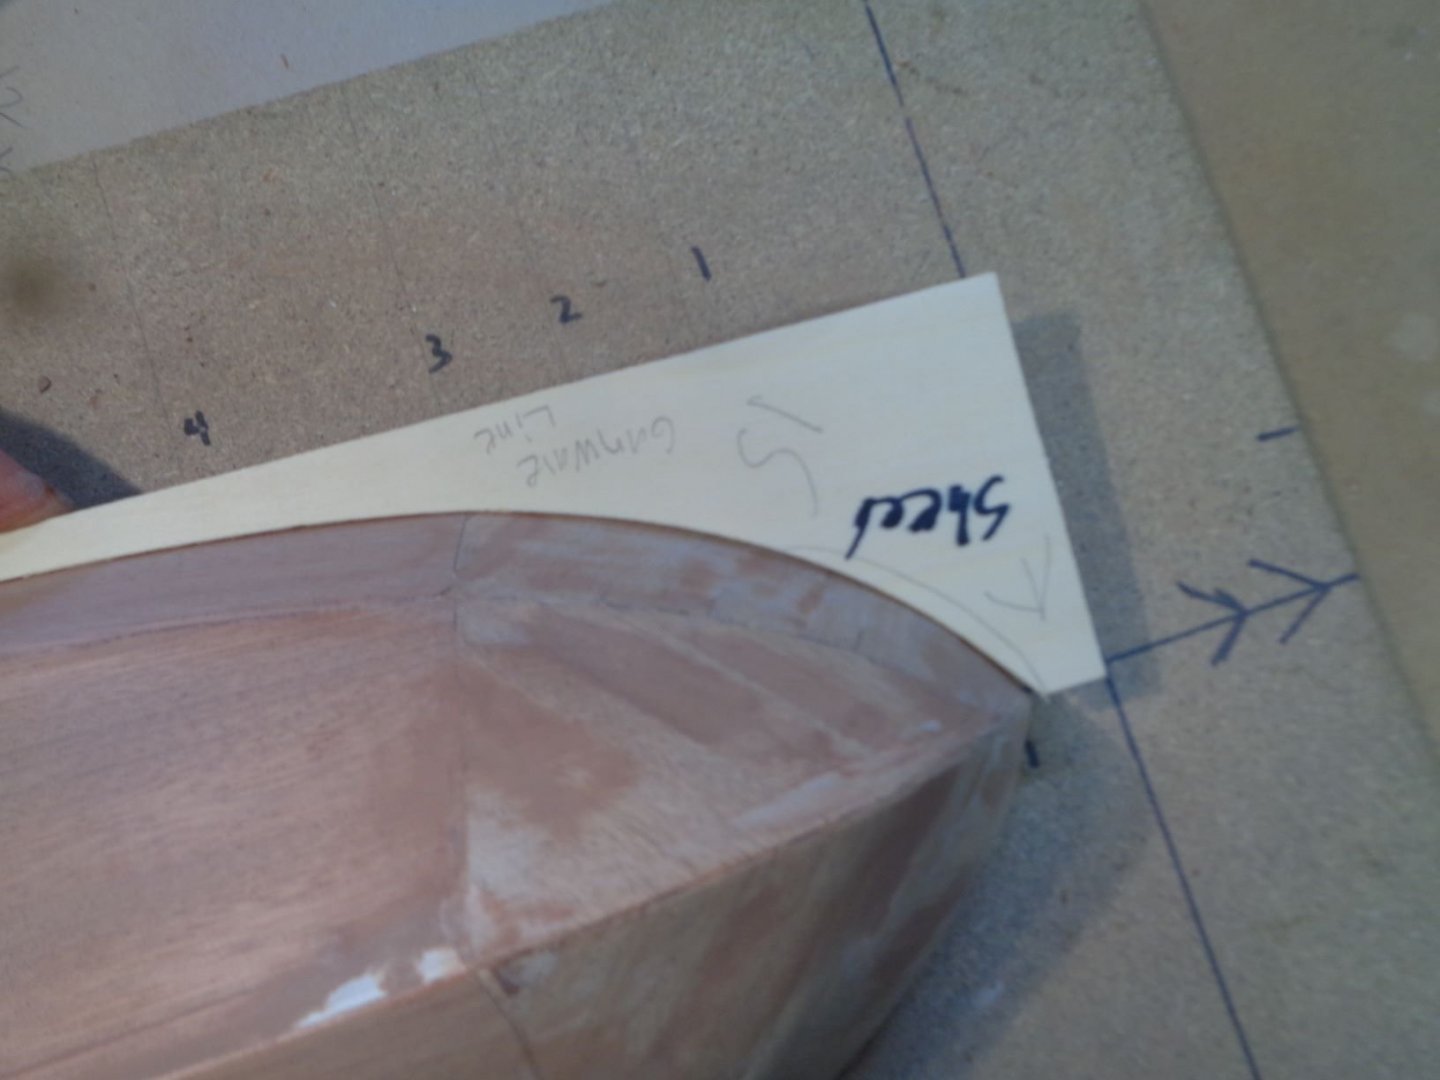
Working on the rough mock-up of the bridge and chart house. The filler block will be shaped at 45 deg angles to hold the control panel and bridge Armor plating
-
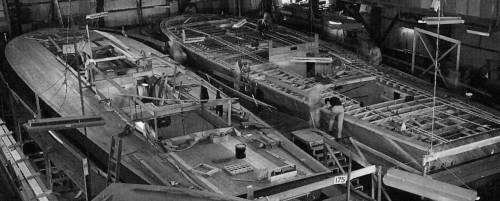
Your right Higgins 70, 77 footers 1940-41 did not have planked decks, but the early Elco 80 footers June July 1942 were double planked fore & aft. mainly the early squadrons RONs 3-5 , however later 1942 boats were built with sheet decks, with a few of the older boats being relayed with sold sheet. great picture A British MTB by Vospers correct. At the end of the day I’m not a must follow all the historical plans to the letter guy, it’s not how I build. Of course, I will never butcher a ship, with some wild off the wall additions. Building a ship right following the plans is important, in this case I kind of like the look of the deck planks The picture is a Elco 80’ being built notice the deck planking
-
Building for display, I have several coats of primer already on, but I'm still seeing a few to many imperfections. I think I will do some more spot filling before I add the spray rail to the hull, and prime some more.
-
Waiting for more deck planking, So did some starter work on the bridge and chart house, very early stages of prep.


-
First coat of the filler sealing mix, first time I’ve done this, Last pic is after the first sanding & light recoat and more sanding. Pleased with the early results, will lightly spot fill a few minor irregulates. Then give final sand. Not an expert on this but I think the a few coats of primer should fill in the very minor flaws.

-
I00% agree about painting over the mahogany or any wood for that matter. It hurts even more so for a guy who’s building style is to never paint over wood. Now the However pain First the PVC was not going to happen. Yes I could and probably should have went for a cheaper wood. not being a big fan of balsa except for filler blocks, or general building needs. Plus, I just did not trust balsa strips to hold up under the shaping bends needed. Many will say I’m wrong it works just fine, and I’m sure it does, just not my choice to work with. I have worked allot with mahogany and walnut kind of the safe zone factor. I have seen others use strip planking for the PT hull and it looks really good. In this case I went for the solid sheets for two reasons, One the PTs were hulled with solid sheets, (not that I’m one of the historical correct always guys) nothing wrong with that, just not me. 2 the nature of the hulls shape straight flat sides between the sheer & chine, I did not want to risk some of the thin strips moving out line, be it weather effects on wood, or the builders miss alignment, and the plank lines would have to be filled in anyway. Long story short I made the call on what worked best for me however, I will say the solid sheets went easier than expected. Like I have said here before we all build for the builder, tackling builds in different ways, helps spread ideas, and better knowledge of the craft. Any just my spin
-
I have spent allot of time talking with experts on the PTs, they kindly have provided me with a vast amount of highly detailed plans and information. It’s important to me that I do the boats and there crews memories justice with this build. Only hope my skill level is up to it, I’m ok with the wood, but the real test will come when working with the weapons and metal, I never fabricated metal before, so the learning curve will be steep.
-
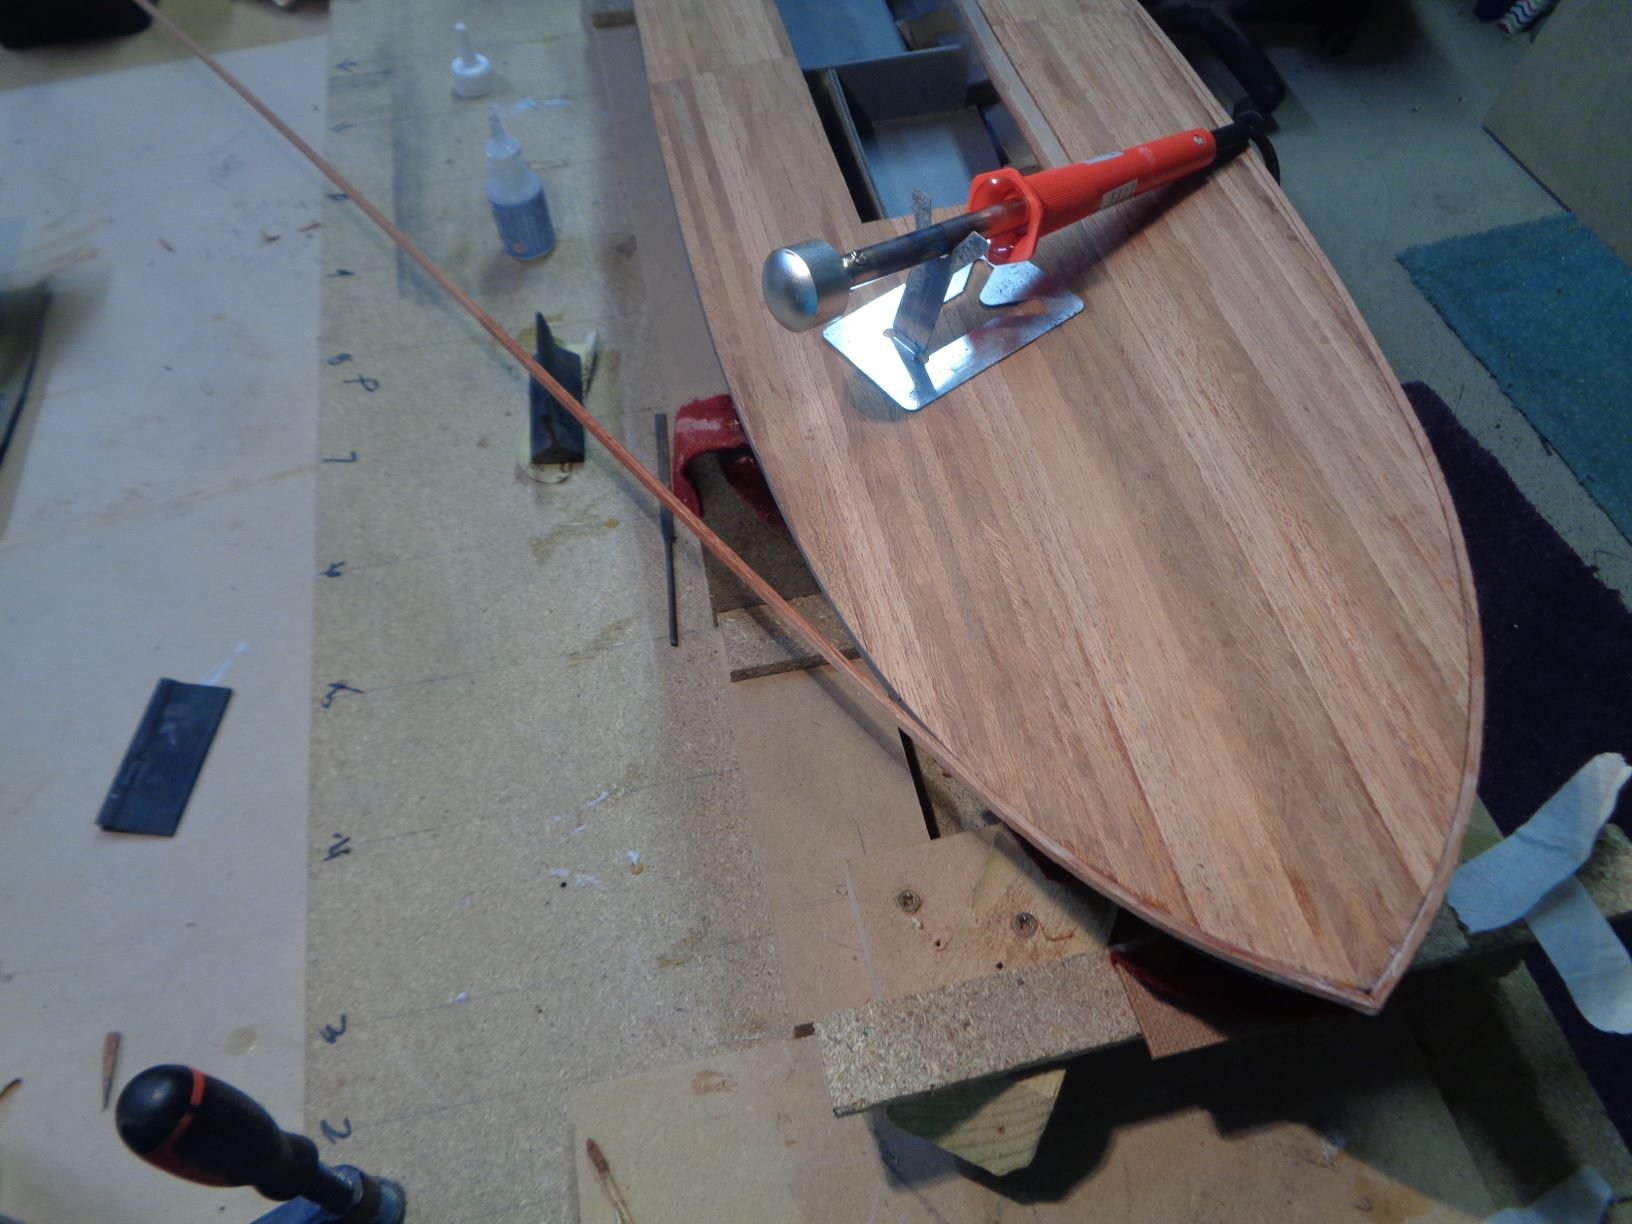
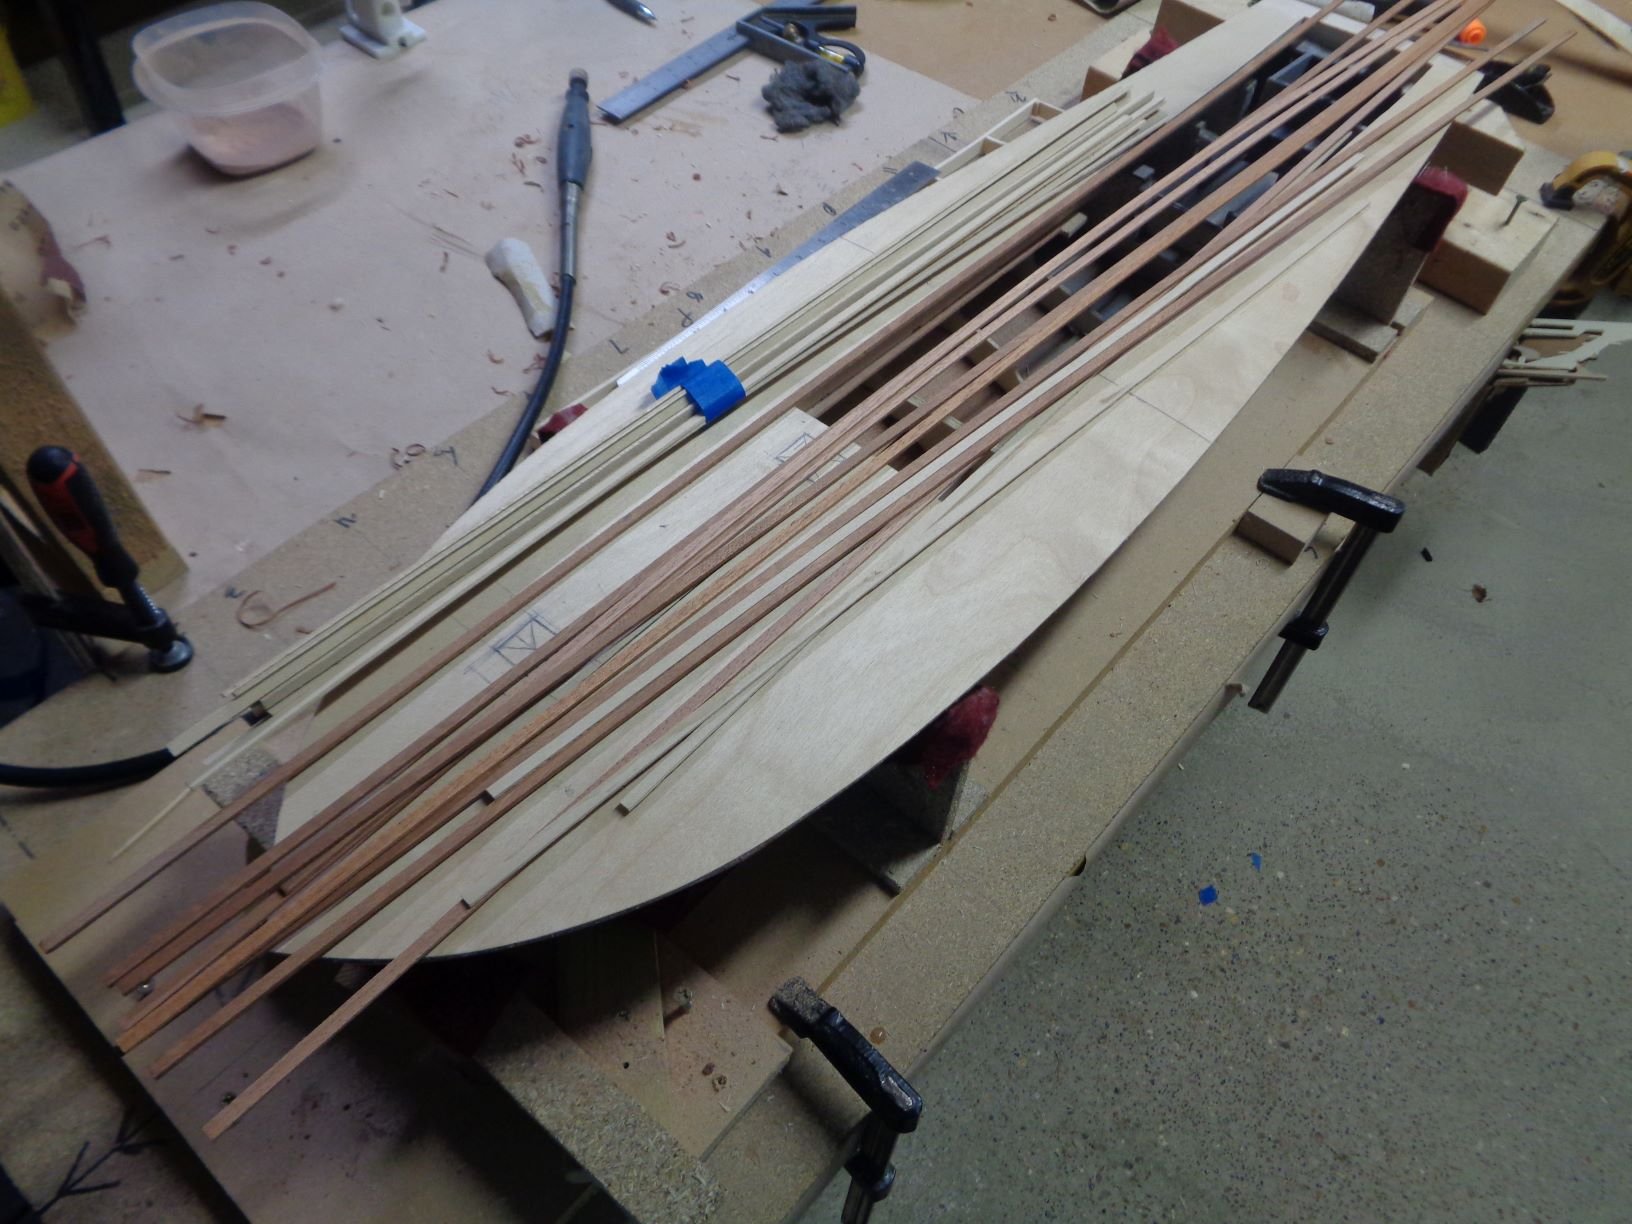
The Dumas kit is a single deck not calling for planking wood. However early PTs 1941,42 had planked decks. I always like to plank over a solid subdeck, so I ordered strips in the size I wanted to use. With all my builds I like ordering my own wood for specific tasks and look. a good part of the kit wood goes into the general supply for building. So I give Cornwall boats allot of money.
-
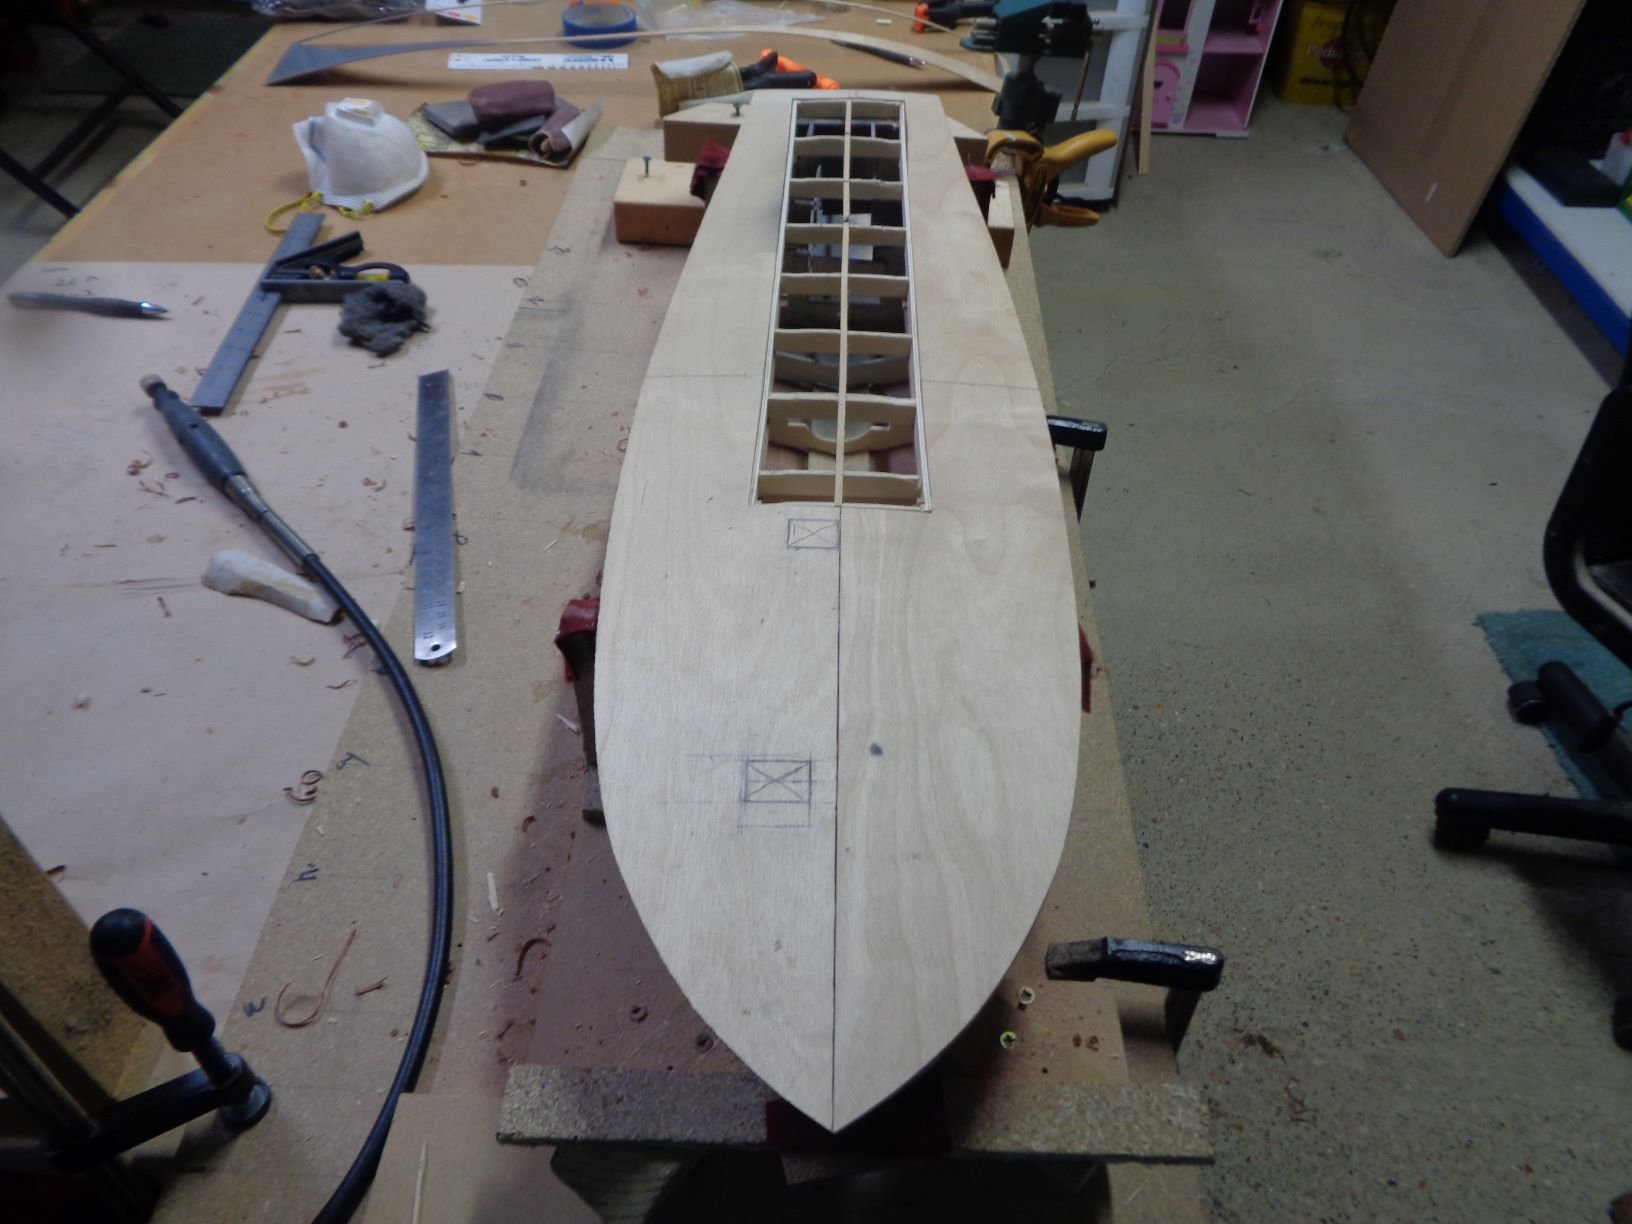
Sub deck in. Planking wood has arrived. Next 3 steps shape edges of subdeck., coat the hull with a sealer filler mix to get the smooth surface needed for primer. Plank the subdeck.


- 195 replies
-
- 10
-
-
Thanks to popeye I rechecked the drawings, and found 2 more hatches. Then talked with two of best PT boat experts on the planet. My Thanks to Jeff Davison from pt103.com who sent detailed drawings.
-
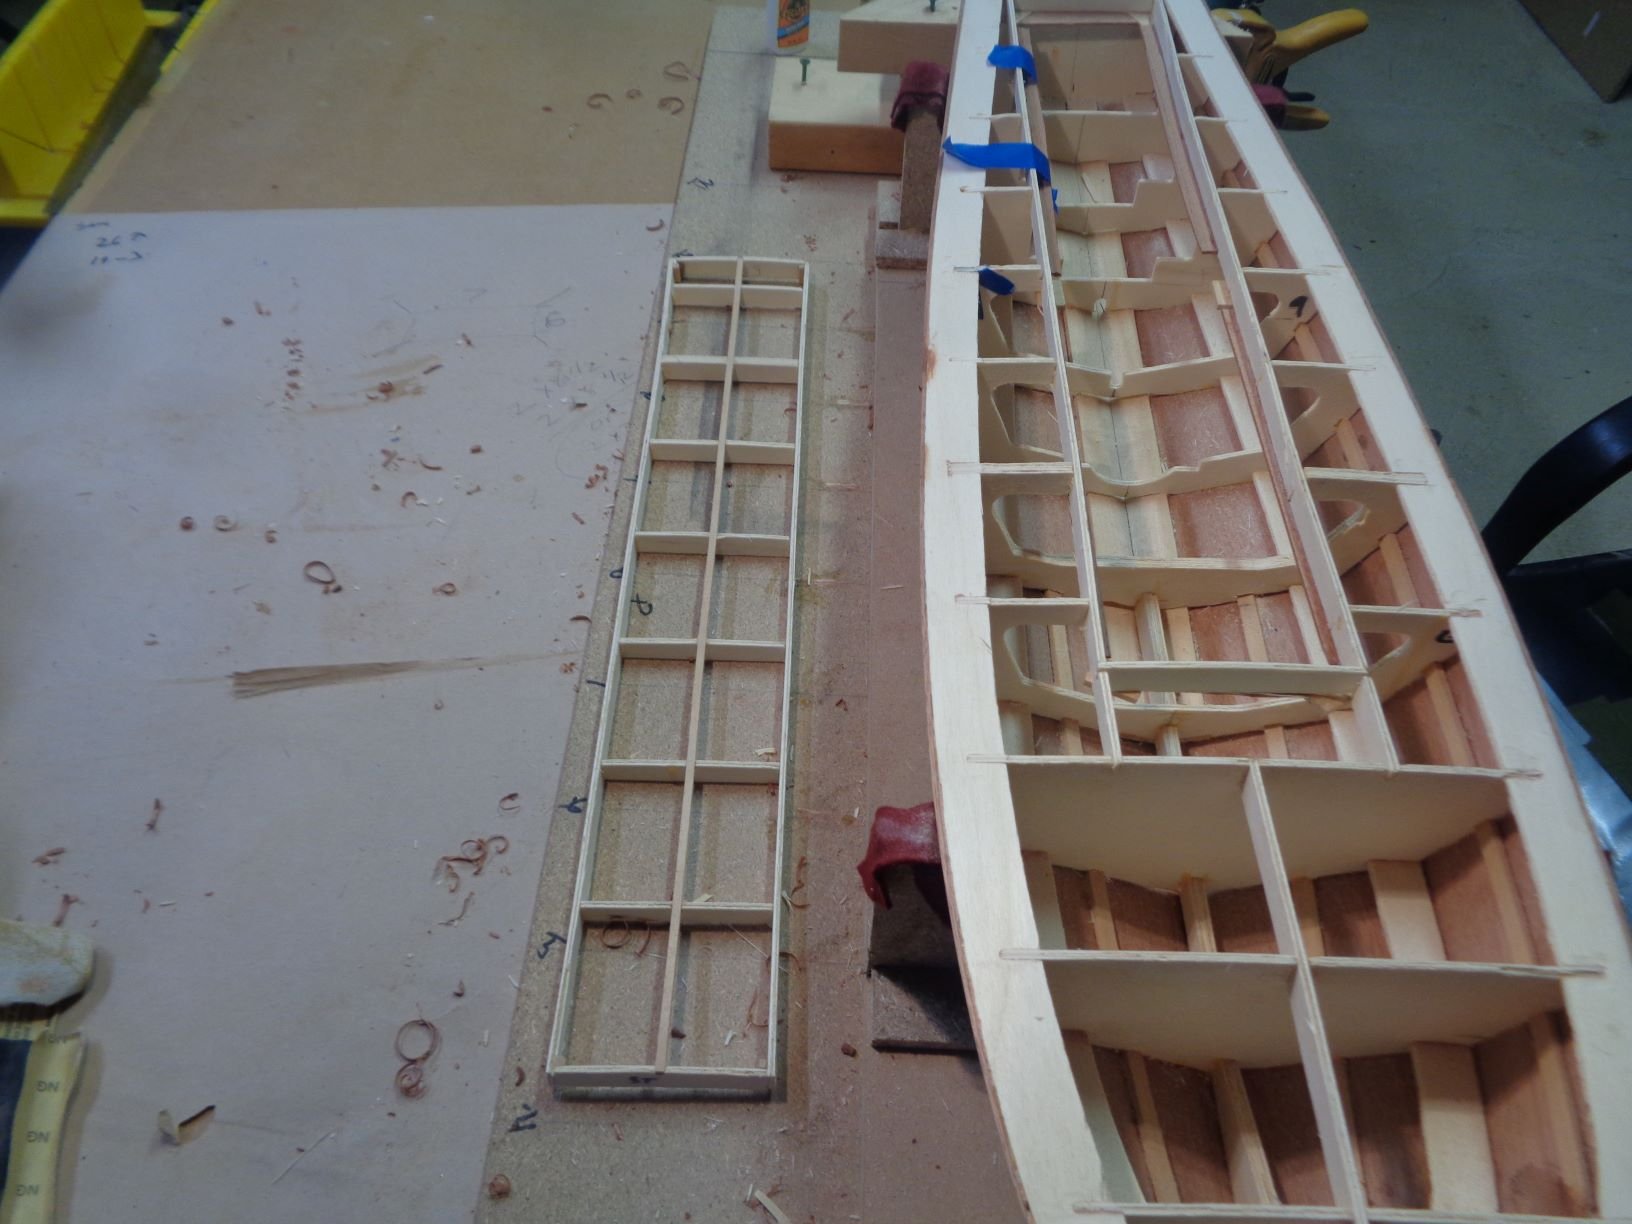
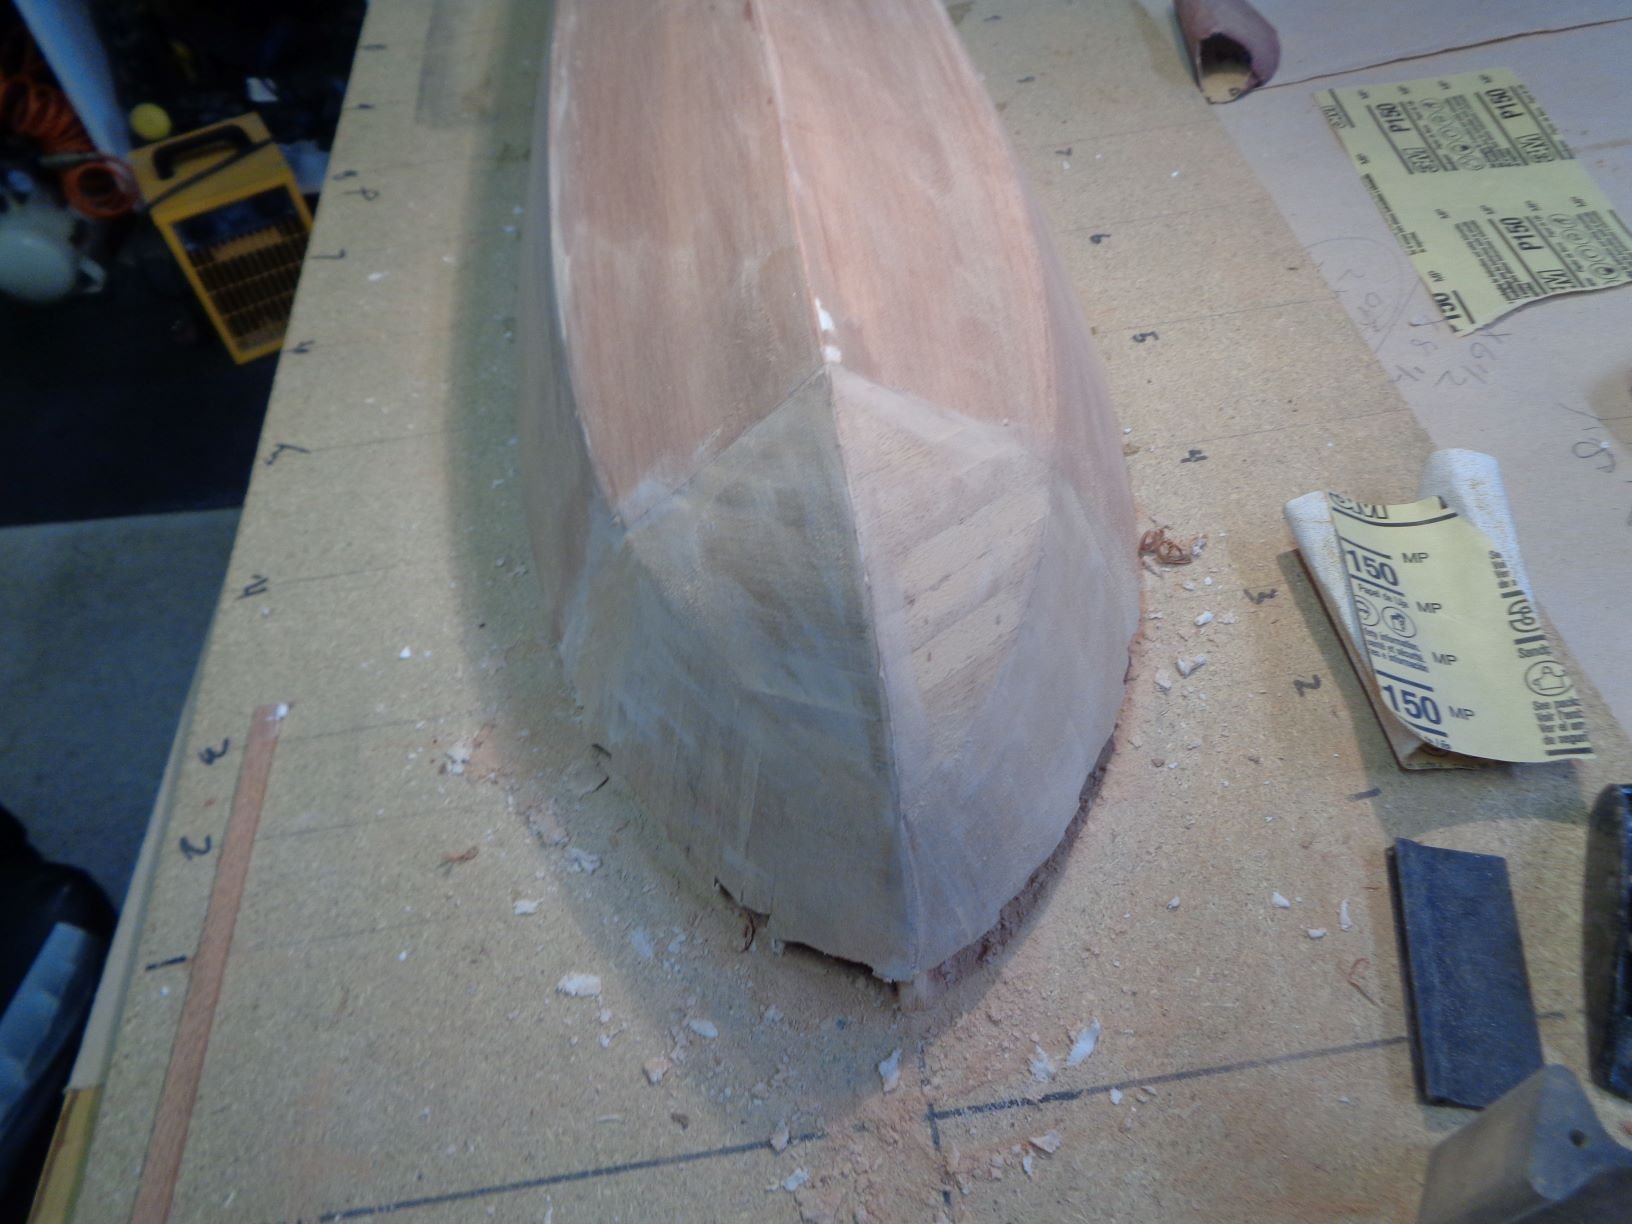
Completed removing the centre hatch, with a static display I guess it’s not a must to remove, however I think it will be easier to work the superstructure off ship There are 3 hatches 2 forward 1 aft, built the boxes in case I decide later to go open hatches. Will work the subdeck next, I have ordered the planking wood.


-
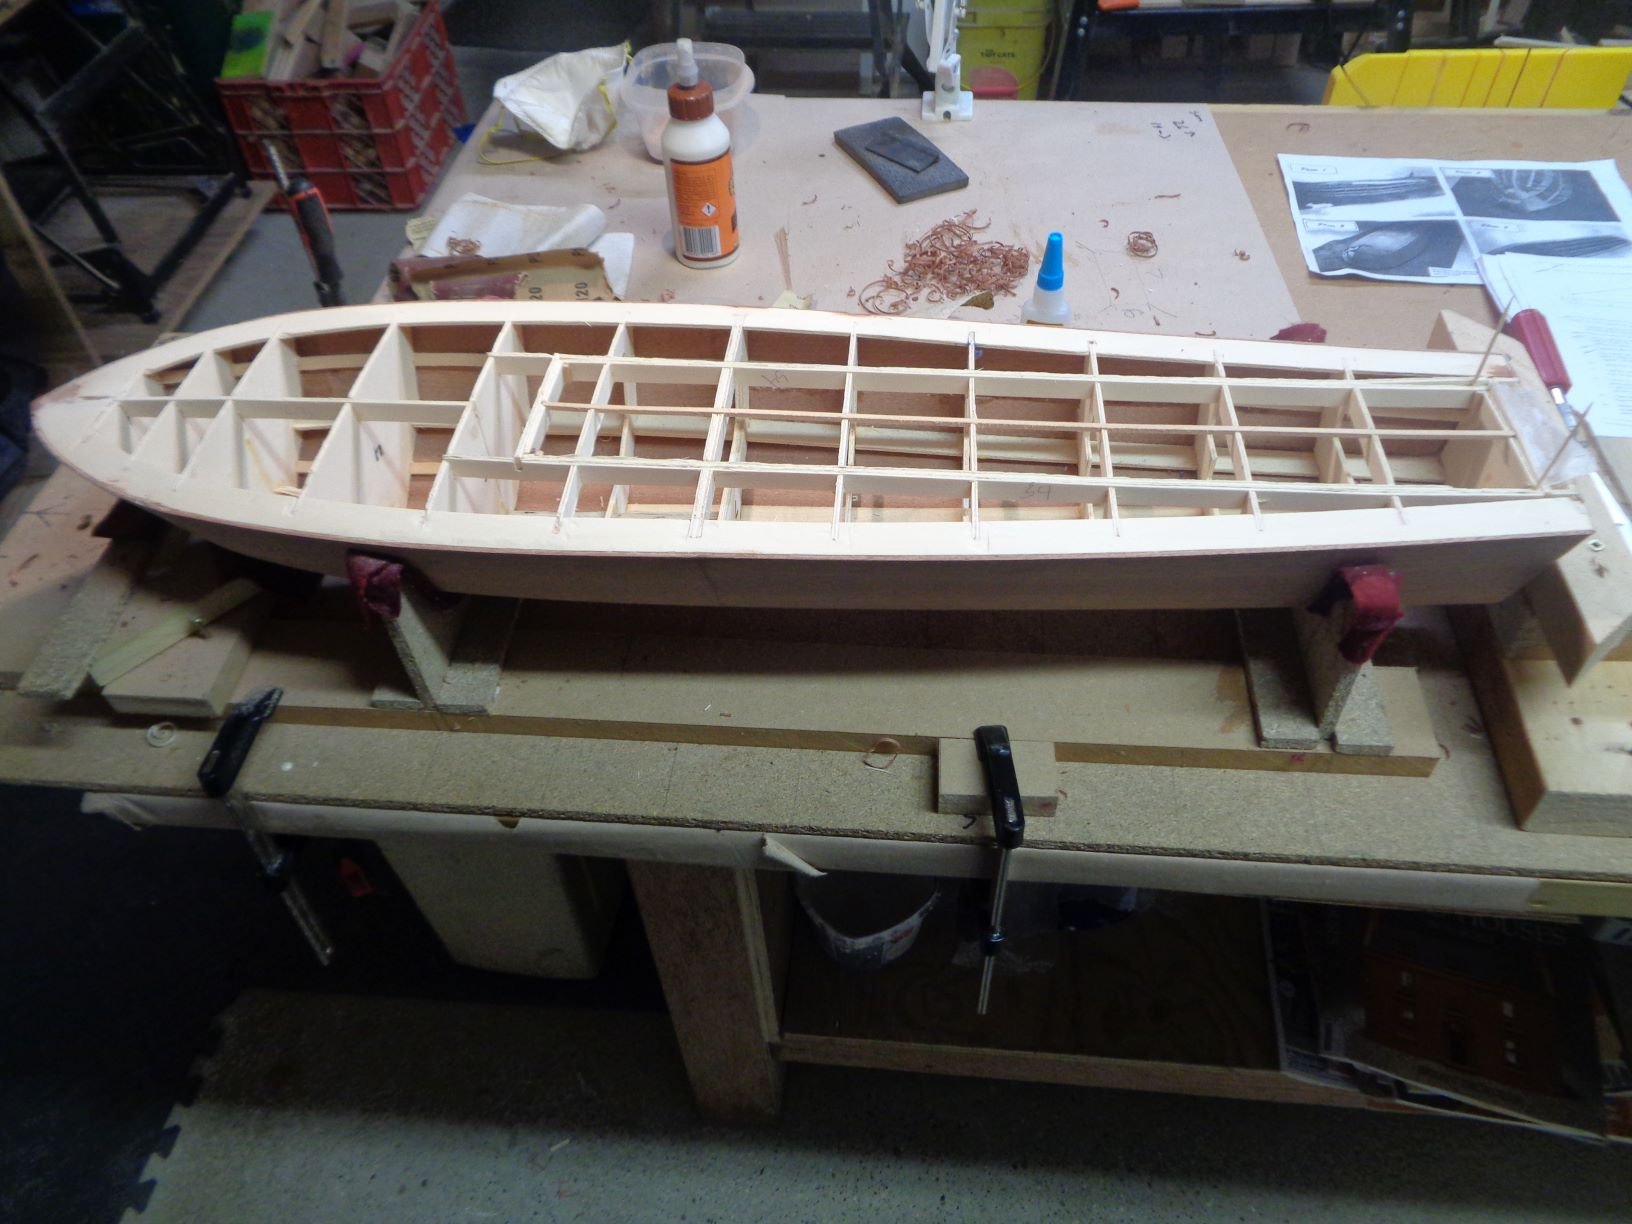
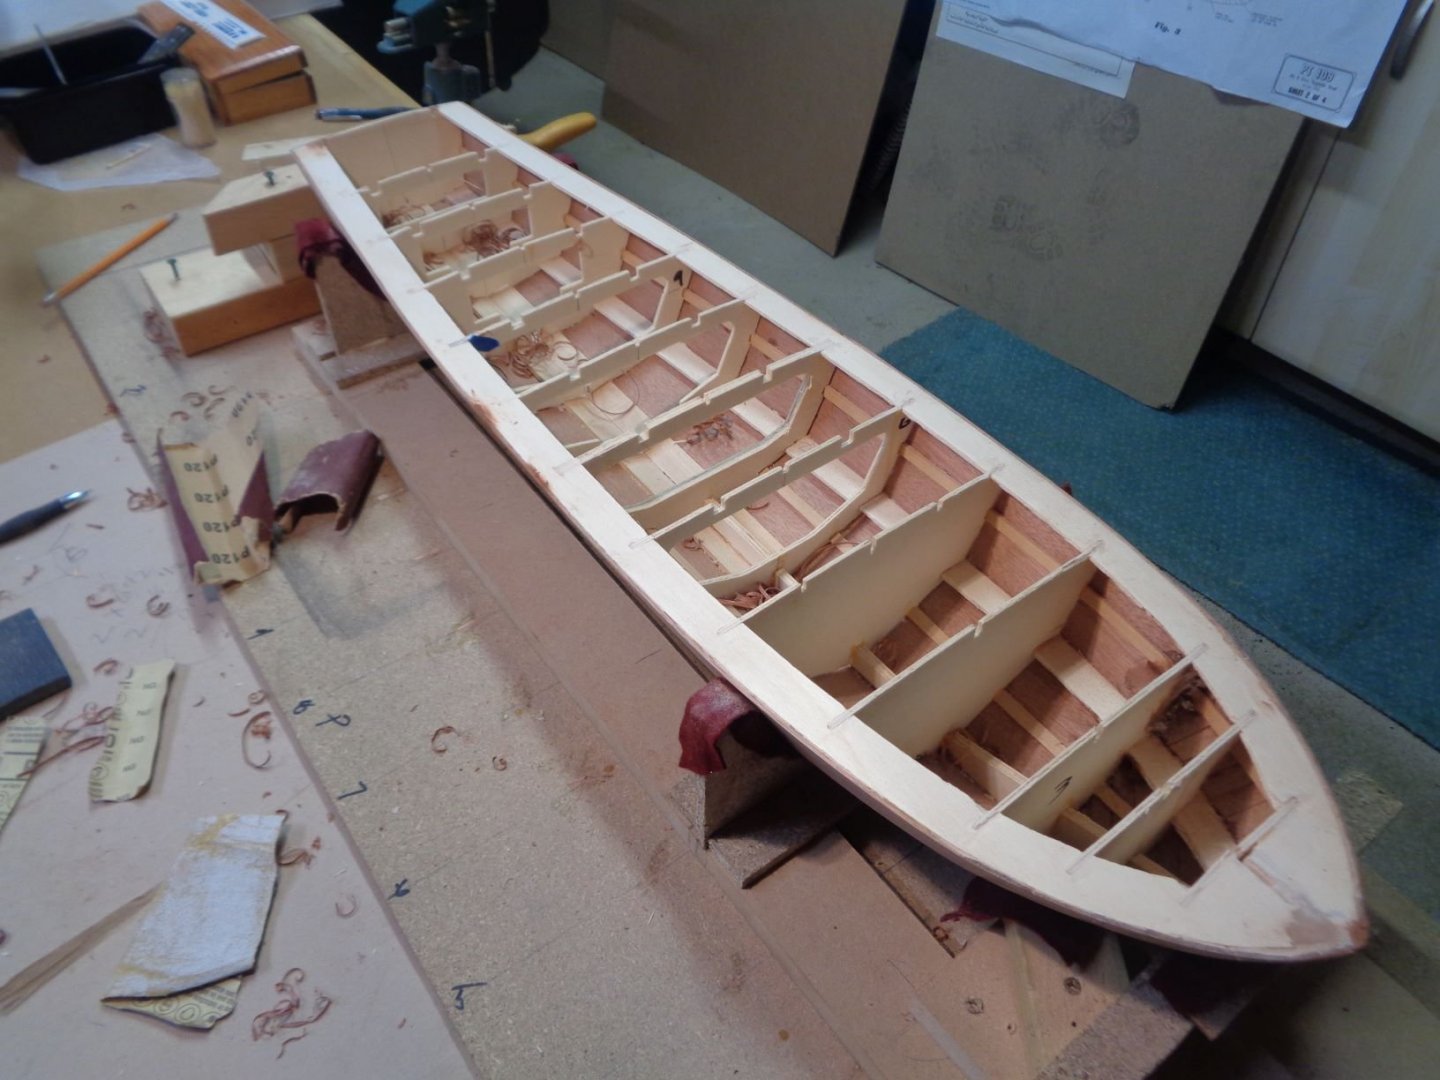
Hull cut from building board, up righted and placed on a stable stand to handle the deck prep

- 195 replies
-
- 12
-
-
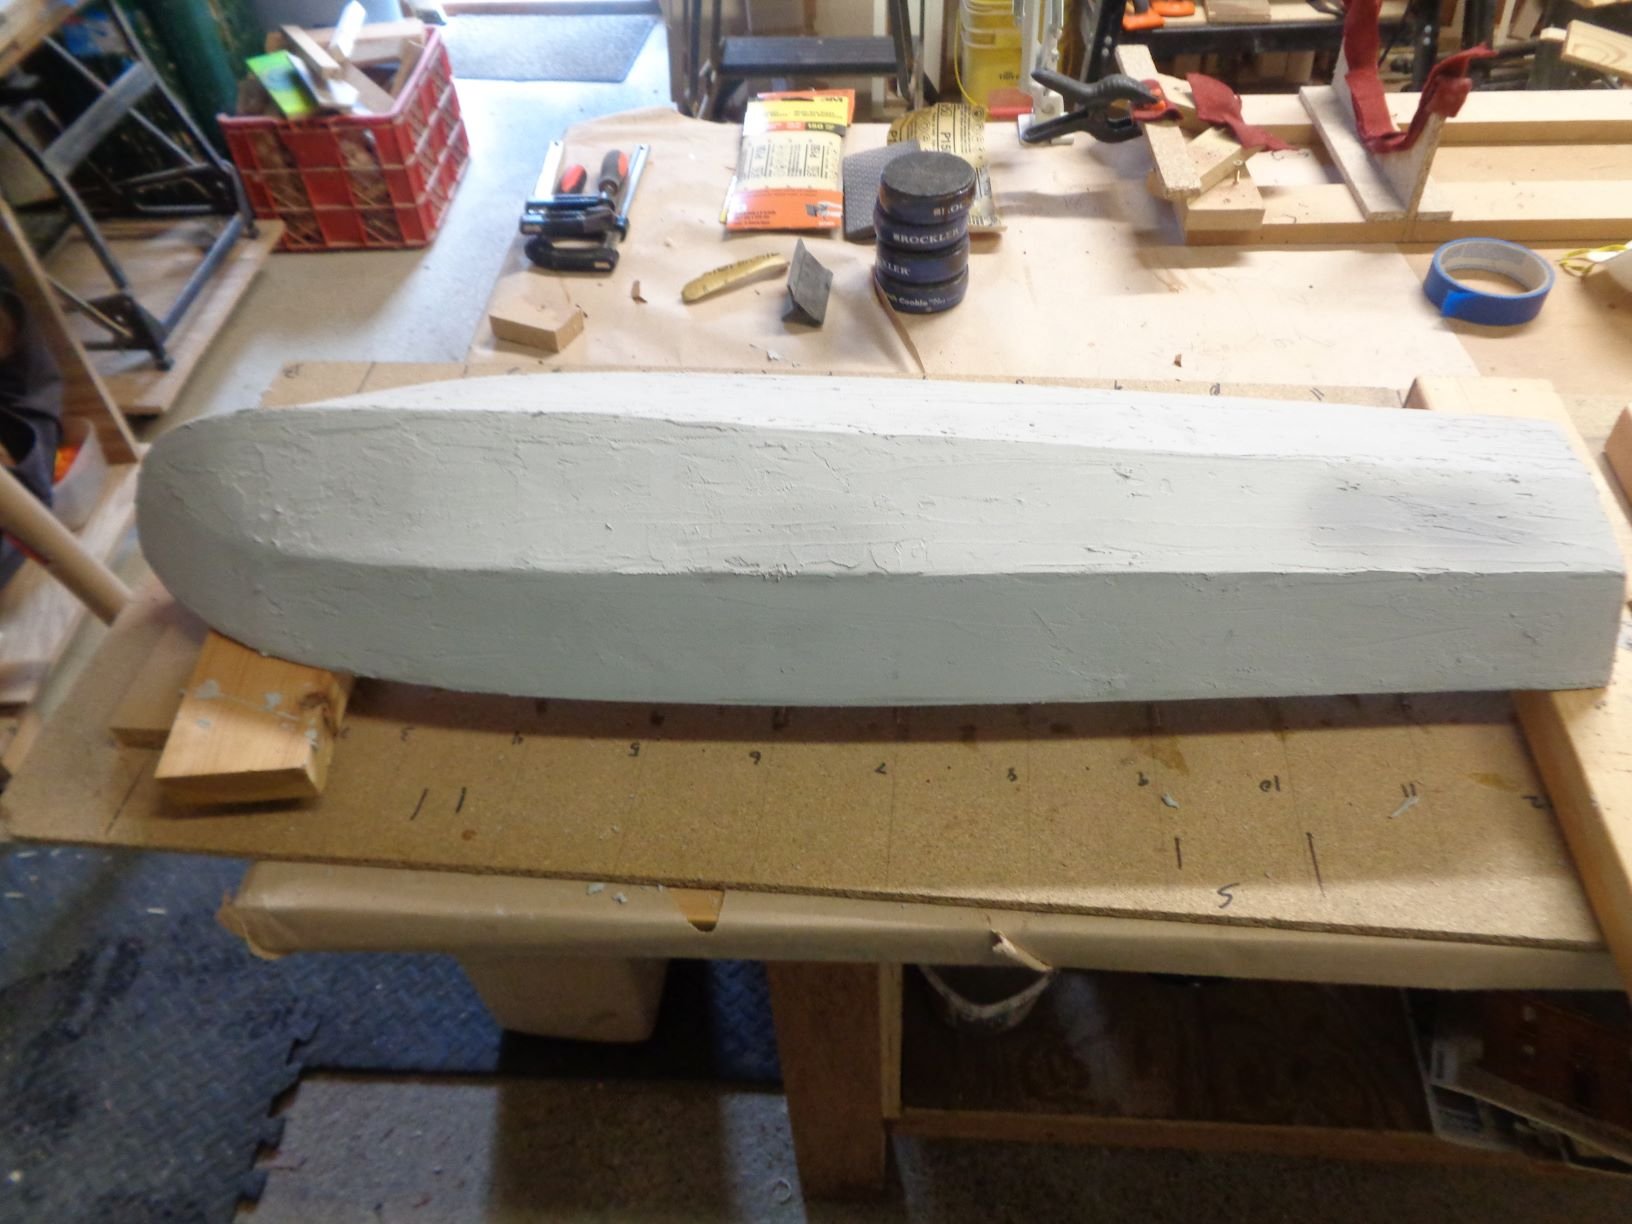
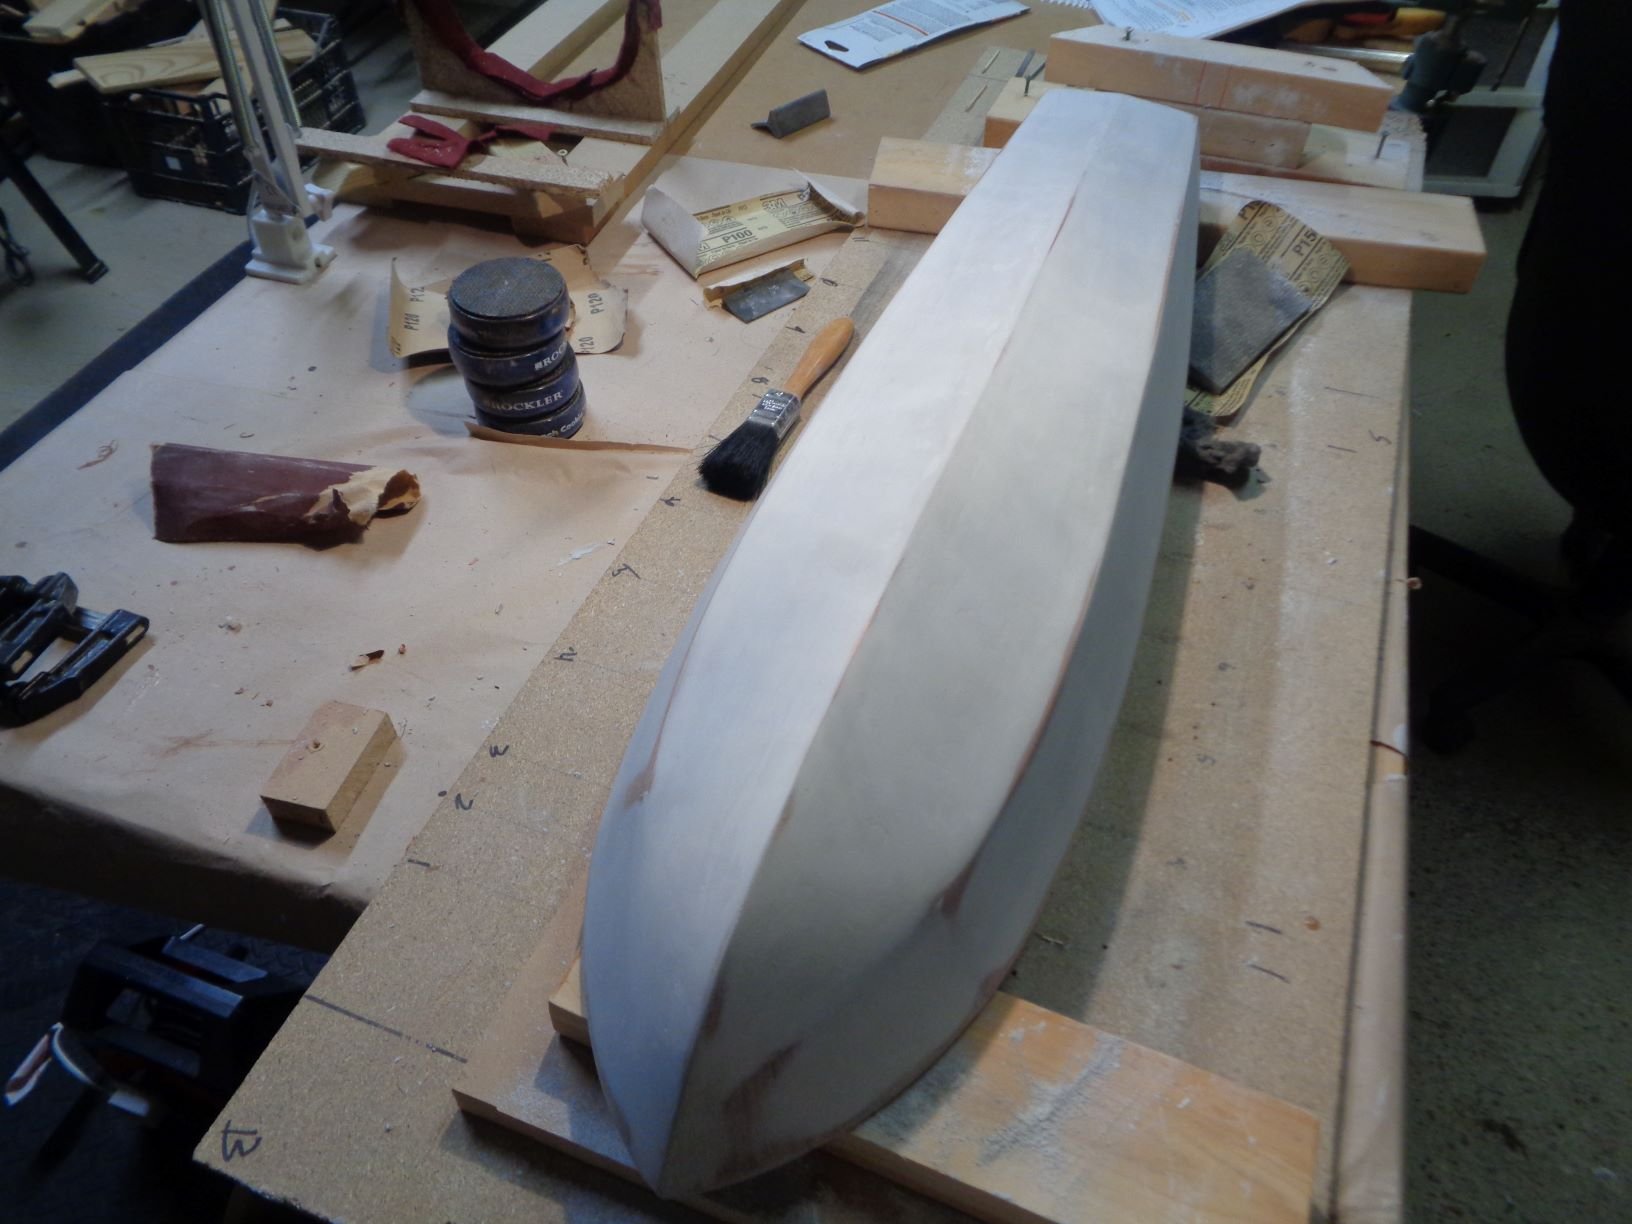
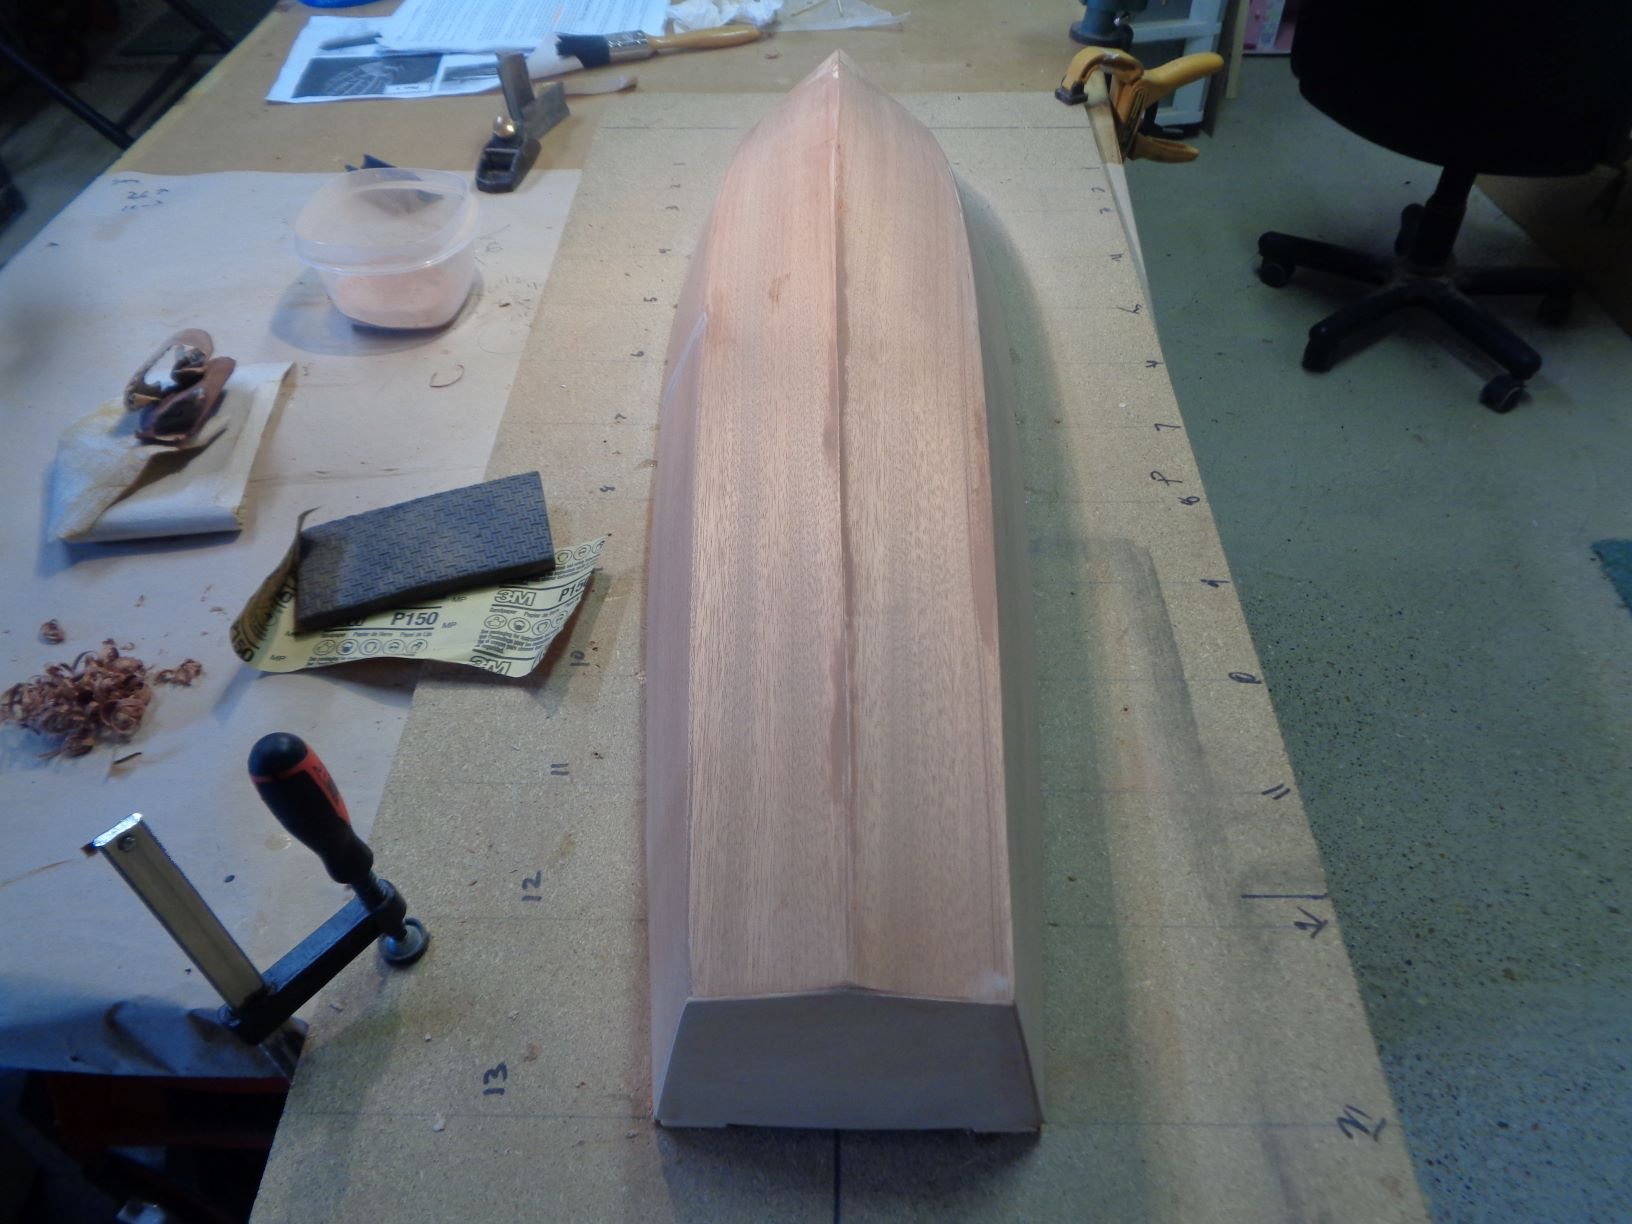
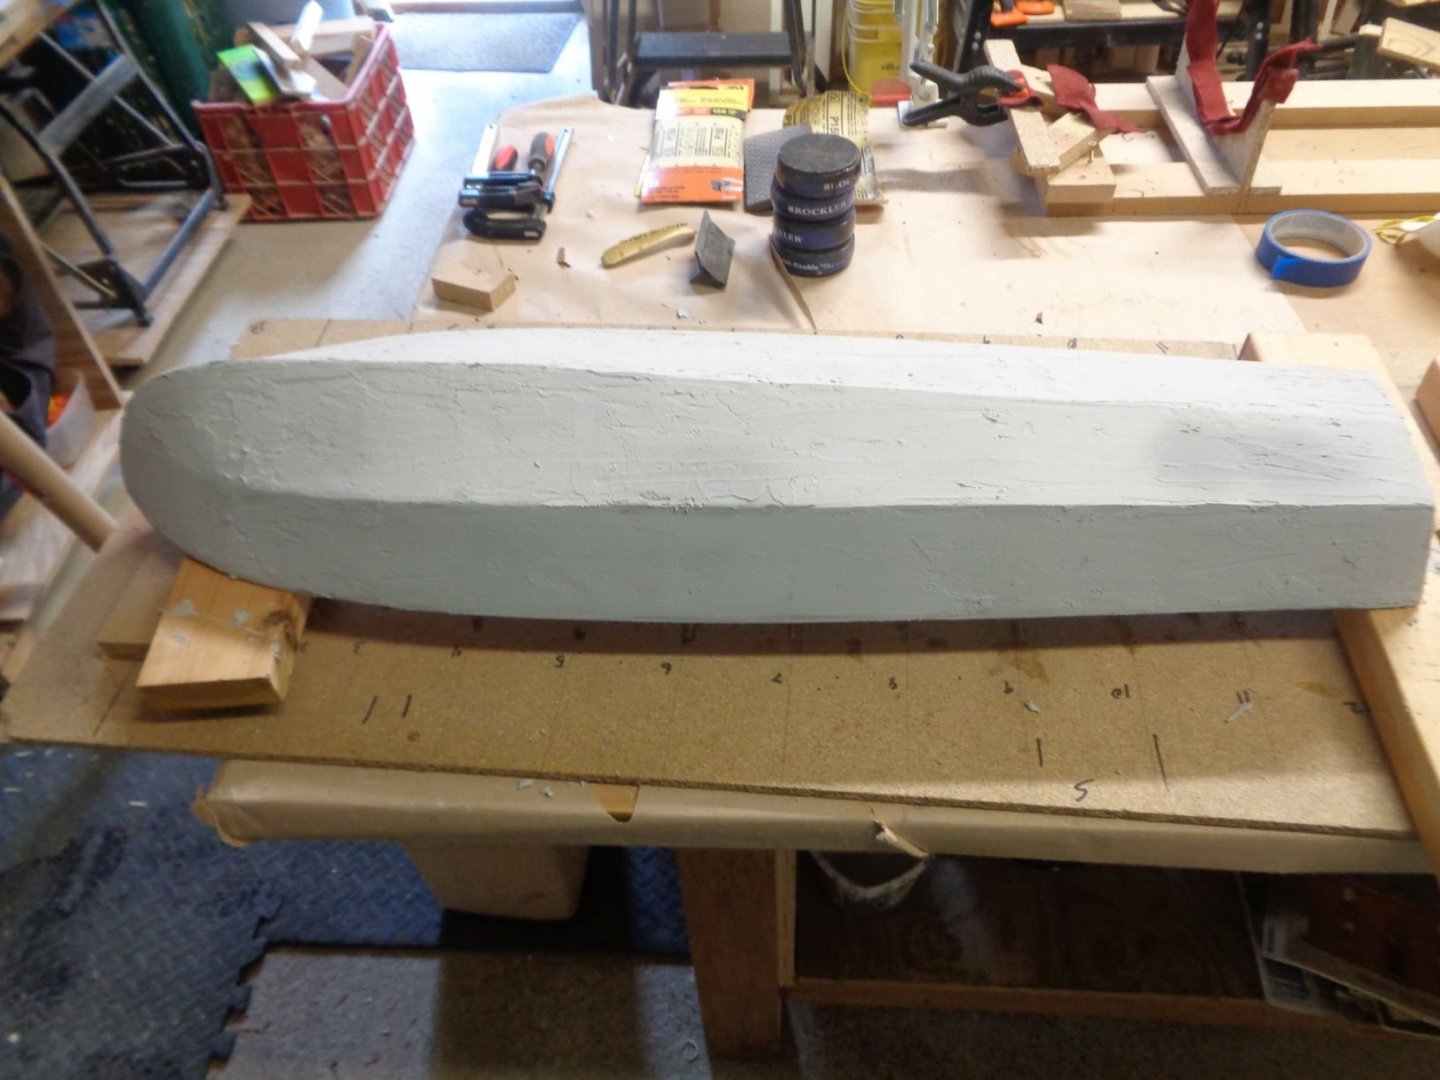
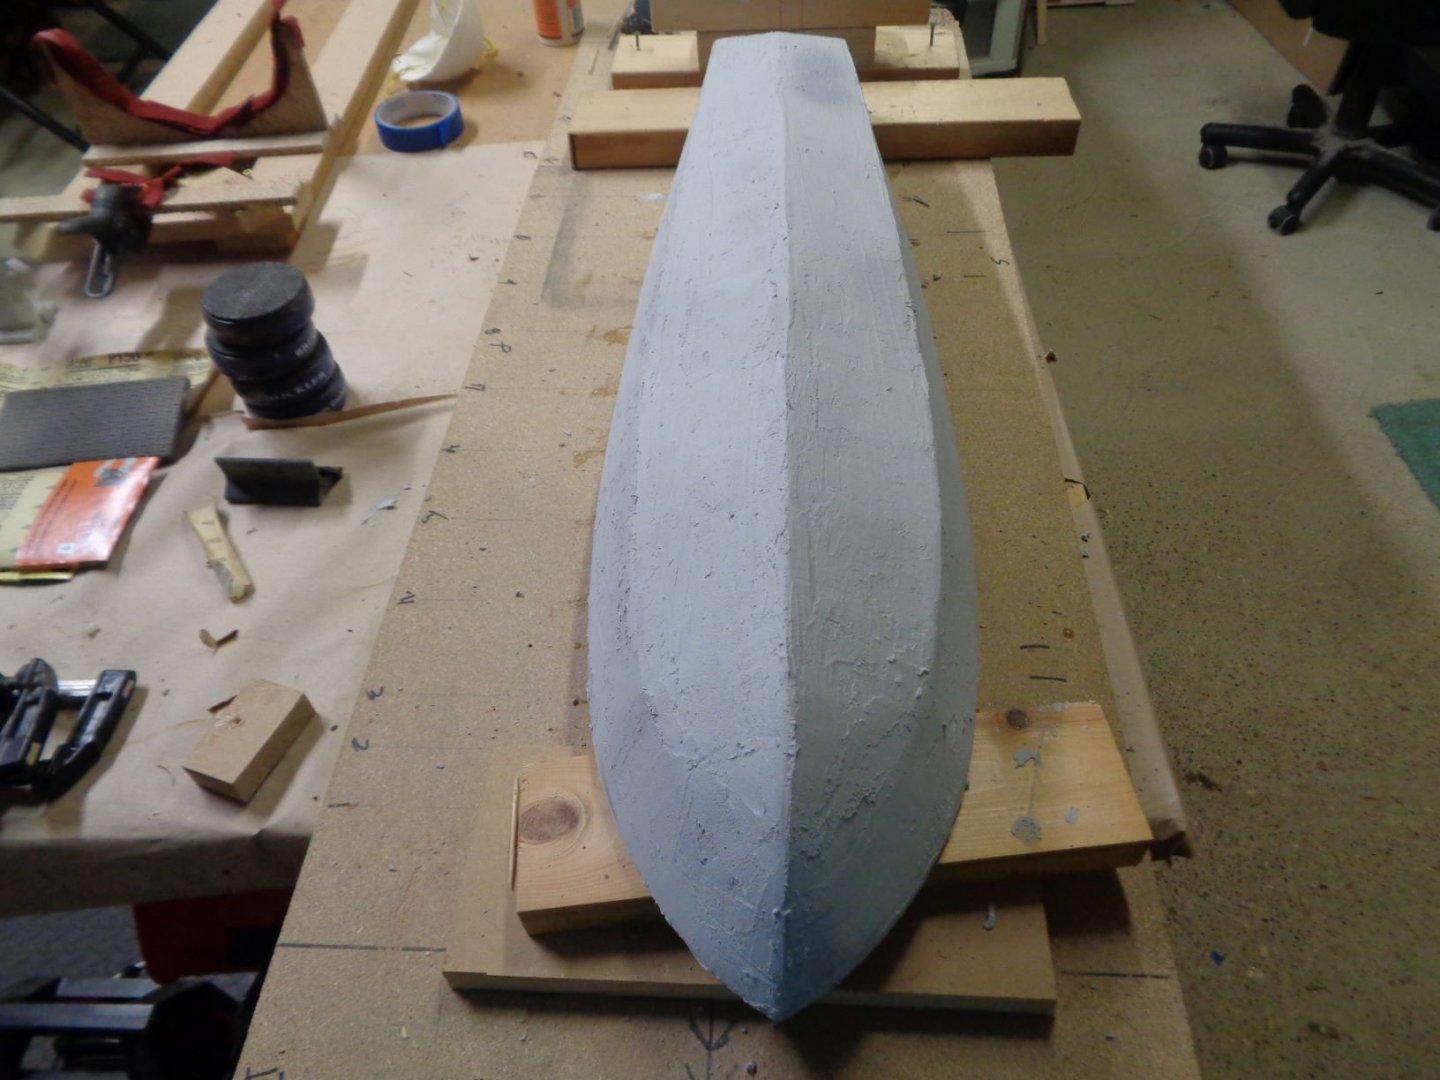
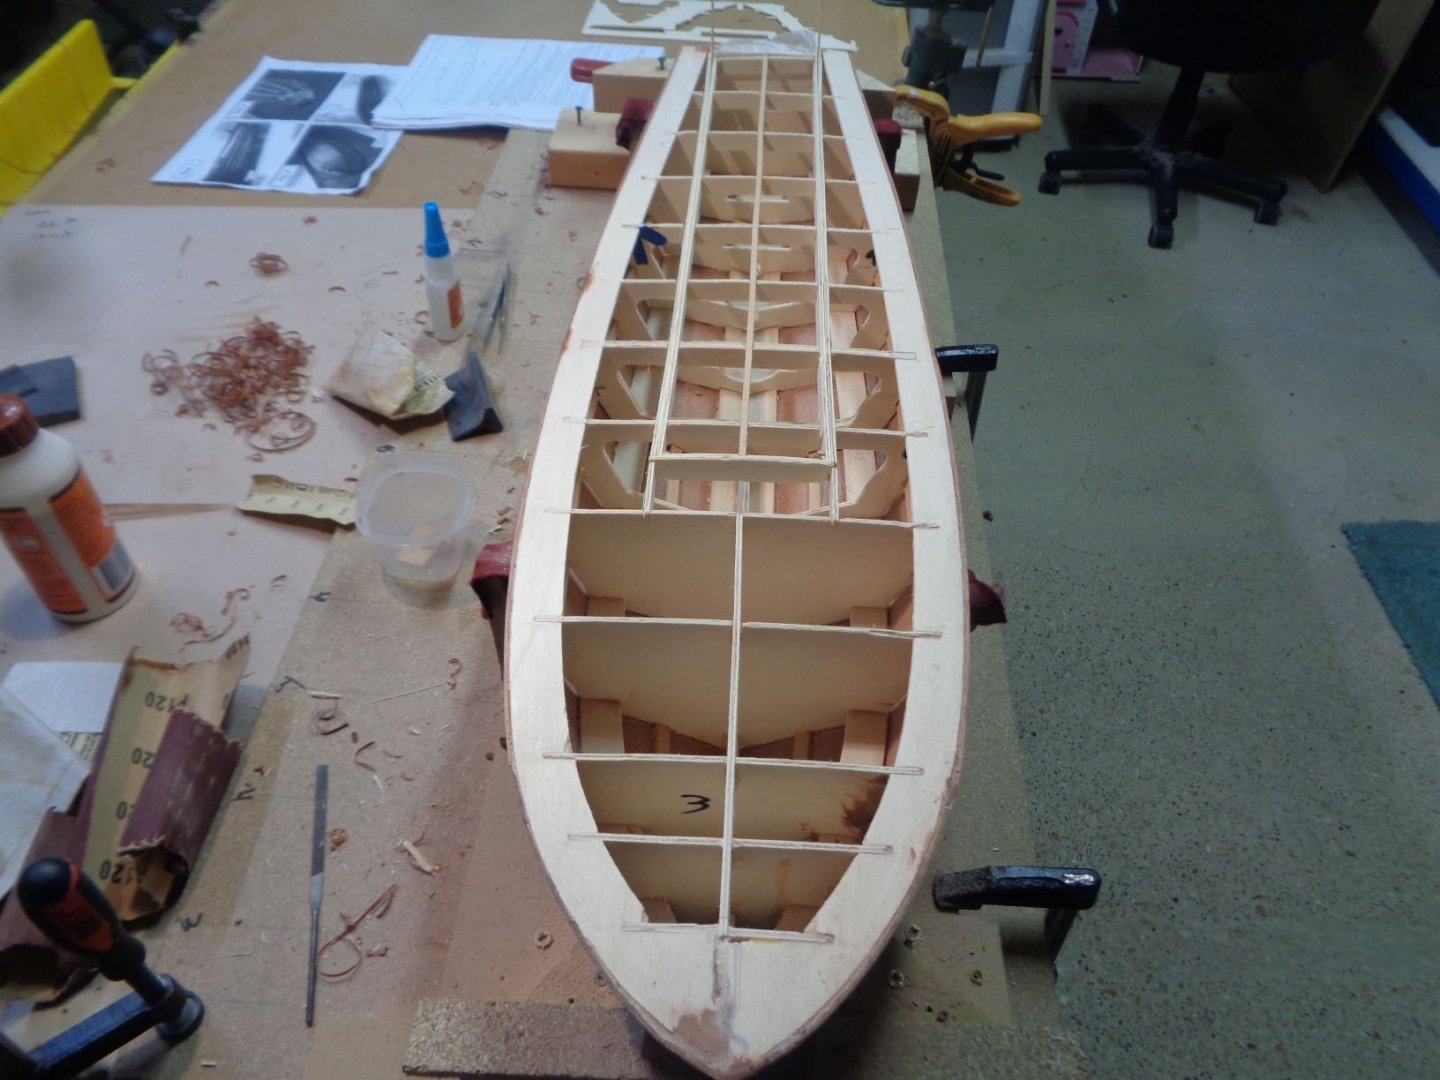
Filled and shaped The lines fit the templates I used about as close as I can get, the hull is smooth. Working my next move. At this stage the plans call for cutting the hull off the board and shape the top for laying the deck, I plan to lay a sub deck then plank. The question is WHAT is the next move? I need to seal the hull so it will be very smooth and take primer and paint I have tossed it out around several sites and gotten some good ideas from excellent builders Resin, bondo, straight primer , spay on a coat of lacquer then prime just to name a few. I think I will cut the hull from the board prep the top and lay the sub deck, then work out best way forward on the hull. Any thoughts on this would be helpful


- 195 replies
-
- 11
-
-
Yes white wood glue is not the best stuff in the world, I only use it for mixing with water to treat rigging lines, and stiffen coils & shrouds. This build for static display so water sealing the hull is not important. Cabinet makes glue and CA will work. I would not have thought too use 2 part epoxy or resin However I do appreciate all the suggestions, good ideas always come in handy sooner or later
-
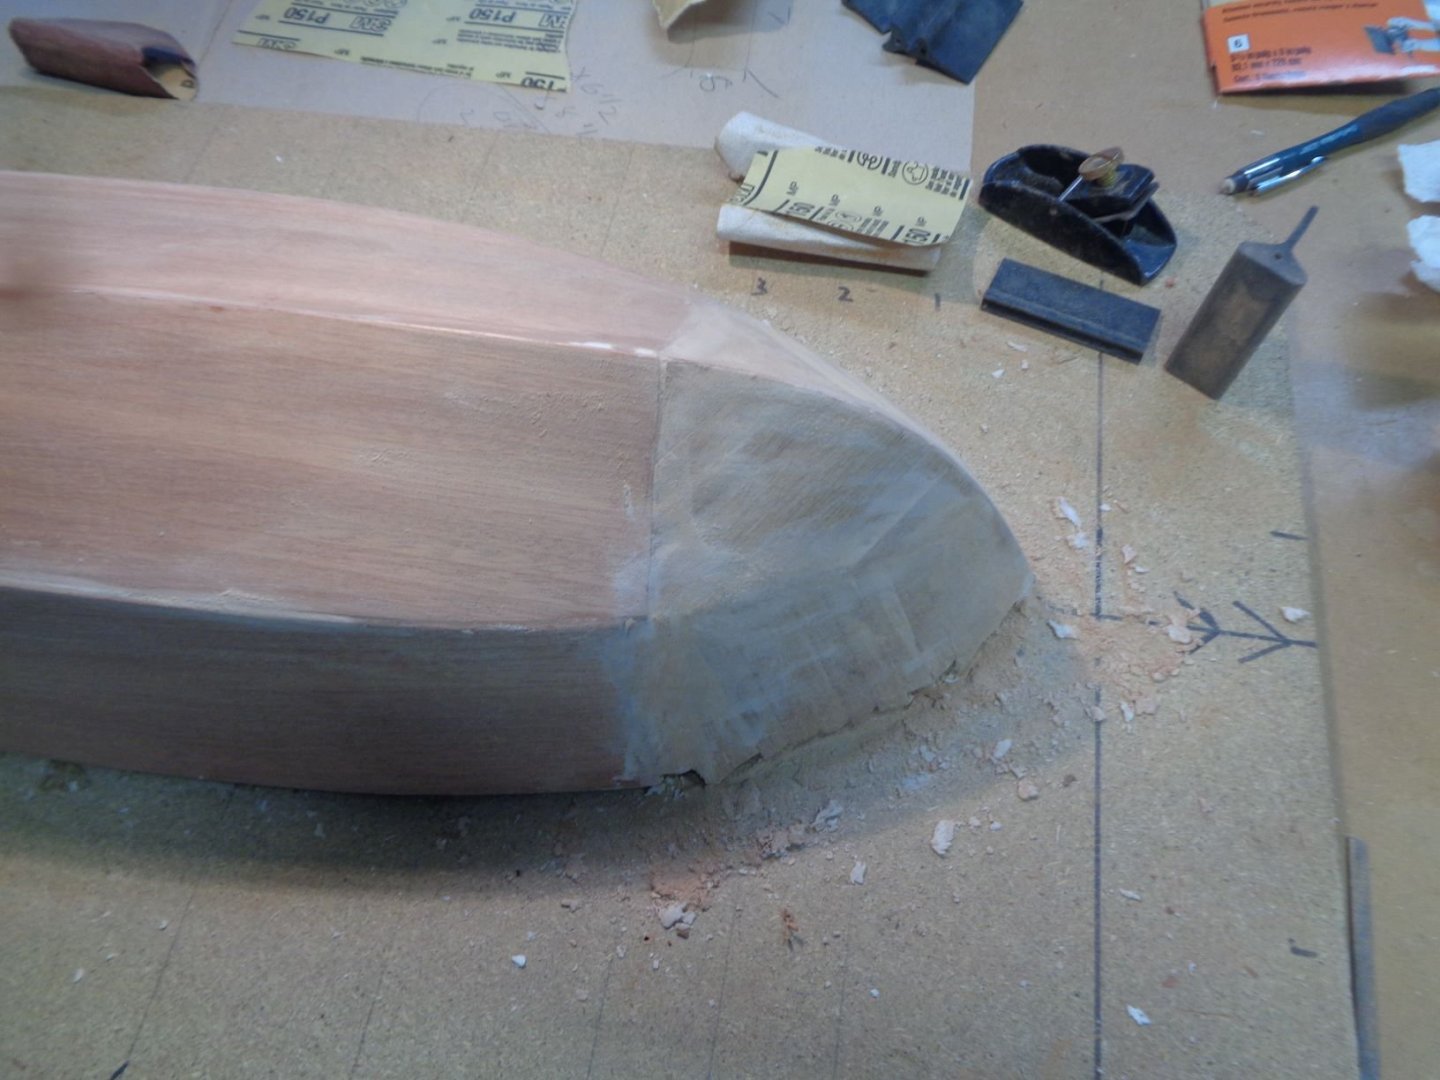
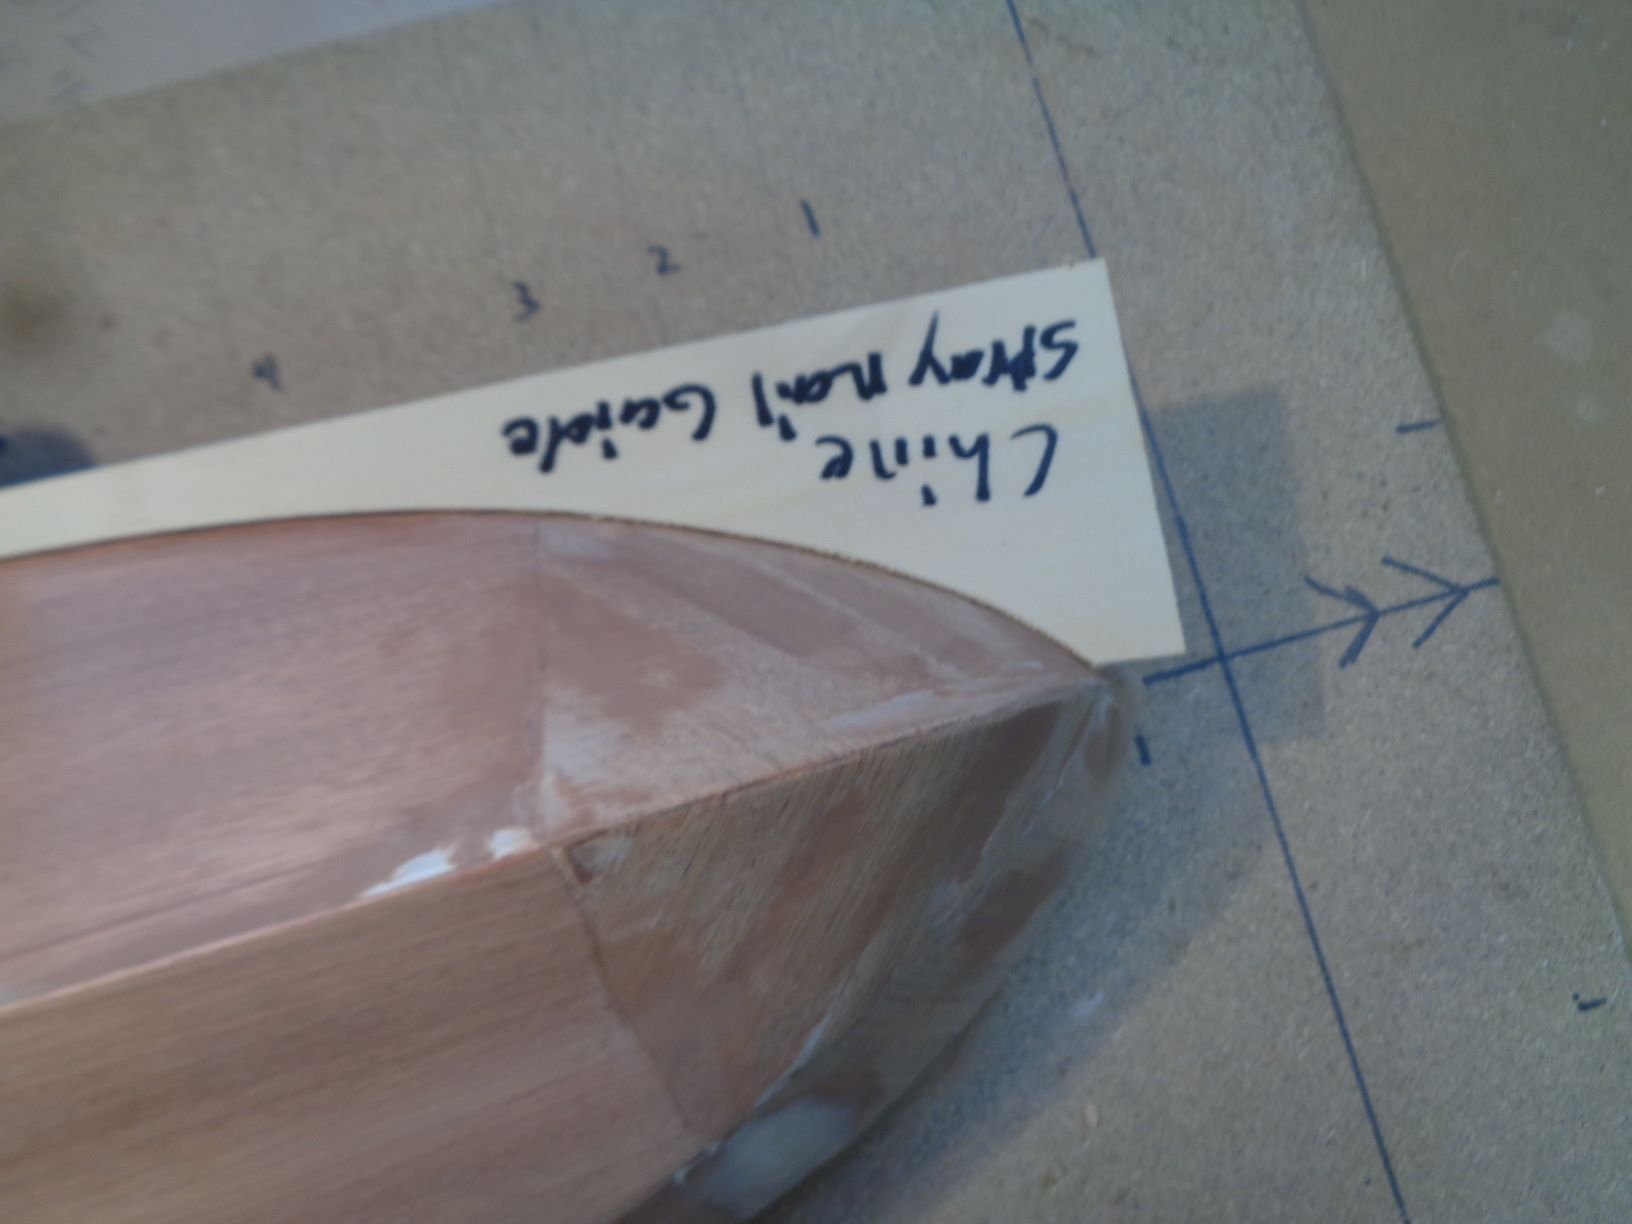
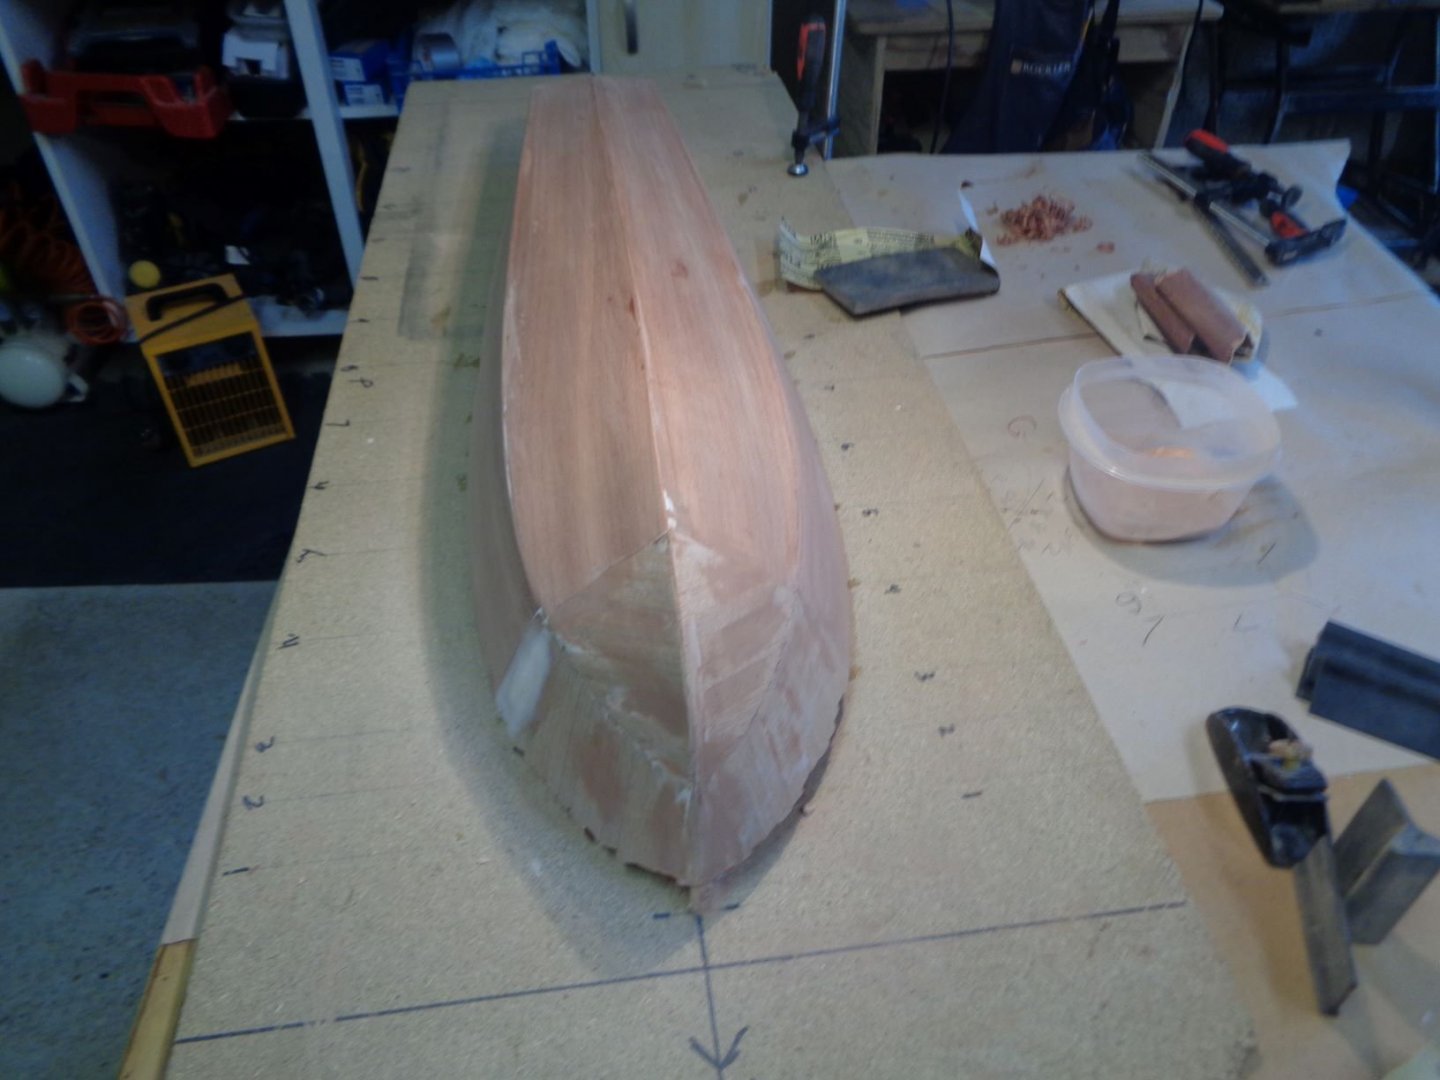
The wood hulls of a PT had to be very smooth as the Bow would bounce and hydroplane over the water at high speed. This build is a single layer hull. Will have to remove many more small flaws than I would normally with a double hull. The bow being the main area I have rough sanded for shape. Then applied a very light layer of wood filler by hand rubbing it into the bow then rubbing in sanding dust, the idea is not to over fill just rub the plank lines and dips in first. Doing this with my hands I can fell the shape. The light rub also brings up the flaws. I will repeat the procedure several times until I get the best surface I can get.