HOLIDAY DONATION DRIVE - SUPPORT MSW - DO YOUR PART TO KEEP THIS GREAT FORUM GOING! (89 donations so far out of 49,000 members - C'mon guys!)
×


mog
-
Posts
196 -
Joined
-
Last visited
Content Type
Profiles
Forums
Gallery
Events
Everything posted by mog
-
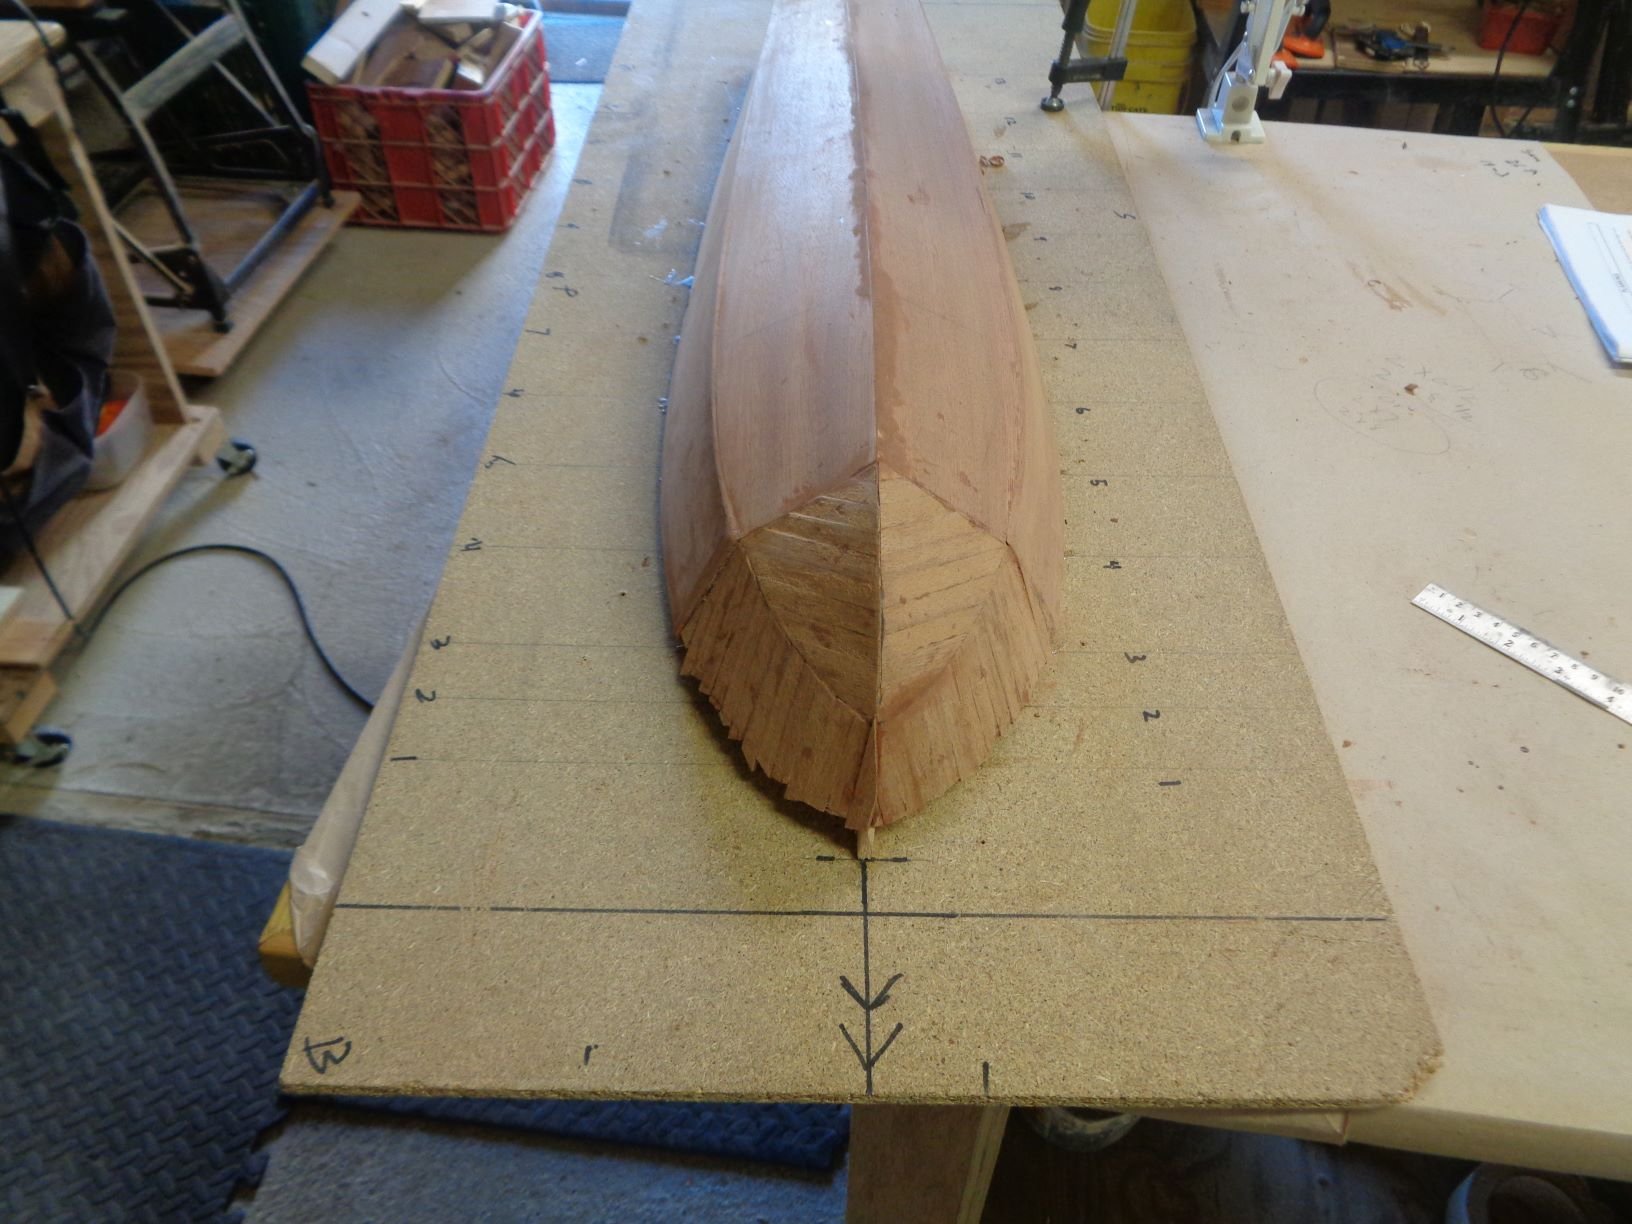
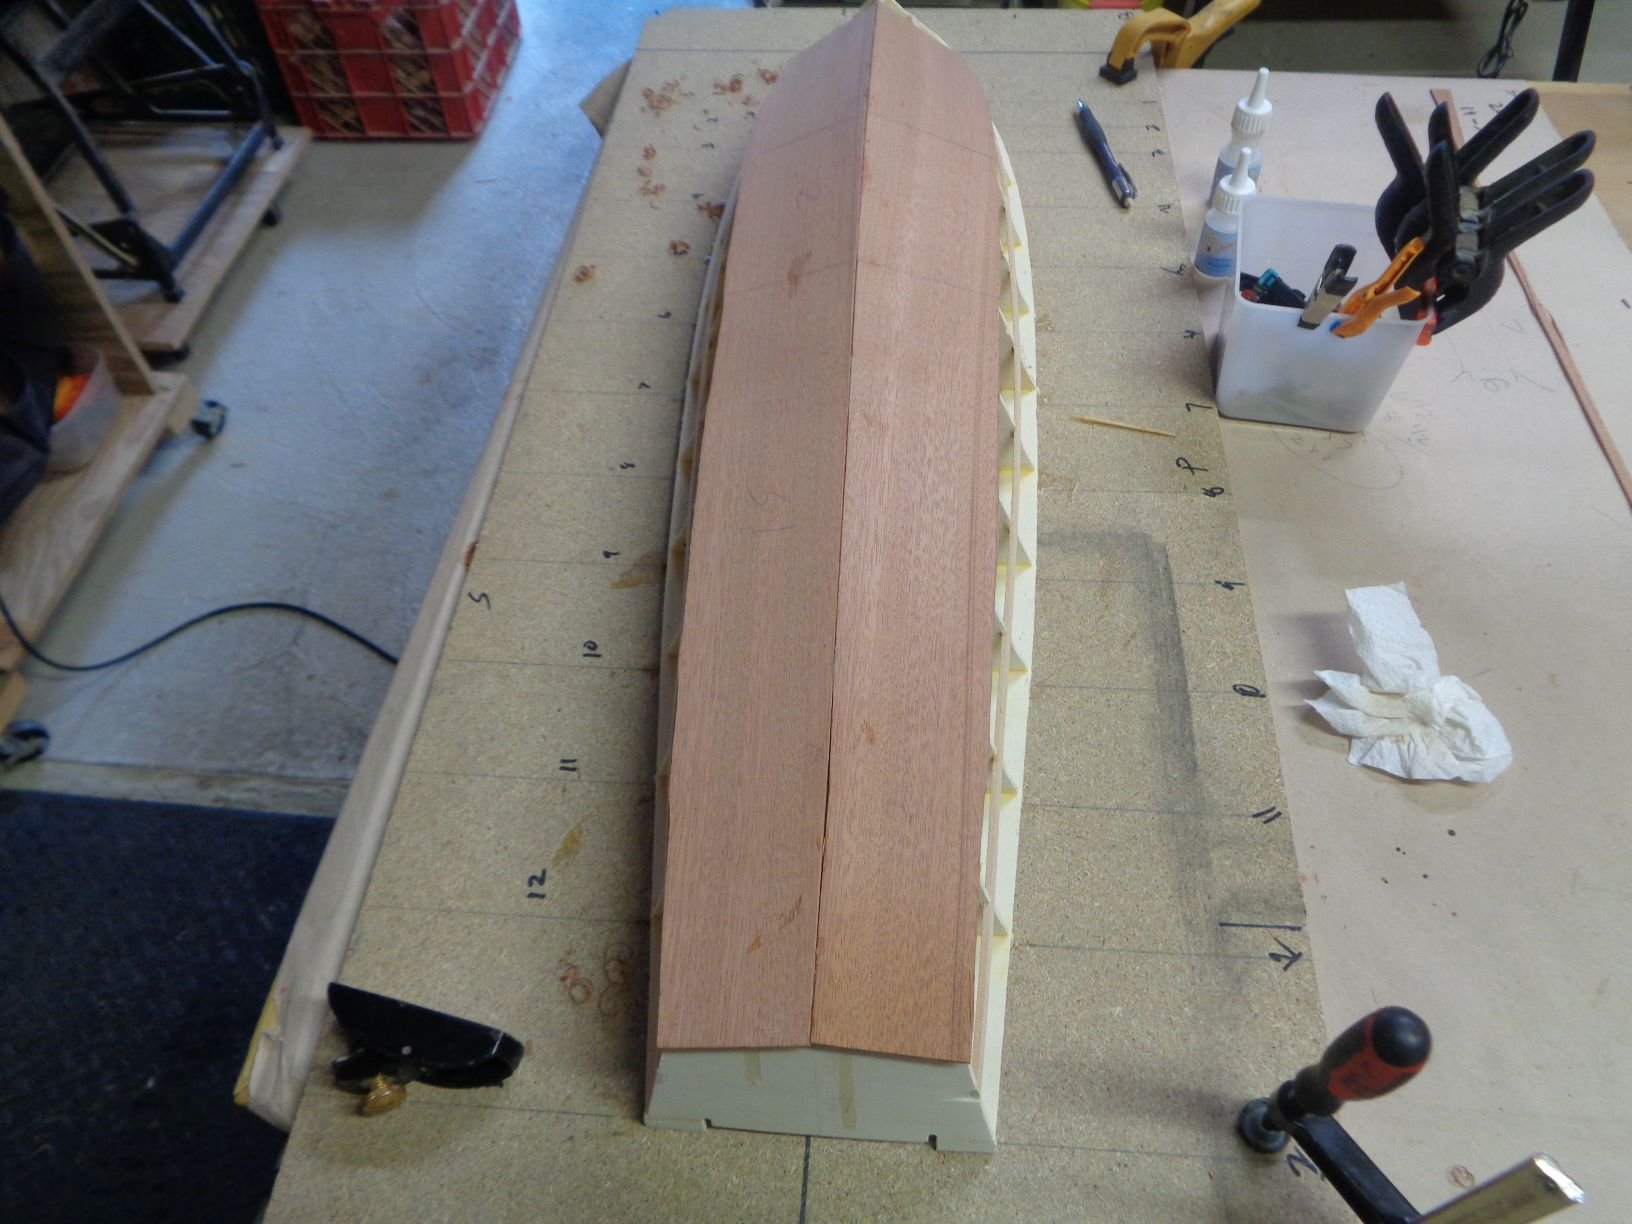
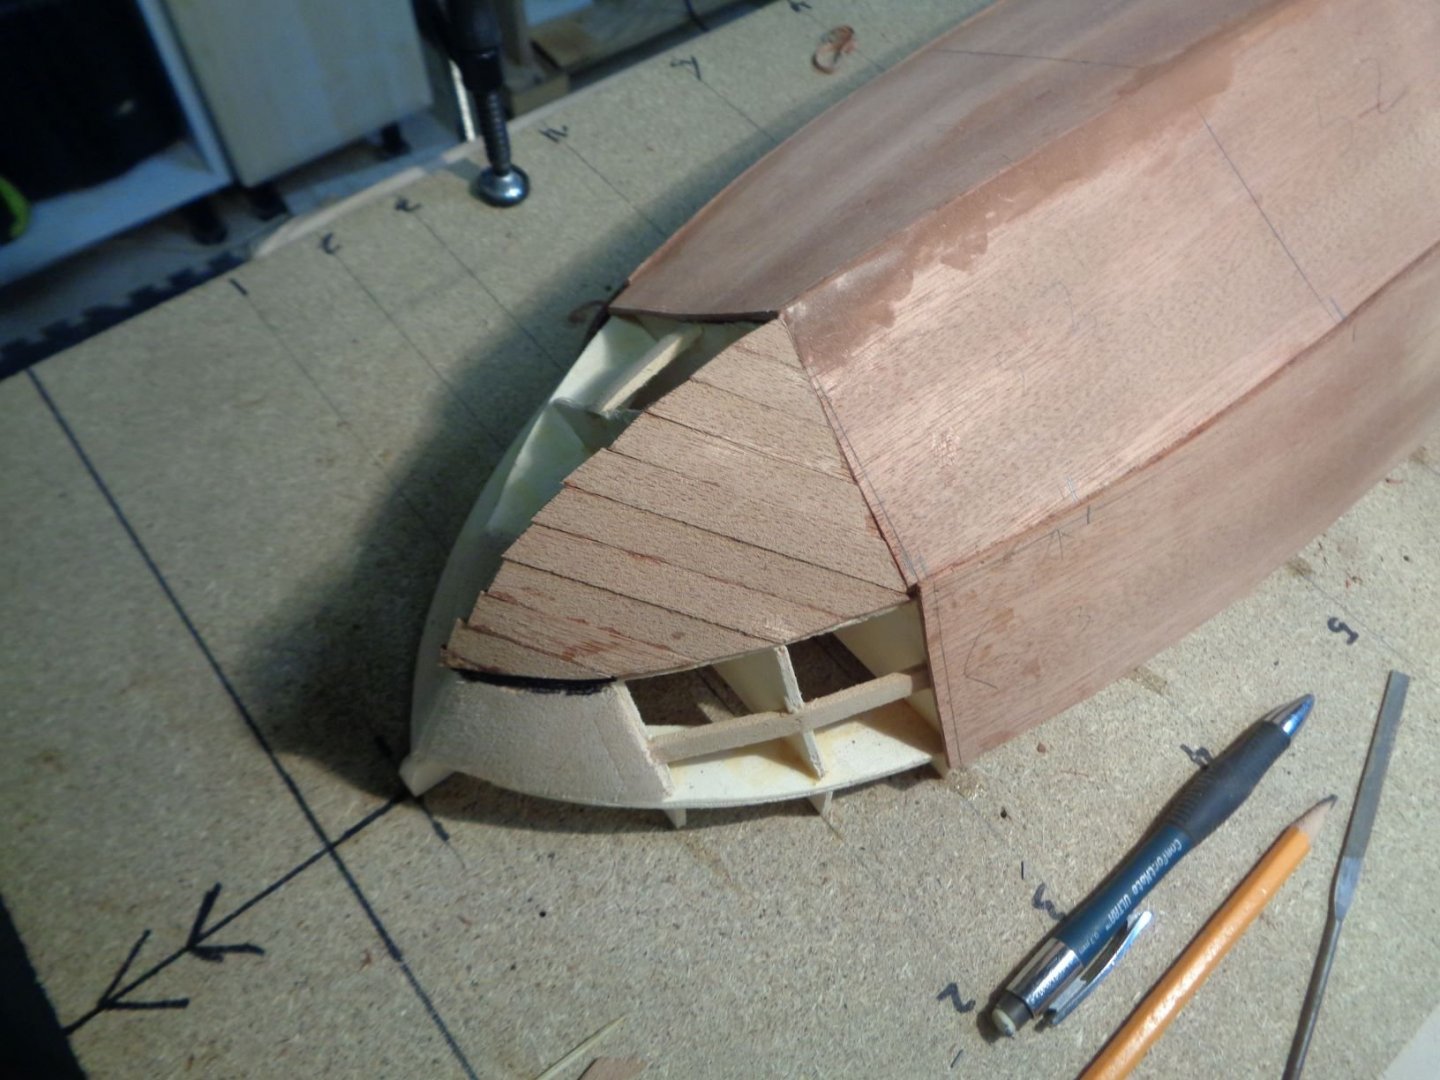
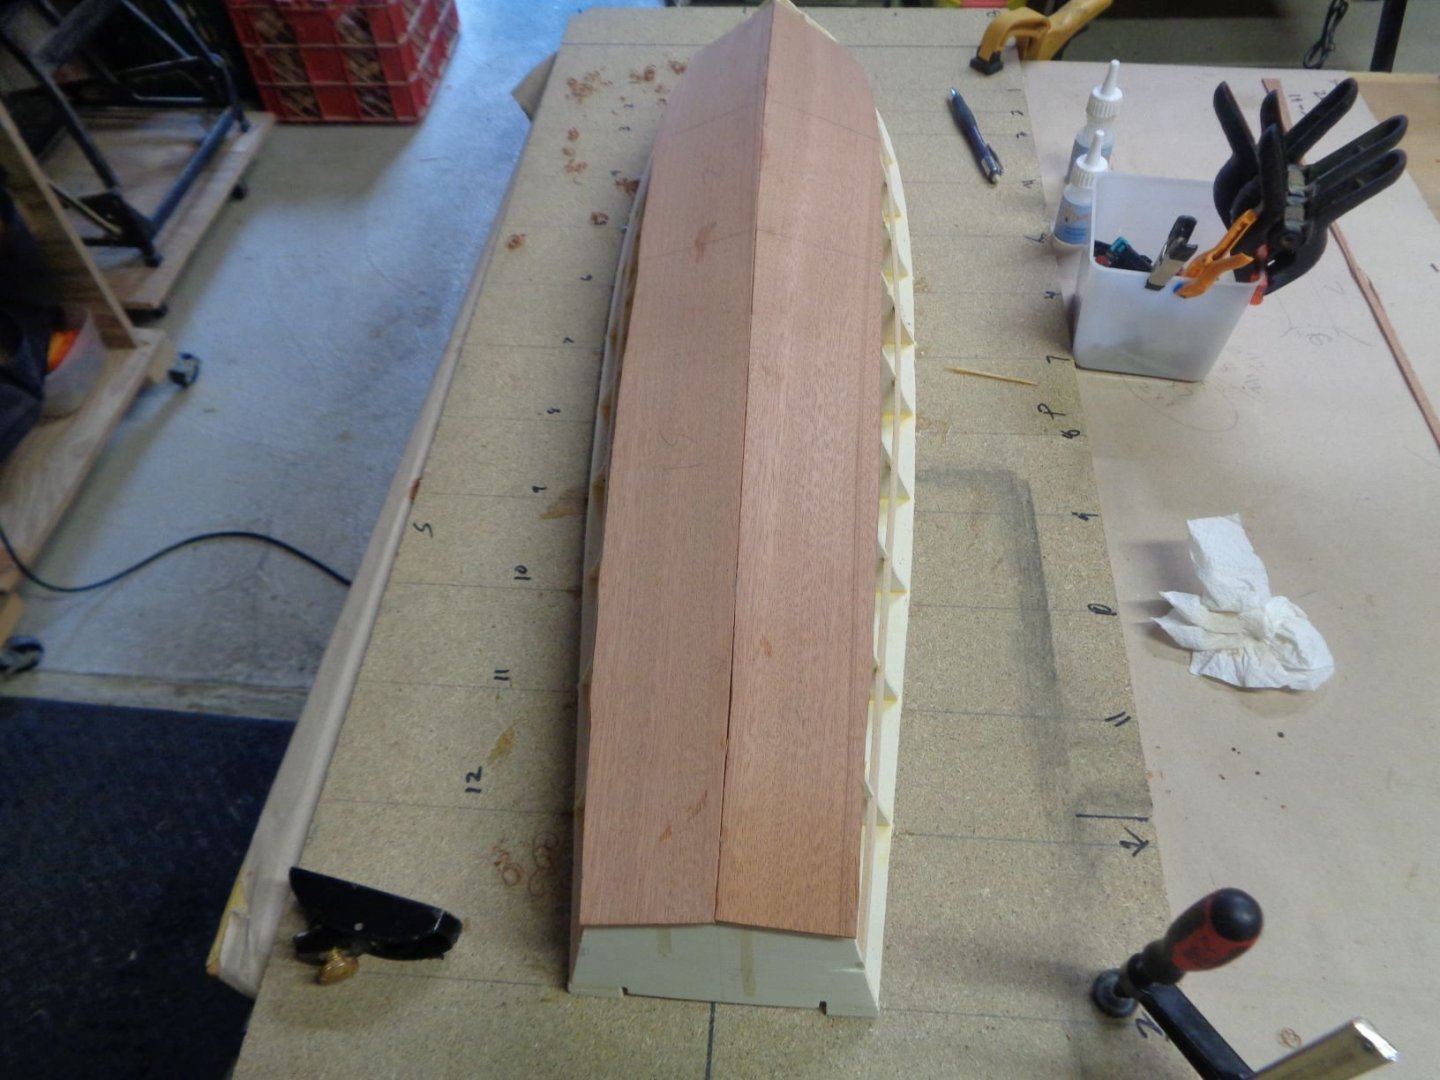
Planking the starboard side bow with 2mmX 5 mm mahogany strips. The Bottom of the bow is at a 45-degree angle with the tops at 30. The PT has sharp lines, the bow forms a fine knife edge First lesson learned here your sides and bottom sheet planking better be dead on straight at the termination point. The starboard side bottom was straight so the fairly even planking However I was slightly off on the port side so will make corrections before planking the port bottom. Given I’m working upside down its easy to misjudge the lines. Nothing a file and sandpaper can’t fix.

- 195 replies
-
- 10
-

-
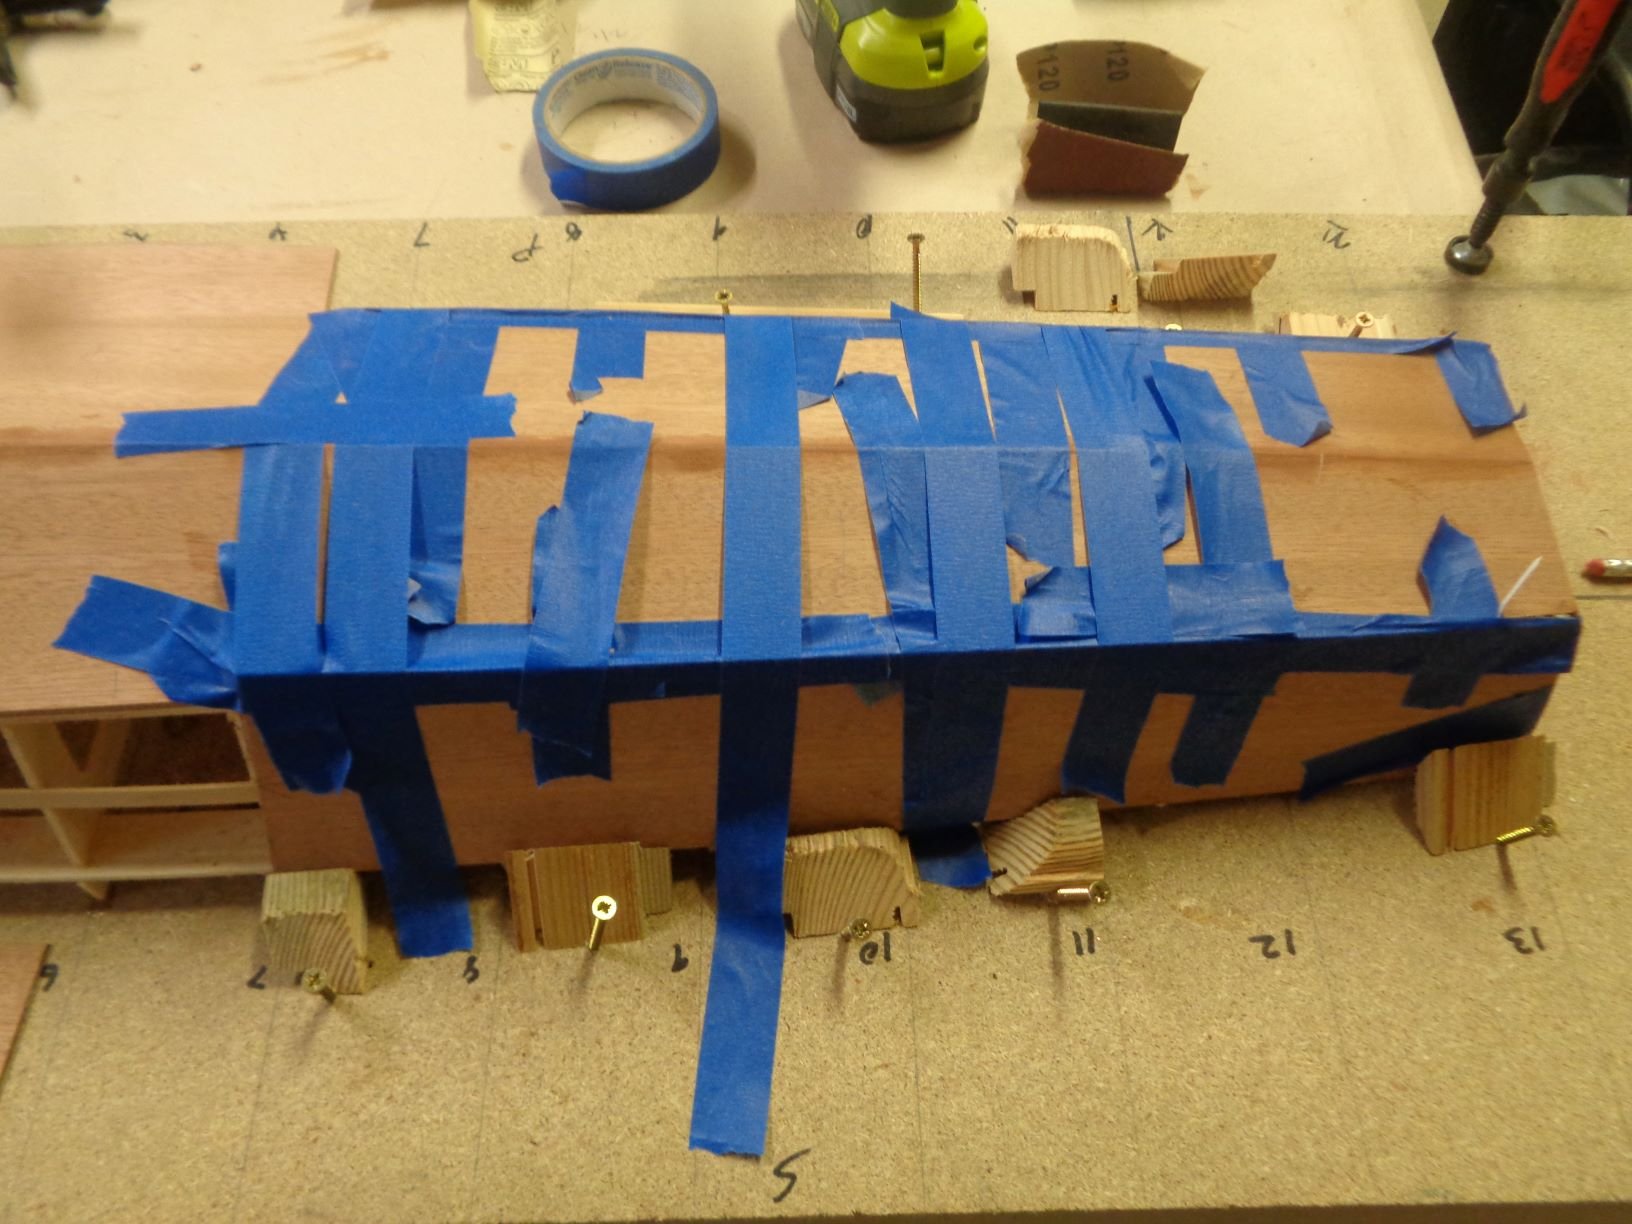
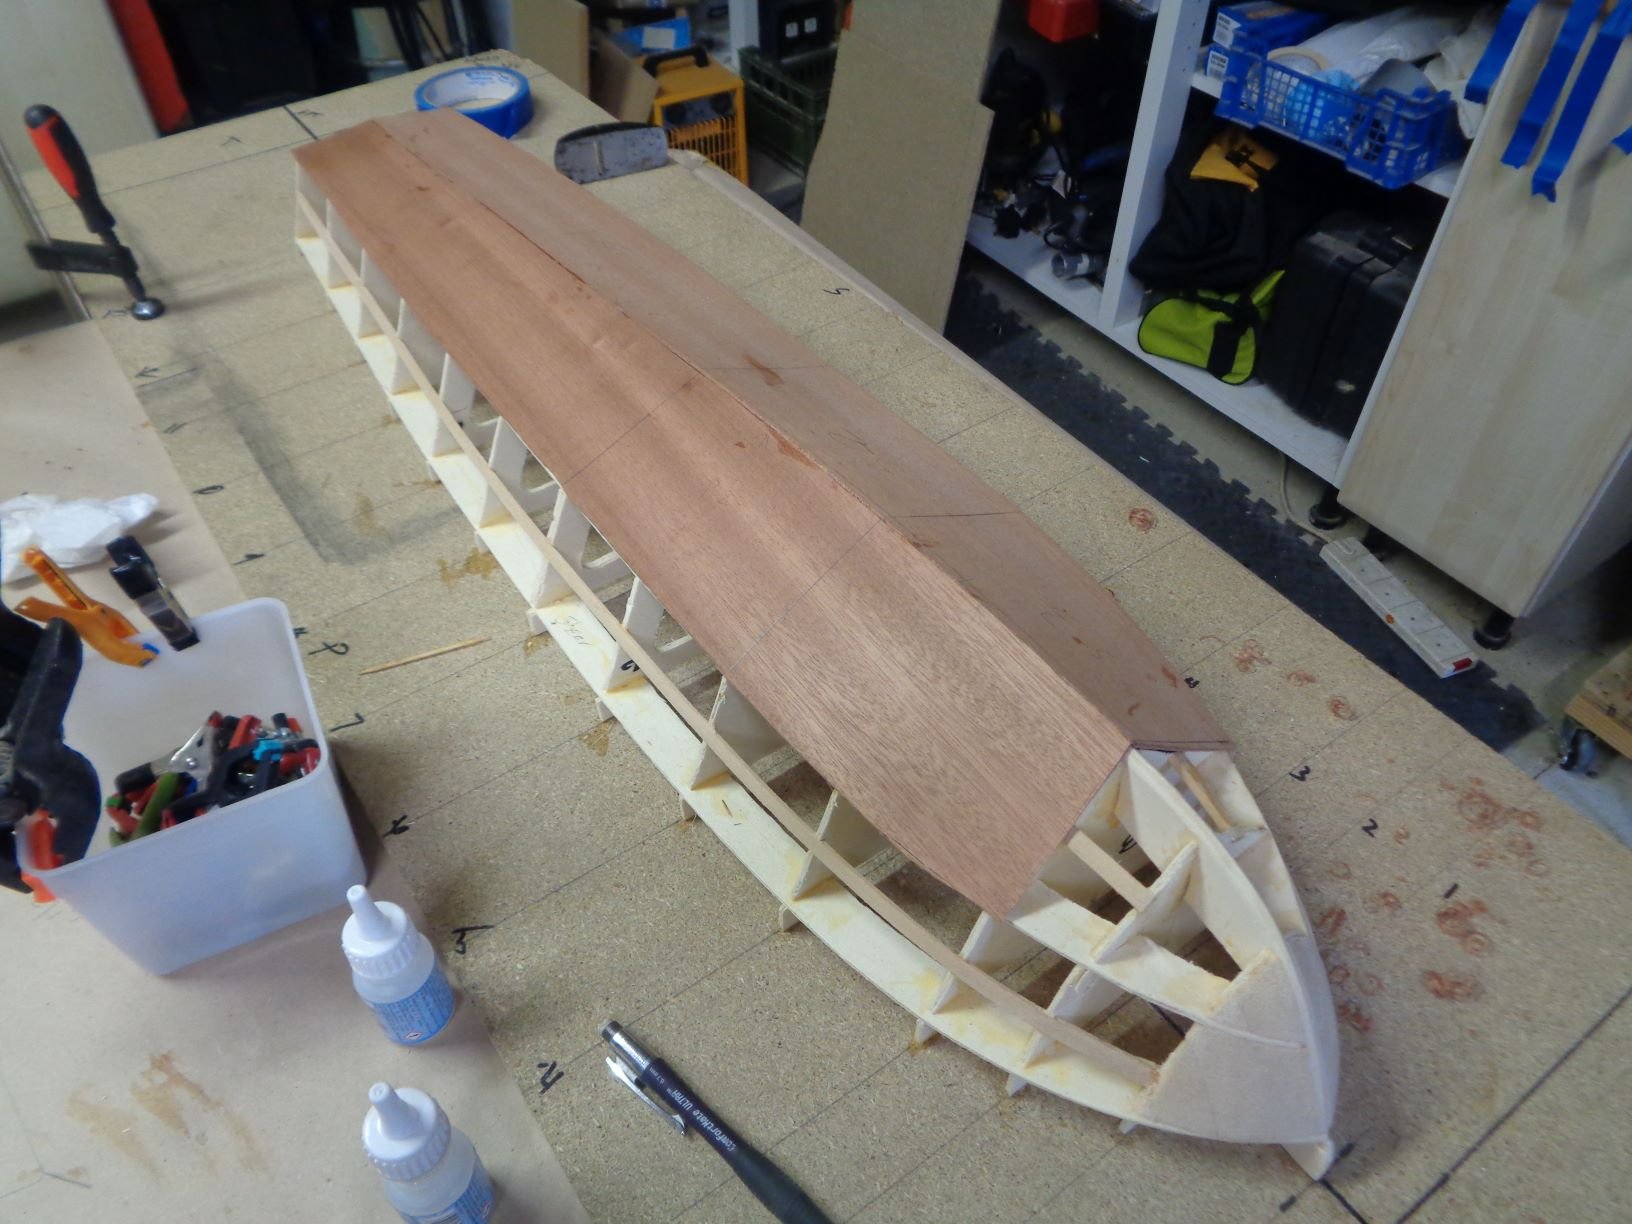
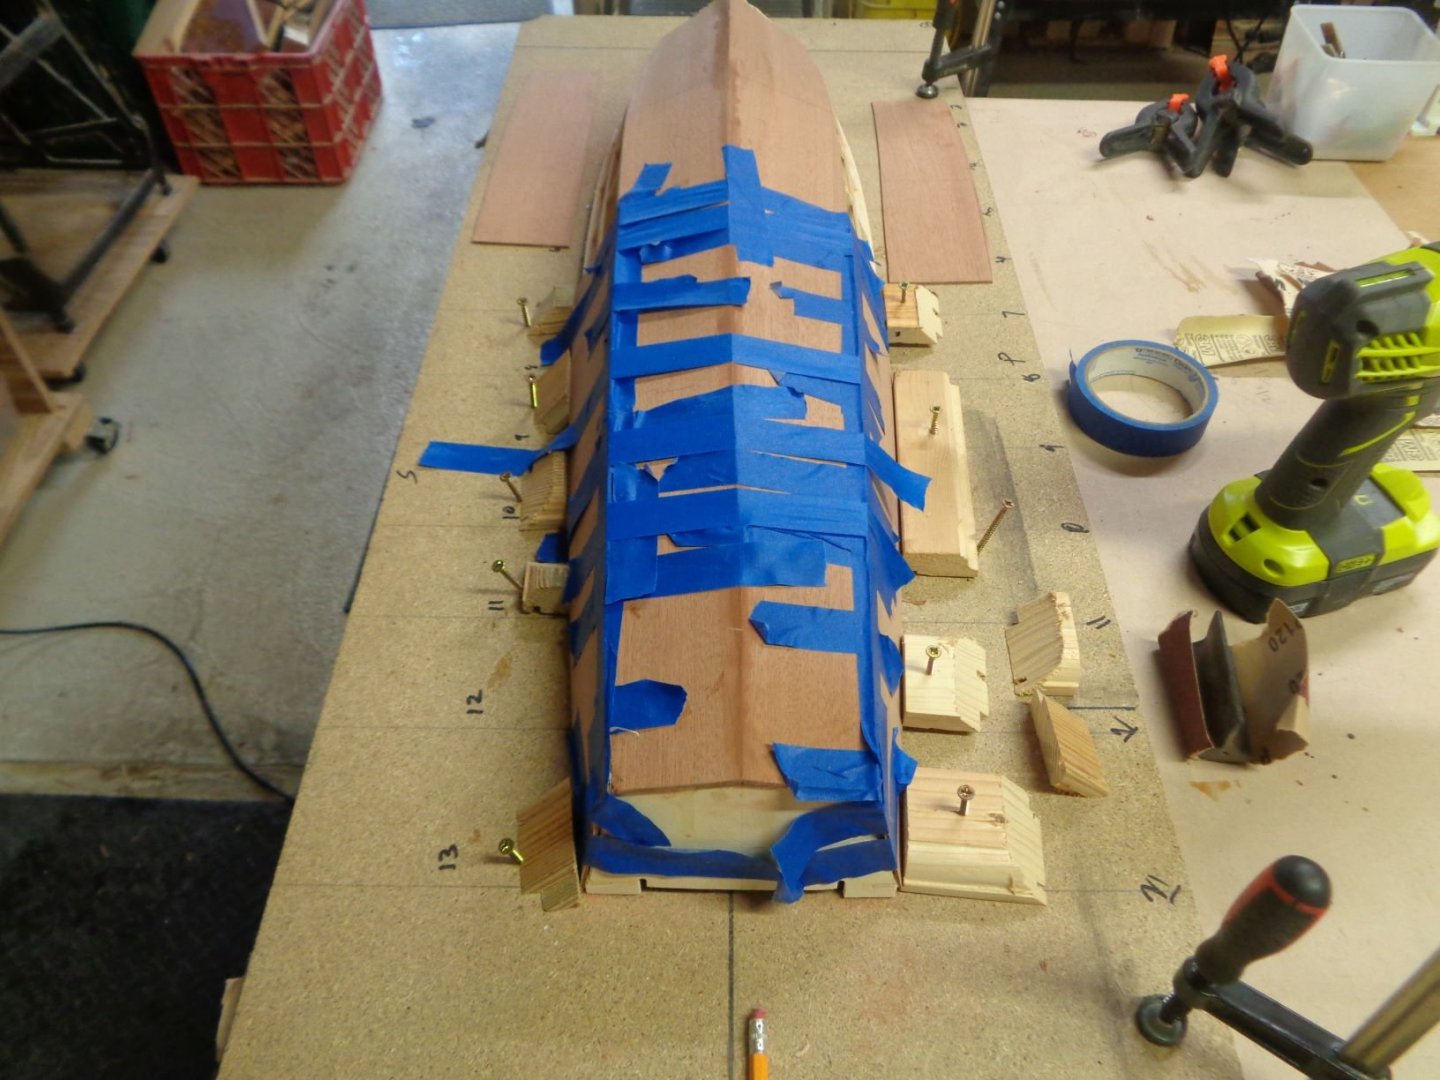
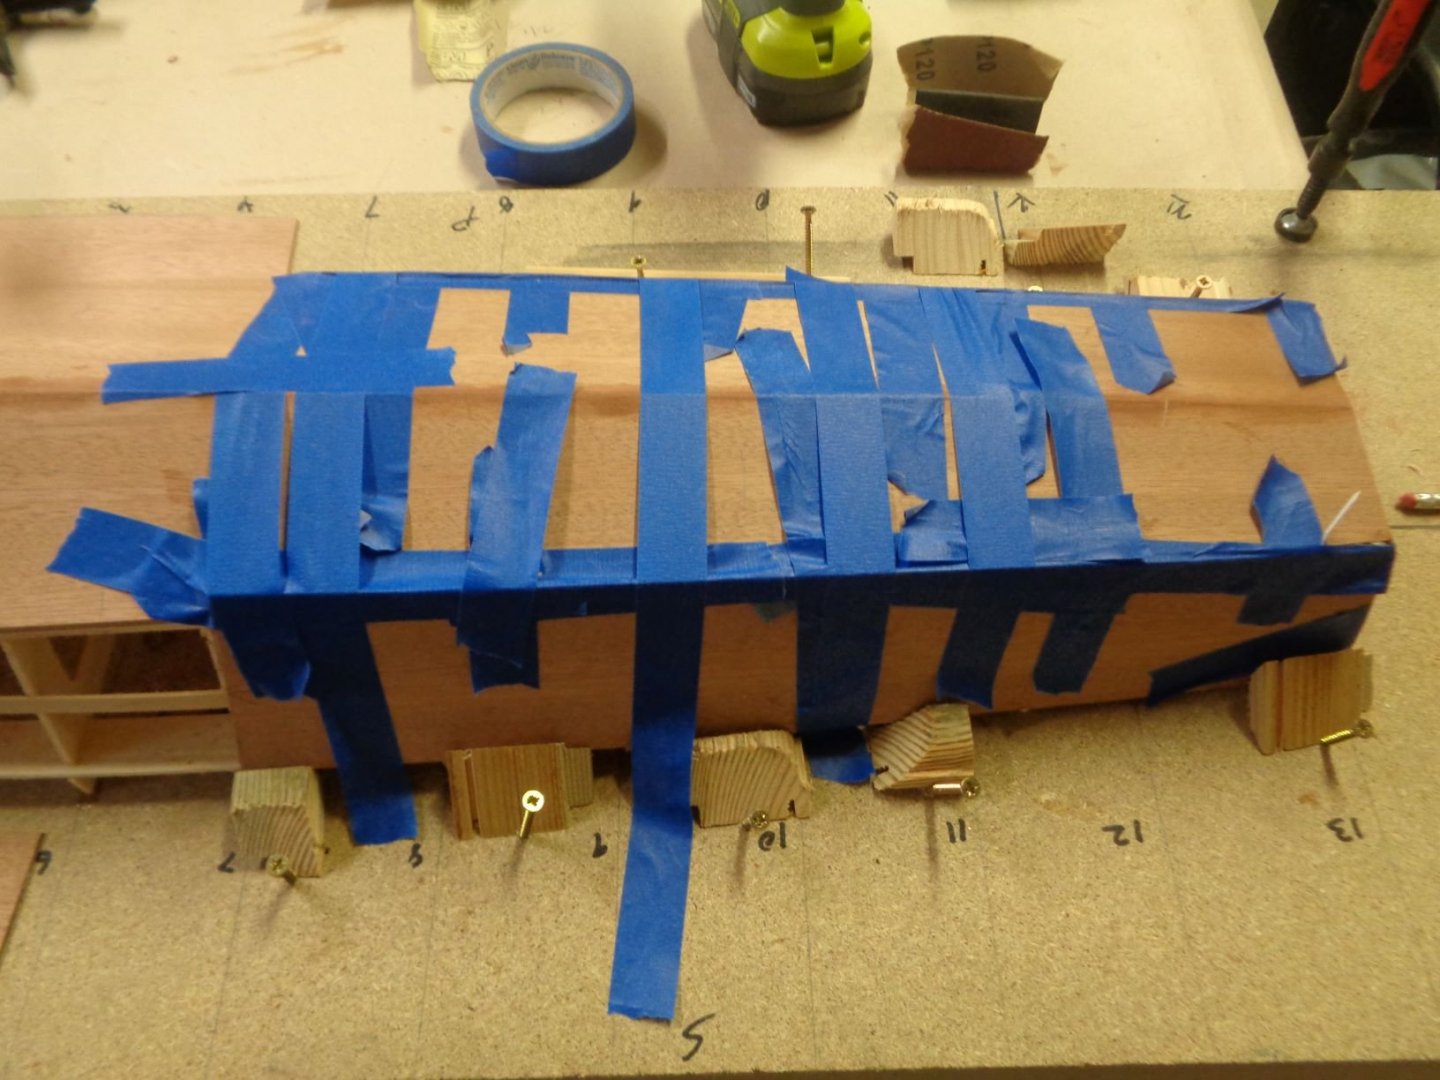
UGLY as it looks it’s effective. I’m quickly learning sheet planking is very different than single strip planking. You have more surface to cover, since you are side planking on the frame upside-down, the top seams (bottom edge for the aft sheet is mainly straight, but the bottom edge curves as you go forward. The screwed in blocks work well for holding the bottom edge firmly in place but given the width and shape of the hull tape lots of tape works best for holding to top edge in place. Before you ask, I did think of using pins to hold it during the drying, but the edges of frames are not made of solid material and will not hold the pins under pressure.
- 195 replies
-
- 12
-
-
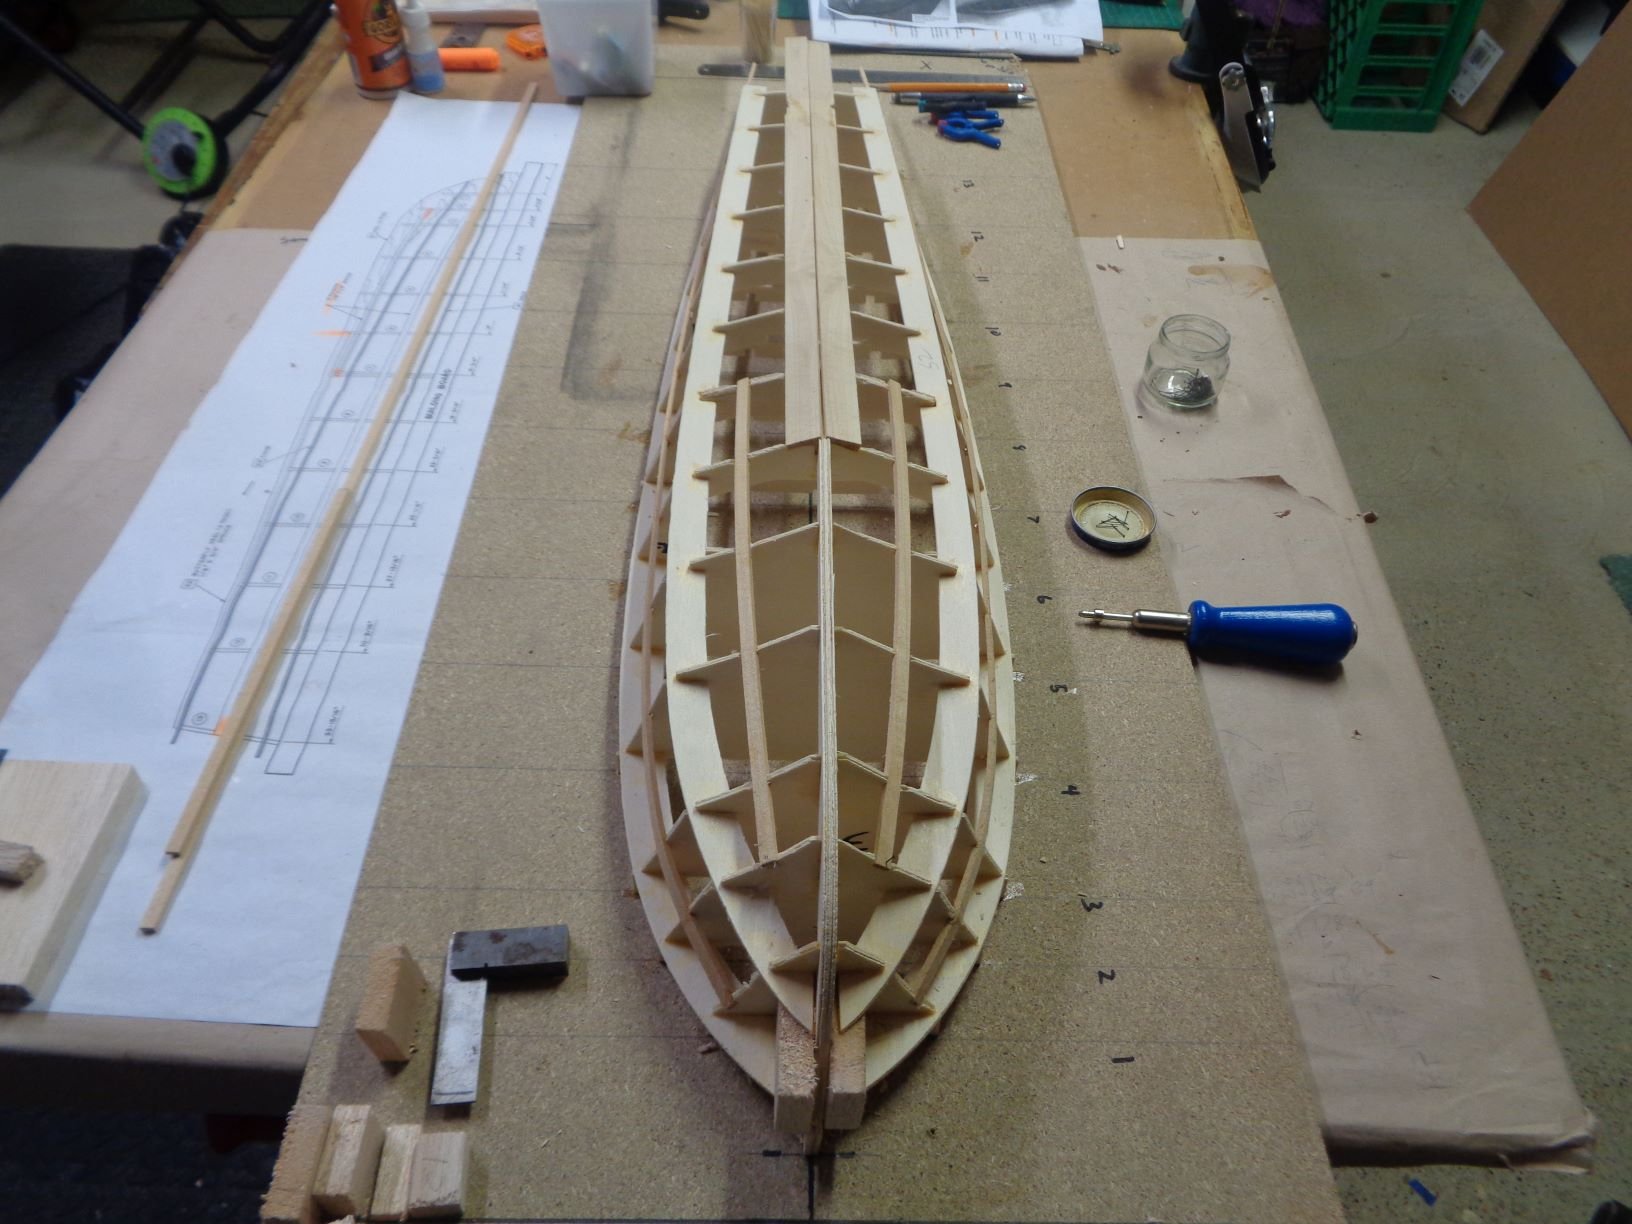
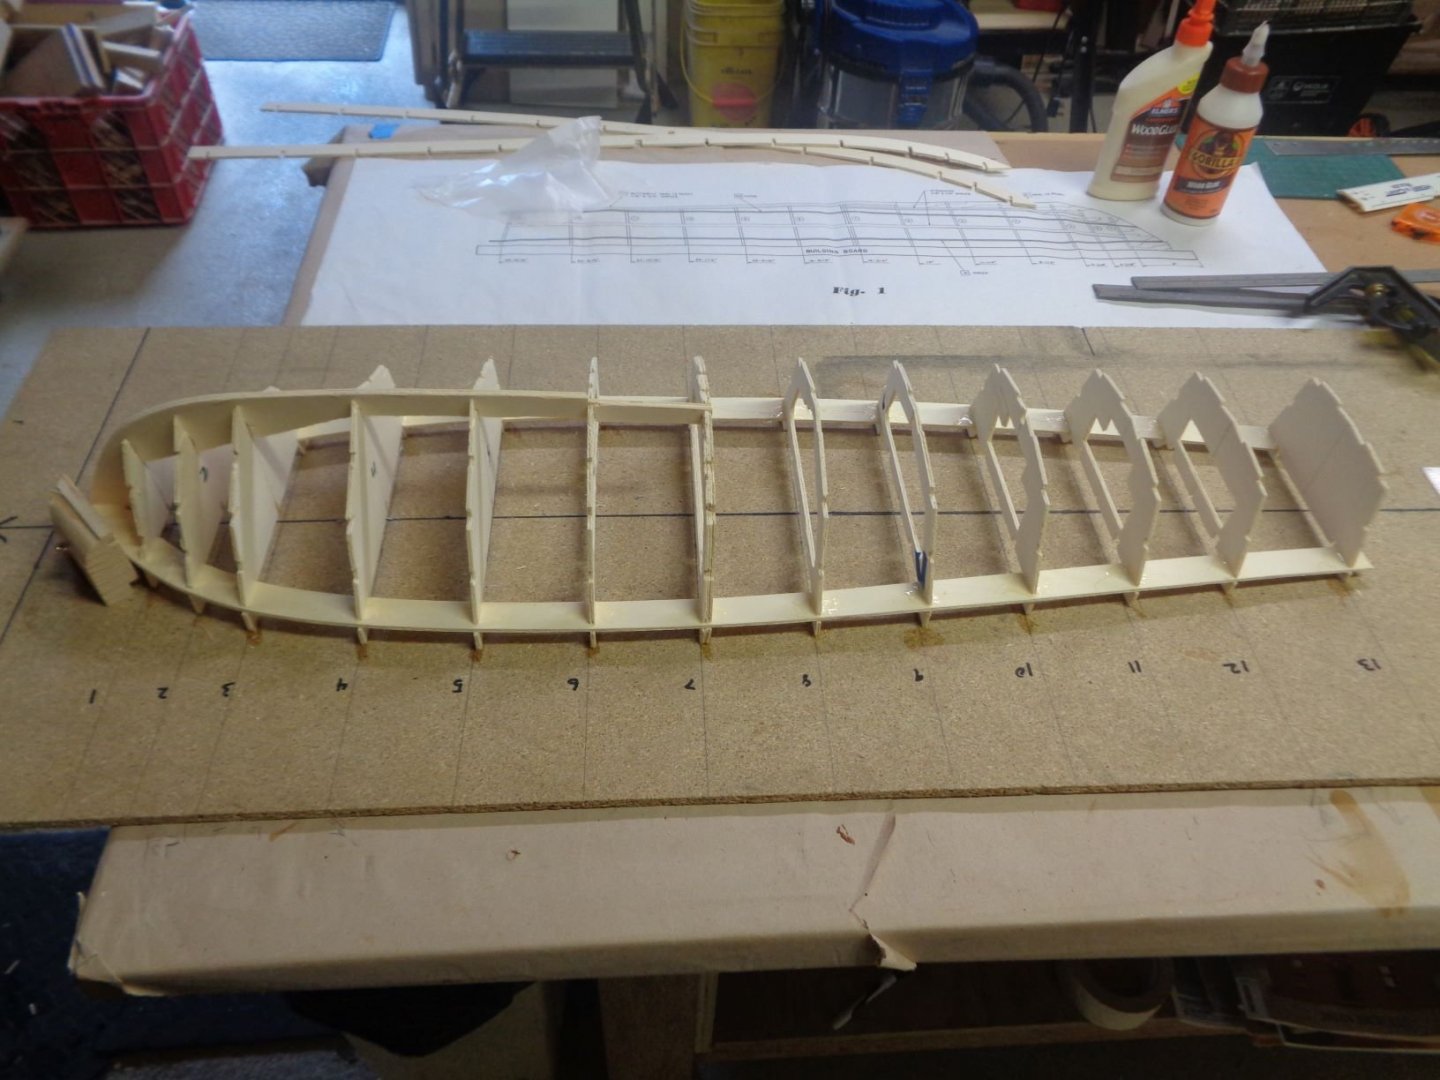
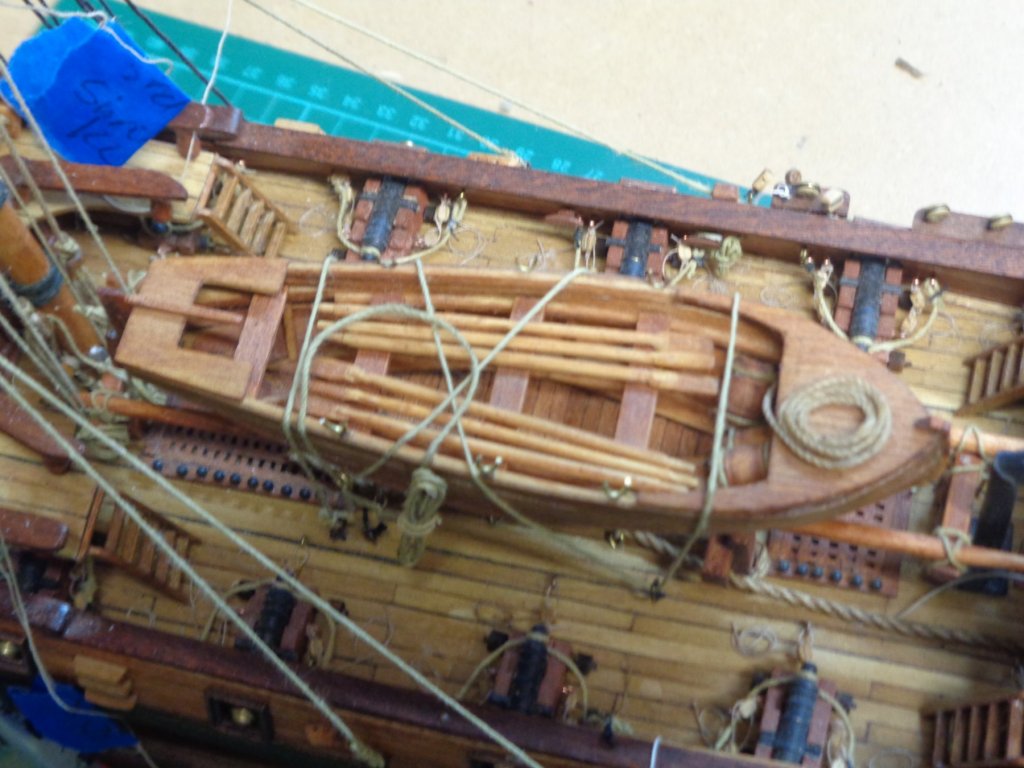
I’m really enjoying the build, it’s fun and different. The PTs are great wooden crafts with a famous history. The men who servered on them have great stories, kind of the rouges of the Navy, no dress whites here. The stringers, chines and sheers all cut Aft flush with frame 13, a solid transom will be added after hull planking.
-
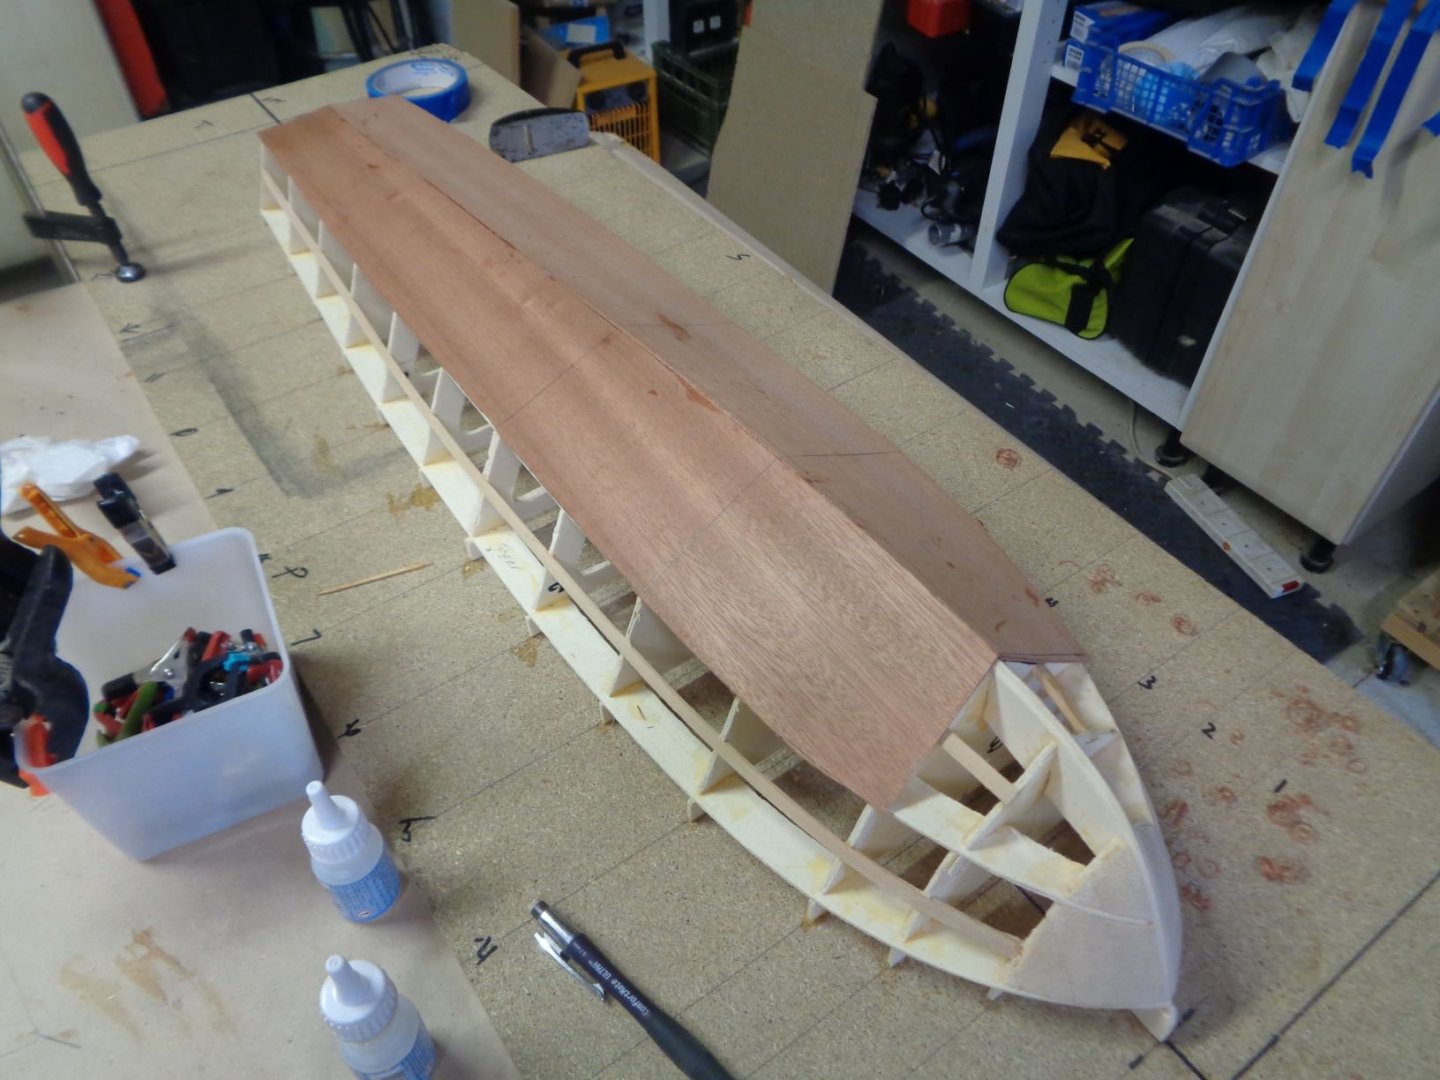
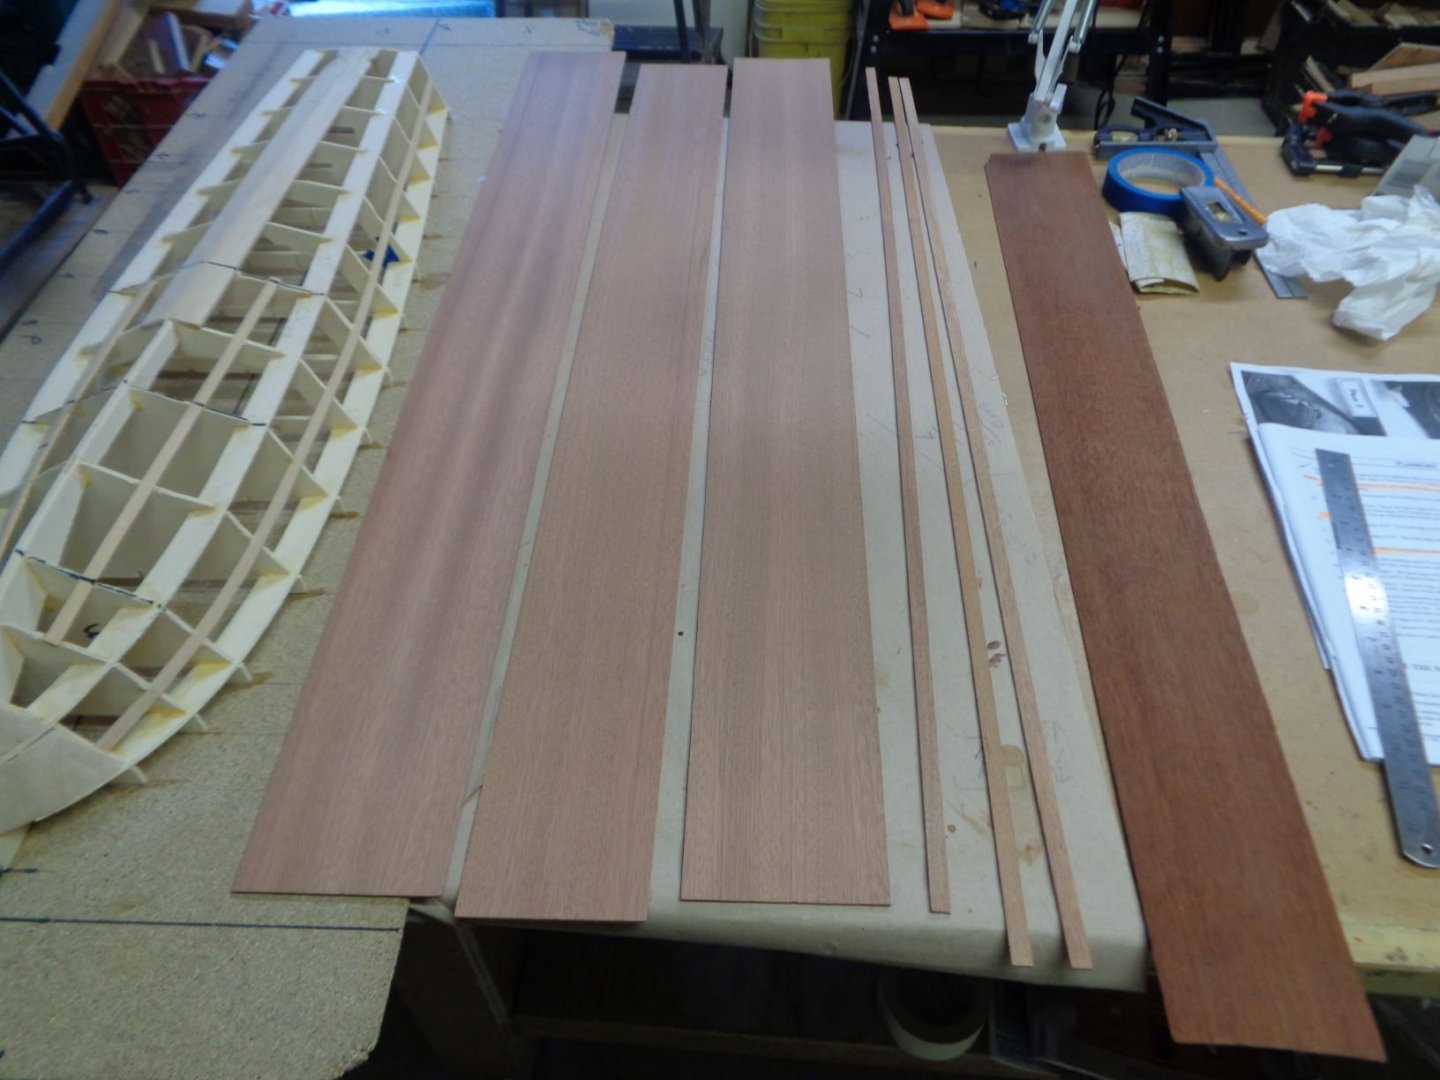
Bottom planking with mahogany. The Dumas plans called for PVC planking using 3 pre-cut sections per side. I went with I full section preside to eliminate seams and get a better shape. Will still have to do some light filling, then plane & sand to shape.
- 195 replies
-
- 14
-
-
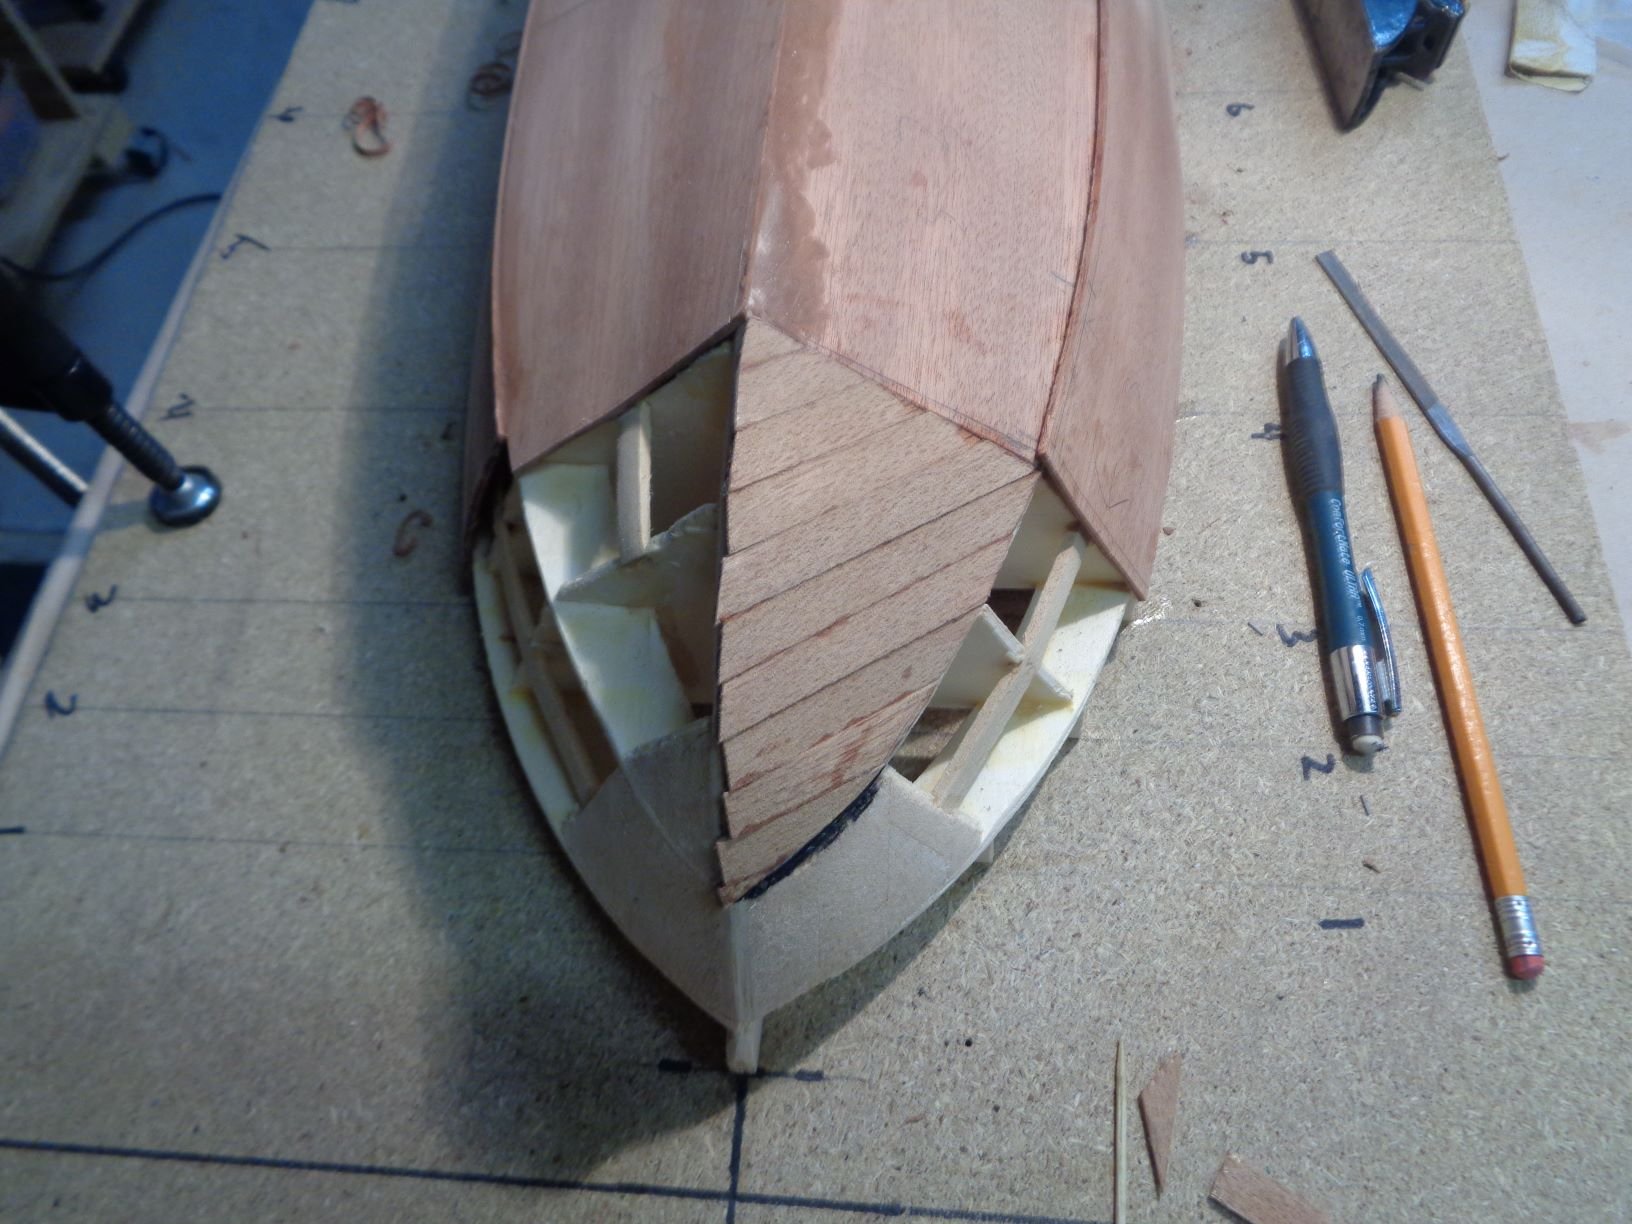
Bow filler shaped, frame ready for hull planking 2mm Mahogany sheets and strips for the planking have arrived.

- 195 replies
-
- 10
-
-
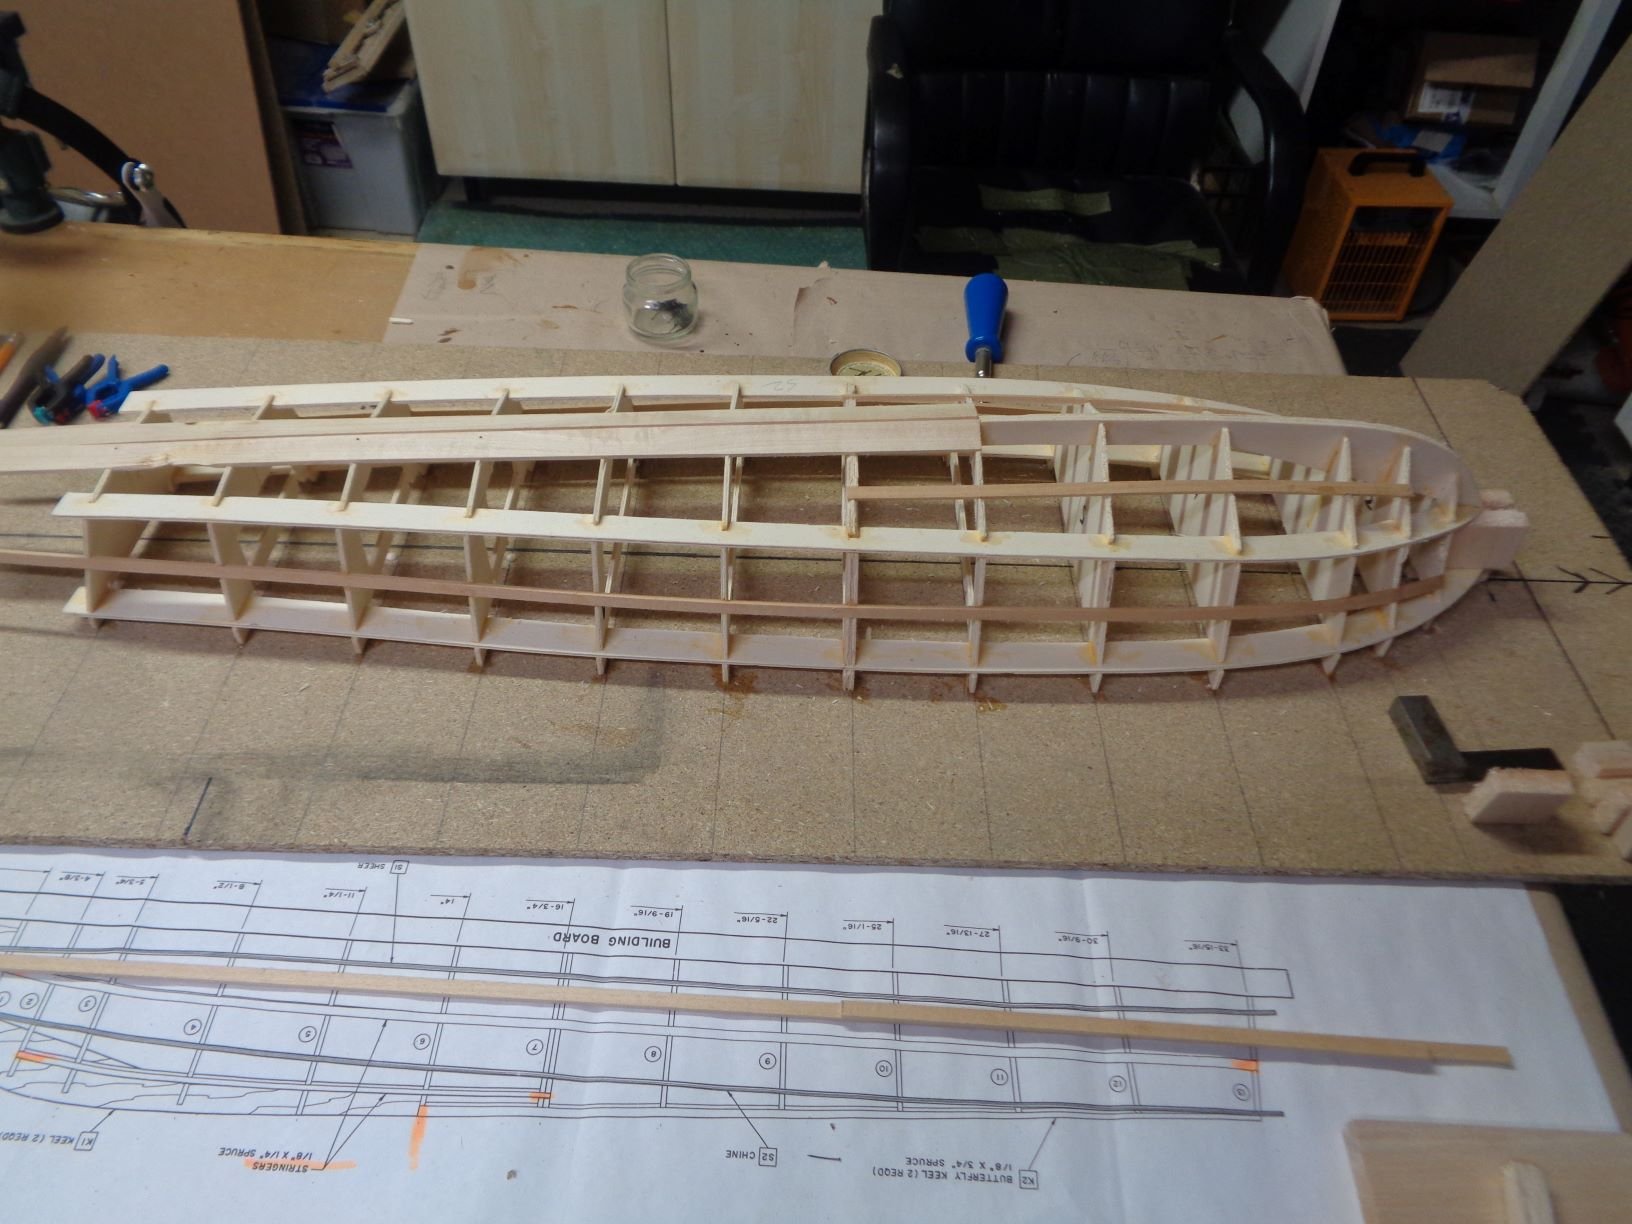
Butterfly Keel and stringers, to keep the shape I had to use planking pins to hold the in place, then removed when set.


- 195 replies
-
- 15
-
-
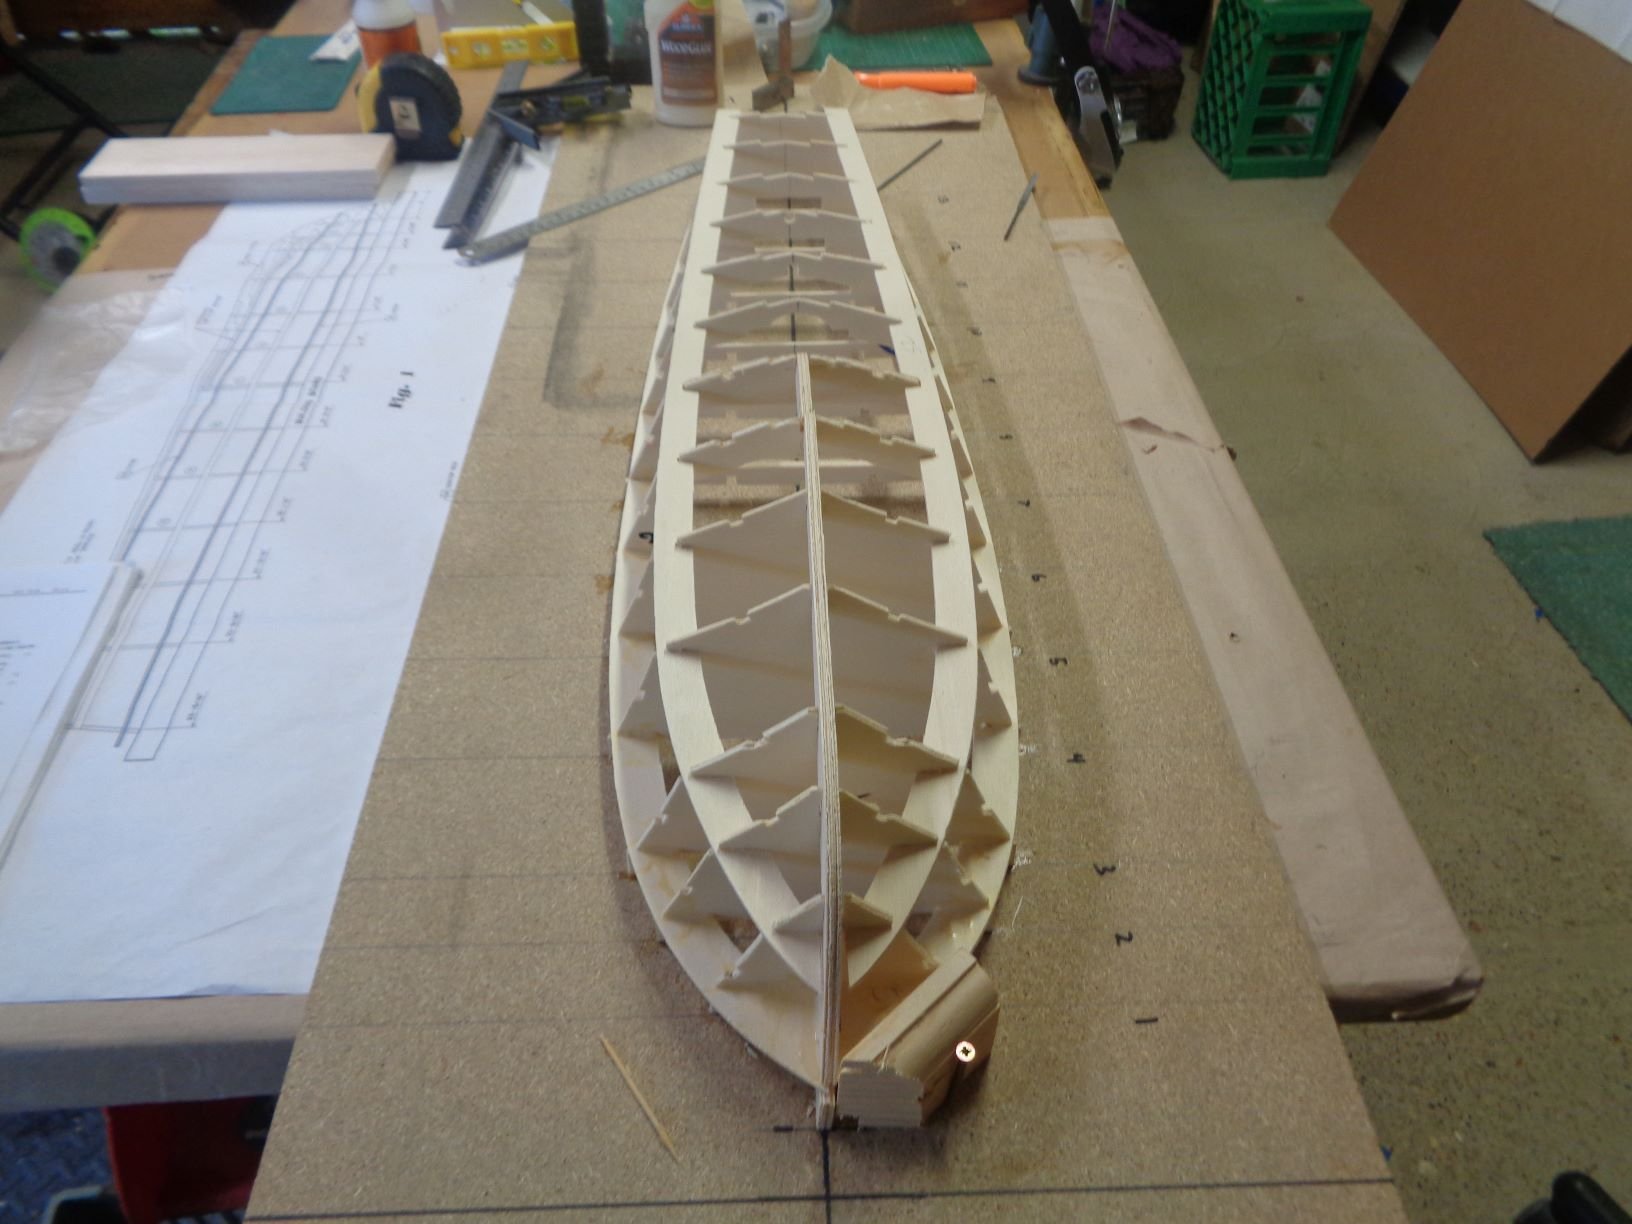
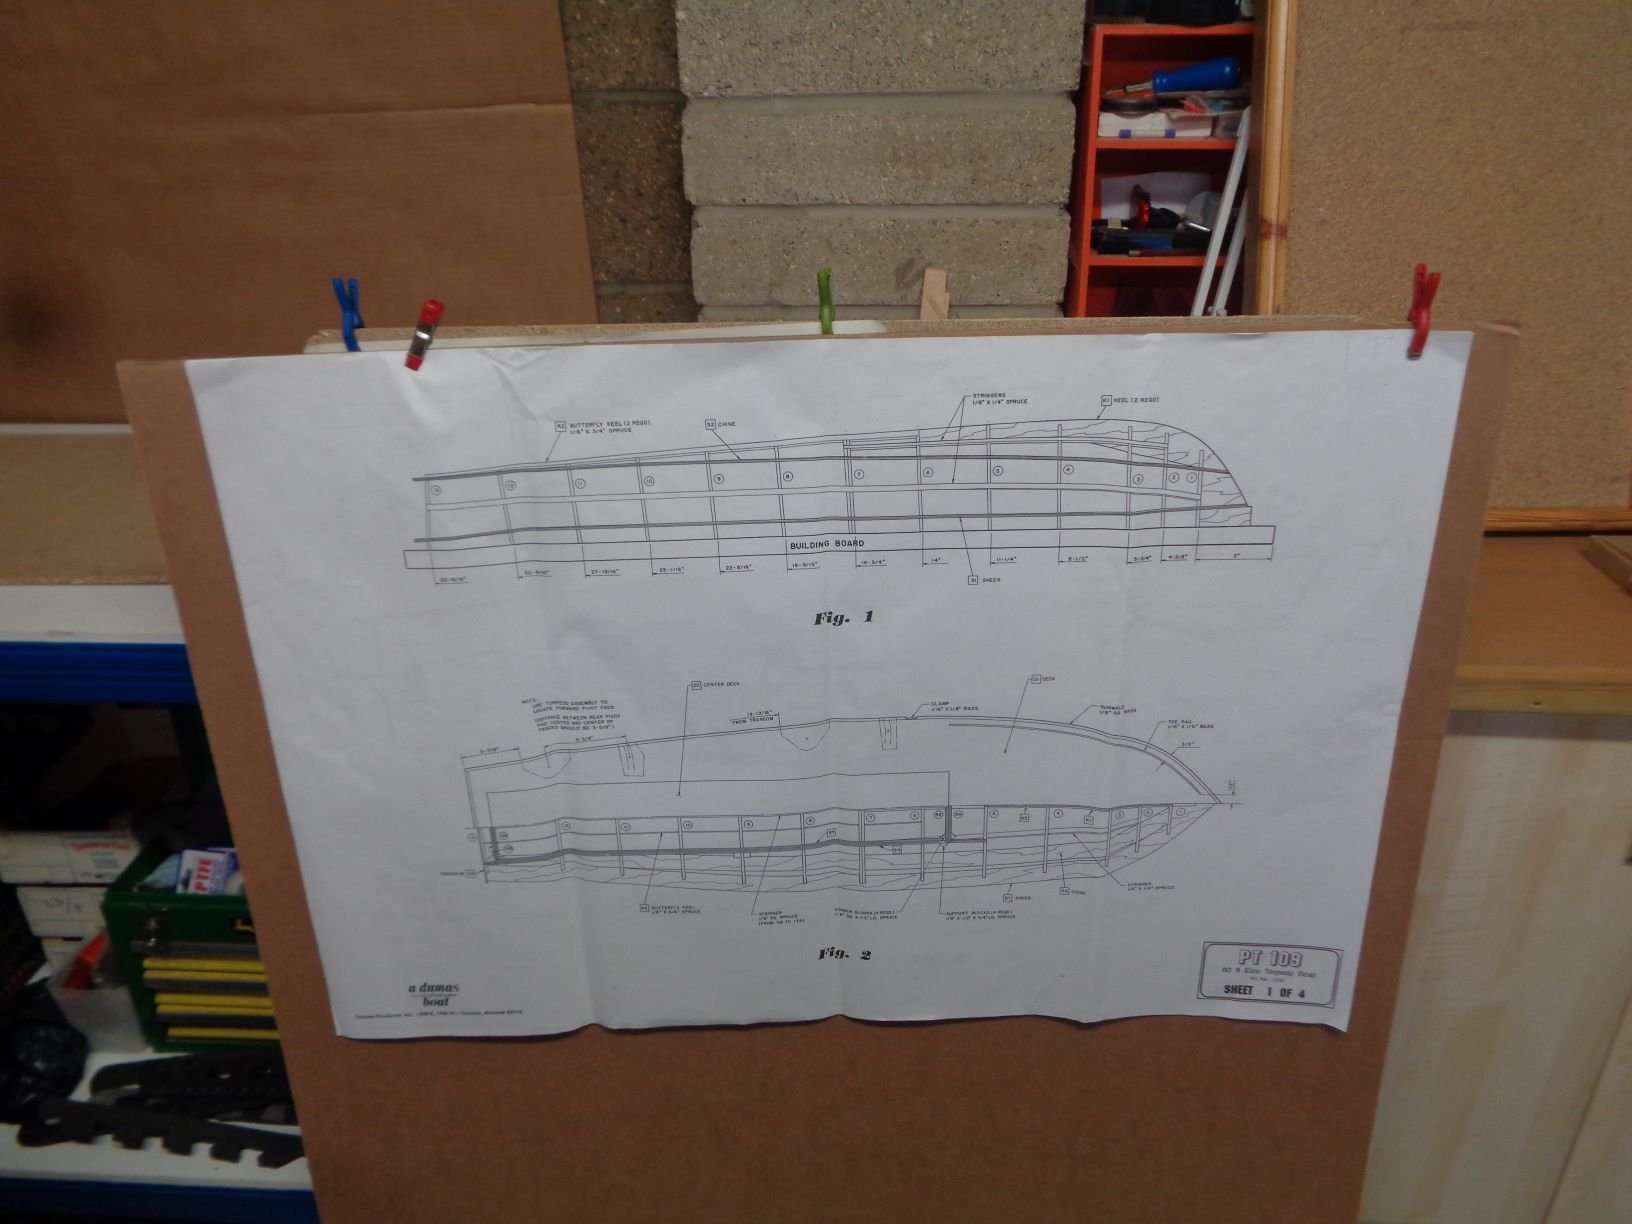
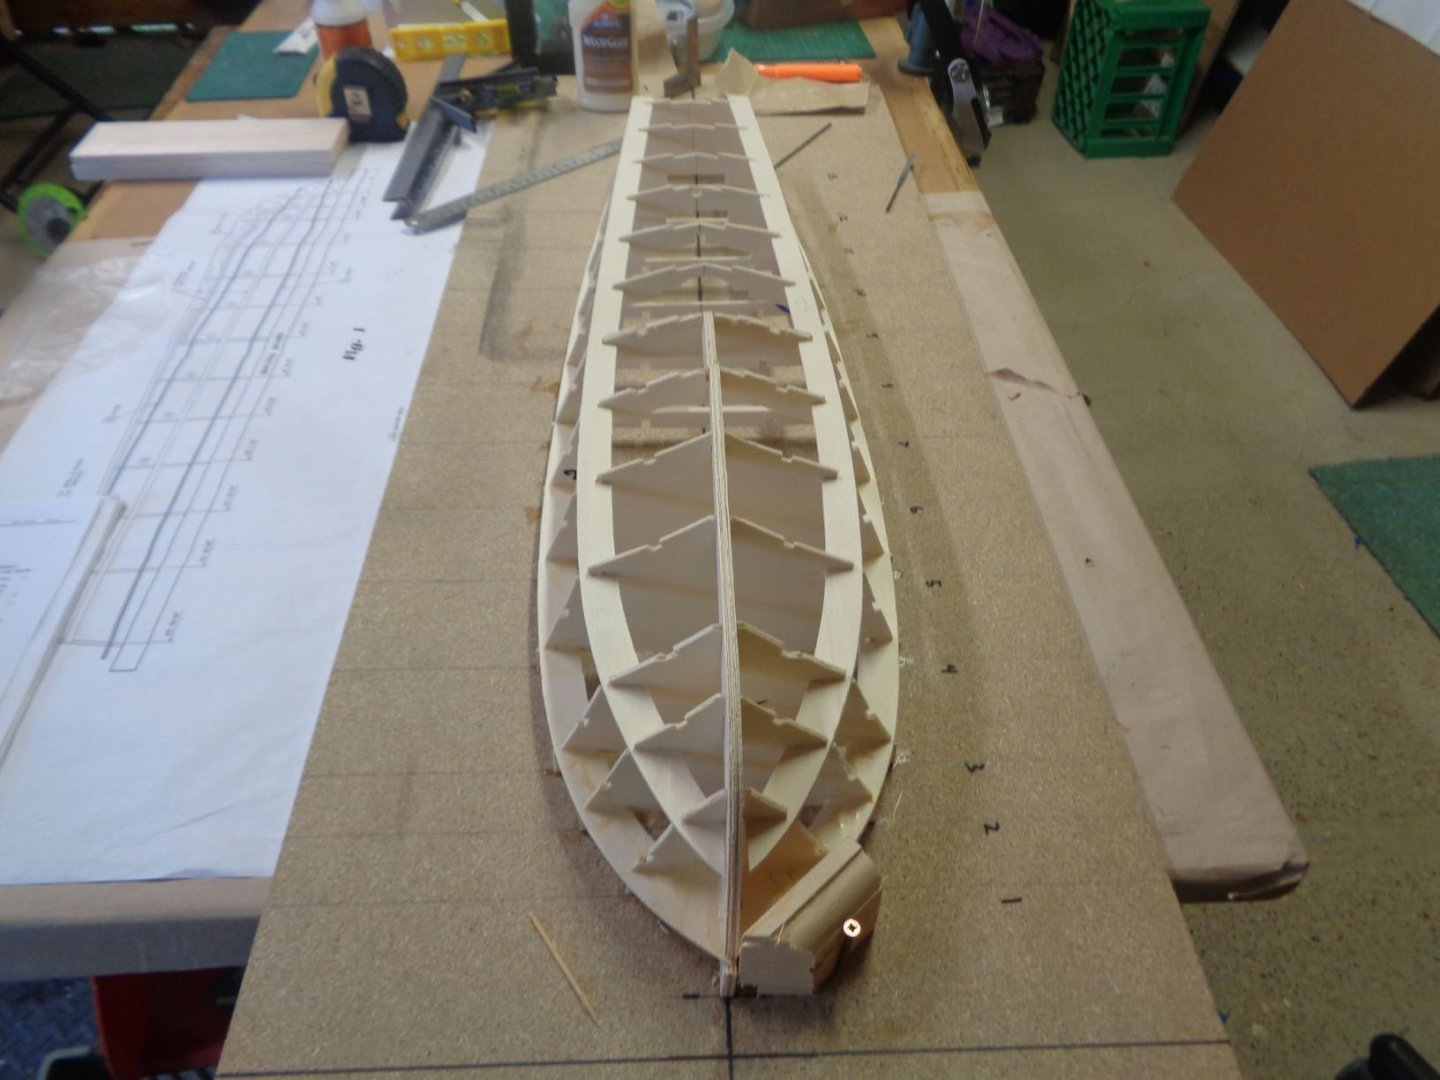
For framing and planking the PT boats were built upside down. The prefabricated bulkheads were lined up on a template on the floor of the building shed. Following this original building style. A building board (shed floor) is marked out following measurements from the plans to form a template for centring the keel, and lines for placing the bulkheads. The keel and frame 1-6 are placed on the board with the keel and frame 1 and 6 glued to the board. A lower sheer is added to both sides & the rest of the frames a dry fitted, checked for alinement, the feet of the frames are glued to the board. Then the chine is added to the upper frames once the lines look good the frames are glued to the keel. Being a different way to build some trial and error came into play, however after working at getting the whole thing centred it was a simple process, the only error was frame 1 moved during drying and did not fit square to the keel. I used a holding block to help get the frame & sheer as close as stress would allow.
-
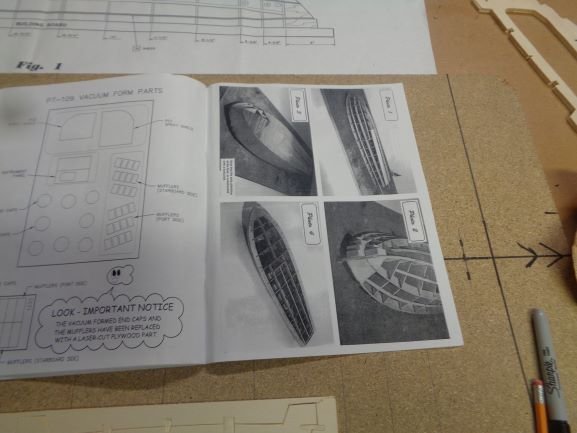
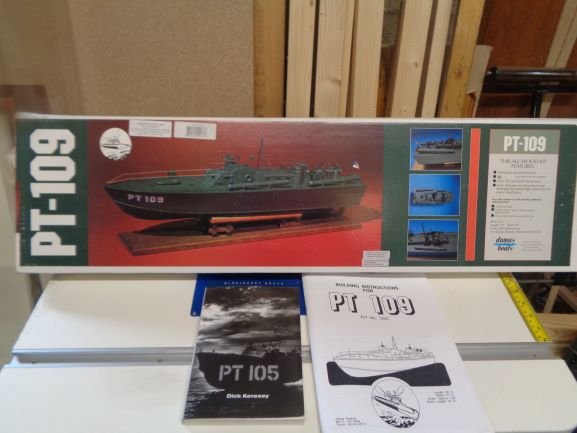
After the Rattlesnake I wanted to do something different. I have always been interested in the WW2 PT (Patrol Torpedo) boat. My build will be modelled on PT 105 commanded by Dick Keresey. Yes, believe it or not they made another PTs besides the 109. The 105 was an 80-foot Elco Torpedo boat 1942, built of spruce, oak and mahogany and made watertight by marine plywood covering. The Dumas kit 1233, 4 large sheet plans, decent 45-page instruction book, ok pictures, good material list. Kit is supplied with Mahogany, birch, and poplar ply. Dumas decided to replace the Mahogany sheet hull planking with 2mm PVC they say it makes for a smother finial finish. OK however if I wanted to build a PVC boat, I would have bought one. I will buy 2mm Mahogany sheets to do the hull planking properly

- 195 replies
-
- 13
-
-
Mike When I finish the case for the Rattlesnake my next build is the Dumas 1:30 PT boat. My first time doing a hull like this so I might be asking for a few pointers, not real sure about this upside down, glue to a working board idea the plans calls for. I have also used Cornwall models for years, great place to get your timber MOG
- 52 replies
-
- 3
-
-
- dumas
- Chris-Craft
- (and 1 more)
-
I wanted a change from rigged sailing ships, have always been interested in the Pt boats, history, missions, crews. Plus the Pts were made of wood. I like to build my own cases, it’s good work and allot cheaper, I use plastic sheet instead of glass, cuts down on the weight and its safer for the ship if you ever have an accident. Wonder if a short build log for the case might be of interest ???
-
Thanks Jon, Your trusted advice, great building skills and outstanding build log had a major impact on my build. I'm going to build the display case next. Then for the start of my second & final retirement I'm going to try my hand at WW2 Pt Boat going to us Duma 1:30 POB wood kit as my starting point, then kit bash.
-
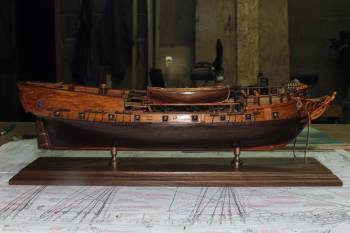
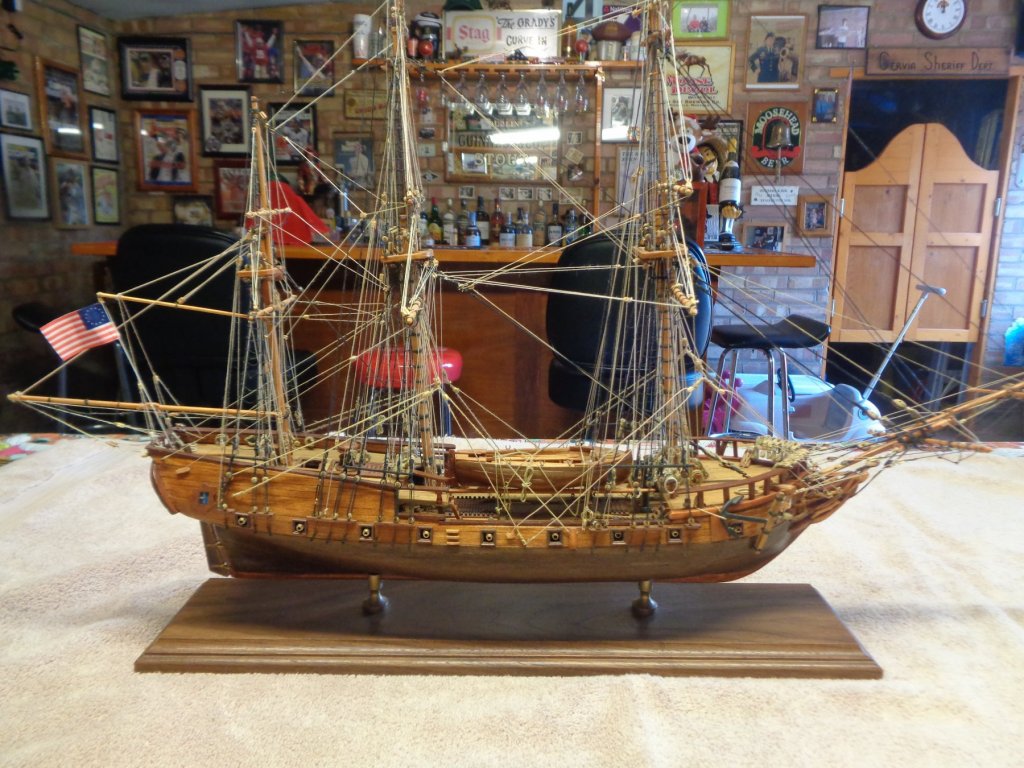
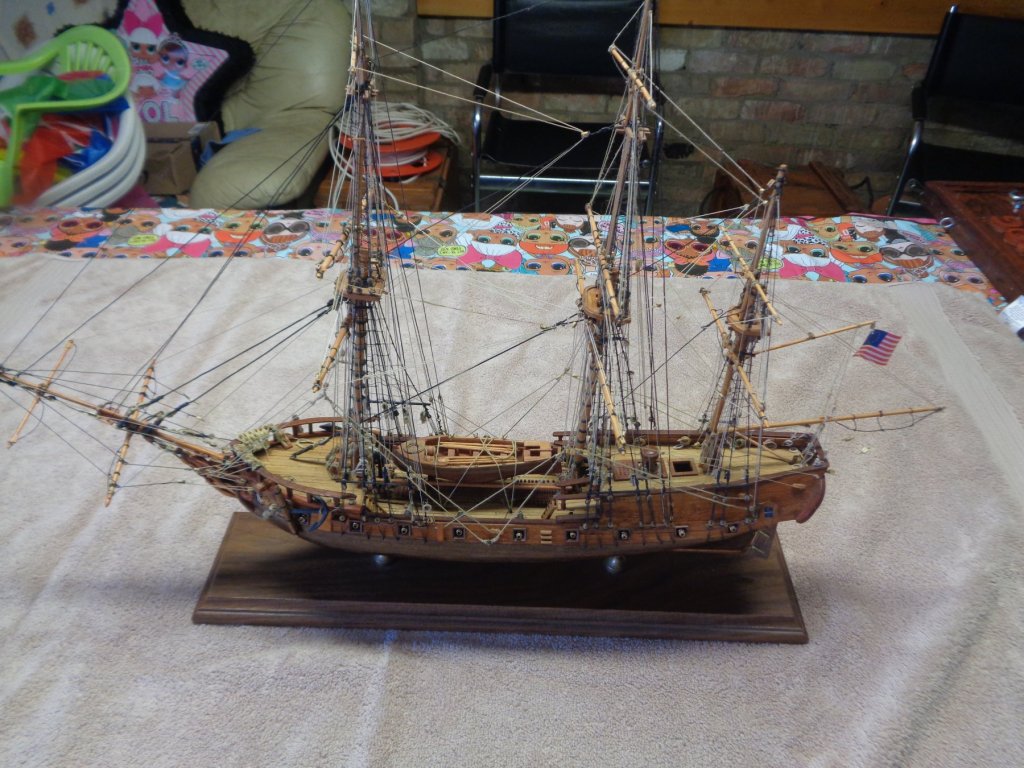
I have been on the journey for over 8 years, it has taken me down a road filled with Ups, downs, joys, frustration, learning, satisfaction and know pride of accomplishment. I have said she’s not best looking one at the ball, but she’s mine, built my way, for me , at the end of the day I believe that’s why we all love this crazy world of ship building. My thanks to the many members who provided much needed advice and ideas along the way. Special thanks to JS Gerson and Martin W. I would also like to thank the staff of MSW for providing an excellent site, for keeping the art of ship building alive. The build may be complete but know its time to build the case, to keep her save for many years to come. Again thanks for all the support MOG
- 57 replies
-
- 5
-
-
- rattlesnake
- model shipways
- (and 1 more)
-
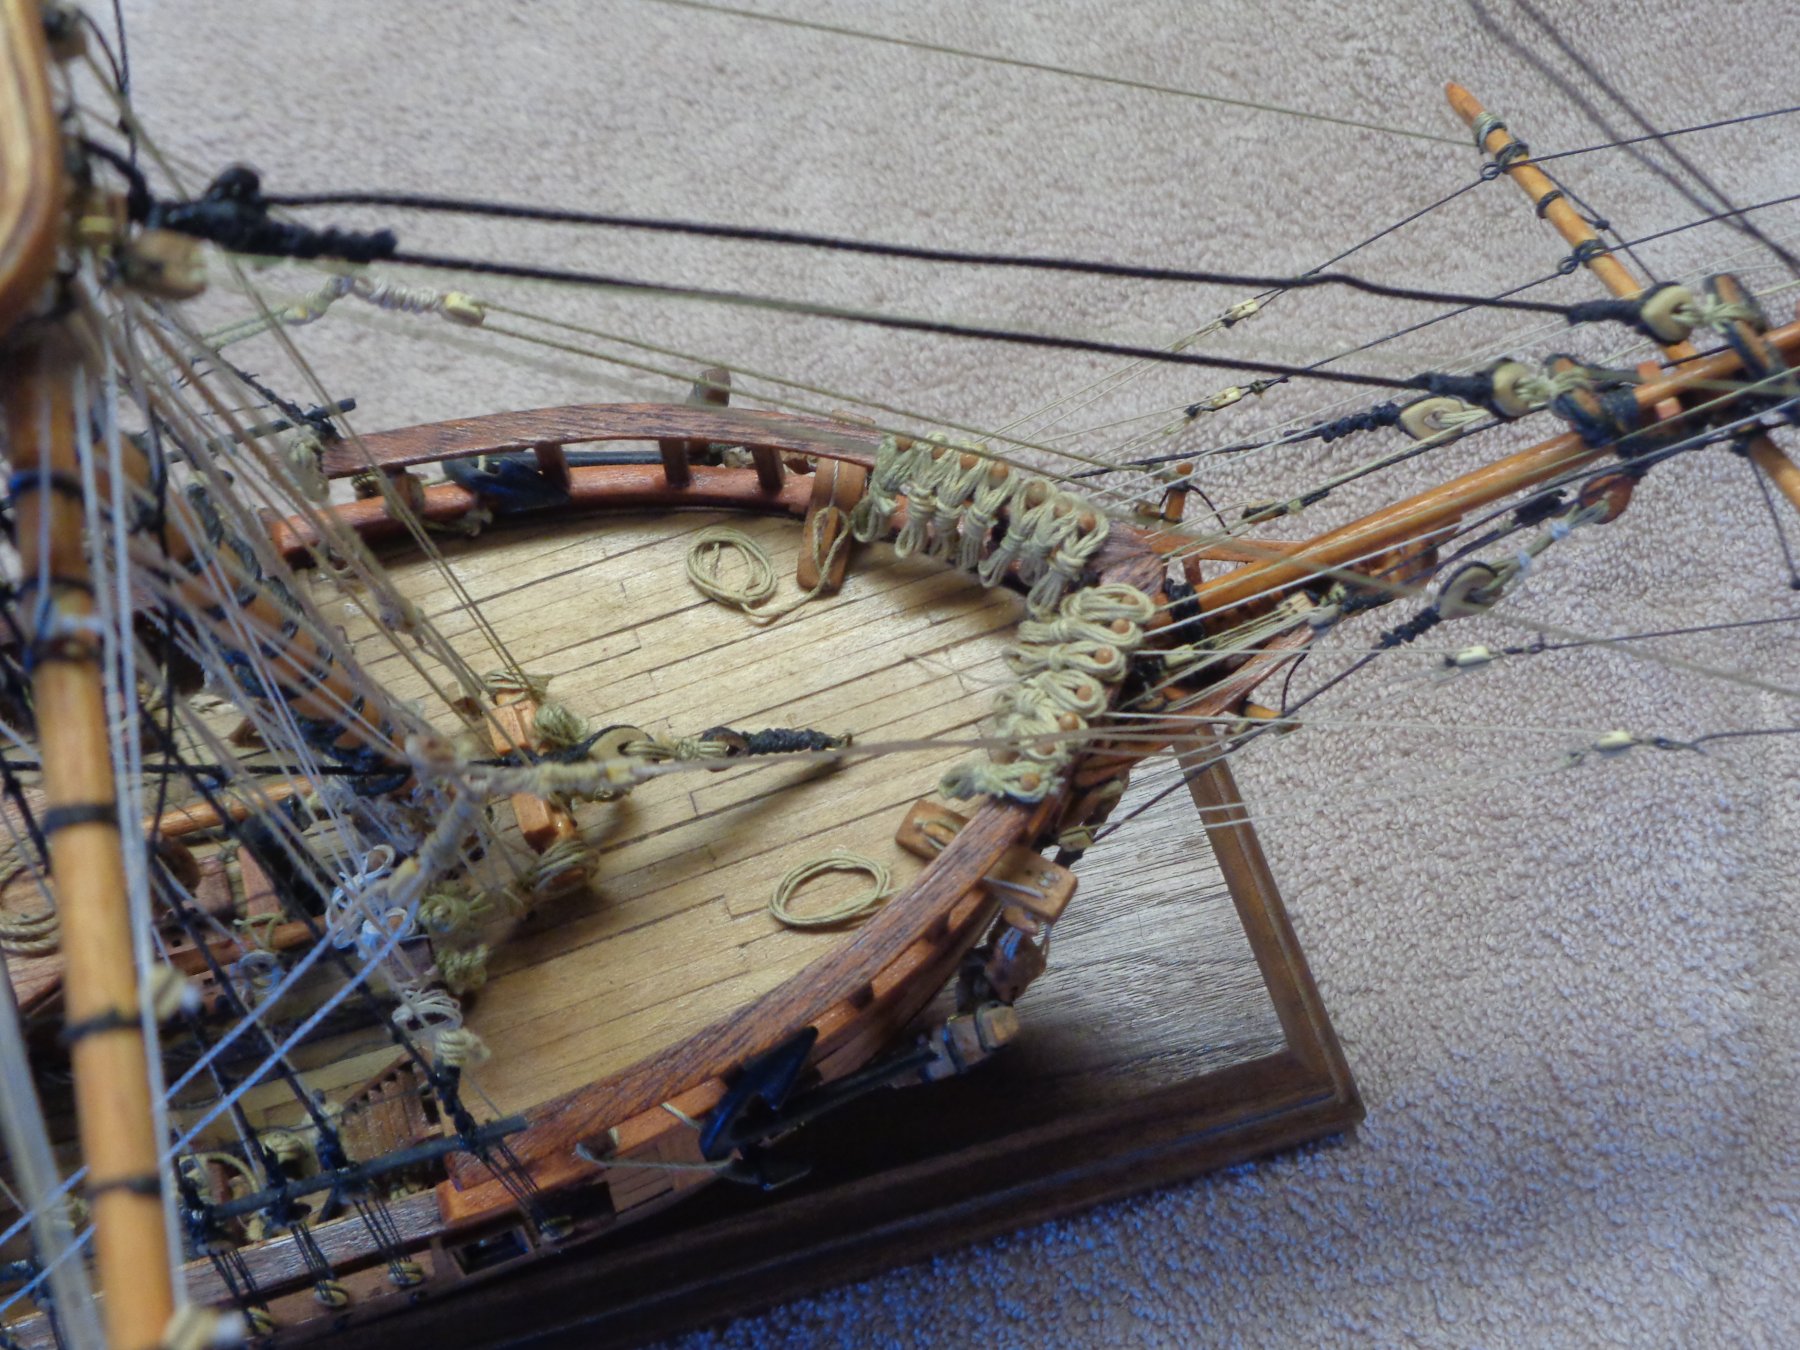
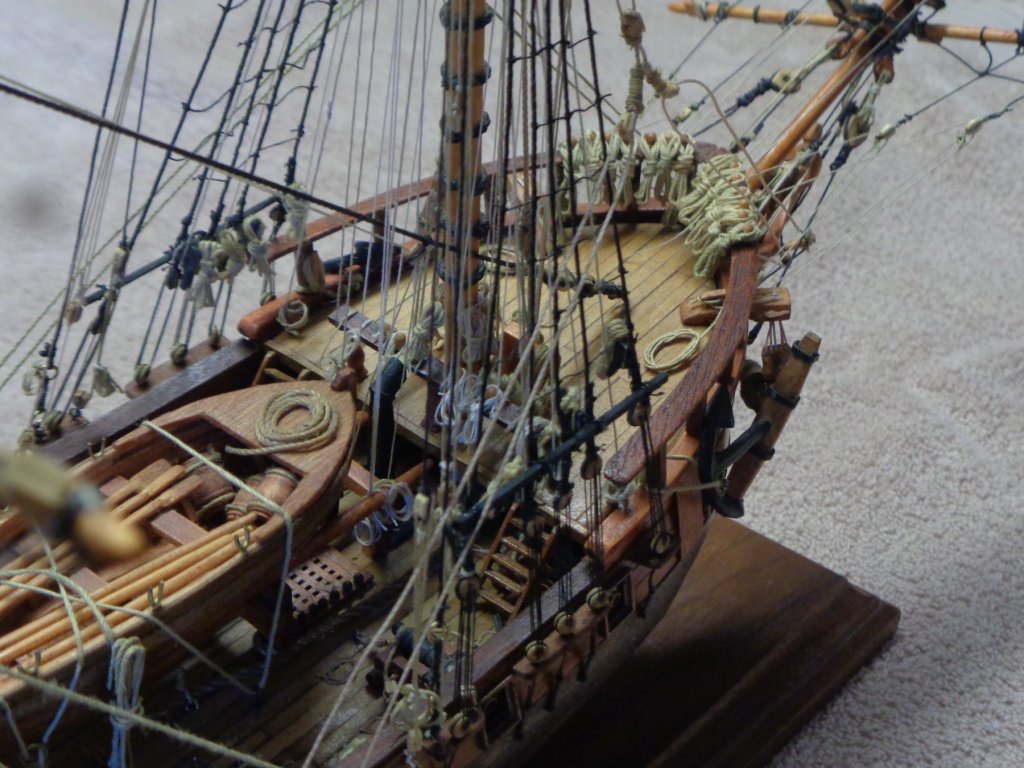
The Final phase , rigged all the bow blocks, stepped the bowsprit 8 years of getting there, starting to get that feeling of accomplishment, however not just yet
- 57 replies
-
- 5
-
-
- rattlesnake
- model shipways
- (and 1 more)
-
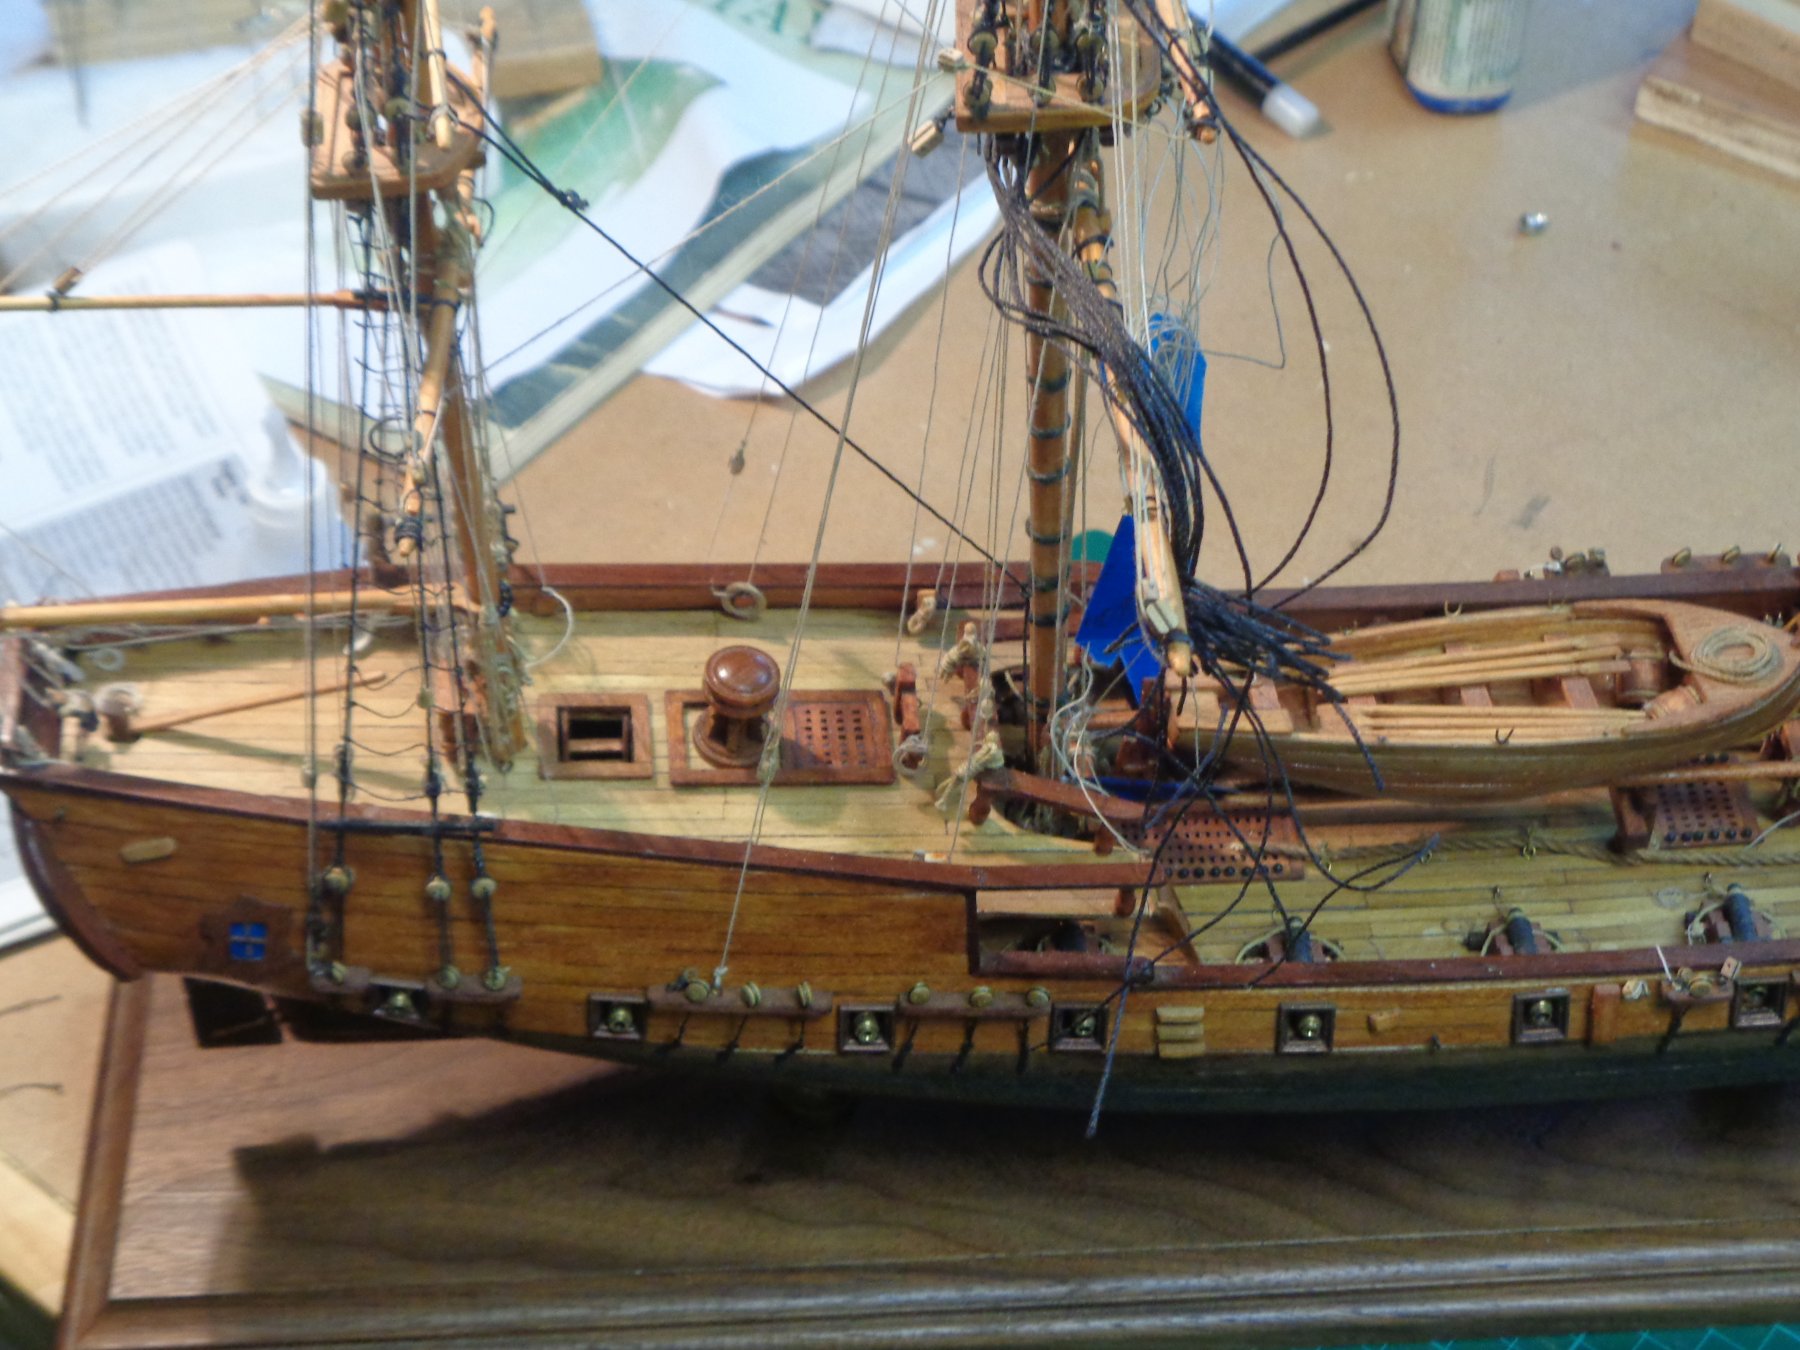
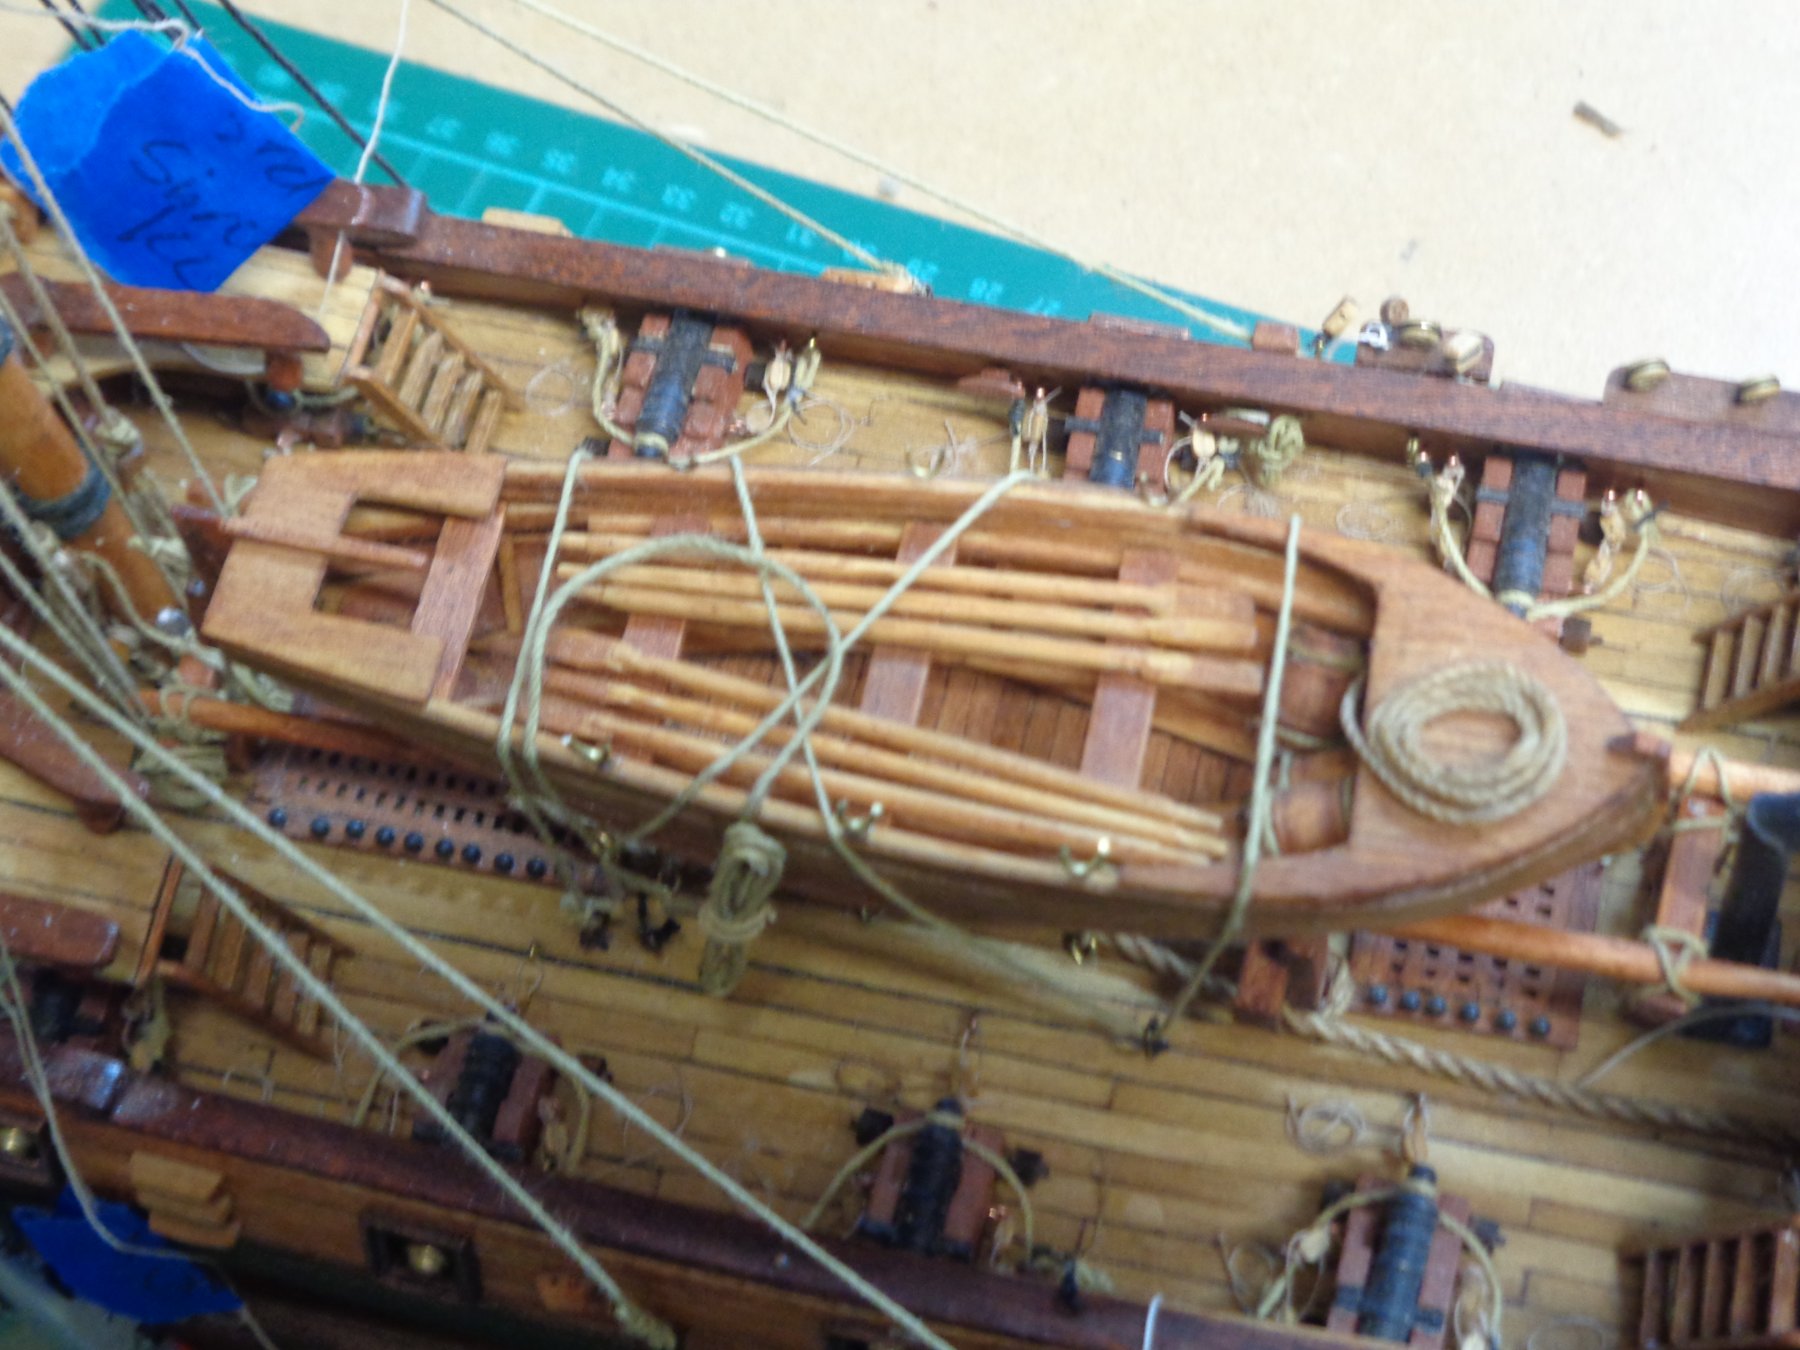
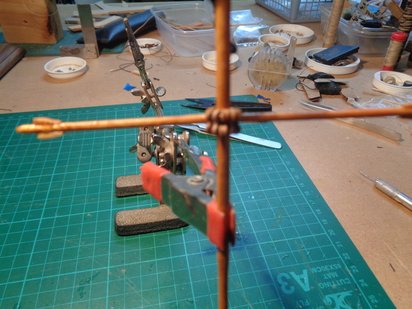
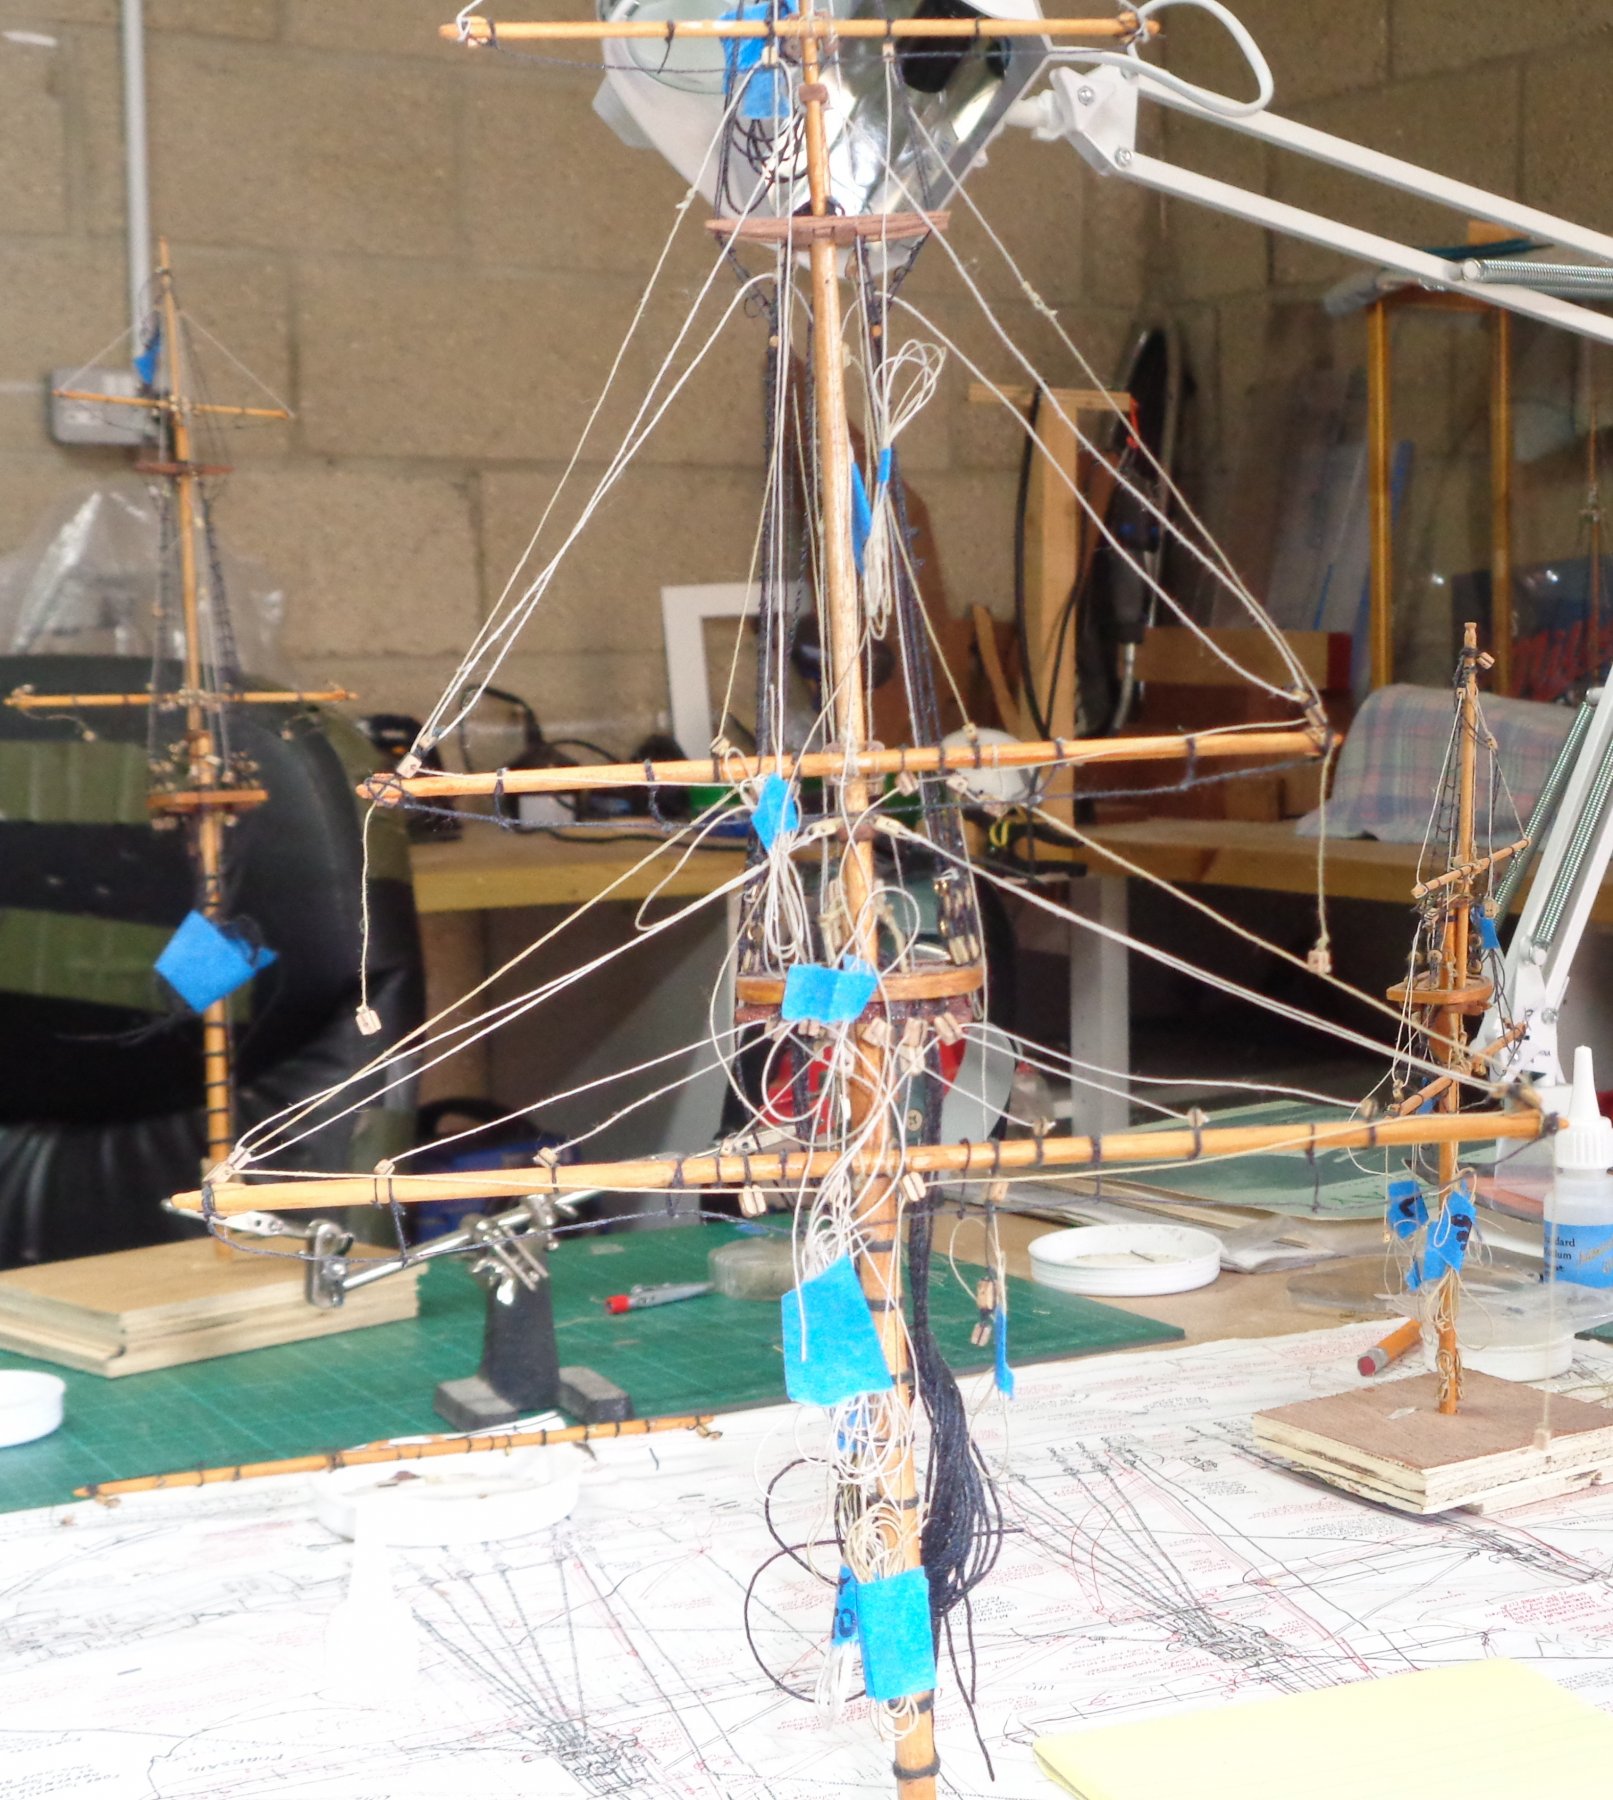
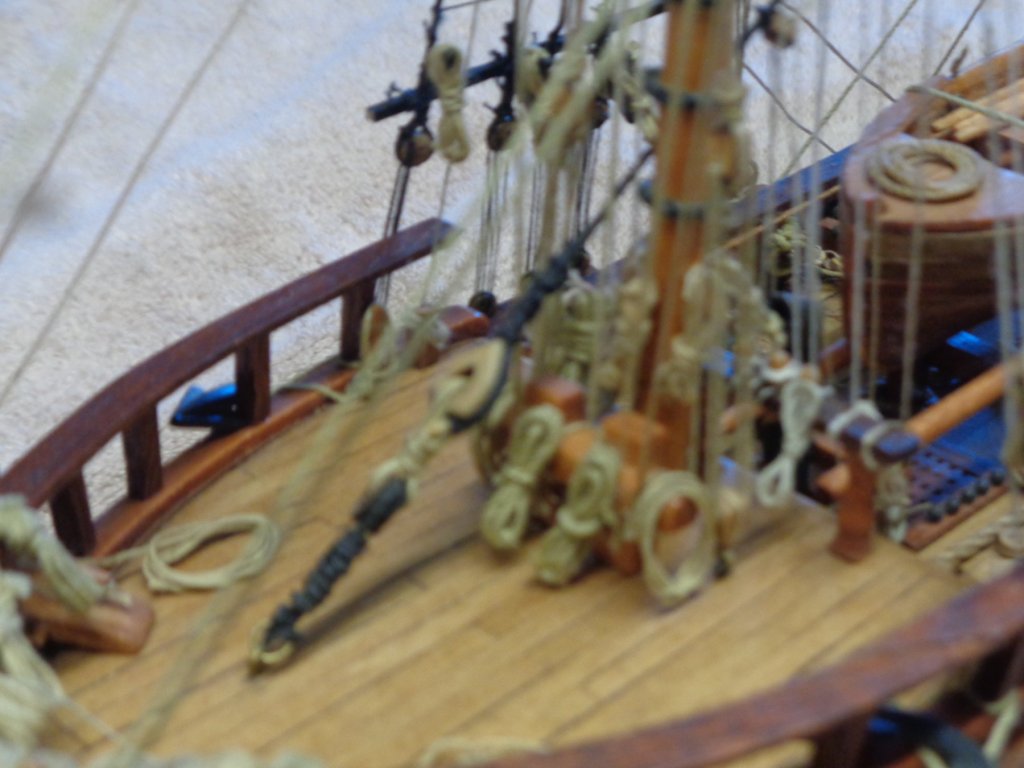
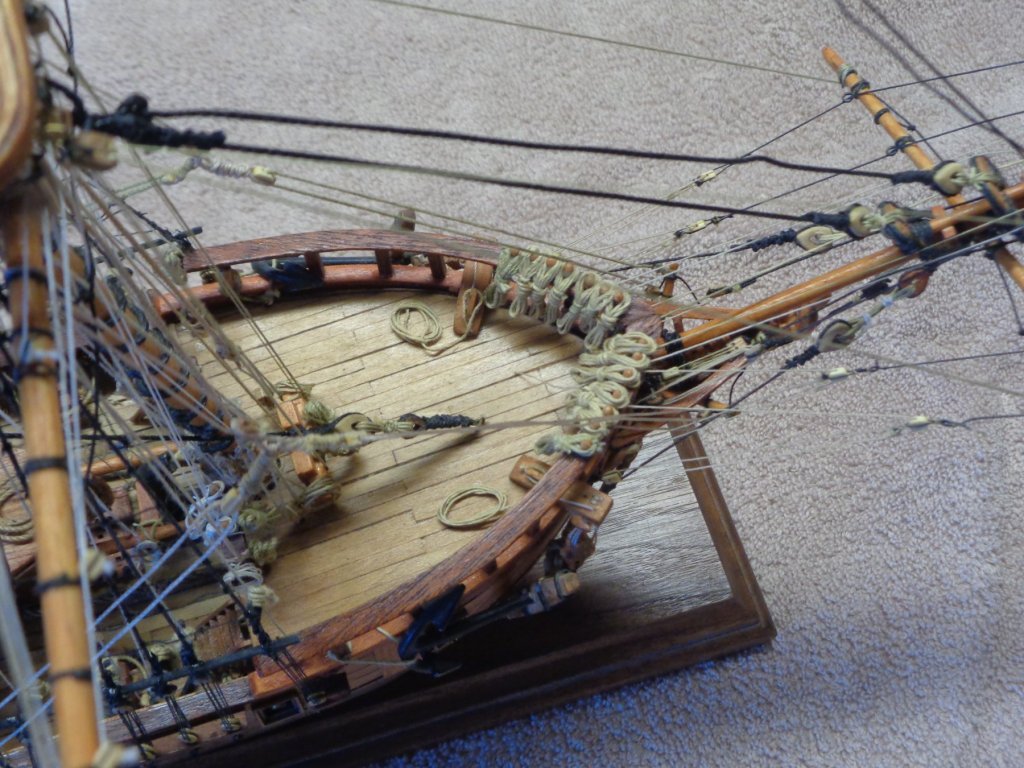
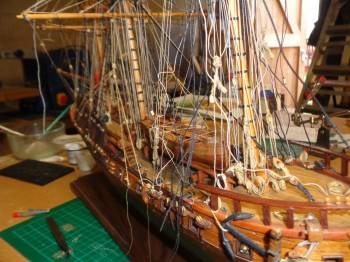
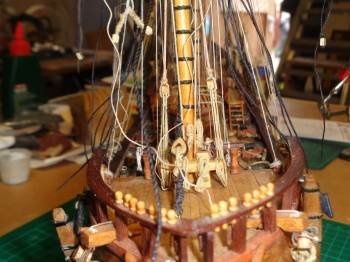
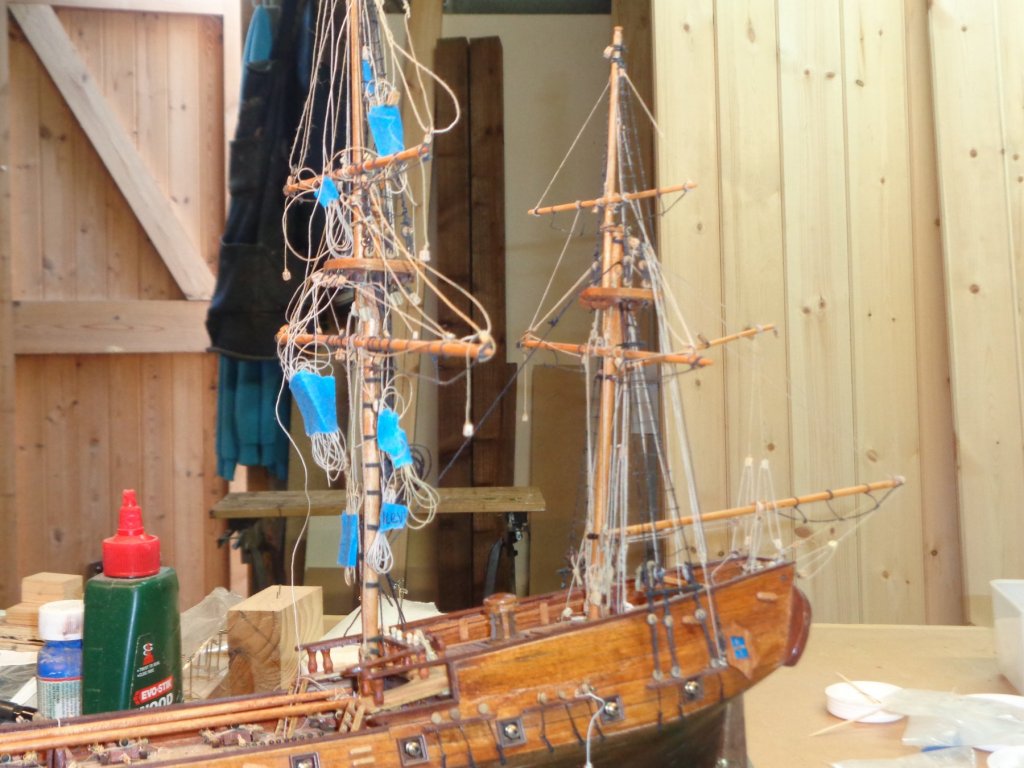
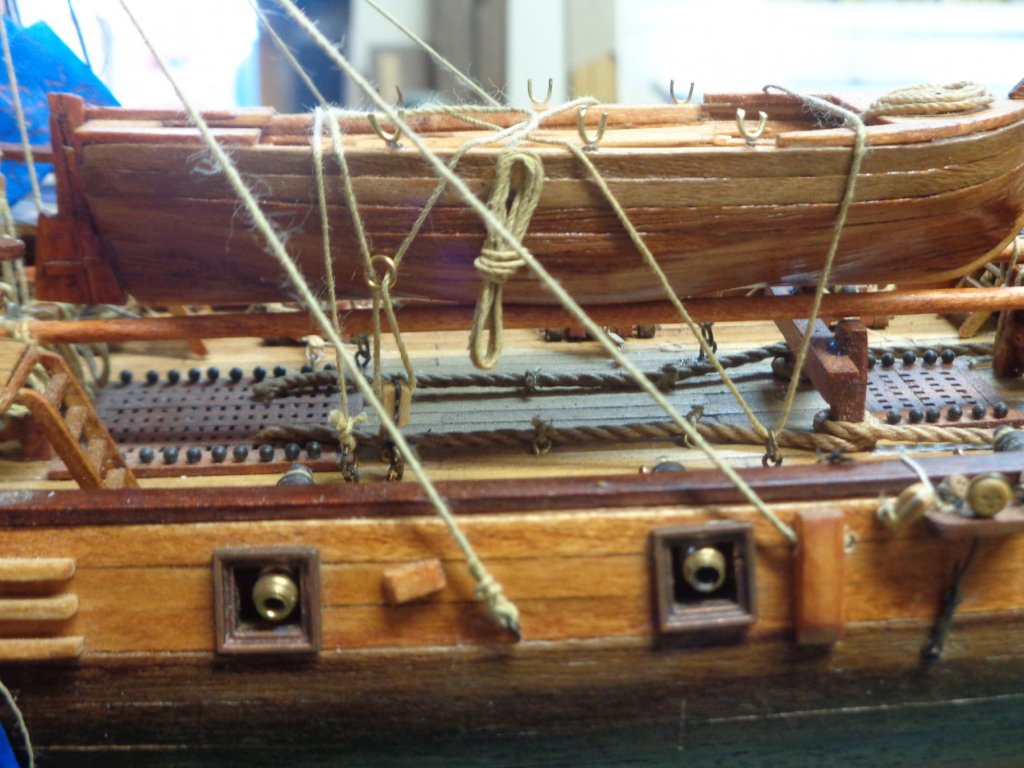
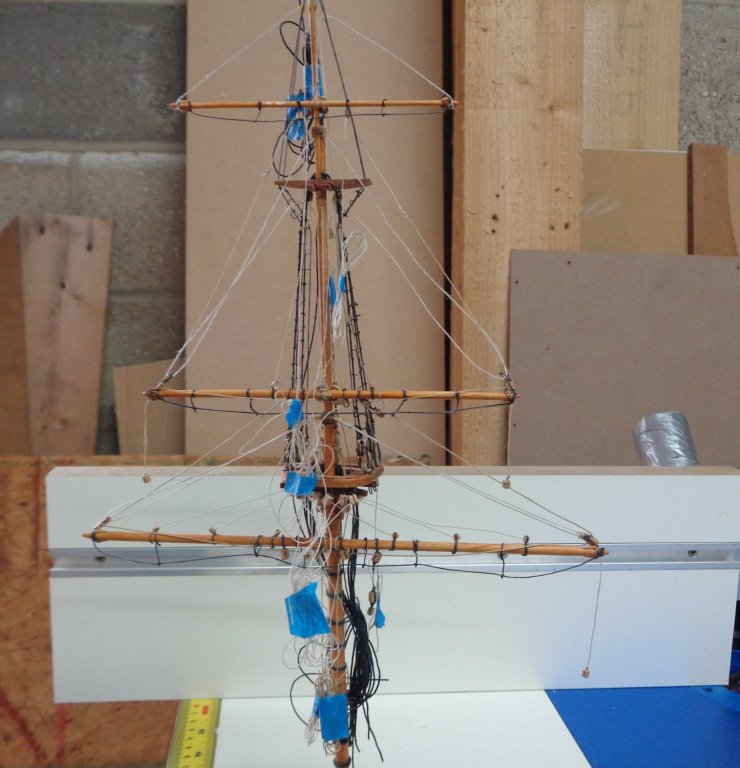
Build is proceeding along. With the masts set it looks like a mass of lines. After all the off ship rigging it took some time to retrace all the lines to their proper termination points. Had to add several new kevels to spread out the lines, as there was allot of congestion around the bits, causing crossed lines. For the lower shrouds I made the cleats and attached the coiled lines before adding them to the rigged shrouds
- 57 replies
-
- 3
-
-
- rattlesnake
- model shipways
- (and 1 more)
-
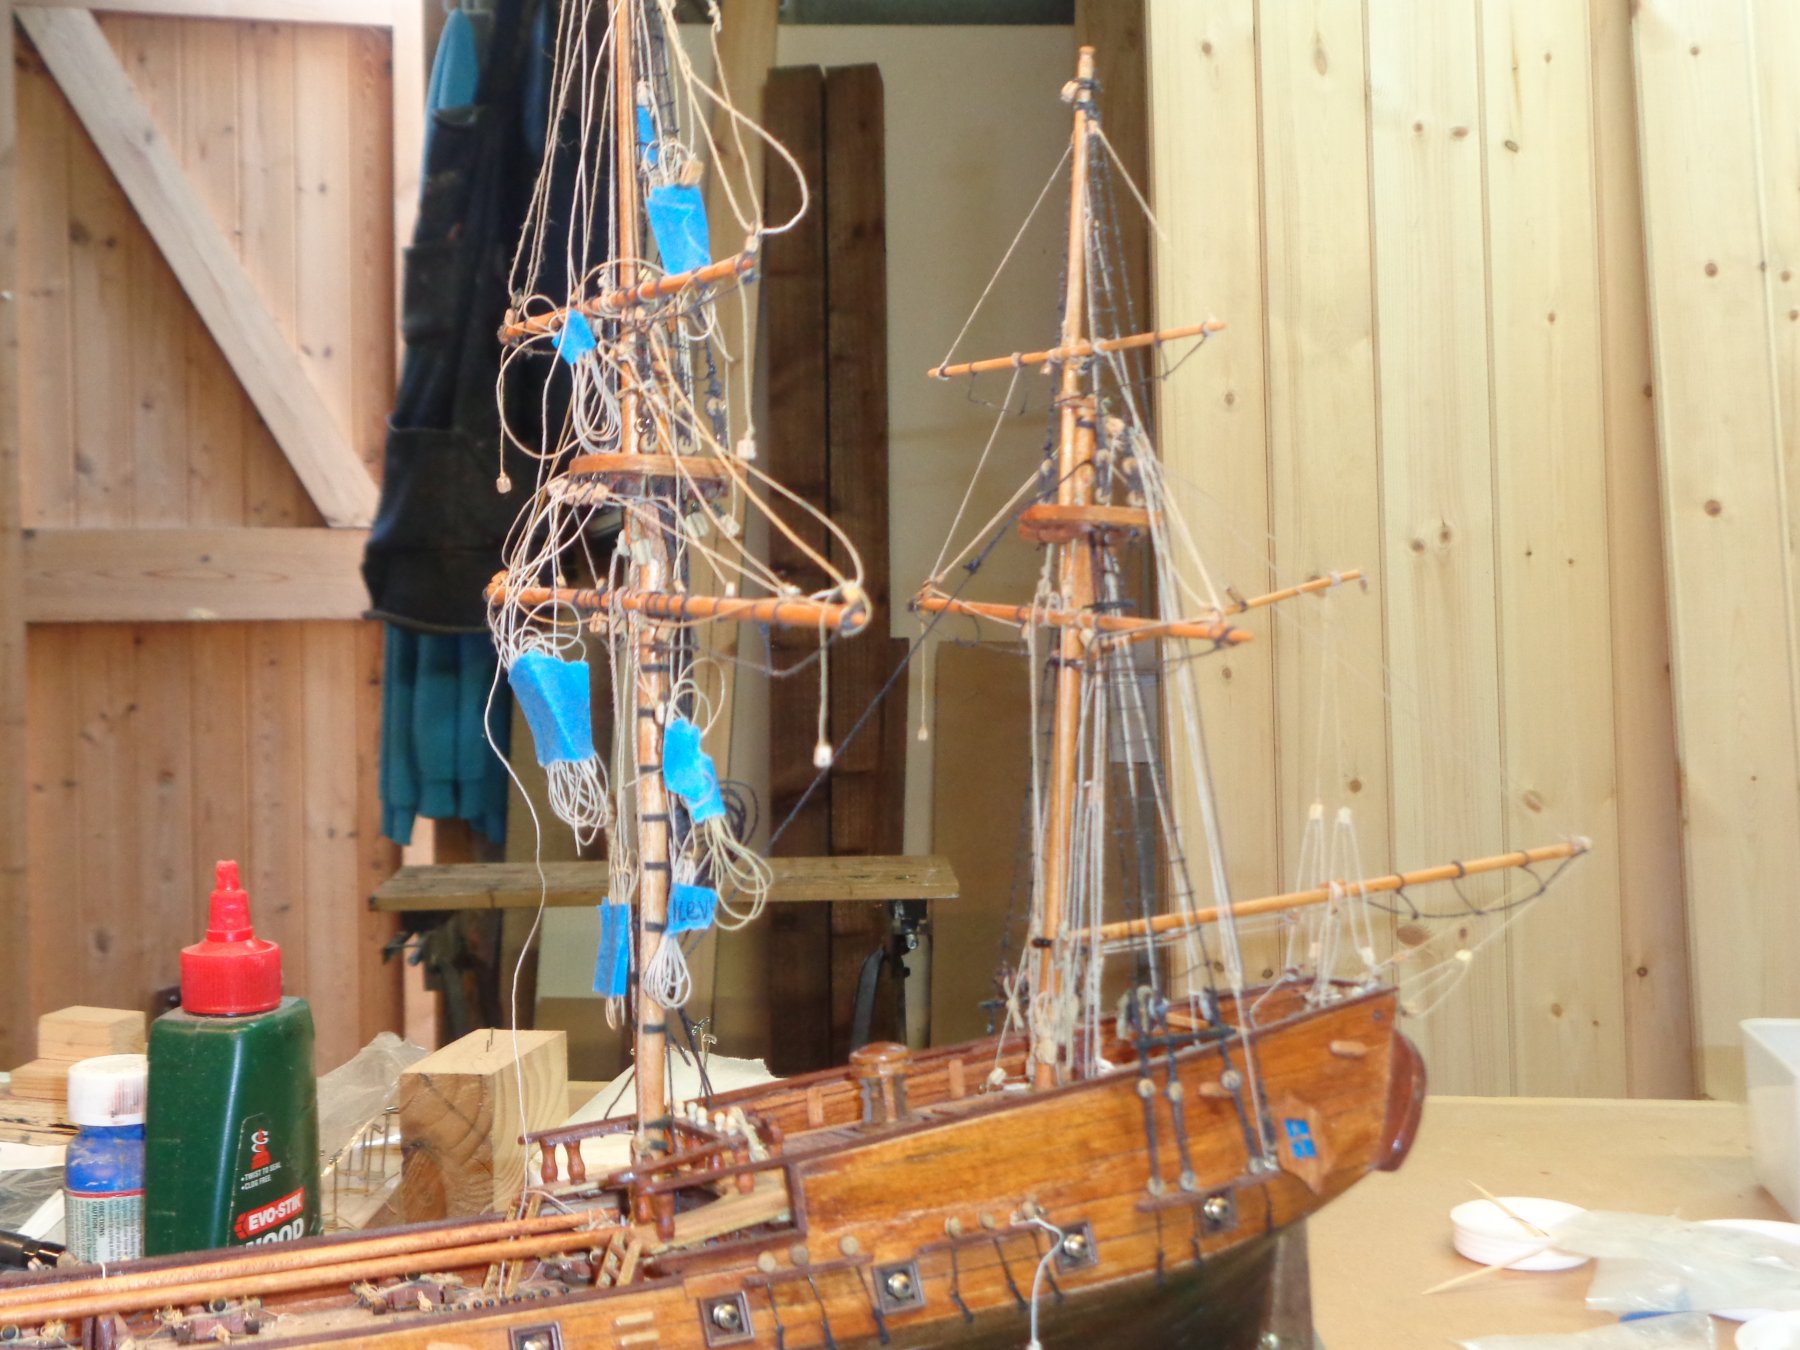
It has been awhile since my last post. Quick update , Mizzen rigged & main 95%. Rigged mizzen, main, & bow spirt mostly off ship, with the main deck & hull lines in place was able to rig the long boat, still not sure it I will keep the coiled line on the starboard side, could look out of place ?? Rigging off ship worked for me but had some draw backs, spent allot of time sorting out the mass of lines while following them on the plans. Also had to rework several blocks and line as they were out of place once the mast was steeped. Still all in all it’s getting there will rig the main shrouds next

-
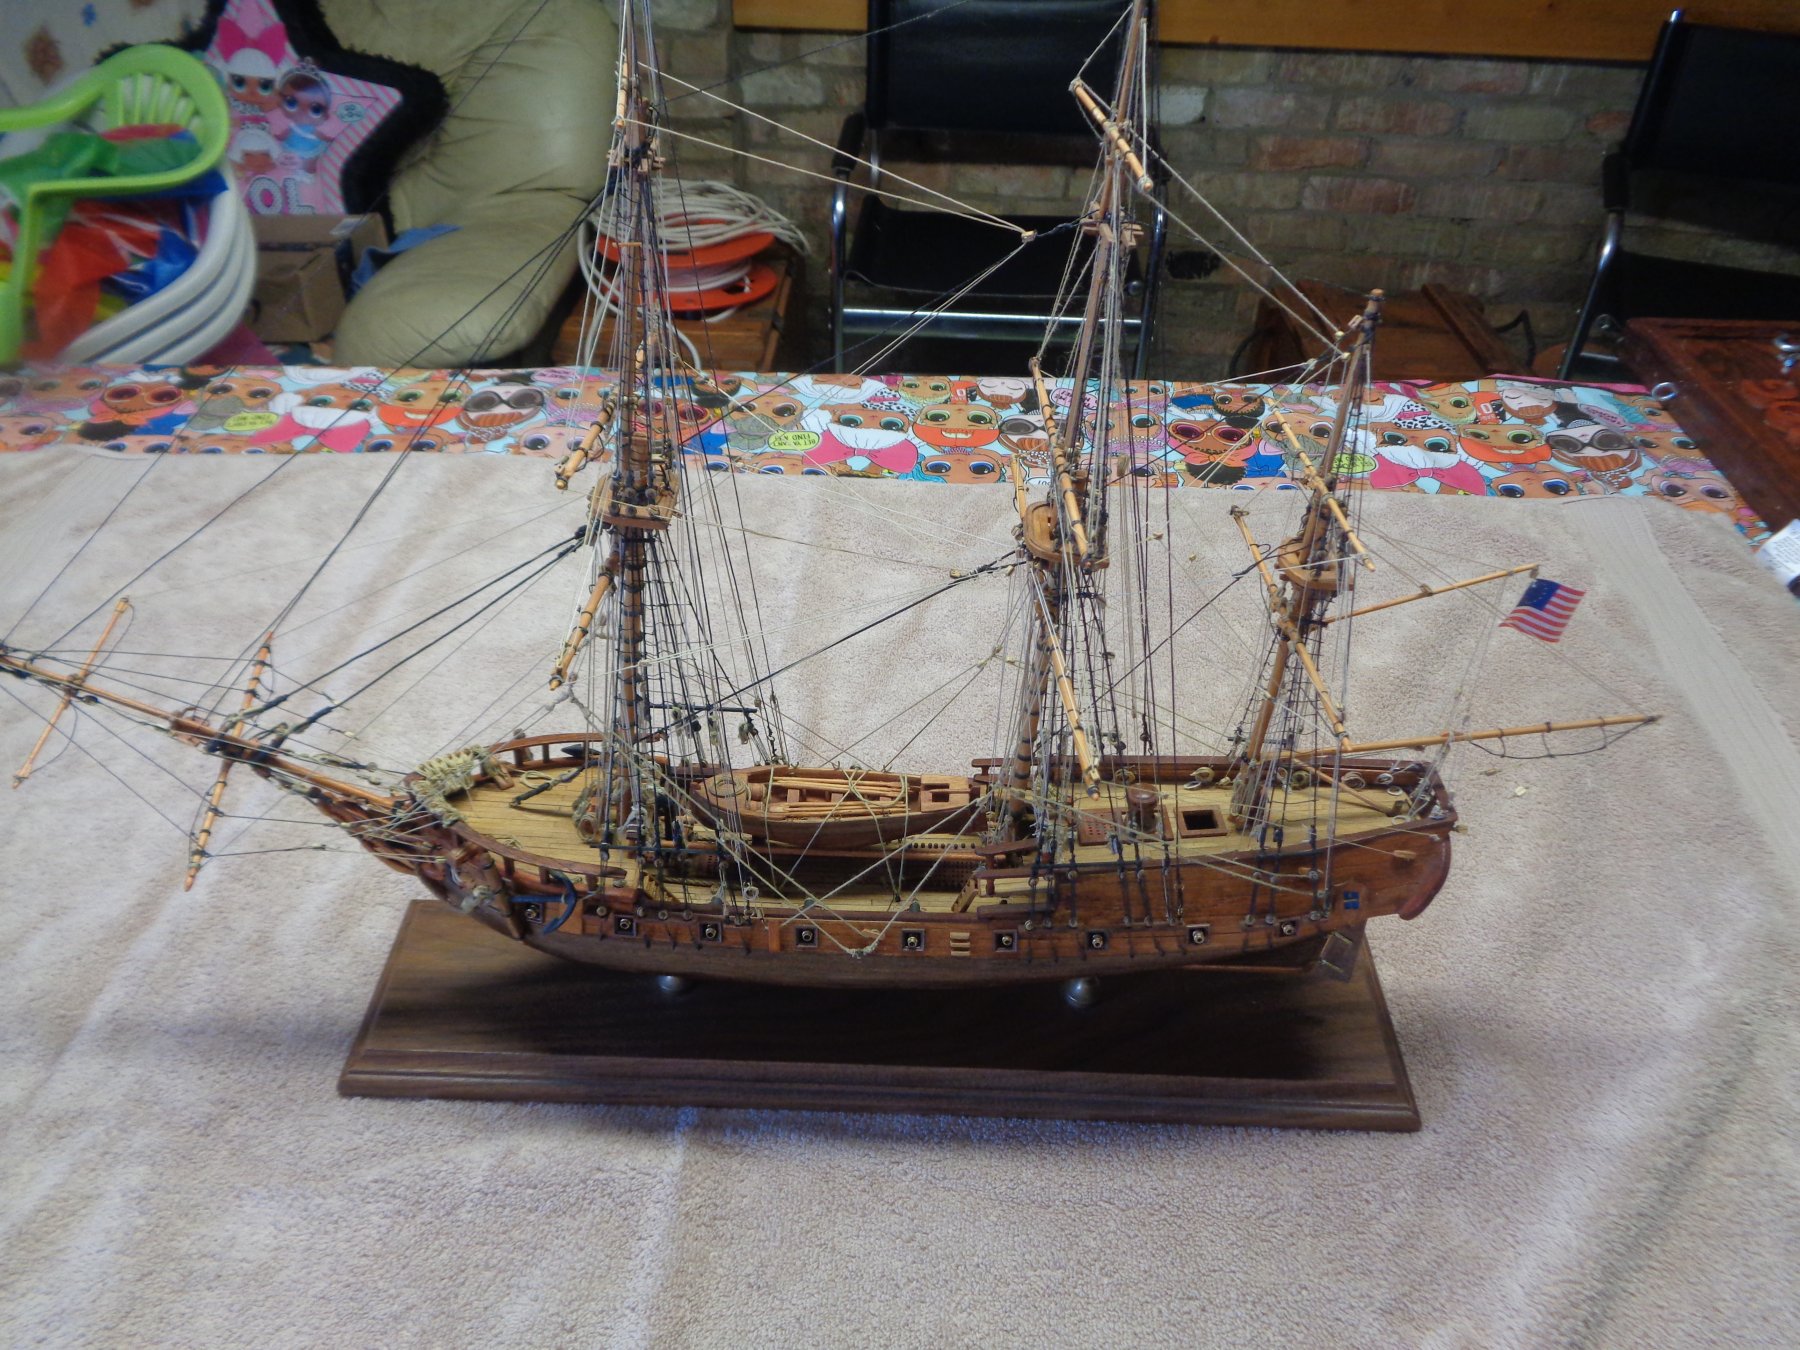
Jorden I prefer stain for most of my work, I feel paint hides the natural look of the wood. Water based, or oil stain really depends on the look your trying to achieve. I use both sometime mixed together. Lacquer based stain is not very forgiving if you make a mistake, plus it will take on a shine effect. I found the best way is allot of trail and error testing, different types of wood react differently to stains, again its all about the look you want. Take notes on all your testing it will pay off later, I have posted a pic of my Rattlesnake as an example of the stain effect. As I have said on this forum several times, "We build for the builder" MOG

-
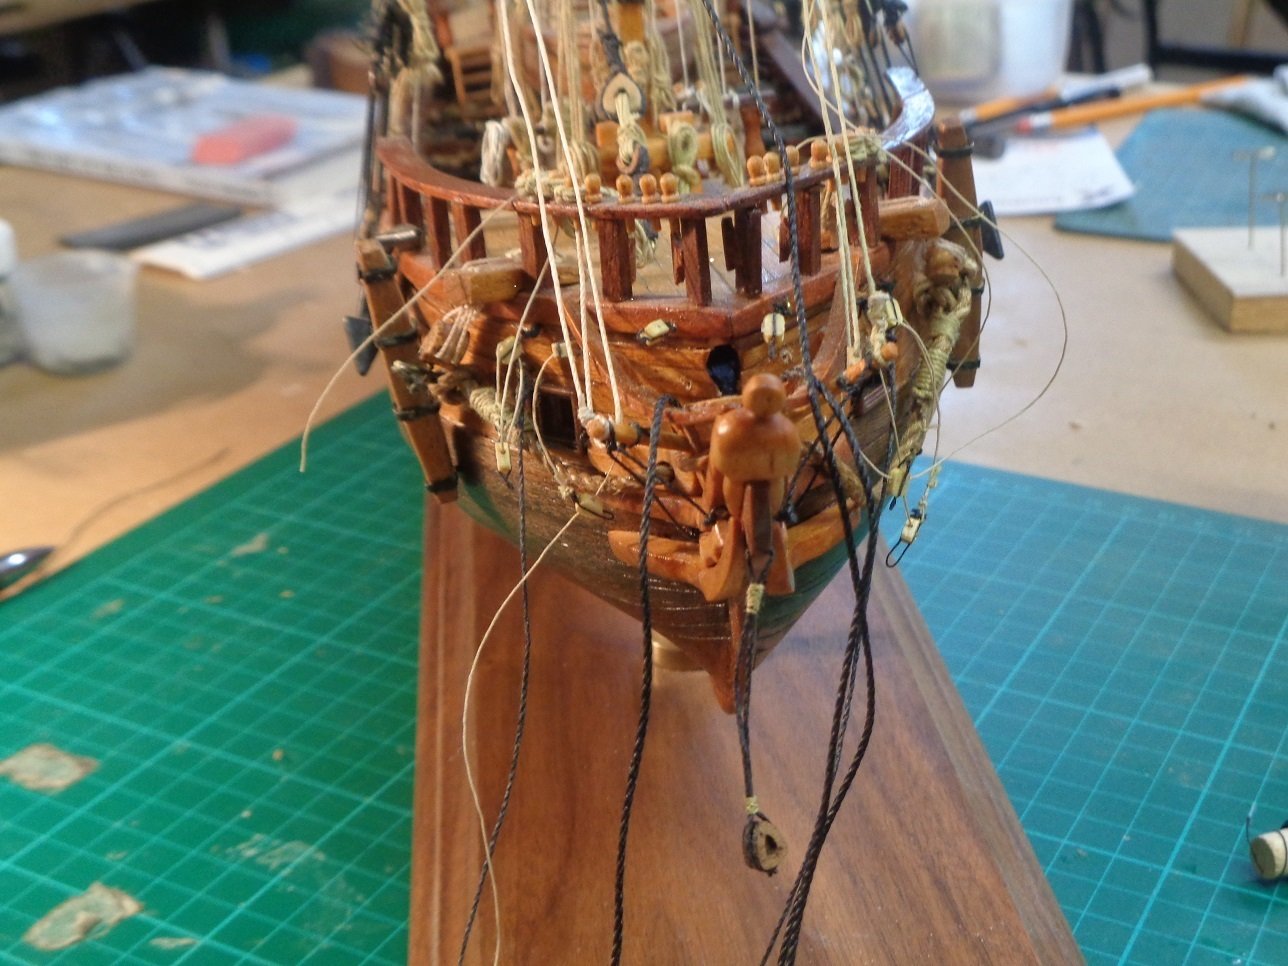
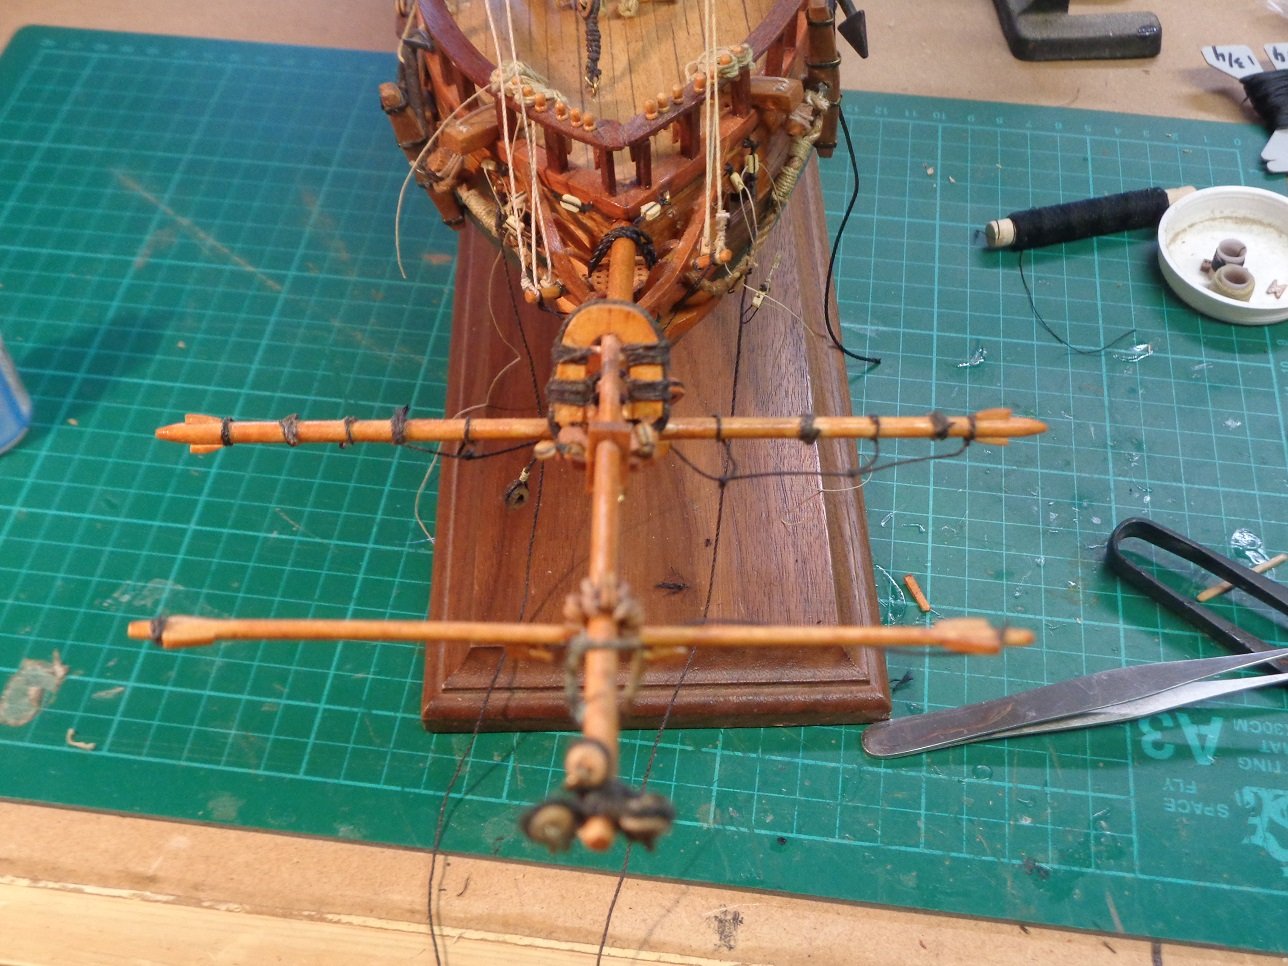
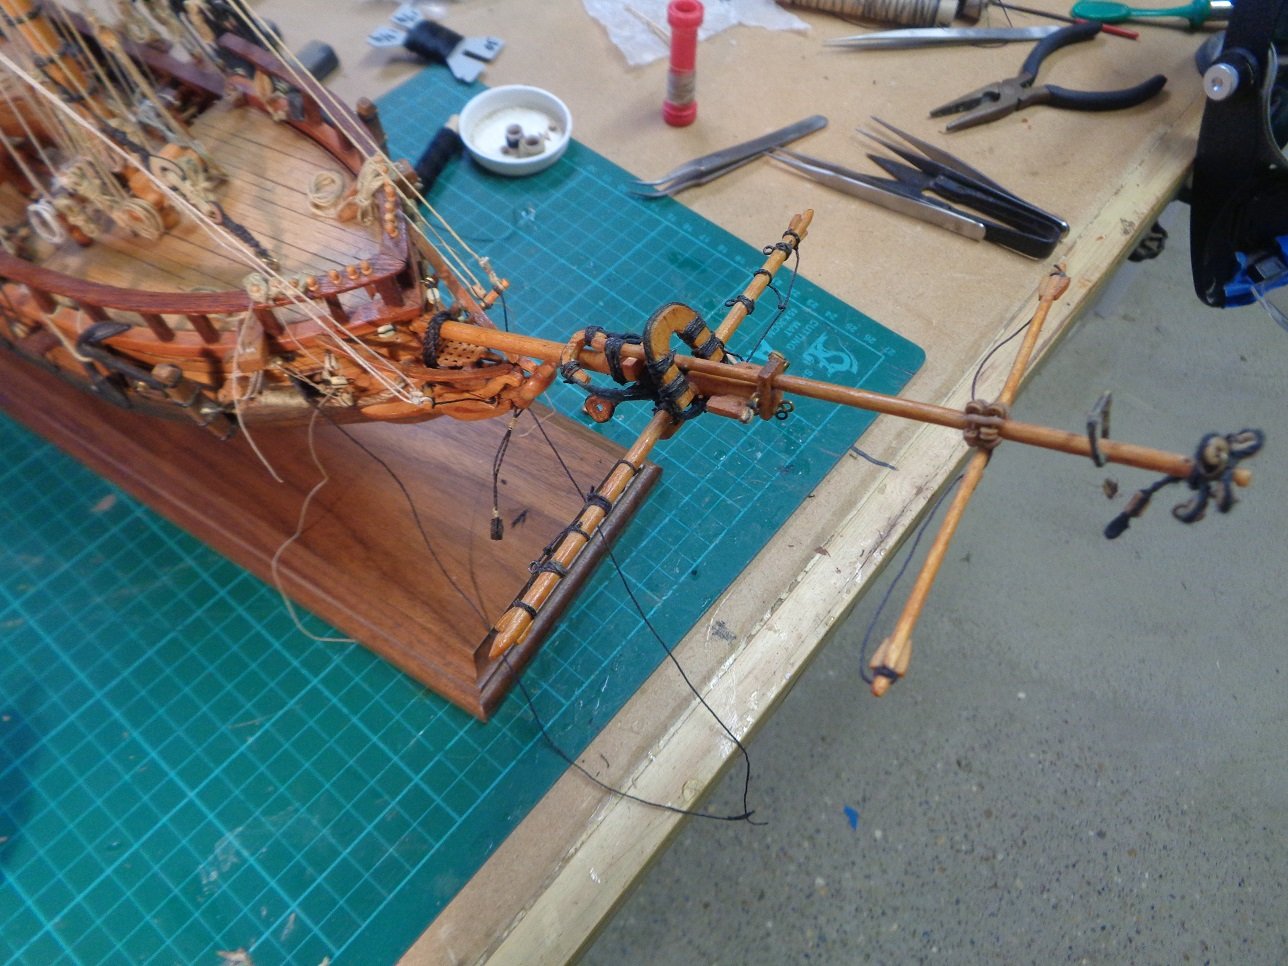
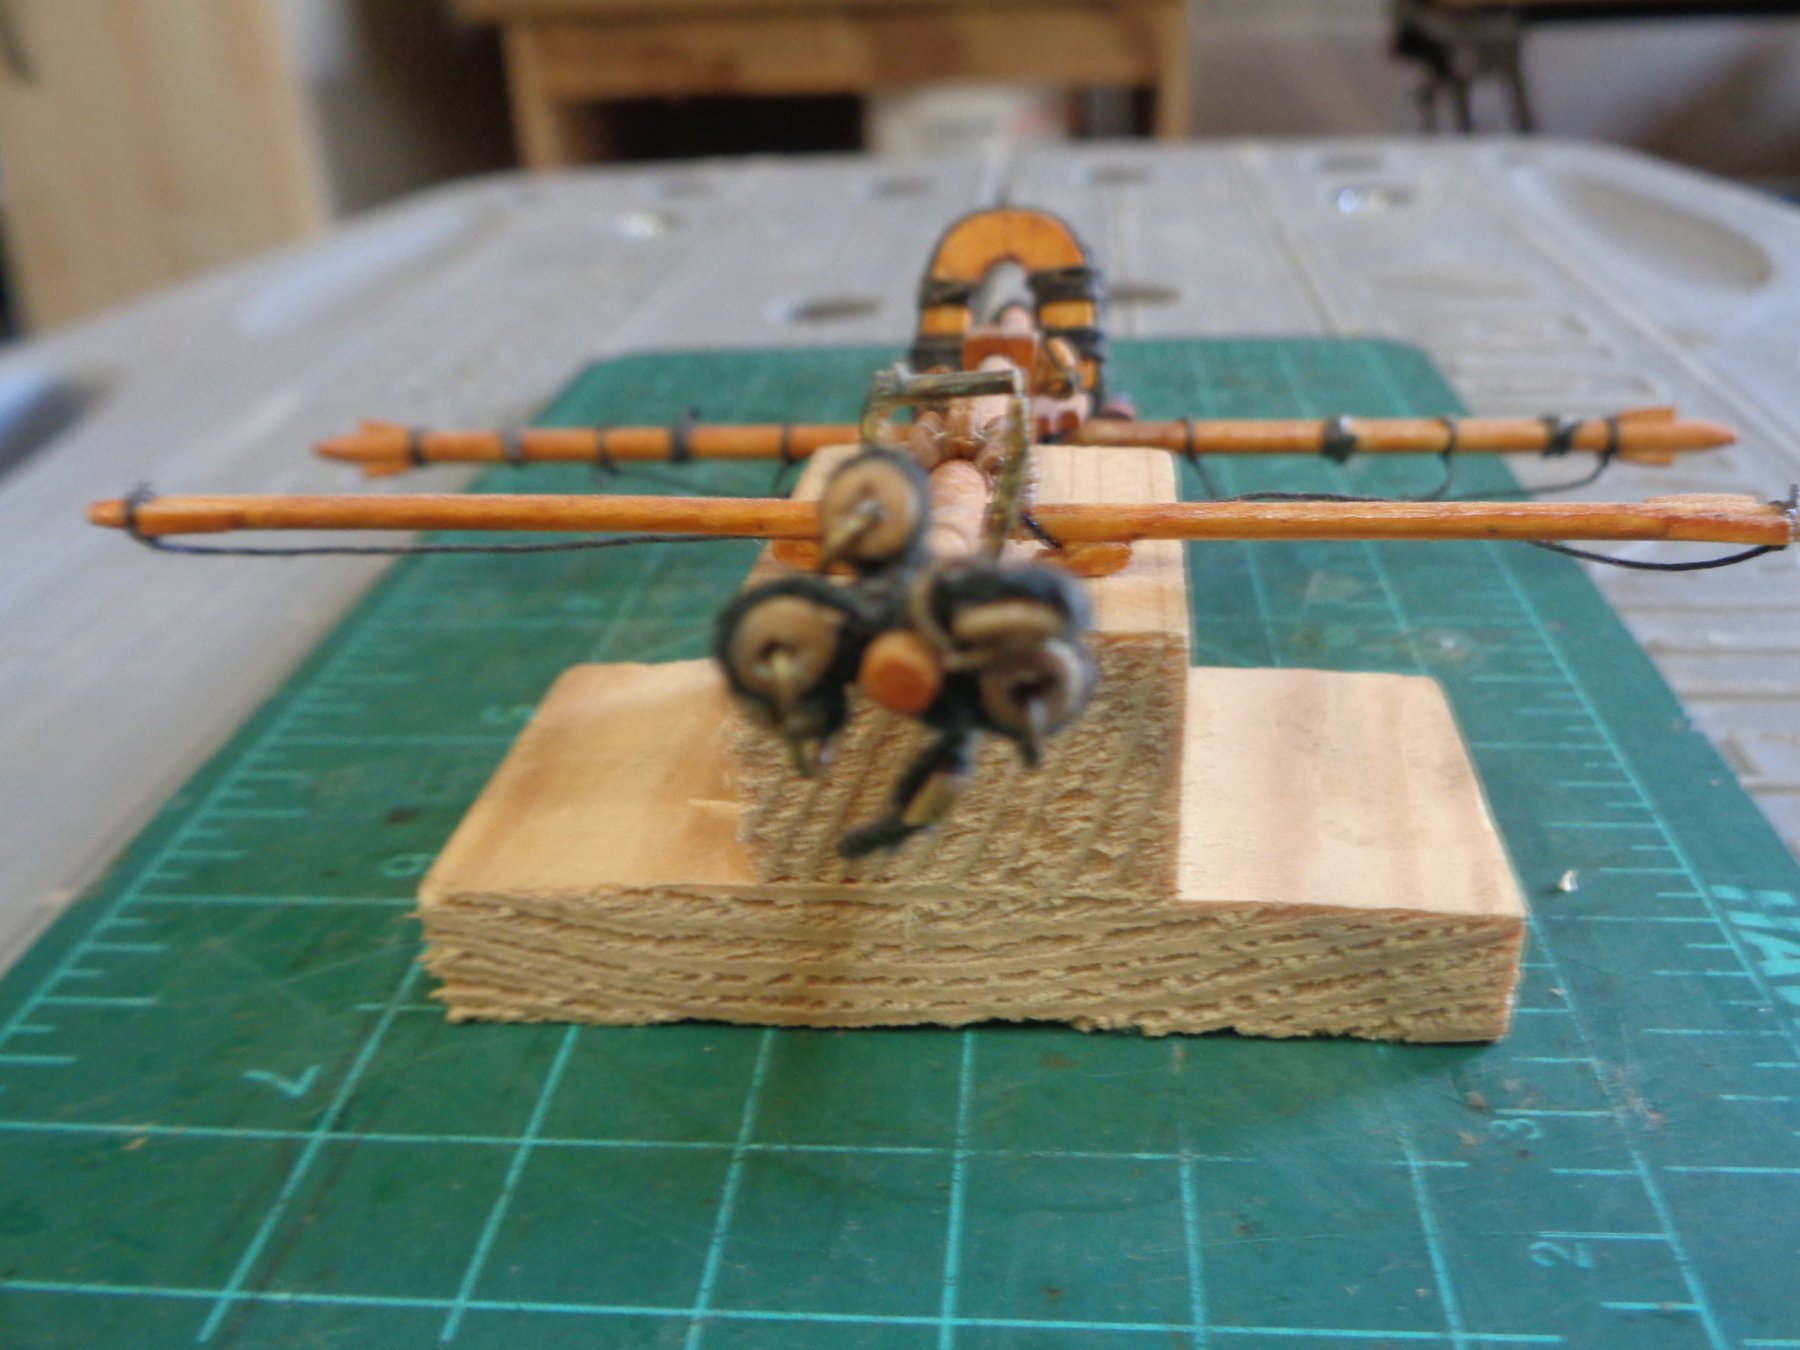
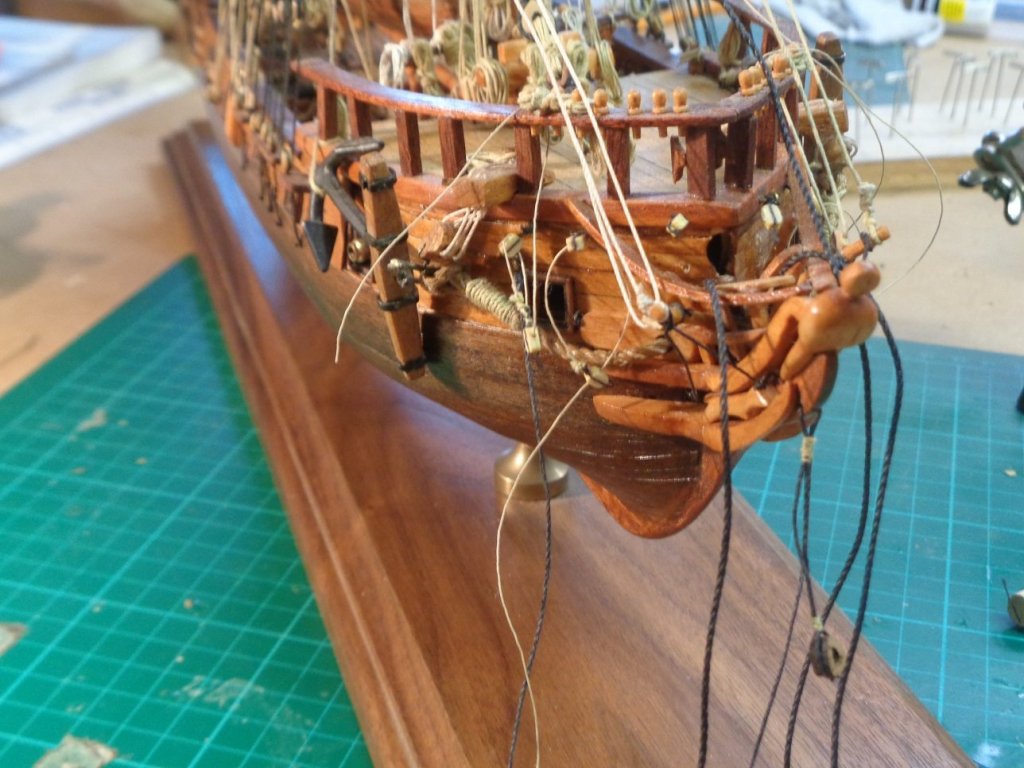
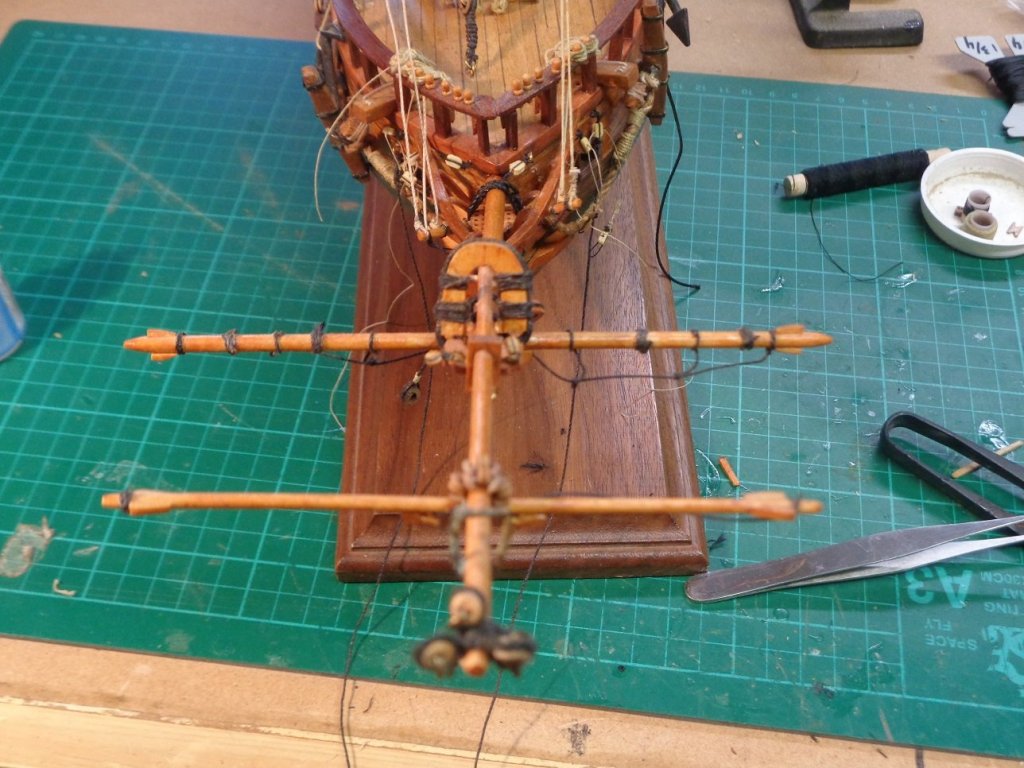
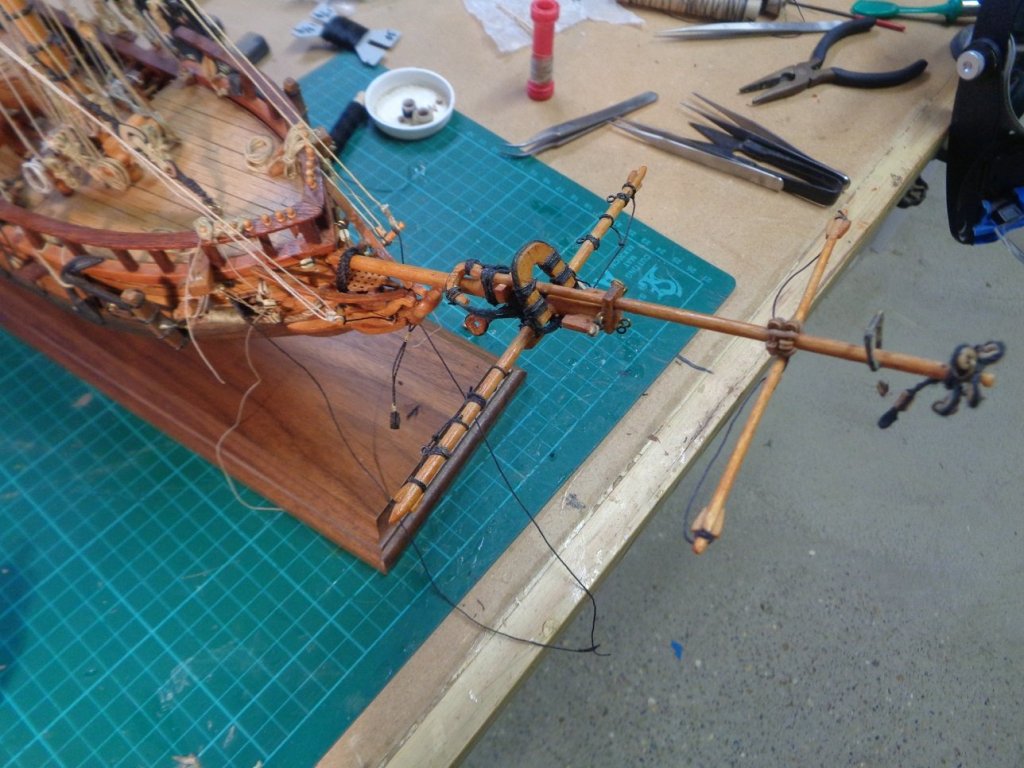
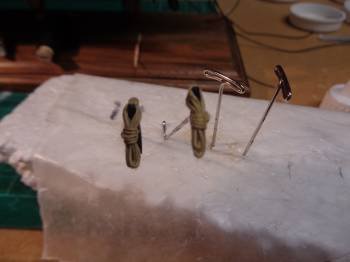
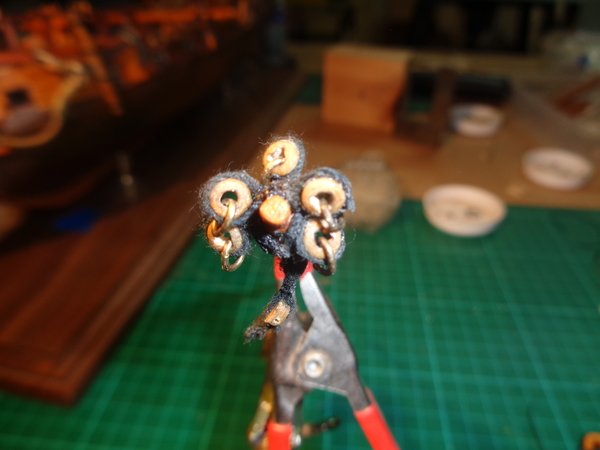
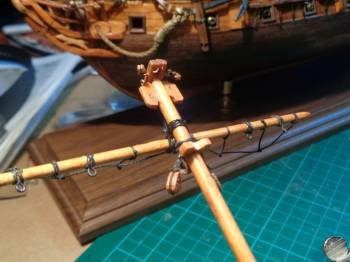
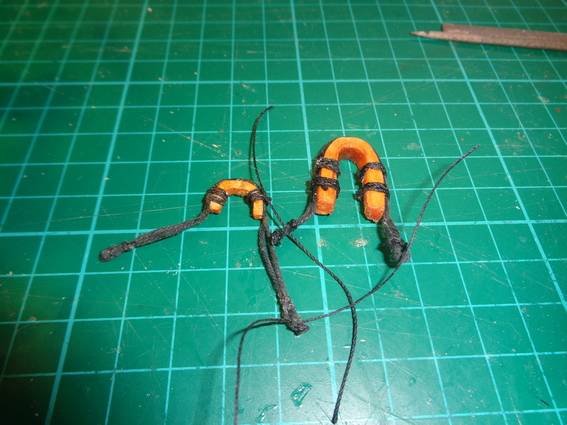
Starting on the bowsprit ,jibboom followed JS Gerson’s plan for the halyard block, guys &lifts, really glad this part is over many attempts, allot of wasted thread, miss drilled thimbles ect, however learned allot but was just glad to get it somewhat right. Collars & open heart but getting there. So far happy with the task a hand.
-
David Have a look at my log RattleSnake by mog I do not paint , preferring to use different types of wood and stain, not being the most skilled builder, but happy with the overall look. I follow the Frank Mastini style of building using his excellent book "Ship Modelling Simplified".
-
Apologies to all I forgot to resize the pics once again the build has fallen into the on and off again stage, from time to time I get forced into the workshop for paying projects. Thankfully many experienced builders have provided some very sound advice for being away from your build for a period of time As the Rattlesnake has very tight deck space at the base of the masts and along the whales belay as much as you can to the mast cleats before steeping and for me most importantly mark each line, and make some notes so you pick up the process close to where you ended. I use a numbers system that works with the plans , name of the line and where its belayed . This will simplify the mess of lines and give some order to the rigging flow, something the plans are not clear on.
-
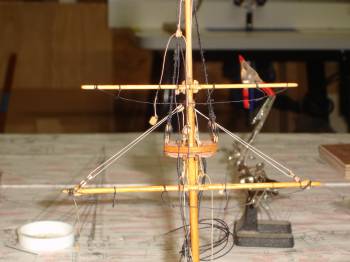
Off ship rigging as far as I can go, as all snake builders know the mass of lines are the norm

- 57 replies
-
- 3
-
-
- rattlesnake
- model shipways
- (and 1 more)
-
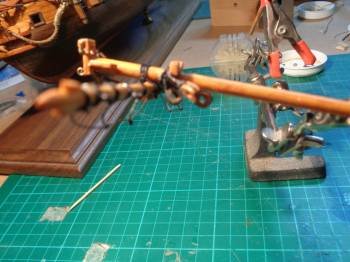
Working on rigging the mizzen mast off ship, I wanted to add my thoughts for future builders. I know most of this has been said before by Ratt builders or any builder. However JSGerson & Martin W gave me the simplest and best advice I have had in the 3 ½ years I have been on this build. “Read every word on the rigging plan, trace every line, and know what it does, then do it all over again, again & again. Sounds obvious right everybody reads and follows the plans. But does the less experienced builder really know what they’re reading?? I thought I did when I rigged the deck, hull masts & yards. Some blocks I rigged months ago only to find they were in the wrong place, or not set up right. it really helps to know what a purchase really does, and why a simple becket is so important to the whole process. As I found when I missed several. I found myself removing, adding & retying blocks, rerouting lines, placing eyebolts and blocks I totally missed until I started to follow the flow of the rigging. As we all have found out the hard way trying to correct mistakes in tight spaces is not a good thing. In short Find and Read a glossary of useful nautical terms. Understand what they mean and put them into practice on the plans one piece of the puzzle at a time.
- 57 replies
-
- 1
-
-
- rattlesnake
- model shipways
- (and 1 more)
-
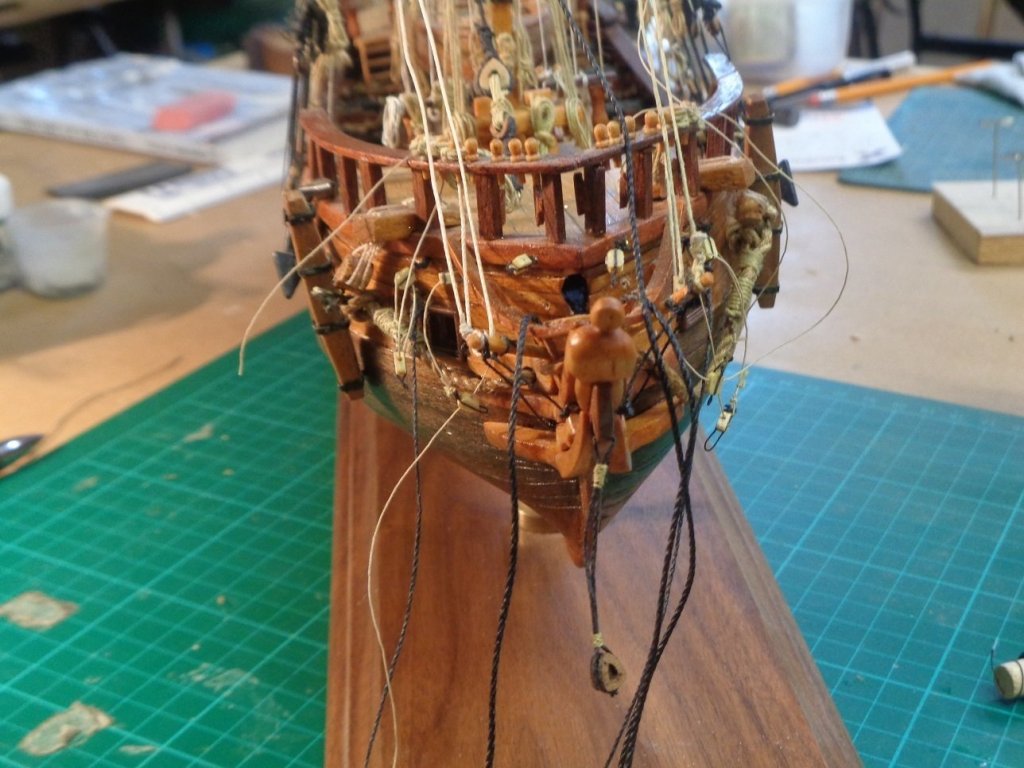
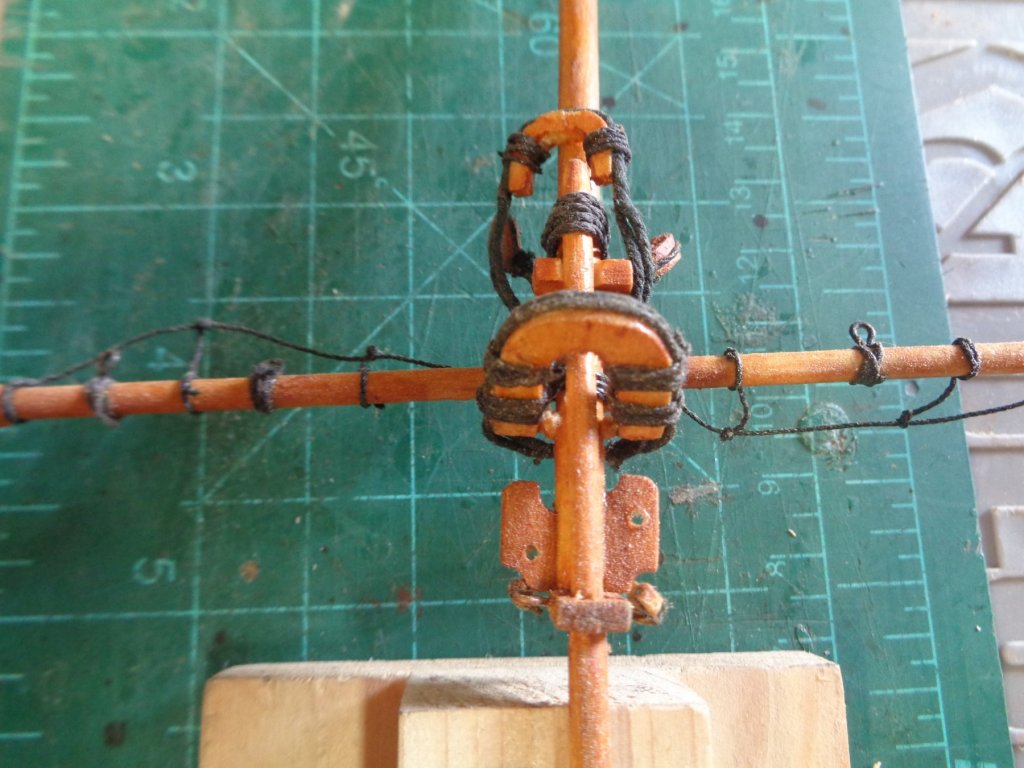
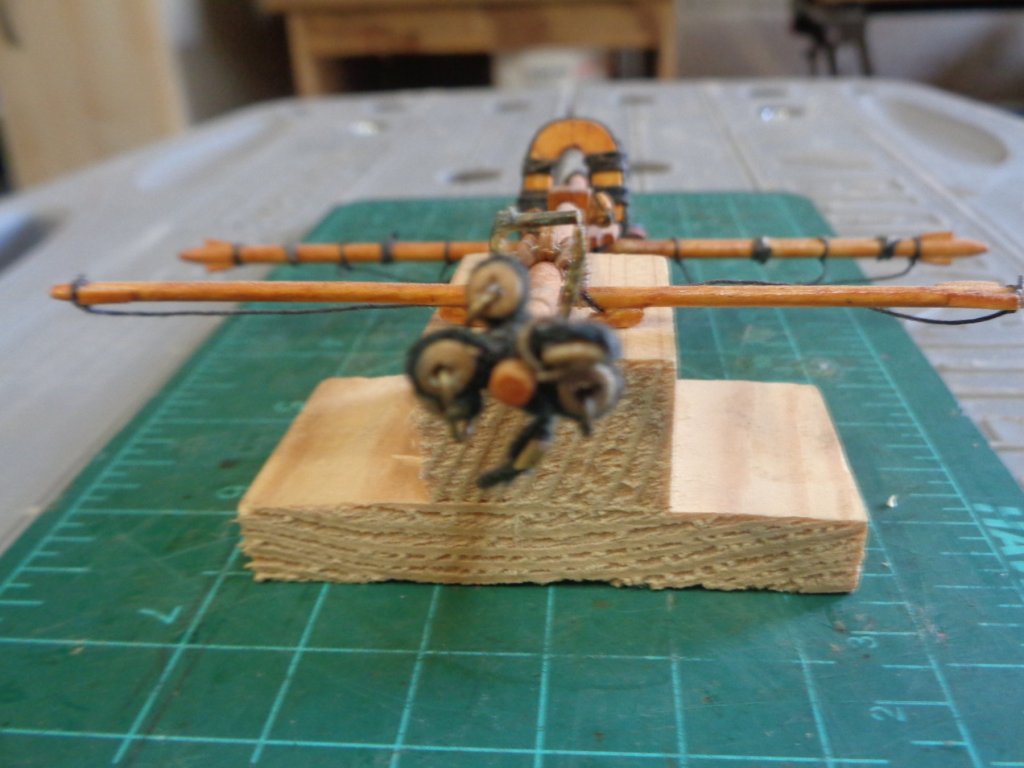
When preparing to return to the build I was faced with the problem of yards and masts. Do I attach the yards to the masts while off ship? Or step the masts without yards? Consulting with several members whose knowledge, skill and problem solving I admire, all have been down this road before. I found this issue is very much in two schools of thought, both with very good merits. The one common factor is the working space on the Rattlesnake is very tight, if not near impossible in some areas. All builders are different in their approach so In the end I went back to my old standby of Build for the builder & my skill set, while using the vast resources of the NRG site. I decided to attach the yards and rig as much as I could off ship. Being the less complicated I started with the mizzen. It did not take me long to realises that there was no way I could have rigged the yards on ship without doing allot of damage the space is just too tight for the way I build. I found I had to redo the blocks for the Jeers & lifts my initial placing of the blocks off in reference to the lay of rigging line. The topsail yard rib & truck parrals where tough to place in the tight space. Taking what I learned on the mizzen I will change the sequence for working the 3 areas on the main. Again this method is not the best way for everyone, but at the end of the day the path of least resentence for the individual builder wins out.

- 57 replies
-
- 1
-
-
- rattlesnake
- model shipways
- (and 1 more)
-
Sapele is an excellent wood , finishes well I would find a use for it. I tend to use walnut, maple & mahogany for hulls, railing est. But honestly box wood and simple basswood works great. I don’t paint I stain and oil to get the look I want. it’s all about trial and error with different types of wood, test on scarp until you get the tone or look you want. Everyone is different. Given all the time maybe years we spend on a build I think it should to reflect the builder Have a look at my build Rattlesnake by mog, I attempted to get a different look blending woods and stains It will give you an idea of what I have come up with using trial and error top get the right look. Also take notes on what you’re doing, so when you do find the look you can repeat it, and at some point you will always have to go back and redo something so the notes will help you get the right match.