HOLIDAY DONATION DRIVE - SUPPORT MSW - DO YOUR PART TO KEEP THIS GREAT FORUM GOING! (Only 13 donations so far - C'mon guys!)
×


king derelict
-
Posts
3,268 -
Joined
-
Last visited
Content Type
Profiles
Forums
Gallery
Events
Everything posted by king derelict
-
That is a great video. Its a very interesting insight into both the construction and the lives of the builders and their mobility. I think they are faster than I am too. Thank you very much for posting it. Alan
-
Looking very good Jav. The masking is great Alan
-
The display idea is really clever and very effective. Large aircraft take up a lot of real estate around the house. I must try to remember this when the time comes. Your display is coming on nicely. The Eighth air force badge is a nice touch. The Vallejo paints do seem stubborn to shake. I have some in my future so the Tax shaker may be borrowed Great work Alan
-
Thank you very much OC. They look really very nice. I'll order a few to see how they look against the stonework. The 10 mm figures I got from Pendraken are probably just too small to do anything with. I did think of painting them white as ghosts of yesteryesr but I don't think it would work Alan
-
Thanks Jack I think I can do that in the castle. It looks like most of the areas are gravel or grass. Those are great dios by the way Alan
-
The Mosquito looks really nice in the PR blue. Beautiful model Jav. Alan
-
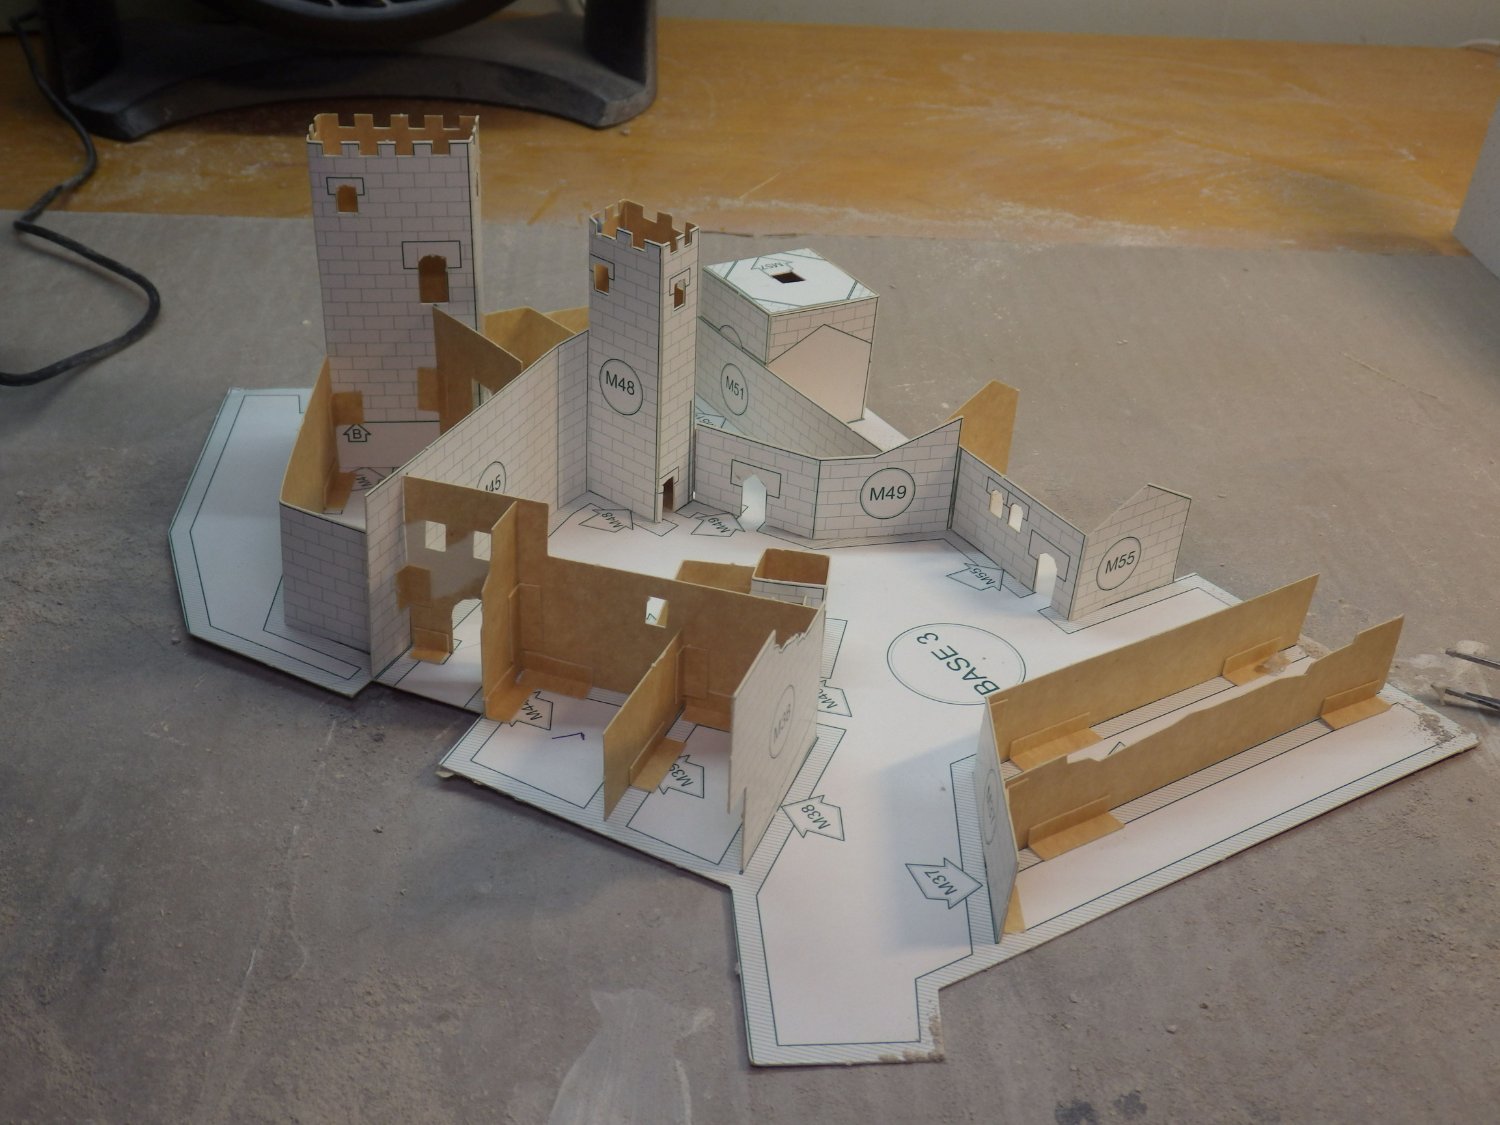
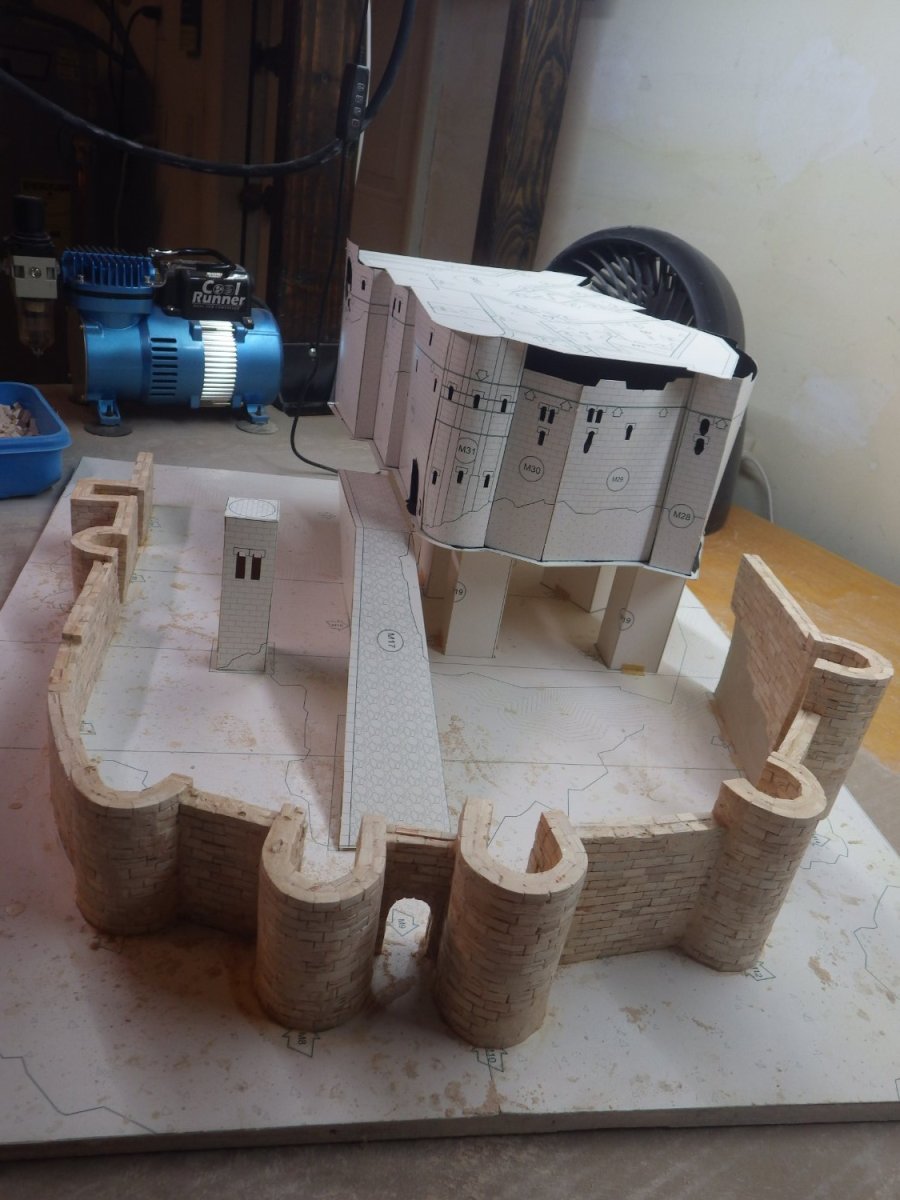
I spent some time today adding the upper layer to the main tower roof. Its a complicated layout. The numbers on all teh pieces make it pretty straightforward apart from a couple of odd pieces which need a bit of extra thought. The instruction / guide sheet is of little / no help - its more just a general outline of the build. There is going to be some fiddly brickwork here. Assembling the structure has made it easy to see which elements are closed in and have roofs and should be lit. I was wrong in my initial assessment and only about five parts will need lights so I have rather overordered on the leds. I'm sure they will come in useful and I suppose I could add a few in the base of the towers in the curtain wall The next step will be to assemble the roof onto the main tower but before then I need the leds so there may be a few days pause. I should have planned better but I hadn't expected to move quite so fast on the last bit of teh wall. Thanks for all the comments, helpful information and the likes Alan

- 462 replies
-
- 14
-

-
OC, thanks - that may be a great idea to try. Those little figures have been bothering me a bit. They are o small that I can't think of an easy way remove them from the bases. Somehow they would have to be added and the landscape built up around them. Lots to think about here. Alan
-
And of course there is the great old pre-decimalisation British currency. Based on 12 pennies to a shilling so more sixes there. Not to mention balls in an over Alan
-
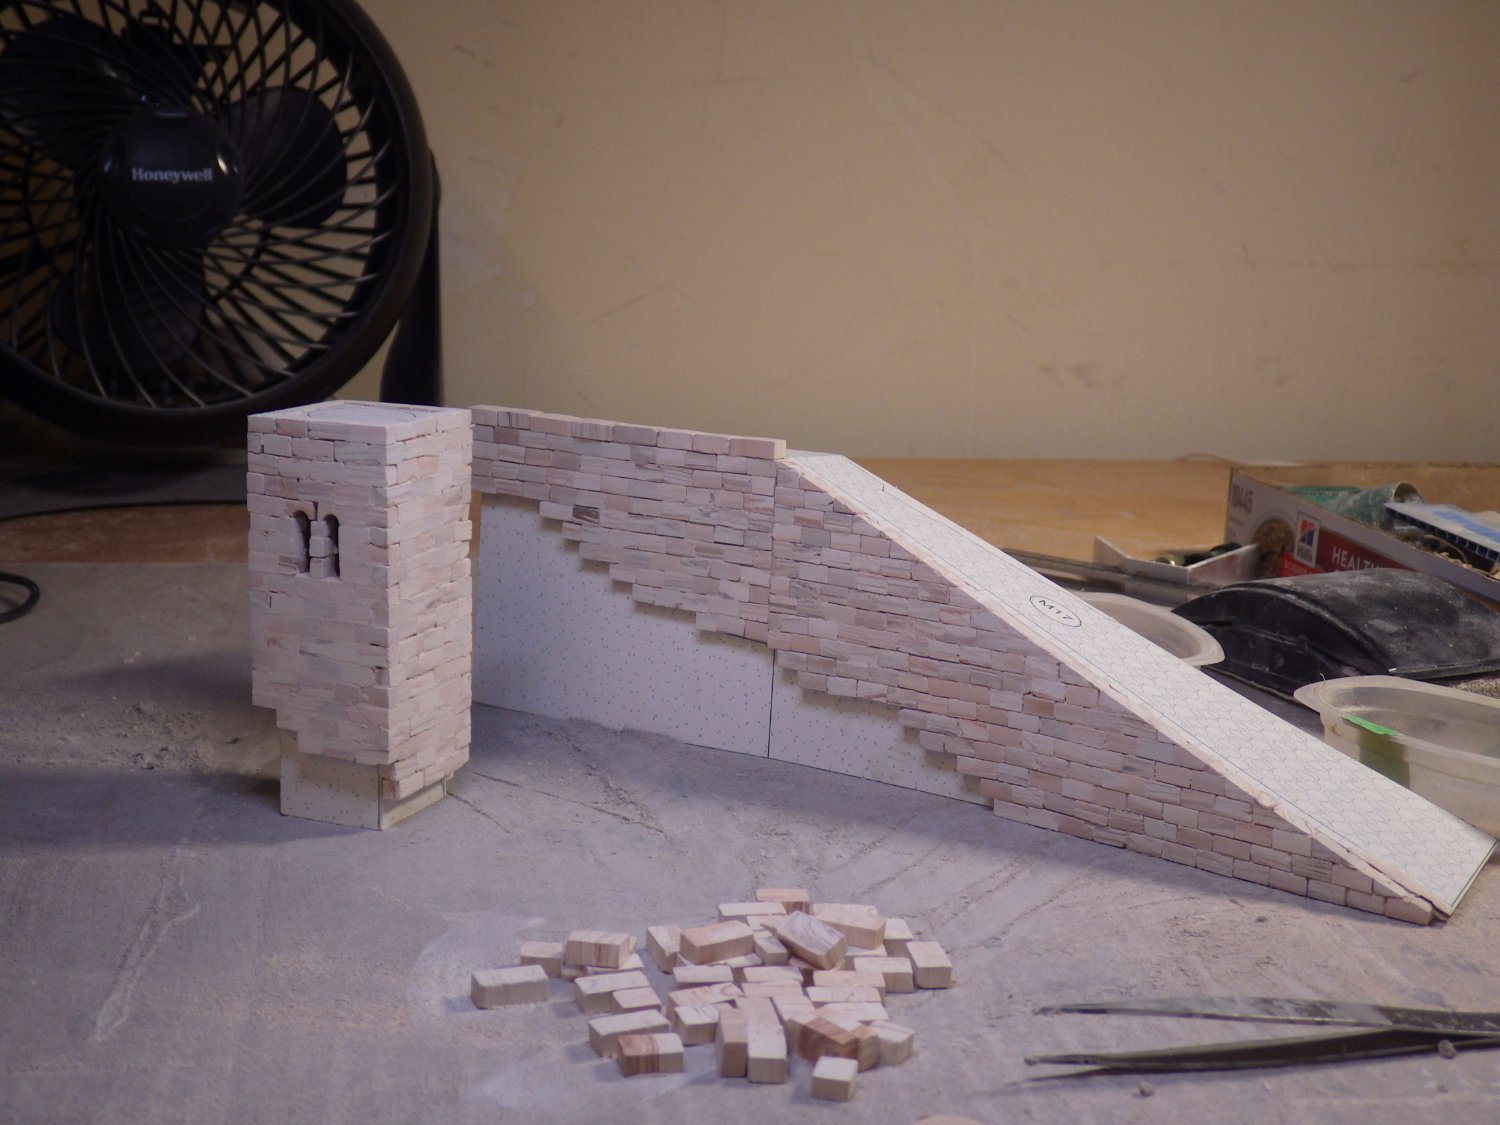
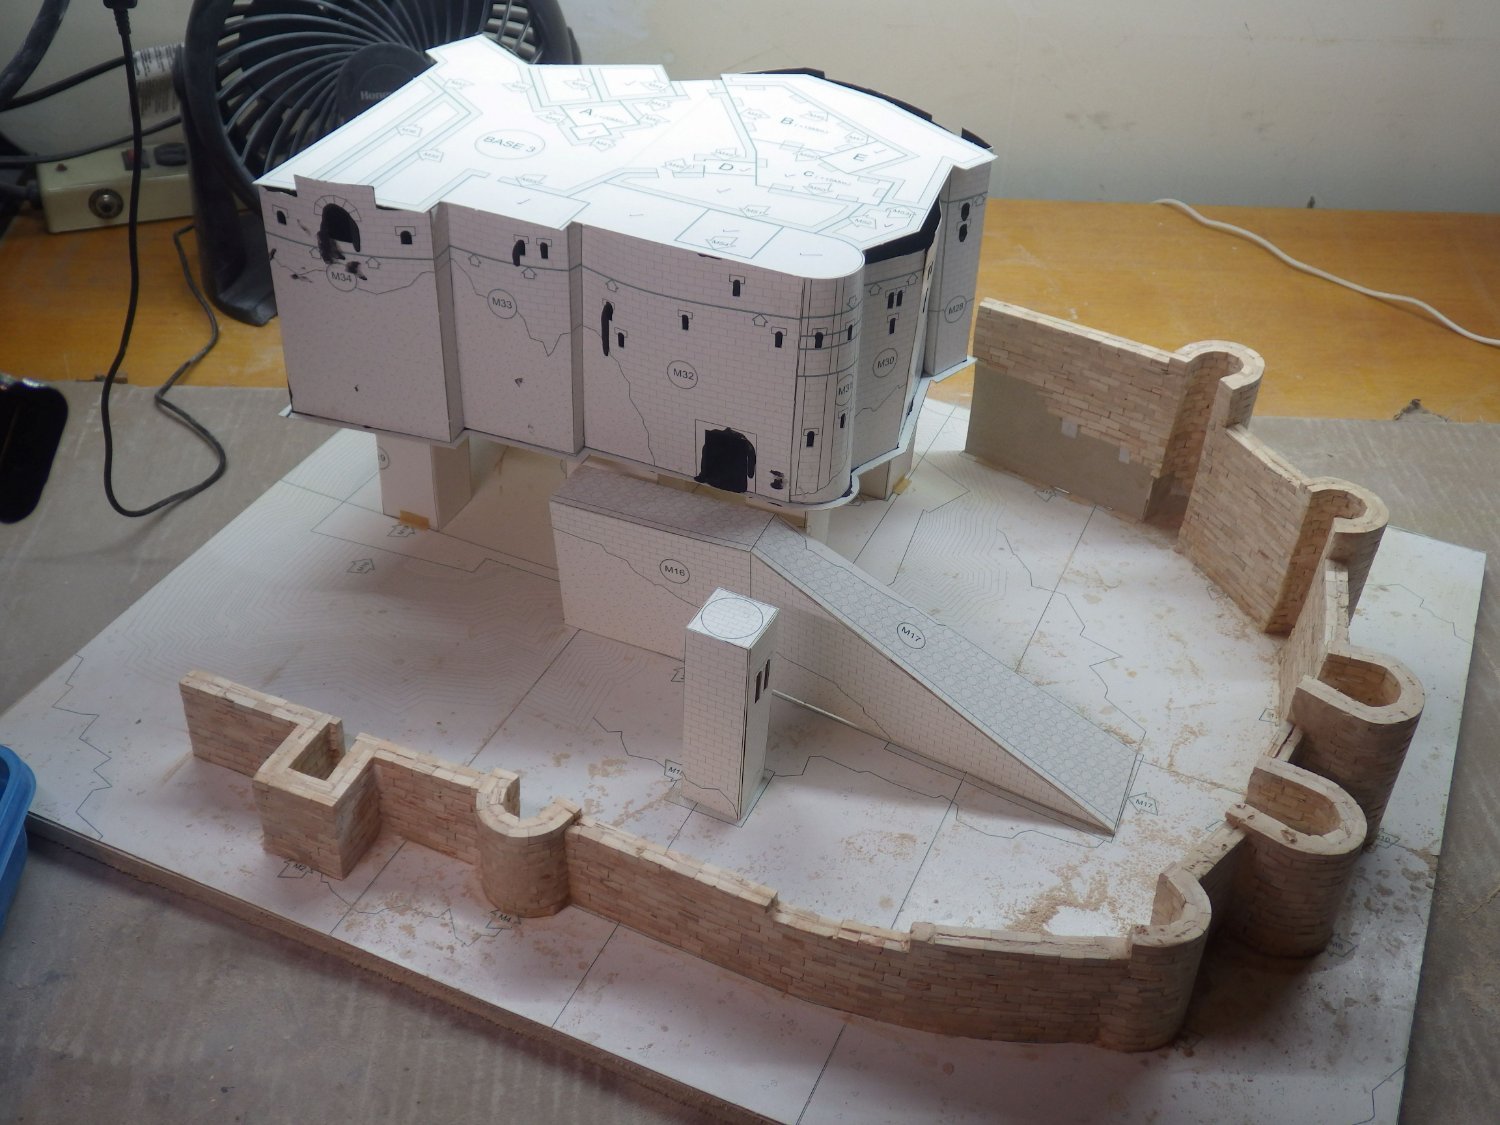
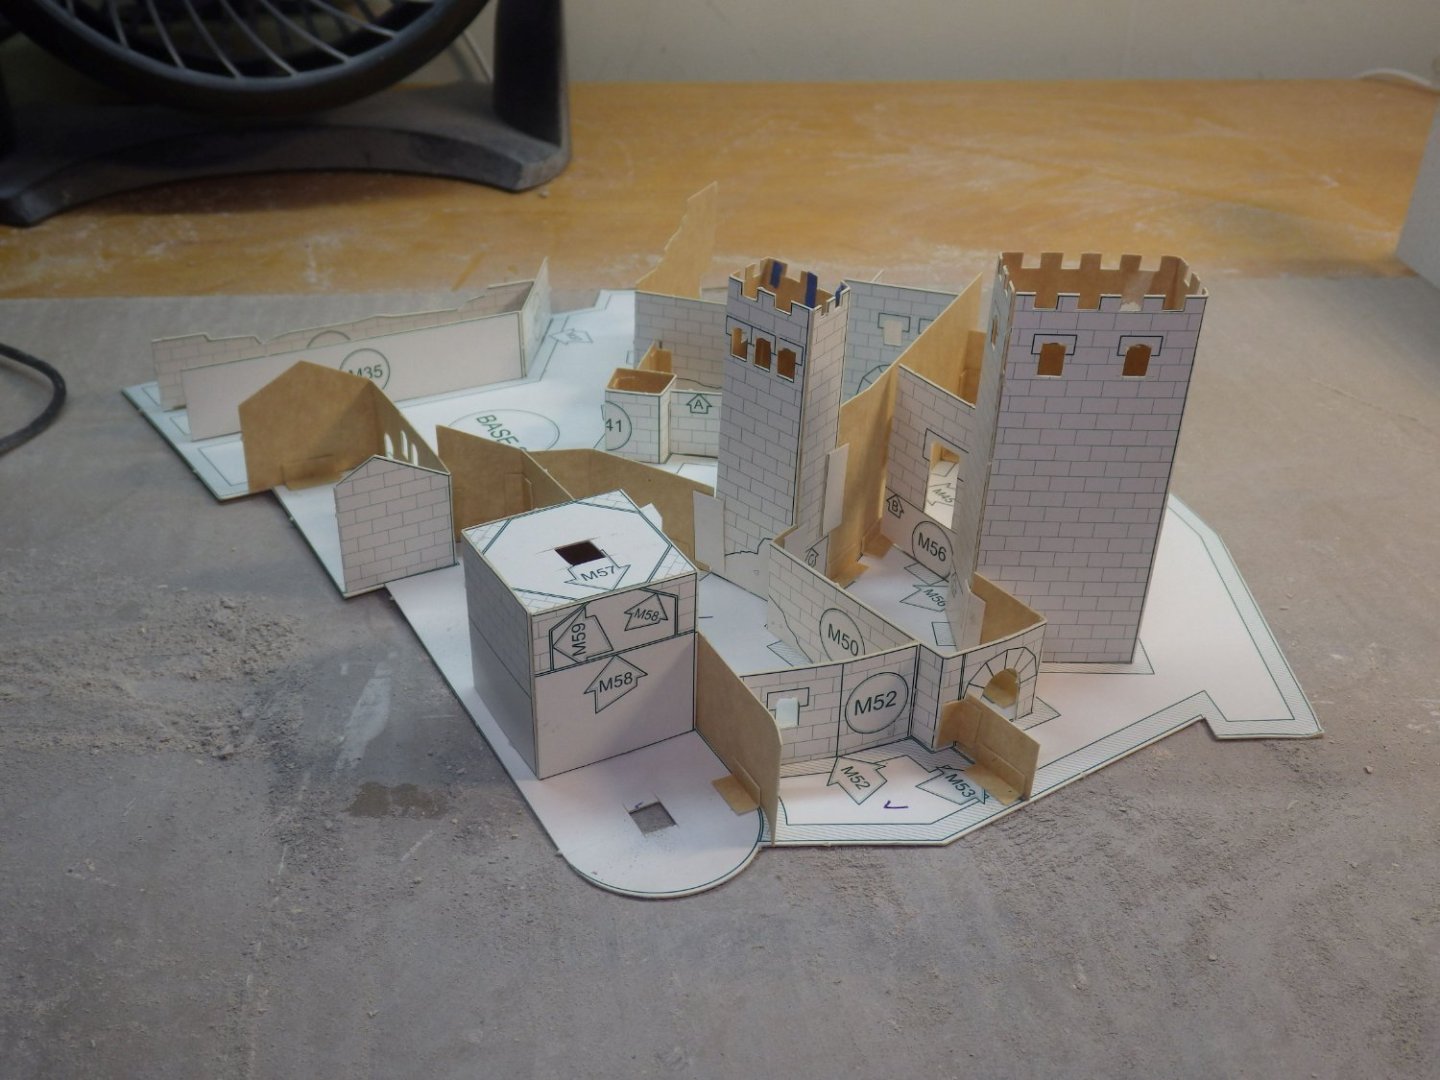
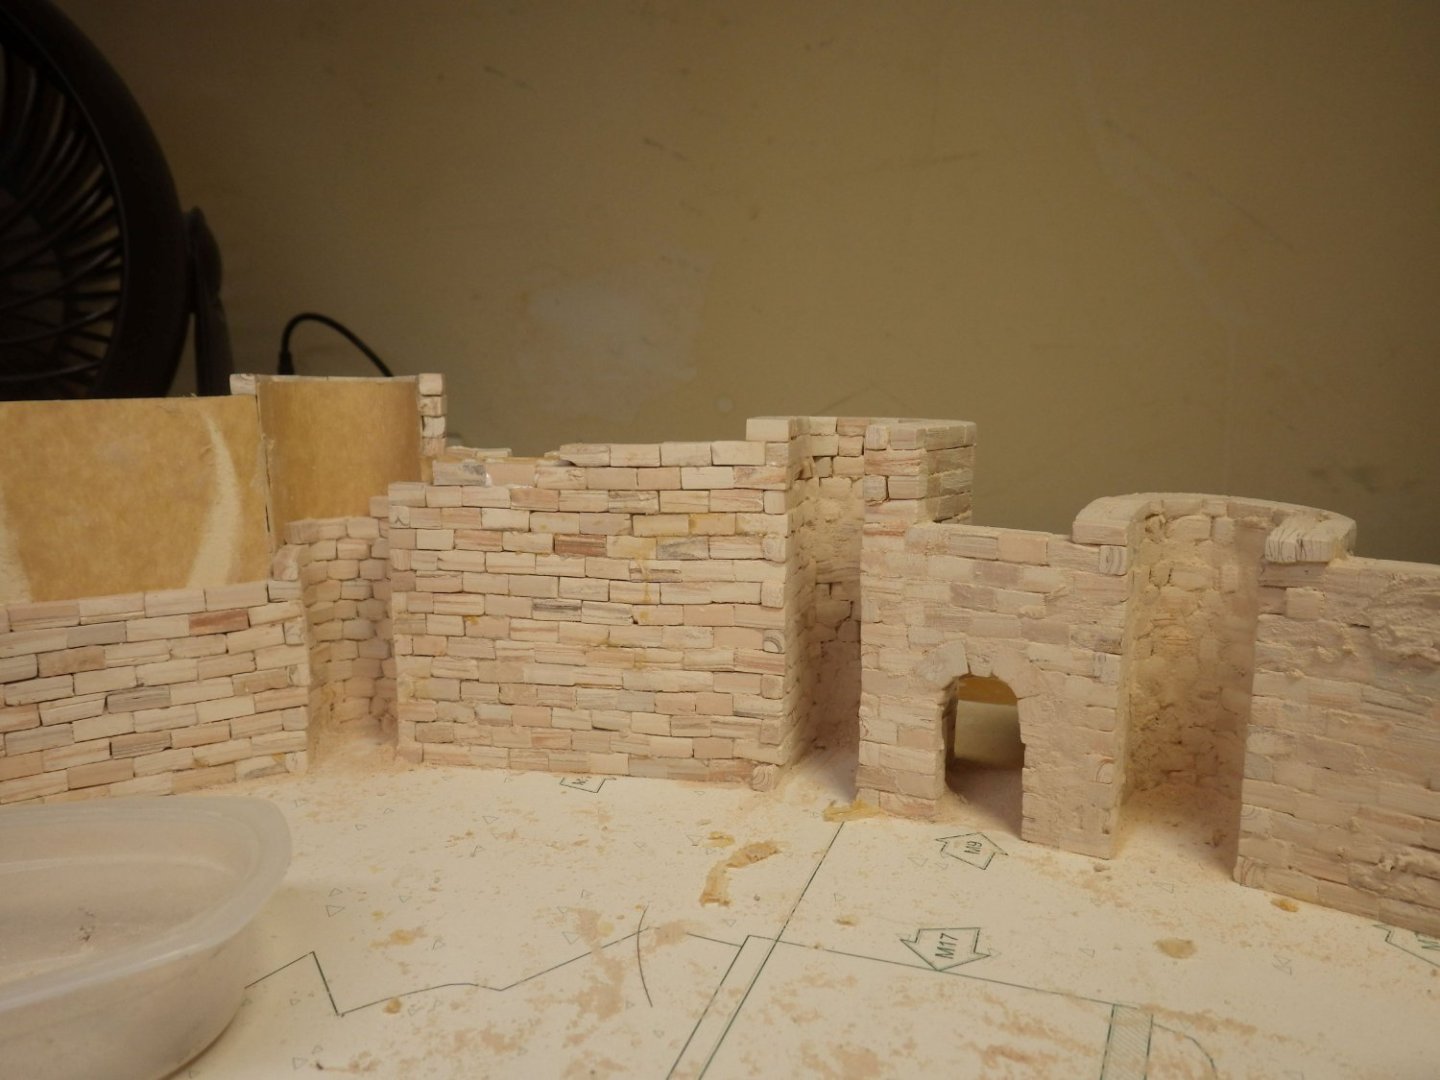
I made some progress with the keep and the ramp. Quite relaxing after the outer walls although the keep windows are fiddly. I spent quite a bit of time puzzling out the next moves; the lighting and the build up of the main towers. I have some cheap 2V yellow flickering leds from Amazon which I have been playing around with. I'm a little nervous of using them in this model being a bit unsure of their quality so I ordered a$50 worth of 3V flickering warm white ones from Evans Design and hopefully they will be a higher quality. The kit guide would have you build up the walls of the tower before fitting the roof but I am reluctant to do that. It is possible to slightly distort the walls as teh blocks go up and then the roof is not going to fit well. I am also trying to work out what parts of the upper structures should be lit and need wiring. This is the roof with the layout of the next levels. I think I am going to try building up the cardboard formers to see what I have up there and then sort out the lighting and wiring before adding the roof and starting the blockwork. Thanks for looking in and all the help and support Alan


- 462 replies
-
- 11
-
-
Very interesting stuff and it is probably pertinent to remember that Pythagoras and Euclid were around a long time ago too Alan
-
Interesting stuff Craig It sort of reminds me of many, many years ago when I worked construction out in the Arabian Gulf. The engineer on site was the only person who could read a drawing and he gave the dimensions to the foreman who was the only other person who could read a tape measure. He would then hunt around for a stick of the right length and the gang would be told "that deep" Alan
-
Thank you very much EG. That is really helpful. 18 inches is less than 0.1 inches at scale so I think I will use the Woodland Scenics yellow turf. and some bushes. The landscaping is going to be a fun part of the build and I appreciate your help. Alan
-
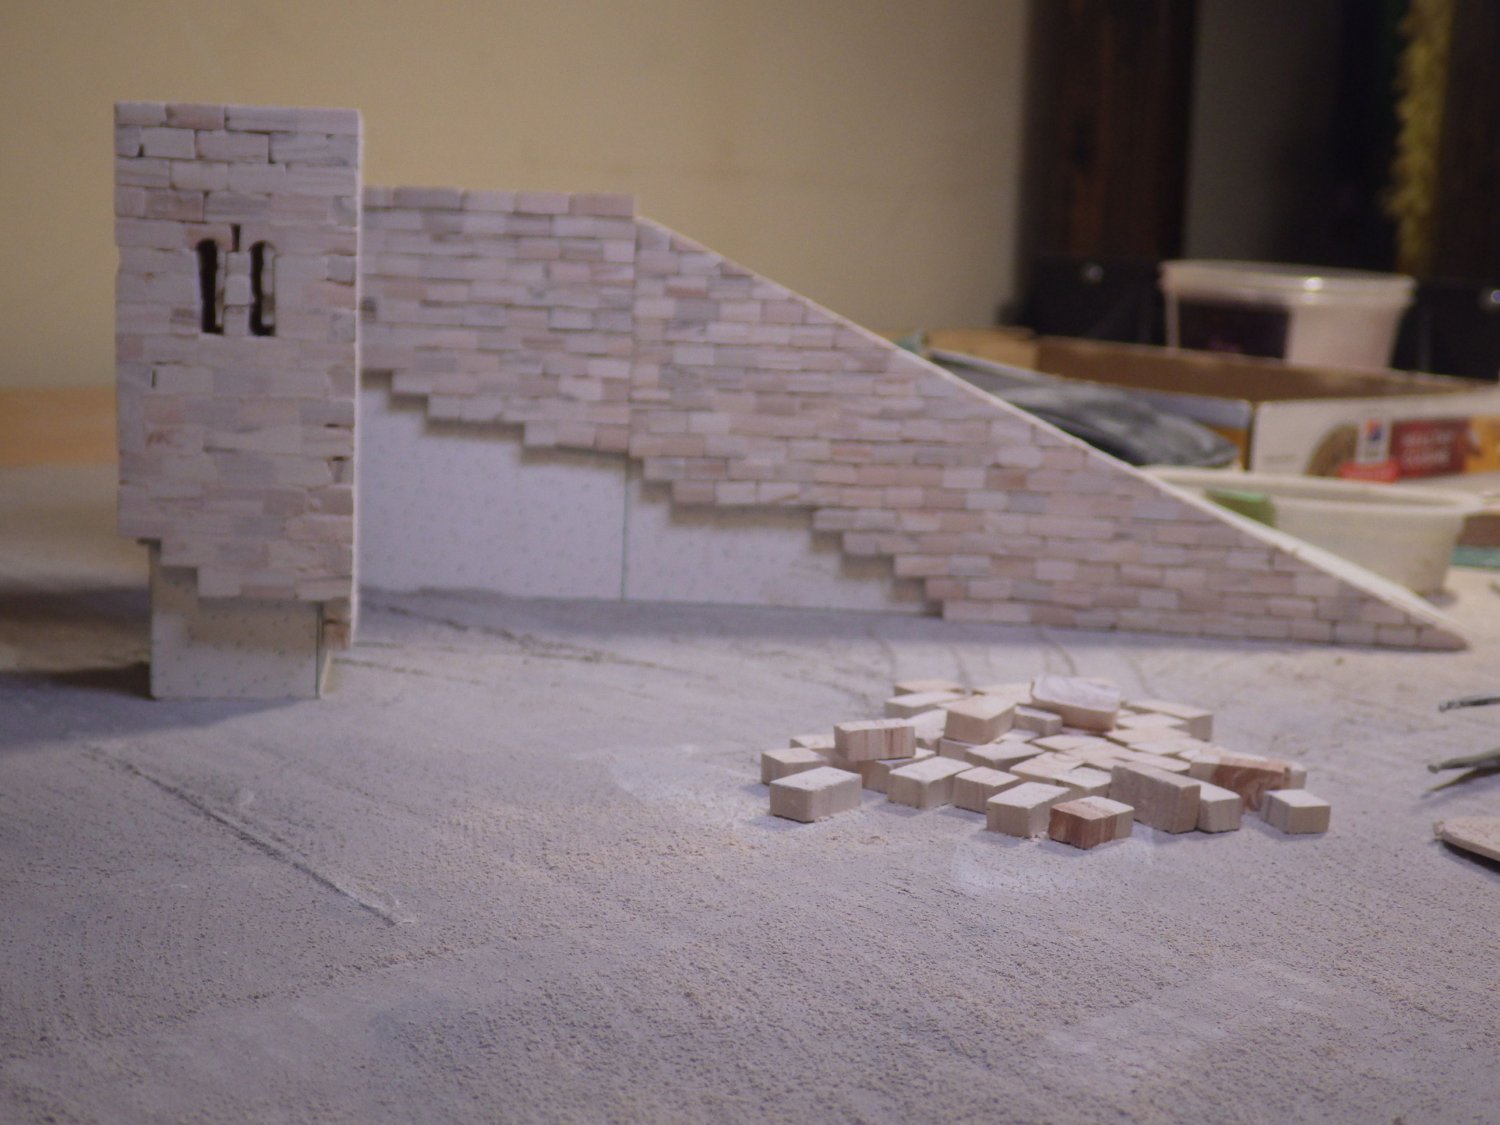
In spite of planning to take a break I am still enjoying this project so much and with the morale boost of completing the curtail wall I decided to carry on while the spirit is strong. I am adding the blocks to the keep and the causeway to the main towers. I then have to stop and think about the lighting. There will be plenty of room to run the wiring under the landscape but I need to work out how many leds will be needed and how to mount them in the towers. I don't think they get hot so maybe i can place them on foam blocks. This will be a bit more of an adventure compared with shaping and adding blocks Thanks for all the support and comments alan
-
Thank you Craig. Its slow but now it feels like I am making progress and I am enjoying watching it unfold. The medieval builders must have been masters of the basic mechanics of engineering and understood levers, fulcrums and mechanical advantages in things like pulley systems. I suppose they had plumb bobs and maybe some sort of level but they certainly did great things and left us some wonderful buildings to marvel over. The cathedrals of Salisbury, Chartres and Cologne are marvels as are the English Castles of Edward in Wales. Alan
-
I had a quick look to see if there was a weight given on the box but unfortunately not. Its going to be heavy though. As for where it will be situated when finished. I'm trying not to think about that. Its too wide to sit on a shelf somewhere. I really have no ides. Its a recurring problem for me. I'm wondering why on earth I bought a 1/48 Lancaster kit too! Alan
-
Thanks Andrew. The ends of the curtain wall look nice and square but that might be modern restoration work. at the end near the main towers the ground is distinctly difficult for a major assault which would be squeezed between the wall and the towers. At the other end the ground is easier but a force coming round the wall would find themselves caught between the wall, the keep and the cliffs under the main tower. It may just have not been finished as you noted. Like Beaumarais castle on Anglesey. Alan
-
Thank you very much OC. I think I can see holes in the curtain wall that may have held the inner ends of beams supporting wooden galleries. I had thought about trying to make some up but I'm not sure I can make the detail fine enough for 1/200. Maybe wire ladders painted to look like wood. I'll see how things look as I get to teh finish line. Alan
-
Thank you very much EG. There is some great reading material there and a lot of good ideas and techniques. I think this is going to end up as a mix of techniques. I think I will use foam board as the basic structure (and to help out those cardboard piers) and mesh and hydrocal. I think I may invest in a hot wire cutter for the foam board shaping. I'm thinking about ground cover too. The green flock provided in the kit will be ditched along with the blue (not even any water in this one). The landscape is more arid and needs to be yellow green anyway. I'm wondering about static grass but would that be too tall for a 1/200 landscape.? I liked the Woodlands Scenic shaker of grass that I used with the WW1 diorama so I may get another in a yellow colour. Thanks again Alan
-
Thanks Jack I have some spare screen mesh in the garage. I hadn't thought of using it but thats a great idea Alan
-
I have a lot of affection for the Harrier family. You did a marvelous job of this one. The panel lines are really neat.I Somewhere in the build line I want to attempt the X-32B, F-35B, AV-8B and Sea Harrier. My STOVL family as it were and three STOVL concepts Alan
-
The individual models are beautifully detailed but the diorama is spectacular. So many interesting elements and all well drawn together Alan
-
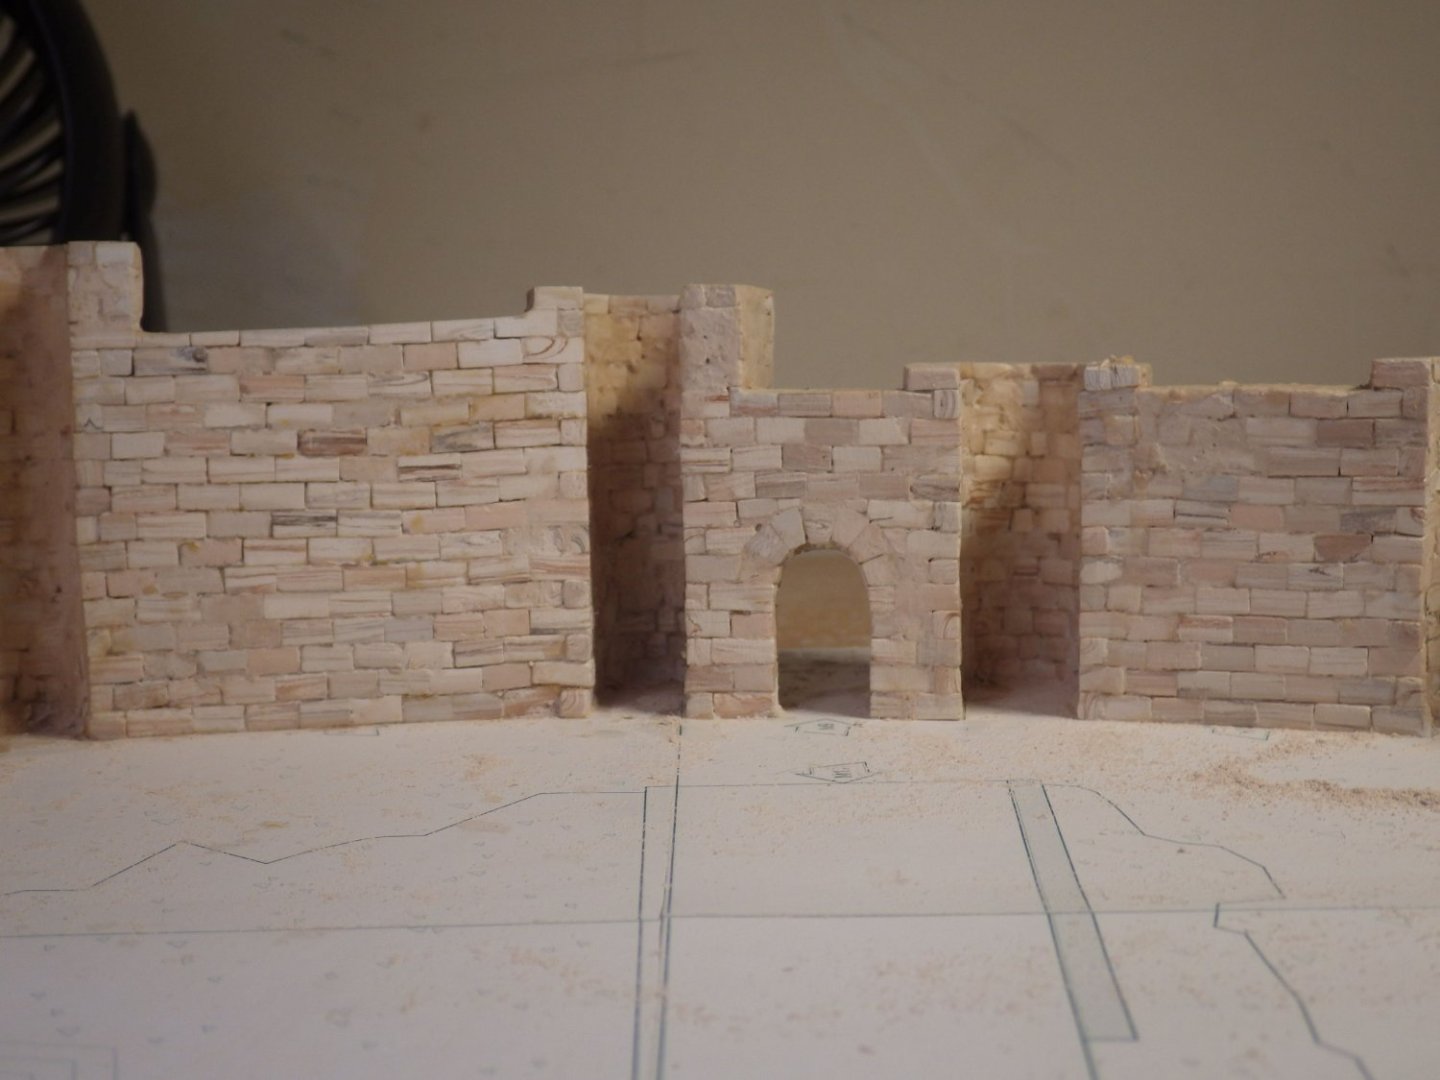
This is a nice video of Loarre Castle which illustrates some of the simplifications of the kit. The base should really be sloping over its entirety but I think its a reasonable interpretation. There are a few elements about the castle itself that I'm curious about. The outer wall and turrets don't have battlements of walkways. I wonder if they originally had wooden galleries with ladders and platforms within the towers. The other curiosity is that the outer walls don't fully enclose the towers yet the ground on one side seems to be easy terrain for the enemy to wander around the end of the wall I may have to try modelling the two rock pinnacles as part of the base
- 462 replies
-
- 10
-
-
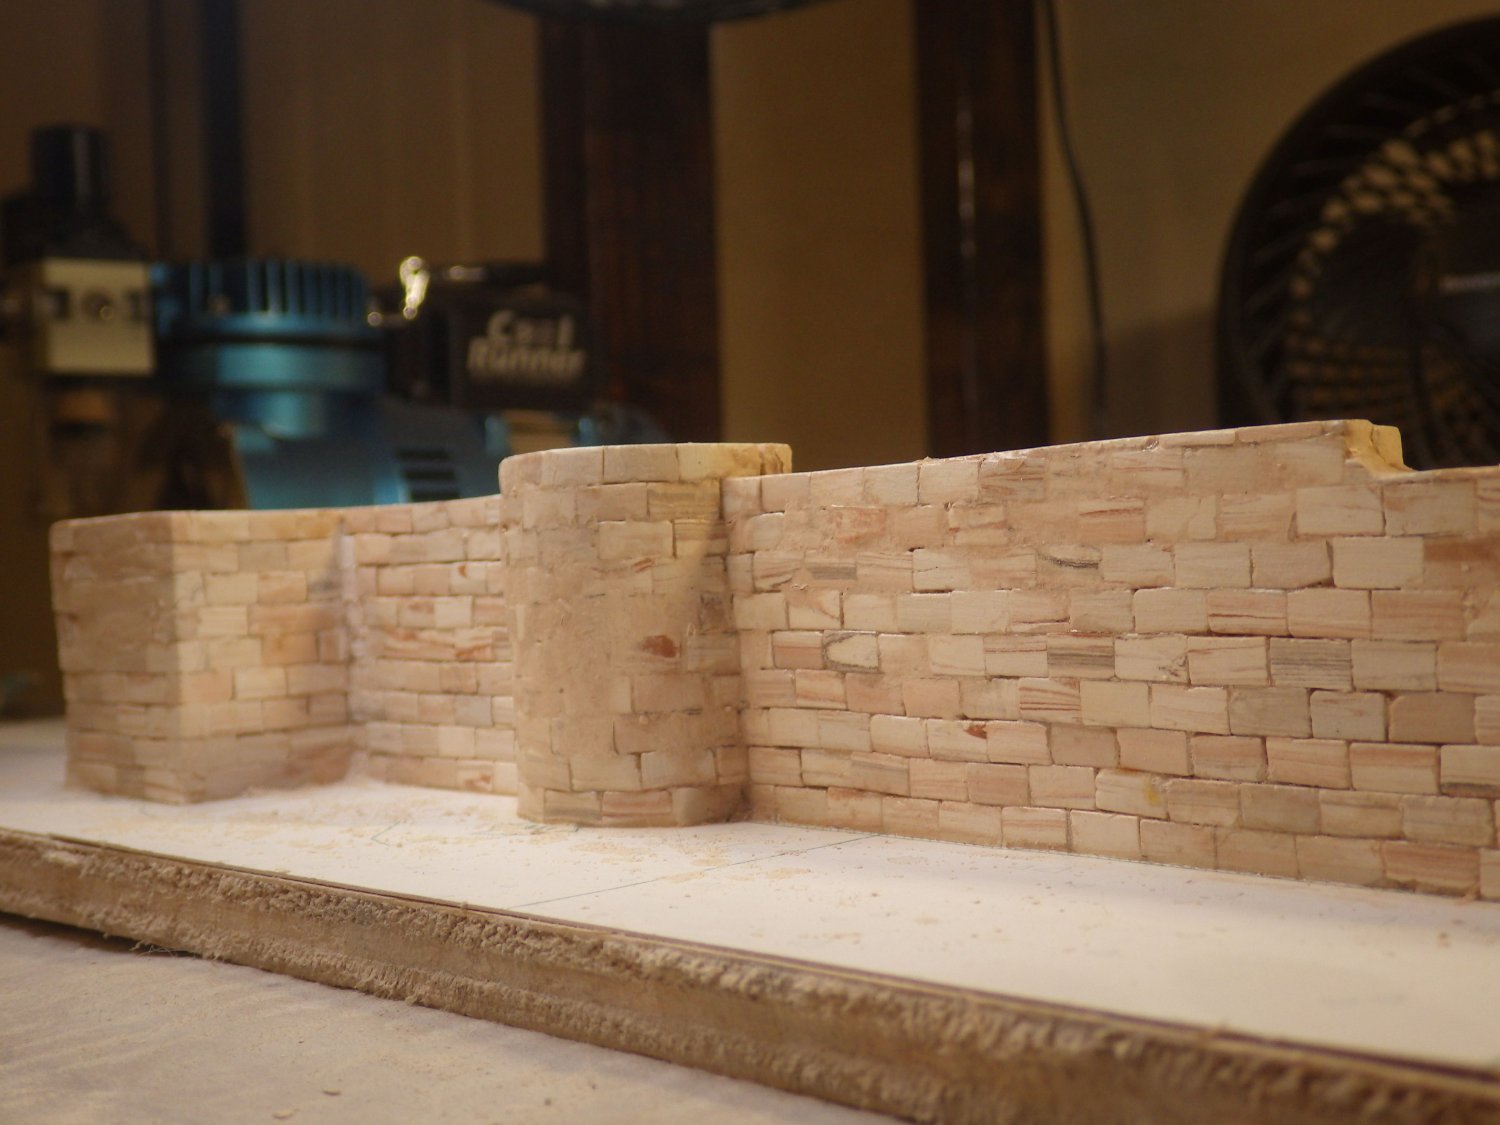
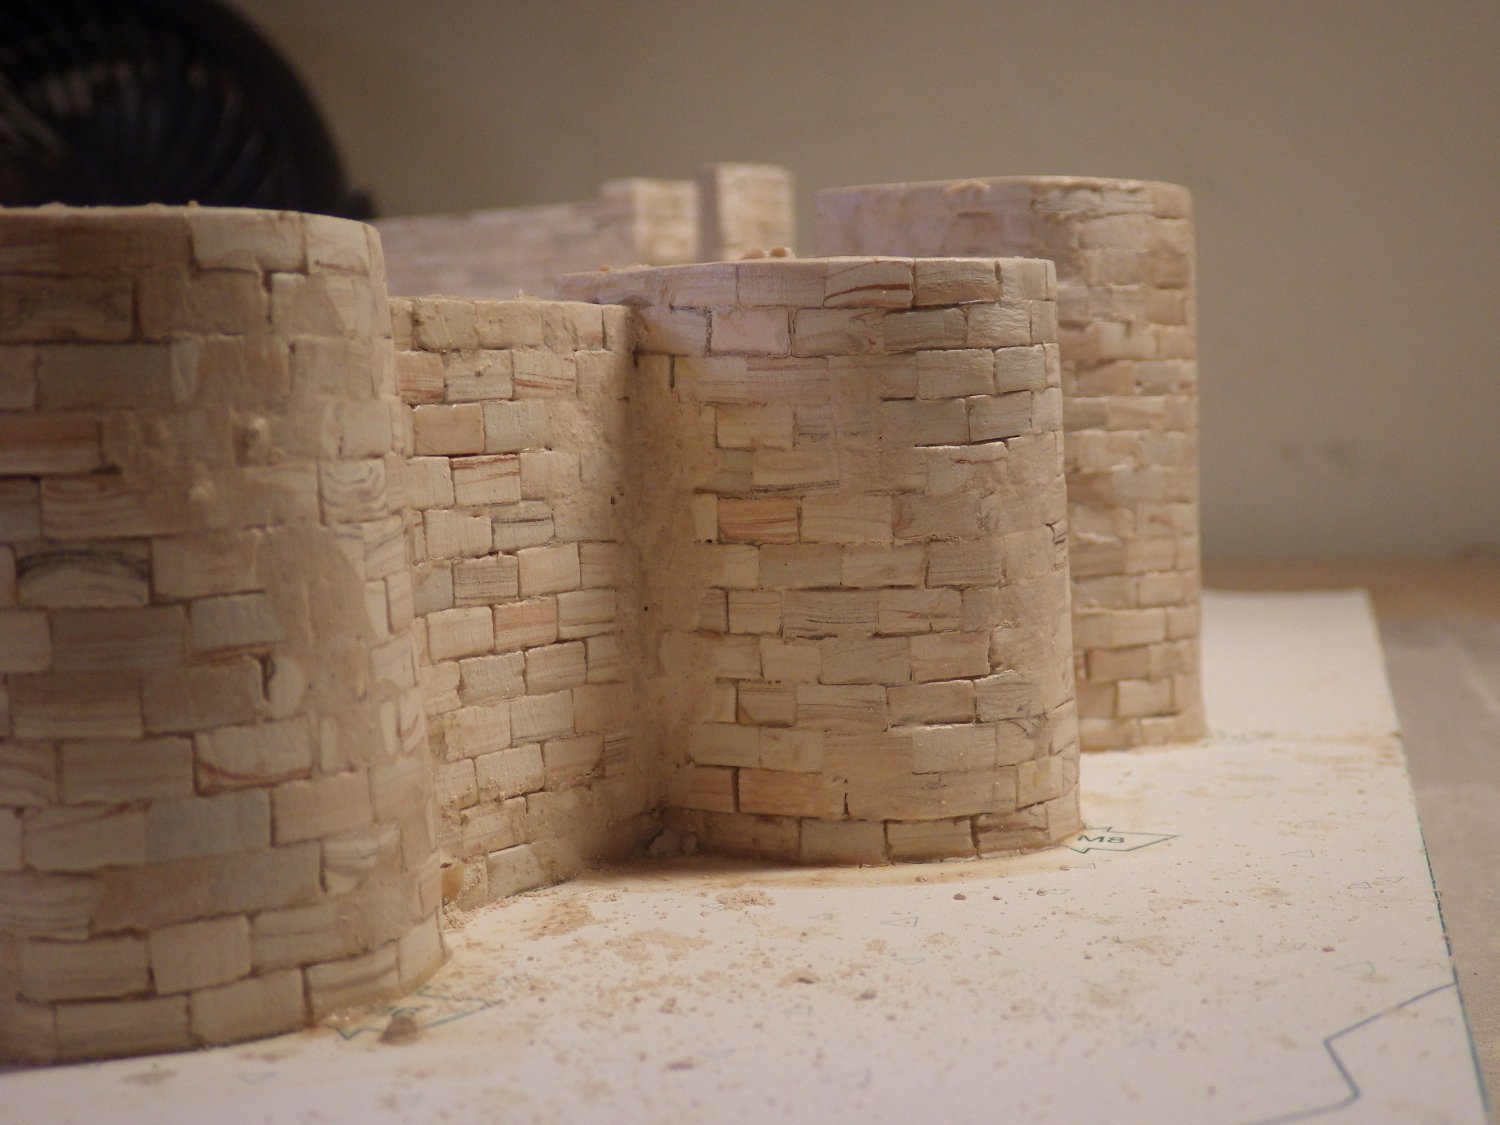
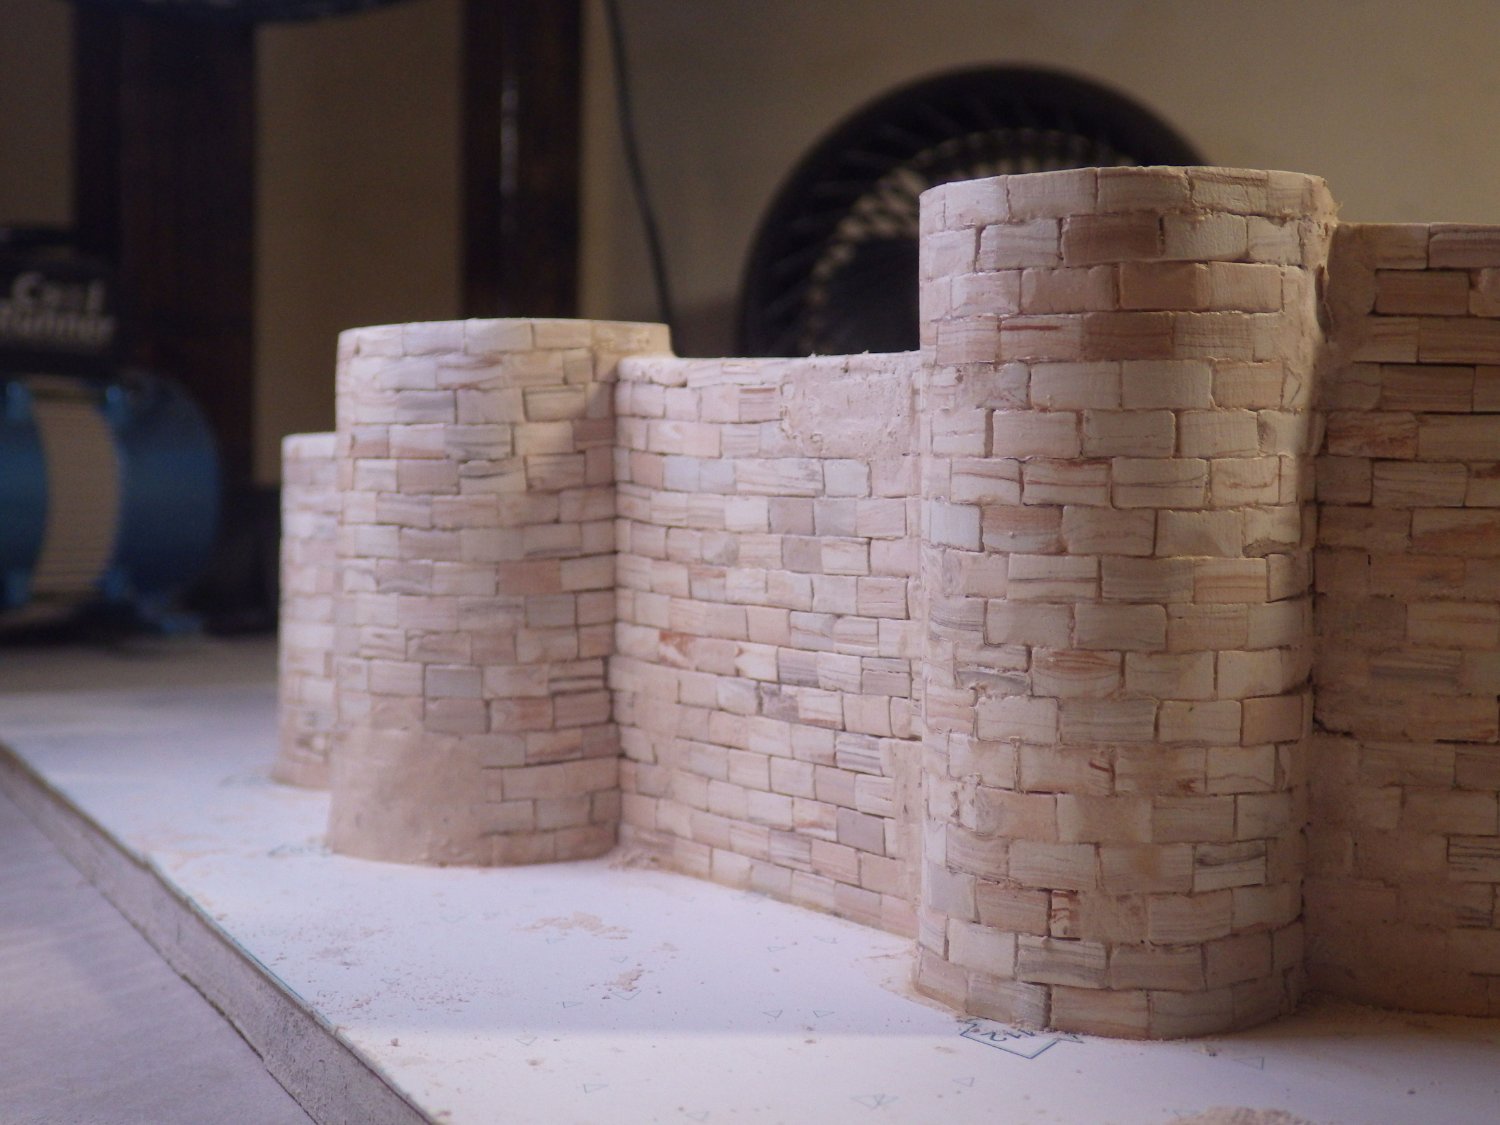
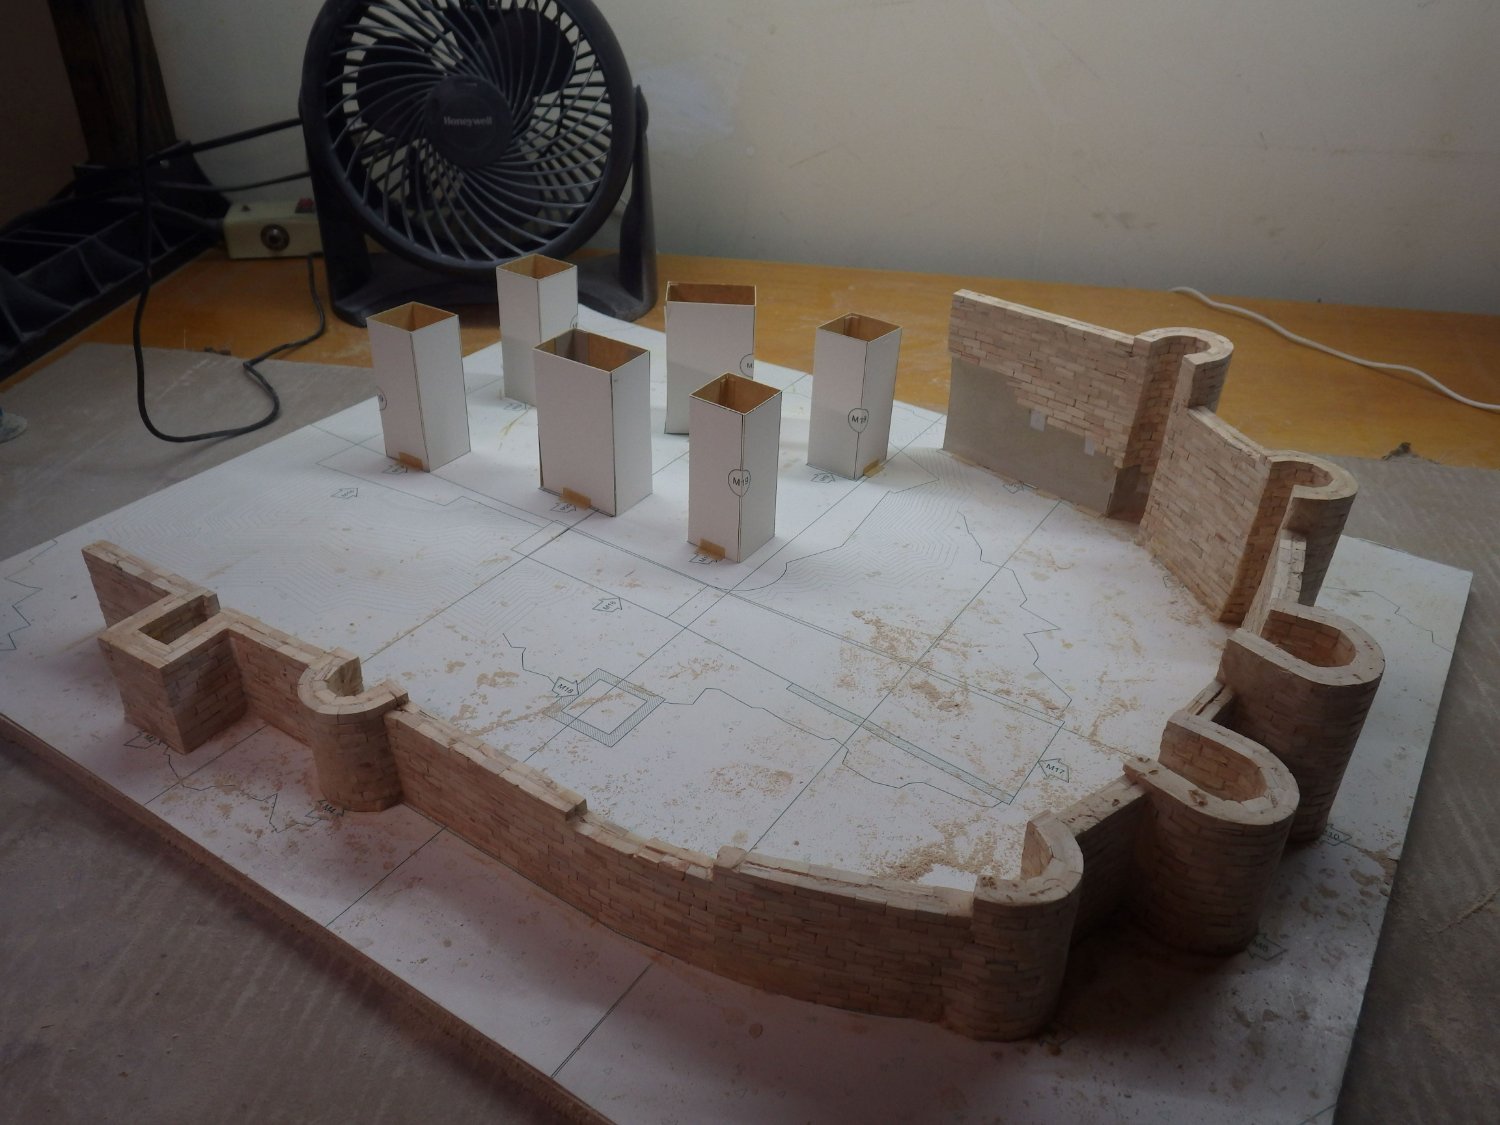
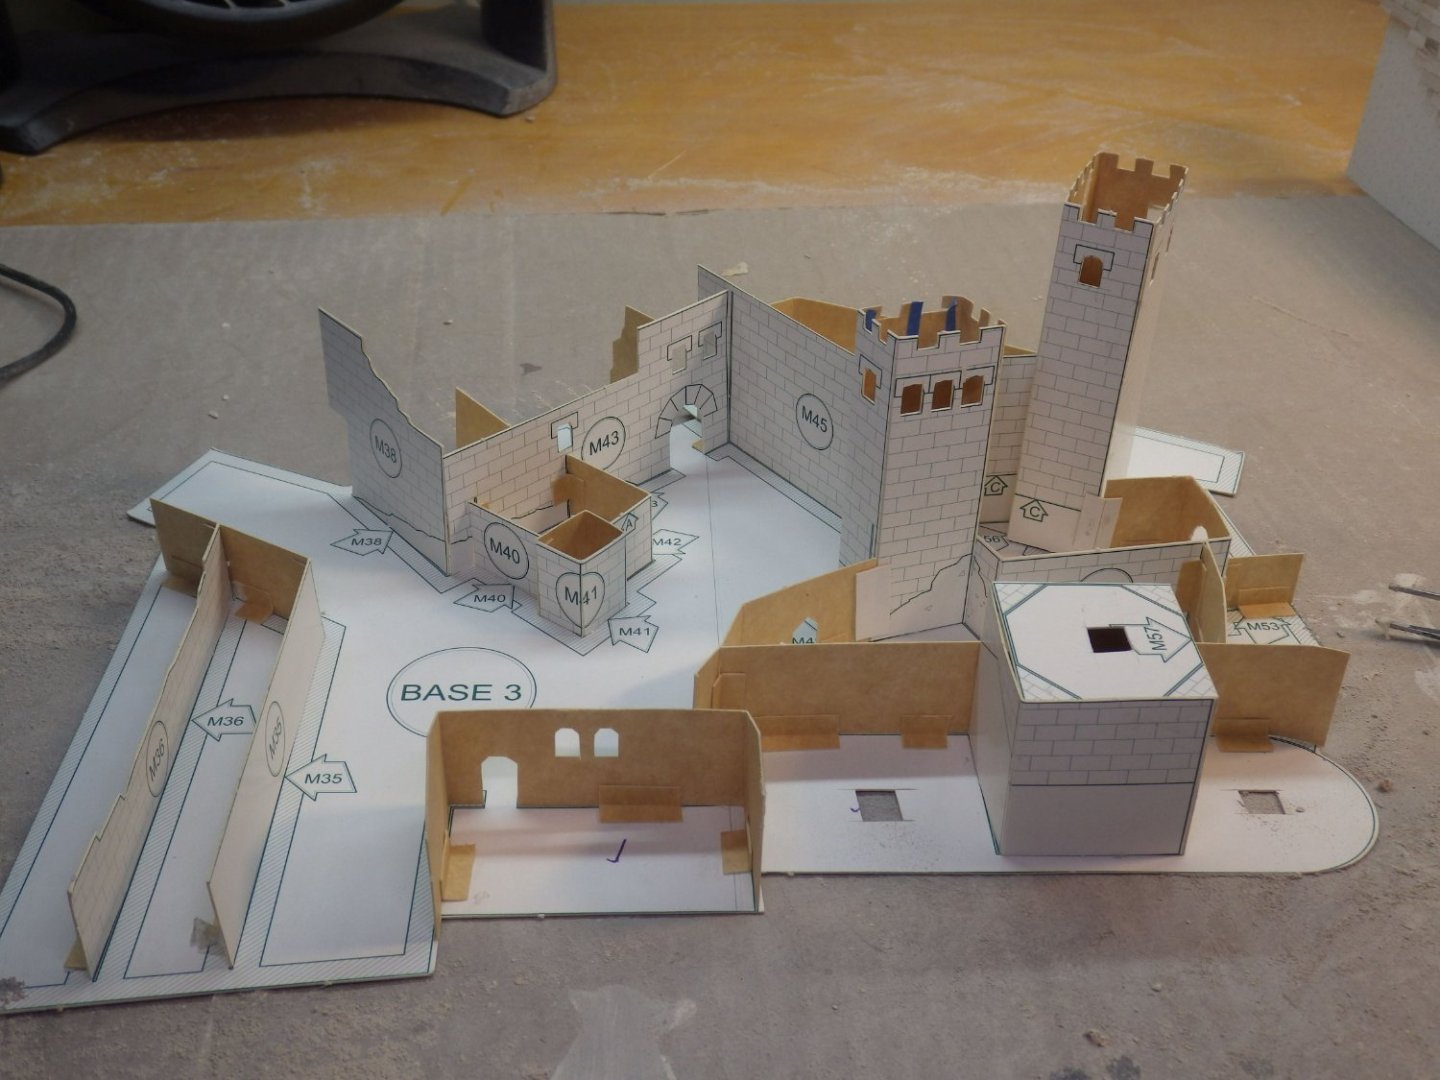
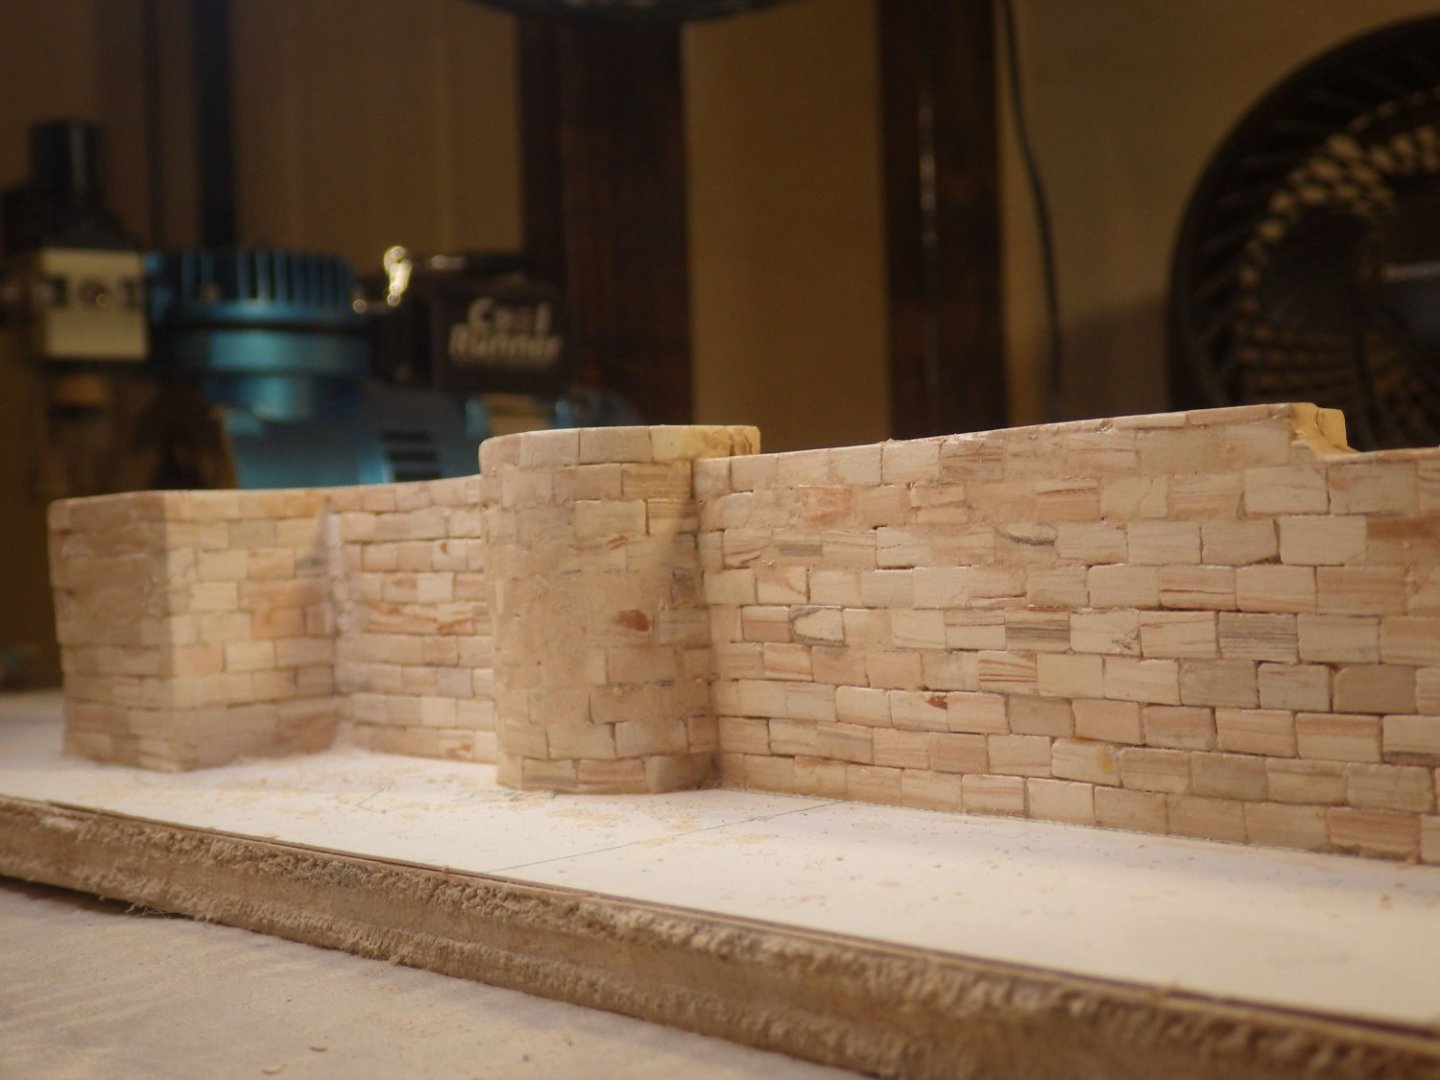
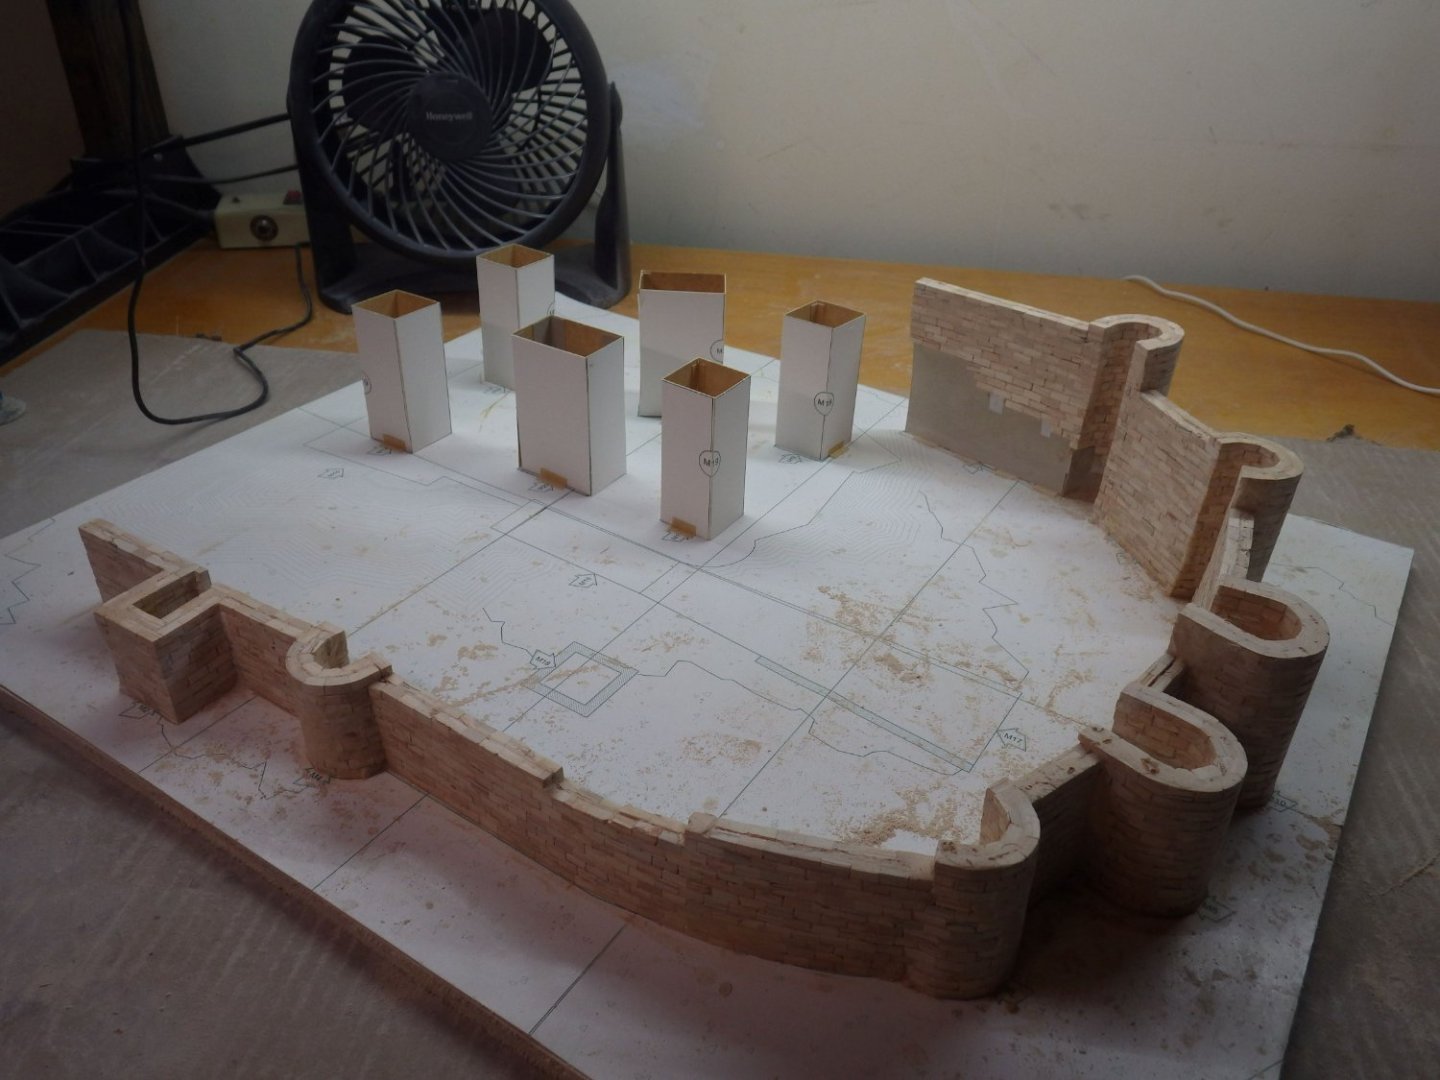
I brushed on matte craft varnish which seals the blocks and the mortar mix. It also seems to bring out the colours of the blocks and suddenly the whole thing seems rather better than in its raw state. Suddenly I'm quite pleased with it although the camera picks out a few places that need a bit of further attention. I built up the cardboard piers that the towers will stand on. I've added them to the baseboard but I'm thinking of adding some more support. Aedes Ars have a lot more confidence in the loadbearing capability of cardboard than I do. I might stack a few heavy books on the piers and see how they do for a few days. I added the cardboard formers for the main towers and the keep to get some idea of what is still to do. Some way to go but its getting time to plan the lighting and start thinking about the appropriate media for the landscaping. I'm thinking foam blocks roughly shaped and then covered with hydrocal or Sculptamold as a start. Embed some plaster cast rocks to get the cliff faces. Thanks for looking in and the likes and comments Alan


- 462 replies
-
- 12
-

-
-
Thank you Mike. Its starting to feel like progress. They have kits out there with 13000 blocks compared to the meagre 8600 in this one Alan