HOLIDAY DONATION DRIVE - SUPPORT MSW - DO YOUR PART TO KEEP THIS GREAT FORUM GOING! (Only 24 donations so far out of 49,000 members - C'mon guys!)
×


king derelict
-
Posts
3,272 -
Joined
-
Last visited
Content Type
Profiles
Forums
Gallery
Events
Everything posted by king derelict
-
Thank you very much OC. The reentrants are definitely fiddly but I'm still enjoying it. Alan
-
That's is a superb figure OC .The painting is first class. The photos are excellent too. I'm looking forward to getting back to plastic stuff and painting again Alan
-
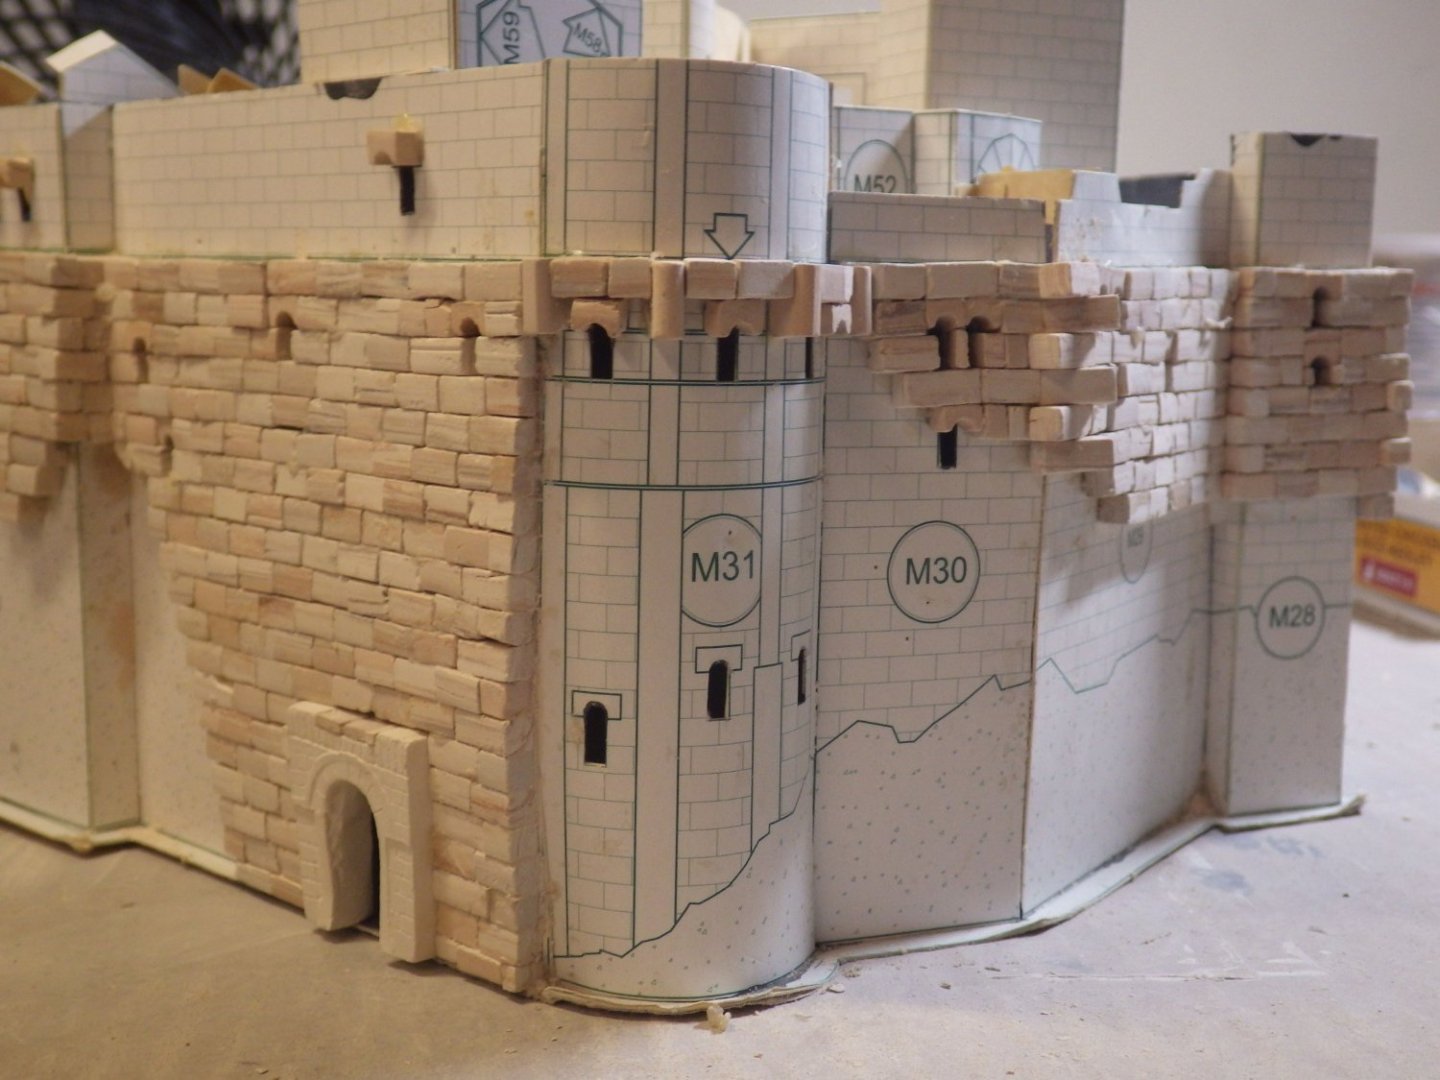
Back at last with the pile of blocks and the sanding sticks. I completed the lower section of another wall of the tower and added the portal. The first windows are being worked around. There will be some cleaning up when I start sanding the walls down. The curved section of the wall with the pillars and tiles is going to be a slow process with lots of fiddly little pieces to file down. Its good to be back making a lot of dust again. I hope everyone has a great weekend and thanks for looking in and the likes Alan
- 462 replies
-
- 11
-

-
This last two years I have seriously thought about it. Yearly premiums are running about $7000 and to keep it down I have dropped coverage on contents, increased deductibles so I get less and less for the money. And of course if you have the temerity to claim they will either drop you or hike the premium. Three years of premiums would just about pay for a whole new roof. I don't see any signs of the market improving any time soon Alan
-
I keep telling myself its a harmless habit after all I could be spending the money on a crazed drug habit
-
I also thought they were brass casings. Excellent job. This looks like a very nice kit. Alan
-
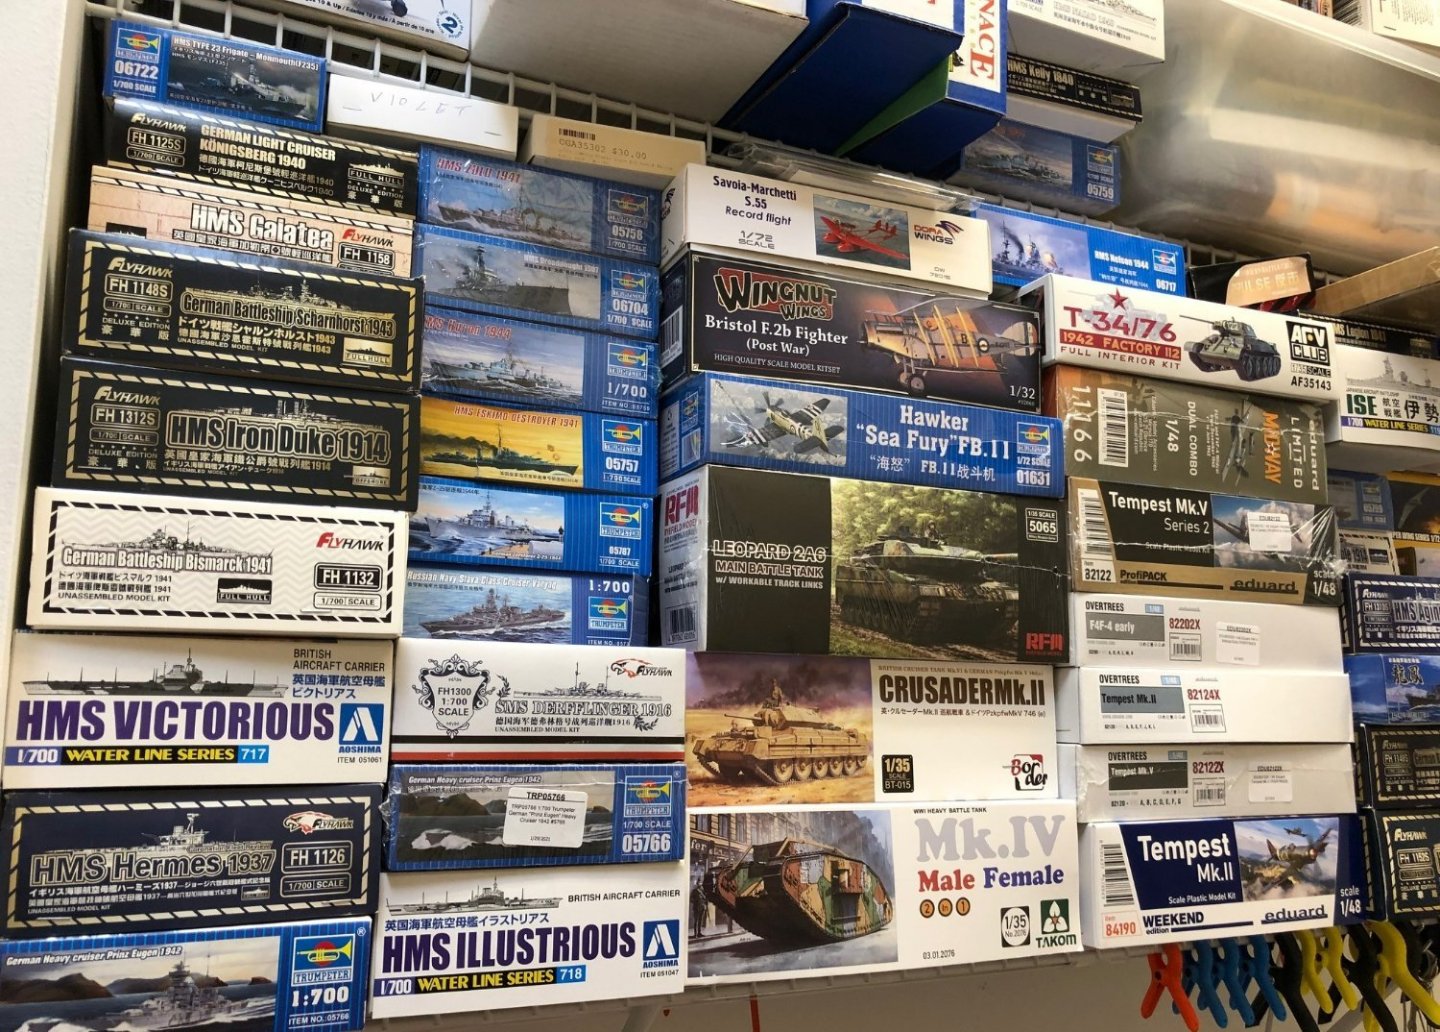
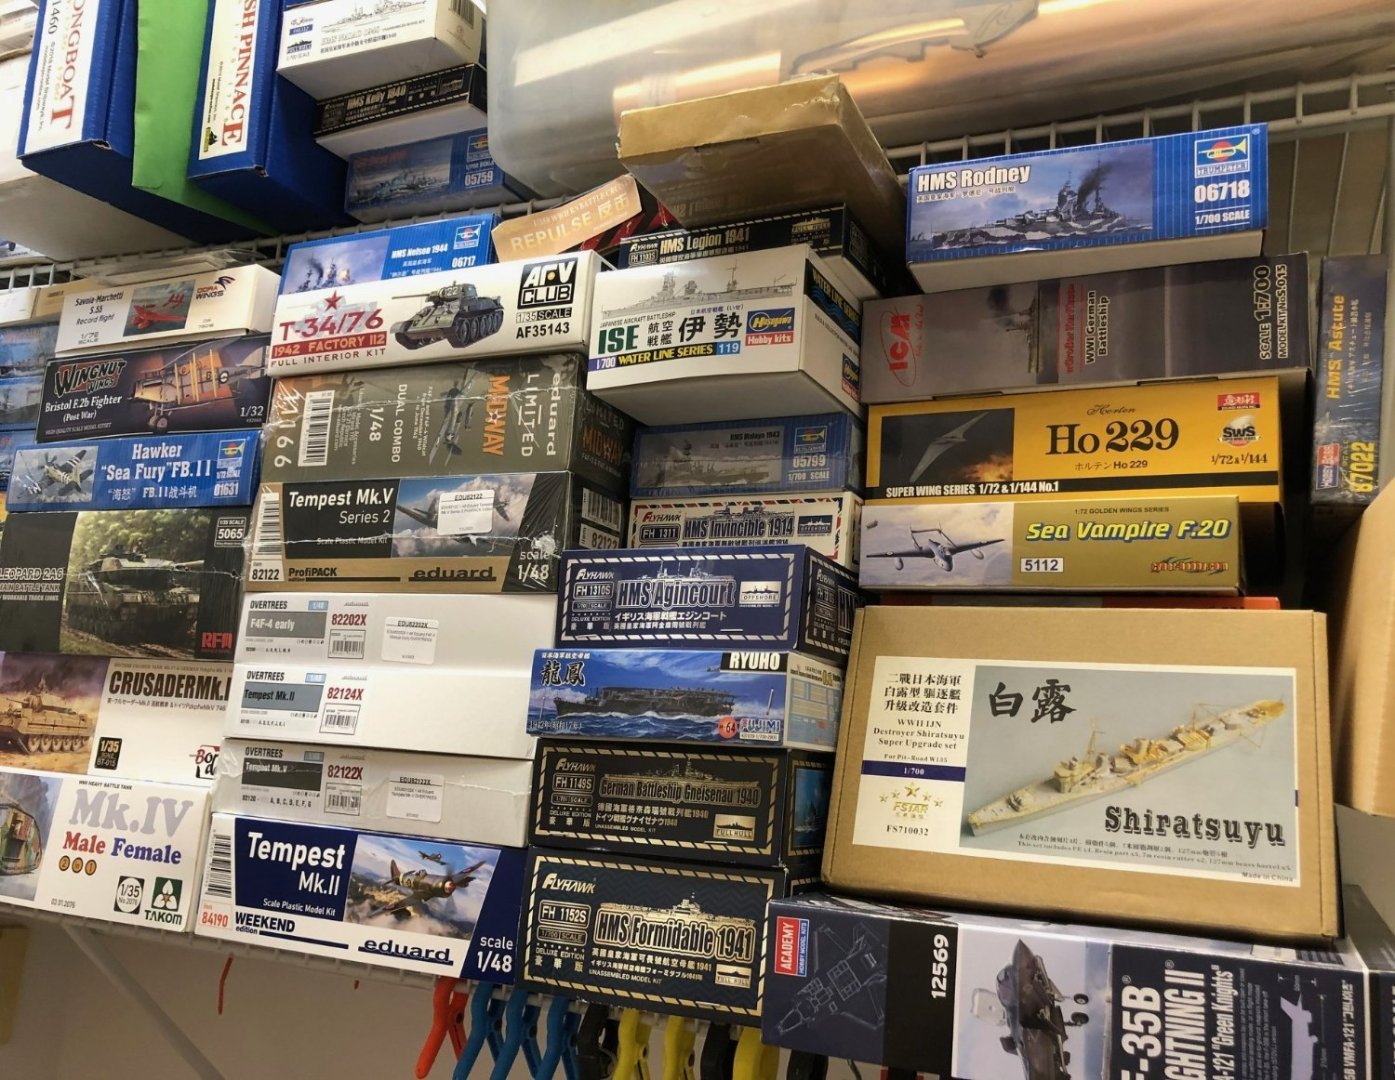
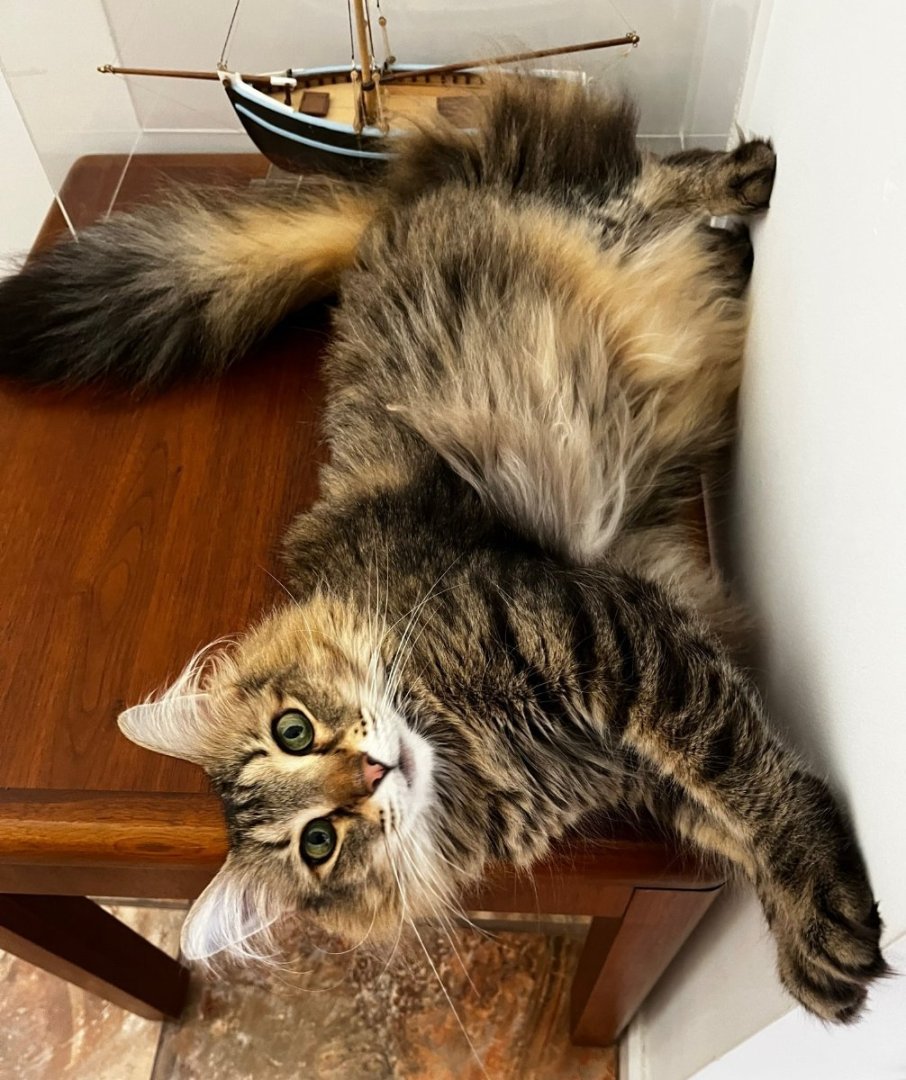
The great piping extravaganza finished today. It was a lot more extensive that I expected. I had thought about doing the drywalling myself but as it was less than 10% of the total cost I decided to be lazy. I was glad I made that decision after I saw the 9 foot by 2 foot holes in the wall that the plumbers cut. Right in the hallway where flaws would be obvious. They did a great job and I have already forgotten where some of the holes were. I spent the day putting stuff back in cupboards and setting up the workshop / utility room again. I took the opportunity to organize the kits on the shelf. There are far more than I think I will ever build but heres hoping I also need to confess that there are other stashes tucked away elsewhere. I hope to be back with the castle tomorrow. One useful byproduct of moving everything around for the plumbers was finding the leftover extra Aedes Ars blocks I had to buy to finish the Towers of Rochelle off. And this little helper is teh reason that finished models end up in cases I'm looking forward to escaping real life again Alan
- 462 replies
-
- 10
-
-
The wood simulation is very effective Alan
-
Oh i like the sound of that. Very imaginative Alan
-
Panard EBR 11 by RGL - FINISHED - Hobbyboss - 1/35
king derelict replied to RGL's topic in Non-ship/categorised builds
The application of the dust is absolutely wonderful. Very subtle and in all the right places Alan -
The catapult looks really good Mike, it's going to be a superb model Alan
-
A really great result Jav. Weathering is excellent. Alan
-
This is going to be a very interesting build. I'm looking forward to seeing it develop Alan
-
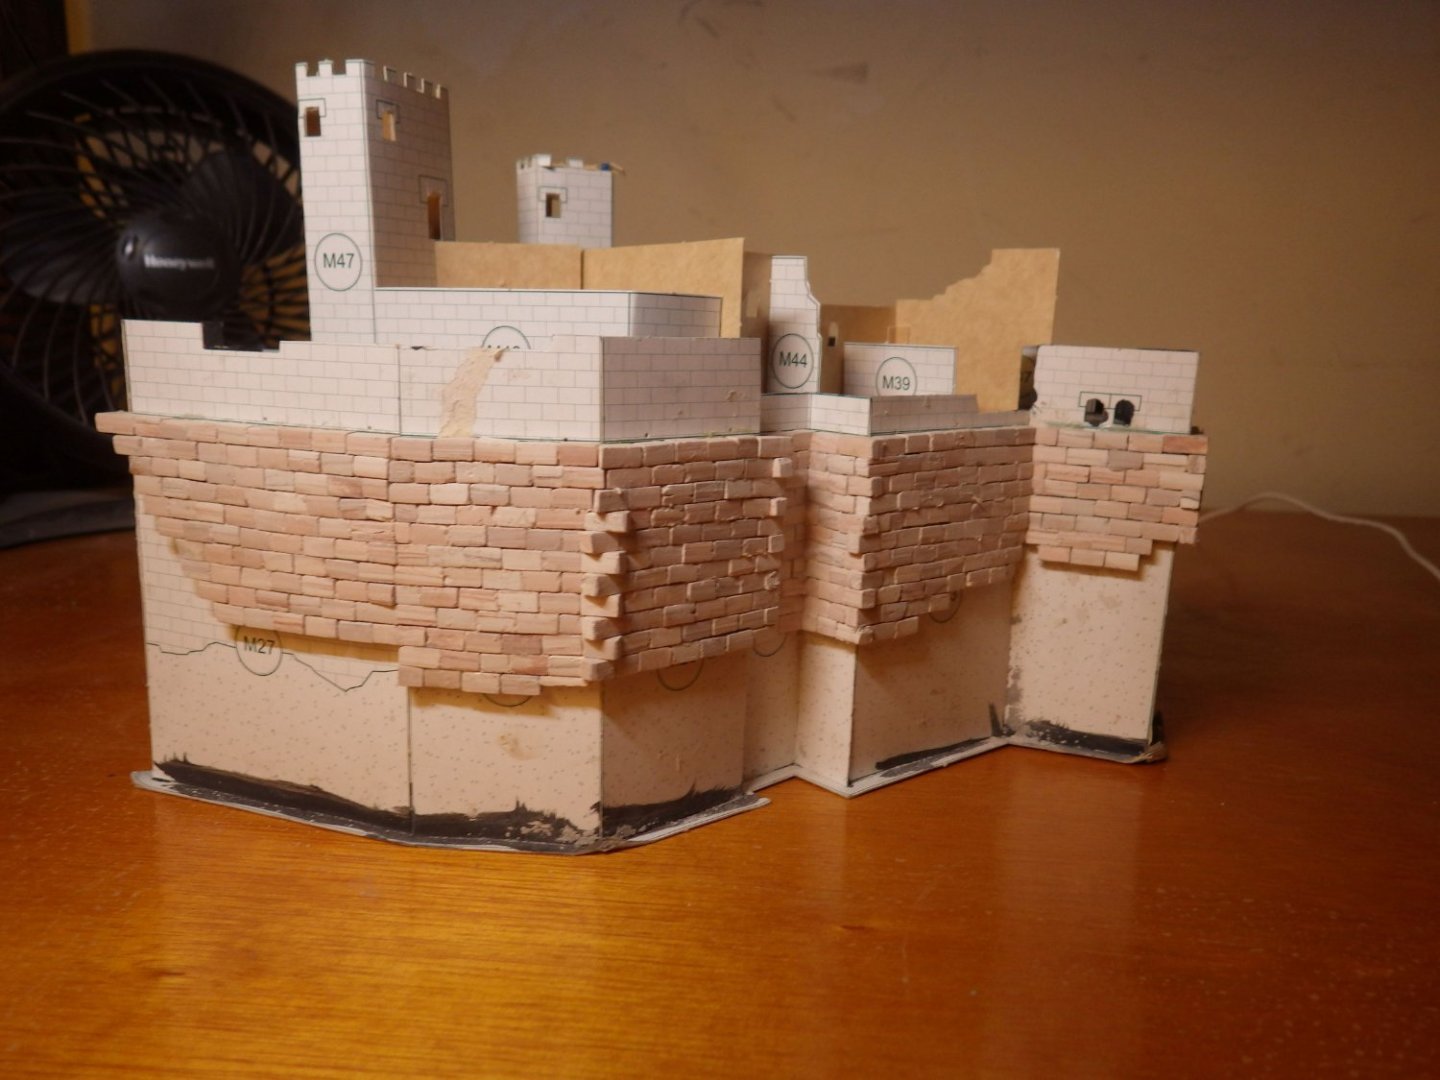
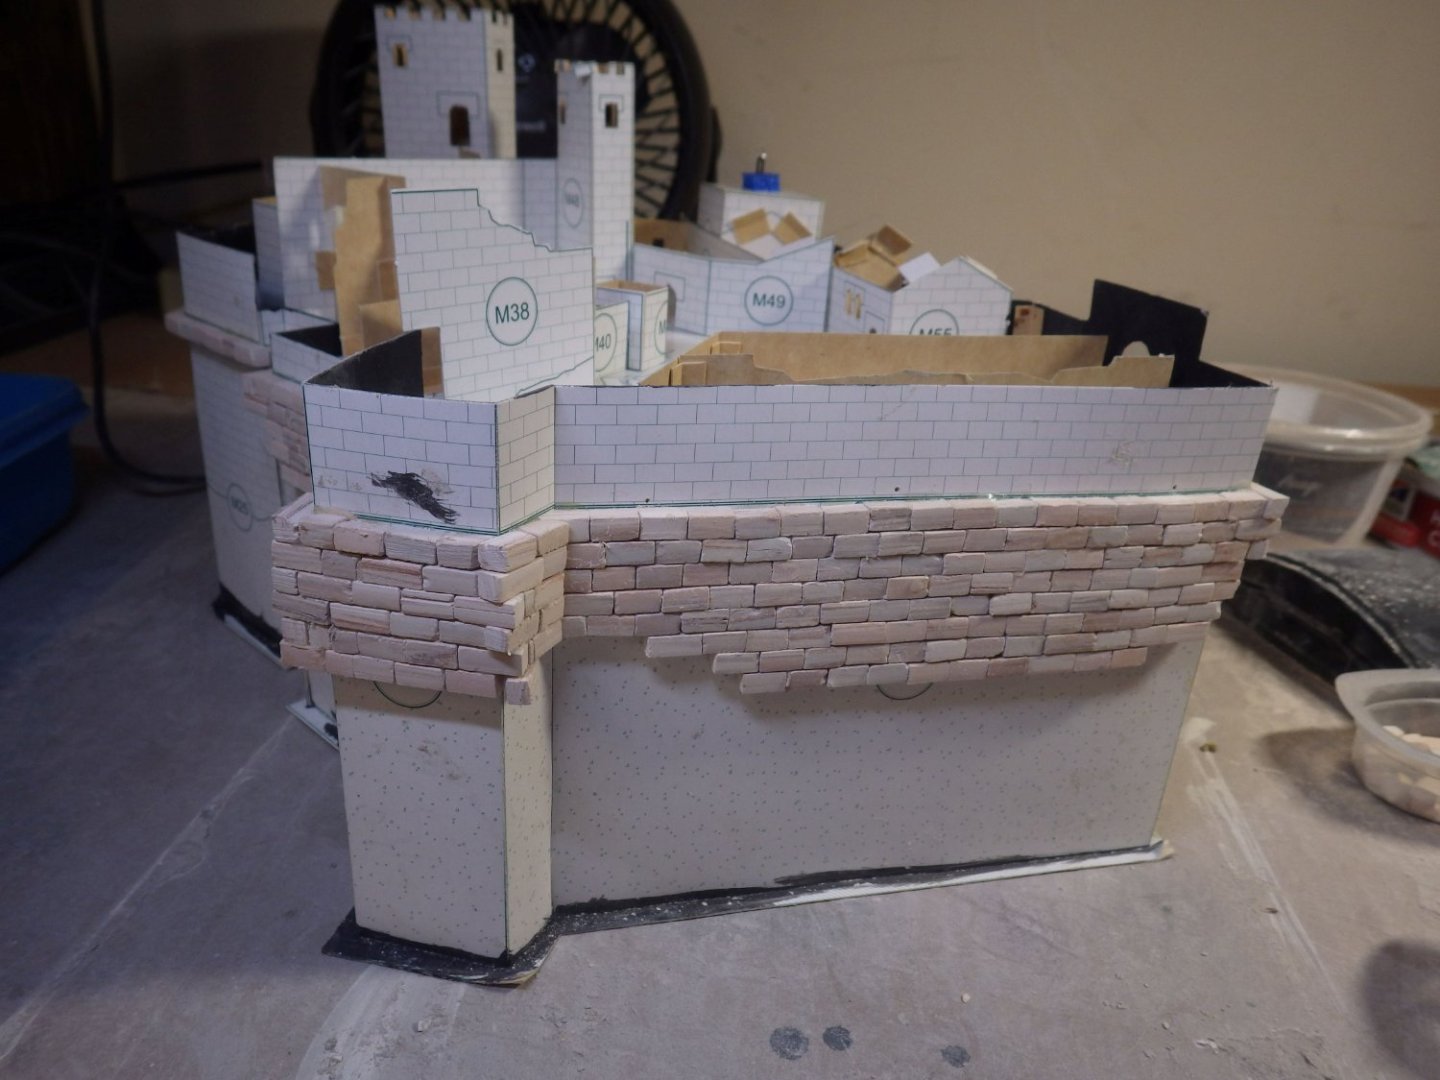
I'm making progress with the main walls. I've laid the lower sections of the blocks almost round the tower now. I have found one less complication on re-reading the guide sheet. From my initial read and looking over the contents of the kit I had formed the idea that a tier of tiles ran completely round the tower at the green line on the formers seen in some of the photos which also marks the main roof level. This is partly why I had started the block work there. The other reason being that it was a chance to get the blocks to run level. The re-read showed that the tiles are only used on the curved section of the tower which will be a great simplification. I've started on the first windows and I confess to a cheat. I have shortened the windows slightly so that they only cover whole tiers of blocks rather than end with a messy thin section to try to blend into the whole wall. I don't think we are dealing with precise scale accuracy on this kit so I went with ease and neatness, This [part is going quite nicely. Not too much need to shape a lot of blocks and so far the windows have been straightforward. The curved section of tower should be interesting. The build will be paused for (I hope) a few days. My house was built with Poly butyl water pipes which are now 35 years old and considered prone to leakage. Homeowners Insurance and Real Estate people are starting to get fussy about it so I have the plumbers showing up on Thursday to replace it all with Pex. This will entail bashing holes in the drywall, frightening the cats and covering everything in dust. Cupboards under the sinks have to be emptied, washing machine and drier moved and the work bench has to be cleared out of what is nominally the utility room. So the castle will be moved out of harms way for a while. Hopefully normal activities will resume next week sometime. Thanks for looking in and all teh likes and helpful comments. Alan
- 462 replies
-
- 18
-
-
Thank you very much. I'm enjoying this much more than the Rochelle Towers. More variety I think.
-
Beautiful recovery
-
The Jewel came out really well. The rigging is very nice and the bird is a great touch Alan
-
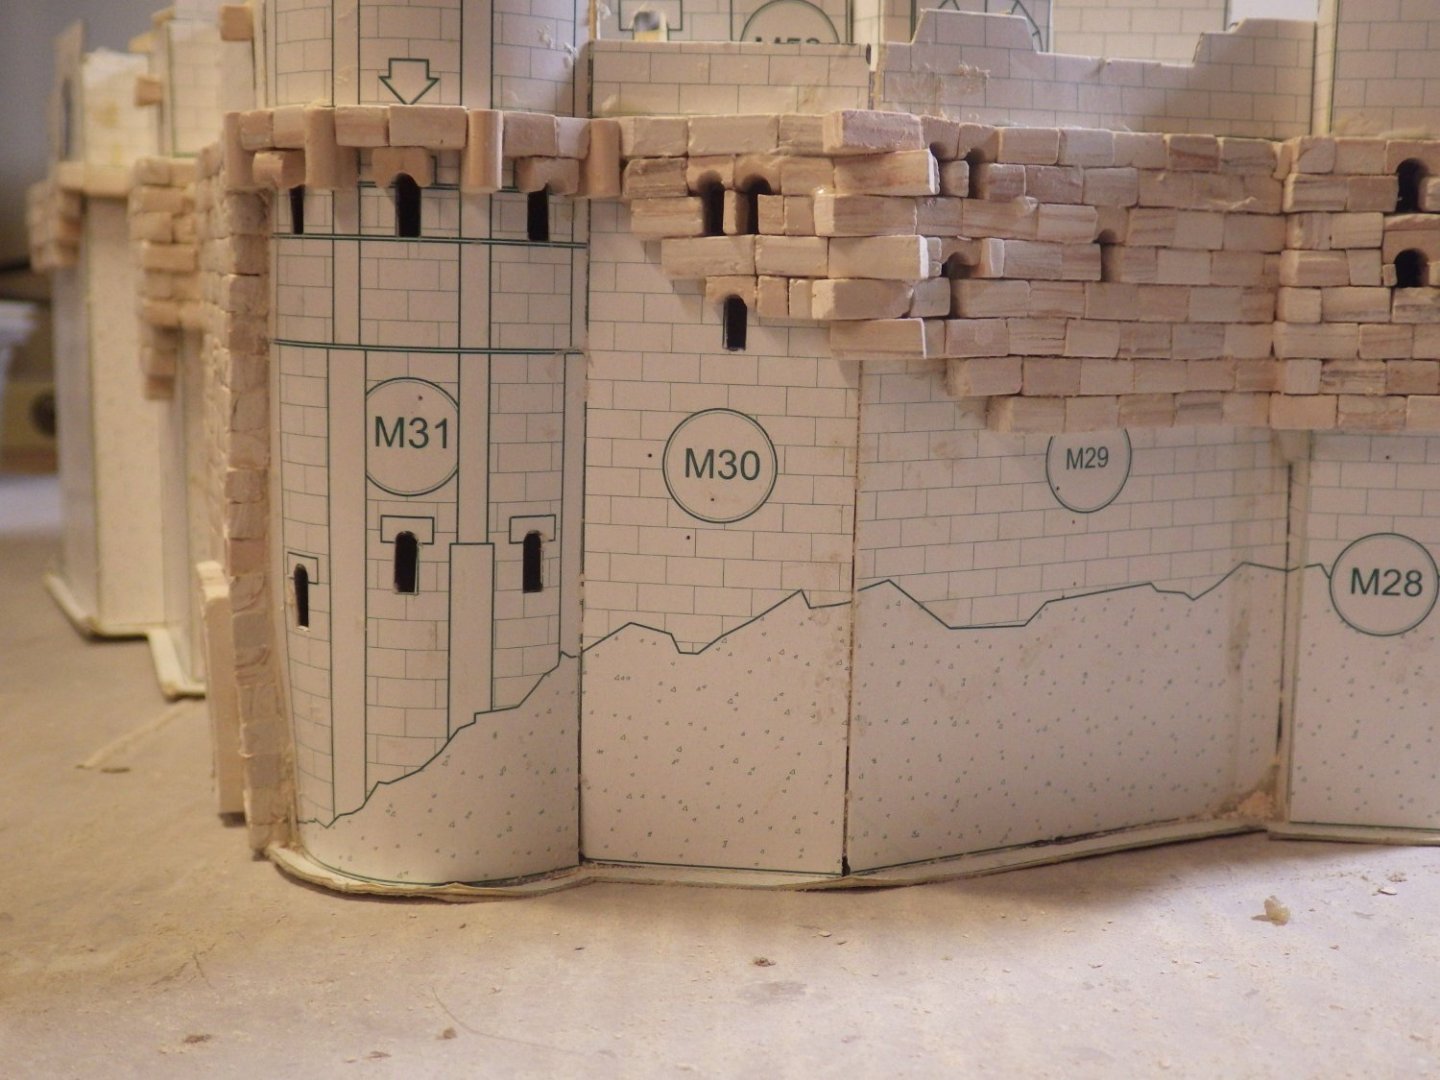
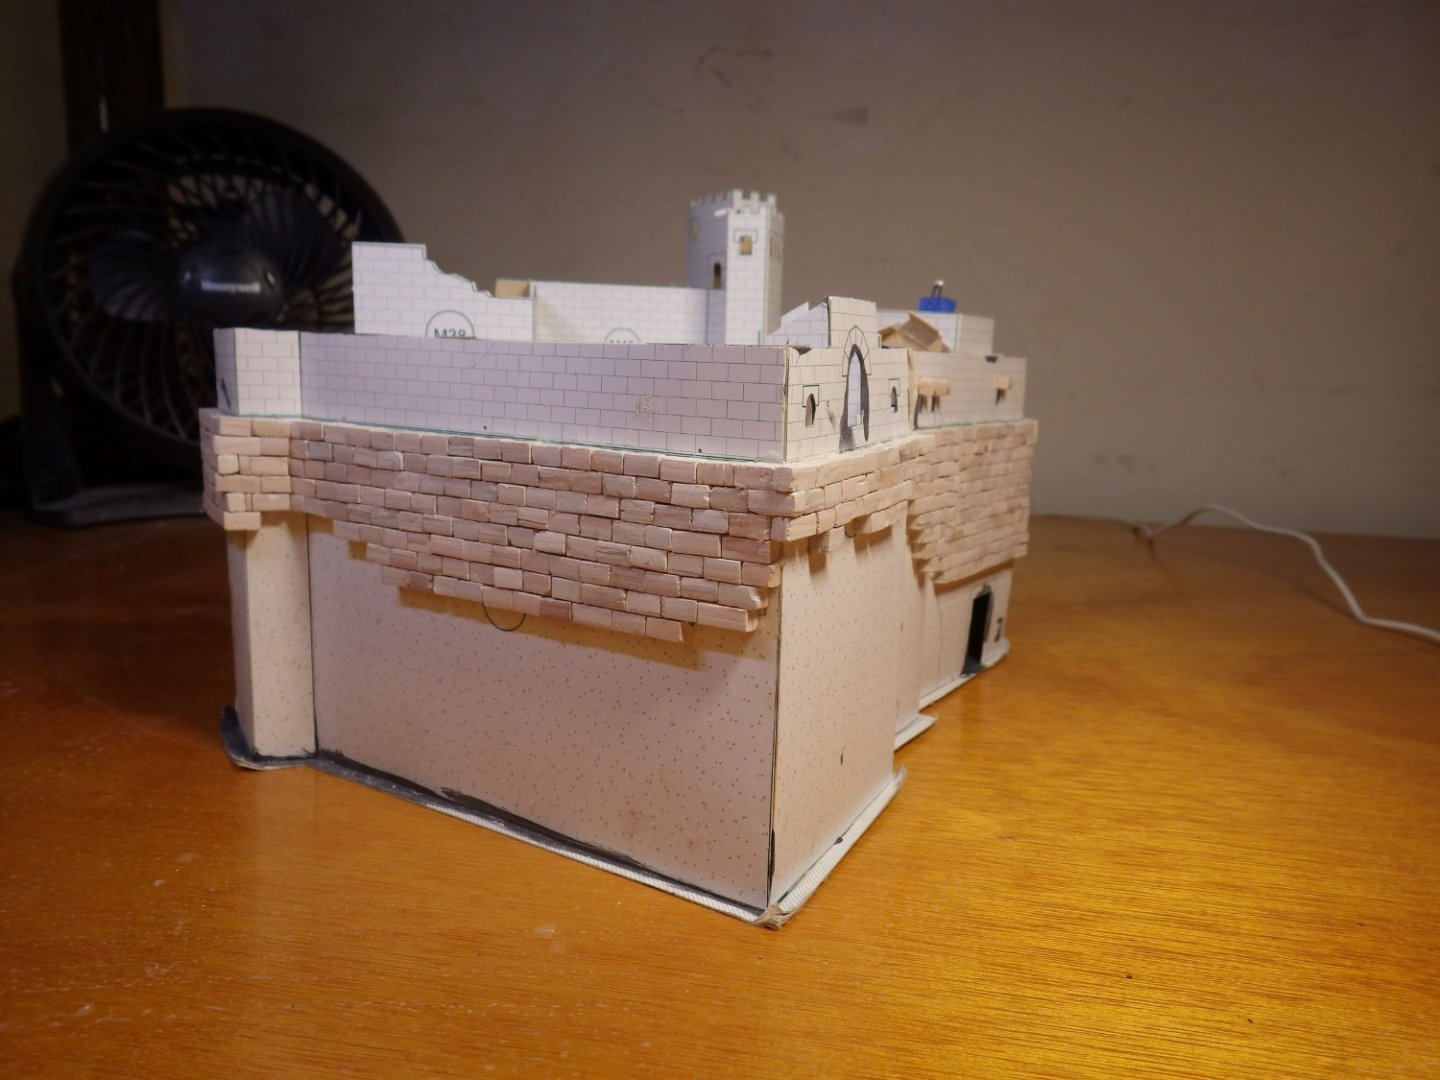
I am back with the blockwork. I gave myself an easy start. No windows and the blocks only run part way down the walls. The rest is covered by landscape. I finished the first bottle of glue provided with the kit. A full bottle of Weldbond has already been consumed too. Thanks for looking in and the comments and likes Alan
- 462 replies
-
- 15
-
-
Thank you Mark I'm hoping the lighting will tone down when I add the roofs to the towers and rooms on the upper deck. If necessary I can add some paint to the leds too \Alan
-
Thank you Andrew This is my first attempt to light a model and in some ways its an easy place to start. There is so much depth in the landscape that hiding the leads is not going to be a problem. A lit ship model would be beautiful. I have used flickering leds and they do look nice. I ran out before getting to the outer walls and keep and I'm trying to decide whether to use the warm white constant leds I have on hand or buy more flickering ones. That would put the lighting costs pretty close to the close of the kit. I guess that's standard though. Rule 1 says you s[pend far more on aftermarket stuff than the basic kit. Alan
-
Thanks so much OC. I'm hoping the tower and the details will be quite fun. There is a curved tower with embedded columns and tiles that is going to be challenging but its not too big and thankfully doesn't need to be doubled. Alan
-
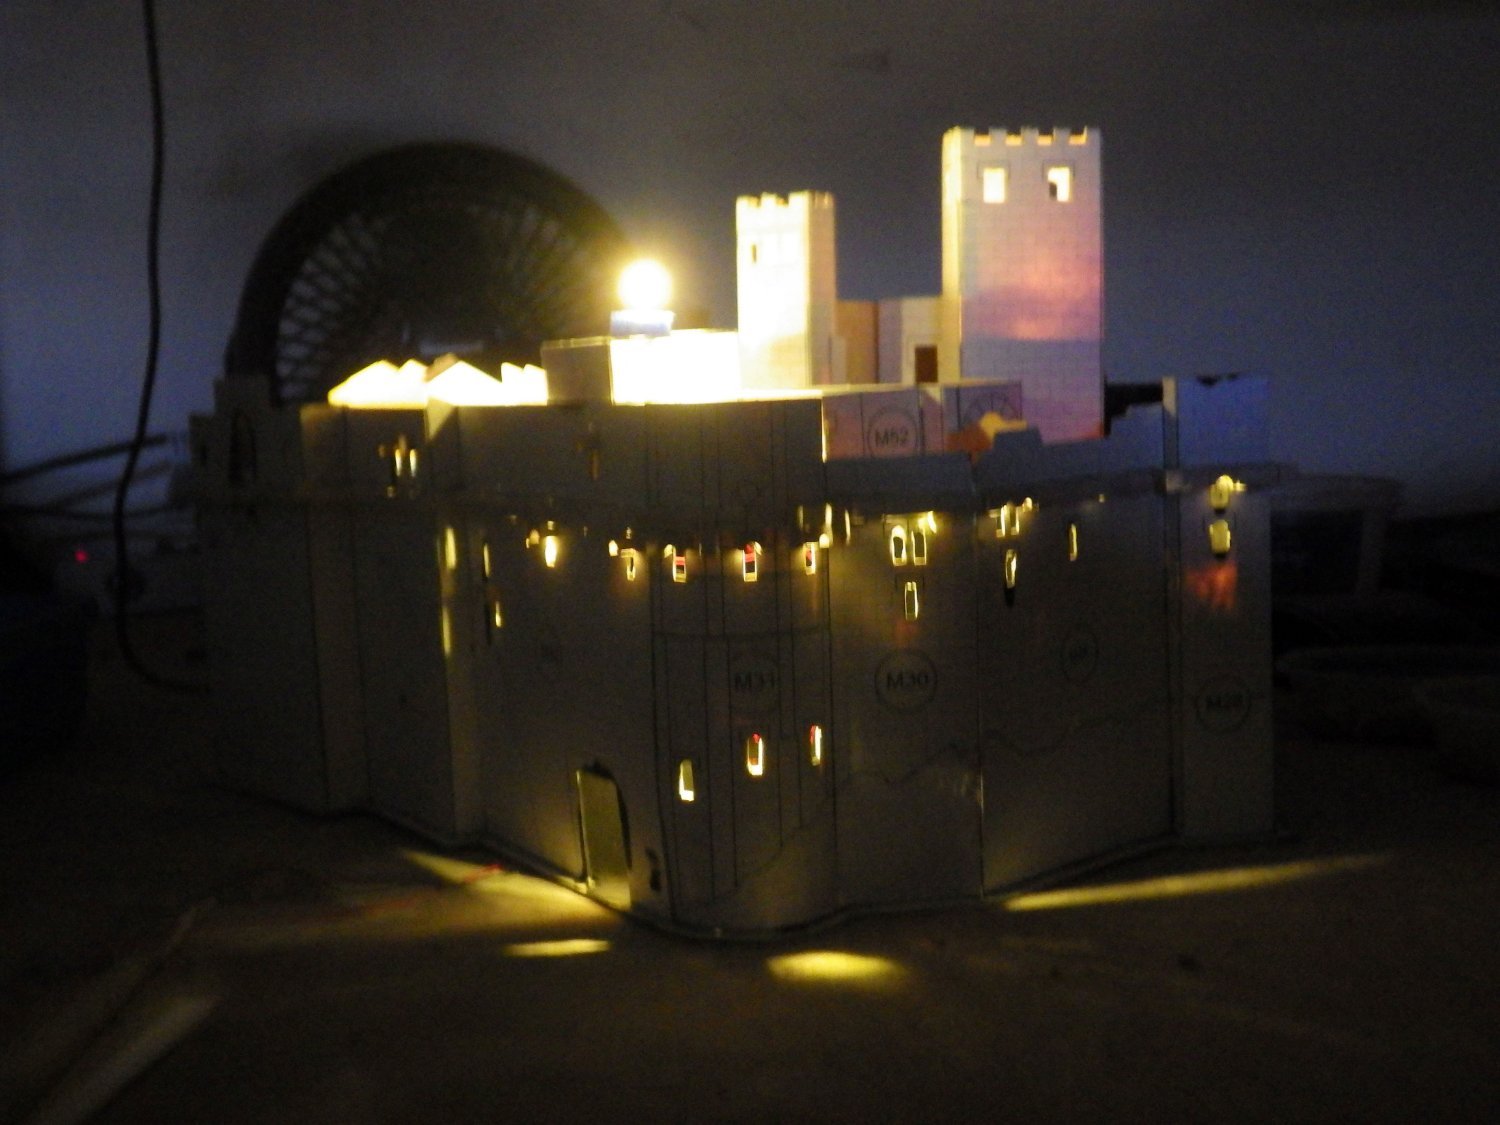
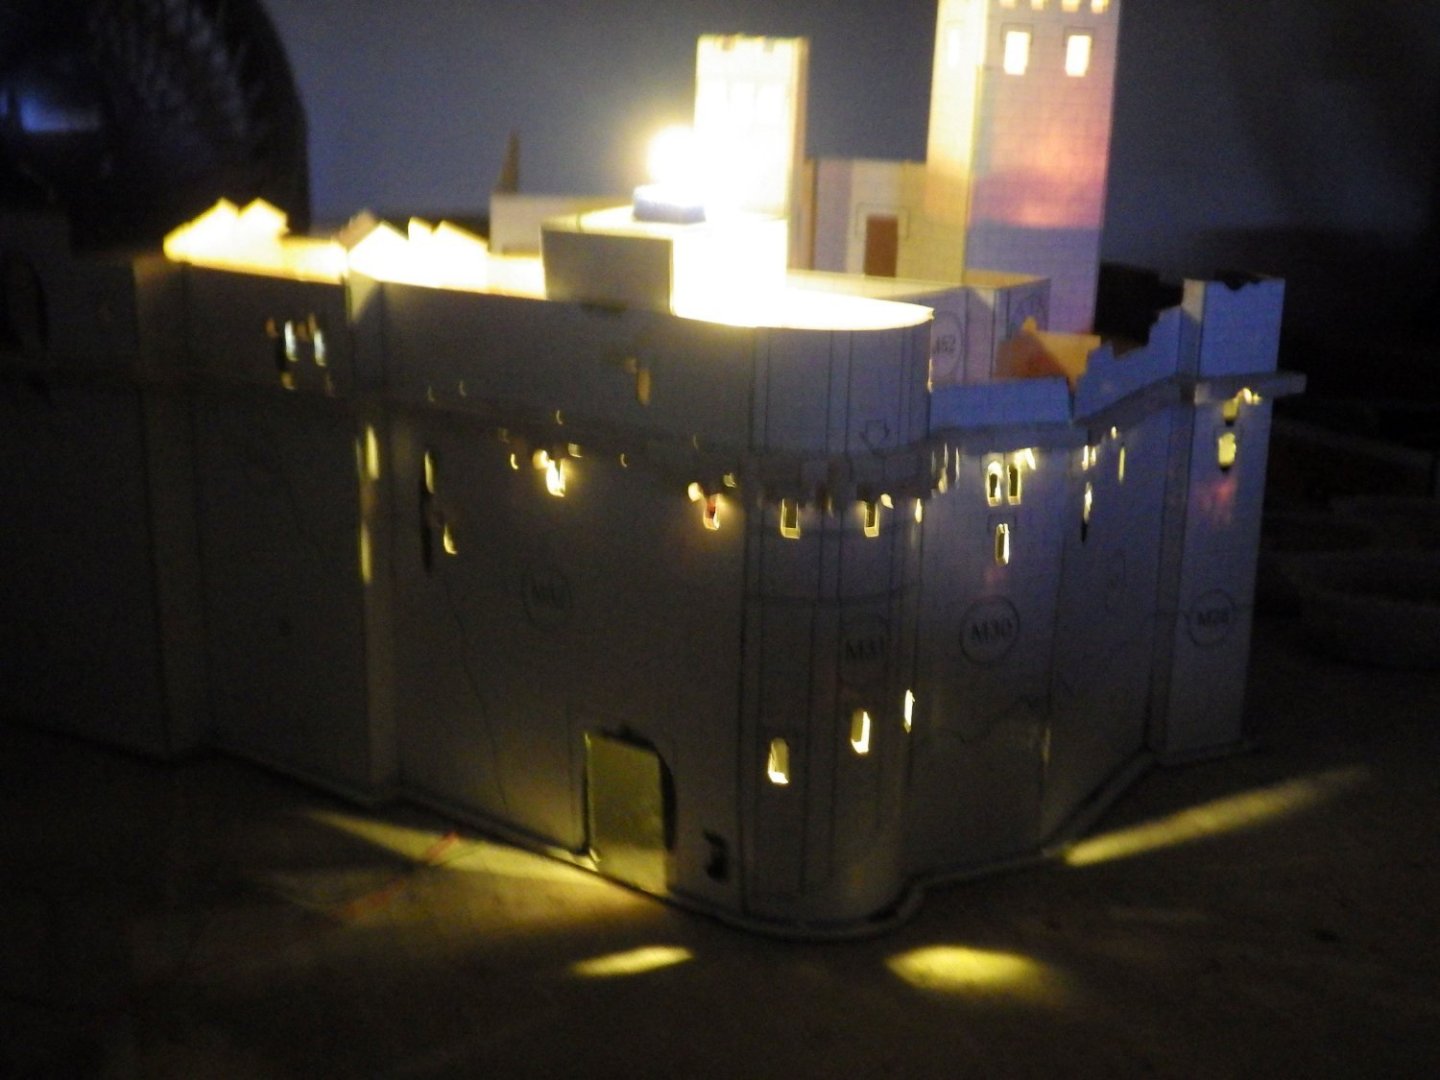
Thank you Steven and the cellophane is a good idea. I think the photo is much brighter than the final effort. There are still a number of exposed leds on the upper level which will be walled and roofed in. I think they are tending to dominate the lighting at present but will only be lighting small windows and maybe a door which may be posed part open. The main tower looked quite dim when I tested the lights there on their own and I was actually thinking I might need to add a few more. I should have access through to the end so I can adjust as I need, colour and quantity. Thanks again Alan
-
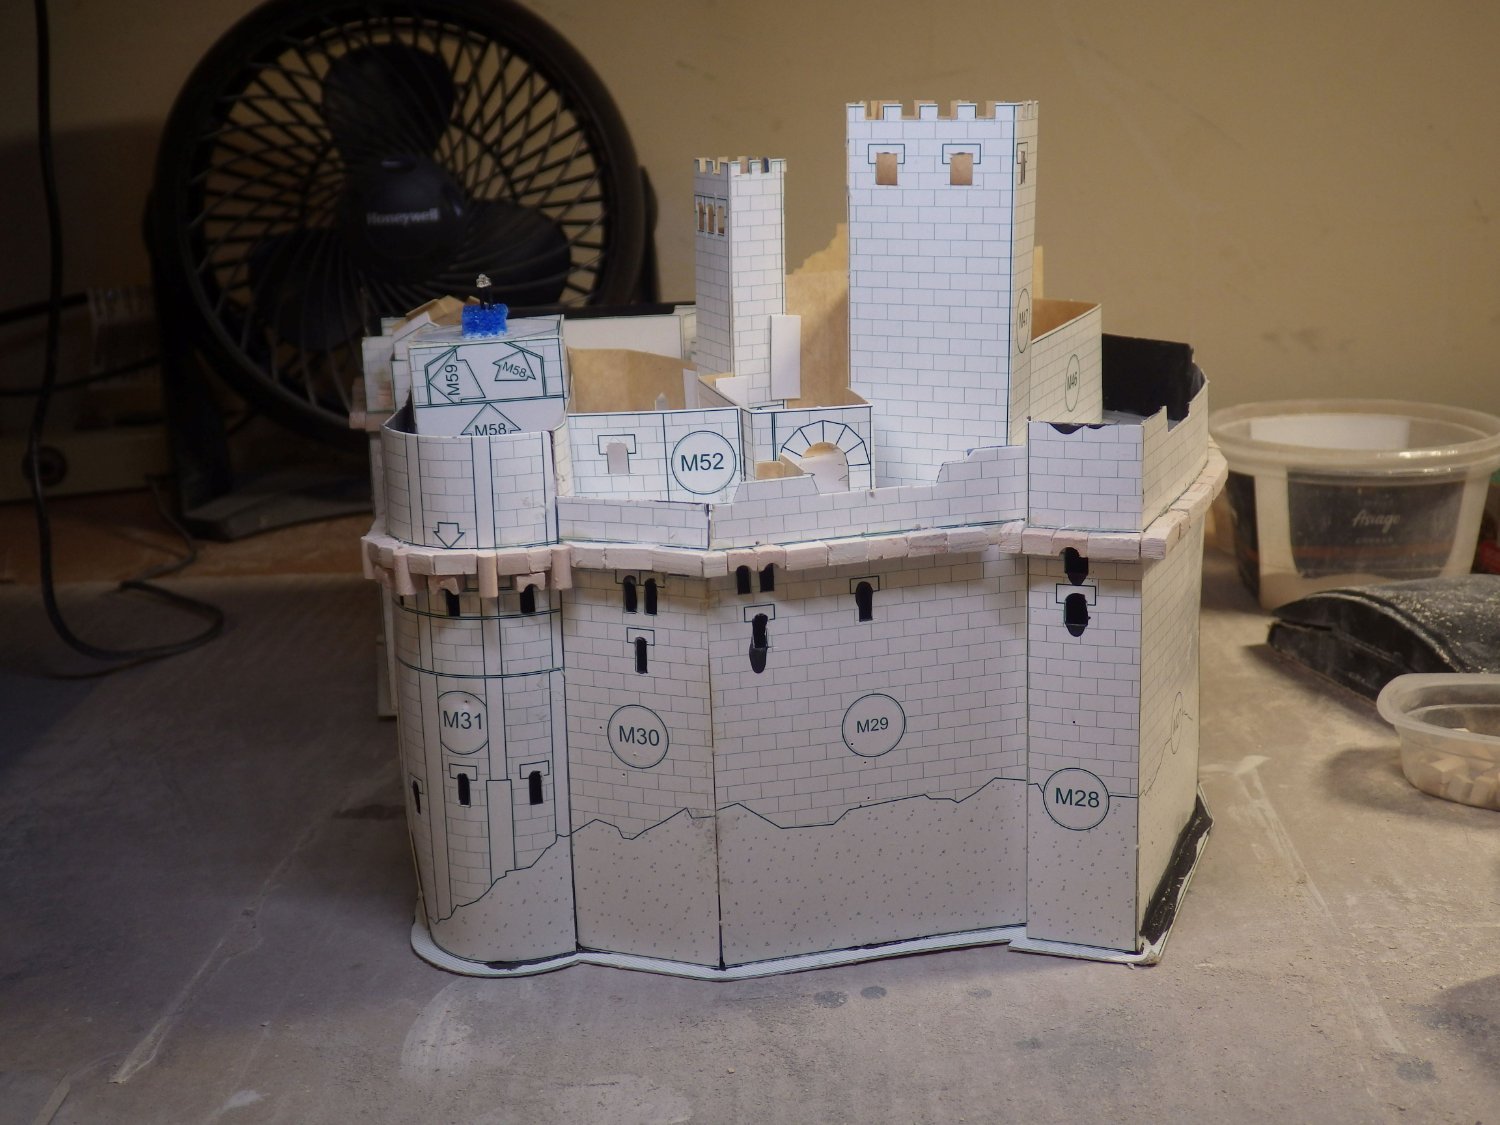
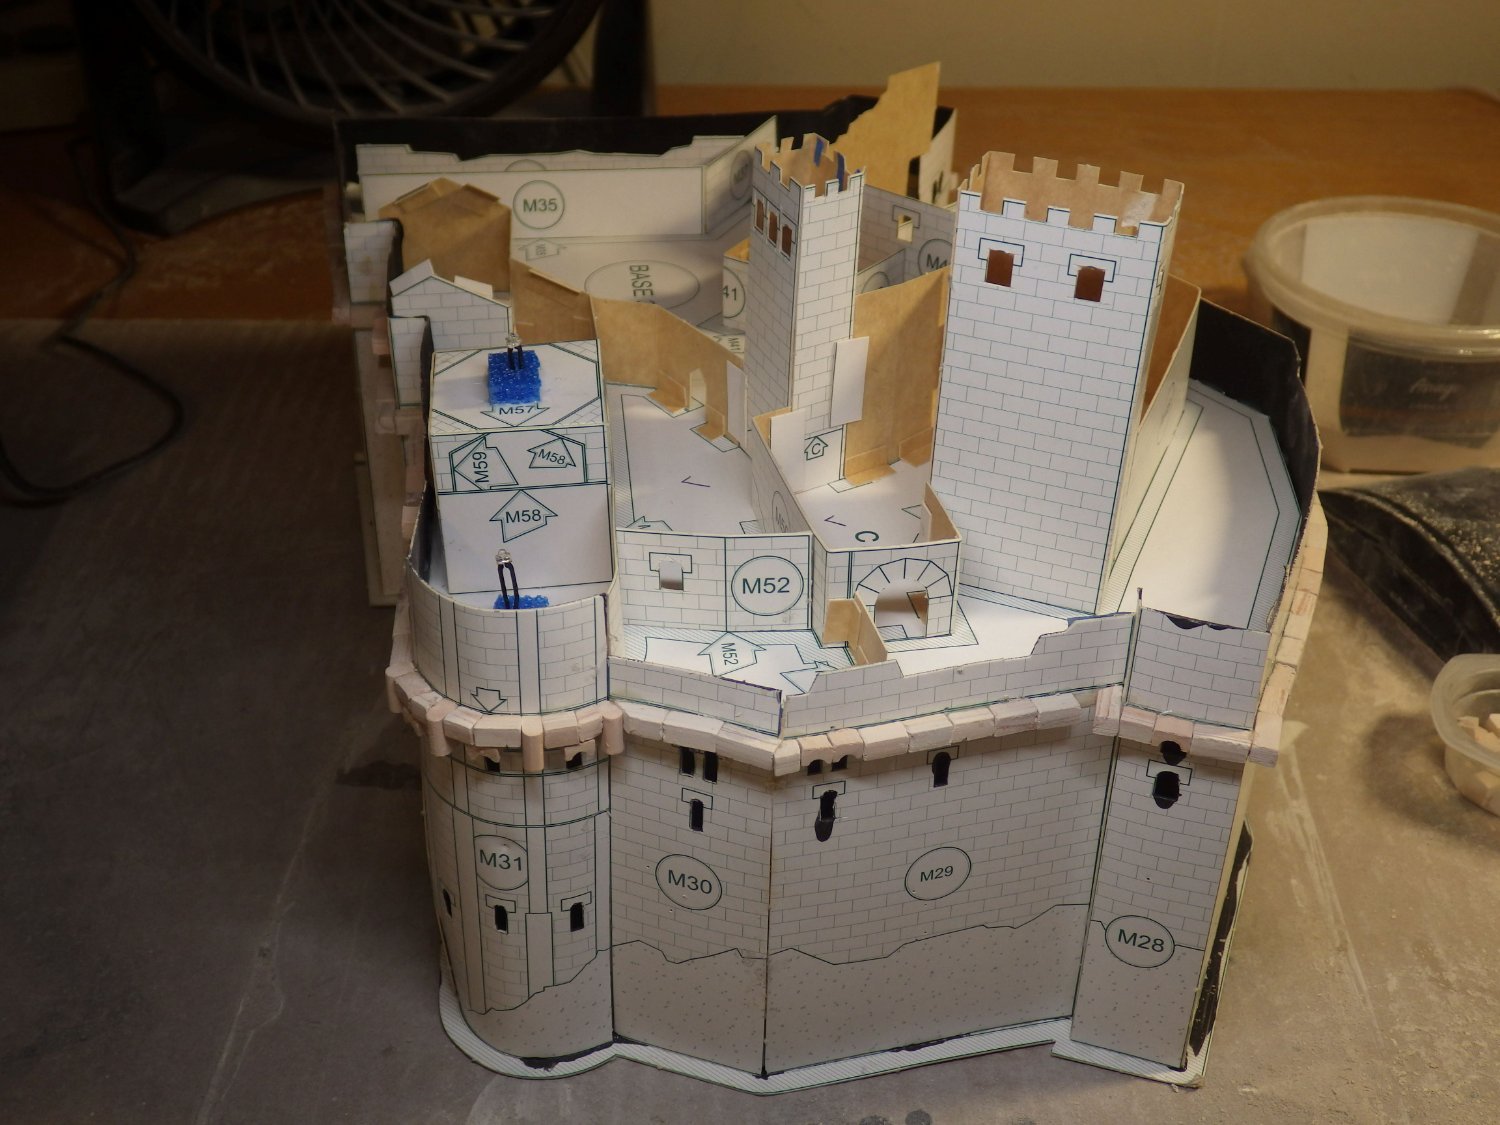
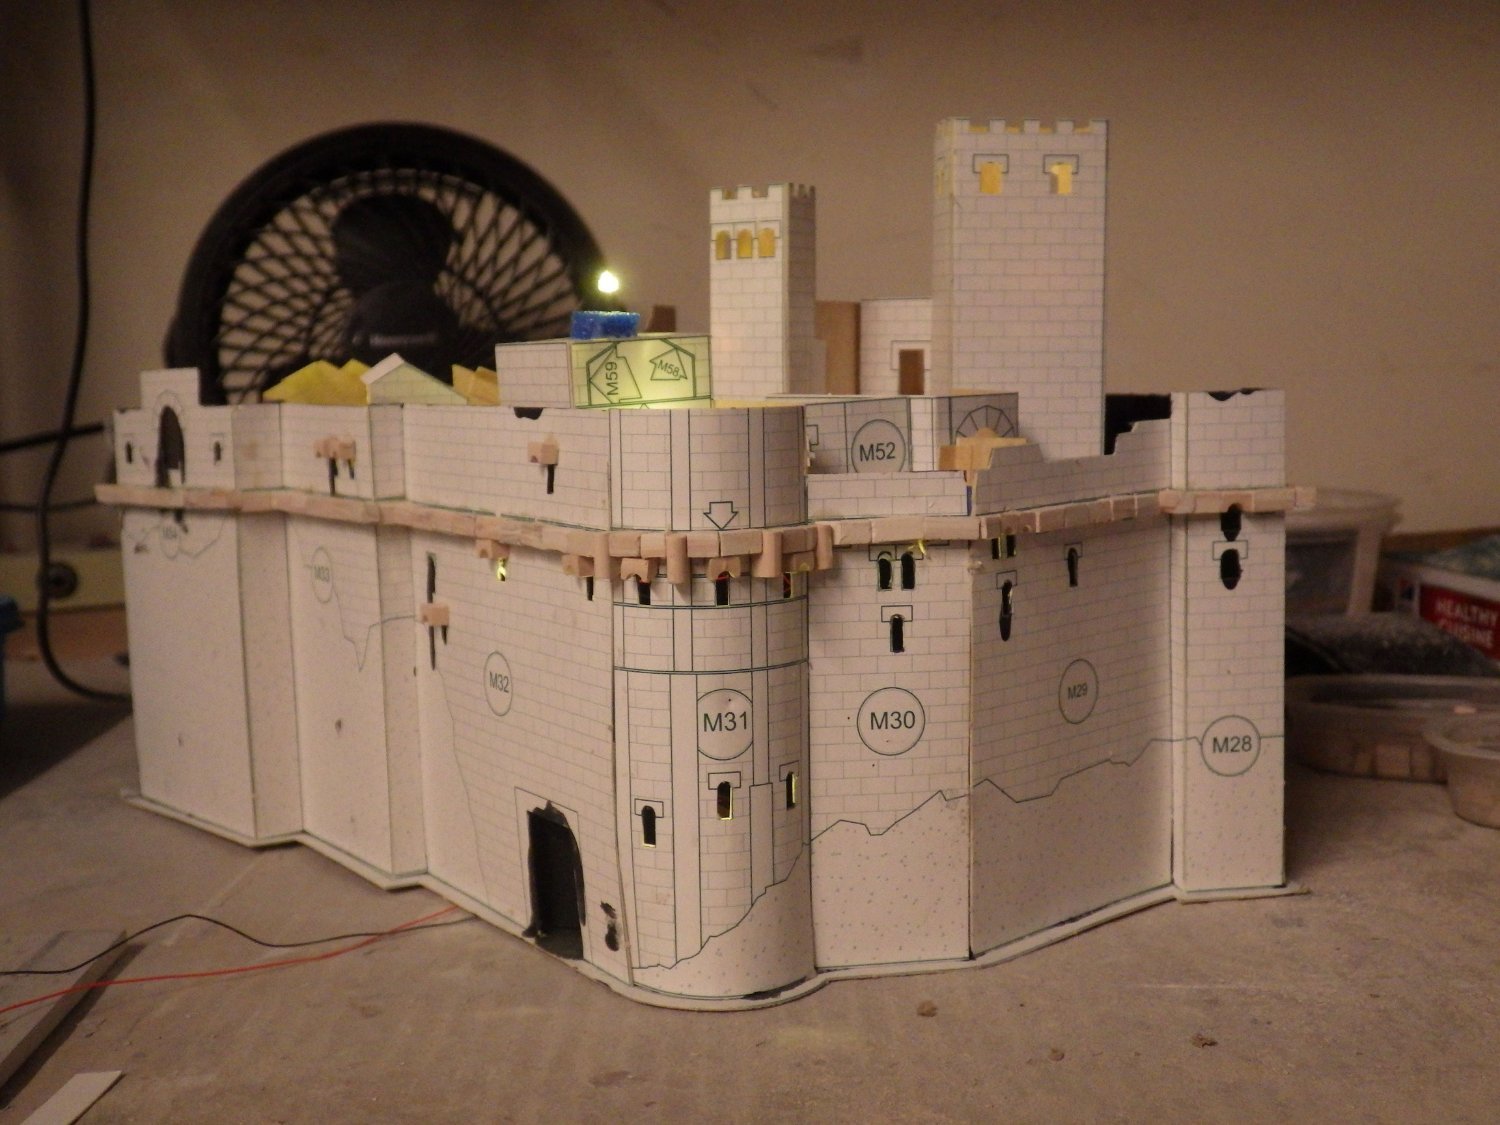
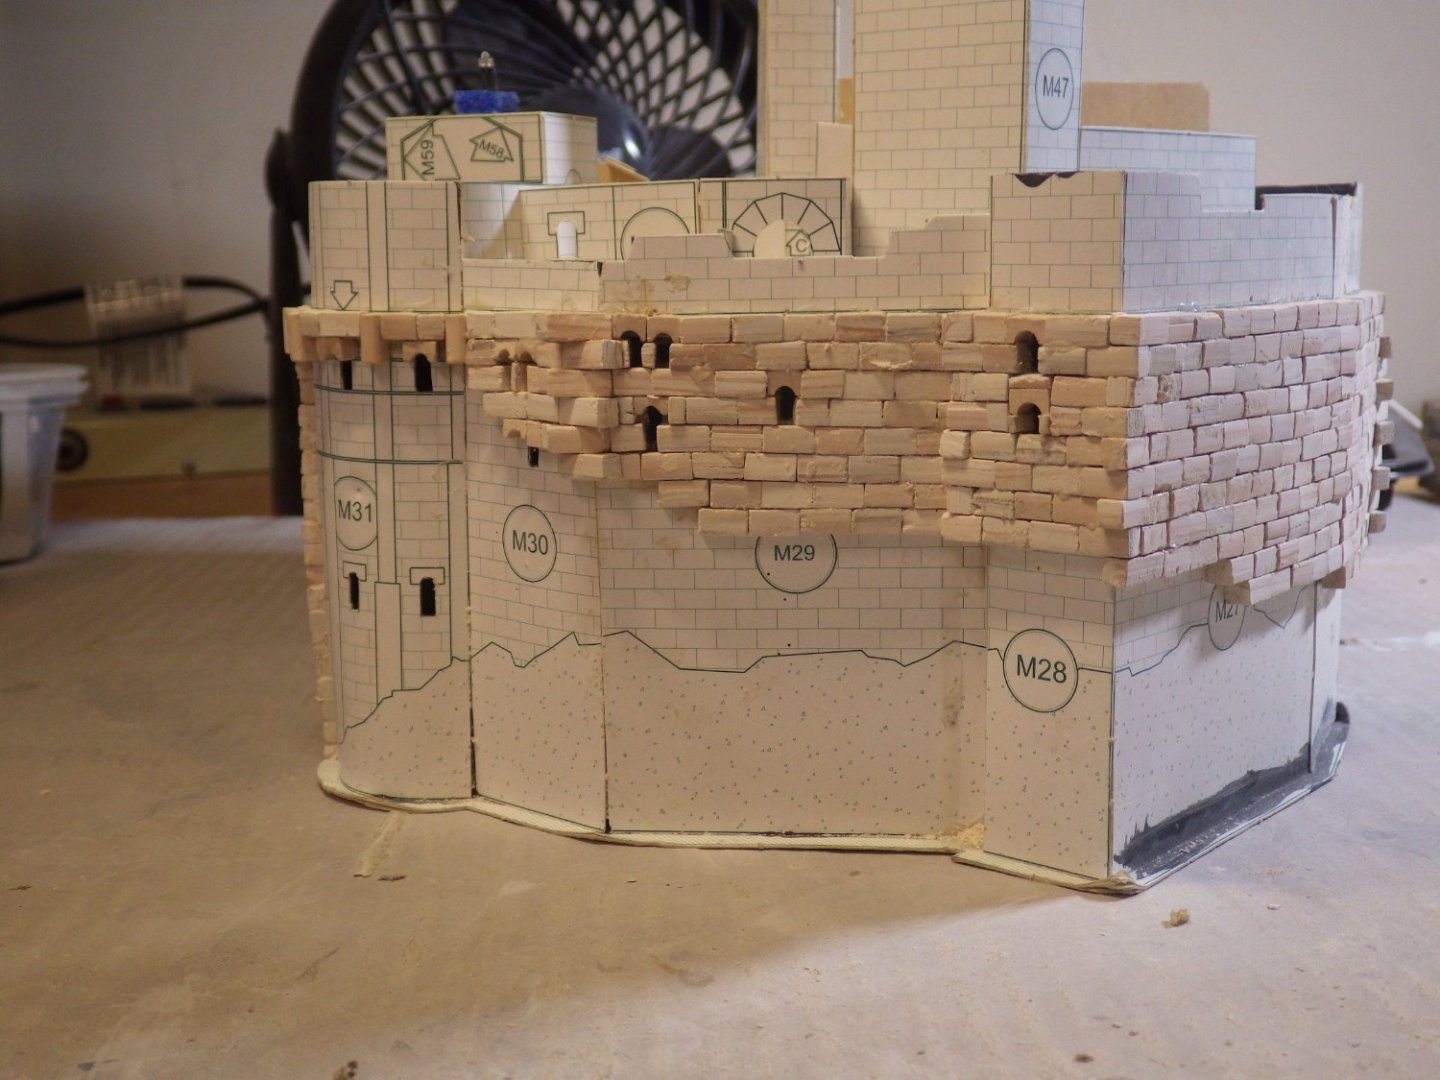
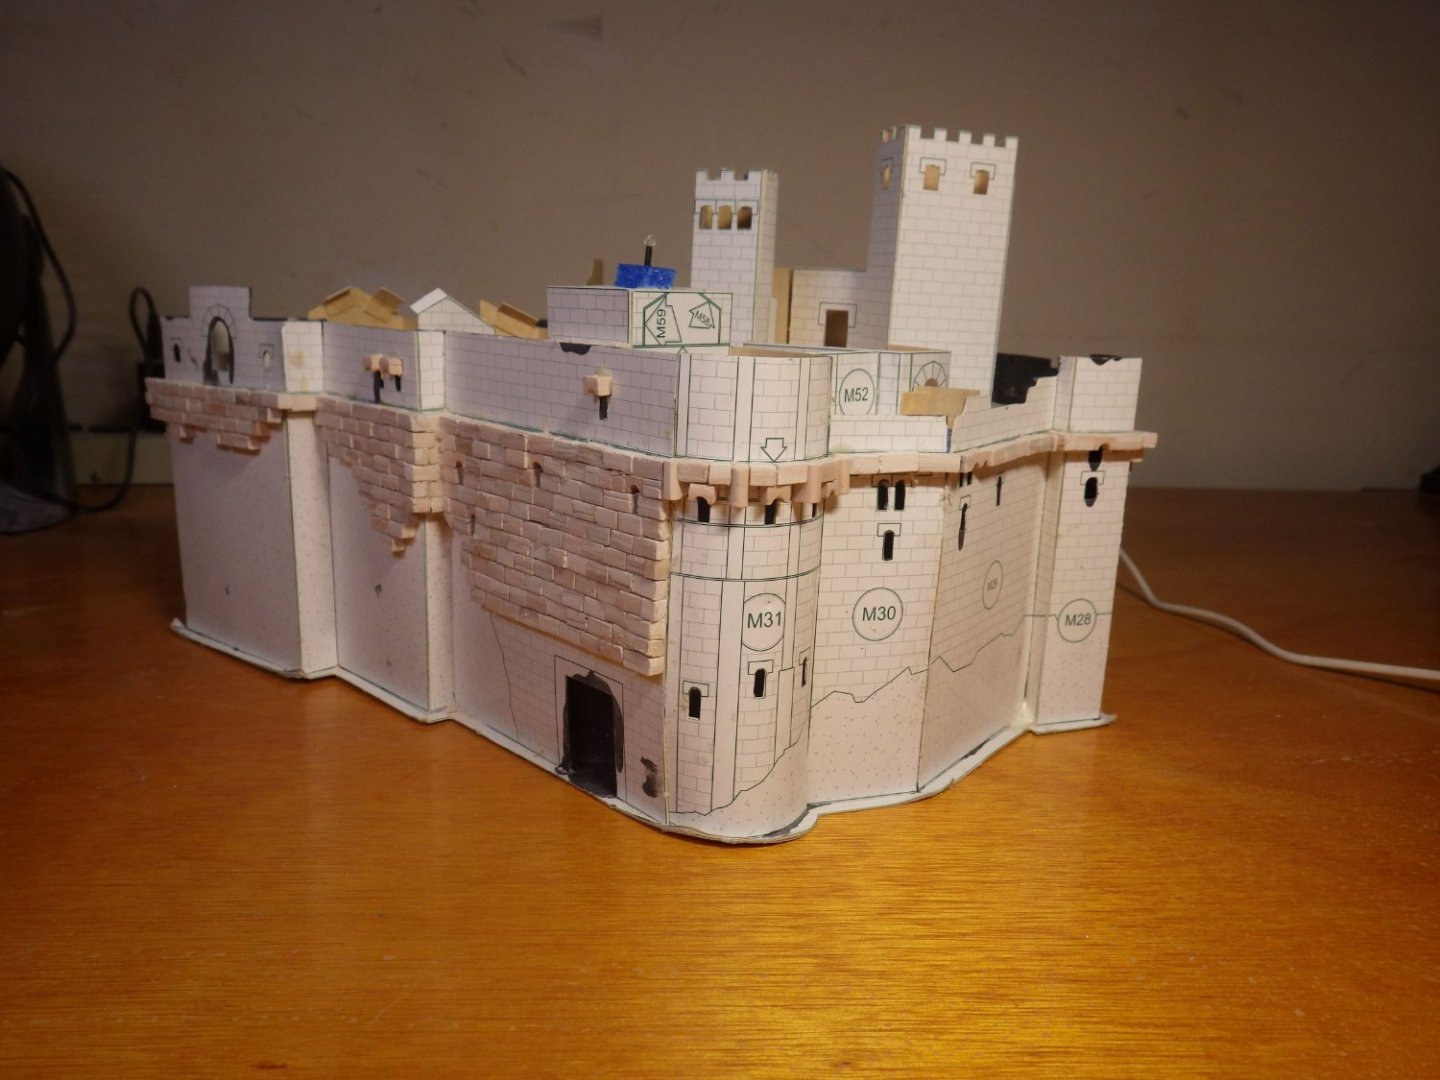
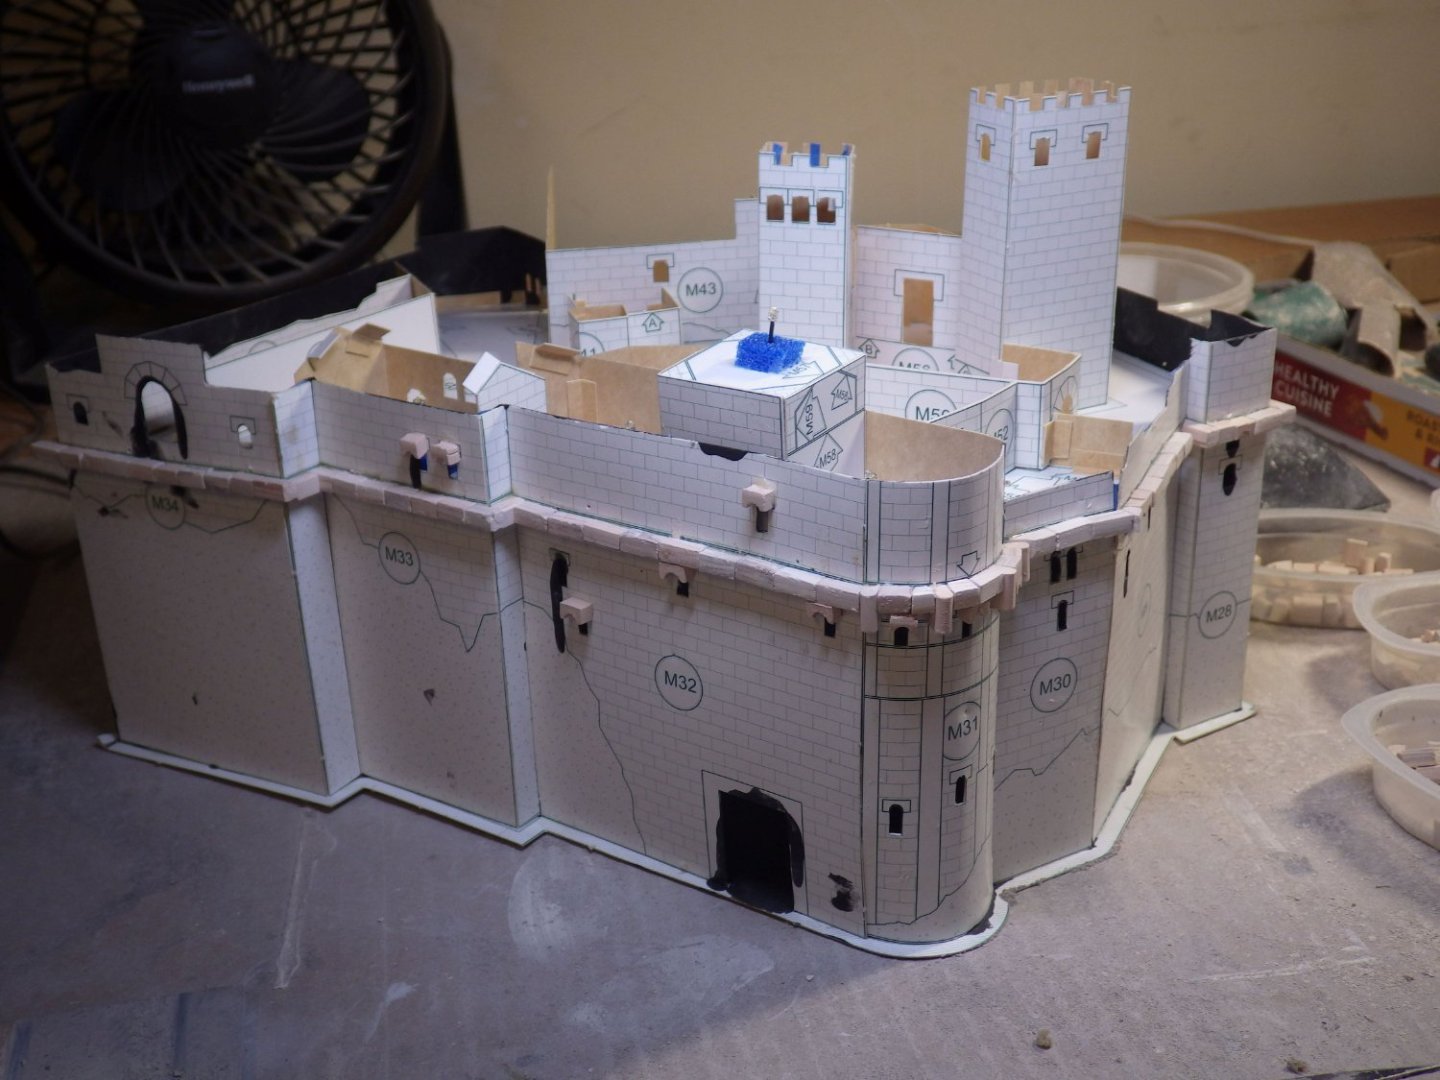
I've added the lights to the main tower and the smaller areas on the roof. Although I need some more leds I can progress with the main tower now. I tested the leds and all work. They are 3v 1.8mm leds in flickering warm white. I fixed the upper levels into place. I didn't rely totally on the card strips provided in the kit. I added some foam strips which gave a more substantial area to glue the top levels to. As you can see there are plenty of interesting feature, doors, windows, curves which will stop this being an exercise in slapping down blocks. Thankfully the landscape [profile means the blockwork doesn't extend all the way to the ground. For this reason I decided to start at the level where a tier of tiles is built into the wall. That also gets me a level start to the blocks. There is some fairly interesting work ahead. The lighting has been checked as the evening came in. I used blocks of closed cell foam to mount and glue down the lights with the leads threaded out through the blocks. It seems to have worked well. You can see the ones still exposed on the tower roof Light bleed looks like it won't be a problem Thanks for looking in and all the support Alan


- 462 replies
-
- 12
-

-
-
Thank you very much OC Praise from the expert is much appreciated. I imagine these are war gaming figures. I can't imagine painting an army. I am enjoying working on a few at a time though and hope to improve a bit. I think I will try a light wash and see how that comes out. I saw this on the Micro Mark website and am intrigued to know if its really any use. The steadiness of my hand is more of an issue with fine details and I'm not sure I want to see that magnified😄 Micro-Mark BrushCam (micromark.com) Alan
-
Thank you very much Steven. I will continue with artistic license regarding dress and colours. I believe the figures are supposed to be circa 14th century. The bombard might be stretching it a bit and although I like it it may not end up in the display. A lot will depend on how the landscape comes out. The gateway to the ramp and the main door will be the most populated area I think so may end being just a column of riders and some watchful foot soldiers. I'll see how creative I feel. I do like the little figures though and will paint more as a break from the blockwork. This will all be a bit of a confection; given the simplifications with the kit I won't be reaching for the ultimate in historical accuracy - but trying to not go too far astray Thanks again Alan