king derelict
-
Posts
3,291 -
Joined
-
Last visited
Content Type
Profiles
Forums
Gallery
Events
Everything posted by king derelict
-
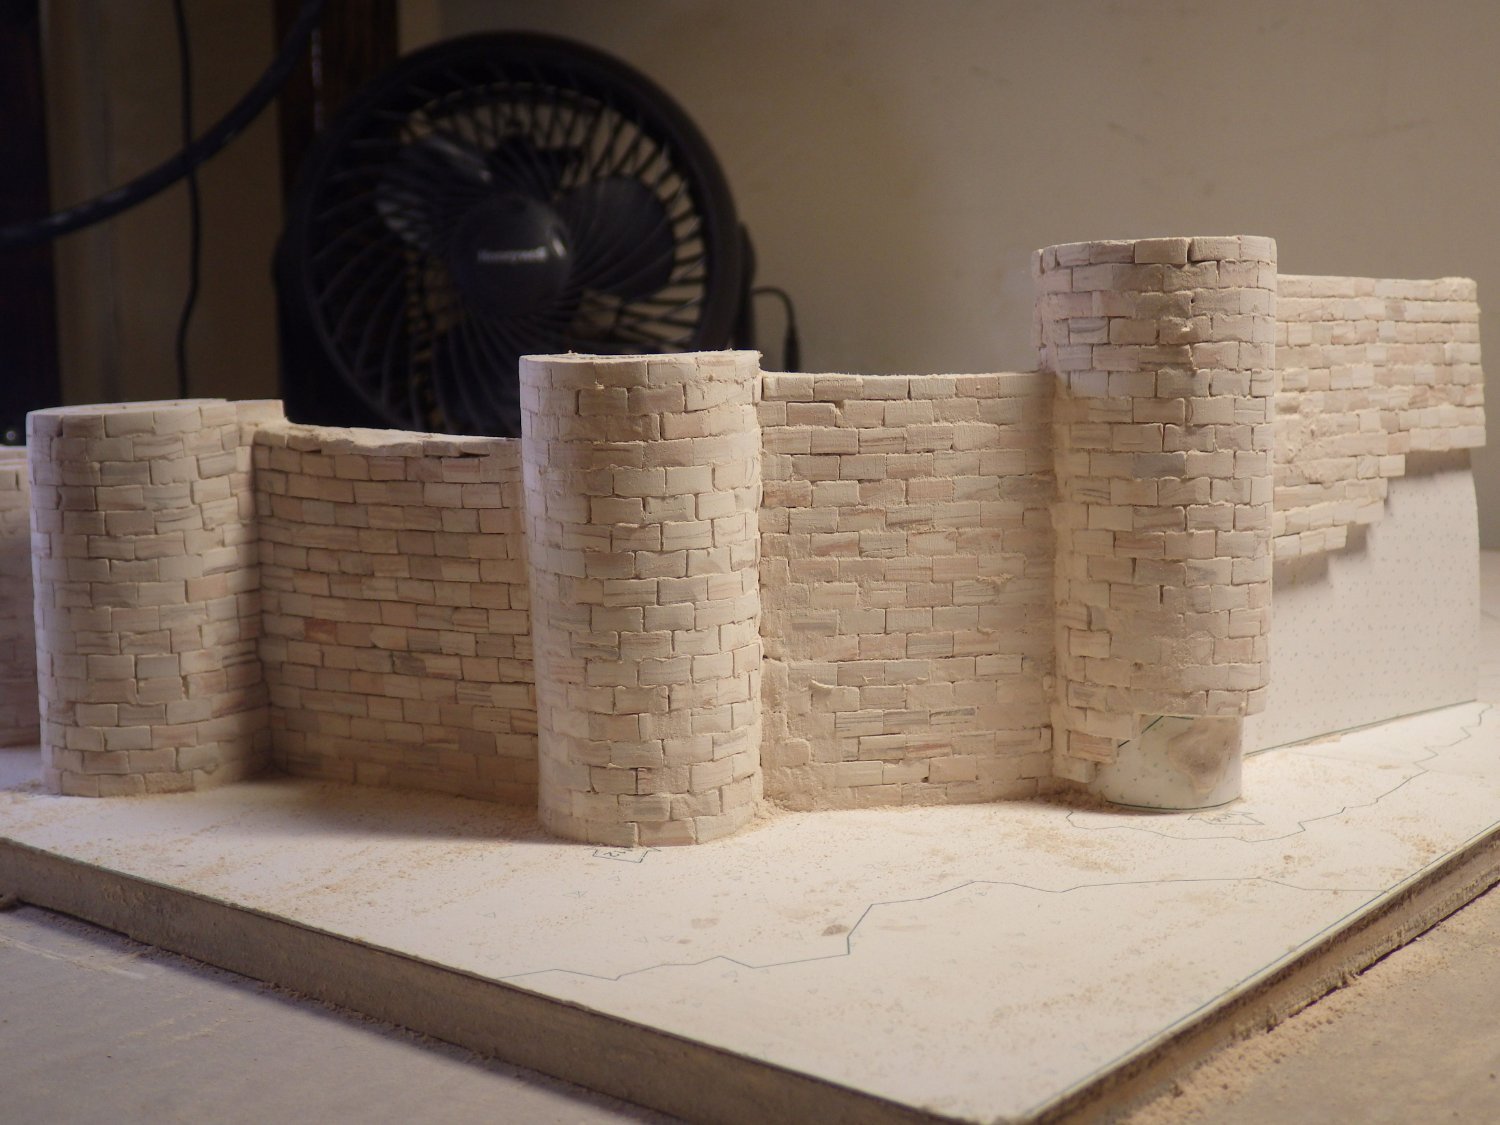
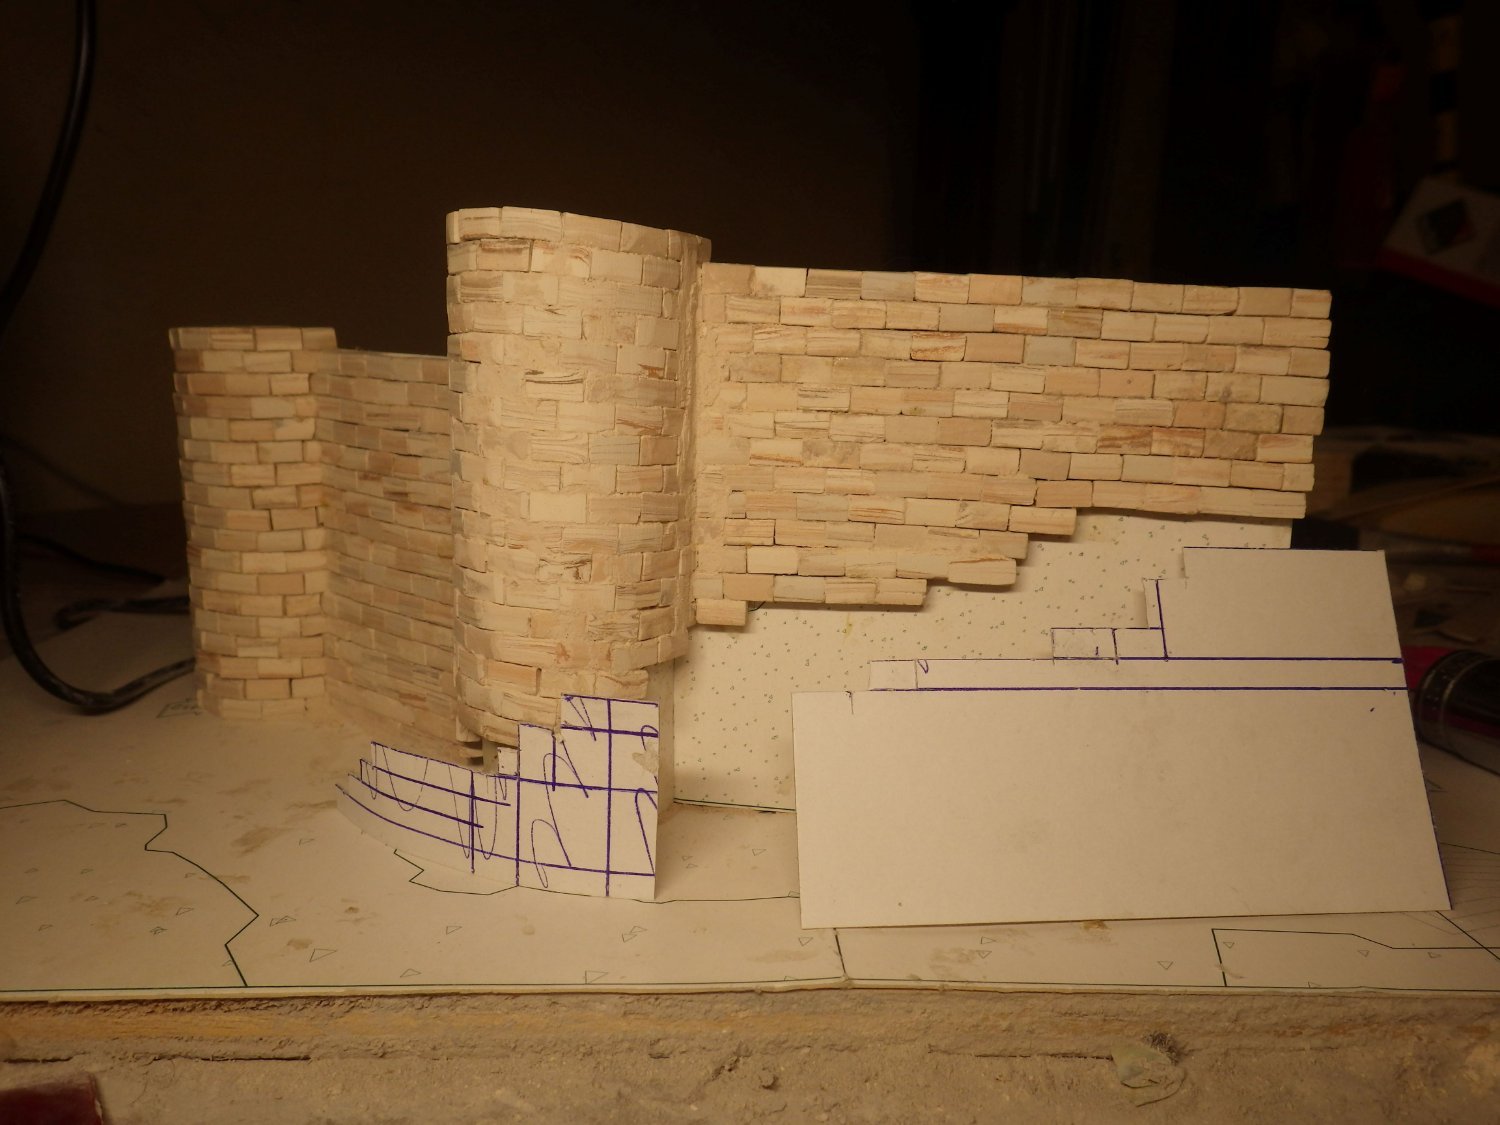
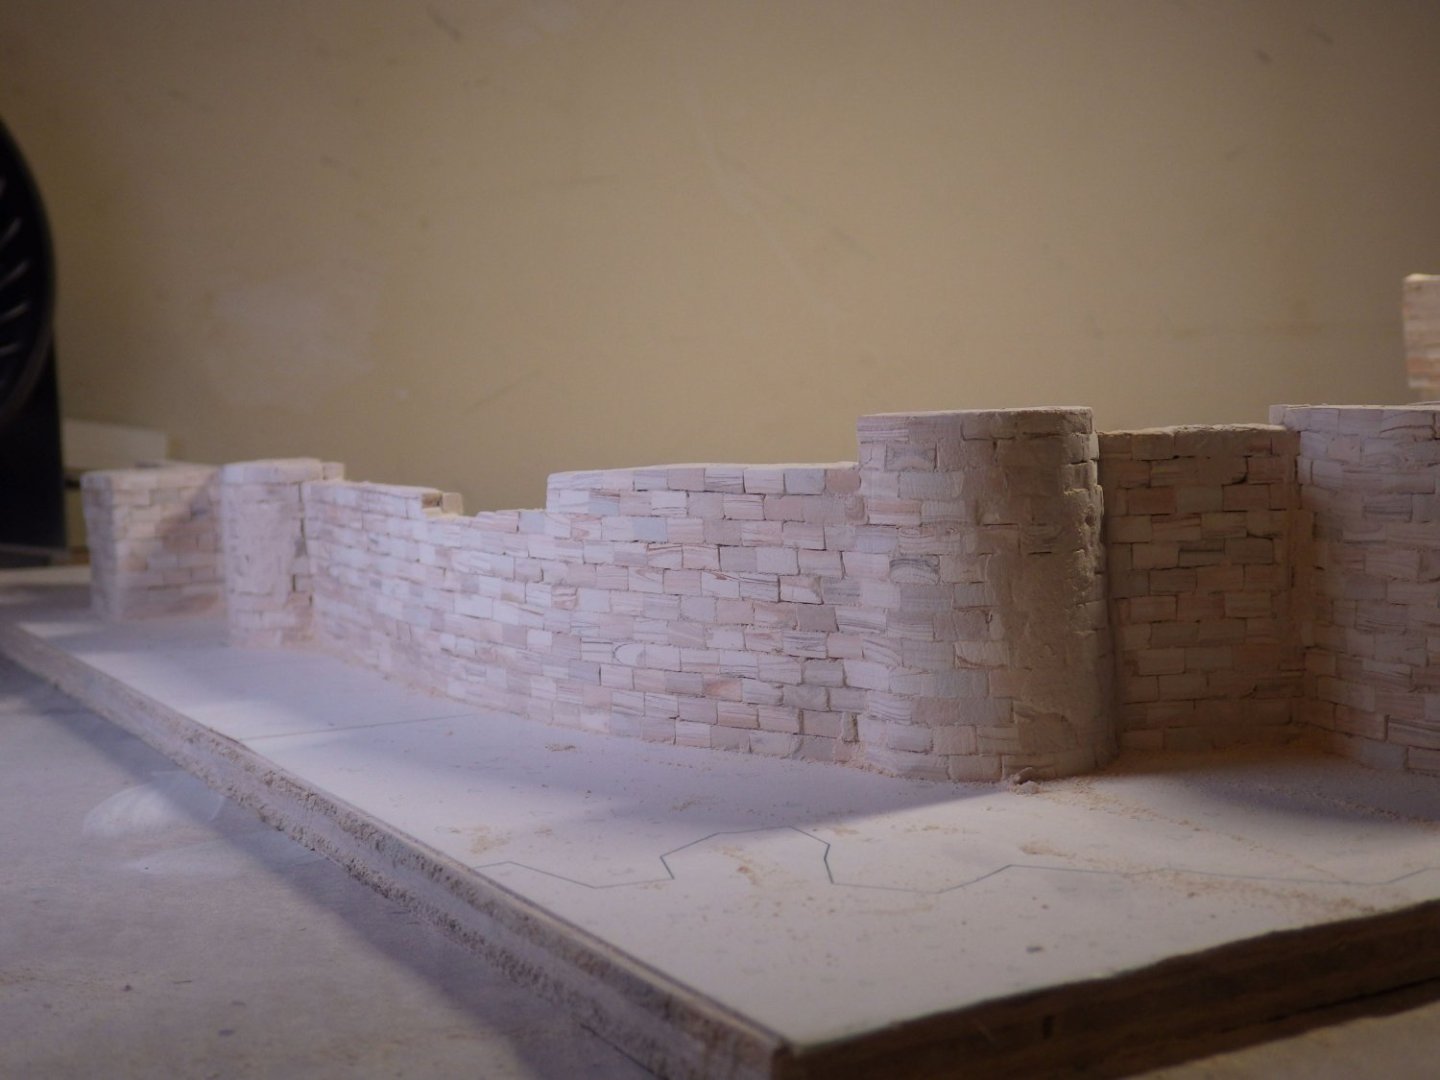
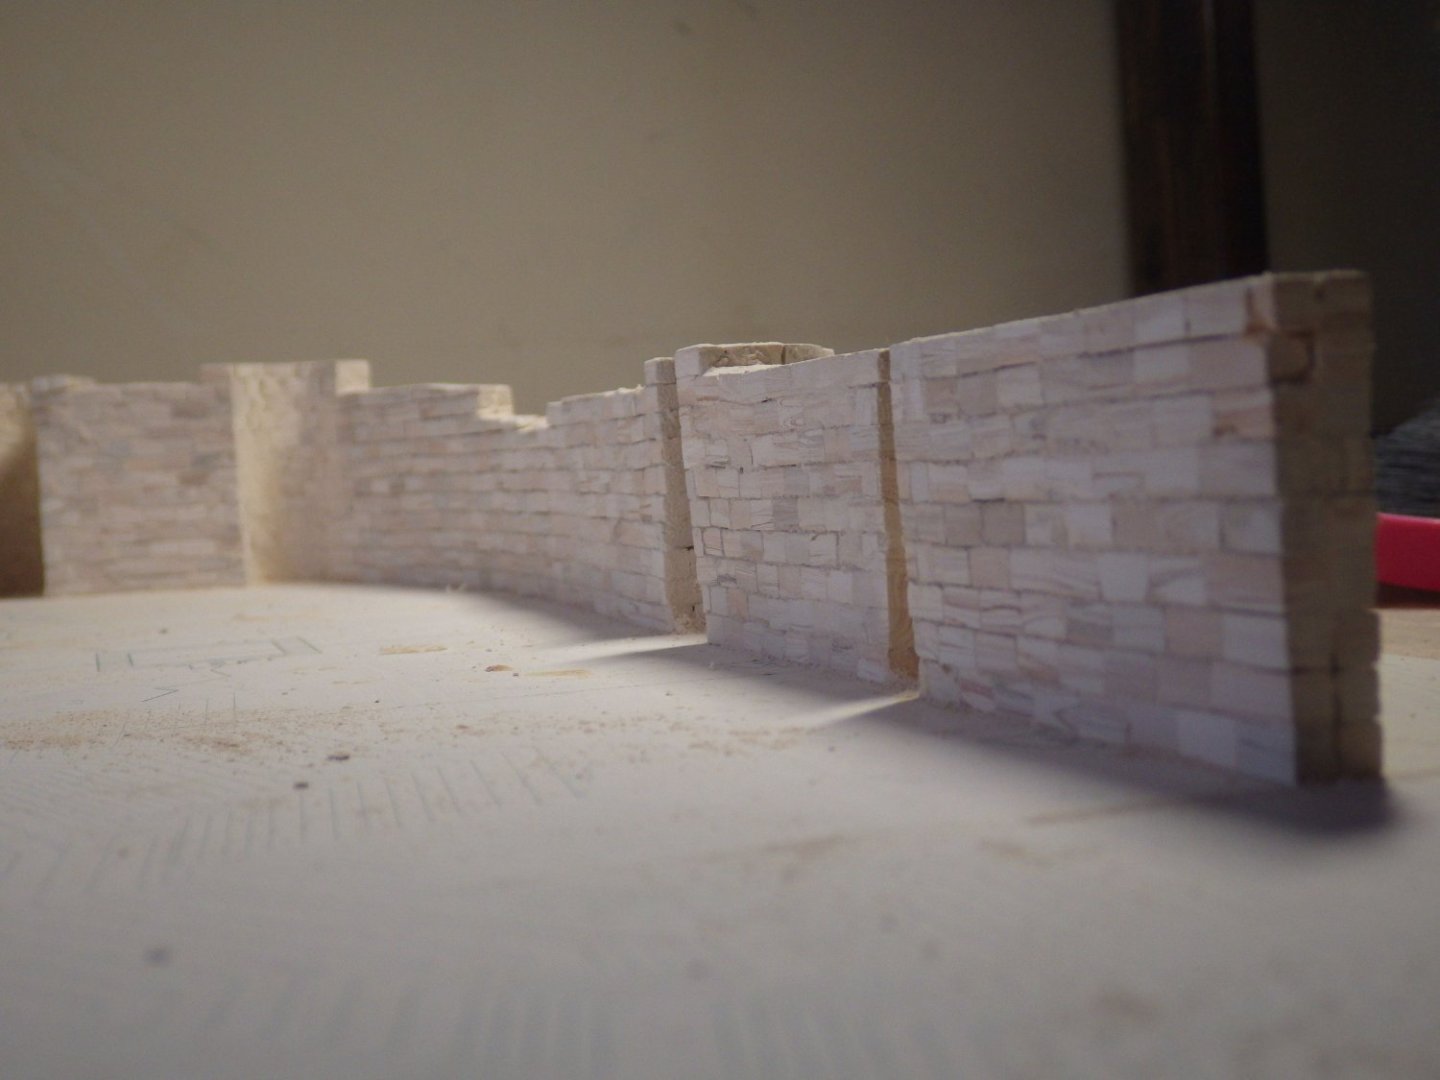
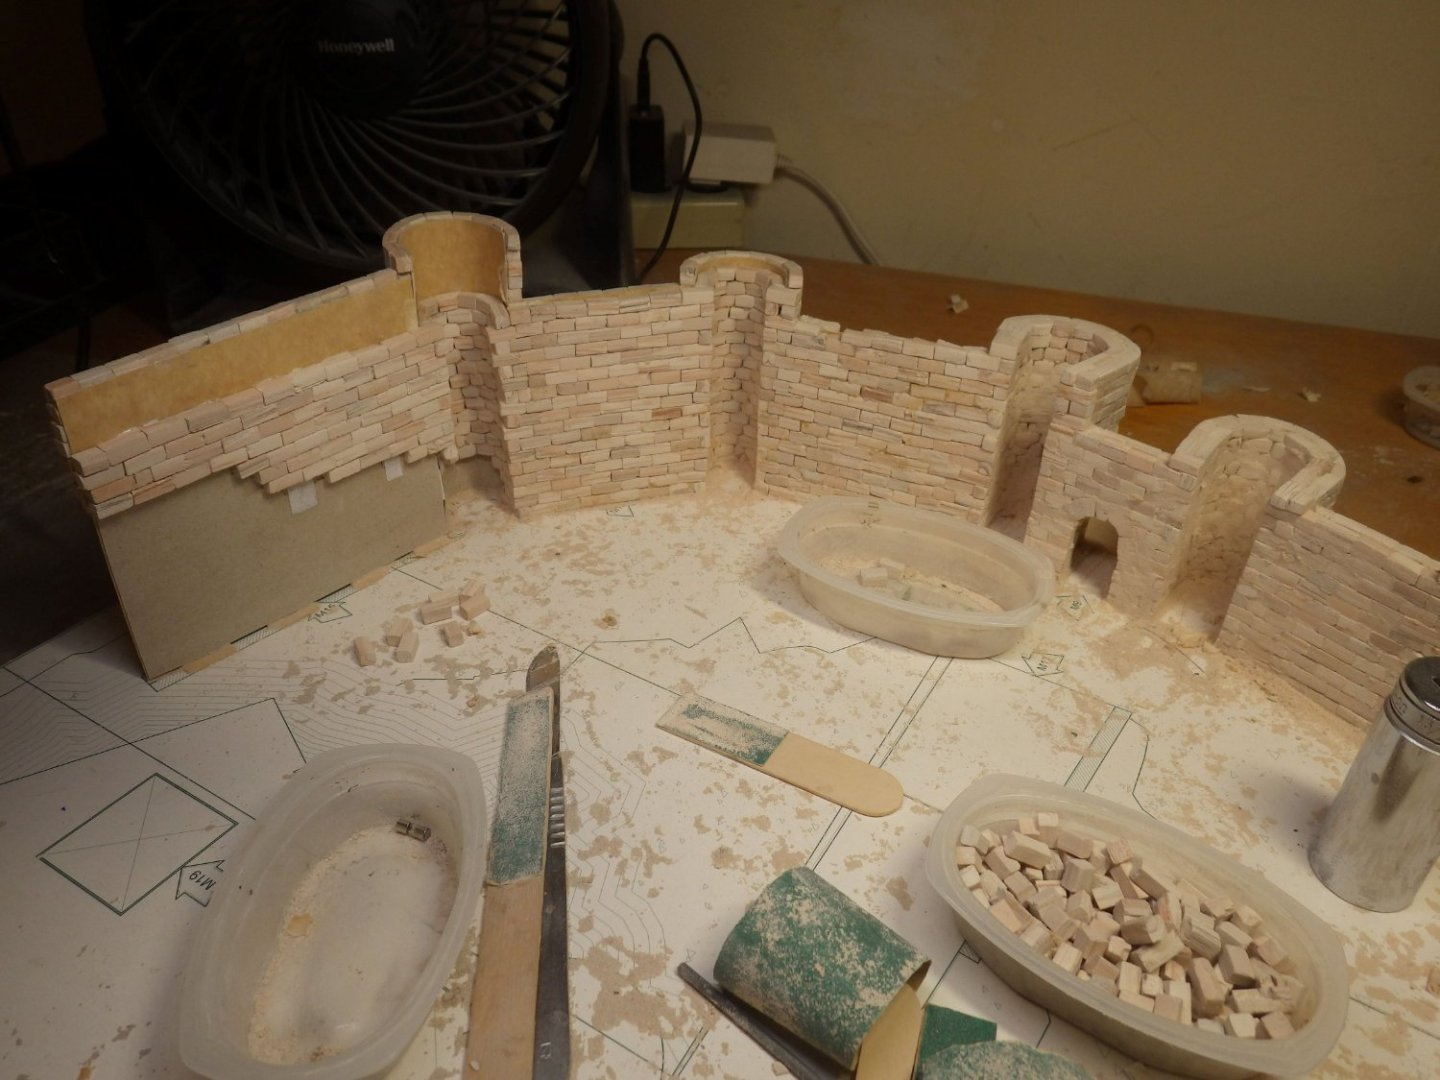
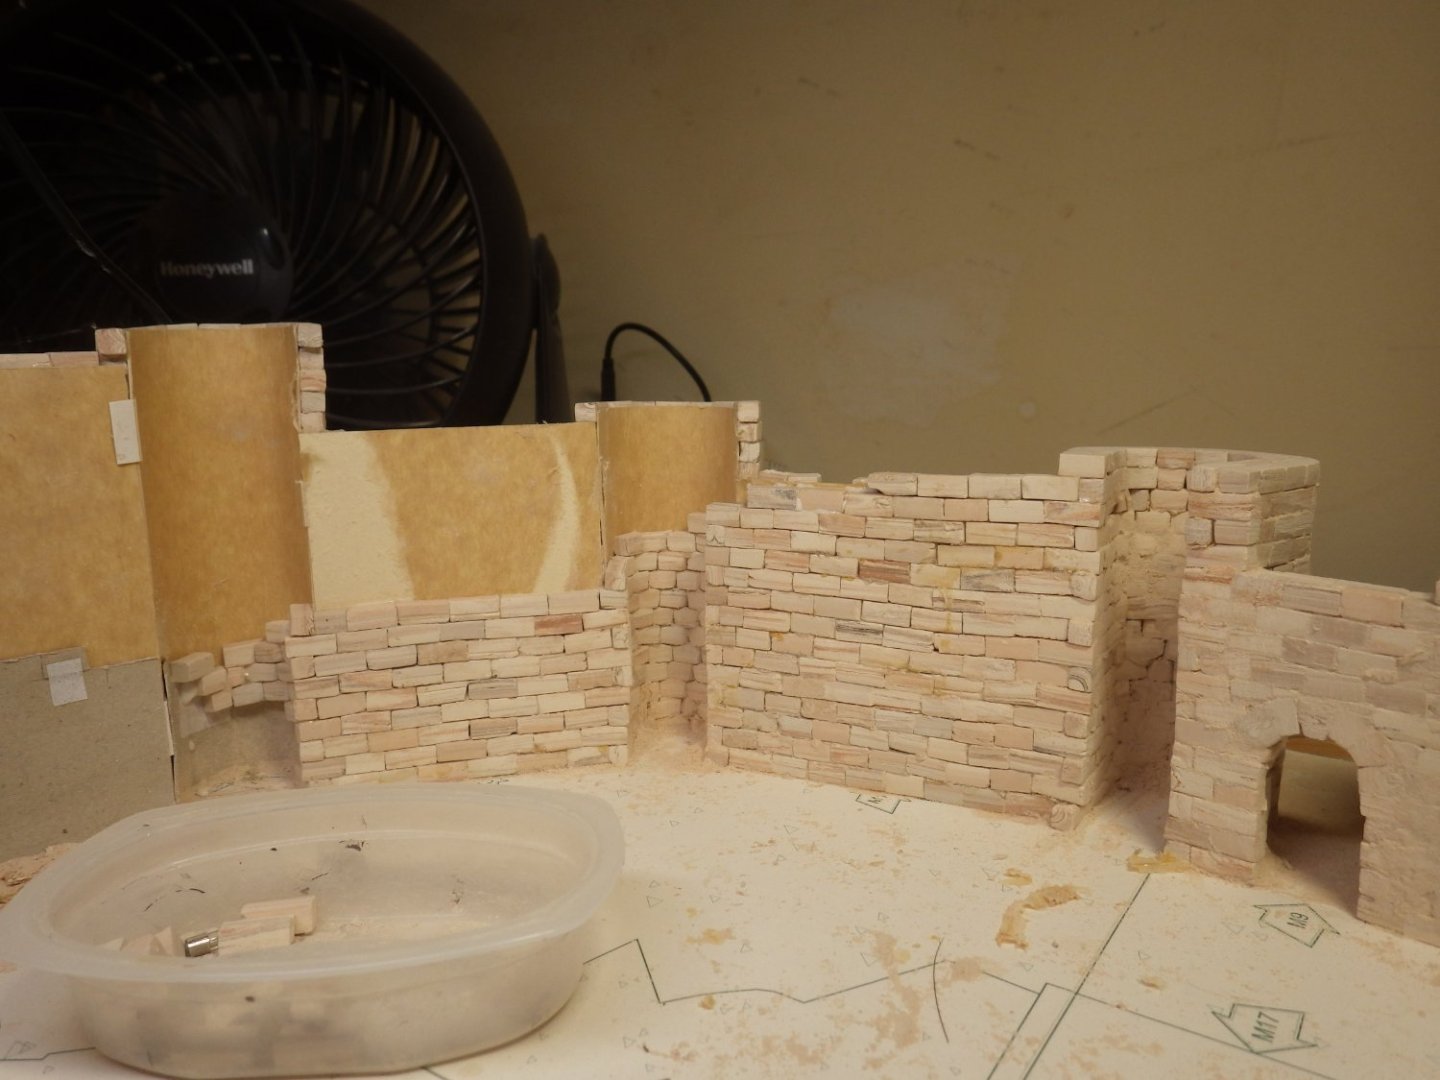
So here we are. A milestone. The last blocks have been added to the outer walls and some preliminary shaping has started. I think I am going to leave a little roughness in the walls rather than sand them to a completely smooth finish. Looking at photos and videos shows some texture to the walls. Smoothing the inside of the towers is not easy even with the "Socket Sanders" (tm). Luckily they will not be easy to view once the model is complete. At this point I think I'm 2/3 of the way through the blocks so that's 5500 blocks shaped and glued onto the formers. I had a full bottle of Weldbond with a broken nozzle that needed using so that was my initial adhesive. That is now exhausted and I'm halfway down the first bottle of the kit adhesive which I like better. It is a thinner consistency and dries faster than the Weldbond. It seemed a bit like Elmers so I made a small trial with a few blocks and it seems to work well so I may move to that when the kit glue runs out. I may be a bit heavy handed with the glue but AA don't really seem to give you enough. I ran out early in the Rochelle Towers build too. The only other flaw (at least to me and I may be missing something) is the concept of building on a cardboard base. Maybe if you don't move it all around during the build then the completed model has enough integral strength to hold itself together but that seems a risky prospect especially with this one where the parts are distributed over a large area. There are few builds out there to reference so I am happier using a sheet of plywood. I hope to finish the shaping tomorrow and add a coat of matte sealant to bring up the colour a little and seal the block surfaces. I am going to take a short break after that and work on a couple of short plastic builds which means I can move out of the garage and back under air conditioning. I was miserable out there this afternoon. That may be an issue with airbrushing out there too. Thank you all for teh support and the likes and comments Alan

- 462 replies
-
- 16
-

-
Thank you very much OC. Your Waterloo build is an inspiration. The stone look is one of the strong points of the Aedes Ars models even is some of the details are simplified and the blocks are really too big for the scale. Once finished I don't think it will be too obvious and this one doesn't have fiddly battlements which would look out of scale. I think figures are going to be a must. To add colour and a sense of scale. I have enough figures from Pendraken so a skirmish is definitely possible. I'm looking at a lot of photos trying to get a sense of how it looked in the medieval period. Alan
-
I guess that's going to stay on the unfulfilled teenage dream list them. Alan
-
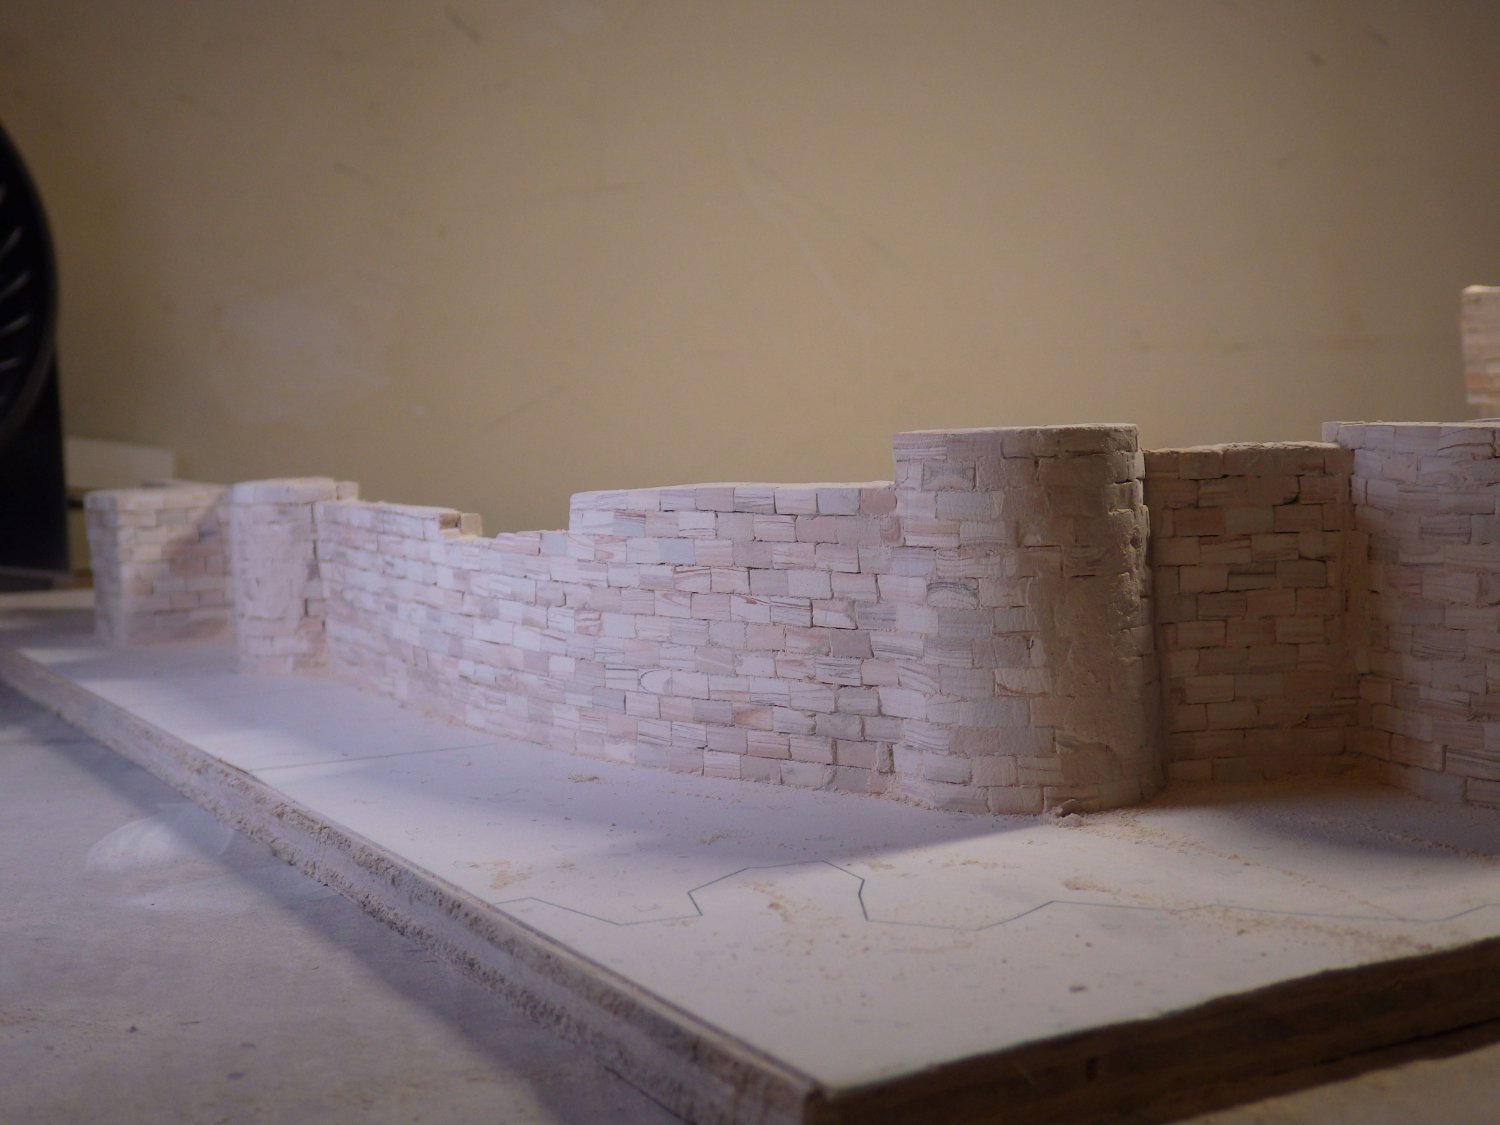
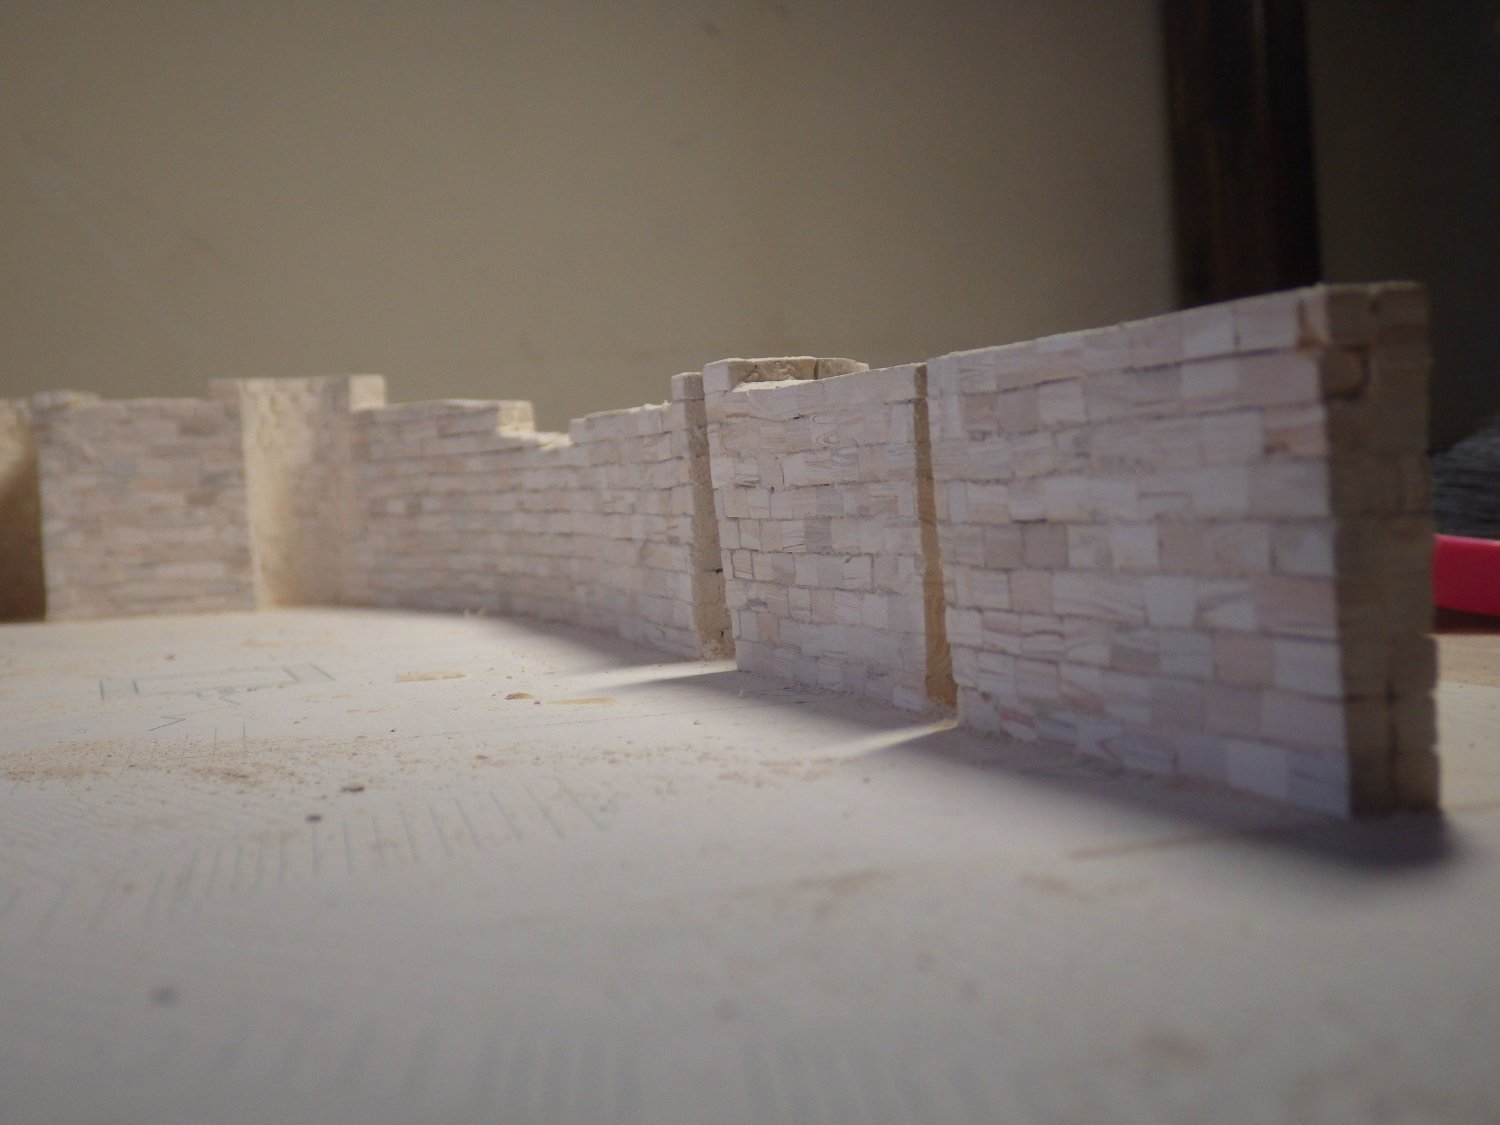
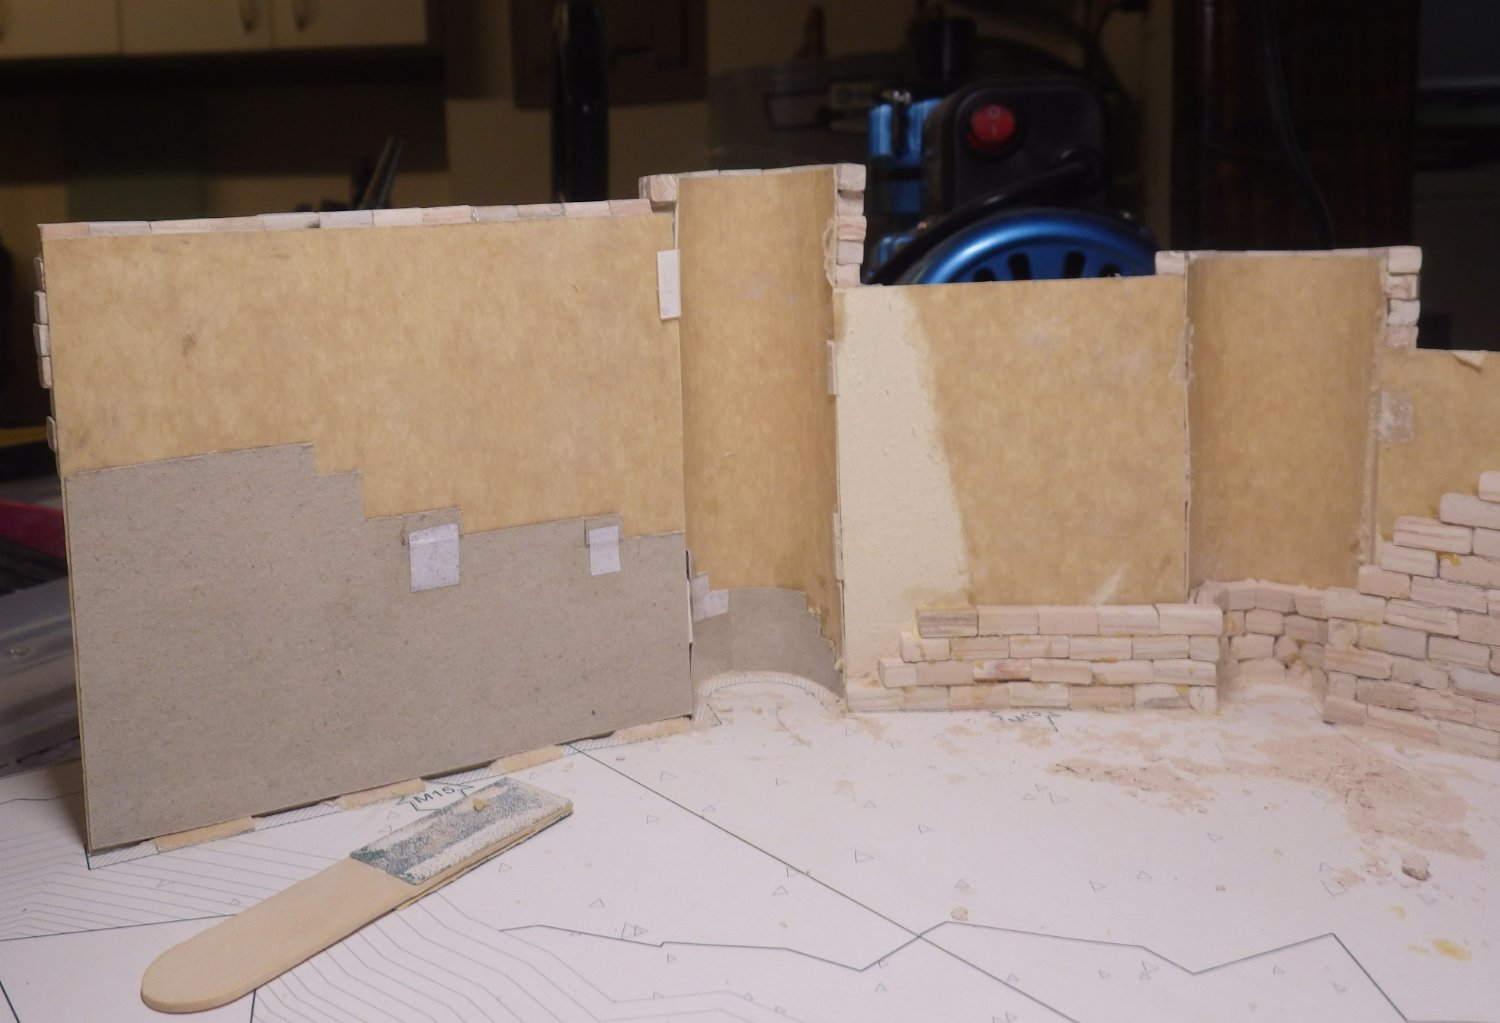
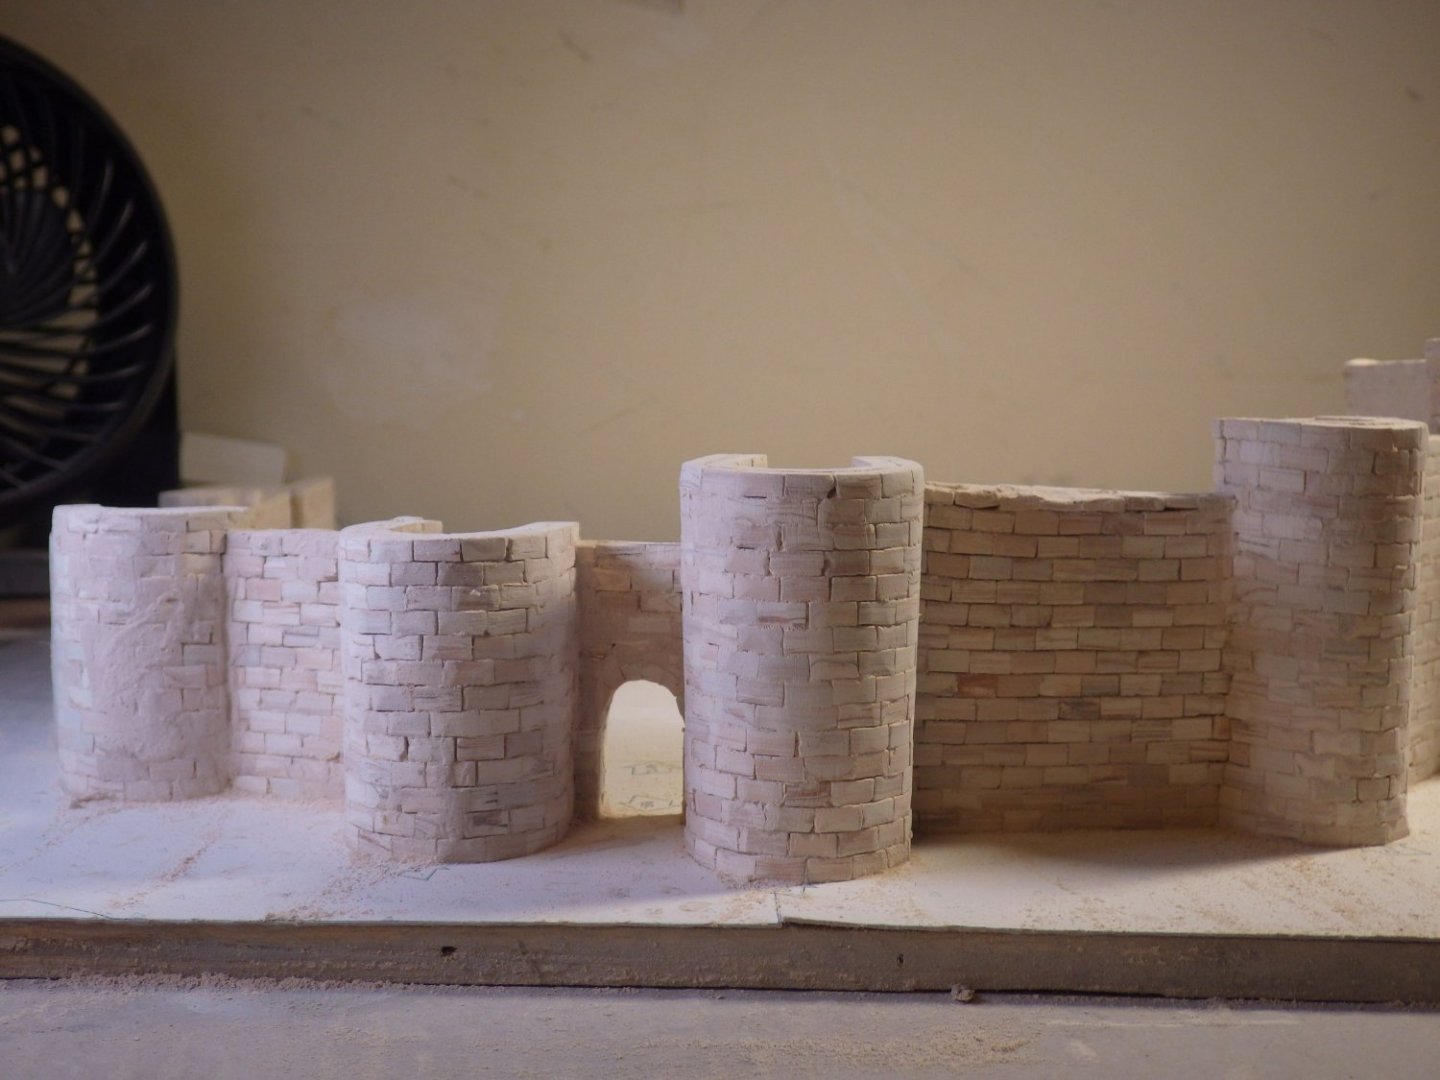
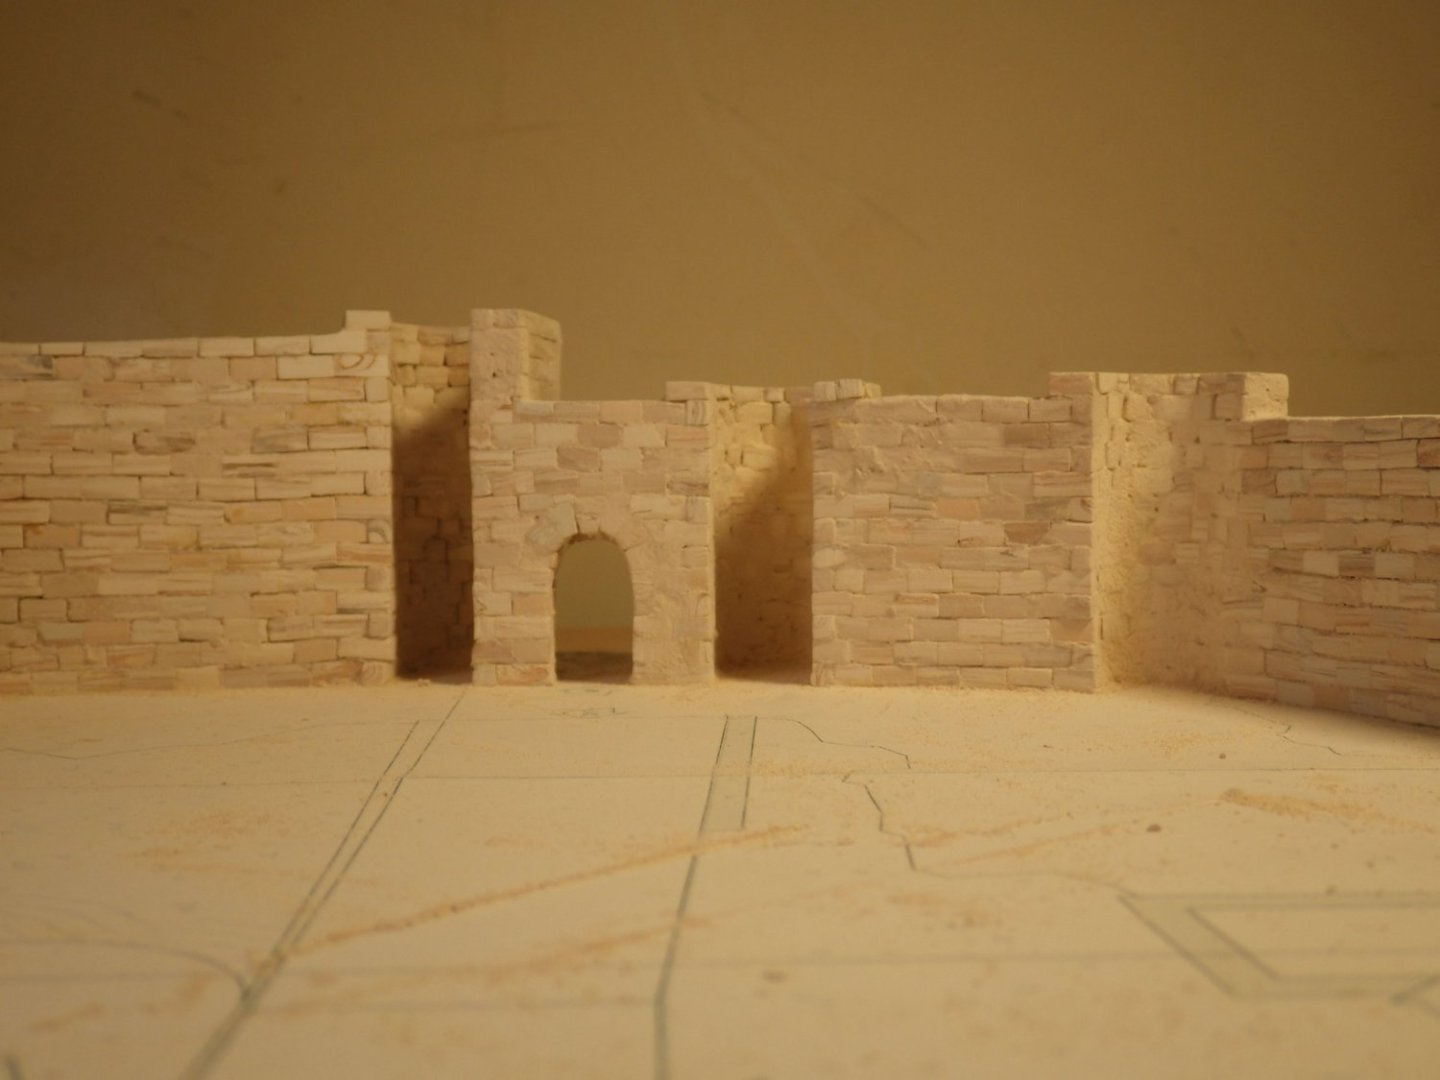
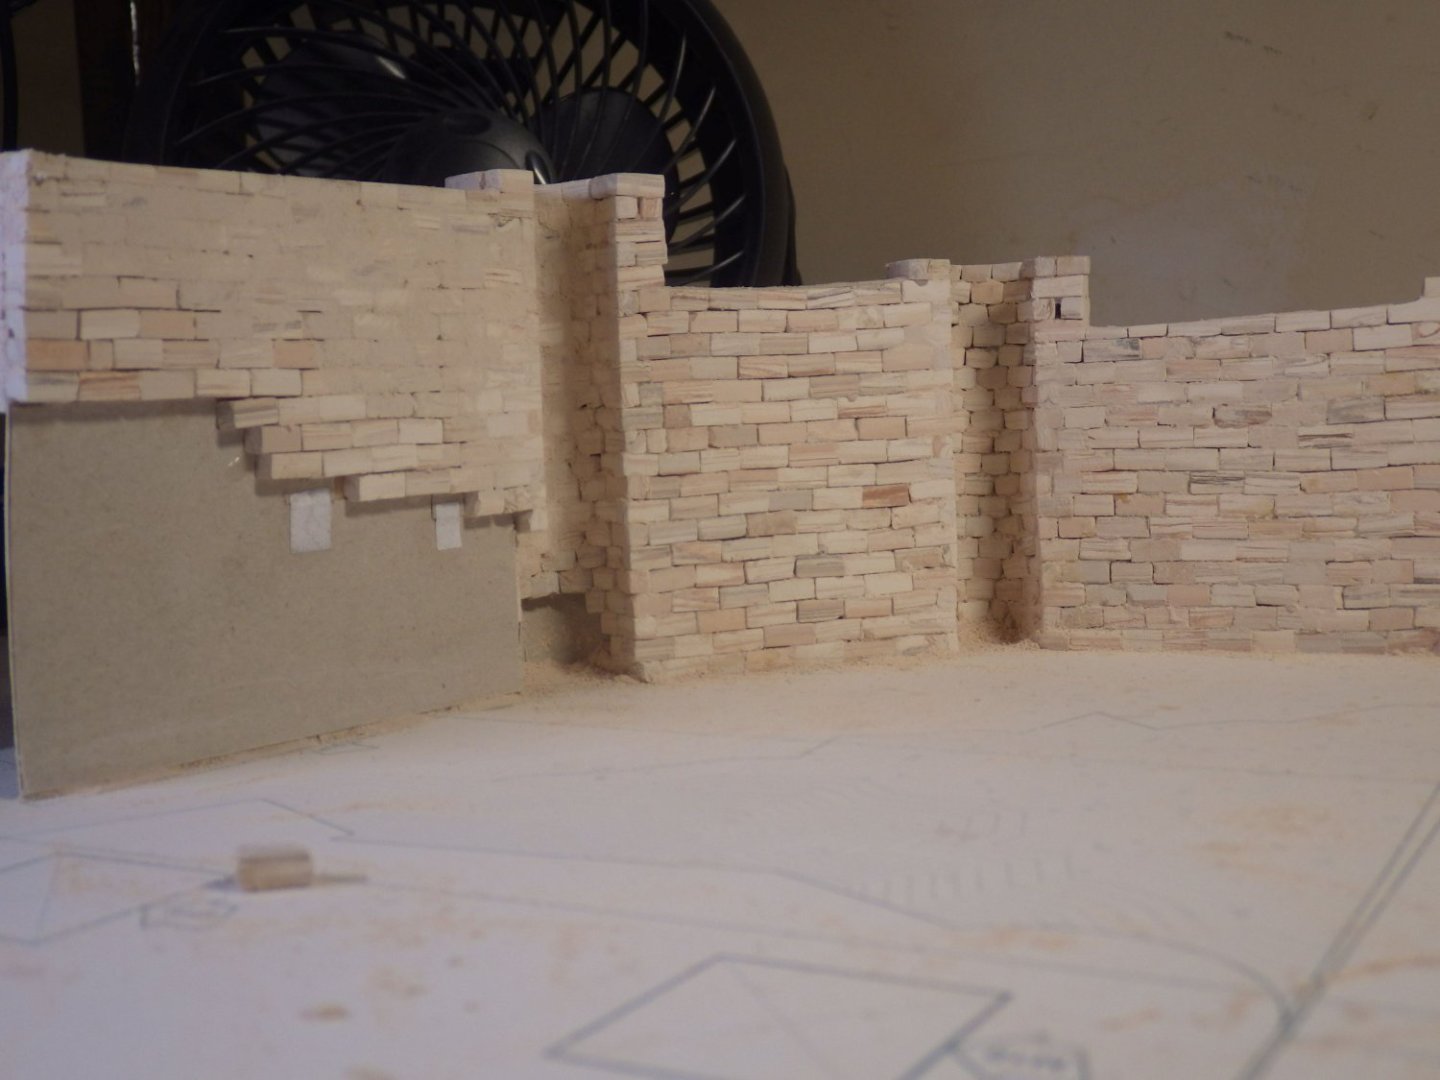
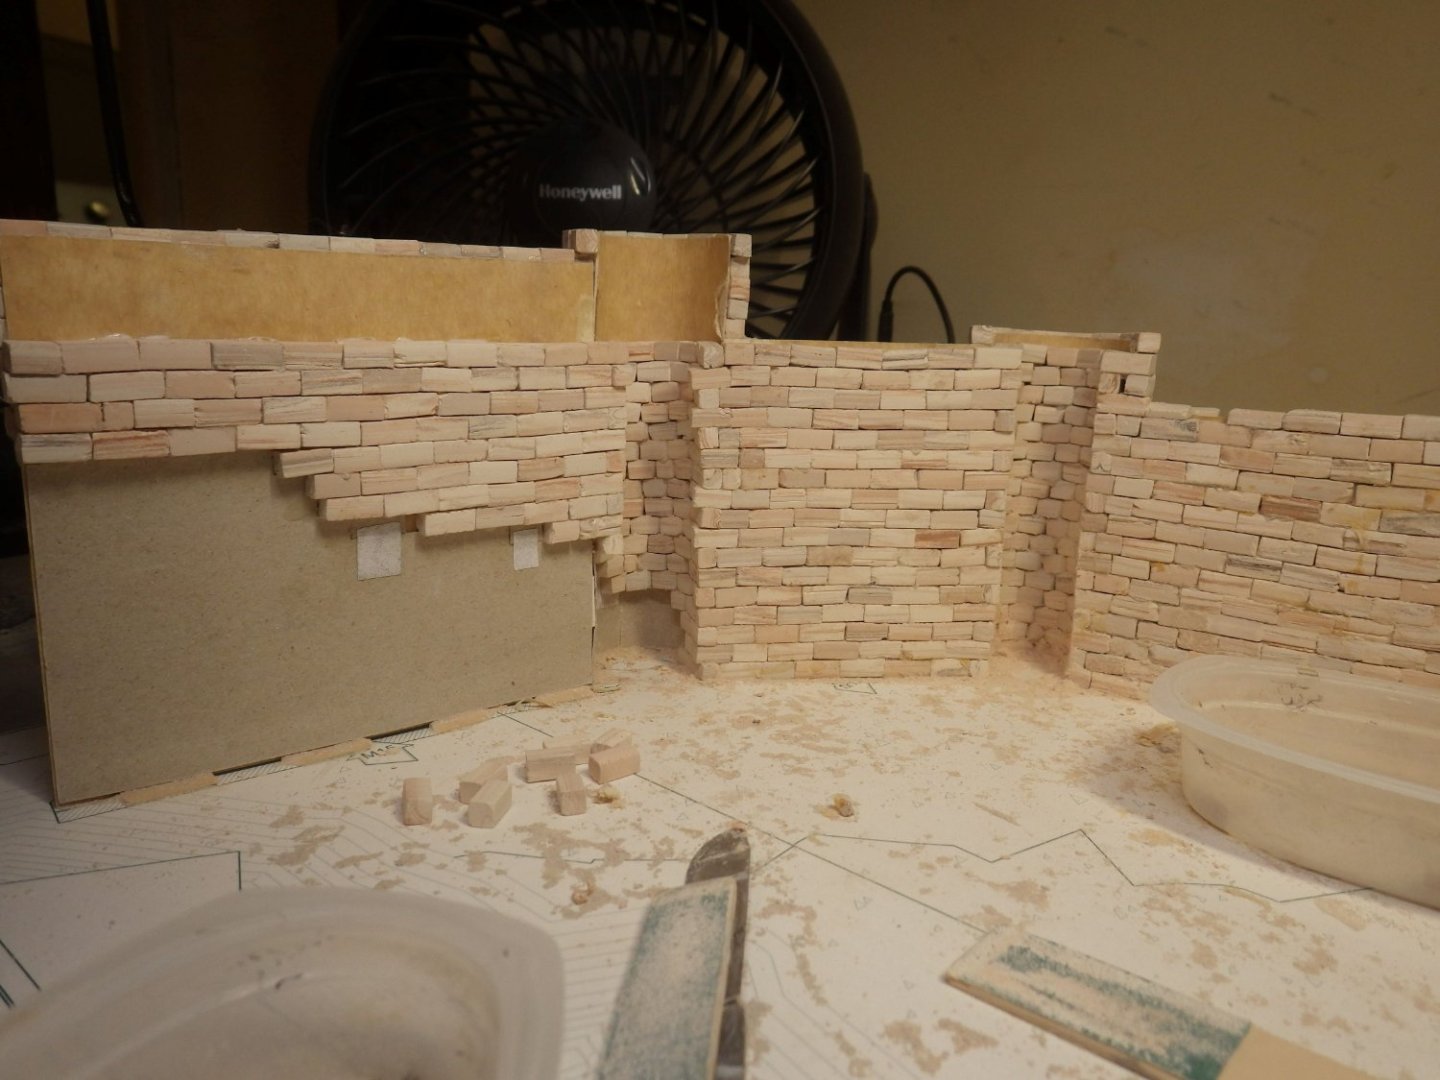
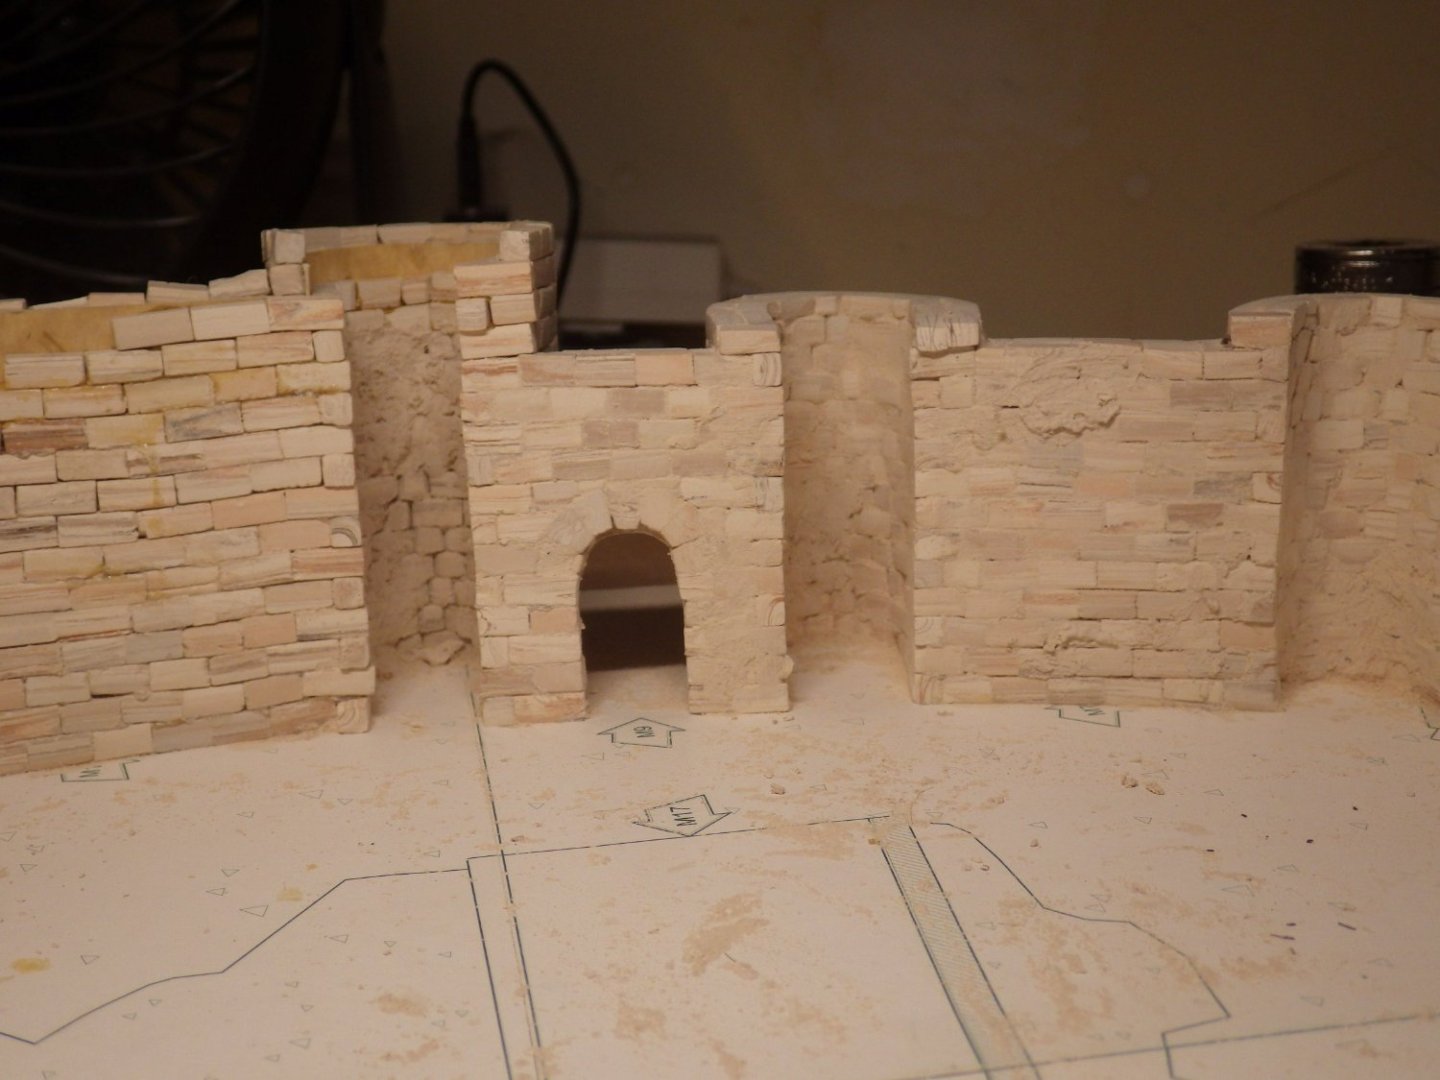
I've managed to spend a bit more time adding blacks and suddenly I seem to be getting close to the end of the outer walls. I've really only got the upper half of the last tower and the wall to be done - and then lots of sanding and filing to get final shapes and smooth the walls down. I'm trying to decide how rough to leave the walls. It's an 11th century construction so a perfect smooth finish seems inappropriate. I had a peek at the instructions (well more of a simple guide really) and it shows the last wall covered in blocks all the way to the base. I had already started on mirroring the outside by then and I confirmed the hill contours are the same on the inside of the walls as the outside so it just seems a waste of blocks. Maybe it adds a bit of stability to the card former but I had been thinking of adding a support along the bottom of the wall from scrap wood or foam anyway. I hope the next photos will show the finished walls and then a clean up of the bench is in order. The remaining stock of blocks is looking a bit better than I thought so I'm hopeful I'm not going to run out. Thanks for looking in and the comments and likes Have a great weekend all Alan
- 462 replies
-
- 14
-
-

-
The GT40 was very beautiful. A huge favourite of my youth along with the Renault Alpine Alan
-
Thanks Craig Crawling down the aluminium inlet ducts in the afternoon dressed in a Tyvek bunny suit to do fan inspections has been a bit of a trial lately. It will be great to not be doing it in August. I'm definitely enjoying being back at the work bench and with the end of the walls in sight the enthusiasm is high. Alan
-
Thanks Andy May have to add another kit to the pile Alan
-
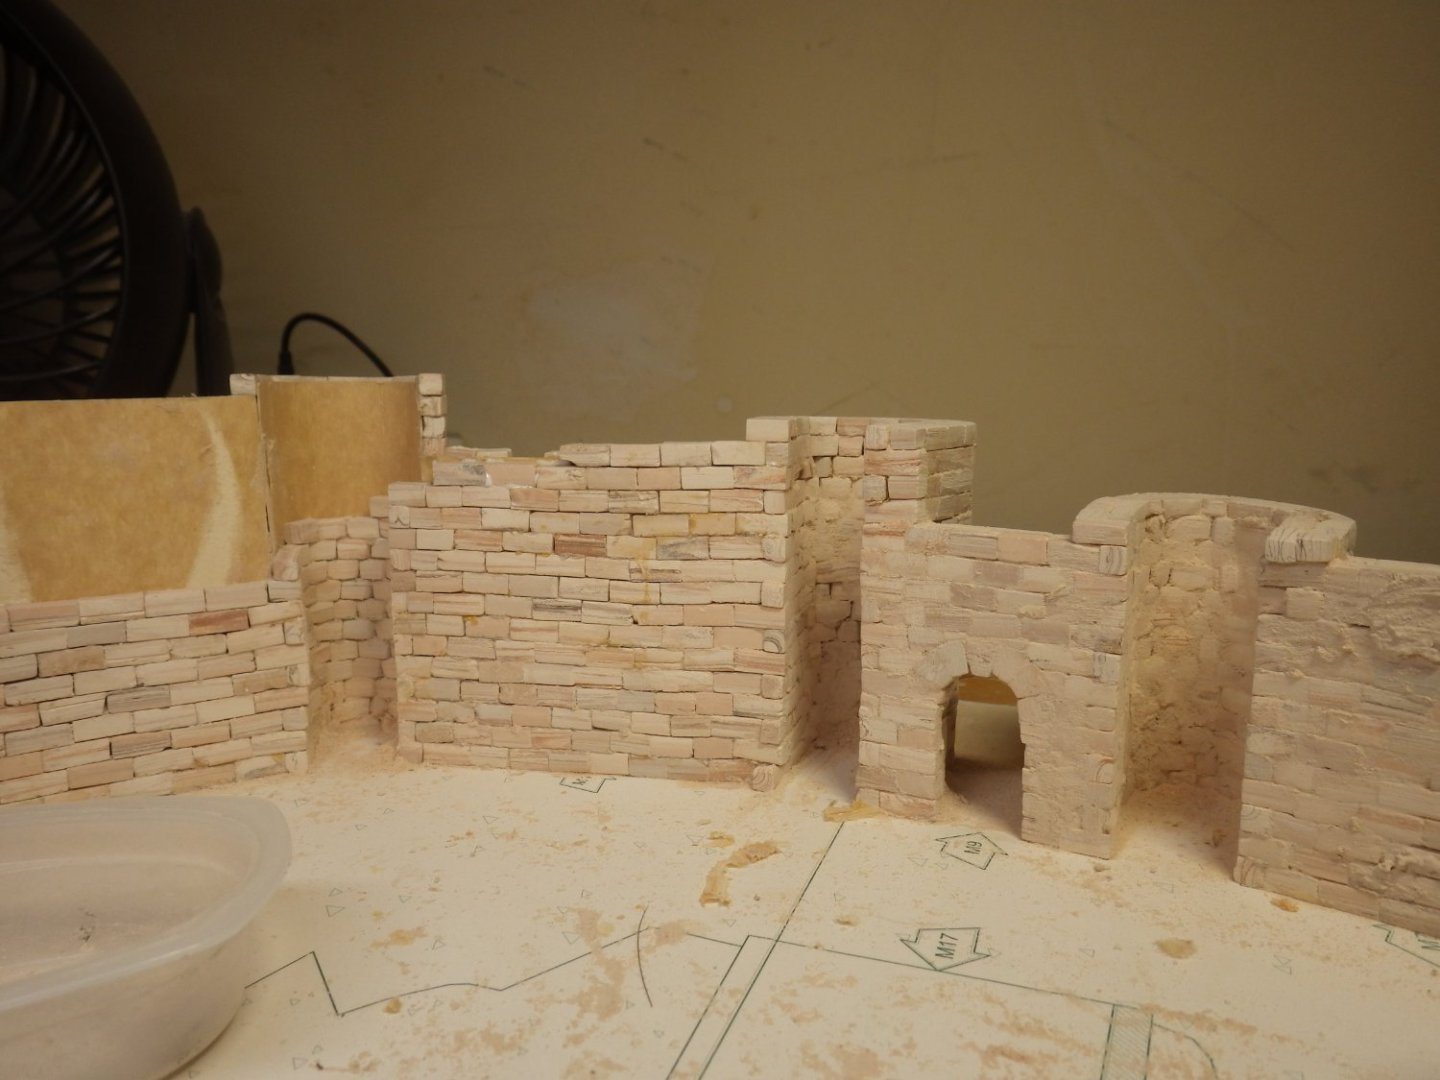
A bit of backward progress first. The camera has a great knack of pointing out defects. After looking at the photos I wasn't happy with the walls to the left of the gate. I hadn't set a block down carefully enough and it had caused the tiers of the wall to sag down in the middle and the wall on the far left had a block on the bottom row that I hadn't smoothed enough and that was affecting the subsequent layers. So it has all been torn down and rebuilt and I think looks better. The glue holds well but does allow painless disassembly; just need to remove the glue residue. After sorting all that out work progressed pretty well. I have started building up the last tower above the template that indicates the level the landscape will come up to. There are a few more sessions needed but the end feels like its in sight and enthusiasm is still high. I'm starting to think that I will take a break once the outer walls are complete. Maybe work on a couple of small 1/72 aircraft as a change in pace and then come back to the towers and landscape. That feels like a natural breakpoint and a chance to clean toe garage work bench up from all the dust that's been made so far Thanks for all the support and likes. Hopefully some steady progress this week. Alan

- 462 replies
-
- 11
-
-
Thank you Craig. Its good to be back. It sounds like I have two / three months of leisure before the engine comes back to Florida. Time to get a few things built hopefully. The pile of new kits is gaining on me. Alan
-
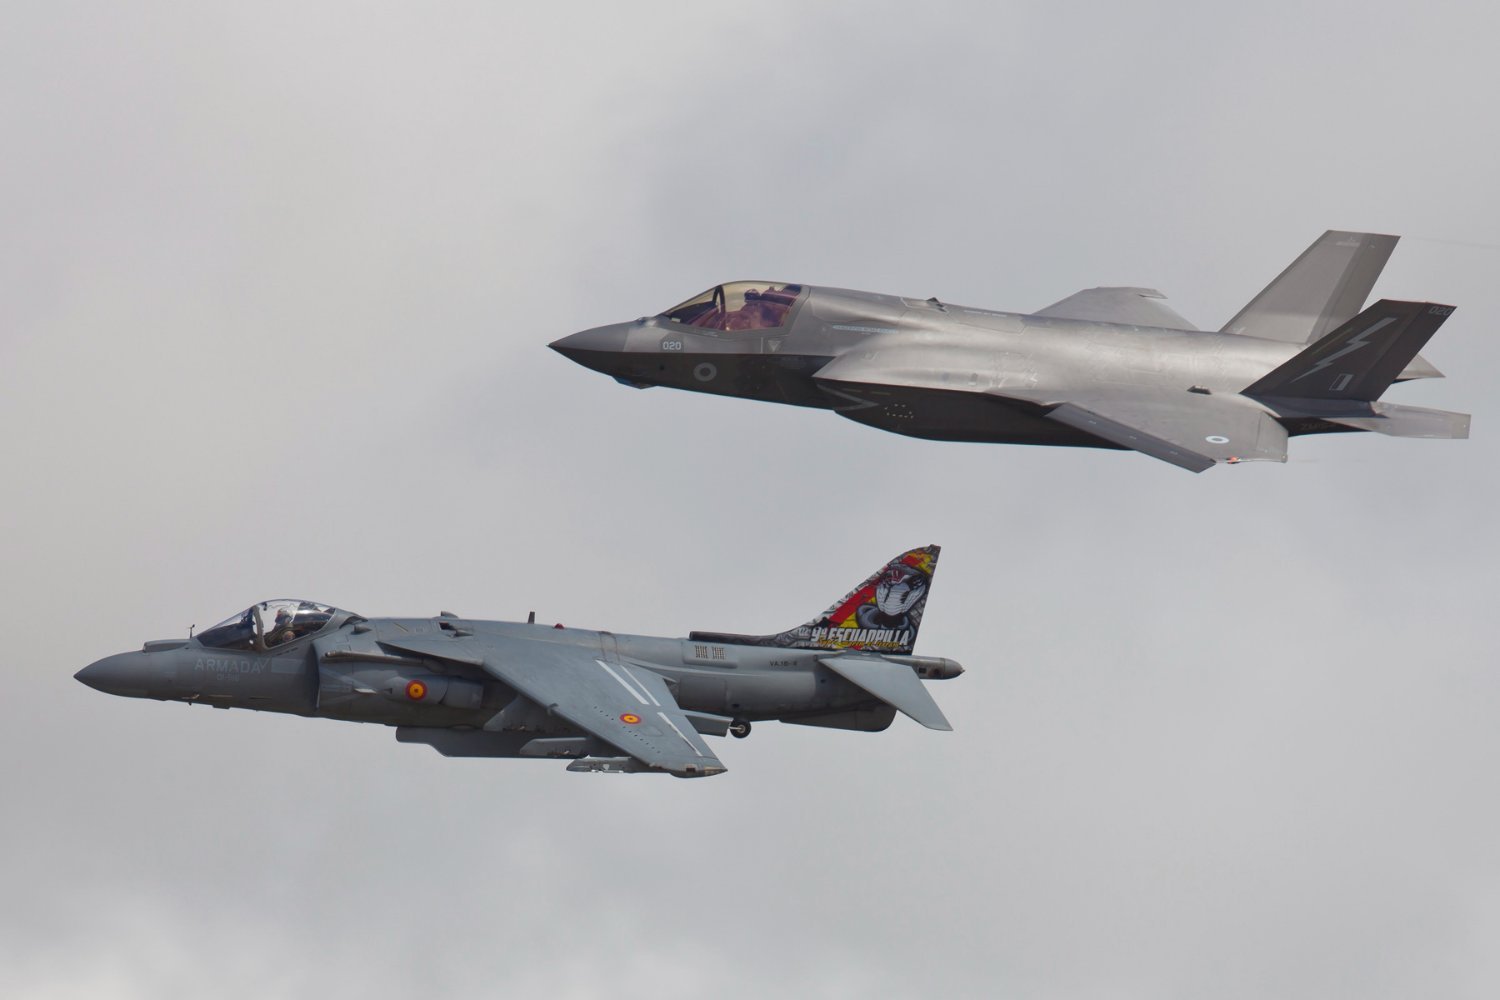
Still adding blocks but nothing exciting to picture so here are a couple of RIAT photos from the company website Two generations of STOVL This would make an interesting subject for a Typhoon model Alan

-
Thanks OC. I'm hoping to spend a bit more time with this now. Only two more of those dreadful towers to deal with. Alan
-
She looks beautiful. A fast looking aircraft and a fast build too. Congratulations Alan
-
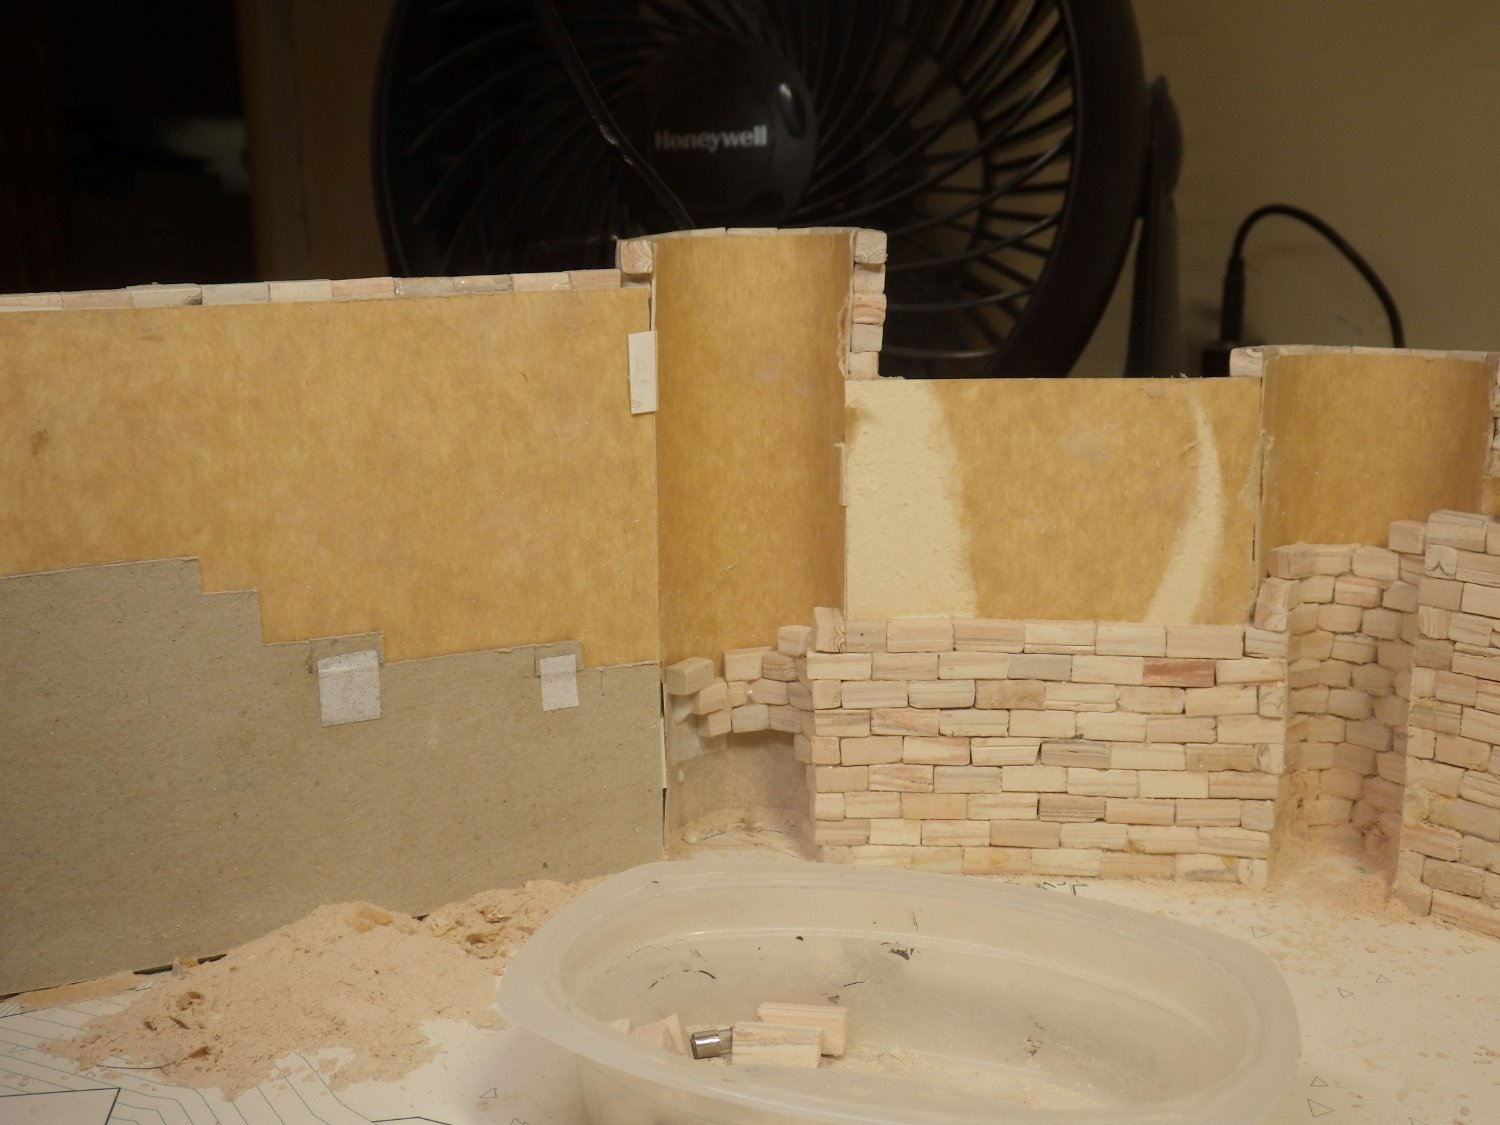
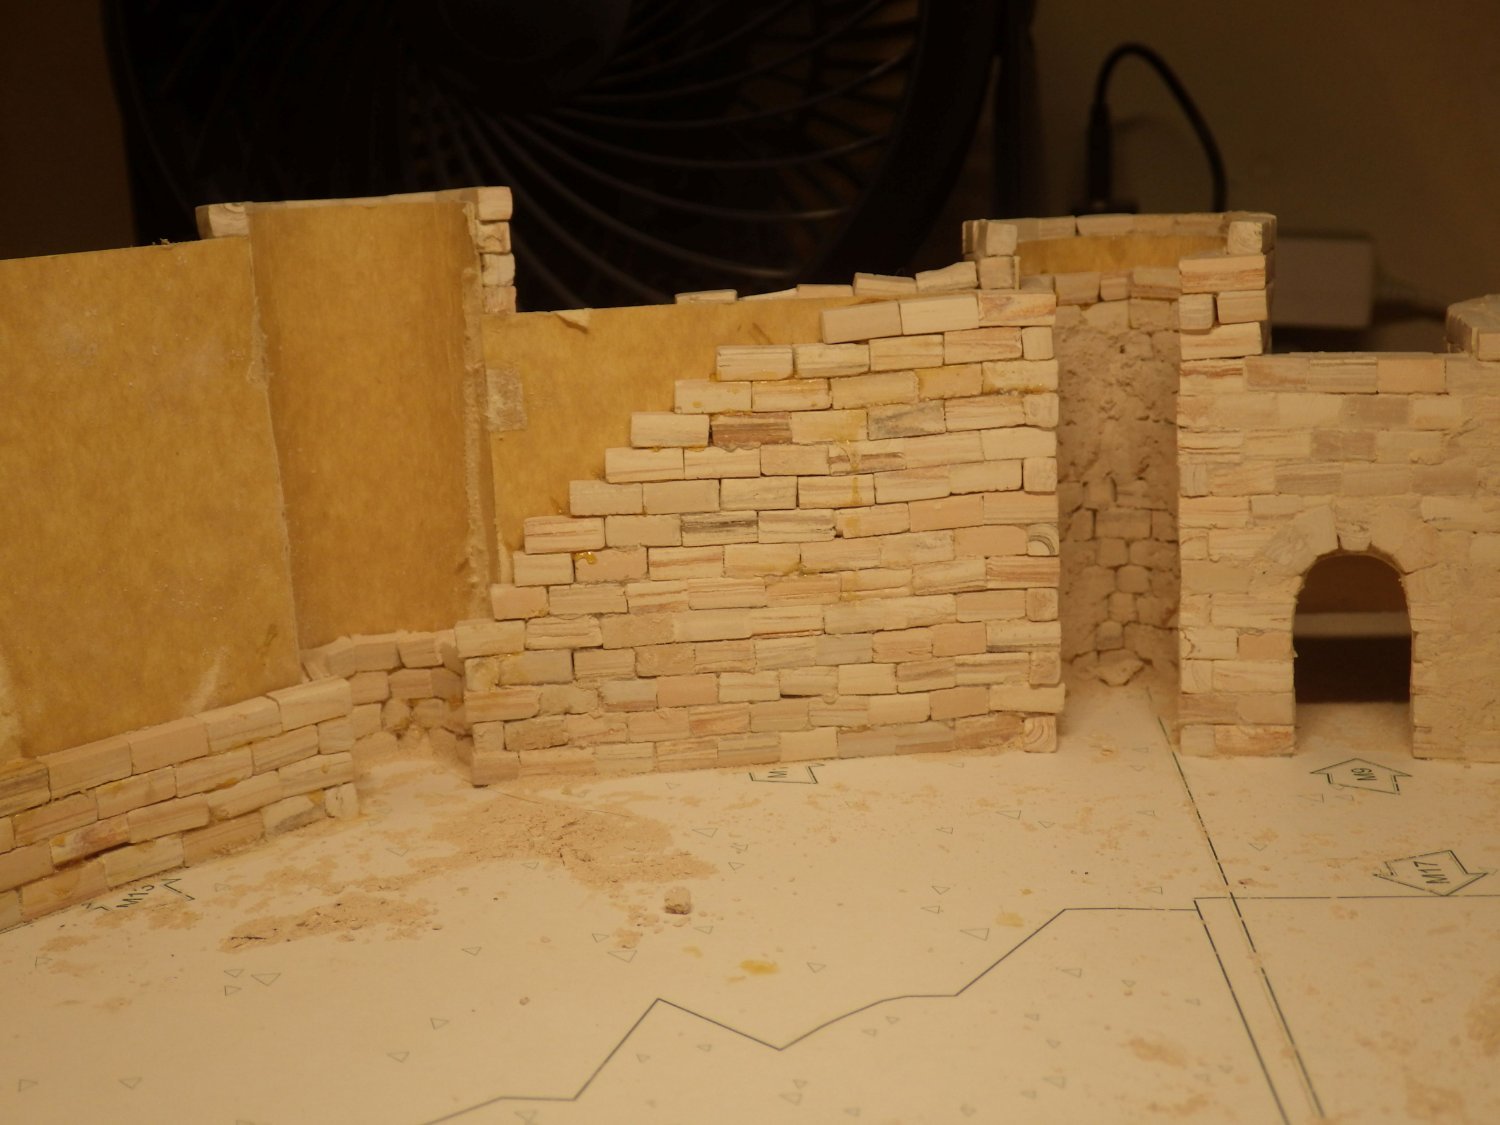
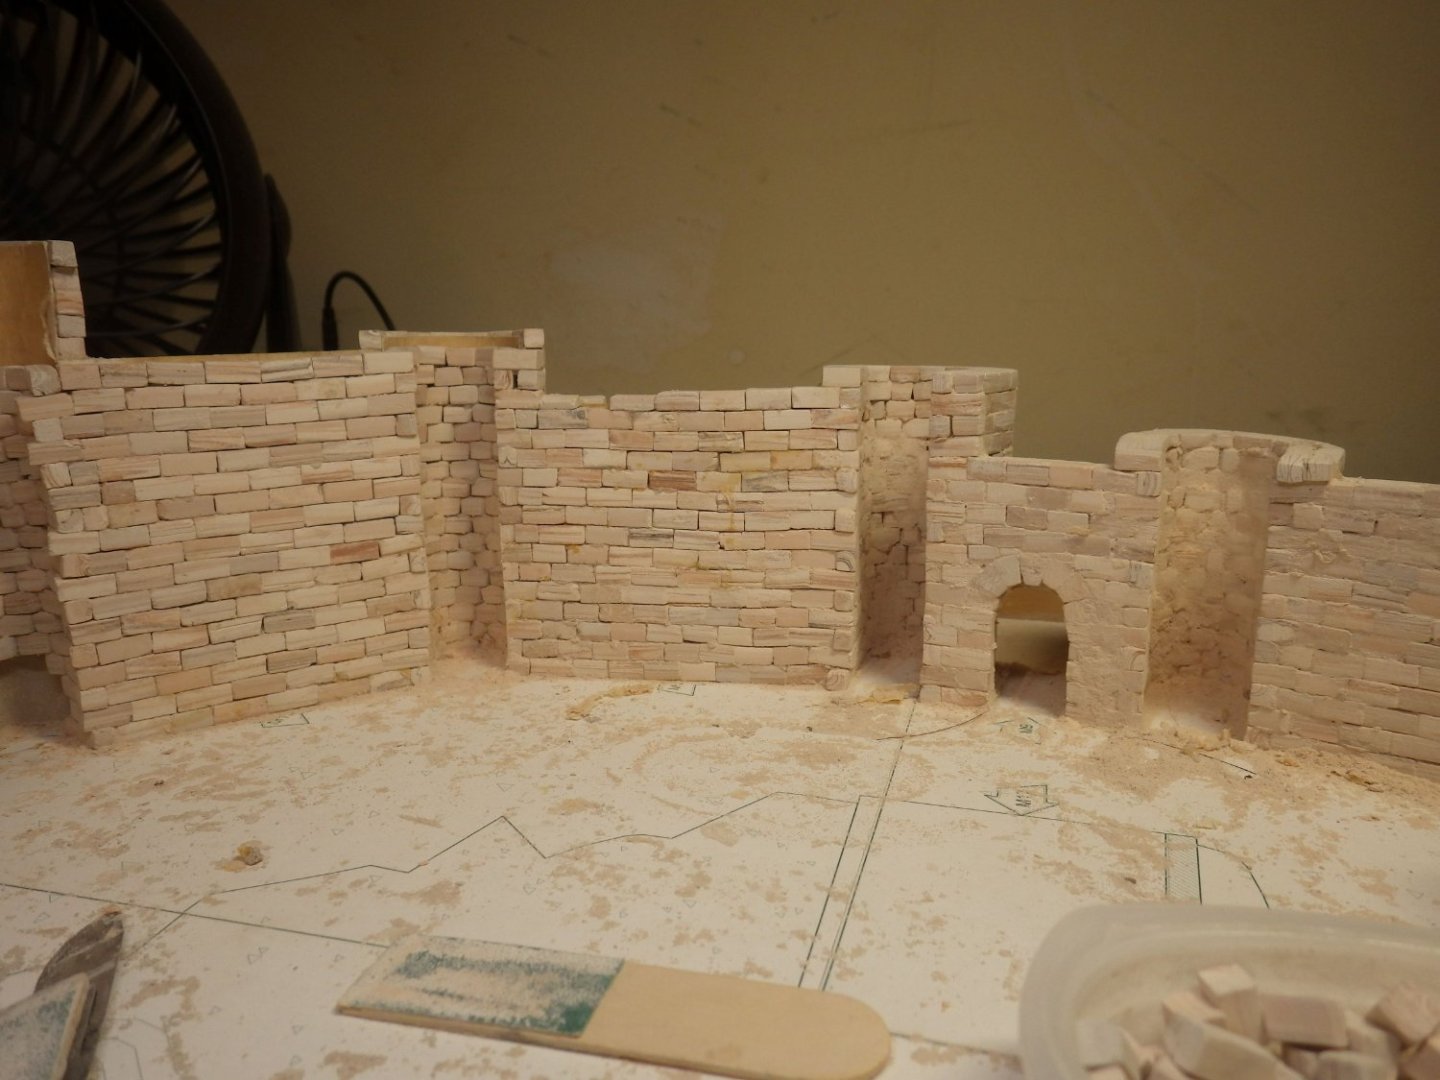
Yesterday P+W authorised pulling the engine for a couple of months maintenance so apart from a few hours here and there tying up loose ends I'm resigning from the real world for a while. Today felt like that first day of the long summer school holiday. Scrub the shower? Weed the garden? Wash the car? No, I decided that it was time to spend a while with Castillo Loarre. I managed to lay don a decent number of blocks and the towers are slowly filling up. I've found its actually quicker to file the blocks for the round sections by hand instead of using the angled piece of the shooting board. There's quite a bit of sanding and tidying up ahead and the pictures look a bit ugly because I've painted on a mortar mix from the sanding dust in some places A little thinking ahead would have been helpful. I should have photocopied the printed formers for the section of the walls that will be disappearing into the landscape and used it as a guide on the inside of the wall. Instead I used the outside wall as a guide and created a set of patterns They don't really need to be exact because the landscape will cover the first row of blocks. I made the patterns out of thin card and I hope the edge will help locate the first rows of blocks in place somewhat positively. The patterns were glued in place and it is a bit of a morale boost to realise that only about half the last wall need to be covered. Shame that last tower is so high Thanks for looking in and all the support. Some fun stuff around the corner. Lighting the main tower should be interesting. I have never done anything like that and will be looking for tips. I plan to use yellow flickering leds but have to work out how to mount them and route the wiring off the model. I hope everyone has a great weekend Alan


- 462 replies
-
- 13
-
-
Wow. I'm definitely looking forward to this build. It's going to be spectacular
-
Thank you OC and Jav. Time to go shopping. I just started Dan's log. So many great builds to catch up on Alan
-
I'm still playing catch up on my reading here. This excellent Craig. The engine is especially beautiful Congratulations Alan
-
Airplanes and Tanks in plastic by Jörgen
king derelict replied to Jörgen's topic in Completed non-ship models
Lovely painting and weathering. I may try your in-flight display. It would maximise shelf space which is becoming an issue for me Alan -
Thats looking very nice Jav. I need to try an Eduard kit Alan
-
Thank you Mike I'm hoping the towers will use much less blocks. The curtain walls really soaked them up but the walls are quite a big area and have to be built up on both sides. Everything else will be a single outer layer. I'm enjoying the castle build but really look forward to getting back into the variety and detail of a plastic kit. The problem will be choice! Alan
-
I am very late catching up with this one but it was well worth reading the thread. A beautiful model of a favourite aircraft. The weathering is perfect. Excellent work I came across this article in a recent newsletter. Typhoon reborn (aerosociety.com) Aan
-
Airplanes and Tanks in plastic by Jörgen
king derelict replied to Jörgen's topic in Completed non-ship models
Beautiful weathering Alan -
I agree with you and the 3D resin parts are so much nicer than the flat PE ones especially in 1/700 secondary weapons. Girders, catapults and cranes all look nice in PE but gun barrels less so Alan
-
The resin printed parts are really nice; especially the single Bofors. I see this being a major change to the hobby providing limitless upgrades Alan
-
Thank you Grant. The bag of blocks has diminished significantly; in fact I am wondering if I am going to have enough to finish the model Alan
-
Curtiss BF 2C-1 by CDW - FINISHED - Hasegawa - 1:32 scale
king derelict replied to CDW's topic in Non-ship/categorised builds
Beautiful model Craig. Excellent work Alan