HOLIDAY DONATION DRIVE - SUPPORT MSW - DO YOUR PART TO KEEP THIS GREAT FORUM GOING! (Only 13 donations so far - C'mon guys!)
×


king derelict
-
Posts
3,268 -
Joined
-
Last visited
Content Type
Profiles
Forums
Gallery
Events
Everything posted by king derelict
-
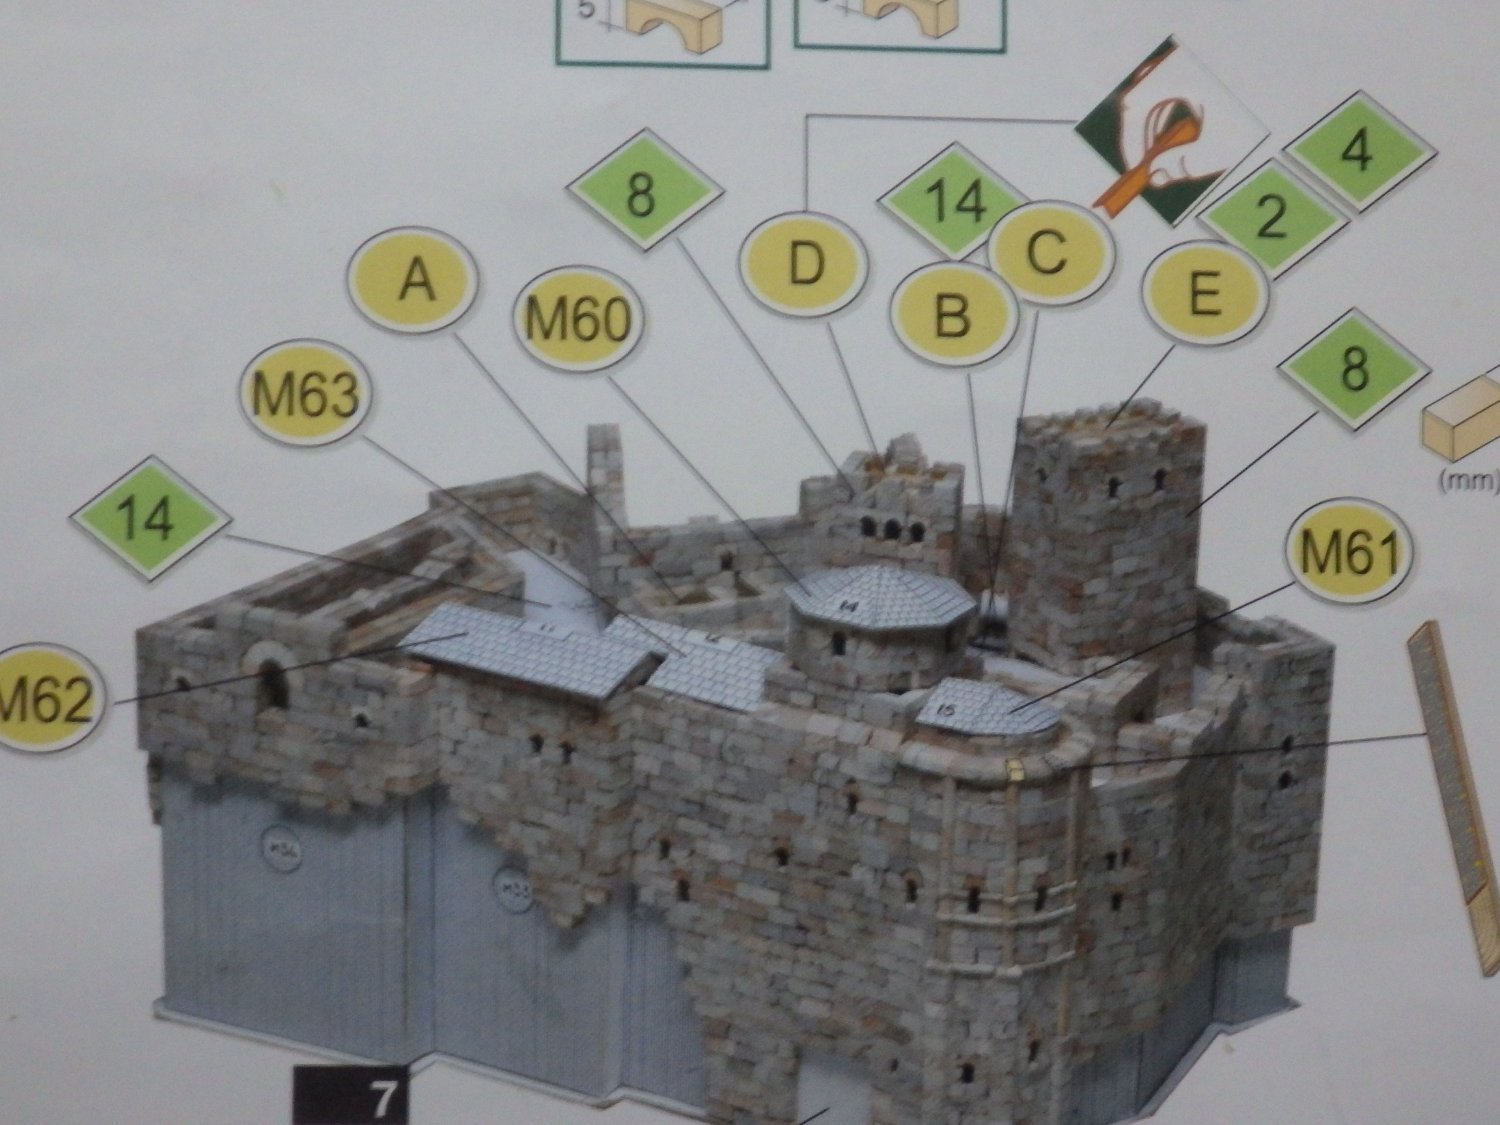
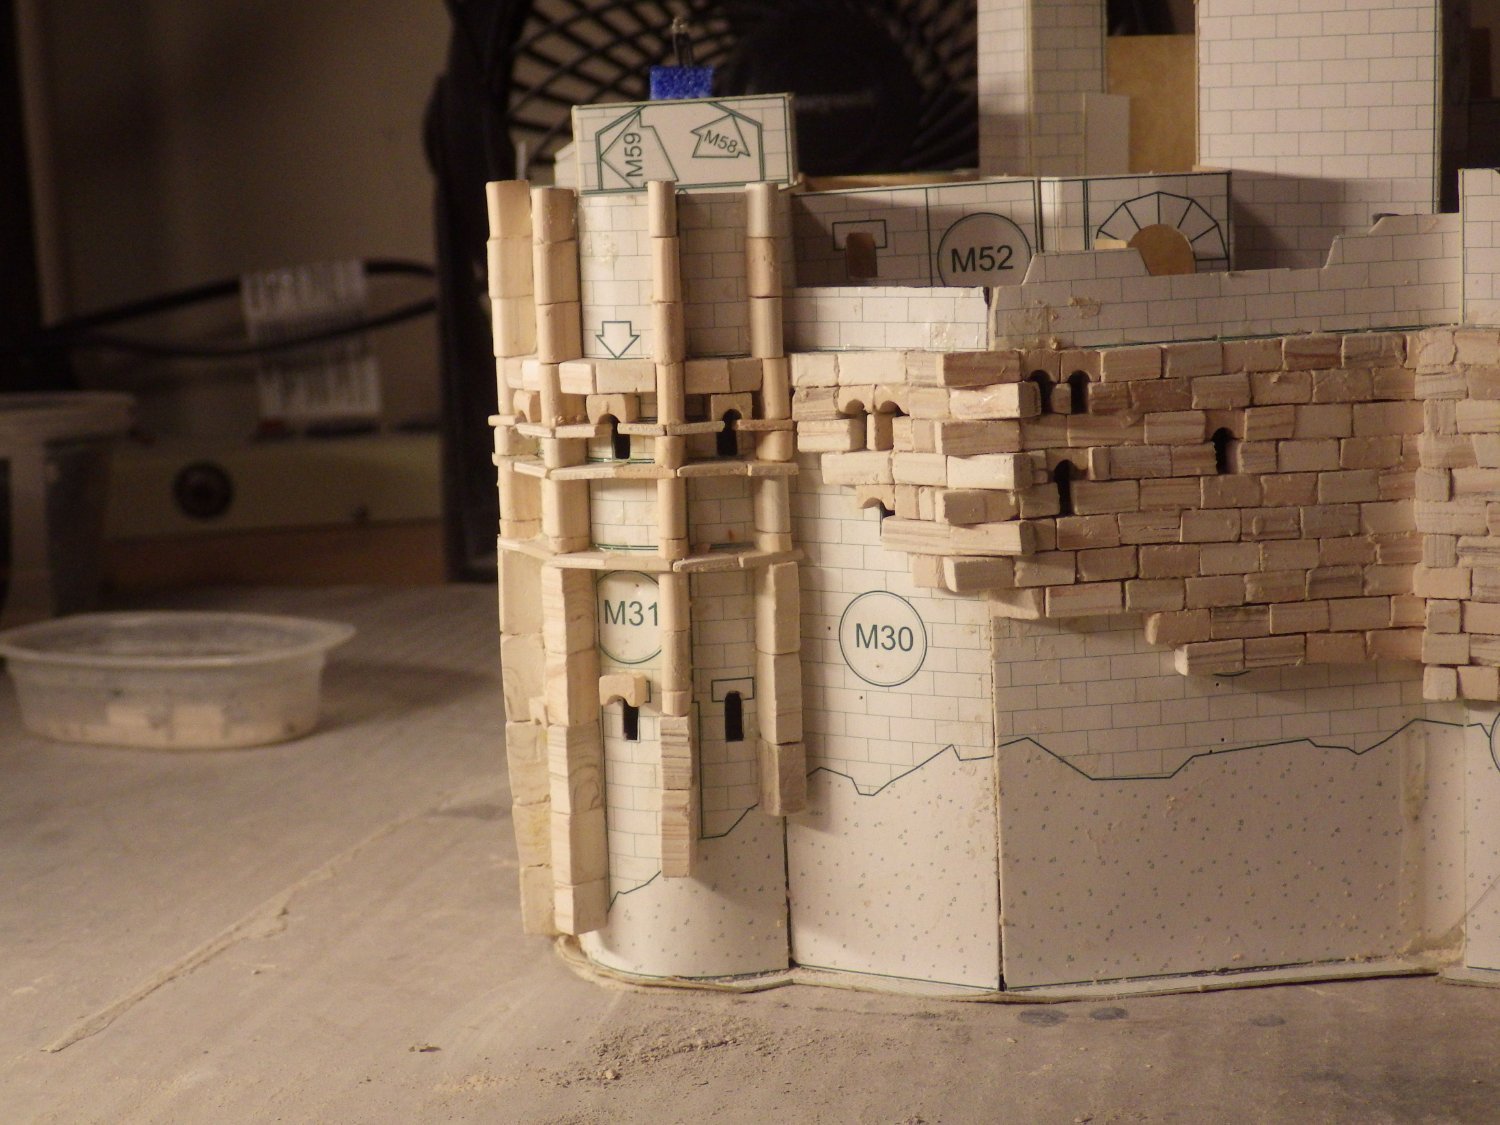
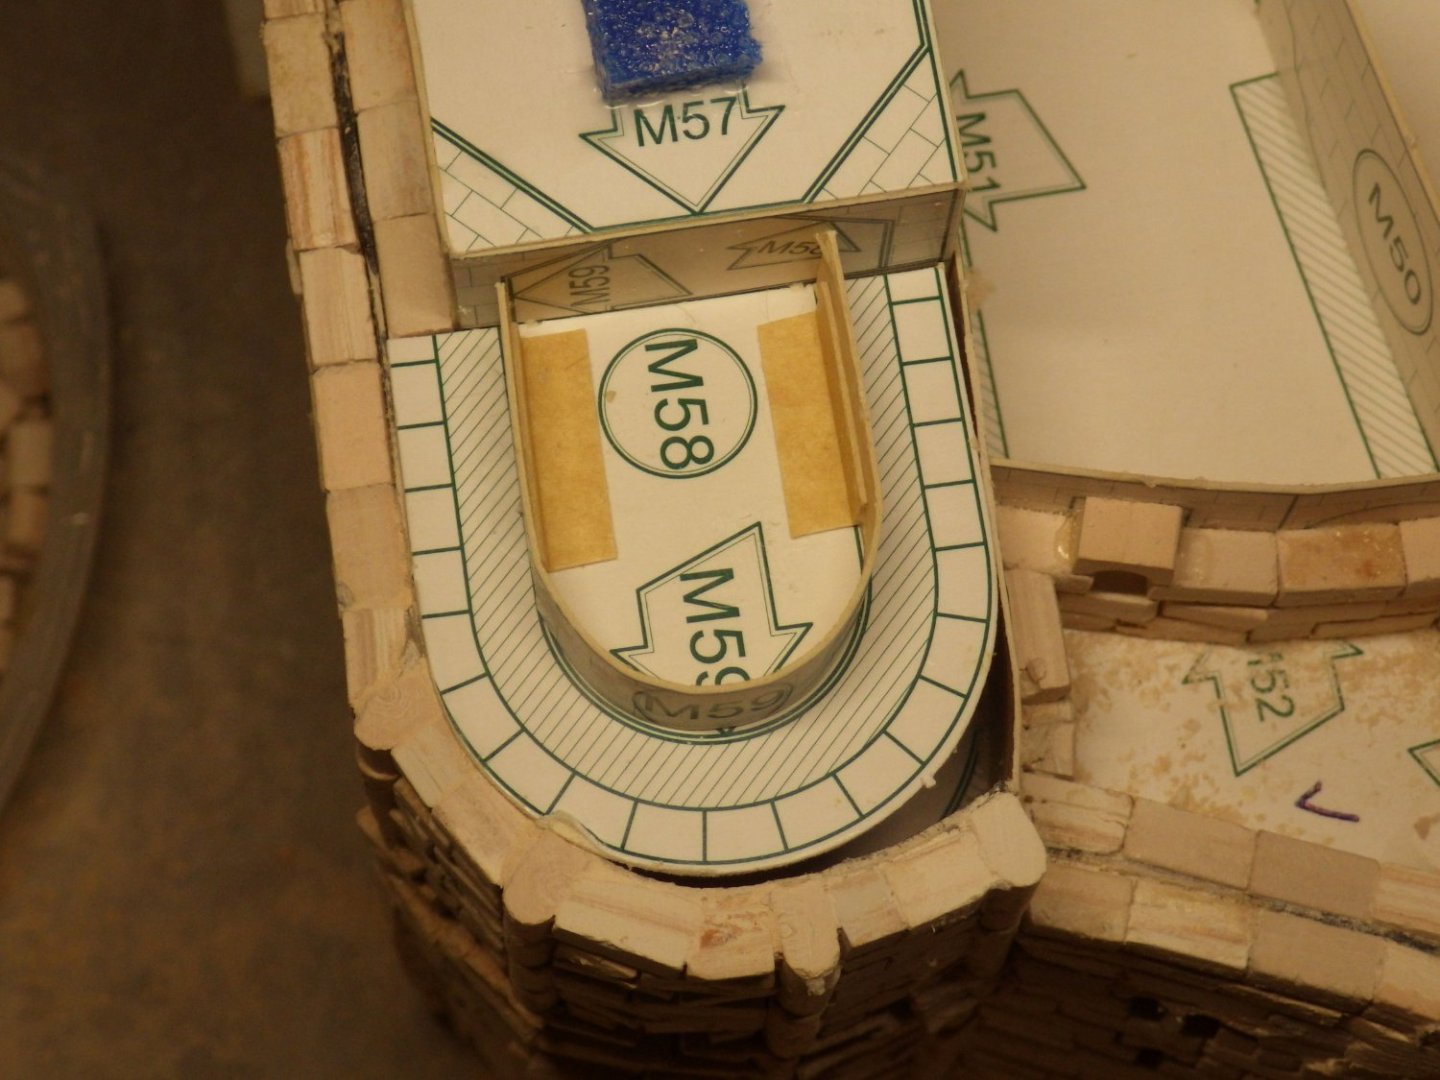
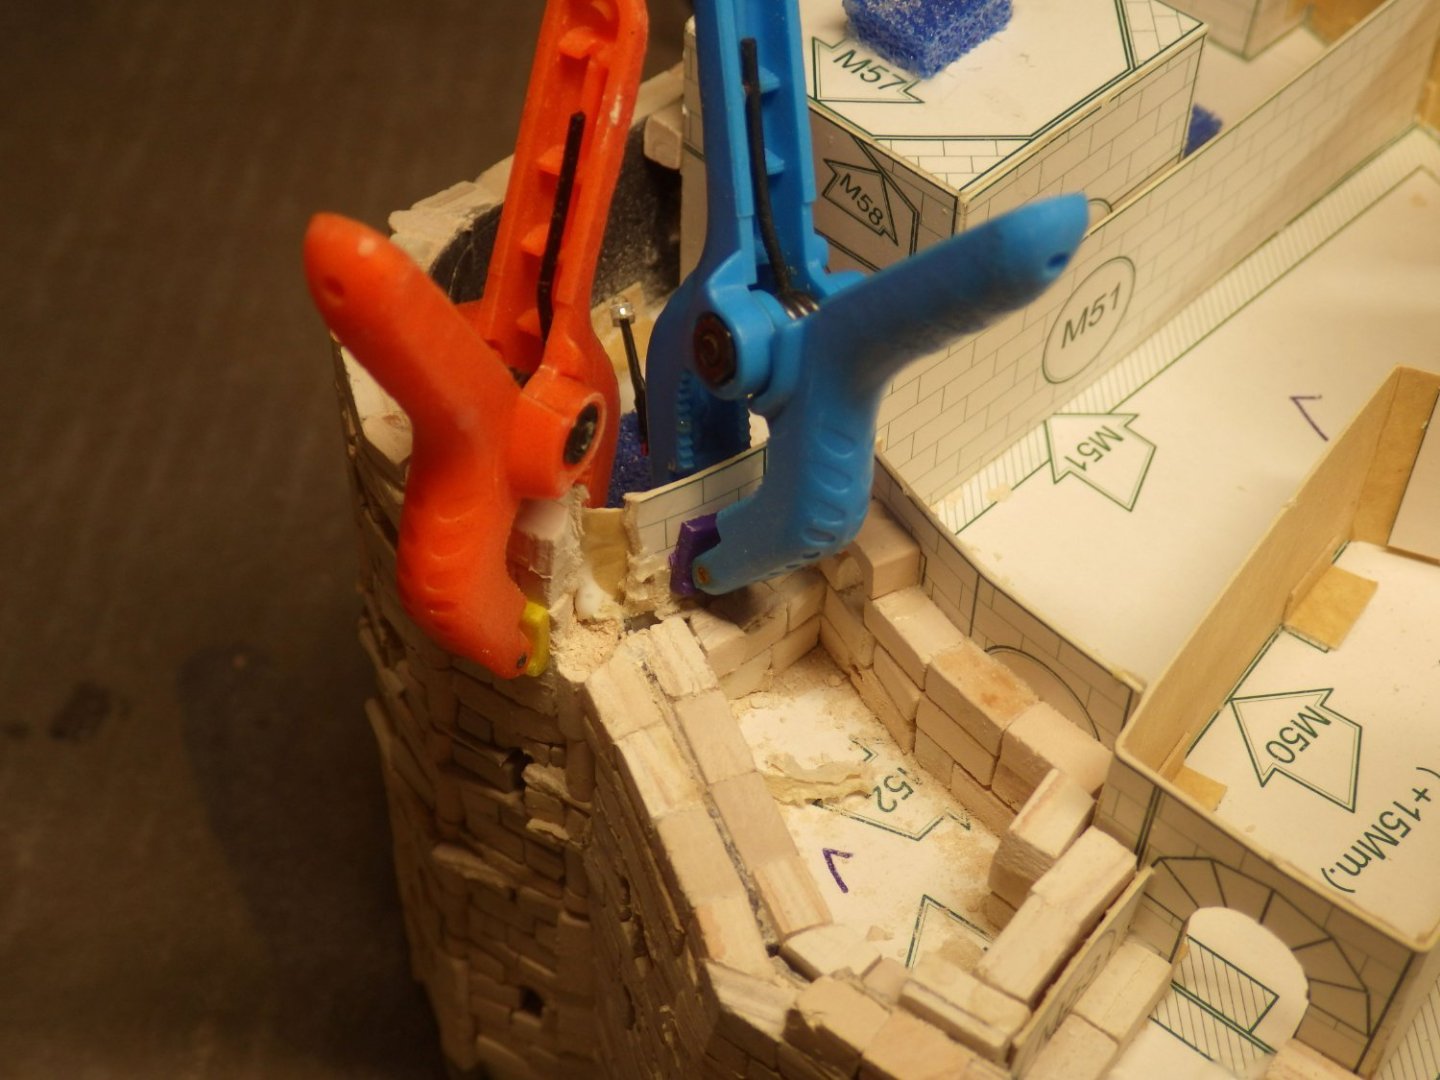
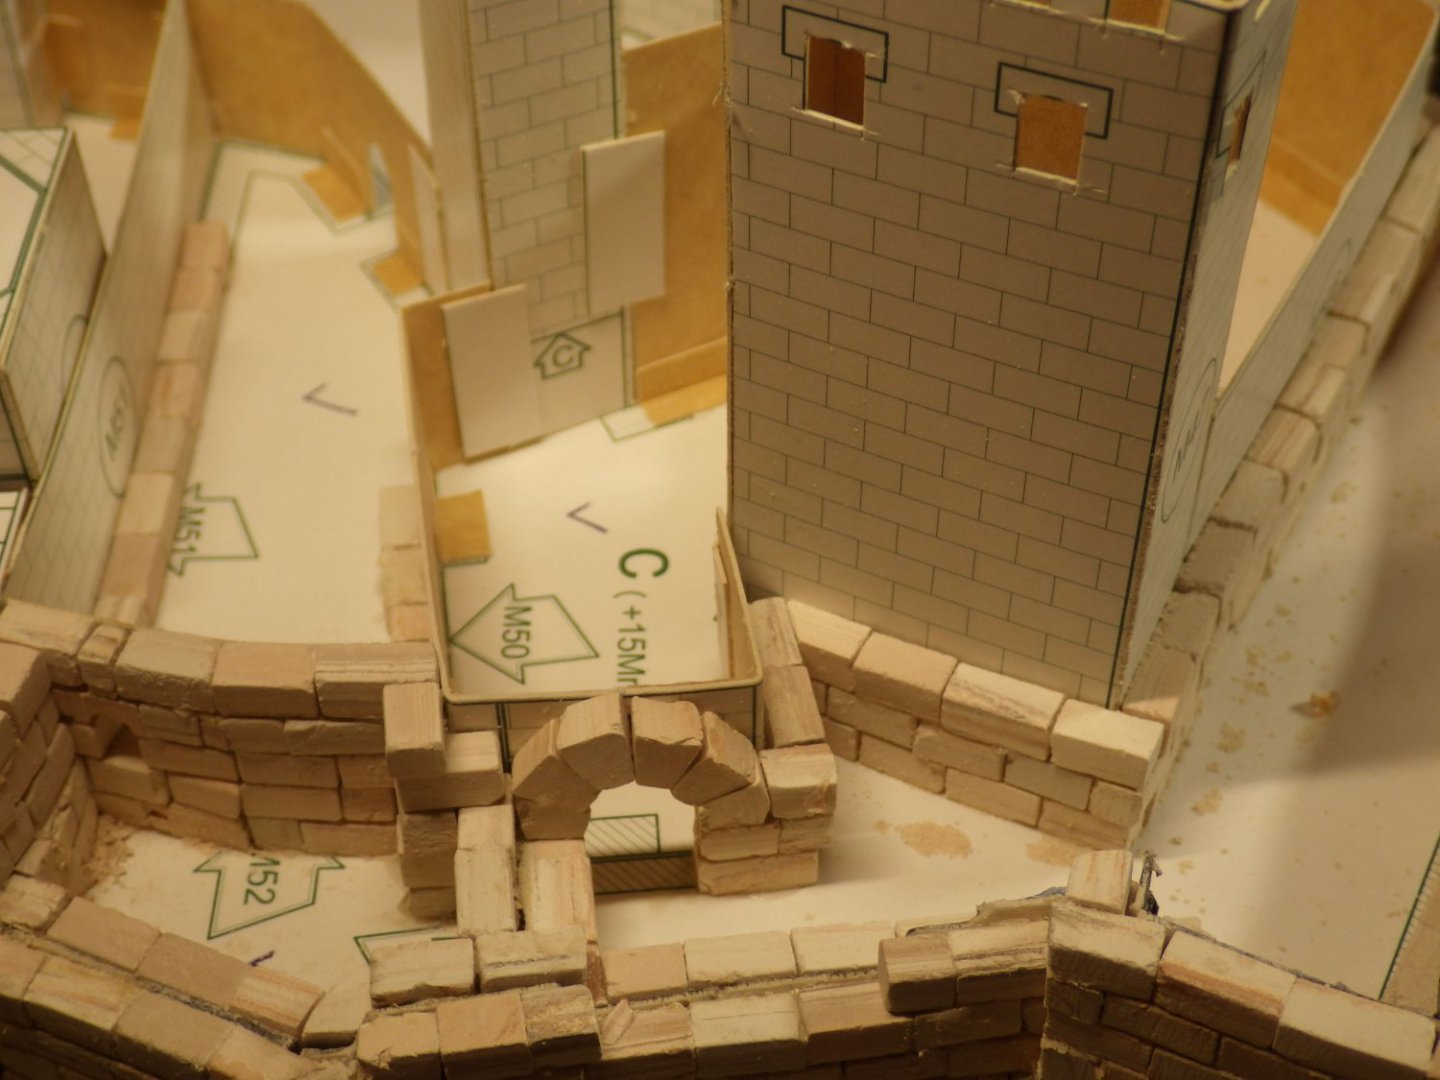
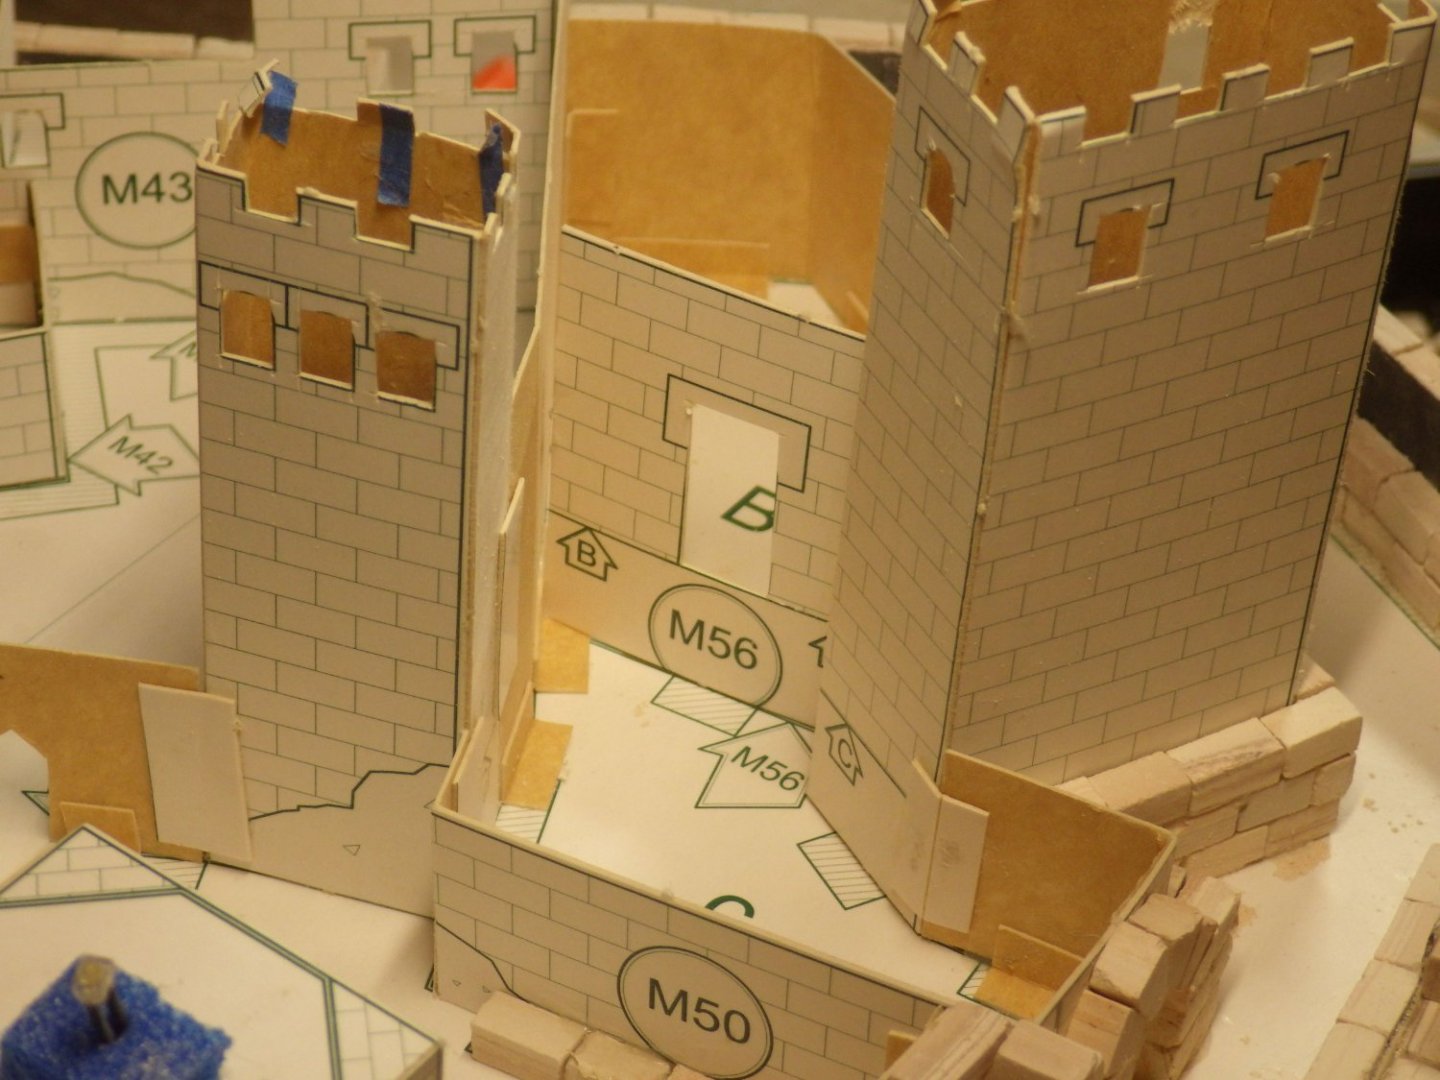
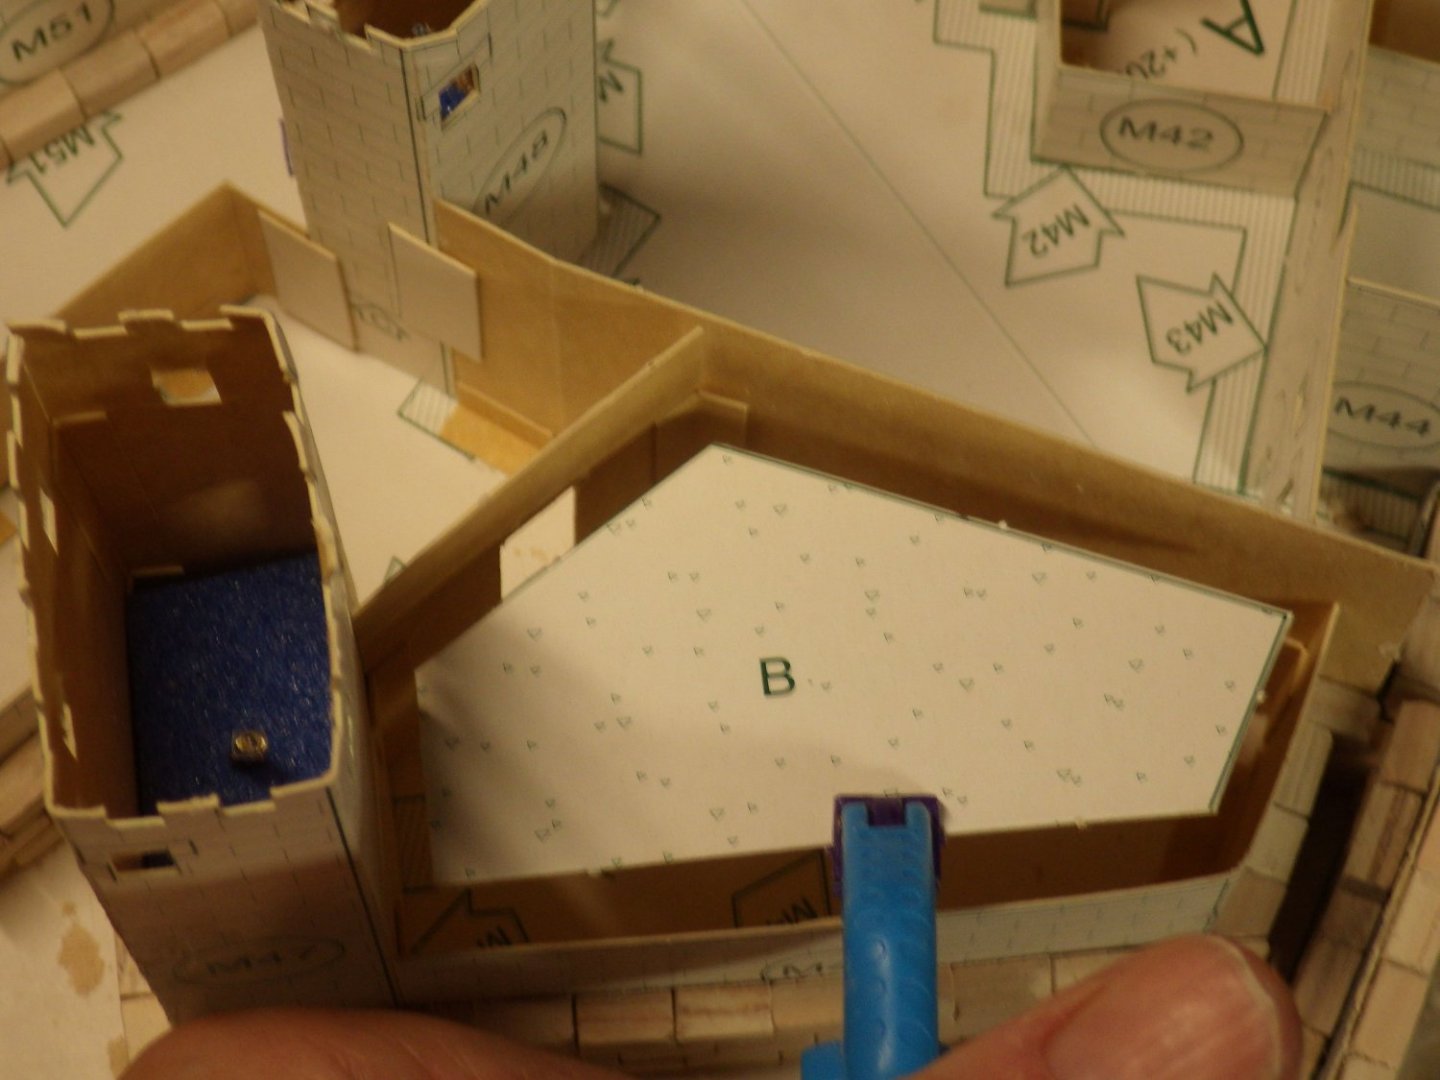
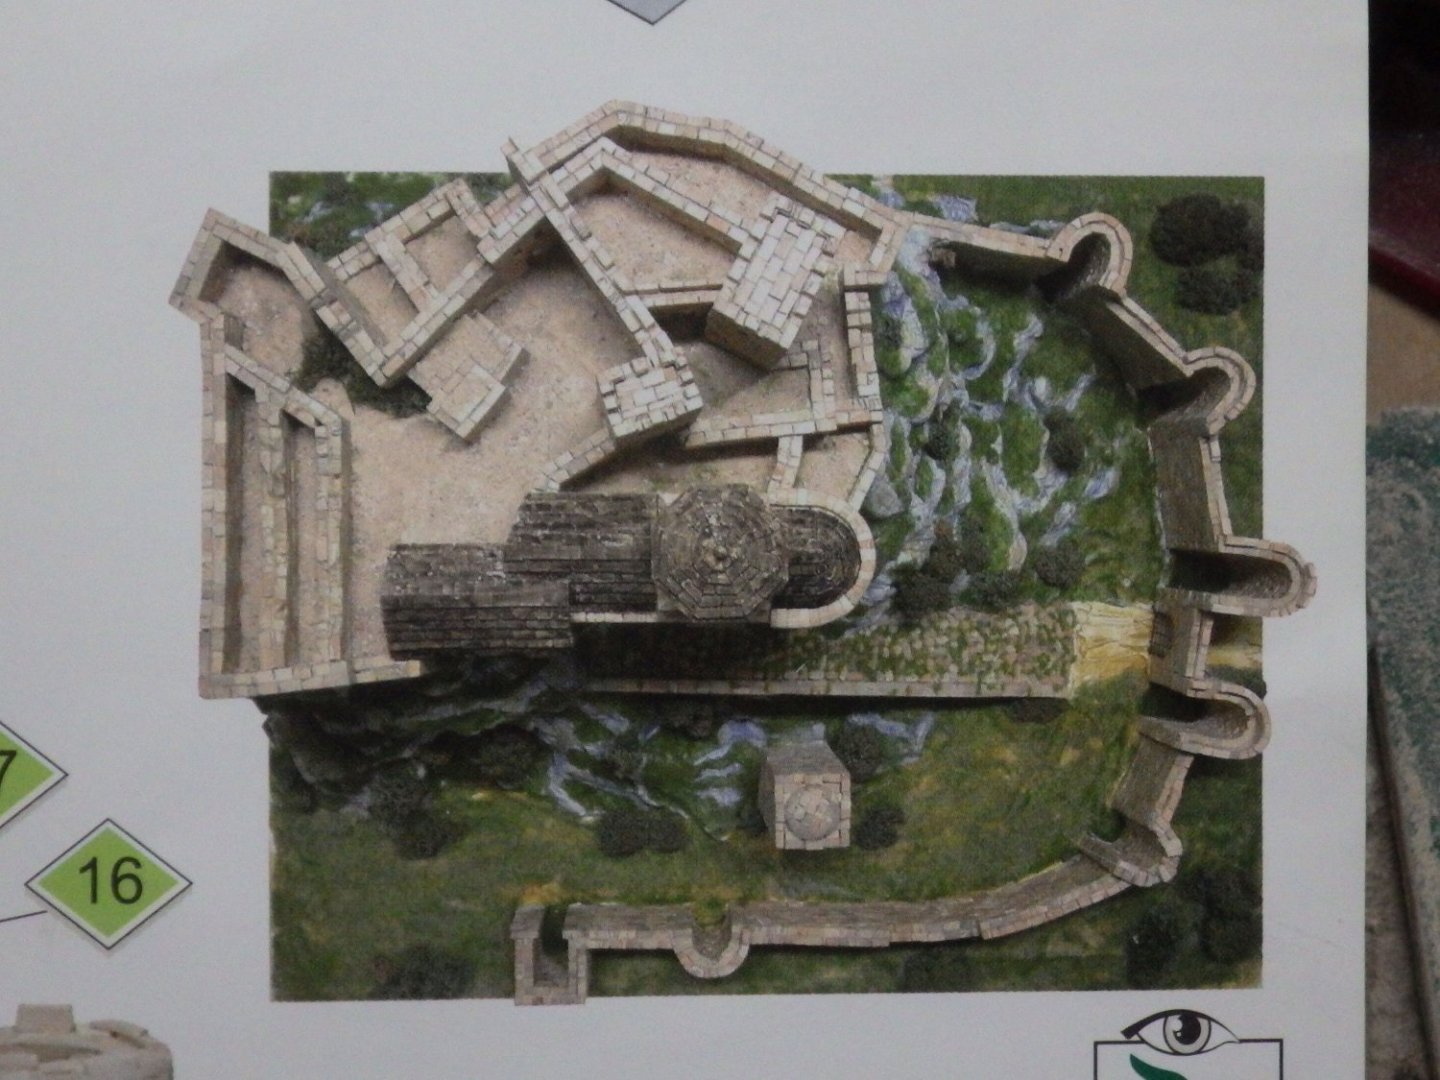
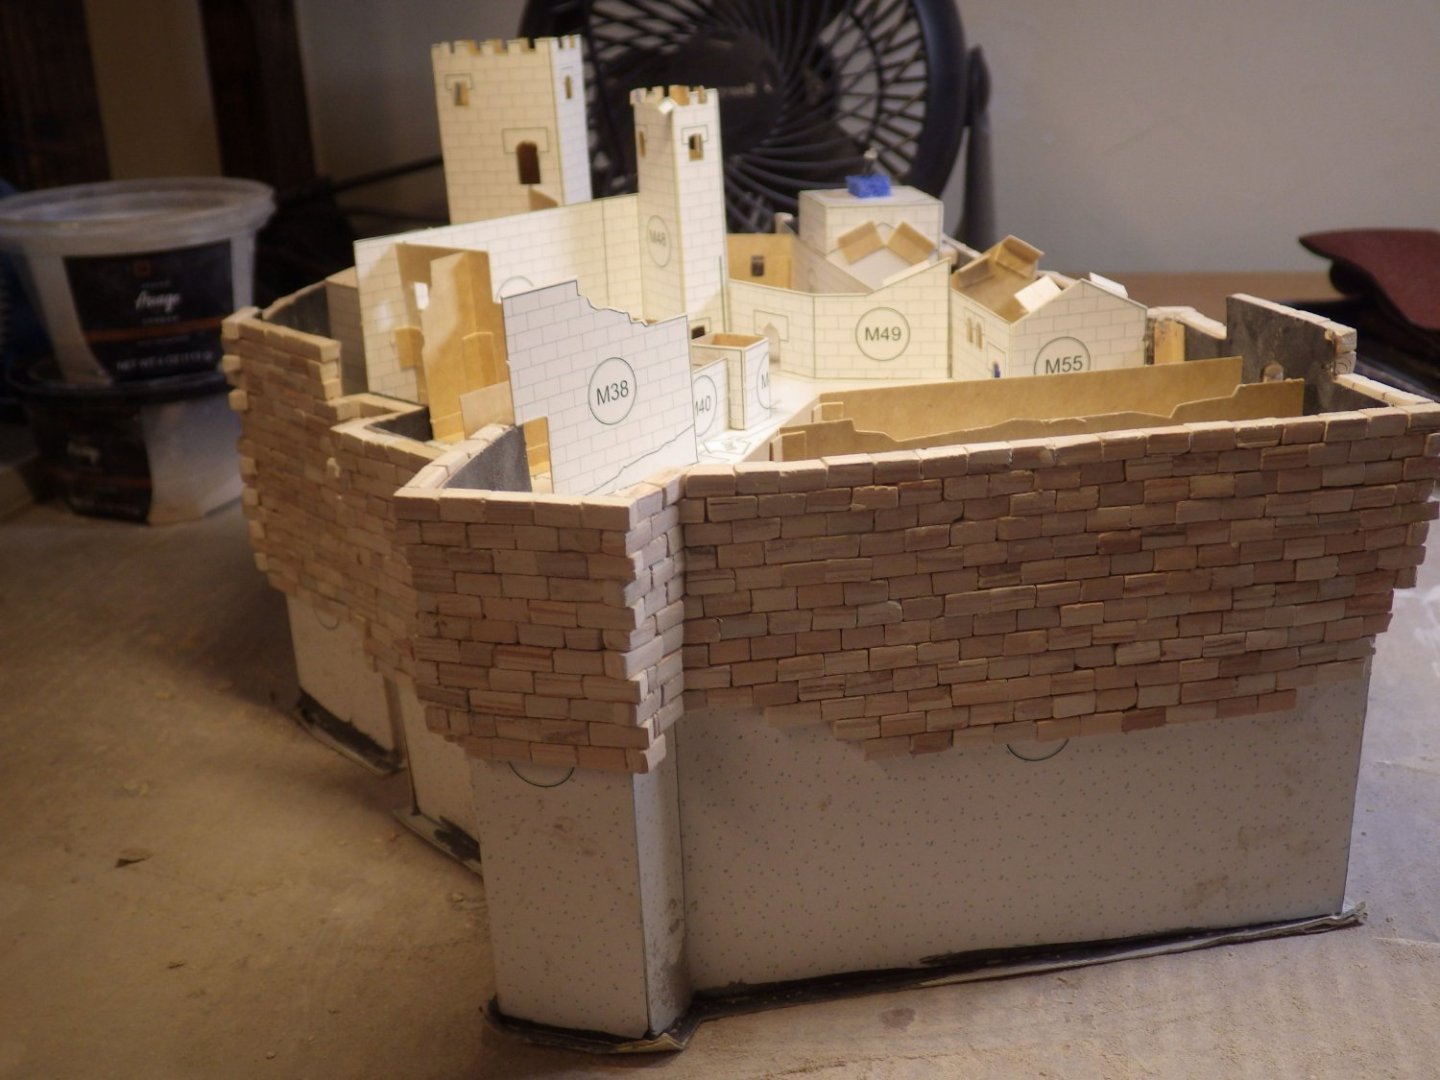
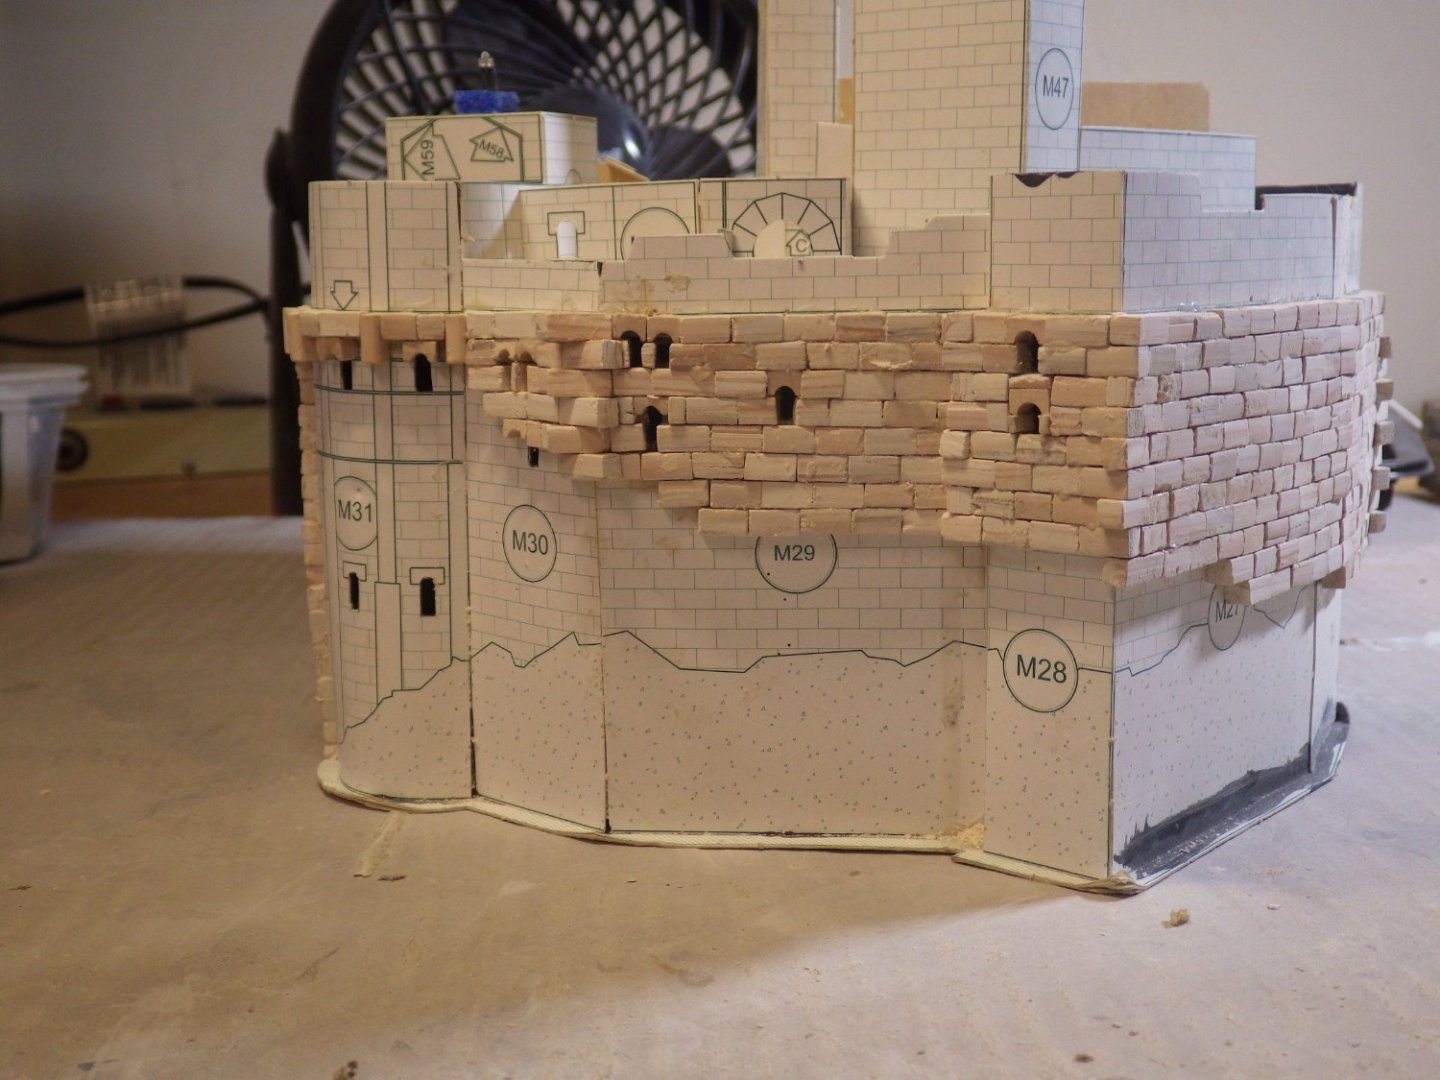
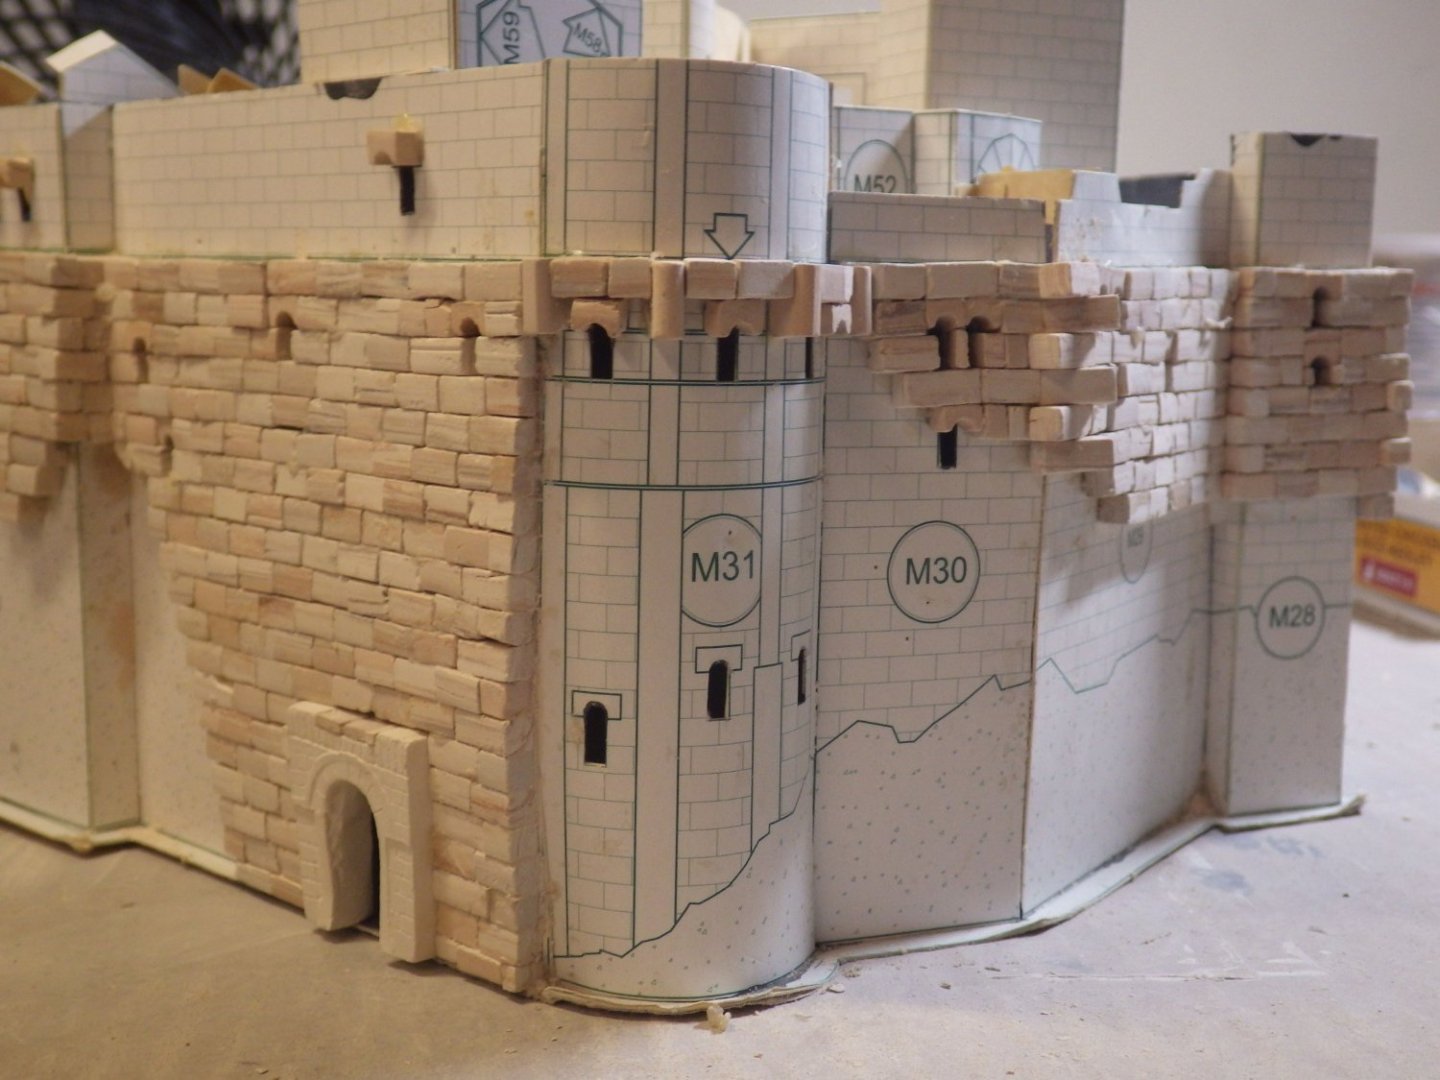
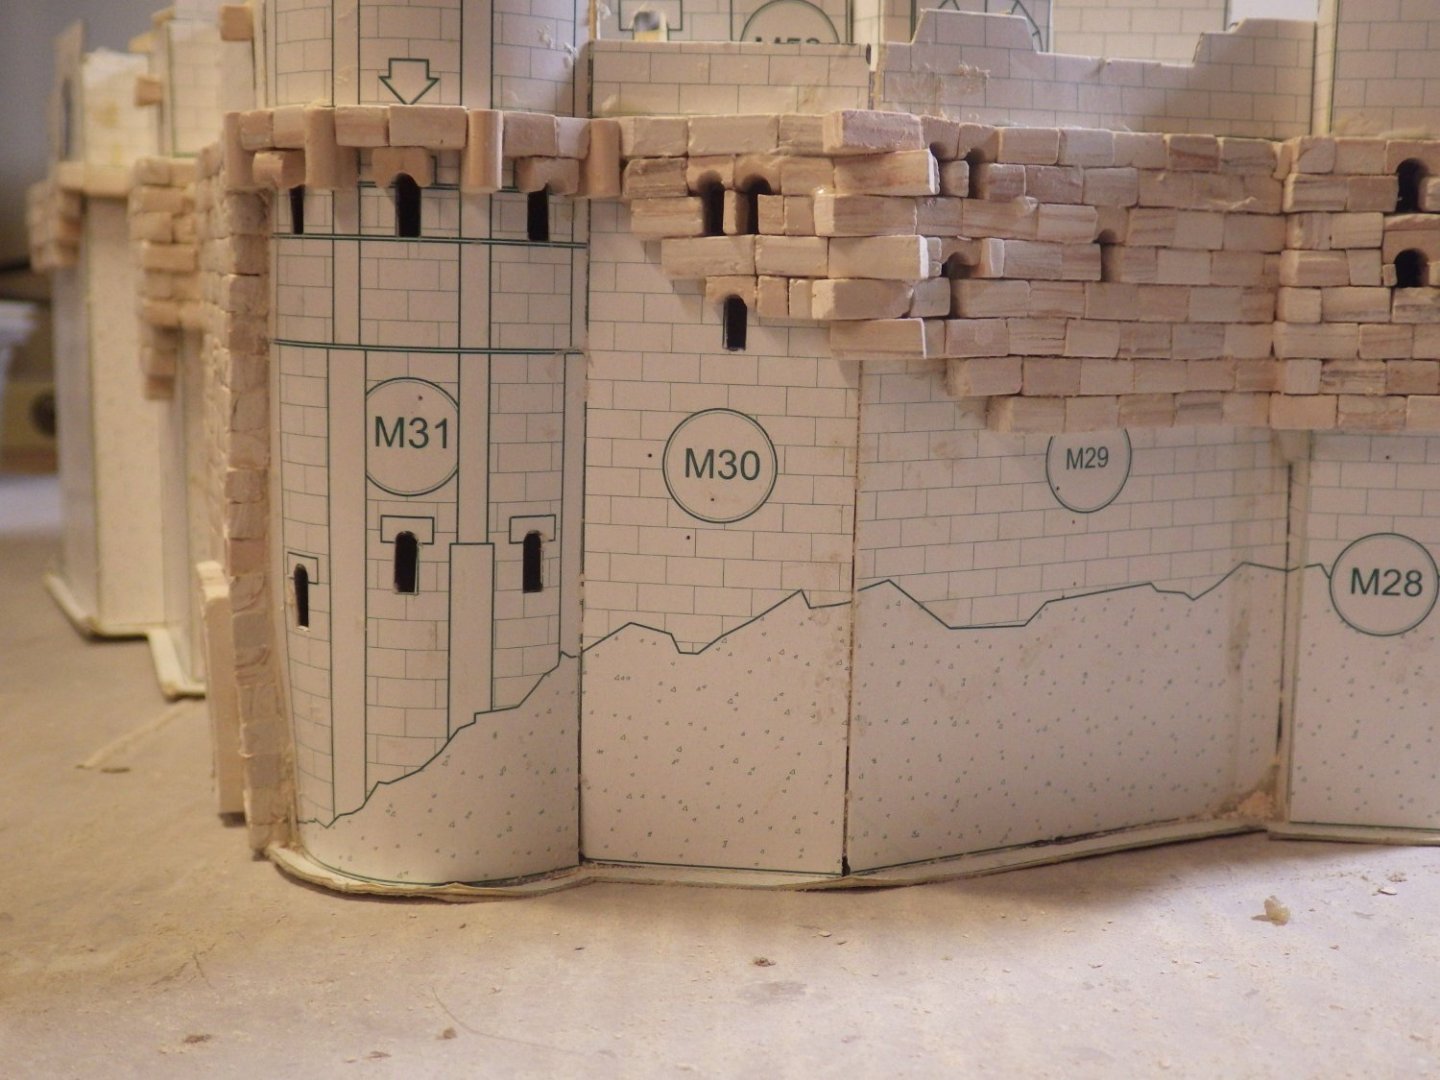
I've made an initial sanding of the outer tower walls and completed the curved tower after much grumbling. Its a bit messy but it will clean up although its going to be very frustrating to sand down between the pillars and windows. I then discovered a mistake with the curved tower. Somehow I had let the template creep out of position while the glue was setting and didn't notice it until I came to start the walls around it. You can see the section of green at bottom right showing where the wall should go. And with the next level in place there is a nasty gap. So I dismantled the upper part of the wall on the right, cut some card to shape and glued it into place after filing the right side wall to a steeper angle where it meets the pillar. That allowed me to rotate the pillars a bit and the wall will curve more. I rebuilt the wall and it seems to have done the job. I plan to add another piece of card under the upper part of the tower which is just resting in place at present. That will be large enough to sit on the walls and should help stopping any light bleed I did a quick check and all lights are still functioning. I started on the upper works and am now down to the last bag of blocks. I think I will make it but its amazing how many blocks disappear from the tray when you lay one of the longer walls. Now I am encountering some conundrums with the upper details and the plan (general guide) is no real help If you look through the arch into a courtyard marked C there are arrows on the surrounding walls showing where piece "C" is fitted. This lines it up with the sill of the arch that leads from the courtyard into "B" Thats fine except that then leaves the raised floor halfway up the initial archway. I'm not sure what the optimum solution is. Maybe cut back the floor and build a set of stairs running up to the raided floor. There is another curiosity. The templates seem to suggest that interior walls are not built . Instead a series of piers three blocks high are built at intervals along the walls. That might hold the floor - except its too small Piece "C" is one blocks width too small for the space so will fall within the piers - or even an interior wall. The same is true for courtyard "B": I think I will make some new templates that are wider and build interior walls for them to rest on. The guide doesn't have any useful views on the subject. It looks like we have reached the interesting part of the build. I'll see if there are any detail photos of the real thing that might be enlightening. Otherwie its time to get that artistic license out and read the fine print! Thanks for looking in and the likes and comments Alan


- 462 replies
-
- 15
-

-
Hi Mike Thank you very much. Its taking longer than I expected. I need frequent breaks to keep up the enthusiasm for sanding, fitting gluing and repeat but its coming together. Luckily the final sanding and the use of the sanding dust in the gaps cleans up the final result very well. I keep saying I need to stop buying the kits - and then someone has a sale Alan
-
My other Hobby by Javlin - Tabletop/Nightstand - 1/1
king derelict replied to Javlin's topic in Non-ship/categorised builds
Beautiful work Alan -
The interior is really nice. I second that it would be a shame to cover it up permanently Alan
-
Thank you very much OC. I started cleaning up the walls and it has rekindled my enthusiasm. I finished the round tower and even laid a few blocks on the roof details. I've found I made a mistake with setting up the template in one spot but I think it's going to be unnoticeable unless the governors of Loarre castle show up with dividers and plans Alan
-
My other Hobby by Javlin - Tabletop/Nightstand - 1/1
king derelict replied to Javlin's topic in Non-ship/categorised builds
Wow, that's a great skill. I seem genetically incapable of making a square cut on a piece of wood so I admire this very much. looks great so far Alan -
Landing hear looks really nice Dan Alan
-
Those are great printed parts Alan
-
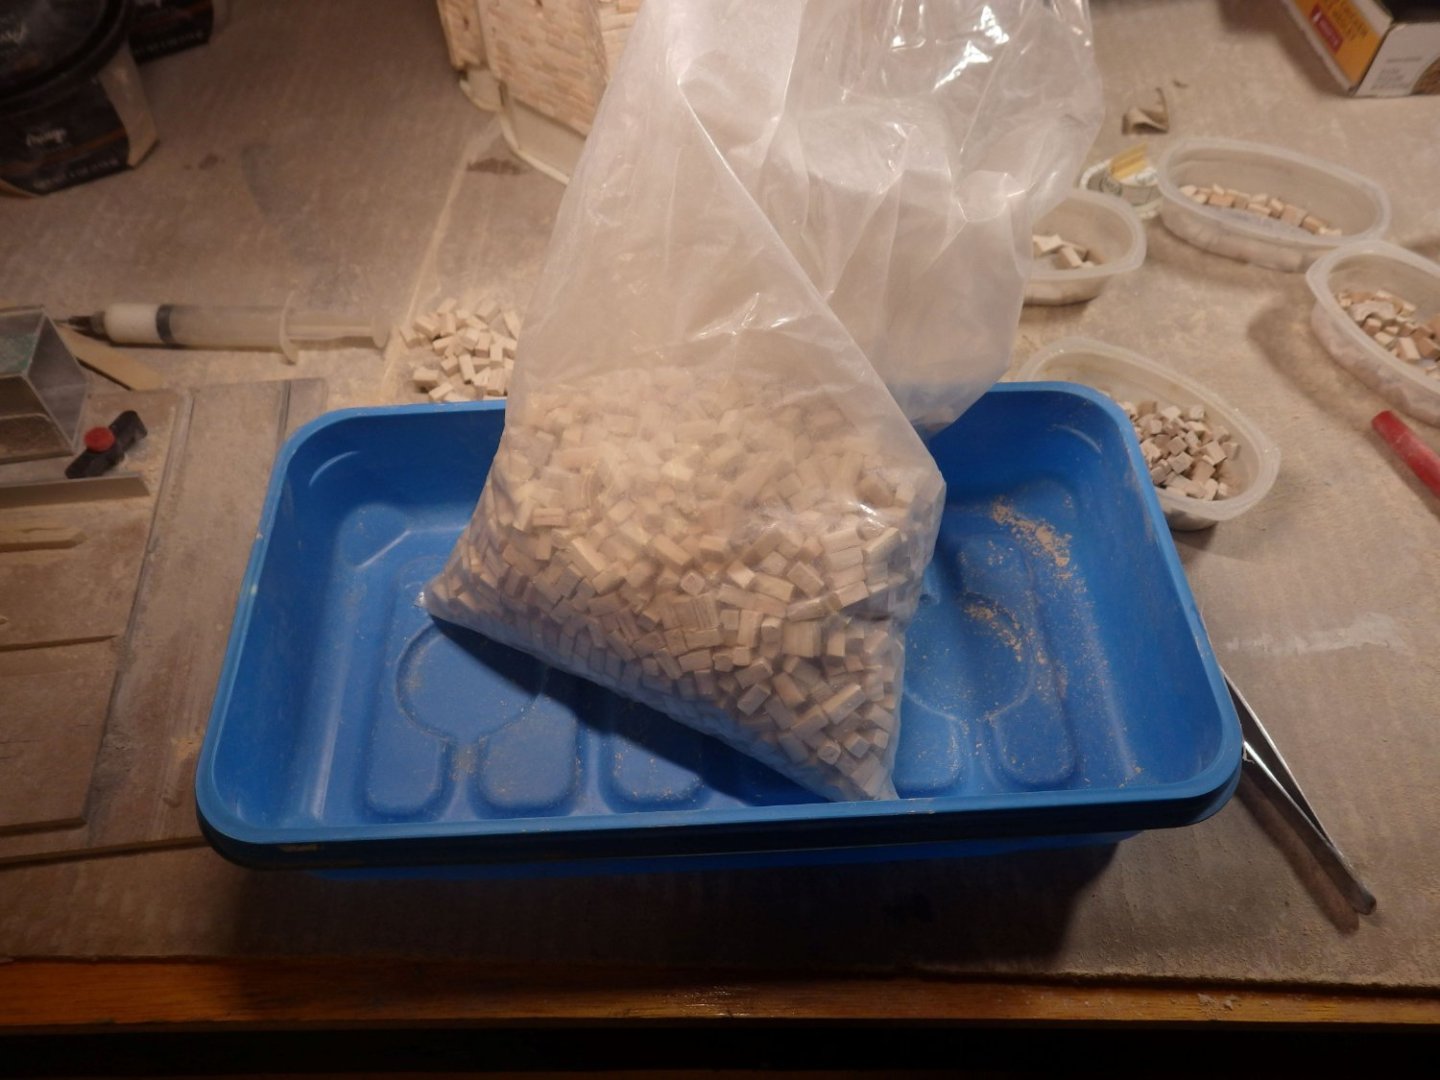
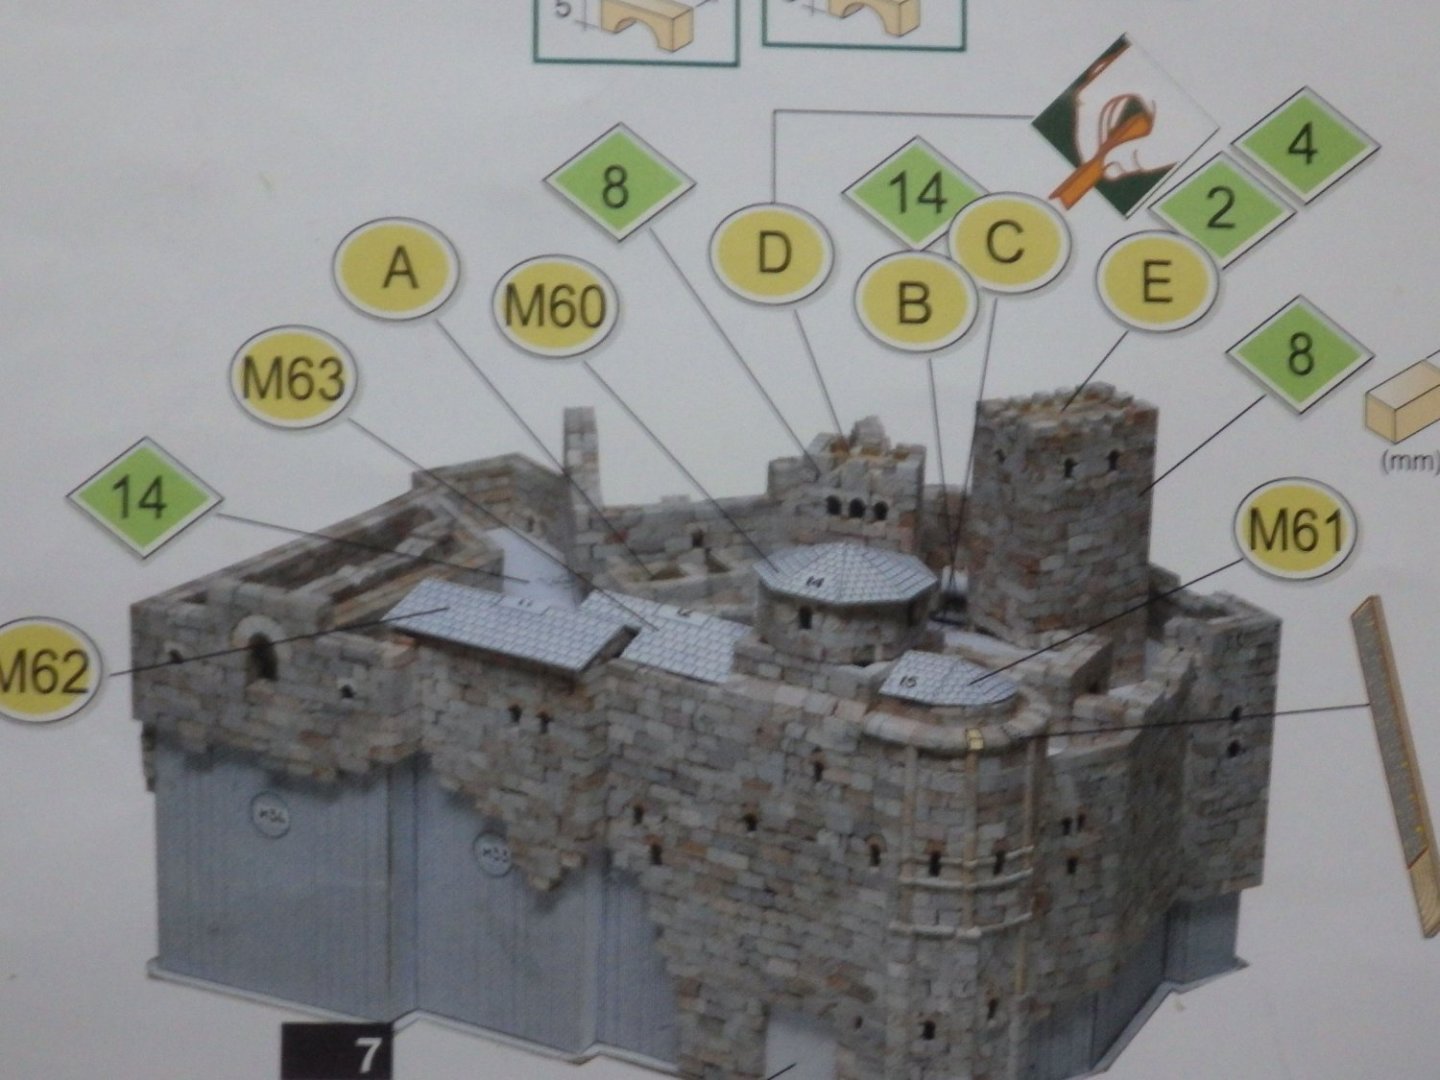
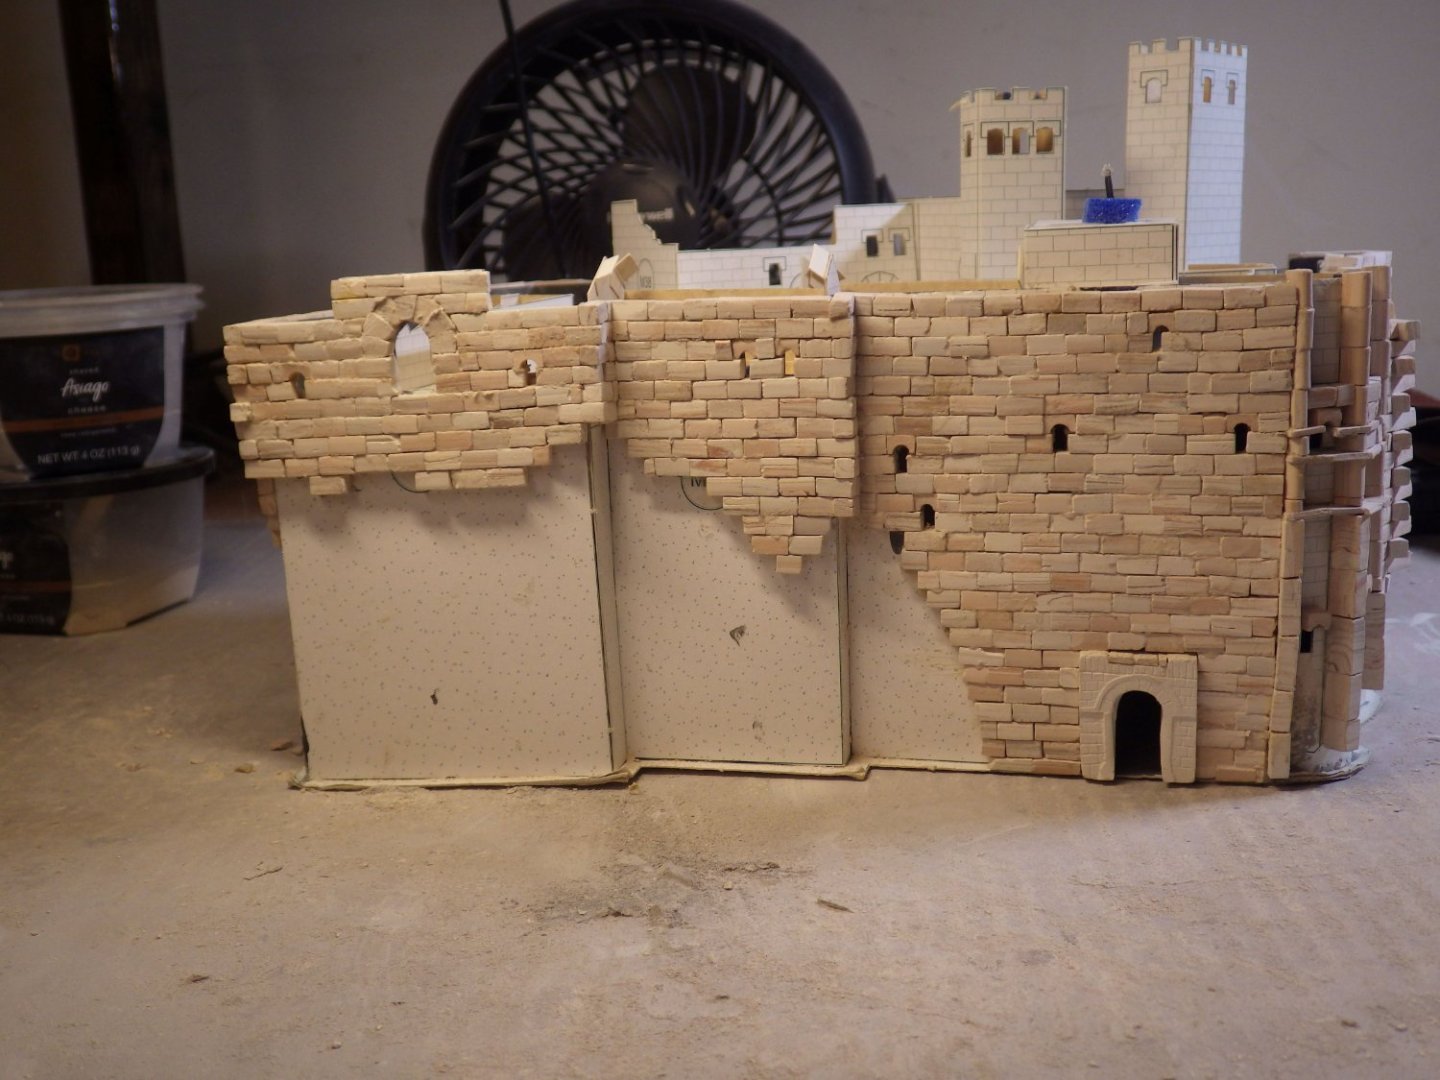
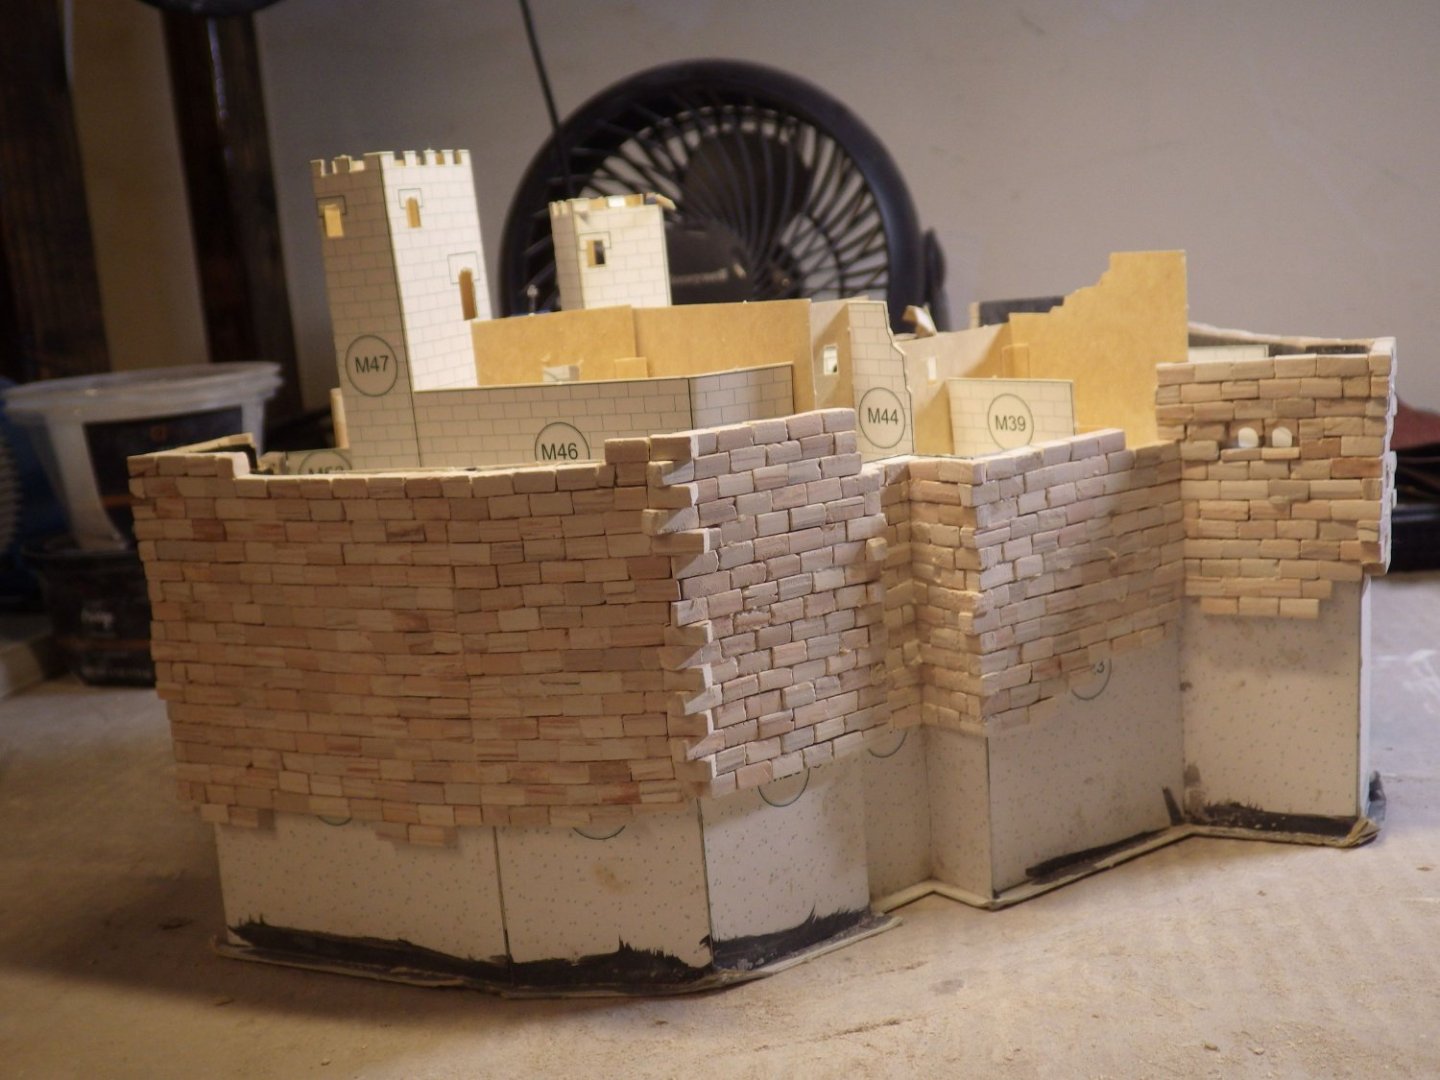
Still plugging along and reached a bit of a milestone today. All the outer walls of the main toers are complete - well apart from filling in the intricate little bits on the round tower - but it still feels like I'm making progress. The windows and archway look a bit rough but they will be opened out as part of the general sanding and clean up. There is some serious sanding ahead. The bag of blocks still looks pretty healthy so I might make it with what was provided. The details of the upper section are going to be interesting. Some areas are going to be difficult to get in to sand down and shape and there are a few bits that I am not really sure how they are supposed to look. The instruction sheet ducks this stuff and the photos don't really show what is going on. I'm hoping it will become more obvious as the blocks pile up. It may have been easier to have added the cardboard templates a bit at a time and blocked up each section but I wanted to know where the lights needed to be placed and setting out the templates was the only sure way to get it right. I think its still doable but it may increase the cuss factor. Thankfully most of the courtyards do not need tiling. I'm thinking about taking a break to do something quick but different after the tower walls are completely finished and cleaned up but at the same time I am still enjoying weeing this come together. A compromise might be to paint some more figures which will be needed later on. Thanks for looking in and I hope everyone has a great weekend and Labor Day holiday in the US Alan
- 462 replies
-
- 13
-
-
Thank you OC. Seeing visible progress is sustaining me but I'm starting to want to do something different as a break. Alan
-
Lovely model OC. It's getting scary that I remember this one as a new aircraft after the Wessex and I suppose that holds true for a lot of other aircraft. It seems like the 50s through 70s generated so many aircraft Alan
-
And sometimes that makes it worse. Trees are higher and some older buildings are more susceptible. When Francis came through here after more than thirty years without a burrito really made a mess. Two weeks without power and I liked a six foot high pile of branches that stretched thirty feet down the kerb.. Wilma came through the following year and the Lights were off for two days and the yard had very little debris. I hope all is well over there Craig Alan
-
A beautiful result OC . The pilot is a great finishing touch Alan
-
Laying the rivet lines down so accurately is great work Alan
-
Beautiful painting Dan. I learn a lot from following your builds Alan
-
Its that time of the year again. I see a hurricane warning is up for the West Coast. I hope Idalia is not coming knocking on your door (or mine). Take Care lan
-
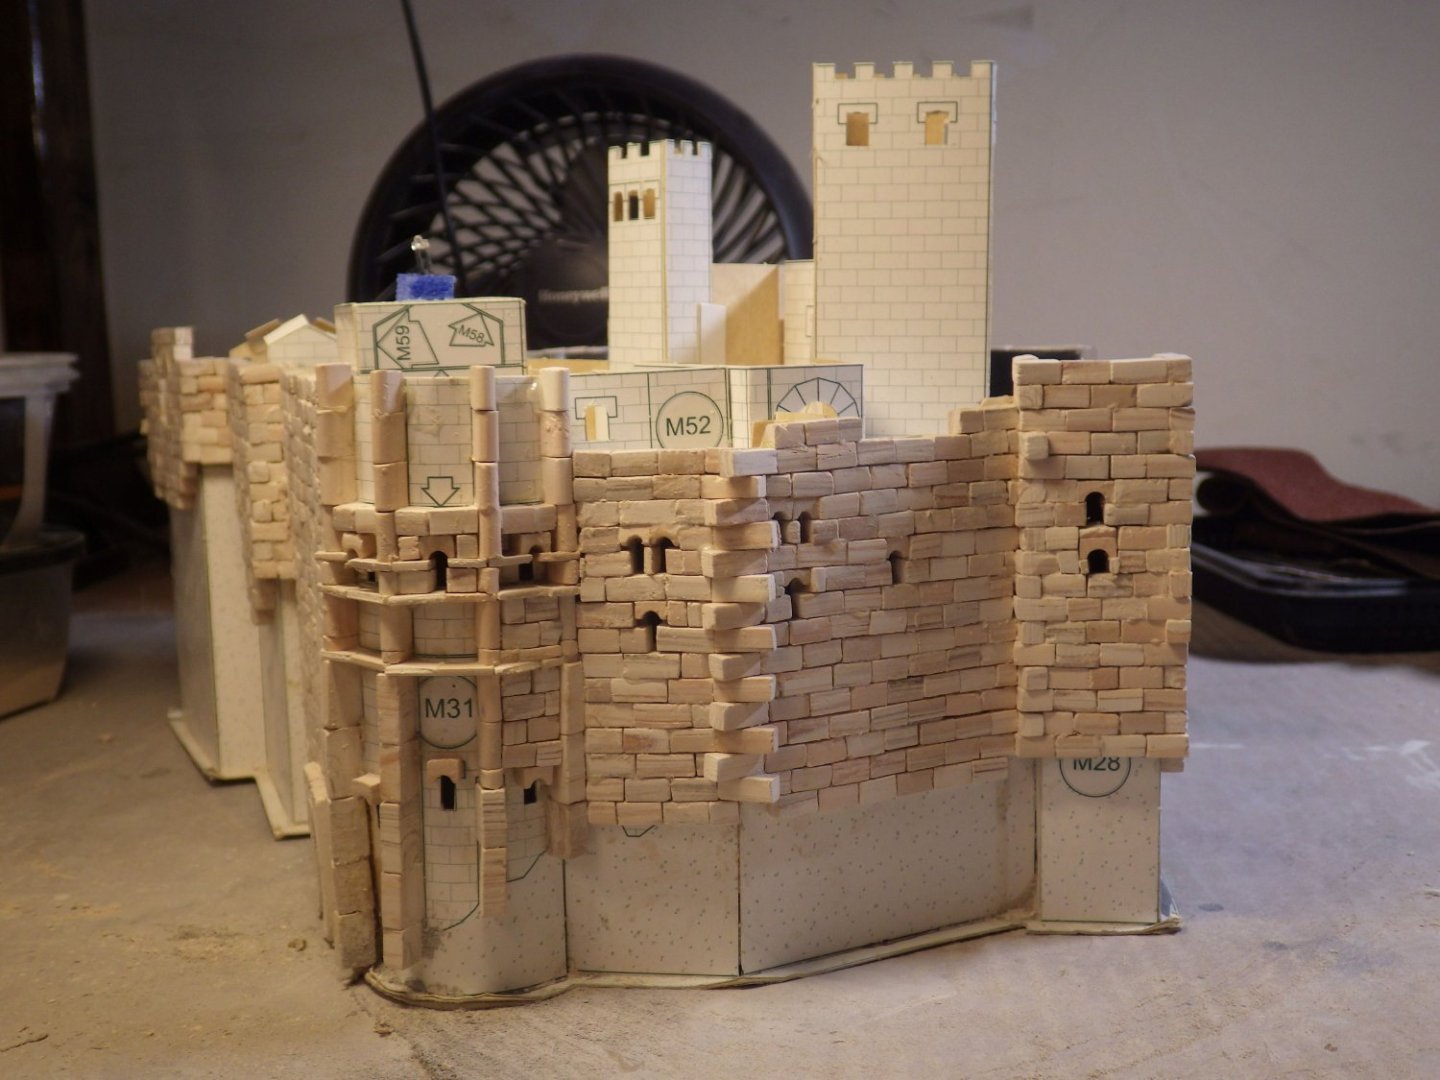
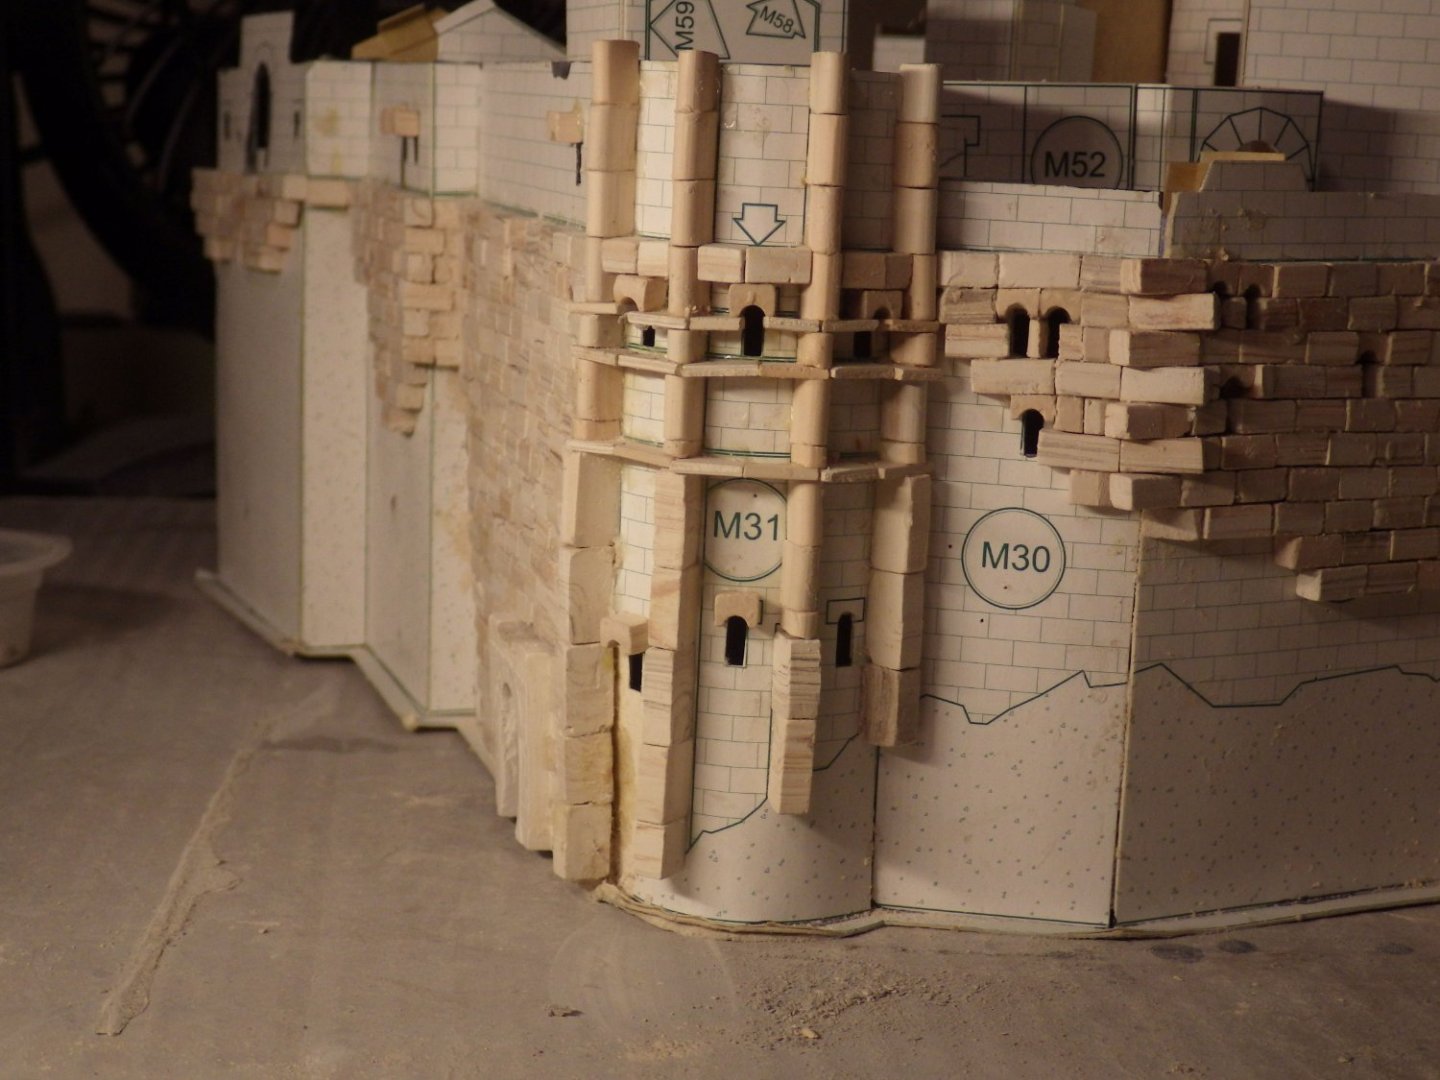
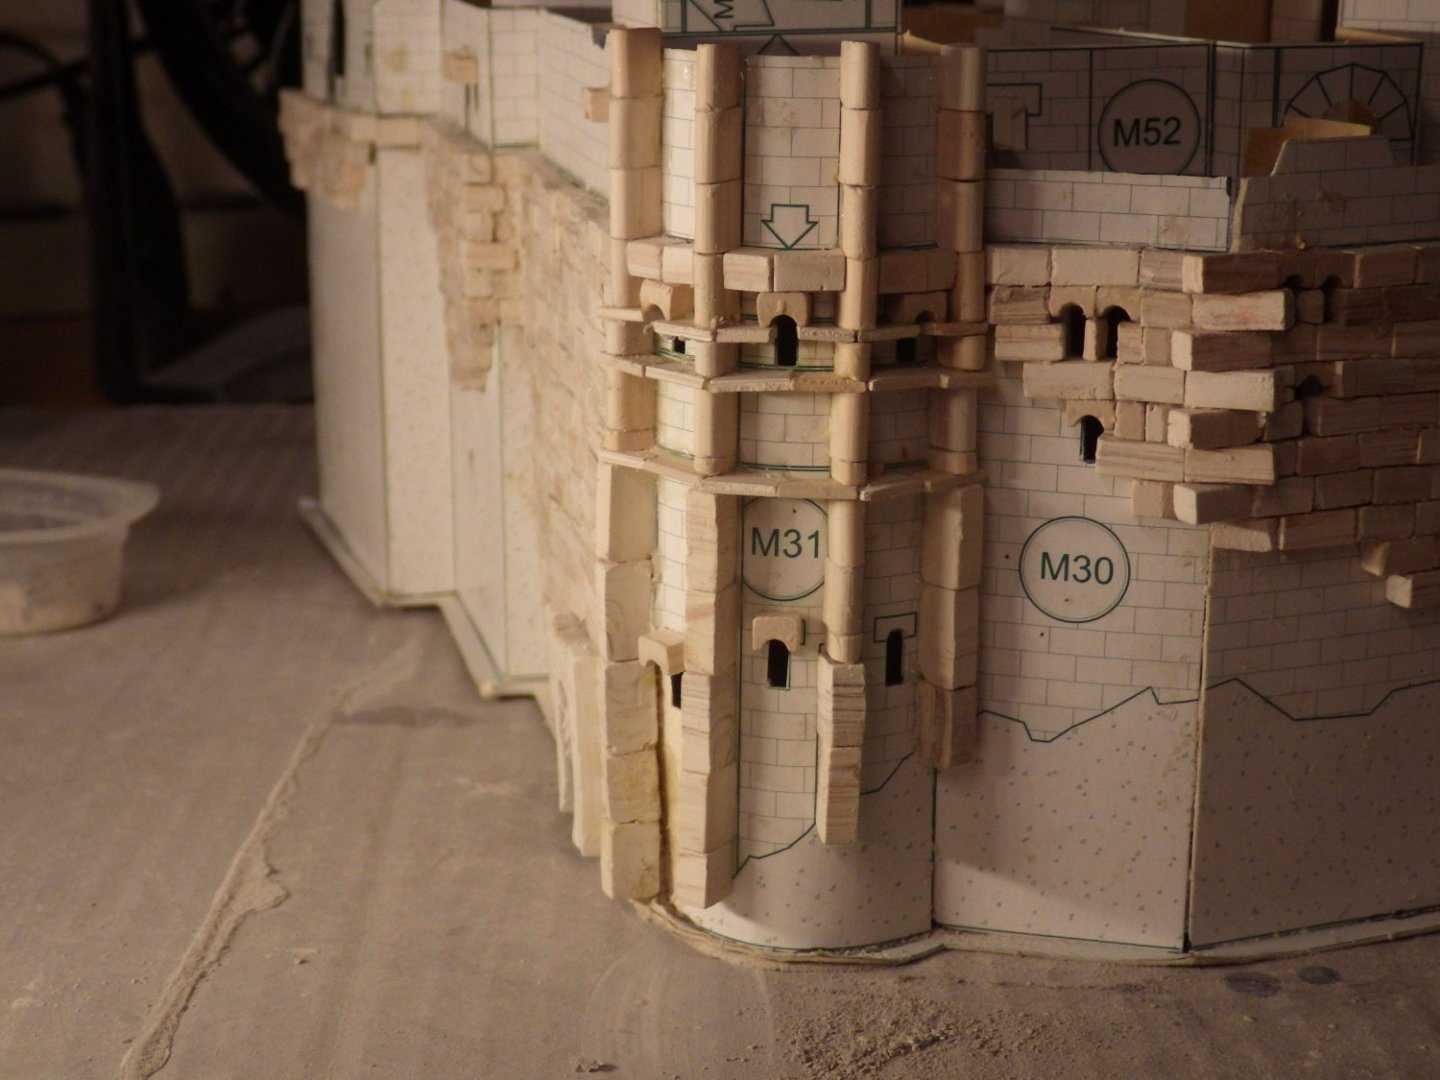
I summoned up some extra patience this morning and decided to tackle that complicated round tower. Lots of shaping and cutting blocks needed but I wanted to get a start on it. In the end I made more progress than I expected and got all the tiles and columns completed. I suspect filling in with the standard blocks is going to be another day or more of fiddling. I found the Exacto saw blade was ideal for part cutting the blocks to size and then cracking them along the saw line. This should all look a lot better when sanded to final shape but I want to let the glue really get a hold before that and also if I fill in the gaps it will stabilise the whole thing. I'm slowly closing in on completion of the lower section of the tower Thanks for looking in and for the likes and comments Alan

- 462 replies
-
- 13
-
-
Thank you Mark. I'm thinking it might be getting a bit obsessional. Thousands of tiny blocks Alan
-
Thank you very much OC. The reentrants are definitely fiddly but I'm still enjoying it. Alan
-
That's is a superb figure OC .The painting is first class. The photos are excellent too. I'm looking forward to getting back to plastic stuff and painting again Alan
-
Back at last with the pile of blocks and the sanding sticks. I completed the lower section of another wall of the tower and added the portal. The first windows are being worked around. There will be some cleaning up when I start sanding the walls down. The curved section of the wall with the pillars and tiles is going to be a slow process with lots of fiddly little pieces to file down. Its good to be back making a lot of dust again. I hope everyone has a great weekend and thanks for looking in and the likes Alan
- 462 replies
-
- 11
-
-
This last two years I have seriously thought about it. Yearly premiums are running about $7000 and to keep it down I have dropped coverage on contents, increased deductibles so I get less and less for the money. And of course if you have the temerity to claim they will either drop you or hike the premium. Three years of premiums would just about pay for a whole new roof. I don't see any signs of the market improving any time soon Alan