
HOLIDAY DONATION DRIVE - SUPPORT MSW - DO YOUR PART TO KEEP THIS GREAT FORUM GOING! (Only 27 donations so far out of 49,000 members - C'mon guys!)
×


king derelict
-
Posts
3,273 -
Joined
-
Last visited
Content Type
Profiles
Forums
Gallery
Events
Everything posted by king derelict
-
Mike That looks really good I feel like I want to make a frozen sea diorama Alan
-
Thank you very much Patrick. I need to stop this - they take up too much space. Alan
-
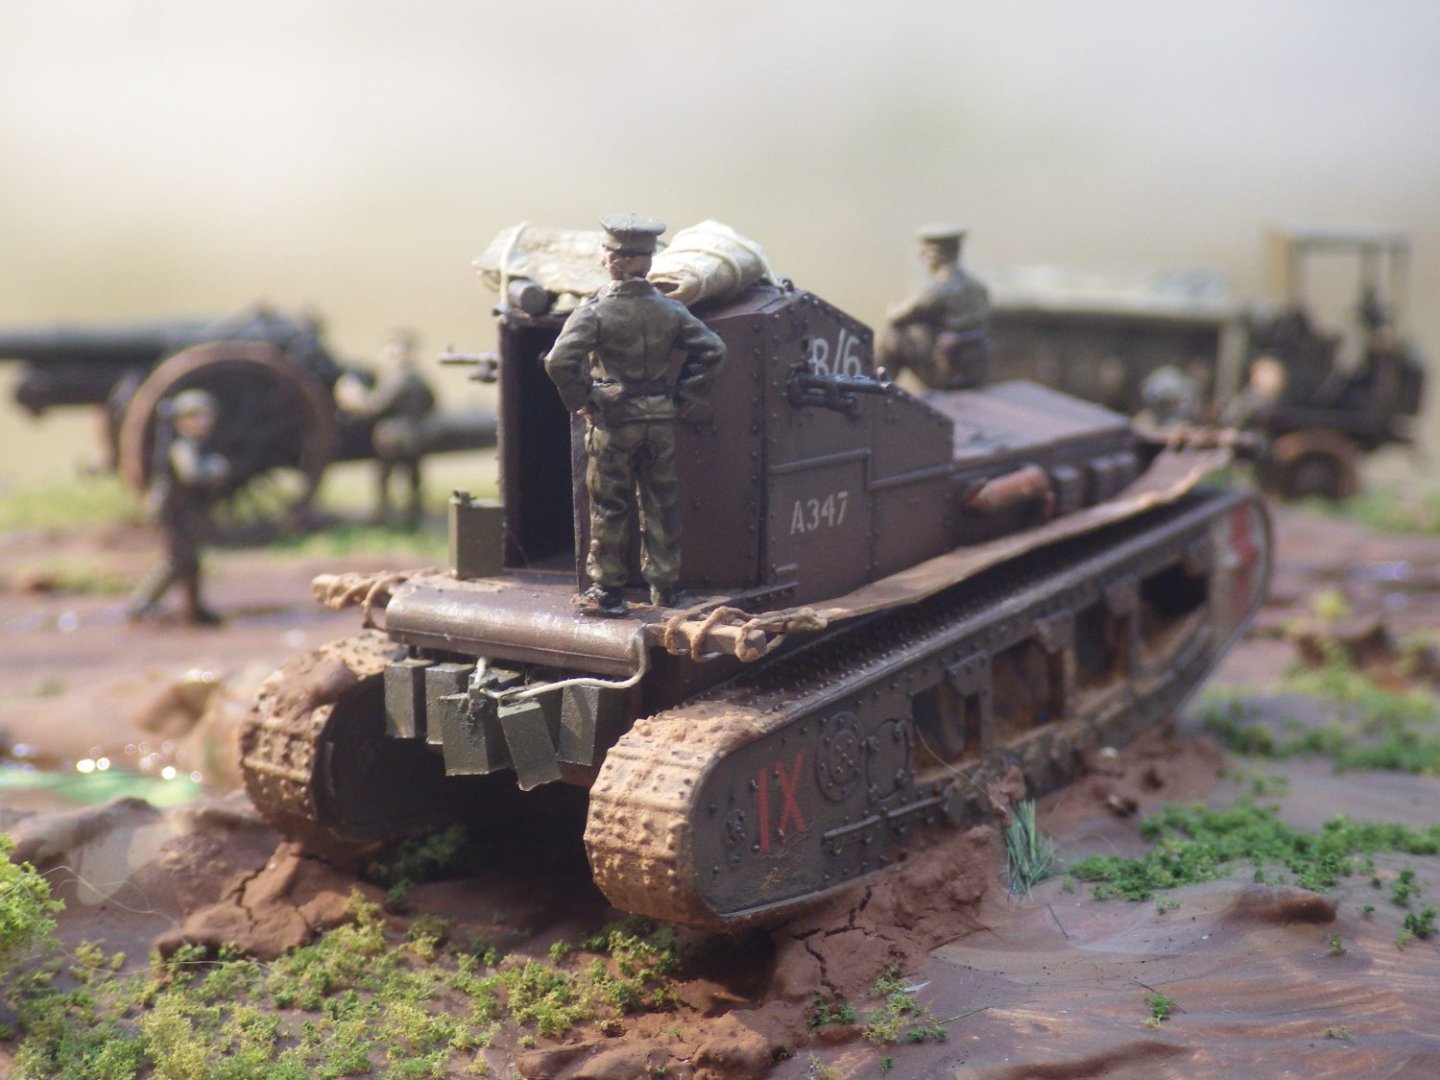
Thank you so much Mike. I would have just liked a couple of additional figures standing by the gun smoking a gasper but I couldn't find anything I could even sensibly modify, The guy on the tank was sort of the starting point for the whole scene Alan
-
Thank you very much EG. Your howitzer in 1/35 will be a treat to look forward to. Alan
-
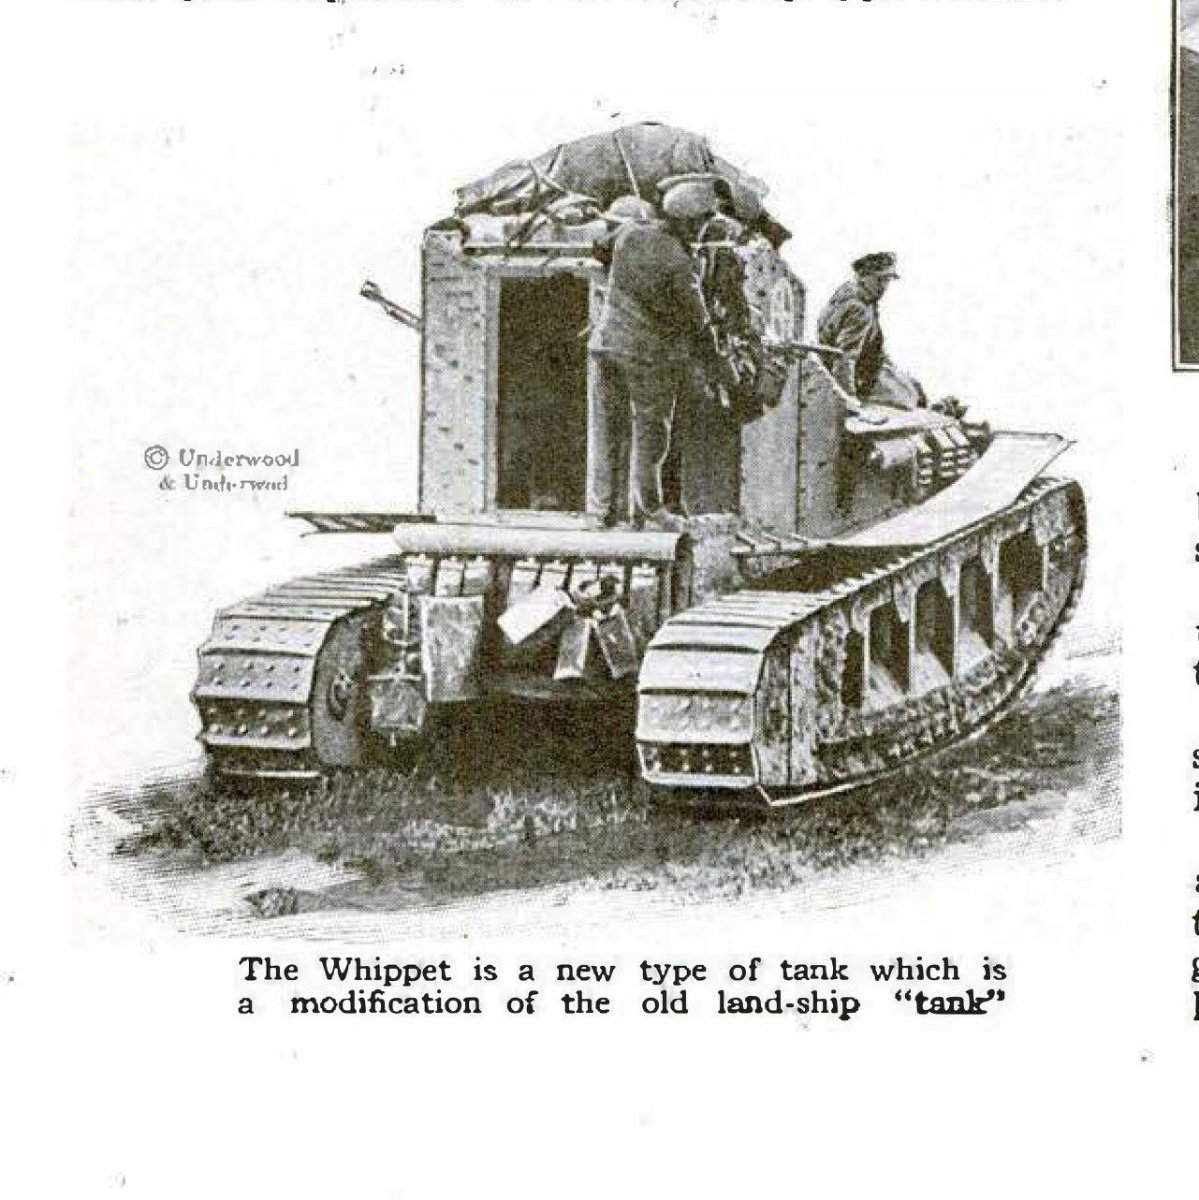
Thank you very much Edward I just printed the third sepia picture on photo paper and it looks real enough that I am quite chuffed. Alan
-
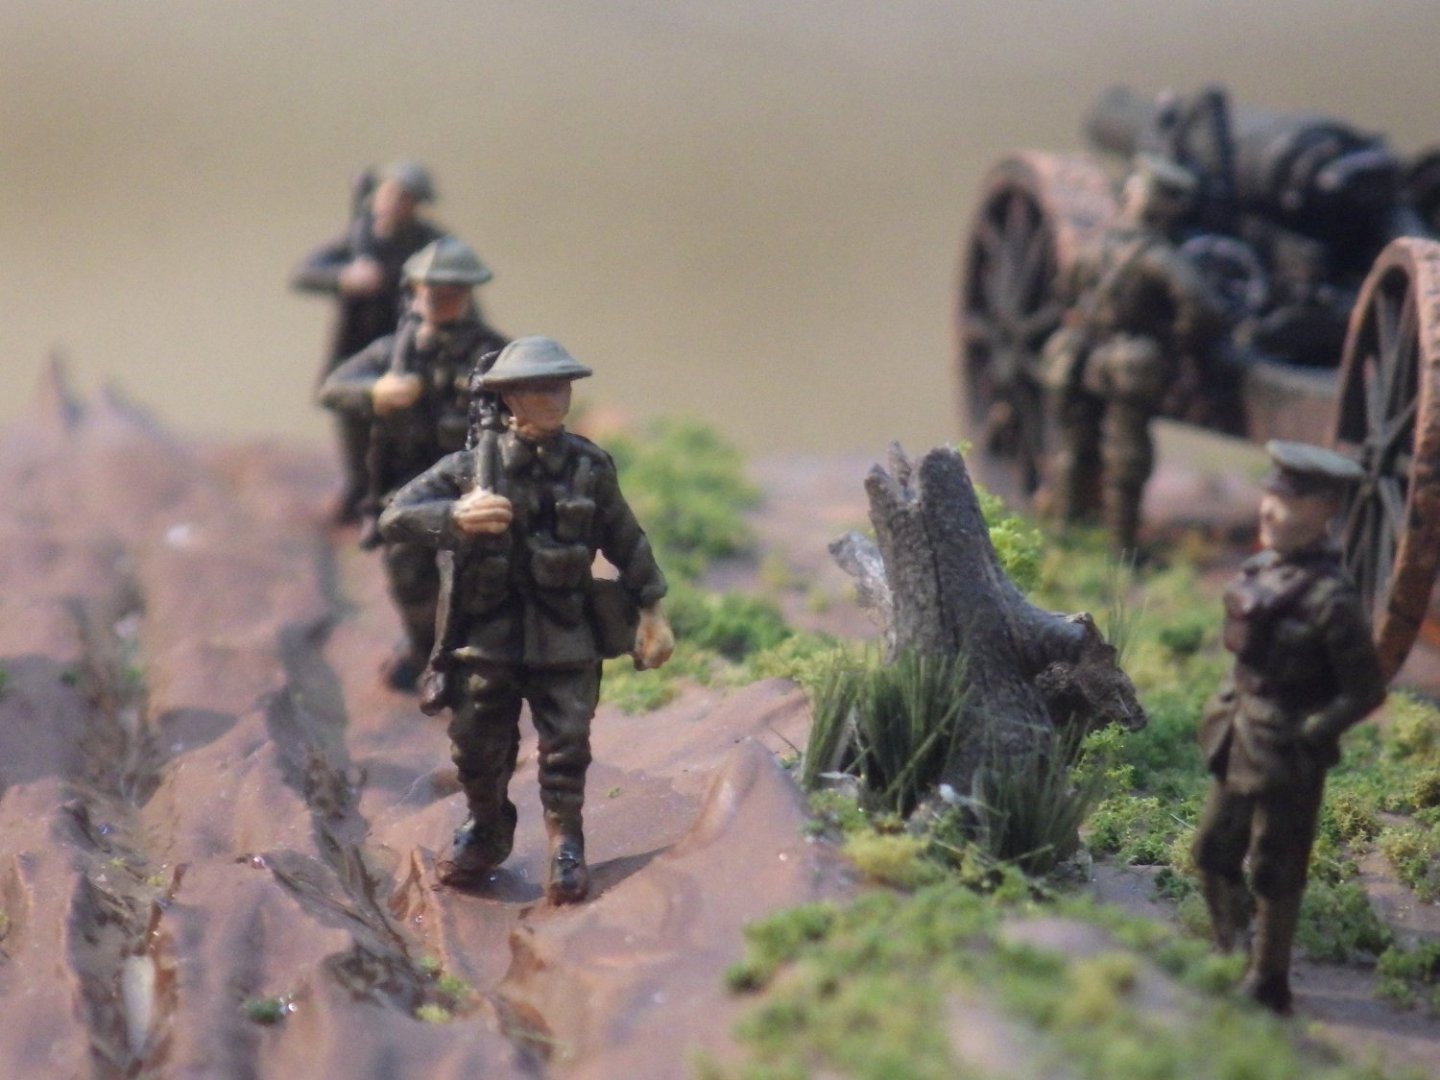
Very many thanks Andrew First time I have used figures and you are right - it really adds a sense of movement to the scene Alan
-
Looking forward to seeing a 1/35 diorama, especially with your weathering talent Alan
-
Thank you very much Ken. I think I should have taken more photos from a lower, more natural eye line. The higher sight line is a bit unrealistic but it shows the layout better. I was happy I had made a backdrop - which will probably appear again Alan
-
Thank you Bruce. Its close enough to make me feel I ended up with what I had in mind Alan
-
Thank you very much Gary. I am still in awe of the realism you produce in your shadow boxes. This is the first time I tried to photograph something with a backdrop and it was well worth it. Alan
-
Thank you Ken The Woodland Scenics stuff really helped. It certainly bets sawdust dyed green as ground cover which seemed to be about as good as it got when I was in my youth Alan
-
Thank you very much OC. I really enjoyed making this, working in the various elements. It gives me big insight into how much work is in your Waterloo diorama aand the great work in the figure painting. Alan
-
Thank you very much Mark. The girl friend thought the third sepia picture was a real WW1 photo Alan
-
A lovely trio of buses. I really like the weathering and top luggage on bus number 3. Great work Alan
-
Thanks Mike I will try the Mr Color series of paints. I am not a fan of Vallejo apart from their black primer. I seem to have drifted from Tamiya to Mig Ammo which i do like a lot. They spray very well even heavily diluted. Alan
- 51 replies
-
- 11
-

-
I added the figures. They are a bit sparse possibly but they are all I can glean from the sets I bought and I didn't really want to have a display loaded with figures. A couple more for the howitzer team would have been nice though. That officer might have to get his hands out of his pockets and get them dirty! I muddied boots and added some splashes on some of the puttees So the photos This was the image that inspired the whole production. Hopefully I got the general impression This is a bit self indulgent but it looks good to me I think that concludes this build apart from building the usual case. A lot of new ideas, techniques and experiments here but I think it came out OK. At some point I would like to try a Mark V tank on a base depicting it crossing a trench so lessons learnt will be useful. Having already broken two resolutions before the New Year reaches double figures (no more new books, no more new kits) I'm trying to hang onto the third and complete the part built projects and bits before starting anything else. Many Thanks for all the support, helpful information, likes and views Alan
.jpg.141b7a27e4d22a5da05da40a7a67a8cd.jpg)
.jpg.7188559130a187b115cf1e1095b0d7ef.jpg)
.jpg.ceafebb2ae95d6c76ea9c2bfaba2f0b8.jpg)
.jpg.1505e9c756ea2455bd41a64347fc57c2.jpg)
.jpg.658c4a4ad130dbb6cd8f16c2baab66df.jpg)
.jpg.049778b8cd974ba601cd6e8ad07a7737.jpg)
.jpg.b787f7c63ca4e8cade5ad5c0f849aedc.jpg)
.thumb.jpg.ea585ff6c93da839c04c5a80e874dd83.jpg)
.jpg.ce34fdb9bd9010e7ae17a8916d5c1632.jpg)
.jpg.f280c5ee63892c395acc089cdcaa00ae.jpg)
.jpg.0a8988807679ec7f3e135eaee94f3a49.jpg)
.jpg.ffe1e23ecbf7e967346e628b3afcb8e6.jpg)

.thumb.jpg.f174602db24f1b528bbff4852579273c.jpg)
- 171 replies
-
- 23
-

-
-
Thanks EG, I will have a browse - and visit Sprue Brothers again Alan
-
Thank You very much Gary. Your shadow boxes are in a master class of their own so I value your praise highly. You create superb pieces of art. Alan
-
Thanks Jack It looks like I need to get some more while I can Alan
-
The micro balloons are great but I also like the paraffin with white spray as a piece of floating ice with snow or frost on it Alan
-
Thank you very much Edward. I remember the Airfix Highlanders. I remember my attempts at the tartan were not very convincing. I did a dry run with the figures on the base nd I think its working out so I'll fix them tomorrow. Alan
-
Their range of figures is impressive. The New Years moritorium on buying more kits may be about to fall apart after 7 days Alan
-
The 120 mm kits I have look very good. Are they still in production? Sprue Brothers seem to be the only people stocking them and their choices seem to be diminishing Alan
-
Thank you very much Jack. You are right. There isn't enough detail to work with. The figures will be deep in the display so I'll add the matte coat and continue. I have a couple of Verlinden 120mm figures on the shelf which I'm keen to attempt especially after watching the technique video you posted recently. Many Thanks for that Alan

.jpg.b09b6ba7954a77b4bb23086b00436c00.jpg)

.jpg.978a9da5fd7973fc1ccb00a9c08a8737.jpg)

