king derelict
-
Posts
3,294 -
Joined
-
Last visited
Content Type
Profiles
Forums
Gallery
Events
Everything posted by king derelict
-
It's beautiful. It looks real enough to walk into. Alan
-
I'm a fan of old castles which is what drew me into these kits.whenever I go back to North Wales I insist on visiting at least one cadtle, either the Edward First ones of Conwy, Harlech, Beaumaris, Caernarfon or the Welsh castles of Dolbadarn or Dolwyddelan. I'm December I was lucky enough to visit Caernarfon on a cold rainy day and with my cousin we were the only visitors. It was great, spiral stairways, gloomy passages and lots of atmosphere. If Aedes Ars ever make a Welsh castle kit I'll at the front of the line with my credit card Alan
- 462 replies
-
- 10
-

-
It's all wonderful but the shed door with the split boards is just brilliant Alan
-
Thank you very much Gary. I will be using your ideas to create partitions in the lower part of the building. All the windows and doors in the upper part (above the horizontal line in the photos will be in separate upper floor rooms so they should be taken care of. The doors on both levels will need to be thought about though. They are very big and easy to see into. Maybe partly open doors and a black or walled partition might work. I have plenty of time to experiment a I build up the outer walls, Next update when I get to the main gate - hopefully soon Alan
-
Thank you very much Denis I learnt a lot about making an effective setting. And now have lots of Woodlands Scenic stuff for many more Alan
-
Thank you very much for the kind words EG Your wish is my command Alan
.jpg.af06767696ec75993e9db0ba125f7e90.jpg)
.jpg.e18981822b669bc311107f7e033b25ab.jpg)
.jpg.3298341958c7b56cf0860cbe1ab88f31.jpg)

-
Thank you very much Patrick. I wish I had the room to do more of this Alan
-
Thank you Zig It was a really enjoyable project Alan
-
Thank you Phil Alan
-
Great subjects. Looking forward to a great build Alan
-
Thank you Mike I plan to try colour in the next attempt. I also probably stirred the mix too fast. It's a bit scary committing your finished model to the resin but for some displays it's a great look. I have a handful of 1/700 submarines that I want to use this technique for Alan
-
I think your Hood diorama will be great. It's worth practicing with your chosen resin before committing to the main task. I found a half inch layer cured no problem. A few stray bubbles aren't going to be an issue with all the mayhem of the sinking. Alan
-
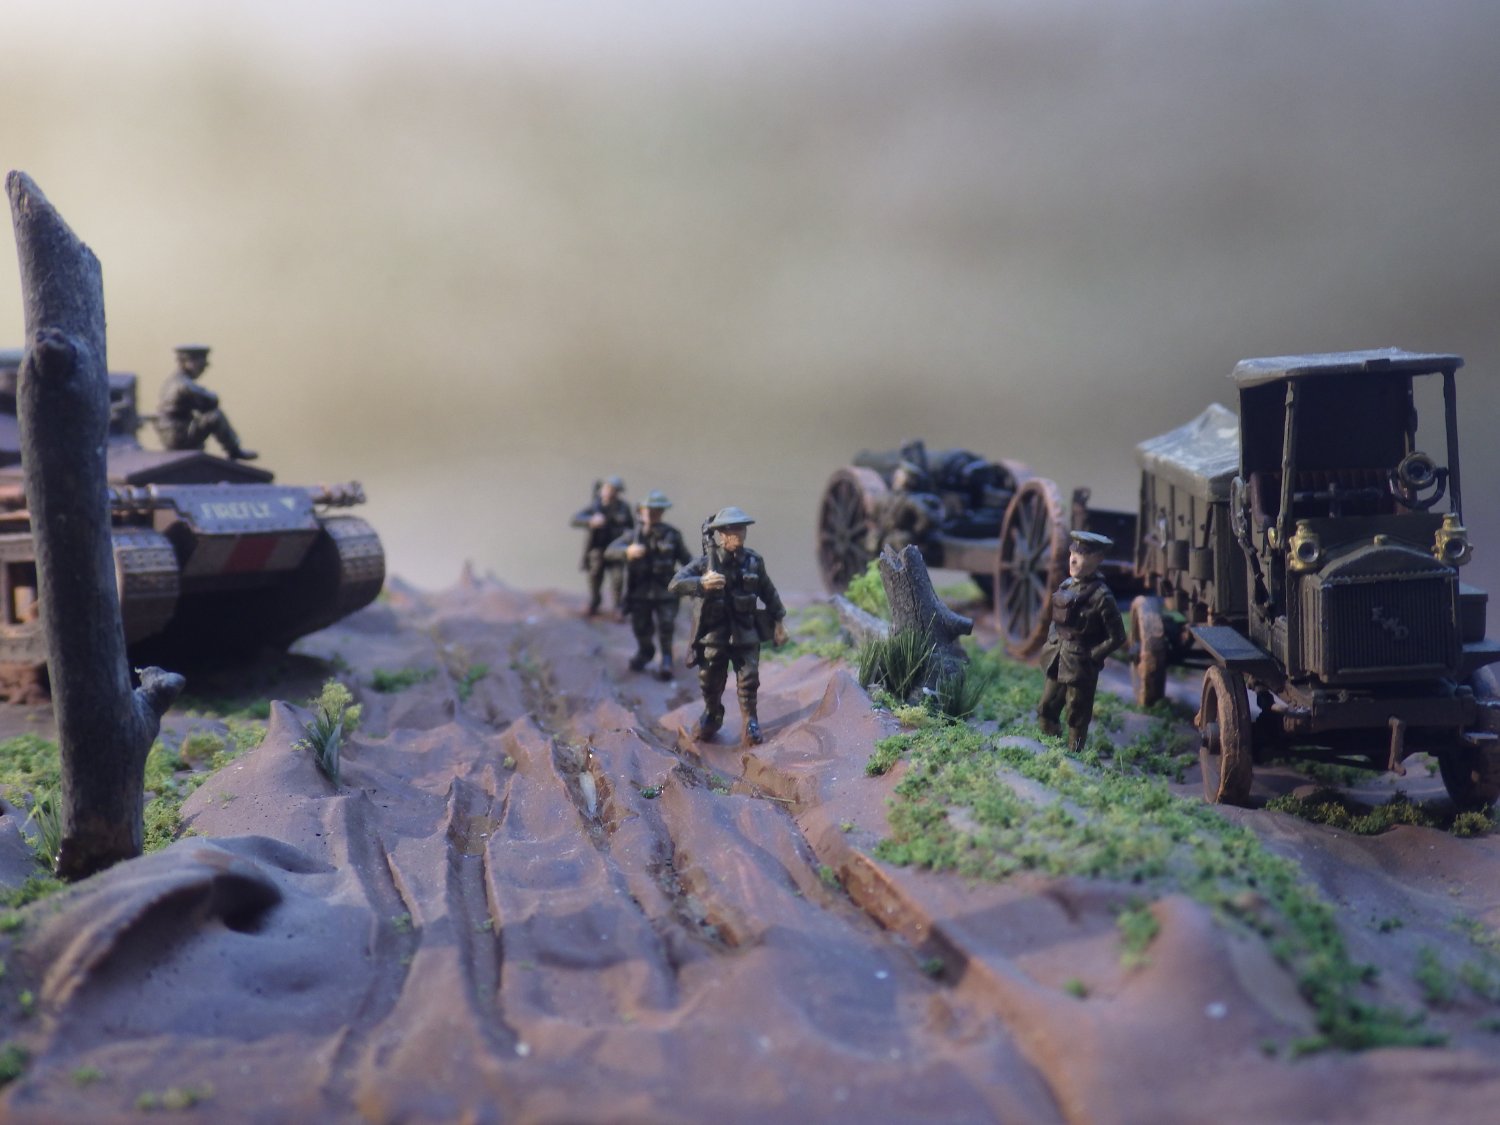
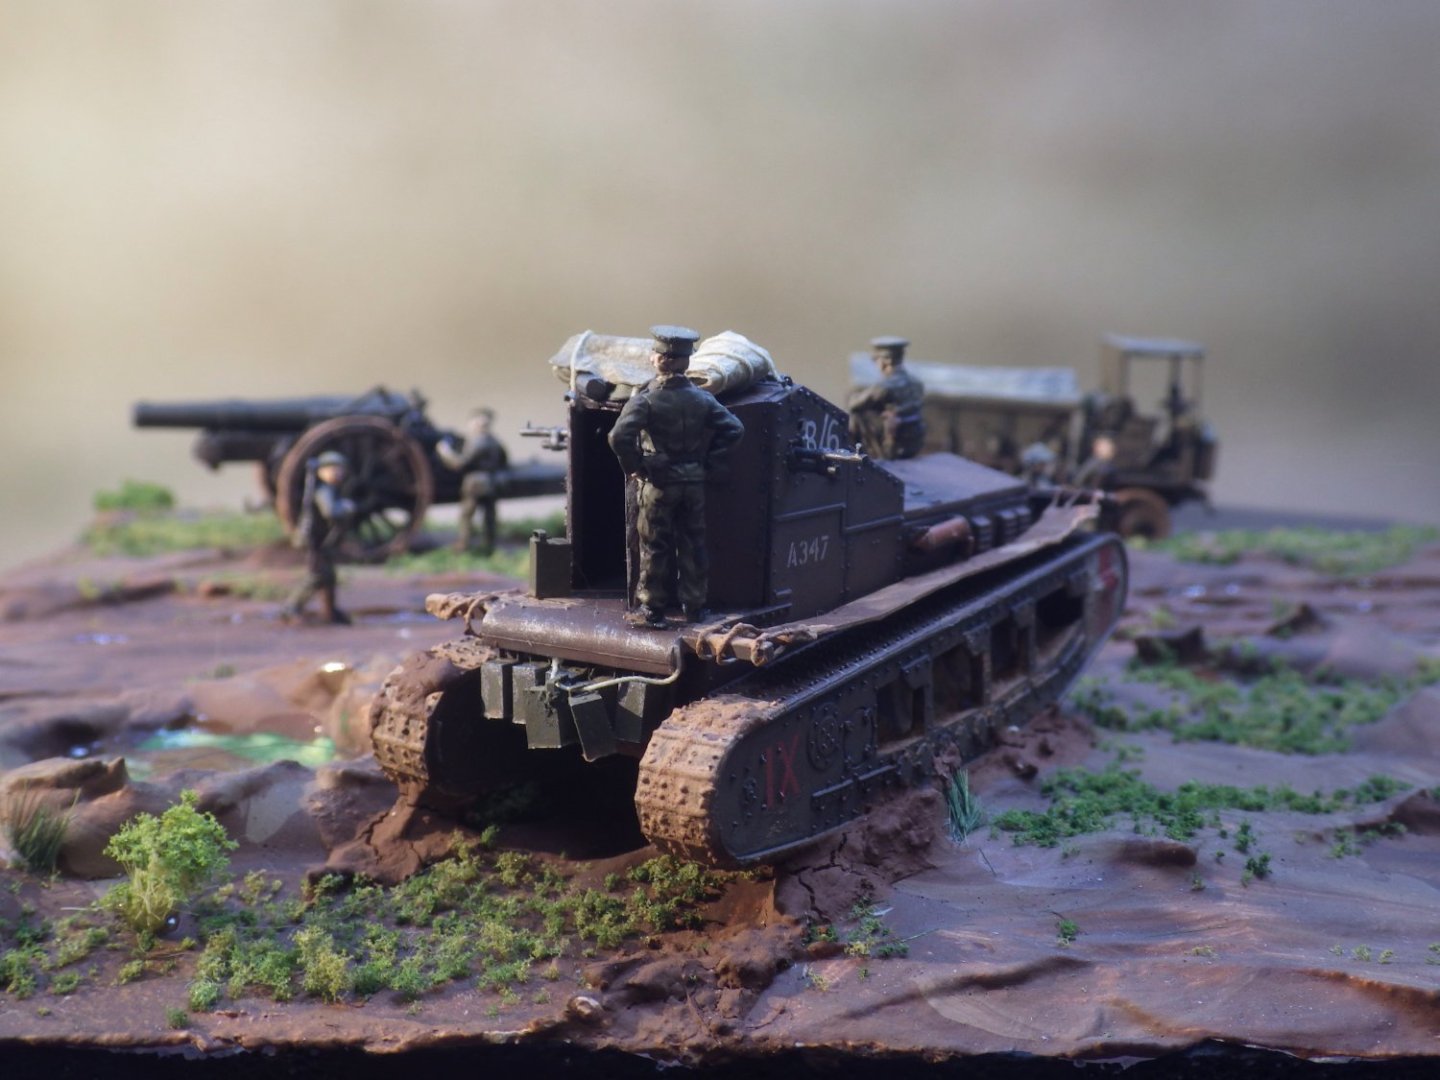
In an effort to maintain my last unbroken New Years resolution (finish all started projects). I completed an experiment with the 1/700 Hobby Boss HMS Astute. I have a few submarine models and it always puzzles me to find a good way to display them. I have also been impressed by modellers who have encased their finished project in resin. I wanted to try it but had no real idea about how to build a casting tank, the right resin, release agents, does the curing heat damage the model or the decals etc. So this is less about building Astute and more about trying to set in an epoxy sea. The Hobby Boss kit has few parts and the submarine has a simple black paint scheme. The decals are a bit of a challenge with lots of long thing bands to place on the hull The casting tank is made of 1/8 Perspex and held together and sealed with hot glue (first mistake). I sprayed the inside of the tank with Future polish as a release agent The plan was to present the model on the surface so the craft sticks, double sided tape and Lego bricks set the sub at the right depth in the tank The project was going to sit on the brand new dryer while the resin cured. It seemed a good idea to put the tank in an extra container - just in case. There was a bit more resin than I expected in the first pour but I put it all in and was not terribly happy to find that the tank had a leak on one of the sides. - but I was thrilled that I had decided to use an extra container and I decided to carry on. Then winter hit Florida for a week and I didn't want to try the second pour in case it didn't cure properly. I resumed with a different brand of resin and made three further pours to get the depth I wanted. They all cured nicely The leaked resin peeled off the bottom of the casting easily The sides of the tank released with a bit of force and the basic casting seems to be successful with a couple of caveats. The long delay between first and second pours resulted in a definite interface between the two pours. Also the second resin has a slight tan cast to it. I had planned to try to colour the resin but couldn't think of a way to get a consistent colour. It belatedly occurs to me that I should have coloured one part of the two part mix which would then be used in all the pours. There are small bubbles - I'm not sure how to improve that I added some waves and wakes with artists gloss medium but it wasn't very visible against the clear resin so I added some medium with micro balloons added. I think it was a bit too much and its stark against the clear resin So i added a sea blue base which has got closer to the effect I wanted Far from perfect but it answered some basic questions for me and I'm happy with a first attempt. I have a part built 1/700 USS Gato for the next part of the project - full immersion. I have a couple of Flyhawk U boats that I would like to make up into a single display with one surfaced and one submerged. They are much too nice to pour resin over until I know what I'm doing, Thanks for looking in. Alan
.jpg.db68de55364b0406a9997b7540723a7d.jpg)
.jpg.be72391b0717c20c8a0a4553c40c7861.jpg)
.jpg.e20af04c545d5a344d63c687837ce682.jpg)
.jpg.9ea48ecd98f4ff8dcb4ec9caa489b043.jpg)
.jpg.48a08ef5536f9119a889d22834fc9fe2.jpg)
.jpg.87f11bb6fcece1f8e64c058324965f97.jpg)
.jpg.e0802a3b09e8ee5ea5f53e1a0a182a7b.jpg)
.jpg.911aed4fb5732afe4aad82c9bc5fa533.jpg)
.jpg.6d97c8eaf26c1b401217a595db67e85d.jpg)
.jpg.595f831464d9ffbc819b761b0399bf04.jpg)
.jpg.f51b402240ed38bc339d6bc3b093719a.jpg)
.jpg.56fddc5260c963a61d6f60679a855b3f.jpg)
-
I'm still moving slowly along with the walls. I've reached the front gate which will be fiddly especially working between the two towers. I've started sanding the completed section of wall; its good for morale seeing the wall clean up. The last section of wall is the highest but the landscape starts to creep in and not all the wall needs to be covered. Thanks for looking in and the likes Alan
.jpg.9872ad3826c1afabae01f199b71b4854.jpg)
- 462 replies
-
- 17
-
-
Thank you OC, I hope it will look better once the sanding starts; some of the gaps will close up. There will need to be some serious sanding though - fitting the blocks around some of the compound curves is a bit challenging. I've started saving the sanding dust to make mortar. Alan
-
The materials for the display case arrived today so the diorama is safely boxed up. I grabbed a last few photos from more of an eye level perspective before the case lid came down Thank you all for looking in, the likes and positive comments. Alan
.jpg.1a627e0f0f9fb54ecf23a4884d75593d.jpg)
.jpg.0a068d372741746e3c9ea5918a1ee883.jpg)
.jpg.11c6b1e7ee0ab11a1f978b2c3d8735eb.jpg)
.jpg.eb5543a4186b15033a2bf70a5445509a.jpg)
.jpg.aef162f573c2f7f226f65f14a0e325af.jpg)
.jpg.edba4f58ac6c1ed8405768d33495b342.jpg)
- 171 replies
-
- 13
-
-

-
Thankyou very much. I learnt a lot about making a landscape. I would like to see a Whippet. I was hoping to see a Ft-17 while I was in Warsaw recently but I went to the wrong museum. There are two military museums in the city (as well as the Resistance Museum) - i found out when I got home. Next time. Alan
-
Many Thanks Jav This one was a fun project all the way through (apart from when I dropped the FWD) Alan
-
The gate looks terrific and you made a good decision to add it. Looking at the earlier photo of the diorama in its case the blank wall kind of chops the scene into two halves. With the gate it brings it all together. Or maybe that's just me. Alan
-
Having decided to light the castillo decided I needed to get a sense of how the model was all going to look as a whole and where the lights would go and how many etc. So I built up the cardboard formers for the mian structure. This is the first level. Another level will go on top but the lights will need to be installed before the roof is added. There is plenty of room to cut a hole in the floor for wires to run through. Having not done this before I am not sure how many leds will be needed and whether I should try to build some interior walls to separate some of the lights. I will get a handful and experiment. There is quite a bit of time before we get to that part of the build. I have read a lot of lighting builds having problems with light bleed through. I think it could be possible with this if there are chinks in the blocks in the wrong place so I think I might tape all the joints and then spray the interior with black primer. I placed the main castle in its approximate place on the base and it shows there will be plenty of room to route the lighting wires and also the amount of landscaping that will be needed The main castle will have the blocks added as a separate module so I can work on that on my usual bench which will be more comfortable especially if summer has arrived by then. Meanwhile the walls are creeping forward. I am turning the corner at the next round tower onto the next section of wall. I started sanding the first round tower and its taking shape as the edges of the blocks sand away. Thanks for looking in and all the likes and helpful comments Alan
.jpg.7b9114bccbb555627a9b66f9cd77b91d.jpg)
.jpg.43b1311ebabcf83101dd06e209bc0e2b.jpg)
.jpg.e5974c0f20482751a5296084000c7684.jpg)
.jpg.4a1fe09b7decc685d956f7f83865201e.jpg)
.jpg.419ca714b93115e5a85518c51e97d226.jpg)
.jpg.abd6a616c5b8e1dc8414794418890fa6.jpg)
- 462 replies
-
- 15
-
-
The Olympia looks really nice. Great work Alan
-
Great subject Craig. You will make it spectacular I am sure. It sort of looks like there is an F=16 stuck in there somewhere Alan