HOLIDAY DONATION DRIVE - SUPPORT MSW - DO YOUR PART TO KEEP THIS GREAT FORUM GOING! (Only 24 donations so far out of 49,000 members - C'mon guys!)
×
Tom E
-
Posts
469 -
Joined
-
Last visited
Content Type
Profiles
Forums
Gallery
Events
Everything posted by Tom E
-
 Thanks Darrell, I was going to form it with 2 pieces of brass strip, instead of drilling a hole in the Bees. One on top and the other underneath. Lined up correctly, it should "appear" to go thru the Bees. Will that be structurally sound or is it best to wrap one piece around the Bowsprit? The more I think on this I'm leaning towards a 1 piece method. Tom E
 -
Mike, I took a look back at the plans, I was pretty sure I miss labeled that brass strap in my post. Looks like a "Bobstay Wye Iron", per the plans. Its where the front Bobstay attaches to the Bowsprit. Did you use an eyebolt there? Tom E
-
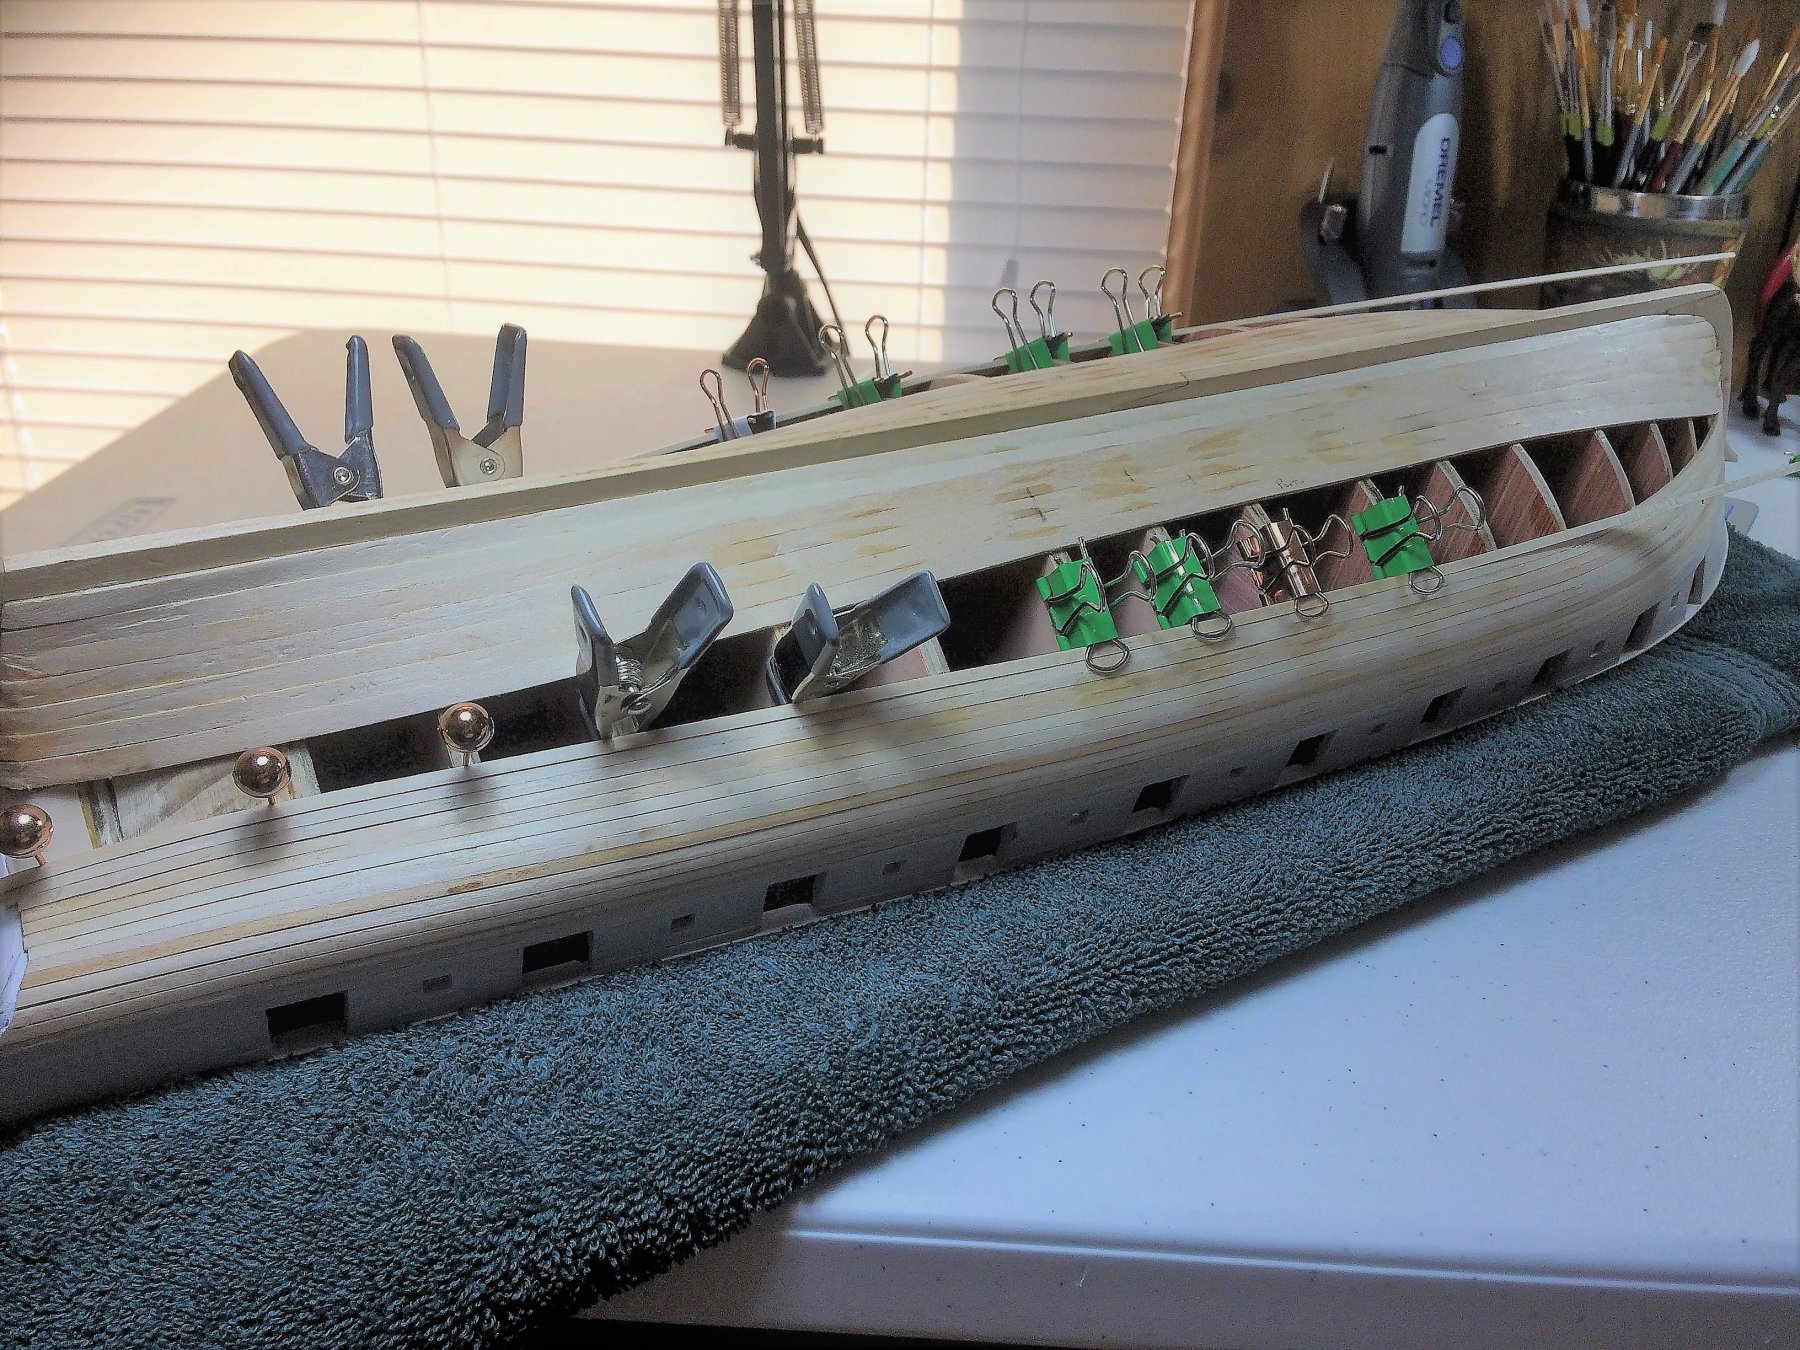
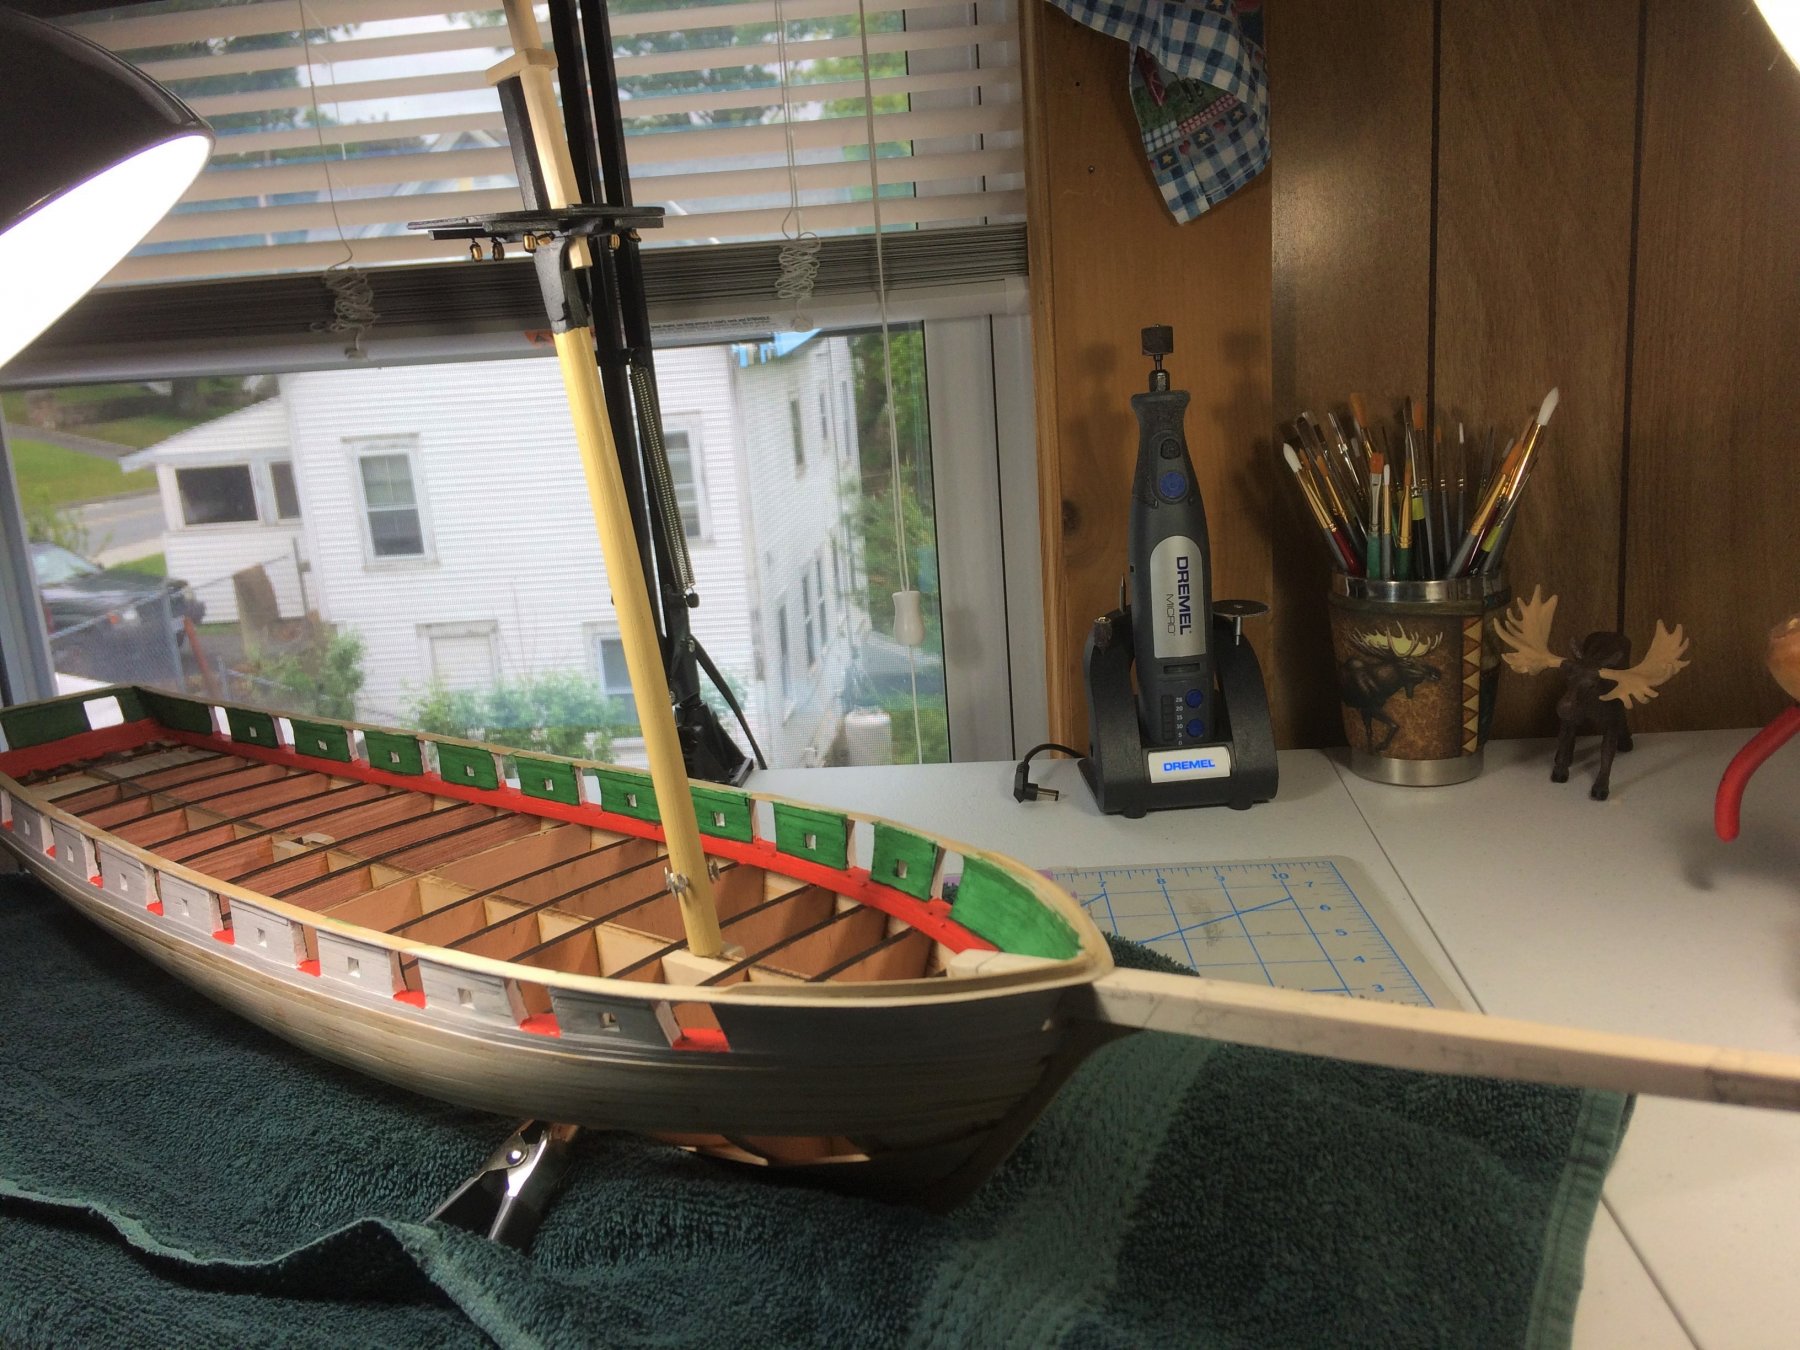
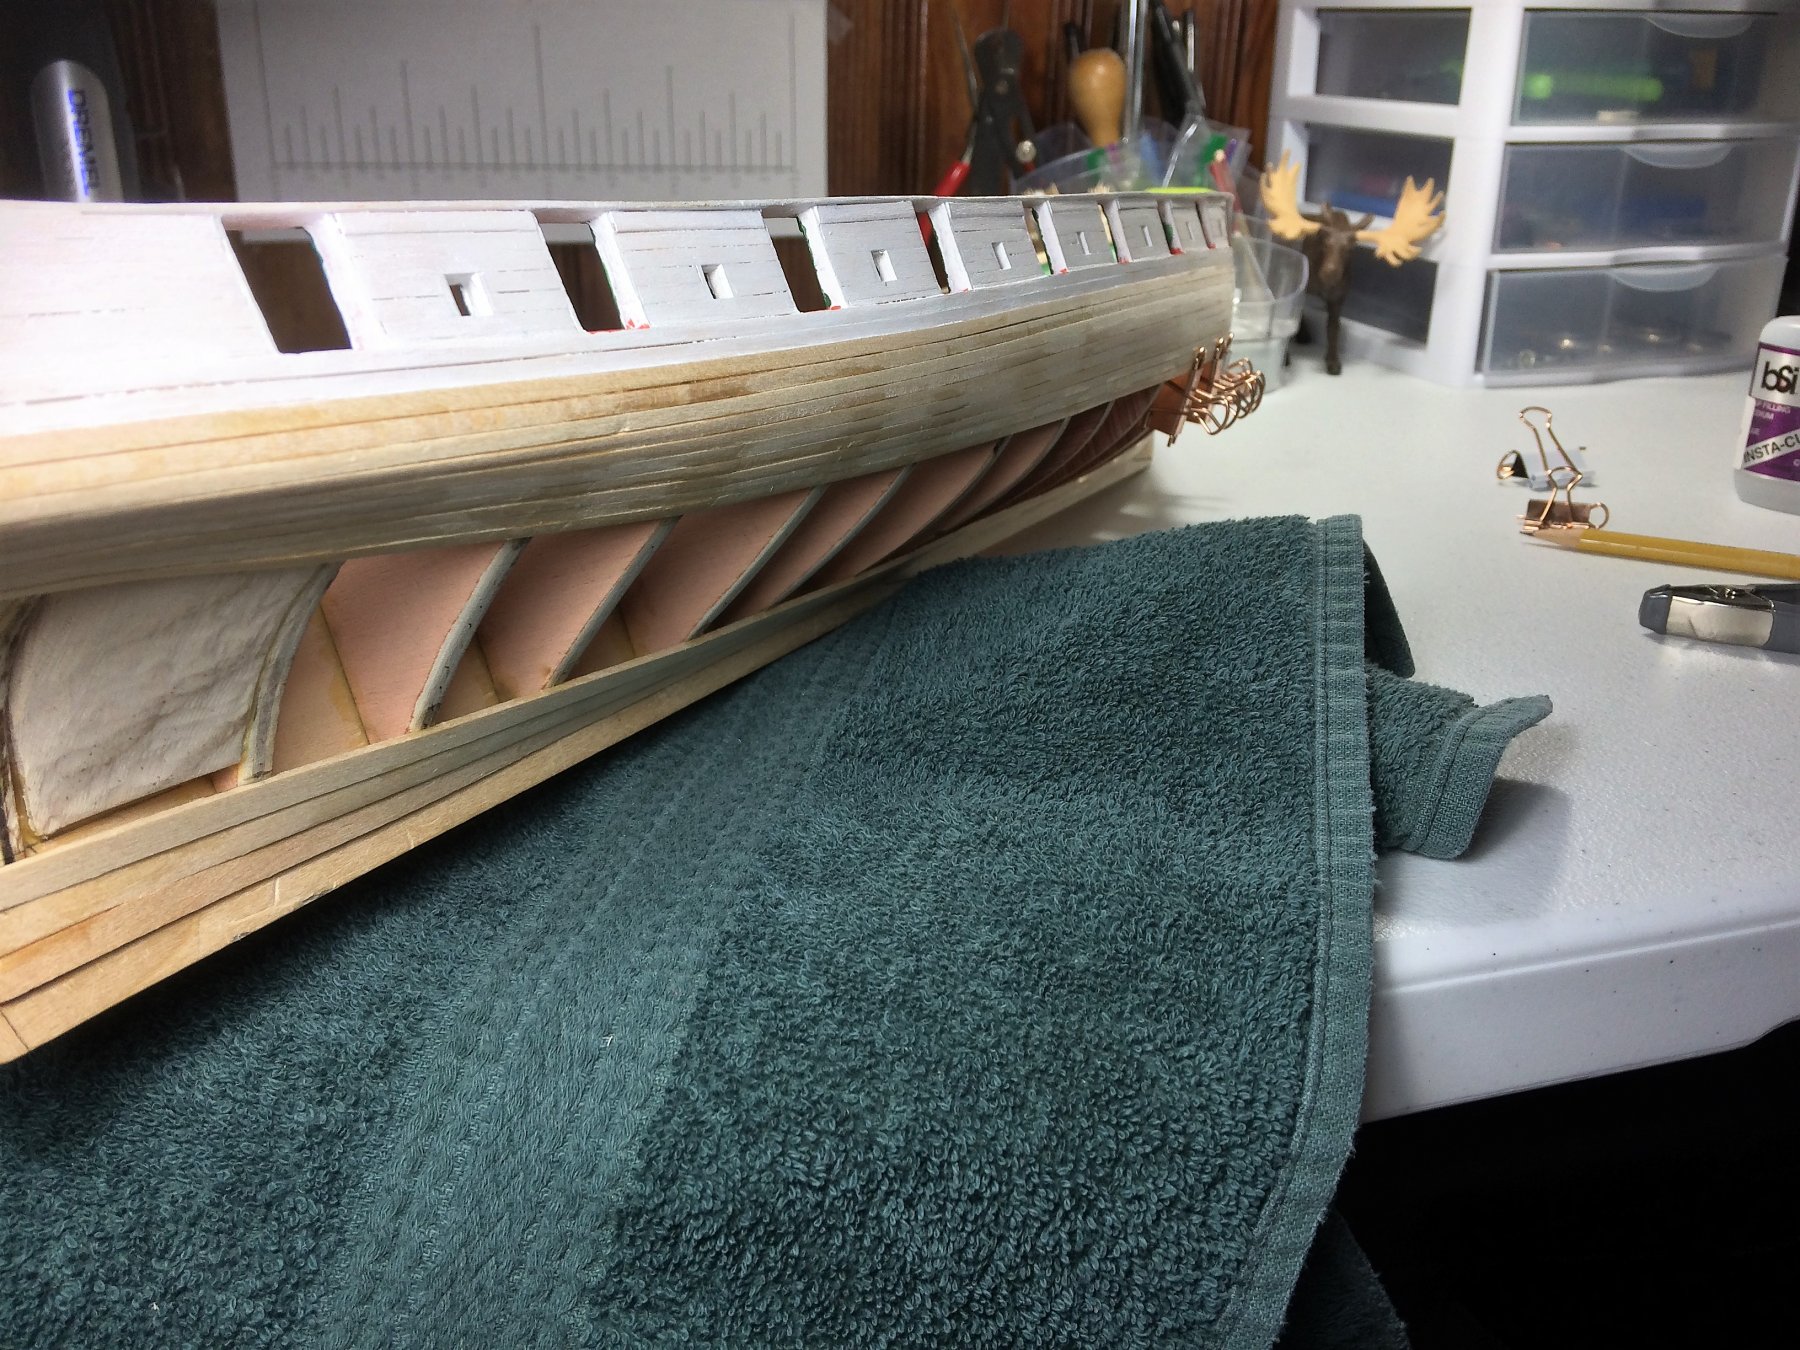
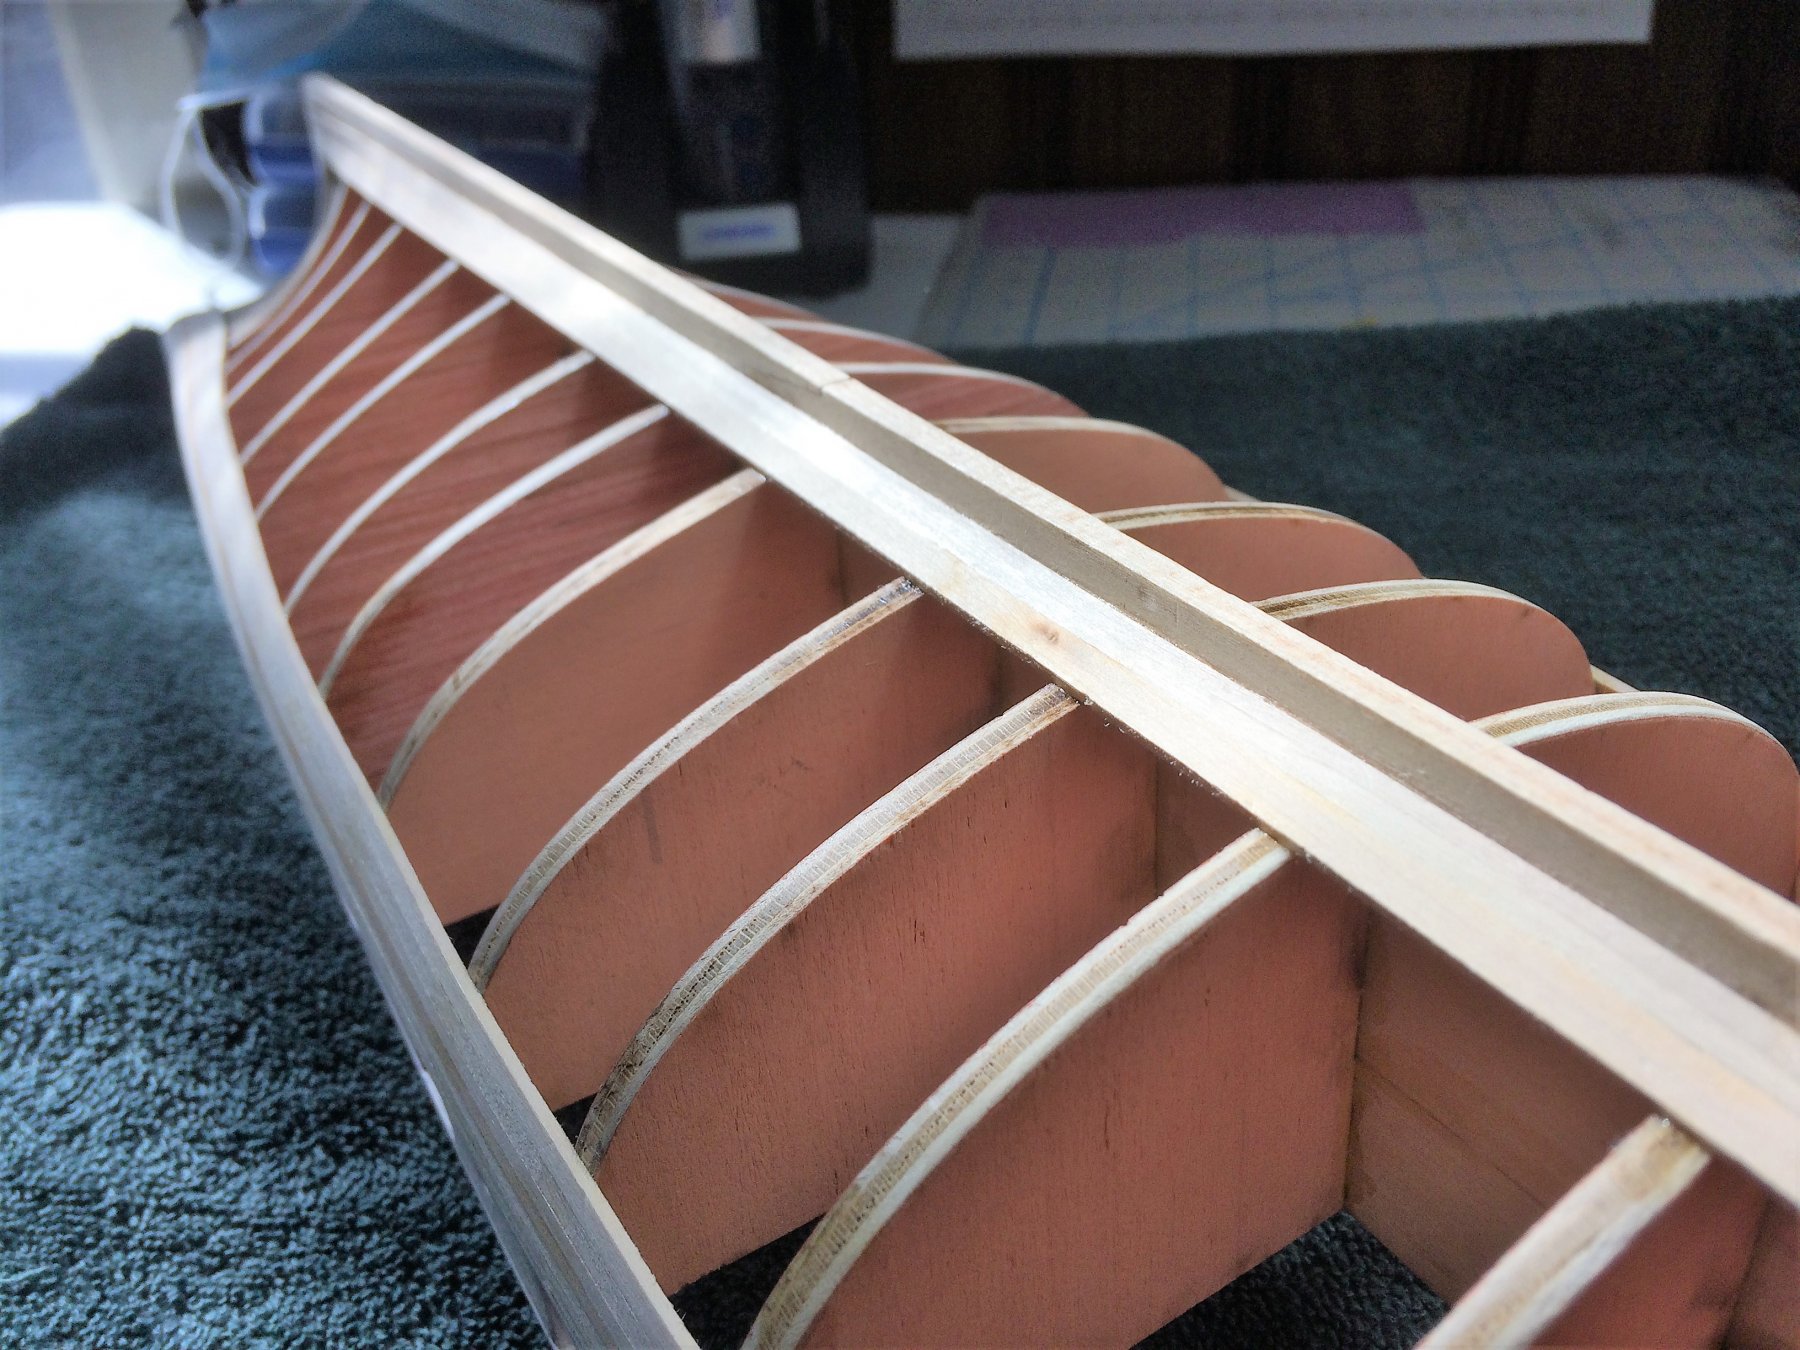
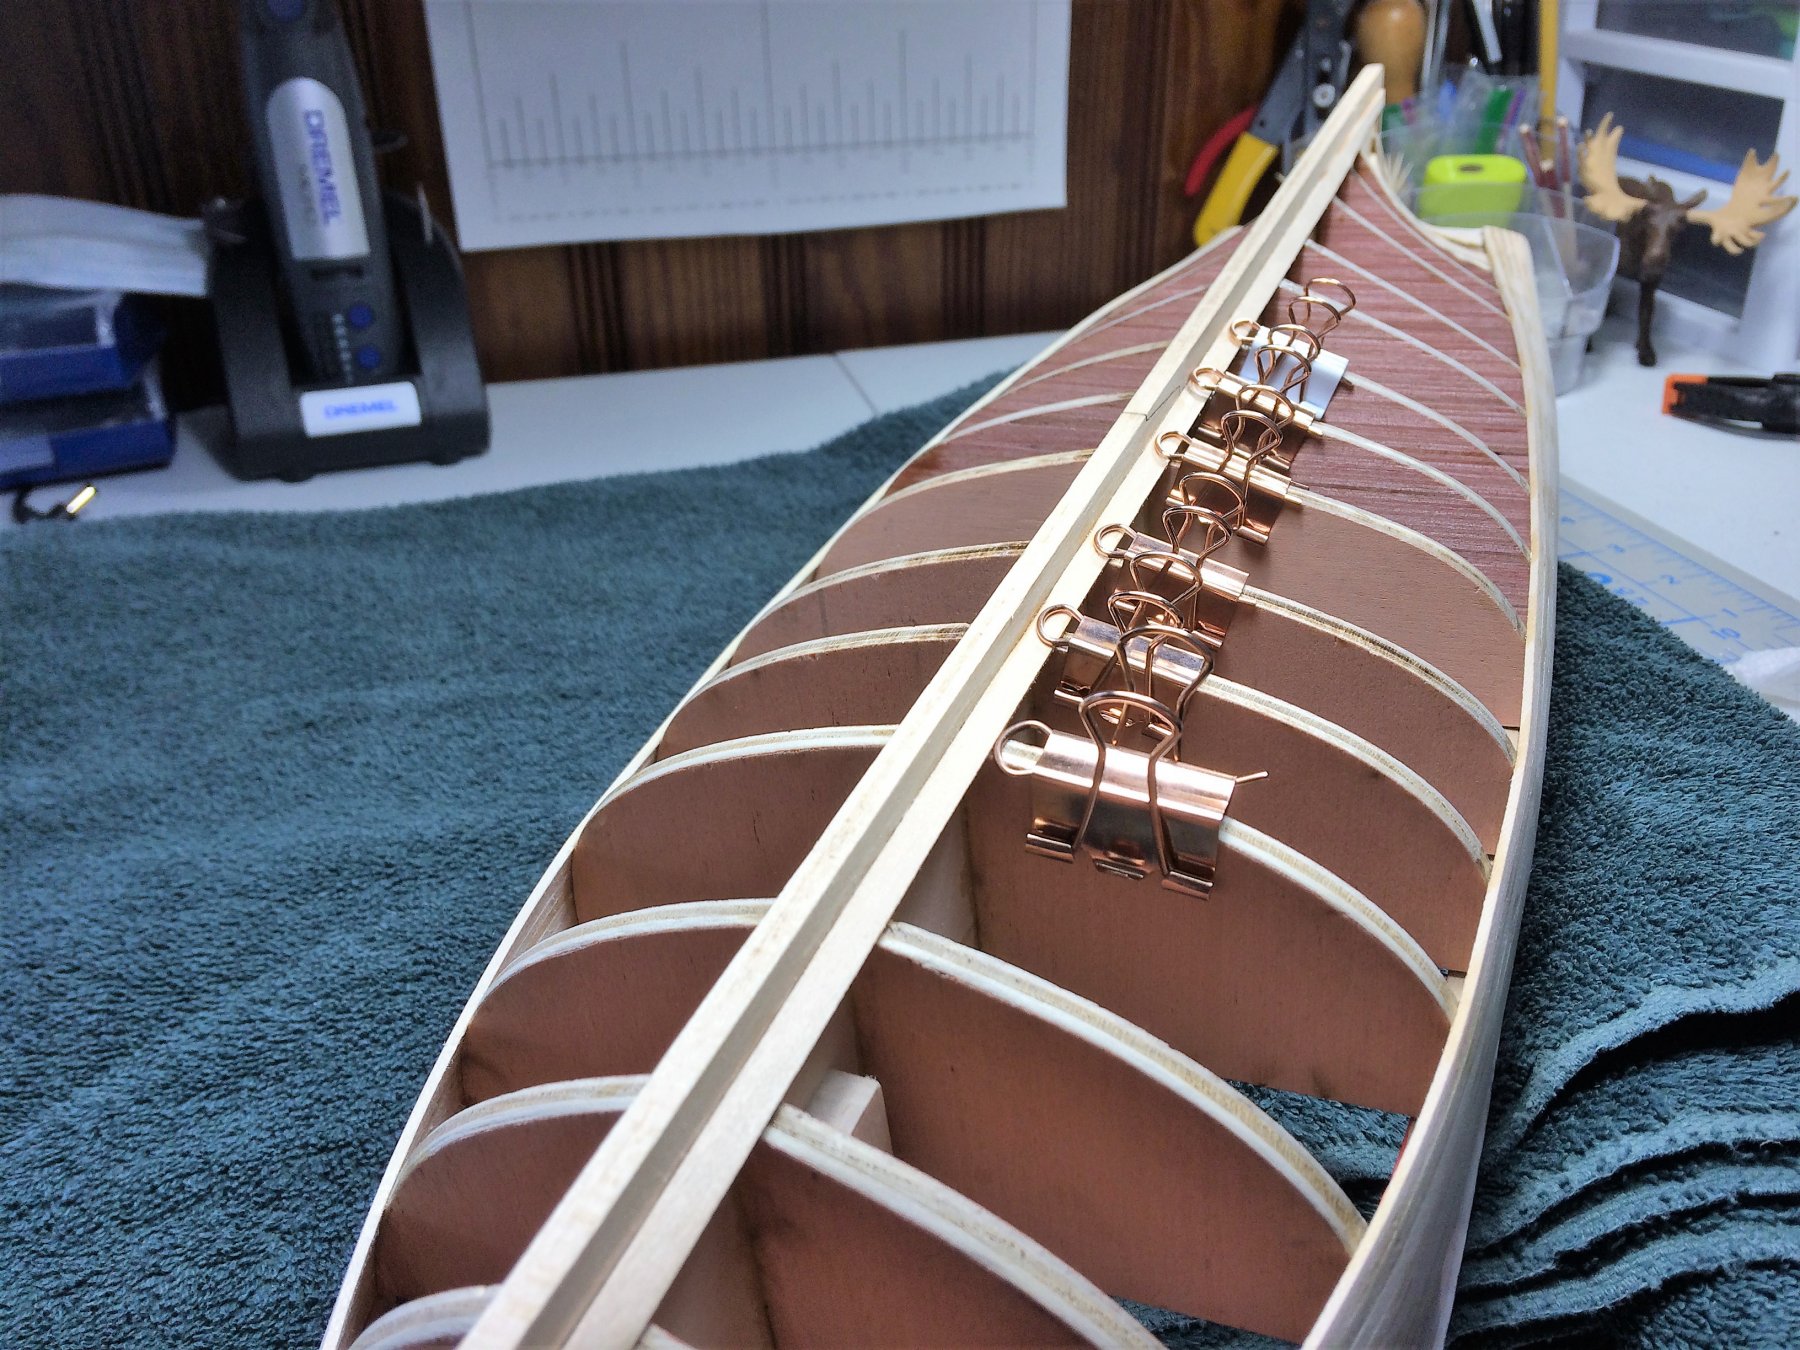
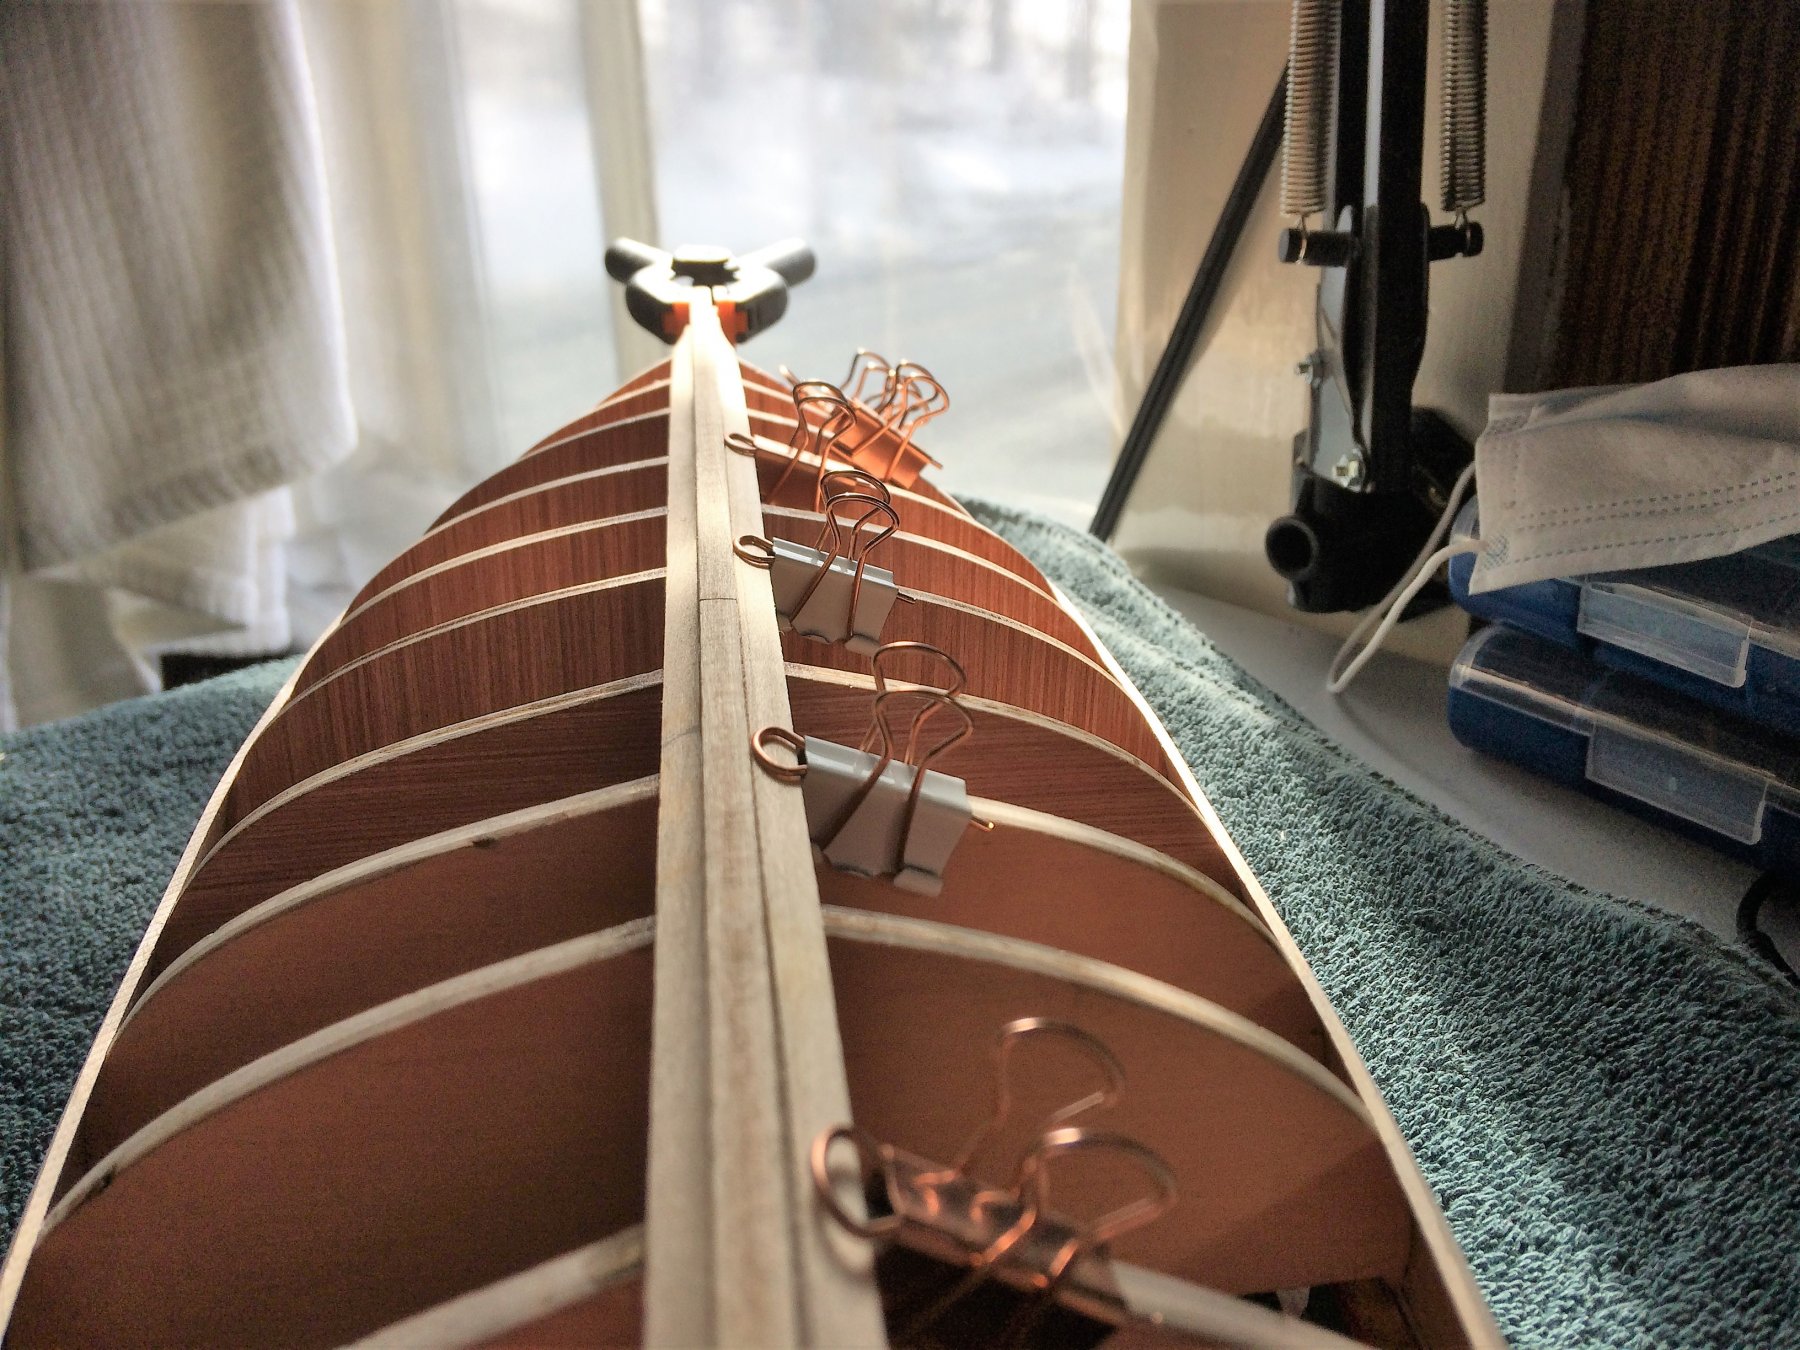
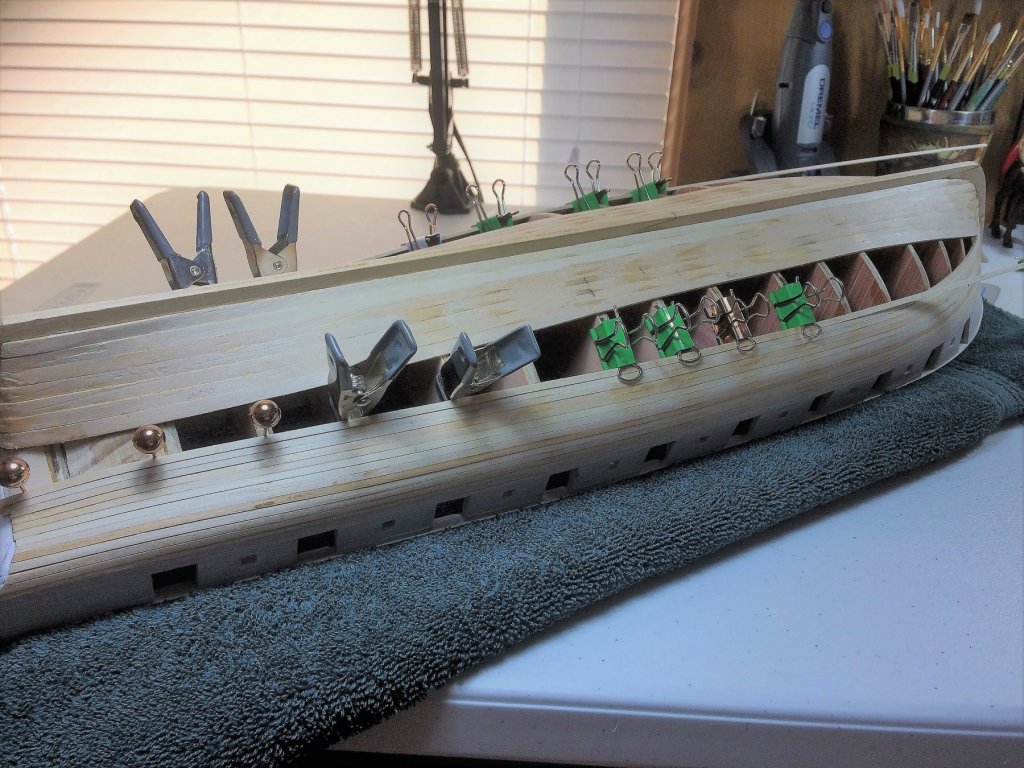
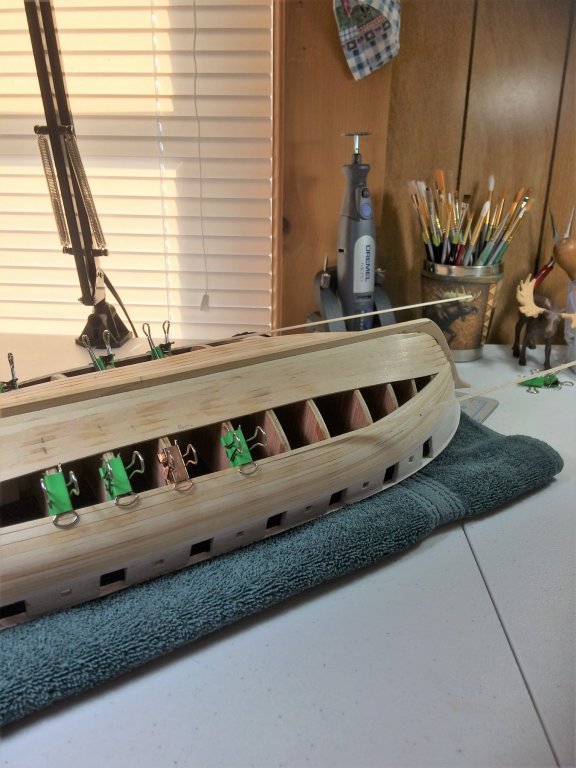
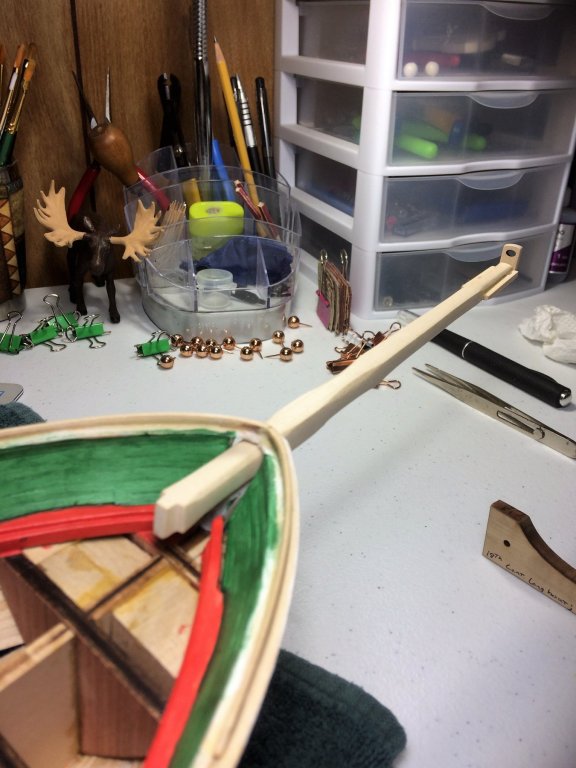
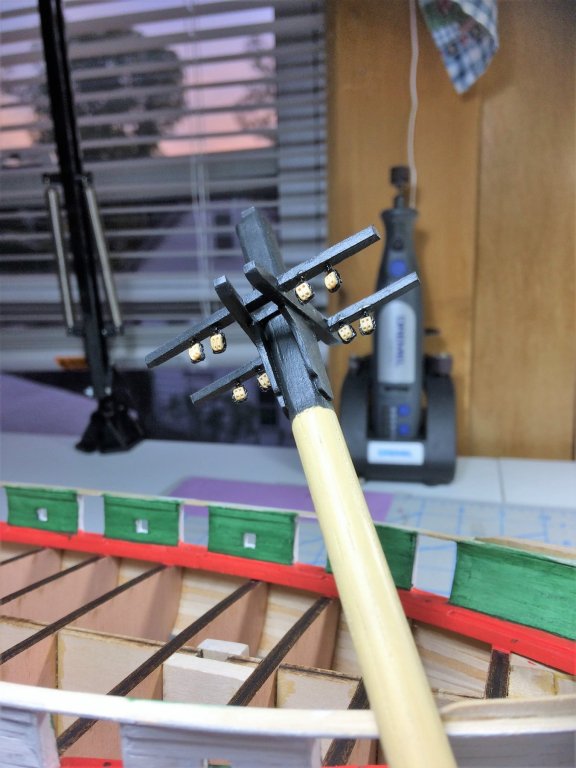
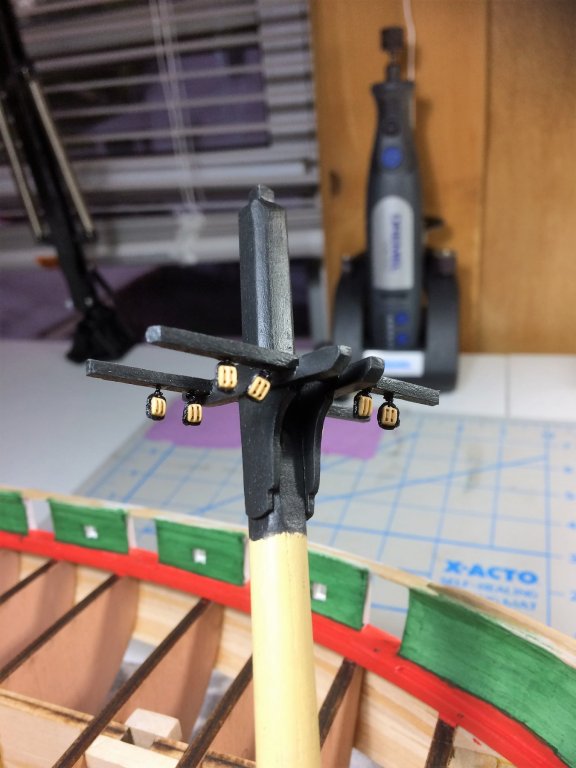
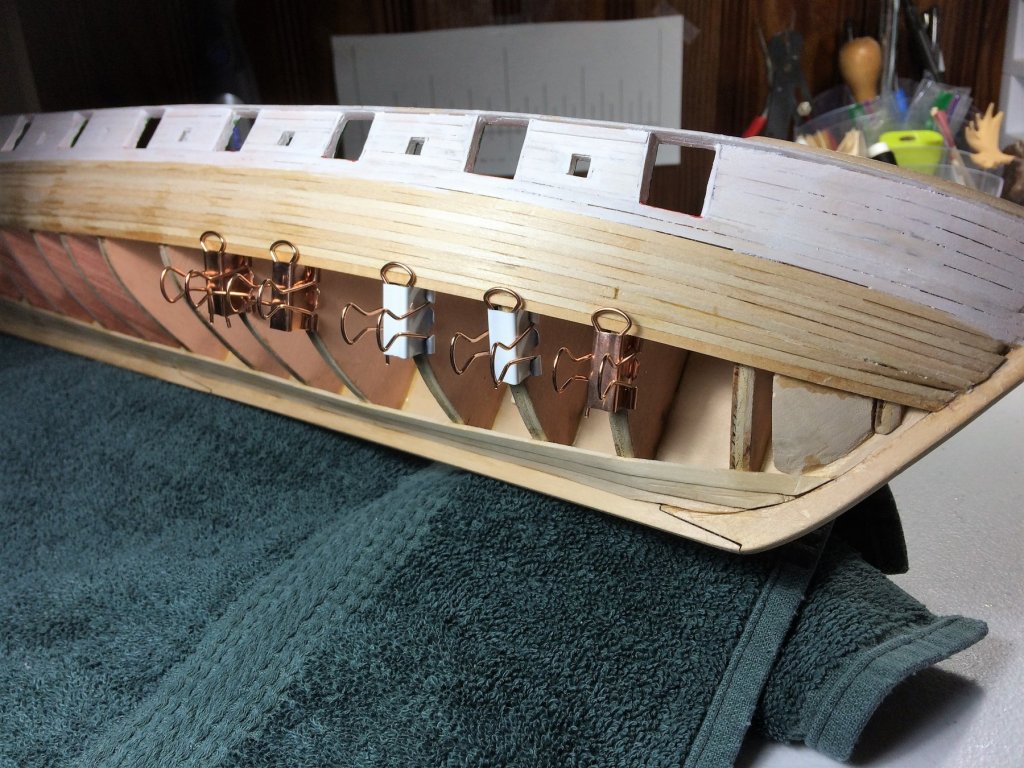
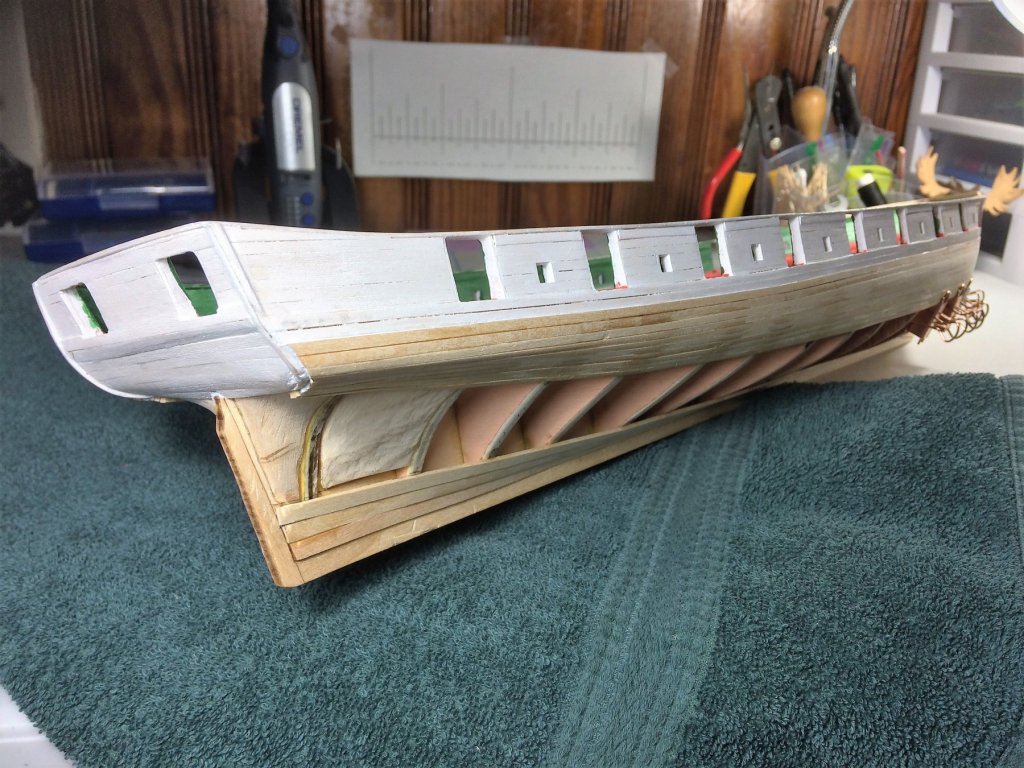
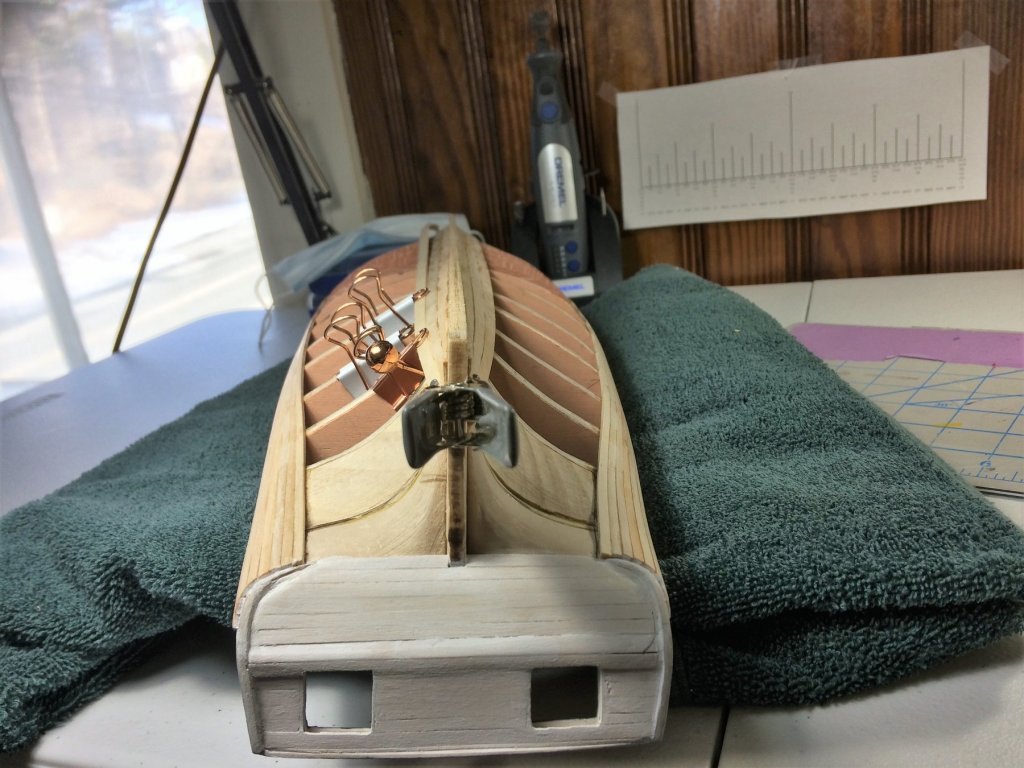
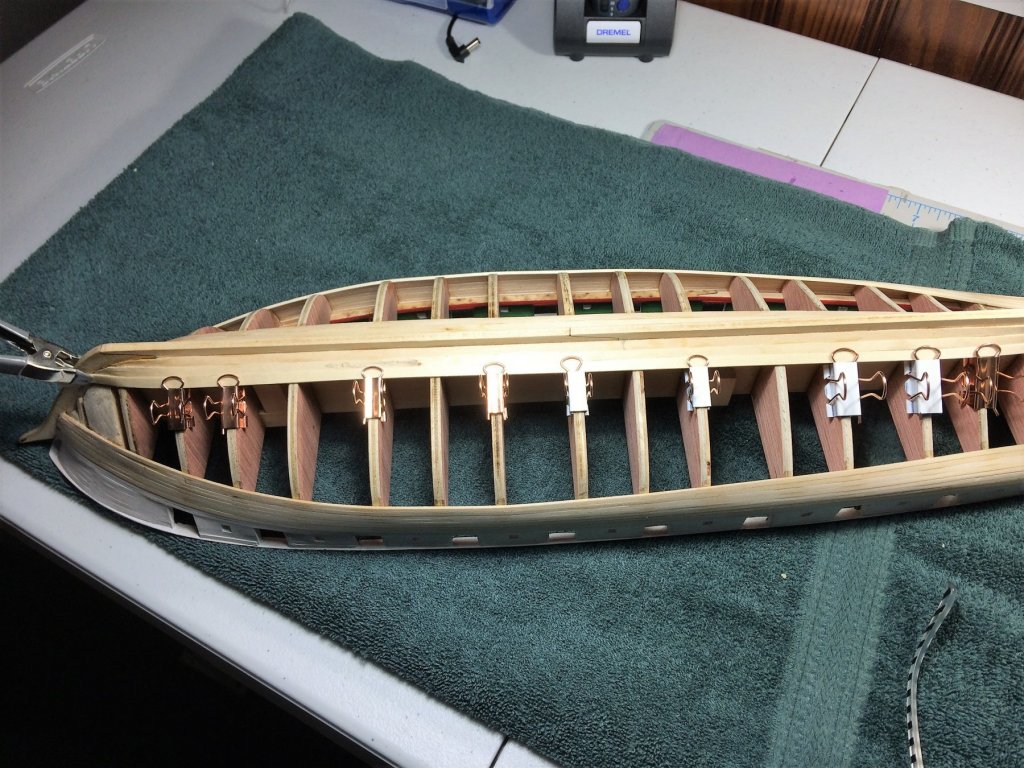
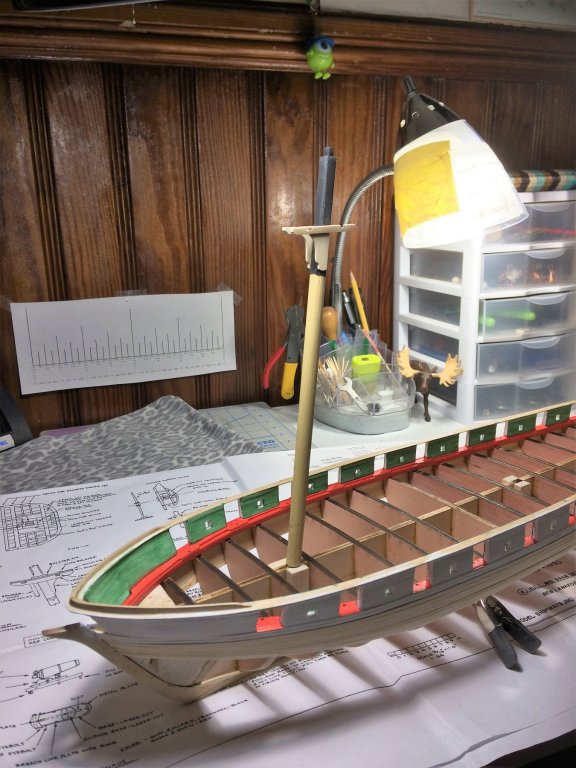
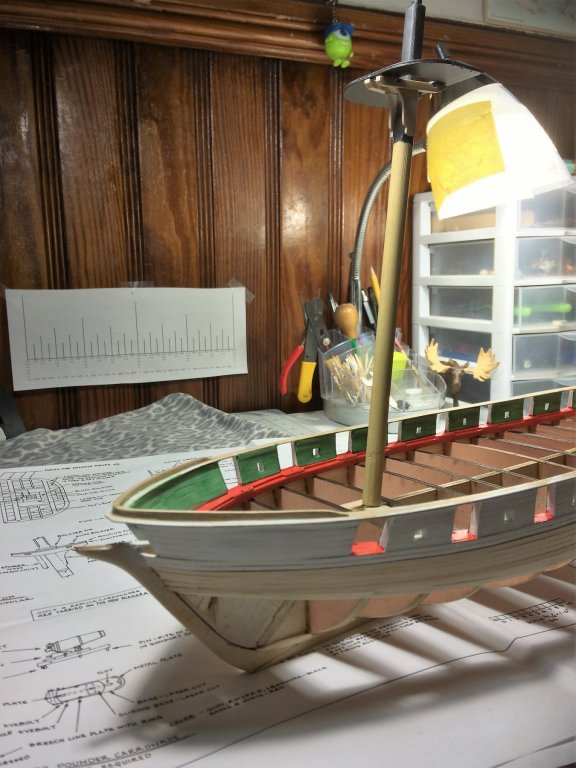
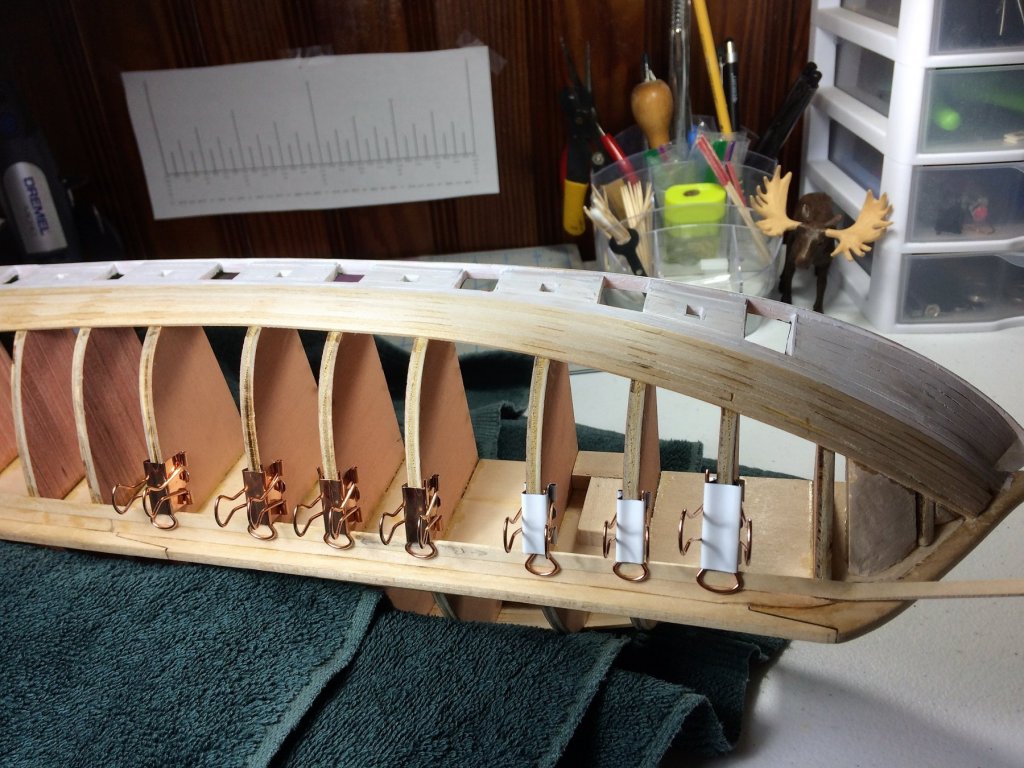
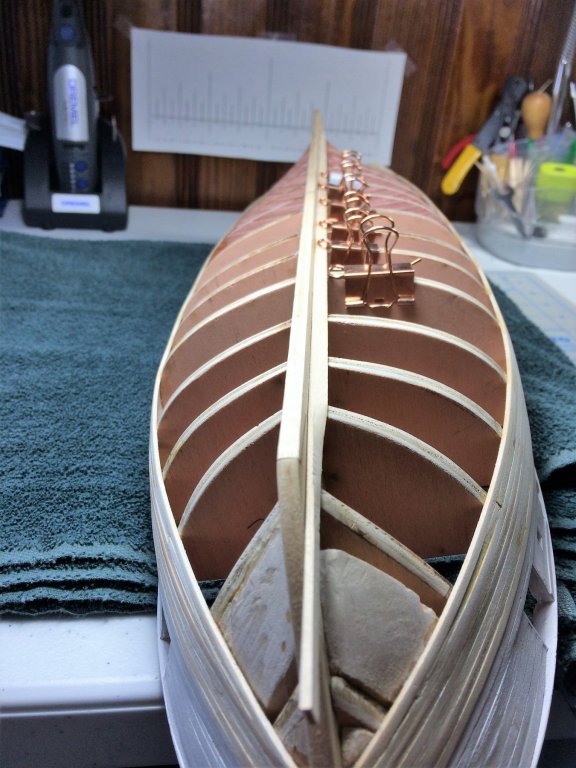
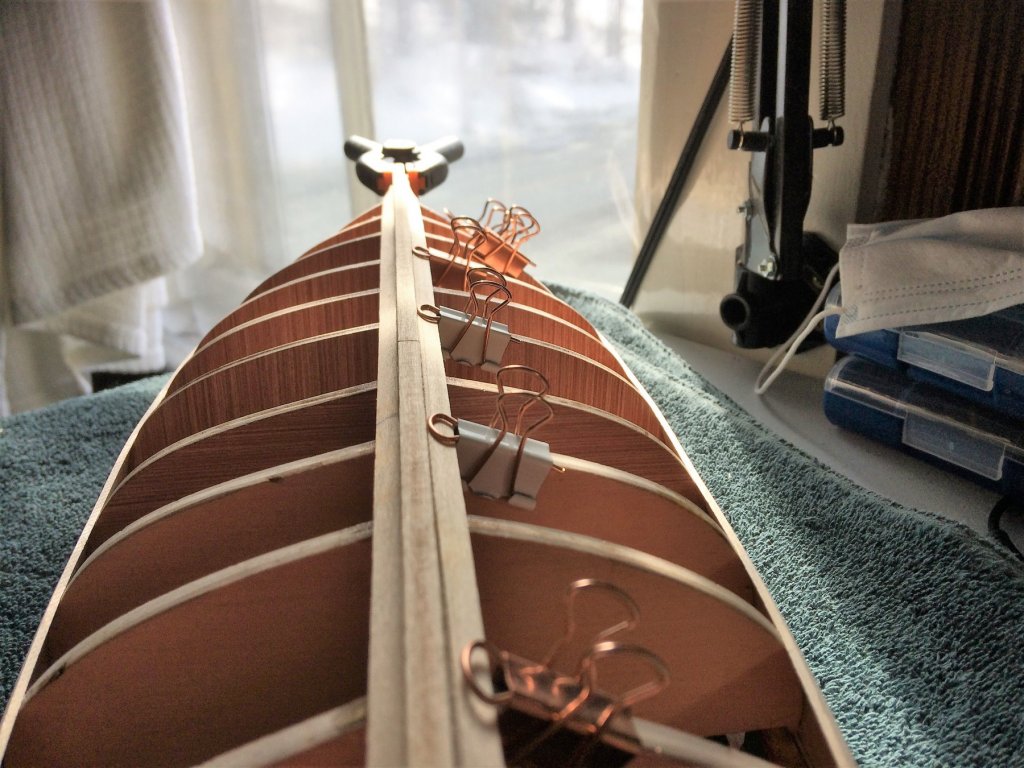
Evening, Another update from the Shipyard. Thought I would update the planking process. Shockingly I'm still at it! I know I know.....sheesh Tom what the!?!?!? Oh well, It was a learning process, Niagara is my first large tall ship. Excuses excuses..... With what was done over the weekend, I should have it done by next weekend, hopefully!!! The below photos don't really show how close I am to finishing. I'm at the point where the clips don't fit anymore and it's just the pins holding the planks. I'm getting to the point where Bands C and D are done, and I'll close the rest up in Band B. Since I never really trimmed the planks properly, I was towards the end after I learned how, I'll have to form and place the remaining planks. I'm ashamed to say its taken me 3 months to plank the hull. I do think I've learned a lot and should show in future builds...….hopefully! I continued on with the Bowsprit. I attached the Bees, with the tiny holes pre made before gluing. The Bowsprit cap is not glued on yet. The Bees will get some more shaping. Used a wood glue for these and they where still drying when I took the pic. There's a brass piece that wraps around the Bowsprit thru the Bees. I do believe its for the Jib Boom (?). Instead of trying to drill out the Bees to accept the brass piece, I'll use a 2 piece approach. One piece on the top, one piece on the bottom. It should "appear" to go thru the bees. Who knows, maybe I'll just drill!! Tom E


-
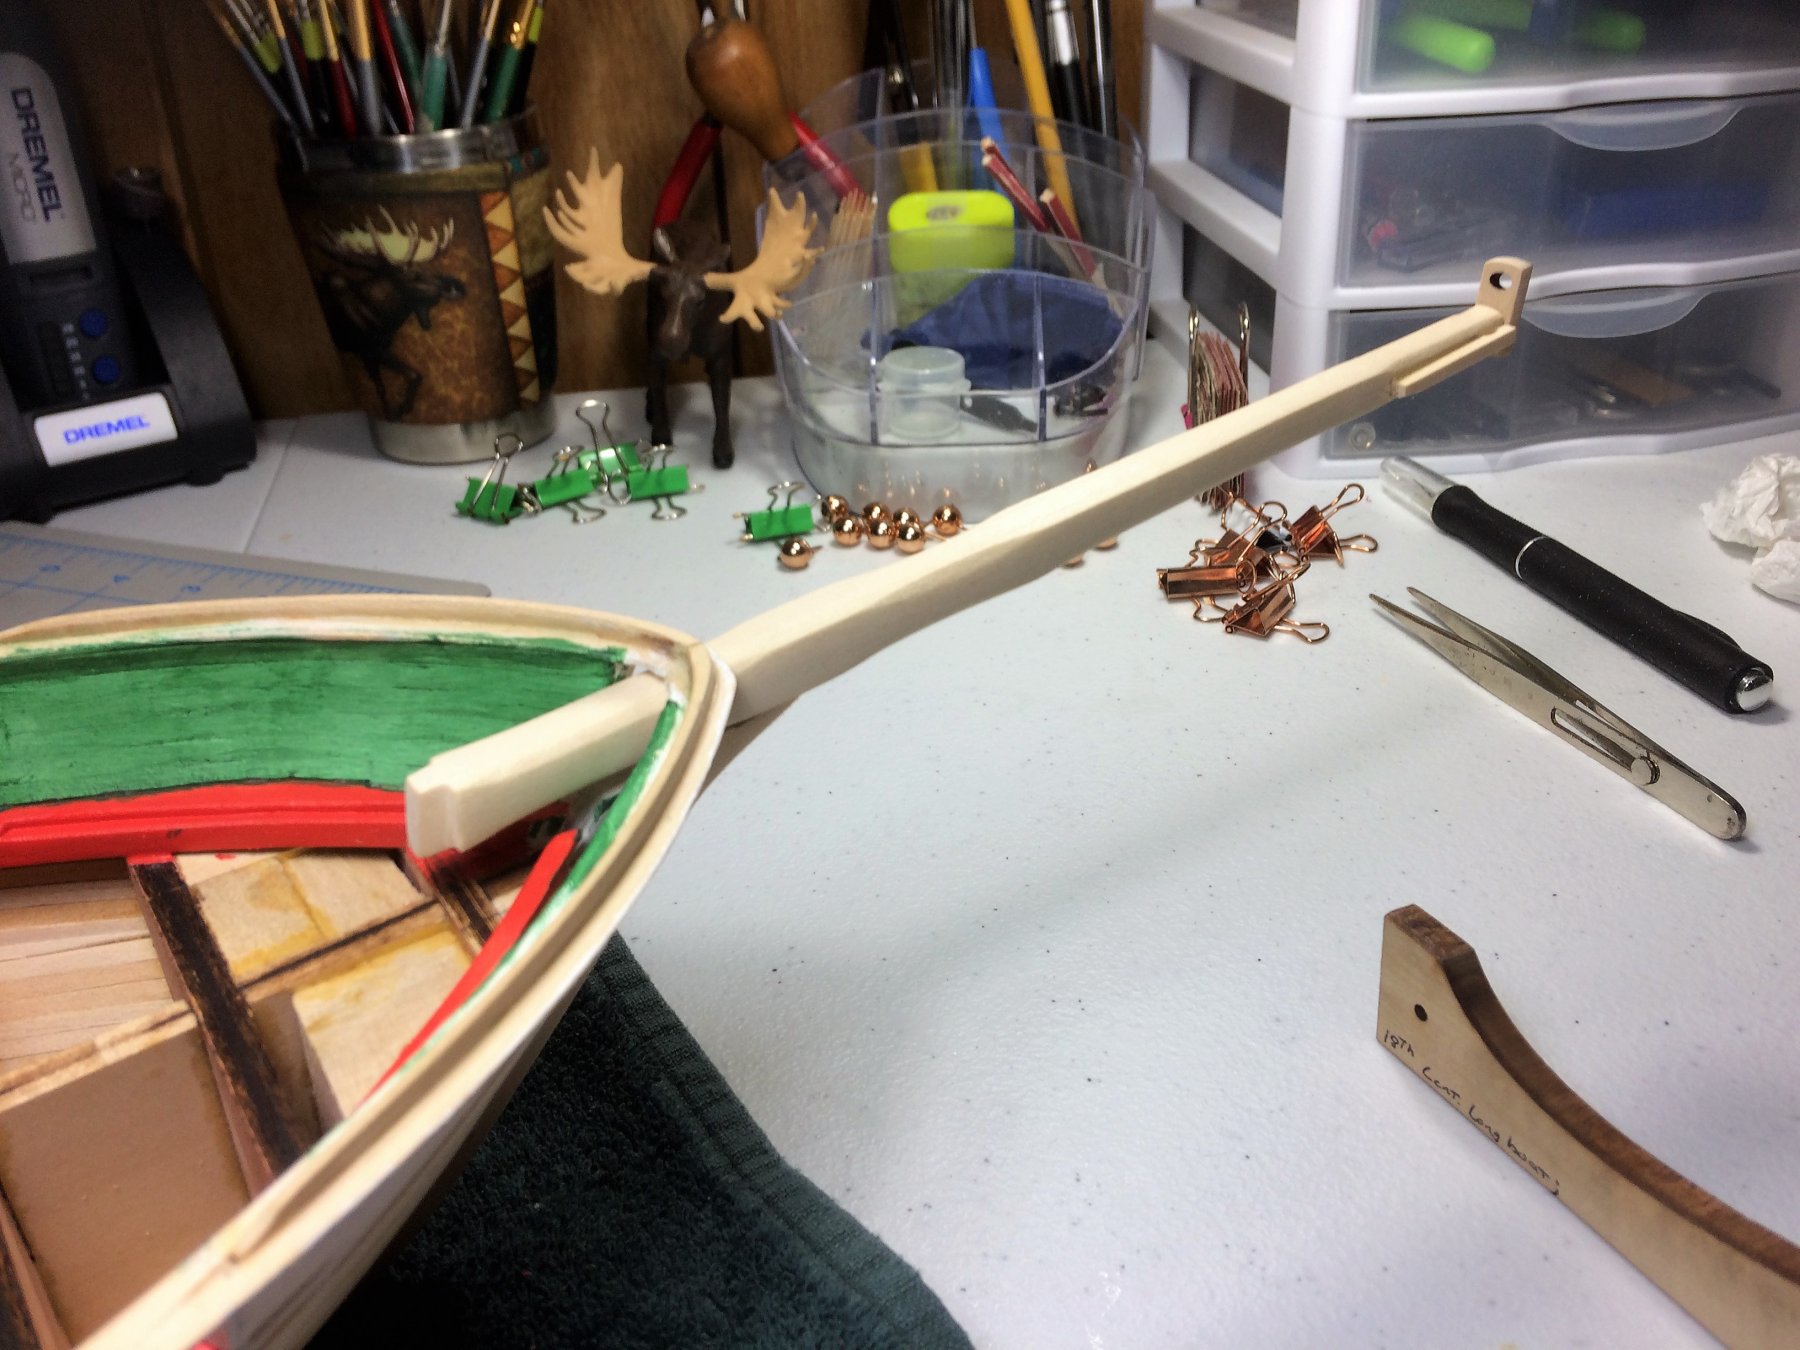
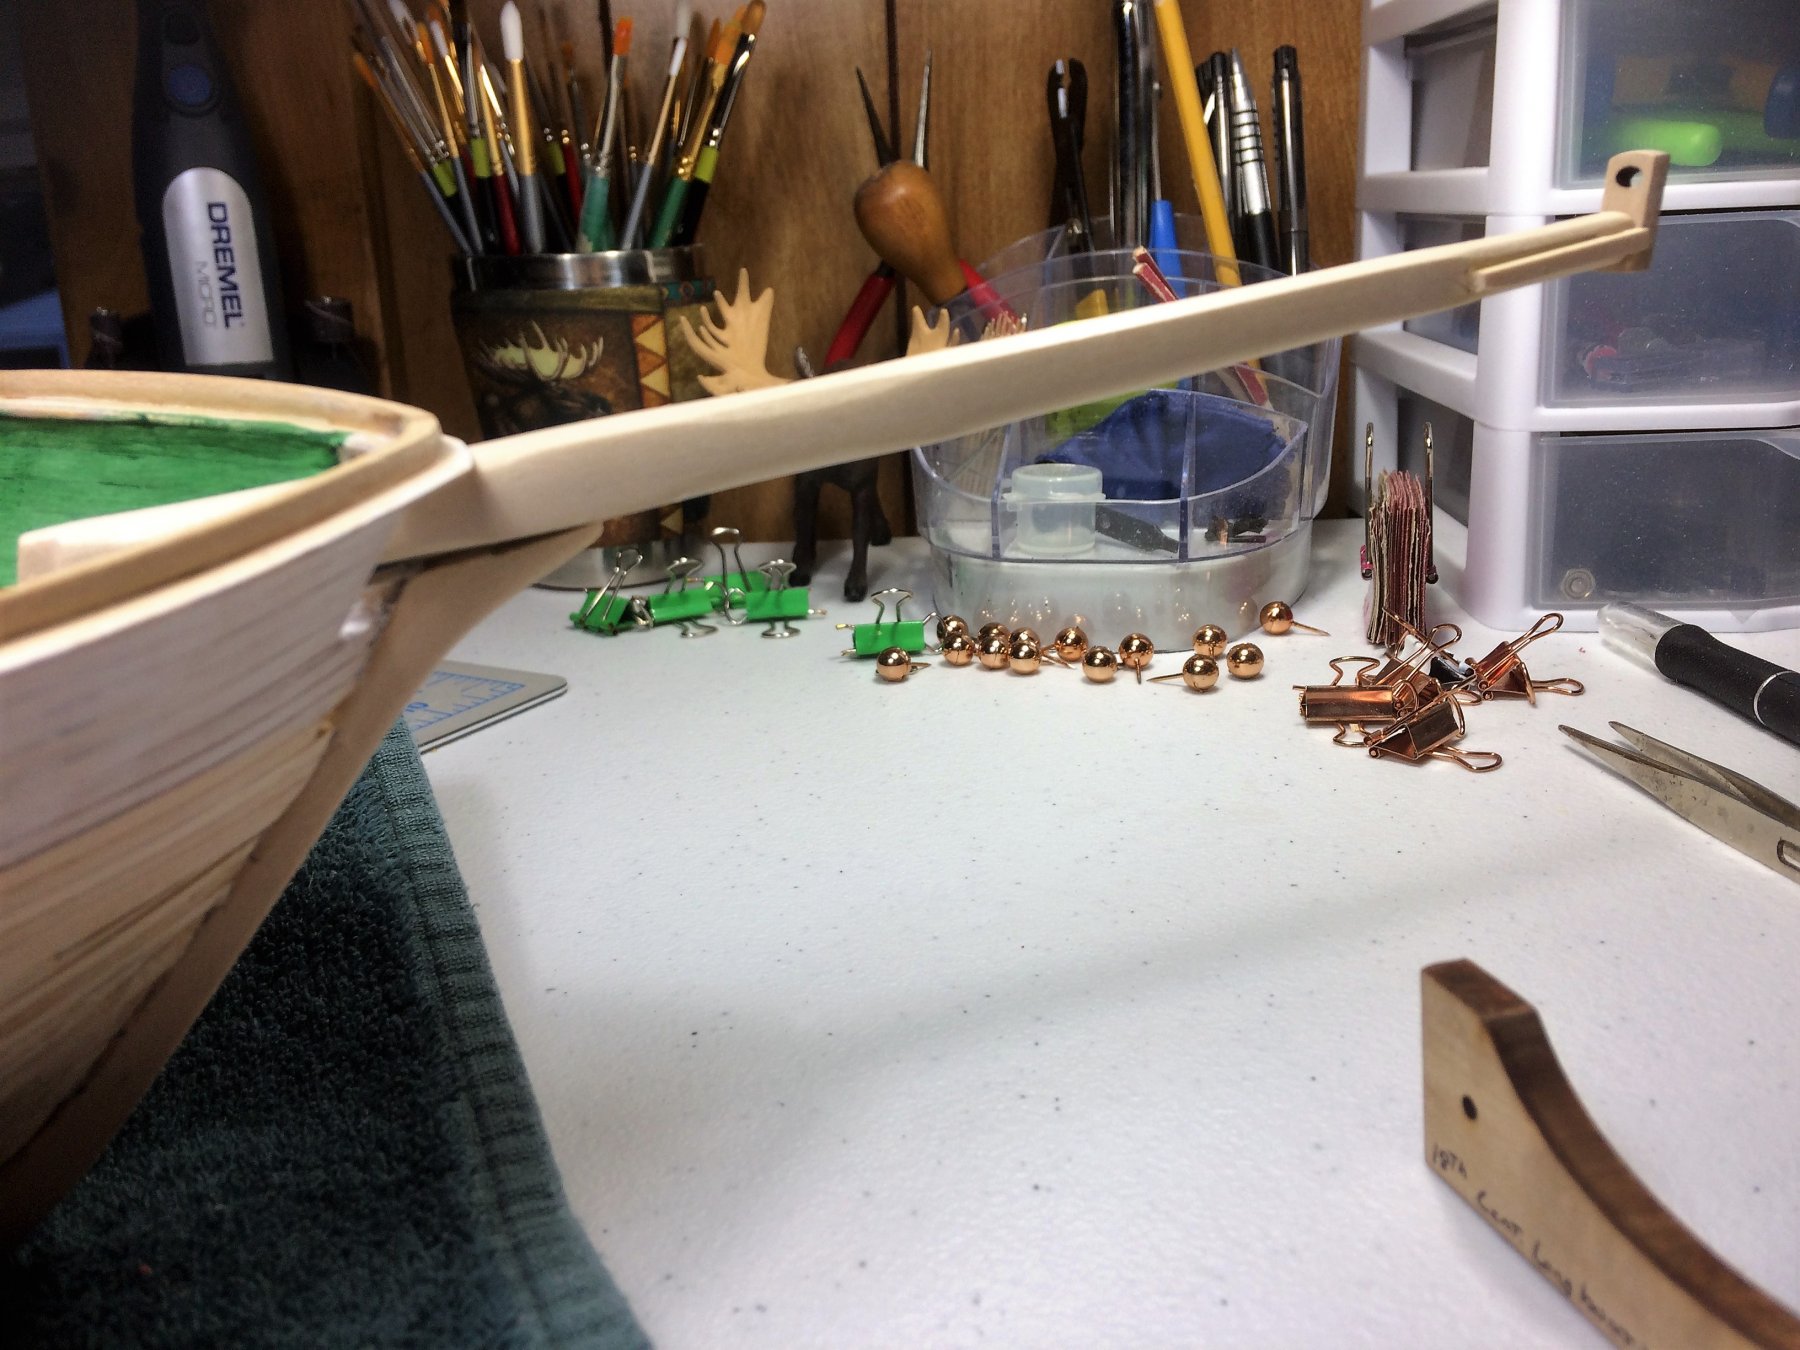
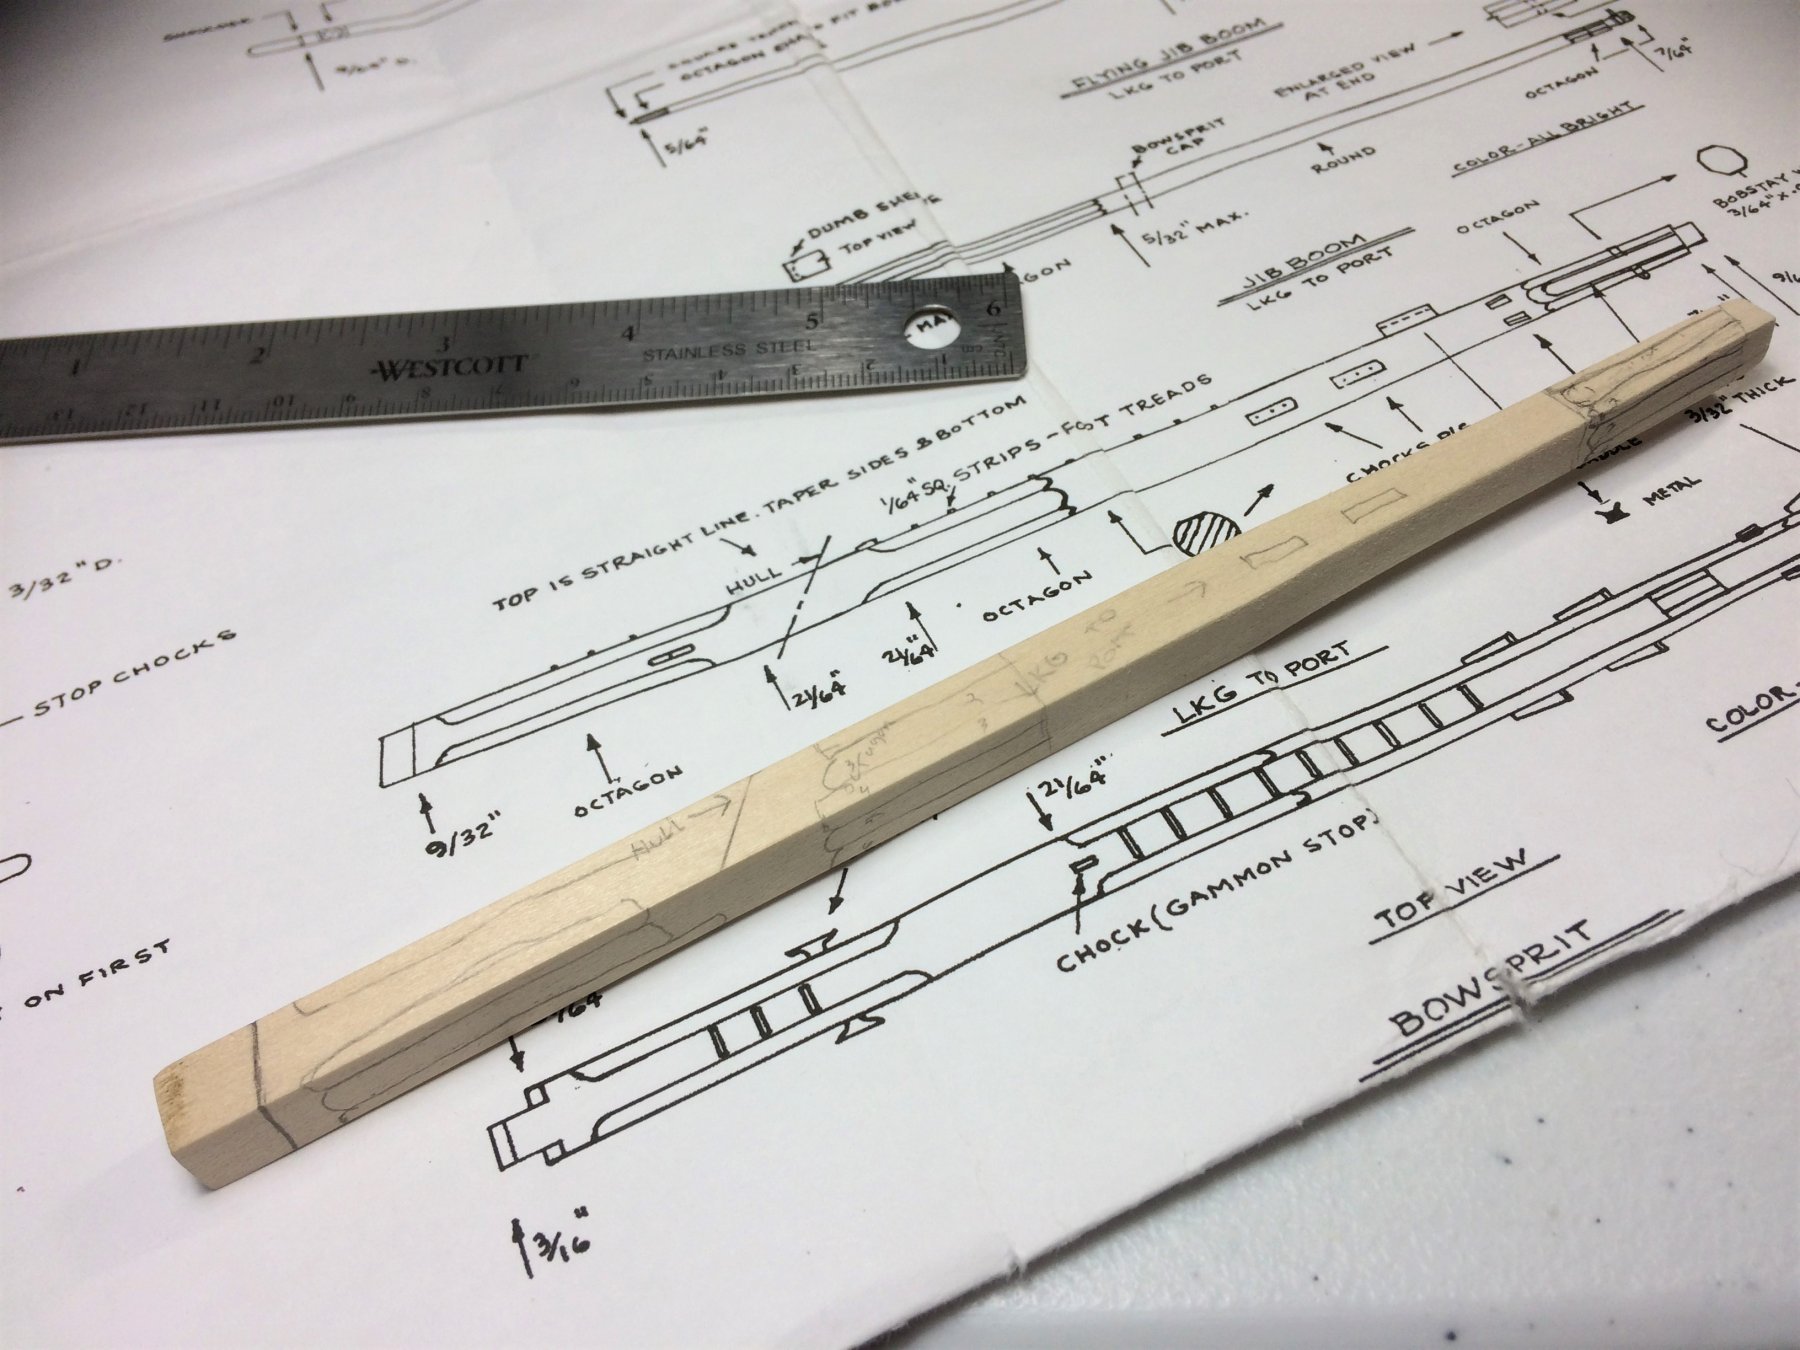
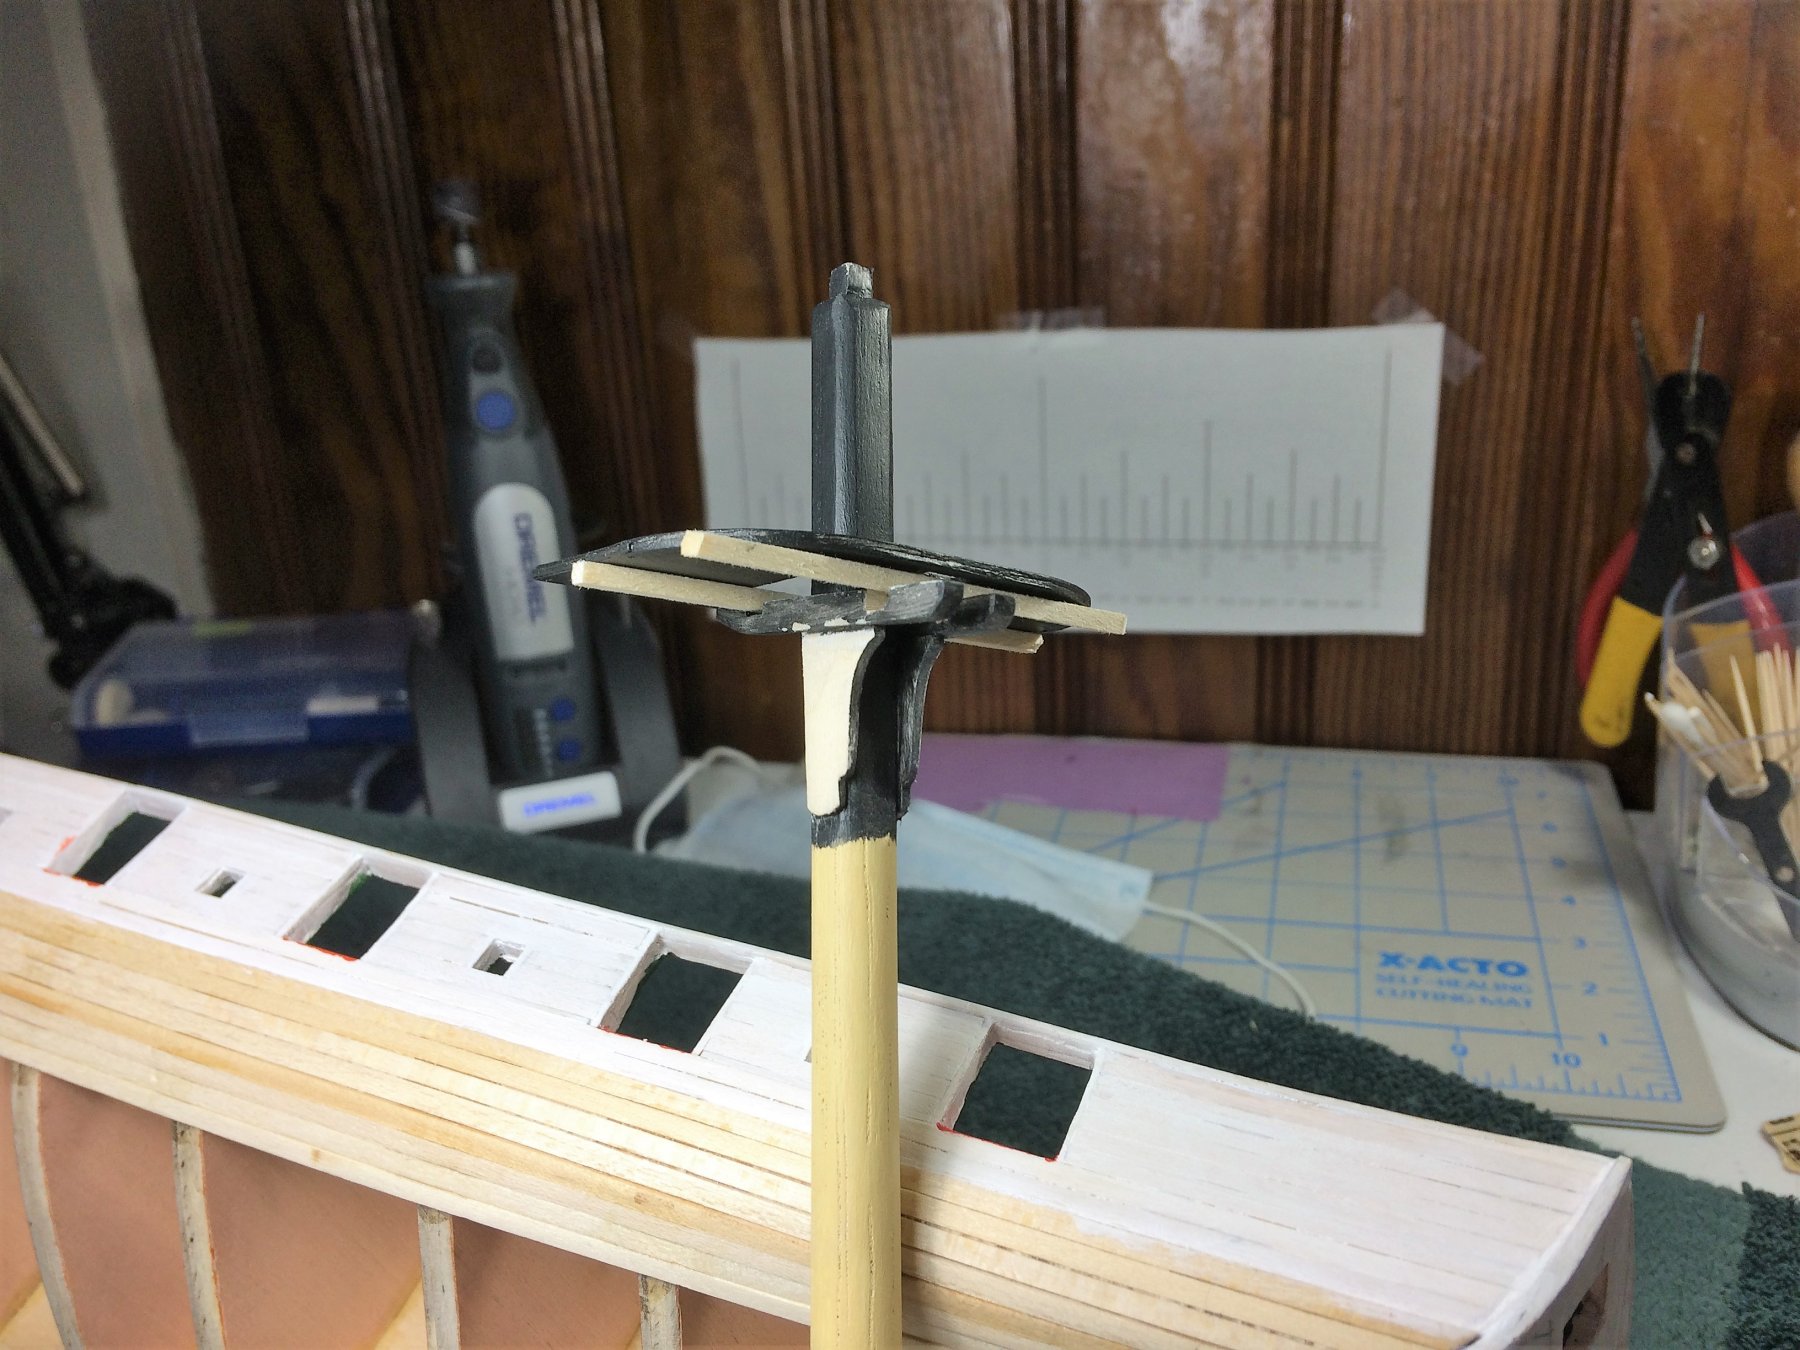
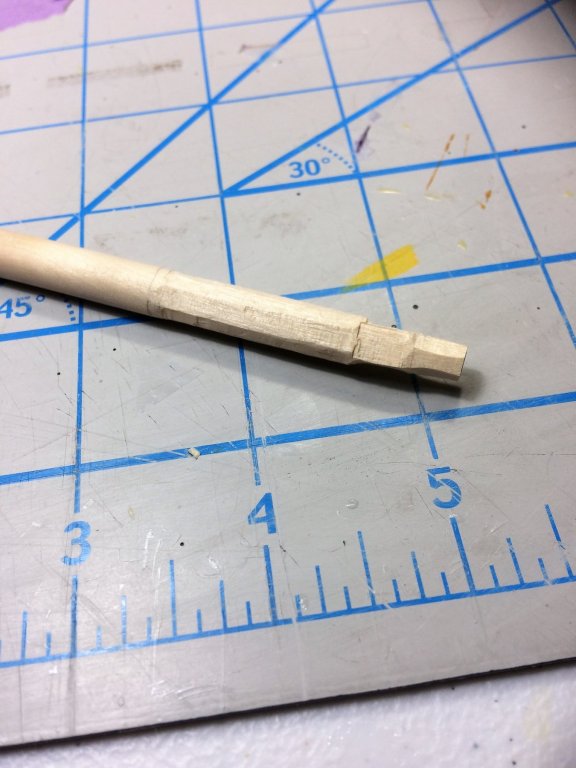
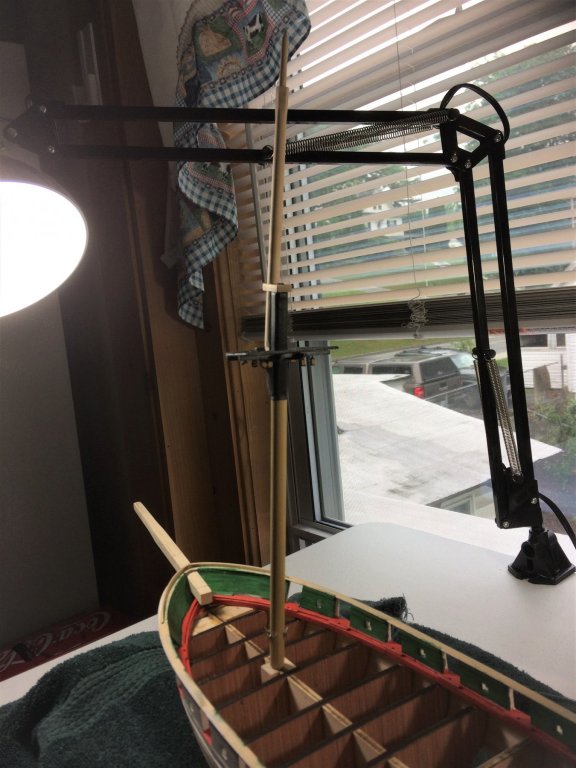
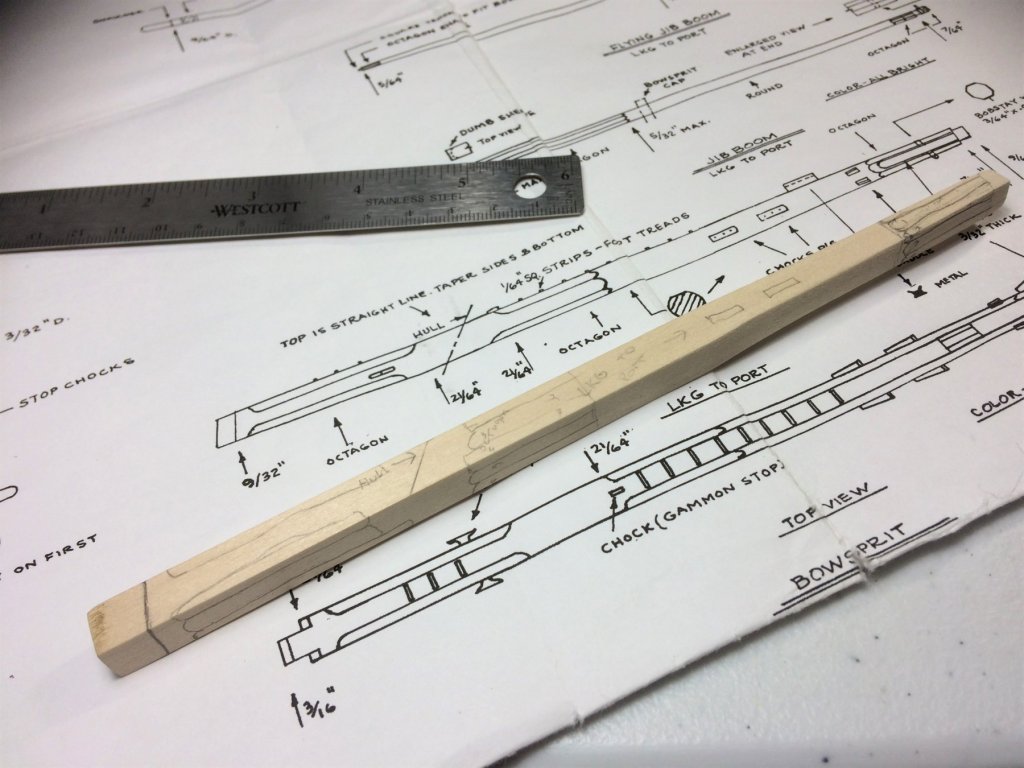
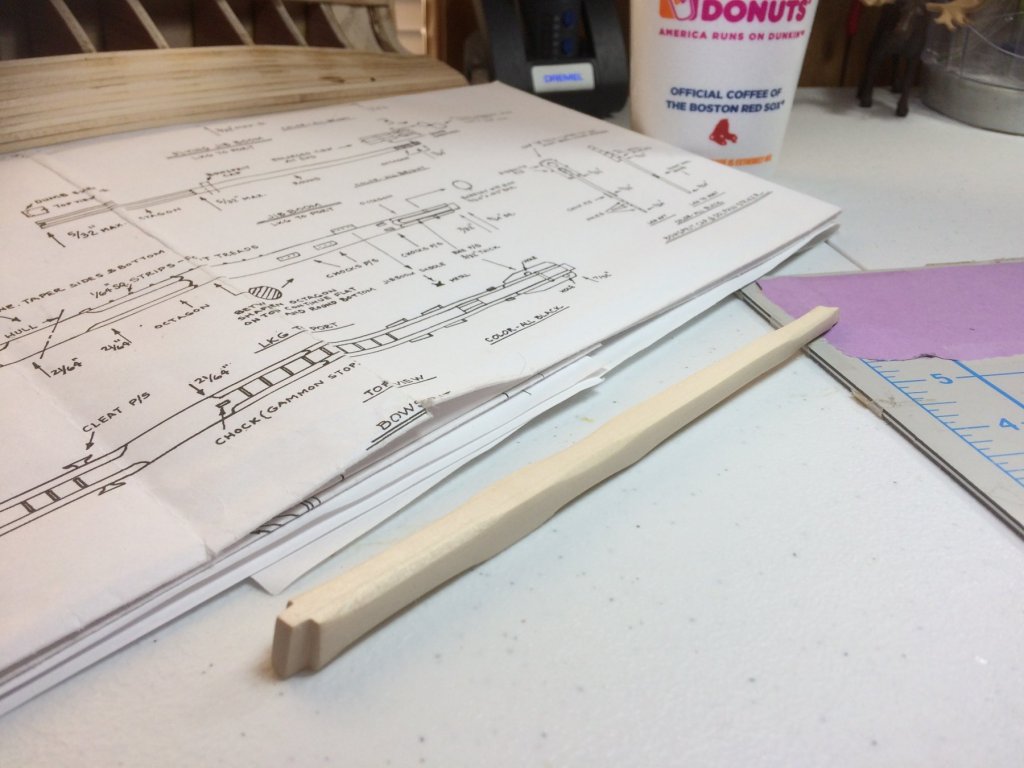
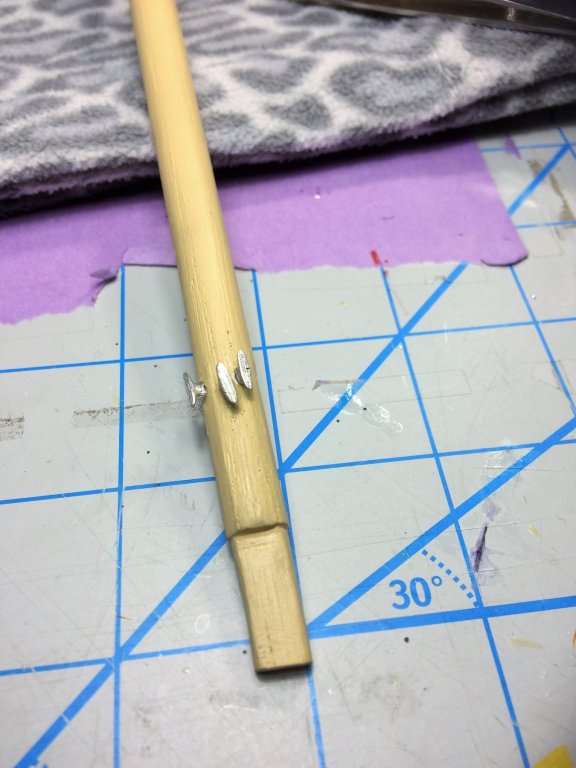
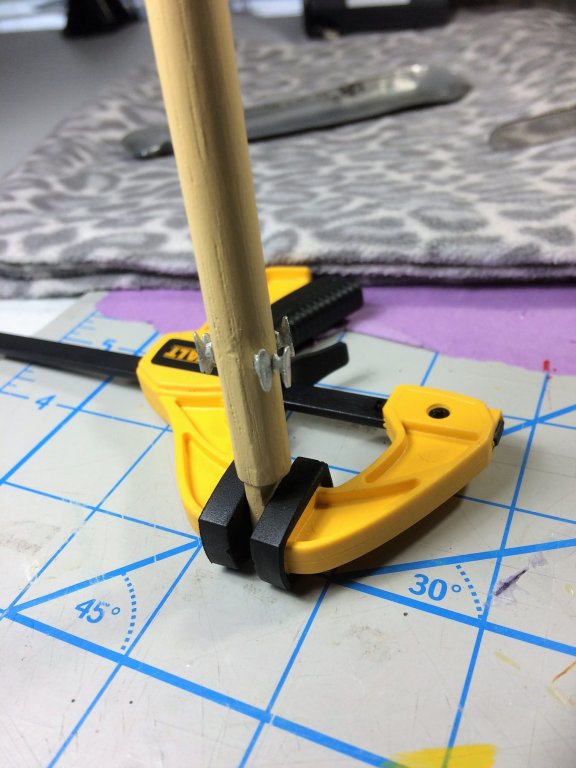
Evening, Time for an update. With things settling down at home, the Shipyard has been busy. Jack, I looked into those cleats and I'm sold. It gives me a reason to place and order. I guarantee there will be some other goodies from Syren with the cleat order! By the way, absolutely loving your Ice boat build. She's beautiful! I see those boats on Lake Champlain most winters. Some have some serious speed! Below, I started carving the bottom of the Topmast. Little bit of a hack job at first, but it sanded up well. It fits well, still needs some shaping tho. I opened the hole in the Foremast cap. Just to keep the Topmast a bit beefier.....but not by much! The Octagon flare at the top is unique to say the least! But, I think I got it with some carving and sanding. She's getting some height! I also marked my Bowsprit for shaping. Reading other builds, I kept a close eye on angles and curves. Eg...the top is flat but round underneath near the front. It was somewhere between the Fore Topmast and the Bowsprit I figured out how to carve! Of all the pieces I have built for this ship, the Bowsprit came out the best so far......I think. Might have been fueled by the large Dunkin Donuts coffee in the background..... The cap area will be shaped to receive the Bowsprit Cap. Mike, In the back of my mind, I still remember you saying don't attach too much or you wont get it in. So I'm holding back on footsteps, cleats, and the like until the very end. Tom E


-
Count me in. I'm building the same kit and still learning this craft. Will follow with great interest. Tom E
-
So happy to see a Bluejacket Connie! I've always been impressed with their kits. It's on my "wish list". Looks great! Tom E
- 104 replies
-
- 2
-

-
- constitution
- BlueJacket Shipcrafters
- (and 1 more)
-
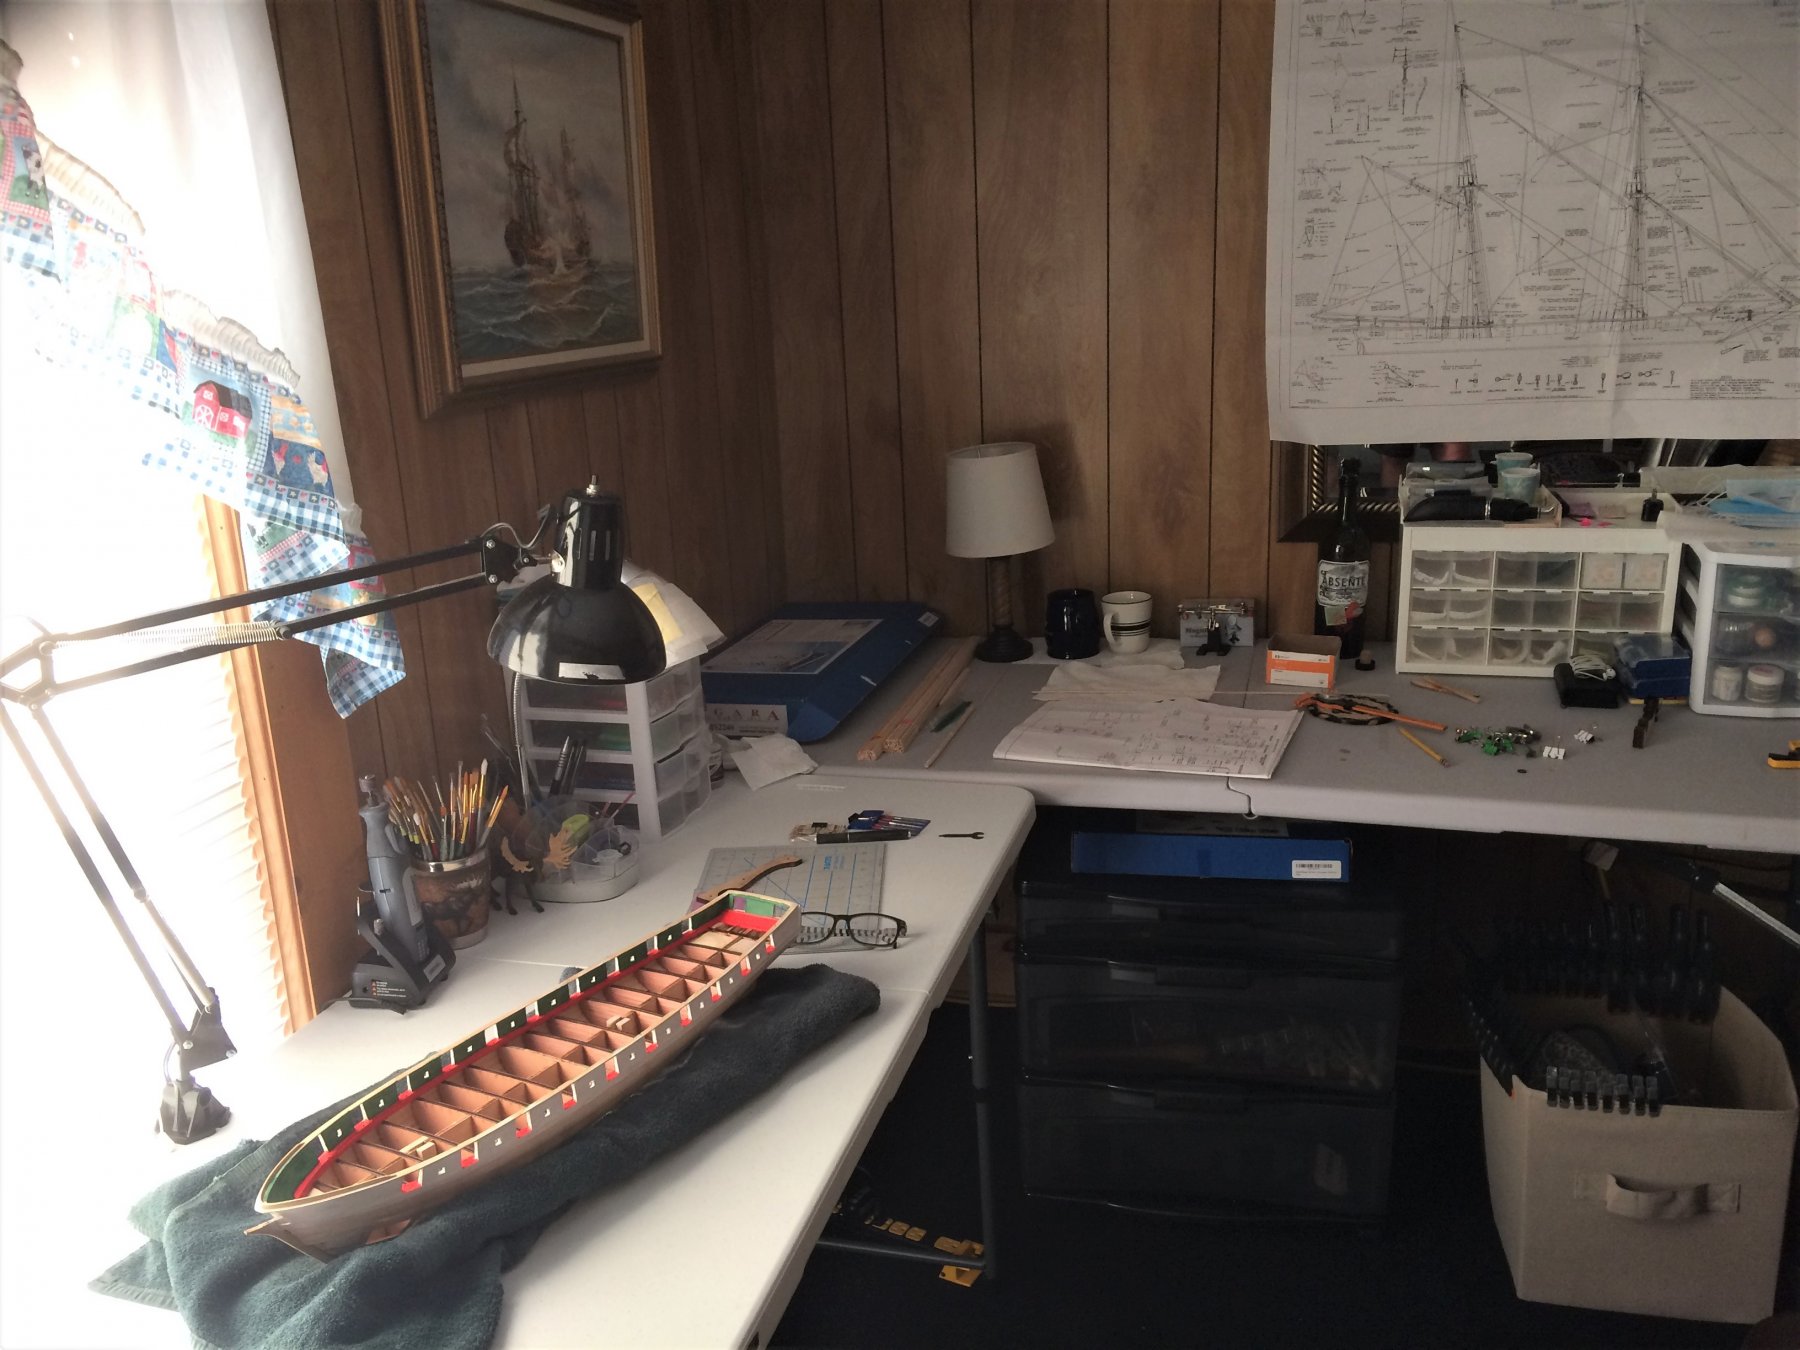
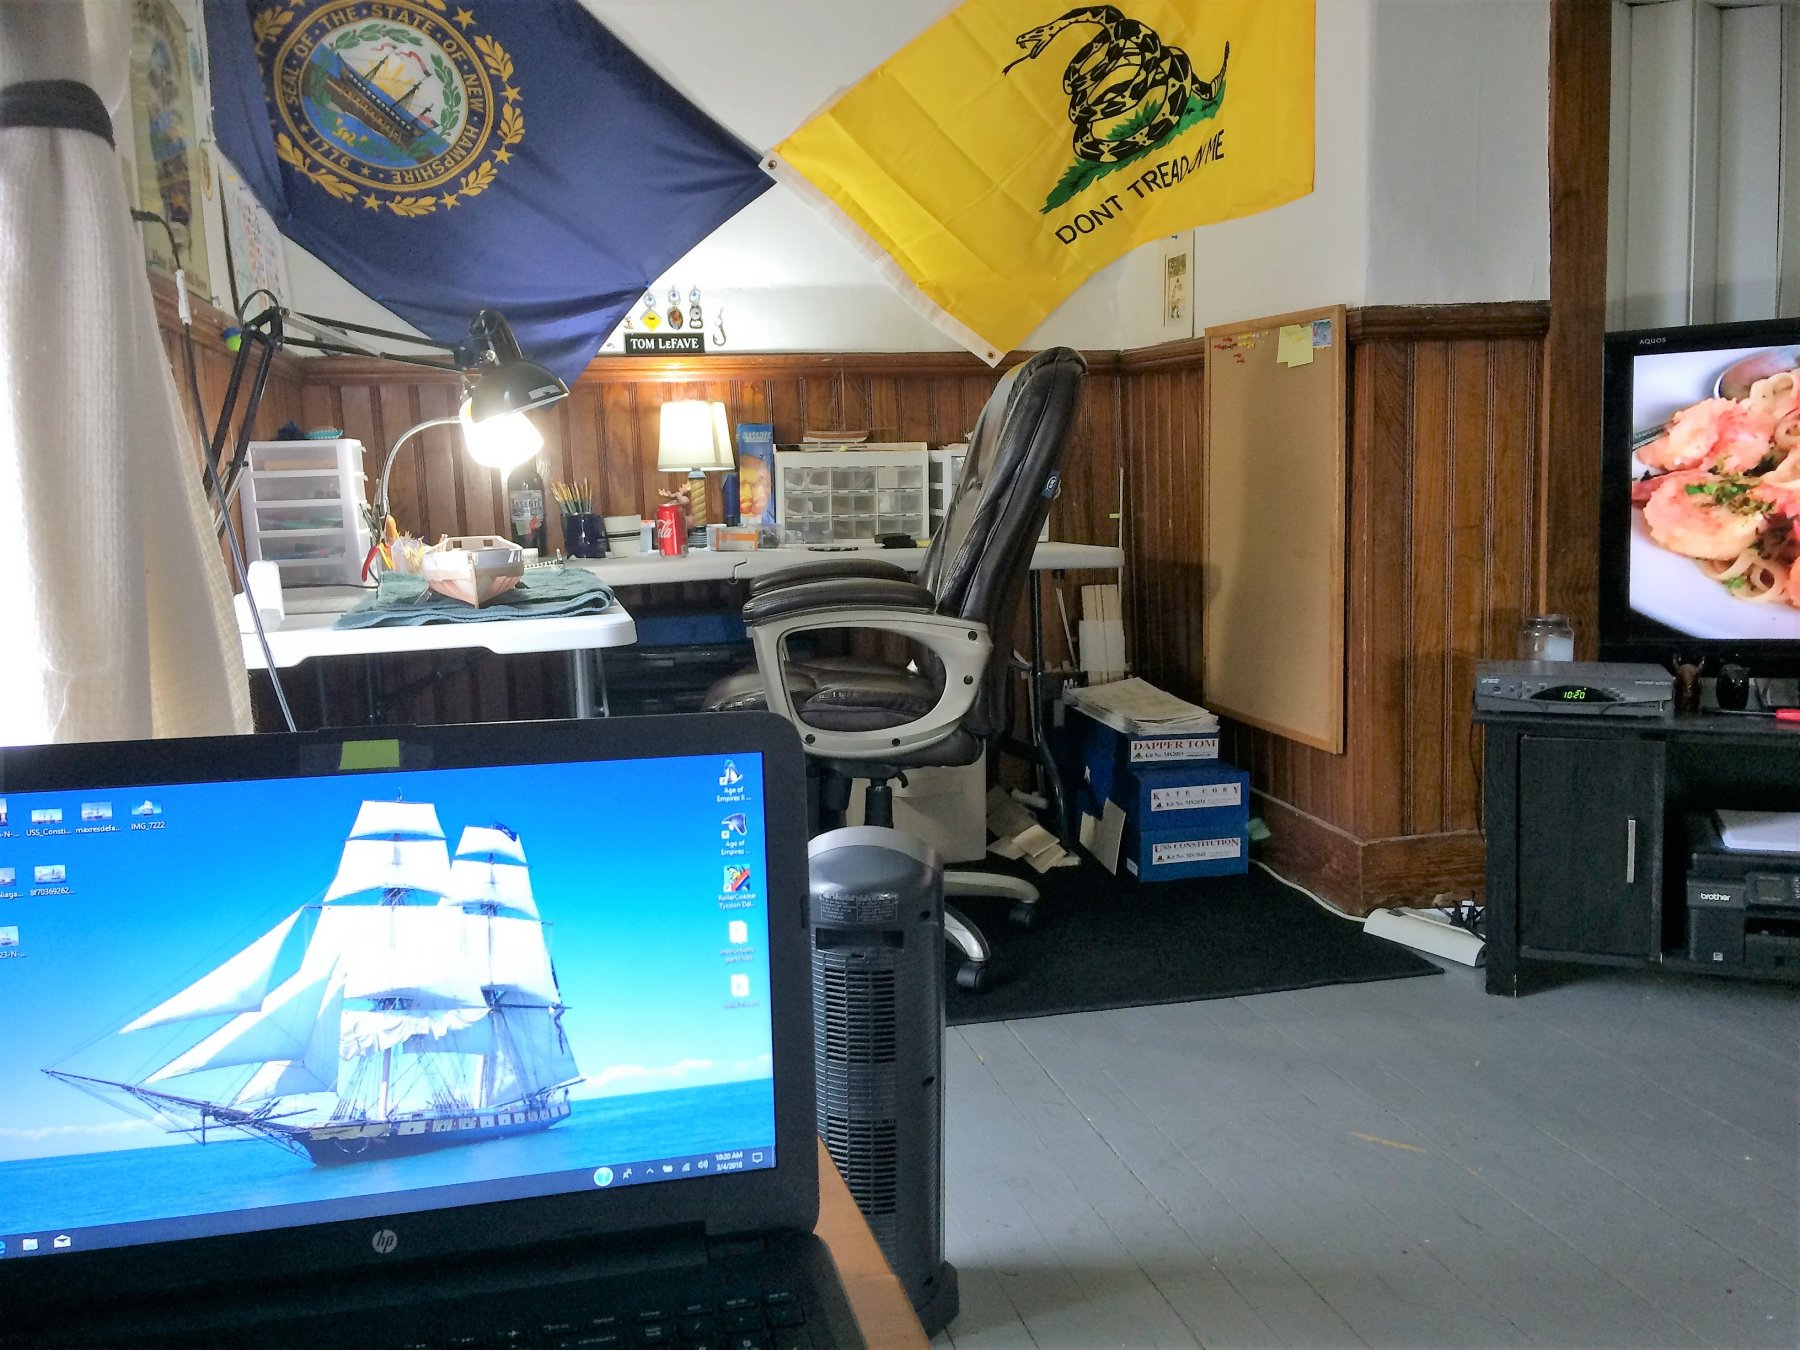
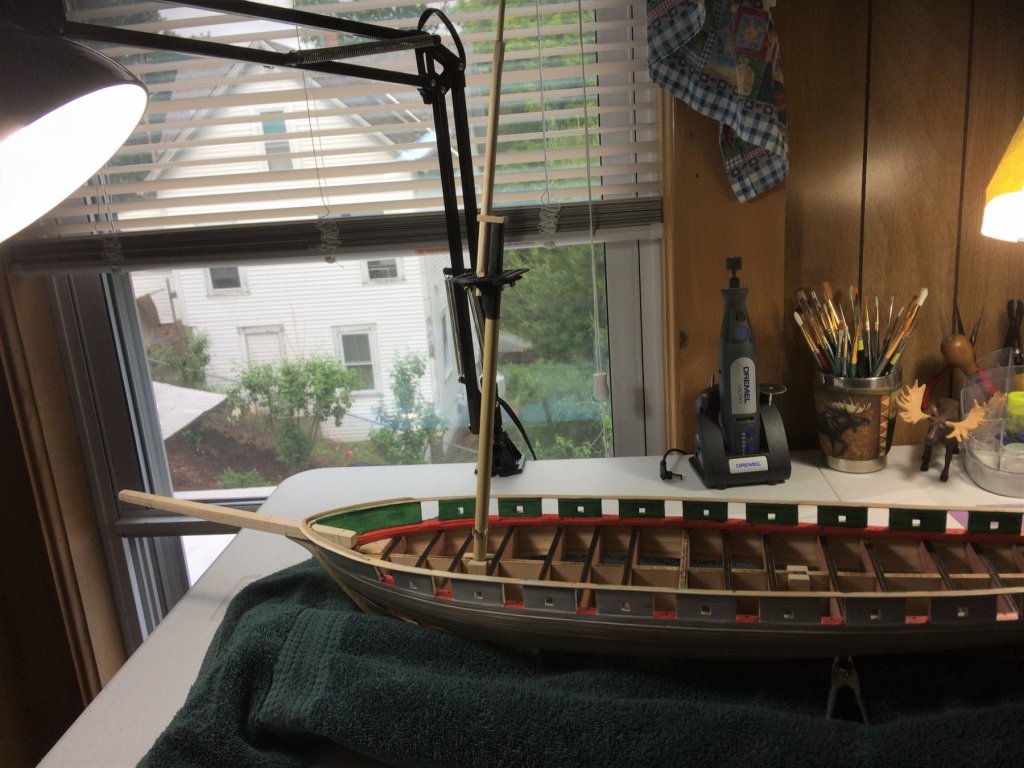
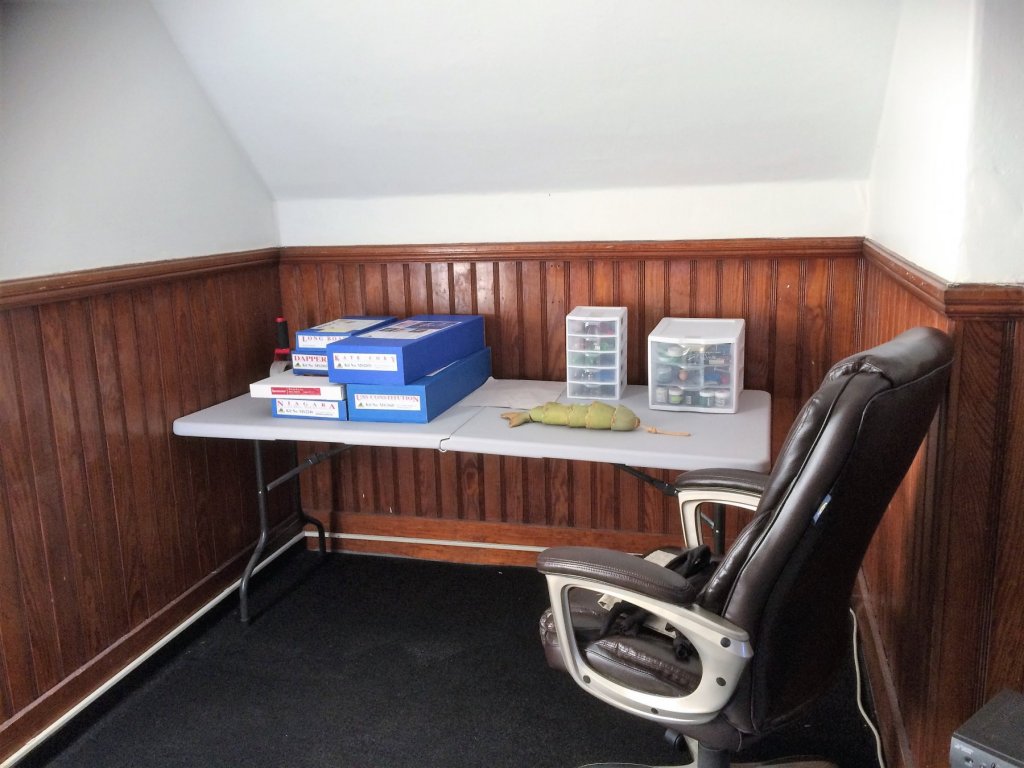
Evening. As they did with the original Niagara, time to raise this build from the bottom of Misery Bay! That's what it kind of feels like. I hate moving. My shipyard has moved 3 times as other things found there place in the new apartment. As seen below, I have found a nice back room that should serve me well. Time to flex some modeling muscles! Sheesh I missed this!!!!!! Its a place to build and store some of my Knick knacks. Below is the current state of affairs as of today. Just to ease myself back into things I focused on moving forward with the Foremast and Top mast. Planking is almost done, but my focus has been else where. The Bowsprit will be carved soon. Niagara is starting to get some height with the Fore Topmast. Starting small, I hung some 1/8th double blocks underneath the cross trees. Looking at the plans its 2 blocks per each side of the cross trees. The Main mast has a row of single blocks on the inside row, and doubles on the outside row. Yet, I've seen some examples of 3 blocks being hung underneath. Am I missing something? I stropped some Syren 1/8th doubles with rope supplied in the kit. It should serve its purpose. I'll save the good Syren rope for other things more readily visible. Attaching eyebolts to each block, I drilled an appropriate sized hole for the eyebolts. The cleats went on next. Should these be painted black? Ahhhhhhhhh…….its good to be settled in the new apartment. Let the building resume!!! Yet so much reading to catch up with tho! I follow sooooooooo many builds and strings! Tom E


-
Hi Mike, They are residential with apartments. Very common practice up here to have the house and then an apartment to rent. Where I live is an Ivy League college town. Dartmouth is 5 minutes up the road in Hanover NH, I live in Lebanon NH. That means there are plenty of rentals. And not your typical college town rentals either, these kids have money. In my case I live above a business, a Gun shop (Welch's Gun Shop). The owner/landlord lives here as well, great lady. She's been in the gun business in some way for over 60 years. She started as a kid loading shells for her Dad. Most of the area buys supplies from her, all the cops do! Tom E
-
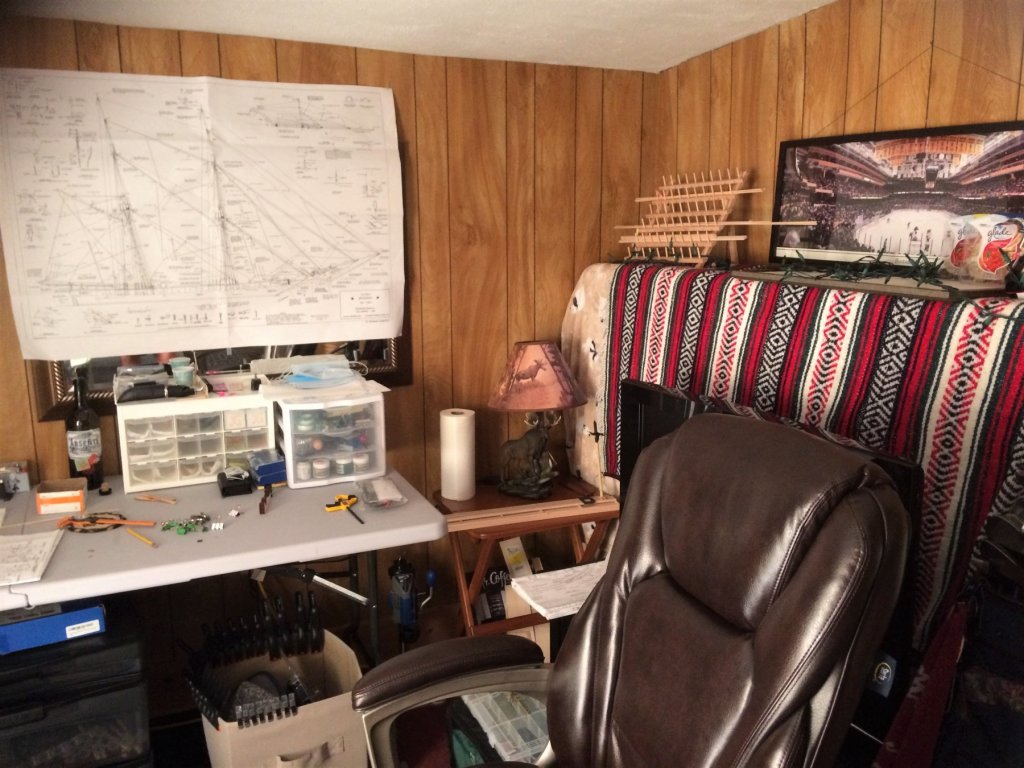
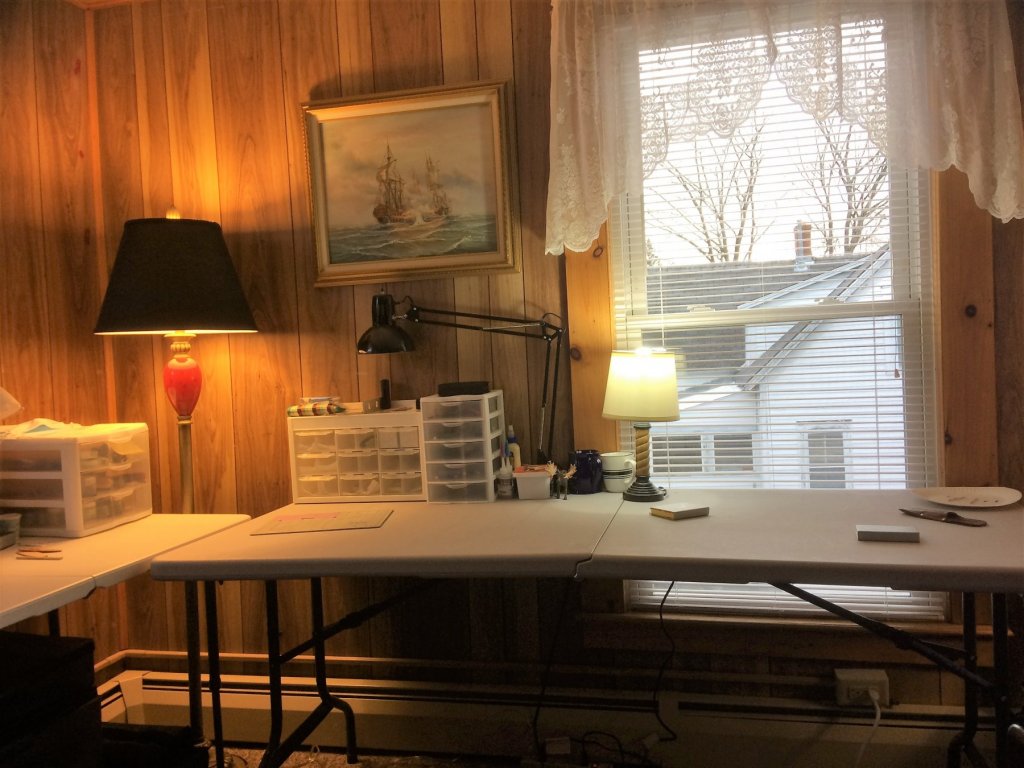
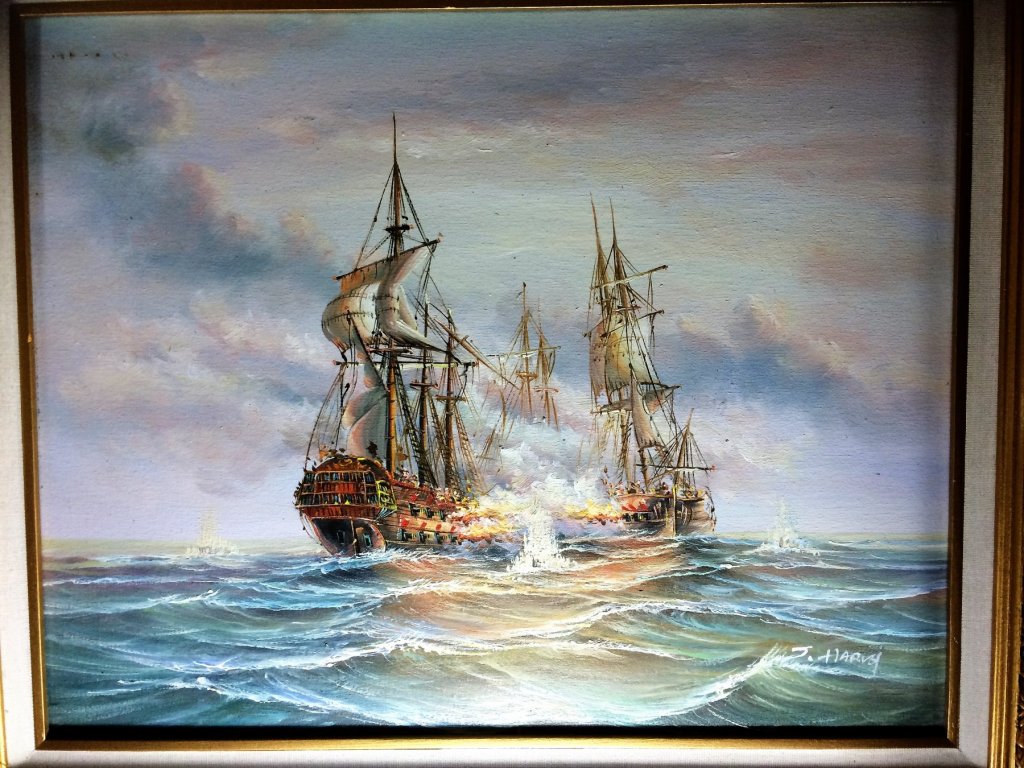
Evening, It is soooooooo good to be back at the Niagara. I've got a lot of reading to do to catch up with all that I "follow". Last I updated I was in the process of moving. Not moving from the colder climates, don't think I could. I'm a New England kid, always have been, always will be. Honestly, It was the easiest move I have ever done. Only 2 doors down from where I was. The big difference, heat and hot water are included in the rent. So hopefully wont be shelling out close to $500 per month for oil during the winter. Below, the old Shipyard. Now onto the new Shipyard. Lots of space and great light! The apartment came with the below painting. There are no names on the ships, so I have no idea what it is depicting. There's a name of J. Harvey on the bottom right. Looks like something you would find in a souvenir shop at the beach. I like it and moved it right above my main build table. Anyone recognize it? Also, today had to be one of the nicest spring days we've had so far. Beautiful sunset. T-storms came thru light night, cleared out the humidity. Cool and comfortable. Pink sky at night, sailors delight! I should have a build update soon. Now that most things have found there place, time to resume planking the hull. Tom E


-
Evening, Thought I would check in. Been a while since I last posted. Absolutely no building has been done. The entire Shipyard has been temporarily shut down. I'm in the process of moving to a new apartment. Its killing me that I have made no progress! I miss the smell of glue and paint! Oh well. Below is the old Shipyard. Had it just the way I wanted it. Hope to have the new Shipyard up and running soon. With what I have in mind for the new place, It should be pretty sweet. Tom E

-
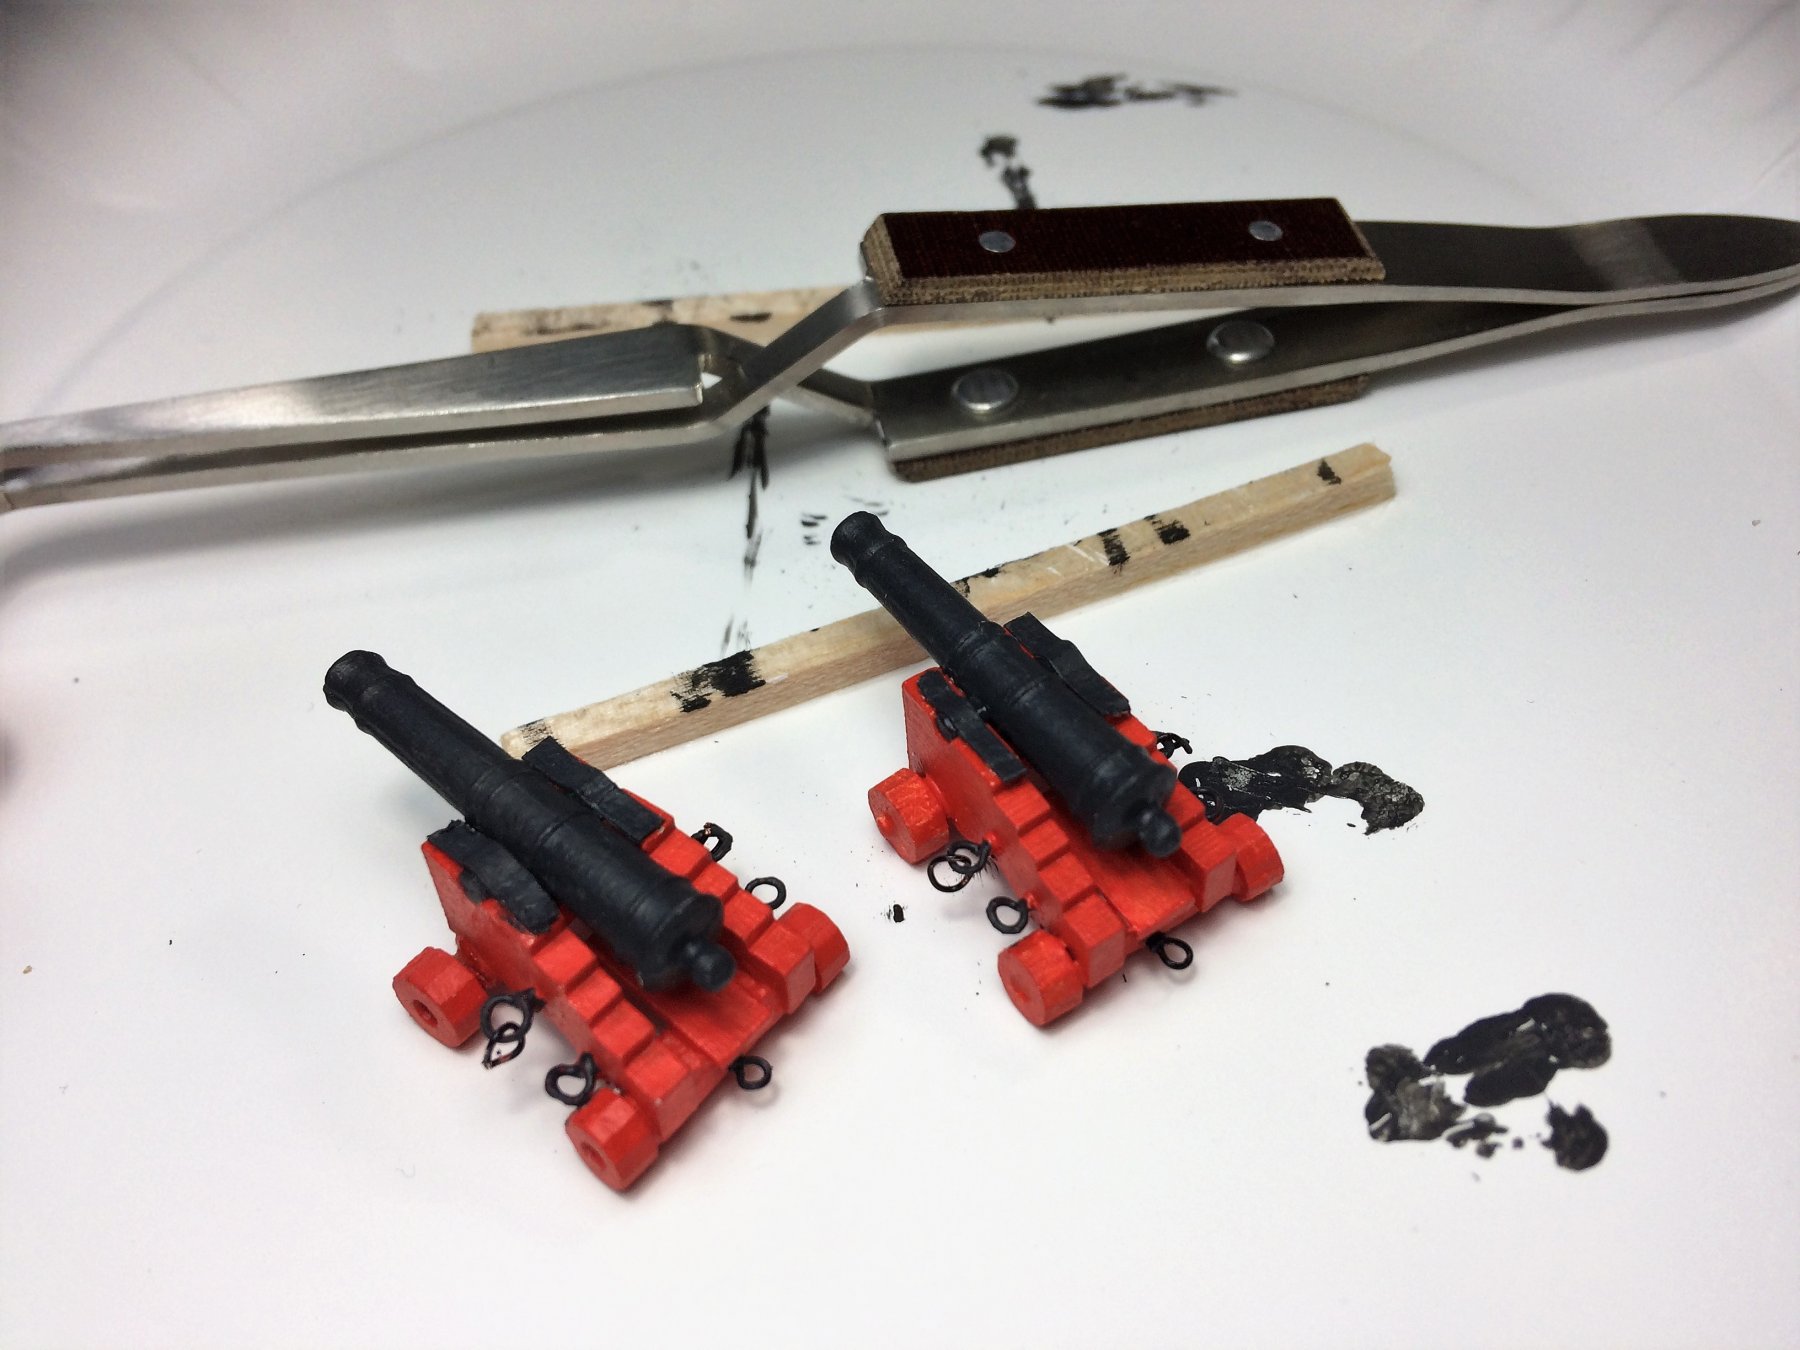
Evening, Time for an update, albeit not much. Planking continues. Man, there is a lot to learn while planking. I know, I'm not thinning the planks enough from the bow. There's a "learning experience" heading right at me somewhere later. When the planking is done and I clean up the edges at the Ceiling, I'm thinking about "beefing up" those fashion pieces. They look tiny with rough plank edges. I will wait until after the hull is done. Lets see what they look like after all of that. There's some waviness to the lay of the planks, but not bad. There is a pleasing flow to the wood. Not bad for a rook! On a side note. I made my first Gun Tackle. Using 3mm hooks, a 1/8th double and single block with 0.012 Tan rope all from Syren. This stuff is so cool! It took most of the morning, but it was pretty fun working with real rope and great looking blocks. I know I didn't darken the hooks, the others will be, but this one I'm gonna let go as is. Can these hooks be darkened chemically? I was thinking of trying Jax Metal Finishing Solution. I can see paint flaking right off these with handling. Tom E


-
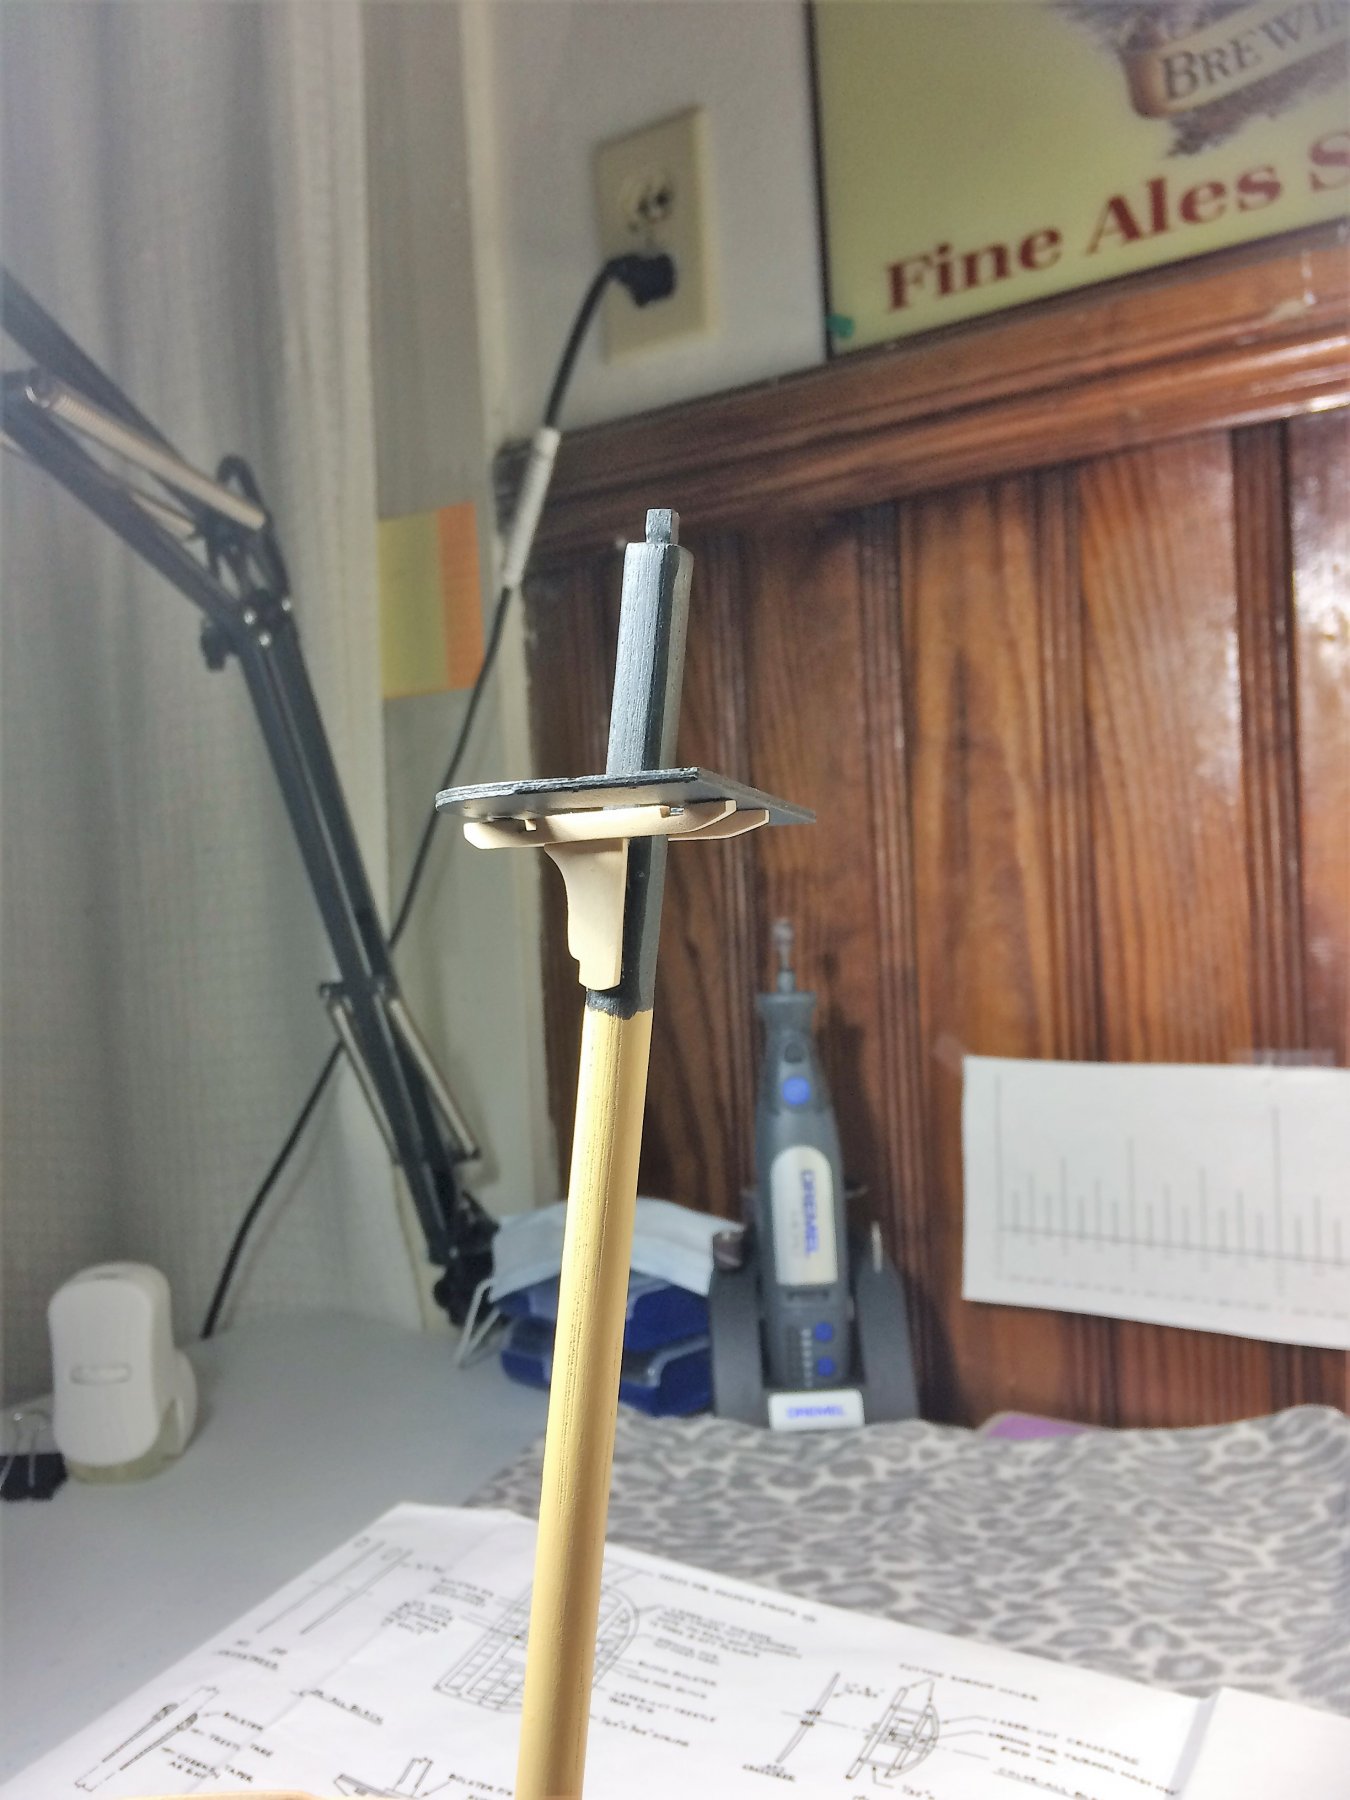
Evening, Hope everyone is well. Been a bit for an update. Not much to show, mostly planking, planking then more planking. Plus some side projects to keep me busy. I have 3 planks installed for Belt D, after the third one was installed I started Belt B. Do a few in belt B then 1 or 2 in Belt D so they meet towards the bottom. I'll clean up the edges after all planking is done. Slowly closing up the hull! Slowly...... I started the Cross Trees for the Foremast Top. Below is the rough cut, they'll be cut to shape after I can seat them easily in the notches. Mike, I took your advice and sanded down the cheeks. Enough, but not enough to look too thin. I also started shaping the Sling Bolster and the Port and Starboard Bolsters. They look a bit thick in the pic but they have been sanded down. Nothing glued yet, just tinkering. Tom E


-
Wow! What a beautiful ship! Hope I can achieve even half of the craftsmanship you've demonstrated. Tom E
- 648 replies
-
- 3
-
-
- niagara
- model shipways
- (and 1 more)
-
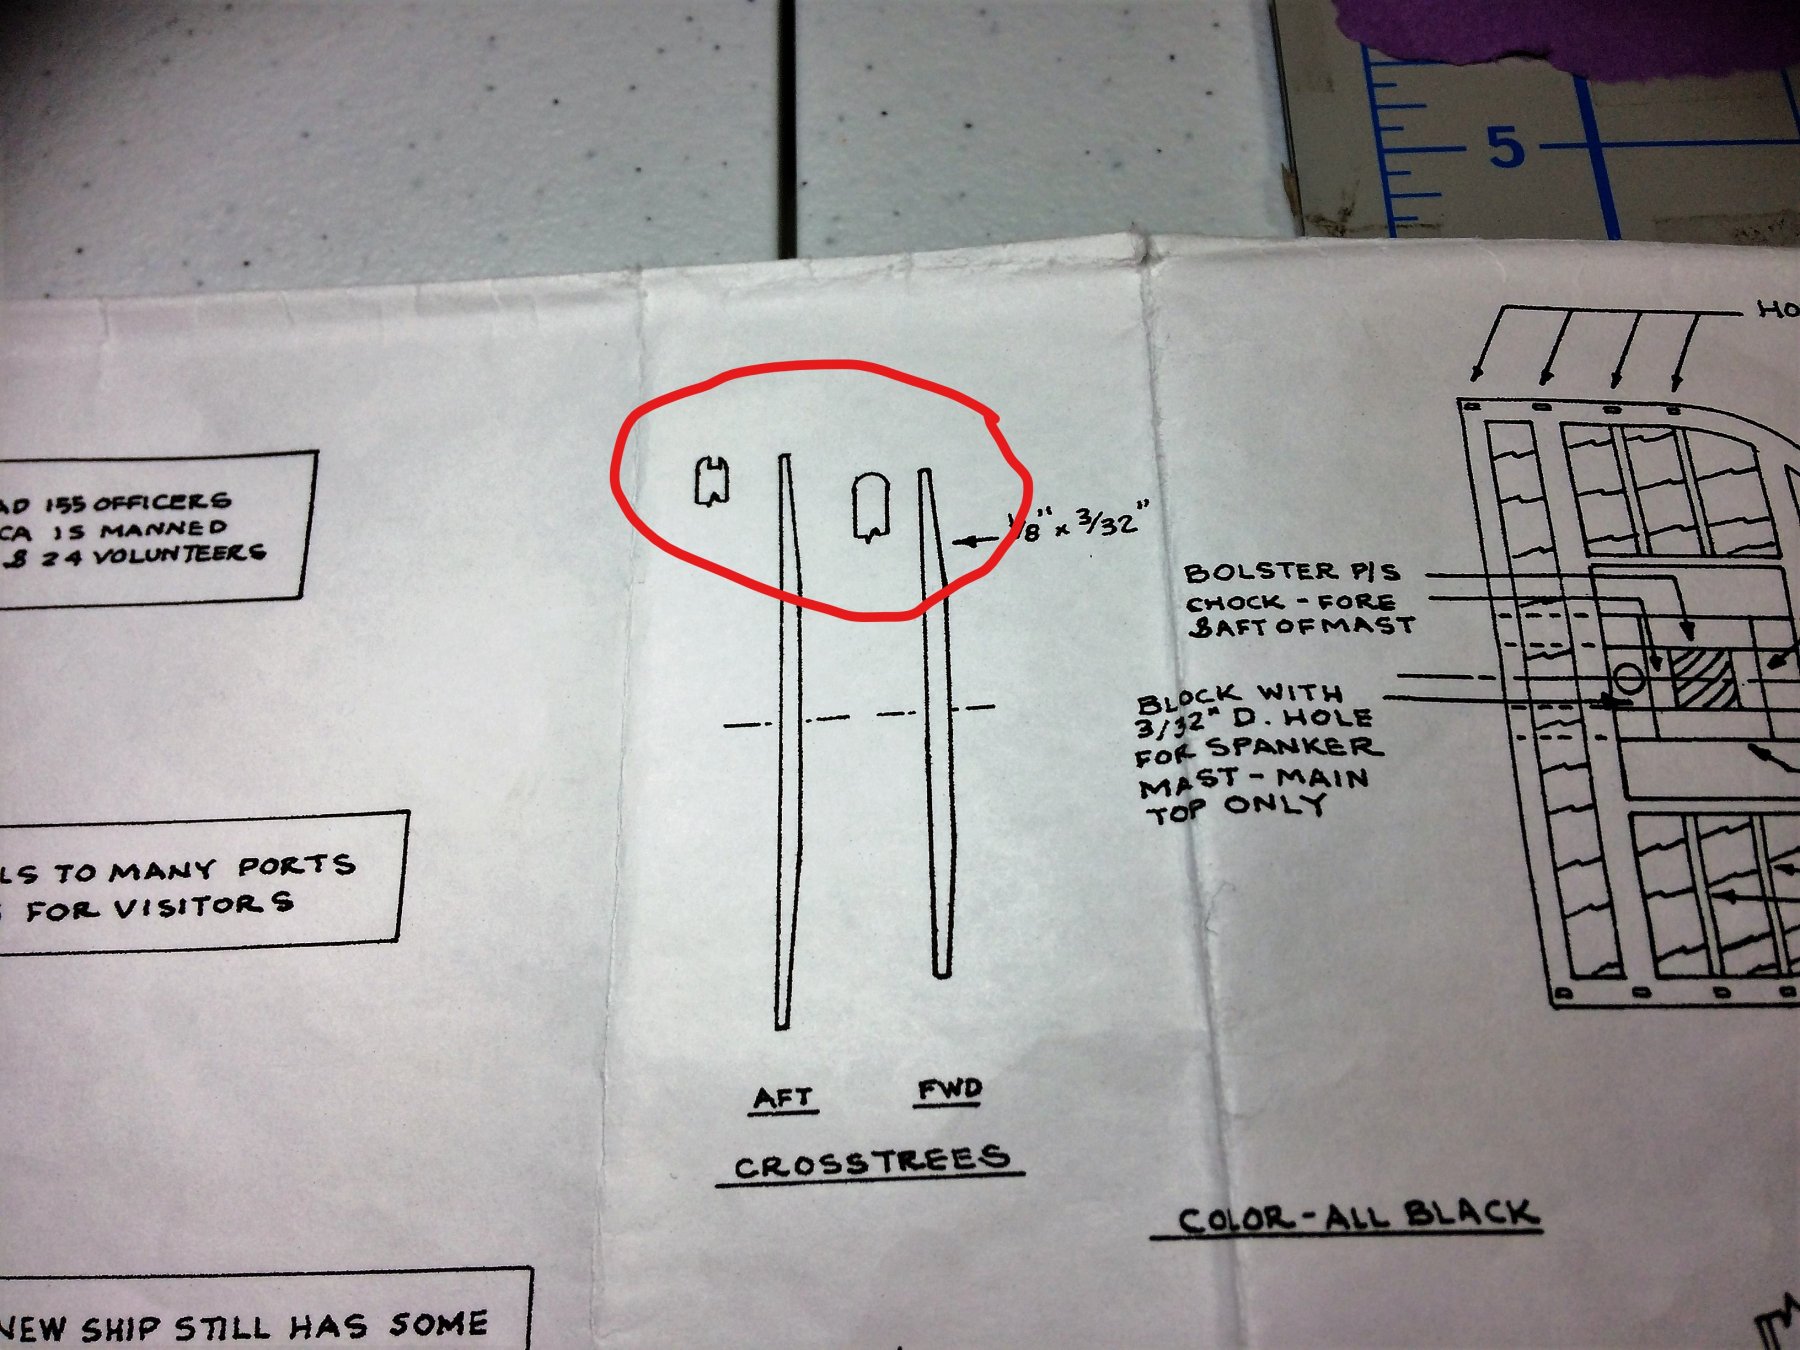
Its on sheet 4 (Hull and Spar Details). As I interpret it...... All of this based of the dotted "centerline" drawn thru the Cross Trees and the drawing of the Top its self to the right. It has a dotted centerline as well. It looks like there being shown as if we were looking from the top as they lay underneath the platform. On the forward Crosstree no slot. The aft one has a slot, that I interpret as straight up and down, not left to right. For the deadeyes/rigging in this area? I have a feeling I'm over thinking it. Tom E

-
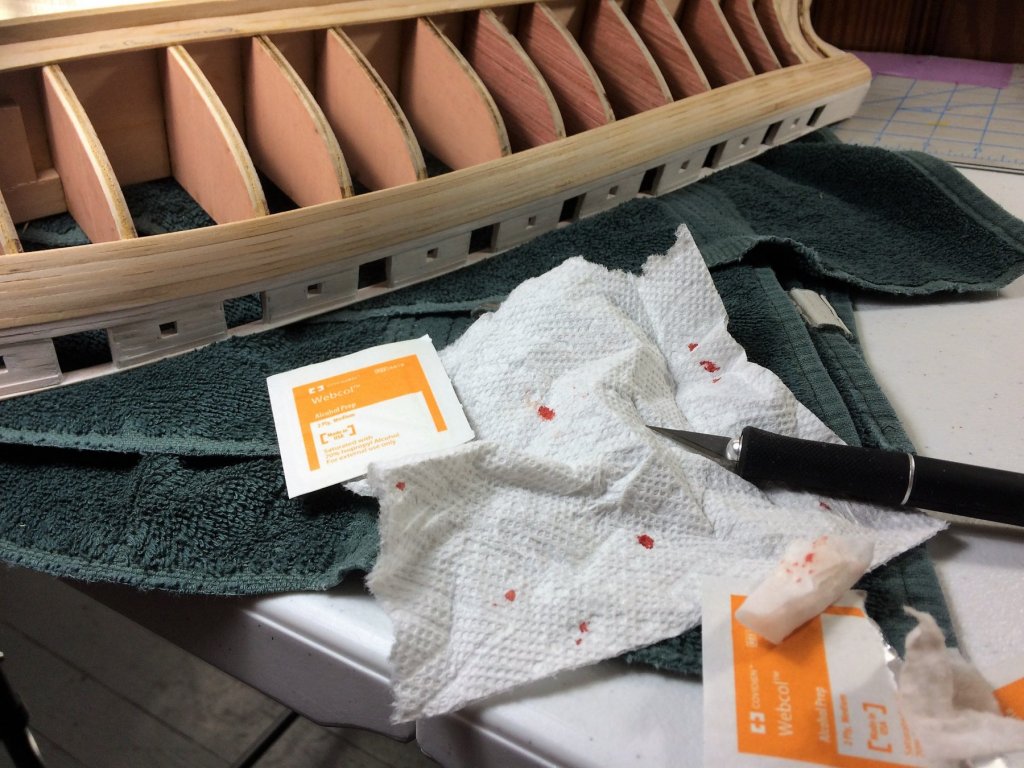
I think we've all done this! Officially the first time Niagara has drew blood. Not bad for this vicinity! Its good to work in the health care industry. During the course of my day, my pockets are kept stuffed with alcohol pads. I usually forget to leave them at work, unintentionally of course, and they end up at home. I have several years supply of these things. But do I have 1 Band-aid............nope! In between slicing my finger, I was working on the Foremast Top. Concerning the 2 Cross Trees underneath the top, the plans indicate a groove at the end of just the aft cross tree. 1) Is it just the aft cross tree that has the groove? (that's how I see it) 2) Does it run vertical to the horizon? Tom E
-
Mike, I have seen that rear set of tackle and it never agreed with me. Seen it on other builds but thought it made the deck look cluttered. I was going to leave those out. As for the excess rope in the tackles, I was going to put some small coils on the deck. I have seen the watered down white glue trick that looks like it should work. From what I've read you have to really let them dry. Tom E
-
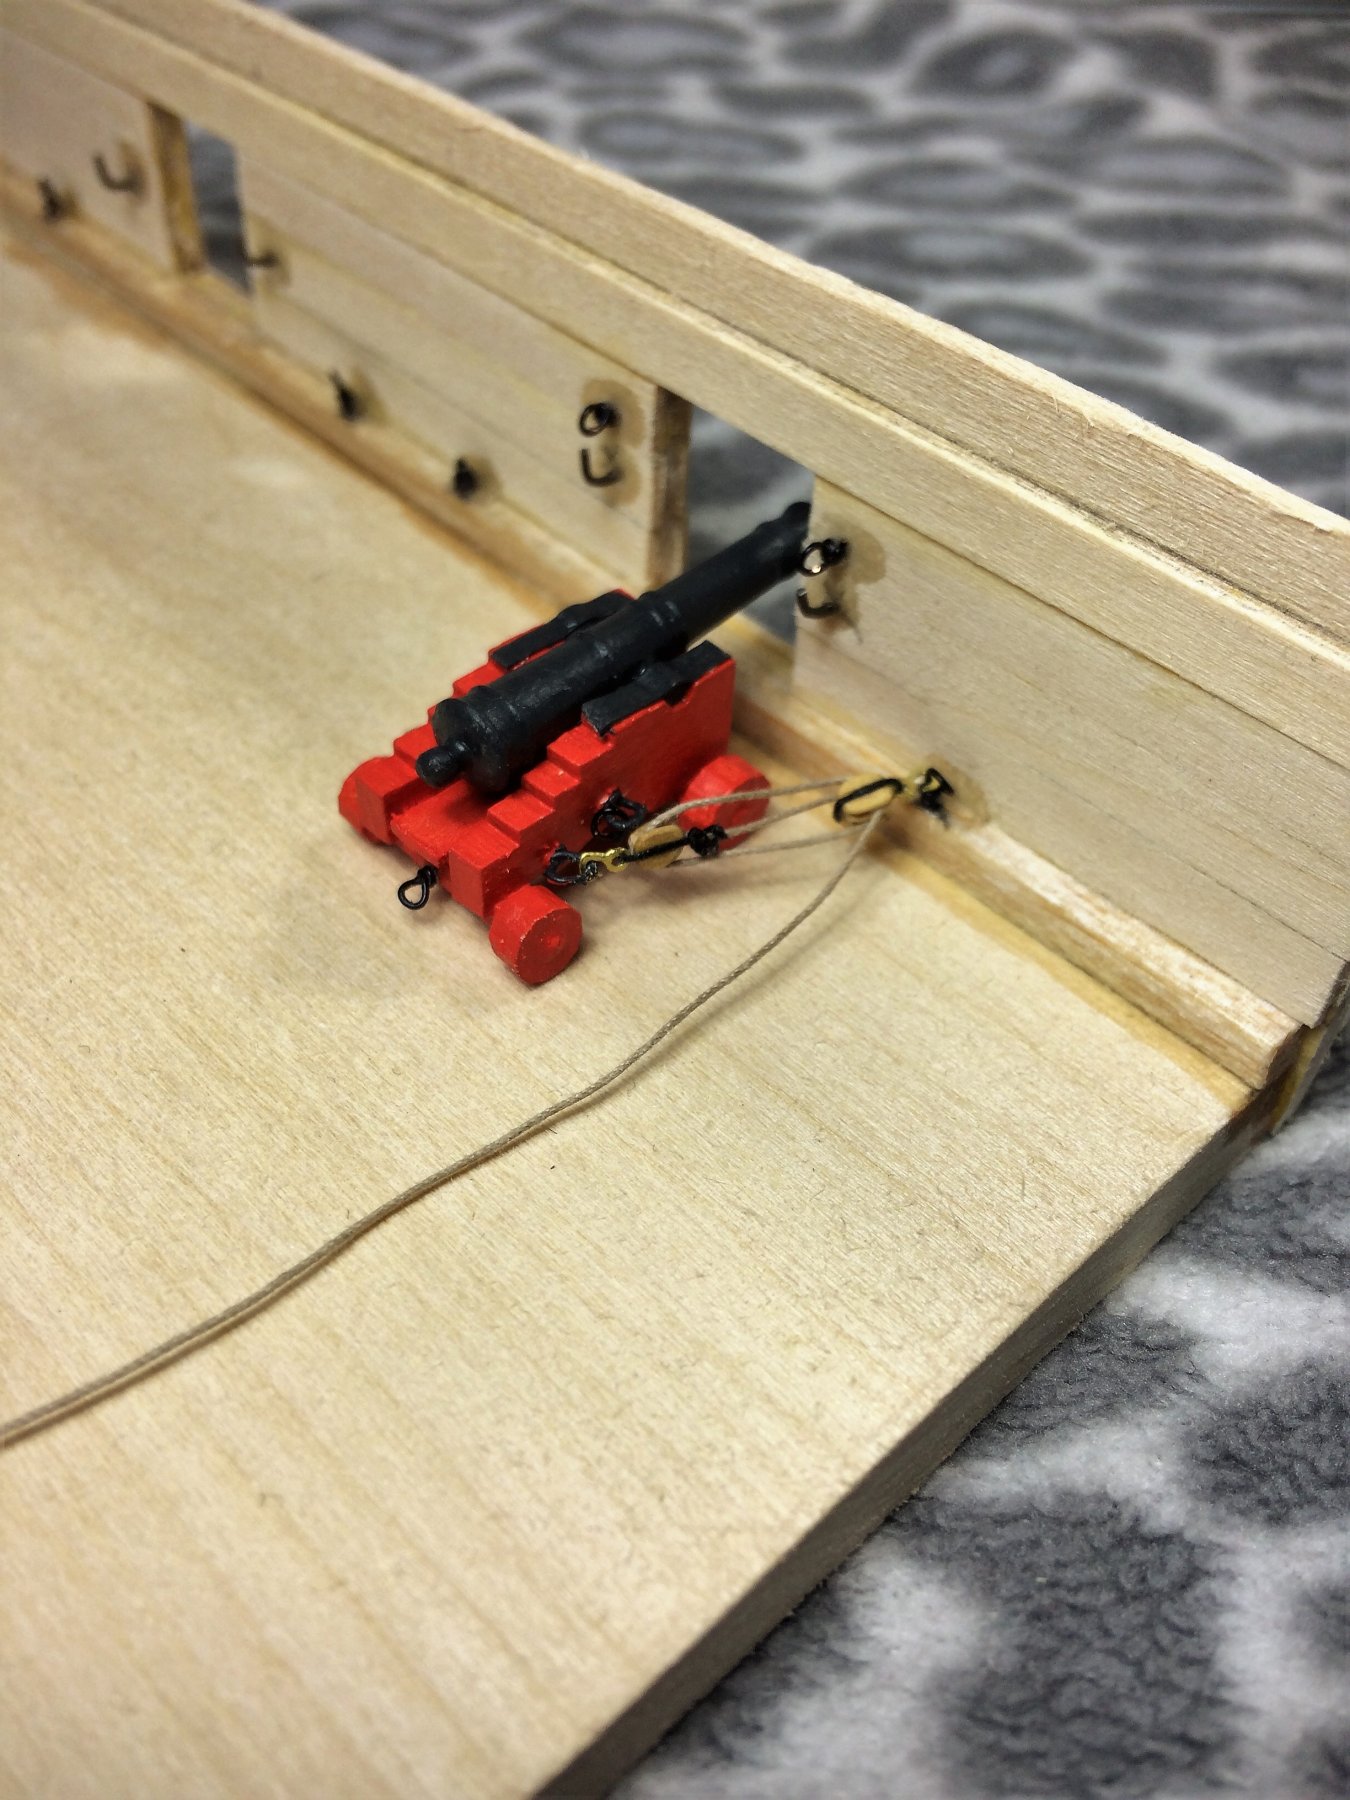
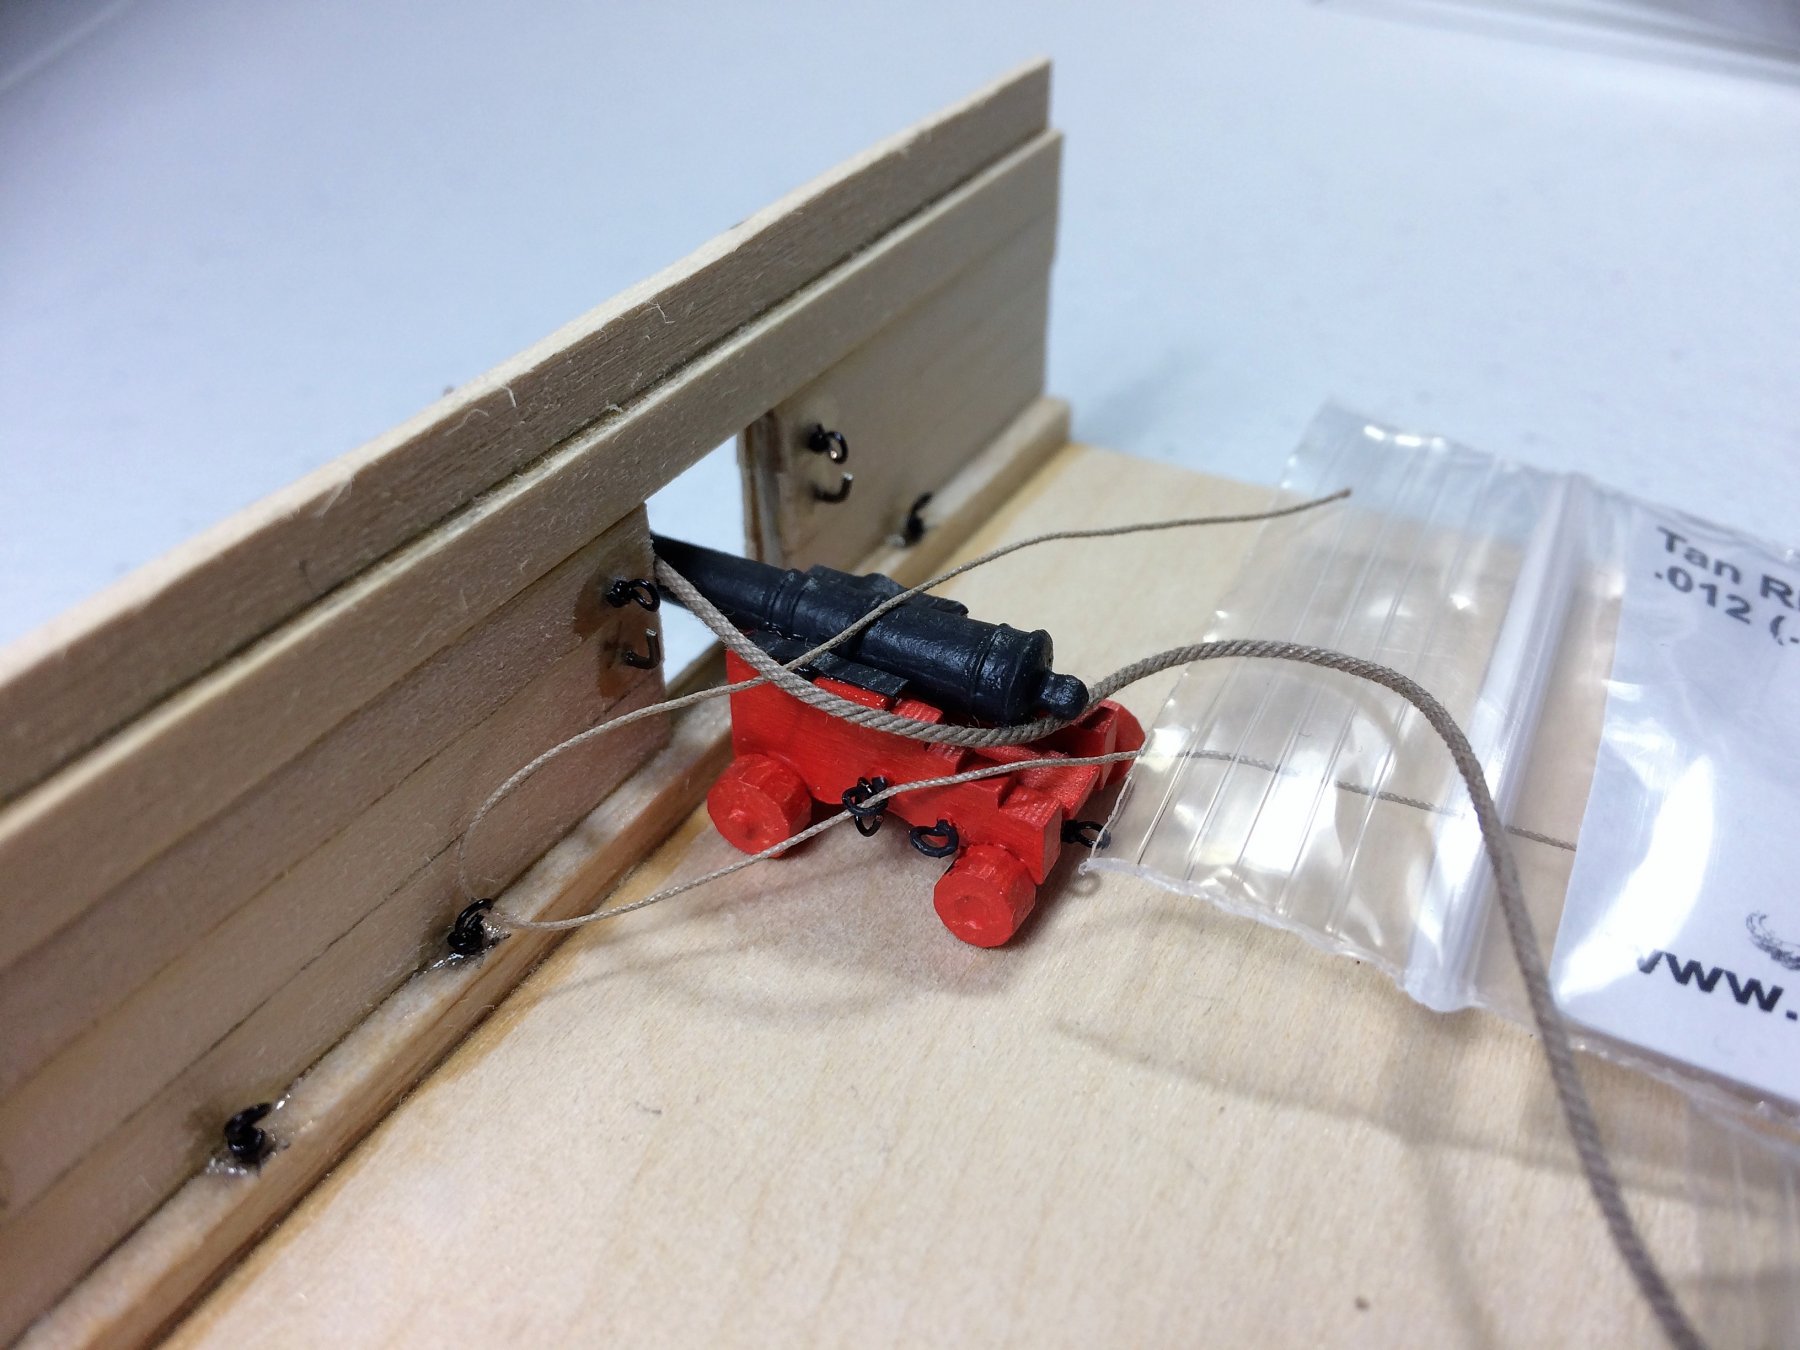
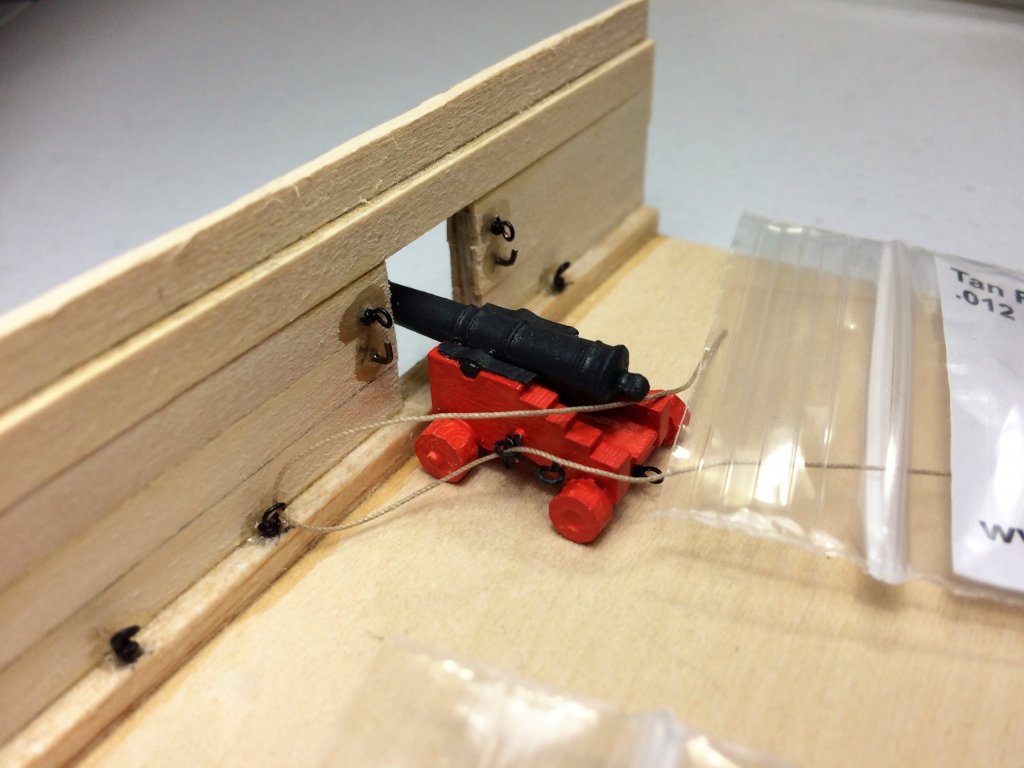
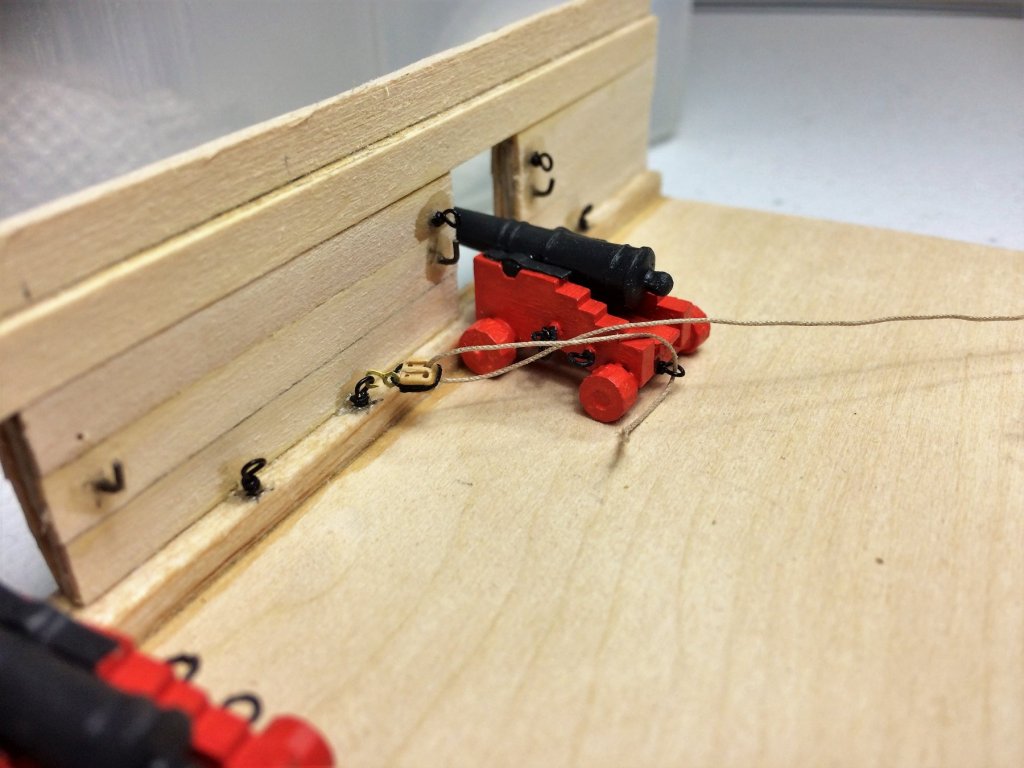
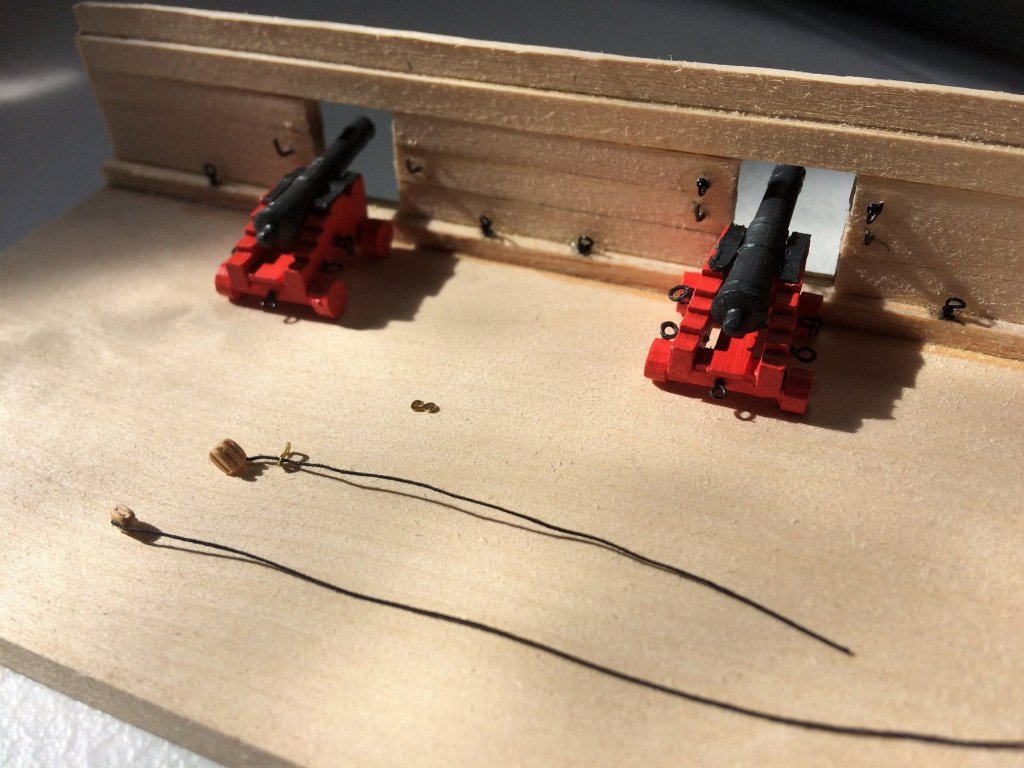
Evening, Well, some decisions have been made. I've decided on the rope combo for my cannon/carronade. Experimented with different sizes. All of these pics are "for show" and nothing has been glued or placed permanently. Below, Is the .012 rope. Below, I tried beefing the rope up with some .018 rope. Too thick and wouldn't really fit well thru the blocks. Below is the .012 with a .035 Breech rope. Looks nice with the Syren product! Finally, the .012 rope with the 1/8th double block. This will be my rigging set up going forward with .035 rope for the Breech. Gonna look awesome with the upgrade in the blocks and rope. This stuff is great! Tom E


-
Sheesh....the Landyards!...... Darrell, Sad thing was, I was running the stropping process thru my head afterwards and the thought dawned on me...."how does the actual rigging start/attach?" I'll strip the single block of its current rope and re do. I'll use some good Syren 0.008 or 0.012 tan rope for the Lanyard. I'm undecided on the size right now. Either you or Mike suggested the rope listed in the plans didn't look "right" scale wise. Mike, Definitely not looking to speed up the planking. 1 plank at a time. Since I re started modeling, the planking of a ship has intimidated me to no end. Its what I always failed at in my younger days and would give it up. I am determined as a bull moose to get this done. I did a small amount of planking on the 18th Century Long boat, but nothing as large as Niagara. If I try to speed up, I'll screw it up. I did see those blocks from Syren that you mention. I was thinking of buying maybe a few of the triples and rig the anchors with them. They do look sharp! When you get them, let us know what you think. I'm very interested in them. I received the Bluejacket kit Bowdoin recently, they would look good on her! Tom E
-
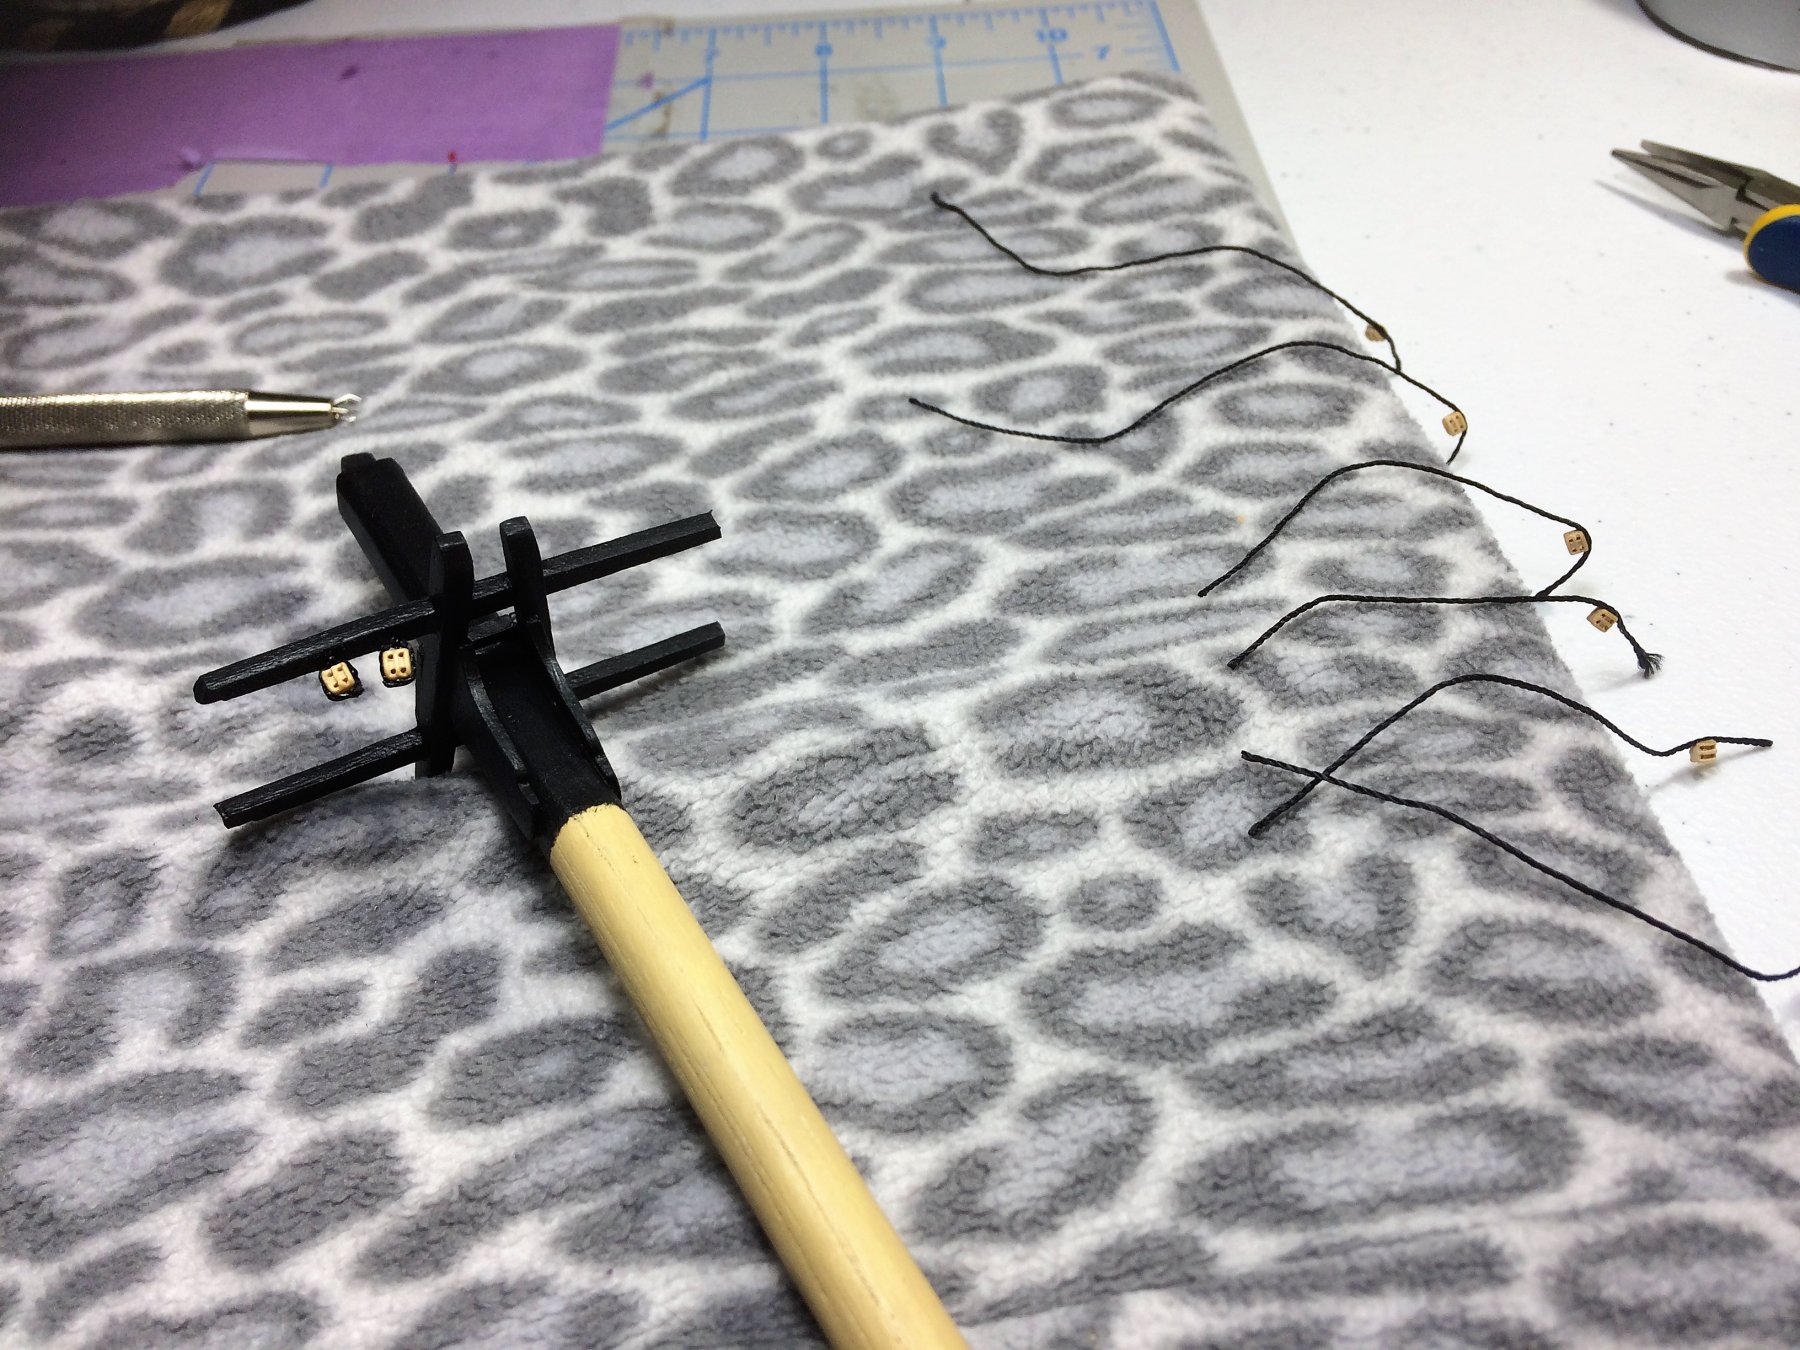
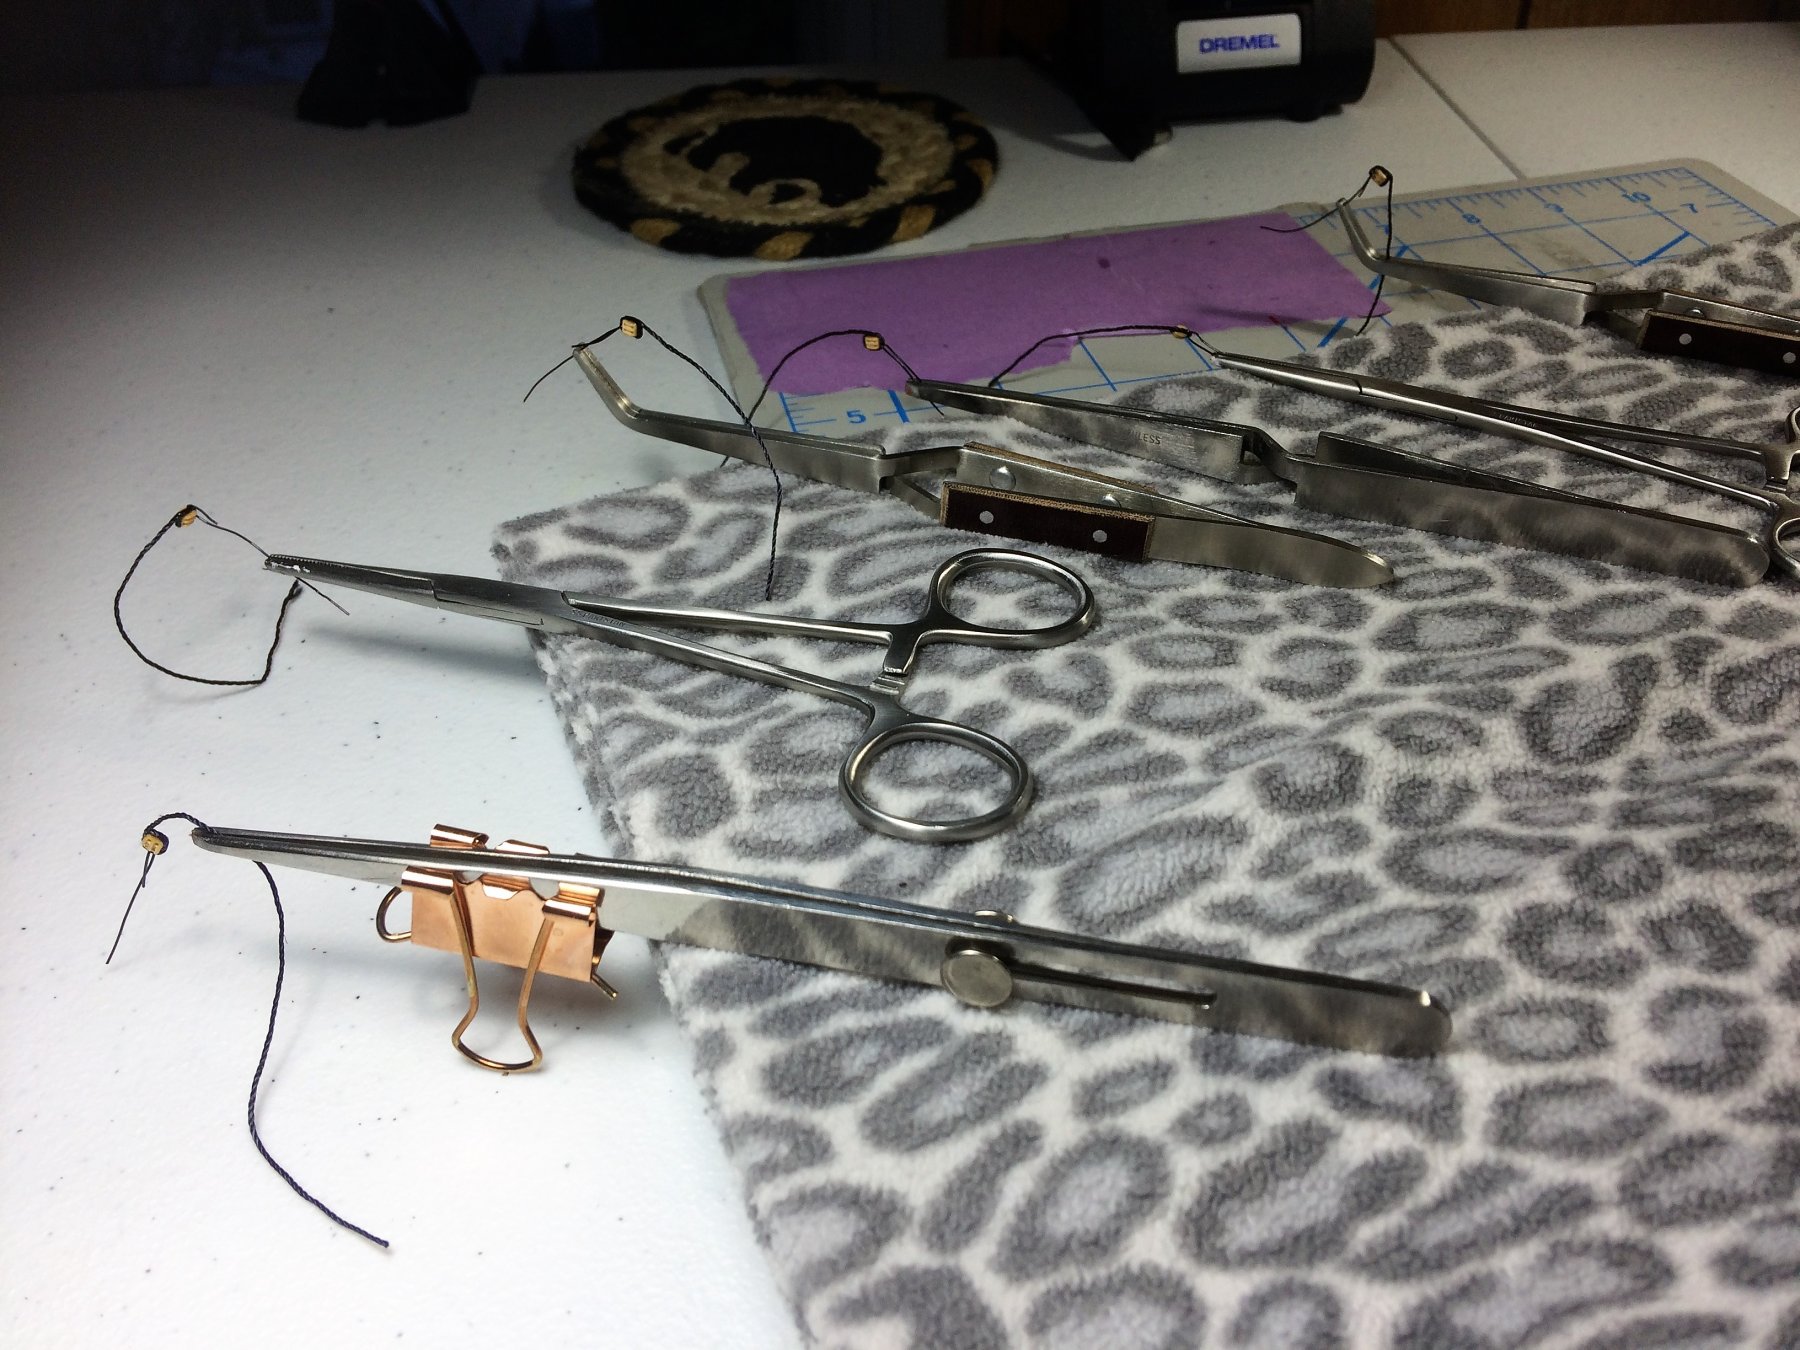
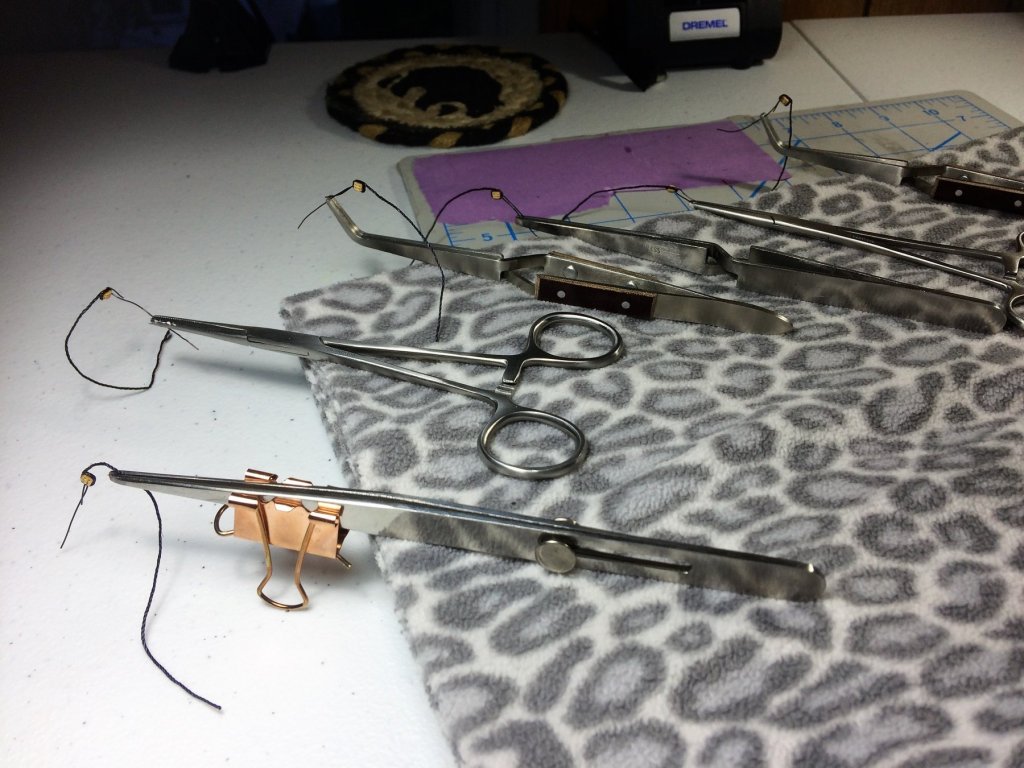
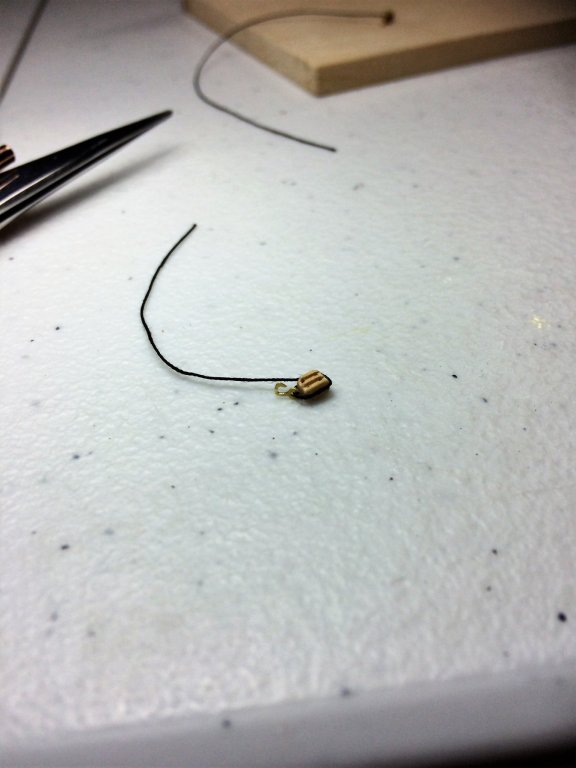
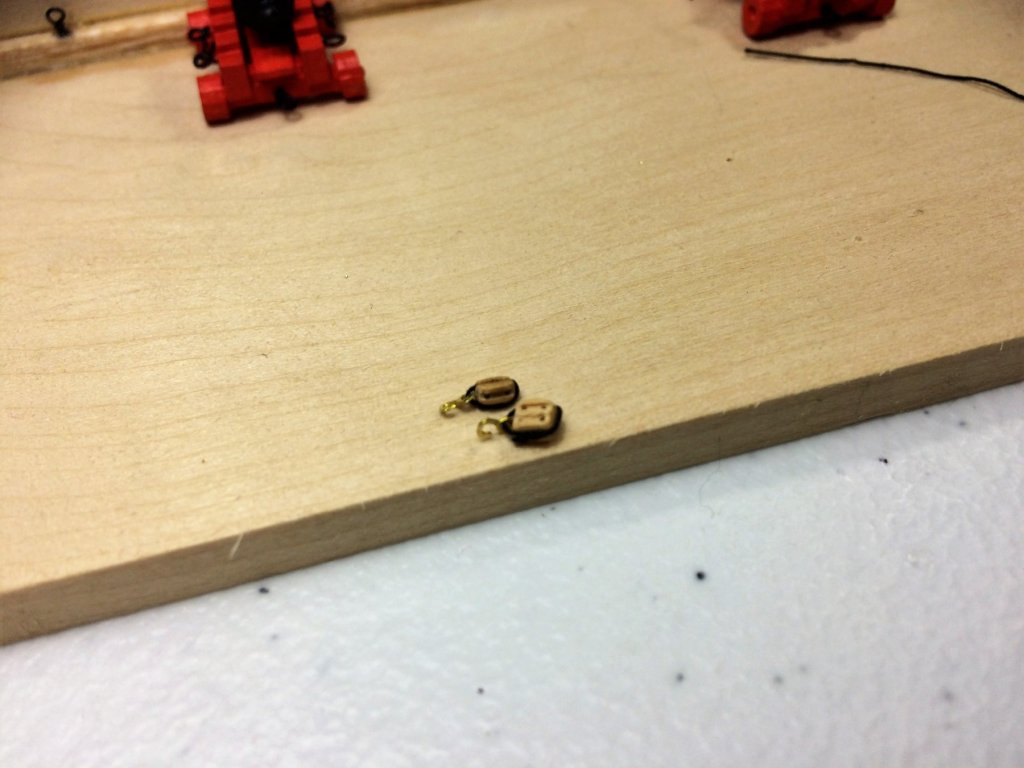
Evening, Happy Easter to all! Spring has arrived in New England and the sun felt wonderful today! Spent some time on the back porch with my face in the sun and a cold beer in my hand. Cigar in the ashtray.......but don't tell the Admiral!!! Every last soul in this house today did nothing but goof off and do there own thing. Good times..... Anywho..... I have been building. Seems several projects at once. I'm really trying to wrap some things up, like the foremast, but there's always something else to install. There's a rush of endorphins when you "discover" something you missed before. Oh yeah.....cleats on a mast. This weekend seemed to focus on planking, tops and stropping blocks. All very productive. I worked on the tops. The basic foremast has been done. Now to dress it up! The platform sits well. Photos don't do it justice. The top isn't glued in yet, just a test fit for "show" I'll prime the cheeks and cross timbers next. They should have there first coat of Spar Black by the end of the weekend. Planking continues. I installed the next plank above the Garboard. I'll do a few planks in Belt B once this plank is secured. In my head.....I see 2 planks in Belt D then 3-5 planks in belt B, then repeat......or something to that effect. Mike, As you recommended, I'm aiming to keep any "fixes" near the bottom. She's as straight as this novice can do! The pic will never do the below justice. It does run relatively straight the entire length. It's a tedious process, but I'm doing that on purpose. Soak plank for at least 30-40 minutes, clamp plank to hull, dry with plank bender, re-clamp, let sit - most times overnight. I average about 2 planks per day. That's ok, I kinda like it. I can see the hull slowly closing up. With every plank, I'm learning something new, and that reflects on the next plank. My bending planks talent has improved, greatly. Darrell, I kinda hijacked your method of stropping the blocks with hooks. I'm using Syrens 1/8th Doubles and Single blocks with 0.008 black rope. I started by gluing one end of about 3 inches of rope half way down one of the grooves in the blocks. I then thread a 3mm hook thru the line. Adjusted to where I wanted the hook. Brought the rope around to the other side following the grooves. At the ropes junction I cut it. Well....... There they are folks......my first stropped blocks! It took all day......but I made two! Only about 170 more needed! And that's just for the cannon/carronade. Rinse and repeat! I think going forward, trying to save the good rope for other things, I may use the kit supplied rope for the stropping. Just to pinch a penny or two. Tom E


-
Count me in! Hope your feeling better. Sounds like you've been doing some research/shopping. Didn't know you were from New Bedford. I'm a Worcester MA kid, born and raised. Only moved to New Hampshire a few years ago for a job. Don't see myself moving back either! Tom E
-
Ummmmmm, My Lawyer has advised me to invoke my 5th amendment rights concerning these stealers..... In all seriousness.....If I'm able to pull off a hull with no stealers.....well......beers and steaks are on me gentlemen! Gonna assume I'll need a few stealers somewhere. Ya never know, maybe I can. Doubting it, but, I'll certainly try. Tom E
-
Sheesh, that's a tough one. Something I haven't even begun to think about, but will eventually come across. I'm one to follow plans, almost to a fault, but that deck does look crowded. I know I am not the one to tell you which way to go, but I have to say that when I get to the furniture I may leave it out. It looks crowded and like its been "forced" in there by the model manufacturers. I don't think the Capstan would be easy to use with a deck like that, Sailors would be climbing over things to work it. Tom E
- 648 replies
-
- 2
-
-
- niagara
- model shipways
- (and 1 more)
-
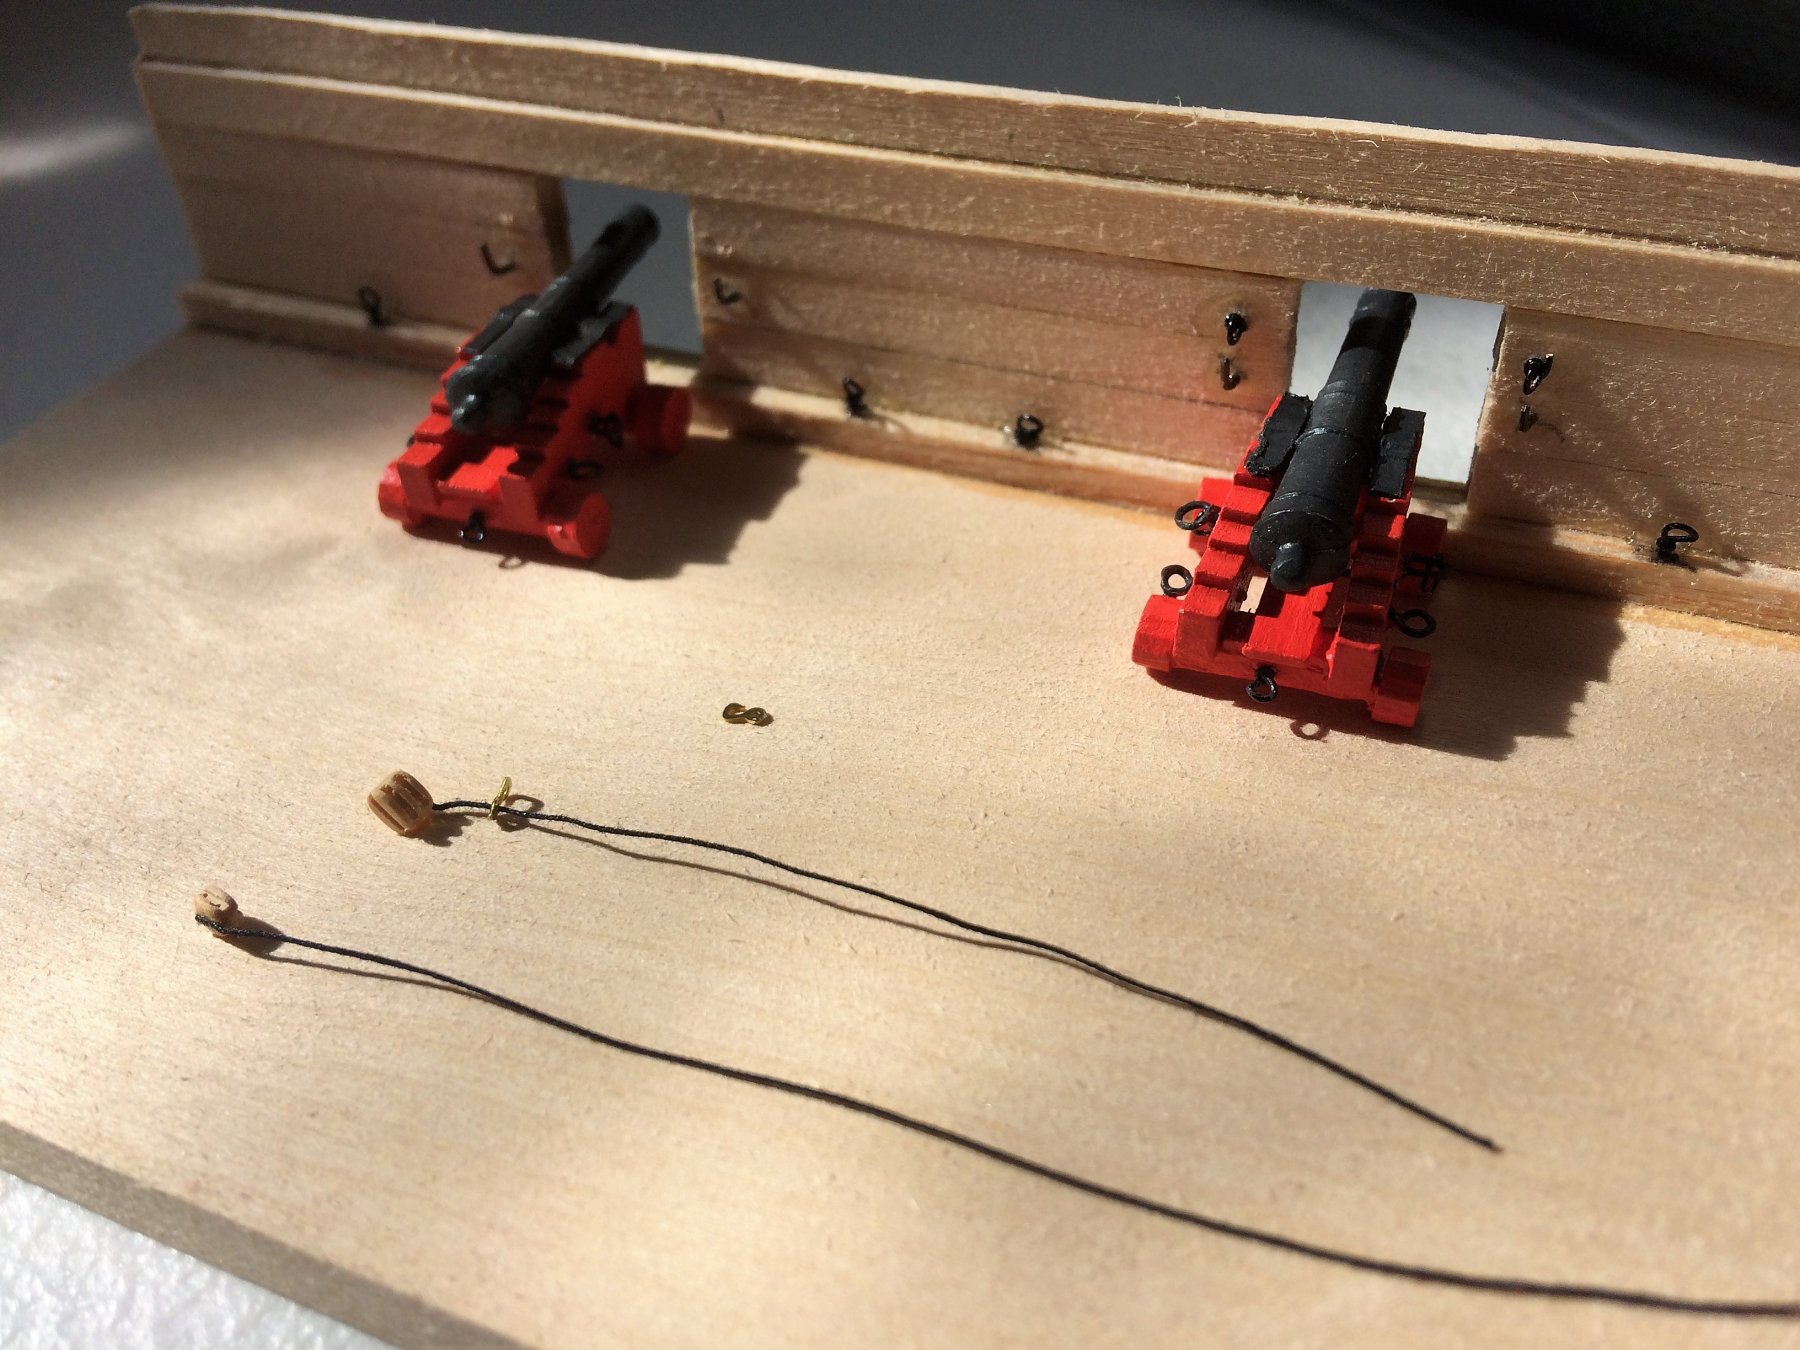
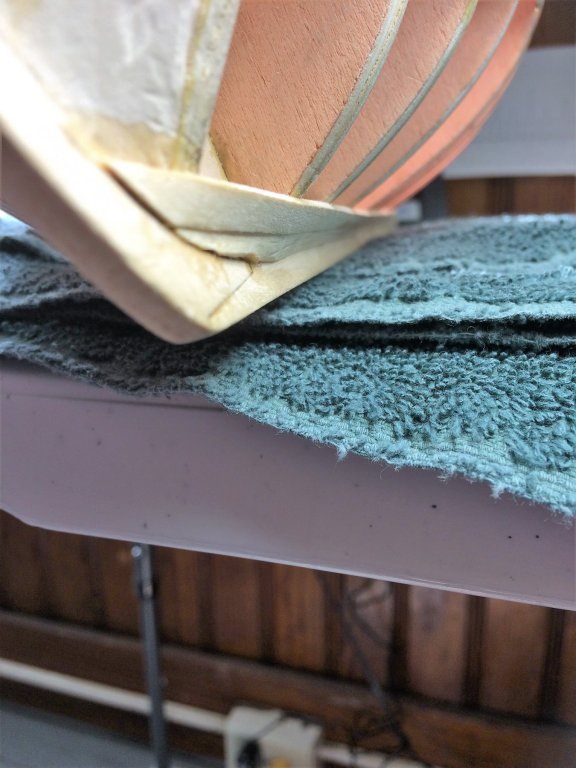
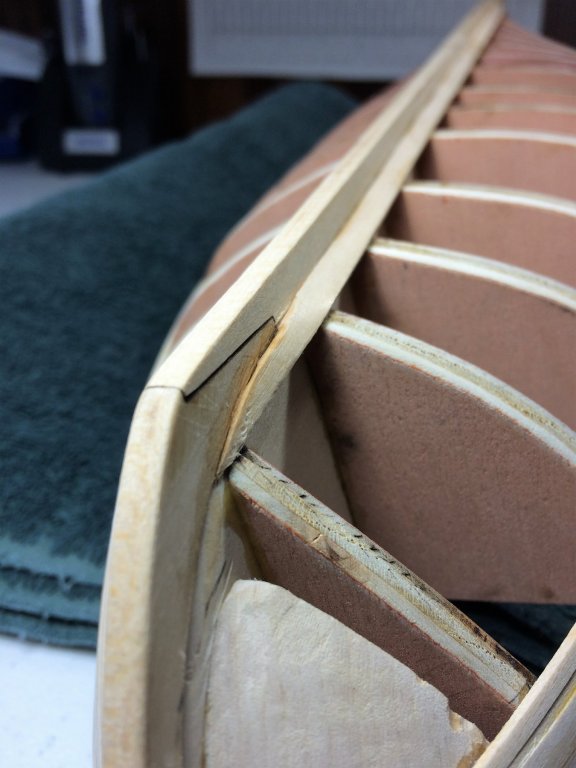
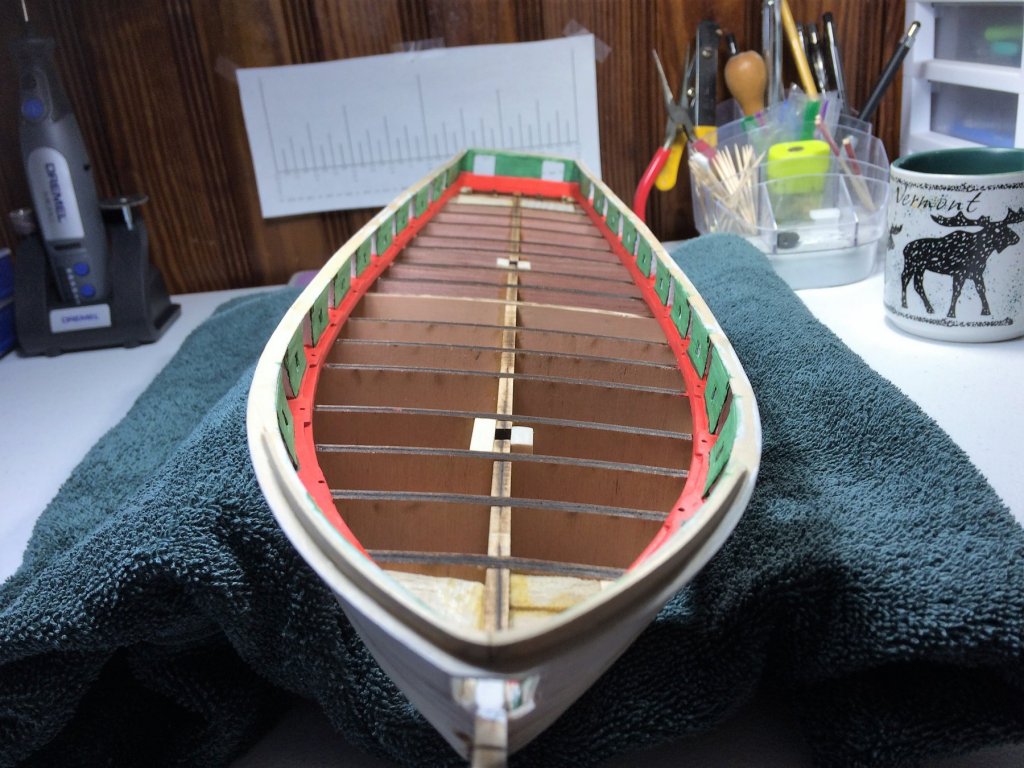
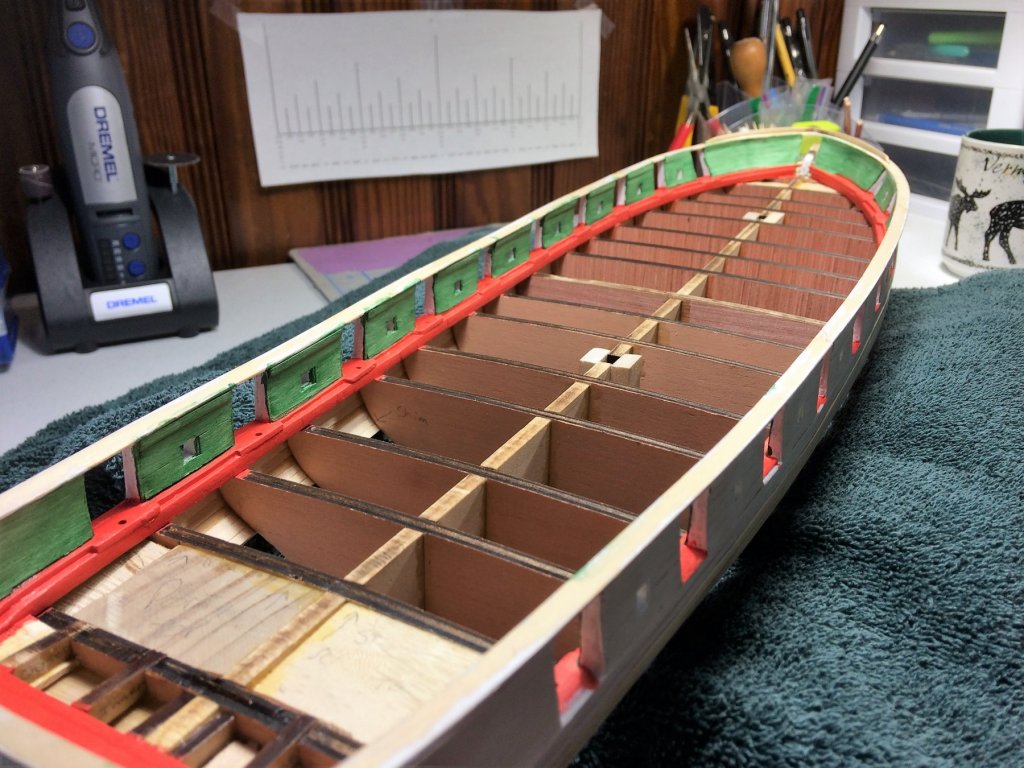
Evening, Has been an awesome Sunday in the Boatyard! The constant drone of either a hockey game or basketball game in the background all day. Kansas and Villanova won! I'm still alive in the work pool!!!!! Would be a nice chunk of "found" money to re-invest back into Niagara. Another order or 2 from Syren should round out what I need for the entire build......plus plenty of extra. Anywho..... As stated in earlier posts, I took out my original Garboard planks. I ended them way to short. I can even remember laying those down saying to myself....I could lay just one piece. Chock that up to inexperience. I took the wisdom of both Mike and Darrell on the second attempt. I think a better attempt. Darrell had mentioned the curve of the plank as it met the rabbet in the bow, and Mike mentioned that the plank must lay as straight as possible for the next plank. With both of those directions in my head I dove in. First things first tho, I soaked and formed my Garboards. I'm not going to "force" anything with these planks. They were clamped up and left to dry overnight. Any curve found from front to back has been accounted for. There's a fairly good twist at the front. But with a proper soak and dry, the planks simply hugs the curve. With some shaping..... The curve falls into the Rabbet and the top is flat for the next plank. Thank you Mike and Darrell for the heads up on that one. PS - The angle of this pic does no justice to the flat part. I should have turned the boat over. The second Garboard went in this afternoon. They look perpendicular to the keel. What looks like a nice straight edge and sits in the Rabbet well the entire length. With some sanding, should improve. On a side note..... My Cannon are basically done. Just have to make to Quoins. Those little buggers are tiny! Brass was being difficult for the Trunnions (Spelling?), so I cheated and used card stock. Its ok, and I figure the rigging should draw the eye away from it for the most part. I also put the very first coat of Bulwarks Green and a fresh coat of red. She has color!.......its weird. Its been mostly a wooden brown thing for the most part. Kinda takes on another dimension.......or its way too many blows to the head as a kid! Get a deck down and she will really come alive! No deck until the hull is planked! Tom E


-
Great work Derek! She's makes for a handsome display. Myself......I would have that right at the front door. So everyone could see it! Your ship, and your build log, are top notch. Look forward to your next project. PS - I'm still really digging the wood in your project. Recently got the Bluejacket Bowdoin kit and I'm looking to upgrade to some of the wood that you've used here. Tom E
-
Mike, Keep preaching! Your keeping me on track. I've decided to re-do my Garboards. I misinterpreted what you meant by that "spot" where the curve of the bow begins. I thought that was a stopping point for the Garboard plank. Logically, it just makes sense to do one plank. I can maintain a straight edge better with 1 plank. Do believe I was over thinking it. Tom E