


twintrow
-
Posts
496 -
Joined
-
Last visited
Content Type
Profiles
Forums
Gallery
Events
Posts posted by twintrow
-
-
Thanks Janos for the samples. I assume you flattened nails, then grind them to shape with a grinding wheel (dremel?).
Do the bits need to be tempered? Heat to cherry red then immerse in oil?? Or are they sufficiently hard left alone?
Are the edges sharpened?
thanks again
Tom
-
Mark
thanks for the links. While they are for the Mini-Mill, some are useful for my purposes as well.
Especially the "products" section.
Tom
-
Thanks Janos
much appreciated
Tom
-
And David
I live in a retirement community and we have both a metal shop and wood working shop, so I intend to join them and get the training I need.
No doubt faster than trying to learn by doing by myself.

-
Thanks Janos
I remember reading about making the mill bits from a drill bit and it just didn't seem practical. I'm glad I asked.
I would like to hear more about this statement though "What you can do though is making your mill bits from broken drill bits, piano wire, silver steel, etc. I am doing this quite often and with those I can make nice moulding profiles." Would a little explanation of how be possible. Or if you know of a site where it is demonstrated?
No ,more than I think I'll be using the mill bits, I think I'm better off buying them from a professional source. I'm thinking 4 or 5 different sizes is all I'll ever use, and overwhelmingly on wood. But I will be making a lot of moulding.
thanks
Tom
-
-
Bob thanks for posting the question. I just ordered an x-y- table for my drill press and was wondering what all I can do with it. My primary intent was for making blocks (ala Chuckie blocks) and decorative moldings. then I saw the windlass on another post, and a couple masts being made on a mill.
So, I'm hopeful it will be as versatile as I think it will be.
Tom
-
Robert, I had to go back to page 1 to assure myself that you said this is YOUR FIRST WOOD SHIP !! Absolutely amazing.
You obviously have some natural talents. I'll be doing the Mars later on and will certainly use your build log as inspiration and guidance.
Tom
-
-
OK Jesse
but I would still go on line and try to identify which particular strain of mold it is before handling or touching it.
I had a small patch of mold in one of my clinics after a rain storm.....OSHA made us tear out the entire wall and seal off the exam room while doing so.
The they identified the mold after tearing everything out, turns out it was harmless AFTER THE FACT!
So check it out THEN decide what if anything needs to be done.
Tom
-
Get new wood for the kit comes to mind first.
If that is not an option for some reason, try adding small amount of vinegar to the soaking water. And when dry sand the area.
Unless the mold is black it usually isn't harmful. Look up mold on Google for the different kinds and try and identify it. If the "bad" kind, discard the wood (all of it) and start with fresh wood. Shouldn't be much of an expense.
Tom
-
There are a couple Aciera on ebay now. $4,000 and up.
Too rich for me.
-
Sarah
Are you waxing the shaft before wrapping it?? Must rub on some beeswax, then wrap, then a drop of thin CA. And wax every other seize, if not every one.
Tom
-
Mike don't forget the old "standbys". A blank door on two or three hand made saw horses works well for a working surface.
If you are near one or two of the big box DYI centers they sell damaged doors, or ones pre-drilled (in error) pretty cheap. Also used furniture stores (like Goodwill) sometimes have desks that will work well in a pinch.
And there are the Habitat for Humanity stores where they sell used doors too.My Dad always said "build it, find it, or get it from scrap, don't buy it new."
He meant when building around the house of course.
Tom
- mtaylor, justsayrow, Landlubber Mike and 1 other
-
 4
4
-
Wait for it to go on sale....AND....if you get their newsletter on-line, often they send a 20% off any single item coupon. Even better!
Tom
-
Alan
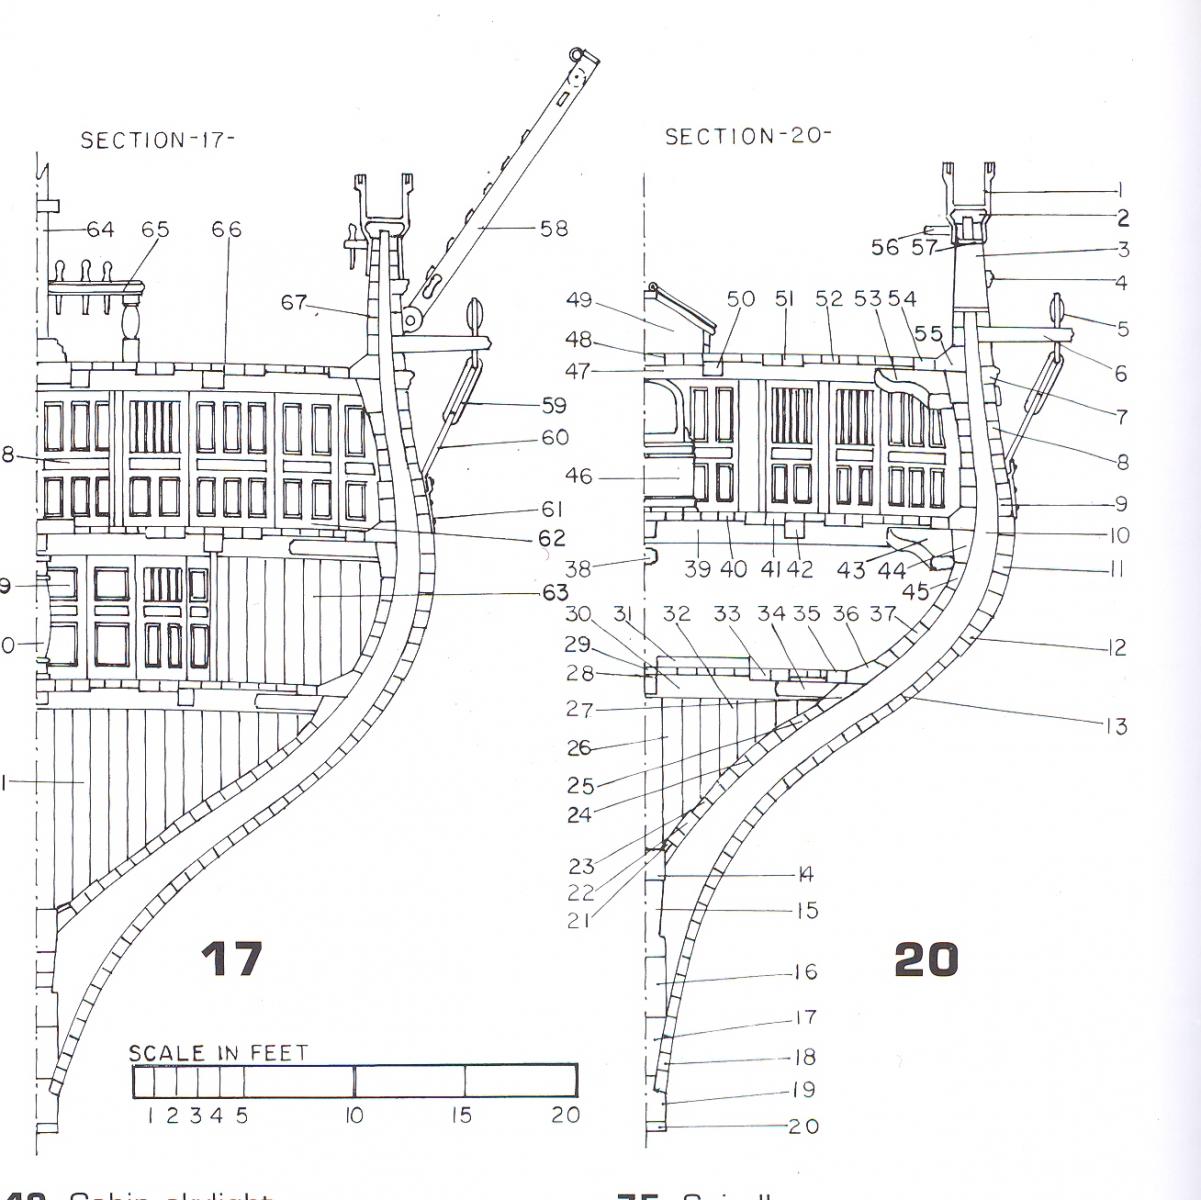
I base my opinion on what I see in the AOS drawings. For example. below are two scans of drawings showing the chainplates, the two drawings (on the left) are of the Constitution and the single from the Endeavour. They show the channel at a 90 degree angle from the ship center. And assuming the ship to be level in the water that would also be horizontal to the sea.
The tumblehome the two ships is slightly different, so my assumption is regardless of the tumble home they would be mounted at 90 degrees.
If I am incorrect in my assessment please let me know because, I mount them always this way.
thanks
Tom.
-
Allen and Wayne.
90 Degrees from the hull would also be parallel to the water, assuming the hull was sitting level.
Brian, I just took a look at 4 different AOS ( I have 8) and all had some form of support to the channel. I have one that shows only the chains as being the support.
It is your ship, build her the way that satisfied you.
I'm not positive given the recent events, but I'm not aware yet of thee being someone who checks our builds for details ;o)
Tom
-
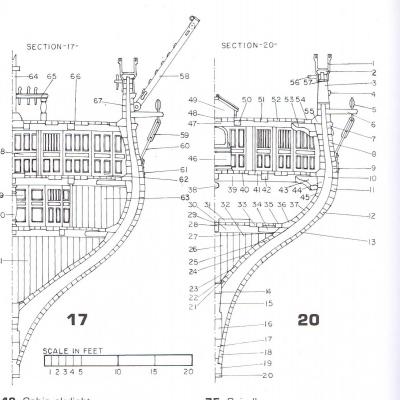
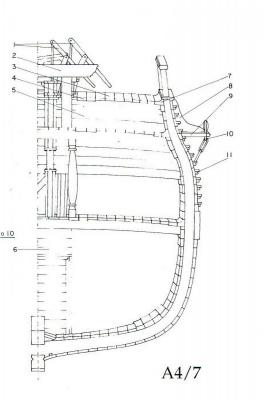
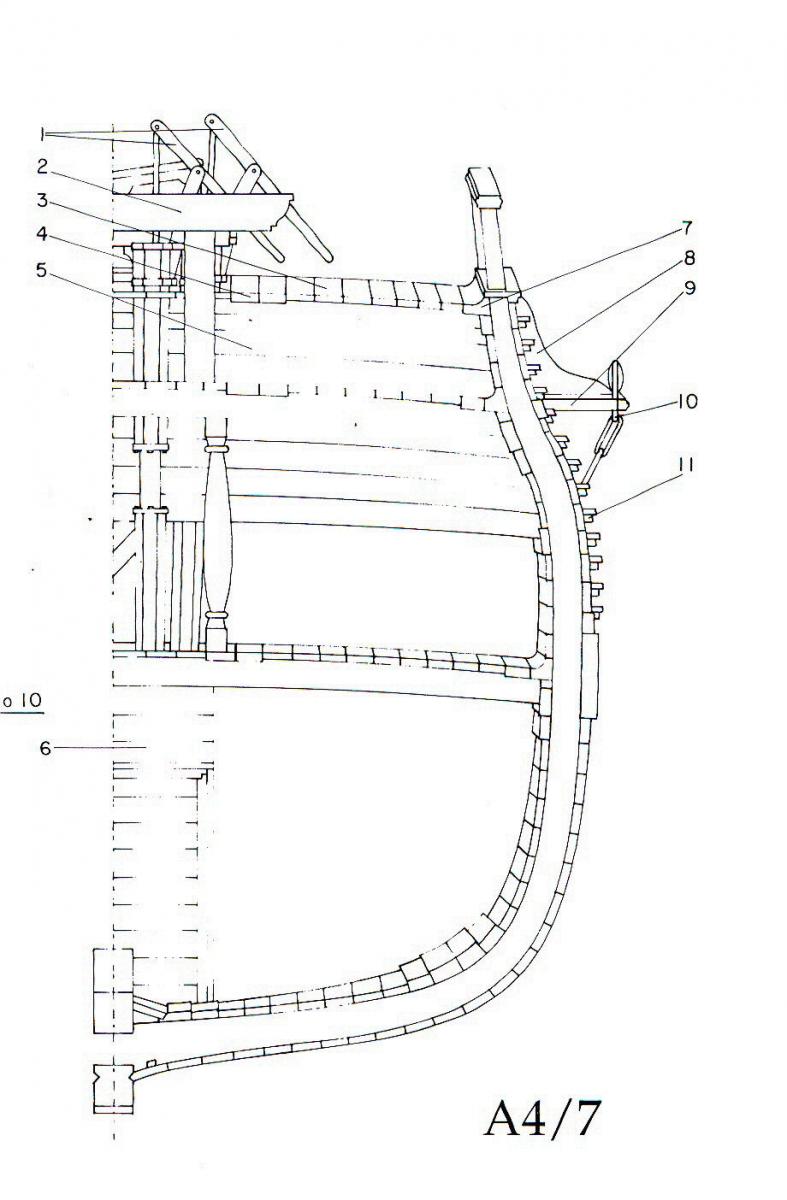
Sam the channel should remain 90 degrees from the hull.
And you are correct the channel should be braced, but not with a knee from the bottom, from on top of the channel.
The purpose of the channel is to anchor the masts using the shrouds. And since the tensioning of the shrouds would necessarily place a great deal of strain on the channel in an upward motion, the channel needs to be braced either with block supports as shown in the picture (picture from Pettersson's Rigging book), or with metal braces, from the top side.
And after nailing or pinning the chainplate in place at the bottom hole, insert nails or pins in the other two holes as well.
Also you will want to run the chainplates as an extension of the shroud following the same angle down from it's attachment to the mast. I take a piece of line and before starting the shroud set up, pull the line down to the channel as the shroud will set, past the channel to show the angle of the chain plate. Using the first hole to mark the angle. You can see the angle of the chainplates in the picture.
Hope that makes sense.
Tom
-
Walt
A good alternative to real sheaves is to use brass cannon truck wheels. Several of the kit makers sell them. I took some out of an old kit I had (don't recall now what it was) using for parts. I've used them in catheads a couple times.
Tom
-
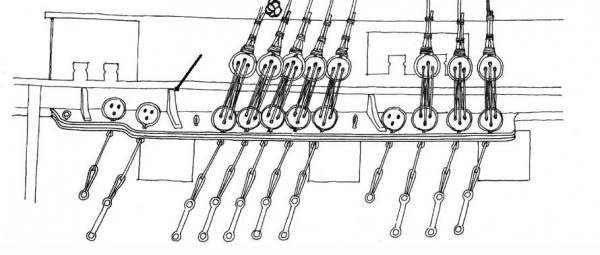
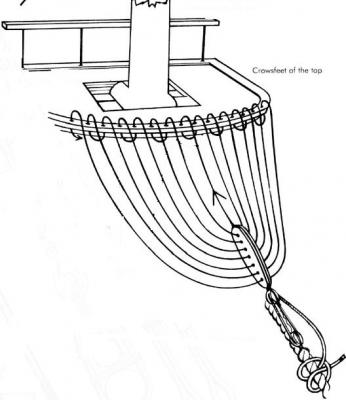
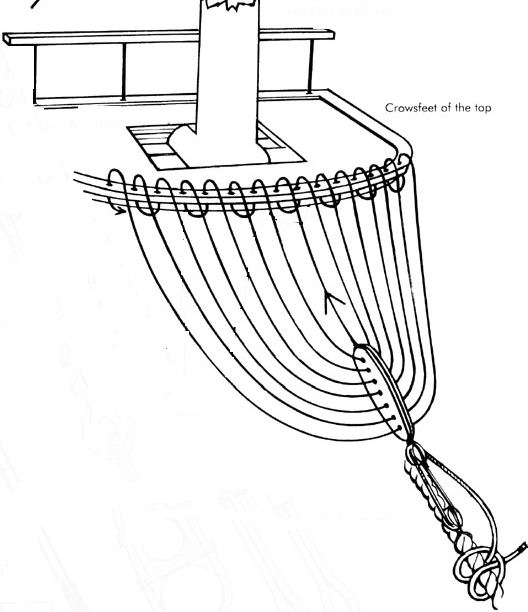
Nick this picture may help to understand euphroe (crowsfeet) rigging..
Tom
- Ponto and Mike Reader
-
2
-
I solved this by running the rope through both blocks (each end), apply the needed tension for the fit you want, then see how she sits before tying off. If it wants to twist, I rotate the block at the bottom until the rope is untangled, then tie off.
Tom
-
At many hardware and some auto parts stores you can buy octagon nuts in many sizes. I put one at each end of the dowel and file a perfect octagon each time. If unable to get a nut with a large enough dia to fit the dowel, I reduce the dowel to the smaller dia for about a 1/4 length of the dowel then put on the nut.
Seems to work for me.
Tom
-
gulfmedic1
You can get a bunch of small clamps at Harbor Freight if you have one nearby. Very cheap. Or in a pinch you can use clothespins, or the black and slver paper clamps too.
Tom
-
You can buy micro bits from Model Expo for $1.79 for a pack of 10 bits, plus shipping of course. I can't imagine buying needles much cheaper??
Tom

What do you use your mill for ?
in Modeling tools and Workshop Equipment
Posted
Thanks again Janos.
Now to try my own ;o)
Tom