HOLIDAY DONATION DRIVE - SUPPORT MSW - DO YOUR PART TO KEEP THIS GREAT FORUM GOING! (89 donations so far out of 49,000 members - C'mon guys!)
×


Oliver24
-
Posts
106 -
Joined
-
Last visited
Content Type
Profiles
Forums
Gallery
Events
Everything posted by Oliver24
-
 This is a great kit. Are the instructions detailed enough? I am building the Amati Santa Maria and I found the planking instructions to be very poor. Basically nothing is instructed. I had to search other materials to complete the planking and that was a little bit frustrating. I am wondering if the Victory models instructions are any different. I will follow your build log with great interest. Happy modelling!
 -
I am just letting you know that I haven`t given up and I continued the planking process. I intend to finish the first planking soon.
-
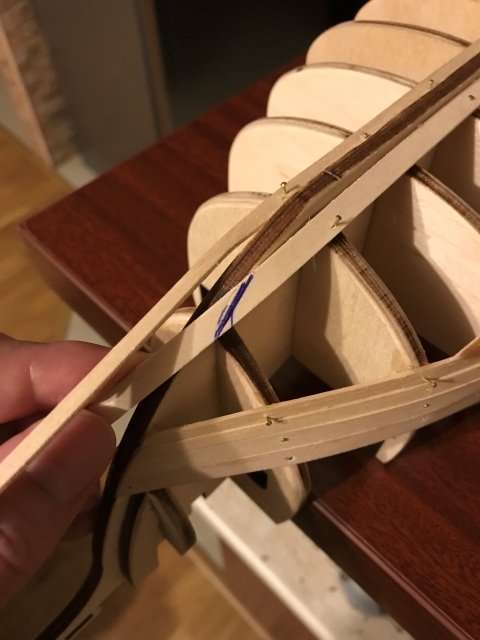
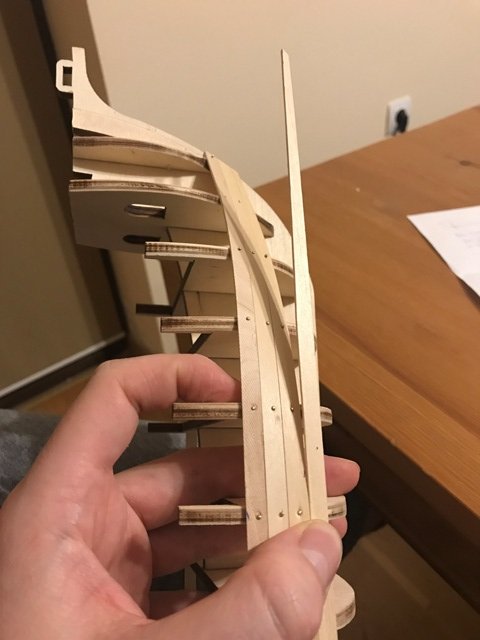
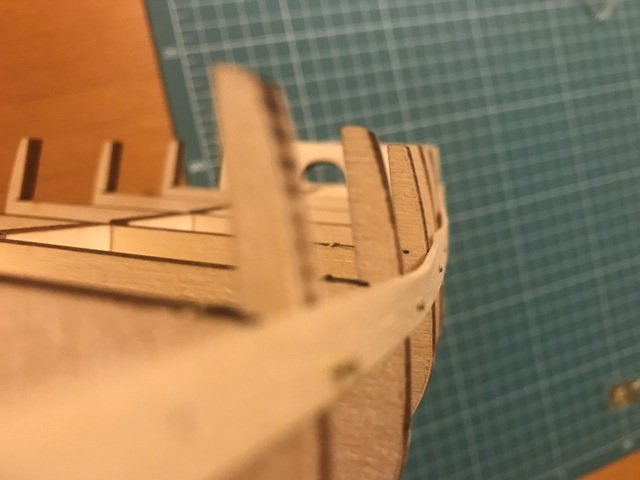
Thank you for the tip zappto. Unfortunately I don`t have access to balsa wood (or any kind of additional wood). Moreover, I don`t have the proper tools to cut it since I am new to the hobby. I will eventually buy some electric tools, but for now I must stick to what I have. I would like to ask you another thing. This may sound stupid, but I better ask it first and not do something stupid. On what side must the bow end of the garboard plank be trimmed? This is very confusing since in no article is described the operation. I have attached a picture and I marked the direction of the trim as I imagine it, but I would really need a confirmation (or further guidance). Thanks!
-
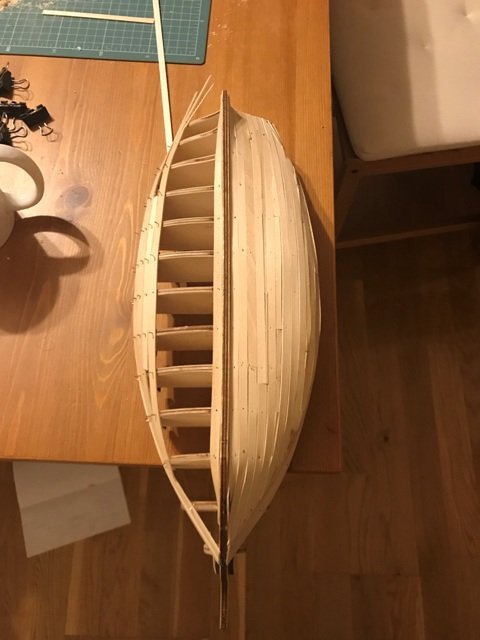
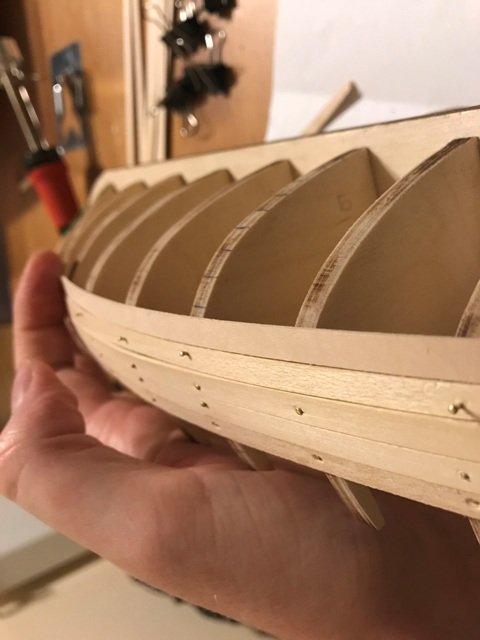
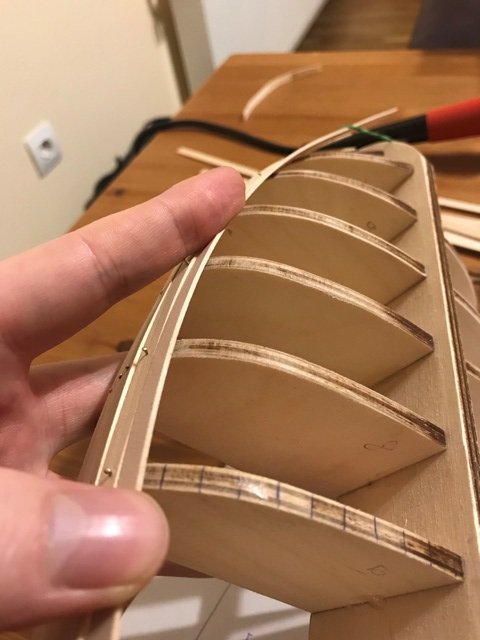
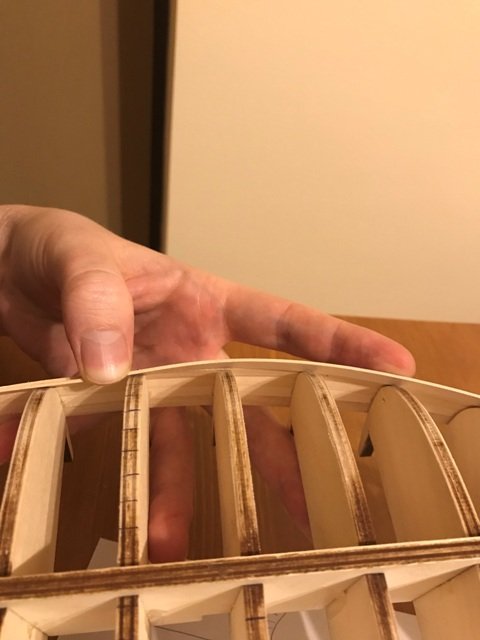
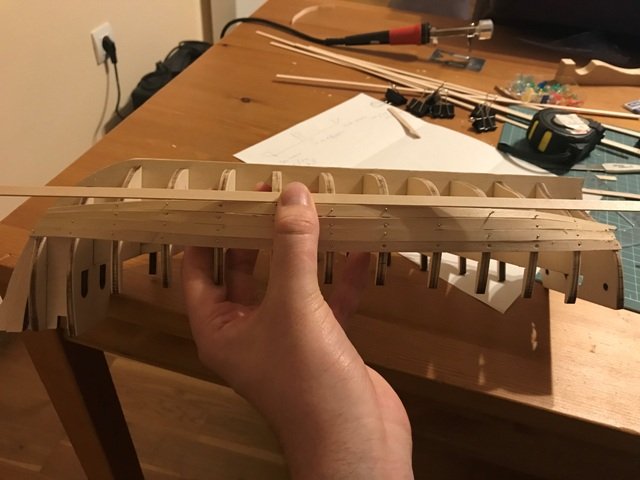
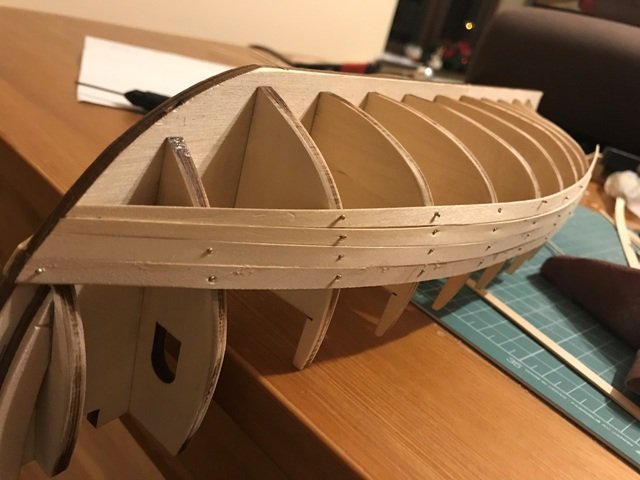
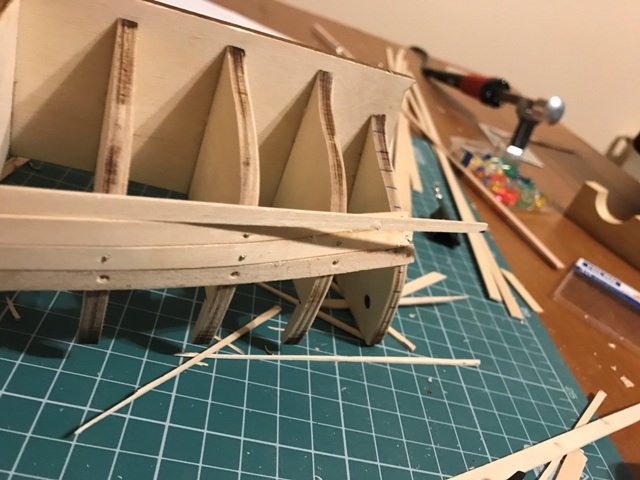
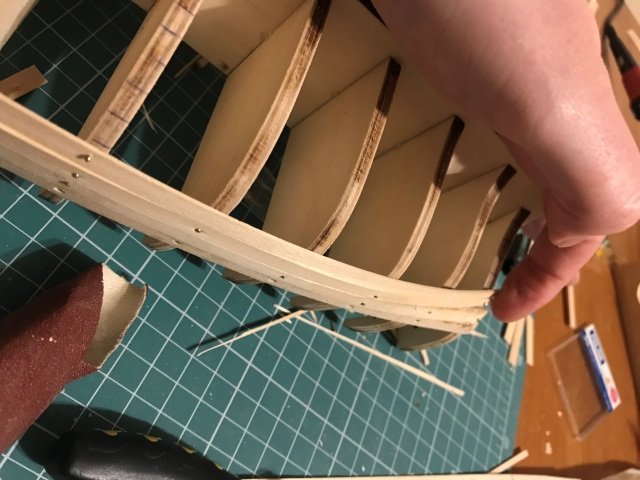
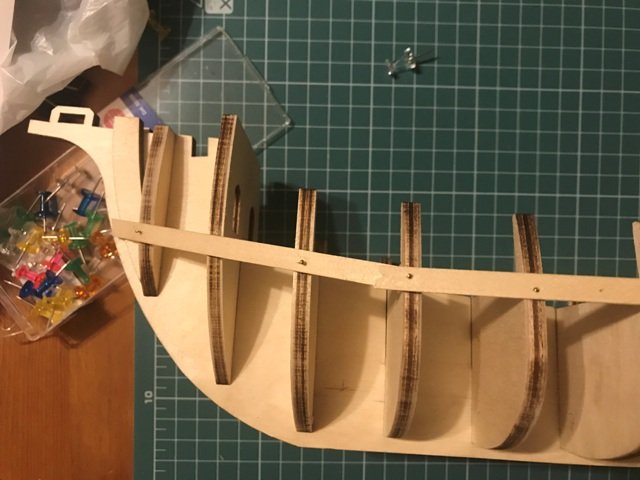
I have decided to rip off the planks gently from one side of the hull. I did some further fairing to the bulkheads as you can see from the photos below. After that, I have decided to go for a different approach: I will try to place the garboard plank first and insert another plank somewhere in the middle of the hull and one at the deck level. I can see now that because of the round shape of the hull probably all planks must be tapered at both edges (if not, they will not fit at on the last bulkhead at the bow and stern). I am also absolutely sure that some filler planks must be added to cover the holes which will be created between the planks...I don`t see any other solution to cover the center hull. As you can see from the following picture, I inserted another plank above the deck line just for you to see that my first plank was attached horizontally. I see no problem continuing upward with the planking, my main problem is planking towards the keel. Here are another two photos with a plank strip placed approximately at the middle of the hull. Attaching it will create a huge eye to be covered afterward, but I see no other solution as tapering alone will not be enough and another tapered plank cannot be inserted anymore because horizontally. I also found on the net some other Amati Santa Maria projects with detailed pictures of the planking process: https://www.modelbouw.nu/santa-maria/voortgang-beplanken-eerste-plankenlaag/

-
Guys thank you so much for your time and comments. I will try to be more specific about my workflow: I actually did the fairing process, but it seems that it was not sufficient according to you. I did not notice any problems with the planks caused by insufficient fairing. However as this is my first ship, I may be wrong. I also made my measurements at the mid ship, bow and stern. It was clear that tapering was necessary at both edges of the planks in order to avoid crowding at both sides. I also must mention that this was told also in the amati instructions. However, I believe that in my case I should have tapered the first planks also. It seems to me that the odd curved shape of the plank which can be seen in my last photo is caused by overcrowded planks at the bow and stern which forced the center part of the last plank which I intended to insert to slightly but noticeably bend upward, creating that blow. This could be solved using fillers I believe but I am not sure how to attache the next plank to create the "eye" which must be filled. If I attach this plank without forcing it, it will create an uneven space above it at the bow and stern. At this point I am thinking to rip the planks and start over...
-
Hi to all, I have bought the Amati Santa Maria myself, however I am struggling with the hull planking. The hull has a round shape which needs a lot of tapering, however even so it seems that I can not plank it with simple horizontal planking. My question would be how did you planked it?? Could you give me some detailed opinions? Thank you very much and happy building!
-
Dear Chris, That is exactly what I did, but tapered both ends of the planks starting from the third plank.The first two were not tapered at all.
-
I was also inspired by a youtube video of an Artesania Latina Santa Maria: .
-
Dear Chris, Thank you so much for your reply. In Mastini`s book the author wrote to begin the planking one half plank from the deck level so I followed. I do not understand what you meant by bulkhead amid ships. Can you please be more specific? Did you meant to start from the bottom of the bulkheads, near the keel (with the garboard plank)? Also I did not understood very well what you mentioned about the tapering. I glued the planks into position unfortunately, but I may try to cut them off with the scalpel.. Funny thing is that I have read several tutorials about planking and still have troubles. I have soaked some of the planks and used the electric plank bender. In general I did not encounter any specific problems attaching the planks (beside the initial upward bending). I am really confused wright now, I don`t know where I got it wrong...
-
Here are some photos with my problems. Do you have any advice?
-
Now I have another issue. It seems that I can no longer attach the planks without forcing them to the bulkheads. It seems that the planks do no longer fit above the attached plank perfectly horizontal and needs to be forced. I believe that I need to use some fillers, but I would like to know you opinion.
-
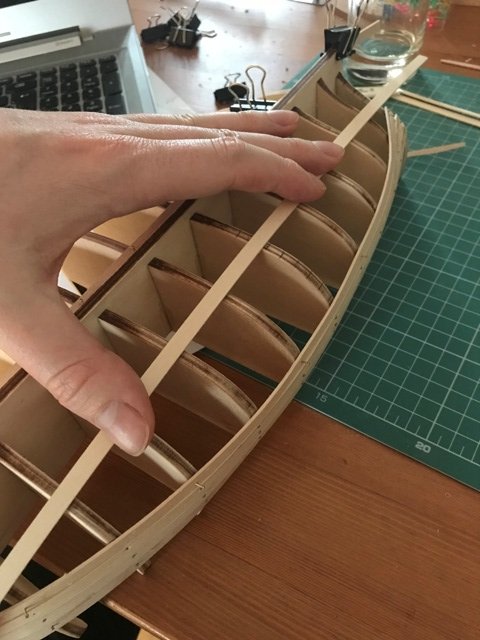
I made some advancements on my hull planking. As I read in many tutorials, I placed the first plank as horizontal as possible, not taking in consideration the pictures from the Amati instructions. However, I ran into trouble. I measured the usable space from the stern, center and bow and decided to gently reduce the extremes of the planks before attaching them to the keel as you can see from the photos. According to my calculations I would not have sufficient space at the stern to attach the planks to cover the center of the hull.
-
Thank you guys! I hope I will finish this little project. All the best!
-
Thank you so much for the advice guys. I will try to do as advised. I just want to thank you all for helping me. I knew from the beginning that the instructions were actually not very detailed and do not give a step by step advice. Moreover, in my situation they clearly miss informed me and as you can see, I got in trouble. @Old Collingwood I will try to fill the spaces of the bulkheads and sand them from bow to stern direction for proper plank layout. (Did I understood well?). @vossy ...you just confirmed my thoughts, the planks must not be bent upward or downward (As Mastini states). I red some planking tutorials on the site but It would really be helpful if I could find some planking videos. I tried youtube for various results. Seeing a video is much more helpful than reading something at least for me. @zappto thanks for the tip. I took a look at Mrcc build log and I noticed that it was a different Santa Maria kit producer. Is it relevant or the planking procedure is identical to all Santa Maria-s? I ask because my version is slightly different from his. @Altduck you have eagle eyes! the keel is slightly bent on the stern area, for abut 1-2 mm. I will try to straighten it out. Finally, another though crosses my mind. If the planks will be placed horizontal, than there will be some gaps in the bow and stern area as you can see from the pictures above. Will they be ”filled” afterwards?
-
Dear shipcarpenter, I would like to ask for some advice regarding the planking of this ship. I am trying to build the Amati Santa Maria myself, however I struggle with the planking process. Did you put the planks in hot water prior attaching the to the bulkheads? Also, I noticed that in the instruction manual that the planks must be attached with a slide bent upward, which I find difficult to obtain. However, in your photos it seems that you did not bent them upward as in the instruction manual. Instead, it seems to me that you just attached them horizontally. Can you explain to me in detail the process of planking please. I`m trying to build my first wooden ship model so I am in a need of help. Also, I have a build log opened for mu workflow where I attached some photos to. Thank you in advance! Oliver
-
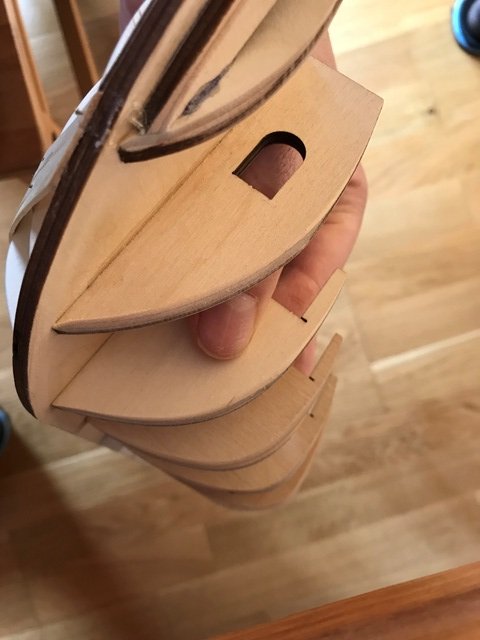
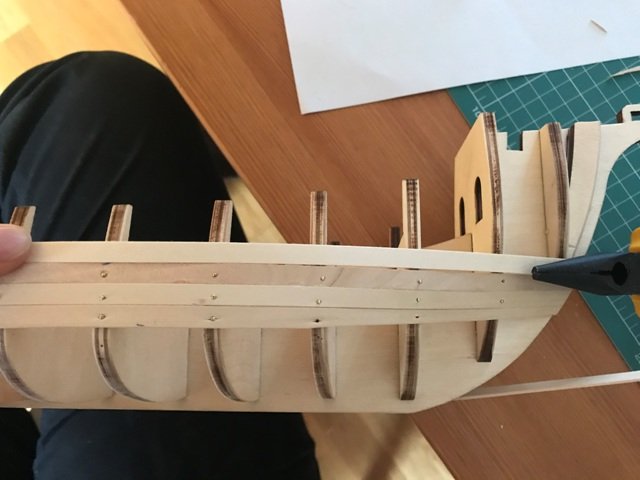
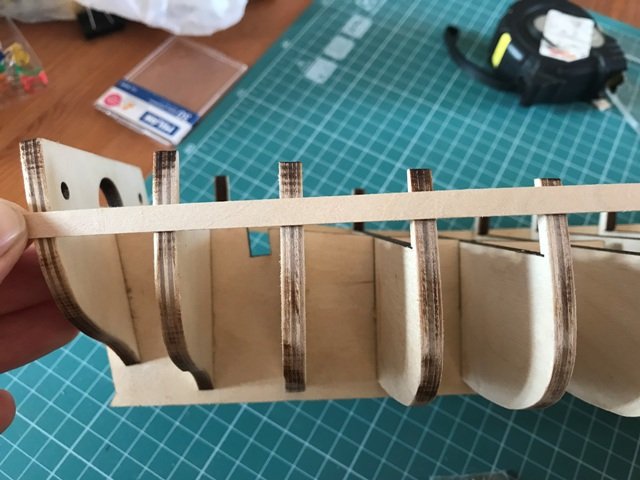
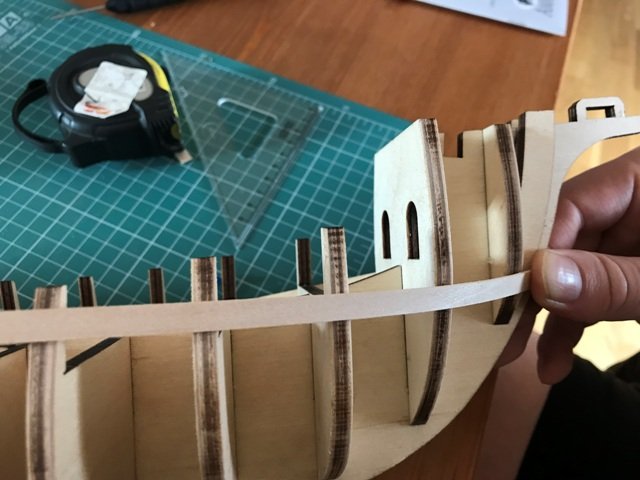
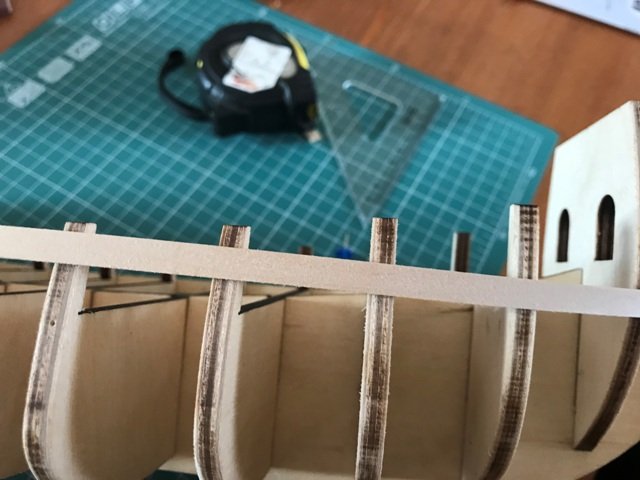
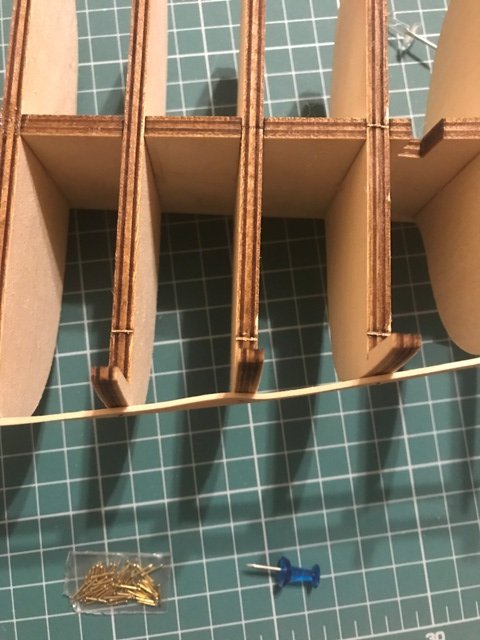
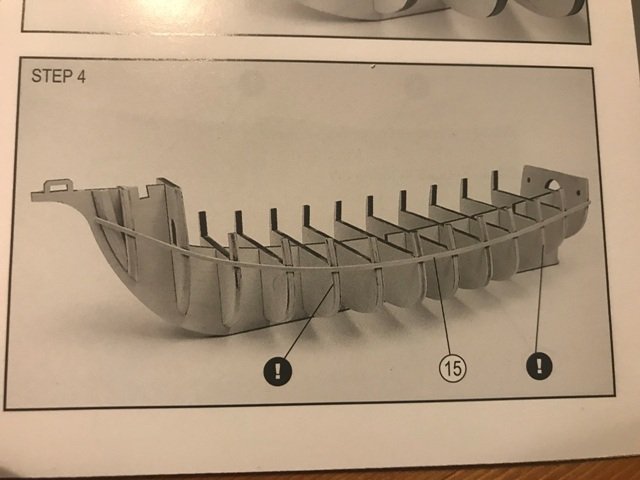
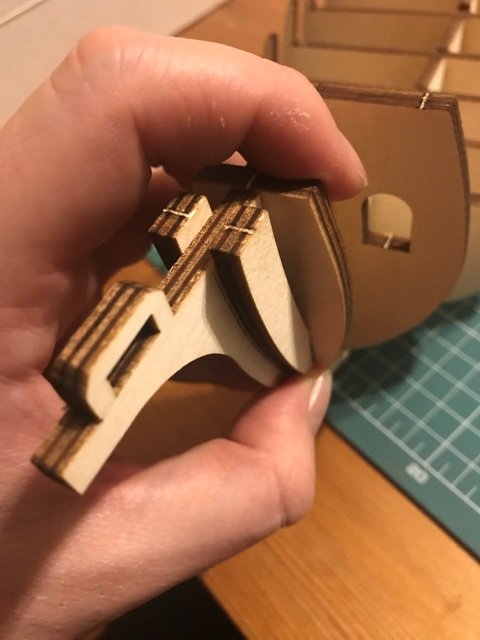
My only question would be: it is necessary to carve a piece of wood and glue it on the supporting parts from the pictures? I saw this on a couple of times. The instruction manual does not say anything about further carving.... As you can see, my keel and bulkheads are in position: Now here comes the hard part. I saw in the manual that the planking must be slightly bend upward. I tried it but unfortunately the wood snapped as you can see from the pictures. Also, I am really not sure that this is the correct way to begin the planking. As you can see, even if I manage to bend the plank upward, the planking will have an uneven fiddling curvature which I really don`t think is ok. For bending the plank I used an electric plank bender, however this will not help me bend the plank upward. What did I miss? I read Frank Mastini`s book about ship modeling and his approach is that the planks is that it must be glued without bending them upward (or at least that is what I understood).
-
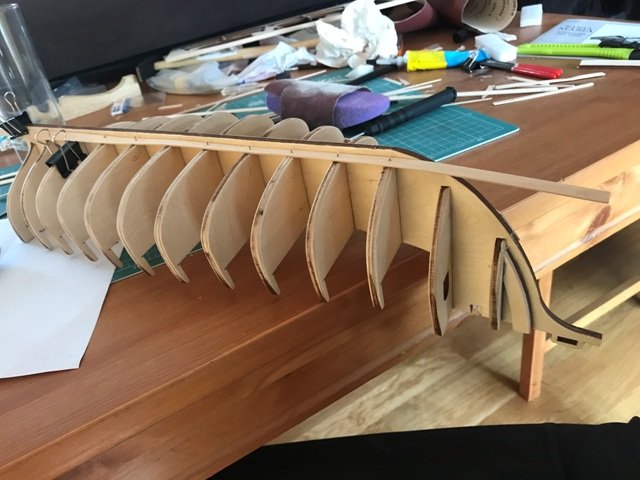
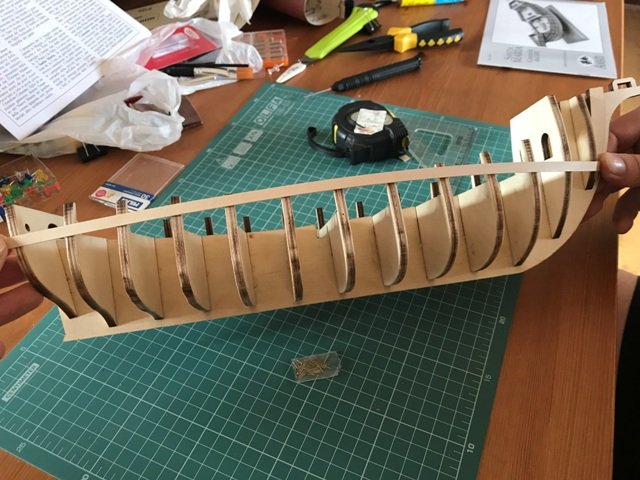
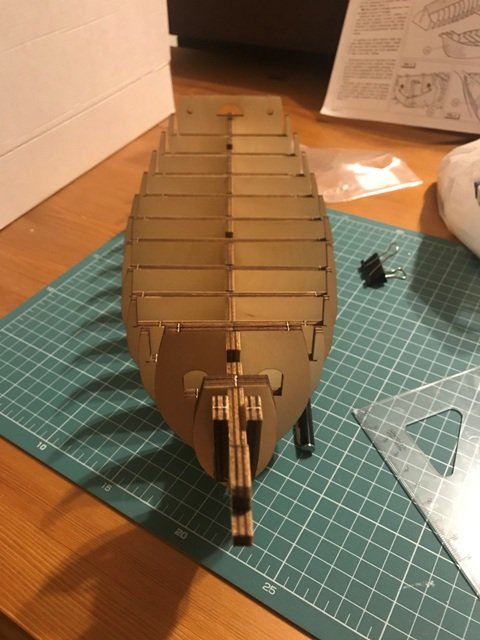
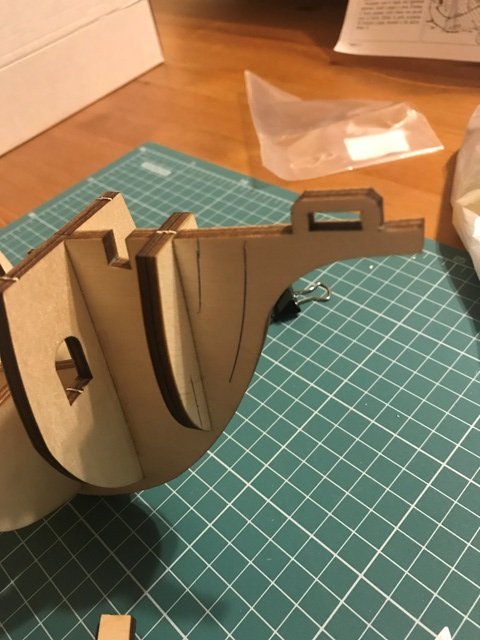
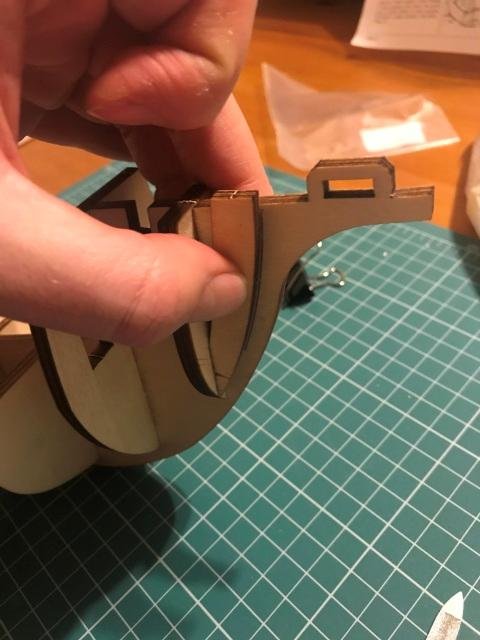
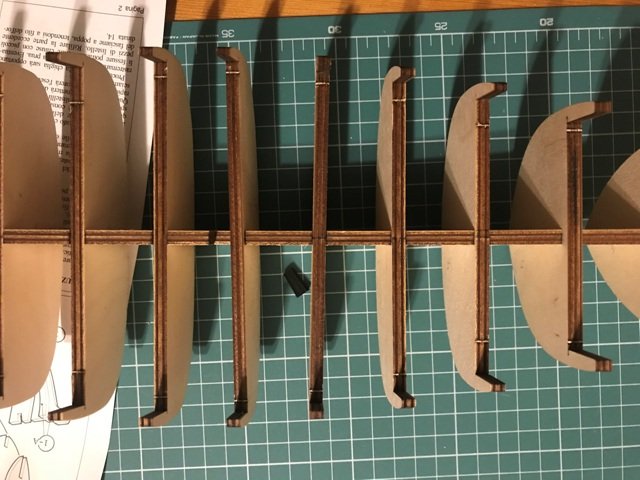
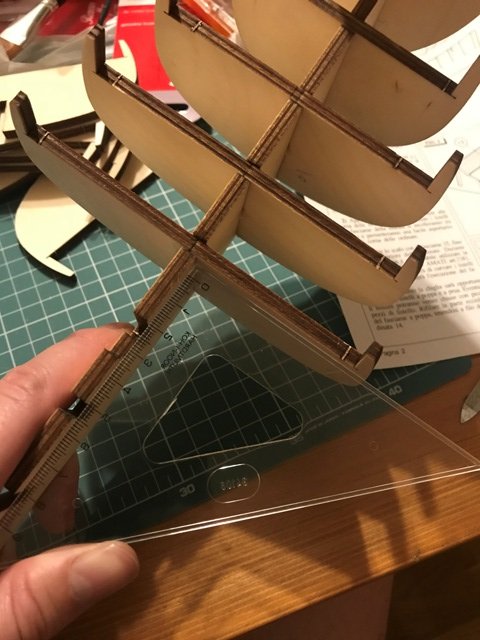
This is the second phase of my workflow. I have attached and glued all the remaining bulkheads and also attached the supporting wooden part in front.
-
Thanks! It is reassuring that I hear there is sufficient wood in the kit. At some point I was asking myself what if I mess something up and need some wood... Unfortunately I don`t have a "local" Amati shop, so I must order everything online and this can influence my workflow. So.. great news. I will try to take as many photos as possible and try to explain in detail everything I will do. It will be important for me in order to get help if needed but also I may help others on their journeys as well...
-
Congratulations for choosing this model. I have a huge crush on this galley. I had the pleasure seeing the replica in Barcelona`s Shipyard Museum. This thing is huuuge measuring 60 meters. Funny thing is they have a wooden ship model of the La Real at the museum. It left such a deep impression on me that after coming home I decided to start this hobby... I will check your build log with great interest since I am planning to buy this kit as well after gaining some experience. What is you general impression about Dusek kits? I heard the wood is excellent. What about the instruction manual? Is it sufficiently detailed for a beginner-intermediate ship builder? Thank you and good luck on your journey!
-
Thank you zappto, much appreciated! In theory I know how to plank the hull and the deck. However, I am super confused by the ropes and the rigging process. Thank you for checking my log
-
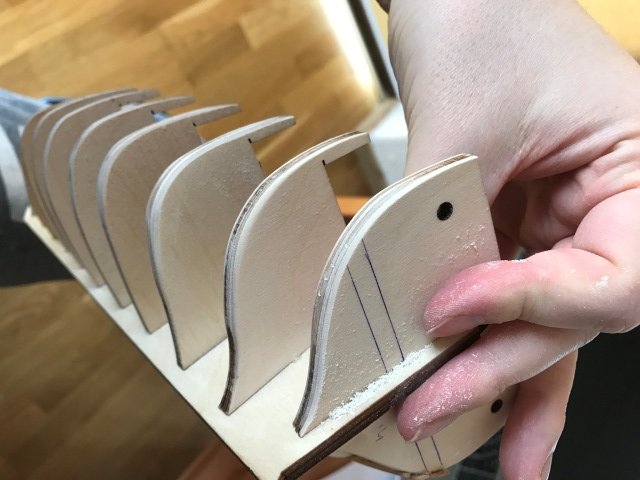
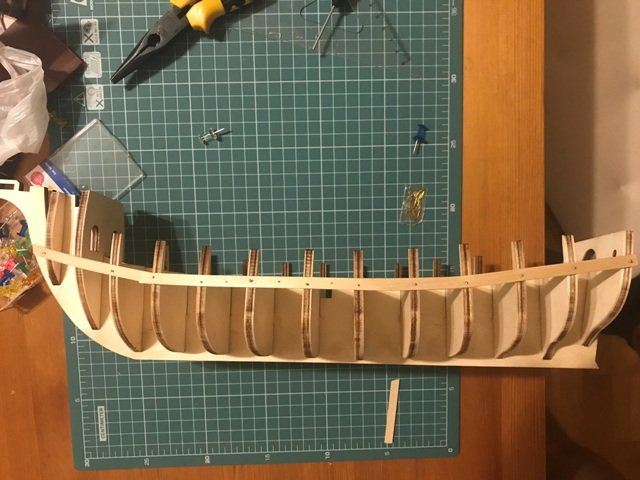
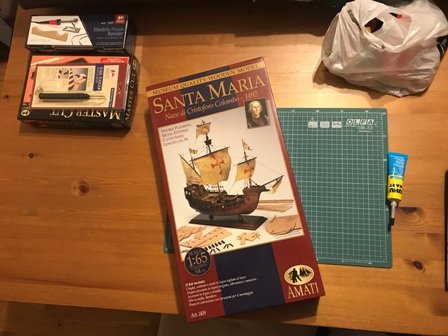
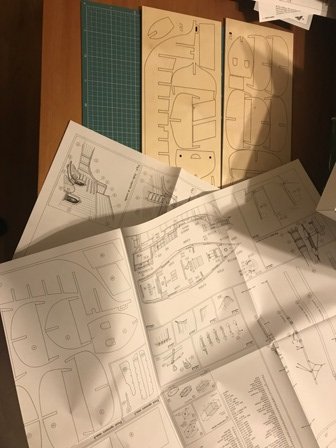
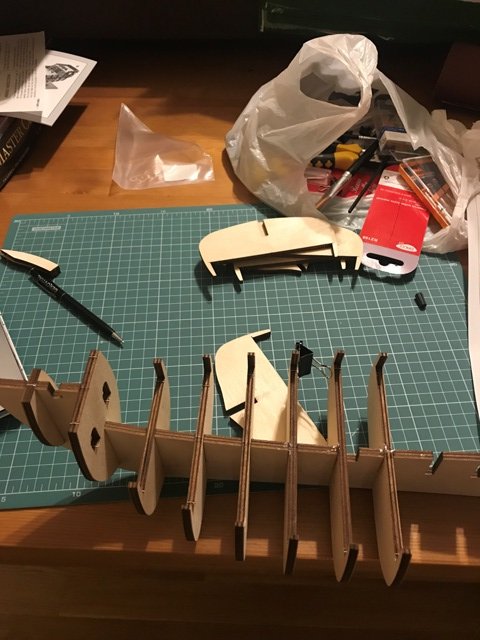
After some thinking I have decided to pick the Santa Maria as my first project. I have some experience in plastic modelling but this is another level. I decided for Amati because I heard good things about this kit manufacturer. This particular kit is specified to be a level 3 difficulty, which means intermediate. Maybe I will struggle a little bit but this is a part of the journey I believe. If I have some issues I will ask for the help of more experienced kit builders so please check my build log. Here it is. The package was more heavy as I expected which is a nice thing. I really prefer the heavier kits. Maybe this is normal for wood but for me coming from plastic models, it is a little bit unusual. I started by studying the plans of the ship and the instruction manual. For now, I understand the process, but there will be some parts where I will need help, especially on the part of the mast and the rigging. I started by carefully cutting out the pieces and numbering them in order to not mess them up later on. After cutting them all out I have inserted them into the keel just to check them out. Obviously I saw some problems with one or two of them as you can see from the picture above. The center bulkhead and the one immediately on his right is not perfectly straight. Another unexpected thing was that one or two of the bulkheads were inserted to the keel with some difficulties and I had a hard time getting the out from the keel. I used a small hammer to get them out... After this I started gluing the bulkheads and attaching them to the keel. I checked their position with a ruler just to be sure that they are straight. After much straightening, I inserted a clip between the two bulkheads and I will let the glue dry for the night.

-
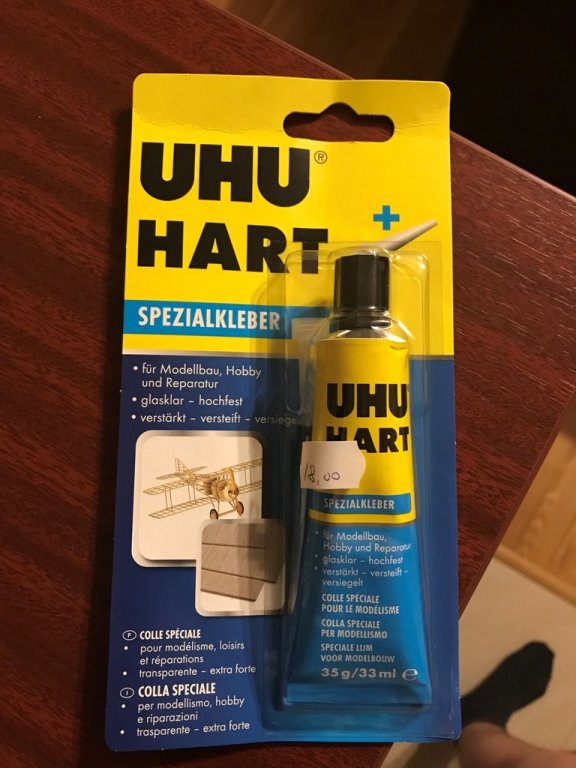
Thank you all for your answers guys! I will check in the near future some carpenter`s glue in a bigger store specialized in constructions. For now I will use the UHU till I get a better option.
-
Guys, I have some questions related to UHU glue. Does anybody used it on this forum? I will attache a photo of the package. Unfortunately in my hobby store they do not sell PVA glue, only this type of glue recommended for ship modelling and a type of super glue produced by Bison. My firt kit will arrive shortly, so any opinion would be great! Should I use the UHU or should I search for a carpenter`s glue in a store specialized in construction assets?