


Rcboater Bill
-
Posts
164 -
Joined
-
Last visited
Content Type
Profiles
Forums
Gallery
Events
Posts posted by Rcboater Bill
-
-
Each step so far has involved letting things dry overnight before moving to the next one...
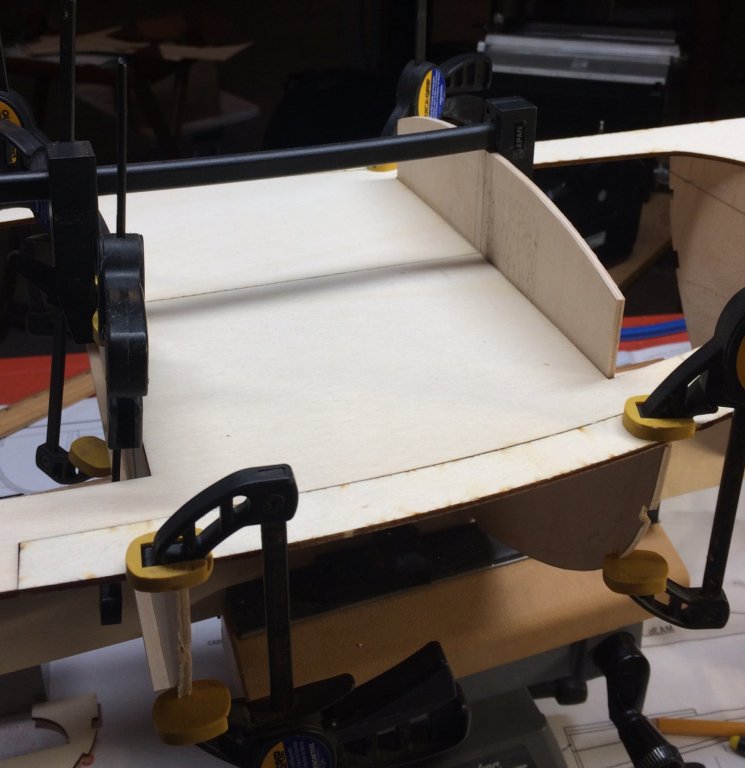
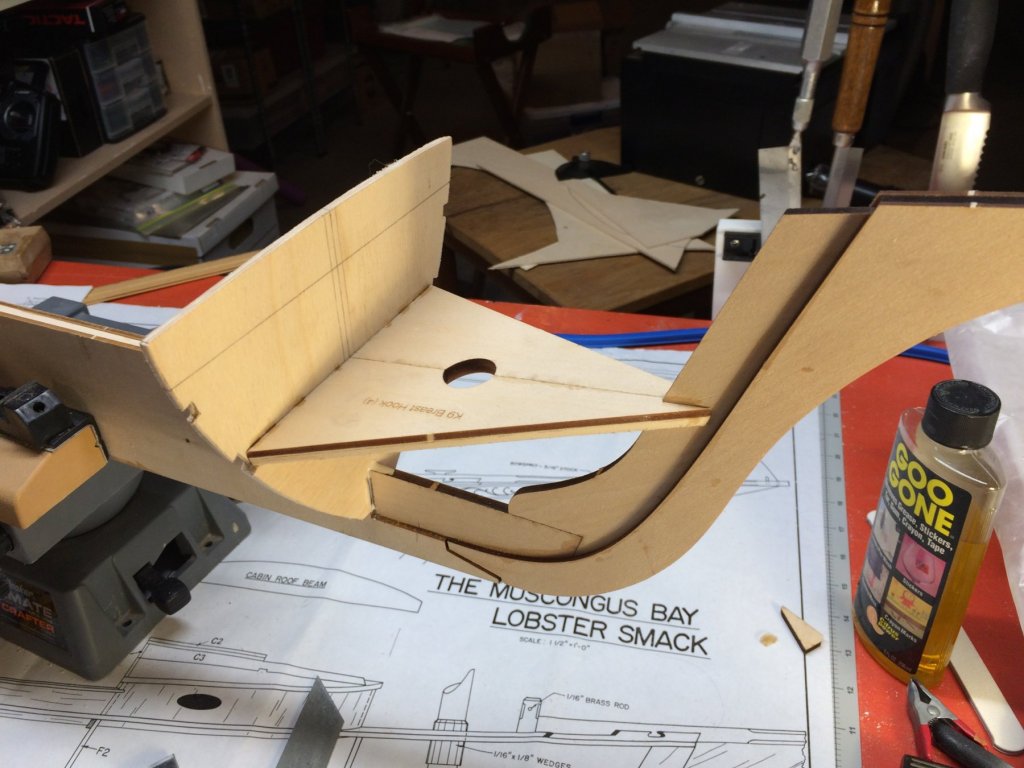
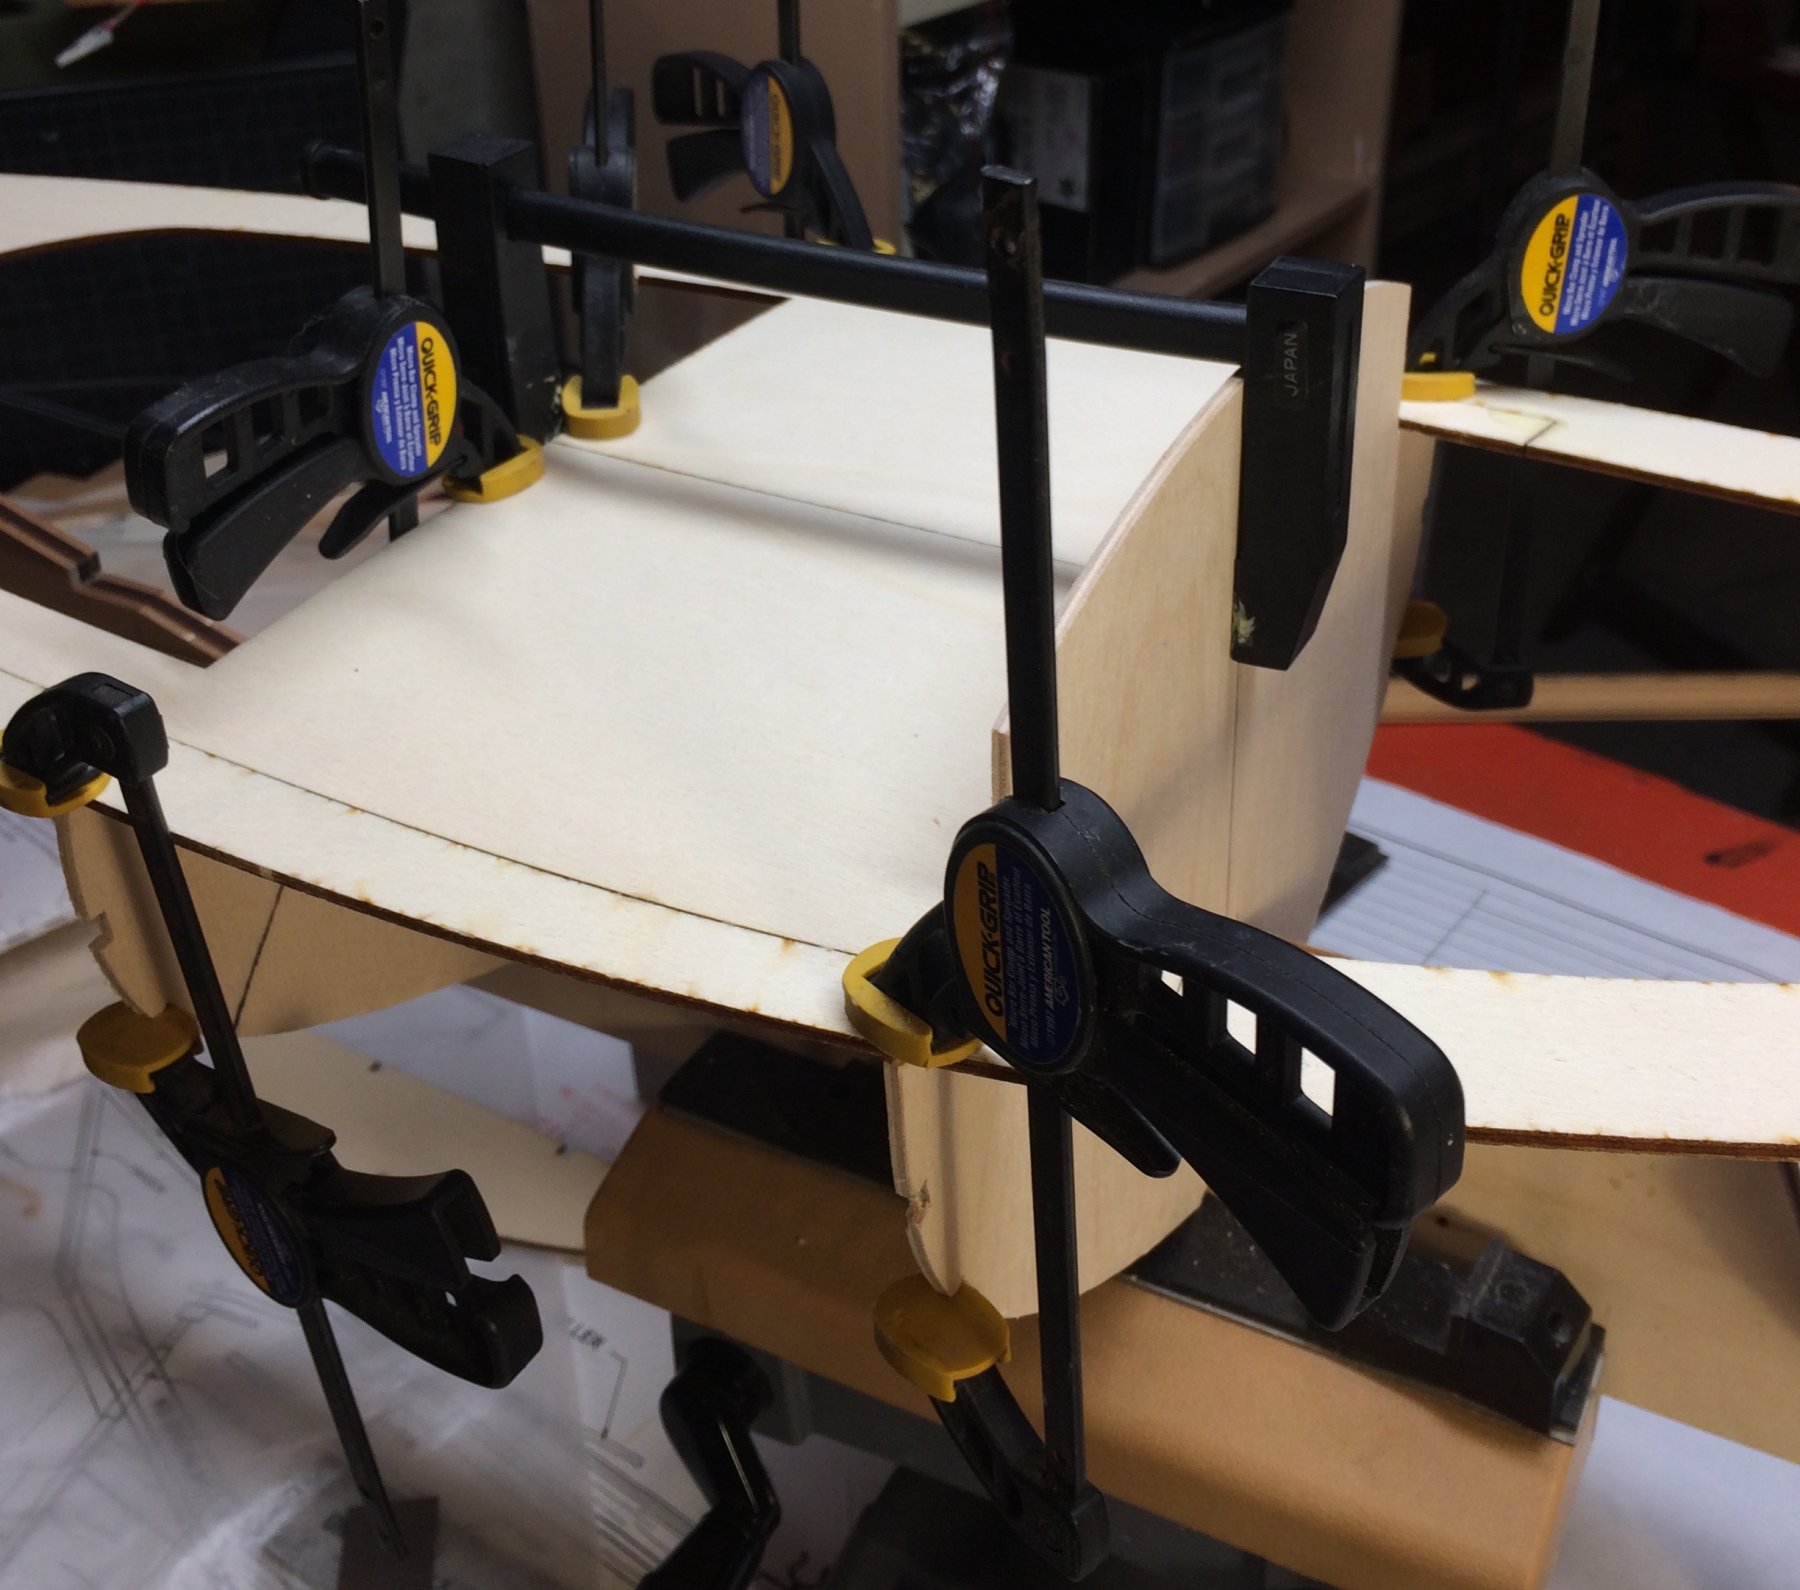
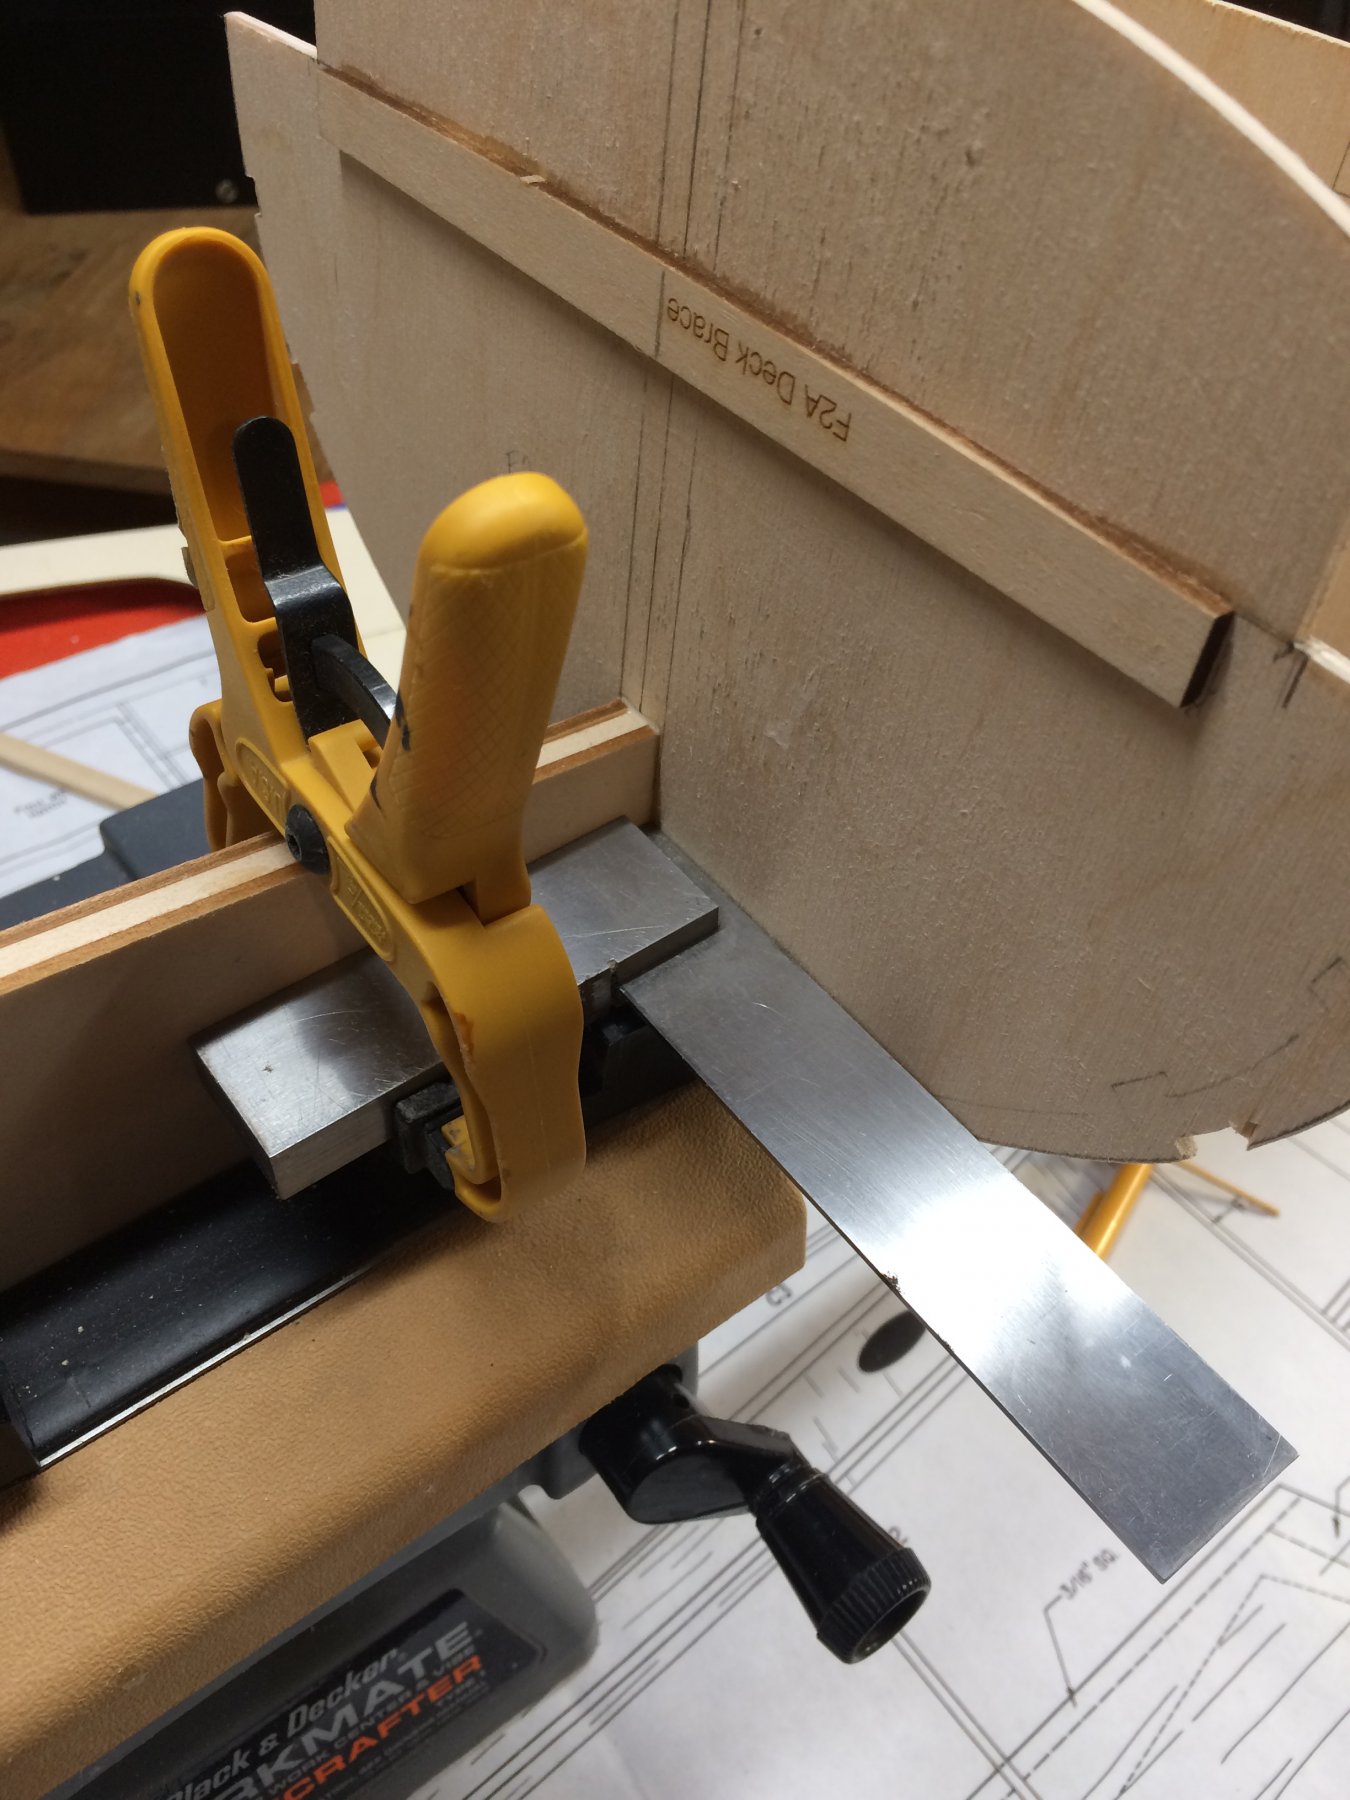
With the first two bulkheads in place, It was time for F3. Getting that aligned with the forward edge of the deck cutout for the cockpit is most important, so I installed the deck at the same time. It will be easy to add in F4 and the transom after this sets...
The outboard clamps port and starboard give the deck the camber set by the tops of the bulkheads.

- hexnut, thibaultron, Fright and 2 others
-
 5
5
-
Ozark,
It may be heresy here, but I would suggest you check out some of the build threads on finescalemodeler.com ‘s ship forum. That seems to be the place where builders of plastic sailing ships go. I’m not suggesting you stop posting here, rather that you’ll find the answers to the specific questions you are raising here already answered.
-
One bulkhead at a time. Last night it was F1, tonight it was F2.

- thibaultron, hexnut and bob porter
-
3
-
Still in catchup mode, documenting work I had already done before deciding to start this log....
Another tip: Draw center lines on the bulkheads before installing them. It will make it much easier to get and keep them aligned when installing them. (I wish all laser cut bulkheads had reference lines like this scored into the parts- it would be so easy to do that in the CAD drawing before sending it to the laser cutter!)
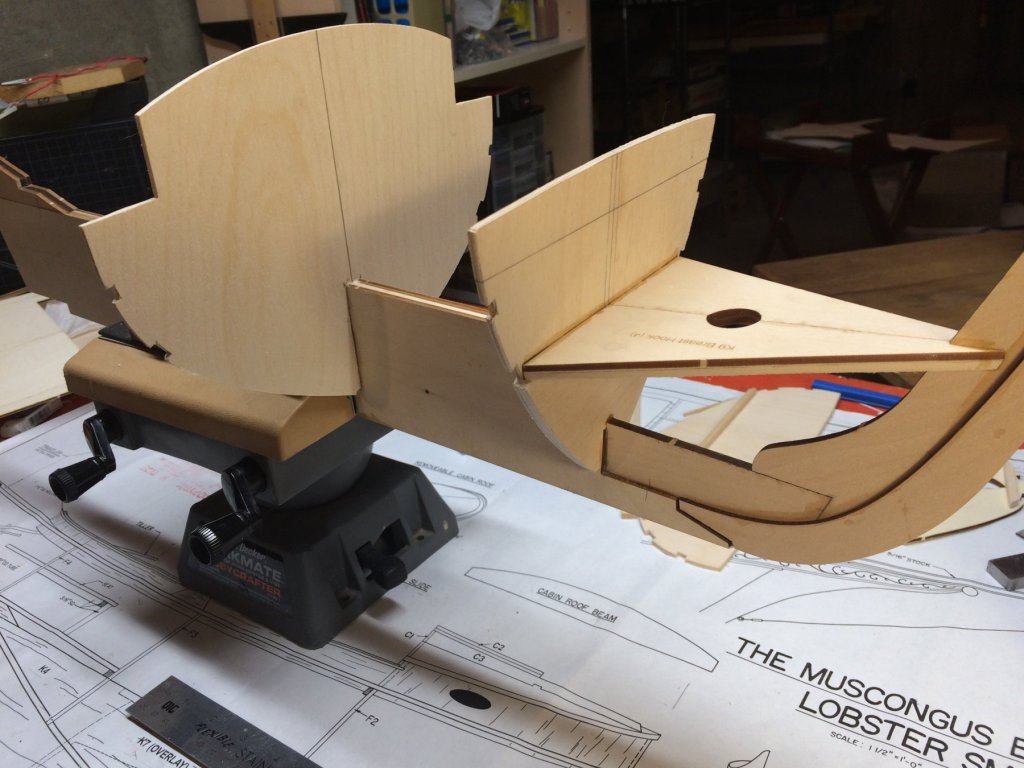
The kit instructions suggest putting all four bulkheads and the transom in place, then using the battens to get everything aligned before gluing. I couldn’t do that even if I had eight arms! Instead, I started at the bow. The breasthook parts make it easier to get F1 in place and squared up. Note that this bulkhead is the only one not perpendicular to the bottom of the keel!
The instructions recommend using CyA glues for assembly. I like something stronger for my operating models- so I am using waterproof Titebond for some joints. I used it on the bulkhead-to-keel joints, to give plenty of time to check and re-check that everything is square. Once I was happy with the alignment, I used little dabs of medium CyA to tack the parts in place while the yellow glue cured.
- thibaultron, Duanelaker, hexnut and 2 others
-
5
-
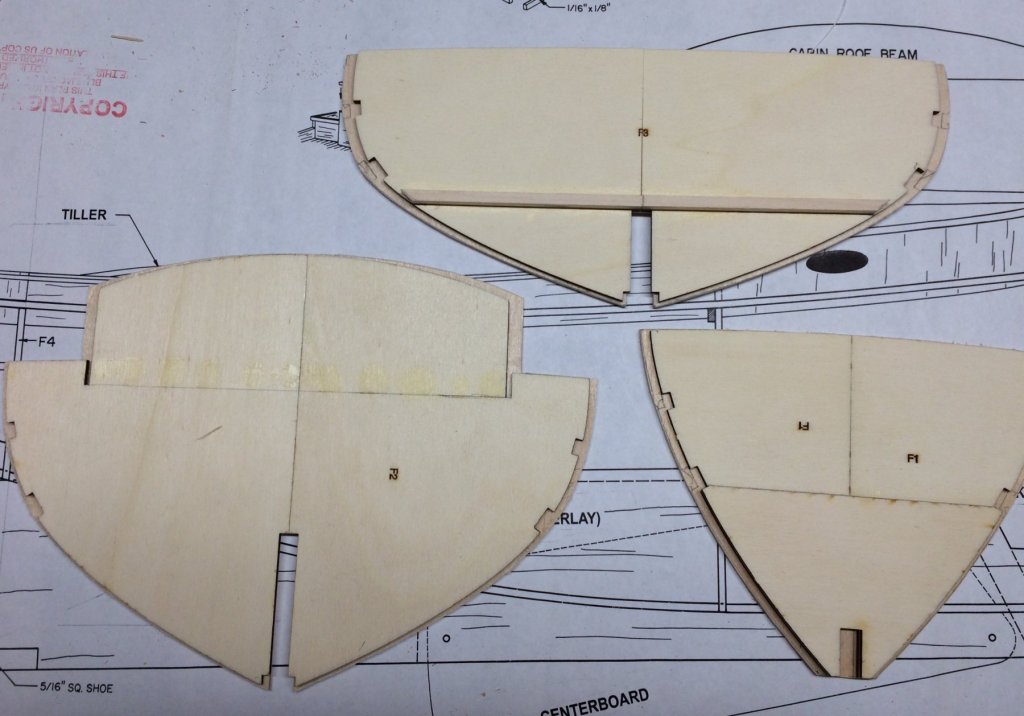
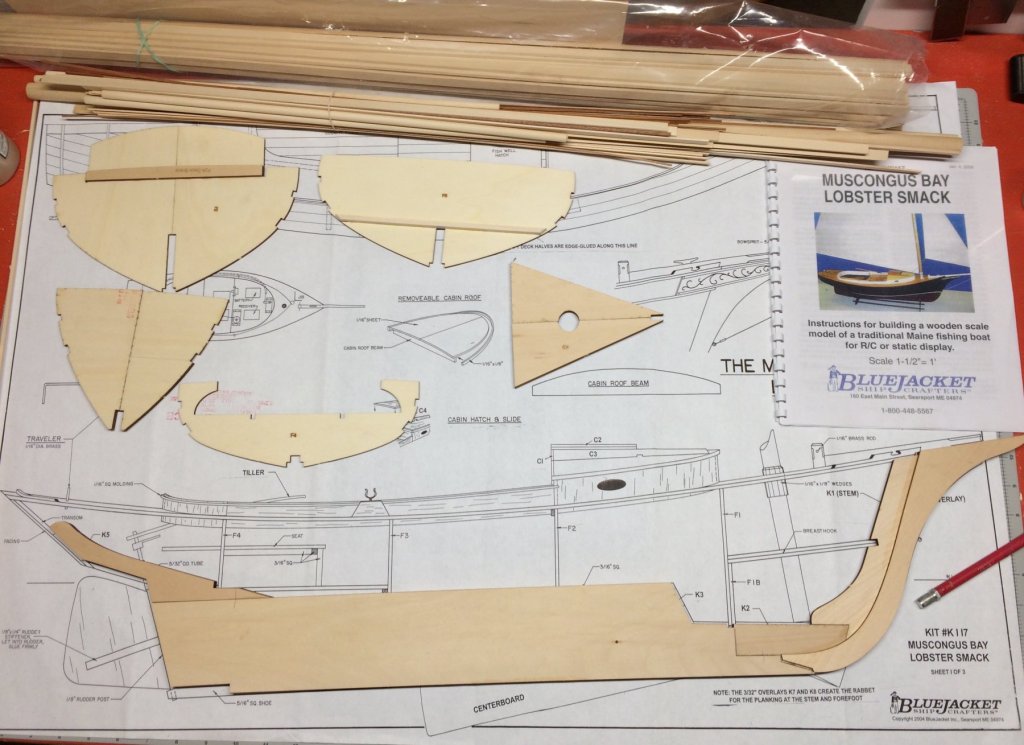
As mentioned in my first post, the kit features beautifully done laser cut parts, and they match the drawings on the plans exactly. There is a minor problem, though- the parts don’t always match each other. Nothing too serious- nothing that the application of a little modeling skill can’t fix! (As far as I can tell, the errors are in the plans, so the laser cut parts replicate them perfectly.)
An issue that needs to be dealt with is the width of the first 3 bulkheads— they are too narrow when compared to the main deck, by a little over 1/4 inch. Also, the slots for where they fit over the keel are too narrow. The shape of the main deck looks great, it is symmetrical, with a nice even curve, so I decided I’d use it as the master, and tweak the bulkheads to match it.
I don’t think it would be too hard to add some strip wood to widen the bulkheads a little, but I decided it would be easier to just cut new ones from a sheet of modeling plywood. (And use my new jigsaw!)
Here’s a pic of my new larger pieces, with the originals on top.
- hexnut, thibaultron, Duanelaker and 2 others
-
5
-
Here’s my first work photo- using up the keel parts and prepping the bulkheads.
My first tip: it is much easier to finish the inside of the centerboard trunk before it is assembled. I considered using epoxy resin, but was concerned that a run or blob would be missed, and I would end up with a hard-to-remove rock that would prevent the keel from sliding in. So instead, I just applied a couple coats of thin super glue. It soaked into the wood and then hardened. A second coat left me with a glossy sheen, so I know I have good coverage.
- bob porter, hexnut, Fright and 1 other
-
4
-
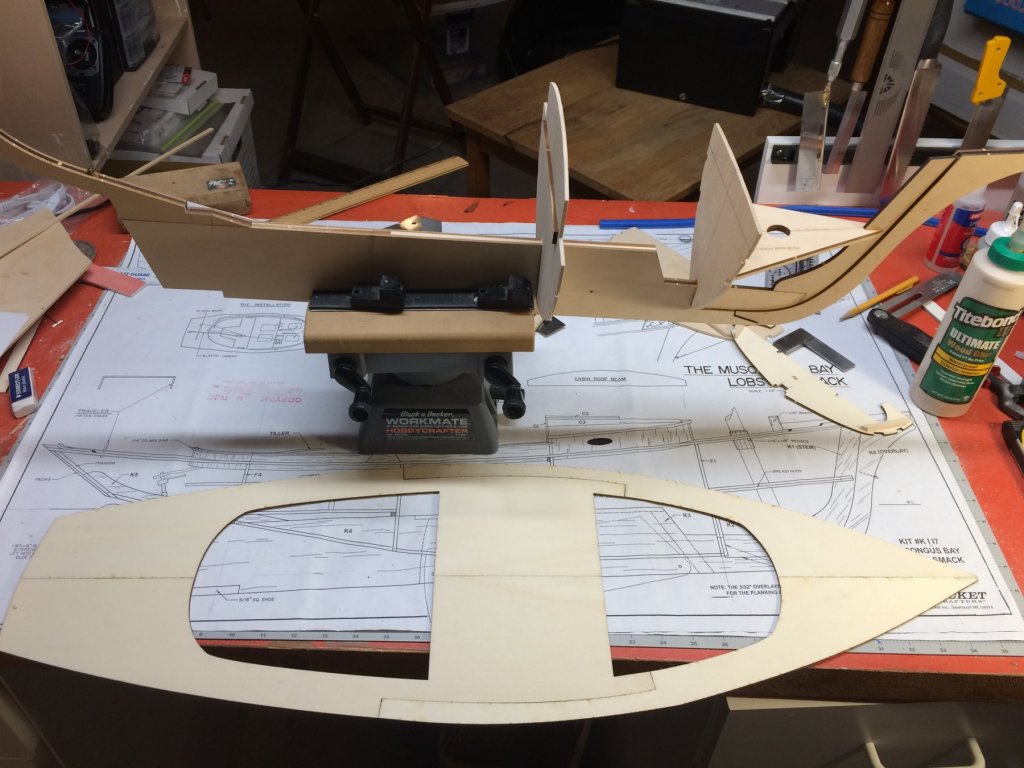
My wife wanted “a big sailboat” to go on top of the living room bookcases, so I’m happy to oblige! I chose the Bluejacket Shipcrafters 46” long plank on bulkhead kit. The plan is to build it as an RC model....
The kit is an old Laughing Whale design, one that hasn’t gone through BlueJacket’s updating process yet. But the kit still makes a fine impression upon opening- bundles of nice wood strips (basswood, mostly, with some Mahogany), and nicely packed fittings in typical BJ style. There are multiple sheets of lovely laser cut parts. There are three large plan sheets, one with profile and deck plans, one with all the laser cut parts plus extra detail and illustrations, and a sail plan. The instructions are perhaps the weakest part of the kit - they look like what you got from Laughing Whale back in the 80s, as opposed to the more detailed instructions you’d find in a more modern kit. The instructions for installing the RC gear are OK for an experienced RC sailor, but a first (RC) timer would need outside help.....
(My intention is to use this build log to organize and capture my thoughts, and provide some feedback to Nic at BJ.)
Warning to readers: I am a slow builder. My last model took about 200 hours over the course of nine months to complete- that’s averaging 23 hours a month!
- Fright, thibaultron and bob porter
-
3
-
I’m a long time RC scale ship builder who recently re-discovered this site.
I’m the Newsletter Editor and webmaster for the Marine Modelers Club of New England, an RC scale club based in the metro Boston area. I am also a member of the Merrimac Valley Ship Modelers and a local IPMS scale modeling club.
I like projects that blend my hobbies- such as converting plastic models to RC, or building an RC aircraft carrier in 1/144 with a deck full of plastic aircraft models. My latest project is that I just started now the big BlueJacket kit of the Muscongus Bay Lobster Smack- the 46 inch long 1/8 scale one. It will be an RC model, but also a display piece. I had started a build log over on RCgroups.com, but may do one here, too, if that’s OK?
-Bill
-
-
Hey Bob,
Any updates to this build? I just found, and am very interested in what you are doing. I am starting on the big 1/8 scale Bluejacket kit, and your build of the little one is giving me some great ideas!
-Bill
-
On 9/23/2017 at 11:42 AM, Moxis said:
Thanks Pete, I will definitely try this. Until today it seems to be best program for this purpose.
Did you ever try it? How did it go?
-
I have both kits. The 1/72 scale kit is the old Matchbox kit, full of inaccuracies and weak or overdone detail- a product of its era. It is also big, with a spacious hull, and makes a fine sailing RC model.
The 1/144 scale kit is half the size and more than twice as nice. It is an example of the great, affordable work that Revell Germany has been doing in the last few years.


Muscongus Bay Lobster Smack by Rcboater Bill - BlueJacket Shipcrafters - 1:8 scale - RADIO - Small
in - Kit build logs for subjects built from 1851 - 1900
Posted
Nic,
Good to hear - I know you can’t fix a problem you don’t know about.
I am pleased with the kit so far— the supplied materials are very nice, and the quality of your laser cutting is superb!
-Bill