
mati
-
Posts
122 -
Joined
-
Last visited
Content Type
Profiles
Forums
Gallery
Events
Everything posted by mati
-
 Mike your model is so neat... that's give very interesting look. I have to admit that is impressive for me. I've missed which paint you using? Red and black... Deck wood is holy, right? Cheers, Matt
- 452 replies
-
- 3
-

-
- cheerful
- Syren Ship Model Company
- (and 1 more)
-
Glenn, You and your build... it's like a national treasure!! Absolutely stunning... I wish to had a chance to see your model once. Cheers, Matt
-
Papegojan 1627 by mati - FINISHED - 1/48
mati replied to mati's topic in - Build logs for subjects built 1501 - 1750
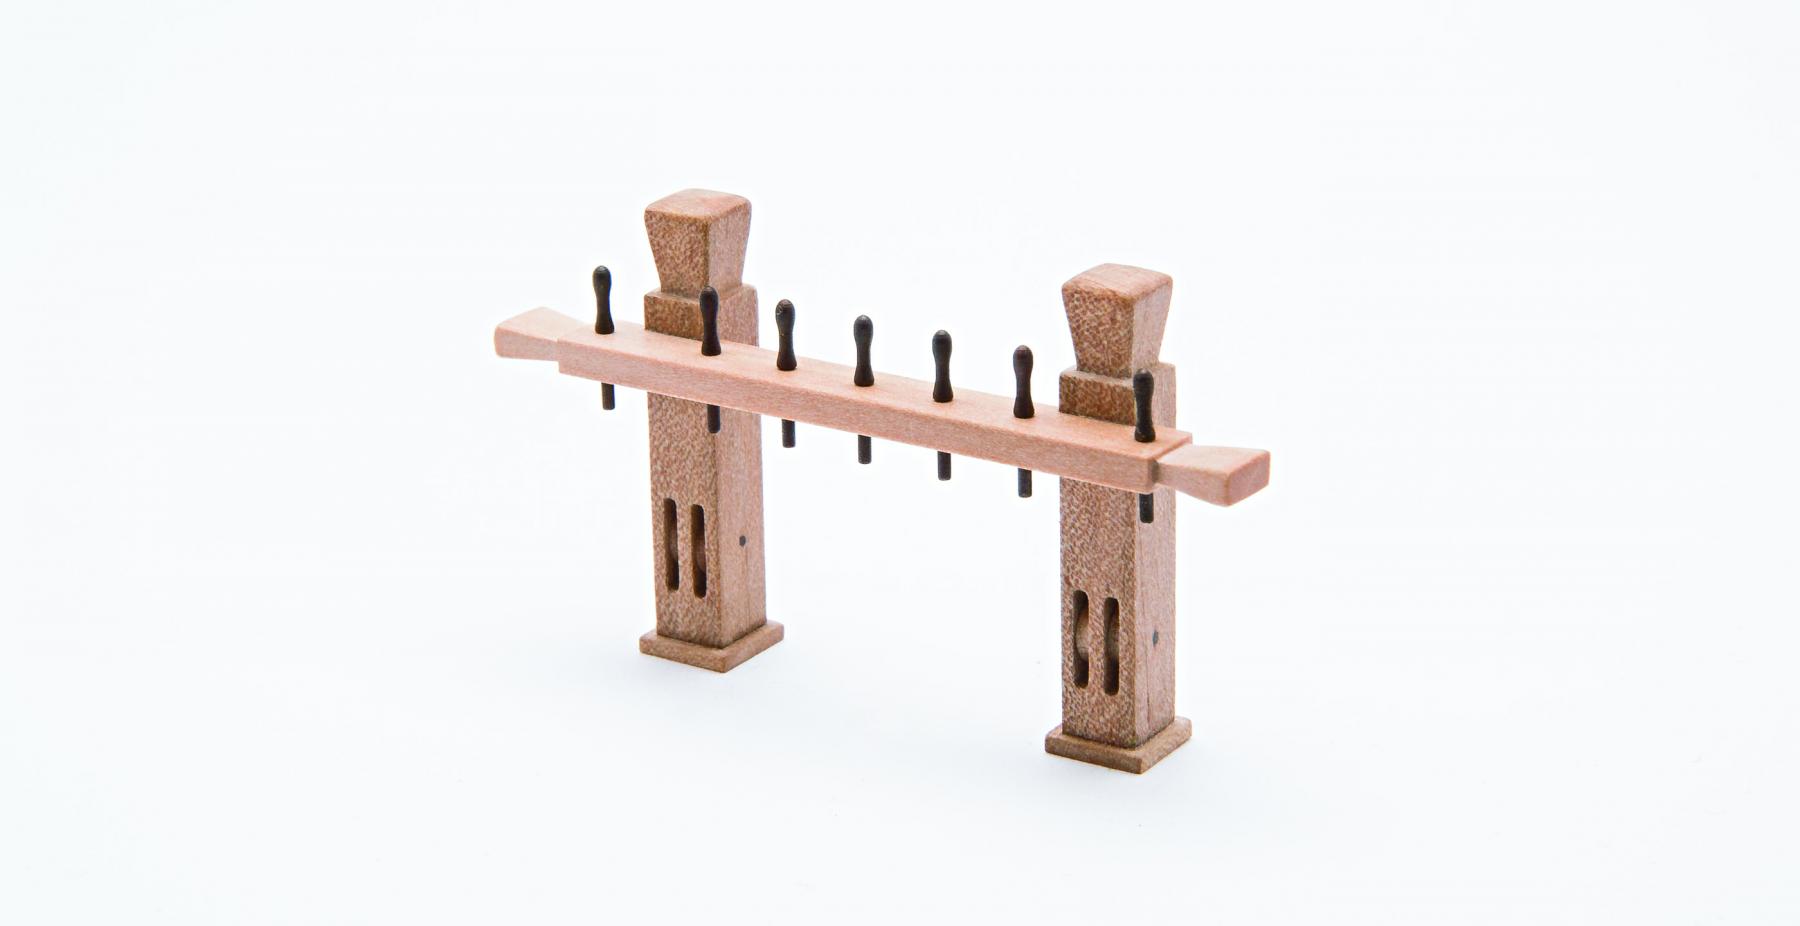
Thank you very much for such a kind comments Carl the size of the bitt is around 2,5 cm. Another little progress Cheers, Matt

- 222 replies
-
- 13
-
-
Papegojan 1627 by mati - FINISHED - 1/48
mati replied to mati's topic in - Build logs for subjects built 1501 - 1750
Thanks Carl Another little fitting Cheers, Matt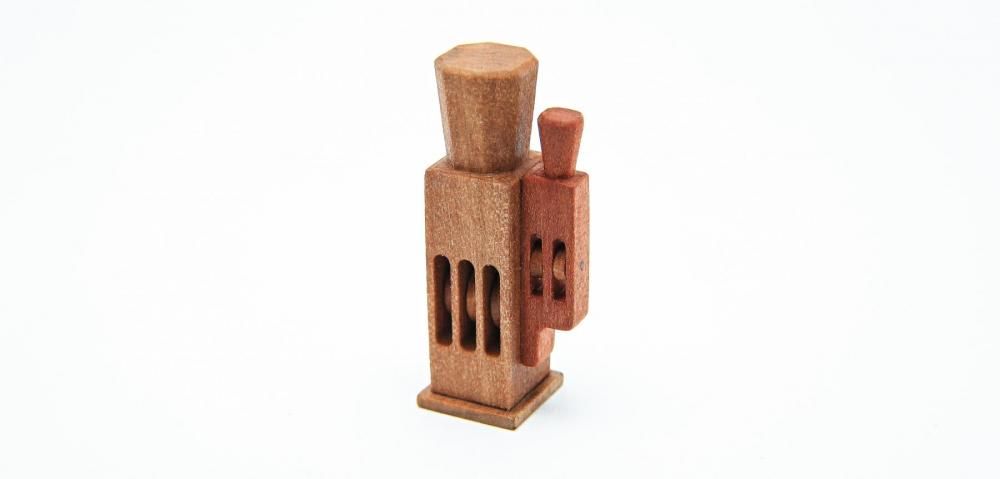
- 222 replies
-
- 14
-
-
Papegojan 1627 by mati - FINISHED - 1/48
mati replied to mati's topic in - Build logs for subjects built 1501 - 1750
Carl and Mark thank you very much A little bit of progress Cheers, Matt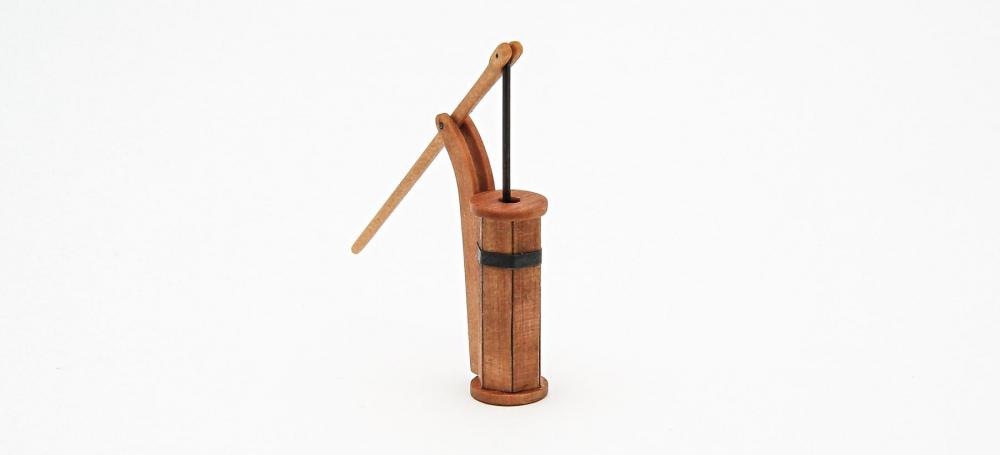
- 222 replies
-
- 12
-
-
Papegojan 1627 by mati - FINISHED - 1/48
mati replied to mati's topic in - Build logs for subjects built 1501 - 1750
... and another little update Cheers, Matt
- 222 replies
-
- 15
-
-
Papegojan 1627 by mati - FINISHED - 1/48
mati replied to mati's topic in - Build logs for subjects built 1501 - 1750
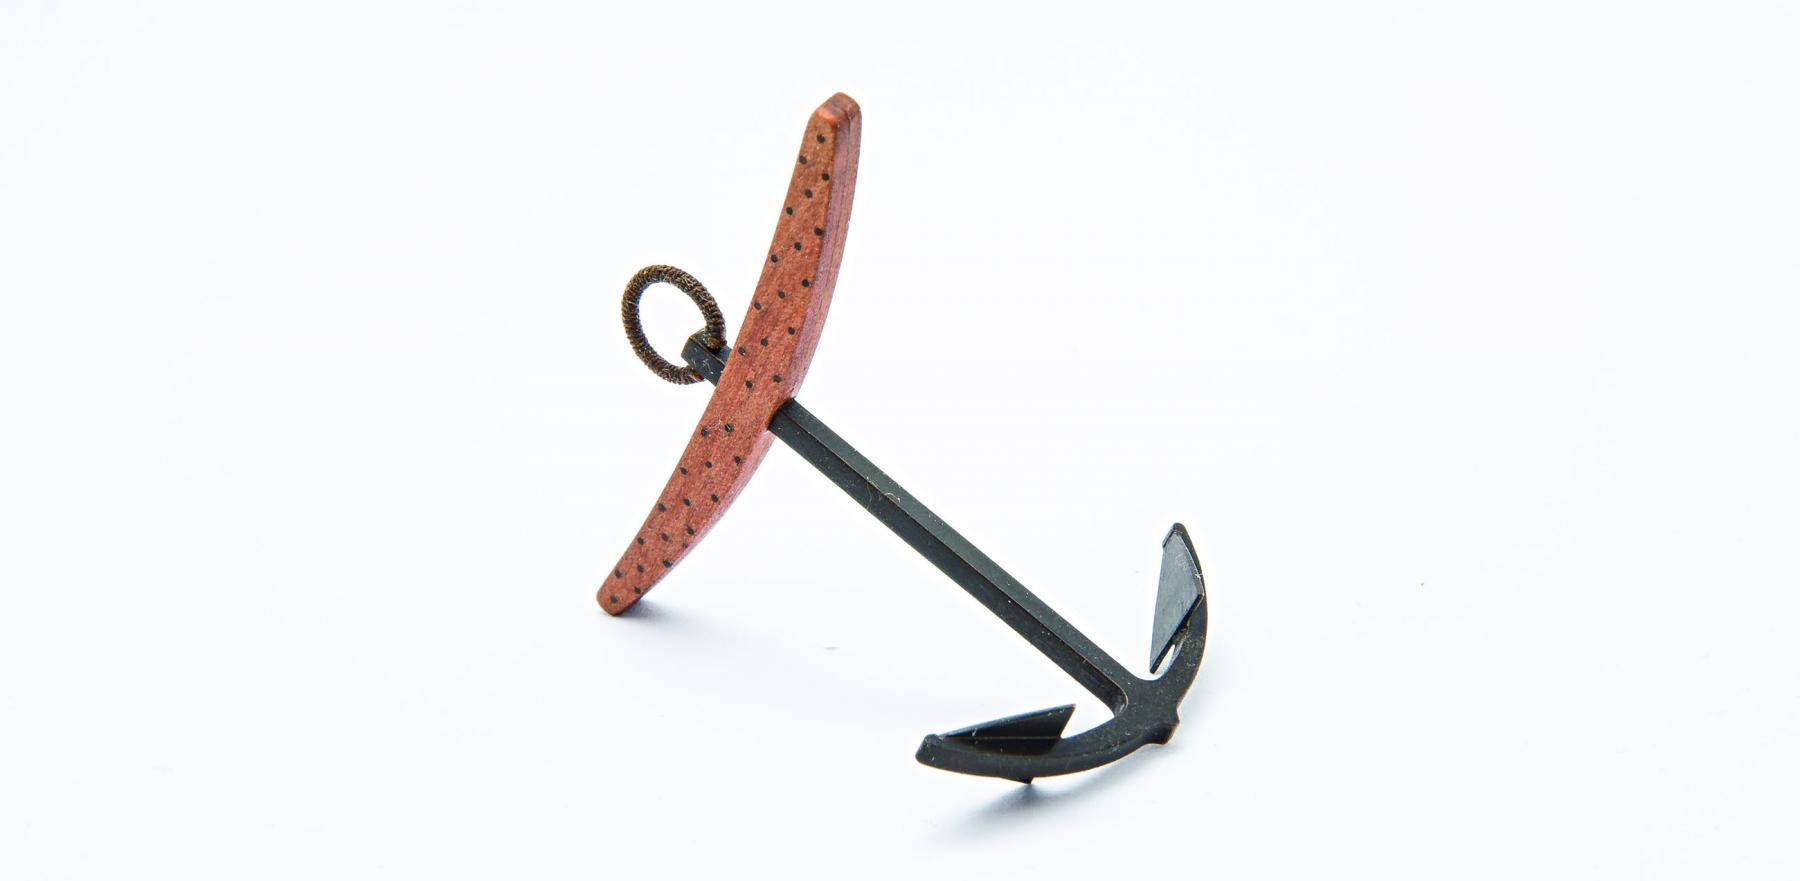
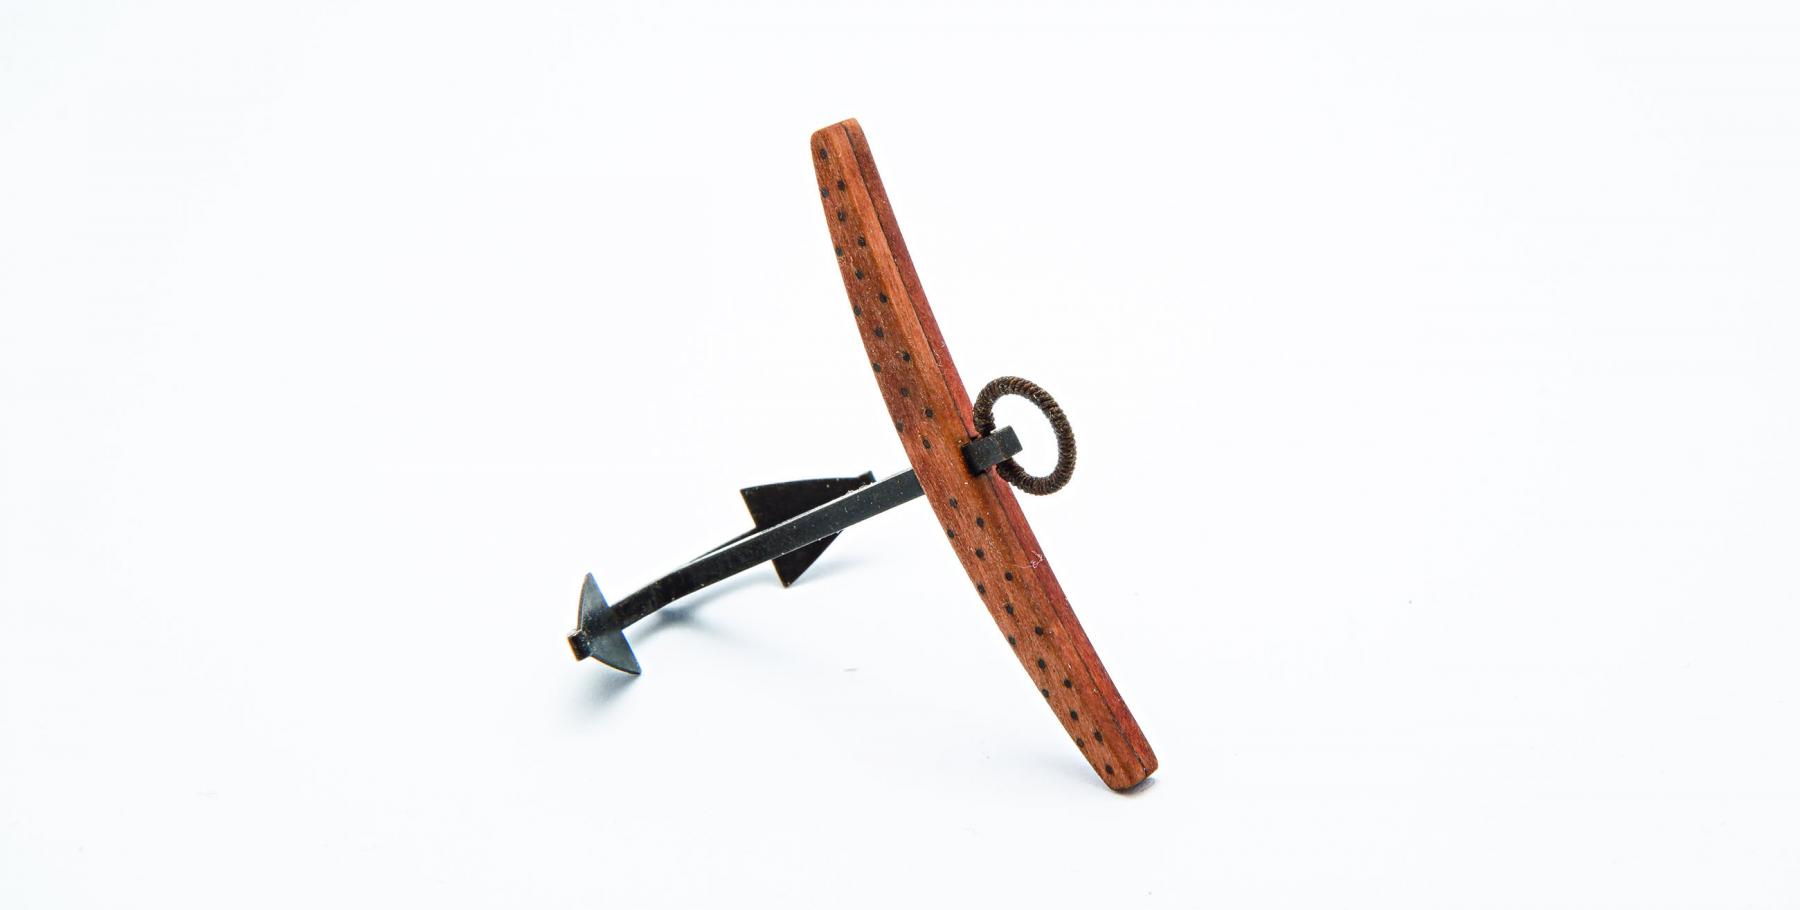
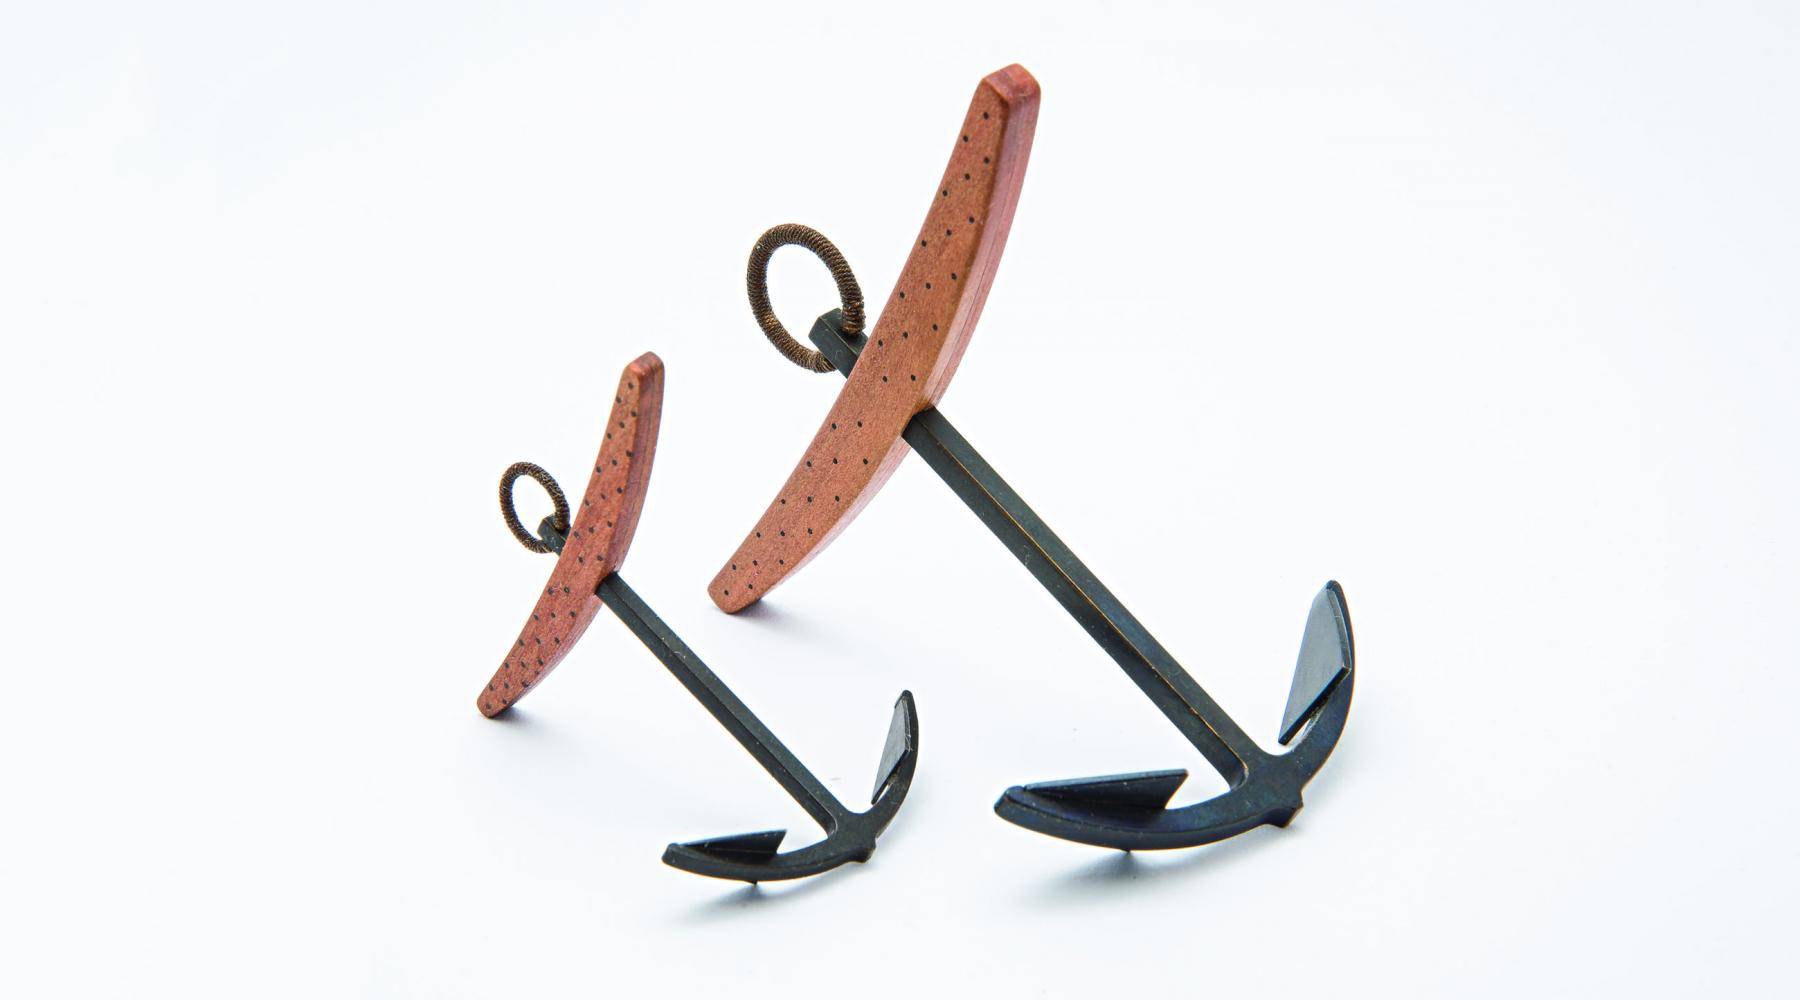
Thank you Gents for your kind words This time I'd like to post just pic of small anchor. I've made it the same way as a big one... few pages ago Cheers, Matt


- 222 replies
-
- 14
-
-
Papegojan 1627 by mati - FINISHED - 1/48
mati replied to mati's topic in - Build logs for subjects built 1501 - 1750
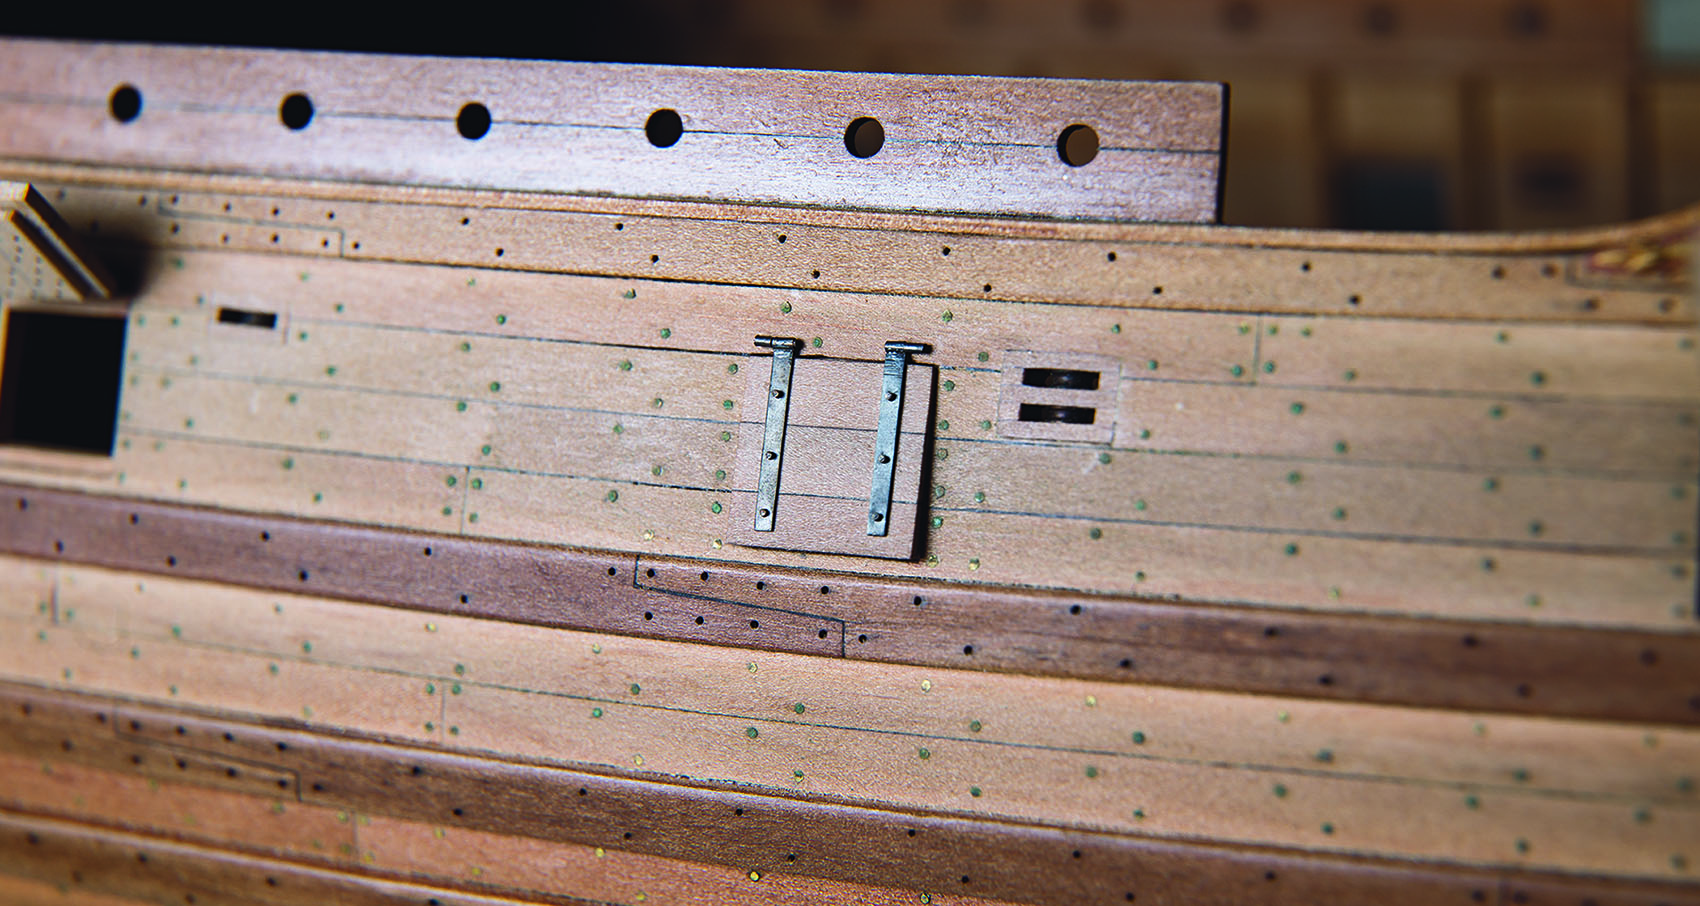
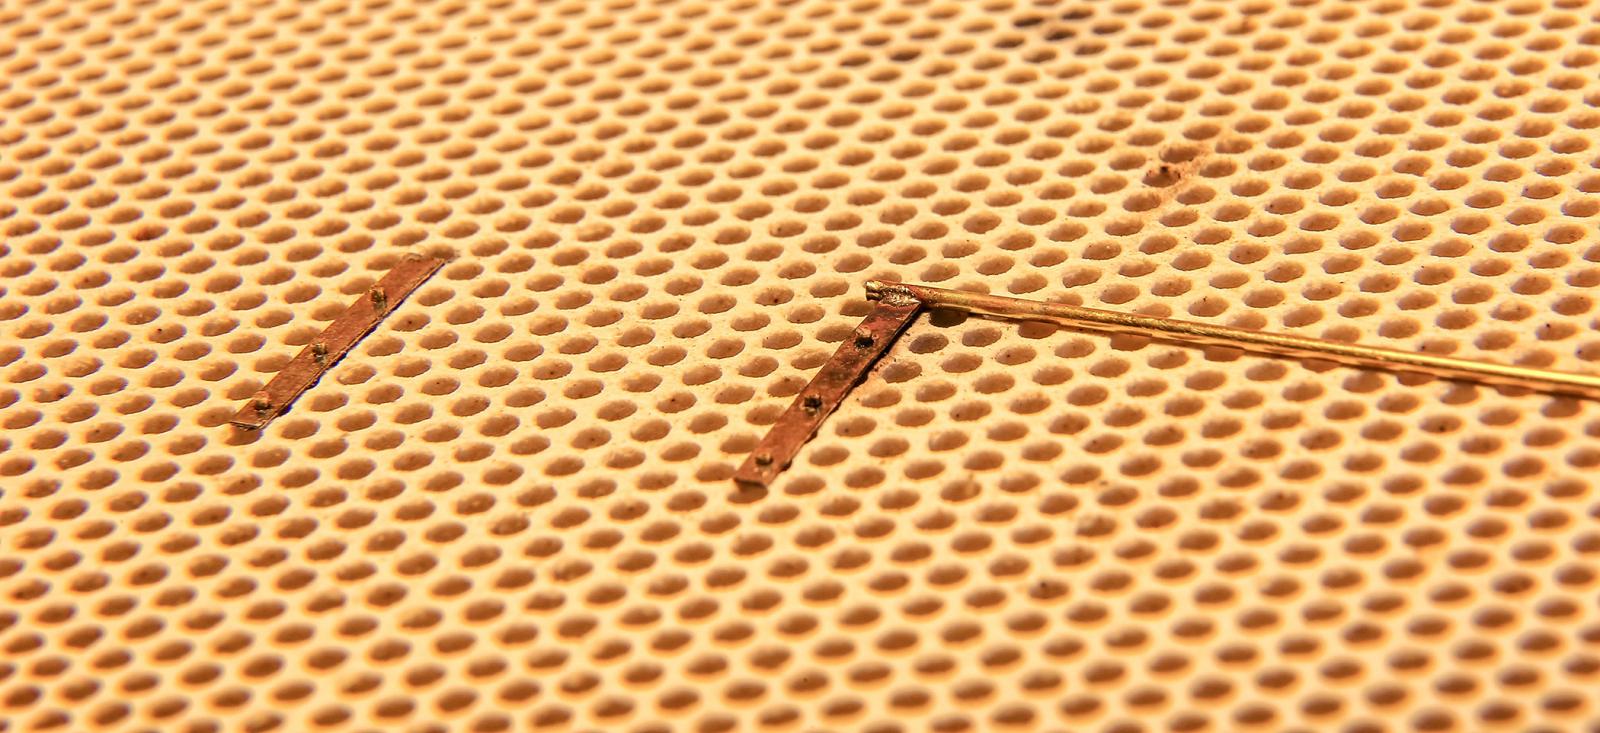
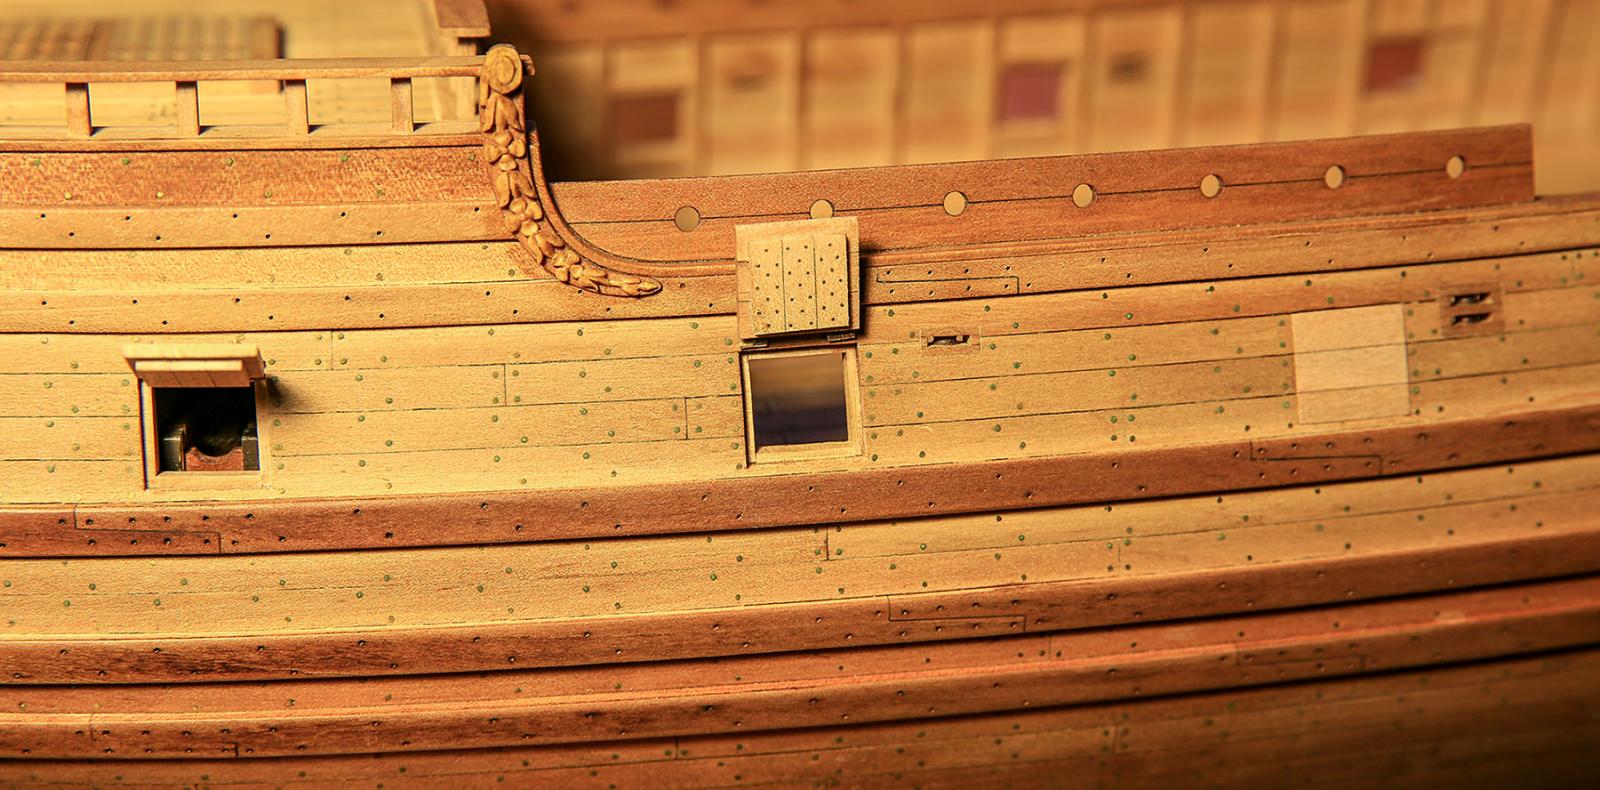
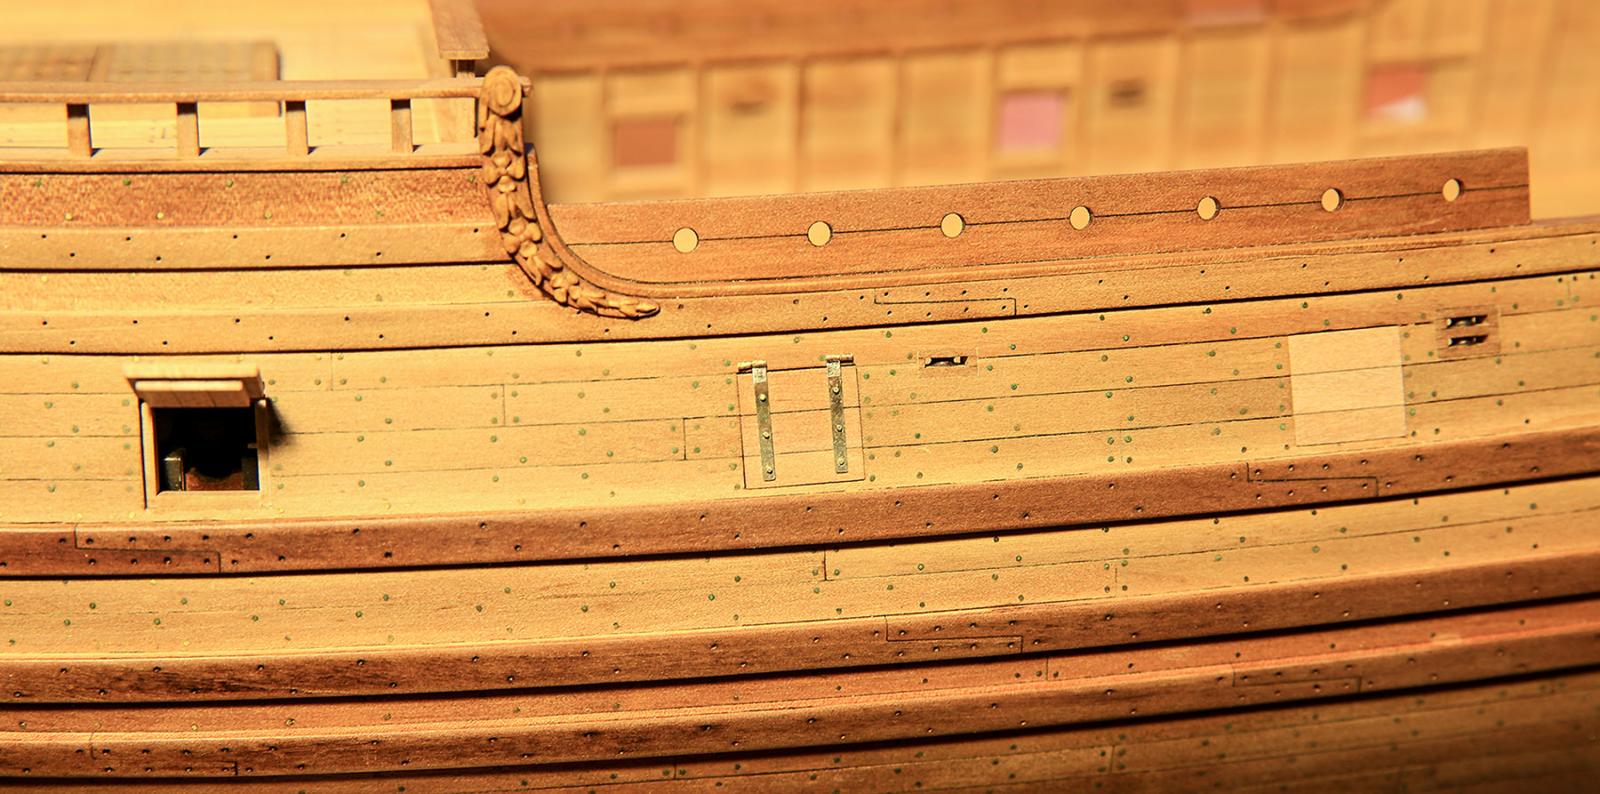
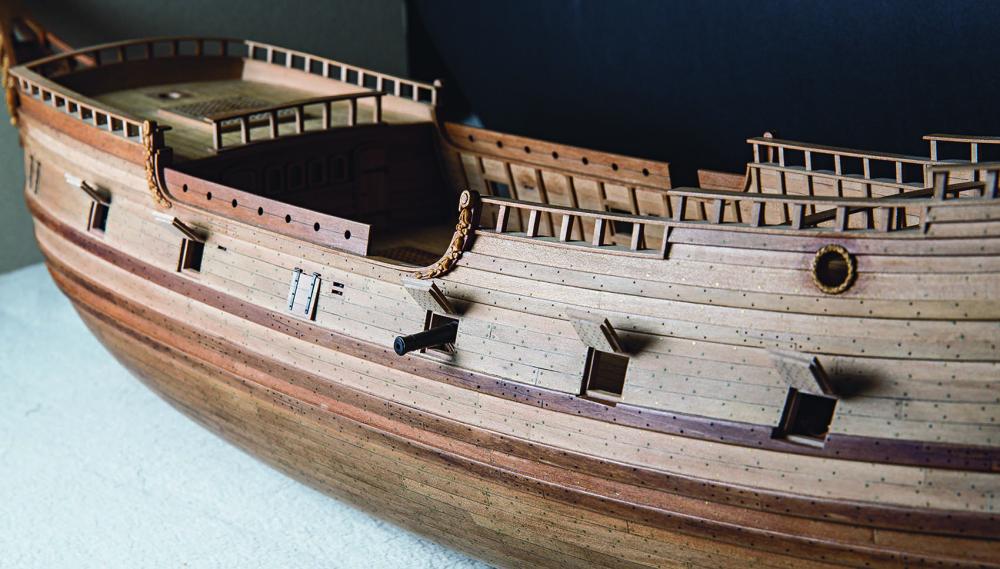
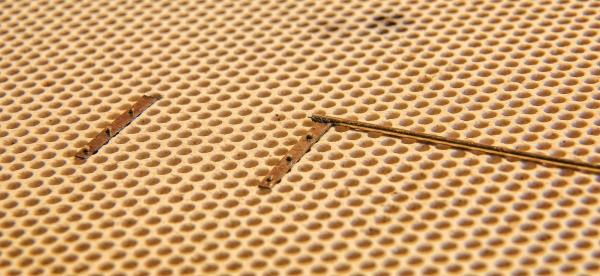
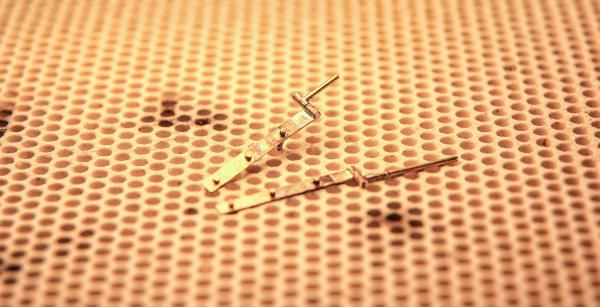
Hello A little update... I'm working on gunport lids and hinges... so far portside is done. Starboard still not Silversolder as usually... after soldering I've done some etching on hinges in iron (III) chloride and after that blackening in JAX solution. Cheers Matt

- 222 replies
-
- 20
-
-
Papegojan 1627 by mati - FINISHED - 1/48
mati replied to mati's topic in - Build logs for subjects built 1501 - 1750
You're welcome Mike Liver of sulphur it won't create some ugly stain... it'll just create some yellowish pigmentation. Easy to remove with water I have also pure Selenious Acid H2SeO3... but it is more demanding when solution is too strong... and when is older it's loosing feature. Cheers' Matt -
Papegojan 1627 by mati - FINISHED - 1/48
mati replied to mati's topic in - Build logs for subjects built 1501 - 1750
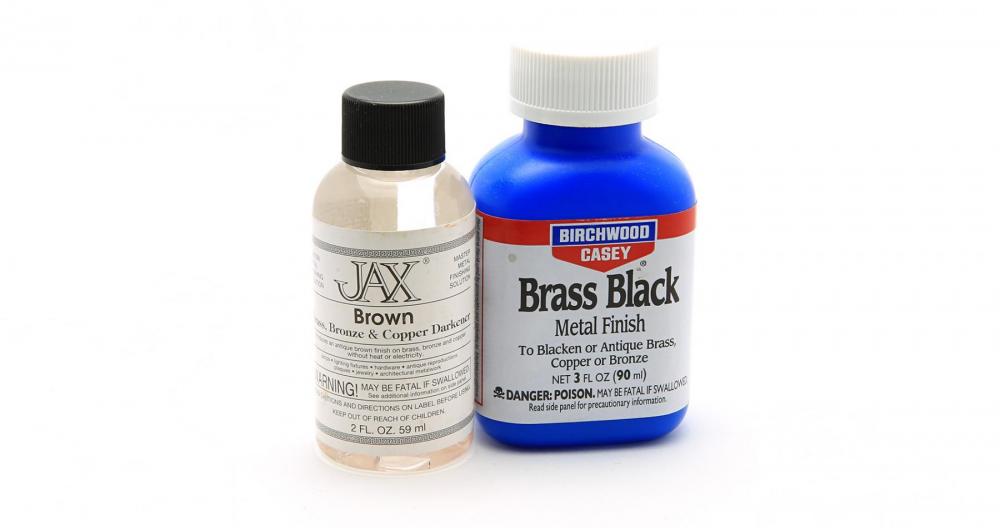
First... I'd like to "say" thank you all for kind comments. Mike, According to your question. In some places yes, I did brass blackening "on wood". Mostly I did it for nails. After sanding or file it is already nice clean surface, but I always give final finish with steel wool (number 0000) For blackening I've used Brass Black (Birchwood Casey) but... you have to clean solution (water and brush) quite fast because of residual which may occure stain on the wood. I'm more pleased with result using JAX product for darkening brass. After reaction with brass won't stain the wood. It's much cleaner process. Of course I've still cleaned with water residuals of the solution. Another method... is to use copper wire and blacken it with potassium polysulfide (K2S) (liver of sulphur) Very nice and fast blackening solution for copper. But also you have to clean residual with water. Otherwise you will get yellowish stains. For eyebolts I think brass will be the best material. And here I can recommend two methods: first you wind 0,5mm wire to create kind of spring on some rod let say 1,5mm diam. and cut out with jewelry saw a single rings, then piece of straight rod solder to those rings (maybe silver solder If you fell that you can challenge that solder) And nice, symmetric eyebolt will be made. Second method... just to bend and form eyebolt from brass wire. And also solder to close eyebolt. Faster... but I thing less effective method. For blackening... brass so you can easily go for your Blacken-It or buy Brass Black from Birchwood (great solution... really!) or JAX products. But... as I wrote in some post before... to allow create blackening solution layer of our desire color... we have to prepare surface properly. So... either classic acetone, citric acid or some cleaning and degreasing solution from mentioned above companies. I have no idea how is in US with some chemicals... but you can get also iron chloride (III) FeCl3 or ready 40% solution. Great stuff for cleaning metal... or actually etching the surface. FeCl3 is solution used in etching PCB... so I think it's easy to get on the market. If you use more classic method like acetone then before blackening dump the element into kitchen vinegar for a while. Vinegar will create microporous surface which help to hold our blackening effect. By the way... If you want to protect you blackening effect more permanent you can always spray detail after blackening with acrylic matt varnish (e.g. Humbrol)... no way that will go off If you have any doubts don't hesitate to ask. If I know I'll help with pleasure. Cheers, Matt -
Mike, What a neat work! Beautiful... surgical precision. Great attention for details Keep going Cheers, Matt
- 452 replies
-
- 4
-
-
- cheerful
- Syren Ship Model Company
- (and 1 more)
-
Pandora by marsalv - FINISHED - 1:52
mati replied to marsalv's topic in - Build logs for subjects built 1751 - 1800
That's what we call perfect lathing! I'm impressed... and I'll keep follow Cheers, Matt -
Well... well... that's gonna be something! Can't wait for update! Your models are just simple masterpiece... so this one can't different Kind regards Mateusz P.S. I know you already from Mirek stores
- 20 replies
-
- 3
-
-
- swedish privater
- frigate
- (and 1 more)
-
Papegojan 1627 by mati - FINISHED - 1/48
mati replied to mati's topic in - Build logs for subjects built 1501 - 1750
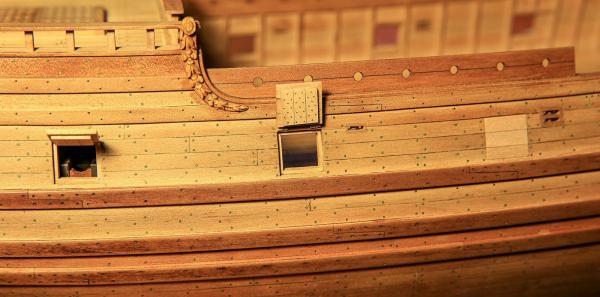
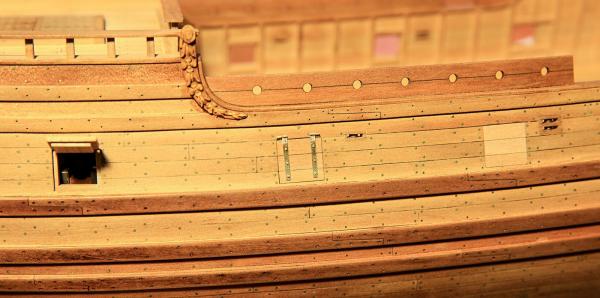
Hello Next update... Some time ago I've made already foretop... but I'm not happy with result... so I've made new one Photo to compare new with old... ...and blackening solution... Cheers Matt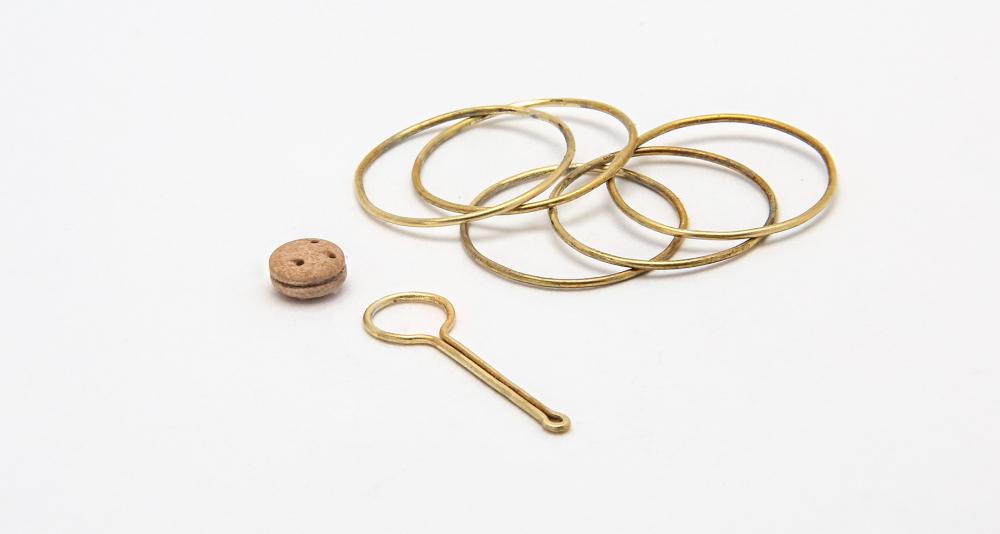


- 222 replies
-
- 18
-
-
Glenn, I'm pretty happy with JAX products. Here you have all the products: http://www.jaxchemicals.com/products.html Of course they are still chemicals... so may cause irritation. Gloves, etc... recommended They'll give nice permanent effect. Of course if surface 'll be correctly prepare. Beside common acetone... I'm using degreaser form Birchwood Casey... but also citric acid (just regular for kitchen... boiling water solution with acid... you just drop the element and acid 'll eat unwanted particles). If you have source... you can use very very light solution of sulphuric acid... dip the elements and acid 'll do work nicely. But let's say this method is for more brave people I guess in US 'll be quite difficult to get it. In Poland somehow is possible... not easy, but possible. For final treat before blackening I use to dip the element in kitchen vinegar. It'll create micro porous surface... which helps to hold layer of black. All of these blackening solution if you will not rinse properly... hmm they 'll eat slowly but surely parts of the element I can highly recommend to cover all the metalworks with Microcrystalline Wax. Great stuff to prevent unwanted oxidation. As regards to rivets... are you familiar with Scale Hardware products? http://www.scalehardware.com/miniature-rivets-c-10 Maybe is not a cheapest way, but rivets are fantastic. I bought few packs to compare with rivets from one producer from Poland. http://rbmodel.pl/index.php?action=products&group=018 50pcs = $3 Comparing to Scale Hardware 100pcs = $10 It's just kind of options to upgrade our models. I'm using for my model combination of different rivets. For hinges I just made them from brass rod. You can see in my recent post. Uff... I didn't plan to write such a long story... so forgive me Hopefully I won't get warning from moderators for locating link and names of few company. I don't advertise Kind regards, Matt
-
Amazing!! I can't wait to see finished model. That's gonna be something! Your blackening looks very nice... gives good grungy finish. Brass Black is very good solution, but recently I tried JAX products. Also very effective. Kind regards and looking forward to see your update Matt
-
Papegojan 1627 by mati - FINISHED - 1/48
mati replied to mati's topic in - Build logs for subjects built 1501 - 1750
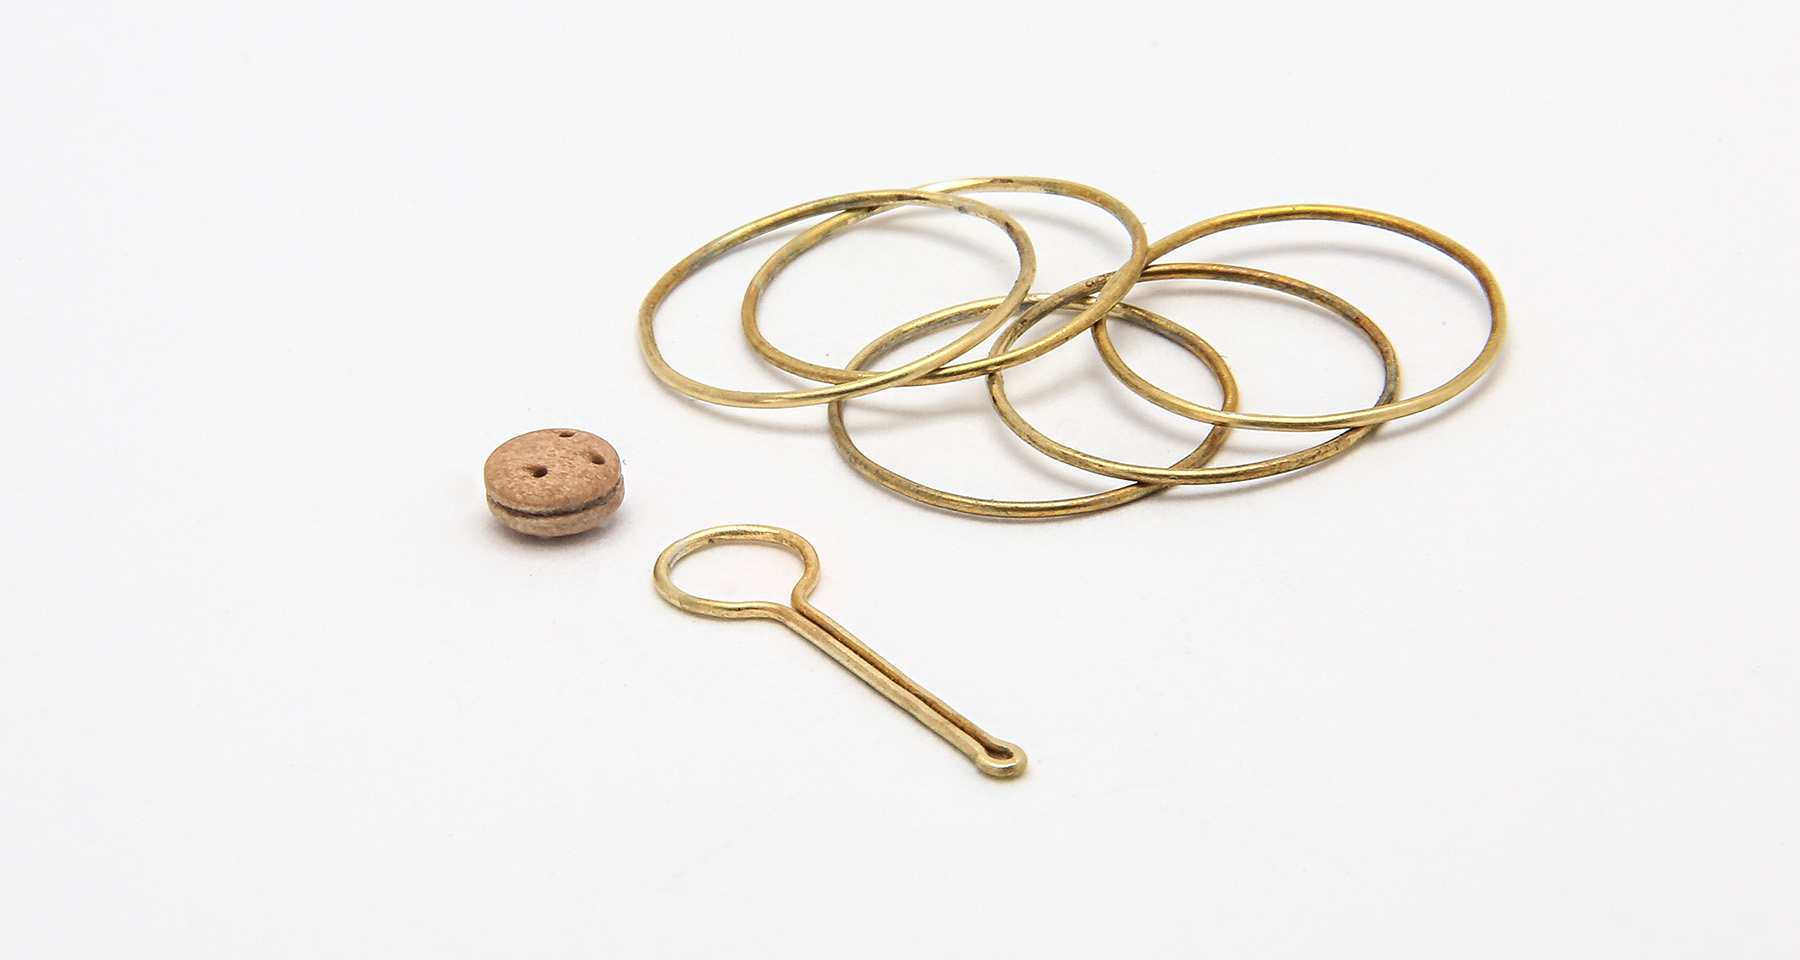
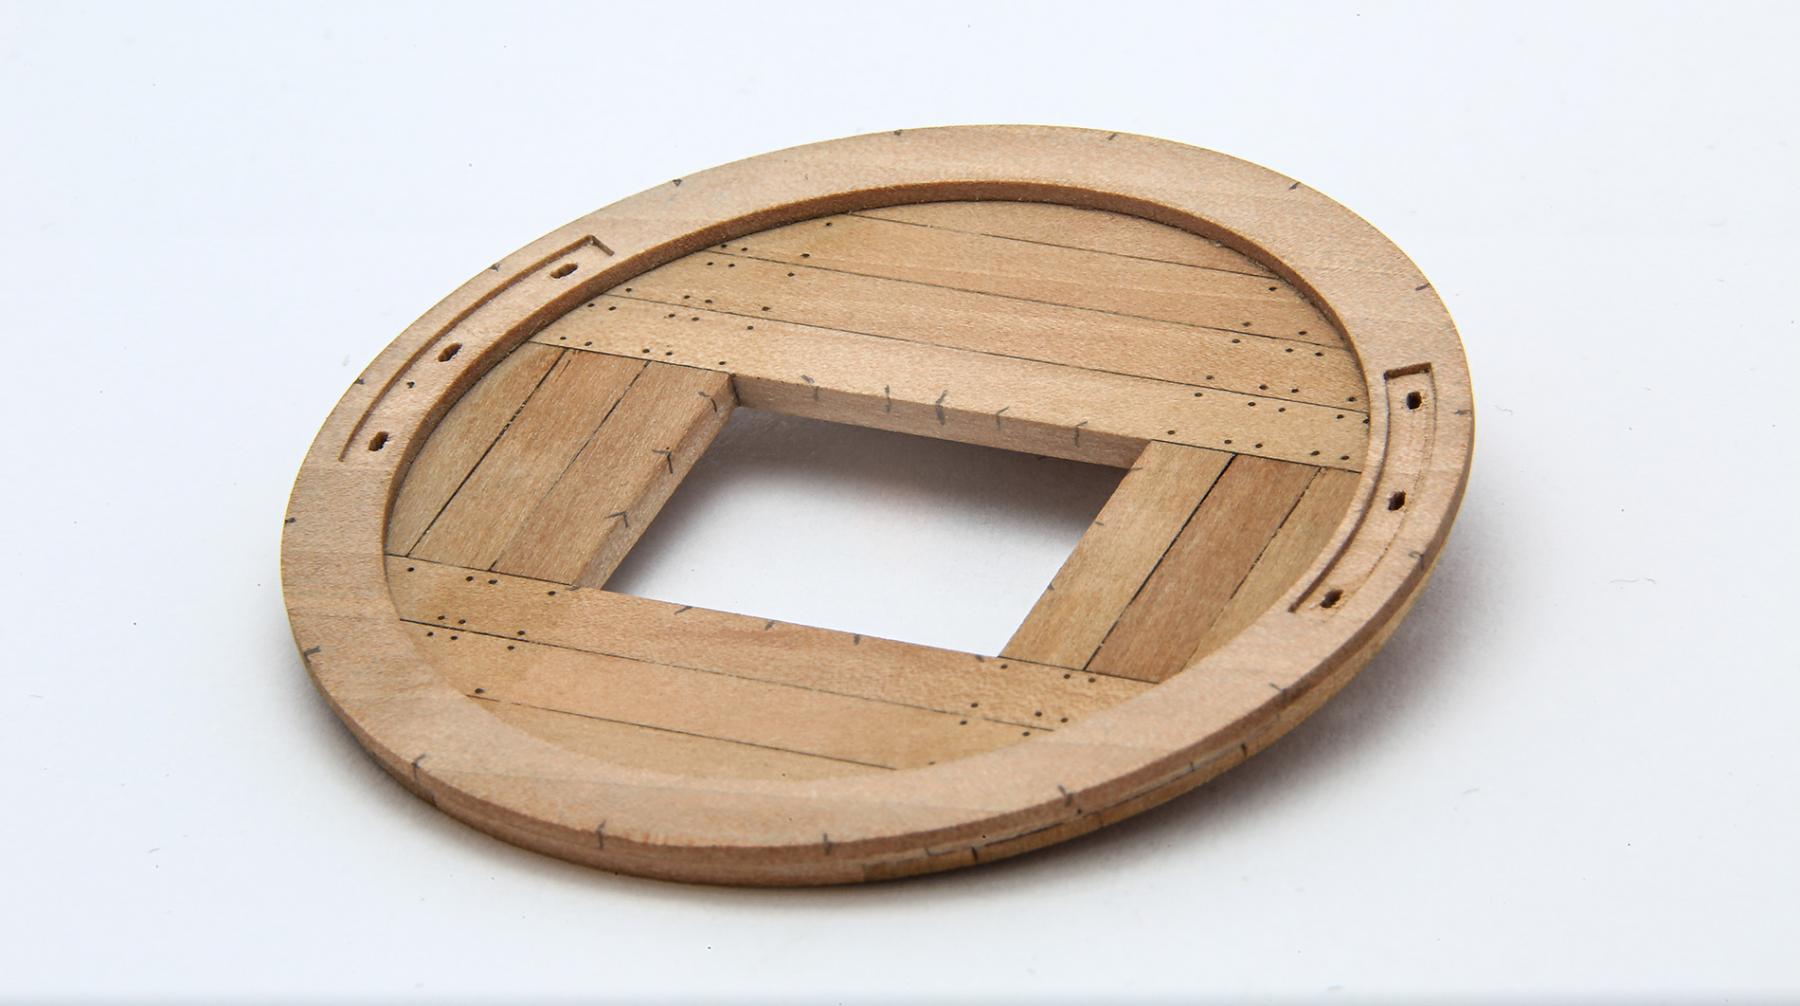
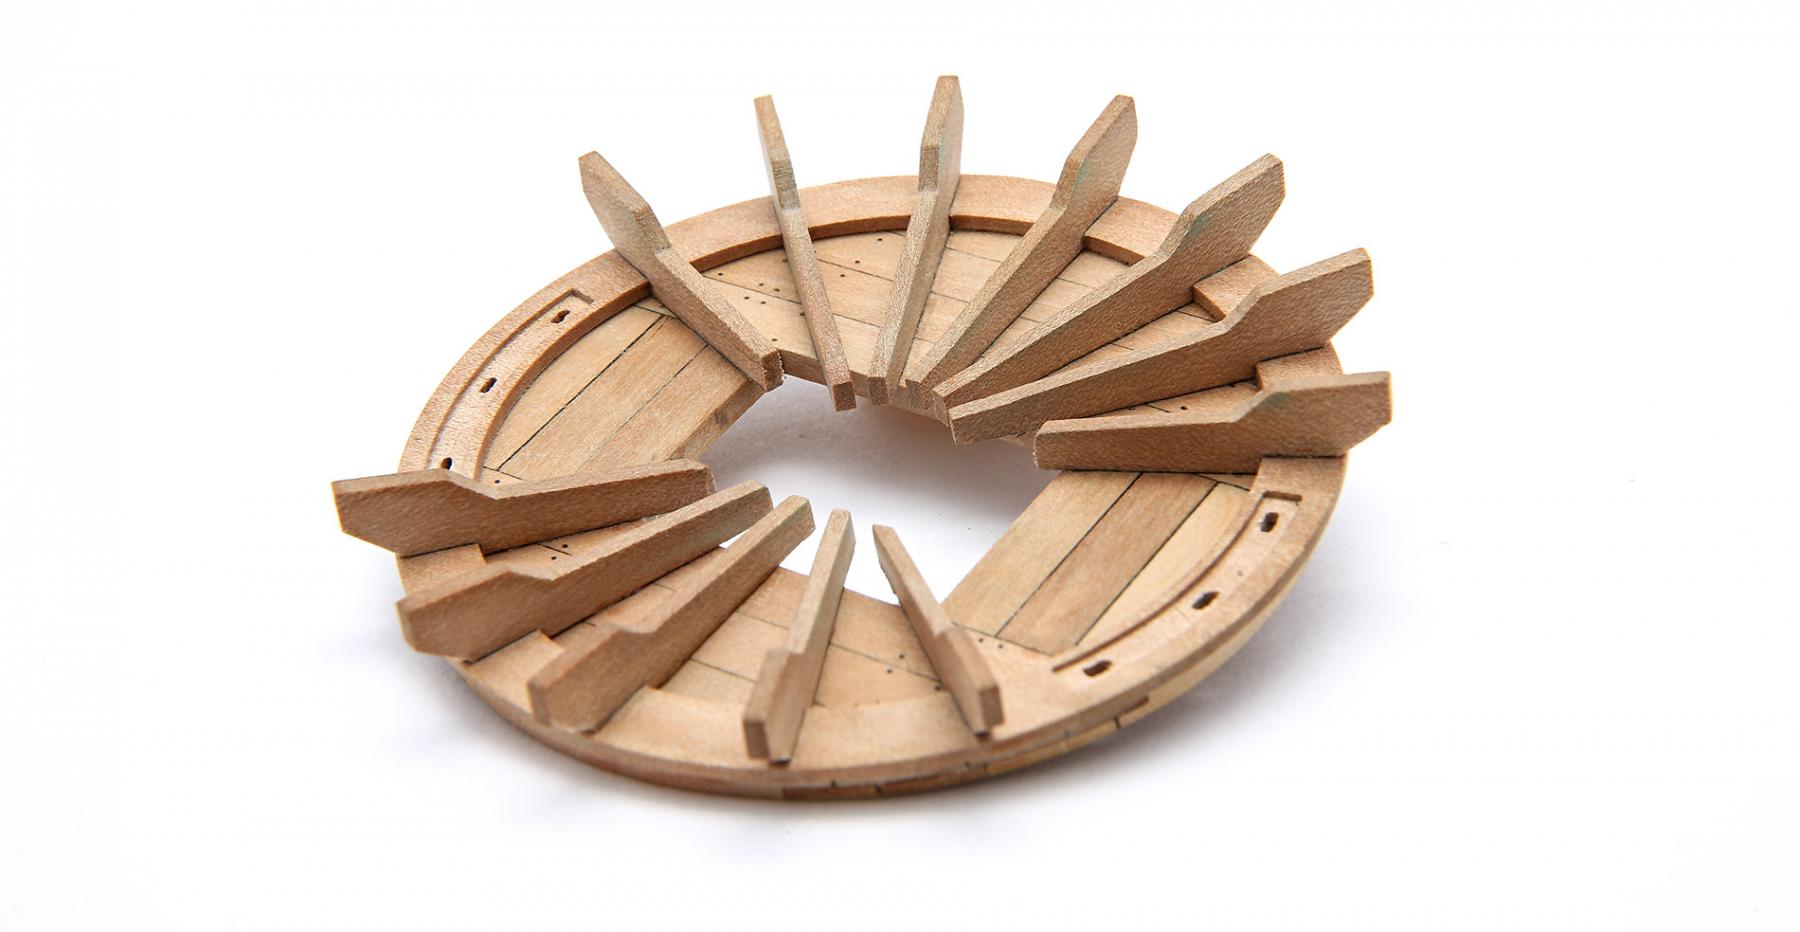
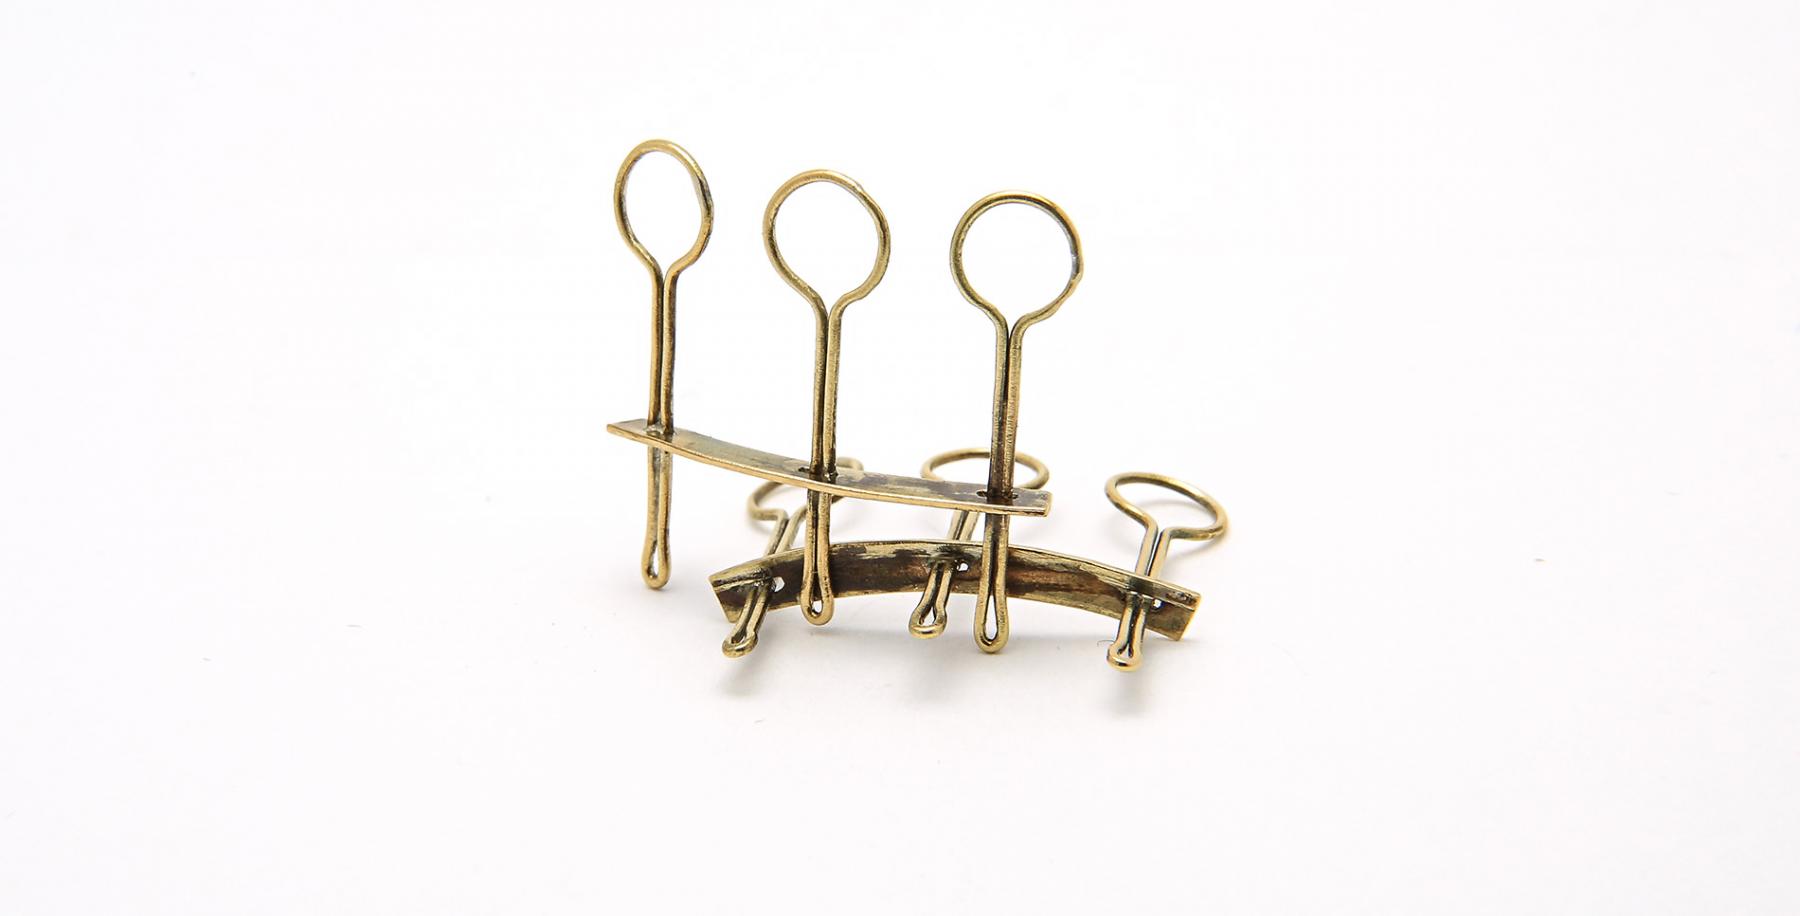
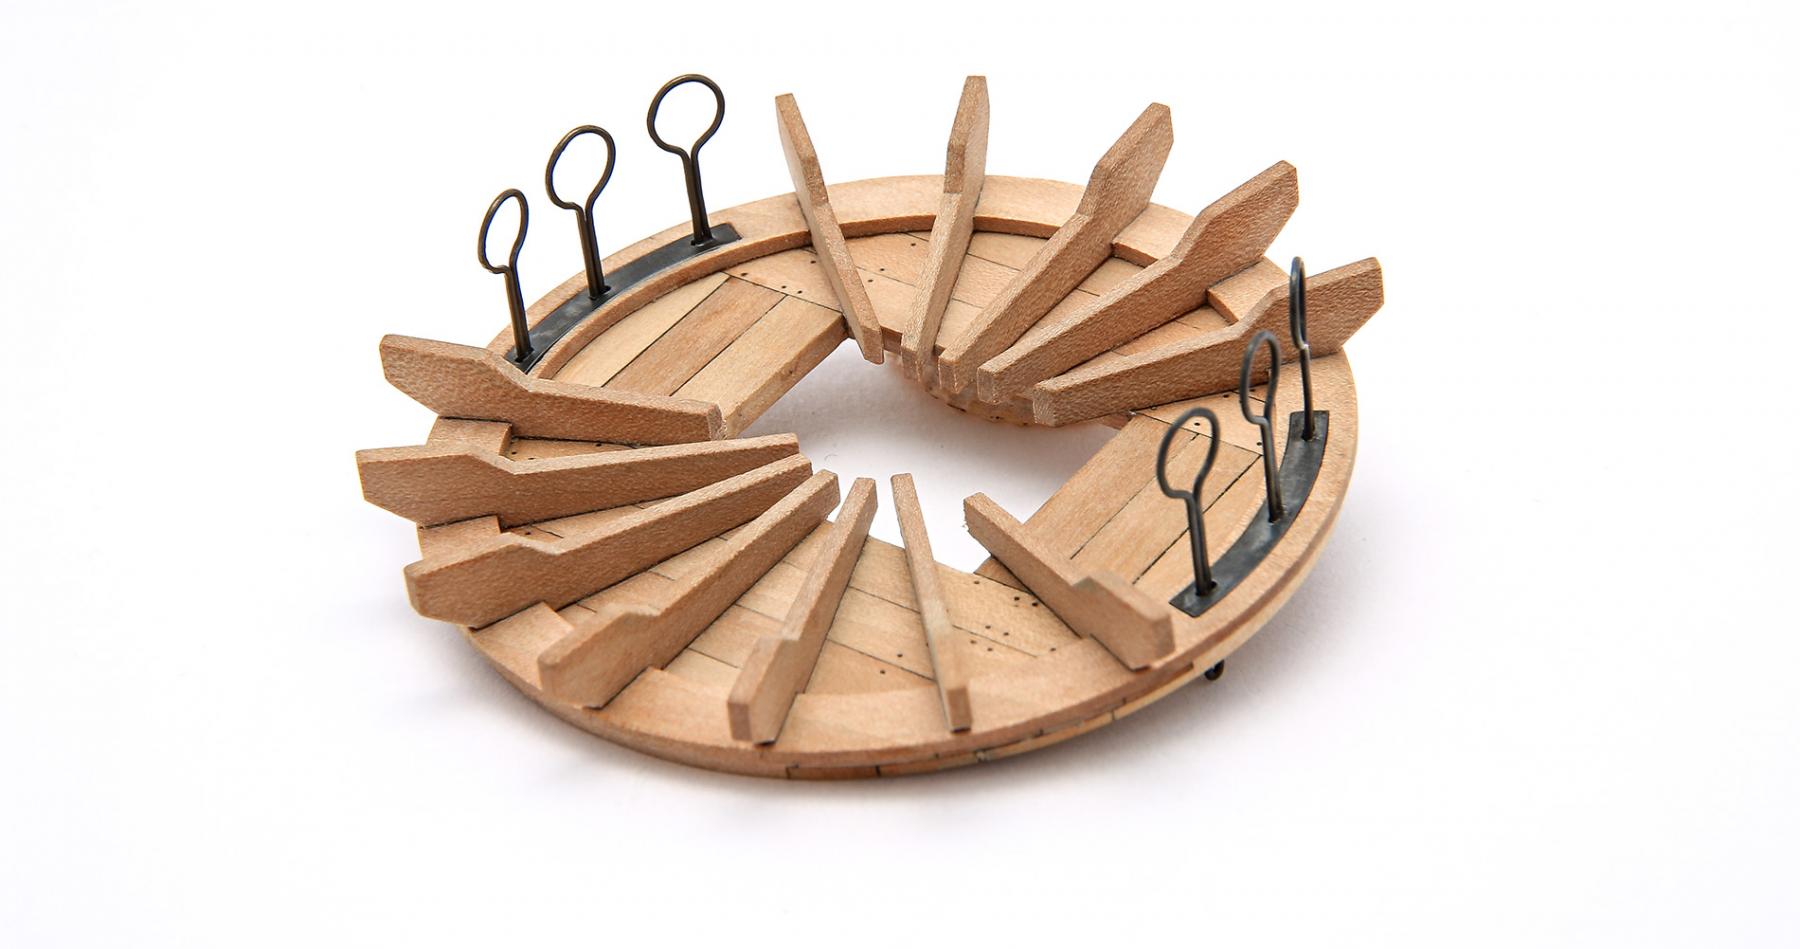
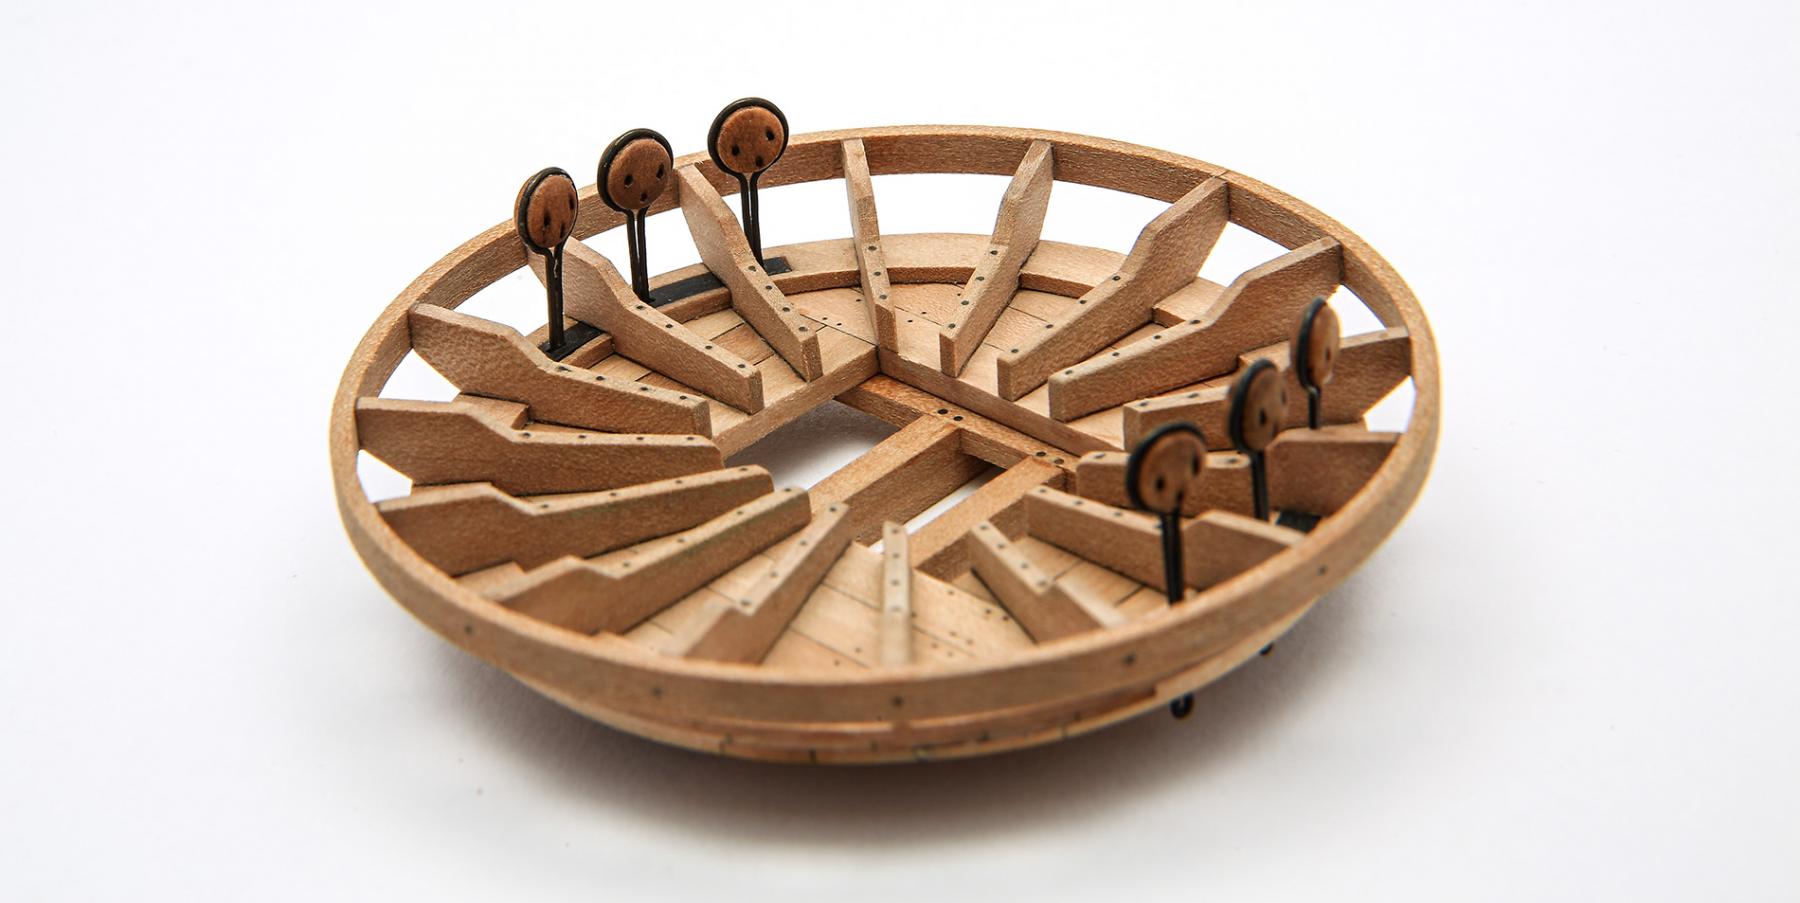
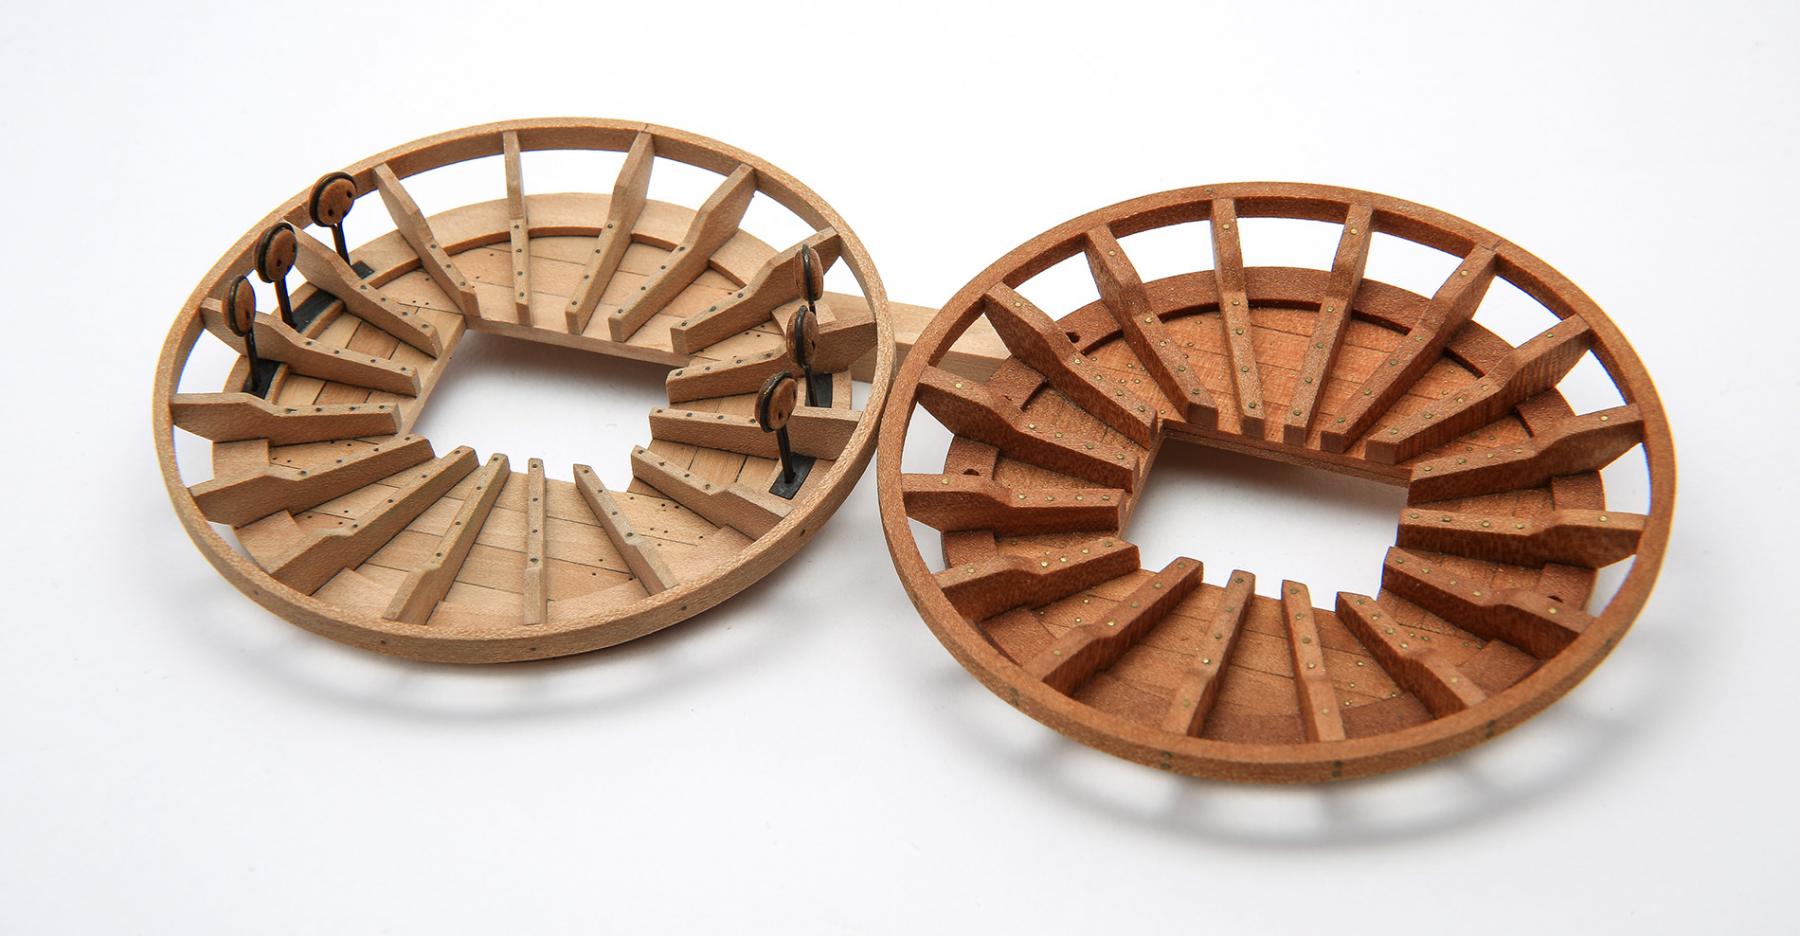
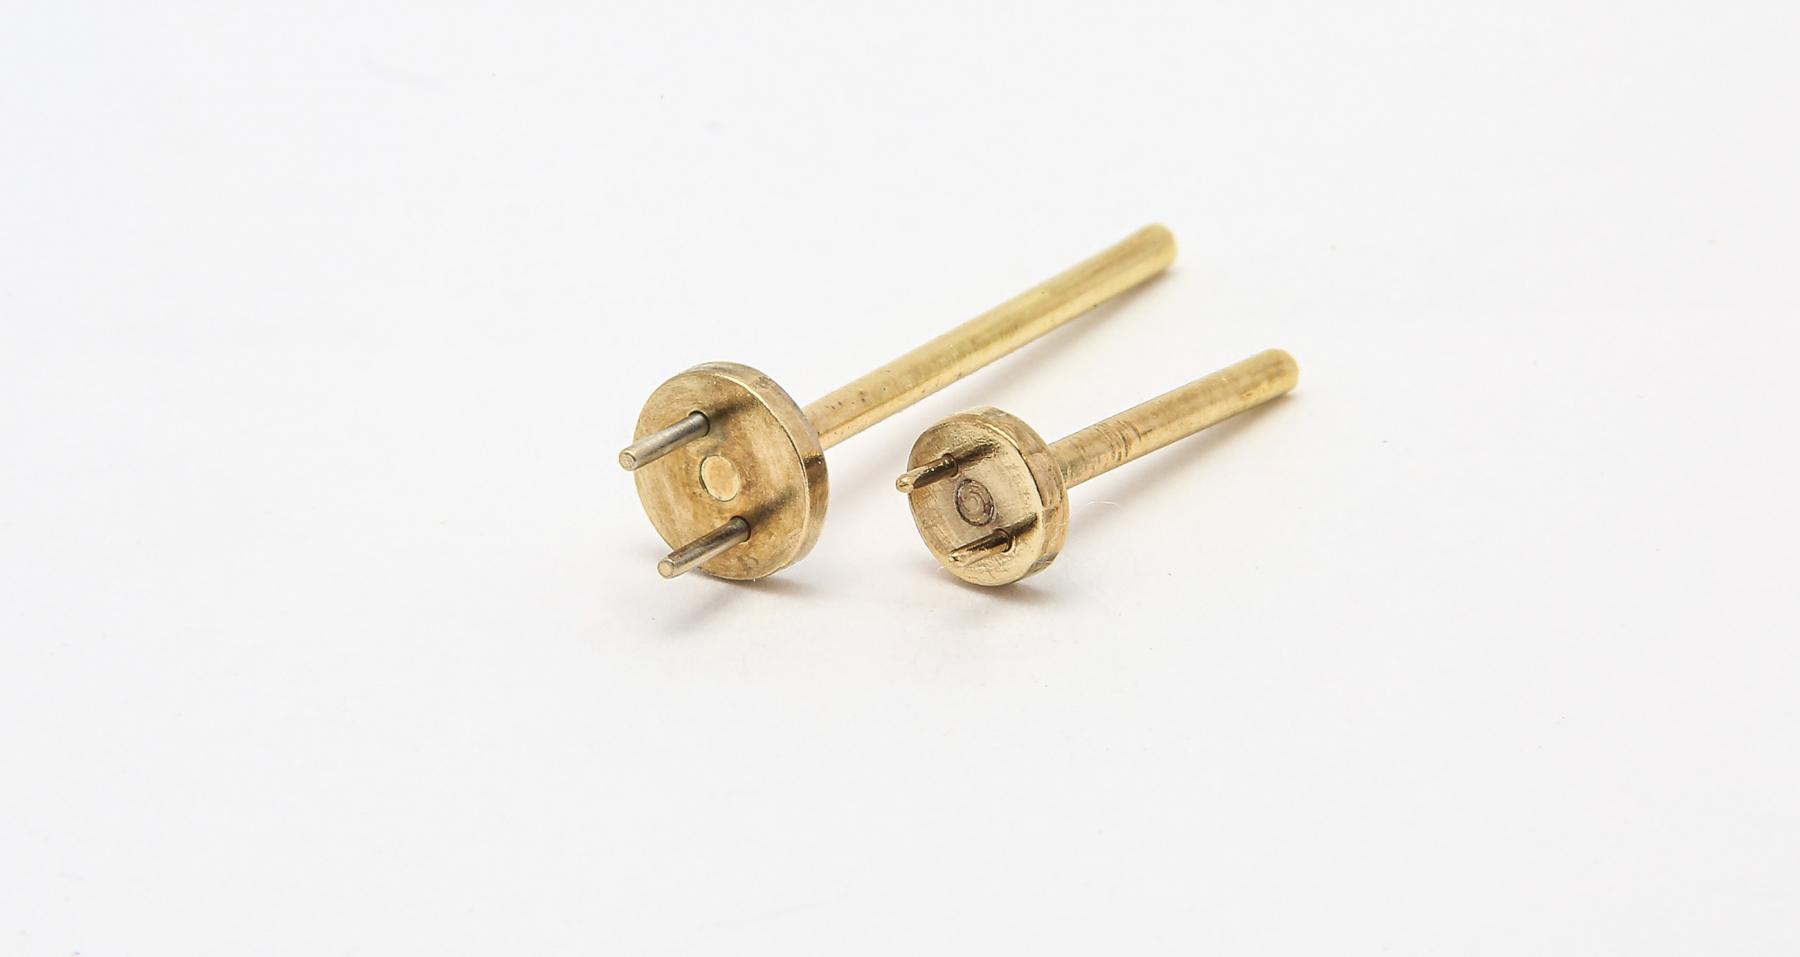
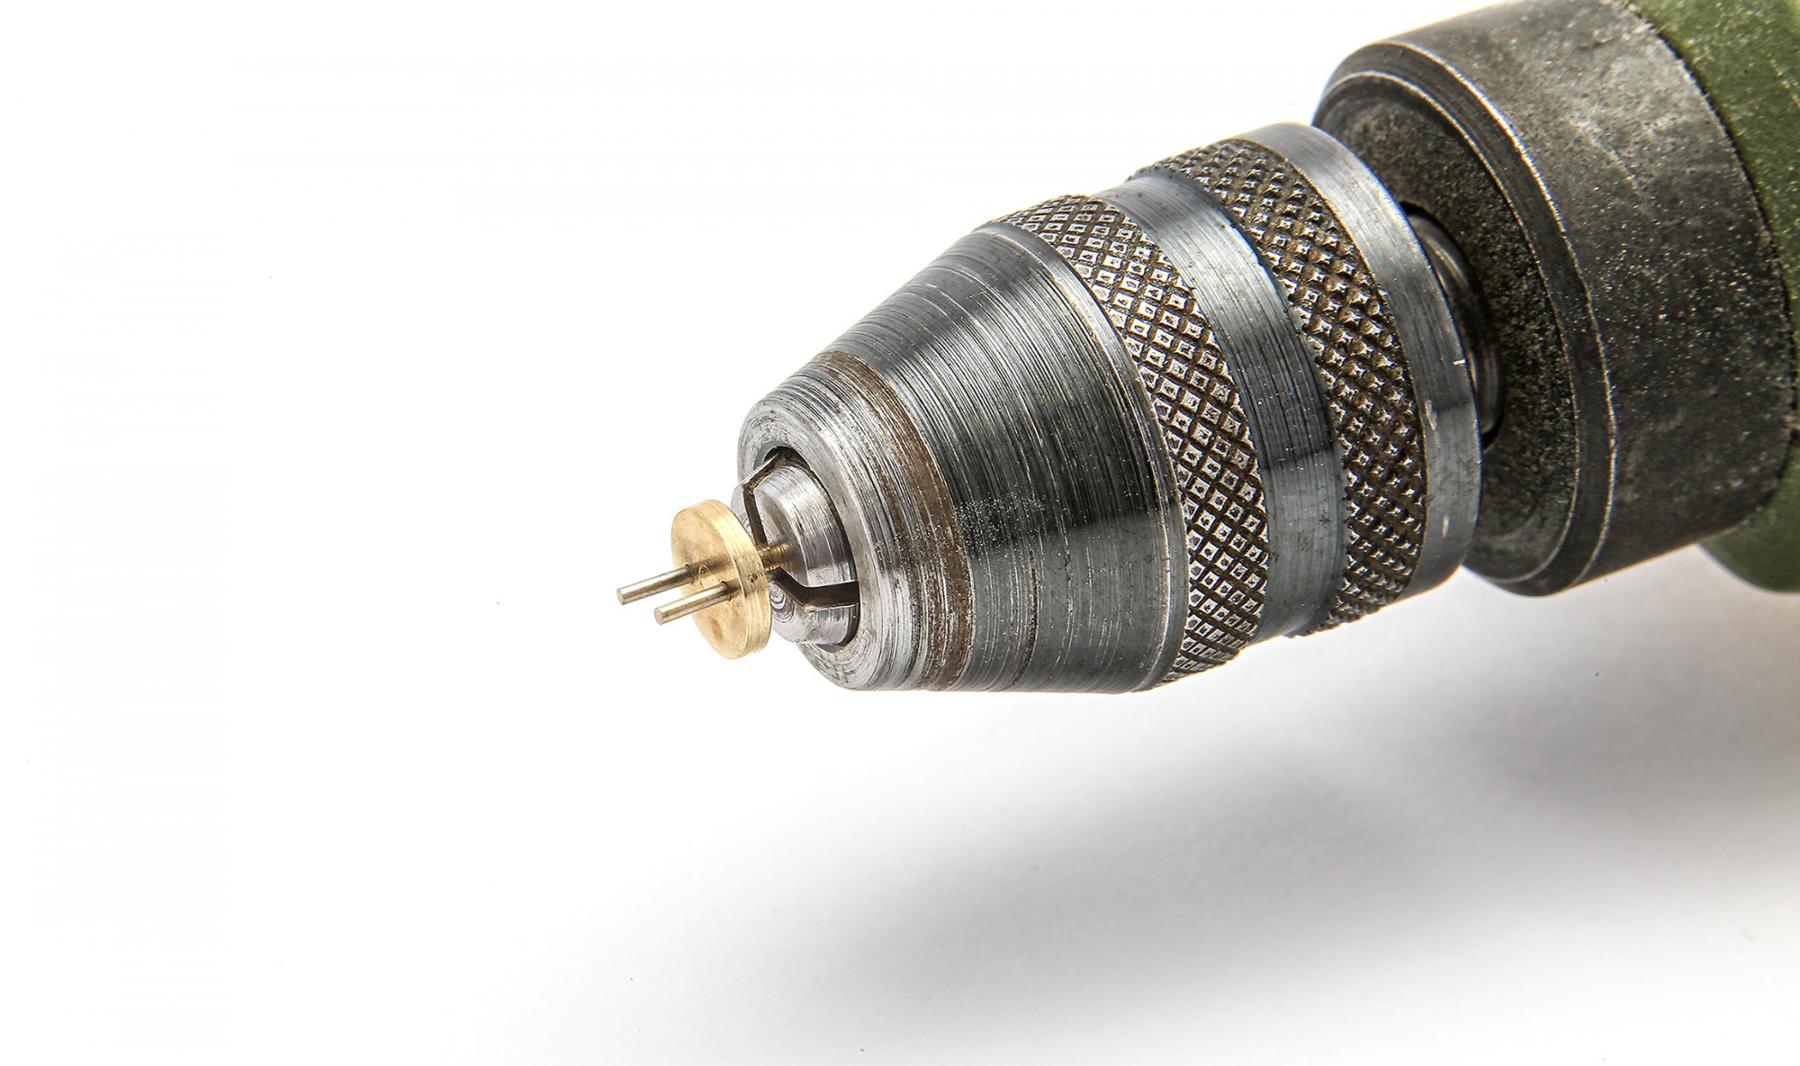
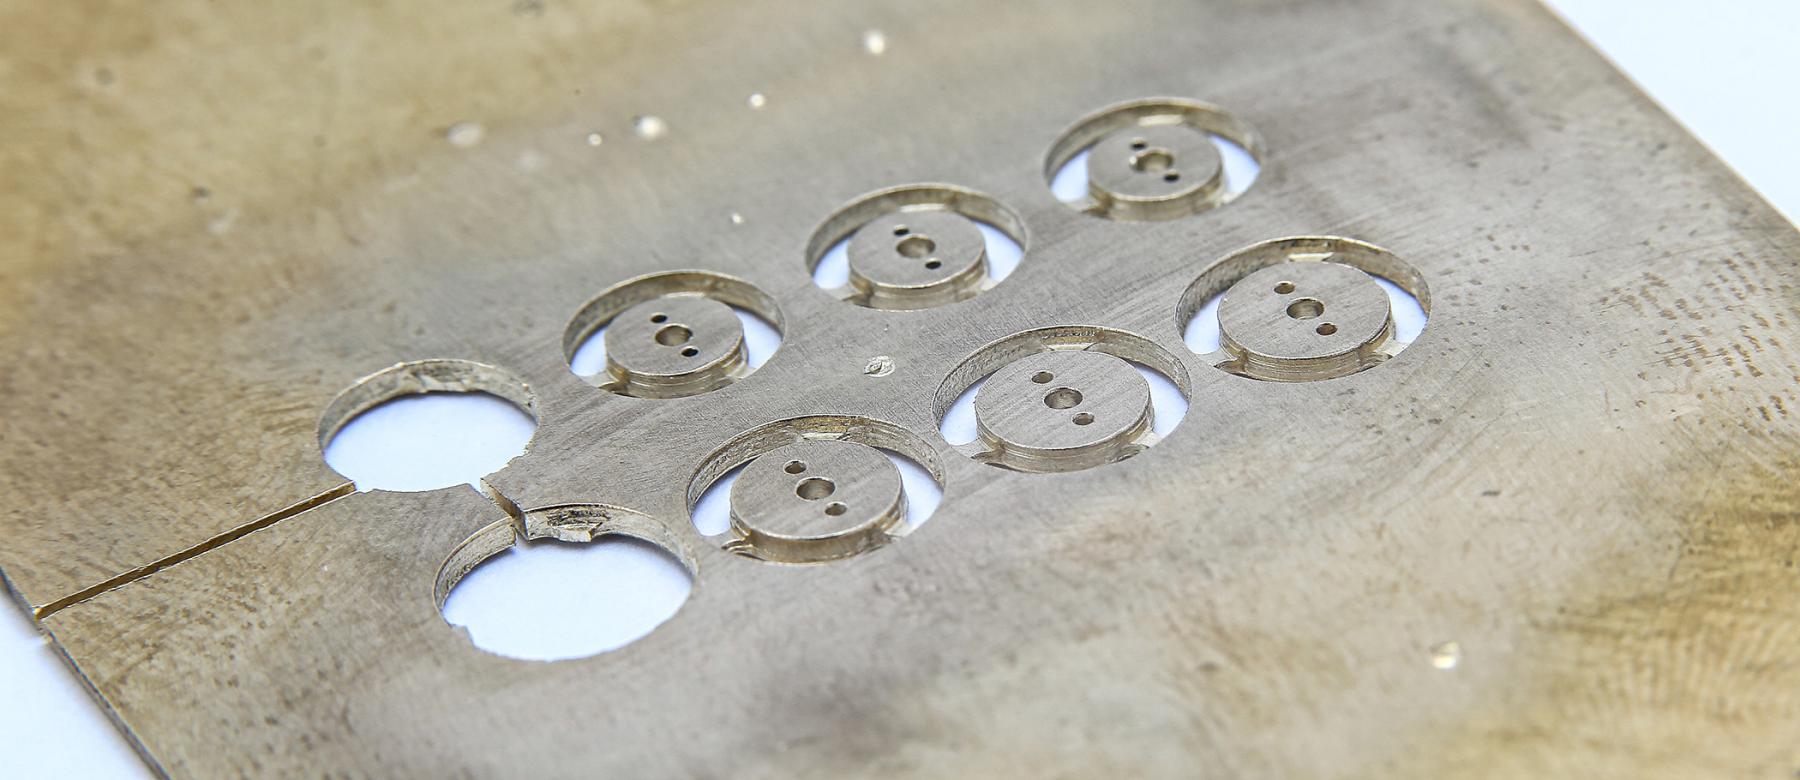
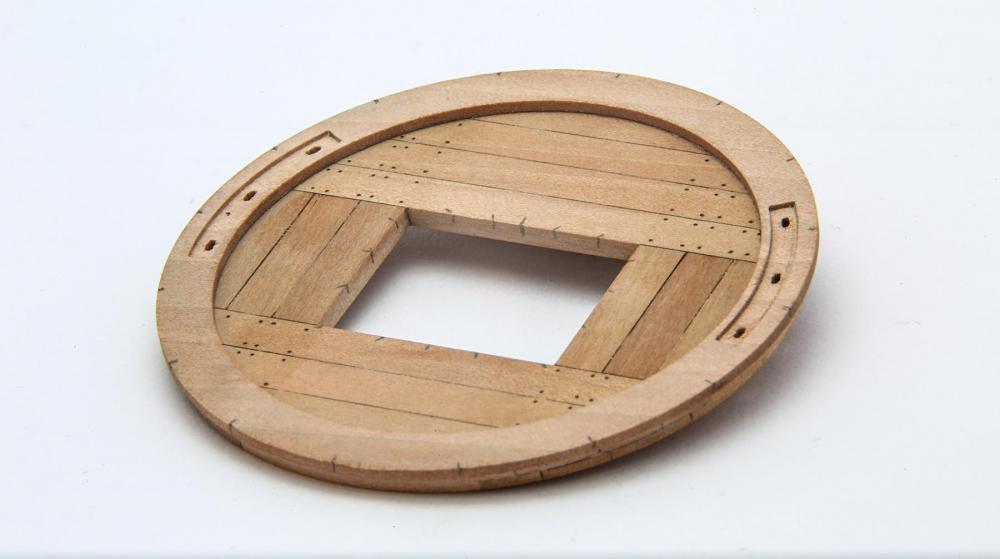
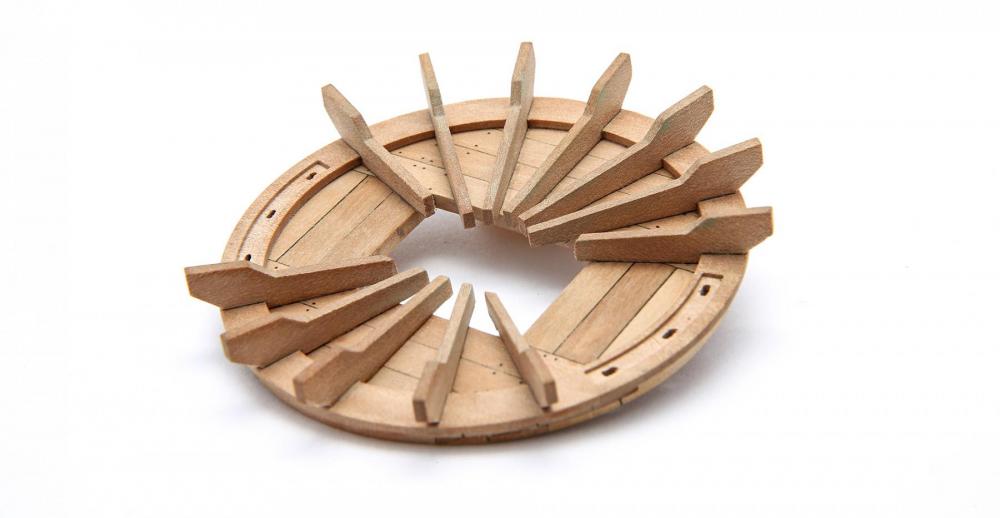
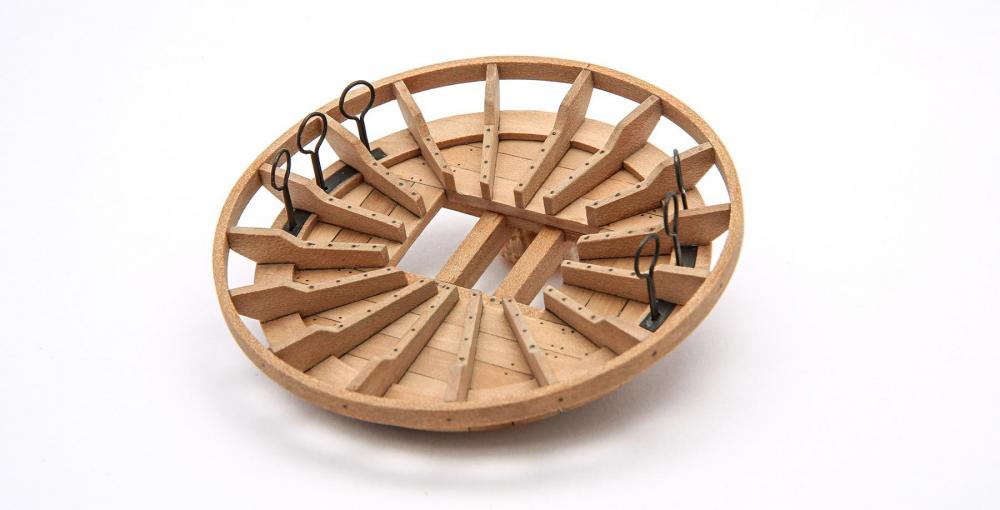
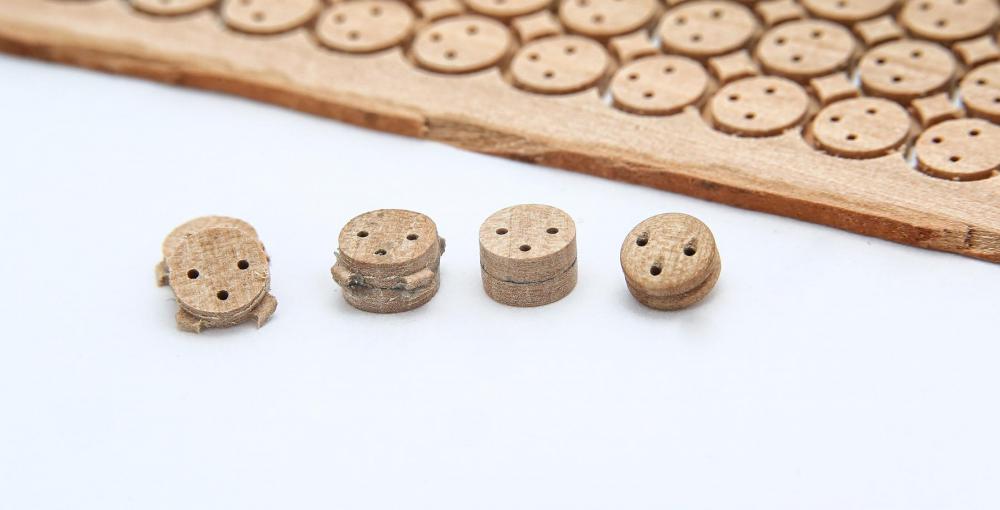
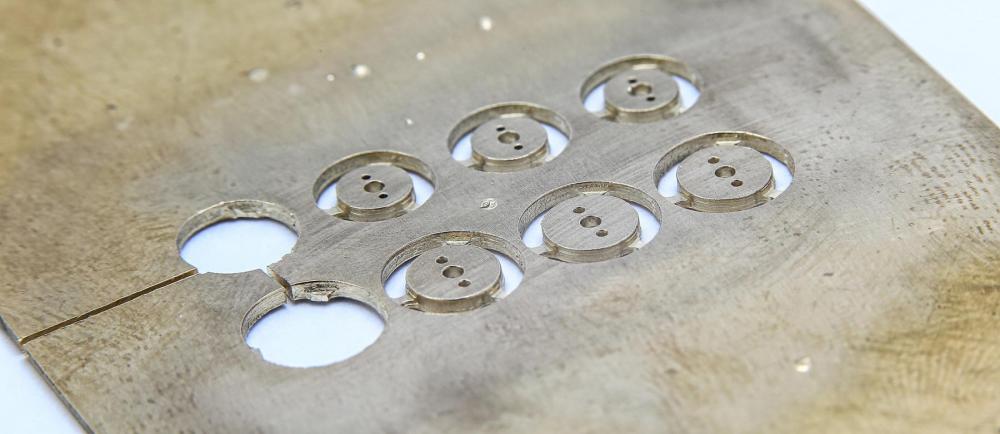
Hello fellows, This time I'd like to show you my technic for making deadeyes. So first I've made project in Corel DRAW. After that CNC and final result was full frame of "deadeyes" As you see their are glued... kind of sandwich Also for this technic I've made little jig for lathing. Enjoy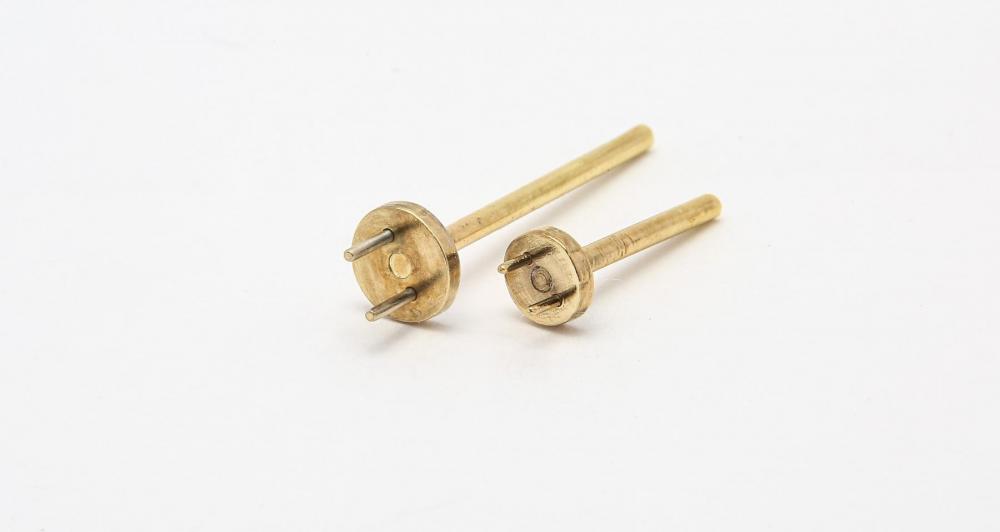

- 222 replies
-
- 16
-
-
Papegojan 1627 by mati - FINISHED - 1/48
mati replied to mati's topic in - Build logs for subjects built 1501 - 1750
Too much compliments... to generous... it's just simple work, could be better and I'm still far far away from some wizards from this forum. But thank you so much for that. Kind regards -
Papegojan 1627 by mati - FINISHED - 1/48
mati replied to mati's topic in - Build logs for subjects built 1501 - 1750
Thank you for nice comments Greg... good memory. Yes I lived in Gdańsk, but 2 years ago I've moved to south. -
Papegojan 1627 by mati - FINISHED - 1/48
mati replied to mati's topic in - Build logs for subjects built 1501 - 1750
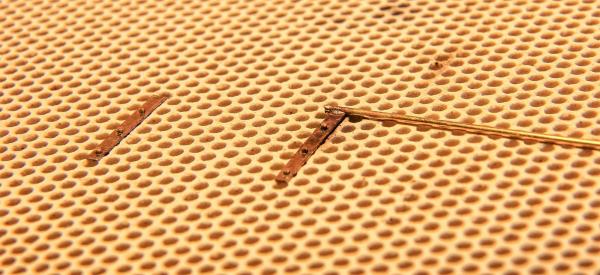
Hello I'm still alive... and today I have little update. I'm working now on gunport lids. 18 lids... not a lot but... bit complicated because of hinges... 1 hinge = 8 pieces. Hinges are moving parts. I don't now why because anyway there gonna be fixed Just some kind of mild modellers perversion Soldering: copper-phosphoric paste Hinges are not final finished. I'll do final cleaning and polish when I will make all of them... 36 Kind regards Mateusz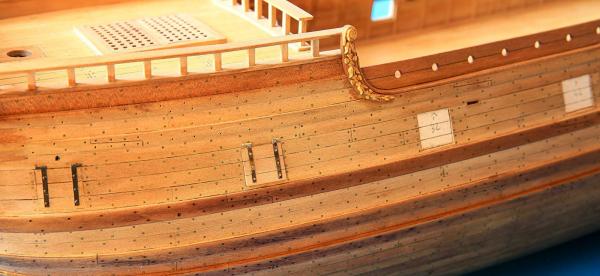
- 222 replies
-
- 26
-
-
Statenjacht Utrecht by Angarfather - 1:36
mati replied to Angarfather's topic in - Build logs for subjects built 1501 - 1750
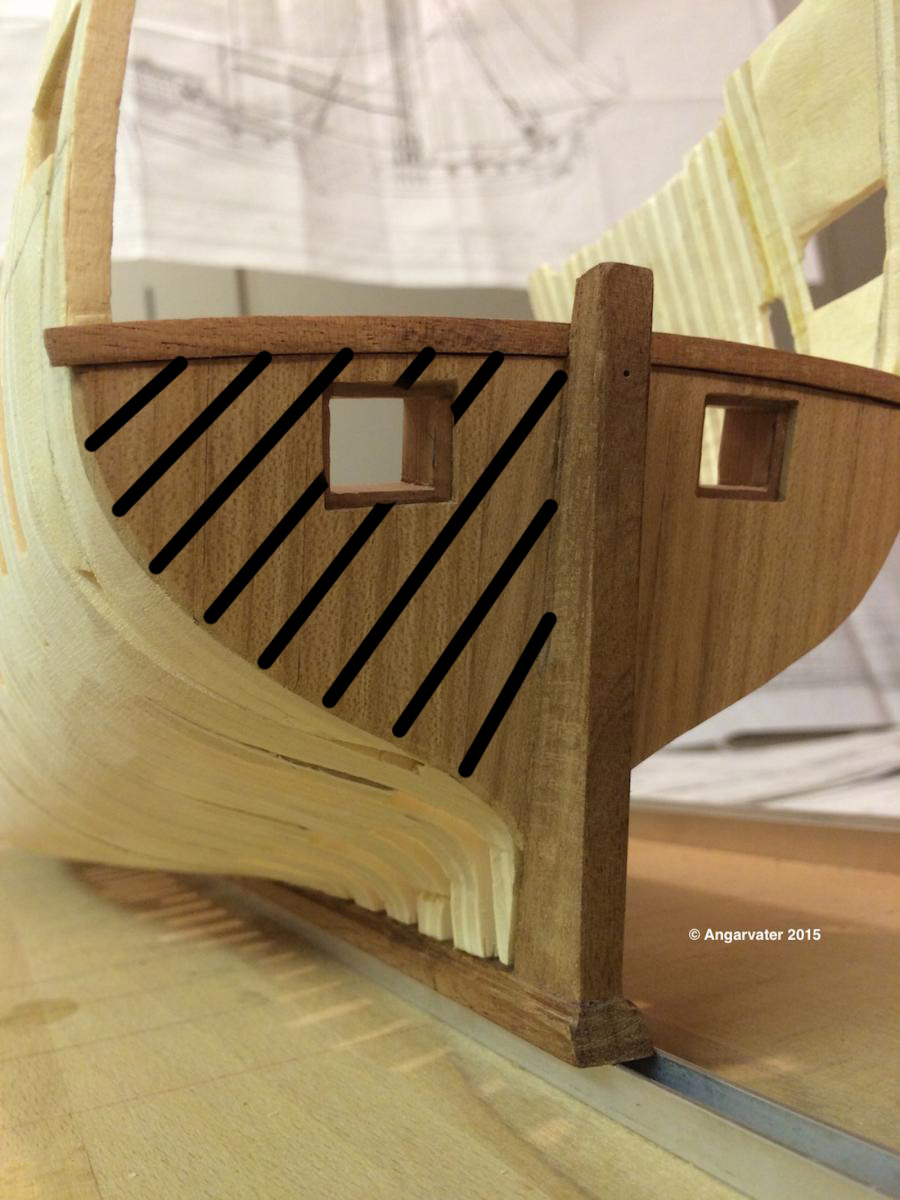
Hi, I like this vessel. I have to order my copy of the plans and book. Nice work... but... Your stern... and hull. Are you sure it has to run straight? Most of the ship has diagonal hull. It used to give extra strength for a stern. As per img below... I think it should be like this. Kind regards, Mateusz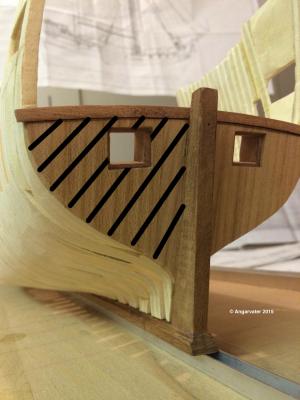
-
E&T, I'm hardly able to say how I’m impressed about your reserch and „sawdust” results As you know I can’t wait when you’ll be ready with plans. Getting crazy about that That’s gonna be amazing model and amazing documentation! However… I have few question. If you don’t mind Which silver paste you’re using for soldering? I mean brand (maybe small pic?) I’m using several brands and just looking for other to compare and to find the best. Are you using just simple propane torch for soldering? Your blackening solution gave very nicely even black effect, can you reveal which solution you have used? Is it Brass Black from Birchwood Casey or maybe Caswell Canada product? The bolts/rivets on stern iron strapping… did you made them by yourself? I really like roundness and accuracy of the heads. I found also very precise products from Scale Hardware. Propeller tracks… are you gonna keep them in this shiny brass color or the final finish will be black? I was thinking about hull of this vessel. 1845, let say very modern fitting and special construction for unusually service. Only bow section were plated for protection and to give extra strength with Arctic Ice Battle. But what about the rest part of the hull. Did they never decide to copper plate full underwater hull? It’s becouse of double hull? So it was pointless to add another layer? It’s just my thoughts and concerns Anyway, thank you in advance for answers. It’s alway plesure to see an update in this log, so I’ll keep folow Kind regards from the middle of North Atlantic Ocean. Cheers, Matt
- 346 replies
-
- 2
-
-
- terror
- polar exploration
- (and 2 more)
-
Papegojan 1627 by mati - FINISHED - 1/48
mati replied to mati's topic in - Build logs for subjects built 1501 - 1750
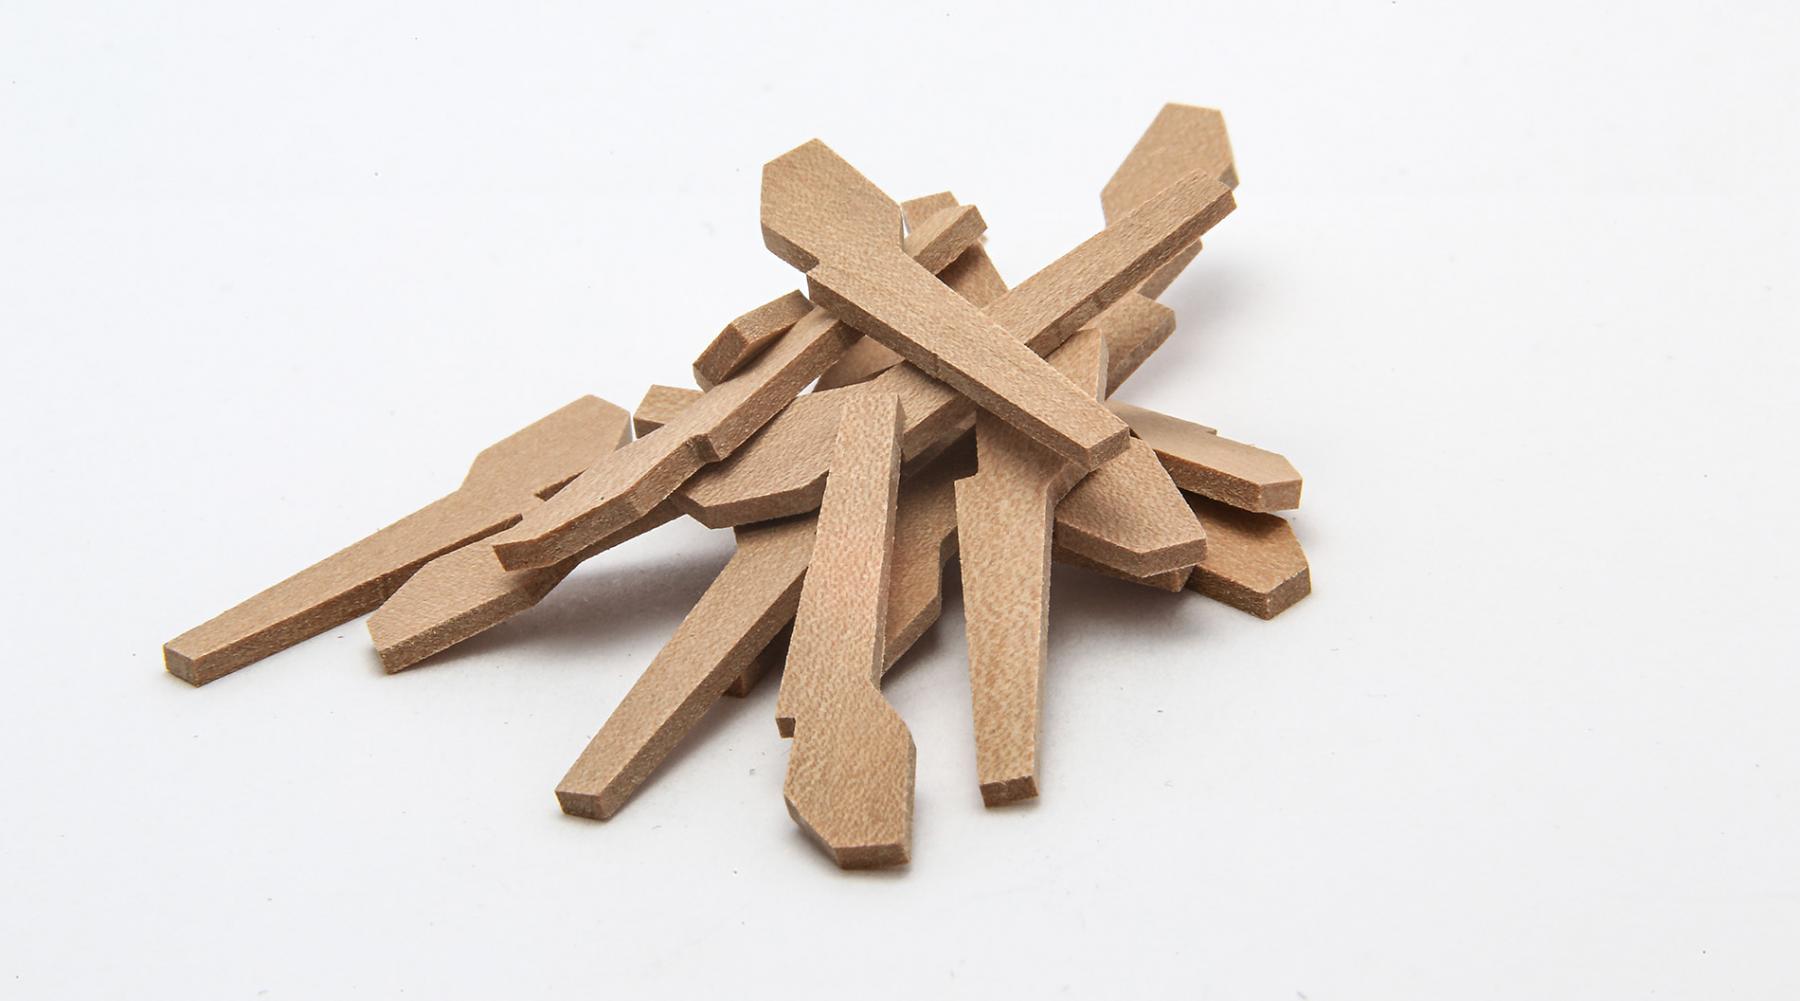
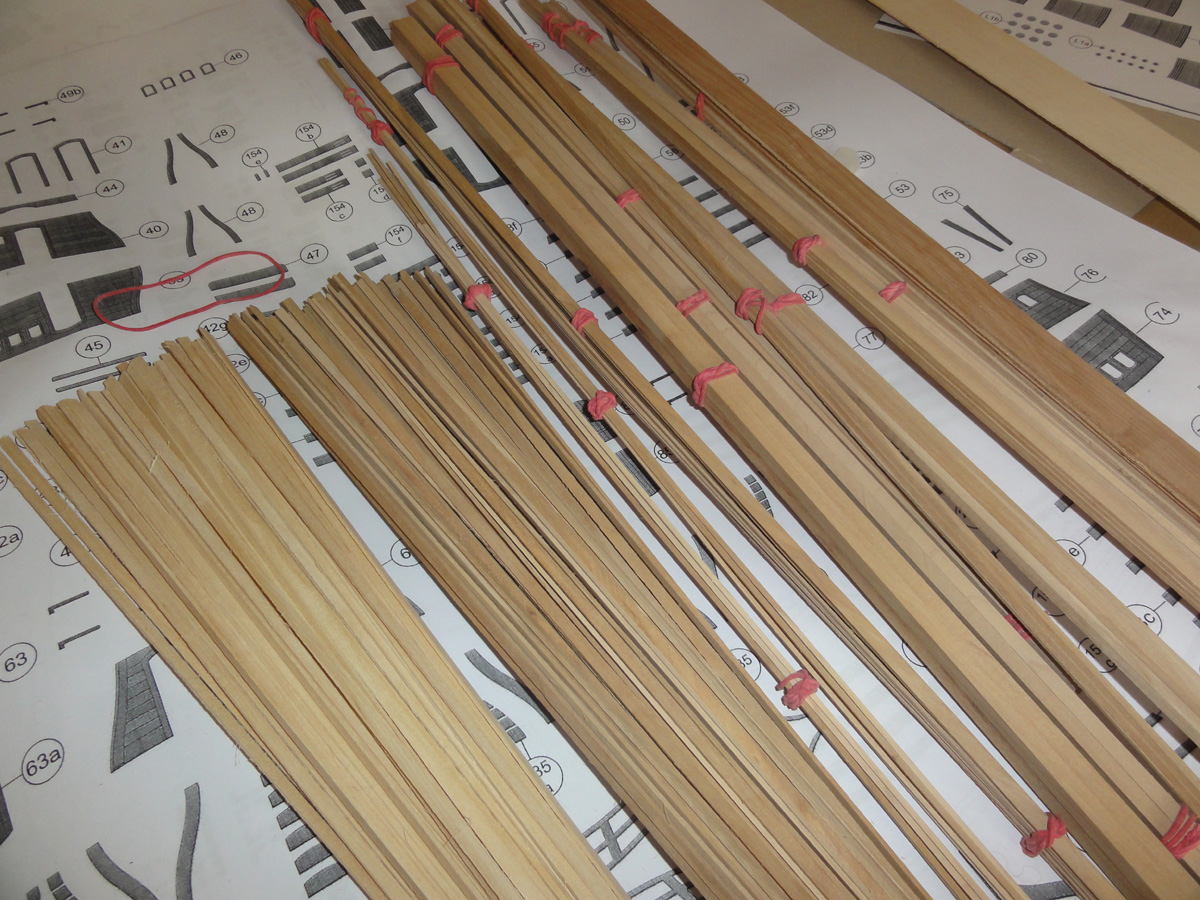
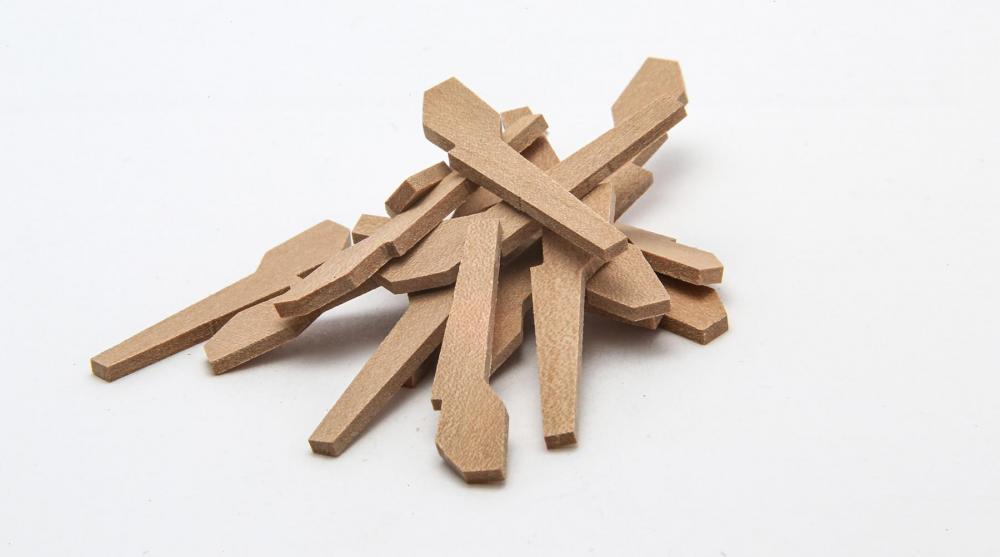
Thank you Frank. For planking I used just regular slats. Bunch of those below Cheers Matt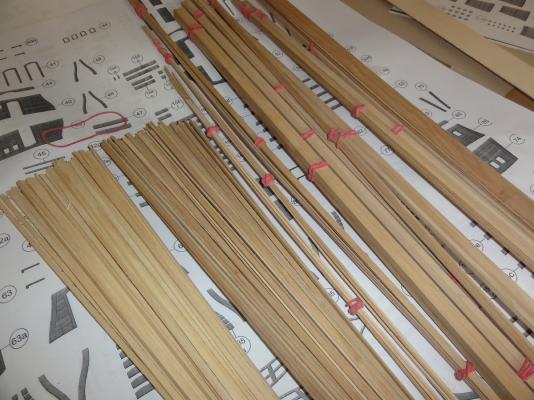
-
Papegojan 1627 by mati - FINISHED - 1/48
mati replied to mati's topic in - Build logs for subjects built 1501 - 1750
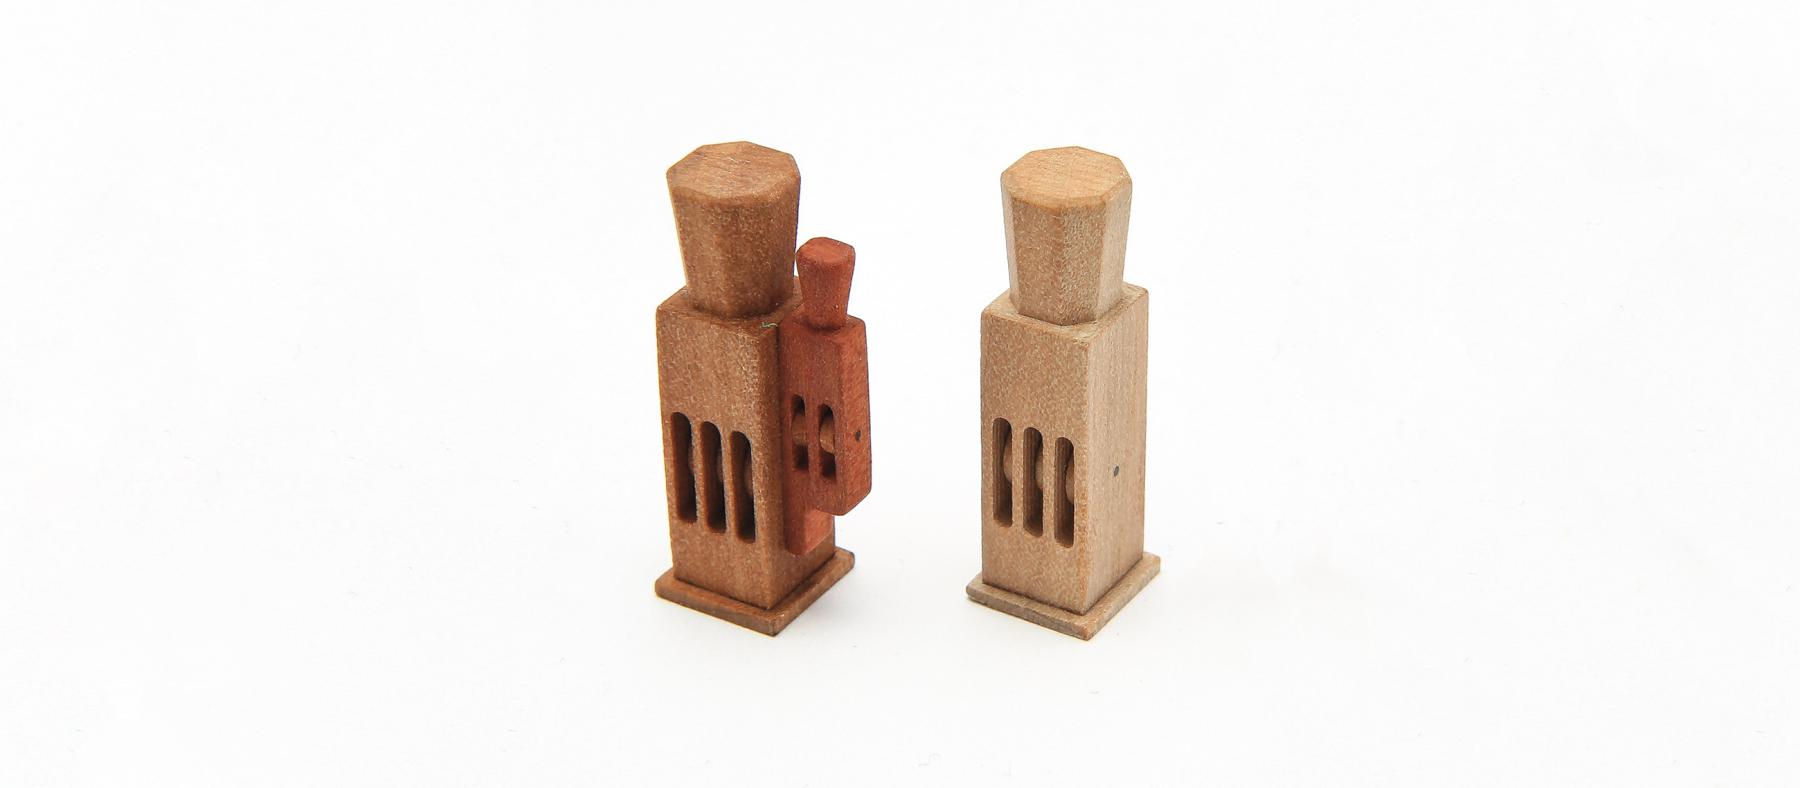
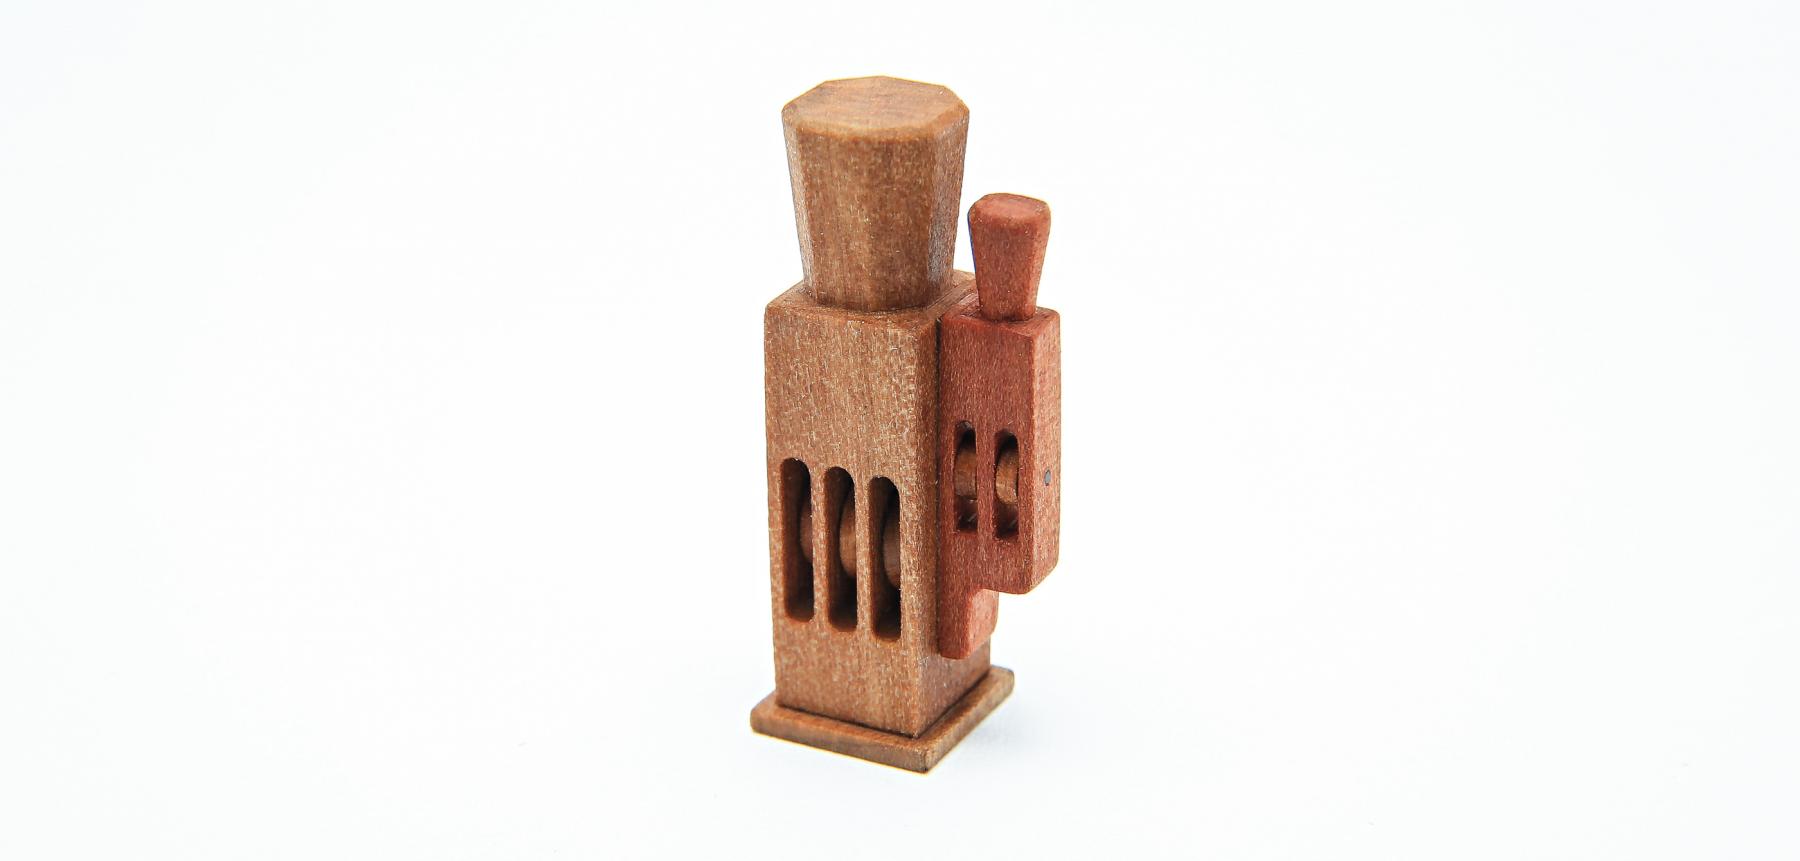
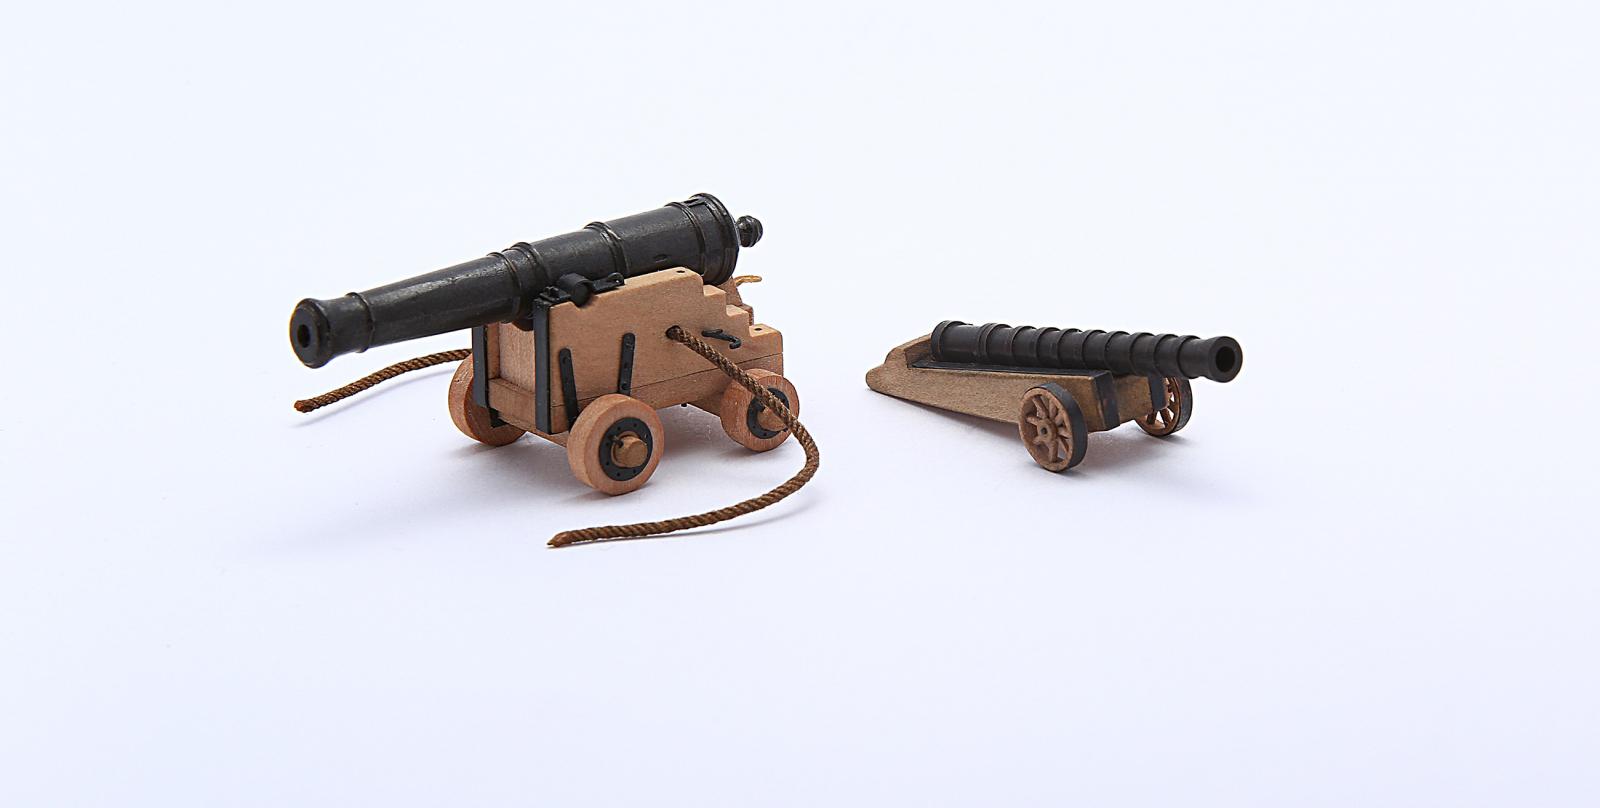
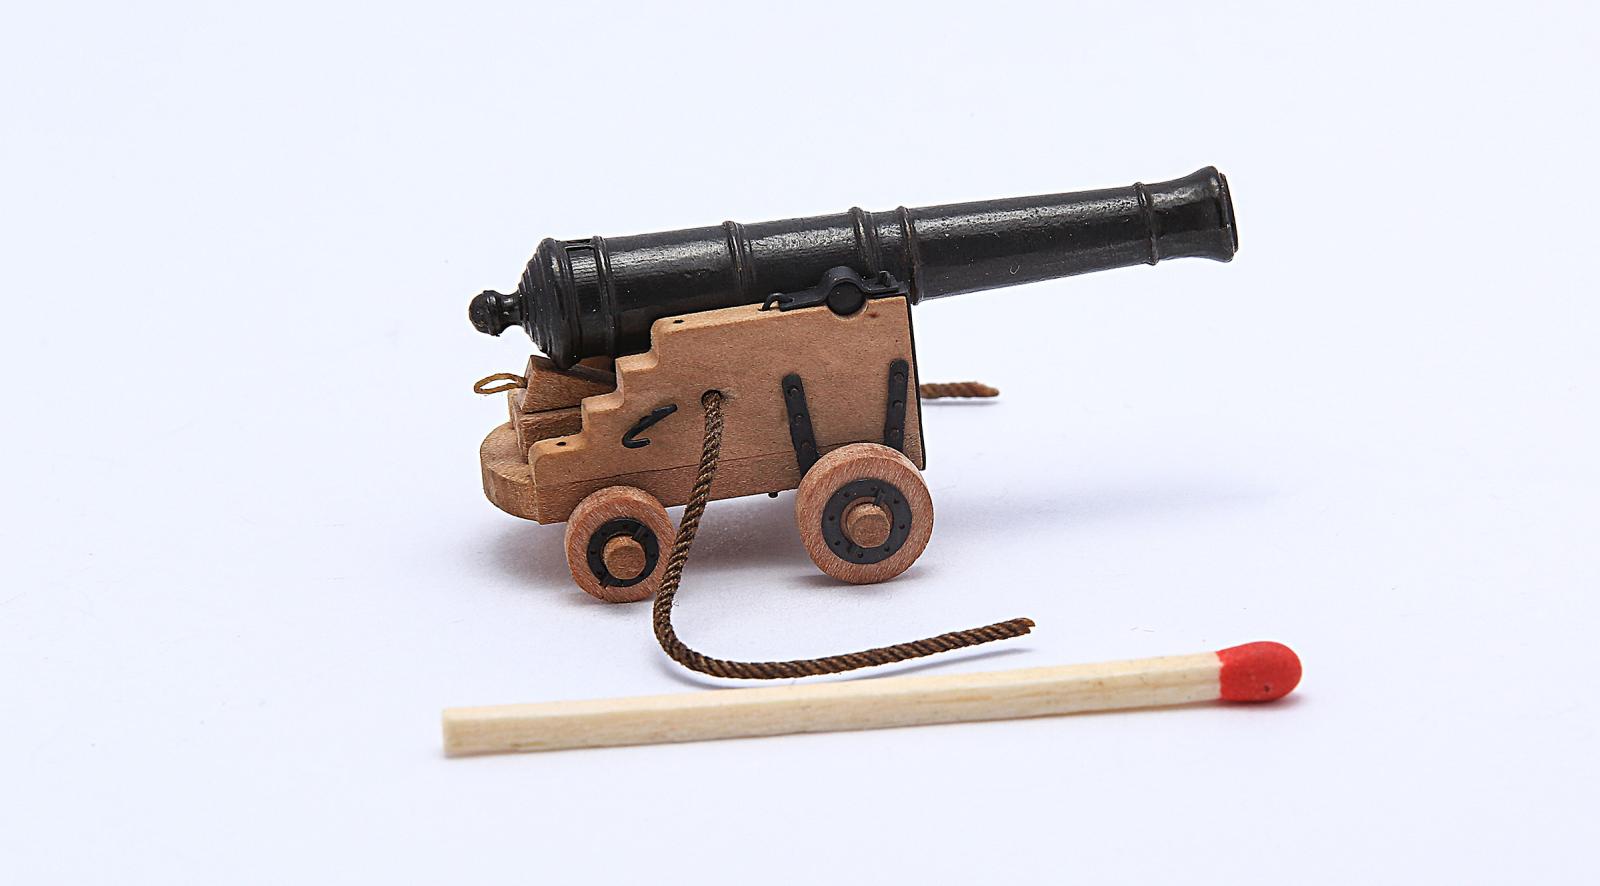
Thank you fellows for comments Just a small update. Chamber gun. 3 pound gun vs. chamber gun Cheers Matt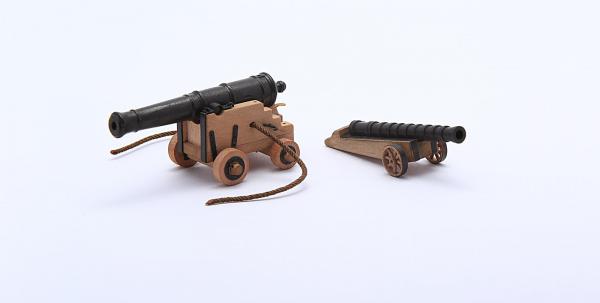
- 222 replies
-
- 16
-
-

-
Papegojan 1627 by mati - FINISHED - 1/48
mati replied to mati's topic in - Build logs for subjects built 1501 - 1750
Thanks Guys for comments and likes!! Cog as your wish extra photo. Cheers Matt
- 222 replies
-
- 18
-