


hamilton
-
Posts
1,919 -
Joined
-
Last visited
Content Type
Profiles
Forums
Gallery
Events
Posts posted by hamilton
-
-
-
Beautiful work, Jason! Re, the knightheads - I'm not too sure, but the knighthead's I've seen are normally either side of the bowsprit - it might have been different with the Snake, and it's also possible that I get this idea from exceptional (and potentially incorrect) models! Others can confirm.
Also - the timberheads would actually be the ends of the frames, so they wouldn't run in line of the gunports, as far as I know....I wonder if you could cut it off, sand it down, refinish and place the timberhead forward of the gunport...again others can confirm
She looks fantastic in any case!
hamilton
-
-
Hi Jim - this is really incredible work! The planking looks great and the detail is fantastic. I wish I had read your very simple explanation of how to finish the shields when I was building this model a year ago! Now I know! Keep up the good work!
hamilton
-
Thanks a lot Andy, Augie, Ferit & Mark! Your compliments mean a lot - especially coming from such great craftsmen. I don't know about going to the dark side......yet....though in secret I've been looking at a couple of lumberyard kits.....
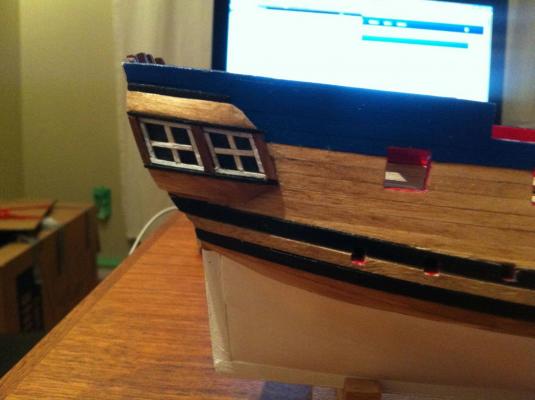
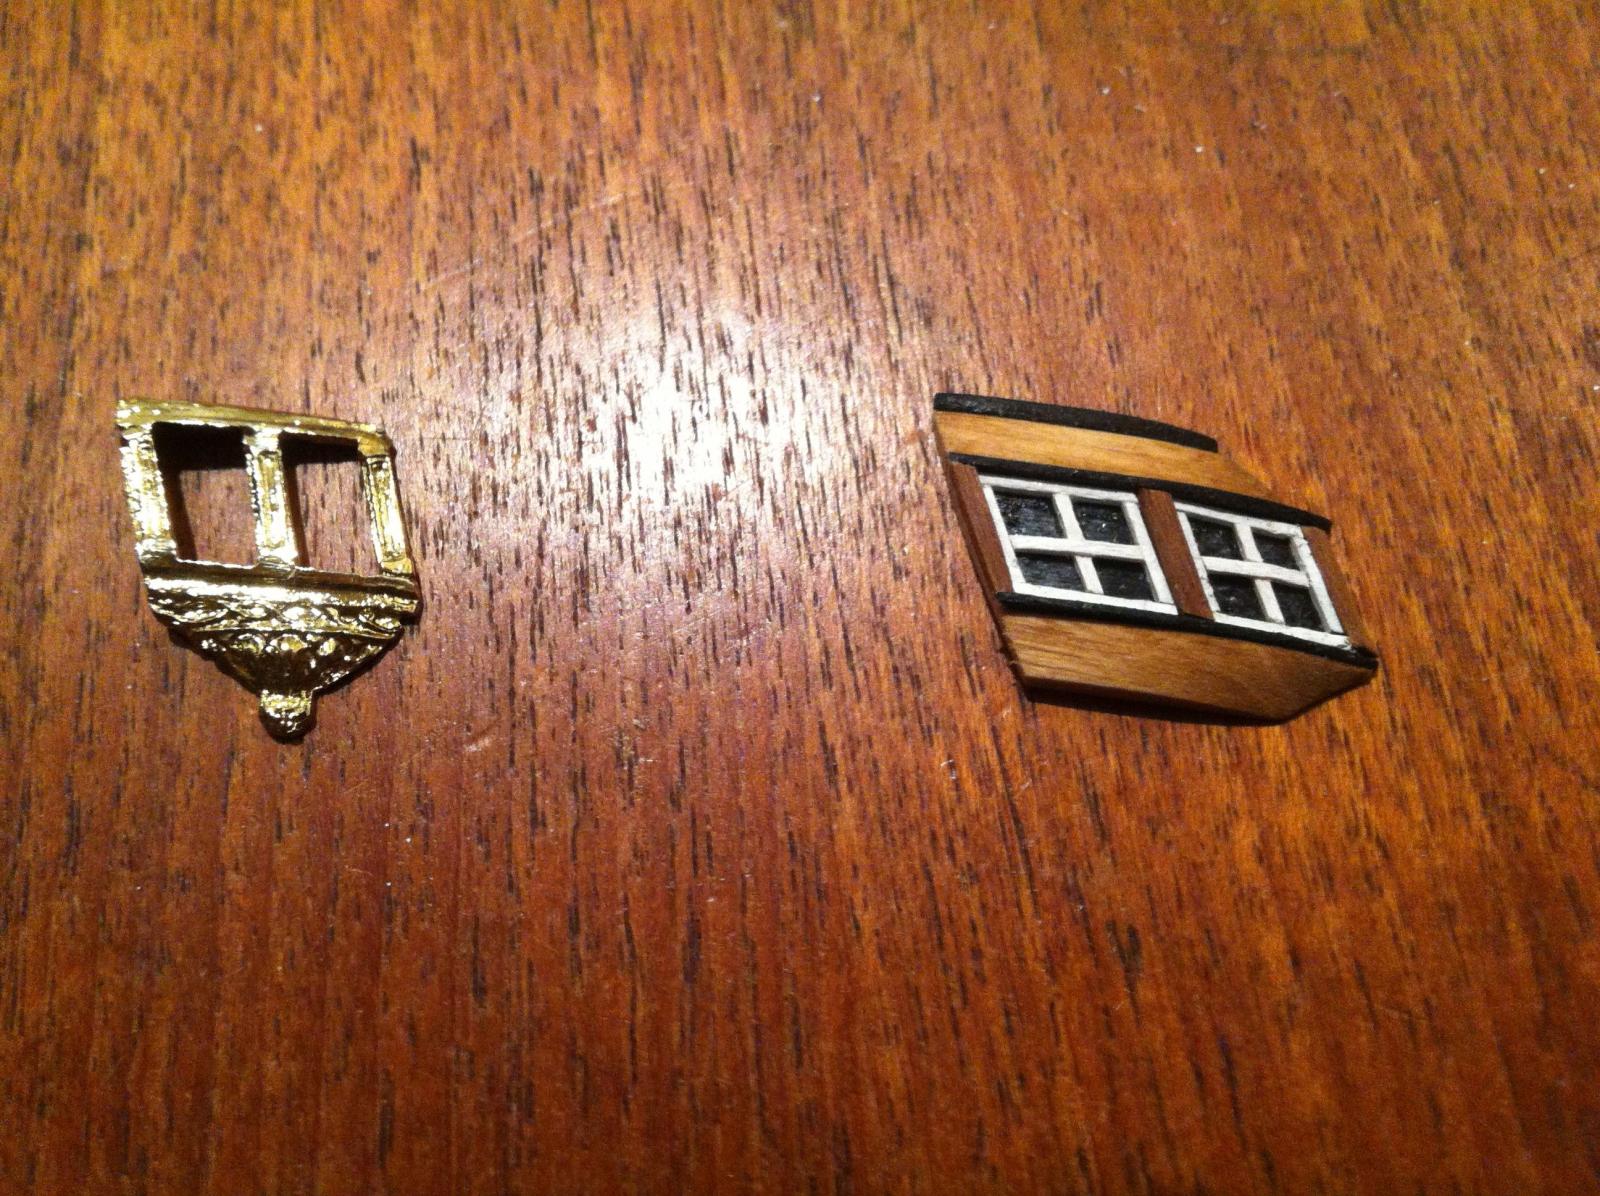
Tonight I finished the port side quarter gallery, and so now it's a nice pair. I still have to make the decorative finishing elements on the bottom of both pieces. I'll do this tomorrow. Here's how they currently look on the model.
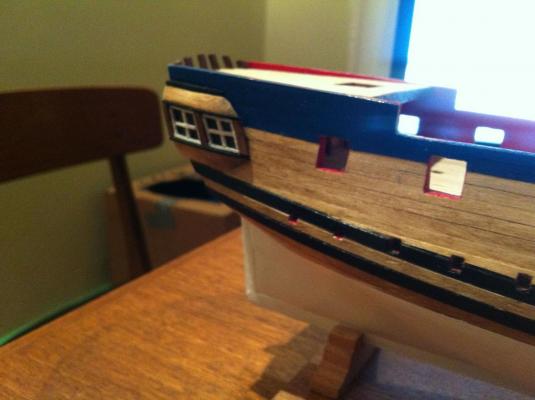

Next up is the transom - I have to say that I feel a lot more confident in making this now that I've made the quarter galleries. It's not going to be incredibly decorative, though I've been on the hunt for things that I could use as decorations in a pinch....Hopefully I'll be able to build the transom in such a way that I can add elements (if I find them) later but if I don't it'll still look ok....
Until next time
hamilton
-
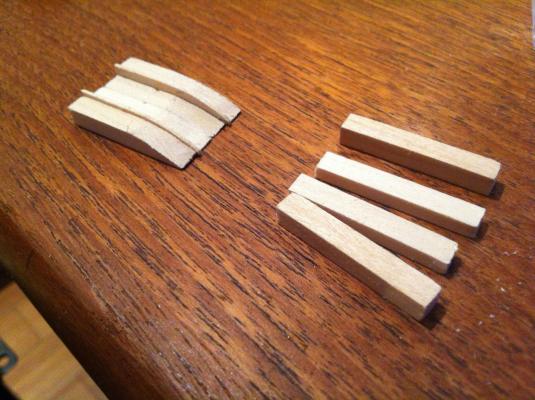
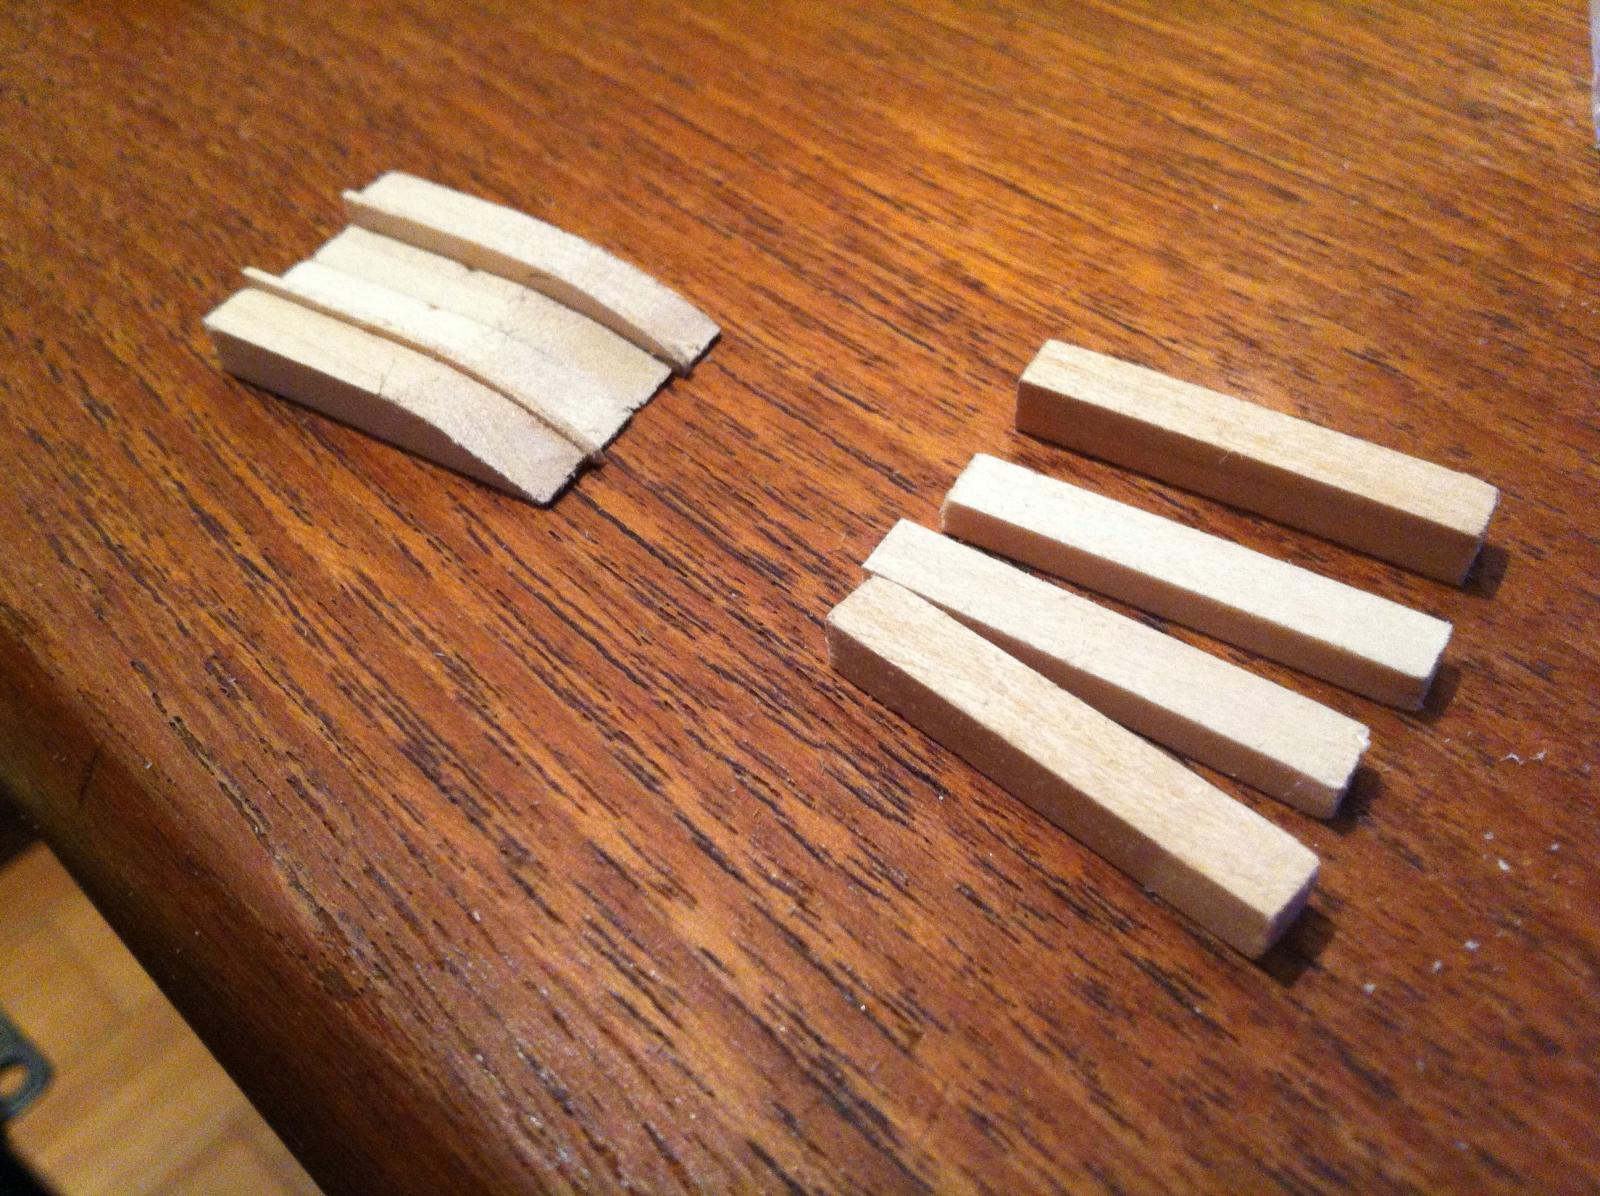
Thanks Mark! - I've managed now to (almost) finish the starboard side quarter gallery and am very happy with the results. I cut all the parts for both quarter galleries at the same time to ensure they will be of equal size. And I'll wait until both are complete before attaching them to the hull....Here's the process
Each quarter gallery is built up out of 7 strips - 2 5mm x 5mm strips for the roof and the lower part; 2 5mm x 3mm strips as a false backing for the windows; 2 6mm x .5mm strips for the sill and head of the windows; and 1 3mm X 1mm strip for a finishing strip on the top. I shaped all the pieces according to a curve I determined.
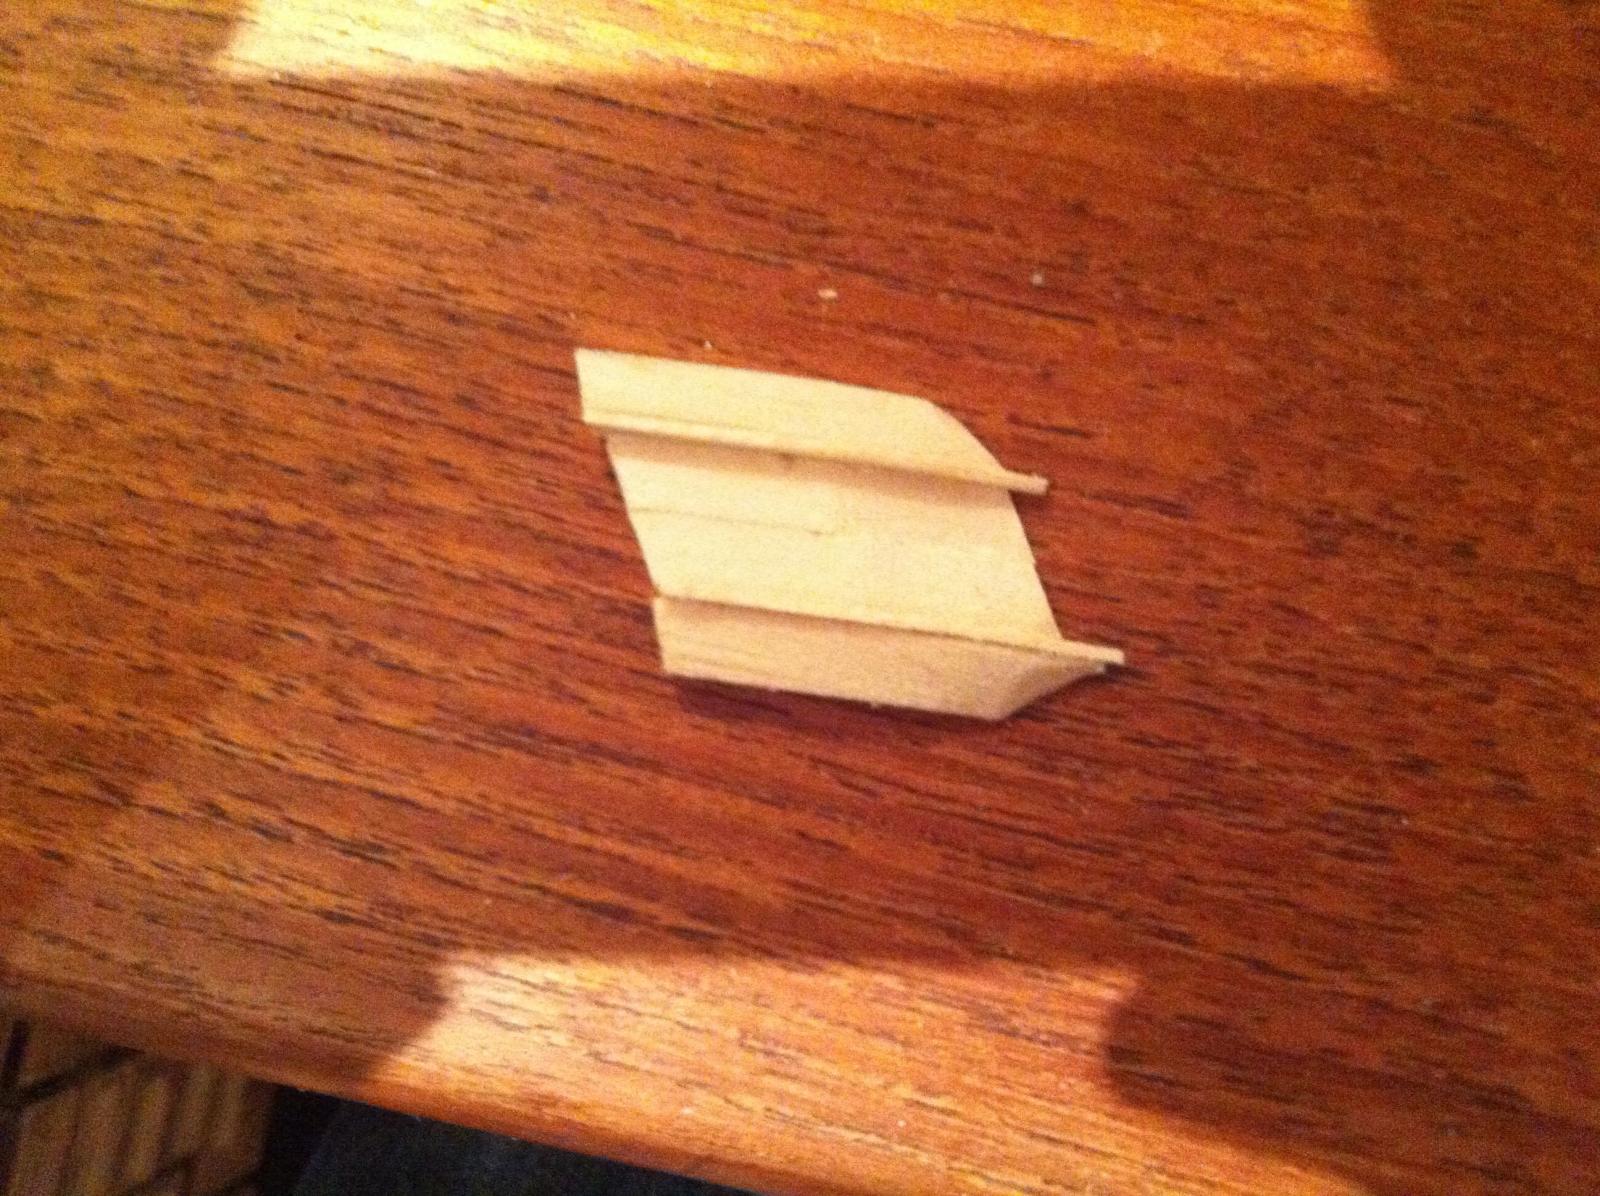
I then shaped the pieces to get the appropriate cant into the quarter gallery.

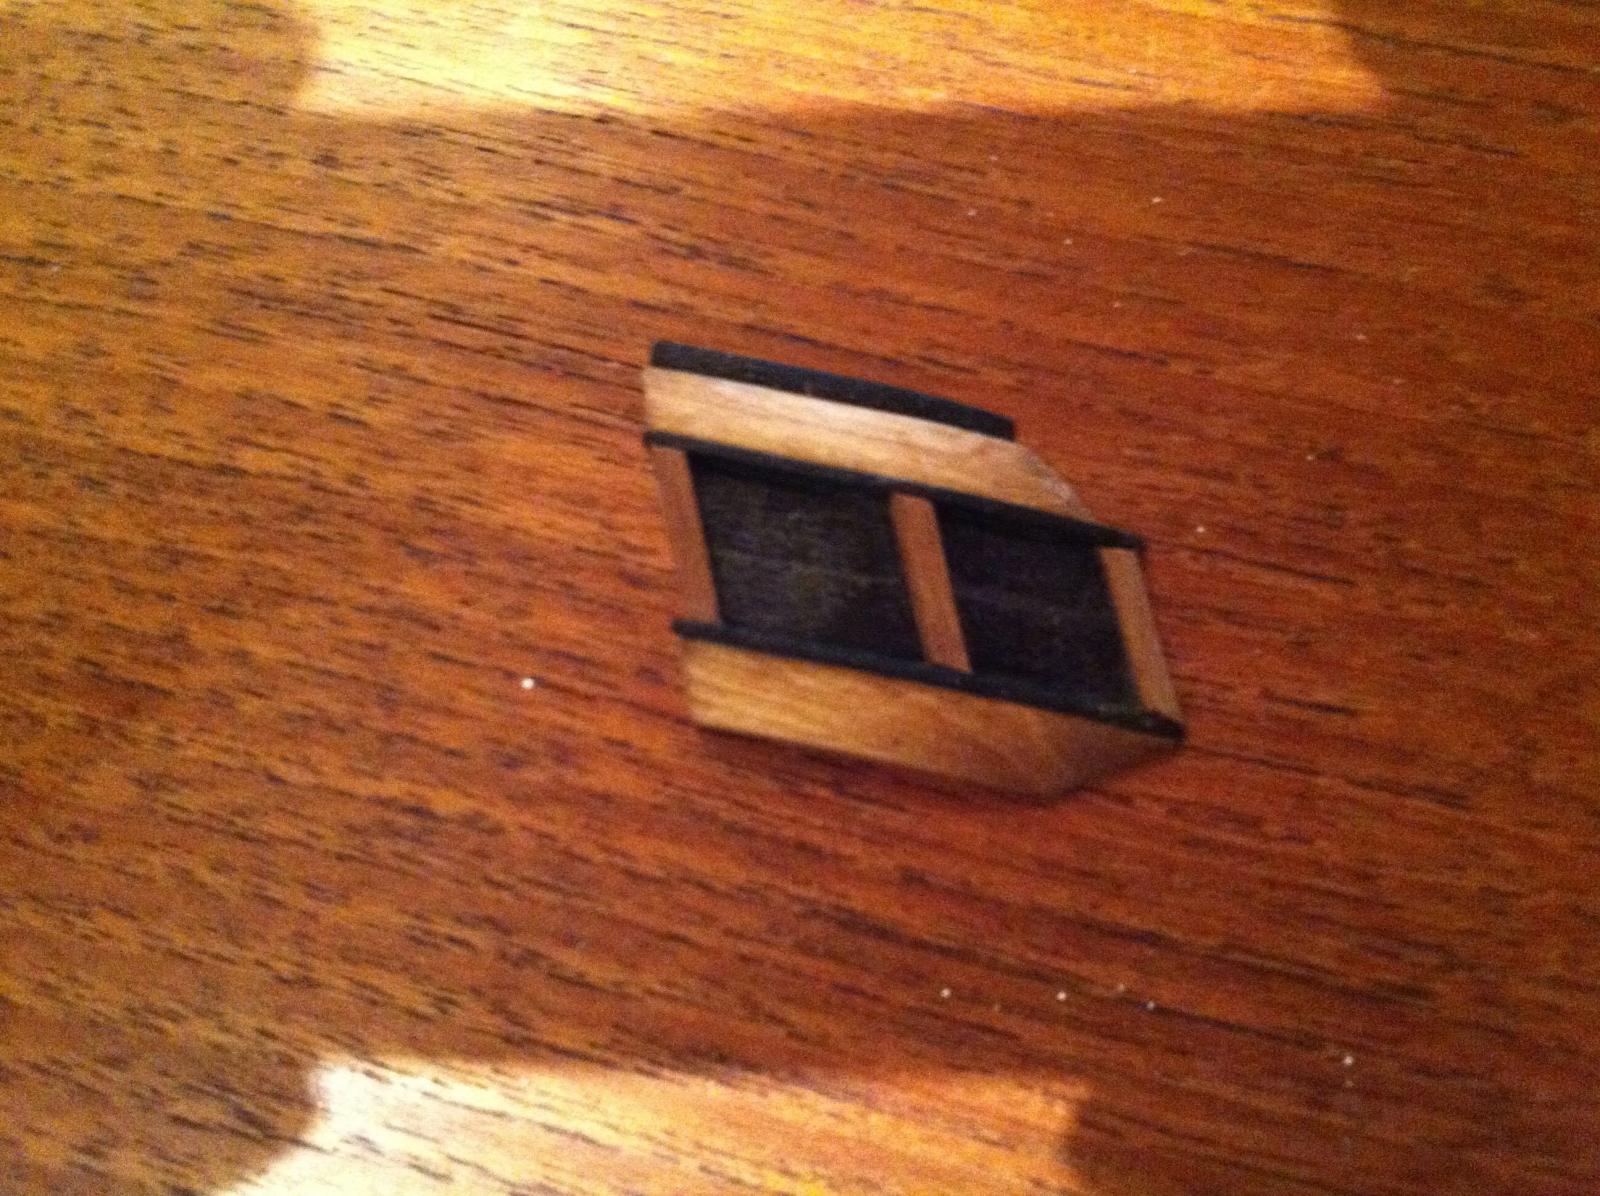
Next step was to finish the pieces - I stained the rood and the bottom piece and all other parts were painted black.
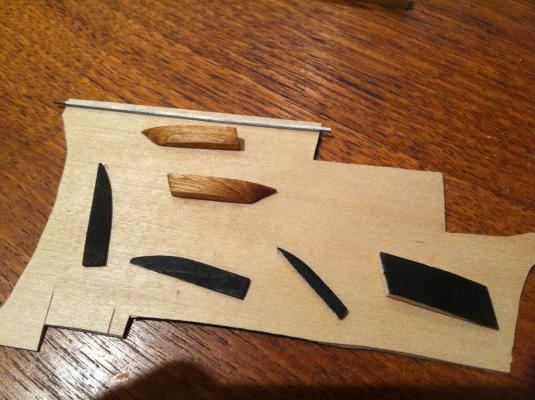
I then assembled it and added posts using 2mm x 2mm walnut.

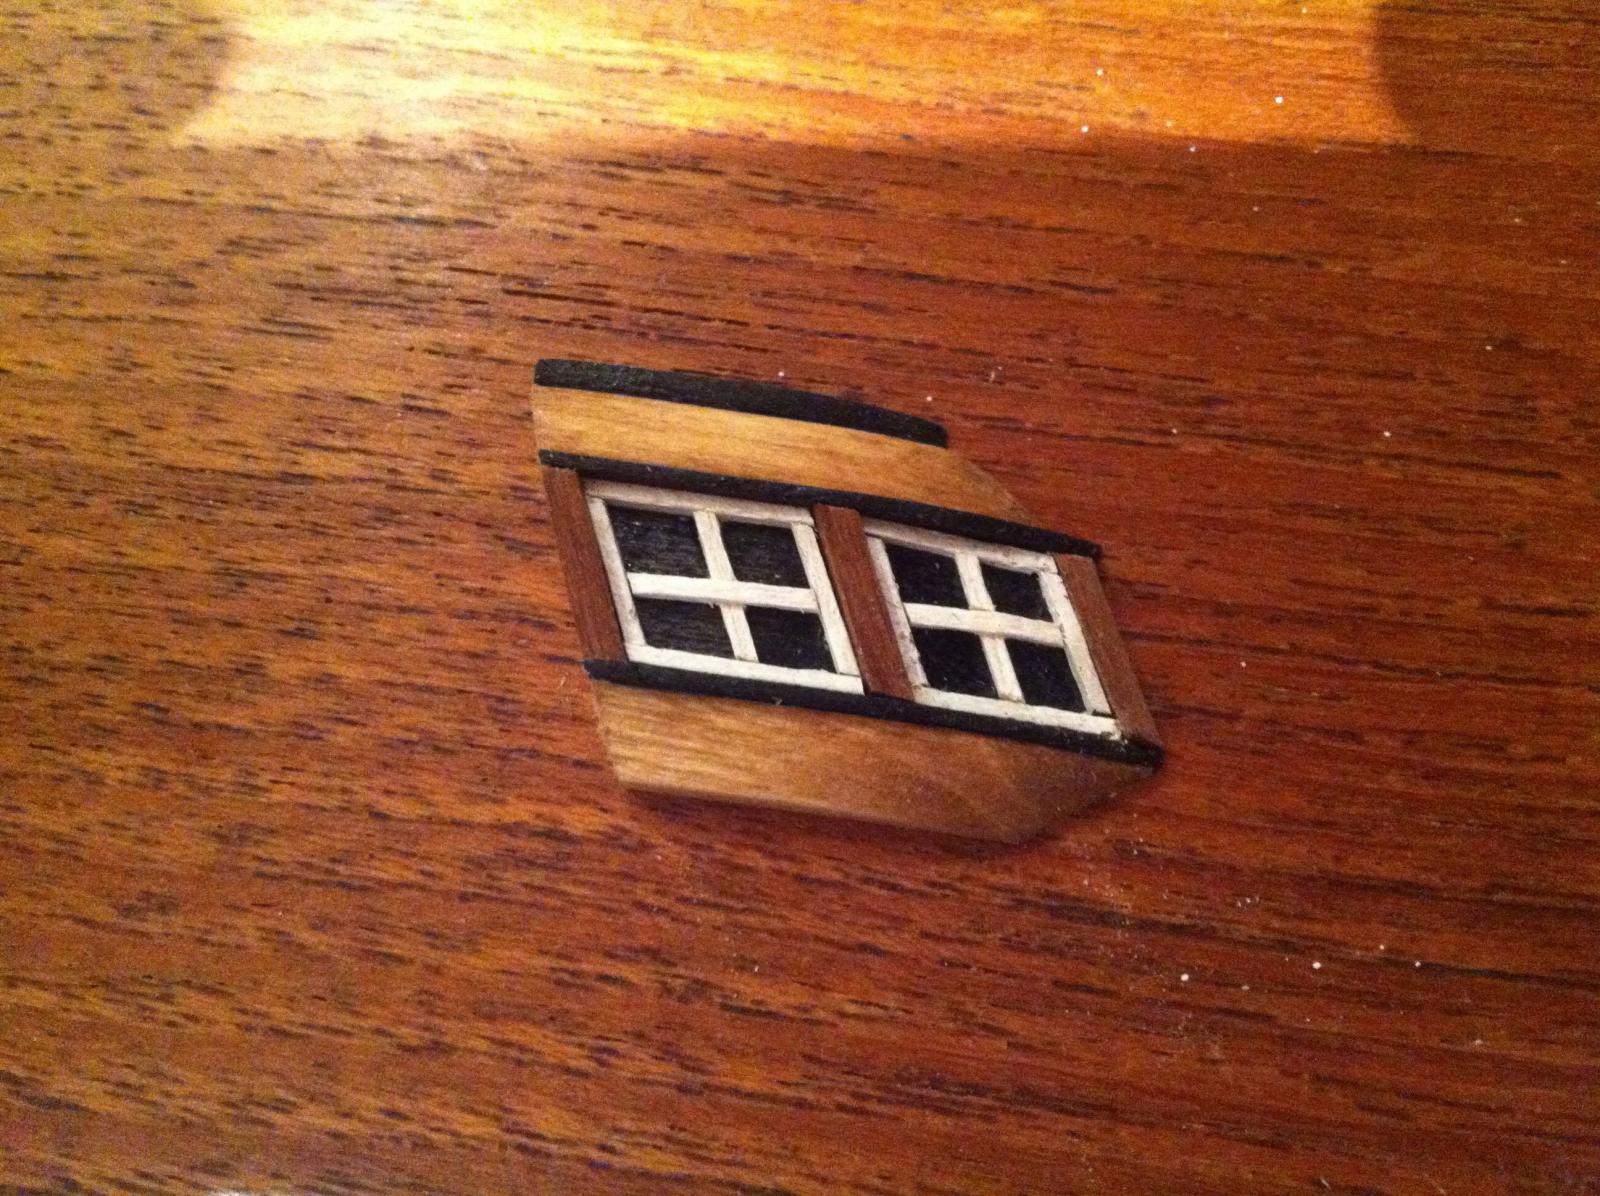
Finally, the window frames were added using 1mm x 1mm strip wood, painted white
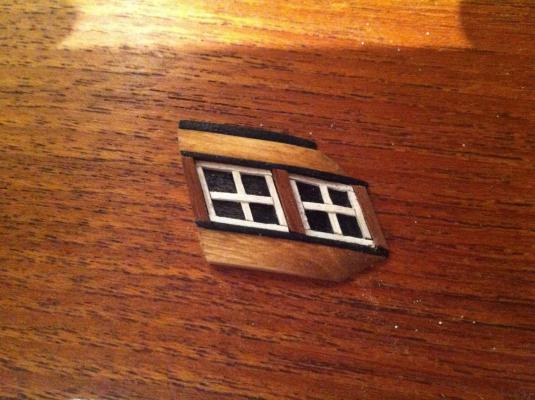
Here is a comparison between the kit supplied part and the one I made.

I still need to add a fnishing piece at the bottom, which I will attempt to make out of sculpy, since I need to do some shaping and my carving skills are nonexistent. Tomorrow I'll do the port side quarter gallery, and then spend the following night making the sculpy finishing pieces and designing the scratch built transom....lots of fun ahead!
hamilton
- maddog33, Ferit, realworkingsailor and 5 others
-
 8
8
-
Hi Mark:
Just took some time to read through your log - very impressive! I'll be following with interest
hamilton
-
Funny you mention that, Mark - I almost glued the roof of the starbard side quarter gallery to the model, thinking that it would be easier to get a sense of proportion and install the windows & bottom part afterwards - but something held me back, fortunately! The good news is that I've already transferred the basic outline of the port side quarter gallery onto the appropriate wood stock. I think I will attempt to build up the quarter galleries before installing them rather than constructing as I install the components....There are a couple of elements I'm still trying to wrap my head around.....very tricky
hamilton
-
Thanks Andy - there's a model train specialty store close to me that carries styrene - I may go that route.
Mark - actually, you were on the money since Goodwin shows both quarter galleries and quarterbadges.....our house is in a bit of disarray at the moment with the painters having essentially taken over our main living area....so no modelling in my immediate future as impatient as I am to continue with the quarter galleries....I managed to construct a roof for the starboard side quarter gallery last night, and while I'm happy with the shape, I'm not sure about the scale - it might be a tad too big....so I might re-make it starting whenever I can get back to the bench.....until then....hope the rest of you are having fun
hamilton
-
Thanks Andy - it seems relatively straightforward - did you use styrene for the molding/window frames? If so where did you get it in such small dimensions? Thanks again!
hamilton
-
Great suggestion, re adhesive backed foils - I actually have a long strip of 1/4" copper adhesive that would suit - a bit of paint and it could work well. I may not be able to get to any attempts for a couple of days - we're prepping
my workshopour living room/dining room for painting....hamilton
-
Well I just took a look at Andy's Pegasus log and his method of building up the quarterbadges....I do not feel confident that I could replicate this with the same stunning results, though the quarterbadge illustrated in Goodwin is much simpler....I may have a stab at both the simplified quarterbadge and the quarter gallery depicted above and see which I like best....to be honest this is a new approach to modelling for me, where usually I just throw on whatever's there! It's quite nice and somewhat more relaxing
hamilton
-
Thanks all for the comments! And to Mark and BE for the guidance - much appreciated!
Mark - the plans supplied by Corel are horrendous, and there is no perspective drawing at all of the quartergallery - though it seems that they have modelled their metal part on the drawing from Goodwin reproduced above....I took a look at the instruction booklet for the MS Constitution, and the assembly drawing included there for the Conny quarter galleries could serve as a starting point for reproducing the design shown in Goodwin's book - all I would need to do is re-calibrate the dimensions...but this kind of design would work well.
BE - I will look at Andy's technique for the Pegasus...From my research it seems that the quarterbadge is more typical of the c.1719 era, while over the period toward the middle of the 18th c. these began to mutate towards the full quarter galleries - at this stage, the 6th rates also went through other modifications that are NOT represented in my build (such as an extended quarterdeck, the ship's wheel moved up onto the quarterdeck, a squared-off beakhead bulkhead, roundhouses at the bow, etc.). I'm tempted to go with the quarterbadge for historical reasons, my only hesitation being the high degree of decorative detail - I don't have Goodwin with me here, but if I'm right, the drawing you're referring to is of a quarter badge that looks very much identical to the one on Pegasus/Fly. My skills are so primitive that I can't imagine the results would be good....there is a drawing in Goodwin of a simpler quarterbadge that might work...
I have some sculpy kicking around in my "modelling drawer" so I may have a go at the decorative element at the bottom if I go for the quarter gallery....I might be able to get the look of the semi-circular tiles with some simple carving - how would they have been finished, do you think? Would they just have retained the colour of the lead with no finishing?
Anyway, thanks all once again for the input - it is great to find such encouragement coming from so many distant quarters of the world!
hamilton
-
Now for the question(s)....
I'm faced with the prospect of having to scratch build both the transom (which I had expected) and the quarter galleries (which I should have expected)...The metal transom is very badly done altogether and while the quartergalleries are not bad, they do not fit very well and would also clash (I think) with a scratch built transom....
So I've looked at the drawings in Goodwin's book, and here is the one that I think I will try to replicate:
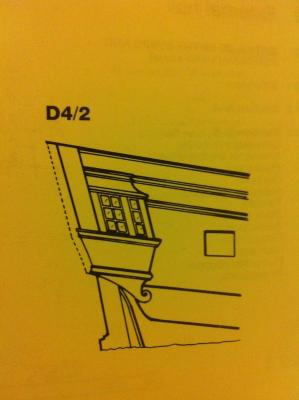
This is the simplest of the several quarter galleries that Goodwin pictures, which is kind of why I chose it....Anyway, I've never done this kind of thing before, and I have several problems with moving from the drawing to a 3-dimensional installation.
1. This is the only drawing in the book and it does not show any other perspective....so I can't get a sense of the real shape - I can make a guess based on the drawing, but it may take several attempts to work out the details....
2. I'm thinking of carving it out of three solid blocks - one for the "roof" section, one for the window section and one for the lower section, fitting the moldings separately. Does this sound realistic? The decorative element at the bottom....I'm not so sure....I was actually thinking of sawing the bottom off the metal piece supplied with the kit and using that since it is roughly the same shape (though with more decorative elements)....feel free to let me know that this is a bad idea....
3. The drawing gives no indication of how it should be finished.....the upper part is in line with the section of the bulwark planking that is painted blue...but I feel like it would be weird to paint it blue....I thought of painting this black, but this might not work either, since the moldings (which are roughly continuous from the moldings on the hull that extend from the cap rail and plank shear) are also black....so maybe I should keep the moldings black and stain the upper and lower part of the quartergalleries? Thoughts? The taff rail will be black, like the other rails....
-- As for the window area, I was going to blacken behind where the windows are, use 1mm x 1mm walnut, finished white, for the frames, and use dark walnut for the posts, with possibly some treated brass strips laid over the posts for an extra decorative element....
Anyway, any guidance or enlightenment you can provide based on these slender details would be greatly appreciated.....
I was going to ask about the transom, too, but maybe I'll leave it with this first before moving on to that next challenge....thanks again to all in advance!
hamilton
-
Ok - a small post after a bit of progress followed by another post with a question or two for you all....
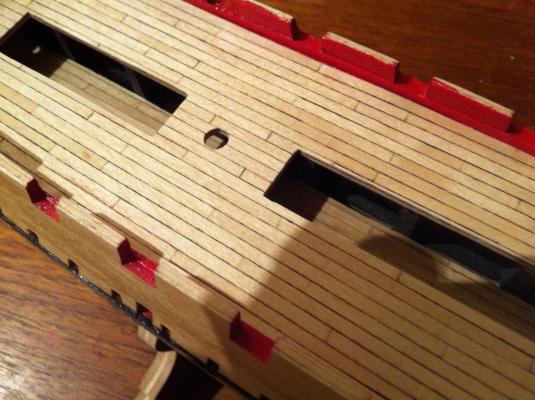
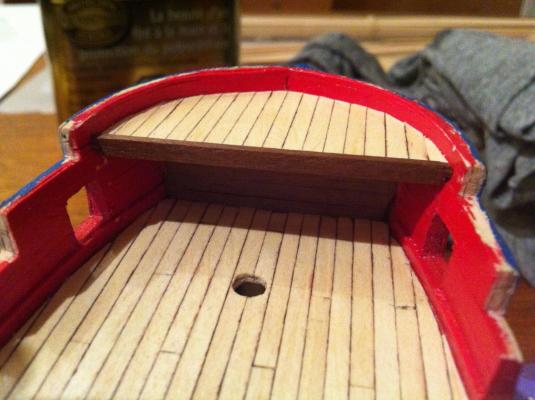
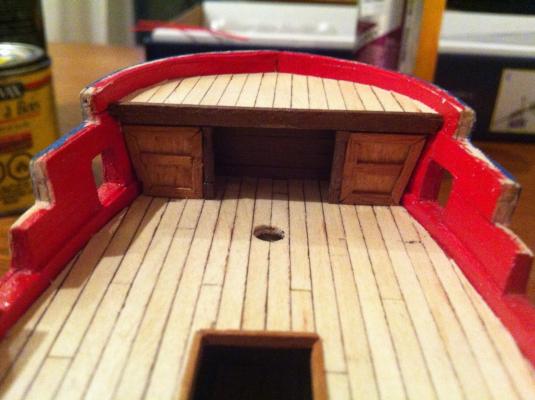
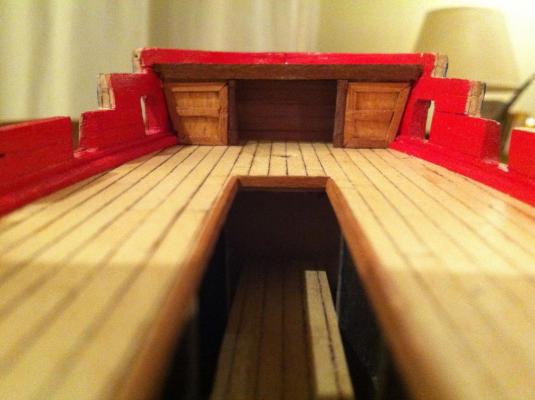
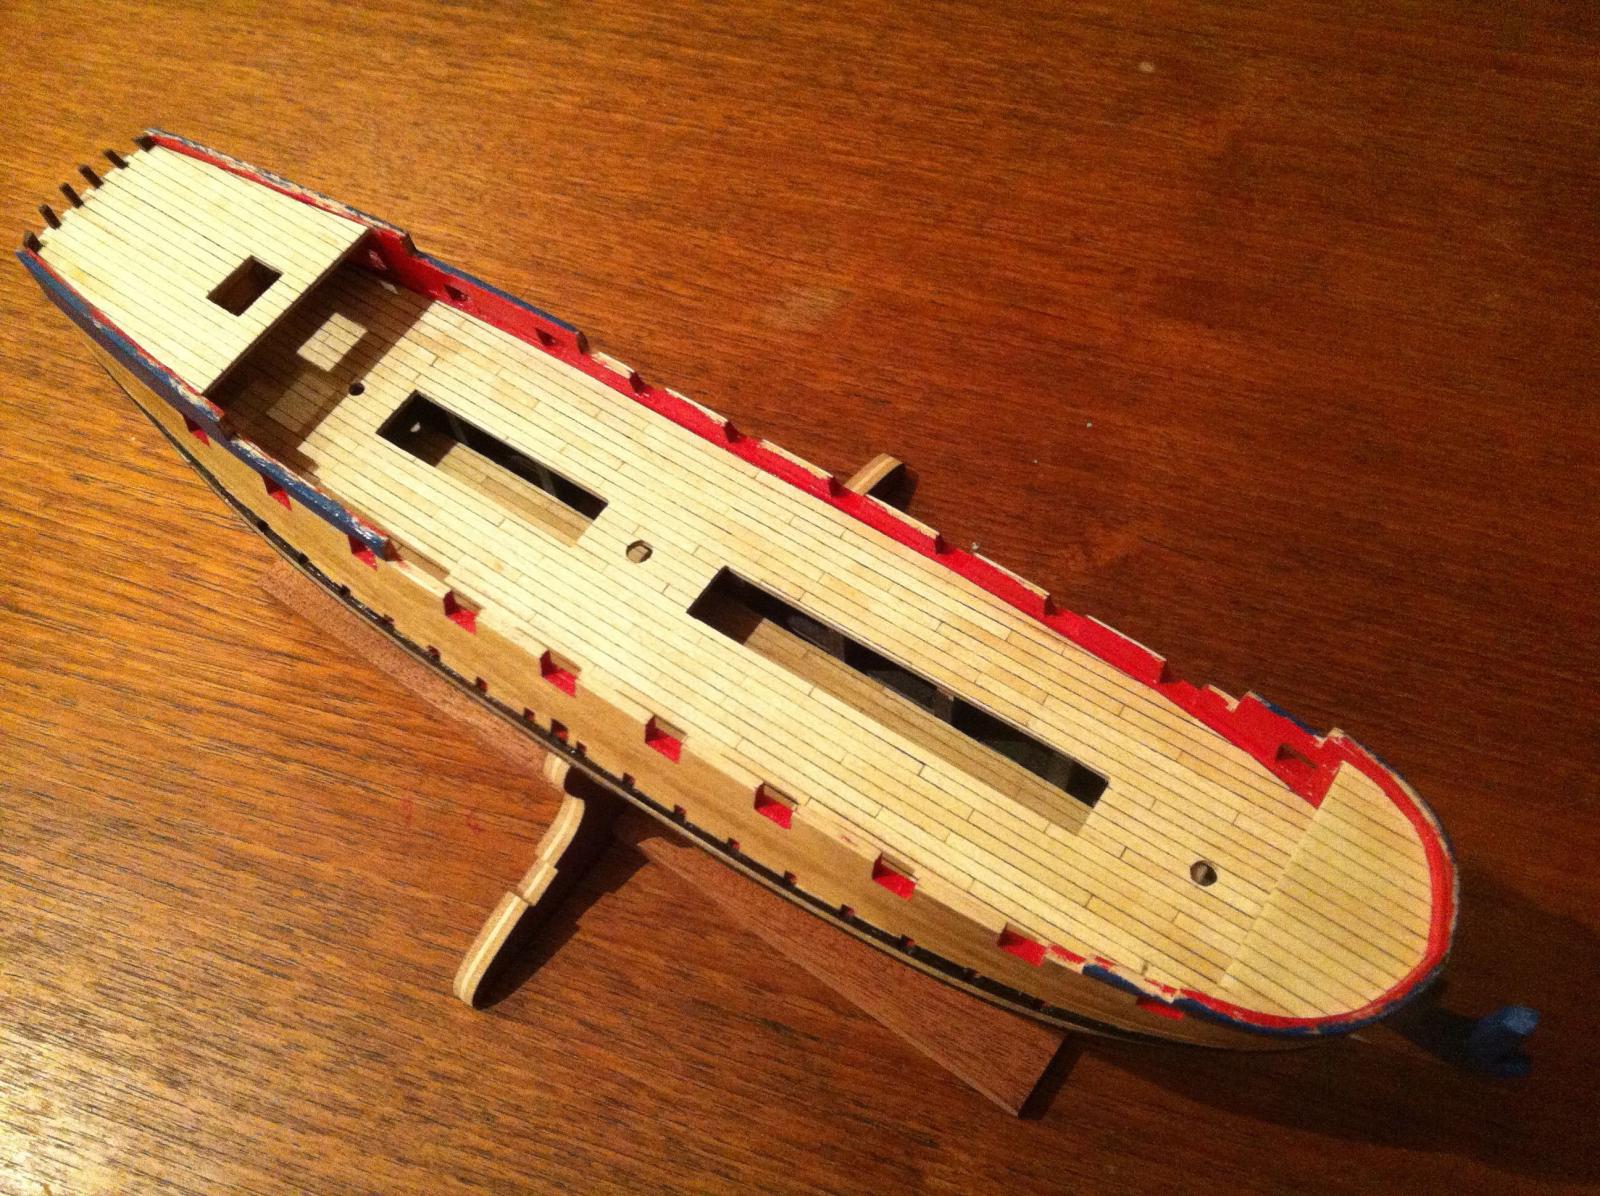
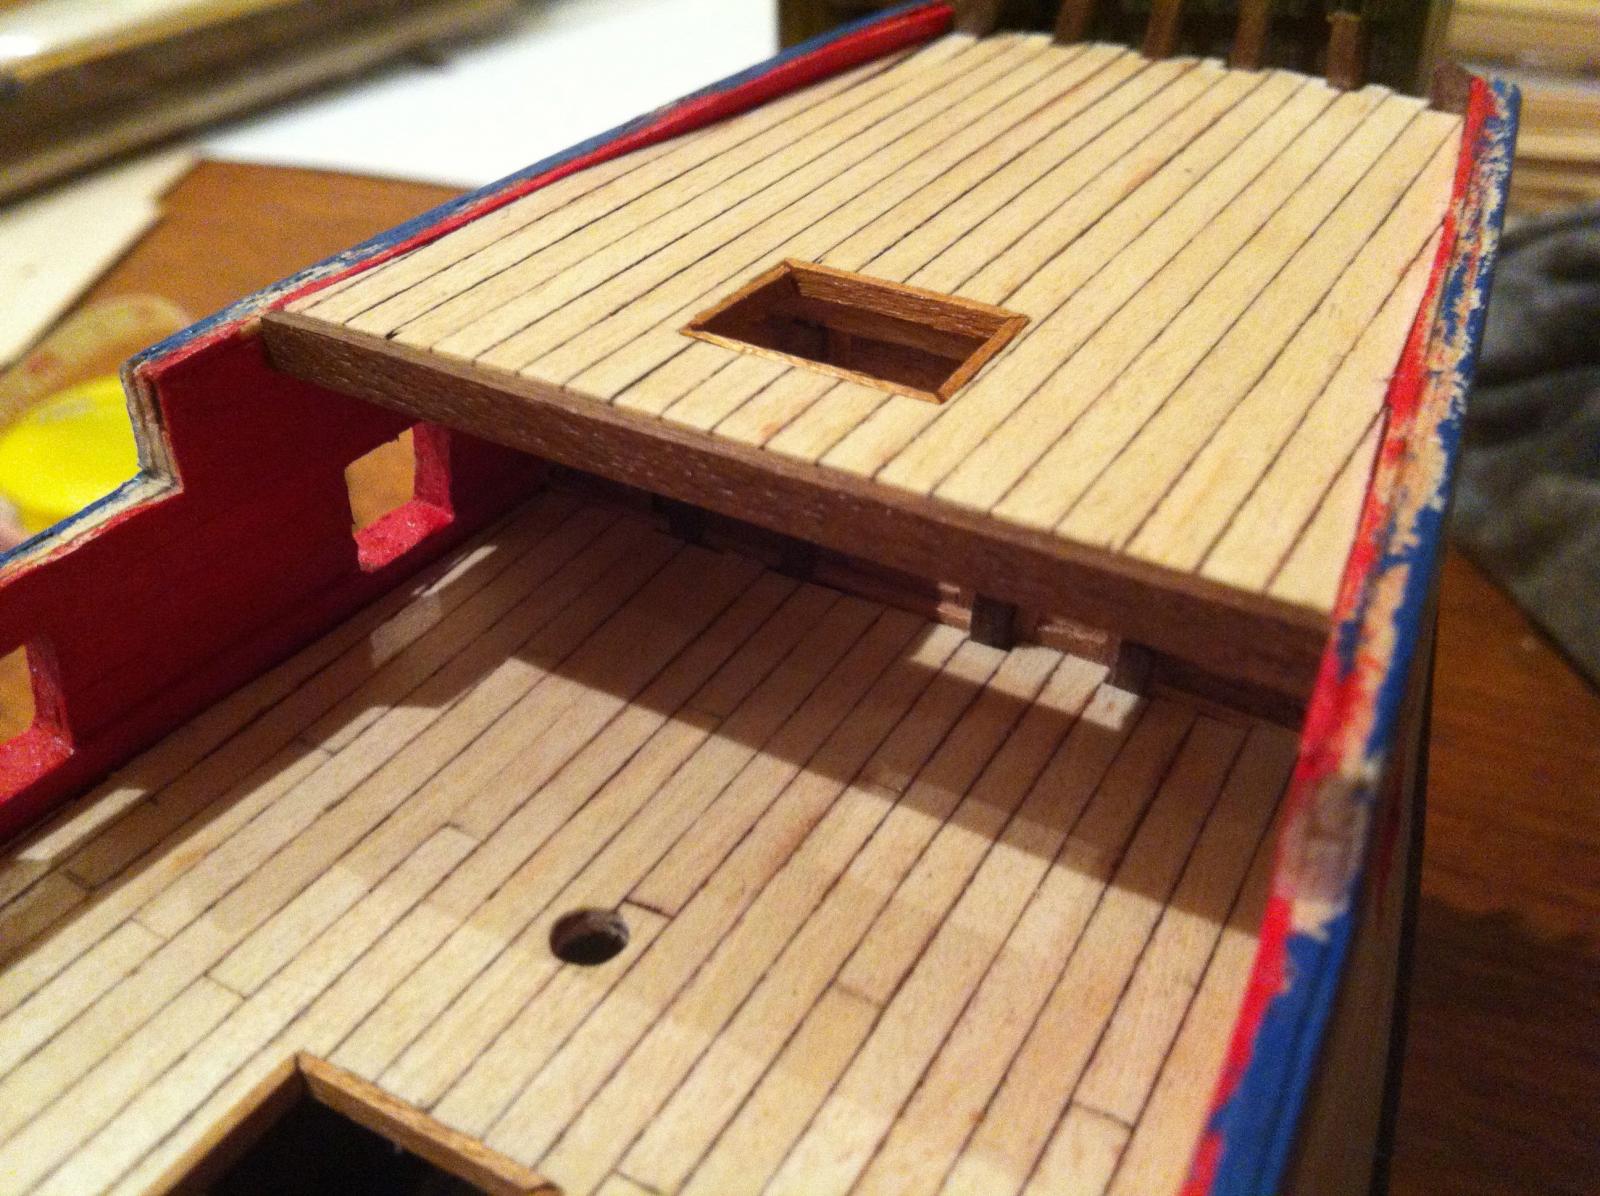
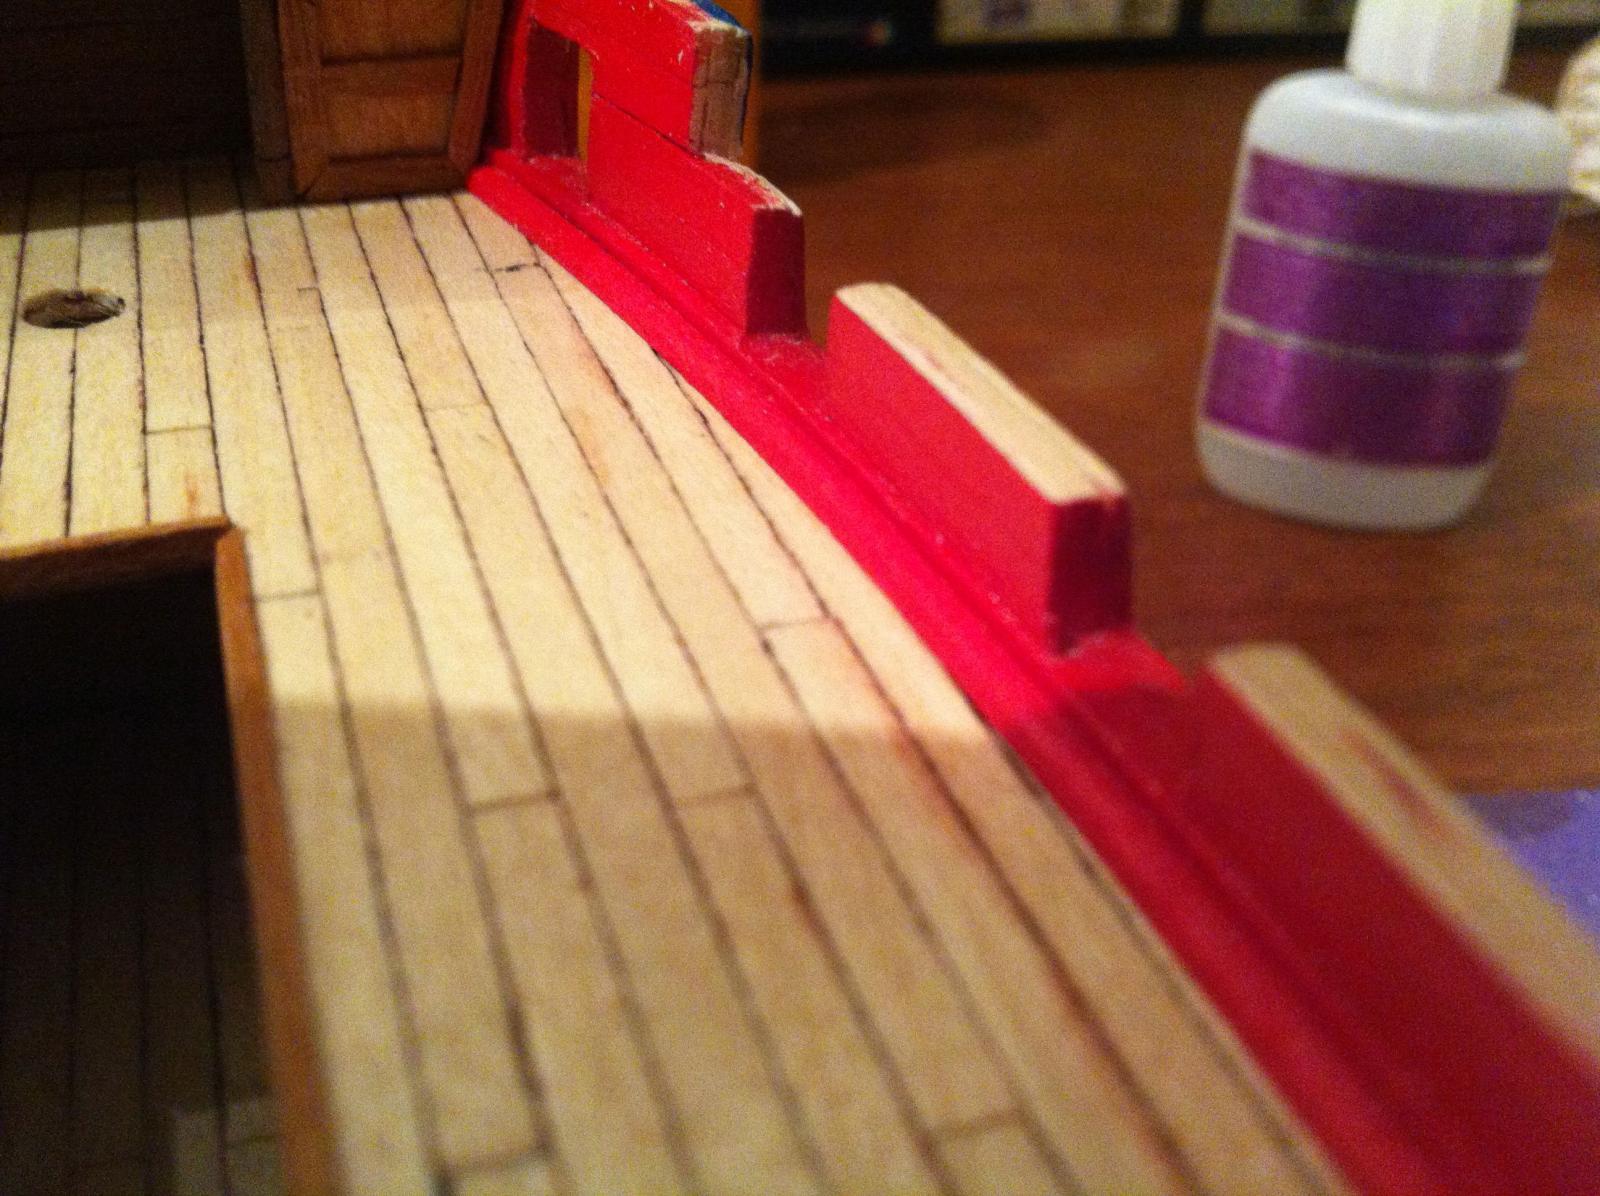
I've now finished planking the deck, which brings my planking pretty much to a close (except for building up the transom)...Yay!! The next phase - hull, deck and bulwark detailing has begun....
My first step was to add the margin planks at the forecastle and quarterdeck, using 1mm x 3mm walnut - pretty basic stuff here....measure, cut, glue.
I then added two half-bulkheads beneath the forecastle as outlined in Goodwin's Anatomy of the Ship. I tried these a couple of nights ago using quite thin (1/32") basswood sheet, but the basswood kept splitting and the one unit that I finished looked awful. So then I decided not to make this particular feature.....
But (in a rare moment) I decided that it would really detract from the build if I did not include this small element, so I had another go and am quite pleased with the results - i used 1/16" basswood sheeting for the backing, 1mm x 2mm walnut for the frames and 2mm x 2mm walnut for the posts.
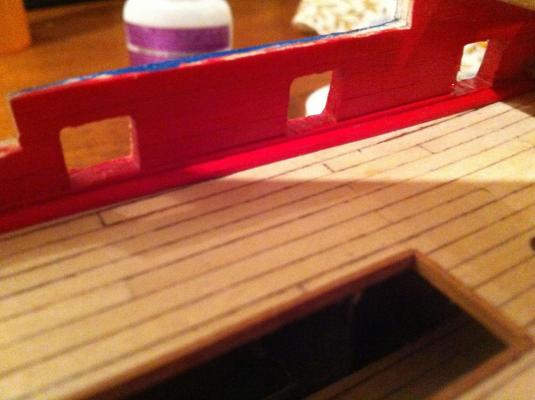
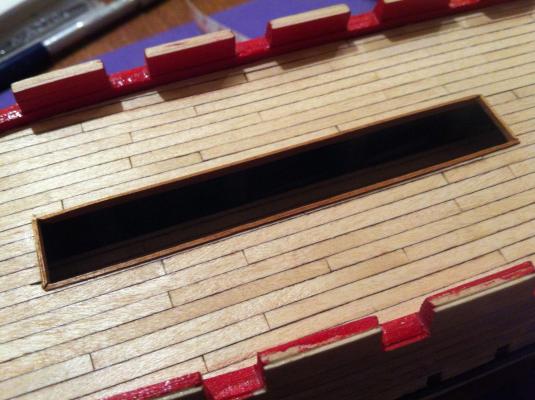
Next I added the moldings around the hatch openings using 1mm x 2mm walnut.
I also added the waterways on the main deck using 1/16 x 1/16" basswood filed and sanded into a roughly triangular section and painted red as with the bulwarks. It is very hard to notice on a cursory glance, but I think it turned out quite well....
Here are the photos....
hamilton


-
Hi Mobbsie:
I've coppered only 2 hulls in my time - the Phantom and the Kate Cory. I didn't really worry about gore lines (though if I had read this log I might have taken a different approach). So far, your coppering looks great. Make a pot of tea and a sandwich or two and keep on going!
hamilton
-
-
-
Looks beautiful in the sun, Andy!
hamilton
-
Beautiful (and I imagine painstaking) work, Geoff! I love the detail and finishing on the spars!
hamilton
-
Thanks Mark - this is very reassuring to someone (myself) who tends towards laziness...in some things anyway.
If you look closely at the photos on the box, it's clear that the prototype model was trunnelled - but the trunnels themselves look very oversized - not to knock whoever built the prototype, which is a very fine looking model. I can only imagine how difficult it is to obtain realistic and good looking results at so small a scale! And even when they are (as on the prototype) out of scale, I am always impressed at the effort that goes into adding these fine details.
hamilton
-
Thanks all for your comments and support!
Andy - I hope I can get to the level of precision you've attained in the masting and rigging of your Pegasus (which I believe I mistook for the Fly in an earlier post! - apologies!!)
BE - yes, indeed. It's a relief to get over the hump, so to speak, with the planking!
Augie - the scale has already defeated me! At least as far as the trunneling is concerned....I've pretty much decided against it - I think I could probably sort something out, but the idea of so much tedious work is overwhelming to me....I will definitely trunnel the deck on the Syren when I come to it - and the Bellona after that.
Ferit - I'm honoured, as usual, by your compliments! Starting on the deck & hull details, I hope to get somewhere close to the cleanliness of your efforts on the Berlin!
Mobbsie - thank you for coming by! Your Agamemnon is beautiful - and not to worry, more will come! I'm not sure if I'm sad or grateful that Sjors has not yet discovered my build log! (though I've been spying on his!)
Harlequin - thanks! As mentioned, I'm also not going to bother with trunneling the deck....too frustrating, even for someone like me who normally relishes repetitive and tedious work! However, I do see a few complexities coming up in the near-ish future...I'm going to try scratch building a new transom, which I started working on a design for yesterday. This may lead me into a scratch building of the quarter galleries (it's likely that the contrast between the scratch-built transom and the kit supplied quarter galleries will be too garish)....I'm also concerned about the head rails and cheeks, which I'm also planning on scratch building...I've only ever scratch built one ship's head before - the Sultana, my second build...but I really want to take a stab at building it myself - as much for practice when the Bellona hits my table as anything....
I was looking at the model this morning and realising that the positioning of the double wale may alter how the cheeks and hawse pieces run....but this is still a bit in the future...in the near term it's the transom and quarter galleries that are occupying my thoughts....
In any case - thanks again all for coming by! Much appreciated - hope you're all enjoying the weekend! (though for some it may already be over!)
hamilton
- augie, Ferit, realworkingsailor and 1 other
-
4
-
Thanks Russ and Druxey!
hamilton
-
Hi there:
I'm wondering what I should do about the waterways on my HMS Blandford (kit bashed from the Corel Greyhound kit). I've painted the inboard bulwarks red, and the deck is varnished maple. The material supplied by Corel is dark walnut.
So should the waterway be painted like the bulwarks or natural like the deck? Thanks in advance for any and all advice and assistance.
hamilton


US Brig Syren by Augie - FINISHED - Model Shipways - 1:64
in - Kit build logs for subjects built from 1801 - 1850
Posted
Hi Augie - I don't know what you mean by "doesn't look like a whole lot" - looking at your Syren, this phrase literally makes no sense! It looks like a whole lot to me!
hamilton