HOLIDAY DONATION DRIVE - SUPPORT MSW - DO YOUR PART TO KEEP THIS GREAT FORUM GOING! (Only 13 donations so far - C'mon guys!)
×


texxn5
-
Posts
2,473 -
Joined
-
Last visited
Content Type
Profiles
Forums
Gallery
Events
Everything posted by texxn5
-
Hi Mobbsie, as you know being good is not fun....lol, but I will be a pig tomorrow for sure! It looks like the Harpoon count is around 16-18. I have 5-6 that will hang under the roof on the Shelter, and 3-4 that will go on the whaleboats as they are rigged out. With 7 whaleboats, there will be 2 that are mounted upside down on the roof, and then 5 will be hanging from the davits. Each whaleboat will be a small model in itself. Lots of work. There are also several other items that will have to be made for the boats. Saltyseadog, a member here, has a very good 1/25 scale whaleboat that is posted on the Forum that I will probaby use as a guide, however I don't believe I will be able to recreate as much detail as he did, and most wouldn't be necessary on my boats in that they will be incorporated into the overal ship and not a independant model.....he even went so far as to scrimshaw the knife handles....outstanding model. I'm glad I was directed to it by some of the members. Pictures to follow as I get them done, but it might be a week or so.
- 2,250 replies
-
- 3
-

-
- model shipways
- Charles W Morgan
- (and 1 more)
-
Wow, Piet, I think you just gave me a quick education on working with the metals. Thank you so much, it is exactly what I needed. With the Holiday coming up I probably won't be able to build this until the weekend or next week. Your discription is like a practicum on building harpoons. I will document and photogarph this as I attempt to build them. I will probably need to make about a dozen of these or so. The instructions from ME don't tell me that???? I am familiar with the techniques you discribe so I should not have a problem. I have a good small anvil, so I do have a good worksurface. I was not expecting such a detailed construction method, but then again I do know you, so actually I should have known....lol. Thank you and with your discription, and my building them, it should really aid anyone else that builds this ship, as well as me.
- 2,250 replies
-
- 3
-
-
- model shipways
- Charles W Morgan
- (and 1 more)
-
Hhi Piet, as I'm thinking about this, I realize 14 ga., is way too big. I'm thinking maybe 22 ga., and peening that into fine flat sheets. If I leave it attached to the 22 ga. wire, it might be about right. If not might have to do some soldering. Any thoughts at 1:64 scale? The problem with 22 ga. seems to me to be able to keep it straight without curves and bends as it is soft. Mine is real soft like phone wire.
-
Hi Craig, welcome aboard, are you building a ship? If so I highly recomend starting a build log. It's a great way to get your model going, and a great resources for information. Thanks for your interest.
-
Thank you Piet. I knew you could have an answer. I never thought about copper. What gauge wire would you reccomend. I have some 14 ga, and maybe some smaller ..... I forgot that copper is more pliable than brass. I'll play around and see what I get. Thank you my friend....moving on....Proost good Ale again...
-
Your metal work is no more than Brilliant......I wish I had your skills....you make it look so easy....looks exceptionally good my friend. By the way.....where's the AA's????
-
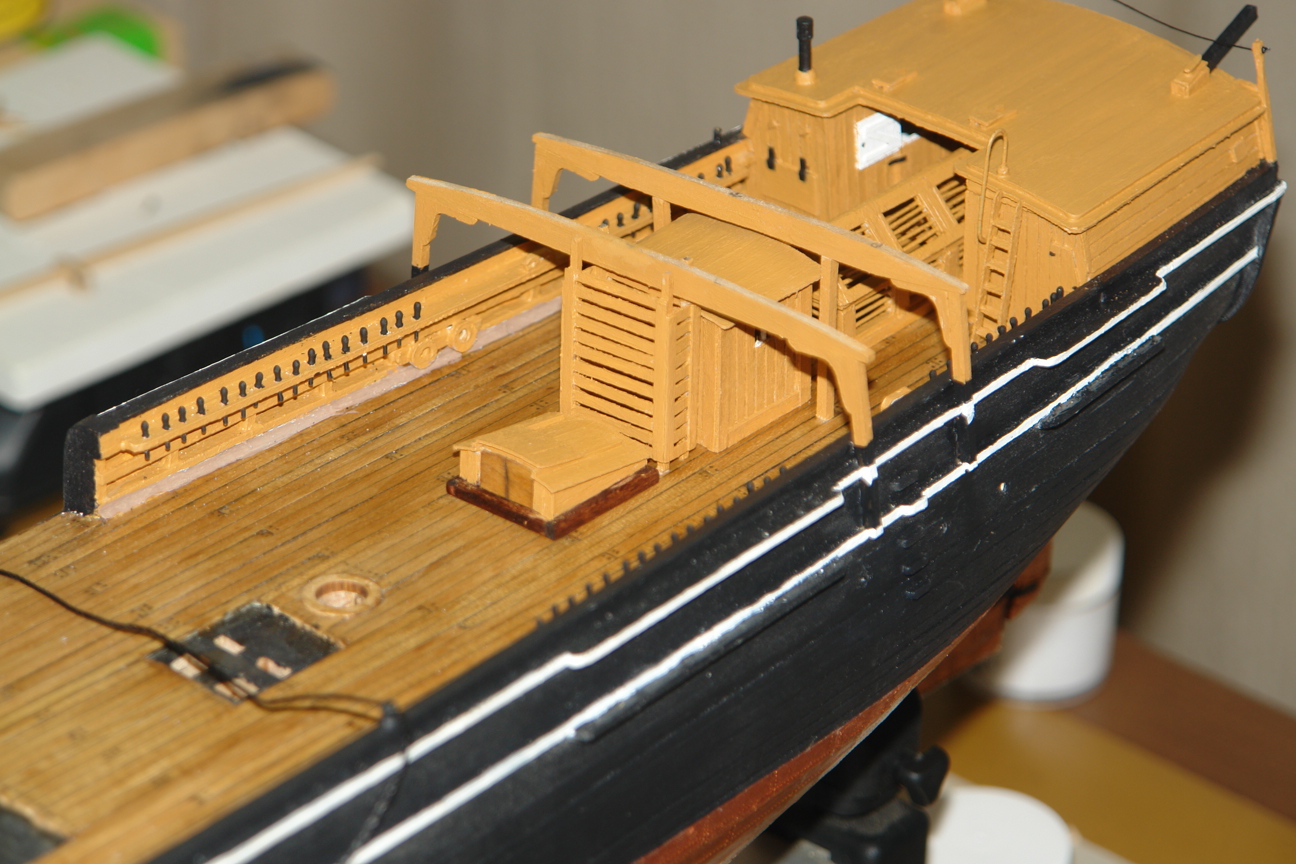
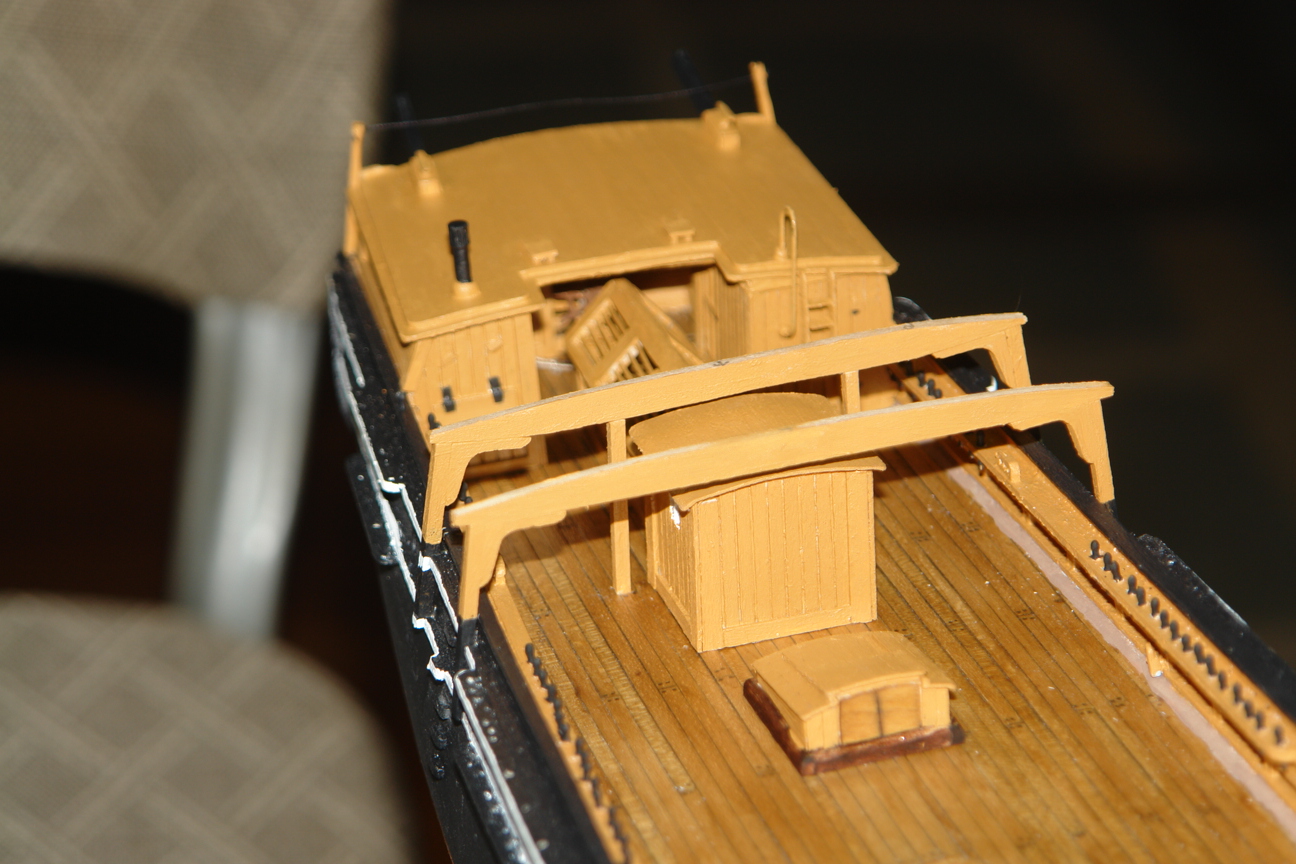
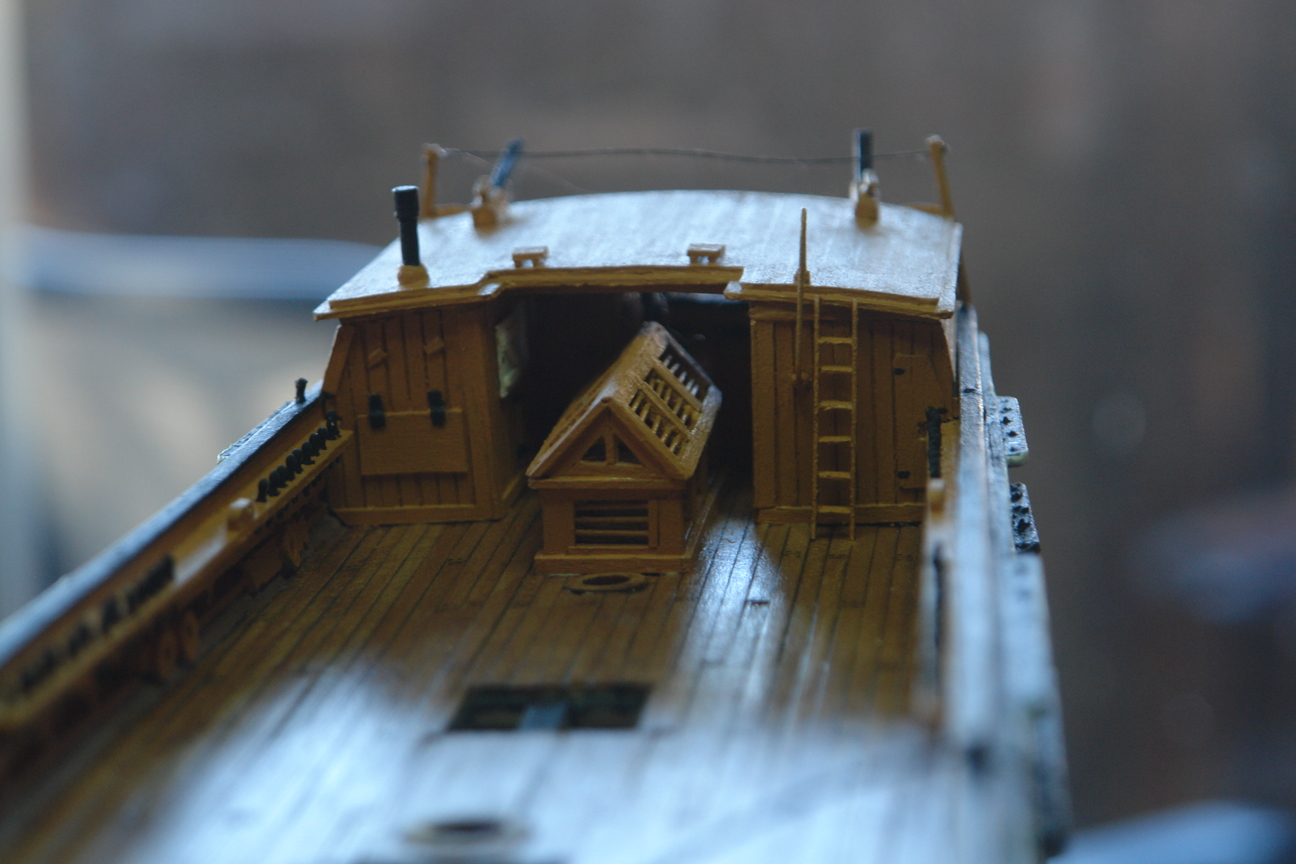
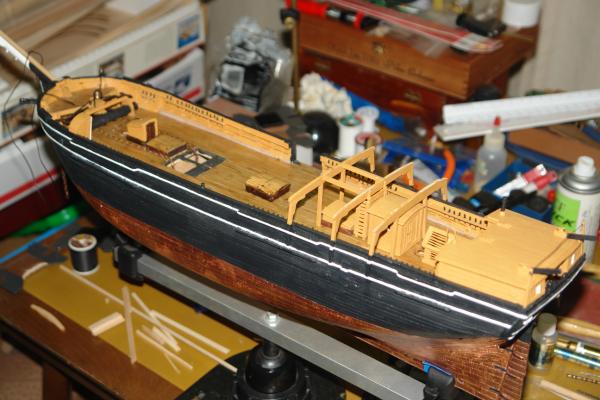
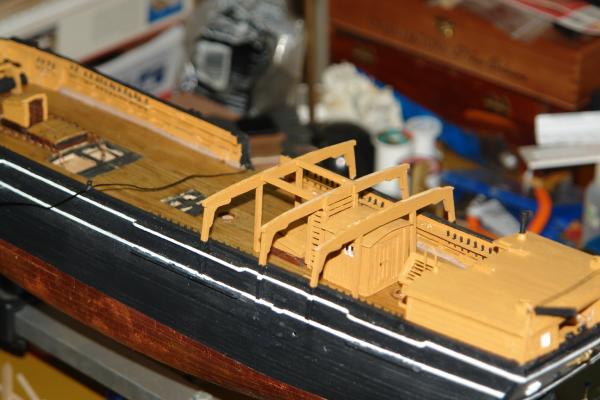
These also show overall views of the entire deck.
- 2,250 replies
-
- 10
-
-
- model shipways
- Charles W Morgan
- (and 1 more)
-
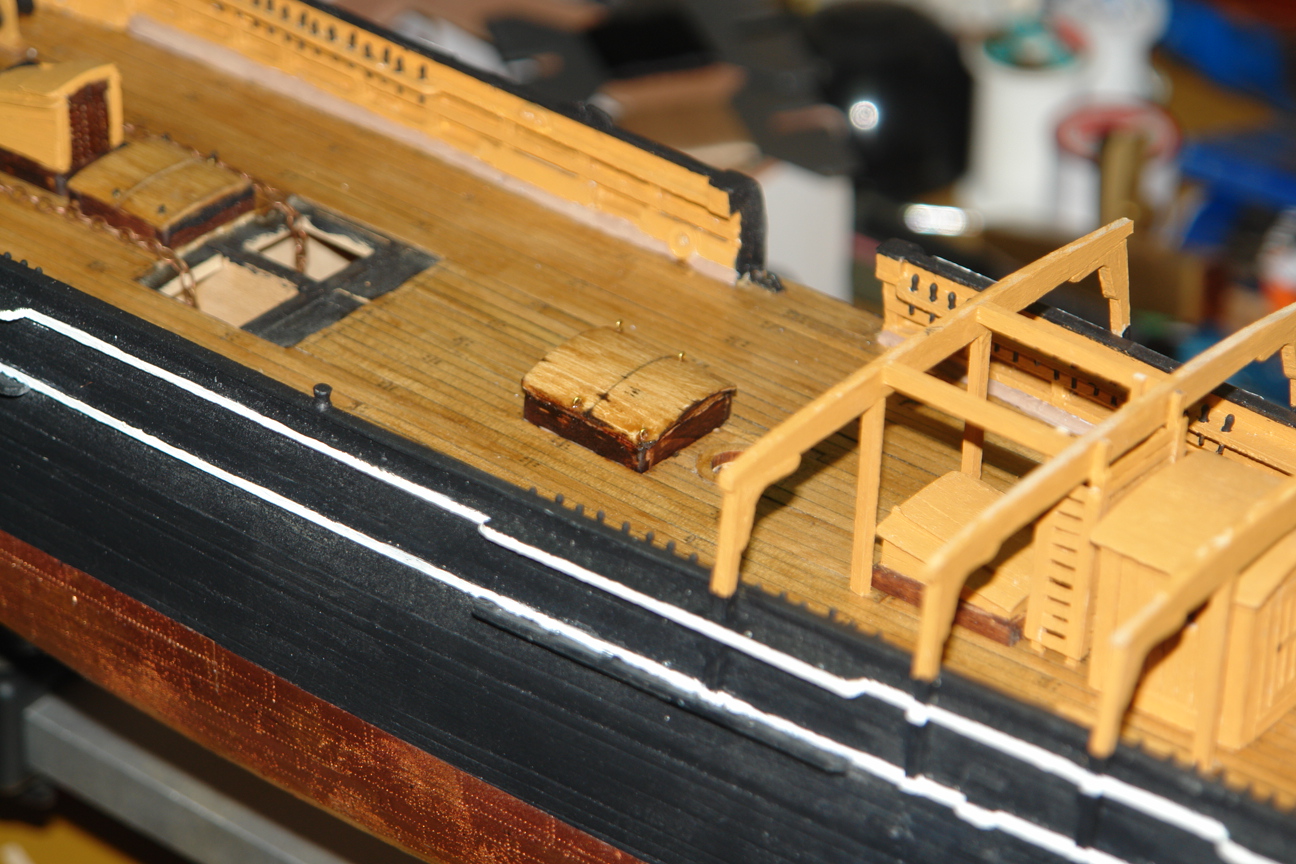
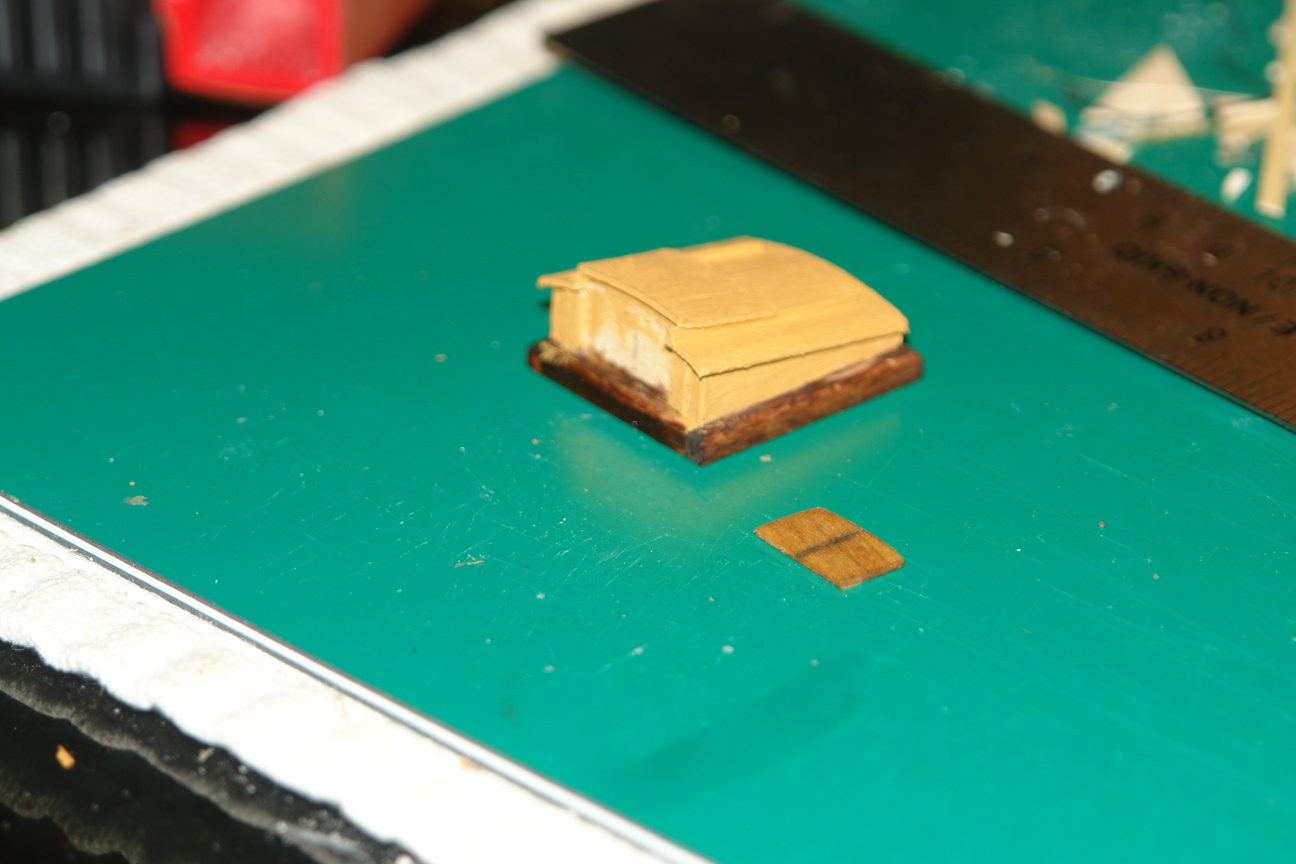
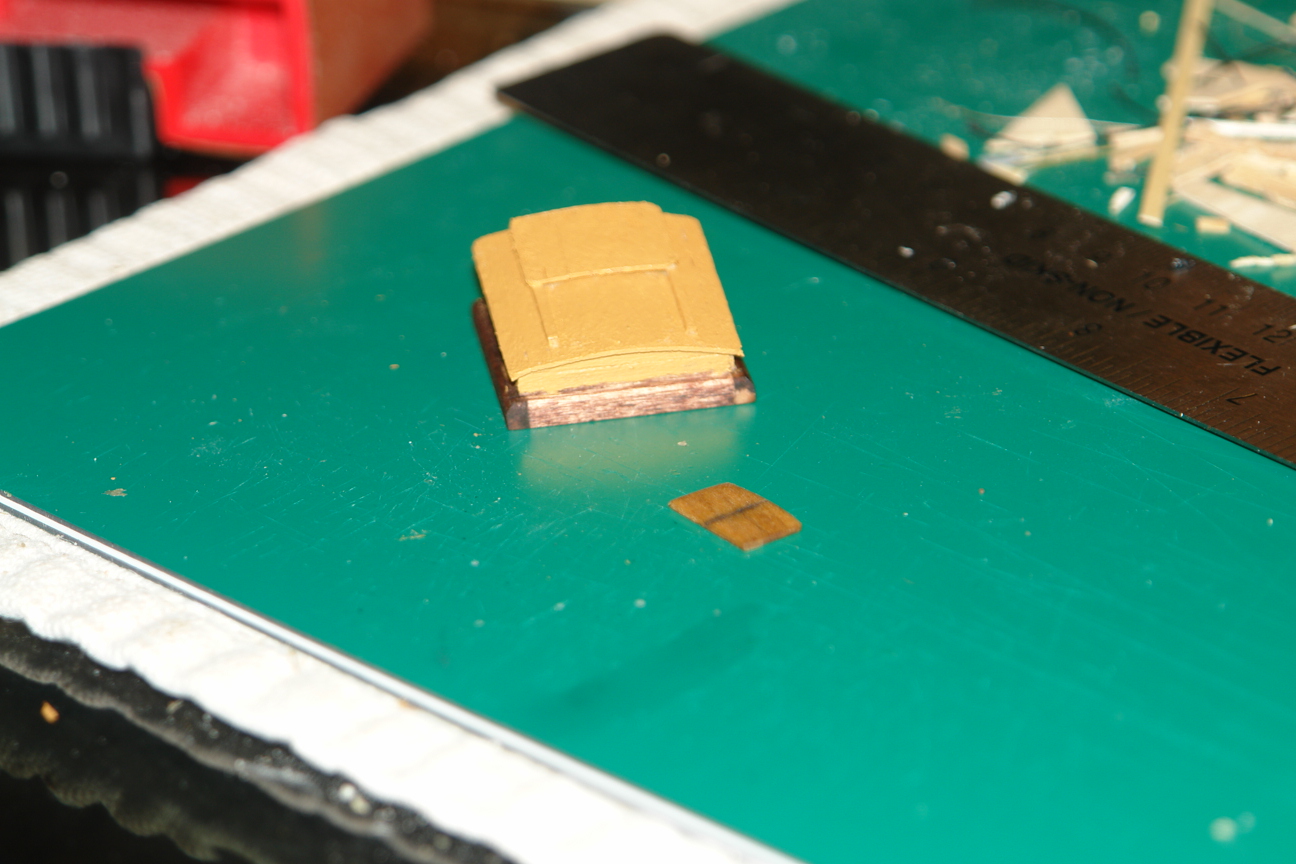
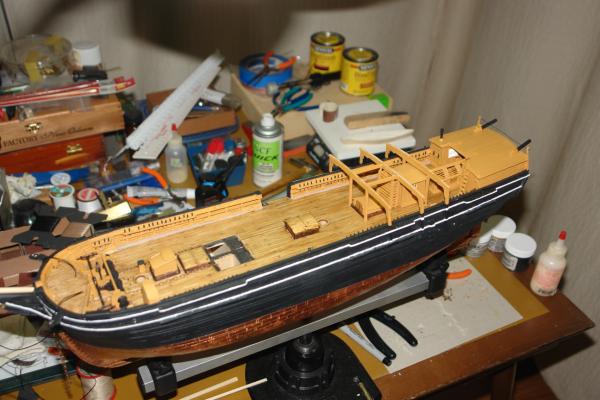
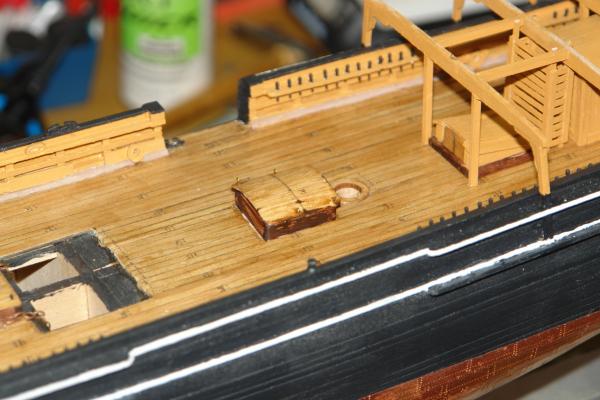
OK, here's today's minor progress. With all going on, I even managed to get a little work done in the shipyard. I got the main hatch done, painted and glued to the deck. The pictures show it still wet, so it will look better tomorrow when all is dry and nothing is showing. Tomorrow I'll work on the Fife Rail and some Bits that need to be added. Maybe even a harpoon or two.
- 2,250 replies
-
- 6
-
-
- model shipways
- Charles W Morgan
- (and 1 more)
-
Wow man, it is looking so good......I need to touch your engineering and metal working skills. I am going to be building some harpoons for the Morgan. So you think I would be better off trying to peen the end of a brass rod, or trying to cut out the shape on a piece of flat brass plate and soldering it to a rod to create the tips or points of the harpoon. At first I considered cutting and soldering, but now I just thought about peening them. Any suggestions? It is probably about in line with your teeth for cutting the wires or cables on the O-19. How would you handle this?
-
Thank you Augie. That is exactly what I'm looking for. I have a Resistance solderer so I wuld be able to solder that type of head to a brass rod to make the tip. The double has really got my attention. From the pictures they have, I should be able to "guestimate" the proportions. I'm planning on making about 6 of these, just to put into the racks I'm going to try to build, much less the whaleboats and toys for them. Thank you for supplying this it should help me as well as anyone looking to build this thing too.
-
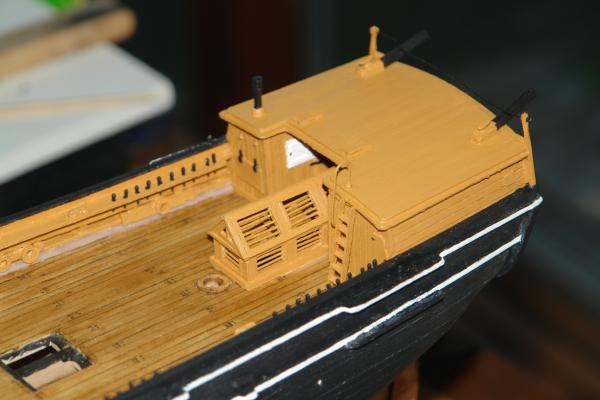
Thanks guys. Piet see post #1081 above for the discription of the rebuild on the Skylight. Yes Popeye, there is a roof over this which holds 2 whaleboats on top for storage. Also some harpoons and things under the roof in racks which is next. I am currently building the Main Hatch and then will build the Fife Rail and Bilge Pumps, then to some Harpoons, barrels and some other things which go under the roof. Then it'll probably take a month build theTryworks....it's a major focal point on this ship. Kind of dreading it and that is why I moved aft first so that I could see progress along the way to keep me going. More pictures tomorrow.
- 2,250 replies
-
- 1
-
-
- model shipways
- Charles W Morgan
- (and 1 more)
-
Thanks Augie, I don't know why I couldn't find it....I'll check it out. ME has a New Bedford Whaleboat in 1/16" scale, but when trying to download their instruction manual they only publish 11 of 64 pages which of course do not have the info pages needed for the accessories. I'll publish my research to the log once I've scaled it properly for future bulder info.
-
Hi Jpett. Thanks for the information. I can't find his log. PM me should you find it. I'm going to keep looking.
-
I do have a question for anyone monitoring this. Does anyone have a good picture of a handheld Harpoon? I need to make several of them, and somehow don't have a good picture and or measurements in real life size that I can scale down to the 1:64 scale of the Morgan. Thanks for any help.
-
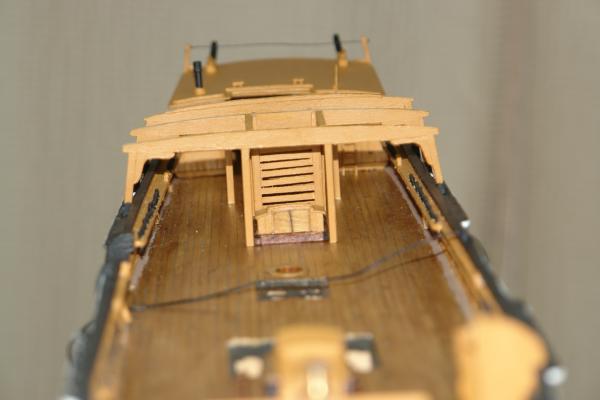
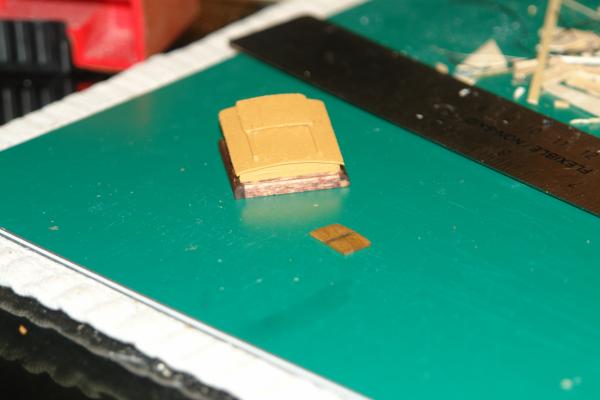
Hi Lawrence, the Skylight had to be rebuilt back to the smaller scale. It's not perfect, in that it is still slightly larger because I couldn't drill into the 1/64" lumber for the protection bars over the windows. They kept breaking and getting off center. I don't have a drill press so they all had to be done by hand, and were way too fragile. In hindsight I probably should have gone ahead and ordered some hardwoods from Jeff, but next time I guess. It certainly looks better than the first one. It did take less time in that I wound up with a learning curve to keep checking it back and forth to the ship so that it could get corrected easily if something gets out of whack. My camera is not very forgiving in that it seems to exaggerate the paint finish....it actually looks better than it photographs. I think we all have that problem sometimes.
-
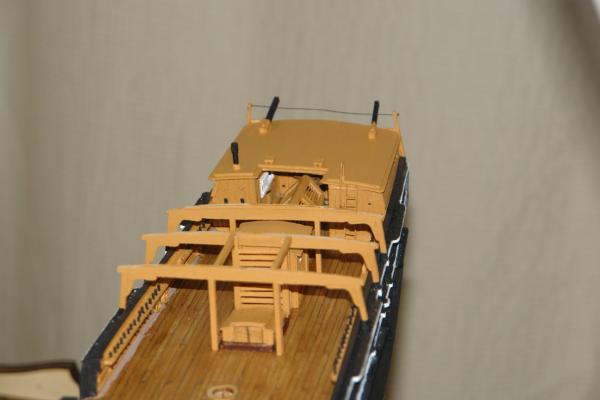
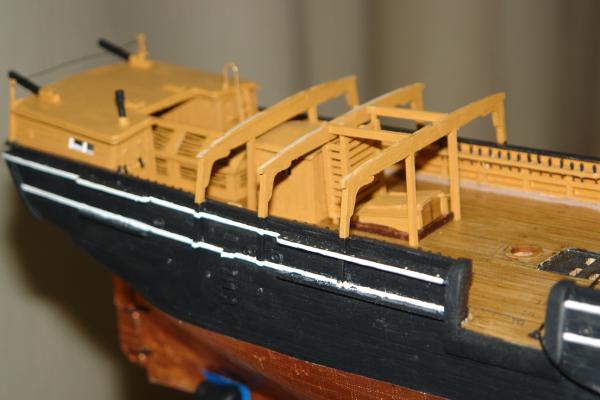
This will pretty much bring this log up to date as to where I am. The tops of the braces are not painted to allow for a good glue joint when the roof is applied. Now I have the Main Hatch, and then some details for underneath the roof to do.
- 2,250 replies
-
- 5
-
-
- model shipways
- Charles W Morgan
- (and 1 more)
-
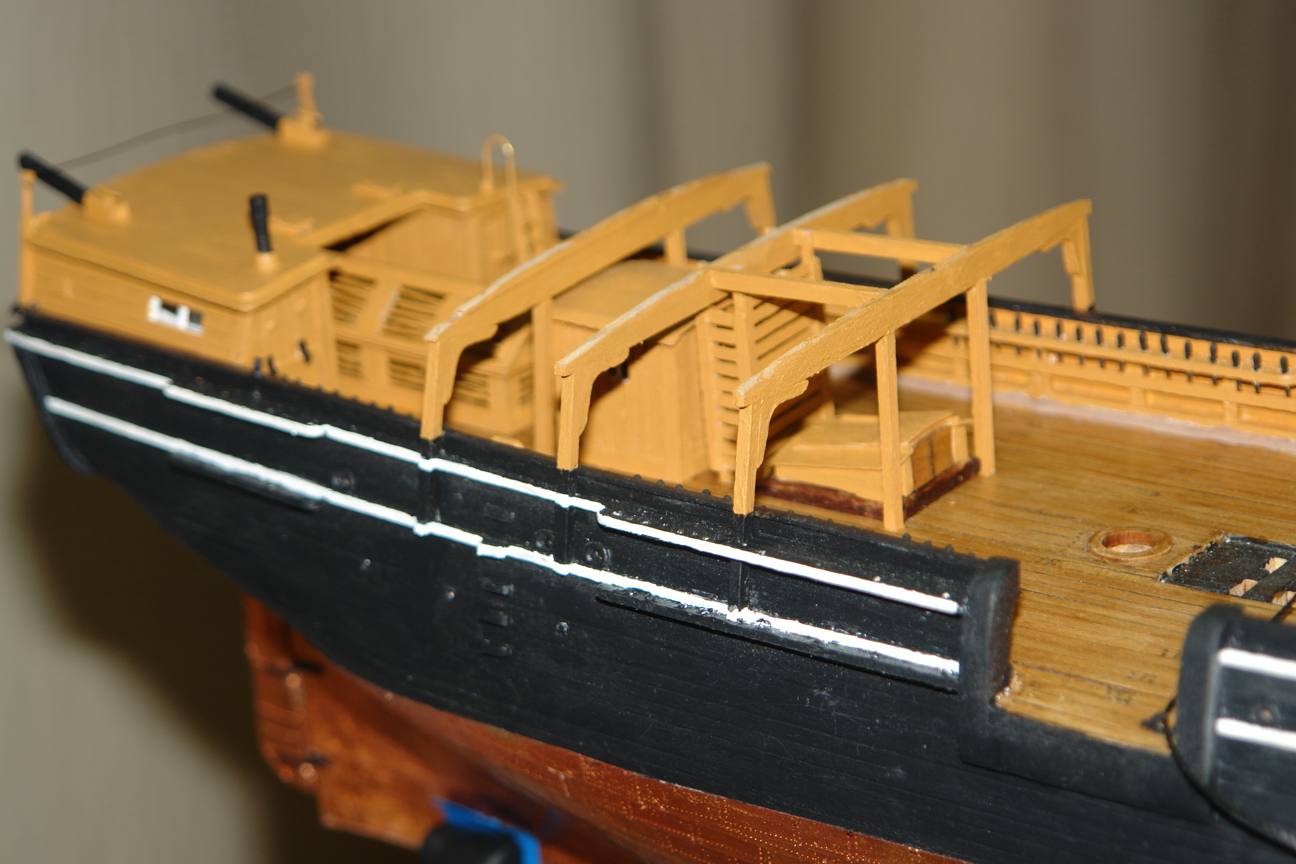
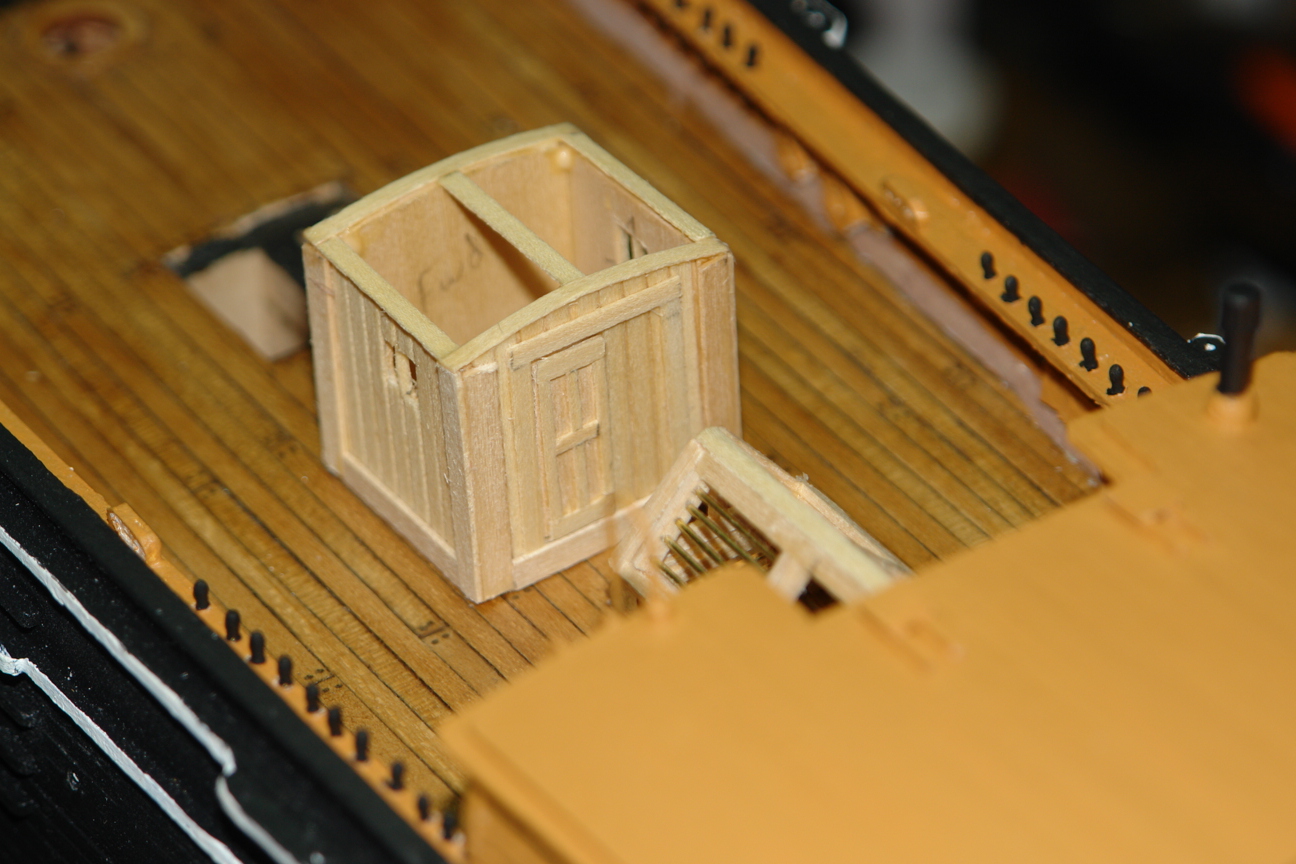
Now for the third stanchion and the bracing for the roof which will come after some more detailing underneath and prior to the attachment of the roof top.
- 2,250 replies
-
- 6
-
-
- model shipways
- Charles W Morgan
- (and 1 more)
-
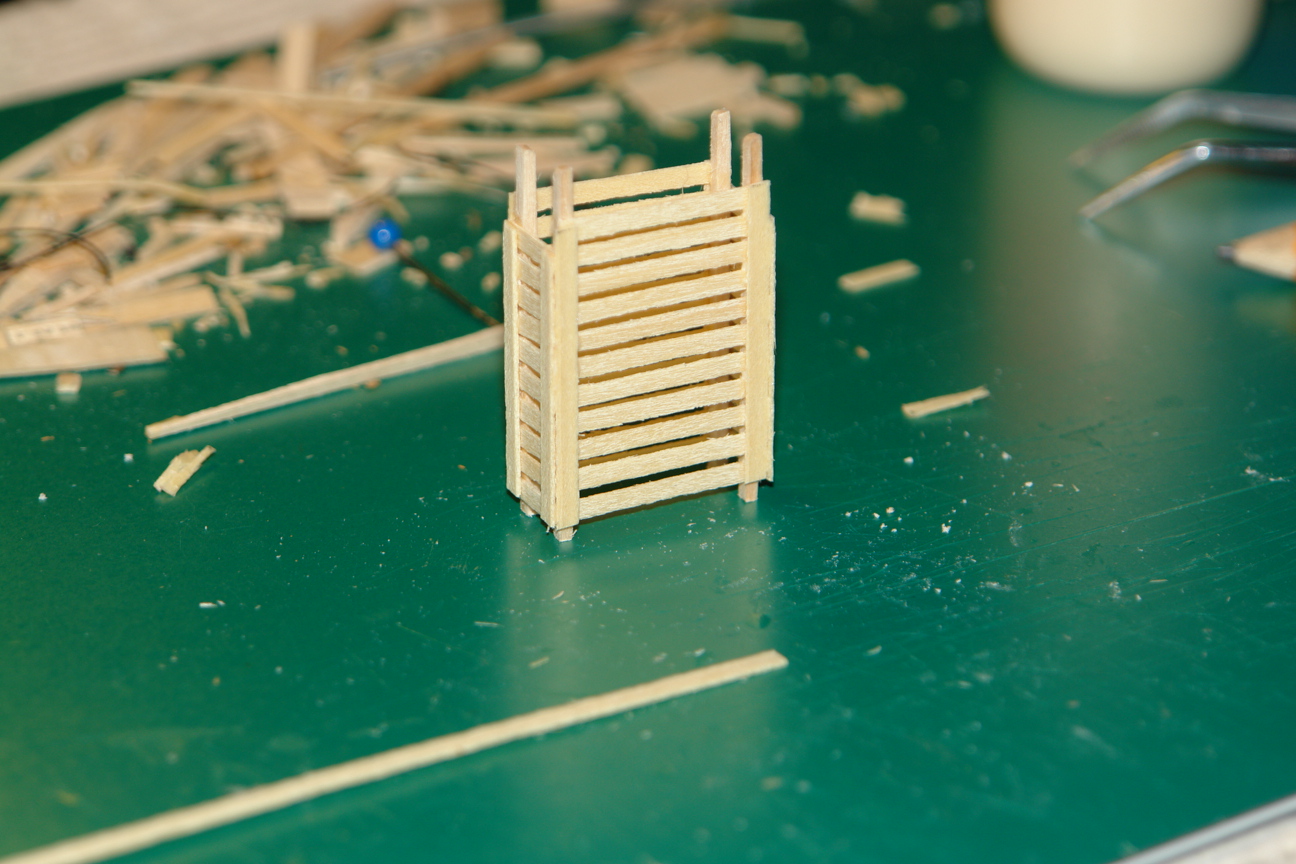
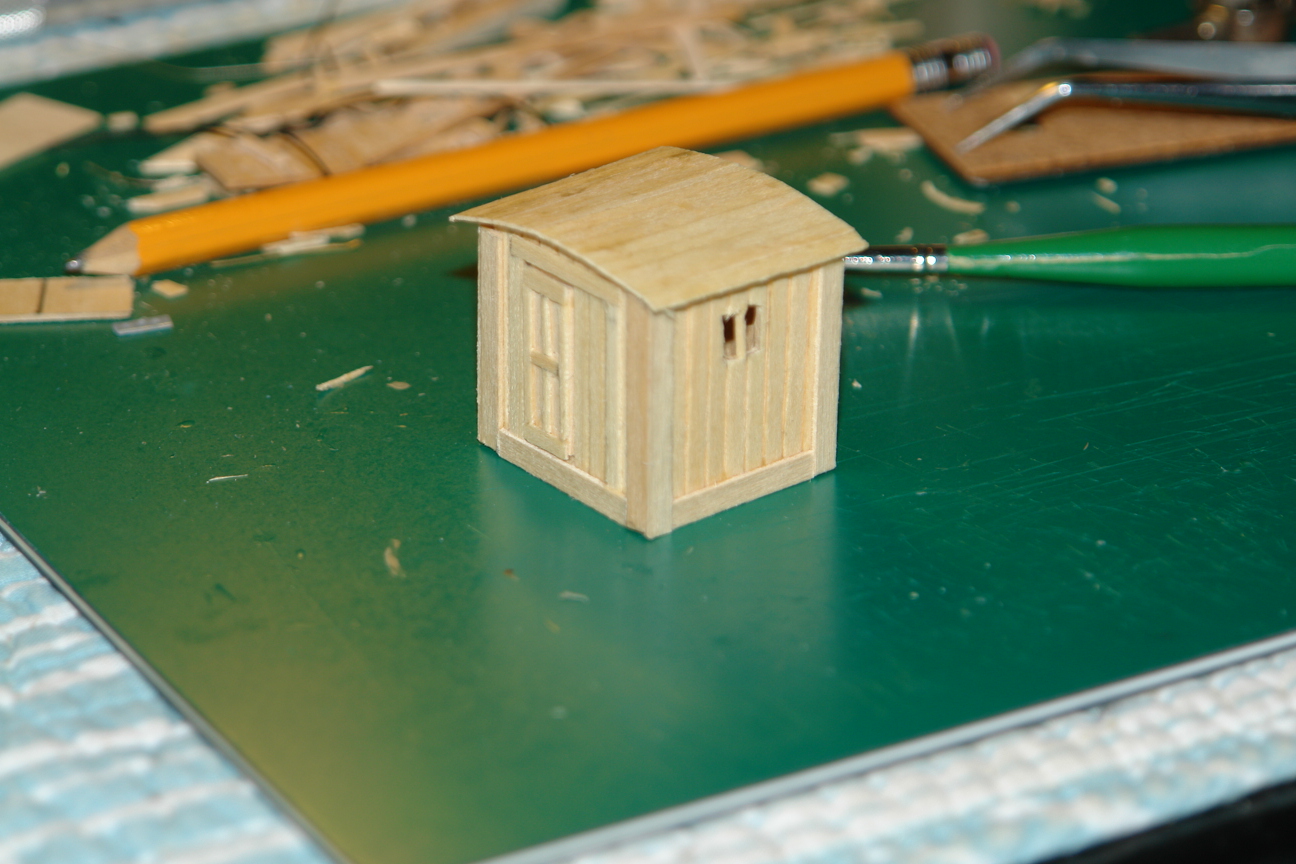
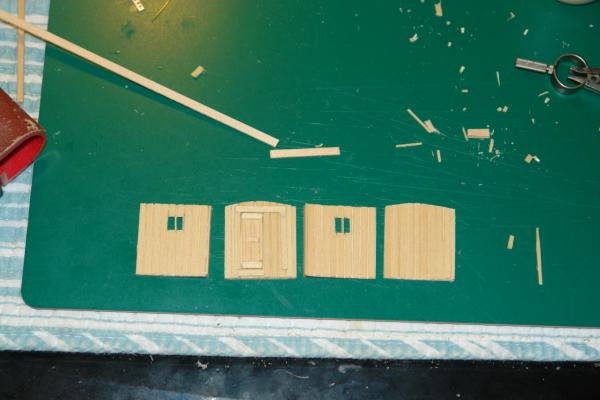
There is a third stanchion, but first I had to build the Vegetable Bin which is on deck and under the structure.


- 2,250 replies
-
- 6
-
-
- model shipways
- Charles W Morgan
- (and 1 more)
-
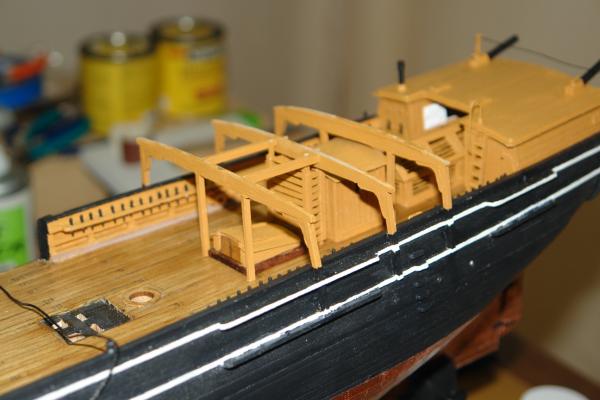
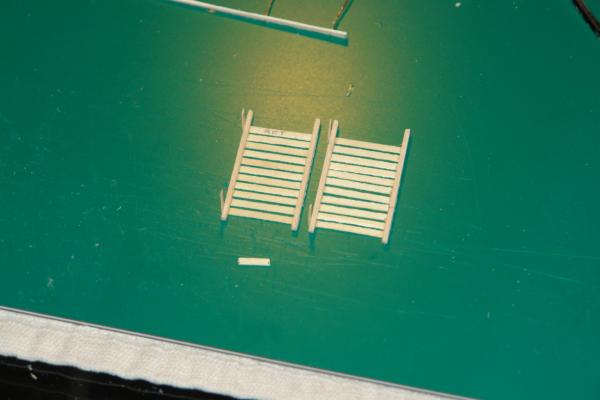
Here is the progression of stanchions...they have to be cut into the rails or notched as required, then painted into the sidelines of the hull both black and white striped.

- 2,250 replies
-
- 5
-
-
- model shipways
- Charles W Morgan
- (and 1 more)
-
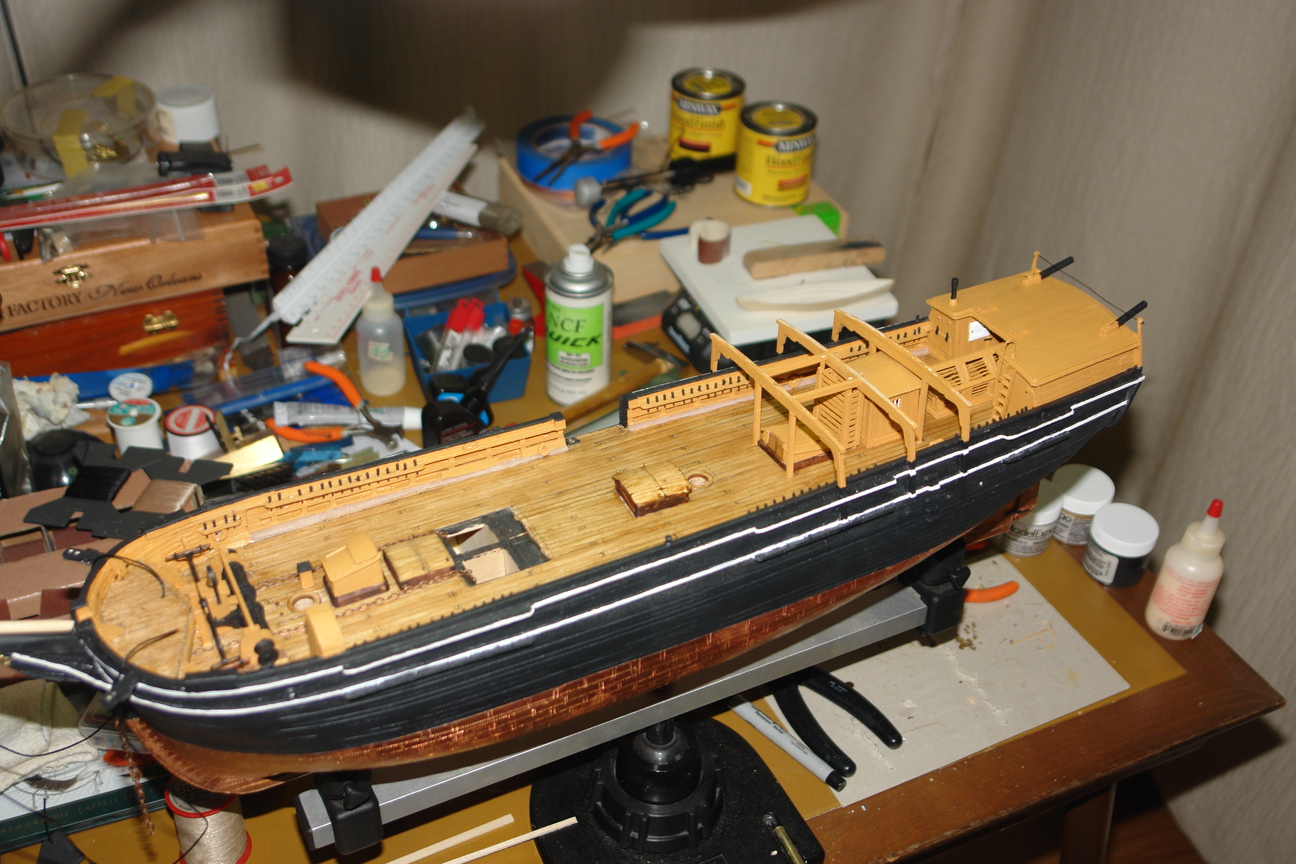
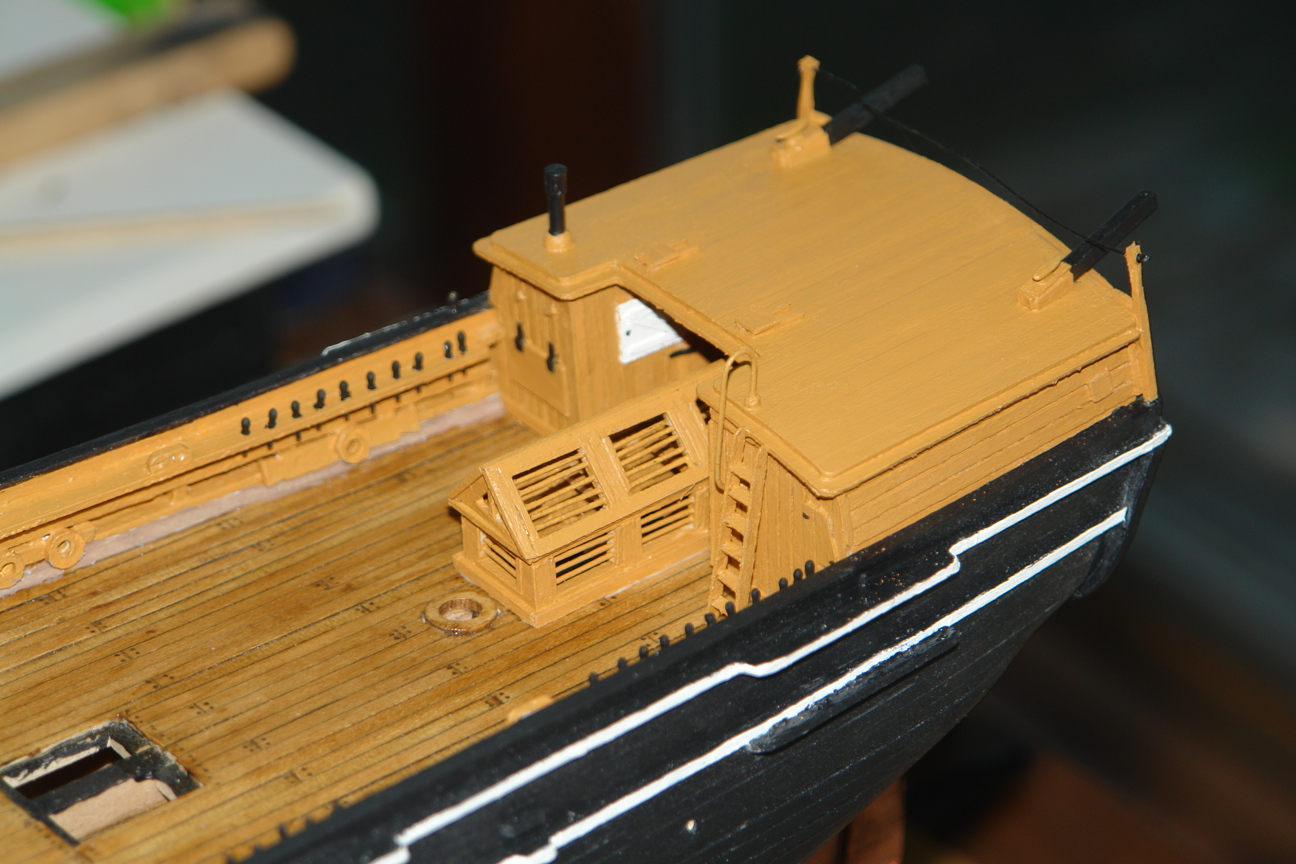
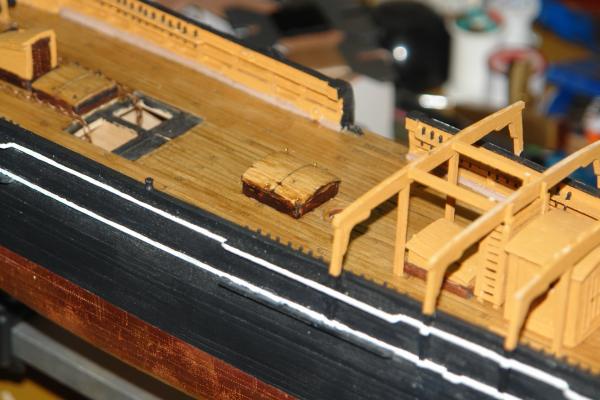
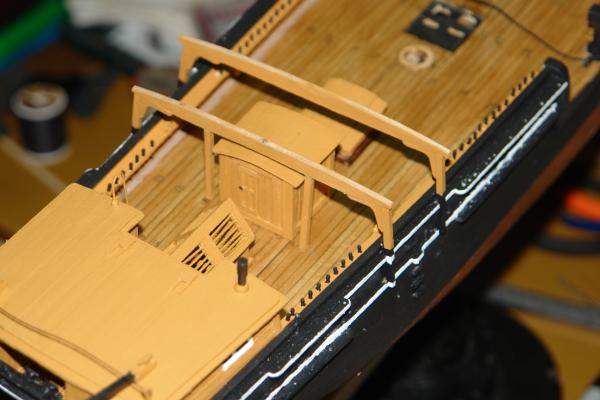
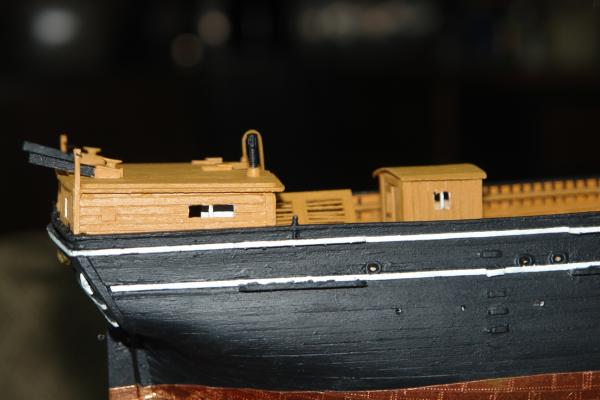
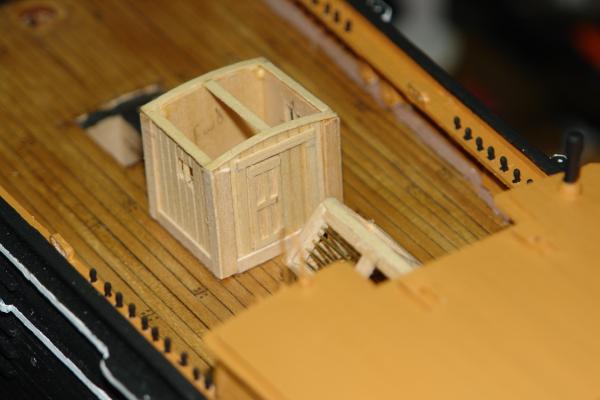
Should anyone need pictures from other views just let me know and I'll post them. After the Deck House was added it is now time to move to the Shelter/Boat Bearer structure, which is a covered area covering the Boat House, and the Steerage Companionway as well as having storage on top for two small whaleboats, secured upside down, so there won't be any details inside. The first pictures are of the Steerage Companionway....


- 2,250 replies
-
- 3
-
-
- model shipways
- Charles W Morgan
- (and 1 more)
-
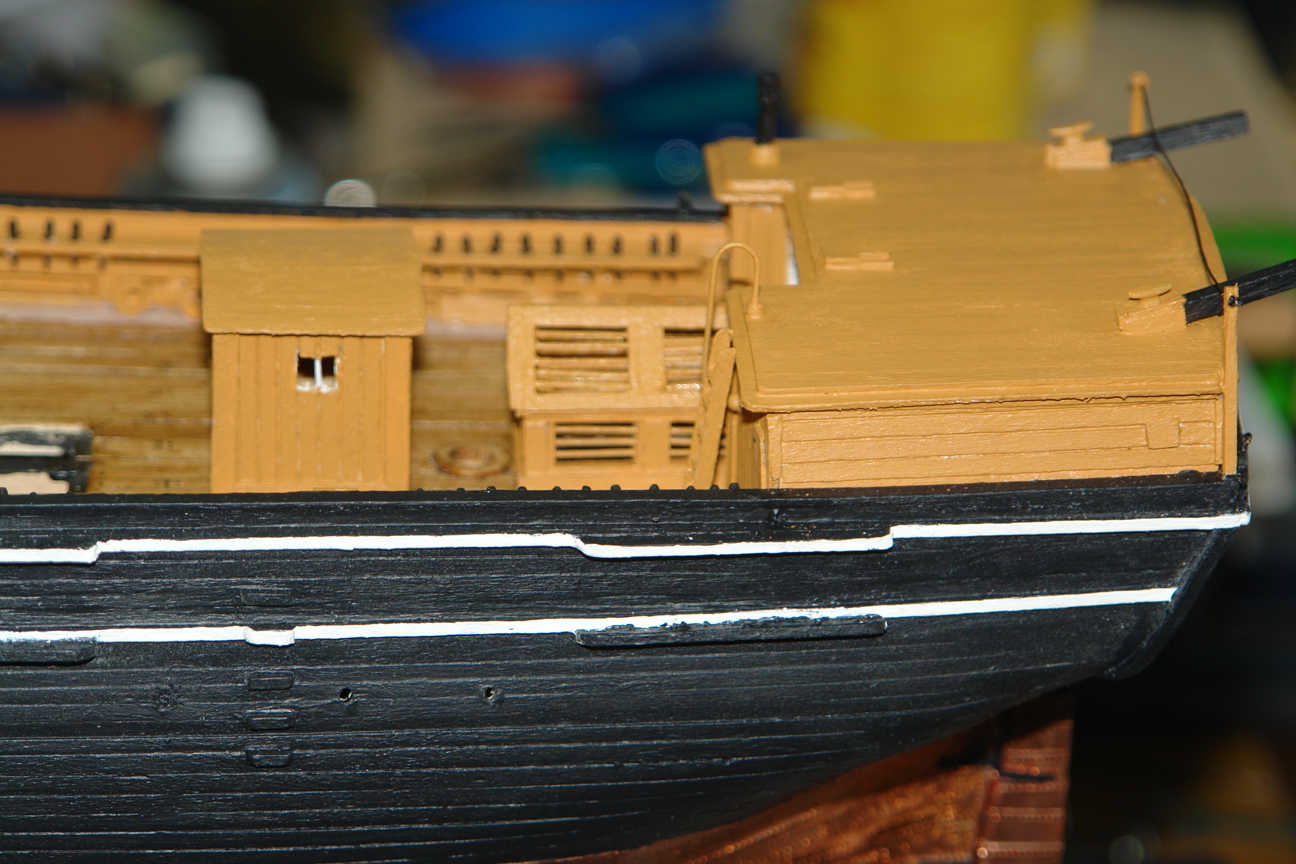
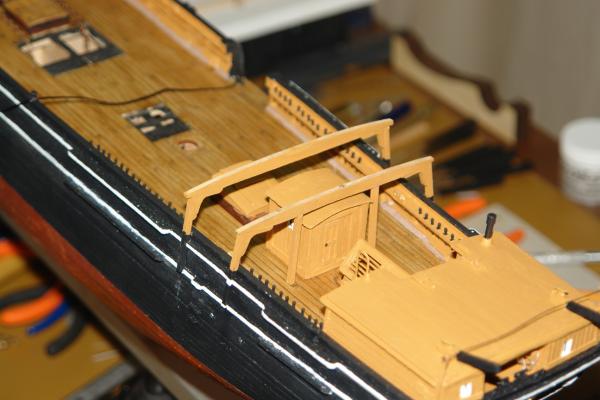
At this point the Skylight has been rebuilt and the Deck House & Berth have been constructed and glued to the deck.


- 2,250 replies
-
- 8
-
-
- model shipways
- Charles W Morgan
- (and 1 more)
-
The next several posts that I'm going to make will mainly be a series of photos mainly for the benefit of future builders of this ship as it really isn't documented very well in the instructions and to the best of my knowledge no one else is building it on this Forum. So, bear with me as I can only post 3 pictures at a time and I have several. I'll try to leave out the multiple views, but will try to show enough details for someone to see what it is supposed to look like. As far as documentation goes, ME provides good blueprint/plans, but one needs to understand how to read them, and realize that there are mutiple views on several different sheets to give you the correct 3 dimensional picture.

- 2,250 replies
-
- 6
-
-
- model shipways
- Charles W Morgan
- (and 1 more)
-
Hello Guys, I am happy to be back in the shipyards again. I know many of you have missed me, and I greatly appreciate that. In the jest of this Forum, I please ask you to refrain from the "welcome backs" and the yada yada that could go with it. I know many of you know what I'm talking about. I will be posting photo's shortly of the progress that has been made during my absence from the yard. Please PM or email me at: email address removed by moderator to prevent spamming should any one need to discuss something out of the build logs, since we are trying to keep the build logs primarily ship related. Let's liven this place up some and get to posting update pictures and discussions and quit looking over our shoulders--- we Are among friends here. We should police ourselves if you know what I mean. More to come a little later, now let's start livening this "morgue" up again and keep up the good work all of you are doing......
- 2,250 replies
-
- 12
-
-
- model shipways
- Charles W Morgan
- (and 1 more)
-
The problem with the skylight is corrected. The Deck House & Berth are also finished. Both are attached to the ship now, and it is time to move on. I'll leave my comments or descriptions at that.


- 2,250 replies
-
- 14
-
-
- model shipways
- Charles W Morgan
- (and 1 more)