texxn5
-
Posts
2,473 -
Joined
-
Last visited
Content Type
Profiles
Forums
Gallery
Events
Everything posted by texxn5
-
Hi Dave, thanks for the input. I have extra bricks and some cardboard left over, so I'm going to build a fake wall up a few layers, and play with that. I was mainly just mentioning I had seen some commercial ones. I would think the only control you could have would be to make your own. I'm thinking a light brownish color very, very thin....something about like old smelly whale oil might look.....lol
- 2,250 replies
-
- 1
-

-
- model shipways
- Charles W Morgan
- (and 1 more)
-
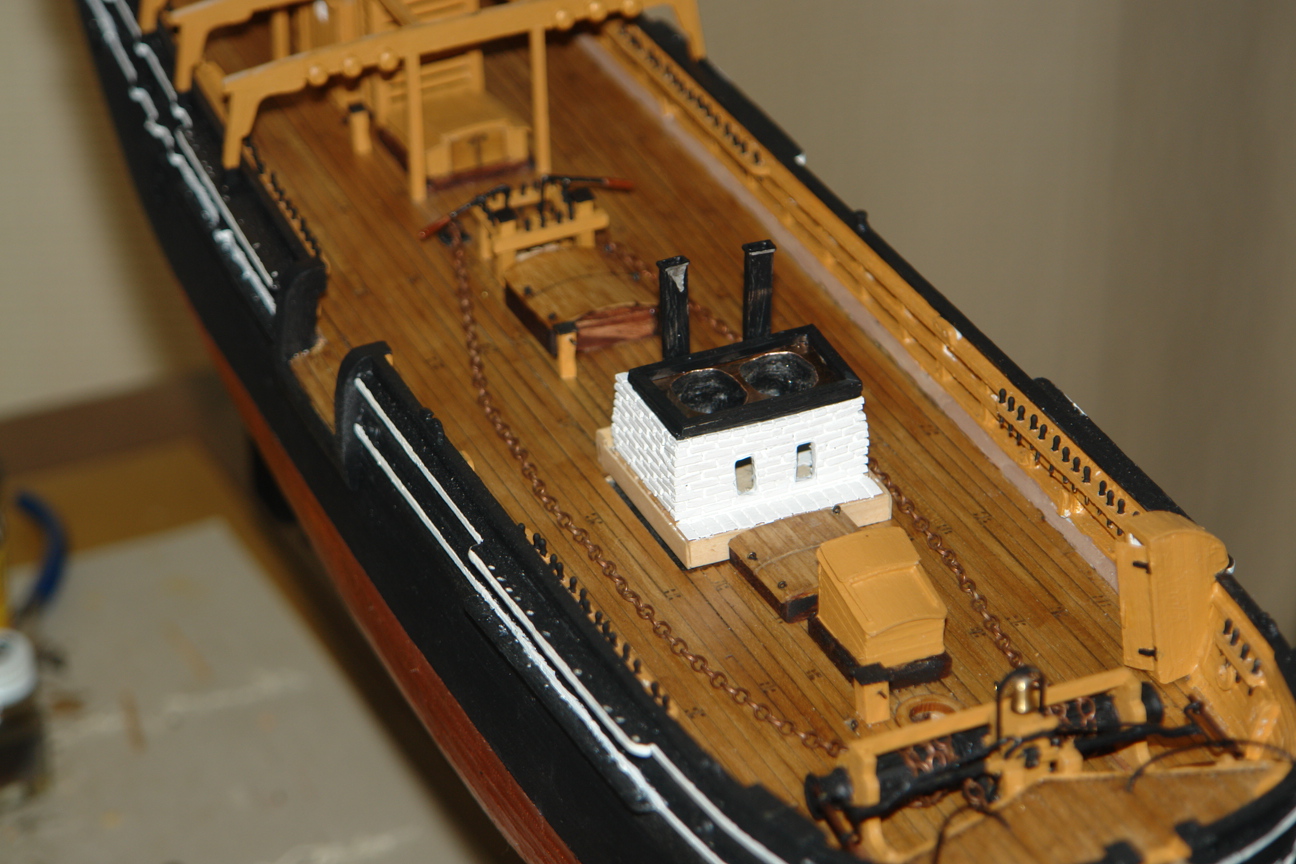
Some now with it sitting on the deck....


- 2,250 replies
-
- 8
-
-
- model shipways
- Charles W Morgan
- (and 1 more)
-
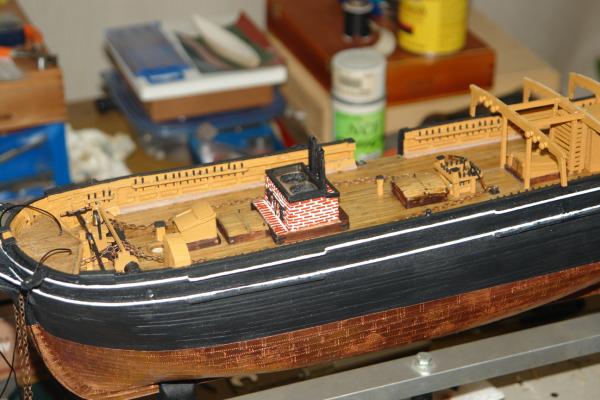
Here are some progress pictures. I managed to get the 2 side rails built and mounted on the Tryworks. As you can see much of the sides are not very visible, and start to tone down the raw brick look. There will be a chicken coop and workbench on the aft side, so very little of the brick will be visible either. Primarily only the front will be visible once done.....there are other tanks and bins to go port and starboard also. Might manage some of these over the weekend...


- 2,250 replies
-
- 6
-
-
- model shipways
- Charles W Morgan
- (and 1 more)
-
Hi Dave and Scott. I was looking at some washes for Model Railroads a couple of days ago. They were a little scary for this in that they seemed to be too heavy as well as dark. In reviewing my pictures of the real one, they are pretty bright also like they've been cleaned up. My understand is they were scrubbed quite frequently to eliminate the odors as much as possible...I might do some experimenting prior to making a decision.
- 2,250 replies
-
- 1
-
-
- model shipways
- Charles W Morgan
- (and 1 more)
-
Shaping up nice Hamilton....life can get in the way....especially when it comes to family.....gotta do what ya gotta do......
-
I just happen to have bricks, mortar and a trowel......send a picture I can build it......what's the scale??? 1:20????? much easier than 1:64 ......lol.....
-
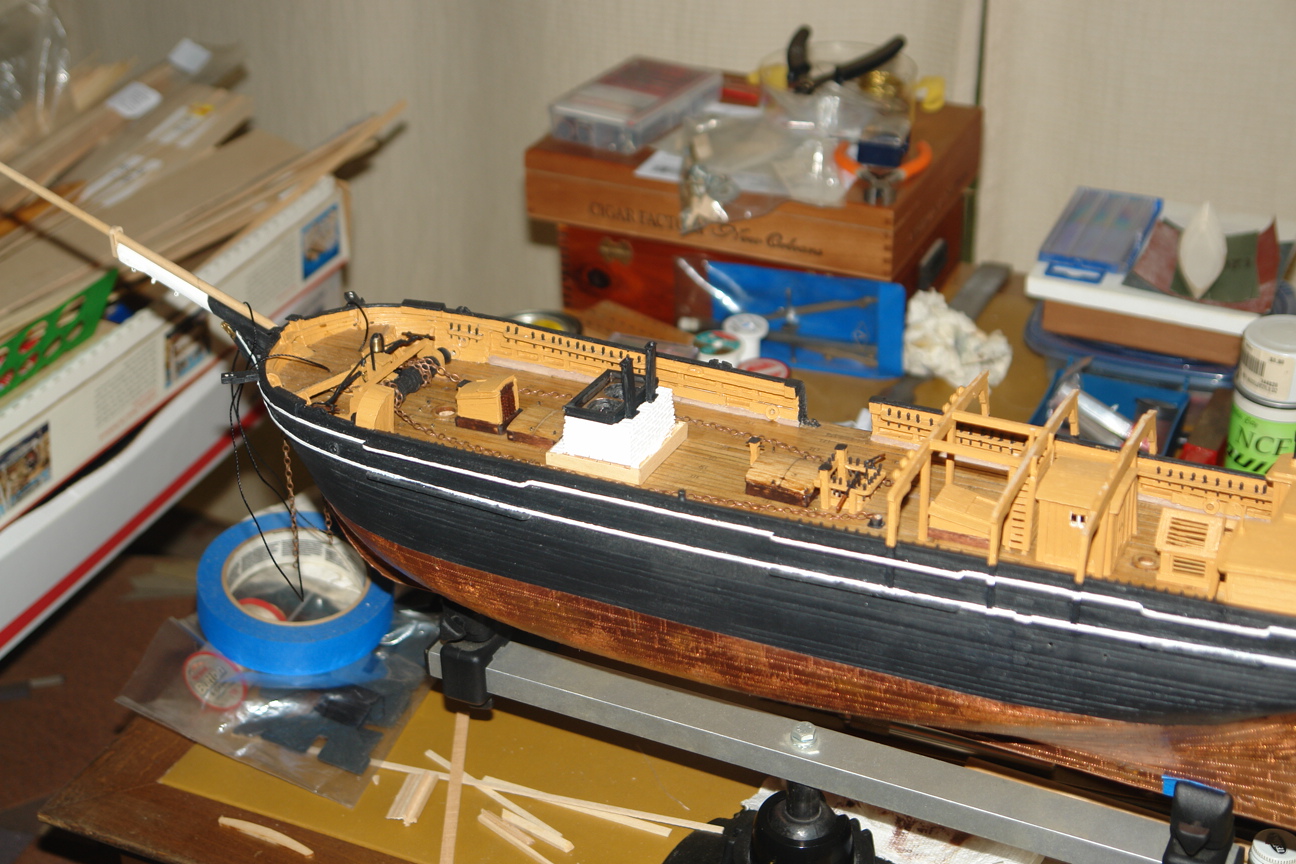
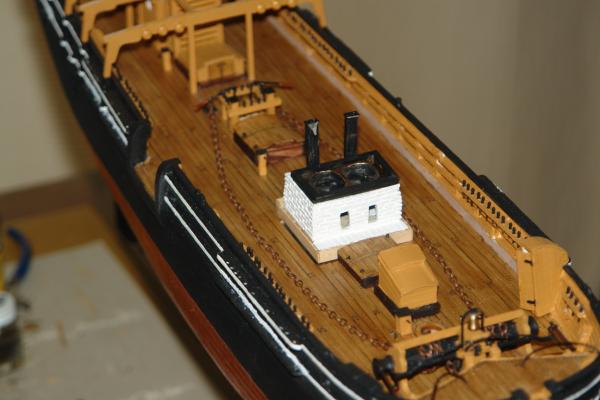
Thank you BE, it has been fun to create this. It's not perfect, but I do like it. Once the sides and other parts go on it should take away from the stark red and white bricks. The front will still be bright, but the rest won't....and that should make a nice contrast.....
-
Ok, man, nice.....now that is going to be a nice detail......the 40mm should be fun, now you can put on the "Gunsmith" hat and build a pom pom...with your attention to detail it should be a work of art as usual......have fun..
-
Wow Popeye, you've really got a project going on. Looking very good my friend. Nice that you have room for all of them....by the way what is the length of the triplets???? They appear to be pretty good size....keep up the good work......hope your "car" thing worked out....
-
Thanks Robert, I'll hit the link and read it...
-
Hi Sjors.......no wood in this ship oven.....they burned the whale residue from processing the oil after most of it was cooked out.....
- 2,250 replies
-
- 1
-
-
- model shipways
- Charles W Morgan
- (and 1 more)
-
Hi Robert, thanks for the comments.....where would I find Liver of Sulphur????
-
Augie.....the whale is still in my mind.......been thinking about him for a while already.....can't have a whaler without a whale....
-
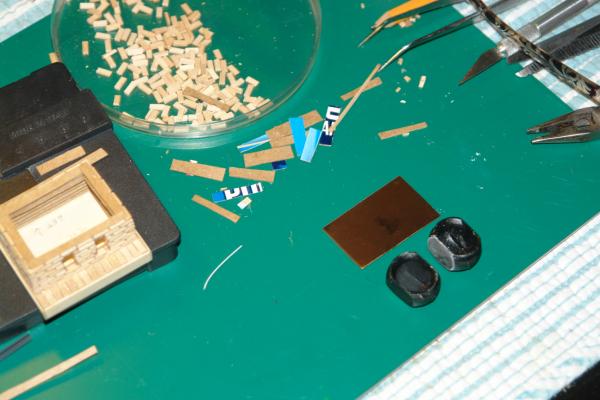
Hi Dave, thanks for the input. I actually haven't done anything to the copper yet. It is still bare copper. I have never used Blacken-it before and have not ordered it yet so I have no idea what it does. Thanks for making me reconsider. I got the draw plate from Byrnes and it is top quality. I just have to practice with it to learn how to use it. I need some small dowels for building the harpoon racks, and some other piddly things. Here's the link with the usual disclaimers. I think they are also mentioned somewhere here in the resources section of suppliers. Great to deal with and fast. http://www.byrnesmodelmachines.com/index.html?id_mm=0926MM153301#
-
Hi Daniel, welcome aboard. Thanks for the link. I haven't checked yet this morning, but I think I actually just found this link last night while I was browsing around the web. I'll check it out though. Thanks for your interest.......
-
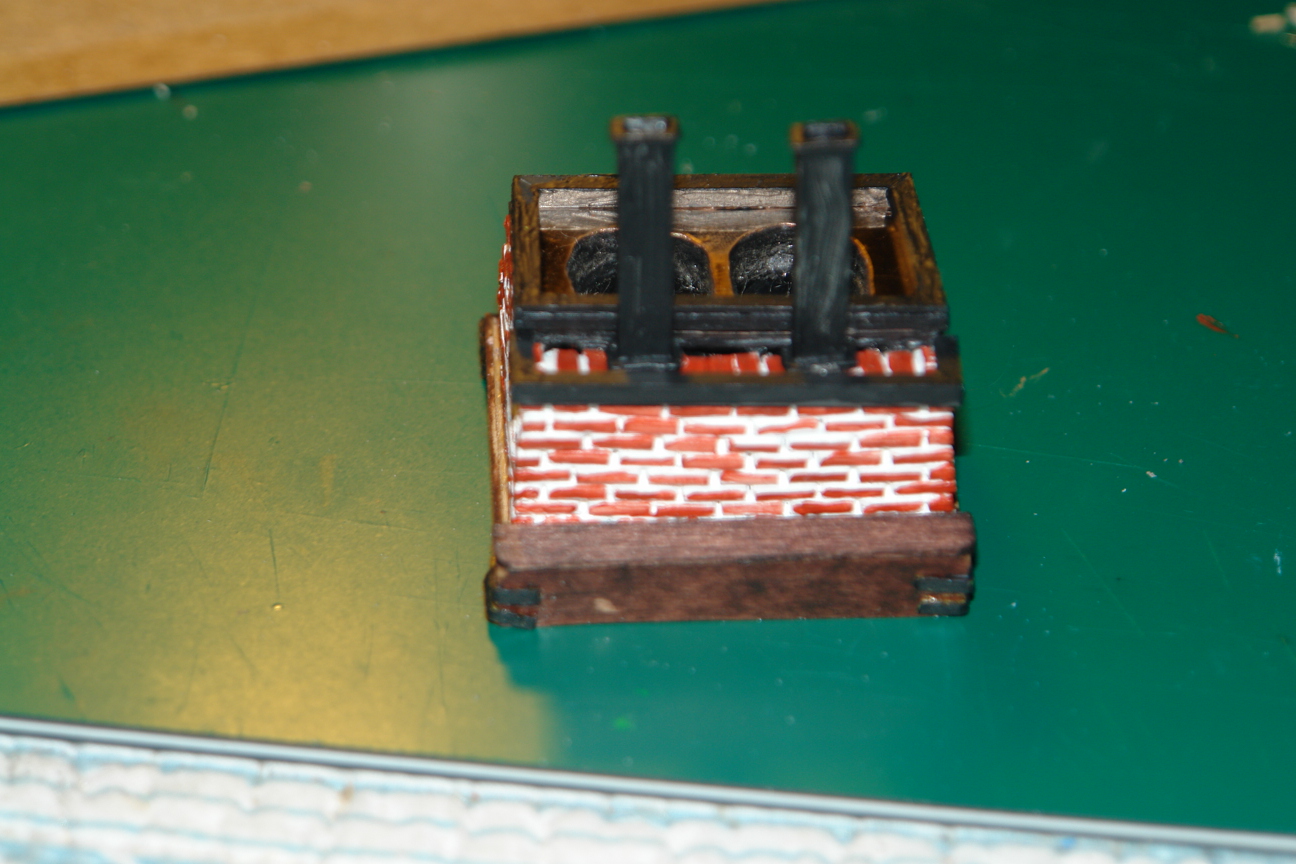
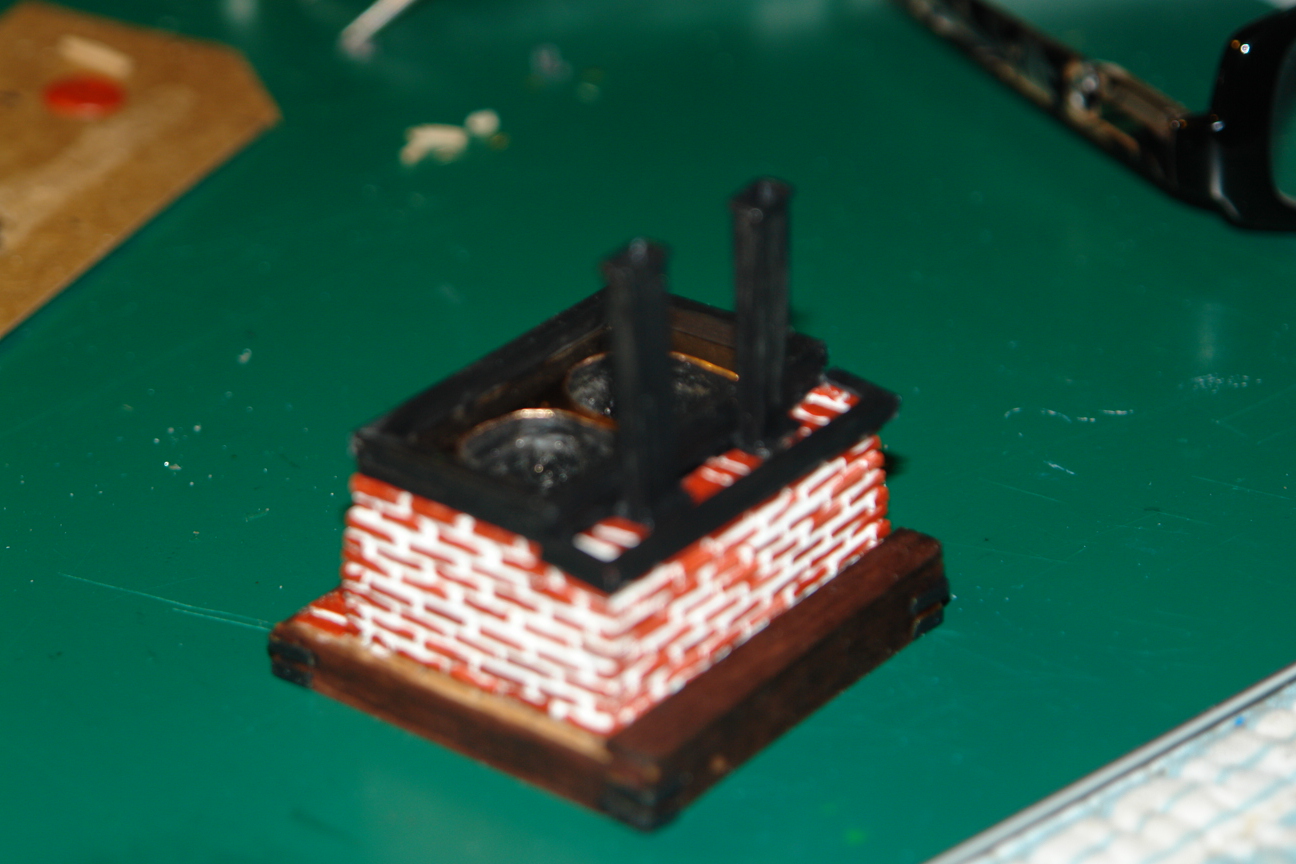
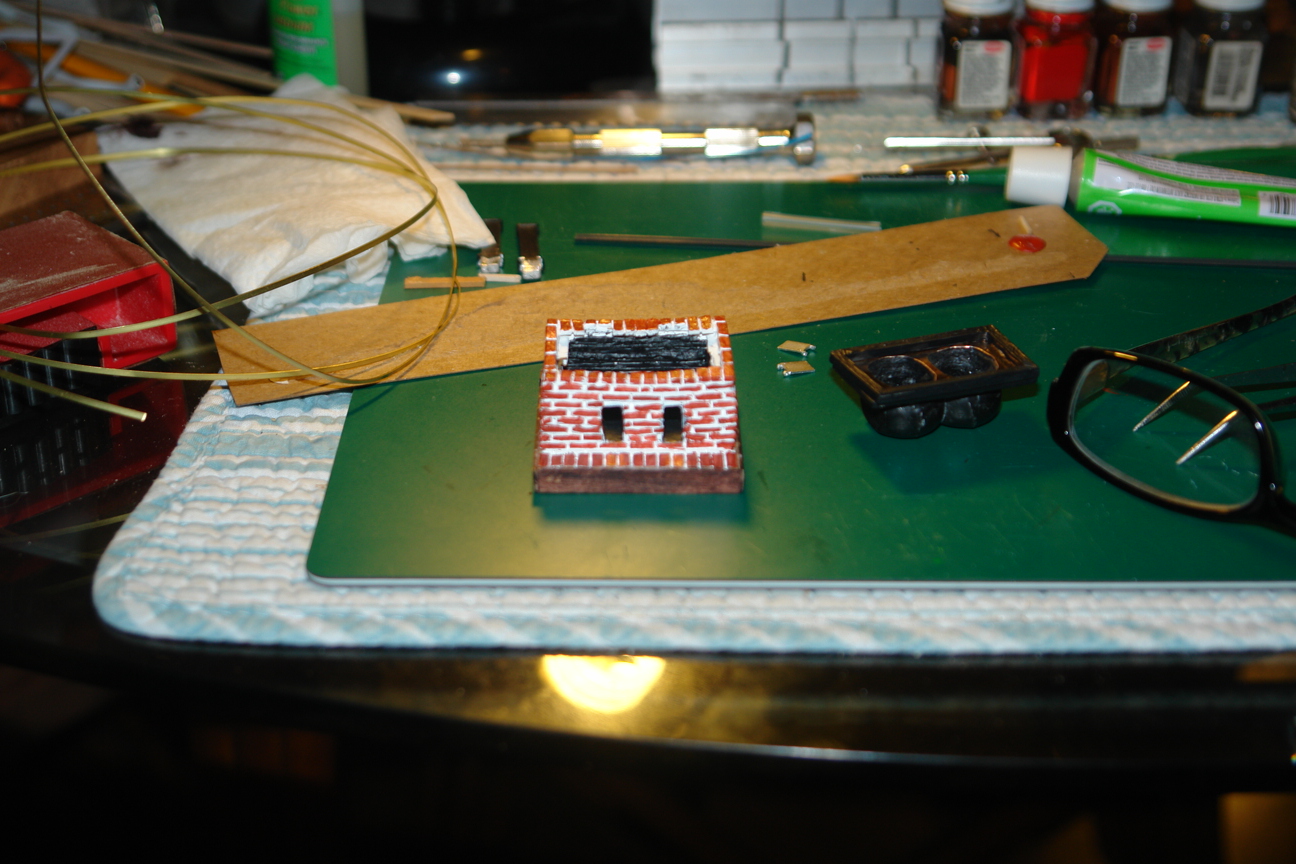
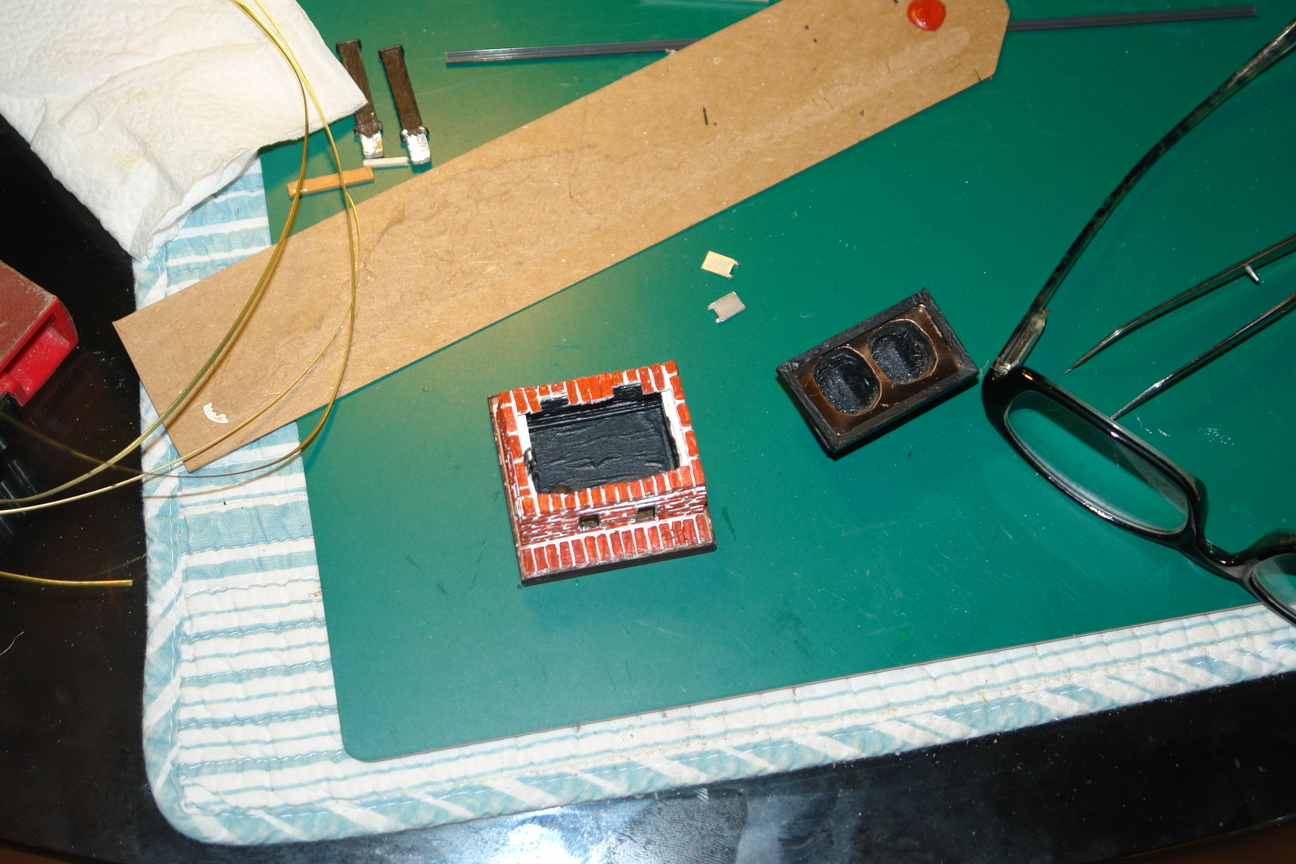
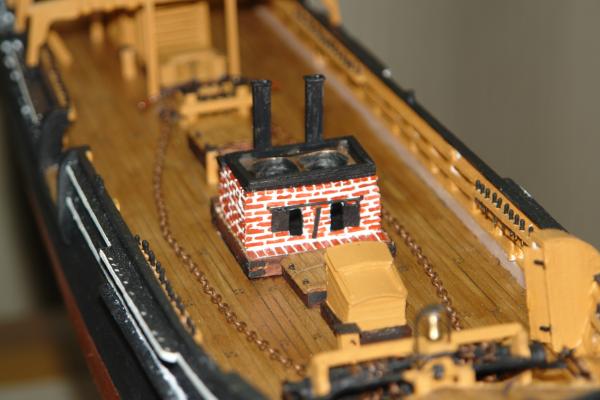
Hi Jason, thanks for the input, the tubs and flues were actually Brittania metal that came with the kit. The tubs are actually 4 pieces of halves CA'd together then CA'd to the copper top. As far as the "grout" for the bricks, I used MS's White Primer which had dried out to a thick consistancy. I painted it on the inside as well as the outside, and wiped off any excess to create the masonary look and feel, then painted the brick an acrylic Venitian Red. I didn't worry too much about the brick and mortar definitions too much since the real ship showed a "sloppy" mortar joint appearance with it being smeared on the bricks. I believe this was for utility purposes to keep the whale oil from accumulating on the brick too bad. They could just scrub it with salt water to knock most of it off and not worry about accumulating it in the cracks....also all of the sides except the front will have things around it covering most of the brick. That will also help to diffuse the starkness of the bright white and red bricks and blend it into the "landscape" of the working deck....
-
Thanks Grant and Popeye, it's fun to be doing this part
-
Thanks Piet, I'll be trying the drawplate shortly, thanks for the input....
-
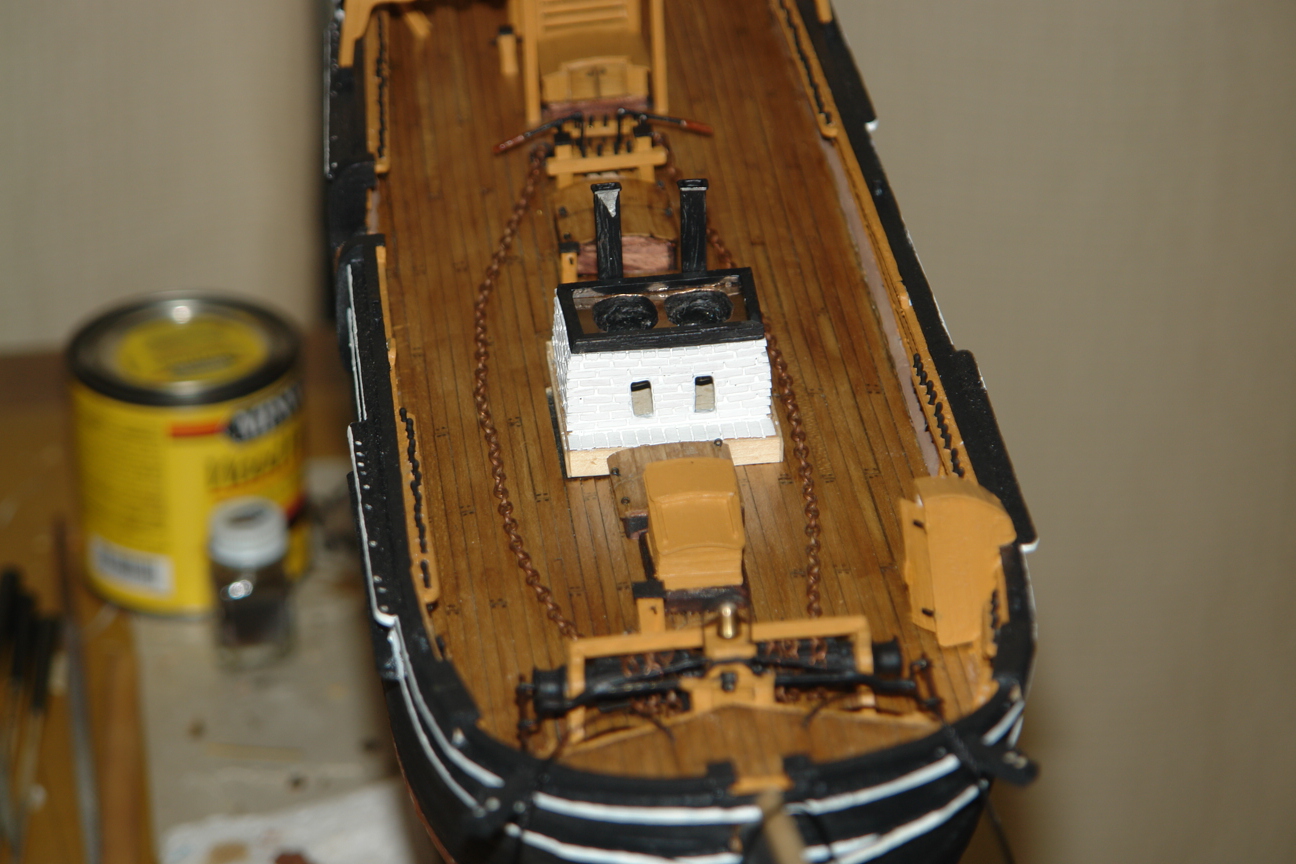
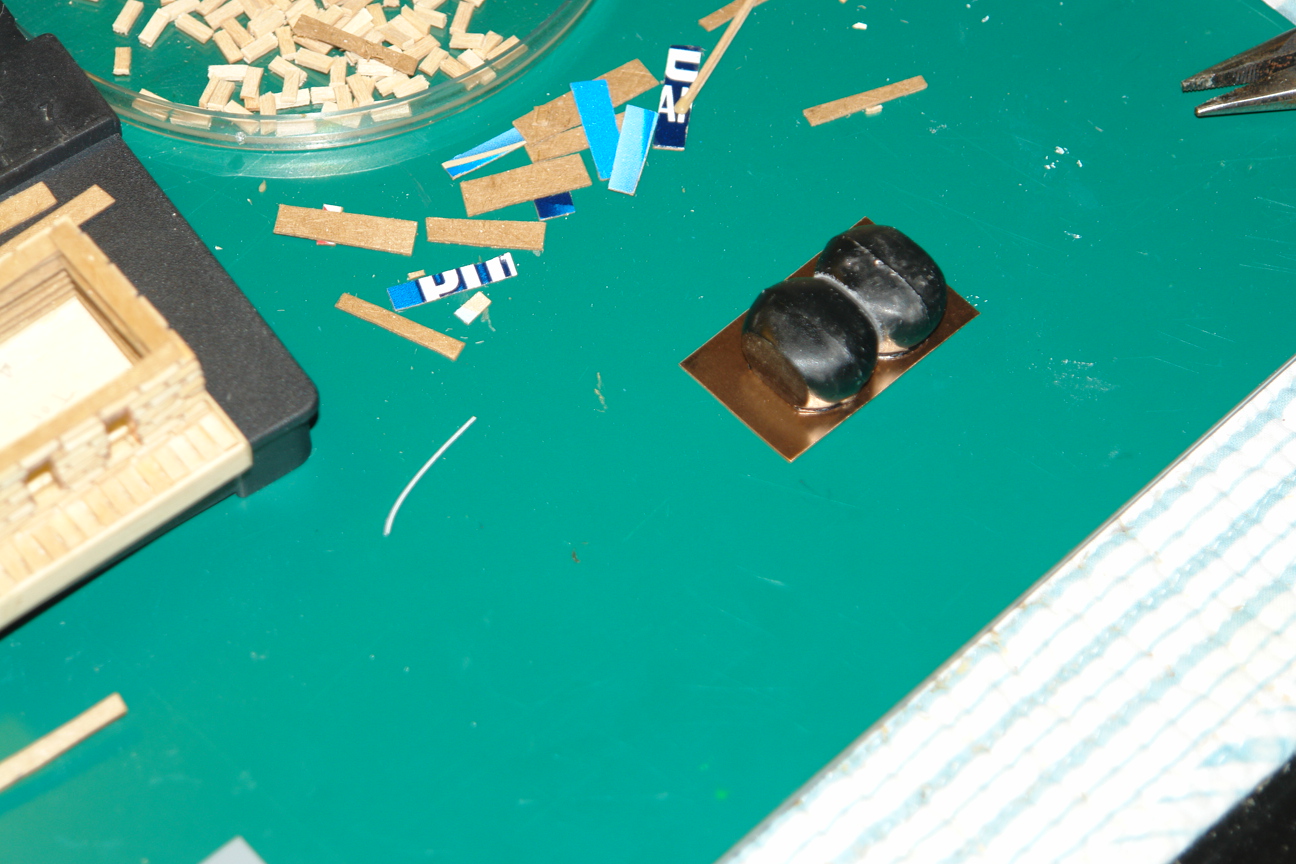
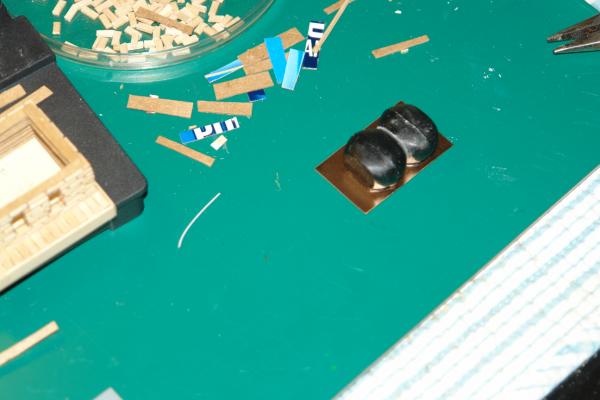
sitting on the deck, not glued yet...probably won't attach, until all the other parts are all built....then do it all at once knowing how everything fits. That is the workbench, cooling tank, insulation boards, and rendering bin...

- 2,250 replies
-
- 11
-
-
- model shipways
- Charles W Morgan
- (and 1 more)
-
Just trying out the fit to make sure it's ok

- 2,250 replies
-
- 5
-
-
- model shipways
- Charles W Morgan
- (and 1 more)
-
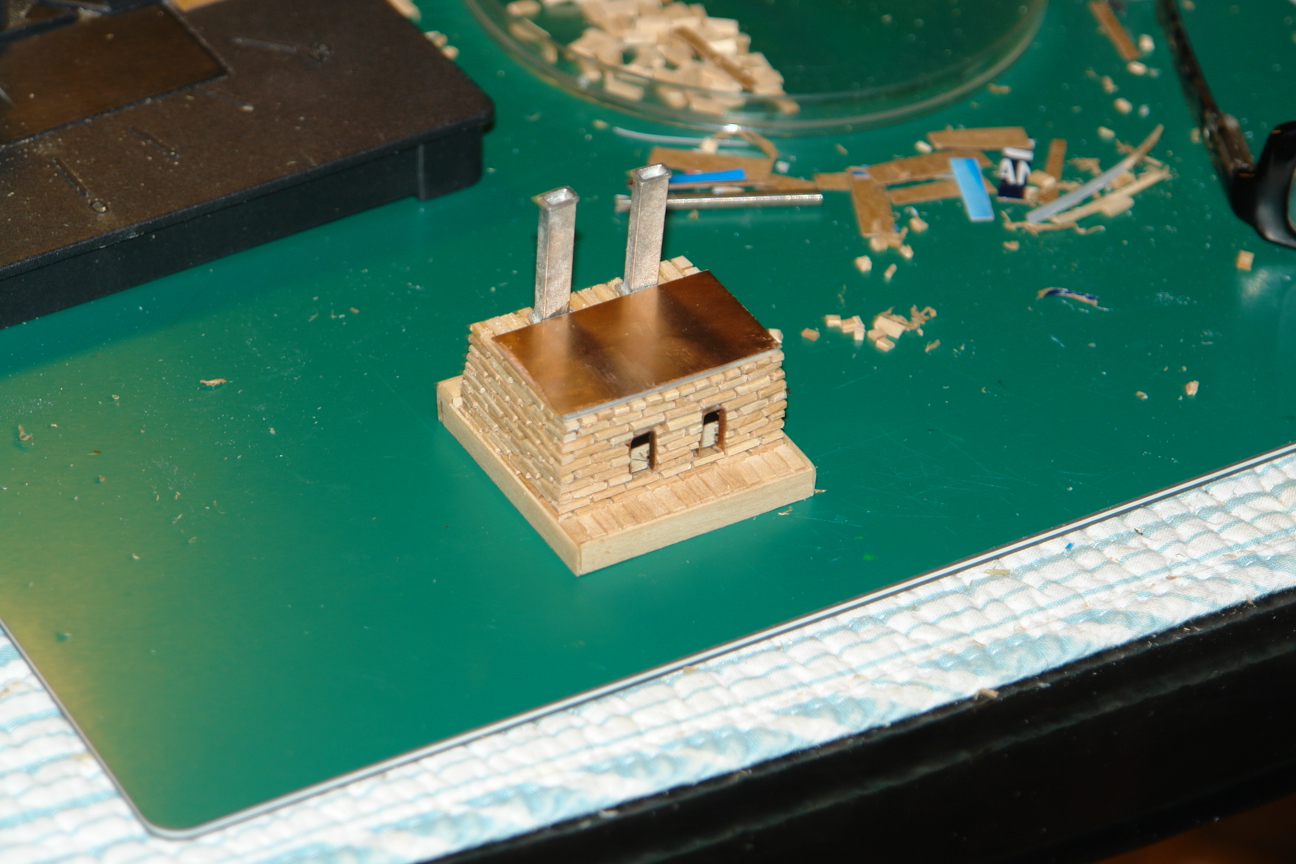
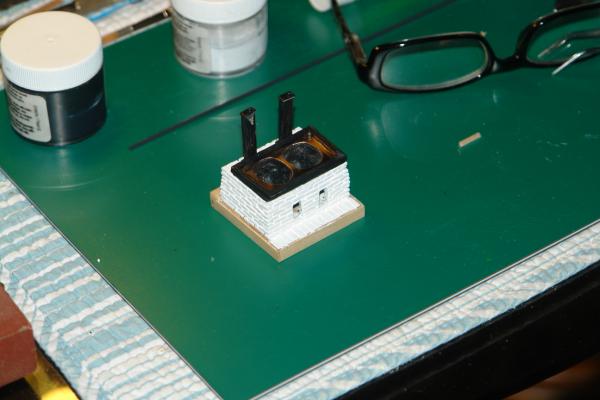
Time for a little update, the Tryworks is coming along nicely. I'm now ready to cover up all the brickwork with black wood sides that protect the crewmen from the hot brick oven as they work around it. So the brick colors on the sides and aft side won't hardly be seen at all, but if you look at them you'll know they are there, and some show through the boards, which is the way it is supposed to be. The copper will be darkened with blacken-it once I get some. Next comes the workbench, cooling tank, and scrap bin.....then, yes Piet.....the harpoons.....When painting, one needs to be sure to paint the inside of the oven black before mounting the cauldrons...

- 2,250 replies
-
- 3
-
-
- model shipways
- Charles W Morgan
- (and 1 more)