texxn5
-
Posts
2,473 -
Joined
-
Last visited
Content Type
Profiles
Forums
Gallery
Events
Everything posted by texxn5
-
Looks good Grant as usual.....very nice... I am studying serving machines. Mobbsie was kind enough to share photo's and instructions on building his. I noticed you mentioned Alexy's version here. May I ask what it is and do you have any pictures of it? I'm trying to plan ahead....Thanks Mate....
-
Hey Popeye......it's happening......actually this is fun ....... I have about 400 bricks looking at me........
- 2,250 replies
-
- 1
-

-
- model shipways
- Charles W Morgan
- (and 1 more)
-
Hi Augie, yeah, I'm familiar with that product. I think it's used in model Railroads too. At 1 mm thick I don't know if it would show that much or look much different than the Flat Red paint.....I'll be playing with it. Good idea though, but I have to drive about 15 miles to the nearest hobby shop which is Hobby Lobby...It's 33 degrees here all day so I'm not going to be getting out.....this is your kind of weather....too early for us. If it doesn't get to 45 it wil break a record that is over 105 years old.......brrrrrrrr.......
- 2,250 replies
-
- 2
-
-
- model shipways
- Charles W Morgan
- (and 1 more)
-
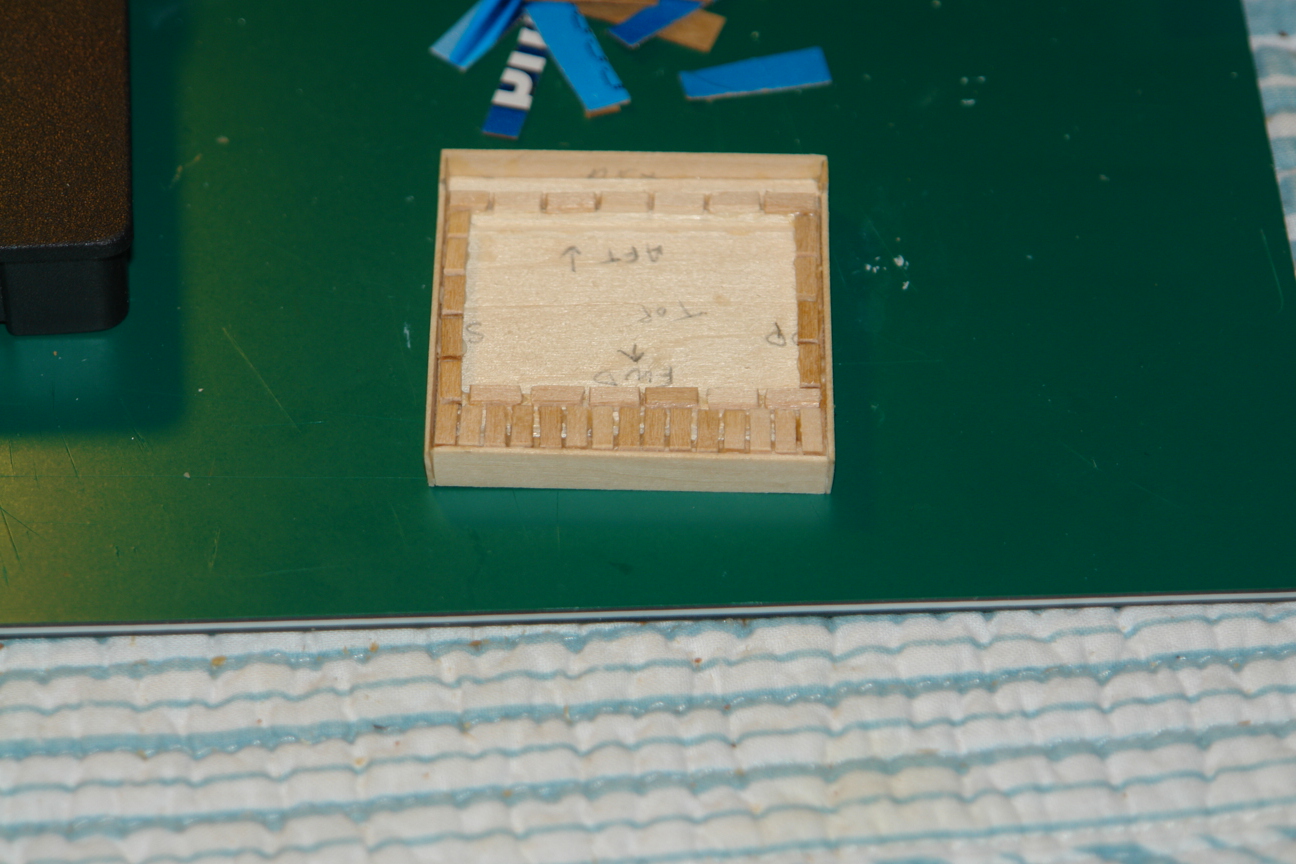
Hi Mark, I had thought about pre painting all of this but I don't know yet......I've started a couple of rows of bricks, and will experiment with a couple of areas before I move too far along. The lower levels won't show as much so it's a good place to play. Some of the sides and back will be covered with wood once the brickwork is finished. The real pictures above show the sides as she is now, and as all references show. Thanks for the advice, and I'll see how it works out.....emmmmm, I love cookies.....especially with ice cream.....like maybe "Cookies & Cream".......darkside temptations.....
- 2,250 replies
-
- 1
-
-
- model shipways
- Charles W Morgan
- (and 1 more)
-
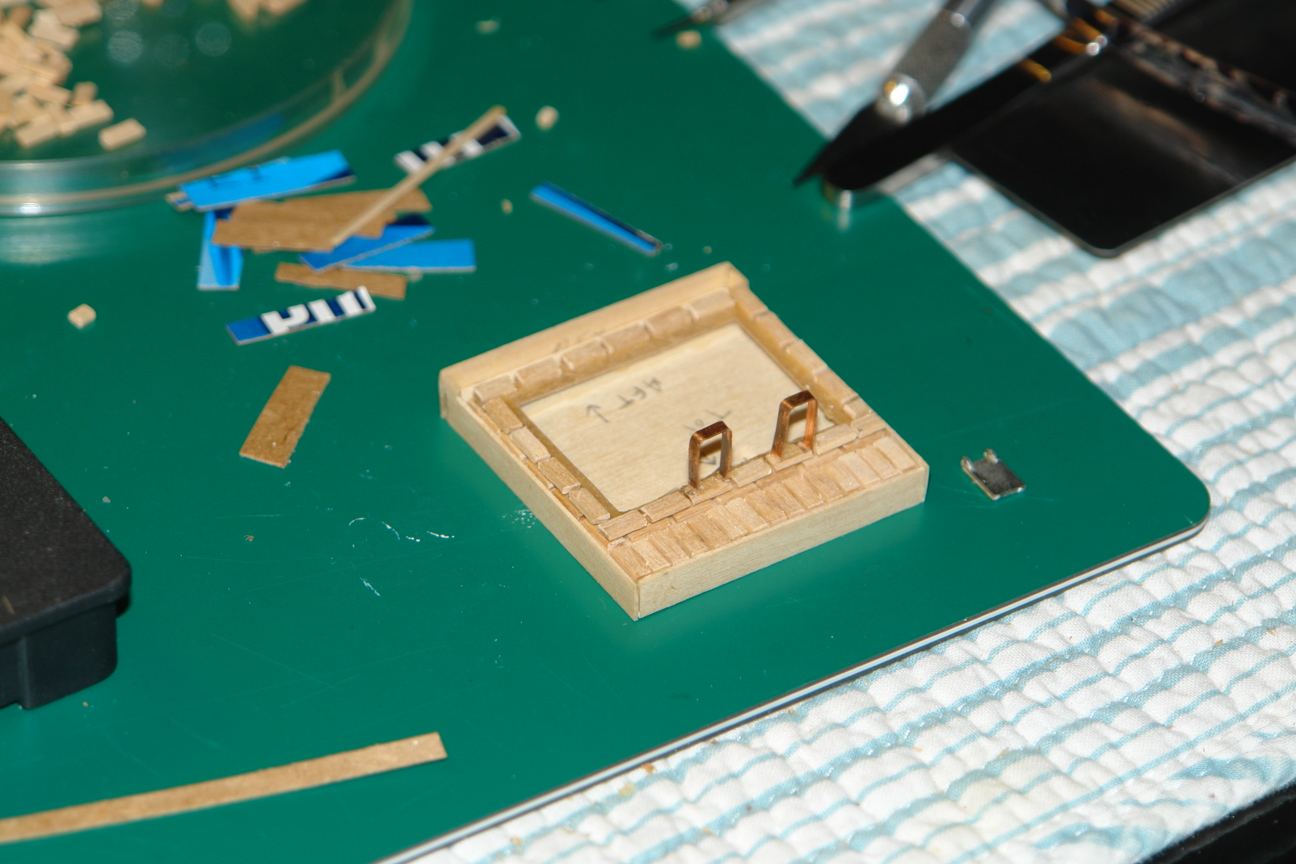
Popeye, yeah man, I already started while I await the mail...thanks for the input though. The bricks are pretty much to scale, and they lay just like real bricks. The mortar is cardboard strips about 3/16" wide set back away from the front edges of the previously laid row of bricks, then it just progresses upwards one row at a time. I'll probably use MS's primer paint to fill the gapsbetween the bricks, since I can't get cardboard inbetween them real easy. Then I'll paint the white and flat red colors. I'm pleased so far, just tedious getting everything straight without the levels and string battens you would use if laying real bricks....
- 2,250 replies
-
- 1
-
-
- model shipways
- Charles W Morgan
- (and 1 more)
-
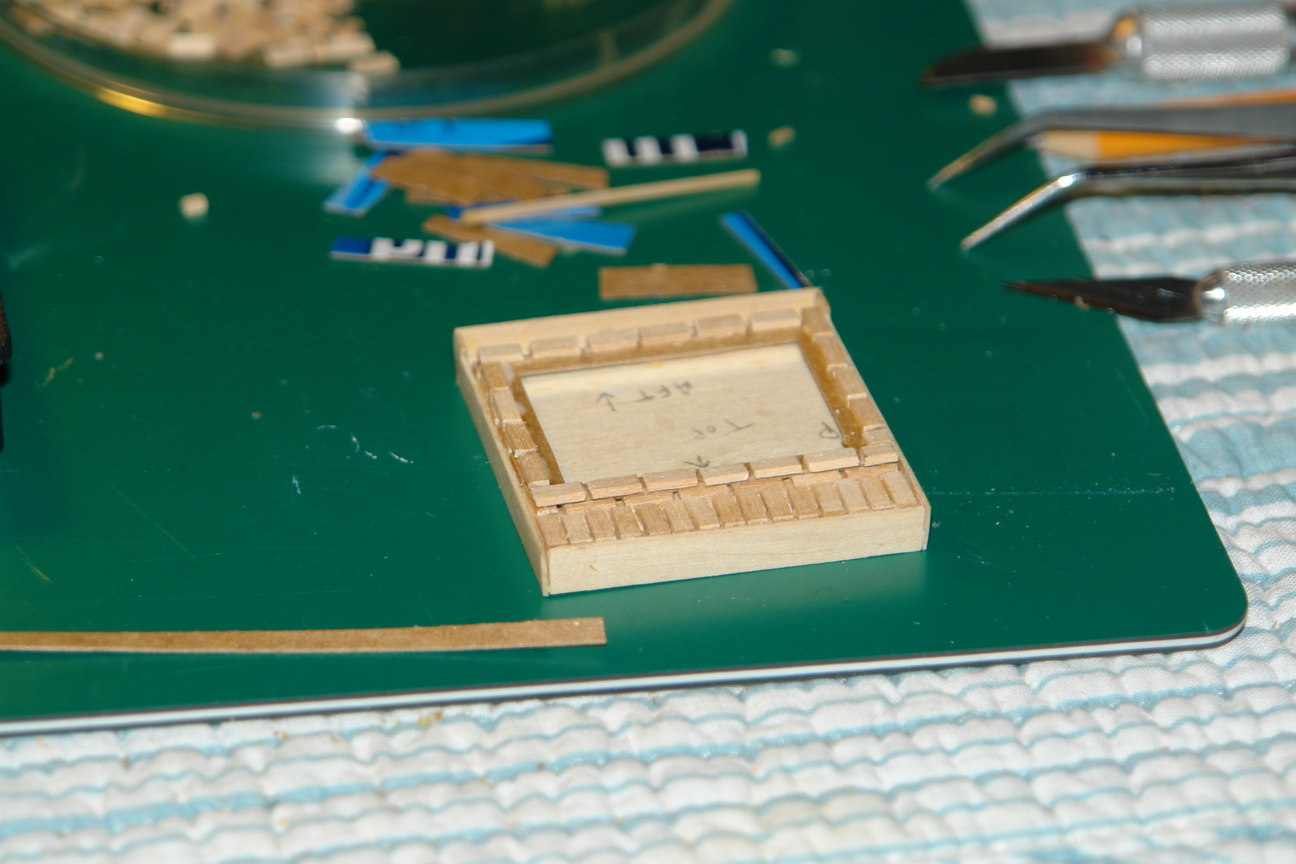
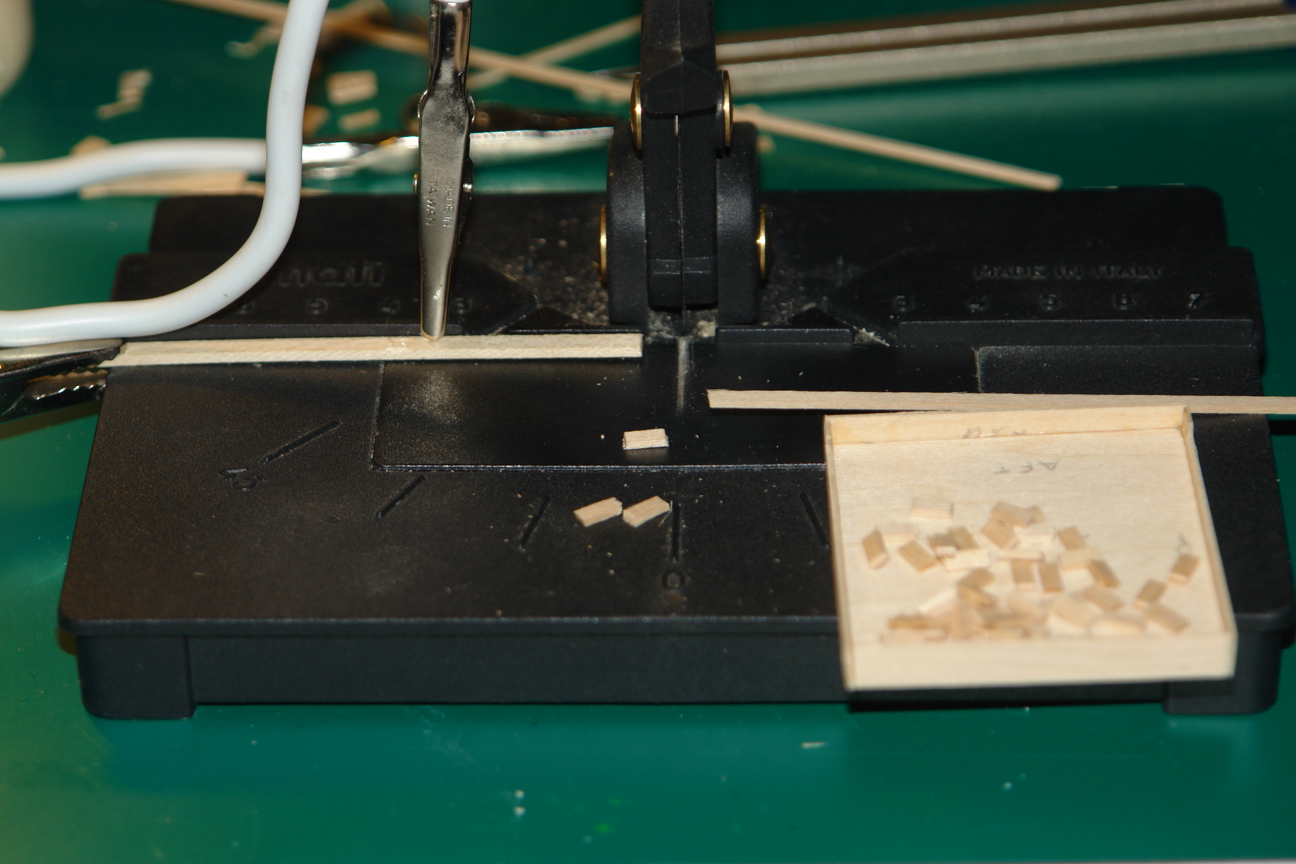
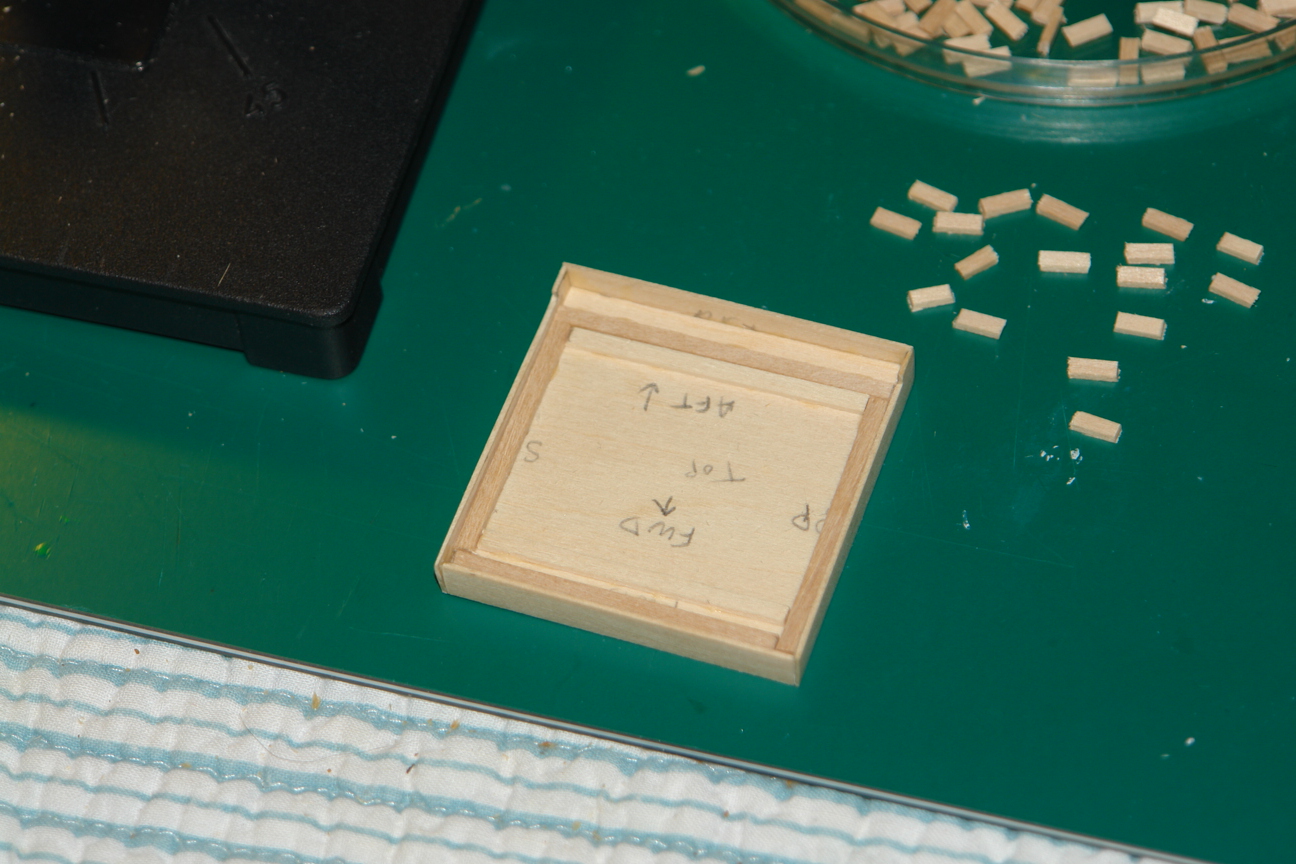
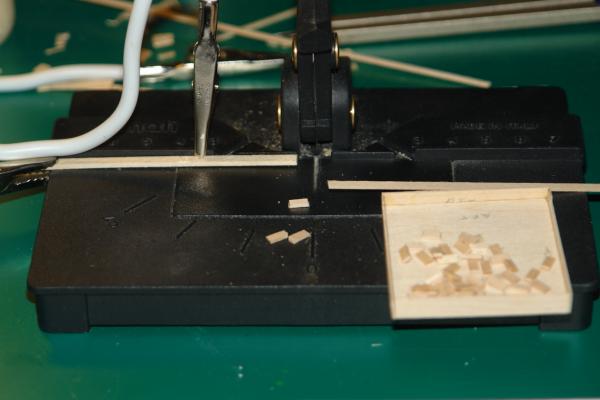
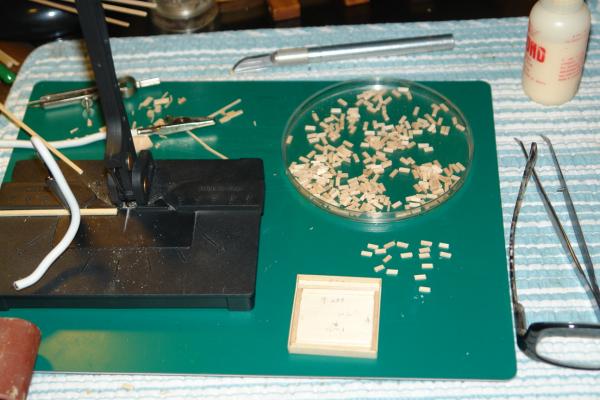
Hello Dave and Popeye, I just thought I would share with you what I decided to do. I have been researching this for some time now knowing what I was instore for. I've looked at the Evergreen bricks, model railroad bricks and several others. None would be right especiall in scale and effect. So I decided to make my own bricks and lay them like real ones. I've done this in real life before, and surprised myself. That's what I mean about different hats depending on the job. So I build the framework, cut about 300 bricks from 1mm x 2 mm stock at 5mm lengths using a jig and my Amati Chopper. Then using a Miller Lite box, I cut thin strips of cardboard to use for mortar. It is .65mm thick. I will then fill in the areas between the brick ends to create the affect I want. I'll then paint the mortar areas white, and then the bricks I'll paint a flat red. I'm using copper strip to frame the doors, and I'll construct the cooktop from copper sheet. Here's how it looks right now as I build the brick oven. Thanks for all your suggestions, I greatly appreciate it. This is probably just an area you just have to make from scratch......hmmm, I hate to use that word around here.....

- 2,250 replies
-
- 8
-
-
- model shipways
- Charles W Morgan
- (and 1 more)
-
Ahhhhh, the fun begins.....she'll start getting ship shape with a Con......nice my friend, interesting to see what all you will do......
-
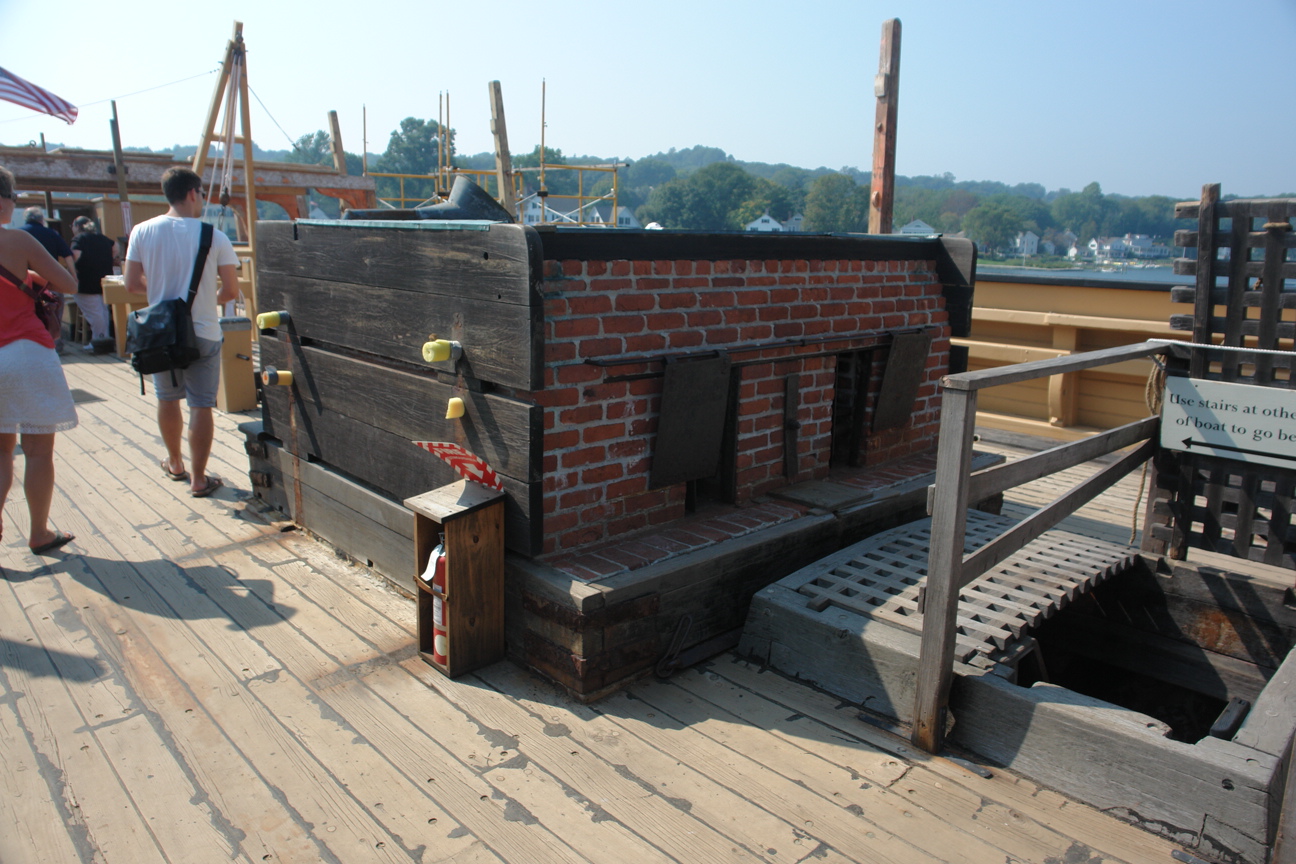
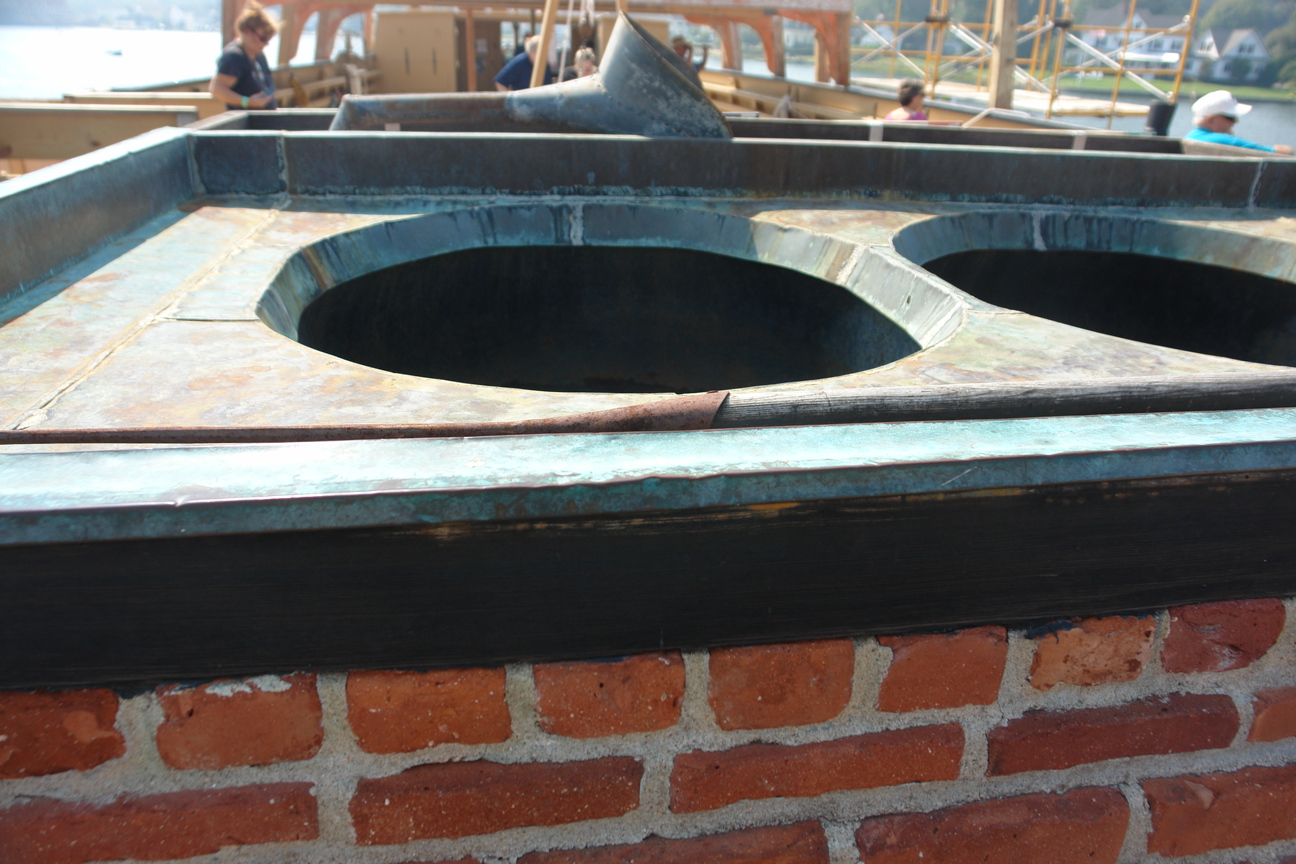
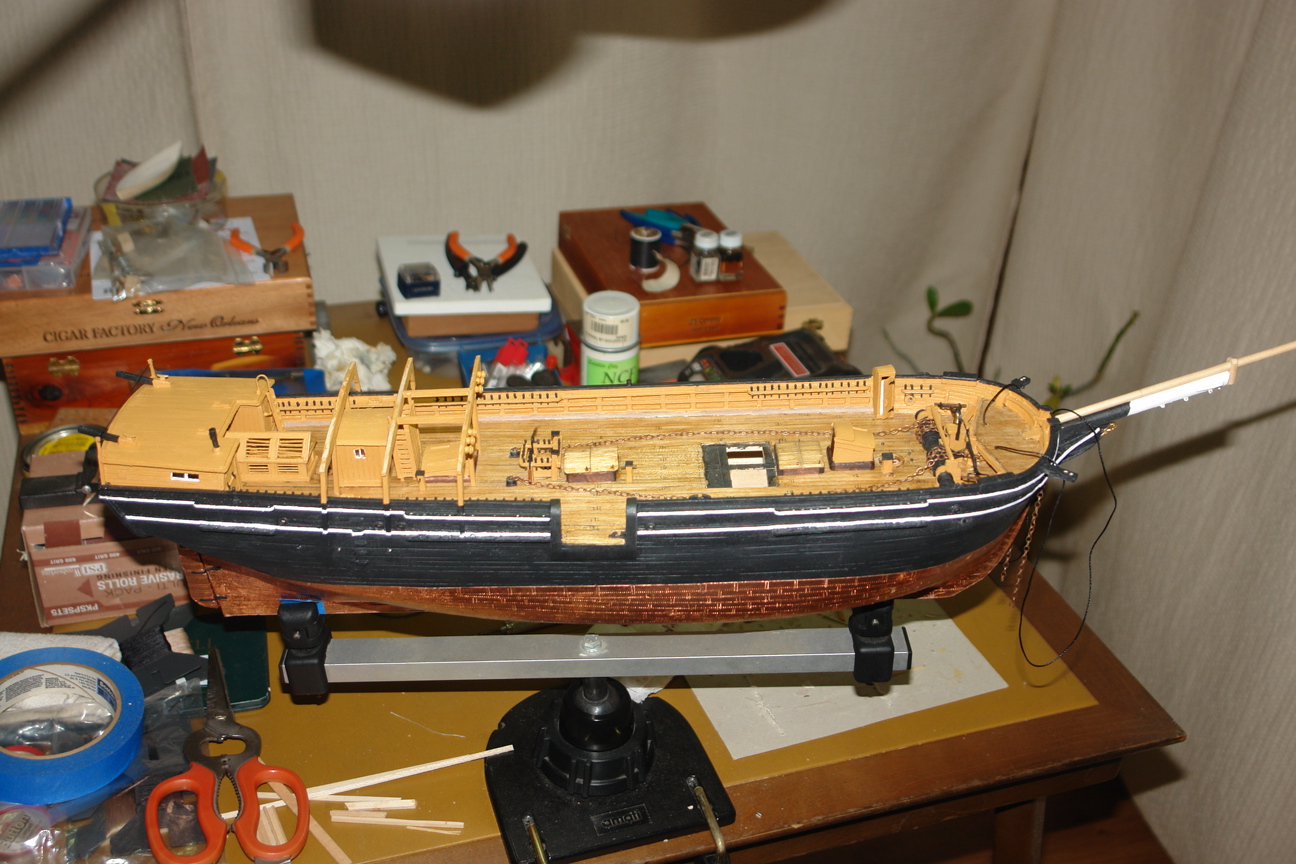
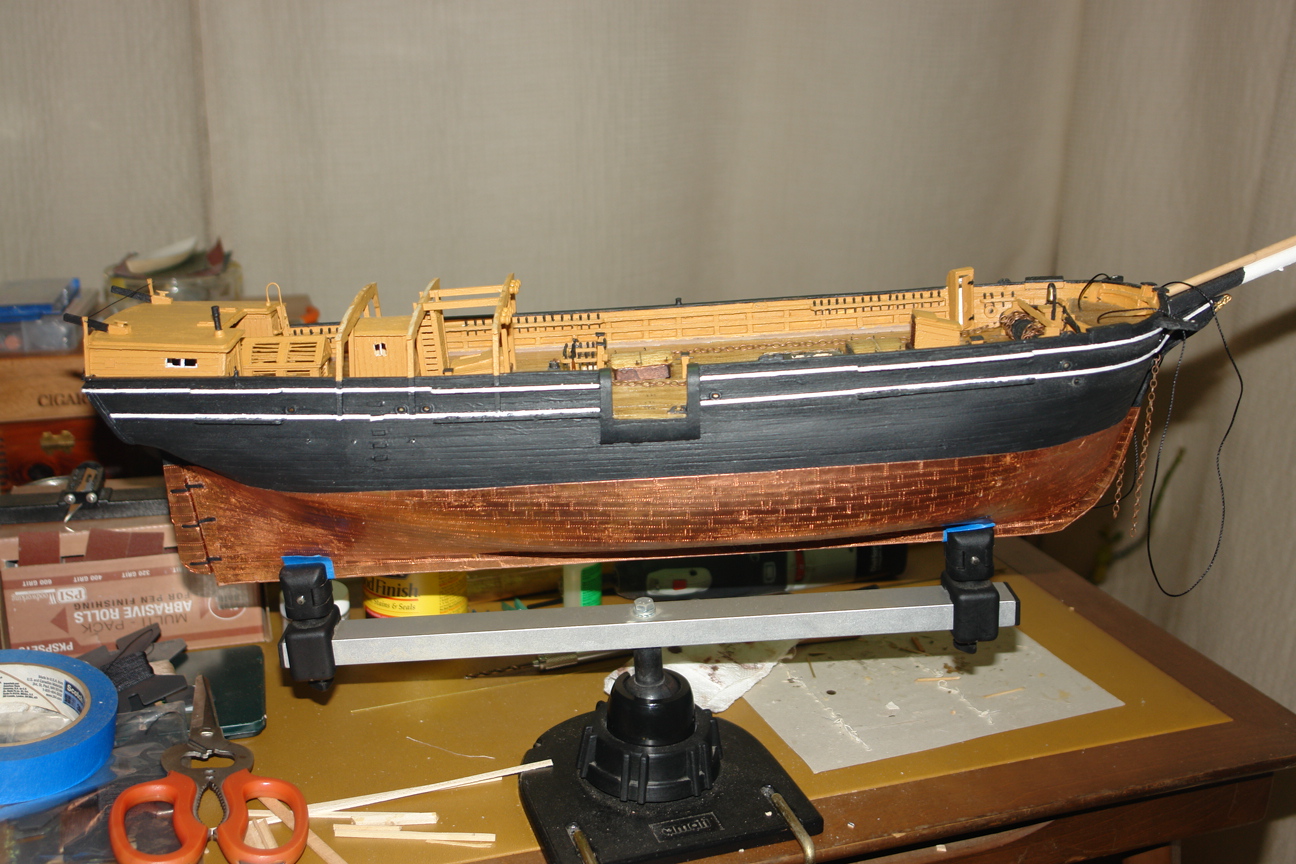
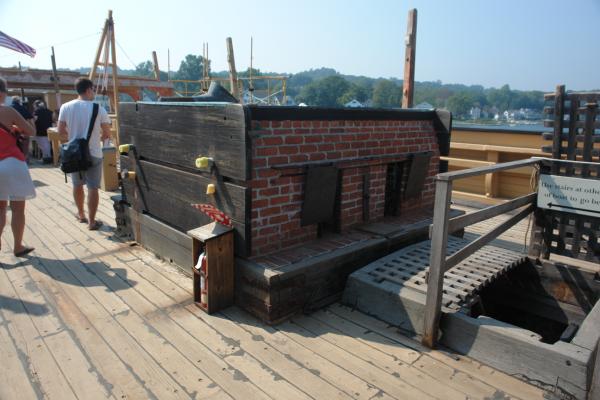
Hi Popeye, thanks for the comments. This is my third attempt to post this one. The last two times I got the text of what I wanted to say and when I went to download pictures AOL lost everything and rebooted....this happens more than I like. So, I will try again. The Tryworks is actually an onboard Whale Oil Refinery. It consists of a Fire Brick Oven with two cauldrons built in over the fire. When a whale is being processed, the blubber is cooked in the cauldrons, there is a workbench for cutting up the pieces, a bench vice, a stone grinding wheel, and then the oil goes into a cooling tank and then into wood barrels to be stowed down below in the holds. Then the scraps go into a copper scrap bin to be discarded later. There is also a Duck Pen as part of it. This is where the masonary "hat" comes into play. As I have said before, it's amazing how many skills or trades we incorporate into these things. Masonry, welding, and soldering hats will be utilized for this one. Here are some pictures of the real one onboard the Morgan in Mystic.

- 2,250 replies
-
- 4
-
-
- model shipways
- Charles W Morgan
- (and 1 more)
-
Thanks Admiral Augie.....the details have been fun, and it does start adding some life to it...more to come....
-
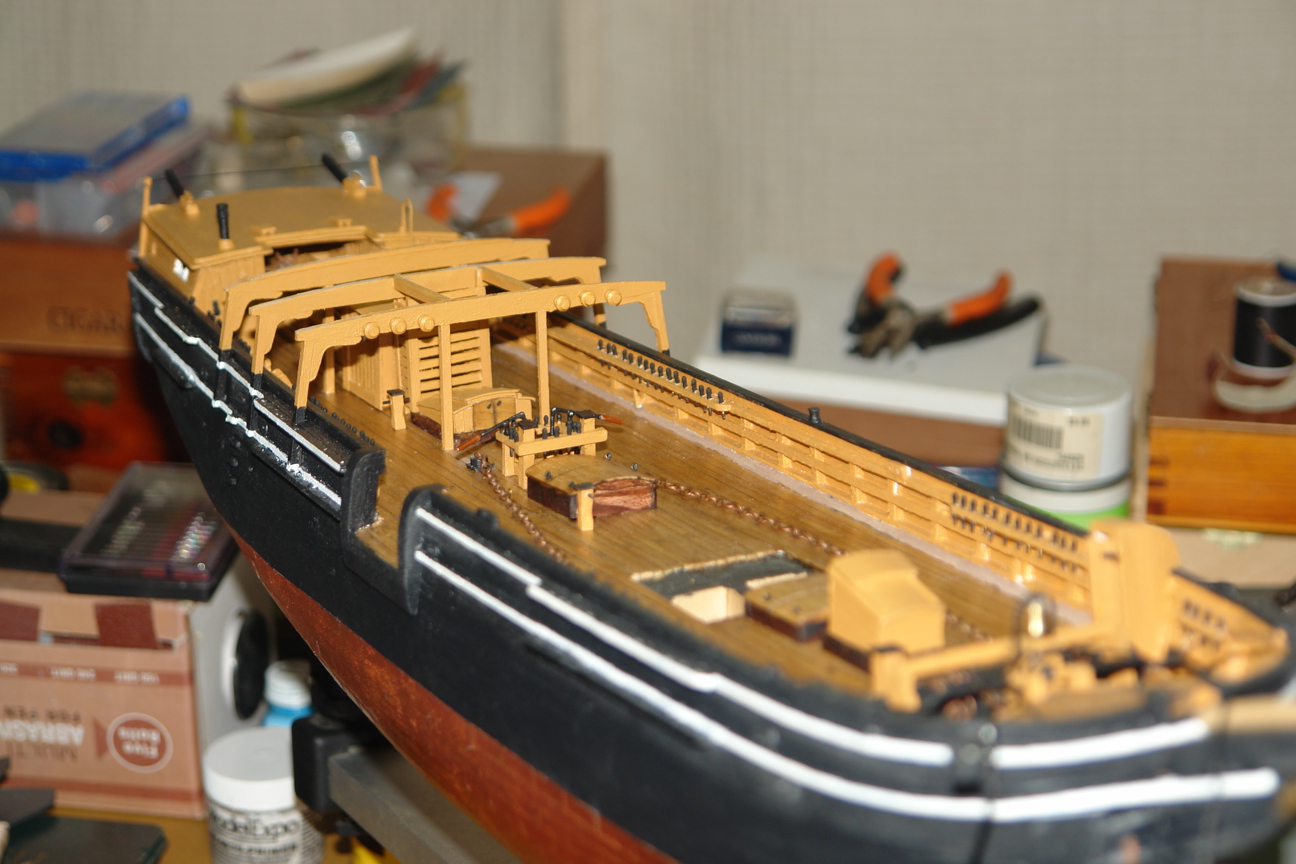
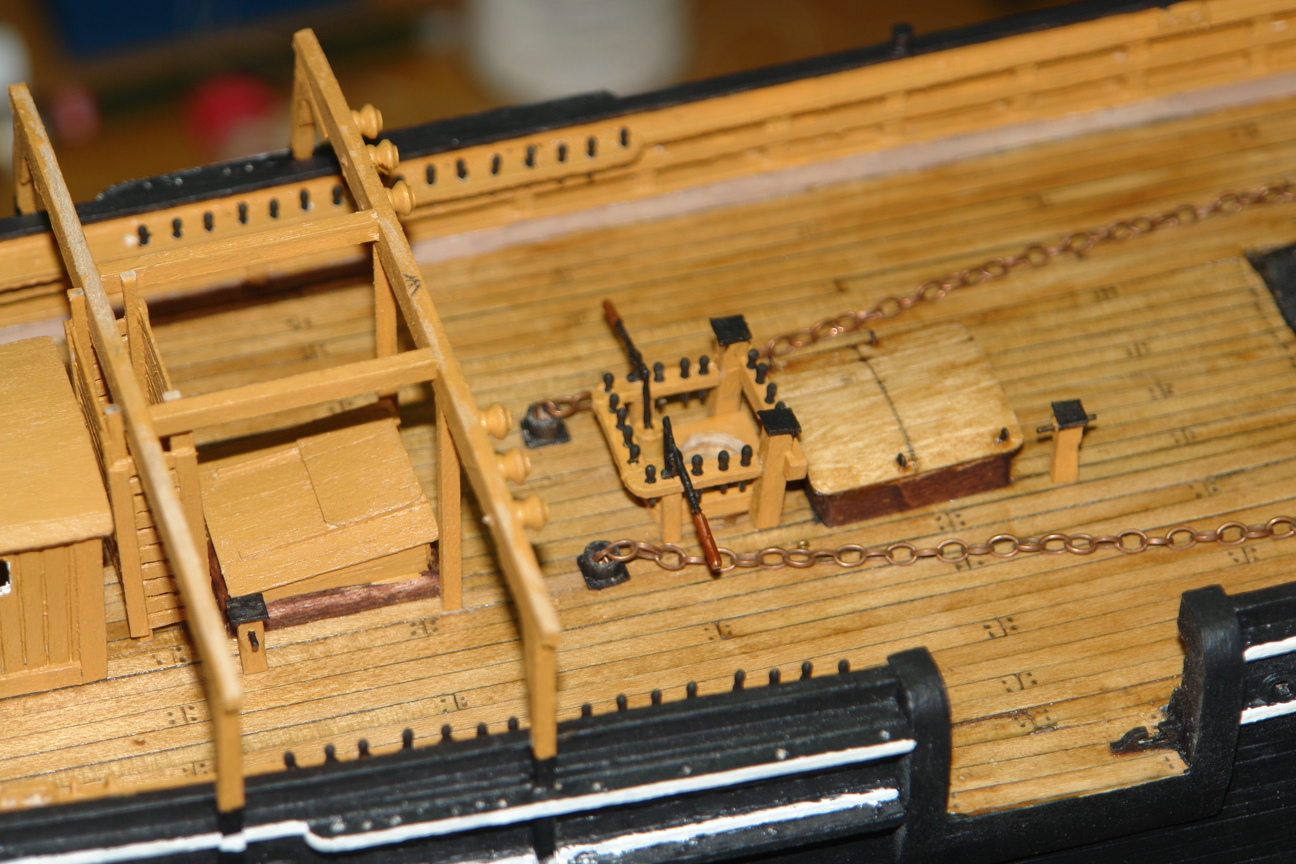
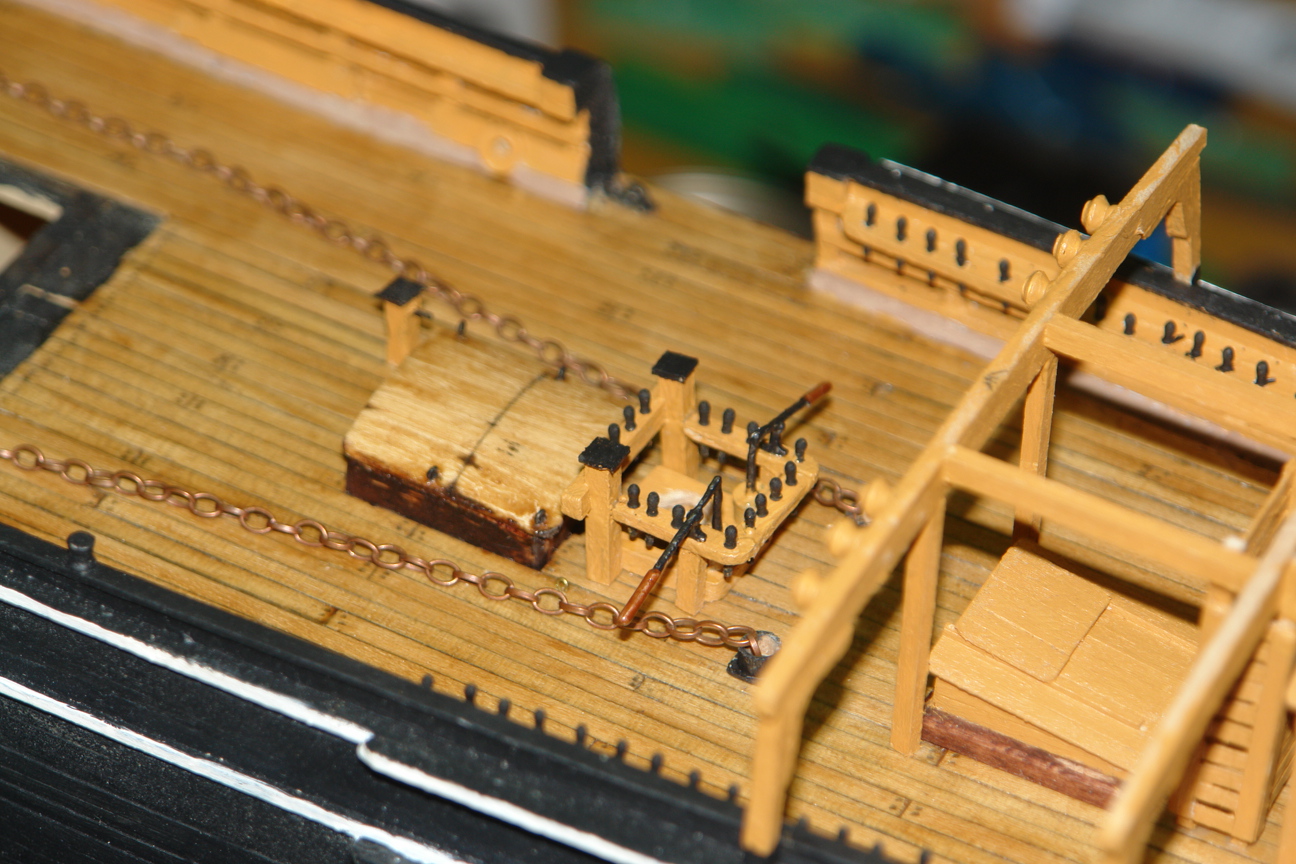
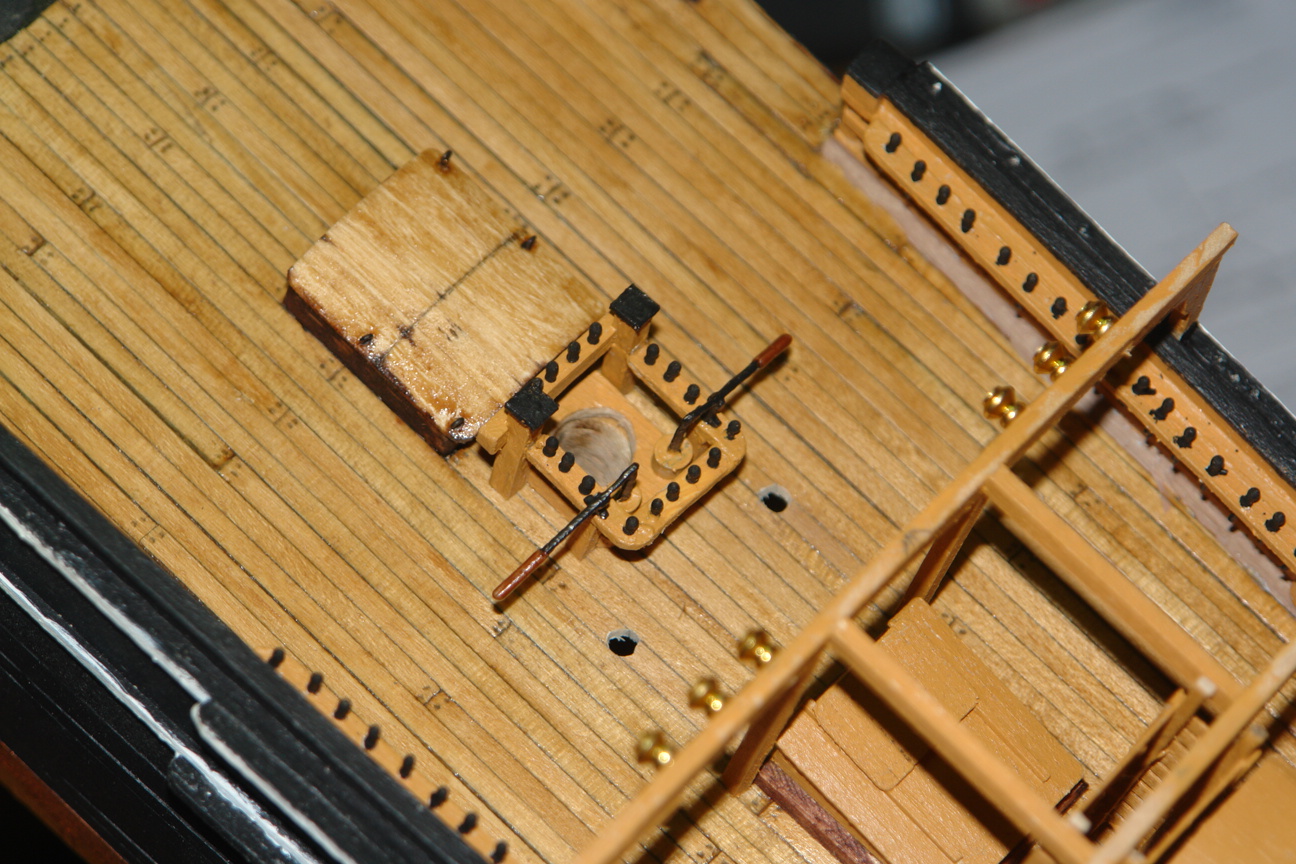
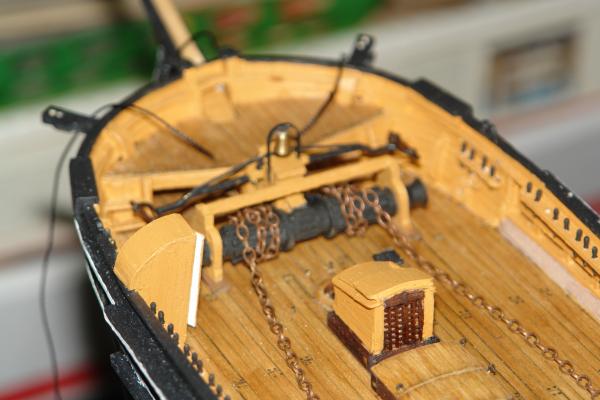
These are pictures on deck withe the anchor chains

- 2,250 replies
-
- 7
-
-
- model shipways
- Charles W Morgan
- (and 1 more)
-
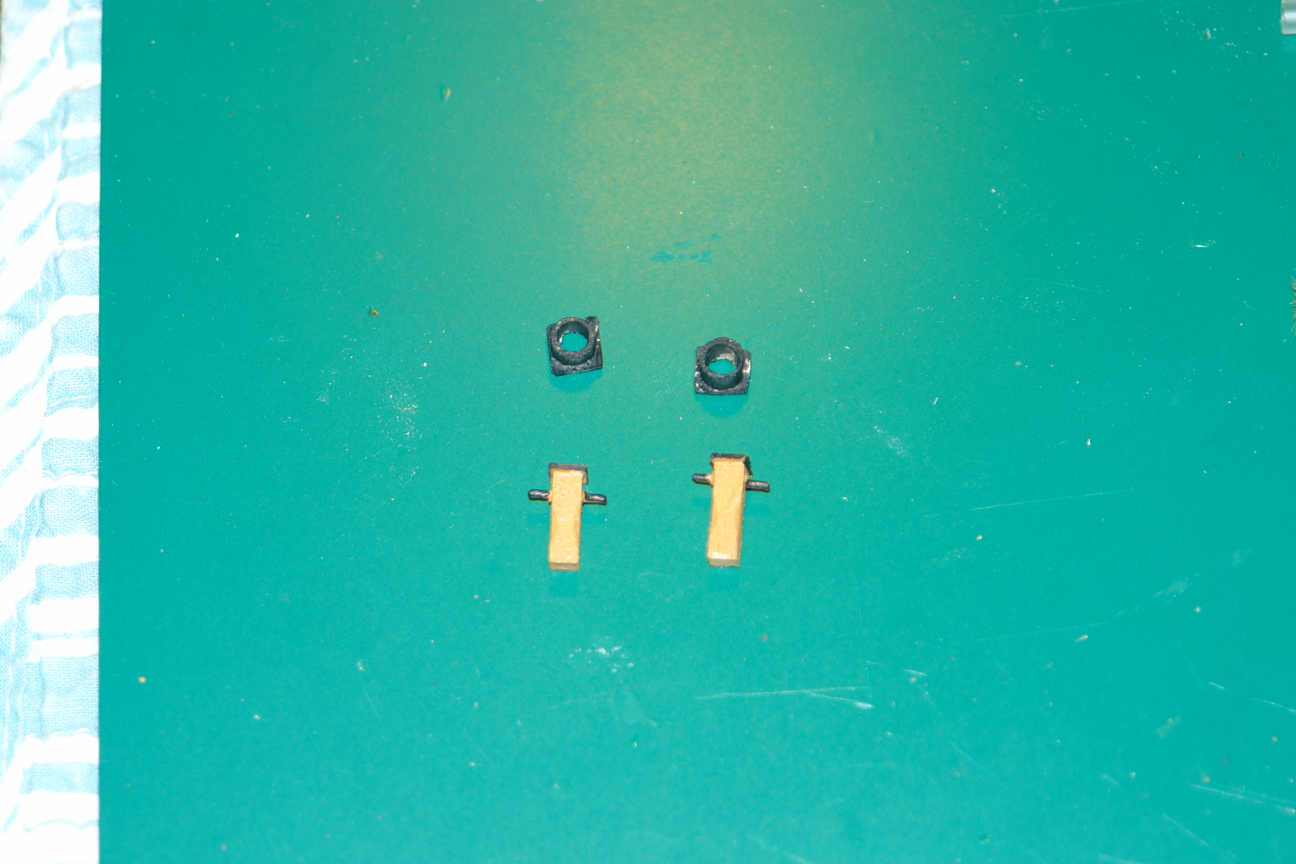
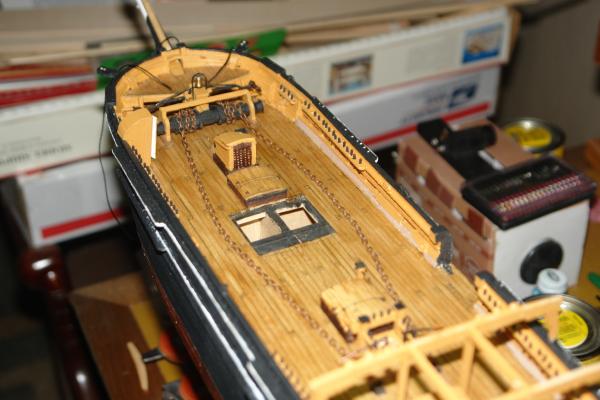
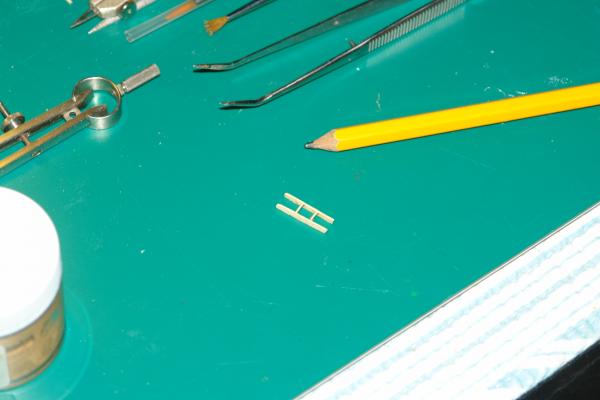
Well, one thing about waiting for something in the mail, is that you get to do a lot of fiddly little stuff. So, today I made 2 bits, a small ladder, added bucket hangers, made the anchor chain pipes, cut and trimmed the anchor chains and wrapped them around the windlass and back to the anchor chain pipes for stowage below decks. Next I have been studying the dreaded Tryworks. I started with the foundation framing for the Tryworks which is where I am right now. The anchor chain is larger than the kit chains, so I couldn't use the cast Brittania parts that came from MS. I took a dowel, and drilled a hole in it, then filed it to where the walls were thin, yet allowed the chain to go through it. Tedious in that I had to drill them by hand, cut with a razor saw without breaking them....same for the frames.....needless to say this took quite a lot of time....and about 8 trys before I got it done. I'm not sure what I'm going to do when the drawplate arrives...I guess I'll stop and make enough harpoons and lances to fit in the racks under the Shelter Roof, then put on the roof and then come back to the Tryworks.

- 2,250 replies
-
- 6
-
-
- model shipways
- Charles W Morgan
- (and 1 more)
-
The sawdust idea is really a good one. I've used that for years for filler......that stuff we shouldn't need.......
-
Hi Dave, just now catching up with the logs. I like the way your pumps came out. Lot's been going on and had a bunch of honey-do's to get out of the way. Going to get some work done in the next few days. I think your pumps came out at a good scale. Hope all is well my friend....
- 601 replies
-
- 1
-
-
- constitution
- revell
- (and 1 more)
-
Thanks Augie, I appreciate the explanation, always learning.....didn't know how to disolve CA.......
-
Thanks Scott, it's the little details on these things that set them apart. This group of guys on these builds demand and expect it....Kidding, but of course it does seem to prompt this......keeps me trying to perfect things.......
- 2,250 replies
-
- 3
-
-
- model shipways
- Charles W Morgan
- (and 1 more)
-
Thanks Grant.....
-
Hi Lawrence, I haven't taken a break because I haven't started them yet.....excuse is waiting on my Byrne's Drawplate.....
-
Augie, the Tryworks is all brick and metal work......panic is striking......gotta build a sink type cauldron, and a brick firebox....of fun......that is why I went aft to build the Hurricane House, and everything that works forward so I could see progress before getting tied down to the Tryworks...about time to pay the Piper....
-
Hi Popeye, I've been wanting one for a long time, and procrastinated about getting it, finally broke down and ordered one....hopefully I can get some decent dowels out of it......
-
Really looking nice. All the colors of the woods give a great contrast....good pictures.