DONATION DRIVE - SUPPORT MSW - DO YOUR PART TO KEEP THIS GREAT FORUM GOING!
×


texxn5
-
Posts
2,473 -
Joined
-
Last visited
Content Type
Profiles
Forums
Gallery
Events
Everything posted by texxn5
-
I totally agree Augie, amazing what they would come up with......
-
Hi Robert, thanks for the input I'll give it a try. First I was using the wrong side of the drawplate, pushing through from the numbered side. I haven't had time to try real hard yet, but maybe tomorrow. Thanks for the help.....
-
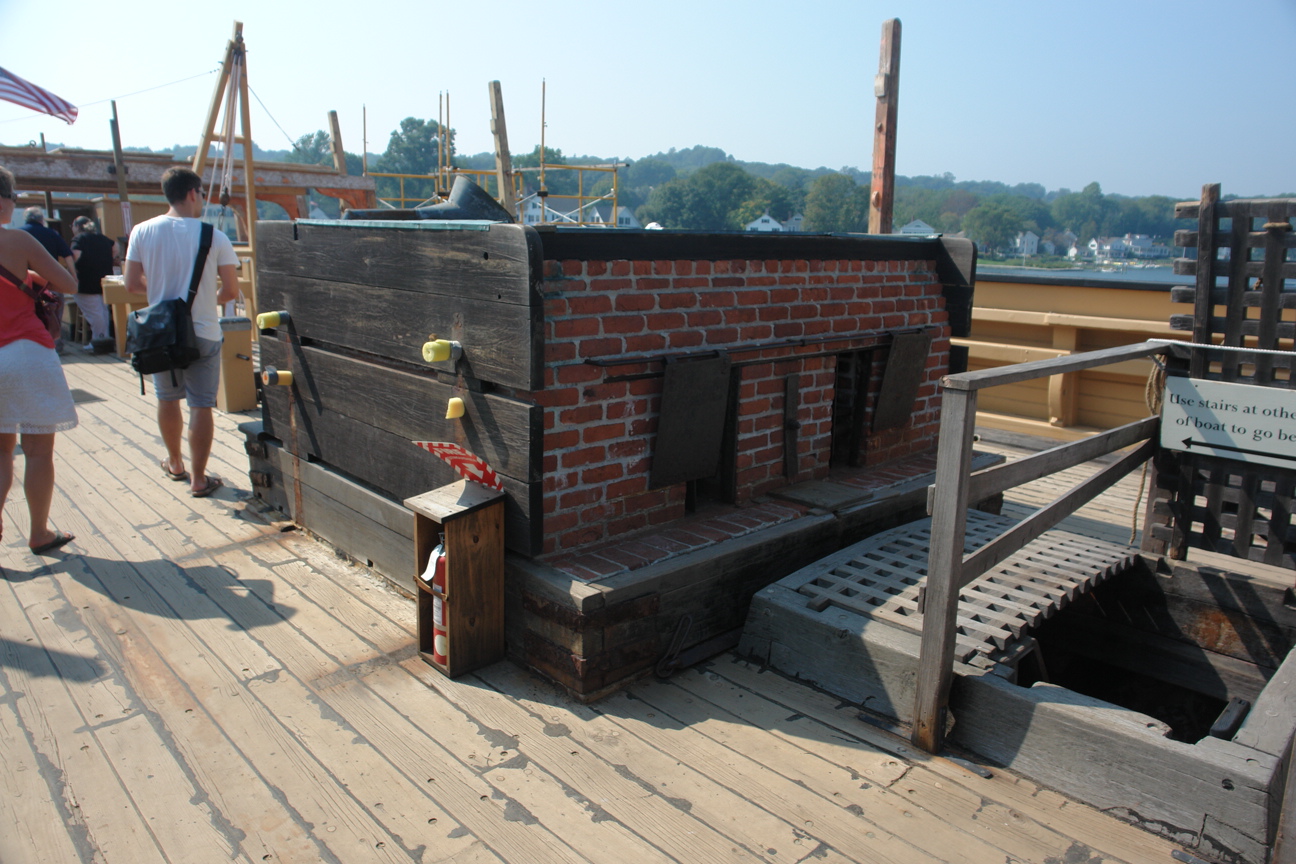
Yeah Augie, isn't that interesting??? Also another tidbit, the reason the Trworks sits up off the deck about a foot, is that it has a water tank under it that they would circulate seawater in and out to keep it cool so it didn't set the deck on fire....thanks for asking the question because I actuallly hadnt even thought about it or heard anyone talk about it....cool
-
Augie, I have an answer for you concerning fuel for the Tryworks. It seems that after the skin and other parts of the whale had rendered all of the oil they were going to, then they were taken out of the pot and put into a rendering bin next to the tryworks, port side. They were then put into the fire and burned as fuel for the fire......looks like most of th whale was used for something and not just discarded overboard....
-
Got another question for ya Mates.....I have zero experience usiing a Byrnes Drawplate. So I ask the "dumb" question.......what do I do with it now that I have it? I tried to get a toothpick to go through it with no luck. I tried a piece of 1/16" square basswood through it....no luck either. Anyone that can share instructions?????
-
Very nice Augie, your planking is moving right along......life can be a pain sometimes......
- 2,191 replies
-
- 1
-

-
- confederacy
- Model Shipways
- (and 1 more)
-
It's nice to see the mill in operation.....thanks for the illustrations.....your ship is magnificent....love the details....
-
Those cannons are so superior to the kit's it's incredible. I will be using Chuck's cannons for the Niagra when I get finished with my Morgan. There's no comparison for quality. Your ship is looking fantastic......thanks for the pictures
-
Now, Mark, there is an idea.....Piet that sounds real good....I've worked with cardboard and paper and it gets real strong....
-
Hi Mike, thanks and yes, I am aware of that link. I studied it trying to decide how to construct this part of the ship. It's a great reference and helped me decide to lay bricks.
-
Thanks Adam, lots to go yet, but moving on...
-
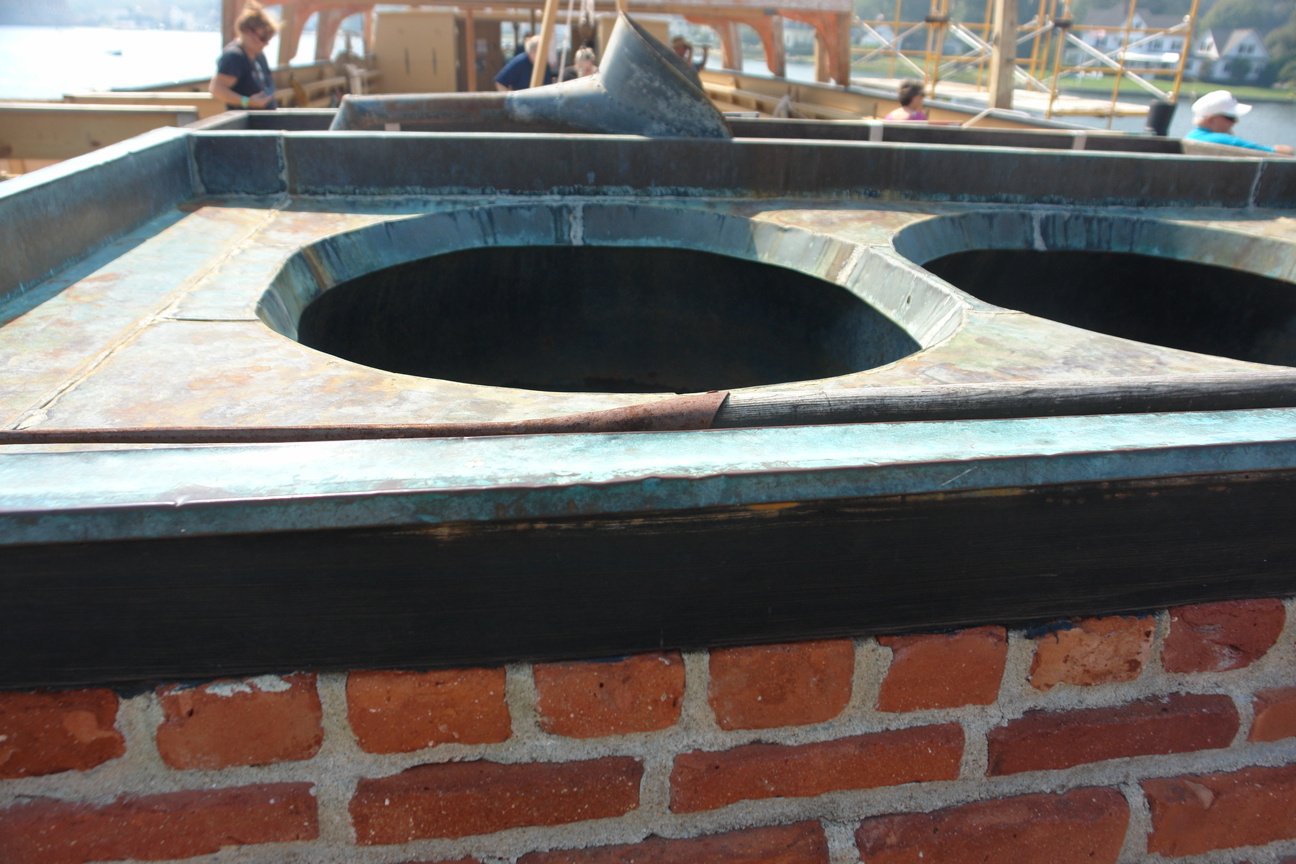
Hi Popeye. First, the holes in the top go into cast iron cauldrons for cooking the oil out of the blubber. The piping on the sides are actually bolts that are currently protected by thread protectors for holding the wood insulation boards to the sides of the oven, as well as the large cast iron angle brackets to keep the entire oven from flying around the deck in rough seas....not good......The oil from the cauldrons is transferred to a cooling tank that will mount on the starboard side of the oven. The blubber is cut up on the workbench that will be on the aft side of the oven, then tossed into the cauldron, cooked, then by the use of a long handled cup, transferred over to the cooling tank and then when cooled transferred to wood barrels. The renders are then discarded into a copper bin on the portside of the oven to be eventually discarded overboard unless they were needed for some other purpose. This area is a heavy work area for processing the whale, so you can see, not only do I build the brick oven, but also all the elements mentioned above to accompomplish this.....should look cool when finished.....I hope.....
- 2,250 replies
-
- 1
-
-
- model shipways
- Charles W Morgan
- (and 1 more)
-
Hi Henry, good to hear from you. Yeah, this week I'm a brick layer and a blacksmith.....many "hats" worn by this group. To me that is one of the great things to enjoy as we build our ships......glad I'm not in Boston this time of year....brrrrr Stay warm my friend
-
Hi Adam, hmmmm scratch.......well to be truthful, about 90% or more of this build is (I hate to use the word here)......ewwwww---- is sratch built. OK, there I've said it...Other than a few laser cut items, Primarily bulkheads and keel and a few Brittania parts, it's all sticks. Of course there are the plans and a limited instruction book, but those could be obtained anywhere if one were scratching.................thanks for the kind words....
-
Thanks Popeye I'm glad you mentioned the white paint pen, I'm going to be at the hobby store this afternoon and I'll pick one up. You are right about this stirring up lots of ideas for doing this, and I appreciate everyone's input.....looks like it stirs up some interest in everyone...
- 2,250 replies
-
- 1
-
-
- model shipways
- Charles W Morgan
- (and 1 more)
-
Augie and Piet.....I'm actually not sure what they used to fuel the fire....I hadn't thought about it....I don't know if whale oil could get hot enough without something else to feed it.. I don't recall the use of coal when at the museum ...good question....I'll have to check that out. I would think that wood would be too cumbersome and take up a lot of room.....whale oil is sounding more realistic...and readily available to this ship....
- 2,250 replies
-
- 1
-
-
- model shipways
- Charles W Morgan
- (and 1 more)
-
Yes Piet, you got it right Belgian Ale.....Proost
-
Hi Piet, good luck with the styrene, it's a bit tough to work with. I'm usually not real happy with what I wind up with when I use it, which is seldom. I've used hot water also when bending it, but I've never attemptted to make a tube with it. Have fun, I know you'll figure it out....I'm looking forward to seeing the con....
-
Hello Henry. This will make such a great improvement to the plastic kit. Looks great my friend, good to see your progress....
-
Thank you Frank and Charley. Charley, I would highly reccomend this as your next ship. It has been a lot of fun to build it and repricate the structures. I have alway liked this ship since I was a kid. Even though I live in South Texas, I have been abord the Morgan 4 times, the last being in September of this year. There is a lot of reference material available, and the MS kit was designed by Ben Langford and approved by Mystic Seaport of America where the ship is located and currently undergoing a 5 year restoration. I'm having a ball building this ship.....and learning so much more than I knew prior to this.. sometimes you can find MS models on ebay and save a little money..enjoy
-
Thanks Mike, I am going to include some pictures of the real Tryworks front, which shows the sides with the wooden insulator boards in place....


- 2,250 replies
-
- 3
-
-
- model shipways
- Charles W Morgan
- (and 1 more)
-
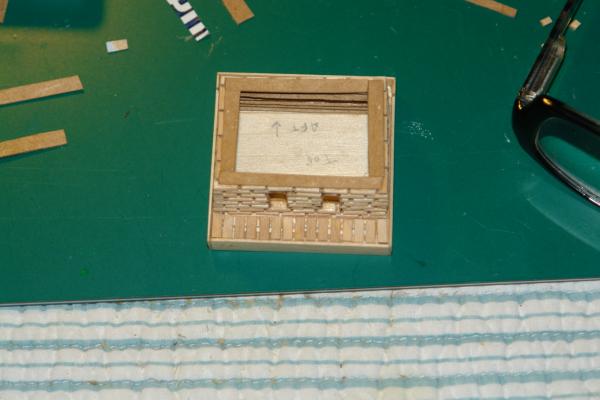
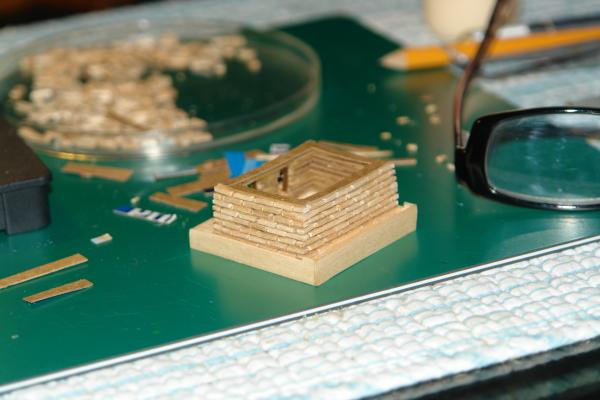
As I am reviewing post #1170 above, it shows a clear picture of the Miller Lite cardboard brick mortar. The strips glue in on top of each layer of brick, set back from the edge around .5-1mm. Each brick has to be sanded on the ends to square them up since cutting them is never perfectly straight when using the chopper and the PVA glue is absorbed quickly by the cardboard so you must work rather quick. I lay about 3 or 4 bricks at a time, then square them up and try to get them level. The cooktop and cauldrons are going to be a challenge to say the least. Might start that later in the day should I get the opportunity...
- 2,250 replies
-
- 1
-
-
- model shipways
- Charles W Morgan
- (and 1 more)
-
Hi Popeye....got the .38 near by.....hope they don't get wise.....
- 2,250 replies
-
- 1
-
-
- model shipways
- Charles W Morgan
- (and 1 more)
-
Here's an update to the brick laying. Have had some honeydo's and Admiral time, so not progressing as quickly as it could. I'm pleased so far. Lot's of details to go yet, this is prominent focal point on the deck once installed.....yes, Augie.....fiddly little stuff.....fortunately, Piet has given me ideas how to do some things so, it should get interesting...more later hopefully......

- 2,250 replies
-
- 10
-
-
- model shipways
- Charles W Morgan
- (and 1 more)