HOLIDAY DONATION DRIVE - SUPPORT MSW - DO YOUR PART TO KEEP THIS GREAT FORUM GOING! (Only 20 donations so far - C'mon guys!)
×


texxn5
-
Posts
2,473 -
Joined
-
Last visited
Content Type
Profiles
Forums
Gallery
Events
Everything posted by texxn5
-
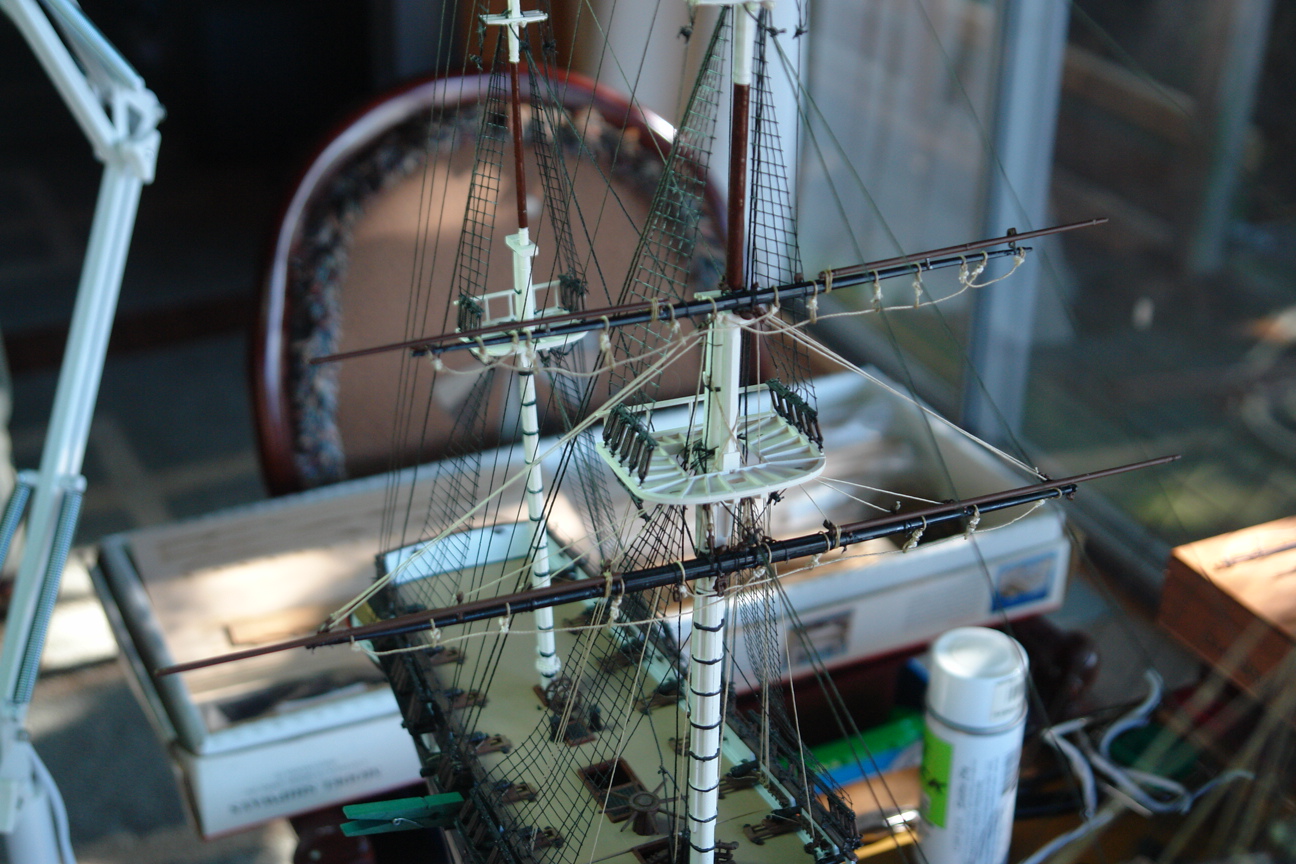
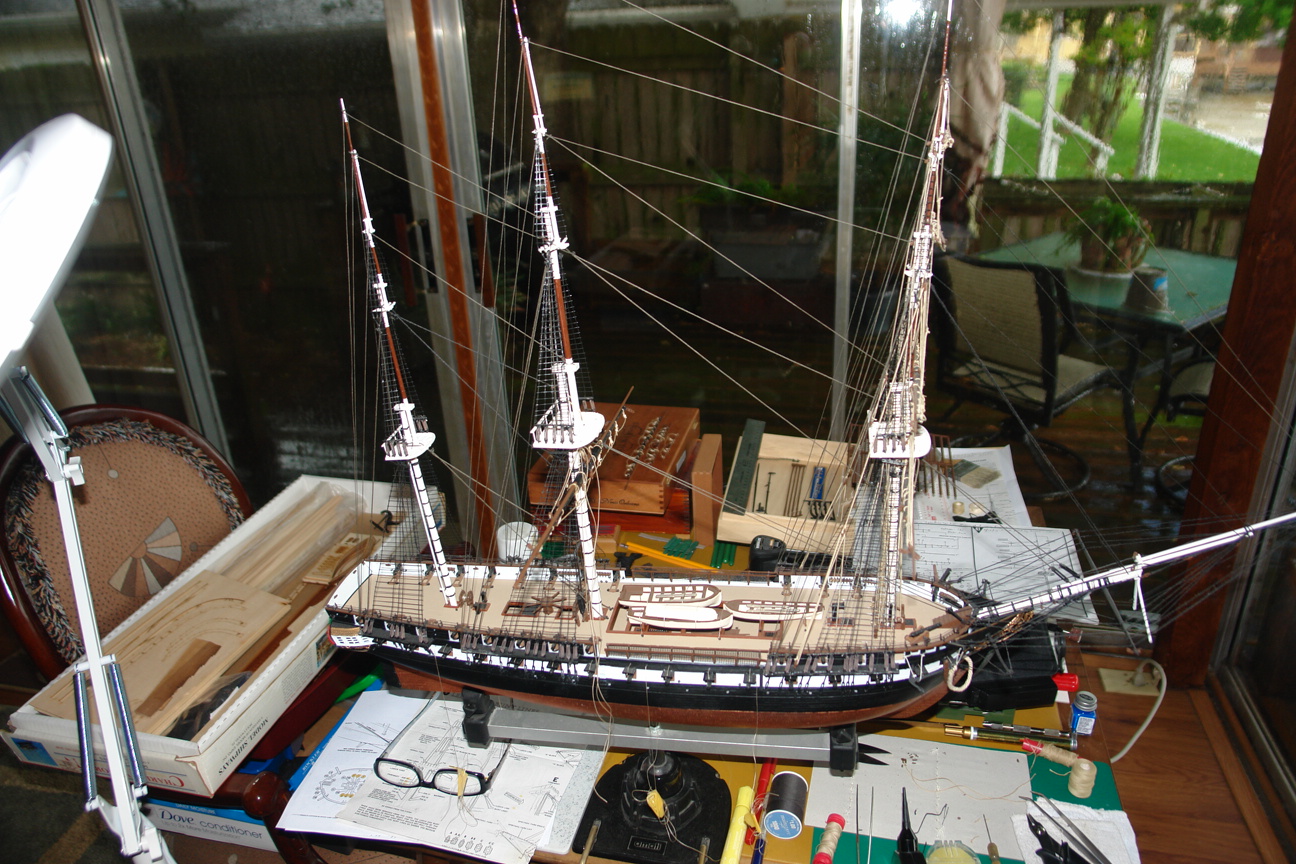
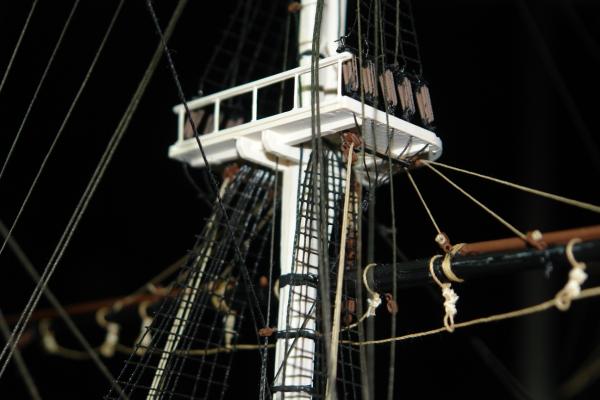
Today has been rigging lifts, leech and bunt, and halyards. Will post pictures tomorrow. Goal is to finish the Mainmast tomorrow. Slow progress, but progress to say the least.
-
Looks good Augie, glad to see the progress. When do you start hanging...
-
Hi Andy, I referenced a couple of built models I've seen along the way, and each was only tied off on the port side. Don't know if that helps, looks like somewhat of a dillema, I can see how it could get slack..
-
I agree with Augie on this one, glad the pinrail held....I worry also about mine as it is not CA'd yet.
-
Well, the repairs turned out to be minor...looked worse than it was....never underestimate the power of CA and Accellerator...almost fixes anything...lol...So, back to moving forward again...
- 153 replies
-
- 1
-

-
- constitution
- revell
- (and 2 more)
-
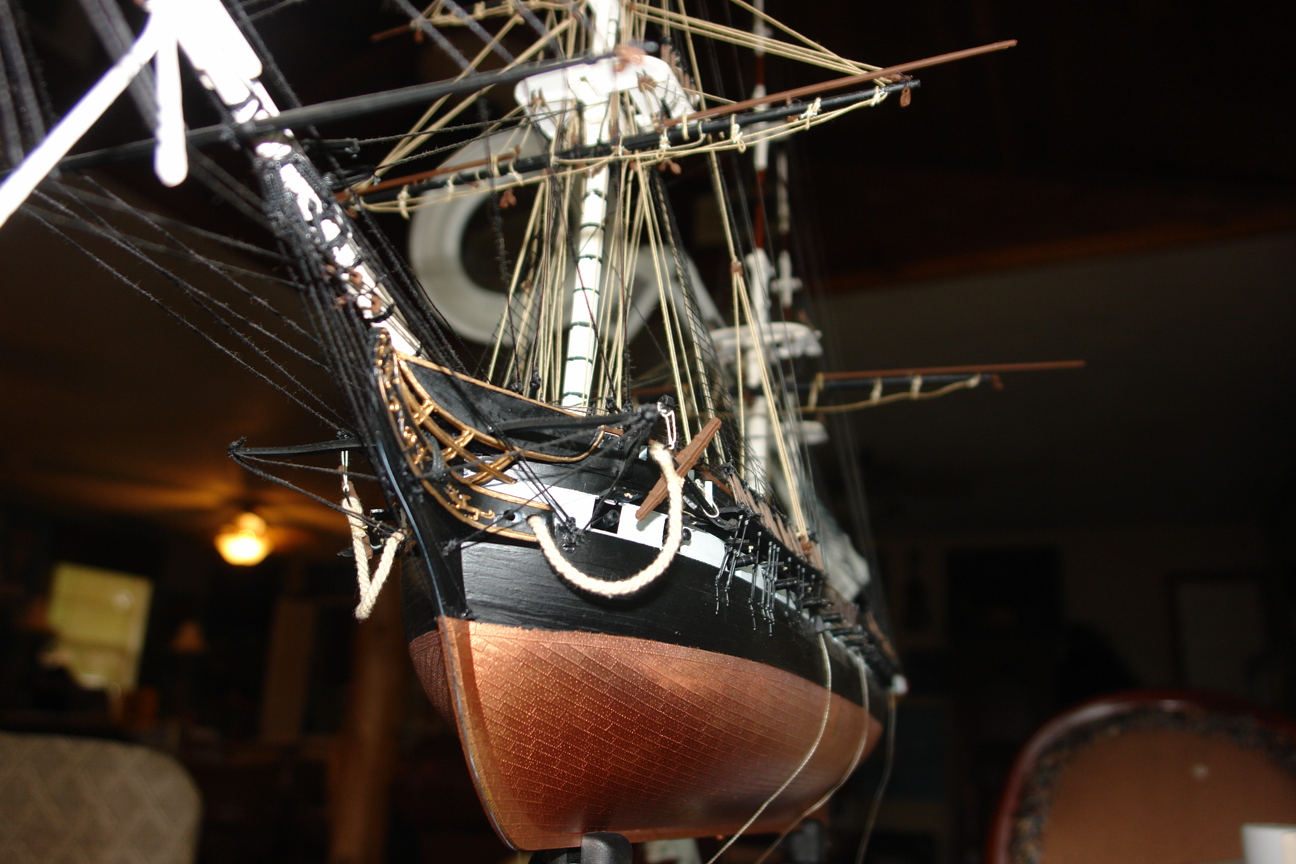
Thanks Sarah, yeah, had a few disasters, but making progress. Had another one last night, the Admiral ran over the bowspirit and knocked some lines loose as well as breaking off the tip. All repairable though so no big deal. That's where I'll start today.
-
This looks great Andy. Your beeswax dispenser is the same as mine and has worked well for me too. I didn't work on mine yesterday...spent some time with the Admiral.. Then had a disaster strike, she ran into my bowspirit, broke the tip off, and knoked some rigging loose. All repairable, so that will be what I get to do today...oops...have a good one, and thanks for the pictures.
-
I've been using some I got from Model Expo, and had good results. It comes in a circular plastic container with opening for drawing the string through it. It coats well and straightens the string well. So far my favorite string line comes from ME also, and it's Amoli brand. I think it is all cotton, which is easier to control than the polyester line.
-
Thanks Daniel...I'm trying...
-
Well, today with all going on in Boston, I spent a lot of time watching the news....sad...isn't it? So, I worked inside and didn't create saw dust, and did some more rigging on the Connie...broke a few things..cussed like the sailor I am, and made repairs from big fingers and frigile plastic. I think I'll be glad to be working with wood. Posted a few pics on the Connie build log for anyone interested...so we have a red sky tonight...tomorrow should be nice...sailor delight...
- 2,250 replies
-
- 1
-
-
- model shipways
- Charles W Morgan
- (and 1 more)
-
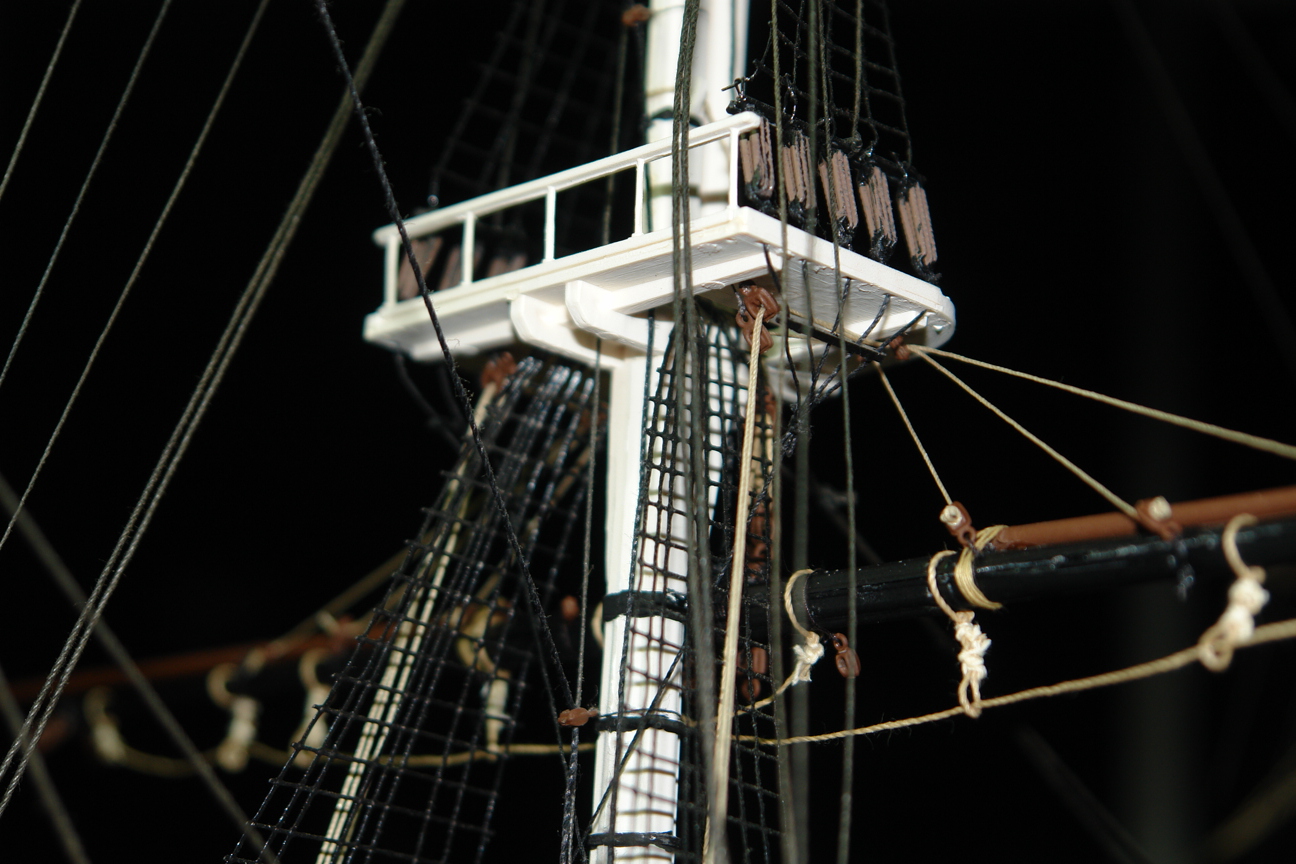
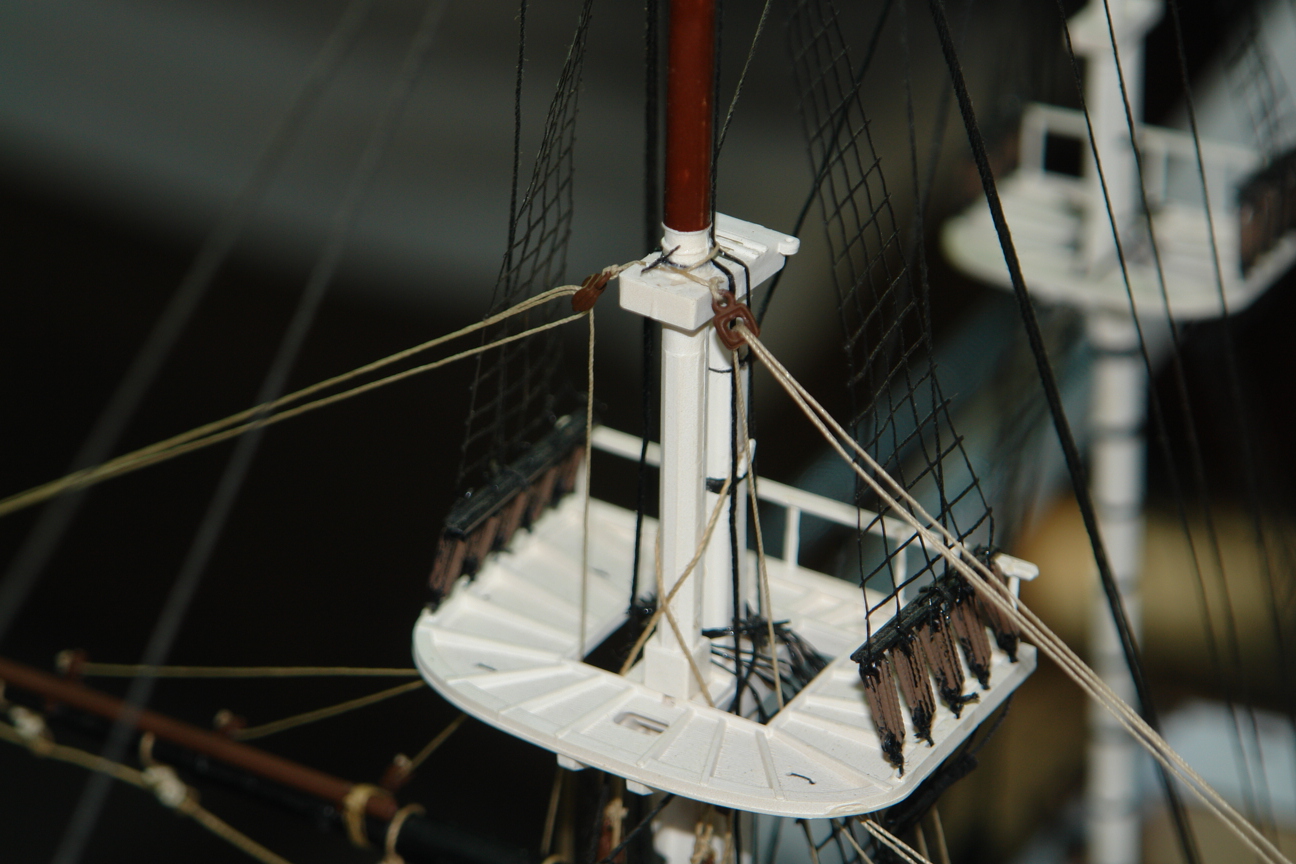
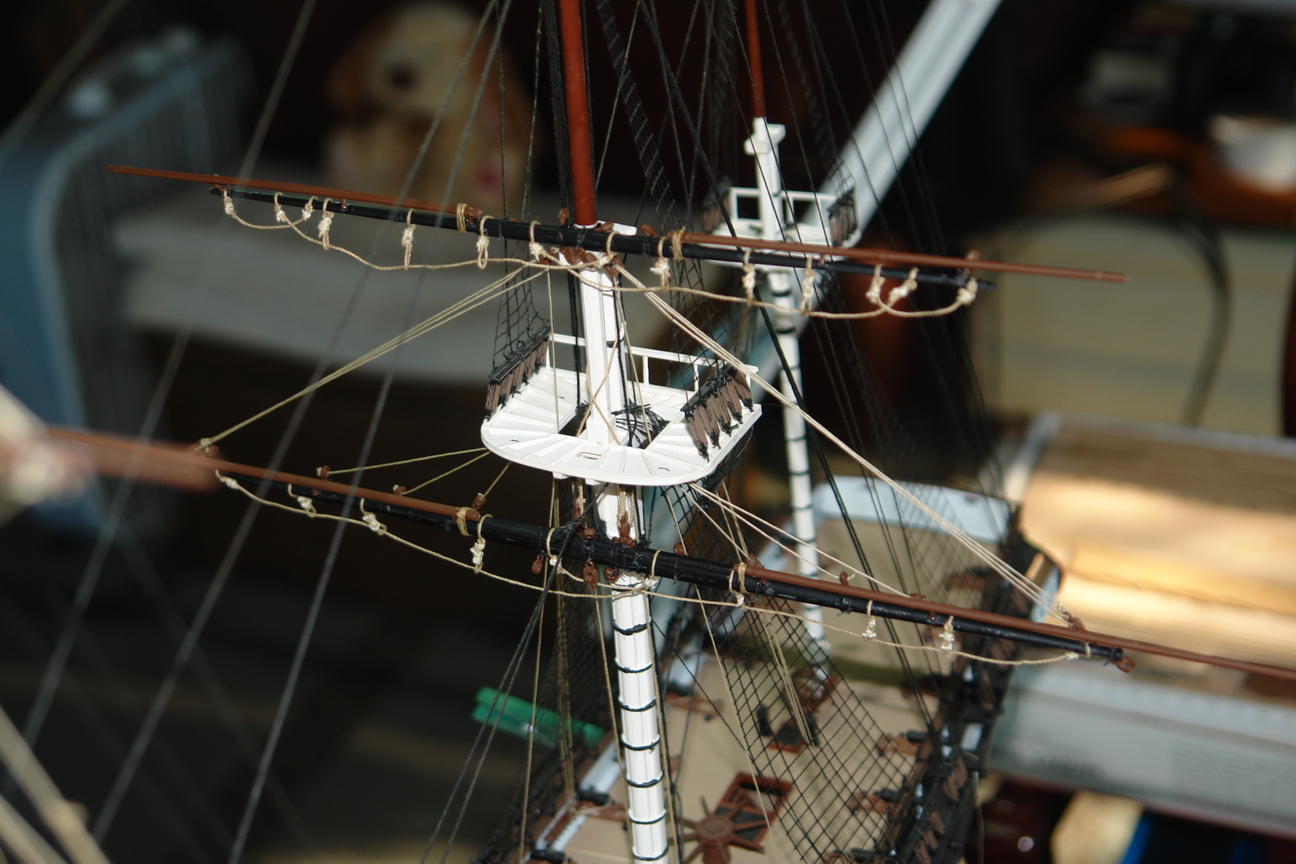
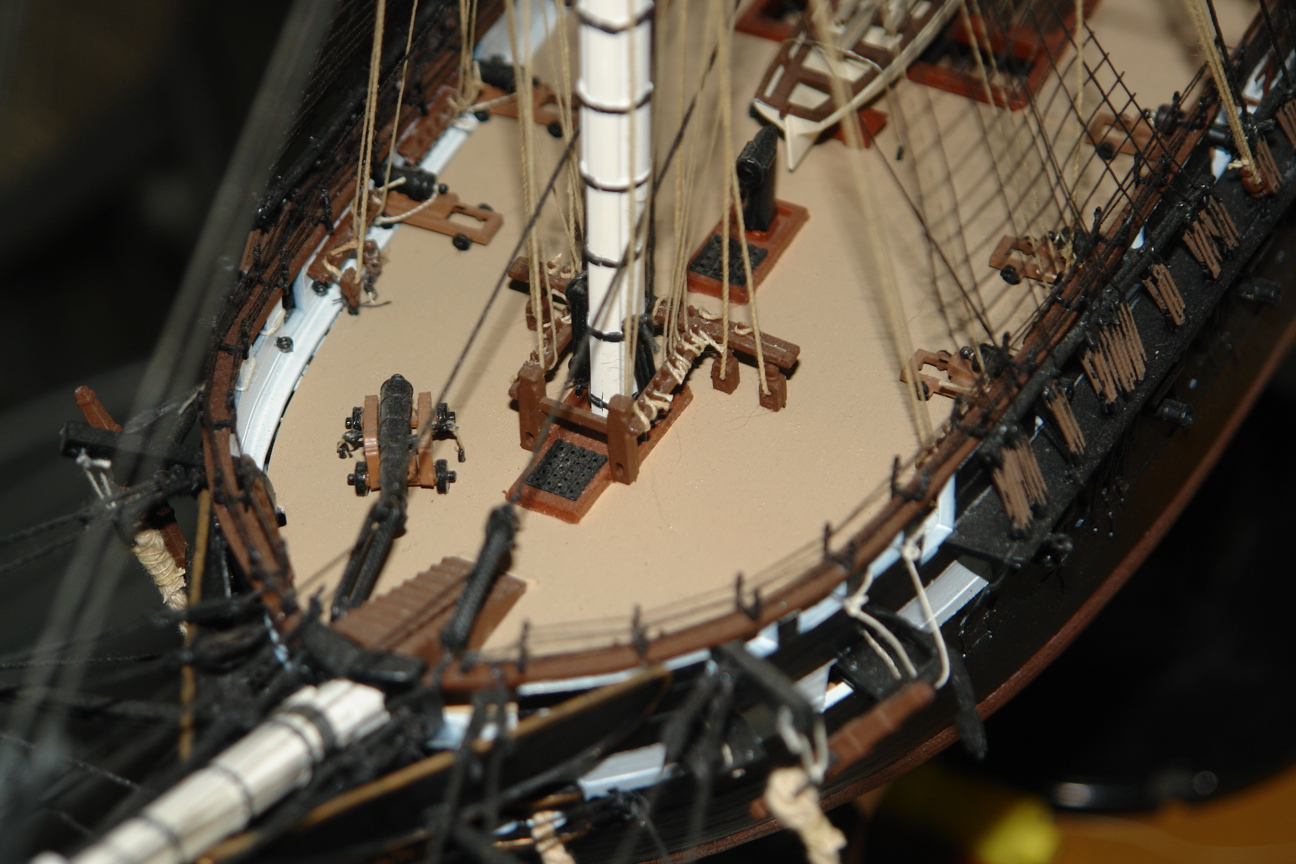
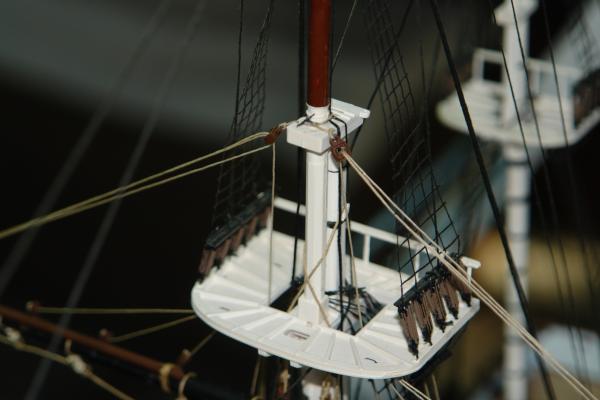
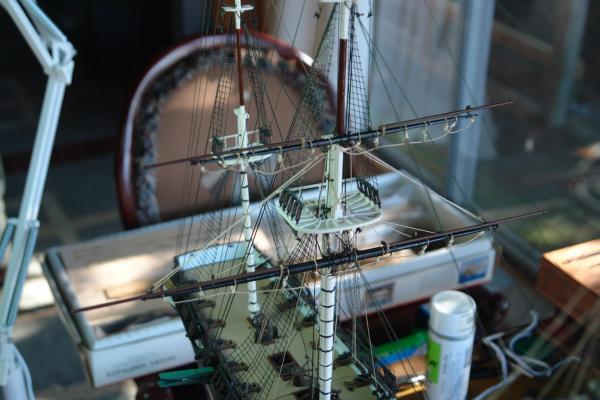
OK, today (in between watching the events in Boston - so sad)....worked on Connie so I could work inside, finished running Mainyard Lifts, knocked off the Standing Rigging Backstays on the Main....quite a bit of foul language practiced...made repairs from big fingers, and hung the Main Topsail Yard....things should move quicker after these have been done....and I don't knock anything else loose....lol...I can laugh now that it's back together...at least progress is progressing...I think. Here's a couple of more pictures.

- 153 replies
-
- 1
-
-
- constitution
- revell
- (and 2 more)
-
Thanks for the info, after losing my other files and photos of the build I intend to try to back up these logs on both a external hard drive as well as online. I'll experiment and see what works.
-
Hi JP, I"m mostly working directly off the plans, and dry fitting all the parts until I'm satisfied with fit and form. Just mostly playing right now trying to get something that looks like "progress" for my feeble mind...lol...So far, it appears to be pretty good, but not thoroughly checked out yet. Thanks for the tips...
-
Well, I have broken out the carpenter skills to start working on the bulkheads today. Did some block shaping for the fillers as well, and overall pretty pleased with the results. I built the Model Airways Sopwith Camel a couple of years ago, so got the hang of working with the wood and small parts. Got more work to do to make sure all is right before gluing the bulkheads to the keel.

-
Hey, keep it up.....keeps me entertained....lol
-
Thanks Keith, I'll revisit the site in a little bit to figure out where I missed it...
-
I'm not sure I got it right, but I did get something. It looks different from your link, so I will probably go back to see what I missed.... thanks for the info
-
Thanks for the link, I'll check it out right now.
-
Thanks JP, cudos appreciated...
-
Yeah Daniel, not a good day.....she also took out a 90% completed Revell Cutty Sark not a good day at all.....divorces can get nasty....
-
No Daniel, the entire ship wash completely destroyed....like a small pile of garbage consisting of plastic fragments and wadded up string...couldn't even make a diarama of a wreck out of her...revenge of the witch...So I started completely over with a new kit...with the other winding up in Davy Jones' Locker....
-
Hi Andy, yes, you are ahead of me at this time. I am hanging the masts as I go up, trying to finish the lower lines before moving up to the next yard hoping to create a little more room for clumsy fingers and wildly flying tweezers. With reference to the above post by RadMan, how do you backup your build logs? This looks good, and you will be finished way before me...lol..keep it up and post pictures...looks great! John
-
No, I hadn't seen that yet, I'm not that far along yet, but it would probably be easier to drill now rather than later. Let me know when you do this and I'll do the same. I also think that I would possibly have gone to the trouble to drill out and replace the all of the belaying pins with brass ones that would make it much more substantial as well as make it easier to rig. Probably a lot of work, but also might have been worth it. Same goes with the eyebolts - I think they would be stronger and would have eliminated much profanity along the way....
-
Thanks Andy, I am following the directions for doing this, and wish I had changed a few things along the way, however, it is way too late now. I would have tried to mix wood and plastic on this with a planked wood deck, and I would have used wire footrope stirrups for a more scale look, also I should have painted the bulwarks green like on the real ship. I've been on board her a few times, but lost my pictures, and since the instructions said to paint them white I did it that way. I think you are ahead of me in your rigging, so I'll be referring to some of your pictures too. I'll try to post a few more of where I'm at with this before I proceed. Your model is quite impressive and I appreciate your pictures.....