HOLIDAY DONATION DRIVE - SUPPORT MSW - DO YOUR PART TO KEEP THIS GREAT FORUM GOING! (Only 69 donations so far out of 49,000 members - Can we at least get 100? C'mon guys!)
×


AndyMech
-
Posts
363 -
Joined
-
Last visited
Content Type
Profiles
Forums
Gallery
Events
Everything posted by AndyMech
-
I started work this weekend on step 2 of the running rigging instructions. Sheet and Clew lines. Since I'm building without sails, the instructions state these lines were tied in place and left up on the masts. I finished the foremast and started the main mast before quitting for the day. Andy.
-
The Revell rigging instructions are pretty good on this point - smaller rigging higher on the masts. Where I believe they fall down a bit is in resource management - they don't provide enough rigging line to rig as intended. They also only specify large and medium for the duration of the running rigging. So I'll plan on using the "small" thread where I can as I have lots of it in order to preserve the medium/large (sorry, don't have the actual measurements). I would also claim that telling the difference between their medium and small, once it's on the ship, would be something hardly anyone could determine. Still, I like to do it as correctly as possible. Andy
-
I finished step 1 of the running rigging this morning - the three royal halyards. Here's a photo of the main mast halyard - these were pretty easy as expected. I used the small tan thread instead of the medium size as I'm trying to conserve resources and a little variety in the sizes couldn't be a bad thing, I hope. Andy.
-
This is the first I've heard of a CA allergy. I've noticed myself that after a day of rigging my ship, using CA in very very small amounts to stiffen lines or prevent unraveling before cutting, that I have trouble sleeping due to nasal congestion. It goes away in about 24 hours. My typical technique for using CA is to put a single drop on a piece of clear plastic, then use a pin to transfer a small amount to a thread end about to be trimmed. I also dip a thread end into the CA to keep the end from unraveling. Is it possible that even this small amount on could cause an allergic reaction? I guess I do use my fingers to wipe off excess from the pin or thread. I use diluted PVA (white Elmer's) to hold knots tight. Any alternatives to using CA to prevent ends from unraveling? Andy.
-
Thanks all, I go slow, but try to make steady progress. I have the day off work tomorrow, so may finish the halyards - only the top royal to do, and it has no blocks. Next up, the sheets and clew lines. Since all the yards are blocked, I hoping this goes well. Andy.
-
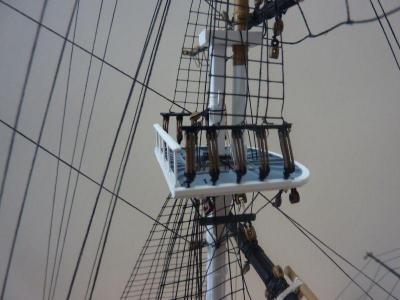
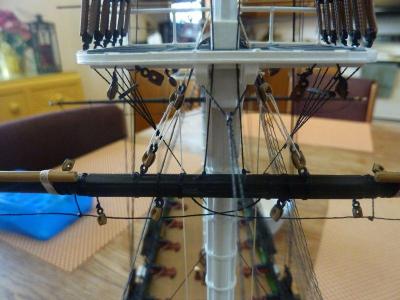
I only had one day this weekend to work, but I feel I got a lot done. I had finished the main mast lower halyard on Tuesday, and today completed the mizzen mast lower halyard. The mizzen was easier as it was just one side, there was no balancing the left and right sides. Mainmast: Mizzen mast lower halyard: I had some confusion on where to put the blocks on the mast tops for the top gallant halyard, and I ended up drilling a small hole in the top near the railing to tie the block: Next, I was able to rig all three masts top gallant halyards:

- 246 replies
-
- 1
-

-
- revell
- constitution
- (and 2 more)
-
Thanks - and I look forward to seeing your build as well. On Tuesday, I got the main mast lower yard halyard done (no photos). I mis-measured the length of the line that goes through the block and ties to the pinrail, and I cut both left and right to the same incorrect length. It was too short by a couple of inches, so I used a sheet bend knot to tie an additional length on to allow it to reach the pin. It's funny, I thought the error would annoy me and I considered removing the line and replacing it with the correct length, but somehow a little flaw like that added some personality to the build. I would imagine, once the ship is completed, that it will be quite difficult to notice. I will know it's there. Photos this weekend, I'm sure. Andy.
-
U.S.S Constitution - Revell - 1:96 - decking
AndyMech replied to lambsbk's topic in Plastic model kits
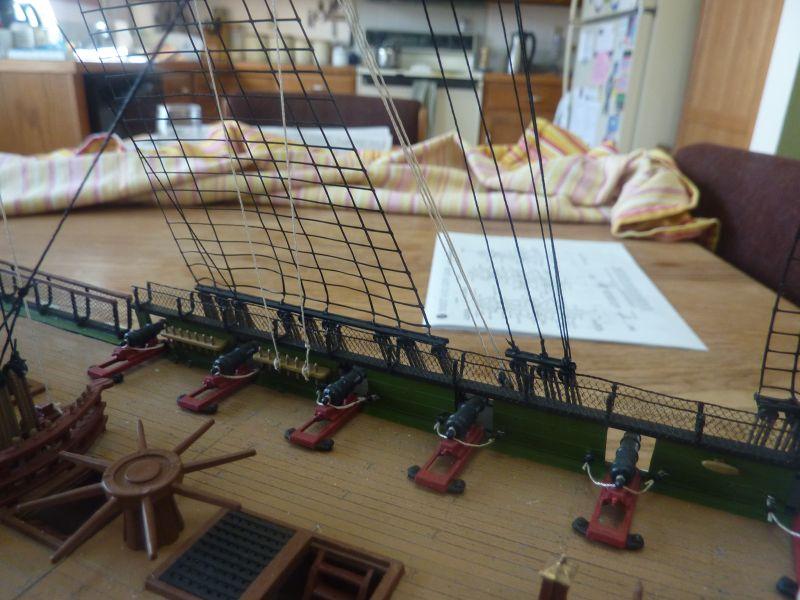
My understanding is the gun deck floats to allow some leeway for the masts to be installed. I followed that instruction on my build and had zero issues getting the masts straight. The gun deck float is pretty small - it's a naturally snug fit which got even tighter once the main deck was in place and I squeezed the hull together when gluing that in. I vaguely remember some issue with the gun deck moving in relation to the hull - two guns span the seam between the middle piece and the stern piece, causing one side of gun carriage to possibly move in relation to the other, but no canons came loose so I think the movement is really rather small. When I installed the top deck, I made sure the bow piece was flush and as far forward as it could. The rest of the pieces were then placed flush, resulting in an unfortunate gap near the stern. I saw no easy way to remedy this, but a more skilled builder than I probably could have extended the stern main deck piece to eliminate this gap. Andy. -
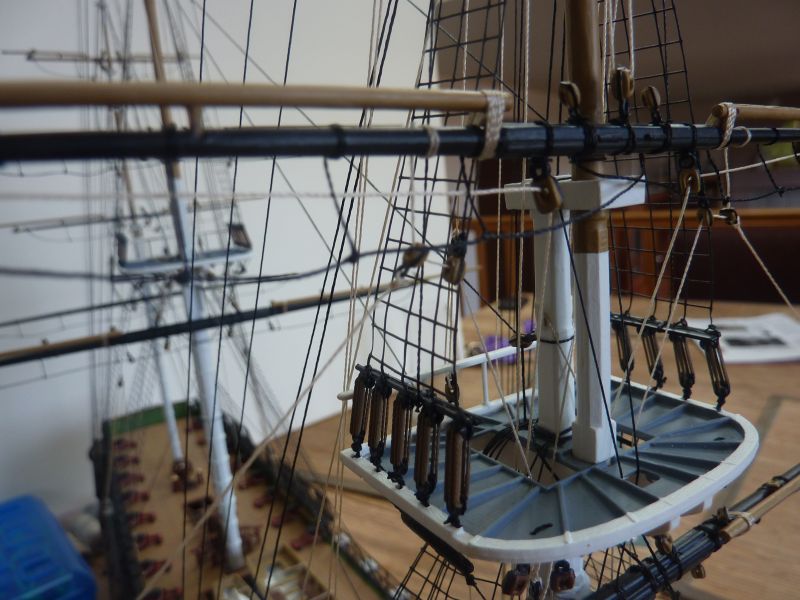
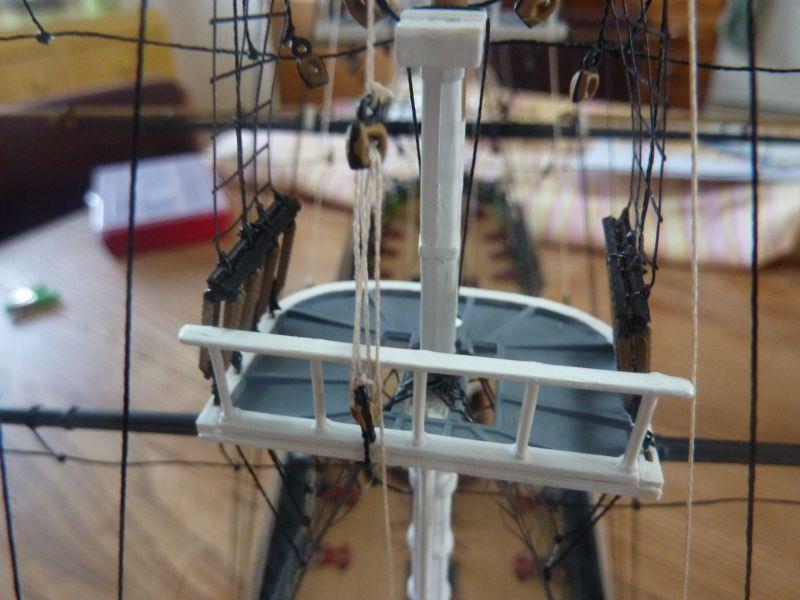
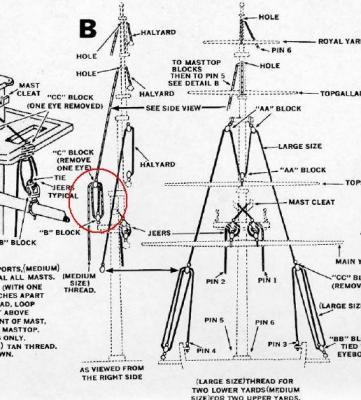
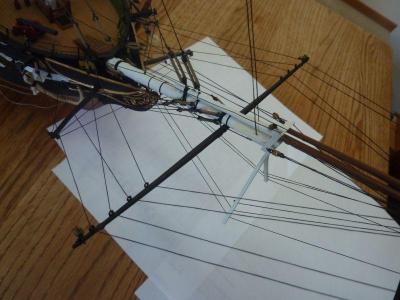
Thanks for the reply - I will take a look at my tops tomorrow and see how that geometry works out. I may like that better than drilling a hole - I'm not sure how easy it would be to drill one, and and you noted there are a lot of line in the way. I'm curious about the royal halyards - the Revell instructions don't have that halyard going through blocks. It seems to me it just drops straight down to pin 6 for the foremast (12 for the mainmast), without going through a block structure like the topgallant halyard does. Yet, you mention tying a block to the mast top for the royal as well. (If I can avoid tying a second block there, it sounds good to me!) Thanks again, Andy.
-
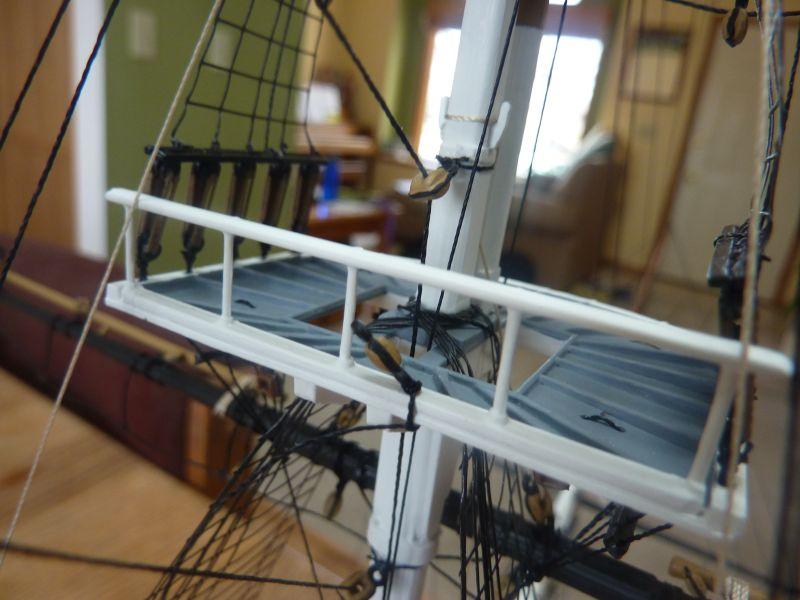
Hi Jose, Thanks for the response - I will take a close look at my yard attachment to see which method I'll use to tie the line there. Once that halyard line goes through the hole in the mast, it's supposed to go through a set of blocks (as the picture on the previous page of this log indicates). My more burning question is where do I attach the block that appears to be tied to the fighting top (or mast top)? There's a railing in way and no built-in mounting point. I think I'm tempted to drill a hole in the top just behind the railing so the tied block leans out (as it were) through the railing. I'm curious to know how you solved that problem? Also, is that block in-line with the mast or off to the side somewhat? (A photo might help - hint, hint). Thanks, Andy.
-
Thanks Russ. Should this halyard block be inline with the mast or off to the side? The line is eventually secured to the right side of the ship, so should the block also be off to that side? Andy
-
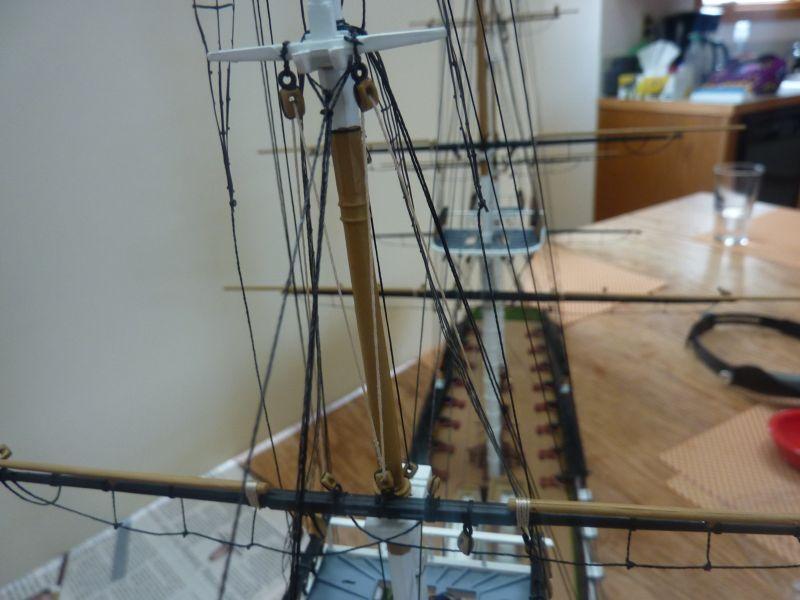
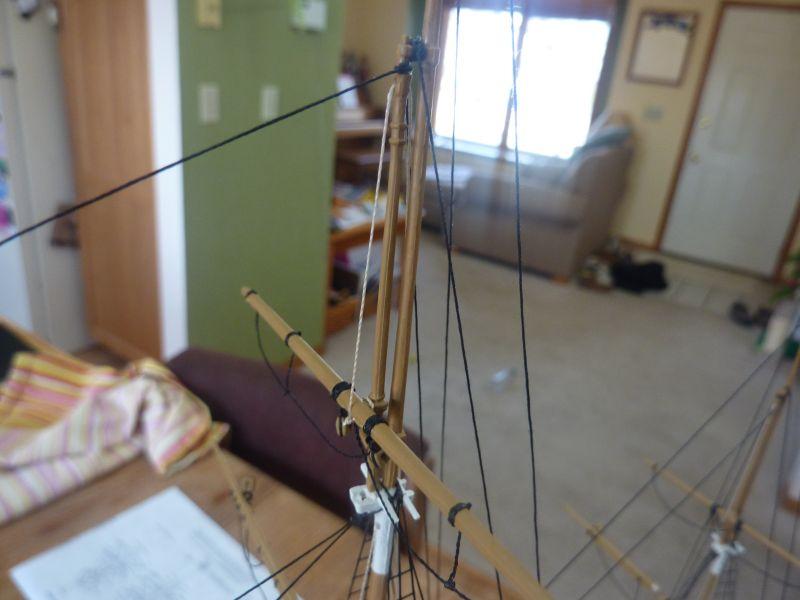
I added the first halyard to the foremast.

-
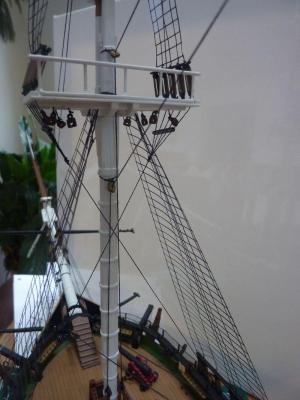
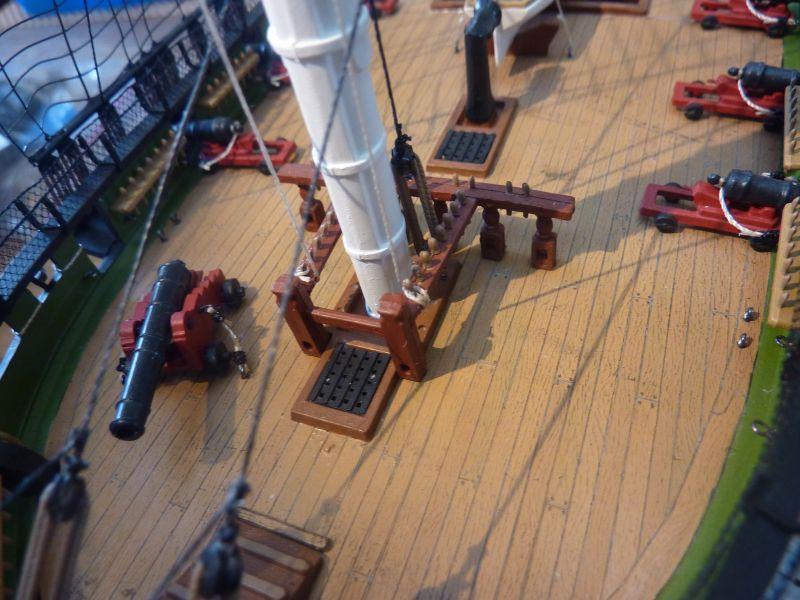
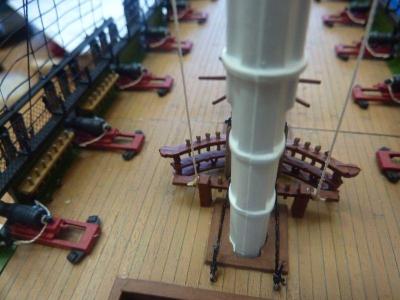
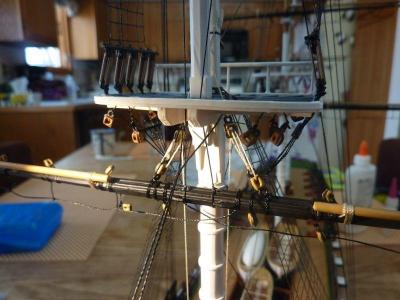
I'm currently working on step one of the running rigging - halyards and jeers. The upper halyard is tied down to the deck through what the instructions call the masttop block: Here's a picture of my masttop (foremast). What I can't figure out is where to tie the block? To the railing? There seems no other hole in the masttop to tie this block. Andy.
-
I don't have much experience in RC models, so I wouldn't have the best ideas on how to convert the Revell model into RC. If you would like the standing rigging to serve more functionally, I would recommend replacing the pre-formed ratlines and doing your own shrouds and ratlines. The pre-formed ones don't do much to stabilize the masts and are pretty much ornamental. You also might want to replace masts and yards with wood instead of the bendy plastic, especially the smaller pieces in the upper masts. Andy.
-
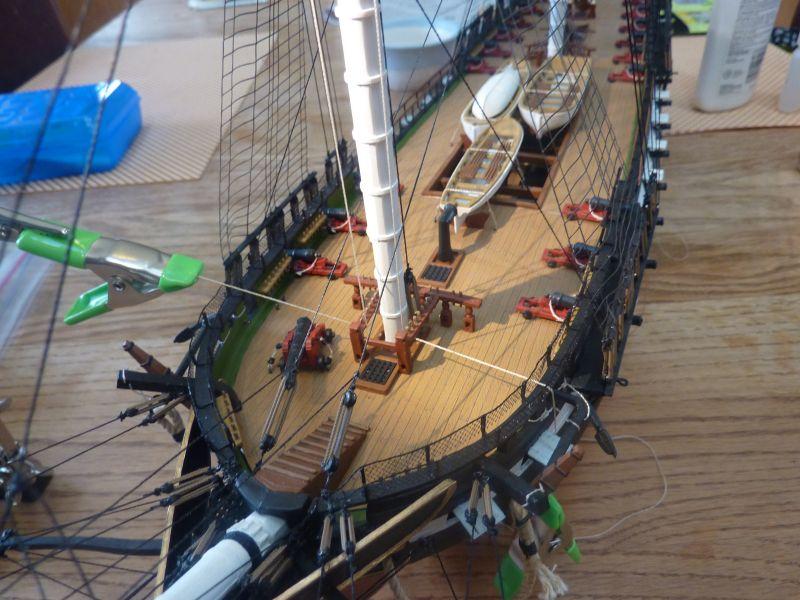
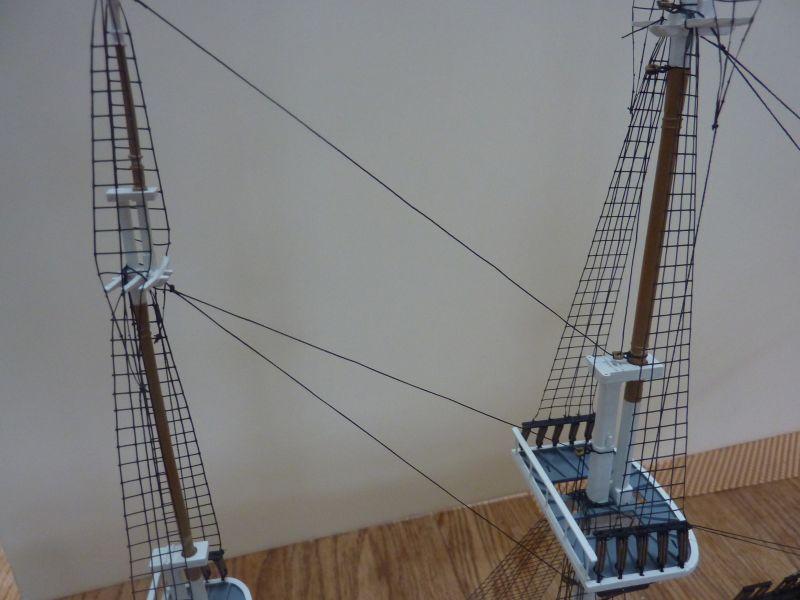
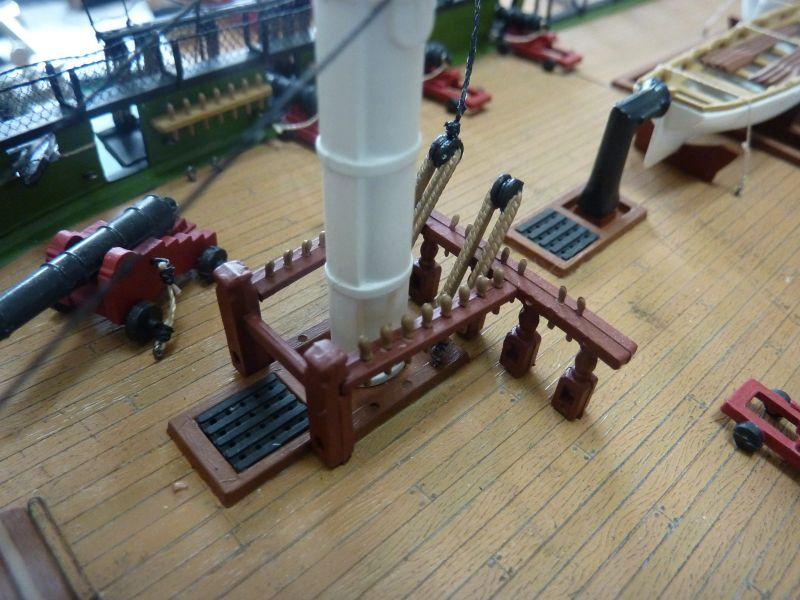
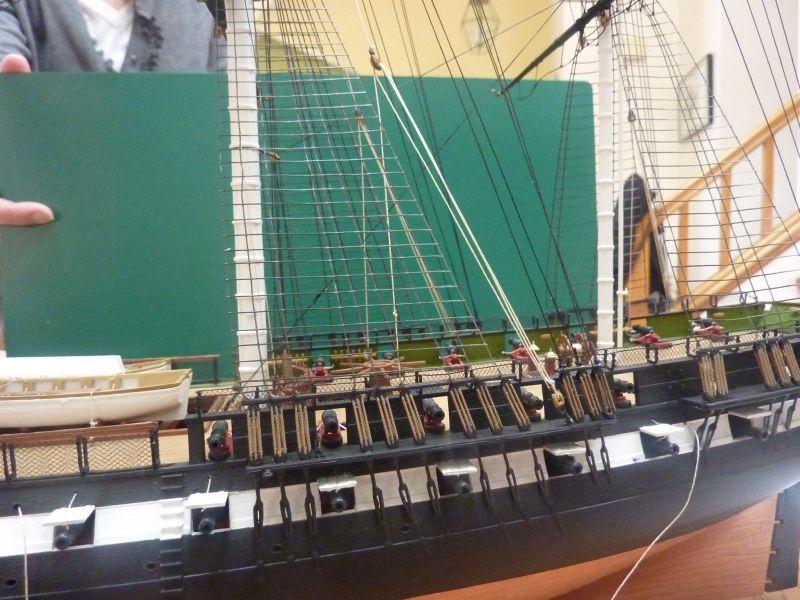
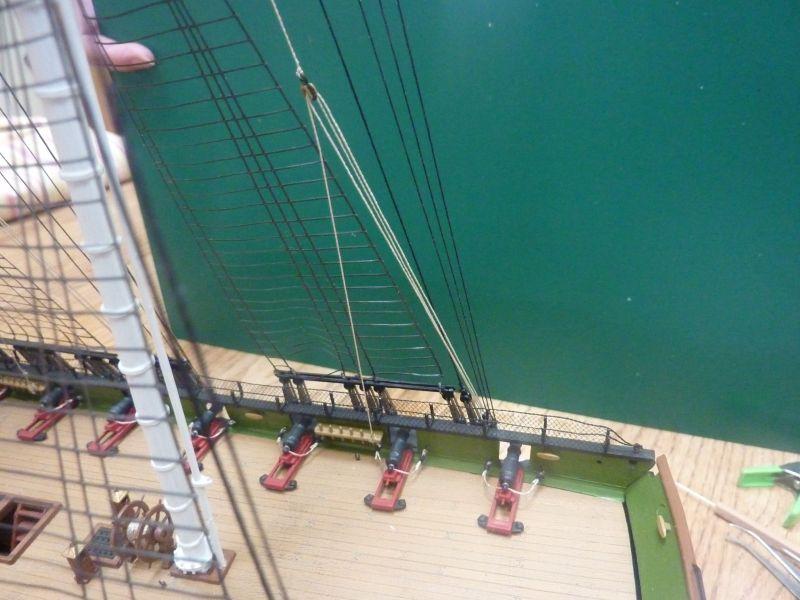
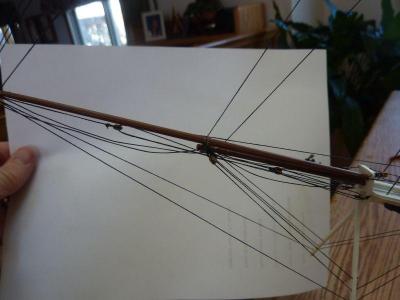
As promised, the main mast jeers. I spent the rest of the day today tying blocks to the crosstrees and chainplate ledges in preparation for the halyards. FYI, for anyone following the Revell instructions, the mizzenmast halyard apparently only goes to the starboard side, and I re-used the same eyebolt used for the backstays. The other two masts had a free eyebolt just ahead of the backstays. I hope this is correct. The mainmast jeer drops and is tied to the railing - there is no pin to attach it for some reason.
- 246 replies
-
- 1
-
-
- revell
- constitution
- (and 2 more)
-
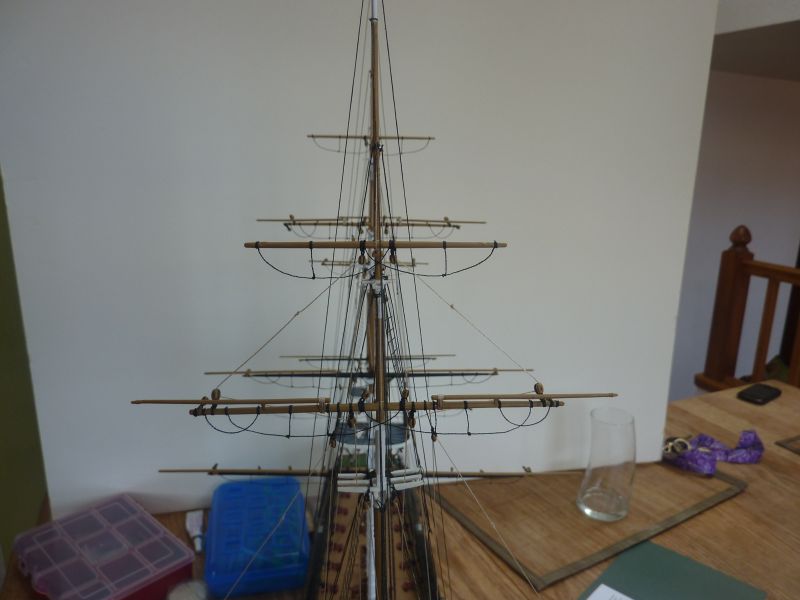
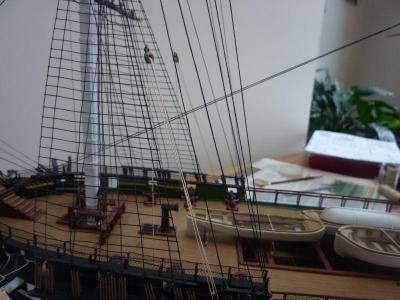
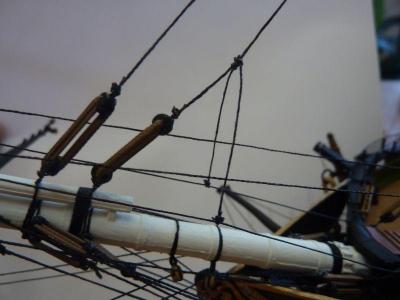
I finished adding the yard supports on all three masts -- only for the lowest yard. Next was adding the jeers. I started with the foremast. The instructions call for the jeer blocks be 3 1/2 inches apart. I found that 3 inches (for the foremast) was a better distance - maybe 3 1/8, but it allows for a better separation between blocks. See for yourself. Next up, the jeers on the mainmast. Andy.

- 246 replies
-
- 2
-
-
- revell
- constitution
- (and 2 more)
-
Thanks Augie -- I'm following your Syren build (as you may have noticed). I have the kit on a shelf, but I will finish the Constitution first, and then probably some smaller wood kit before I tackle the Syren. Your build is quite inspirational to me, so thanks for that. Andy.
-
Yes, it would have been nice to have the saved copy, but I did find 90% of it on Google Cache (so much searching I got locked out of it for a while). I had all the photos I posted in a saved location, so re-creating it was simply a matter of time. I'm glad to see people are appreciating the build. Thanks to everyone, and now maybe I should get back to work on it - I have the day off work and very few excuses. Andy
-
Thanks for the photo offer, but I think I'm good. I found a batch of photos a while back that I've been using, and now that the running is underway, I think I'll be relying on the instructions more than anything else. Thanks though, and thanks for following the build. Andy
-
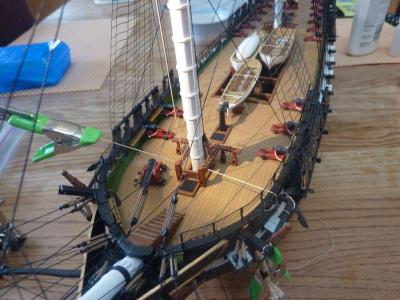
Last weekend, I added the yards, all 12 of them, to the masts. I also did a slight bit of touch up painting. where the yards are glued to the masts. This gets us caught up to present time. I'm tired, so I'll work on the ship tomorrow. Andy.


-
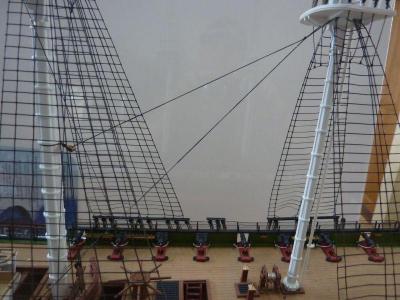
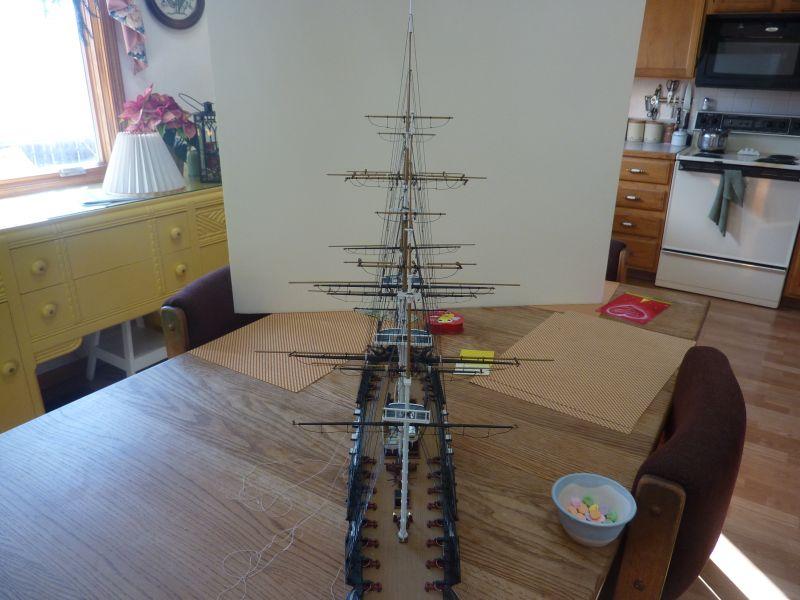
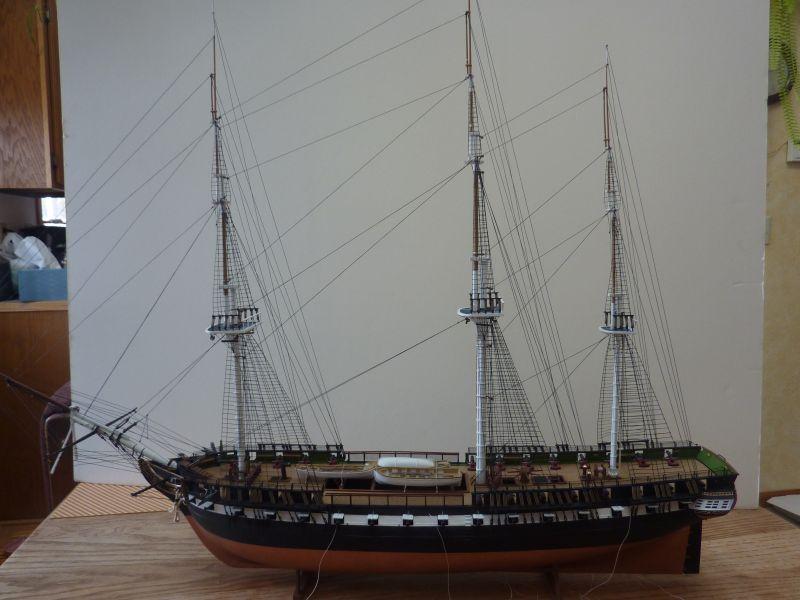
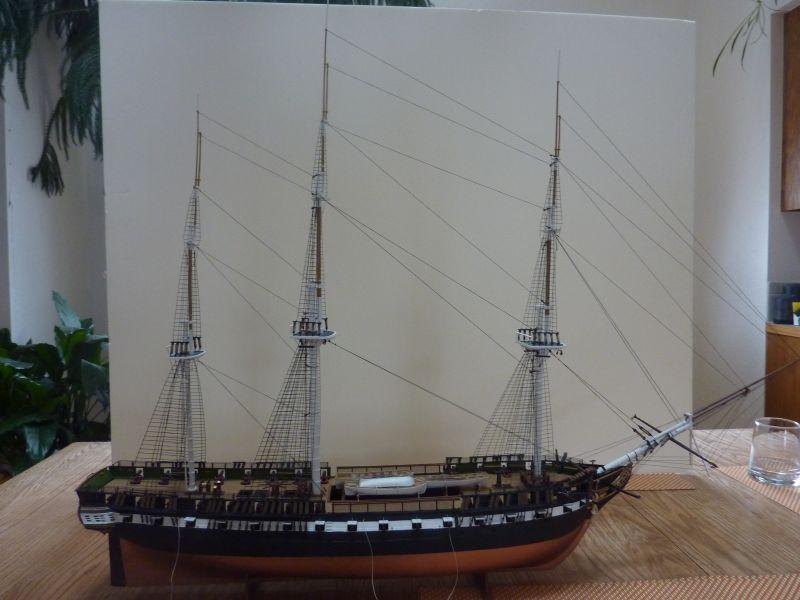
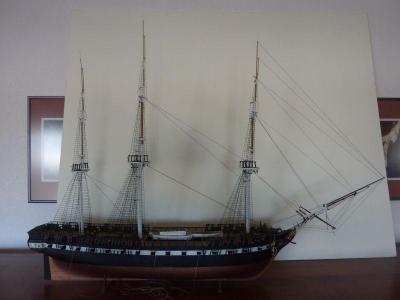
Finally, the standing rigging was completed with the addition of the backstays. Bowsprit final:

-
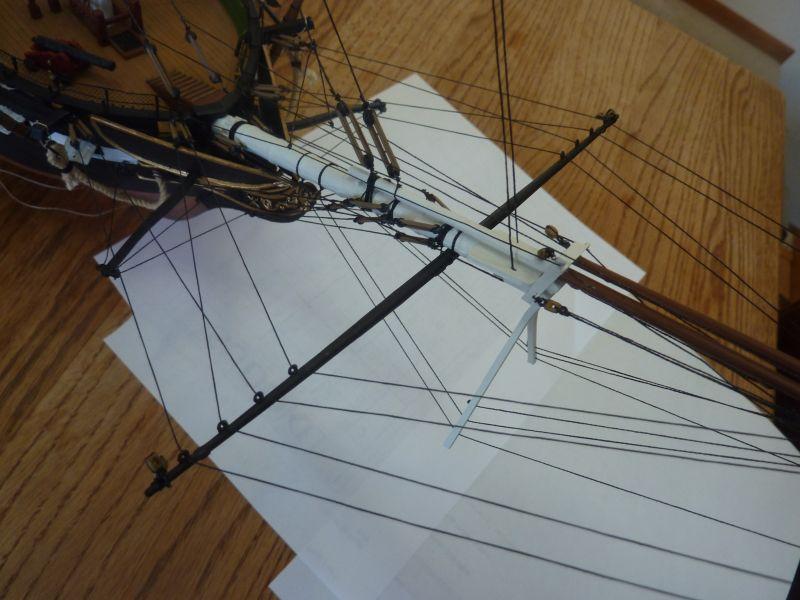
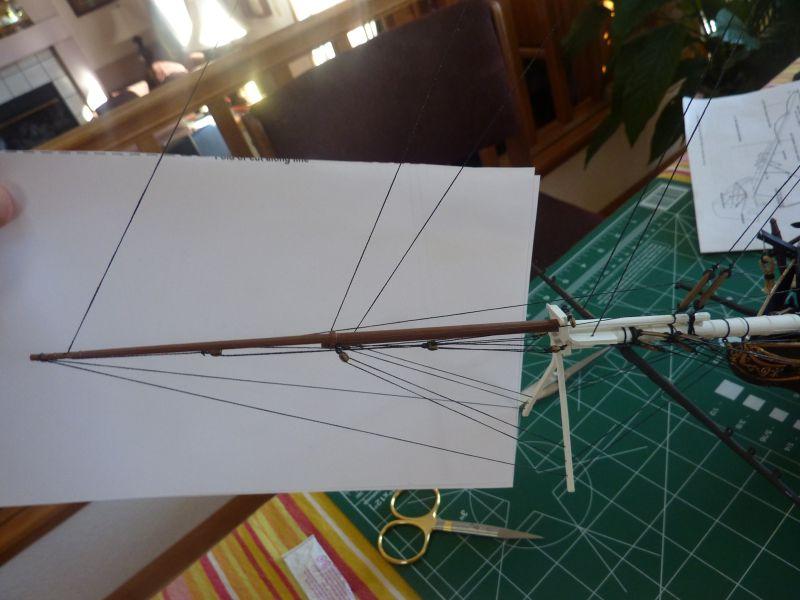
I finished step 5 of the standing rigging - the manropes and boomkin guys on the bow. No real comments - it was a straightforward set of ropes, easy to get taut. Doing footropes again was fun, and getting the right amount of sag not too difficult. I stiffened the lines with 50% dilute white glue.

-
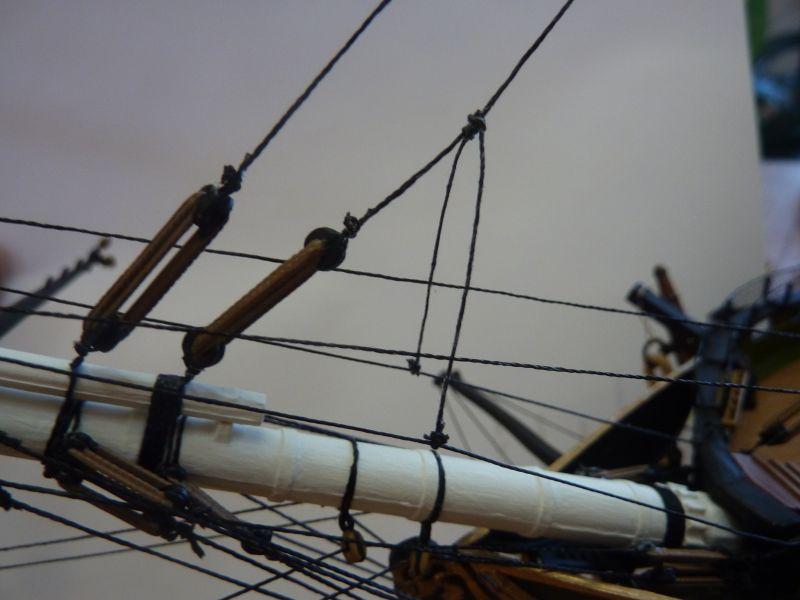
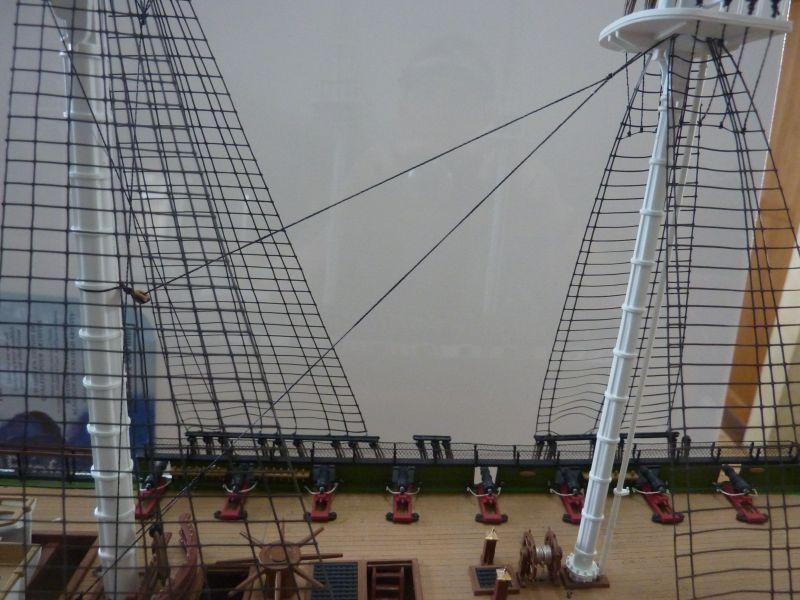
Waxing the lines with beeswax makes such a big difference in how the lines feel and tighten. Finally, I'm just about out of my medium size black thread. I'm not sure if other Revell Constitution builders had this problem or not. I ordered and received 30 yards of 0.012inch thread from Model Expo, that should be enough to finish the standing rigging. I finished the forestays today - connecting the mainmast tothe mizzenmast. The mizzenmast is very slightly out of vertical now, but only slightly so I will leave it as is. Again, hopefully the backstays will correct it somewhat.

-
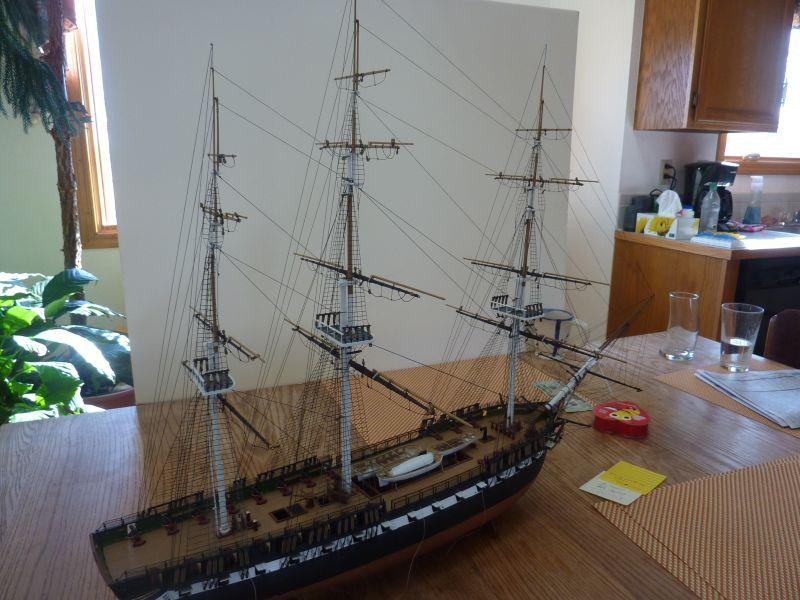
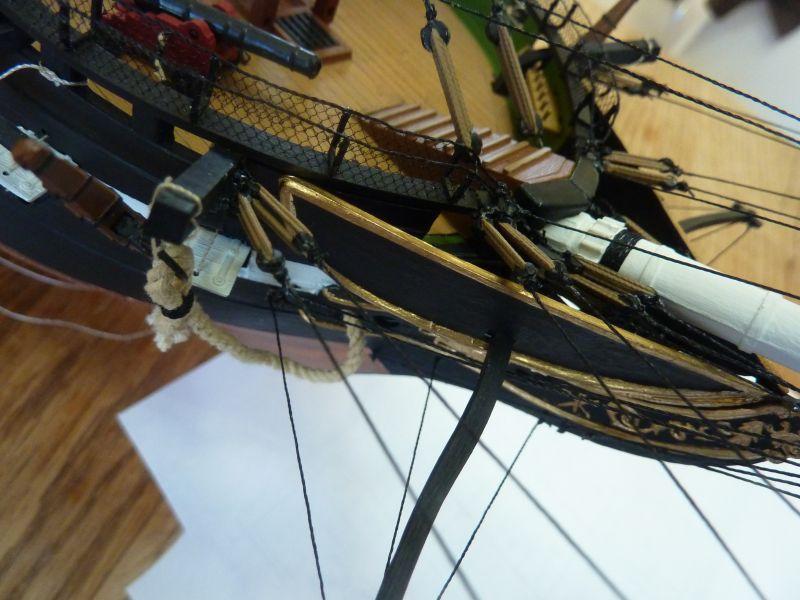
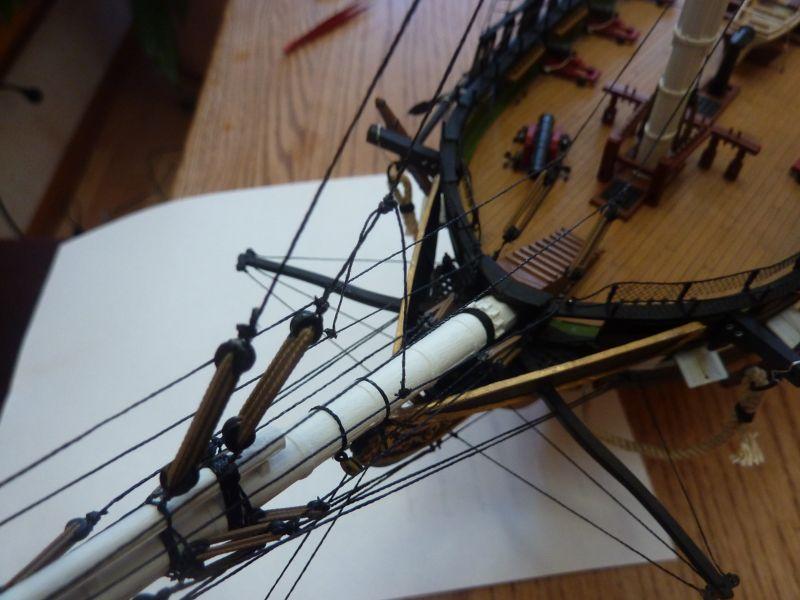
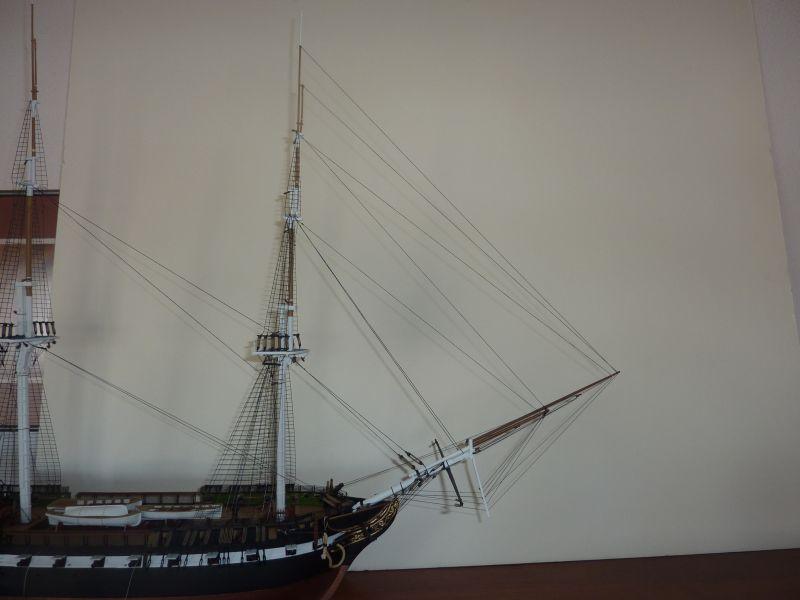
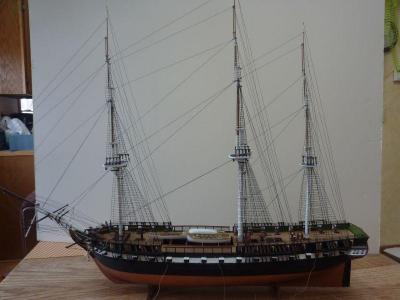
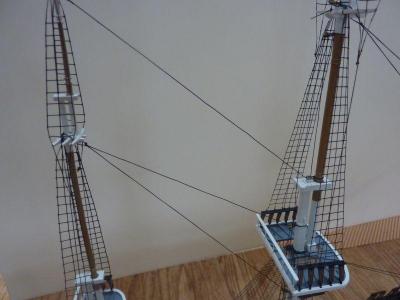
I complete the foremast forestays: Jib Stay Fore topgallant stay Flying jib outhauler Fore royal stay Flagstaff stay (I get these names from the instructions, I certainly hope they're correct). The only difficult part is the getting the tension just right -- to much and it bends the masts (which it may have just a bit), too little and the lines are slack. I'm using simple overhand knots or hitches for these. I've also decided to forgo doing the forestay ladder rigging as the photos of the current Constitution don't show them and I personally don't feel they add much to the look of the model. Closeup of the block rigging on the jibstay and flying jib outhauler. This is detail O in the instructions bowsprit rigging The completed foremast forestays Full ship shot


-
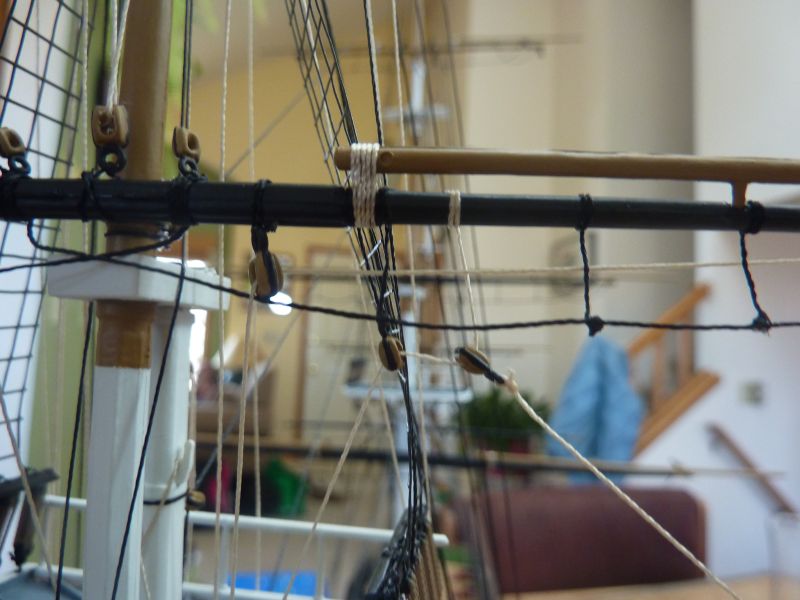
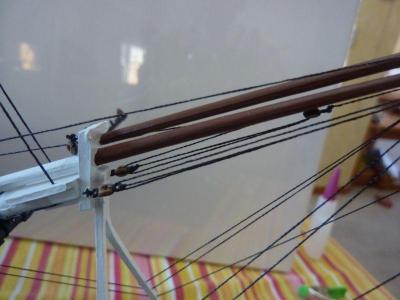
Today I finished the lower forestays for the mainmast and the mizzenmast. It took a full day of work (3-4 hours) for me to prepare the bulleyes and the eyebolts as well as tie the 3 blocks to the masts. Then today I was able to rig the final large thread forestays. Doing the seizing on them was quite challenging due to all the ratlines and shrouds in the way, but I'm pretty happy with the result. A shot of where I had to glue the bulleyes near the foremast - the instructions were not clear, so I used the foremost holes to glue them in. The main mast forestay - here against the foremast. I threaded these behind the futtocks as they were pressing against them otherwise. The completed mizzenmast lower forestay Shows the forestay tied to the rope around the main mast.