HOLIDAY DONATION DRIVE - SUPPORT MSW - DO YOUR PART TO KEEP THIS GREAT FORUM GOING! (Only 69 donations so far out of 49,000 members - Can we at least get 100? C'mon guys!)
×


AndyMech
-
Posts
363 -
Joined
-
Last visited
Content Type
Profiles
Forums
Gallery
Events
Everything posted by AndyMech
-
Hey Terry - thanks. I did buy a set of saw blades a while back for a different project, but they don't fit my Excel knife handle very well at all. I think I'll go back to Hobbytown and see what they have (with handles). A quick search turns up razor saws and jewelers saws, so they should have a selection. Andy.
-
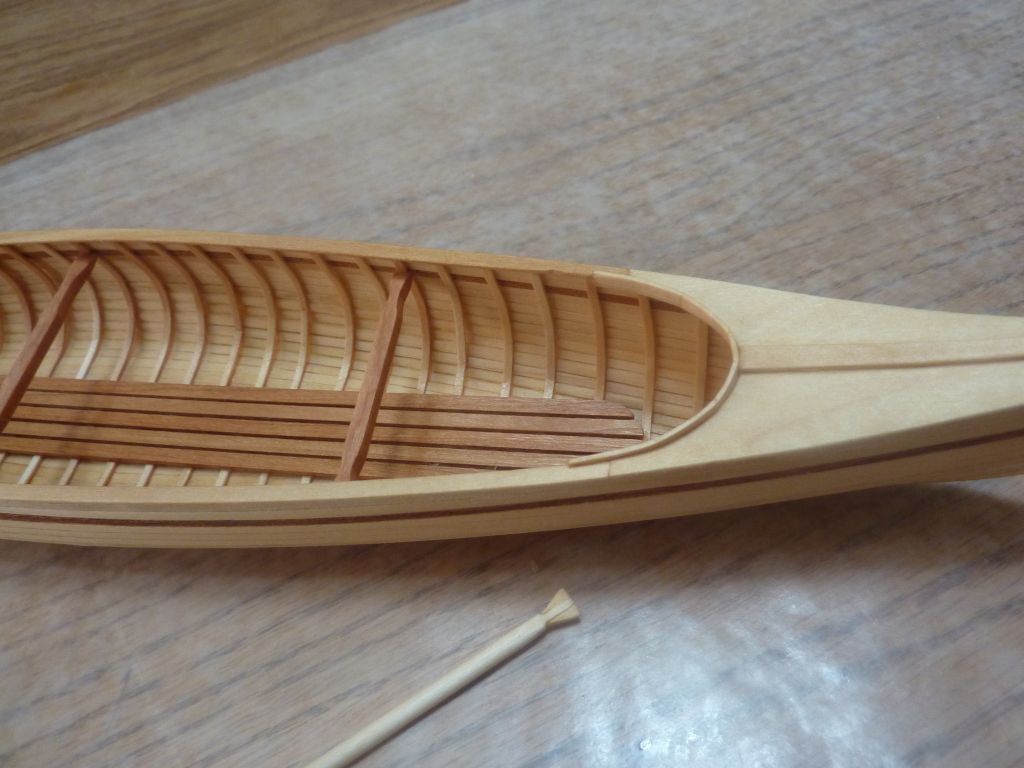
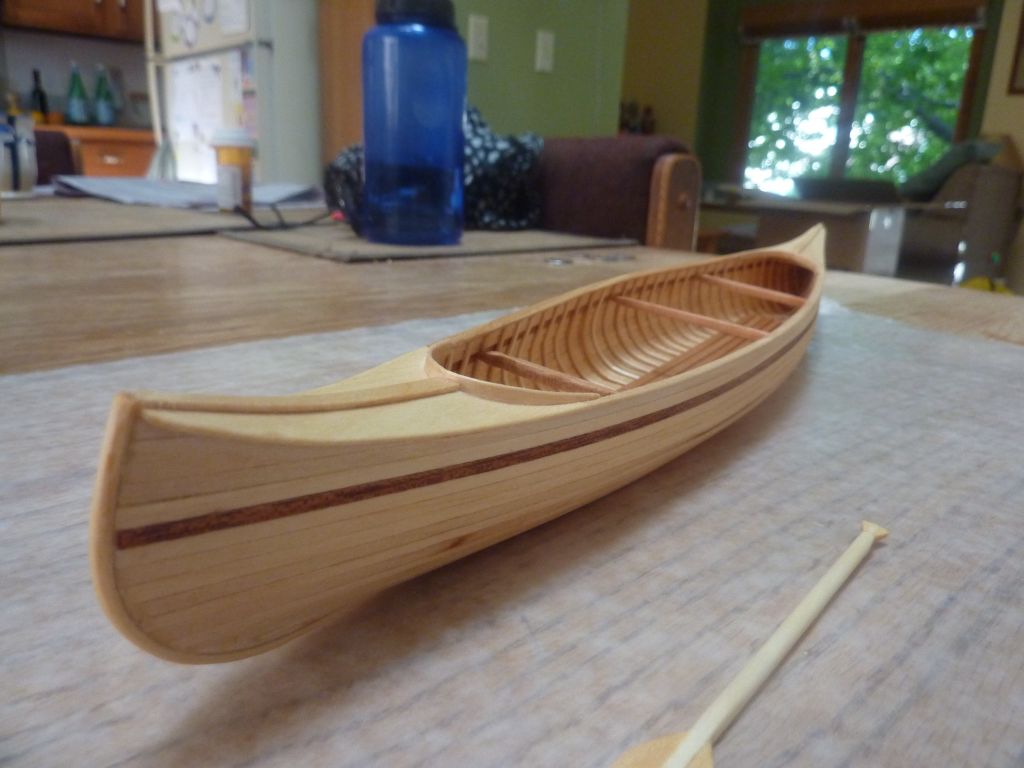
Terry - thanks much about my canoe. I followed Slagoon's log pretty carefully and took my time. Finished in tung oil and really like how it turned out. Andy.
-
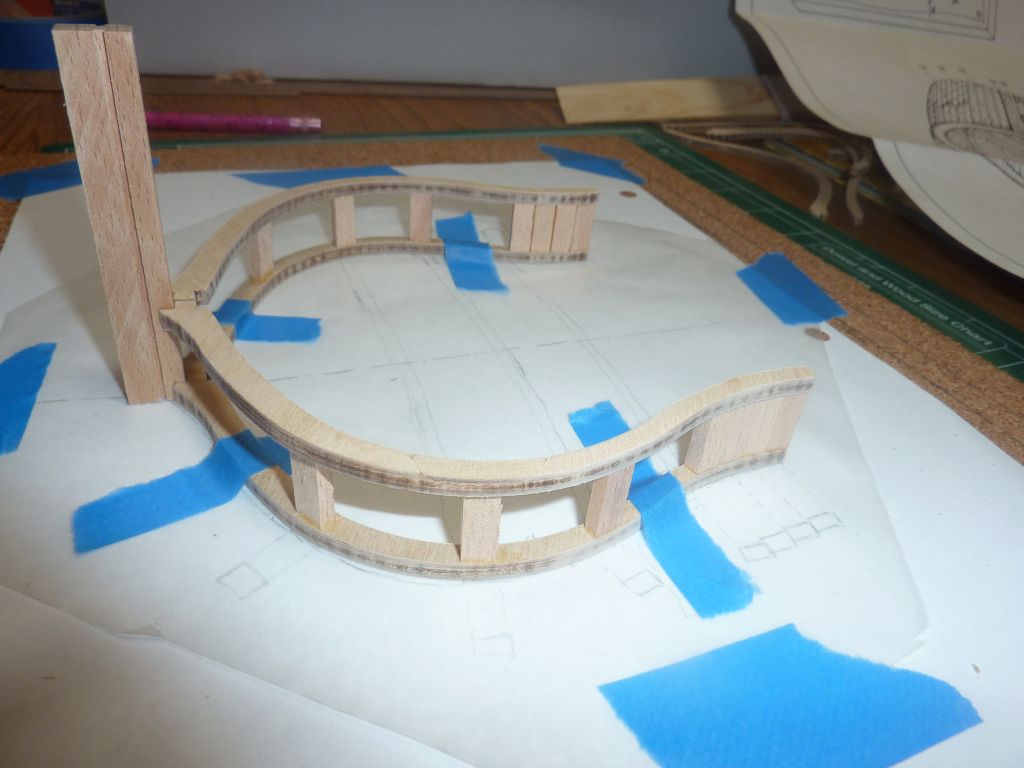
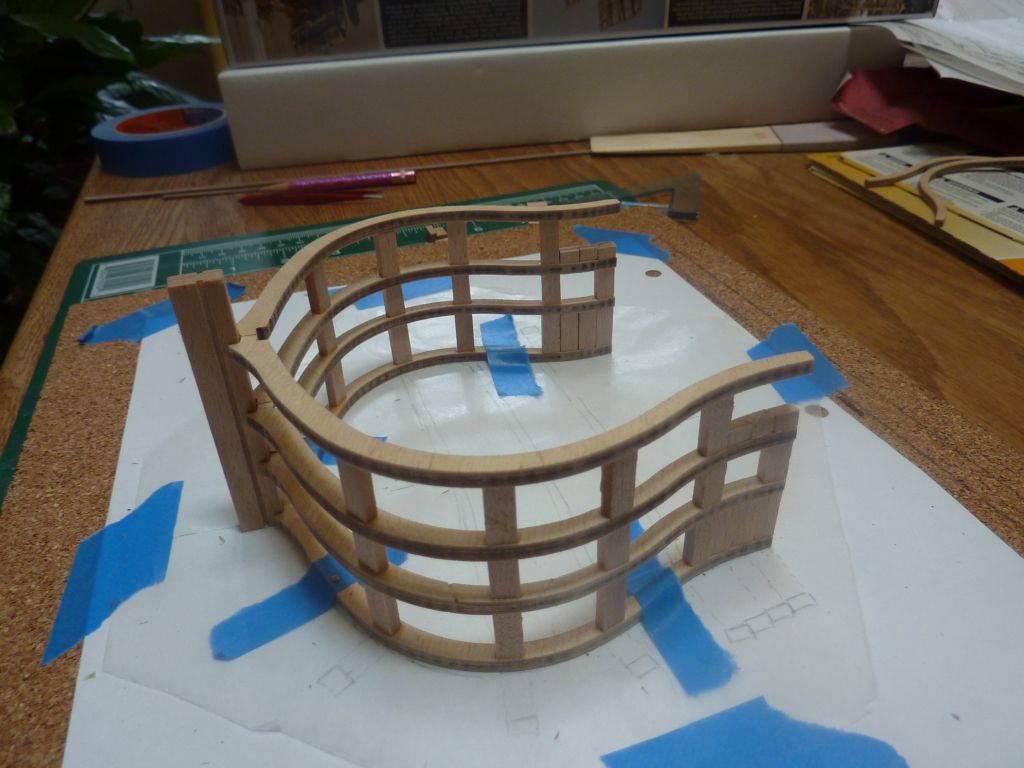
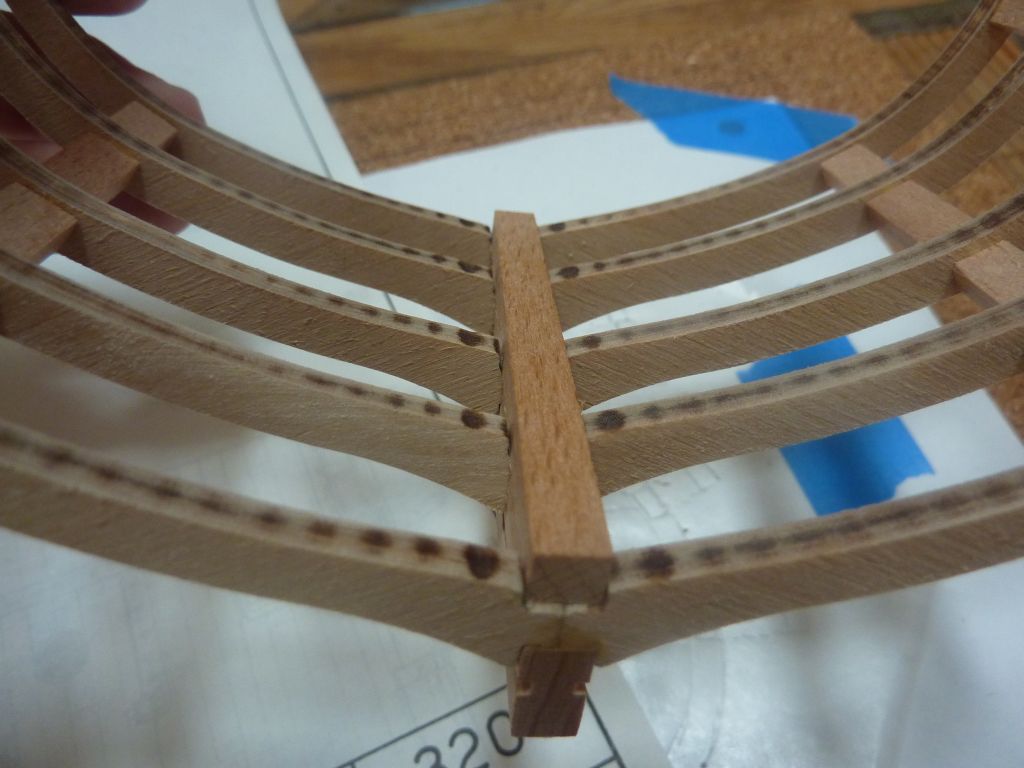
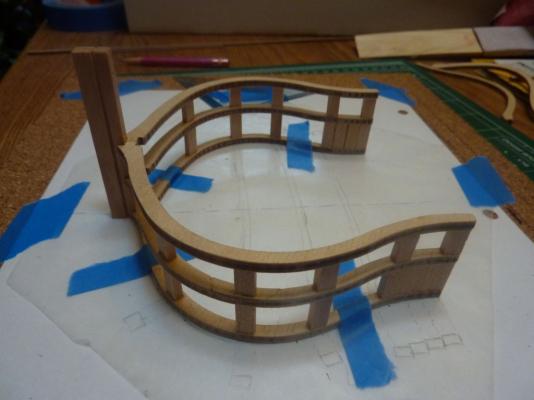
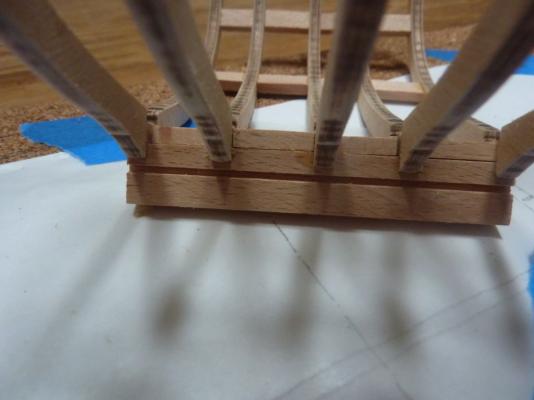
Ok, Into the build - the first steps are setting up the frames. Mamoli provides spacers (although not quite enough). I did find the instructions a bit lacking - I didn't realize the need for spacers near the keel and added them in afterwords. Finally, added the false keel. This is supposed to be 72mm long but was only 70mm, so I had to center in the hull. Not a big deal I don't think. I'm pretty nervous about making mistakes, so I tend to measure 47 times before cutting or gluing. Which brings me to my next wood related question, for anyone listening: I'm supposed to cut a bit off the bulkheads to make space for top deck furniture - I don't think my #11 hobby knife is up to the task. Any tools (saws or chisels) that would make this an easier job? I'm going to be cutting a fair bit as this progresses, so I don't mind buying a good tool, just need to know what that might be. Thanks, Andy.


- 188 replies
-
- 2
-

-
- constitution
- mamoli
- (and 2 more)
-
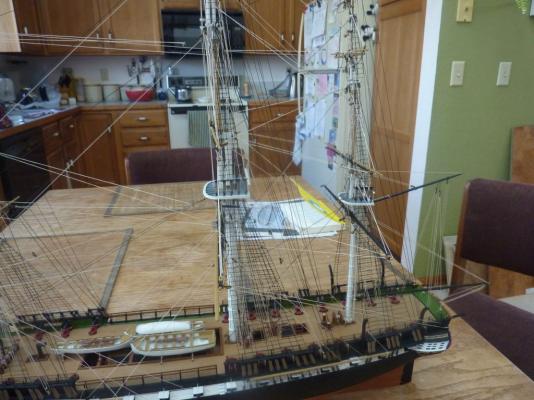
Hey anyone, Since I finished my Revell 1:96 Plastic Constitution in the spring, I've been wanting to get into wood modeling. As I've only been a plastic modeler to date, I was a bit apprehensive as it feels like a whole new skill set (which I don't have). I've done nothing with wood, other than trim a few tree branches along the way. So, with that in mind, my first wood ship was the Midwest Peterboro canoe (at 1:12). It took maybe 6 weeks to do (I never seem to do any of this fast), and here's the result: Next up, I needed more experience. I have a Syren kit "on deck", but don't feel ready to tackle that yet. I felt a cross section would be a good next step up in complexity, as it involves some planking, some deck furniture, some masting, etc. A little bit of everything and with a ship I know pretty well from the Revell model. So, taking advantage of a nice sale by ModelExpo, I purchased the Mamoli USS Constitution Cross Section at 1:93, so very close in scale to my full ship plastic build. I'll detail the build step by step and stick to the instructions as best I can. I'll also be using some fine builds here on MSW to guide my progress. Suggestions and criticism welcome - I'm a wood novice so I'm especially interested in tips, tricks, best practices, painting suggestions, etc. Thanks for looking. Andy.


- 188 replies
-
- 7
-
-
- constitution
- mamoli
- (and 2 more)
-
Mike, Thanks so much for reading. One of my goals for this log to a complete box to rigging documentation. I found so many partial logs when I started that would begin late in the process or never finish at all. I'm glad you found it useful and good luck with your own build. Andy.
-
I completed this model a few months ago. Check my signature for the link to my build log - it covers the construction from start to finish. I followed the Revell instructions pretty closely and didn't do much customization or bashing. The best alteration I did was to make my eyebolts from metal instead of the supplied plastic - really helped with the rigging as the metal ones were not going to fail. If you have any specific questions, don't hesitate to ask. Andy.
-
I made my own eyebolts out of small-gauge wire, and it wasn't really very difficult. The twisted ends grab CA well - they feel super sturdy. Takes about 30 seconds to make one, faster if you do a bunch assembly-line manner. Check out page 2 of my build log, at the very bottom (post #30). Andy
-
You're welcome - I'm glad my efforts were able to help. I was feeling pressure to finish, but not from "racing" anyone, just that I have guests coming over the next few weeks, so if I didn't finish last weekend, it would have been another month! So close, had to get it done. I think I see that you secured the boat braces to the eyebolts in the deck rather than the pin, correct? I wonder if that was a mistake in the instructions, those eyebolts seem so obvious. After I finished, I had the same feeling of, I don't know, "free time" last Sunday. I tightened a few backstays, took photos and then ... nothing. I put all my modeling tools away so the living room doesn't look like a workshop. Don't worry, they're easily retrievable when the next model is on the horizon. I'm not giving up the hobby, and I, too, feel that wood beckons. I also need to fix my ship-in-a-bottle (CA does NOT adhere to glass!). And, I need to figure out a display case solution, but no rush, the temporary one will keep the dust off. Nice job, congrats on a job well done, and as usual, your photos are excellent. Andy.
-
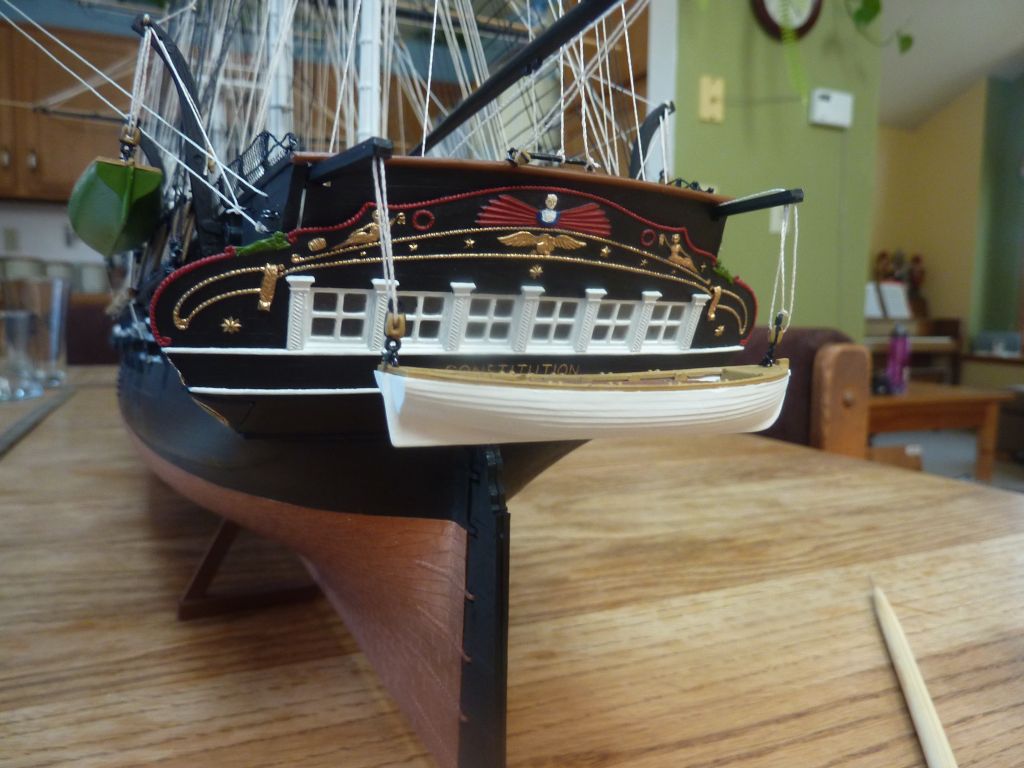
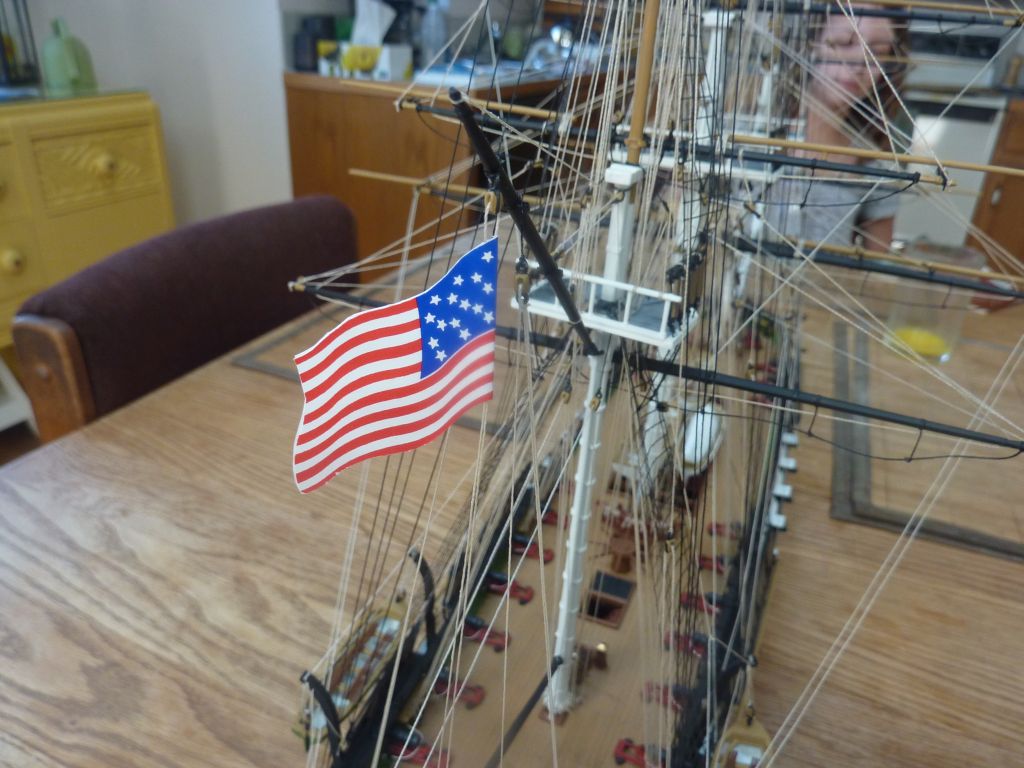
No, I cut the pendant out, but did not choose to mount it. To be honest, I'm not super happy with the US flag at the rear either - the paper seems a bit too shiny and "fake" looking. I just used dilute white glue to put it on there, so it would be easily removed if anyone has an easy, better solution. Andy.
-
I, too, can't wait to see what it looks like. Looking forward to seeing the results. Andy.
-
My (most likely) last post to this build log, unless there are specific questions. Just to let folks know, I've created a gallery album in the "kit gallery" of finished builds. I had to fix a couple of drooping forestays, which I only discovered while taking the pictures. Some photos will show it fixed, others not. Just imagine them all straight, and that's how it looks now. Thanks again everyone. Andy.
-
The boom looks good, the gaff should go well for you, I'm sure. Using weights on the gaff to keep it tight will also work, as I'm sure you realize. Got any plans for a display case? After all that work and time, I'm sure you'll want to protect it. Andy
-
Thanks everyone. I do plan on taking a series of photos for the gallery, just waiting for good light. I appreciate the comments and hope to start a new log when I decide on the next project. Thanks again, Andy
-
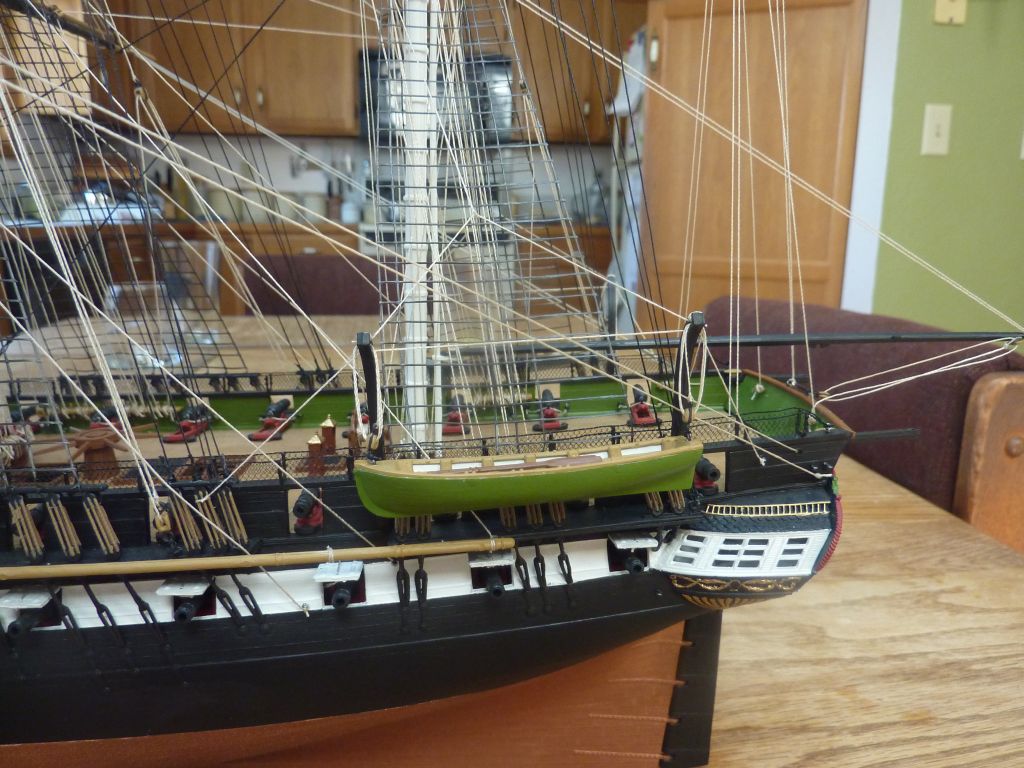
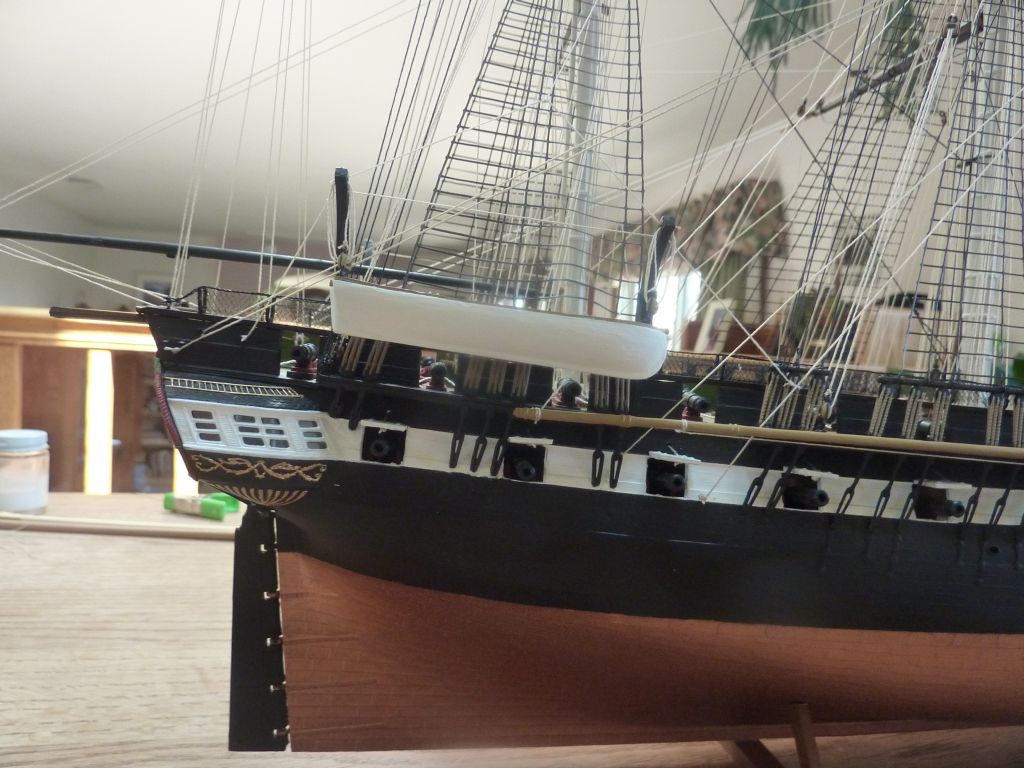
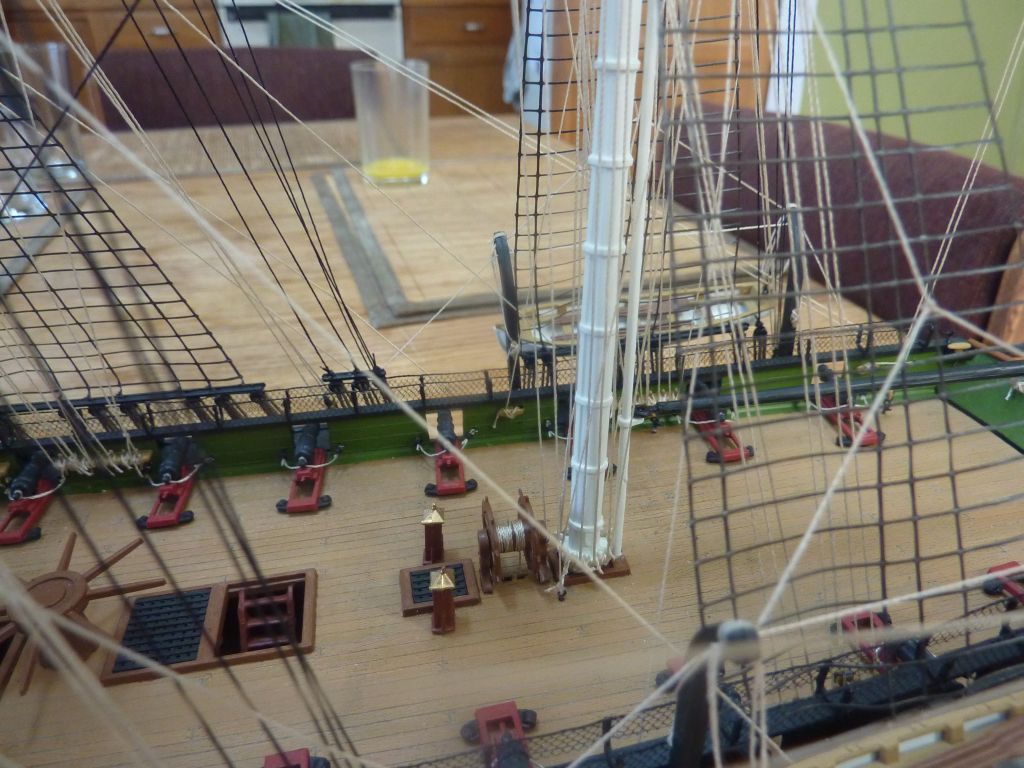
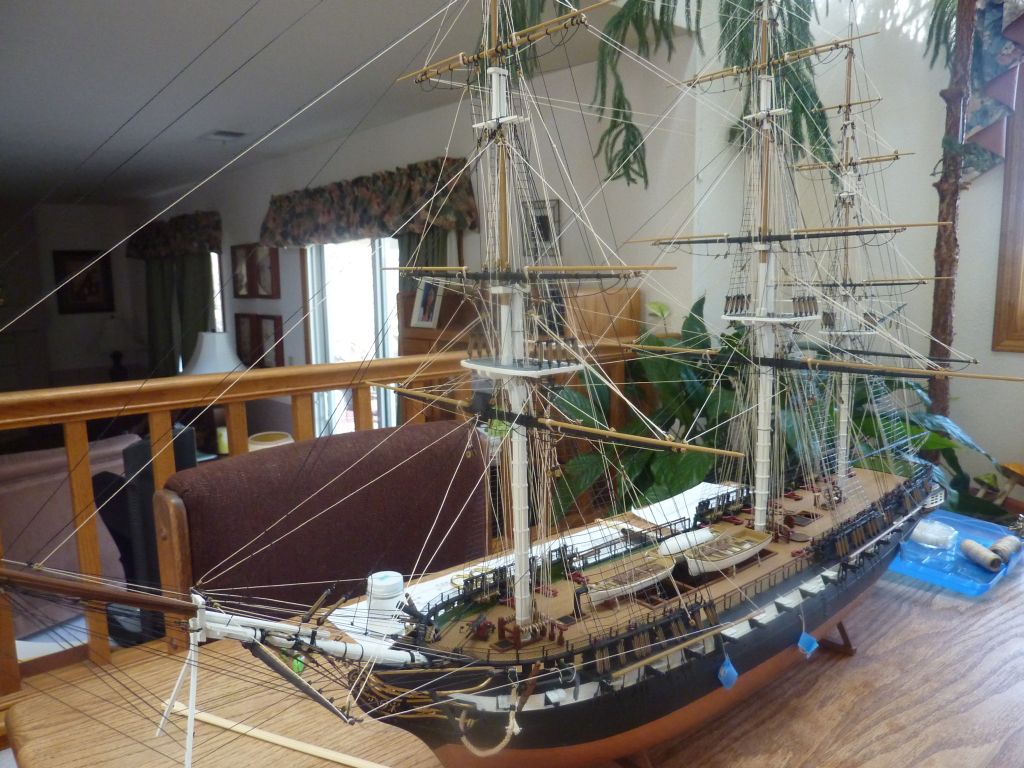
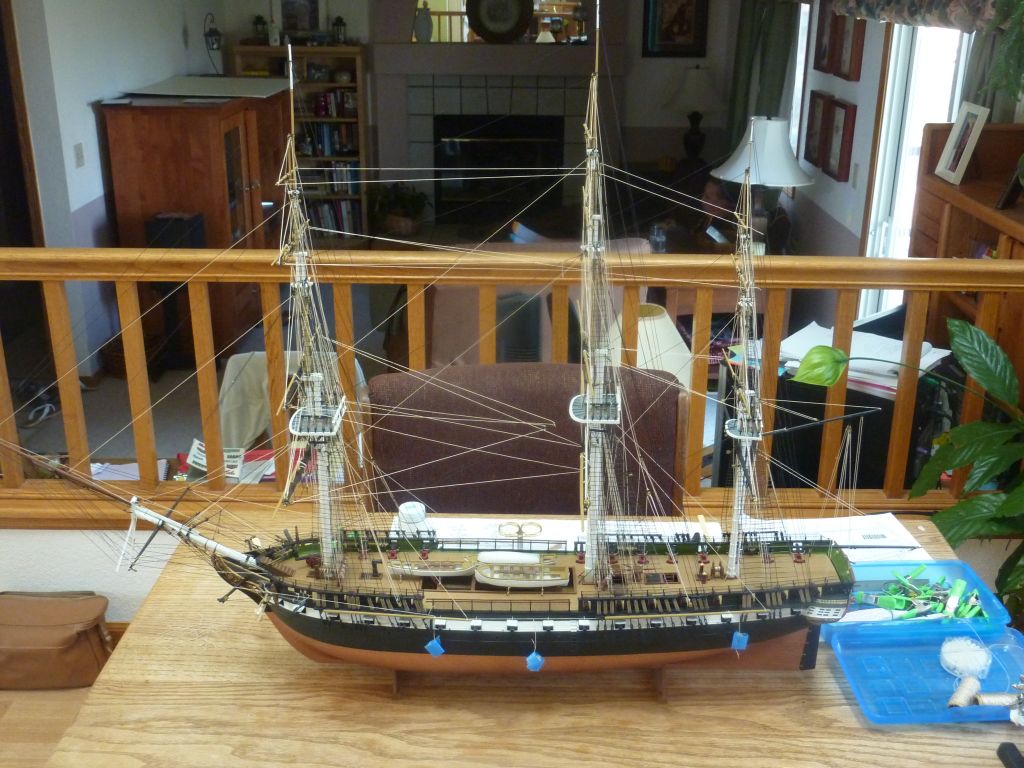
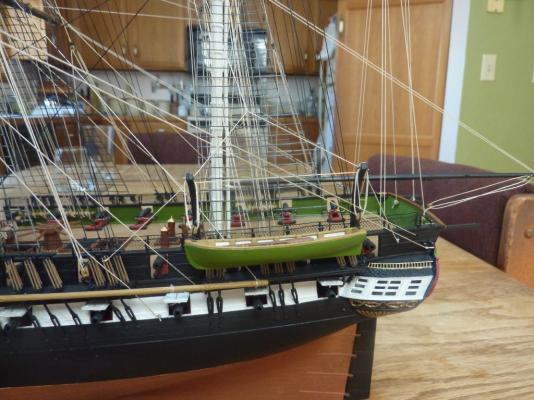
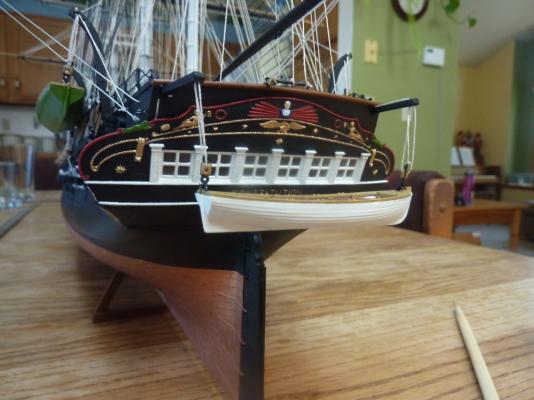
Ok, step 8 of the running rigging instructions for the Revell 1:96 USS Constitution is to hang the lifeboats and the Captain's cutter. Ages ago I assembled and painted these boats, with oars, and they've been sitting patiently on a shelf waiting to be added to the model. One of the jollyboats I painted green, the other white. This was based off photos of the current Constitution, but I will admit to having no idea if it's representative of how it was back in 1812 or so. I like having the one boat green, so green it is. Another small deviation was the tying off the lifeboat brace lines. The instructions have them going to the pinrail around the mizzenmast, right next to the ship's wheel. I did try for quite a while to get the lines in there, with absolutely no luck. Then I noticed two eyebolts (one on each side) on the deck that just seemed made for securing these two lines. I used them instead of the pins and I think it's makes sense (at least to me). Finally, the flag was added. I used the kit's paper flag - cut it out carefully and used my dilute PVA glue to secure it to the flay halyard. The ship is complete! Green jolly boat White boat Using deck eyebolts instead of pins. Captain's boat The final touch! Thanks to everyone who followed this build on MSW 1.0 and now 2.0. I purchased the kit on September 15, 2011 and started washing the plastic a couple of days later. Ship complete on May 4, 2013. 1 Year, 8 months total time and I have no idea how many hours of actual construction time. Next up for me will be long neglected home chores. Next ship will be a wooden ship. I've already purchased the Syren, but I will do a smaller wood ship or two to get familiar with the medium before going at the Syren. Suggestions are welcome, I was thinking of a Midwest products ships - something quick, but allow me to learn planking. Andy.

- 246 replies
-
- 3
-

-
-
- revell
- constitution
- (and 2 more)
-
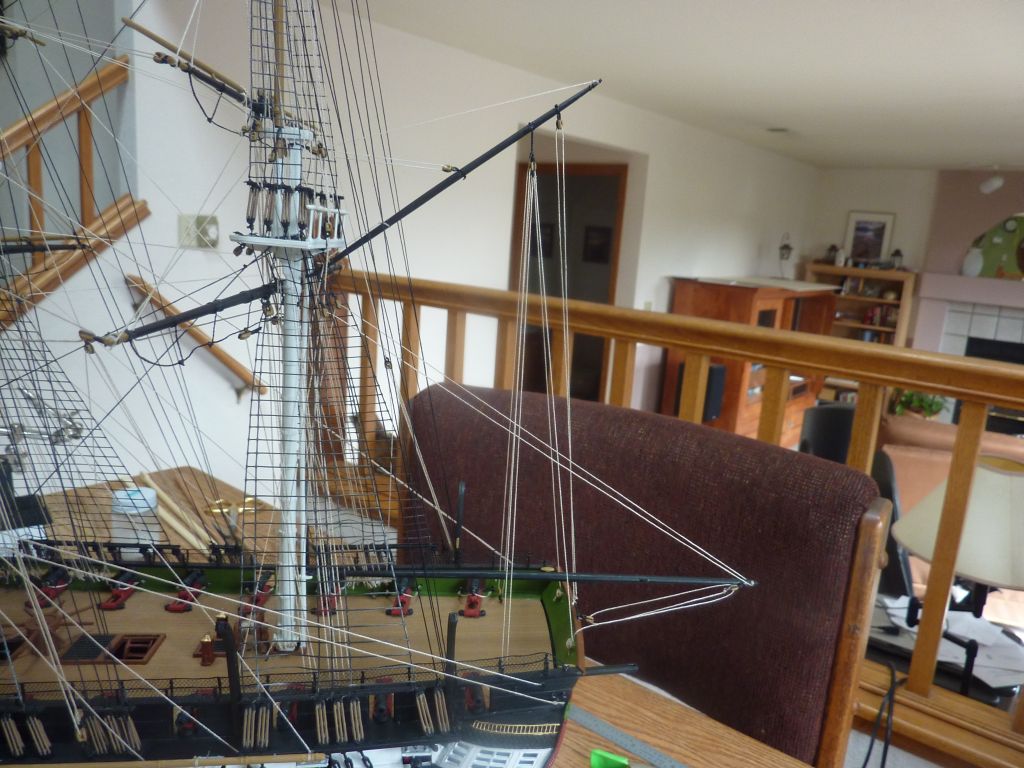
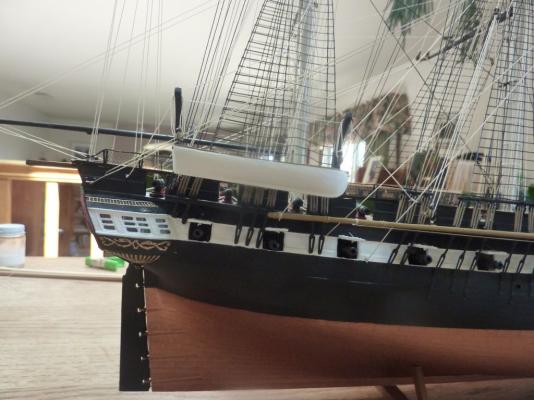
As I mentioned earlier, I was unhappy with the height of the spanker gaff from my original effort. A couple of days ago, in the evening, I went back to fix it. Since I've been using dilute white glue to secure the lines, it was pretty easy to remove the tied lines from their pins. Just a touch of water to soften the glue and they come right off. It took a few hours to remove the lines, and re-string, but I'm much happier with the look. Andy.
-
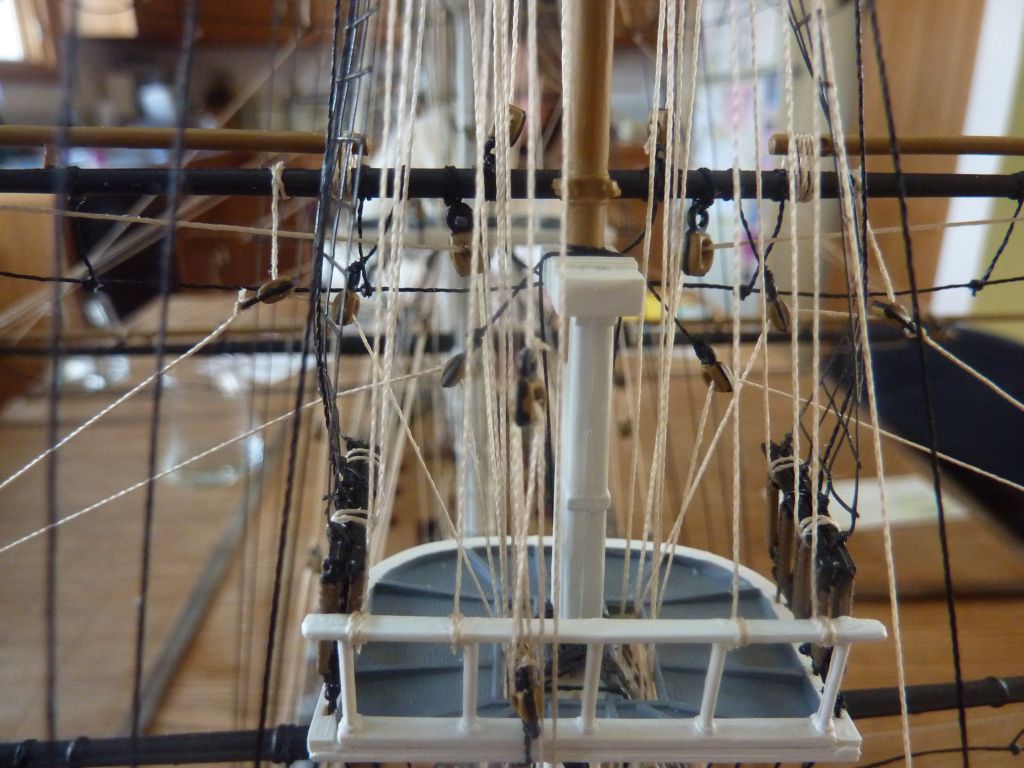
Sorry, just saw this question. I didn't strop the block, as the plastic is molded to simulate it anyway. I simply painted each block a "wood" color, then went back with a fine brush and put some black paint on the eye and a thin line around the block for the stropping. When I did the first one, way back when, I just wanted to see what the effect was. The problem was, I liked it and therefore committed to painting all seventy-thousand (or so) of the little guys in same manner. I still like the look, and it was a good break from rigging. Before each rigging step, I would count the blocks needed and paint those rather than try to paint them all in one session. That would have driven my eyes batty. Andy.
-
Your build looks great, and the photos you take are excellent. If I was a few steps behind you, it's exactly the kind of photos I was looking for when I was doing that step of the rigging. I plan on re-doing my own spanker gaff (the end is too low and it's bugging me), so we'll see how much access is retained after all the braces are in place. I still think it's the right decision, but eventually the last line will require some tight access. All do-able, in my opinion. Keep up the good work - you seem to work much faster than I. The work you've shown took me many days to get done. If you're moving on to the braces, I would recommend getting all the blocks tied in prior to running any of the lines. For me, that allowed the braces themselves to move more quickly. Of course, quickness is relative -- it took me over 3 hours just to get the blocks in step 7 in place, and I already had the ones on the yards tied prior to mounting the yards. Keep up the good work. Andy.
-
Thanks lambsbk, I appreciate the thought. It's my feeling that if you take care of the details, the big picture will take care of itself. Heck,so much so that sometimes I don't even step back and see the whole thing. All I see at night is the many, many little blocks that needed painting! And Augie, my moment of weakness has passed. There's still work to do - lifeboats, the sailors, the permanent case. Maybe even rope coils, but lets not go crazy. Good luck with your own rigging torture. Andy
- 246 replies
-
- 1
-
-
- revell
- constitution
- (and 2 more)
-
Thanks everyone. This build, while not quite finished, has been a great experience. All the encouragement, advice and helpful information really motivate and help me along. While physically, I do the build by myself, the people on this forum provide a virtual audience that inspires. I'm probably getting too maudlin, but when I tied off my last tack line today, it was a strange feeling of relief. I shouldn't talk this way, I suppose, until I hang the lifeboats and flags, but thanks to everyone's encouragement for getting this far. Andy
-
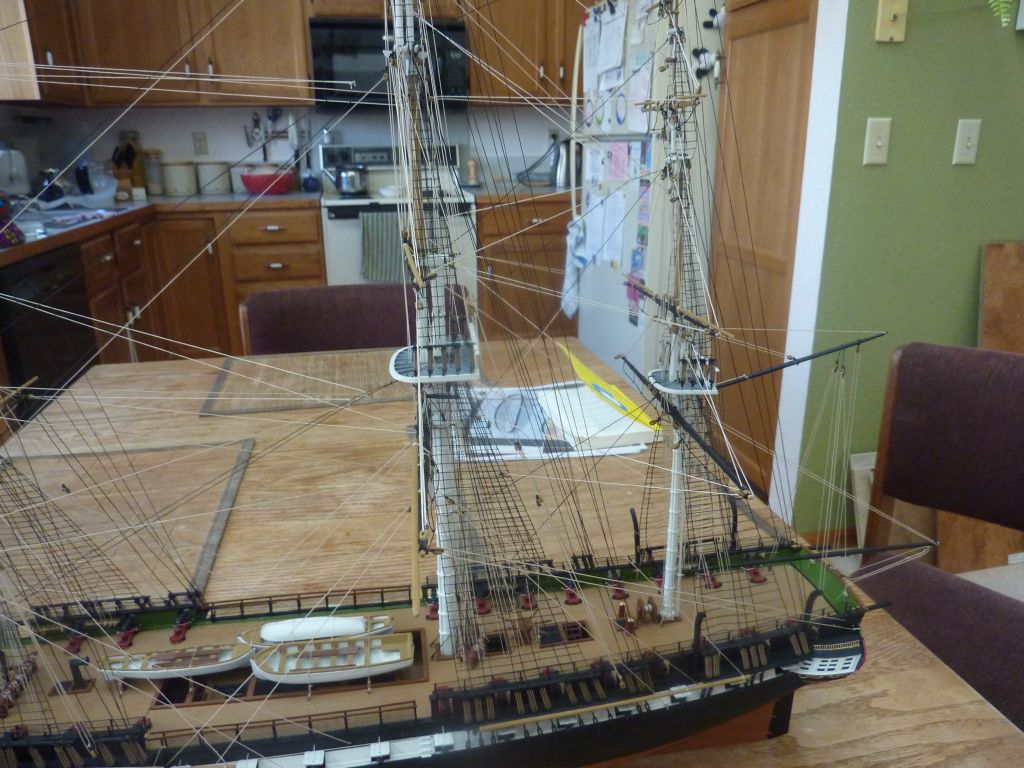
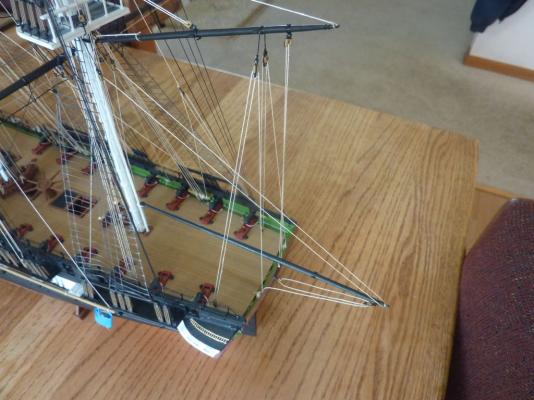
Braces completed today, as well as going back and finishing the lower sheet and tack lines. Major rigging is complete. Everything went pretty smoothly - I only had minor issues access the rear pin rail. Future builders might want to hold off on the spanker gaff and boom until after the braces just to be able to access those pins a little easier. Tying the lower sheet and tack lines was quite easy; I'm glad I waited to do those as those lines would certainly interfere with accessing the internals of the ship. Next step is to hang the lifeboats and I need to let the davits dry before doing that. Andy.
-
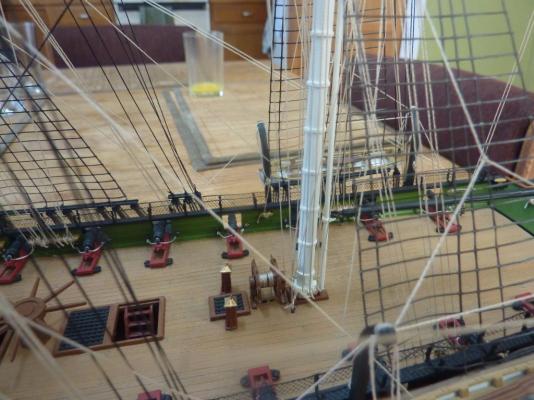
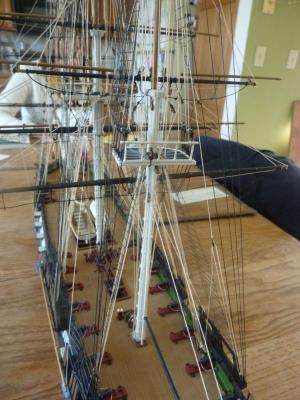
I got 8 pairs of braces completed (before my eyes hurt too much to continue). All these terminate at the pinrails at the bast of the main mast -- that pinrail (or is a monkey rail?) is now full, just like the foremast. The remaining braces all attach at pinrails along the bulkheads. Andy.


-
Progress has been made over the last couple of evenings, and I had Friday off work and managed to get more done as well. As I mentioned, I had painted the remaining blocks, so next I started tying them to the ratlines where the instructions indicated in preparation for the braces. Yesterday, I added the spanker gaff and fully secured it with no glue - the lines are more than enough to hold it firmly in place. I feel the tip of the gaff should be pointed higher, but fixing that would now require removing and replacing too many lines. I also added the flag halyard, but I will not add the flag just yet. I'm feeling that the flag should be the very last thing added to the model. Moving on to the braces. I've still skipped step 4 of the instructions (lower sheet and tack lines) and I've analyzed which pins on the pinrails I need to be using, so will add the braces working on the inside pins to the outside pins, followed by the final sheet and tack lines and then the ship's boats. I won't finish this weekend, I'm sure, but it surely can't be long now. Andy.
-
I believe I used the same eye that the backstays were tied to, so I've got three backstays and one halyard tied to that single (plastic) eye. I do remember looking around at that area to see if I did it right. I also think there will be unused eyebolts in the hull, near the rear cannons that won't be used. Perhaps they were put there for sails, but I can't see where I'll hook anything up to them. I'm glad my photos helped - it's getting quite complicated back there. Small update - I painted what I think will be the final 18 blocks - I counted the blocks for the braces and ships boats and prepared them all. I can see the end coming! Andy.
- 246 replies
-
- 1
-
-
- revell
- constitution
- (and 2 more)
-
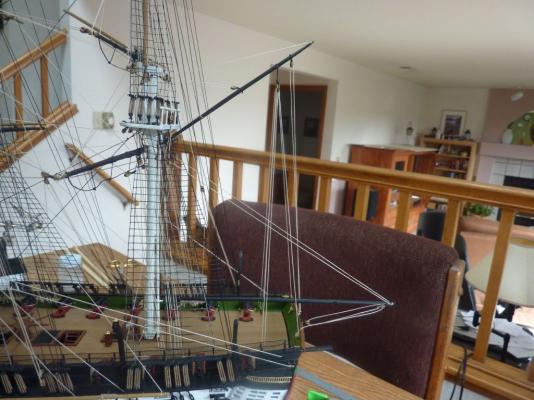
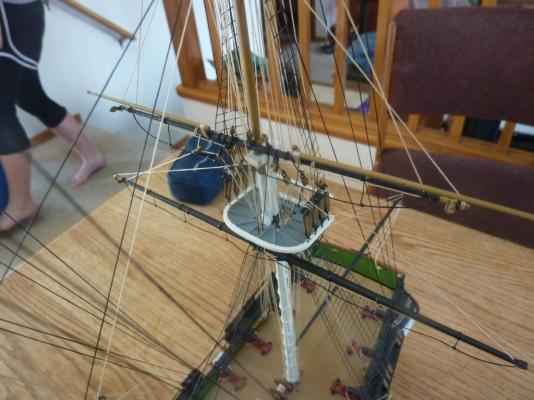
I took a few pictures. Man, but it is hard to get the proper focus with my camera. Hope this helps. Andy.

- 246 replies
-
- 1
-
-
- revell
- constitution
- (and 2 more)
-
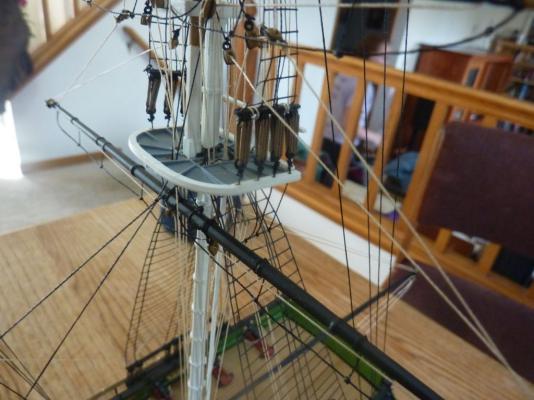
The picture on page 3 was of my yards with the blocks and footropes prior to mounting is all. Ok, bear with me - the mizzen crossjack is the largest and lowest of the mizzen yards, and the topsail is the one just above it. For the mizzen crossjack, there were no jeers or halyards, just lifts, sheets and clews and then the leech and bunt lines. Compared to the fore and main mast, it is lightly rigged, and I simply followed the instructions. The mizzen topsail yard has just the one halyard - starboard side I believe, that goes through a two-block rigging just like the other masts, but only on the one side. One thing about the lifts that I do recall - the lifts on the crossjack and the topsail both go to the same pin on the pinrail (24-26 port, 25-27 starboard). I ran only the crossjack line through the block on the deck before the pin, and tied the topsail lift line directly to the pin, not going through the block. I can try to get a photo or two tonight. My camera skills are not as good as yours, but a skilled observed should be able make things out. Andy.